Ghostly Plesiosaur Lamp
Hello! This is a project I completed as apart of my DESN 551 class at CSULB for my HXDI grad program. This hanging lamp structure is based off the plesiosaur Cryptoclidus and is made from clear acrylic, wire and fishing line. Let's get started!
Supplies
Autodesk Maya (Or equivalent 3d software)
Adobe Illustrator
Laser Cutter
6mm Acrylic Pane
Blue LED strip
Step 1: Model the Pieces in Maya
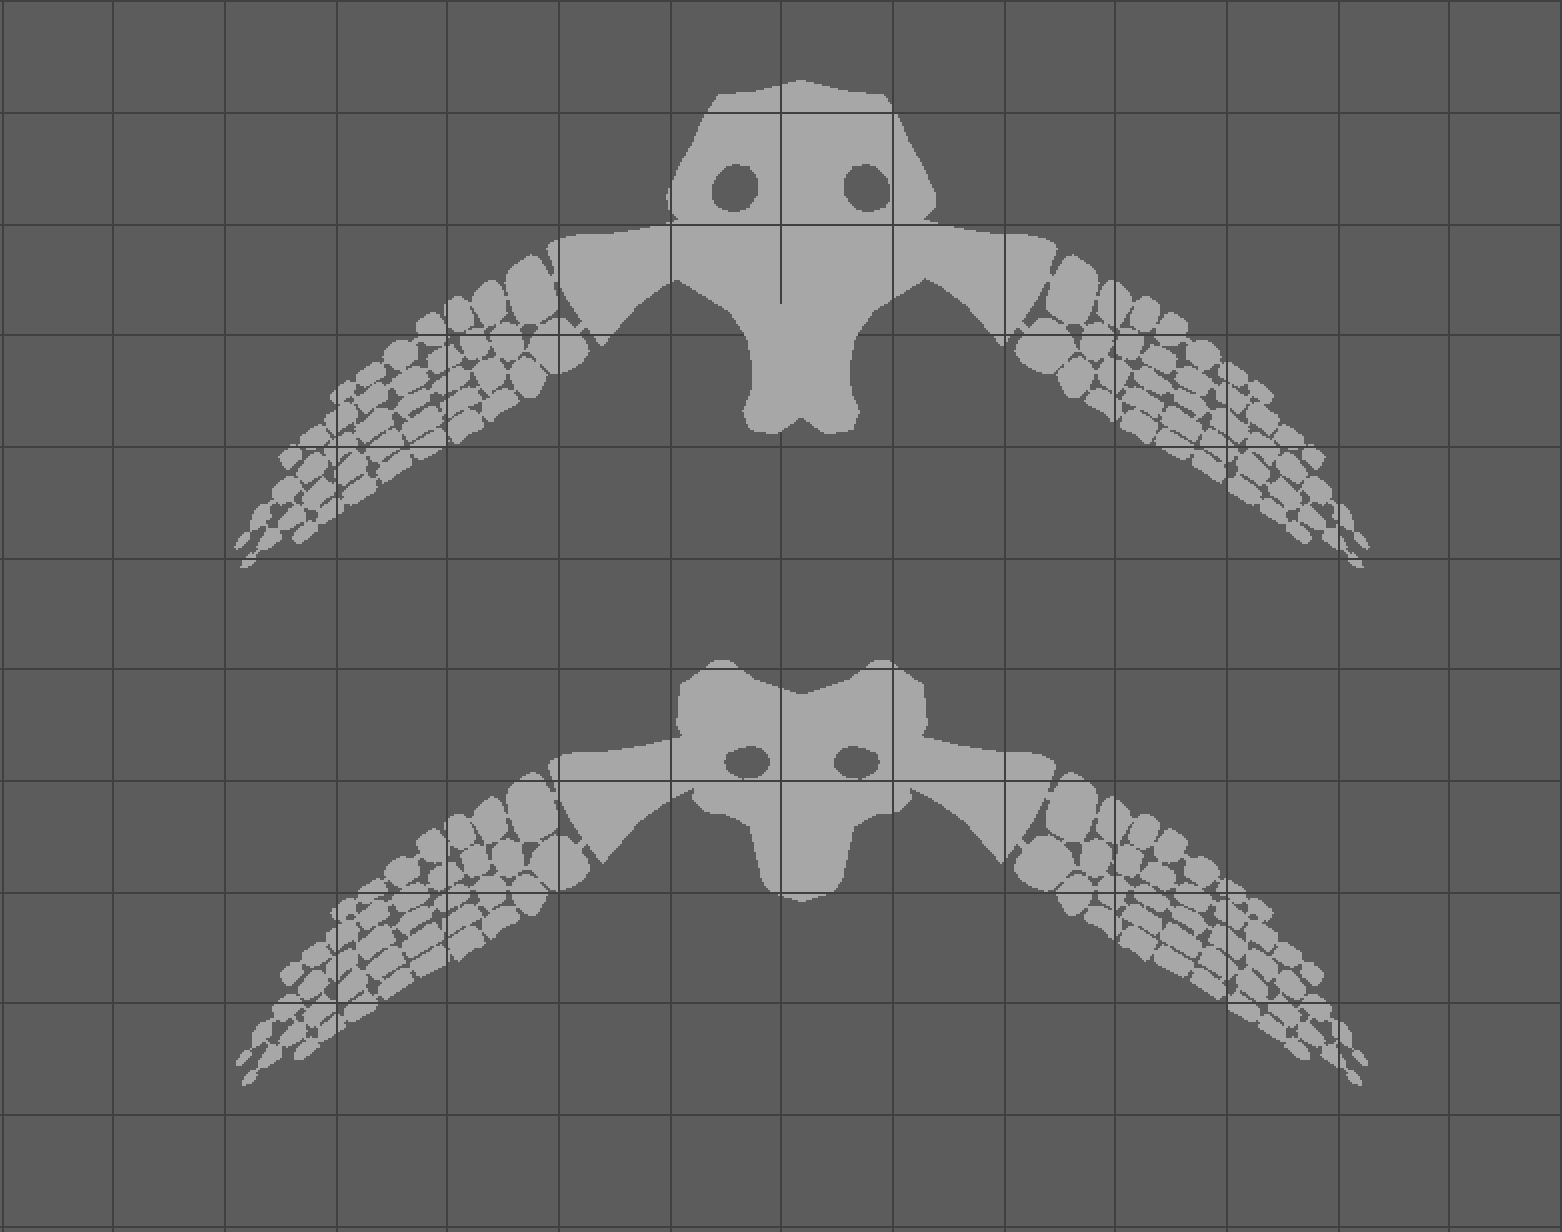
Using anatomical references, I modelled the most noticable pieces of the Plesiosaur skeleton. (This is by no means an anatomical study). The model is split into the following pieces:
- Skull
- Small vertebrae
- Large vertebrae
- Small ribs
- Medium ribs
- Large Ribs
- Gastralia or "stomach ribs"
- Front Flippers
- Back Flippers
- spacer pieces (circles)
Step 2: Assemble the Model in Maya
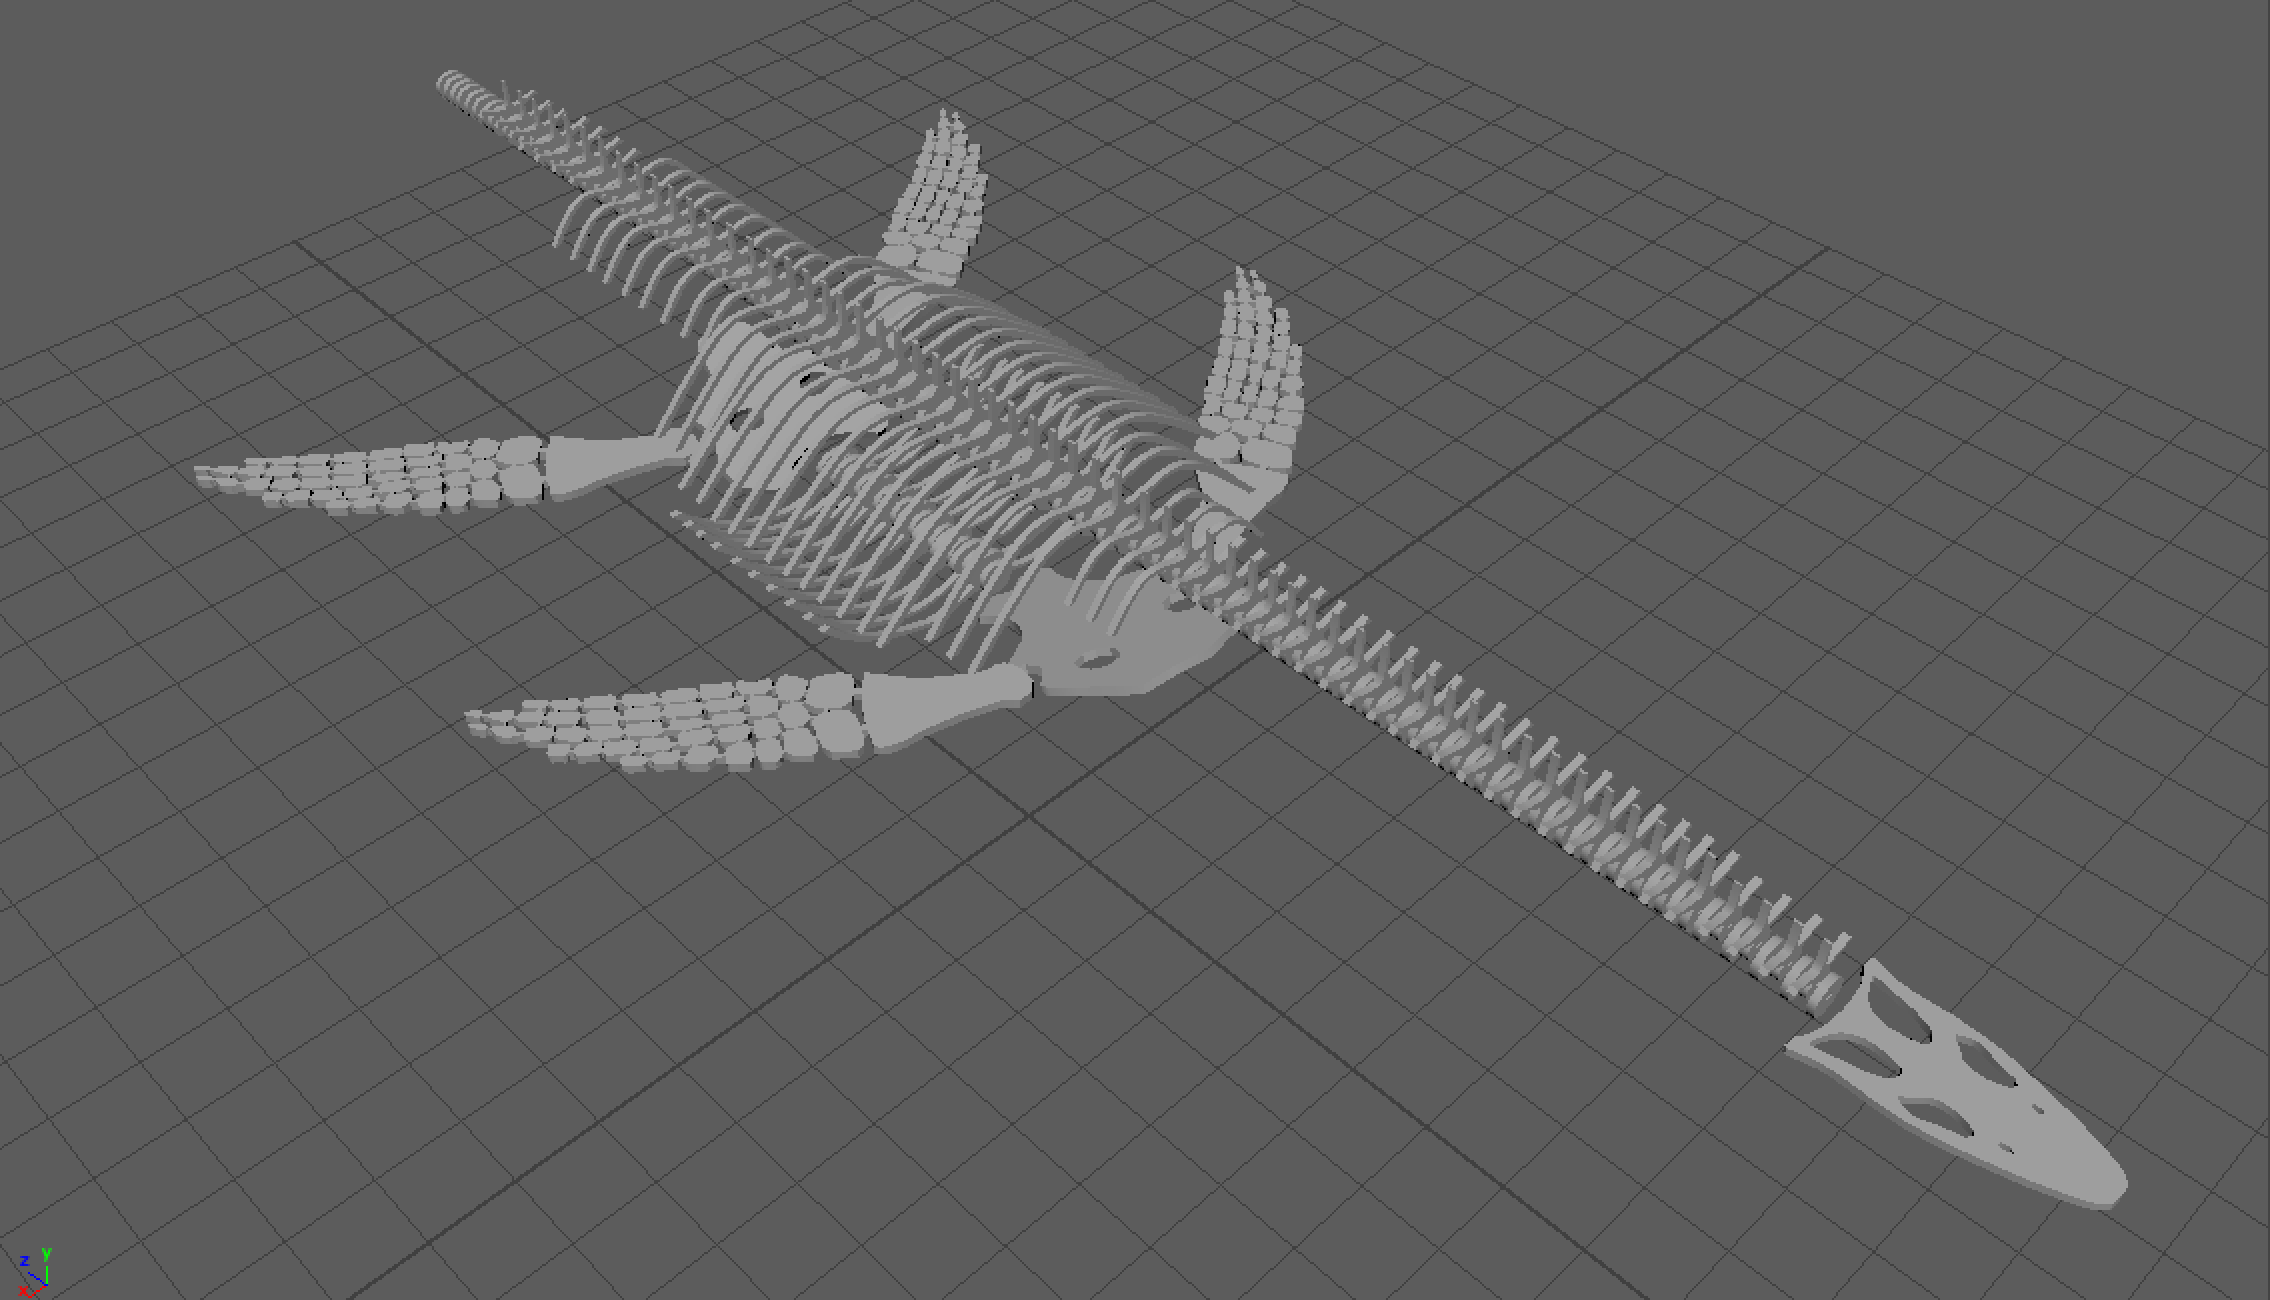
Next e will assemble the model in maya. THis helps us to figure out dimensions and experiment with different poses without wasting any materials. Once fully assembled, figure out how many of each unique piece you need.
Step 3: Assemble the Pieces on a Horizontal Plane
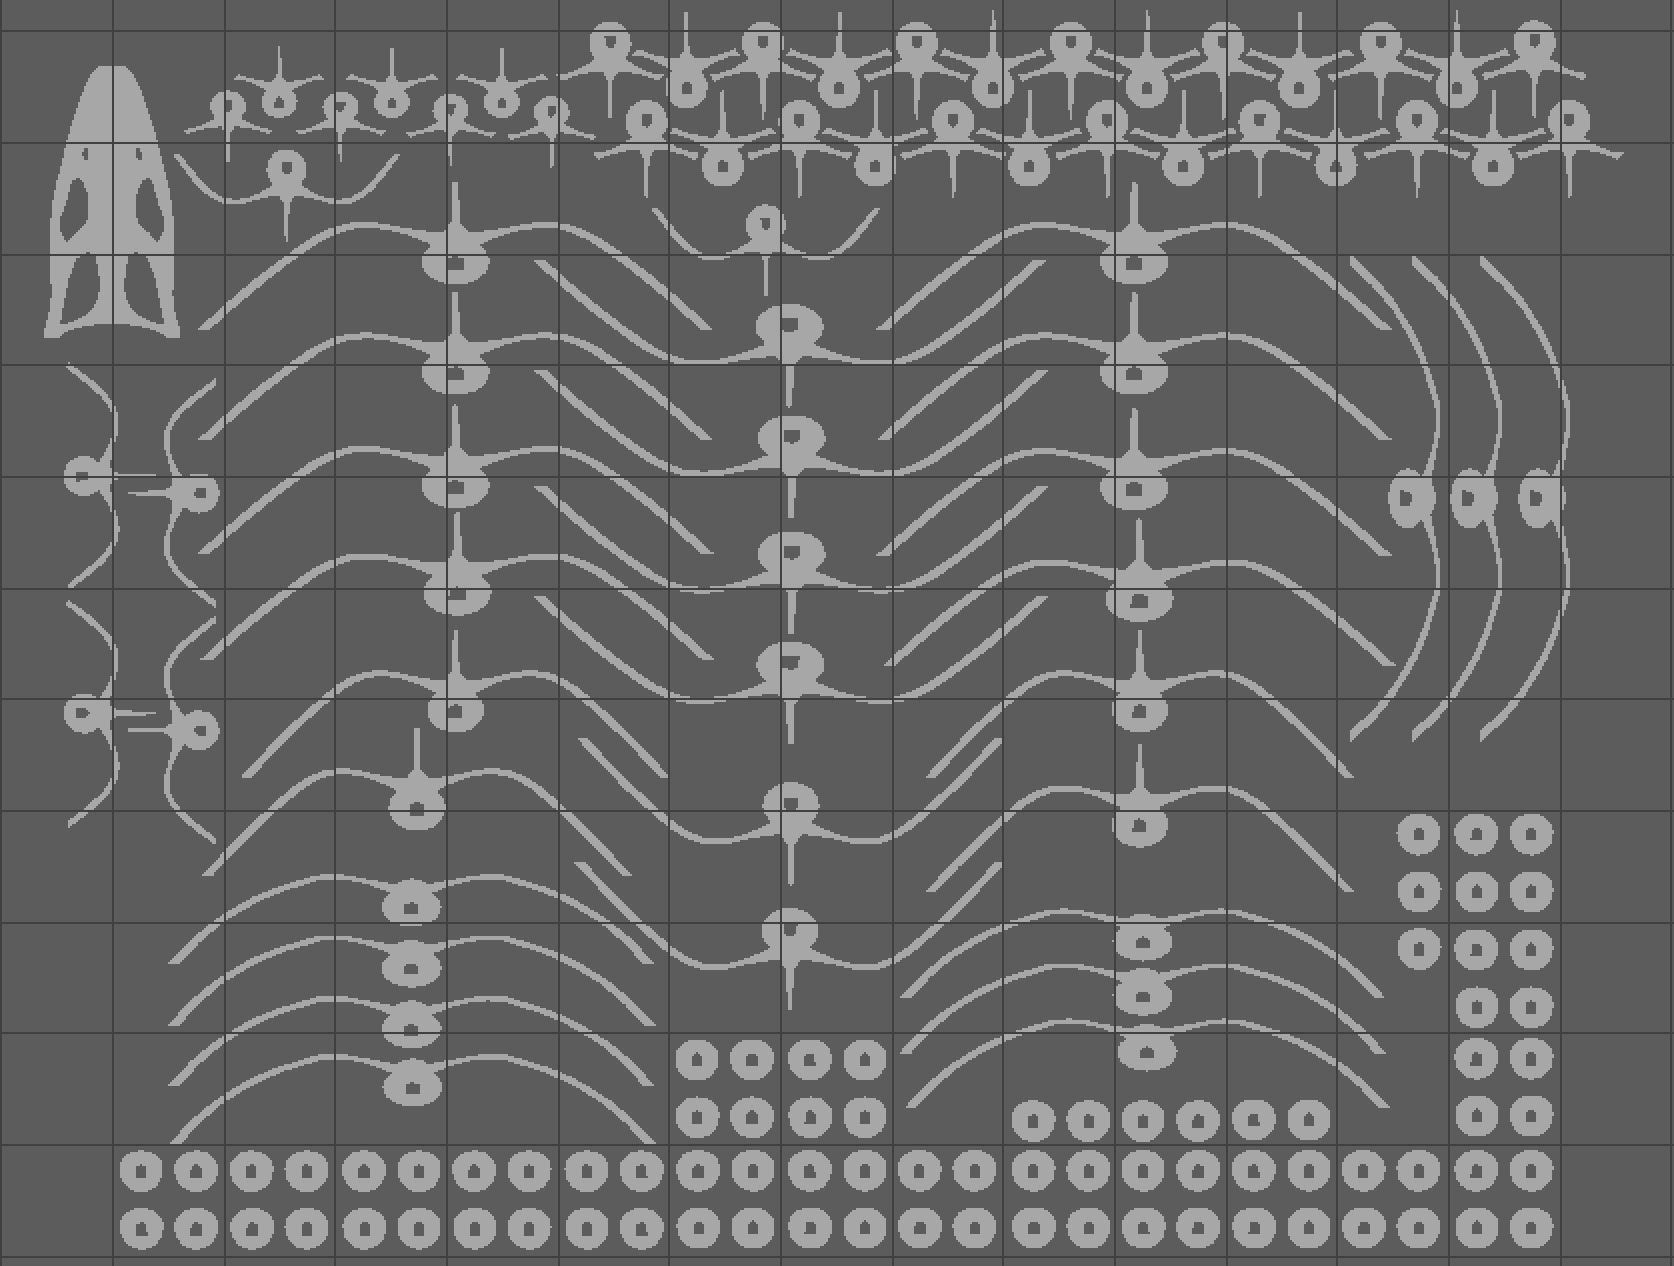
Once you have created the appropriate amount of each piece, lay them out on a flat plane to be exported as a .DXF file (Note: Maya itself cannot export as .DXF files. I suggest exporting as a .OBJ and then importing it into Rhino or other 3D modelling software than can export as a .DXF file).
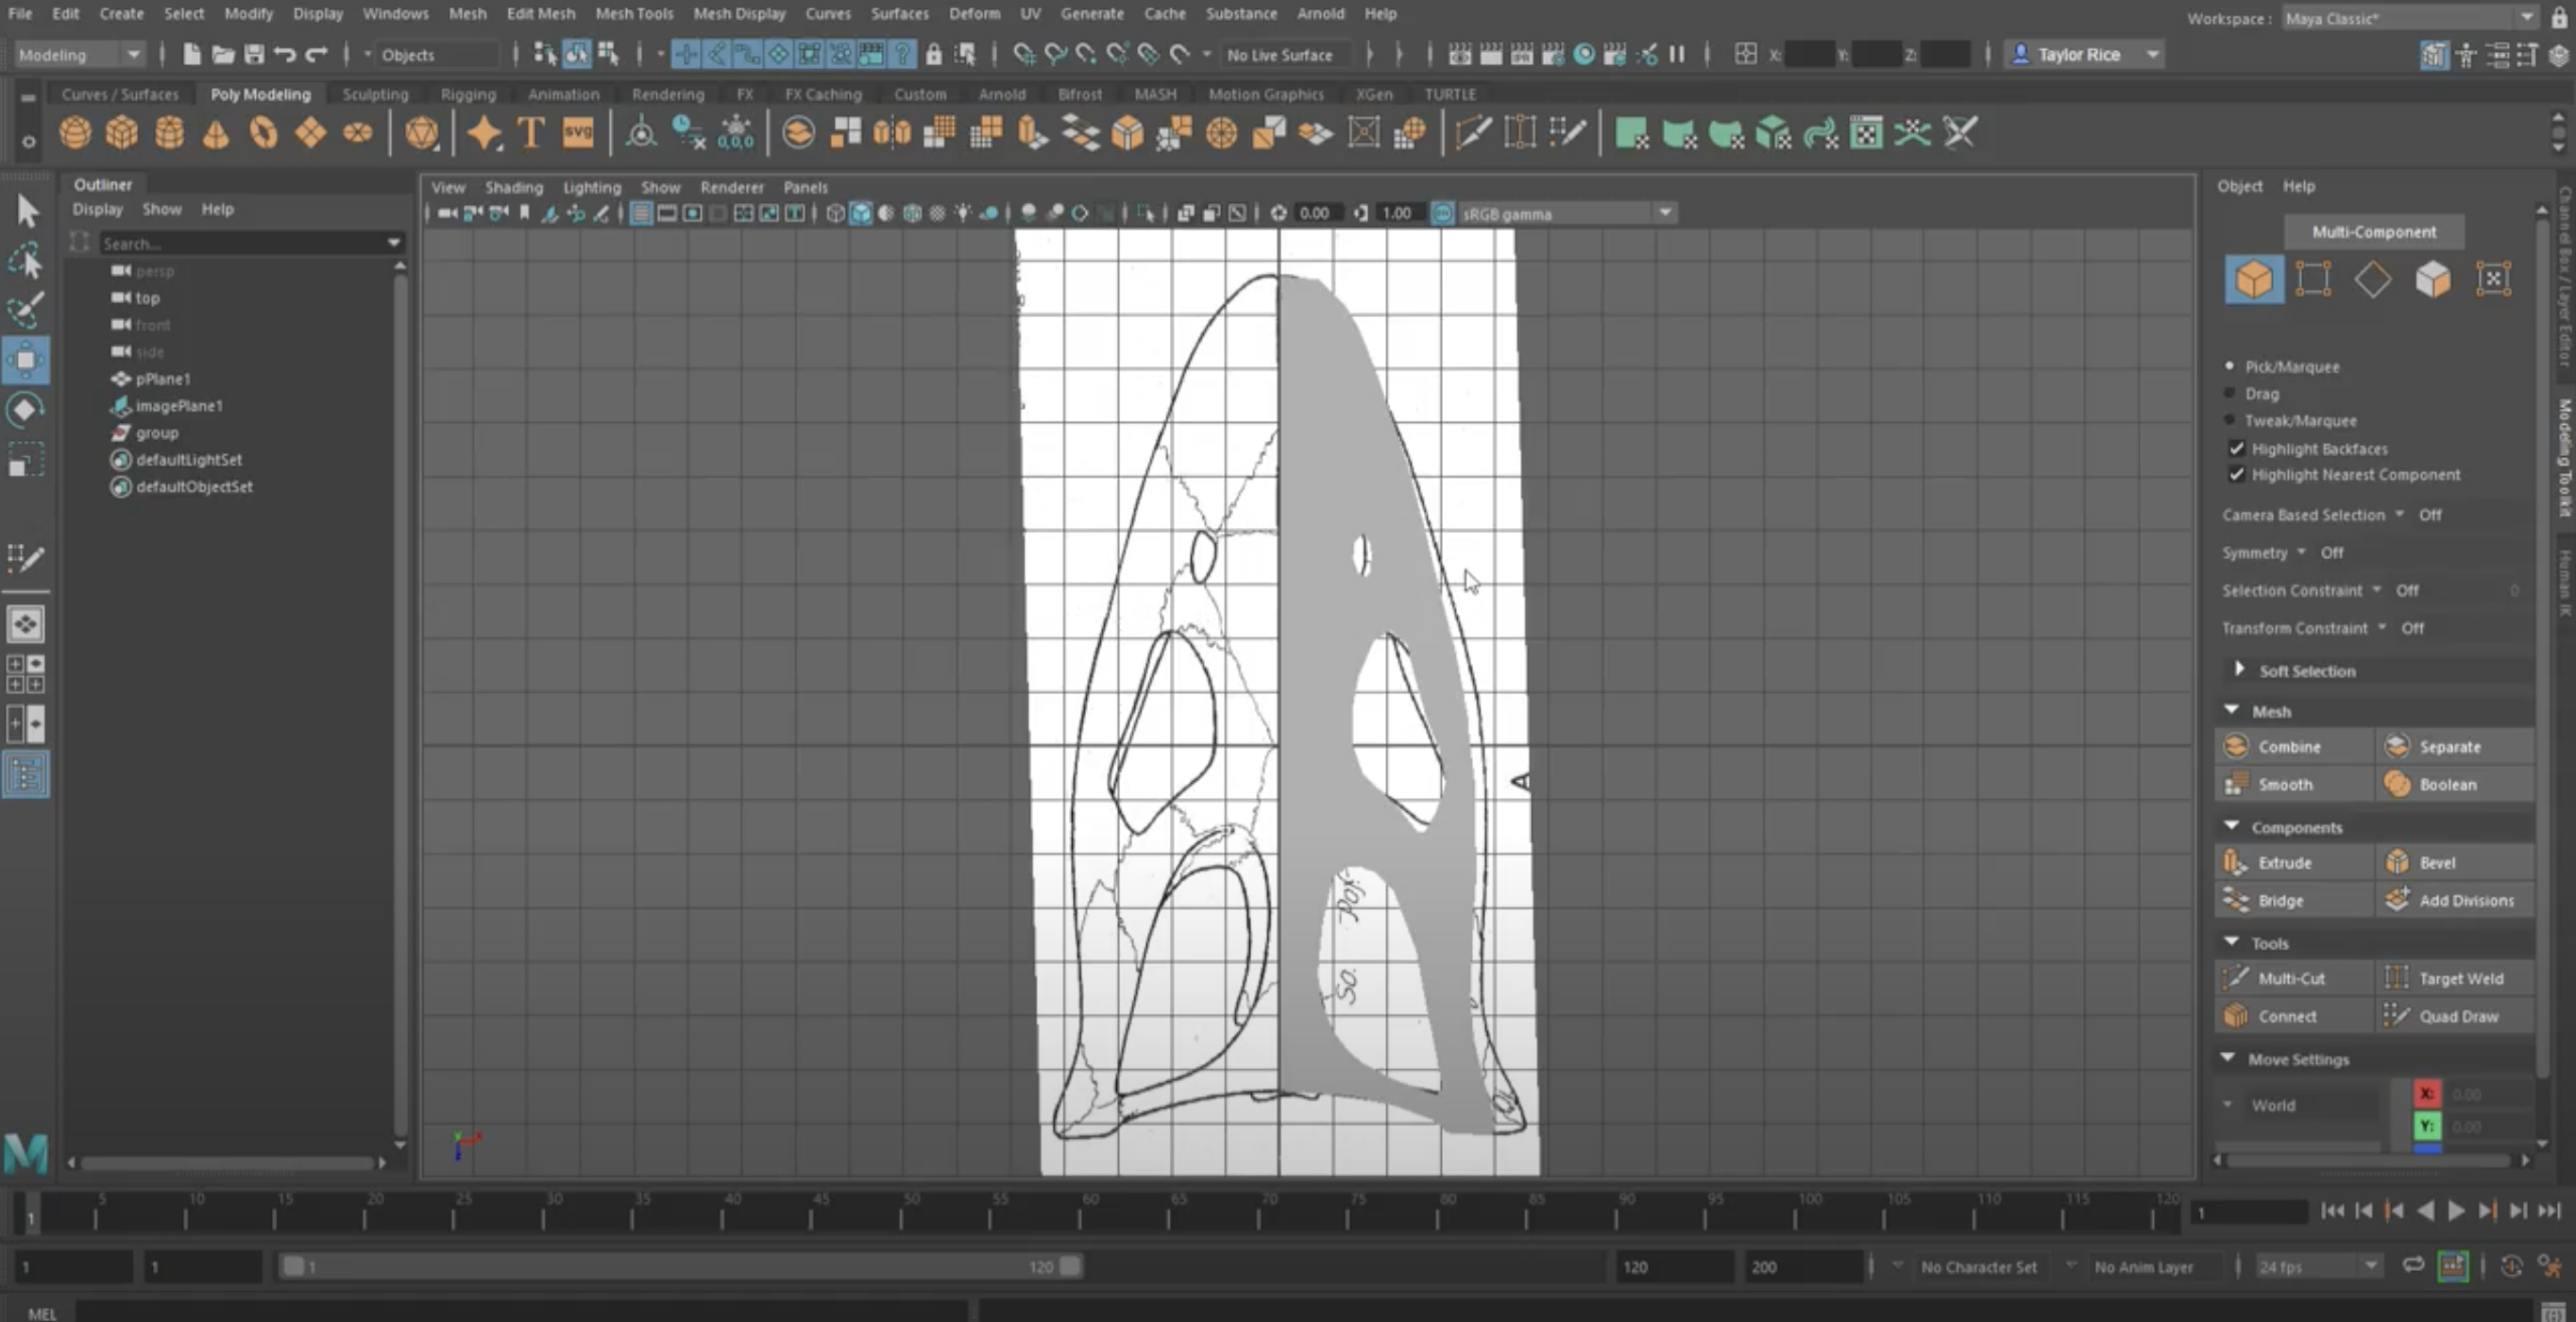
Step 4: Open .DXF in Illustrator
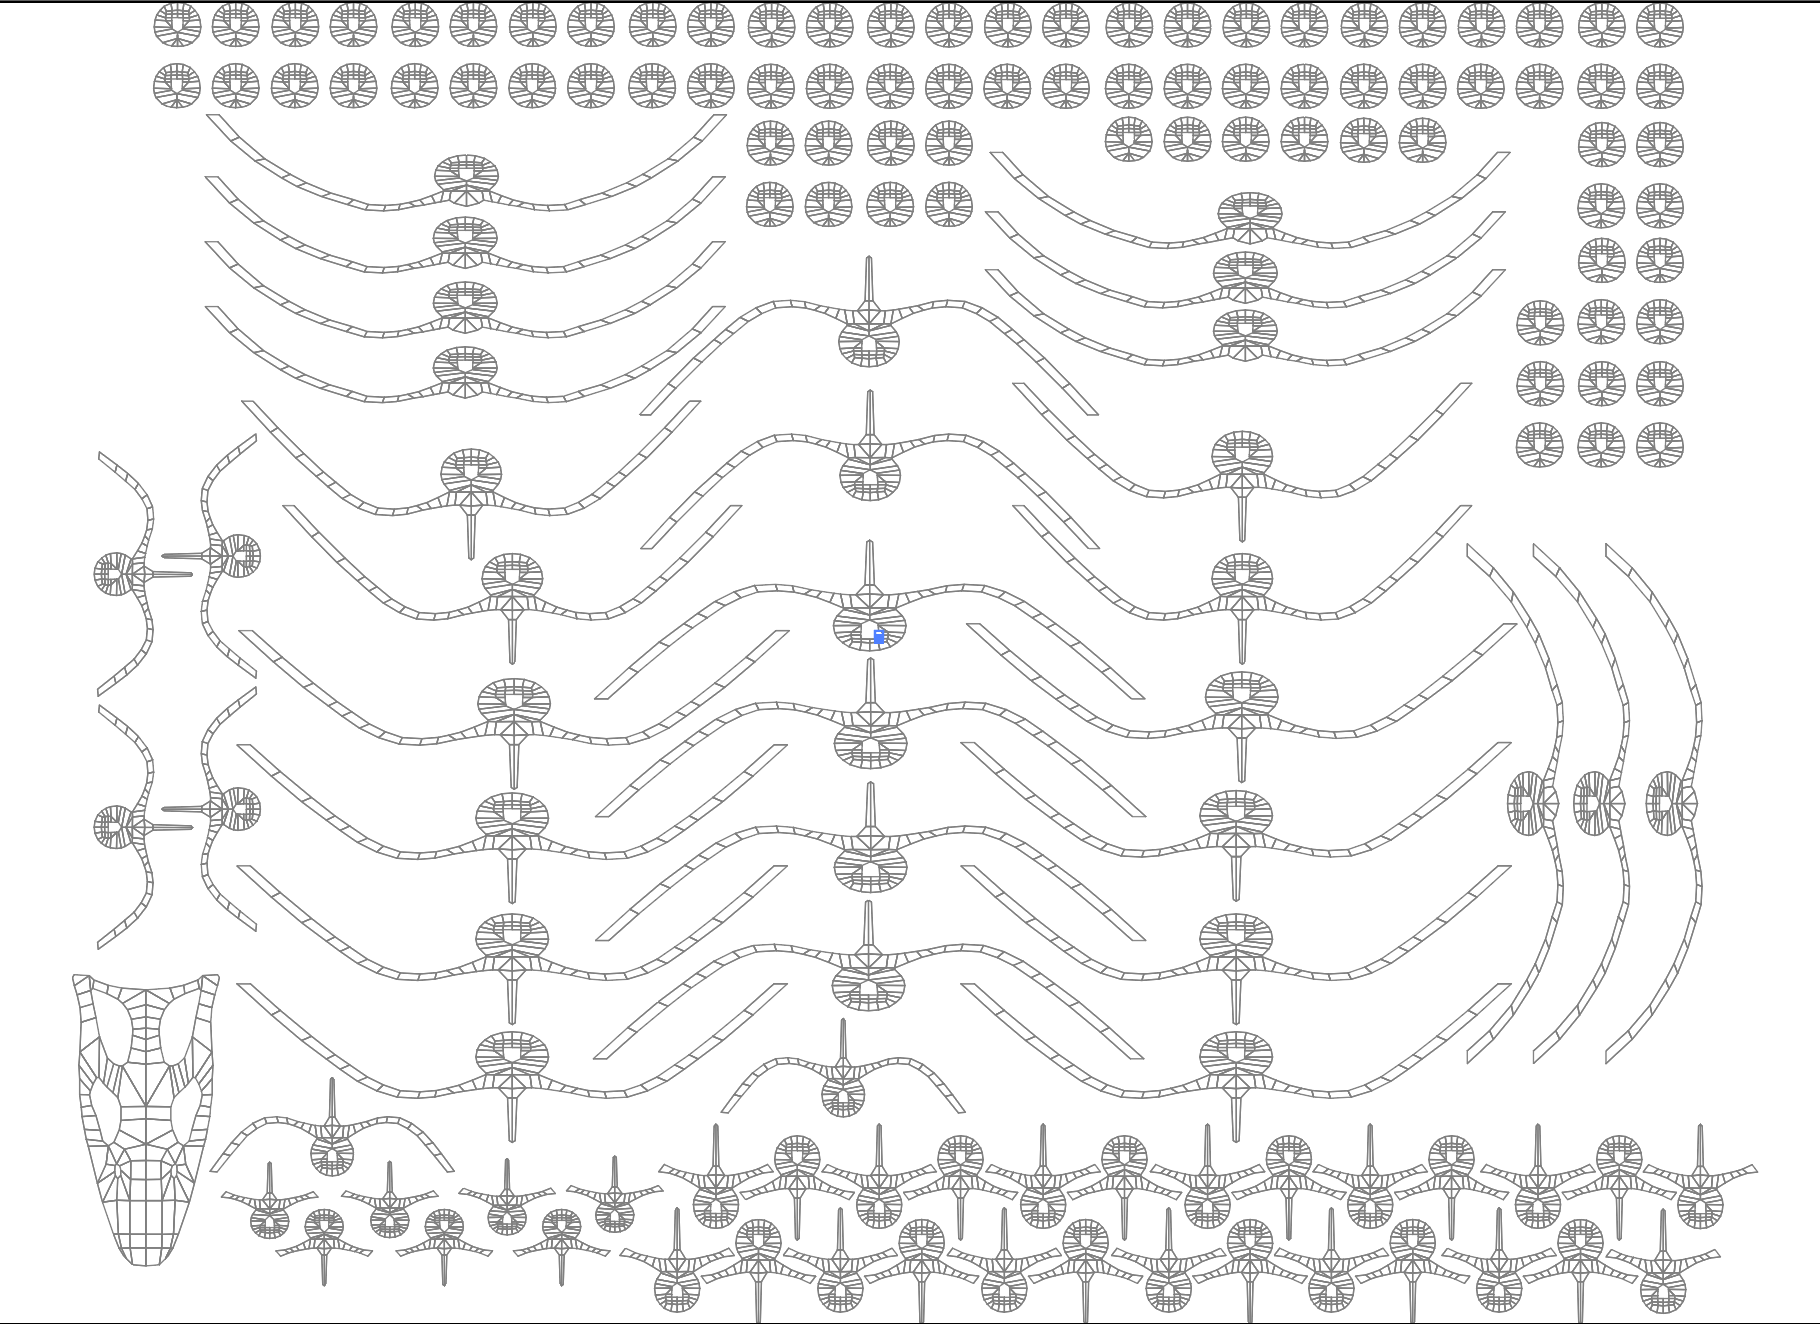
Once you have successfully exported the file as a .DXF, open the file in Illustrator. Go through the pieces and delete what is left of the wireframes so only the outlines of each piece is visable.
Step 5: Laser Cut the Acrylic
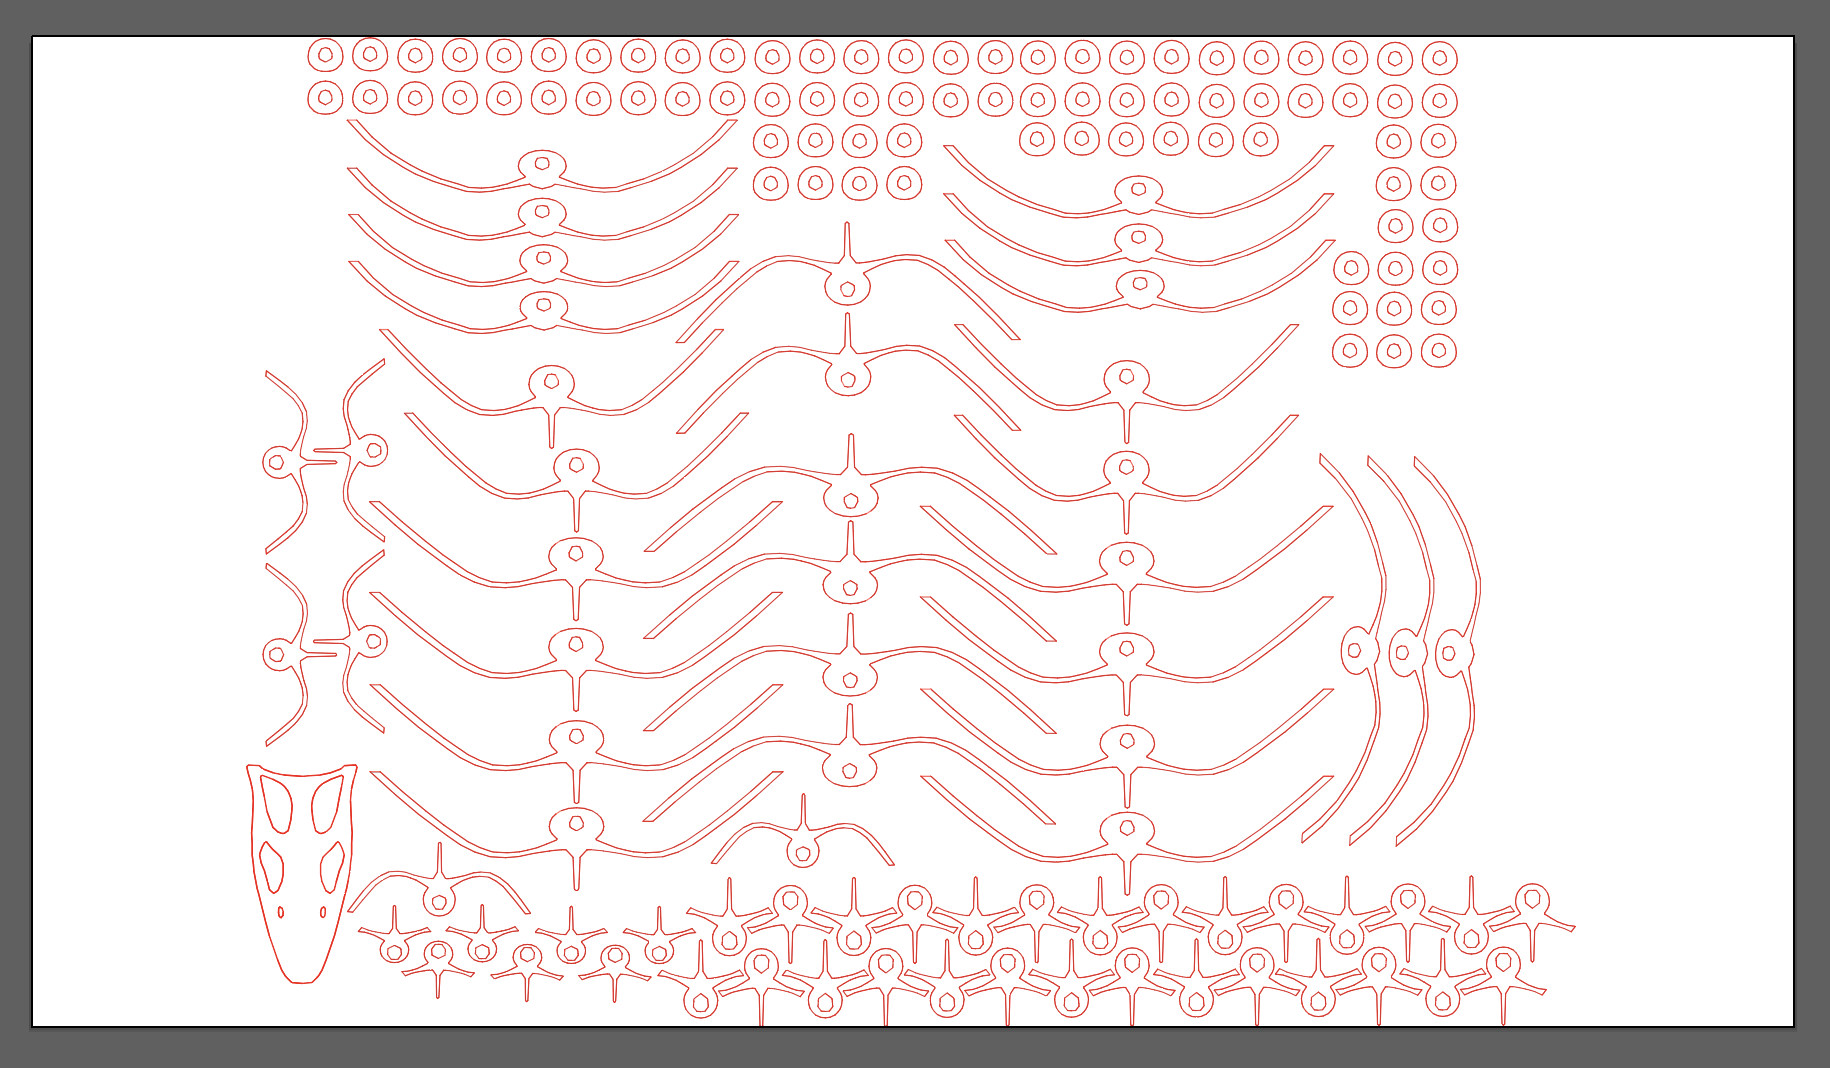
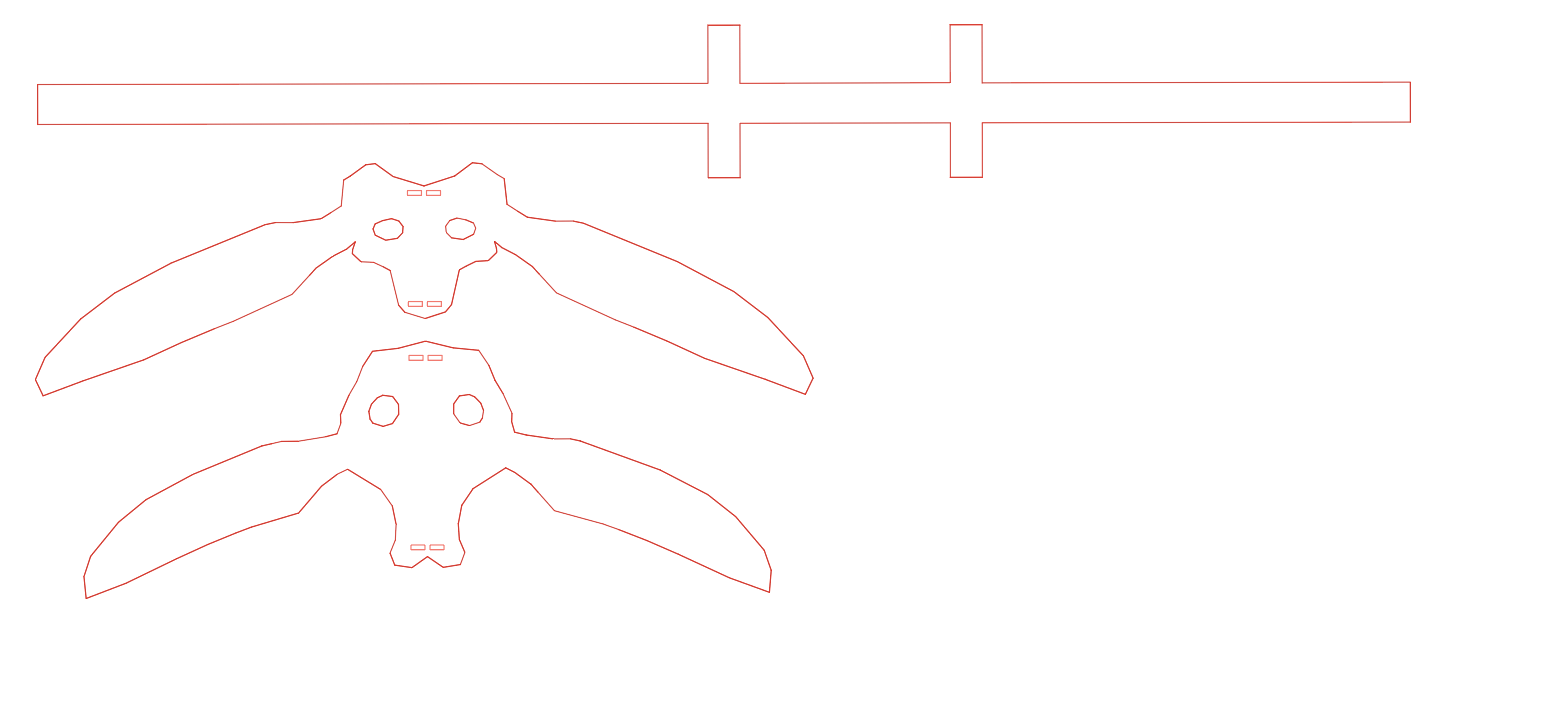
Once you have deleted the wireframe remnants, submit the file to be laser cut. I chose to use a 6mm acrylic material because the way it reflects and holds light added to the ghostly effect.
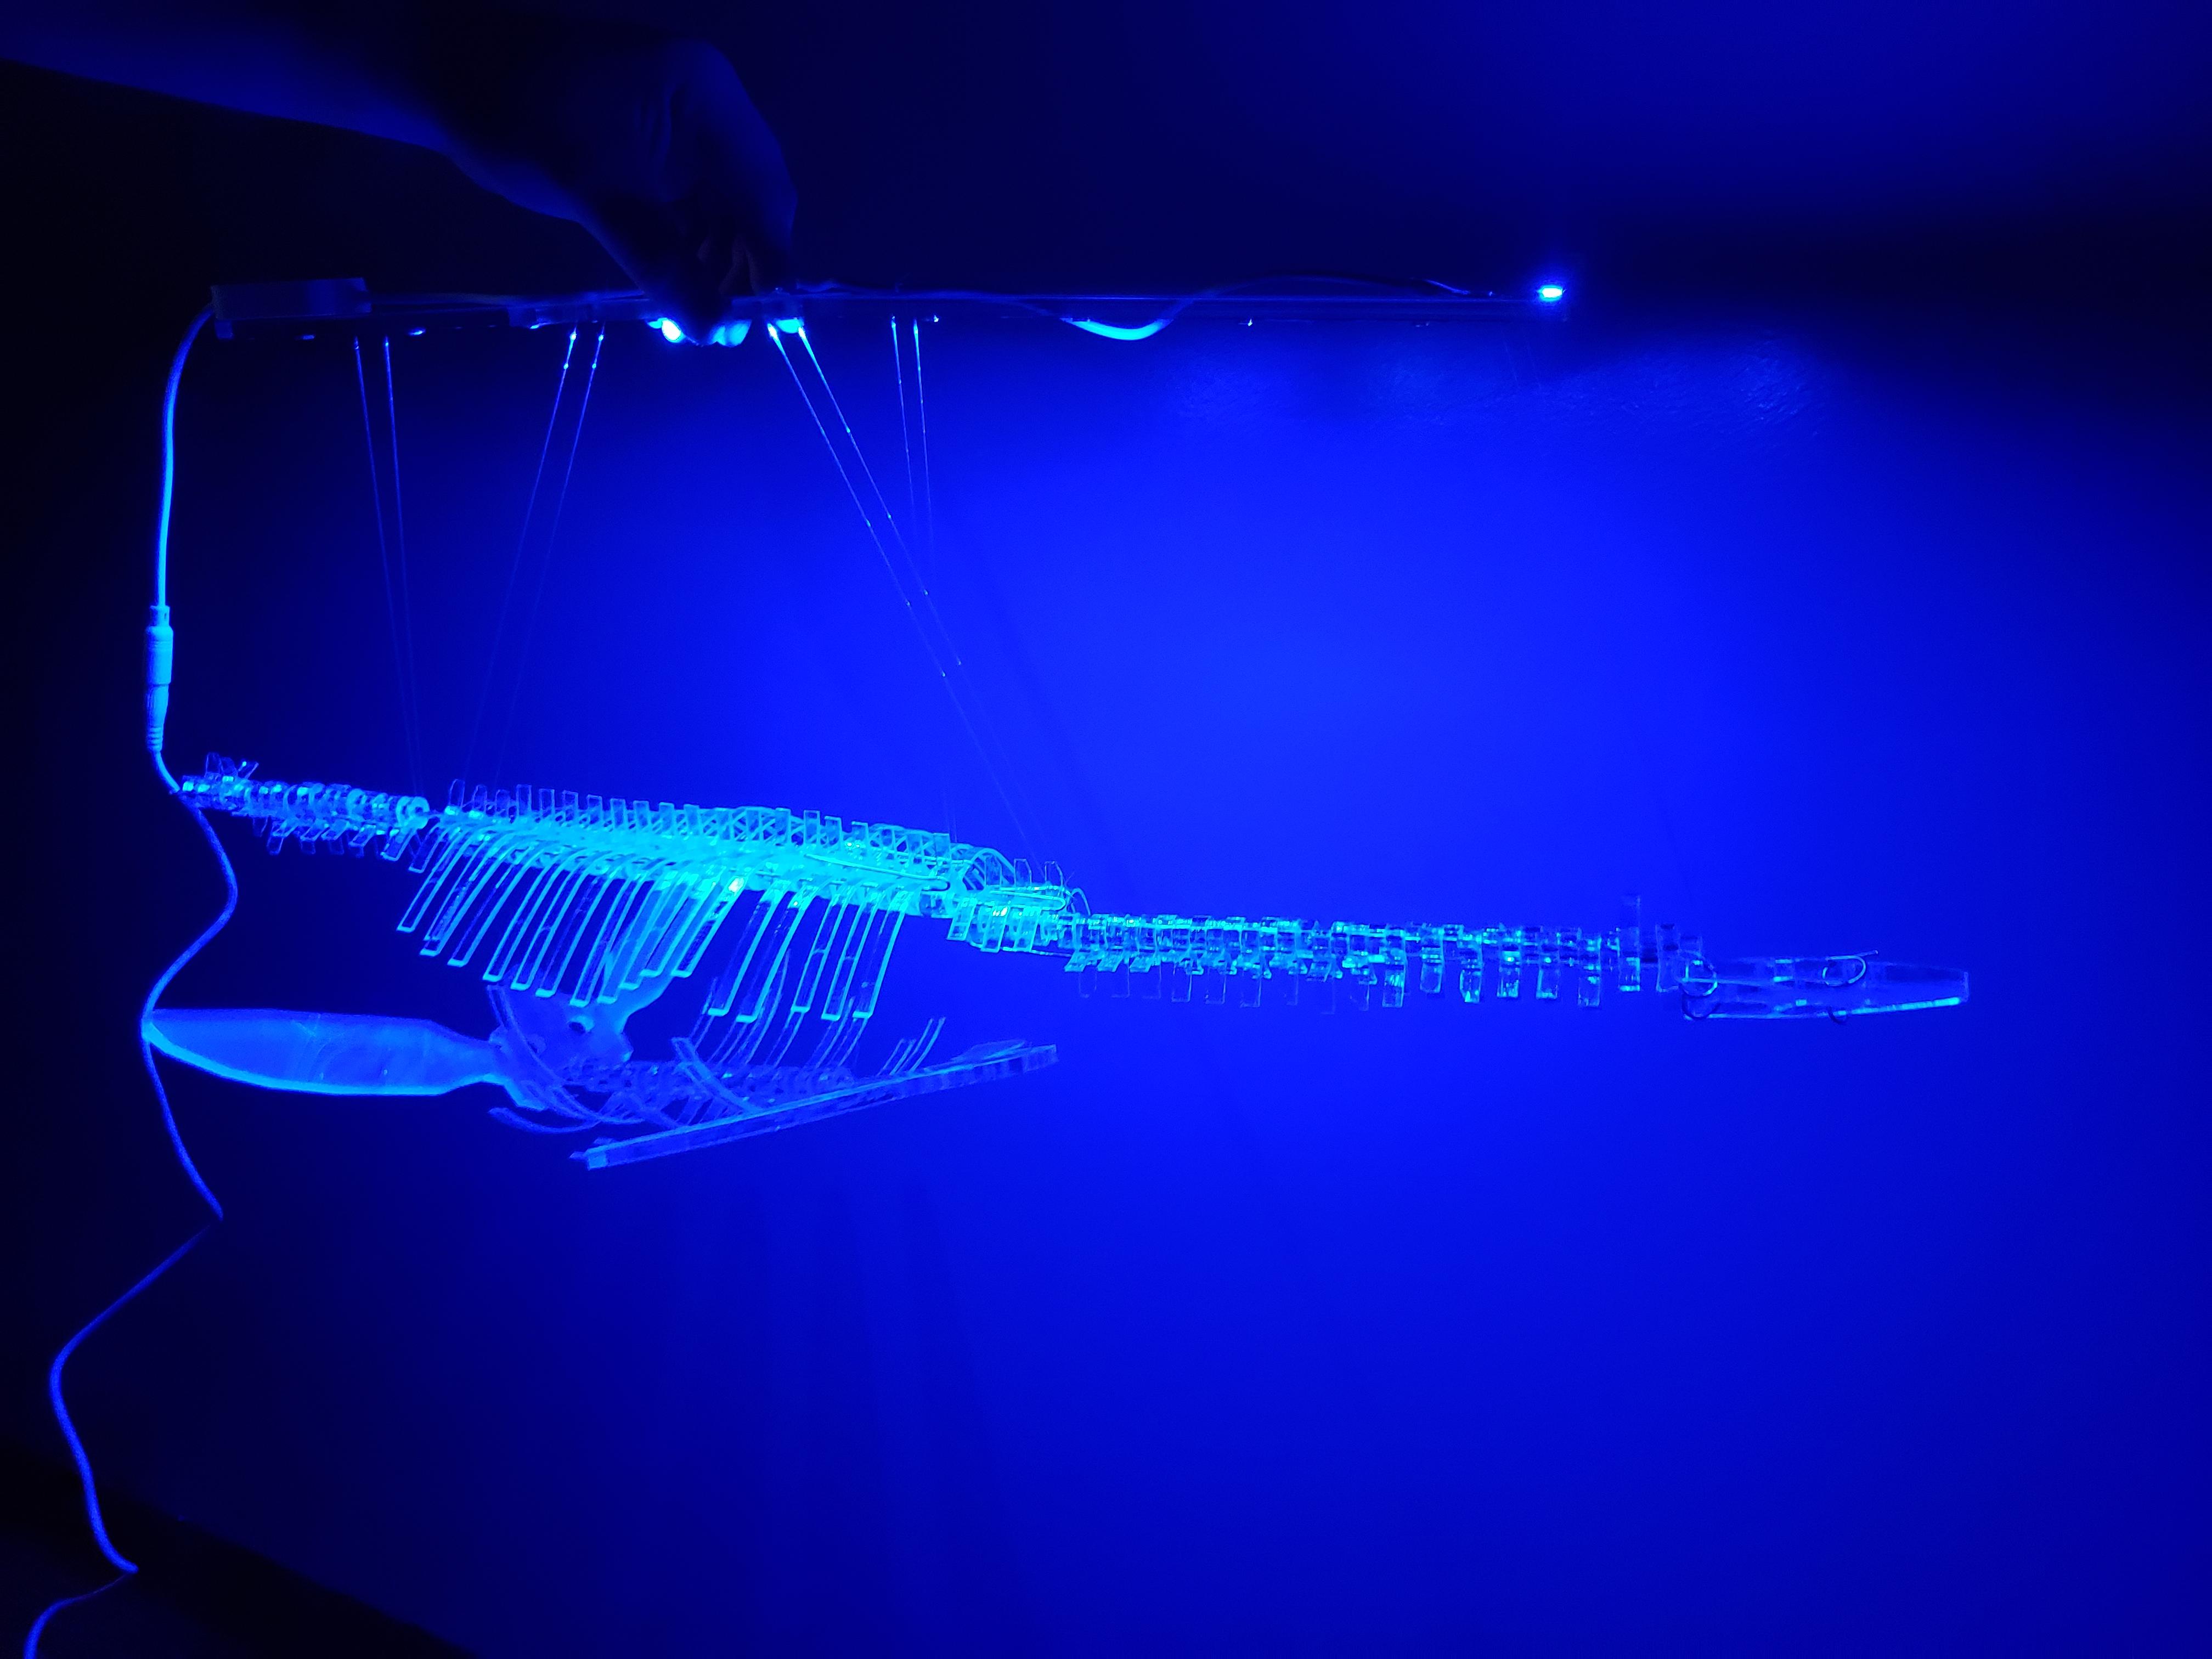
Step 6: Run Metal Wire Through Each Piece
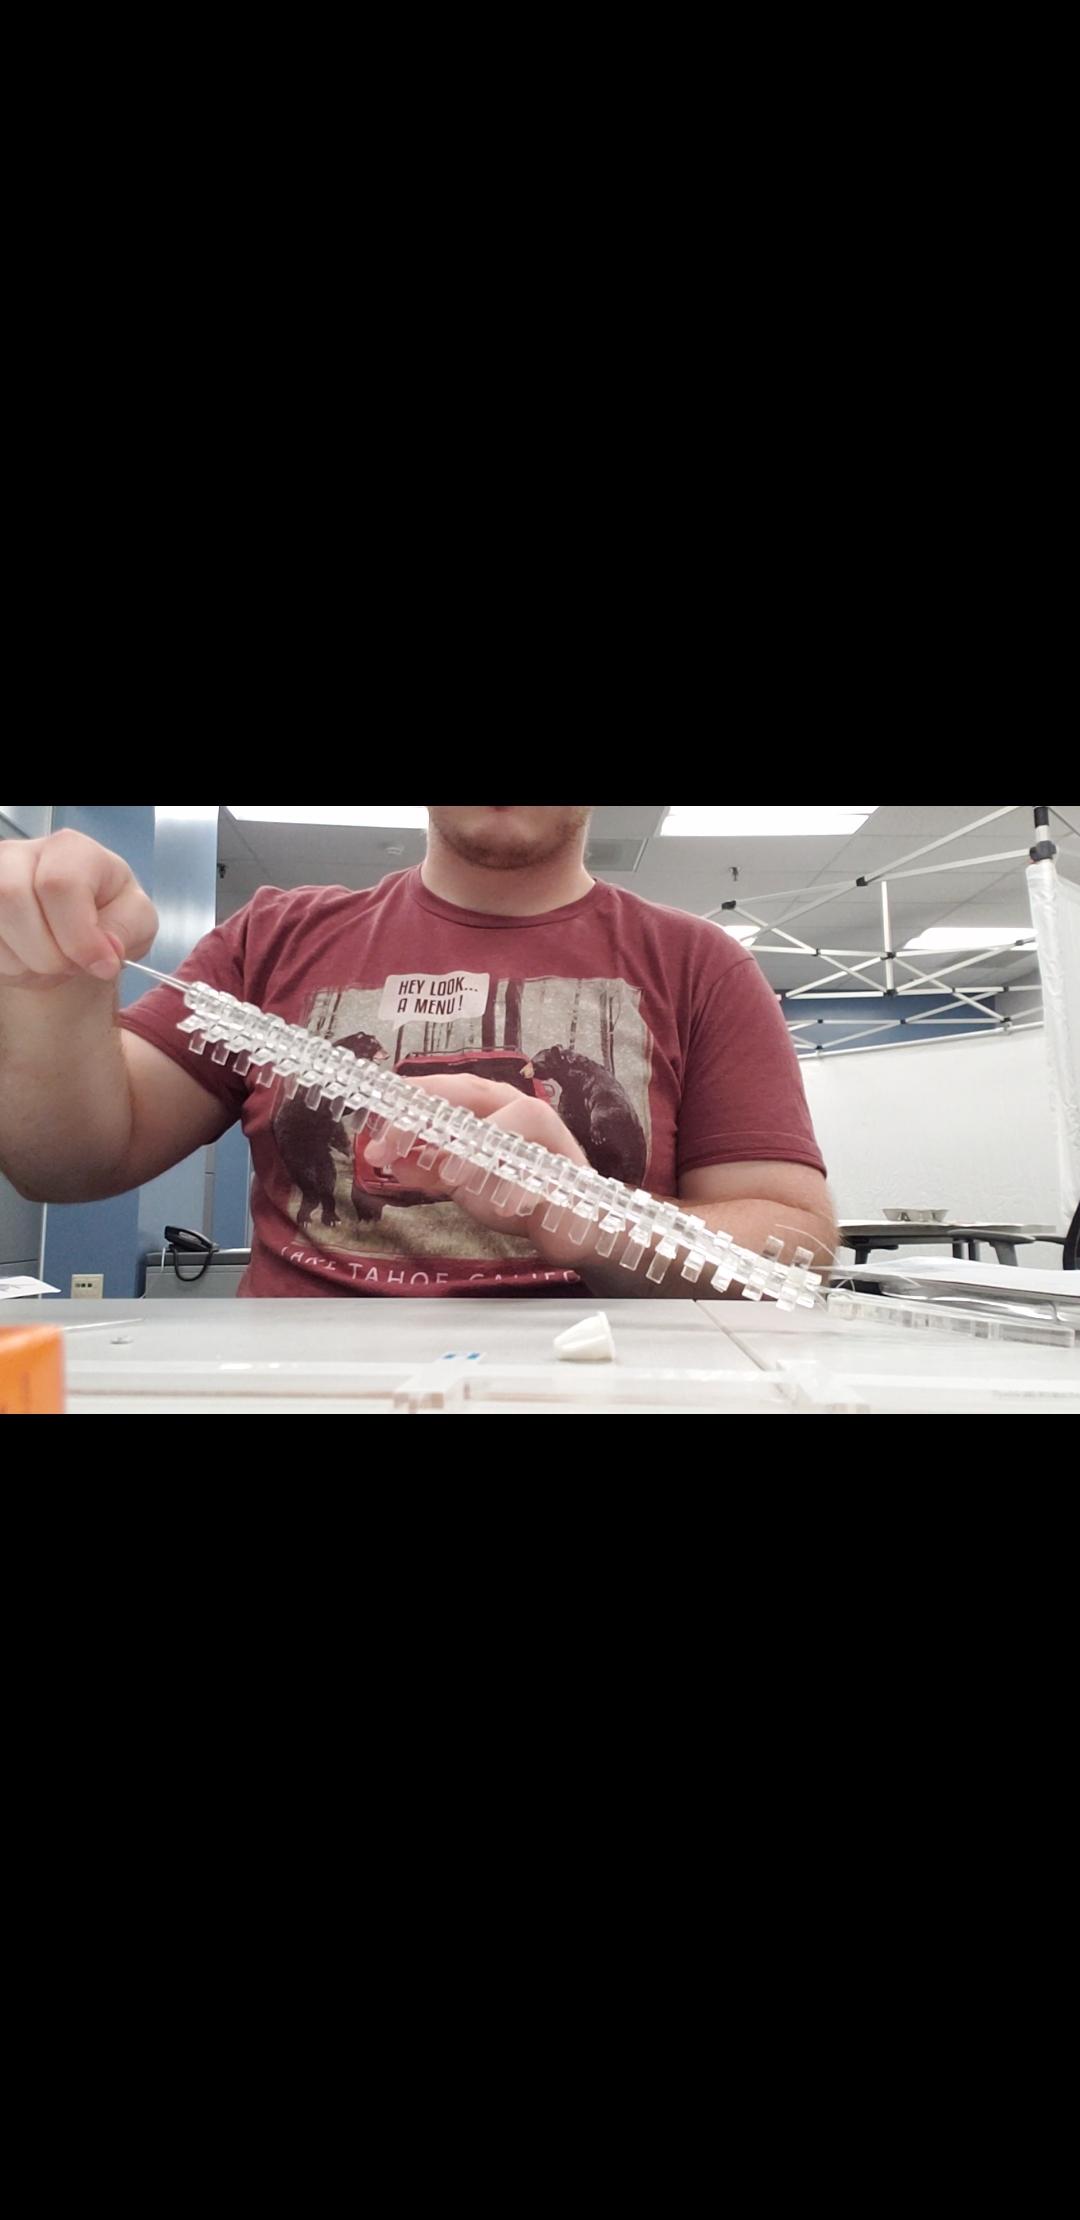
Once each piece has been cut, run your metal wire through the holes in each piece. This will help the model to hold its form. You should have two pieces by the end of this step:
- The top piece including the neck, ribs and tail.
- The bottom piece including the front flippers, gastralia and rear flippers
Step 7: Run Fishing Line Through Your Two Pieces
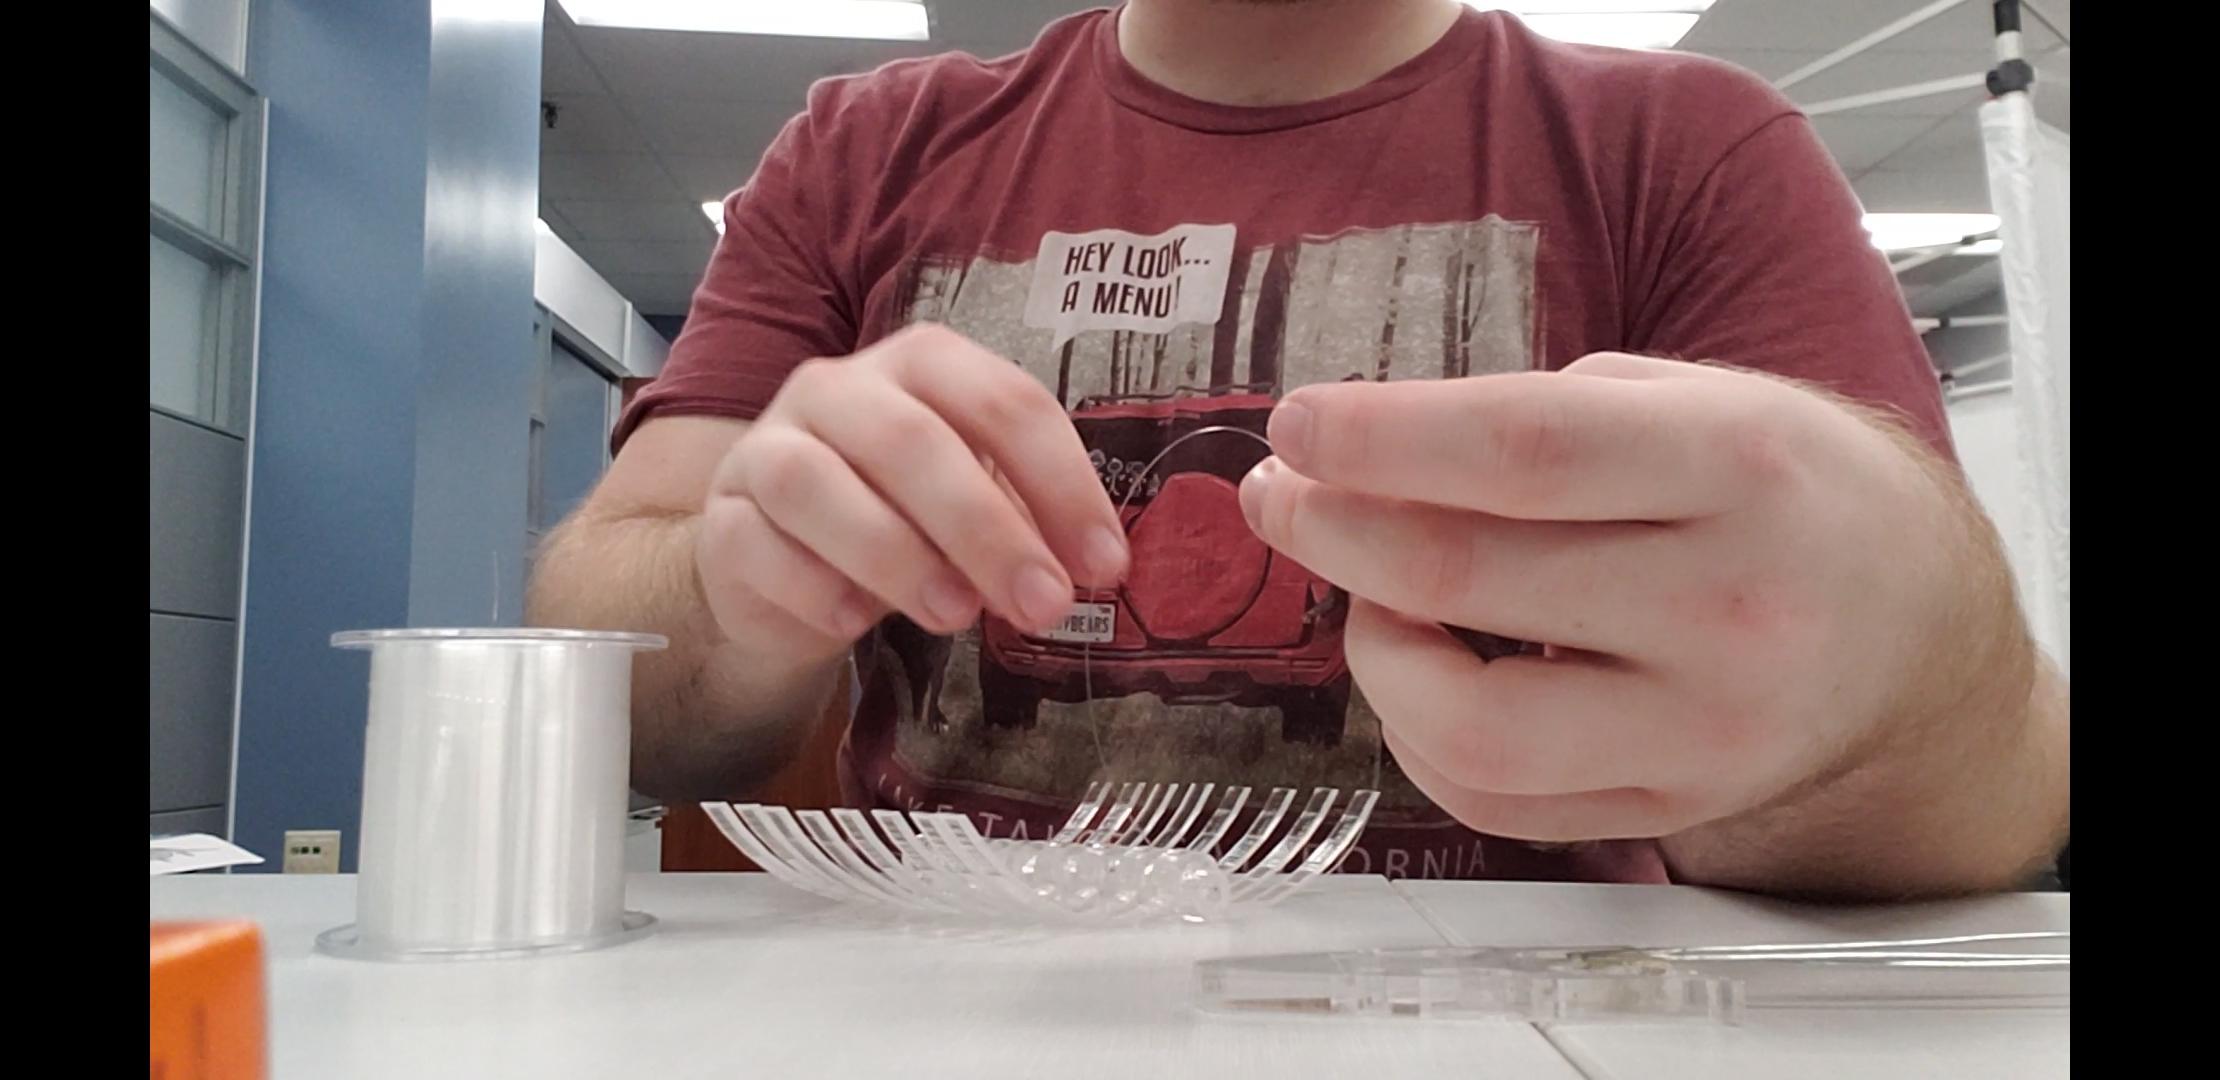
Run fishing line through each piece in the top and bottom, then feed it up upwards through weight bearing parts of the model. This fishing line will attach to the LED strip. Repeat as amny times as neccessary for a firm support structure.
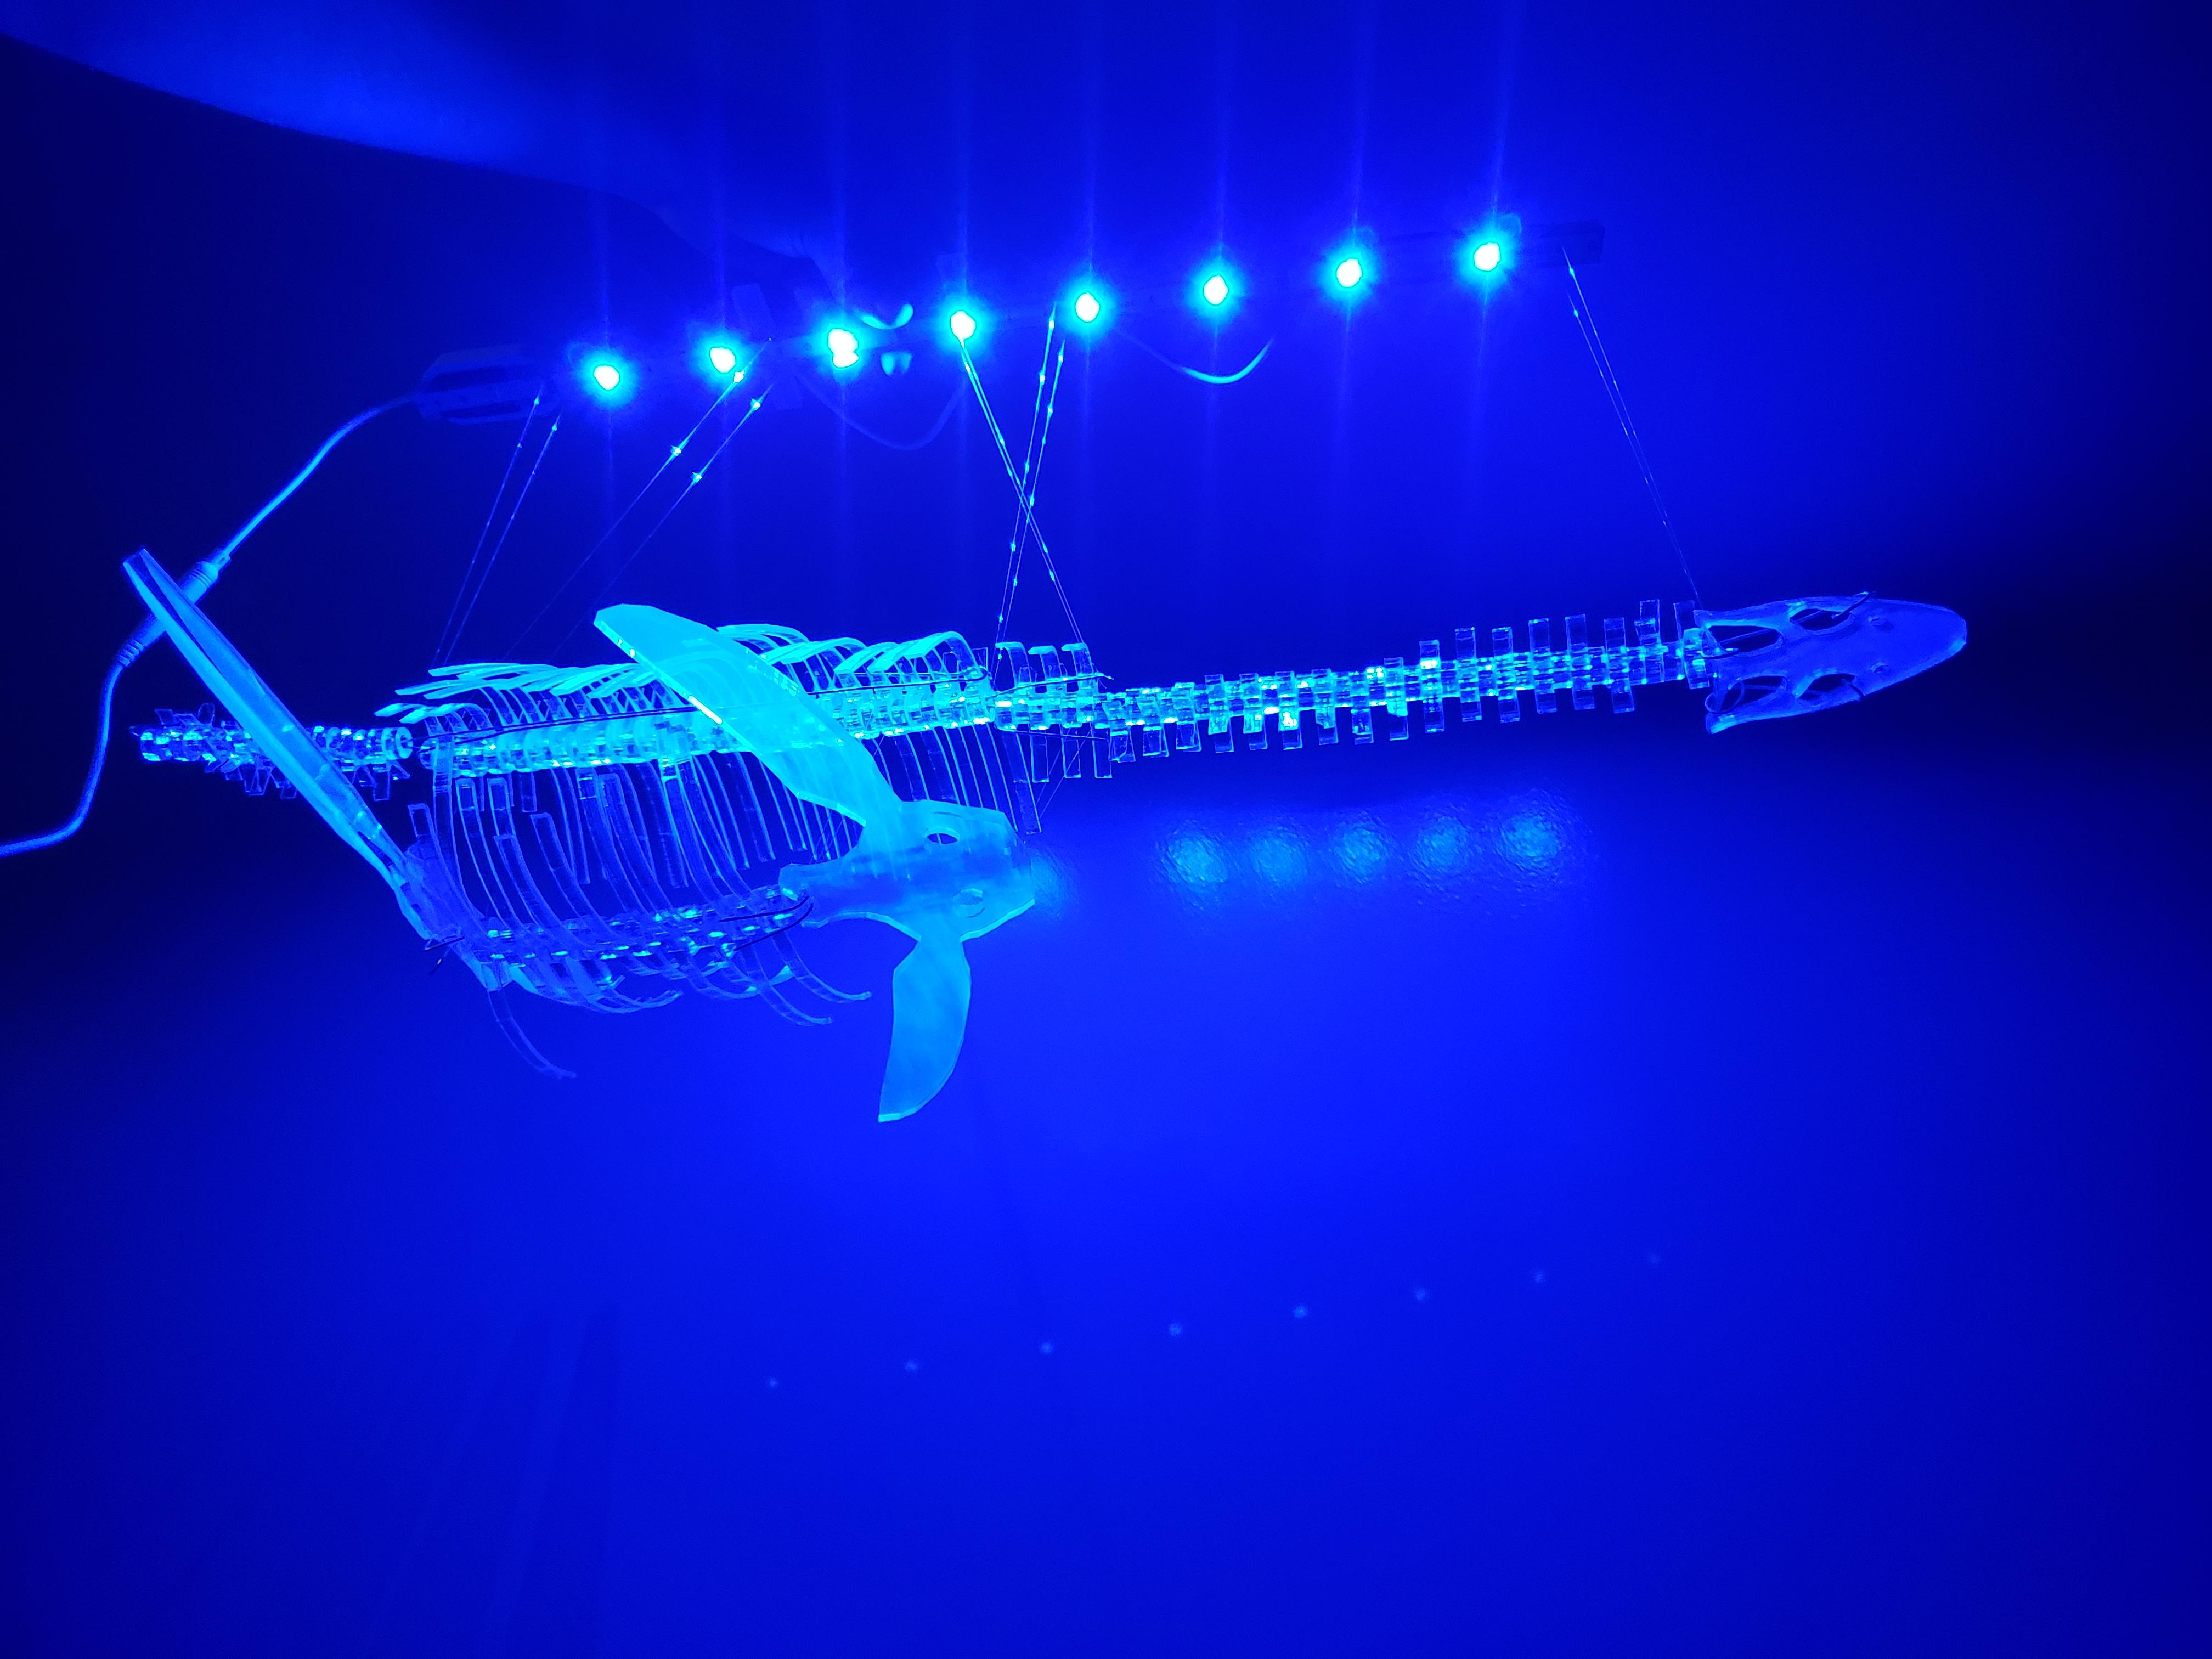
Step 8: Tie Fishing Line to LED Axel
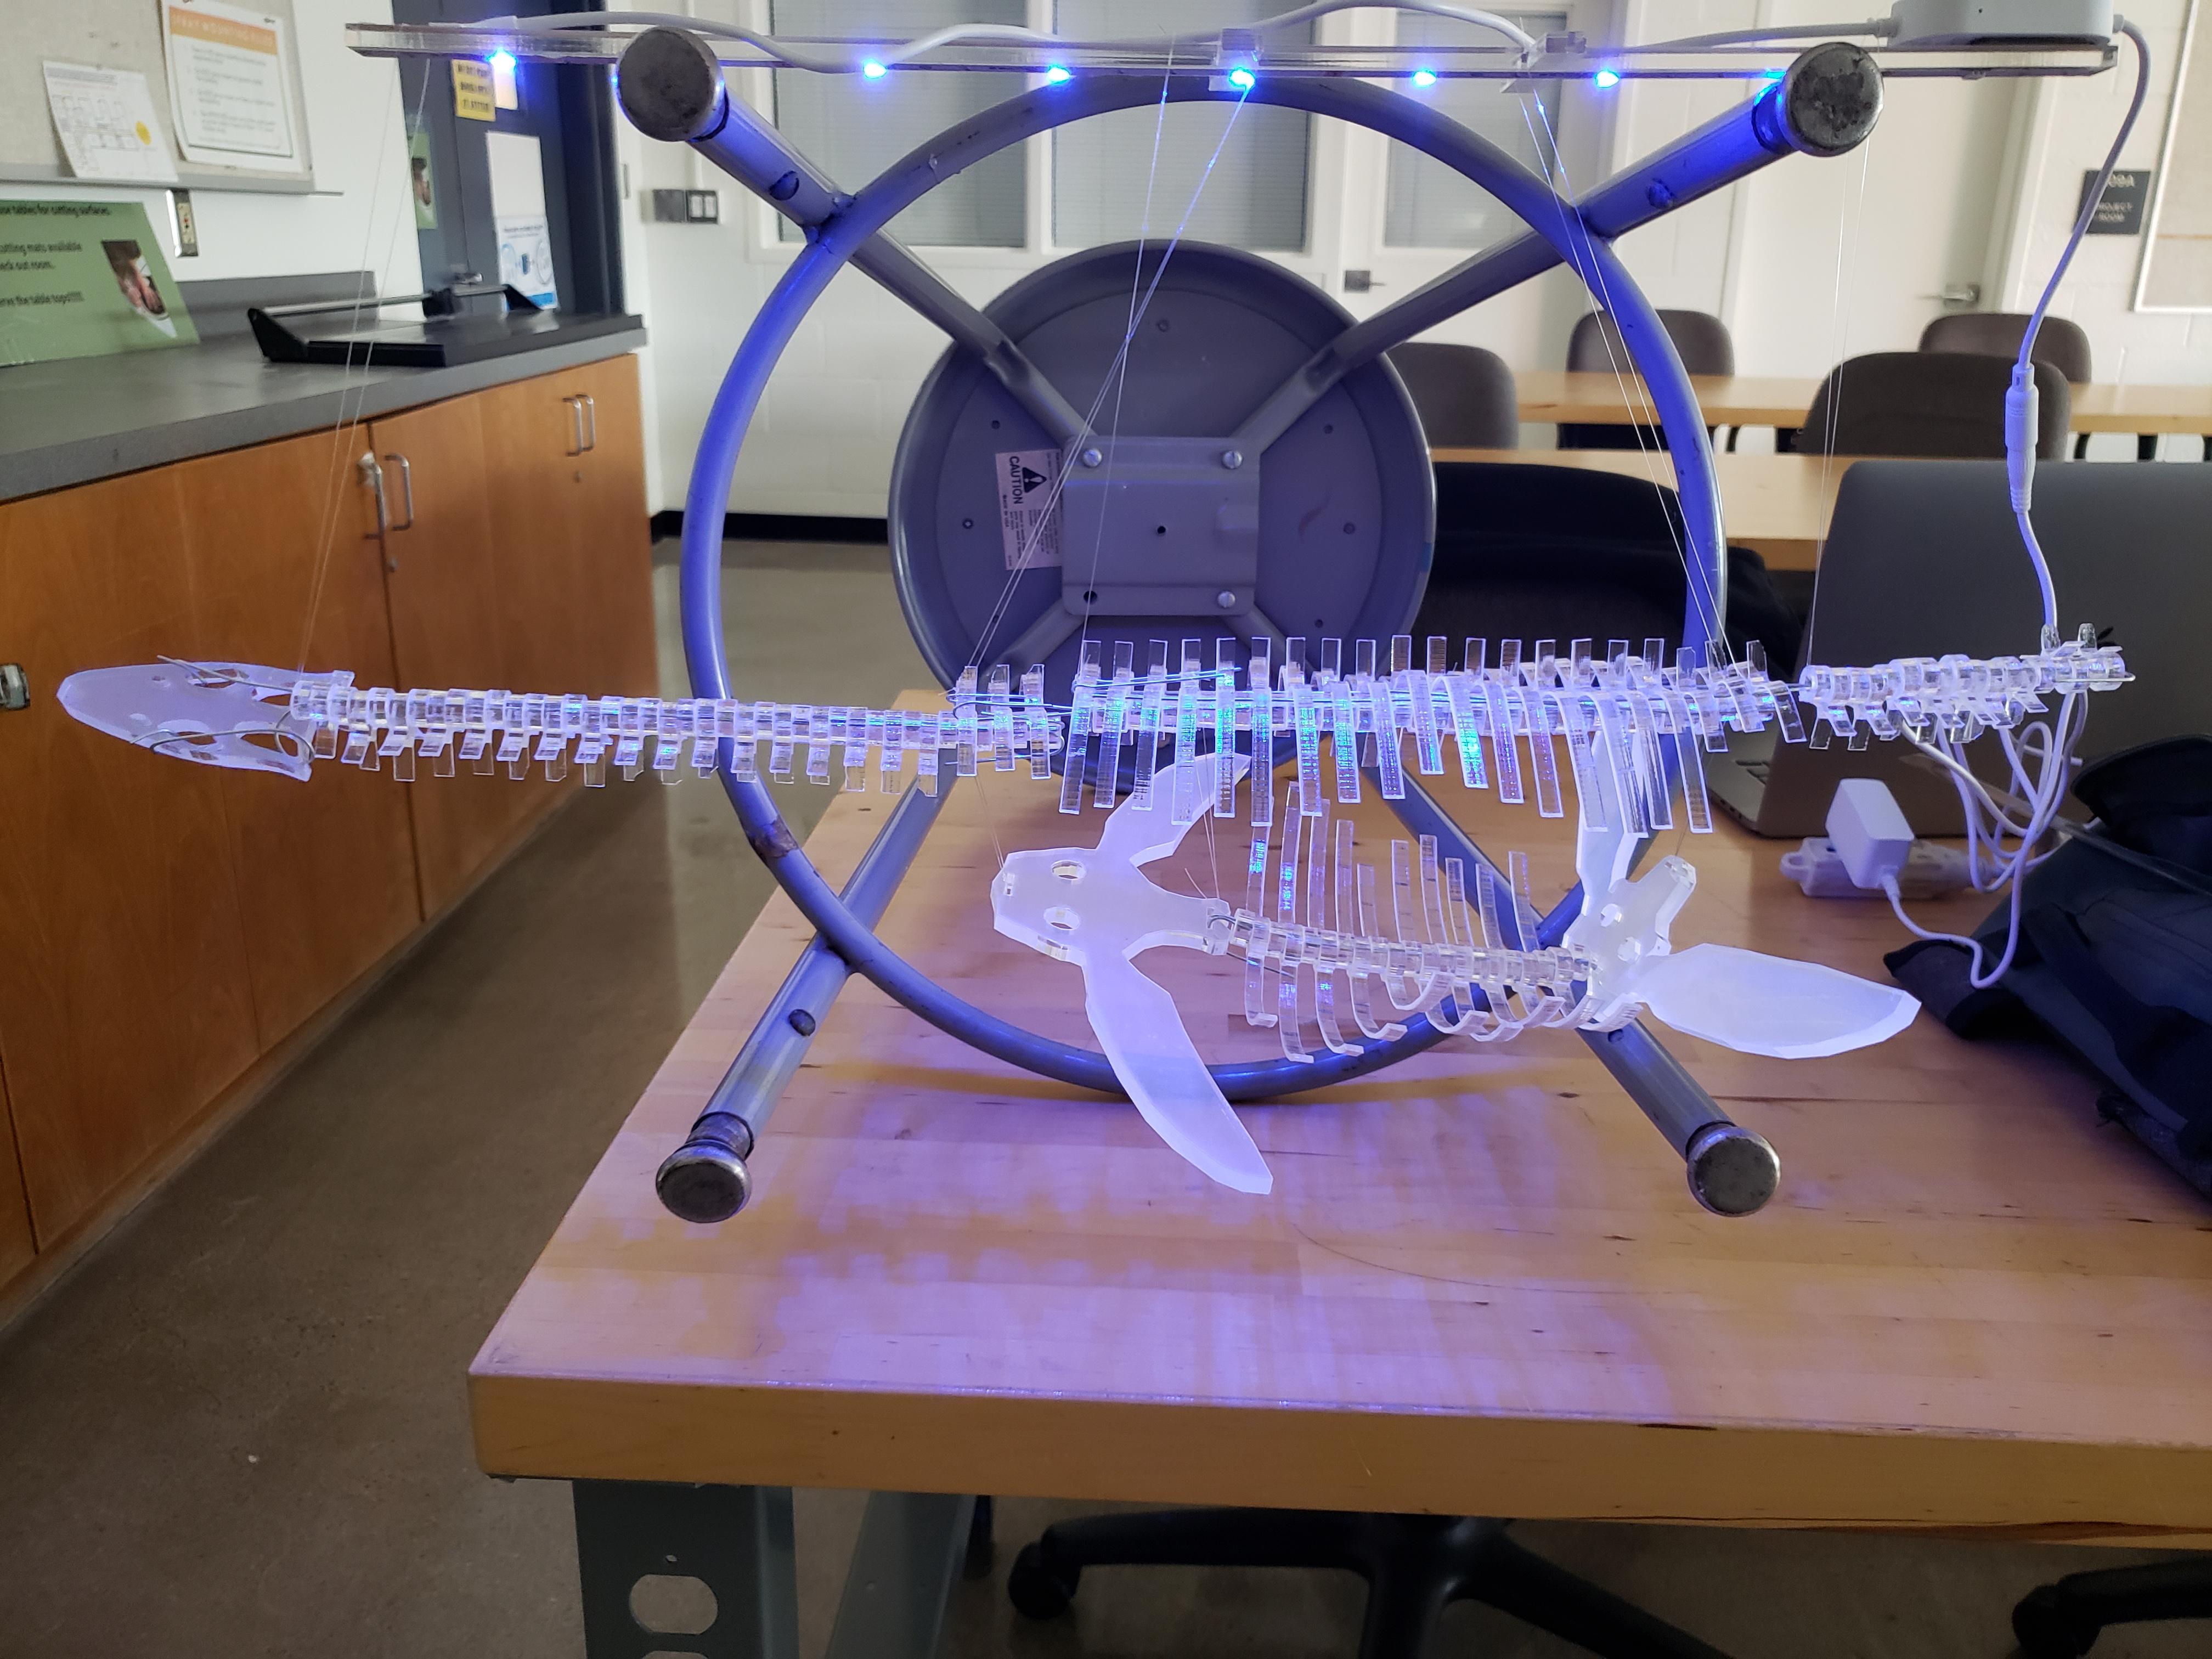
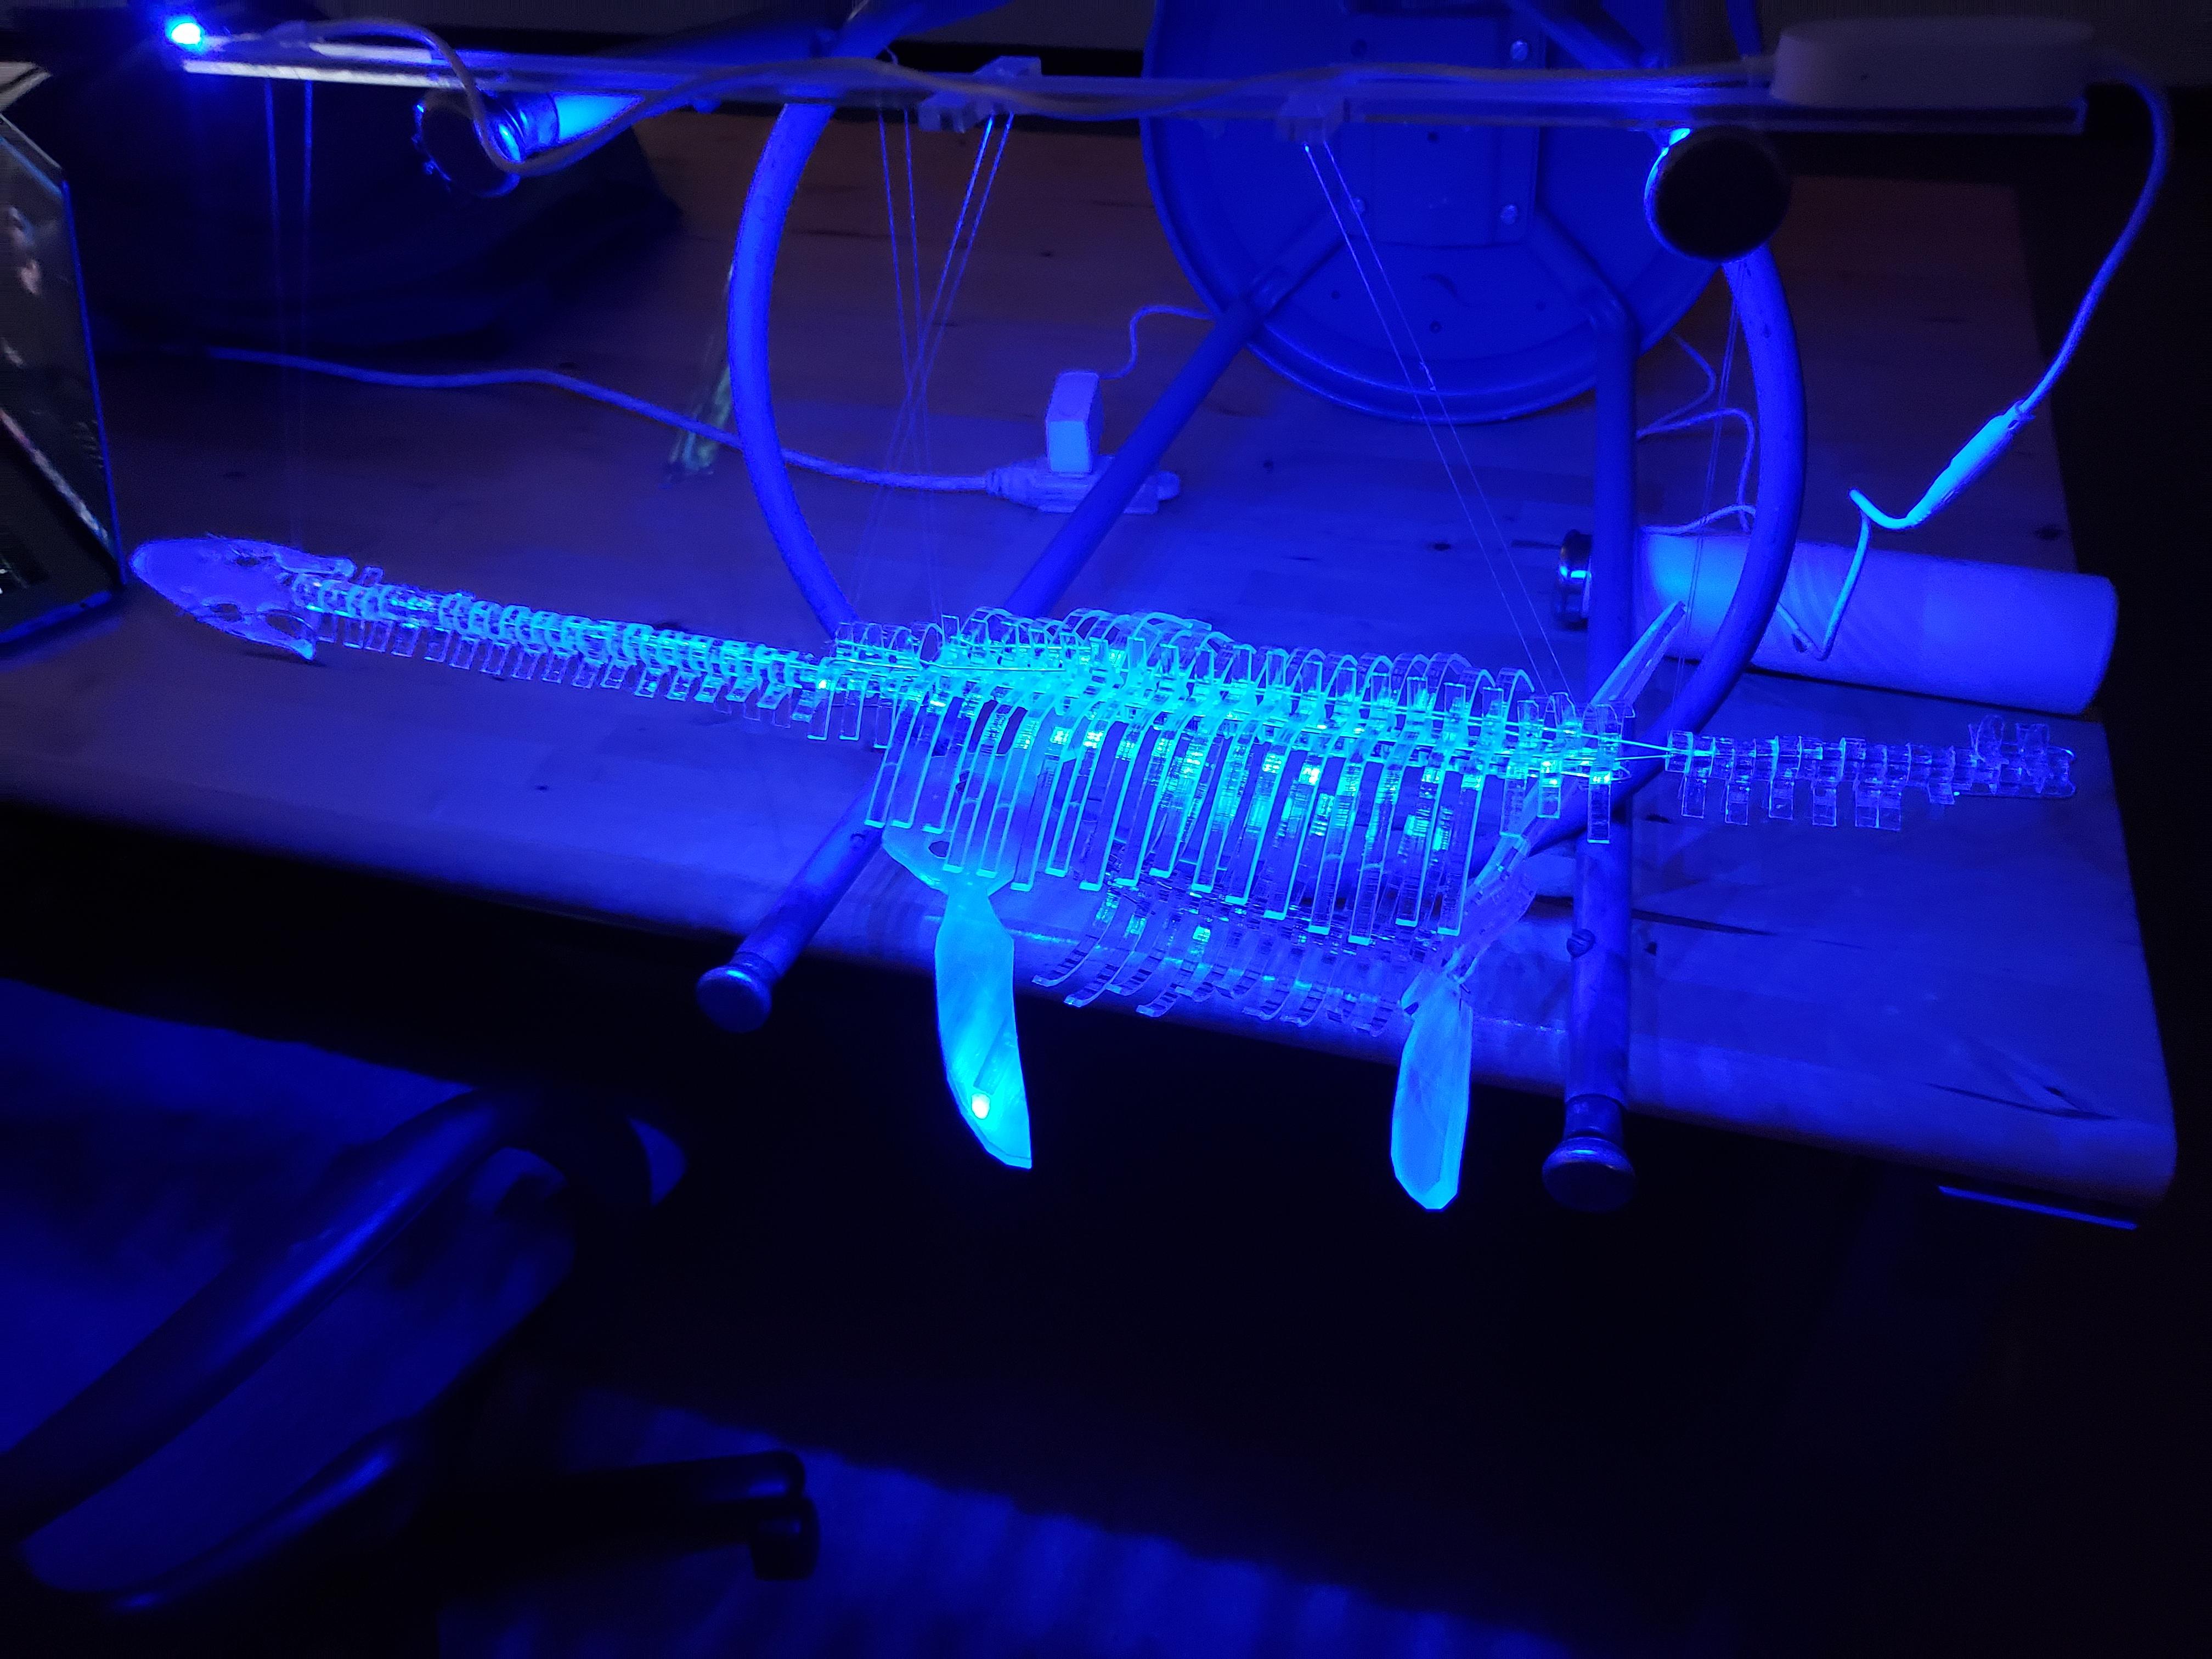
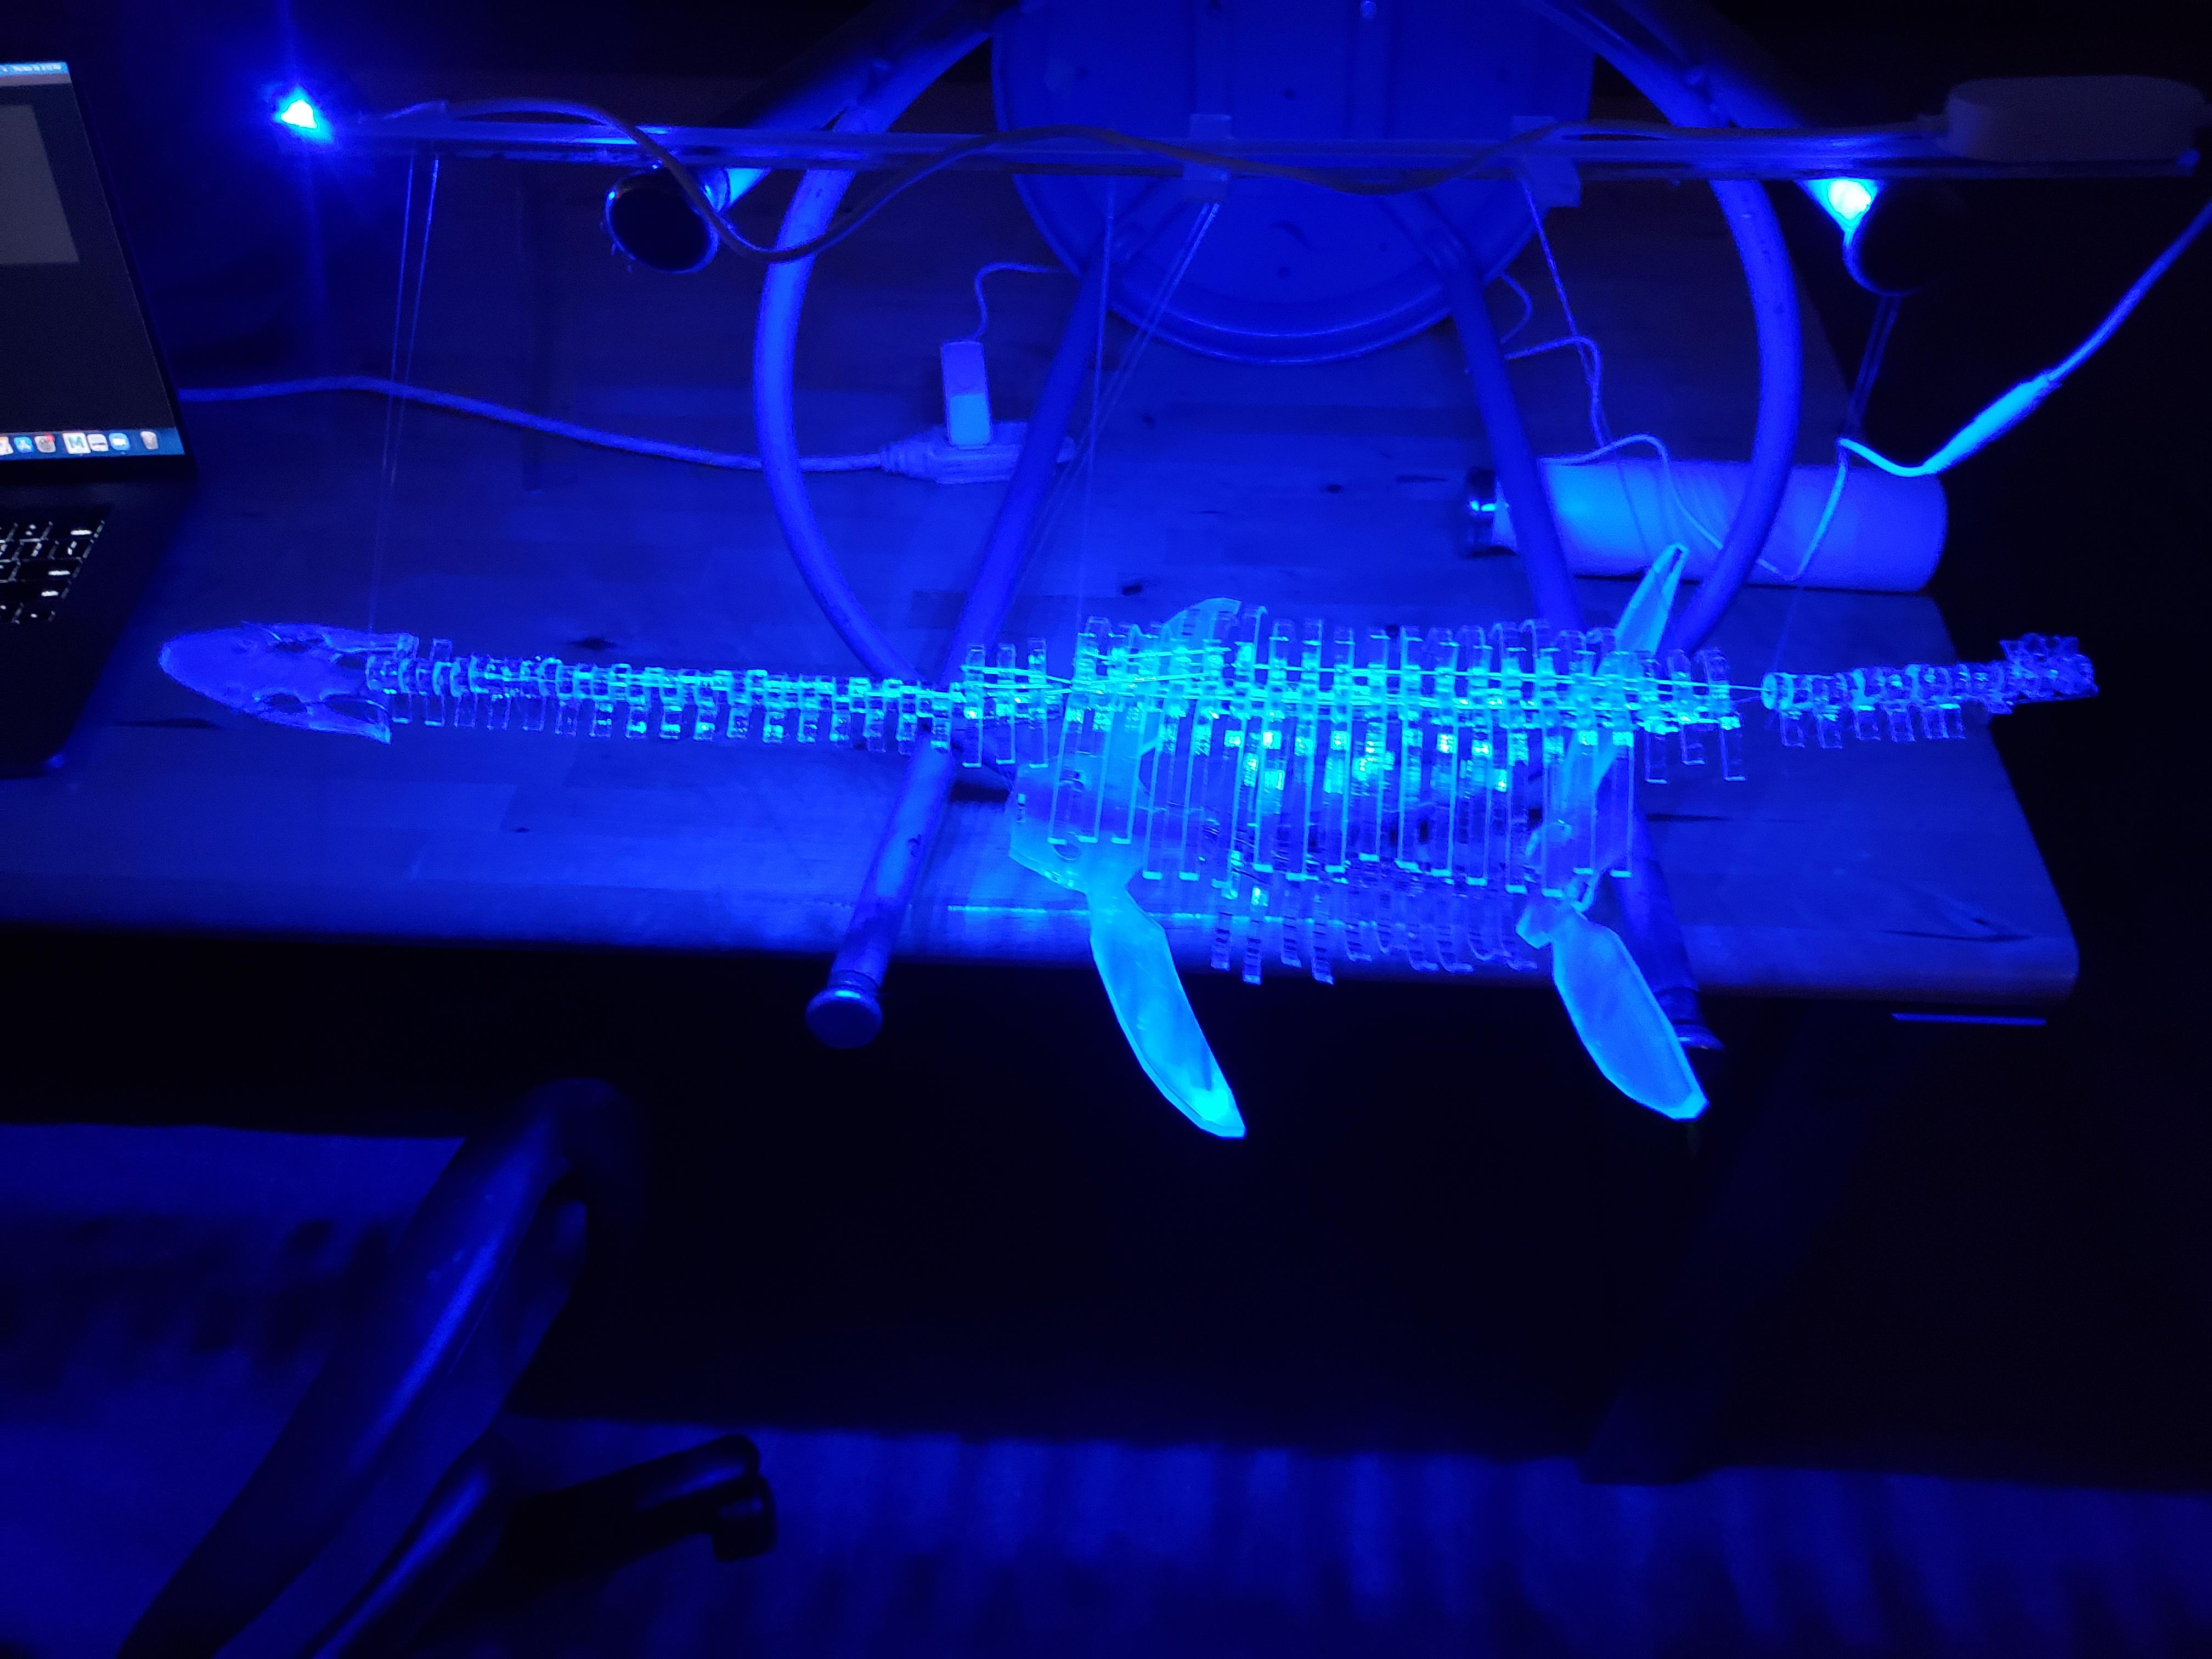
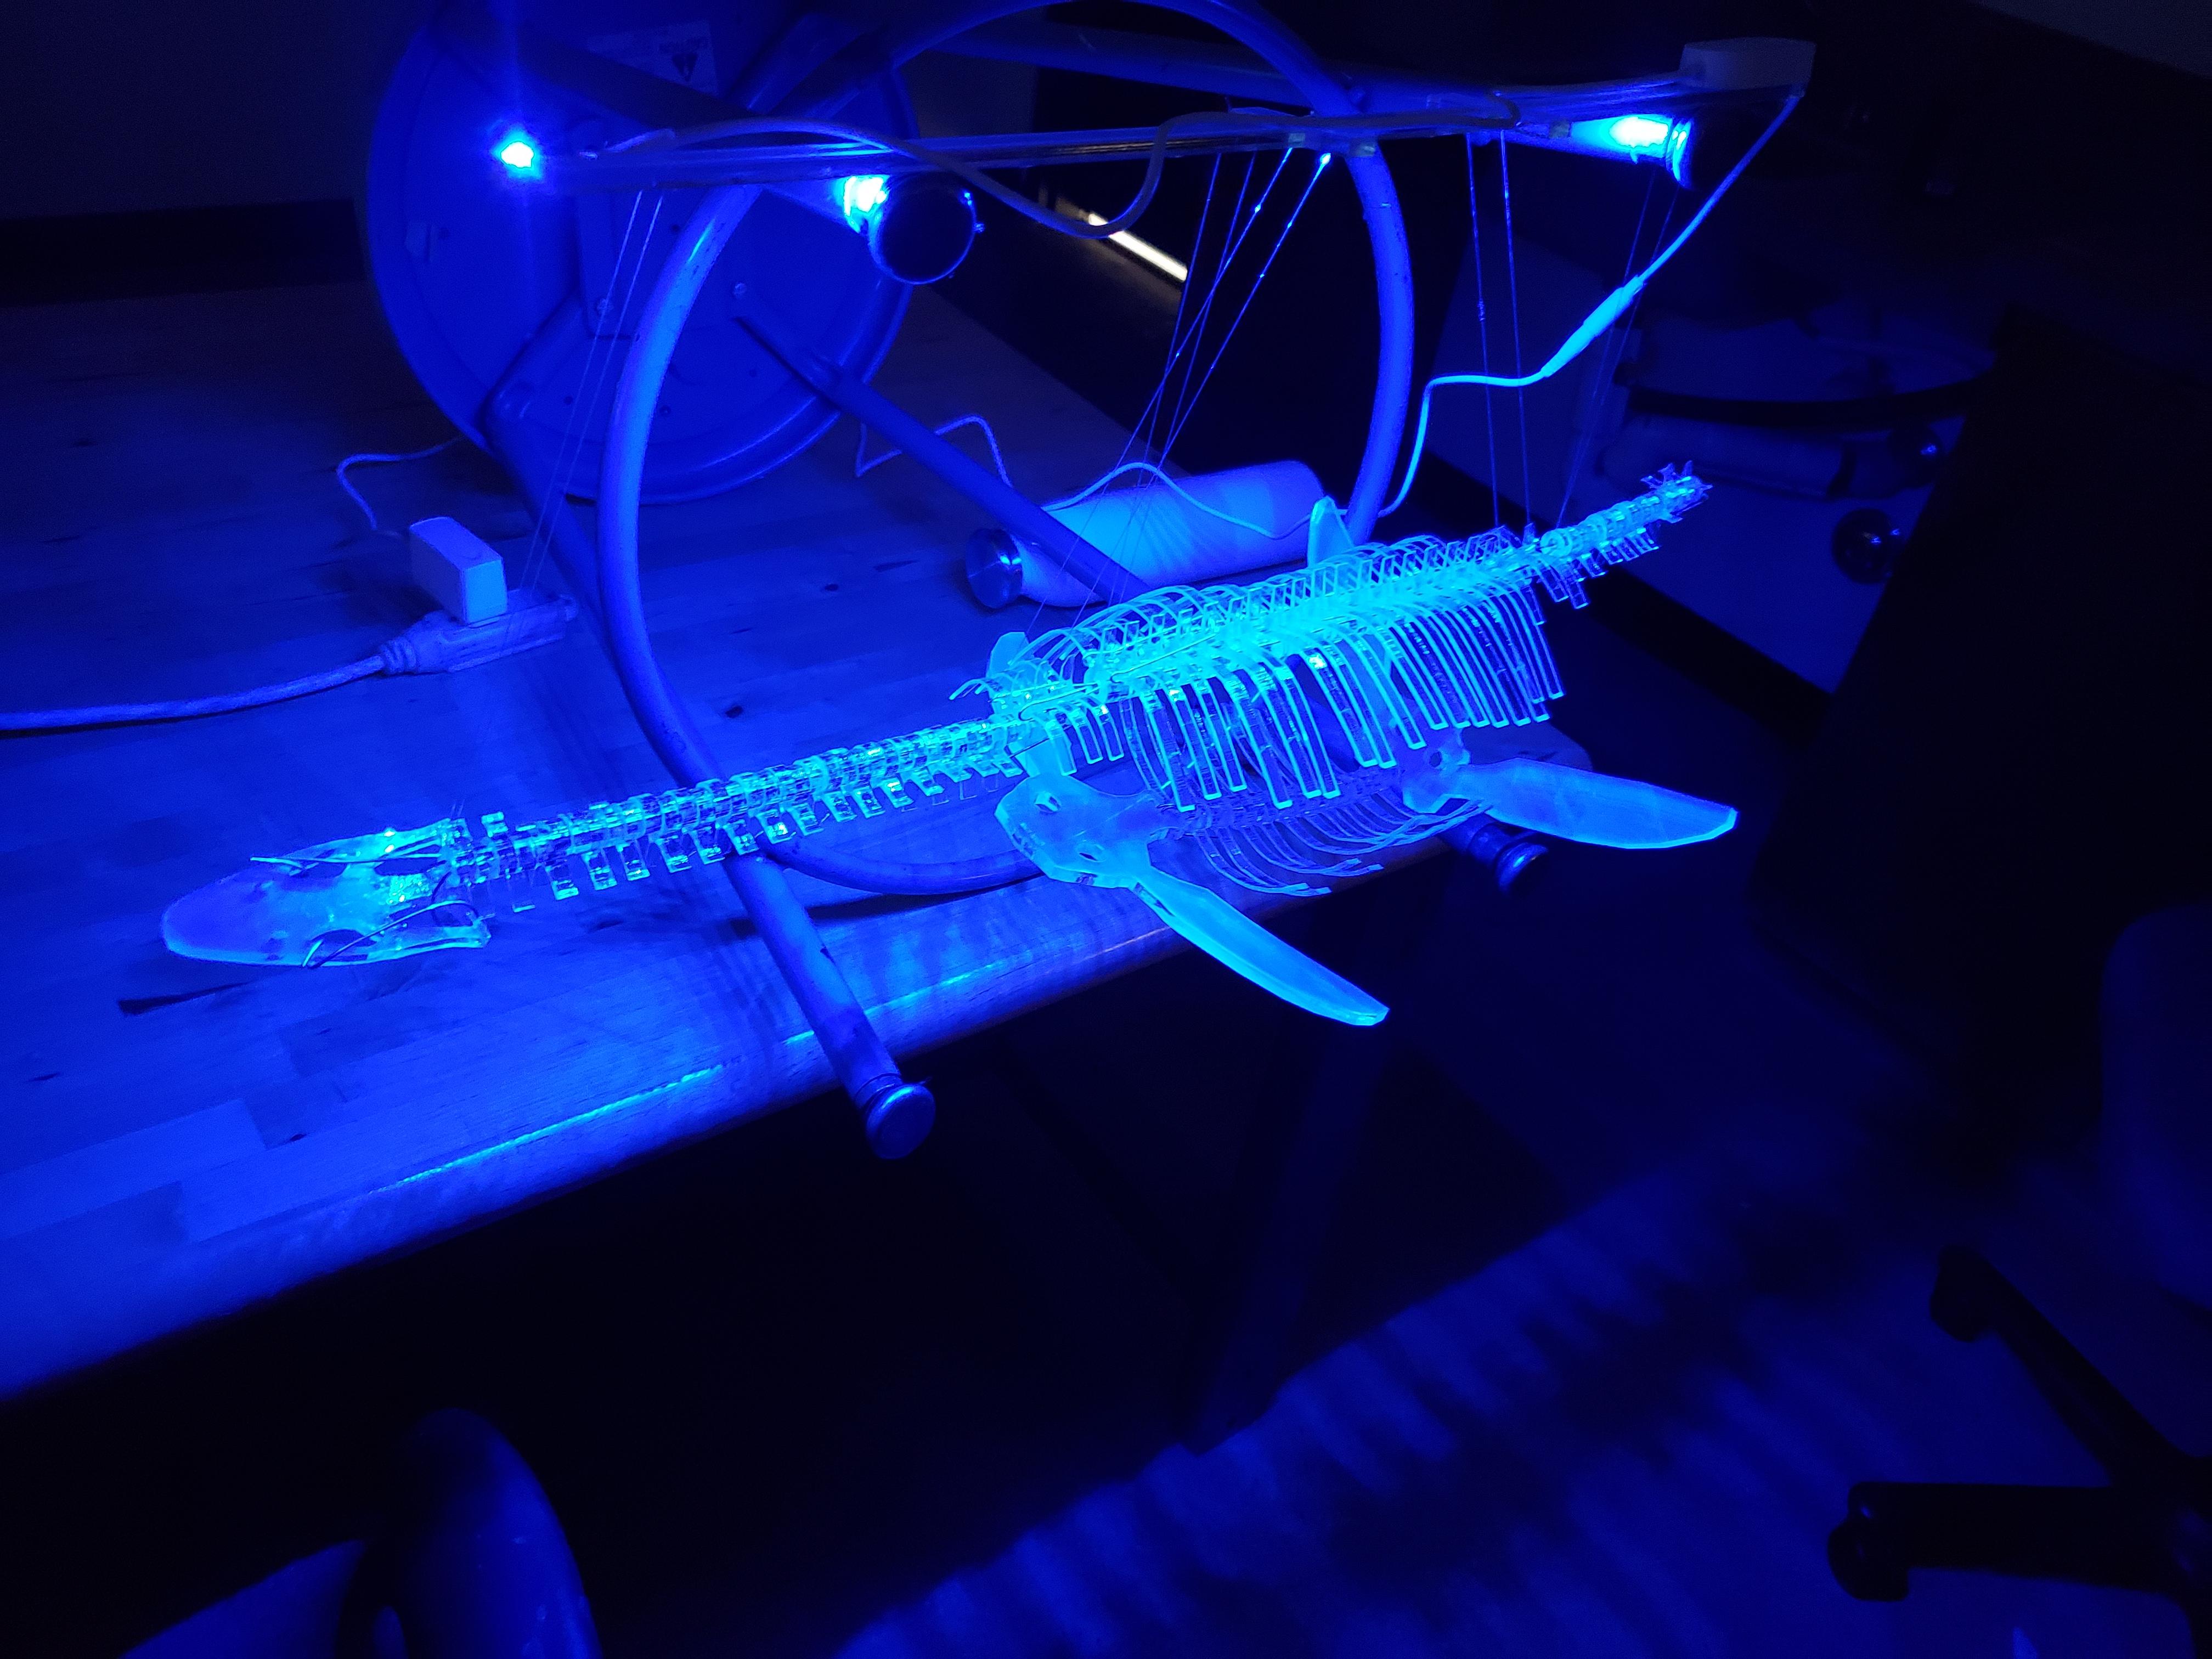
Tie the fishing line to your light source. I chose to Laser cut my own axel and attached blue LEDs, but your light source can be set up in whatever way you find satisfactory. Your top piece should hang a bit higher than your lower piece. Display in a dark room for a ghostly effect!