Getting Started With Traditional Wood Carving and Carving a Mask
by mitchell_furr in Workshop > Woodworking
5174 Views, 52 Favorites, 0 Comments
Getting Started With Traditional Wood Carving and Carving a Mask
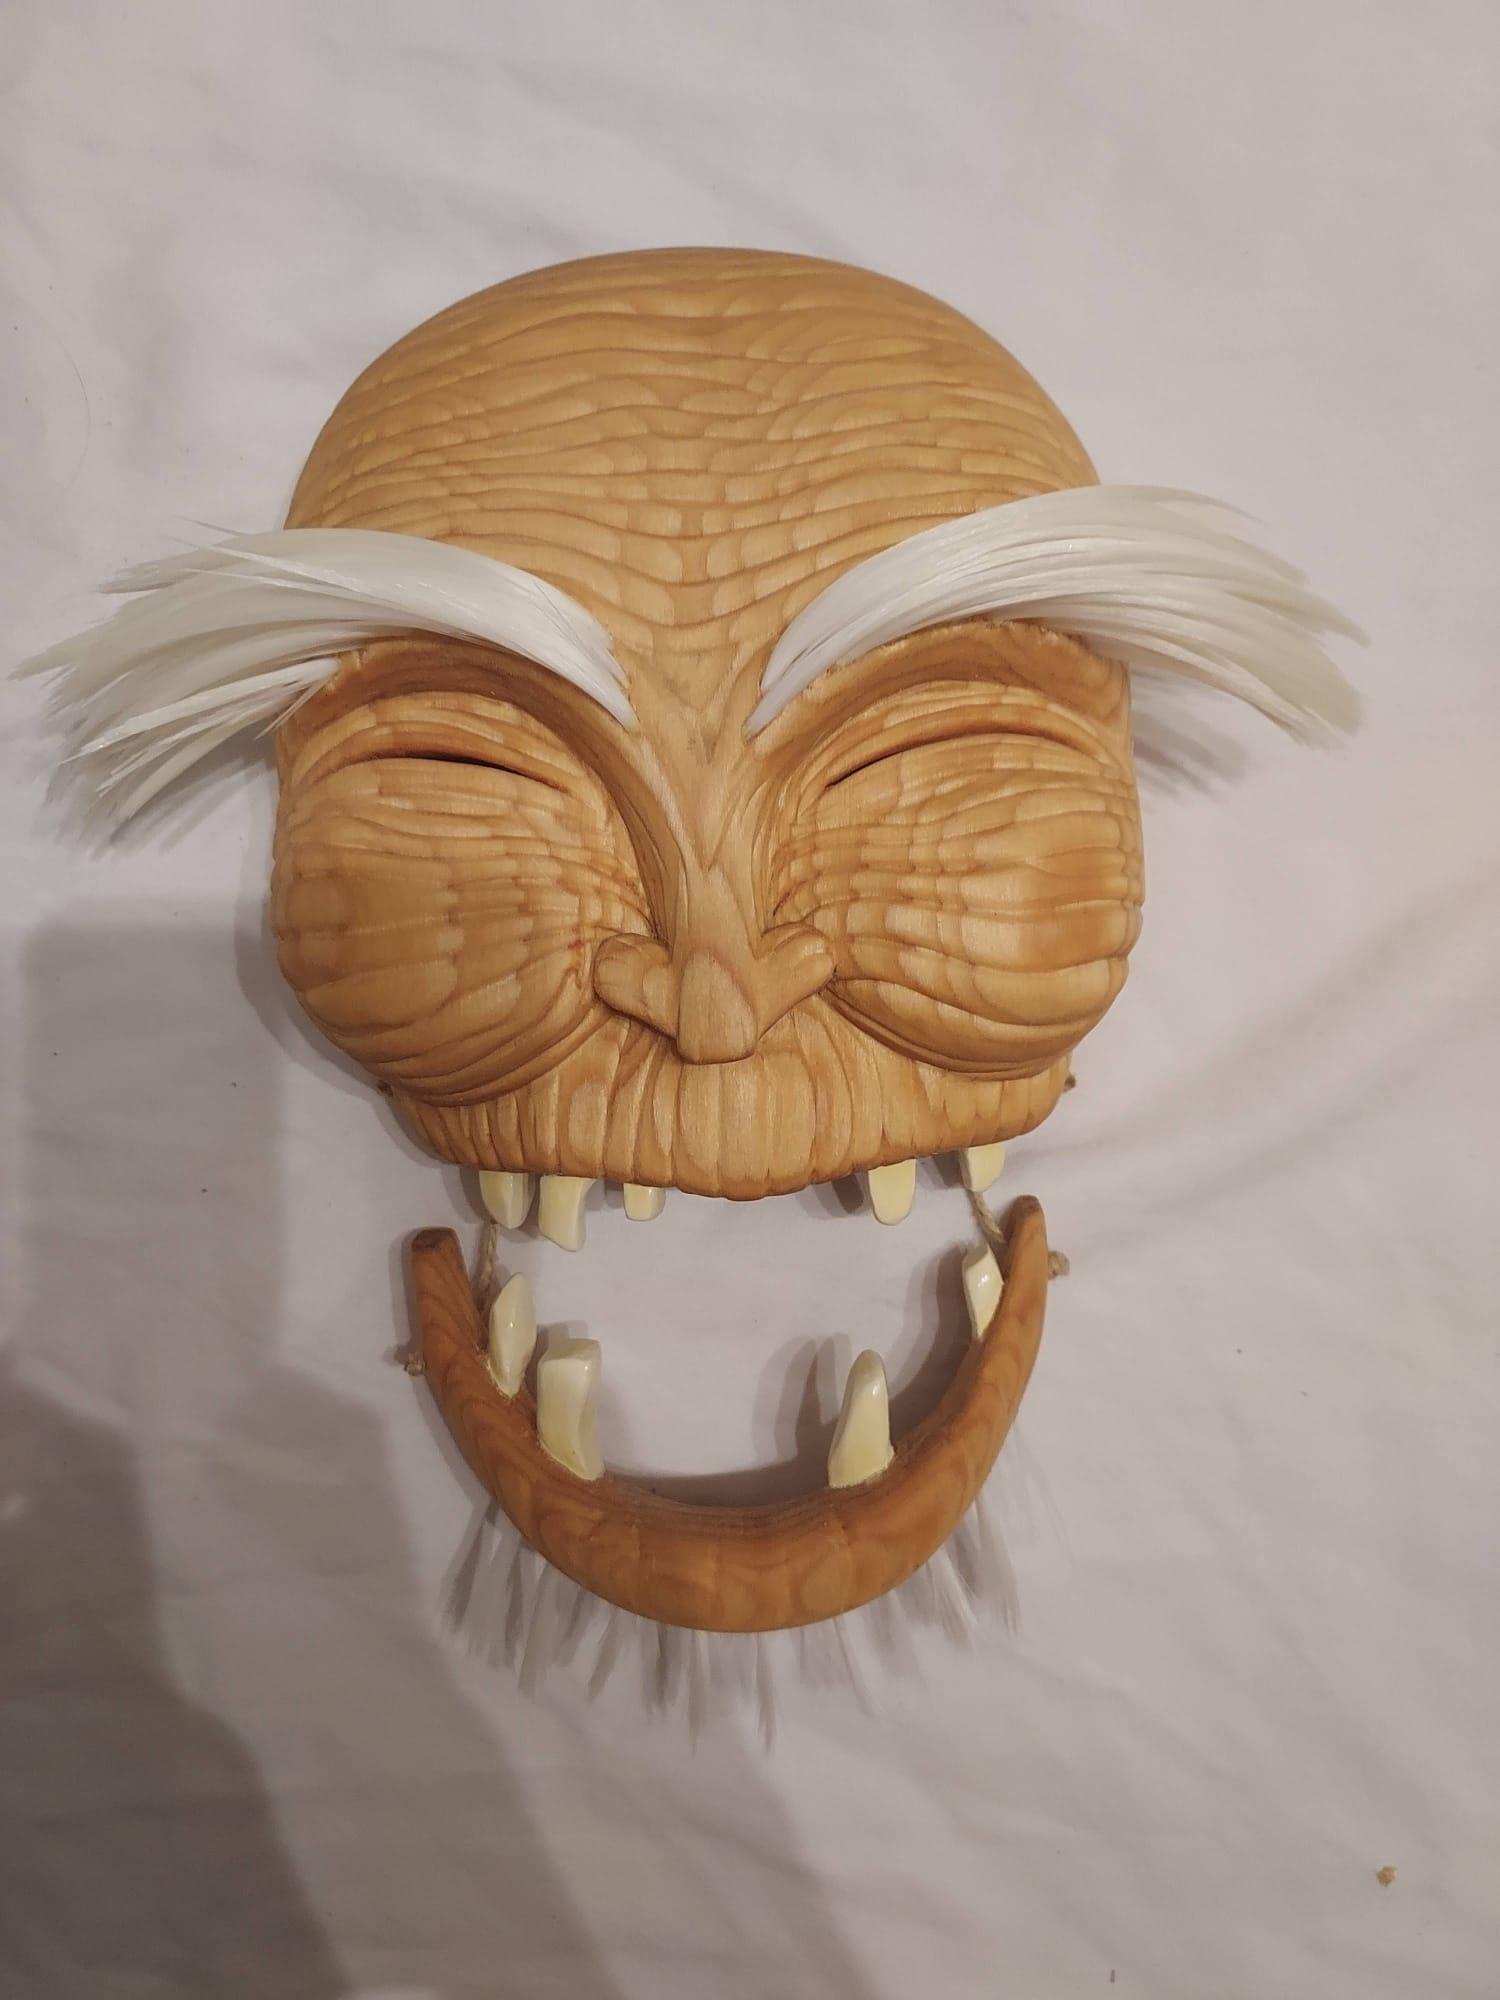
Ever wanted to start carving with traditional tools, but don't know where to begin? Tired of perfectly cut CNC machine that really lack that human touch? Traditional carving practices can be tedious to some, but for me its meditative. Join me as I show you how to get started and carve a wooden mask.
I often found that I was a bit too clumsy with power tools, high speed spinning machines can create catastrophic mistakes. Hand tools really taught me how to slow down and meditate on the piece. When I was a beginner, I didn't know where to begin. Are expensive gouges important? What wood to use? Are my tools supposed to be sharp? What the heck is a fluteroni? This instructable will try to focus more so on the process of getting started, some basic techniques, and minimal specialized tools. From here, you should be able to expand and begin your own journey into carving like the masters of old.
Supplies
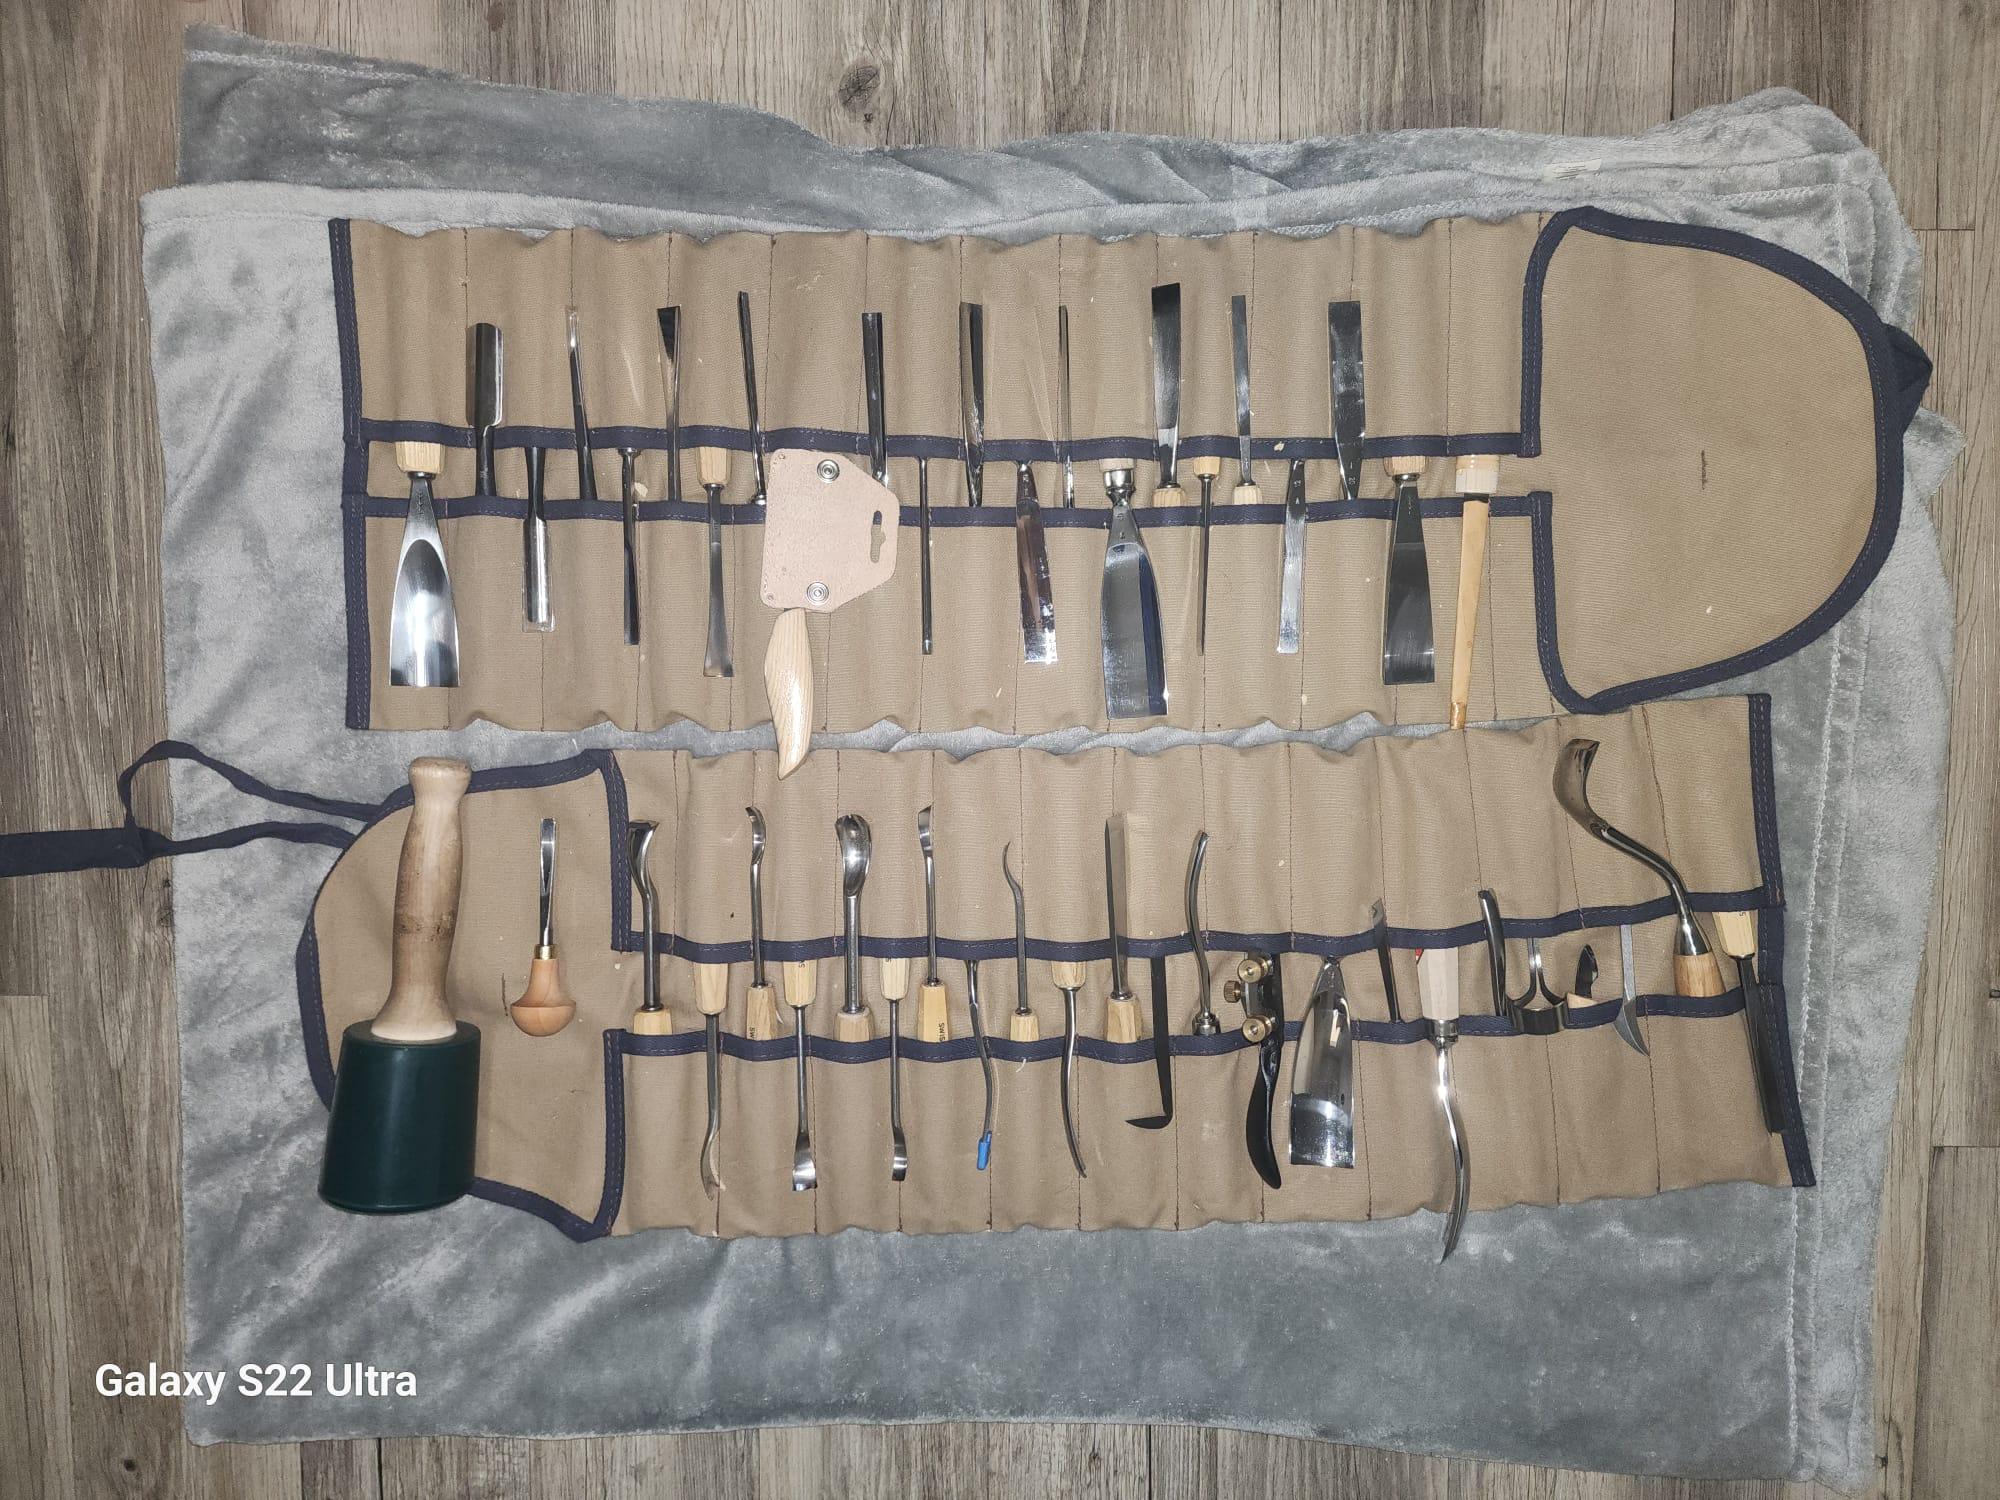
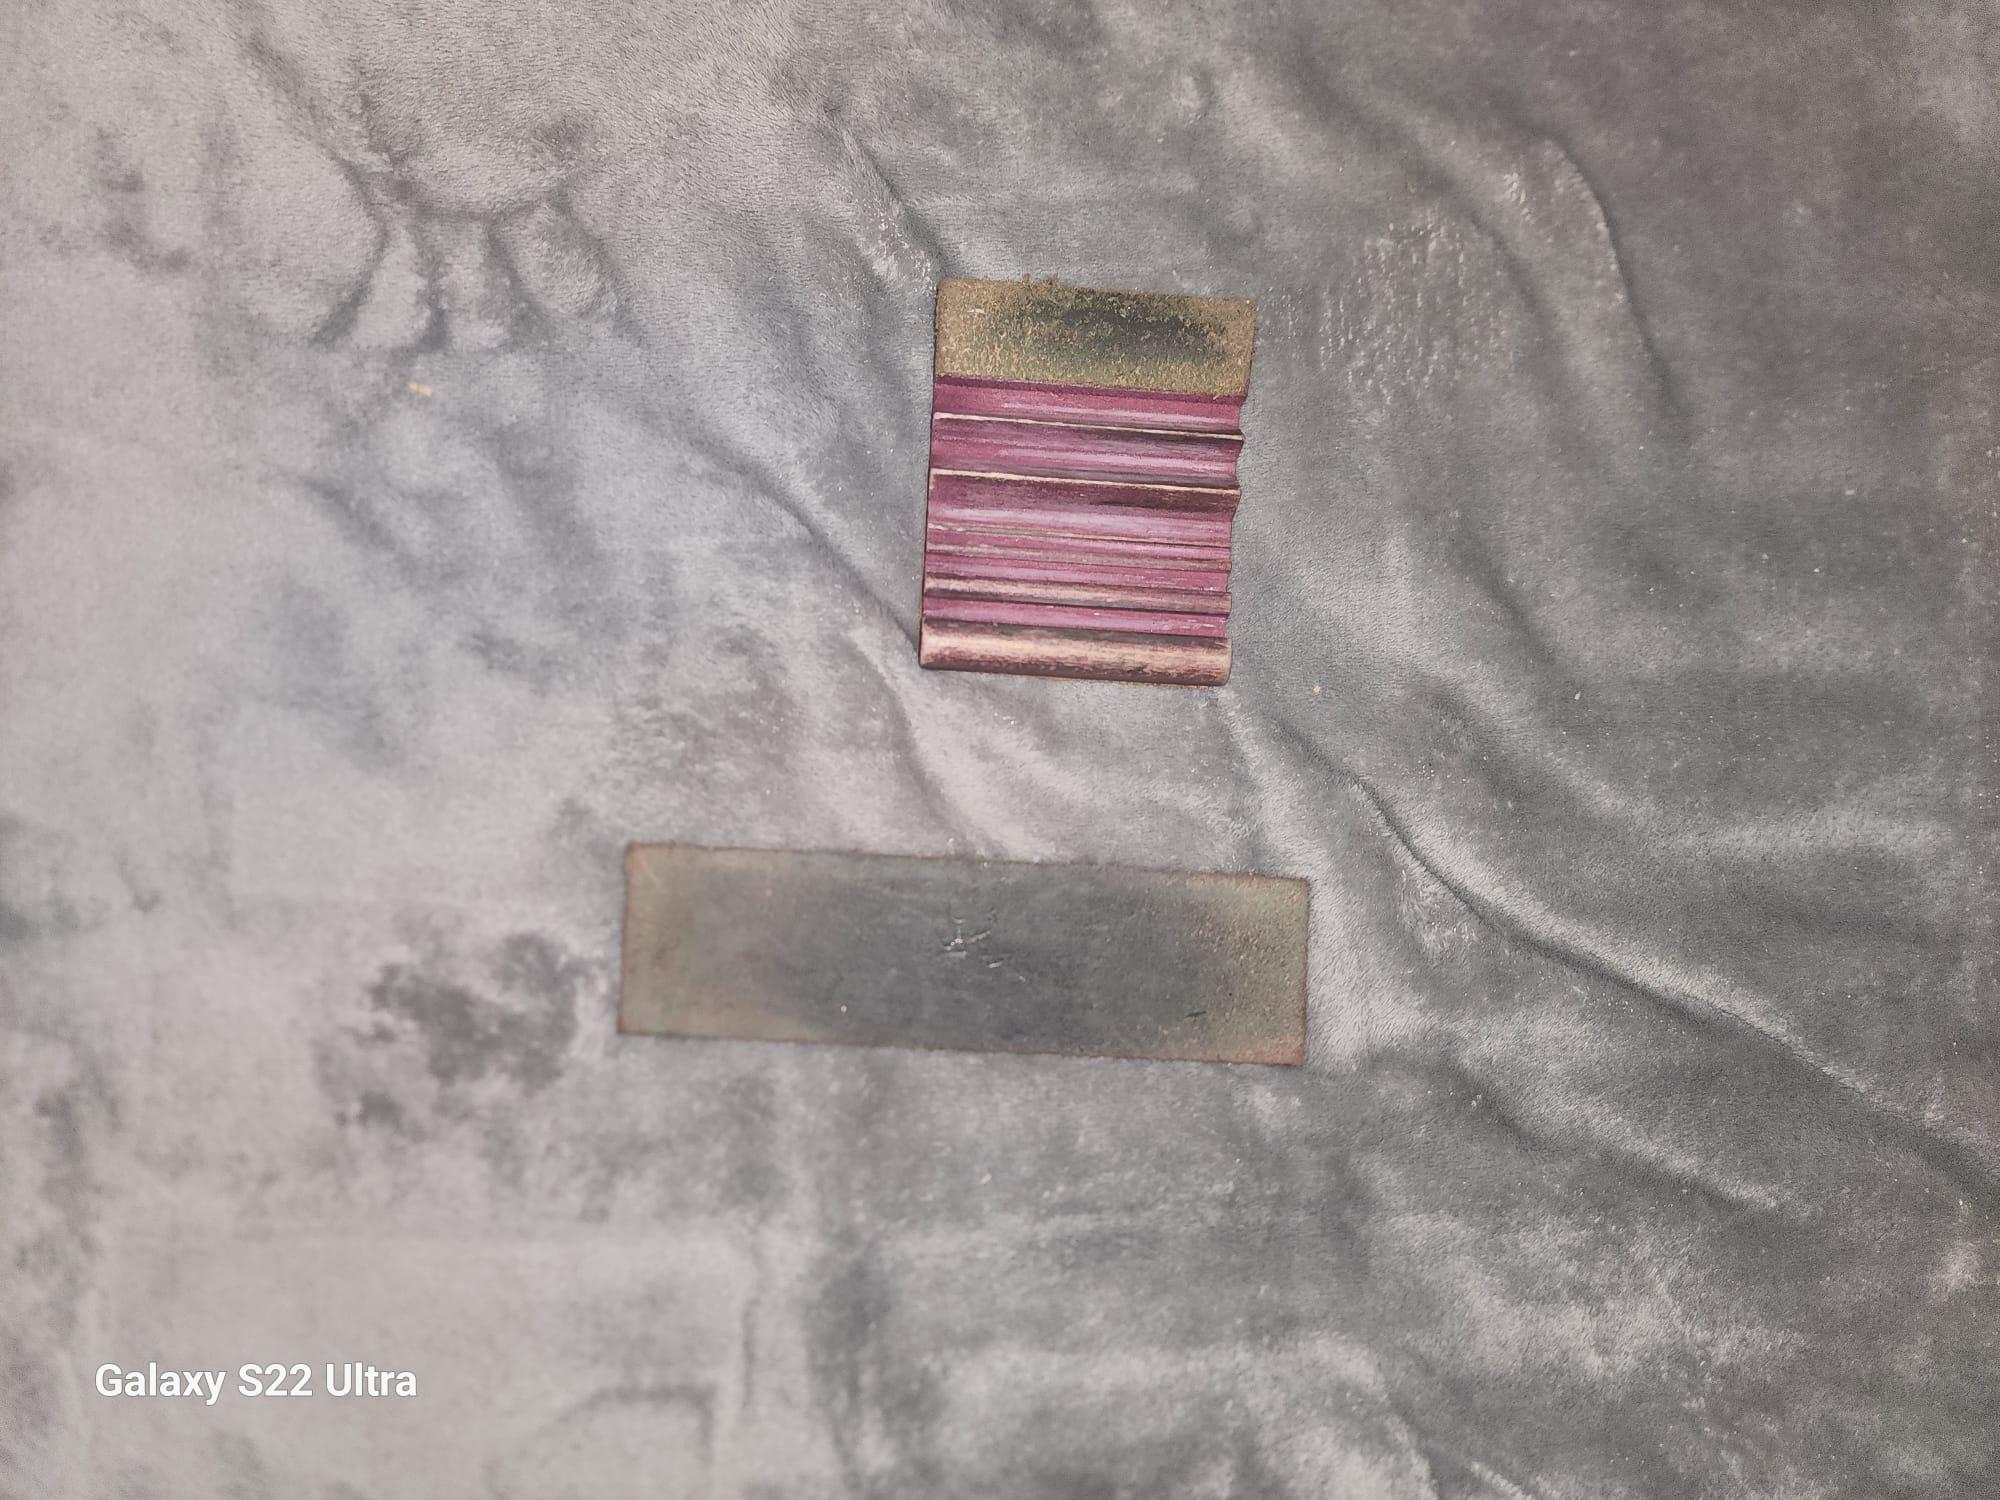
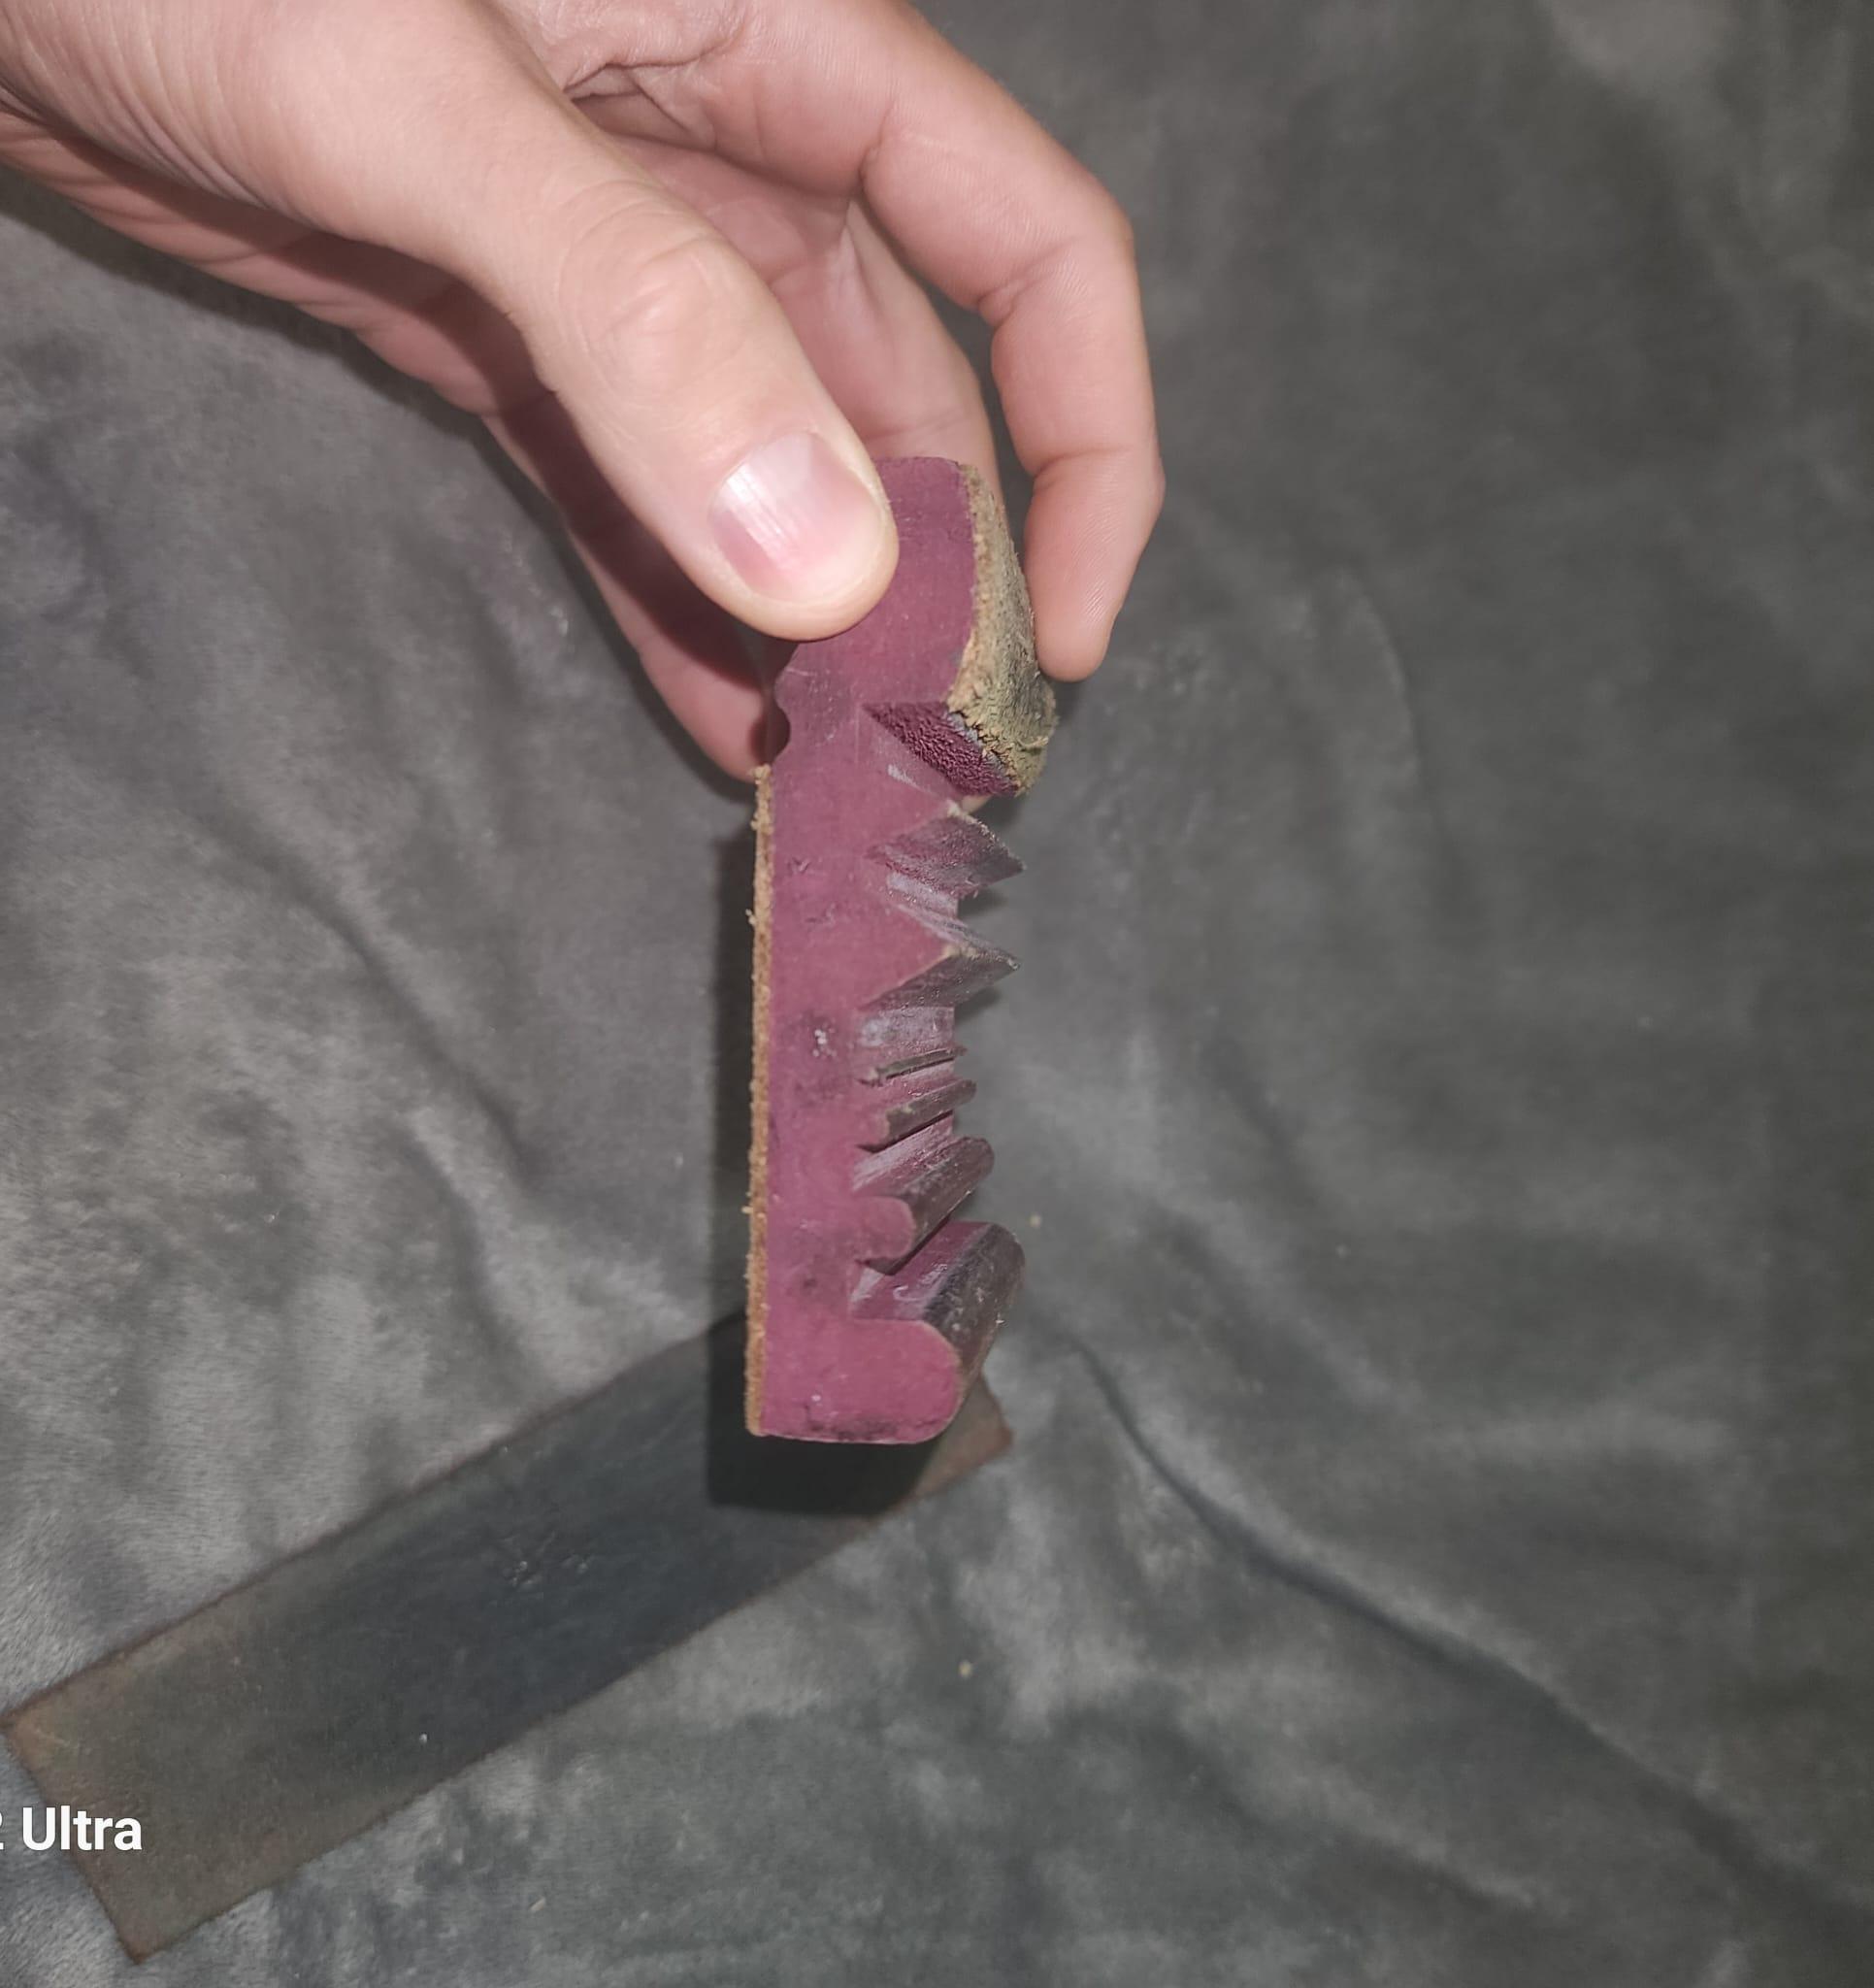
I'll start out with the list, but don't worry, I'll explain the specifics of them shortly after. Pictured above demonstrates only a fraction of my tools. But is this too much? A good carver can get away with less.
Required:
- Gouges - I would suggest 3 types/sizes: straight 20mm #7, straight 20mm #3, V-gouge or parting tool. Hirsch is my absolute favorite but can be harder to get sometimes, followed by Pfeil (AKA Swiss Made). Flexcut is also has decent mid-ranged gouges, I just find that they need more maintenance, but they have decent prices for full sets.
- Chisels - Much simpler, a set of three sizes will do. I generally use a 3/4",1/2", and 1/4".
- Saw - typically I would recommend any type of fine toothed saw. But it will depend on how much you need to process your wood stock. If you have a band saw or jigsaw available, use those.
- F-clamp or something to secure your piece.
- Strop with polishing compound - be sure to keep your tools sharp and honed. These can be as simple as a leather belt, loaded with compound, to complex shaped blocks of wood for gouges (pictured above). This instructable will go on the assumption that you know how to sharpen and hone a blade already.
- Wood - size will vary depending on your needs, but for this project I recommend something at least 2 inches thick. In this case, I am using 7"x8" basswood.
- Cut resistant gloves - at least an ANSI level A1. These can be on the thinner side, so you can still work easily and wont accidentally remove a finger. Though a sharp corner of a gouge can still go through it. Use your common sense.
- Sand paper - generally 120, 220, and 320 grit will do just fine for this.
- N95 mask - make sure you have this when sanding, don't want to breath in that dust.
Not required, but highly recommended:
- Bent gouge or spoon gouge - these have curved shafts, and are useful for hollowing out the back of the mask. they come in similar profiles and sizes, so I recommend at least a 20mm #7.
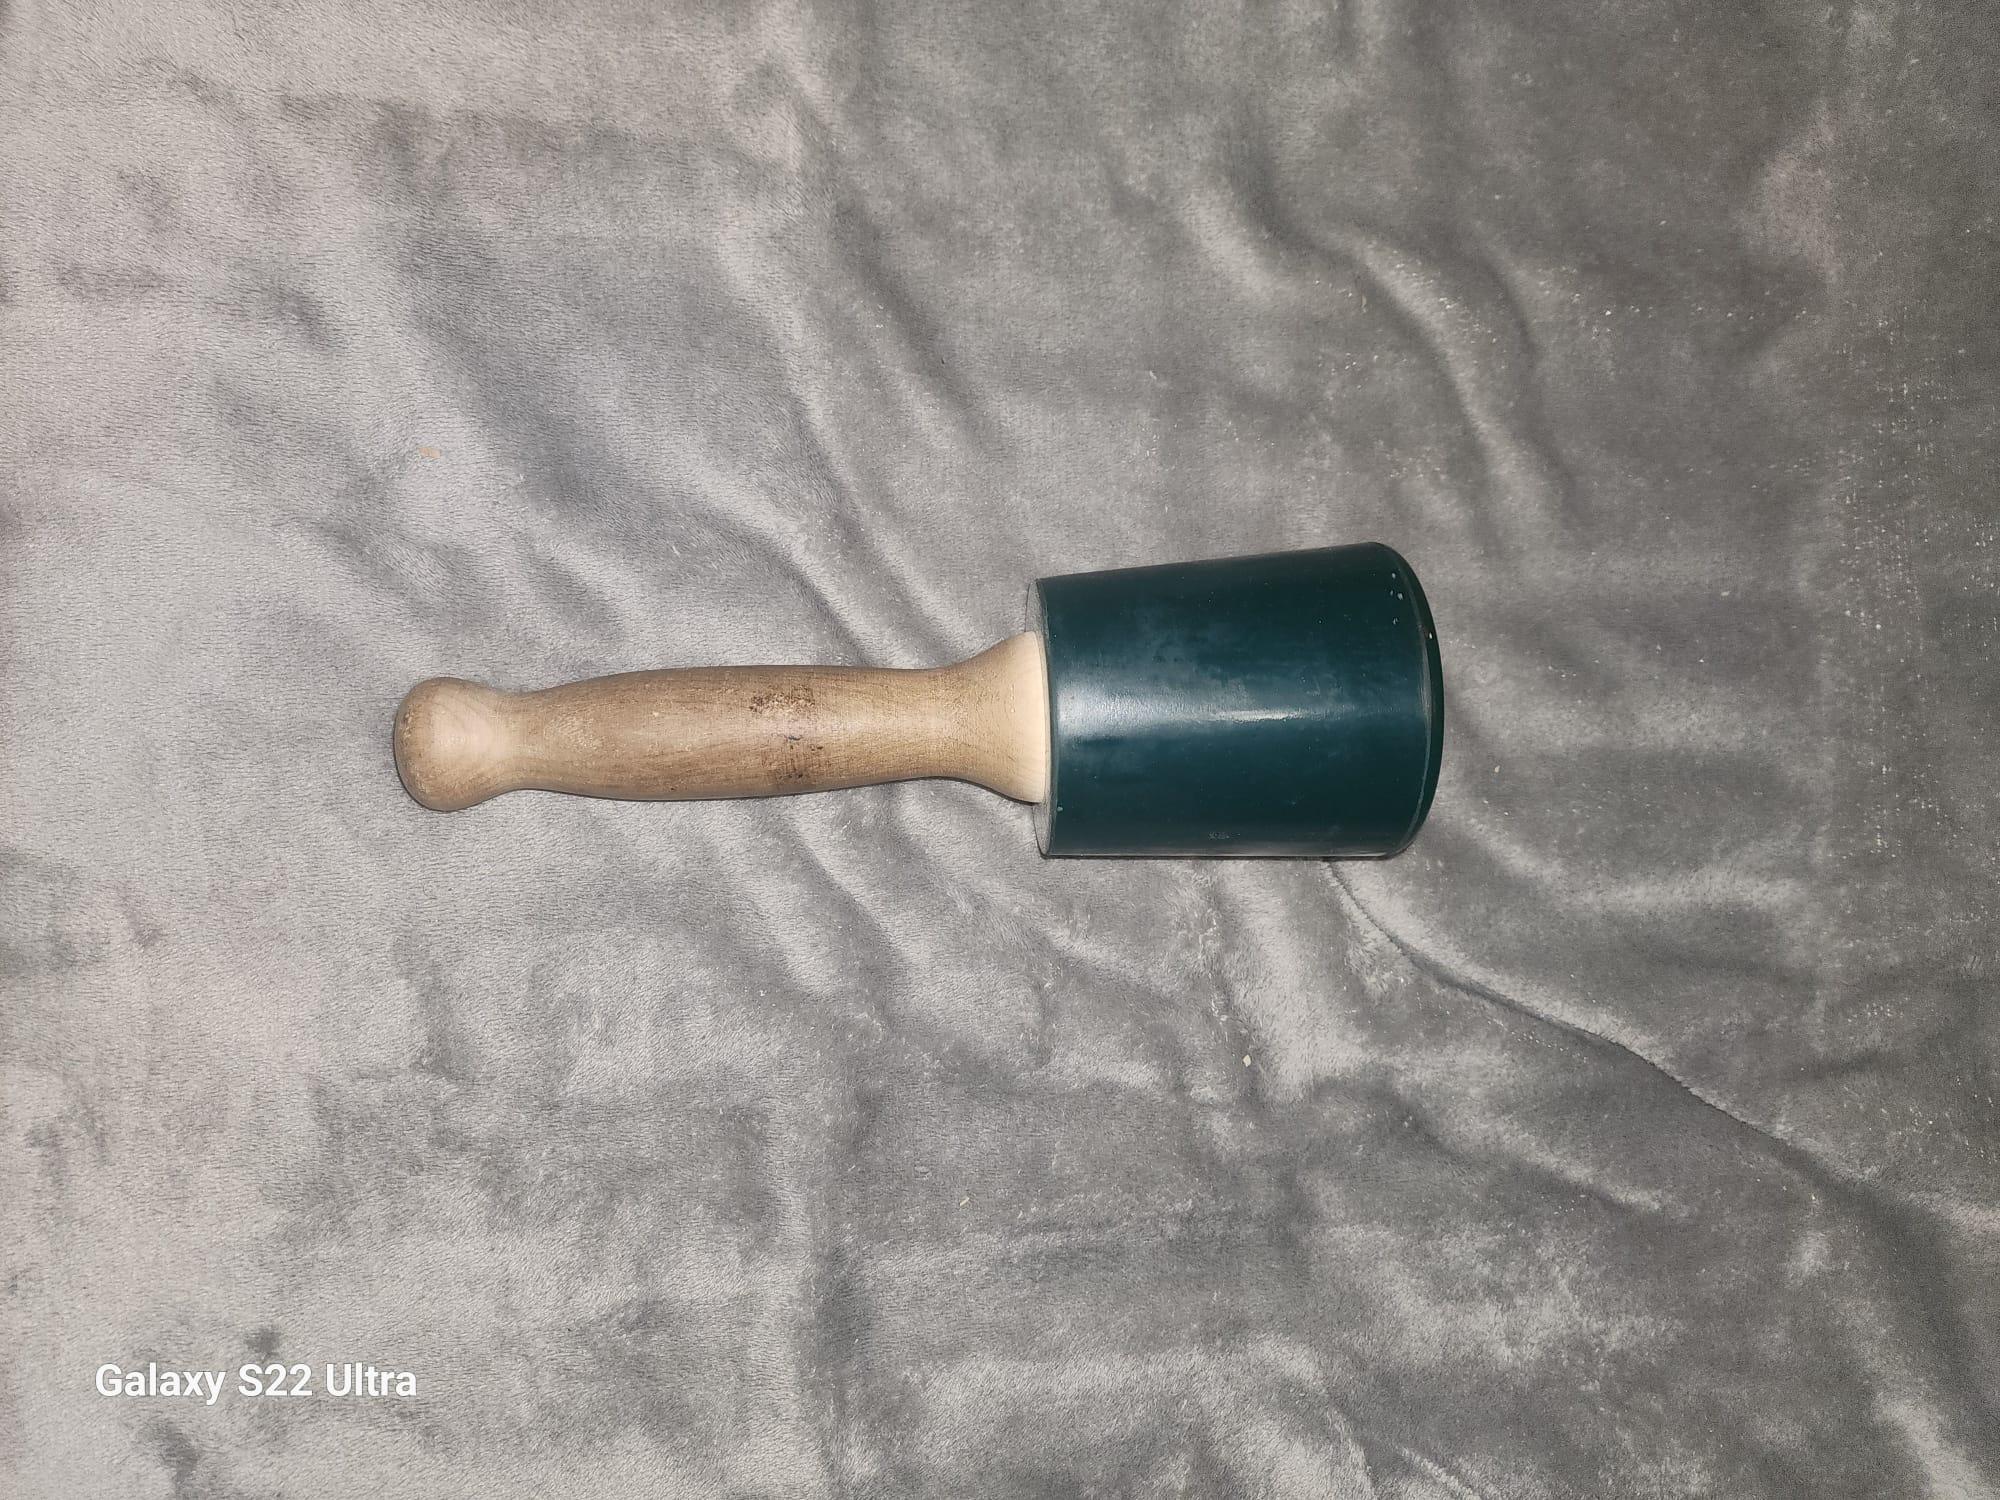
- Mallet - you will typically be pushing the gouge by hand, but occasionally you need gentle persuasion. A mallet like this is what I use, but you can also use a rubber mallet. Avoid using an actual hammer though, it can damage the chisel handle.
- Pattern - don't be afraid to make an impromptu mask, but for symmetry I recommend using a pattern. I prefer to use card-stock, as its a bit more durable than just paper.
- Rasps and wood files - I will not be using these, but they can help even out some of the edges. Sandpaper works too.
- Pencil - to mark your wood of course. Avoid using things like permanent markers, as the ink can seep deep into the wood and will be hard to remove.
- Wood finish of your choice - My favorite is danish oil, but you can use whatever you want, such as boiled linseed oil, polyurethane, etc.
- Paint - I only use just a bit for this piece. I prefer the natural look of wood when possible, but you may want yours completely painted. I'm using a basic acrylic hobby paint.
- Drill set - required if you plan to make eye-holes. The eyes of this mask are very small and thin, so I used a pin vise hand drill like this.
Not required, but used in this piece
- Cordage - just some simple twine, to hold the jaw in place and to tie the hanging loop. You could also use it for a strap if you intend to wear it.
- Hair extensions - this is used to create the eyebrows.
- Super glue and painters tape - for securing the hair.
Which Gouges Do I Use, and Why
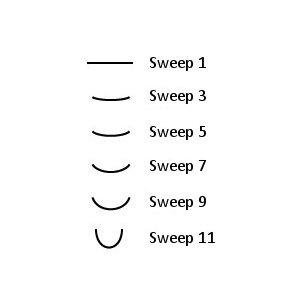
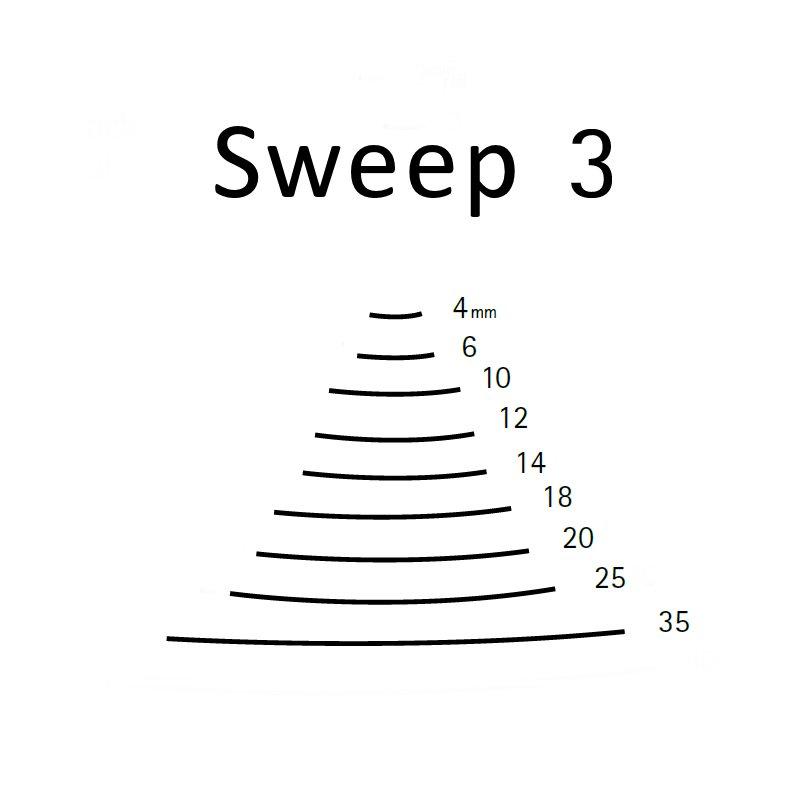
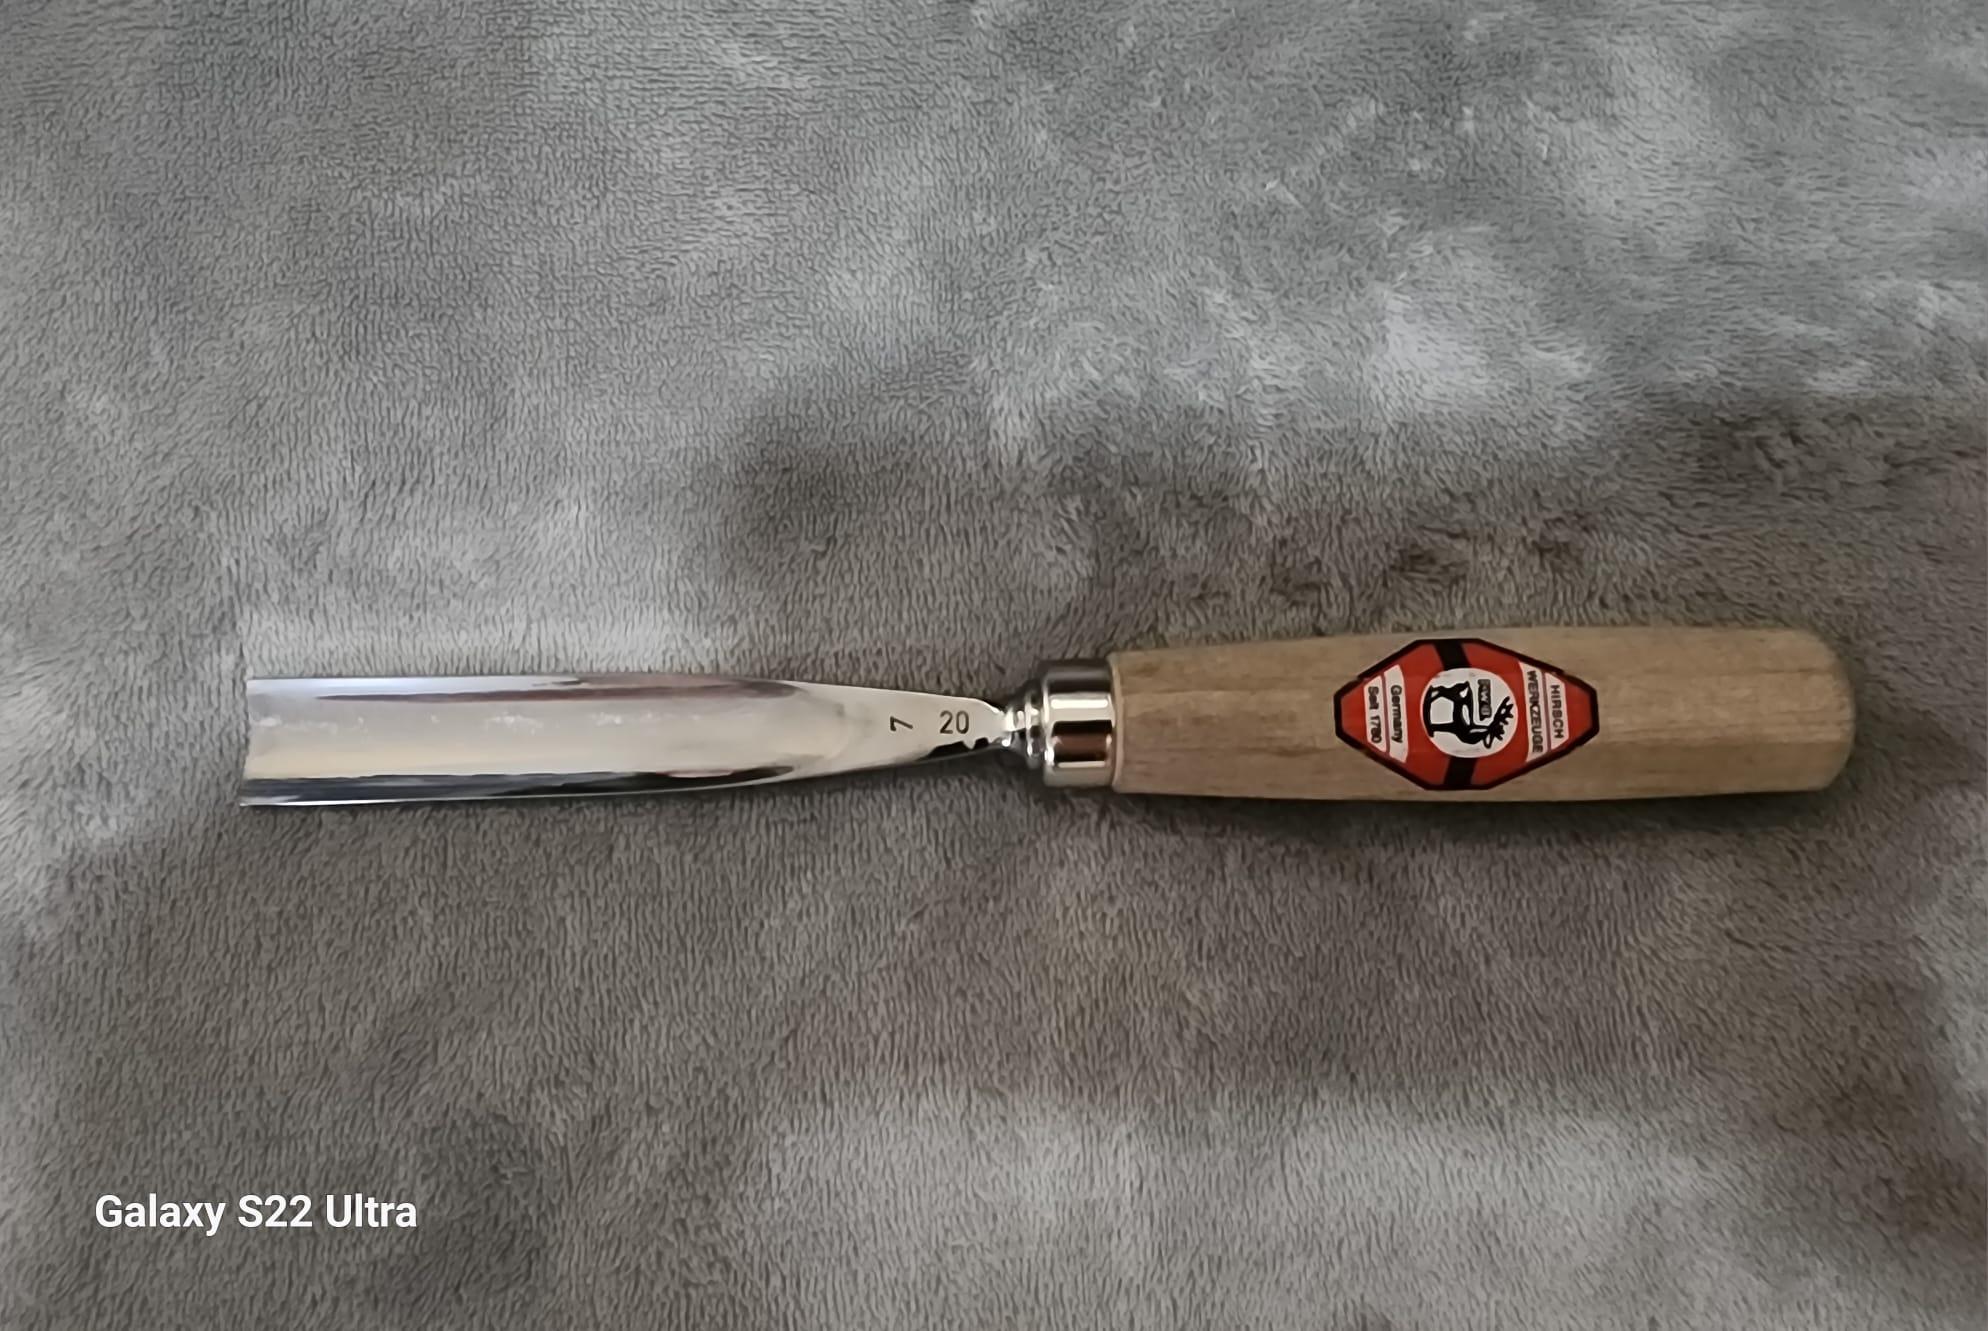
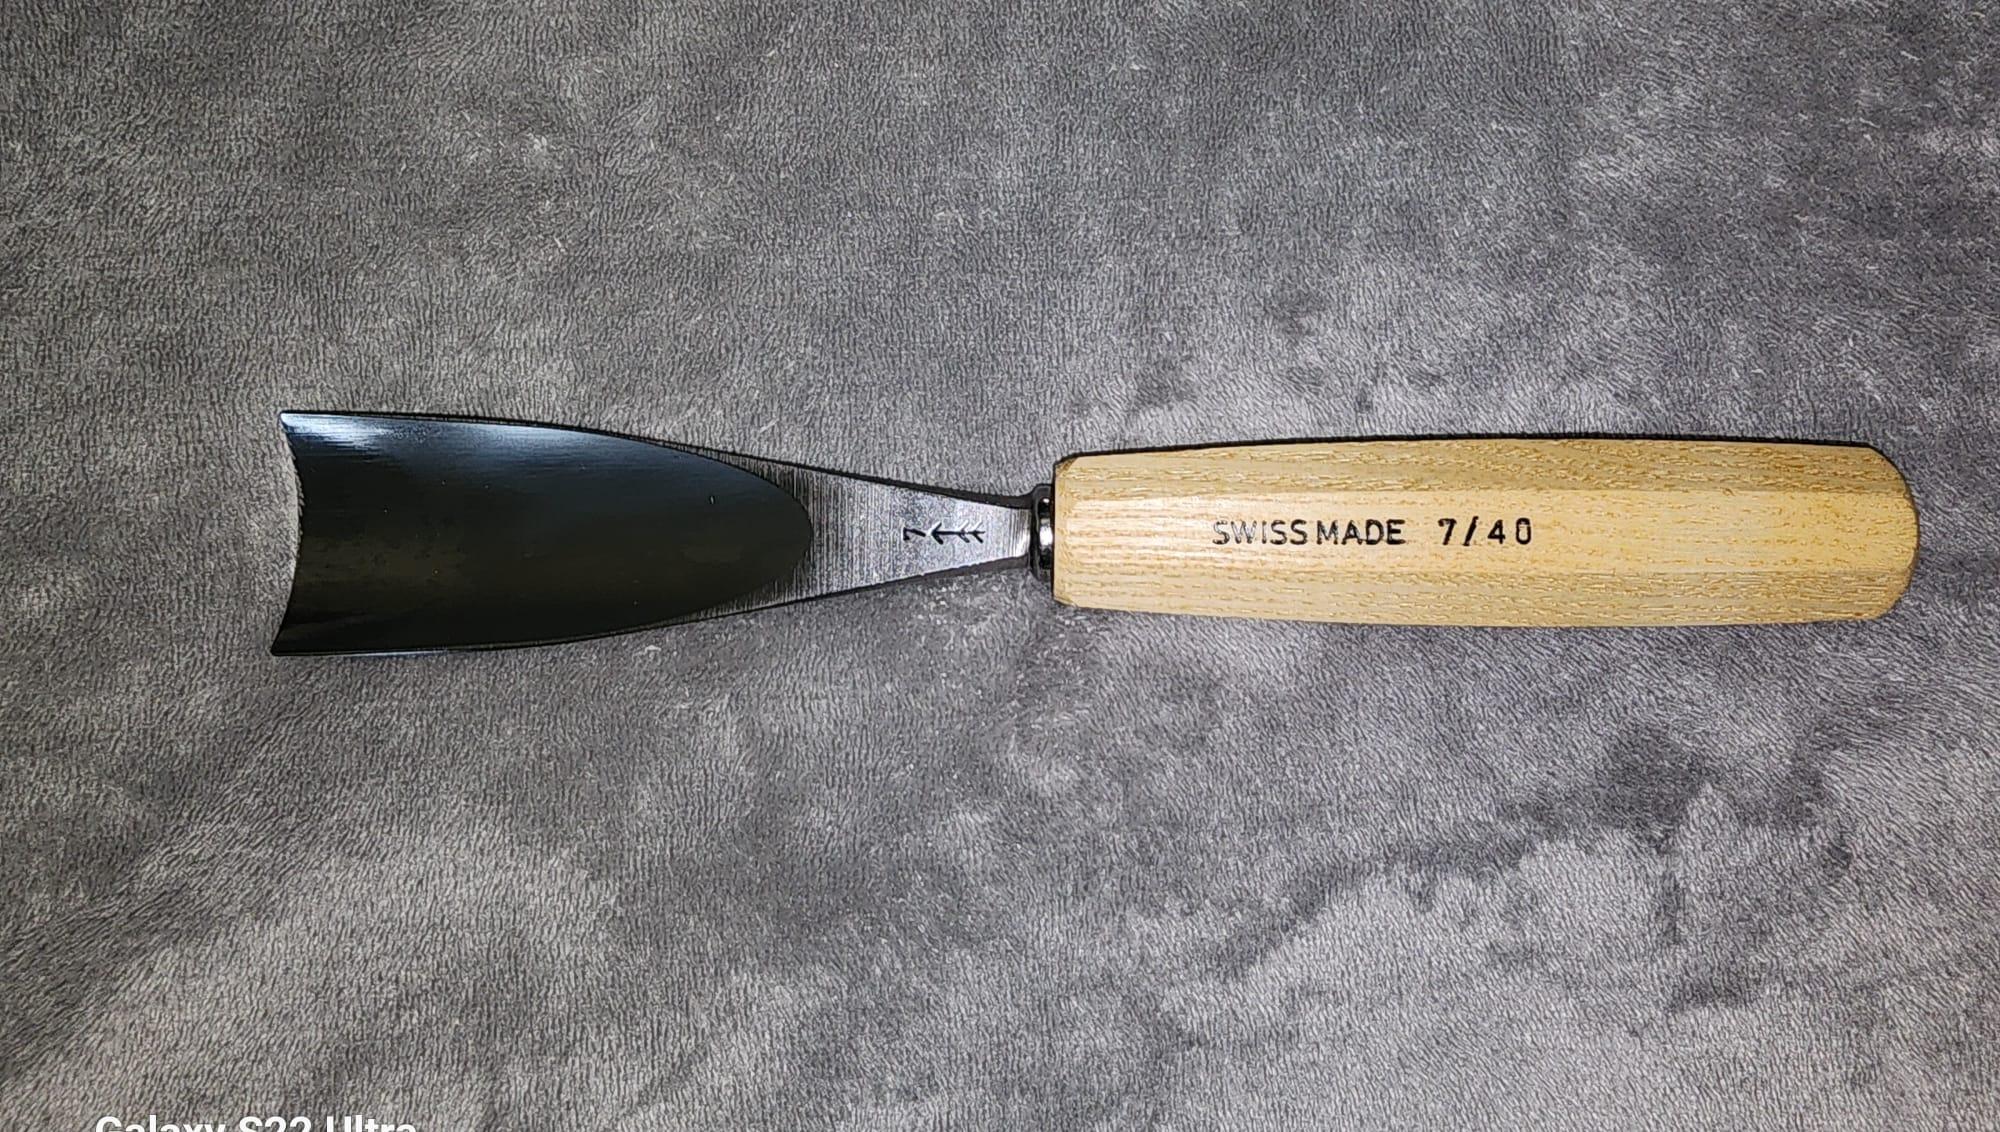
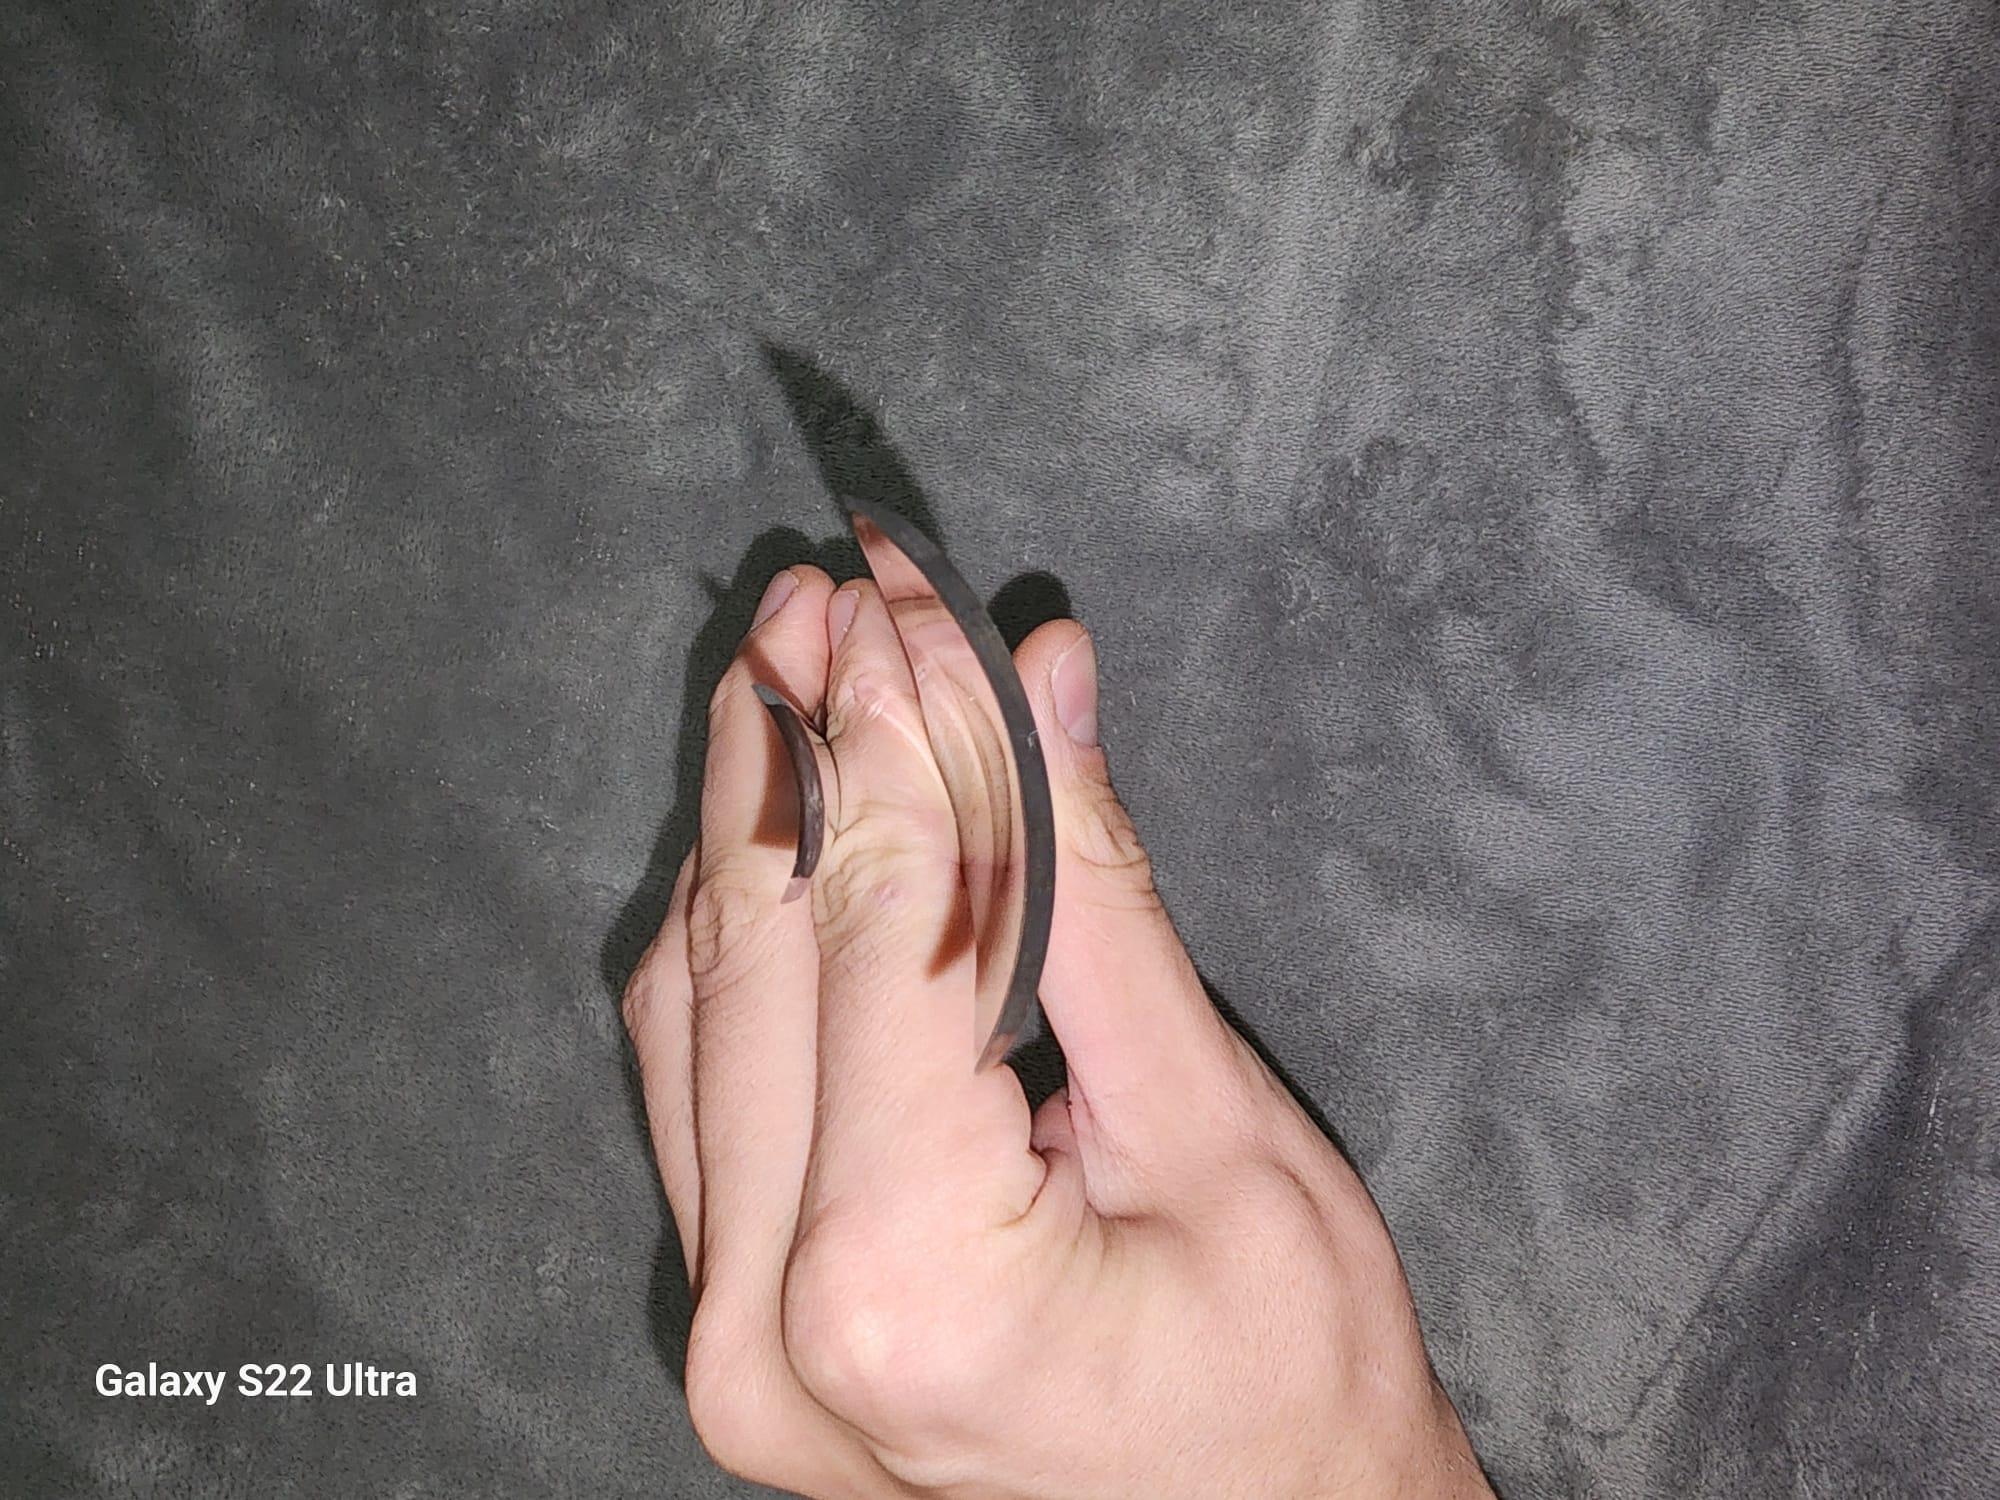
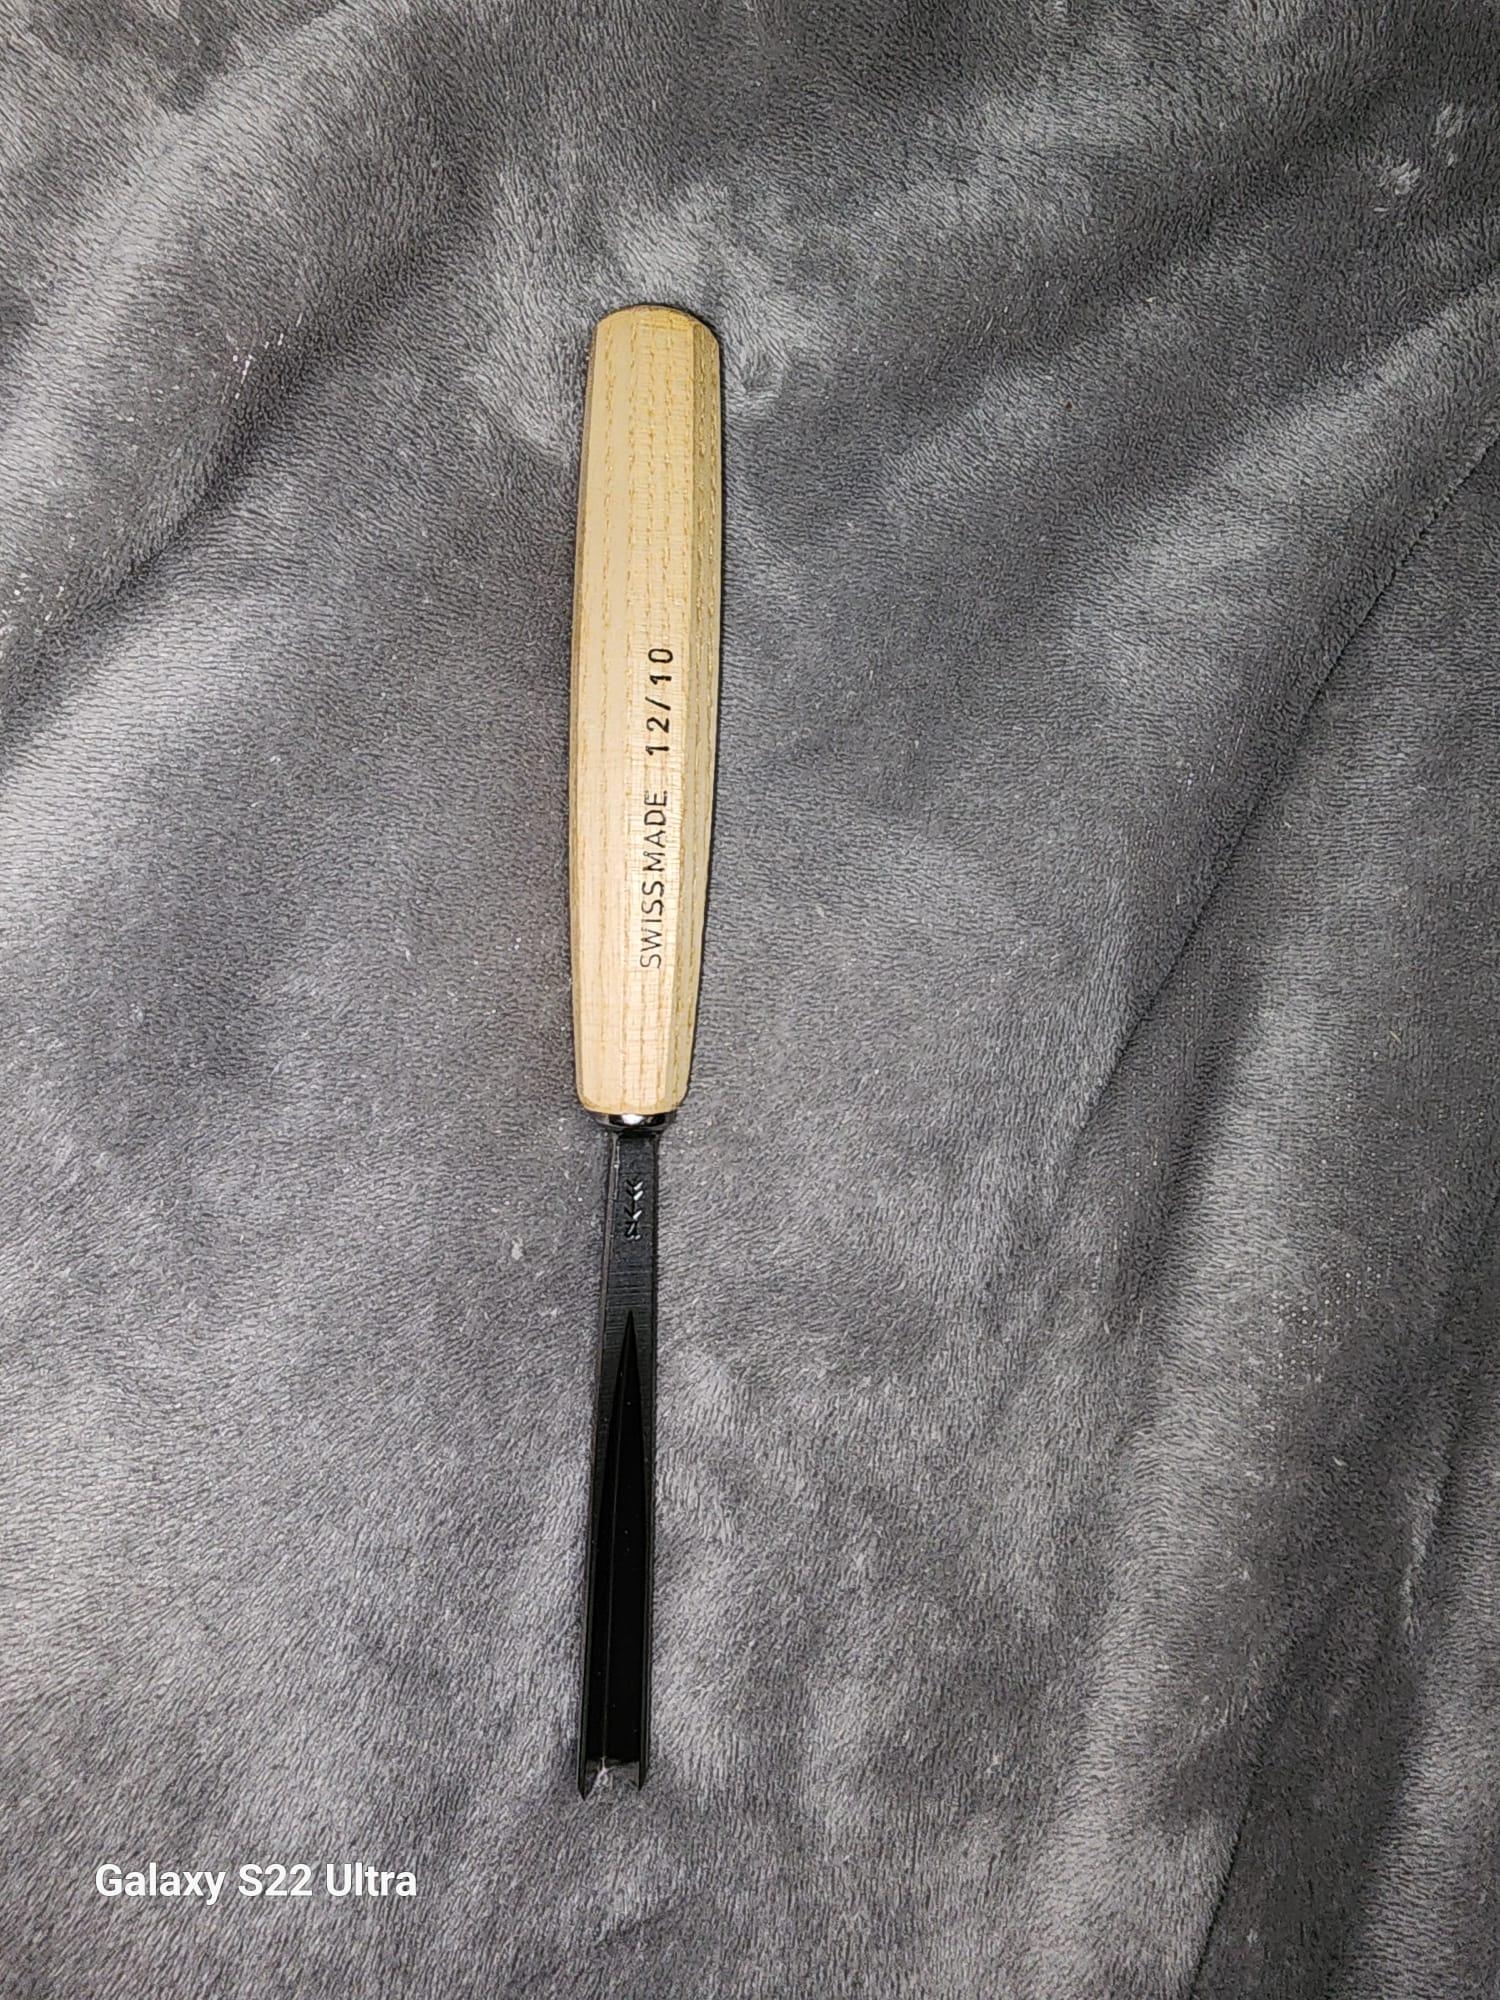
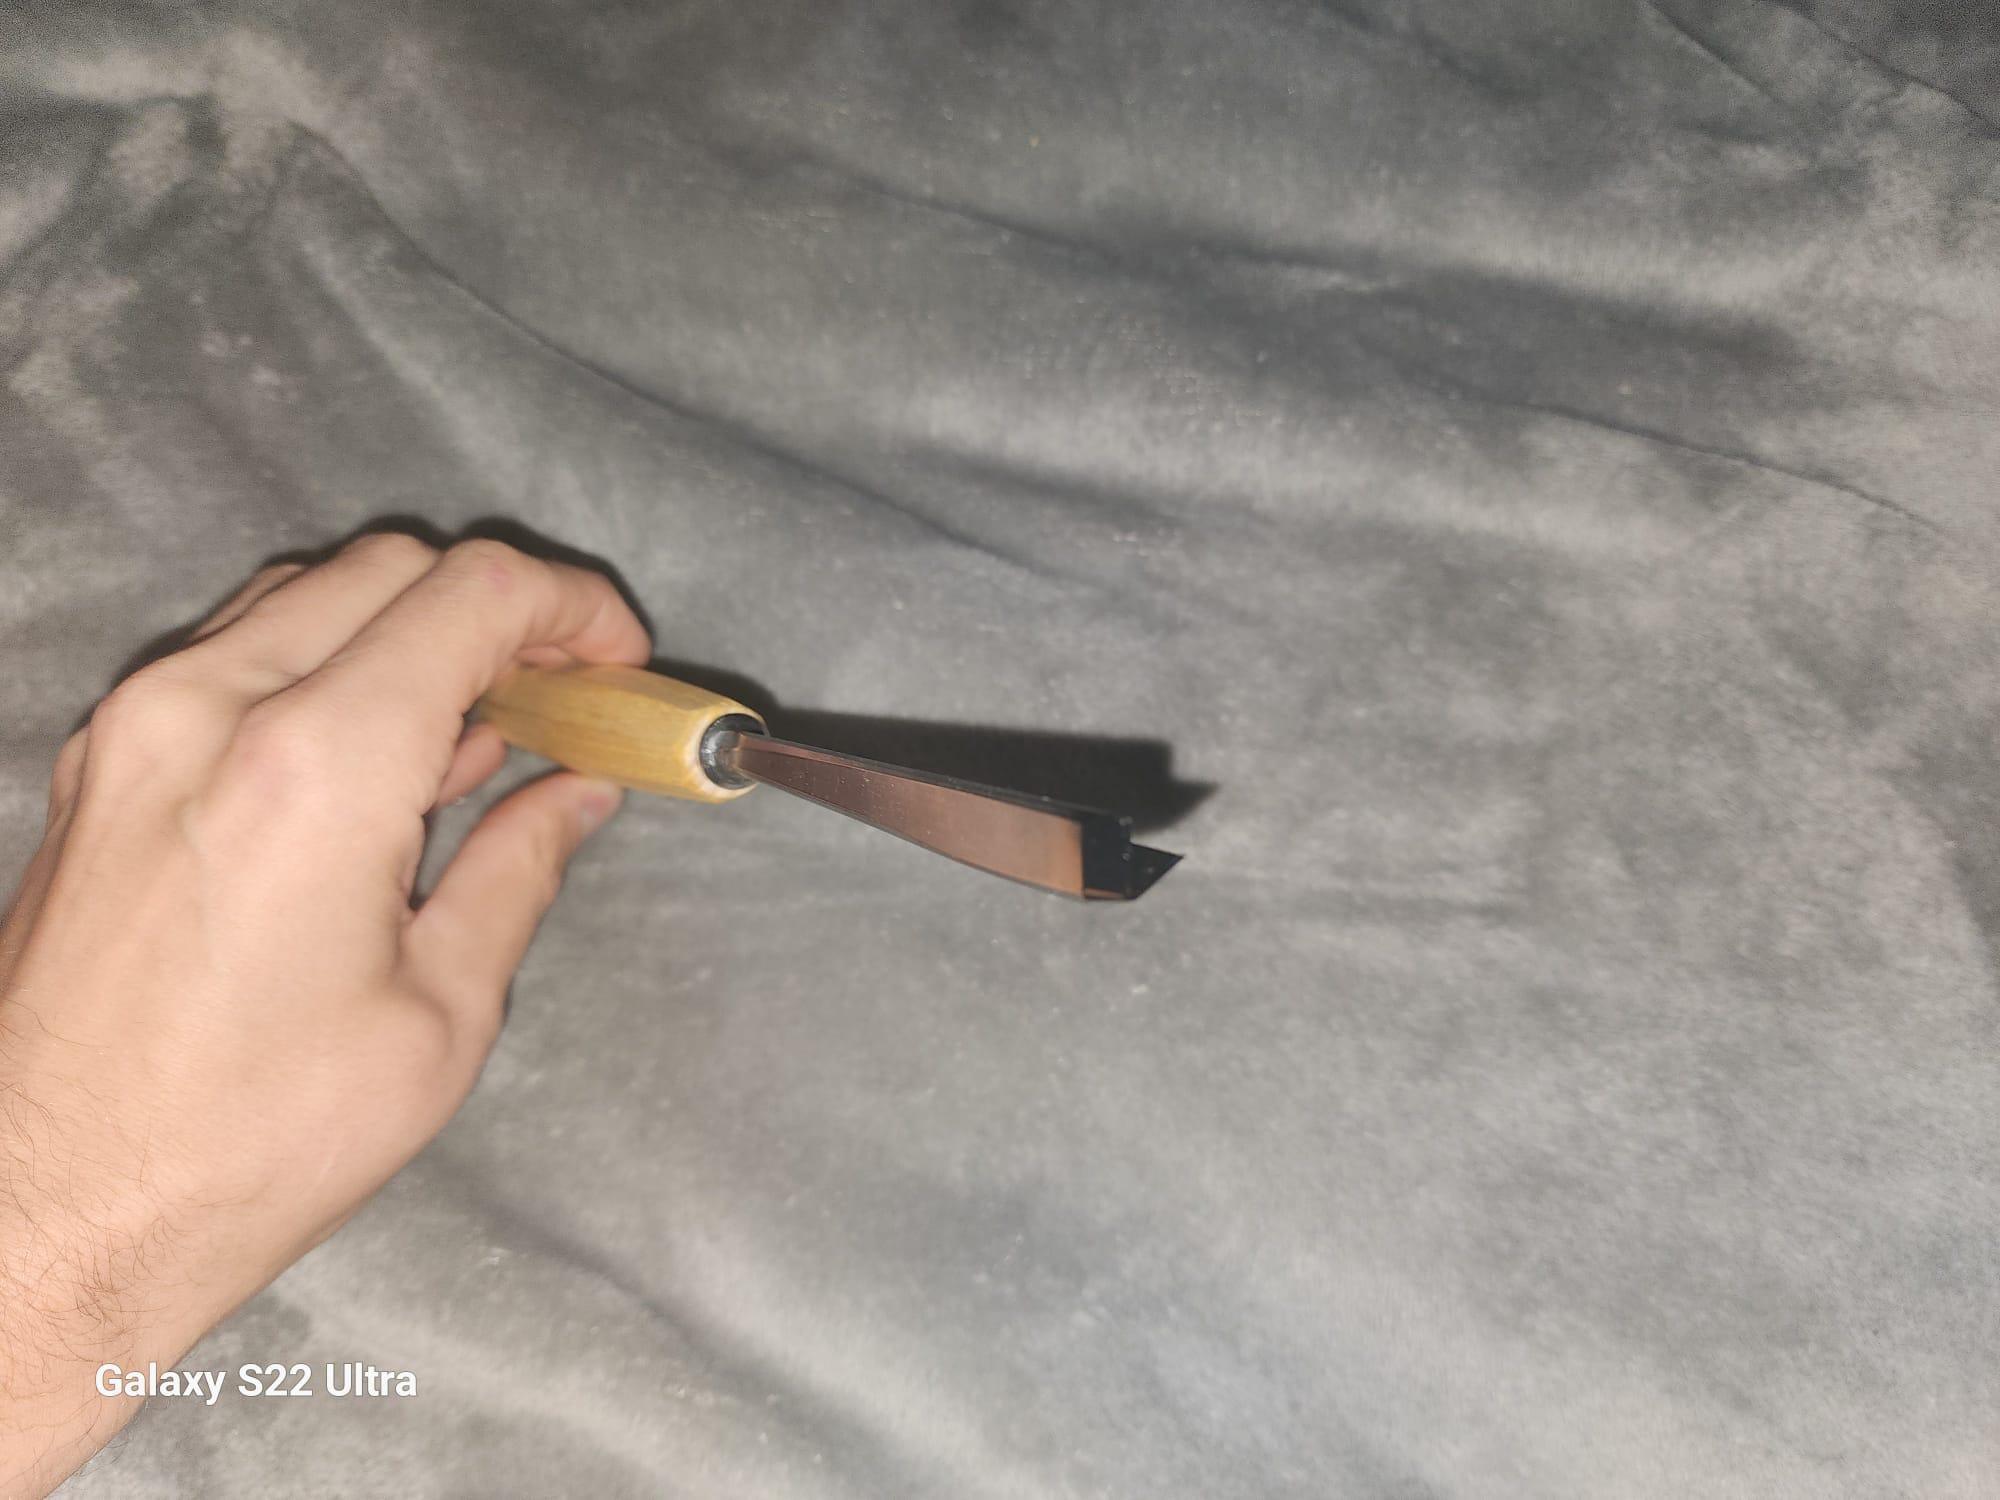
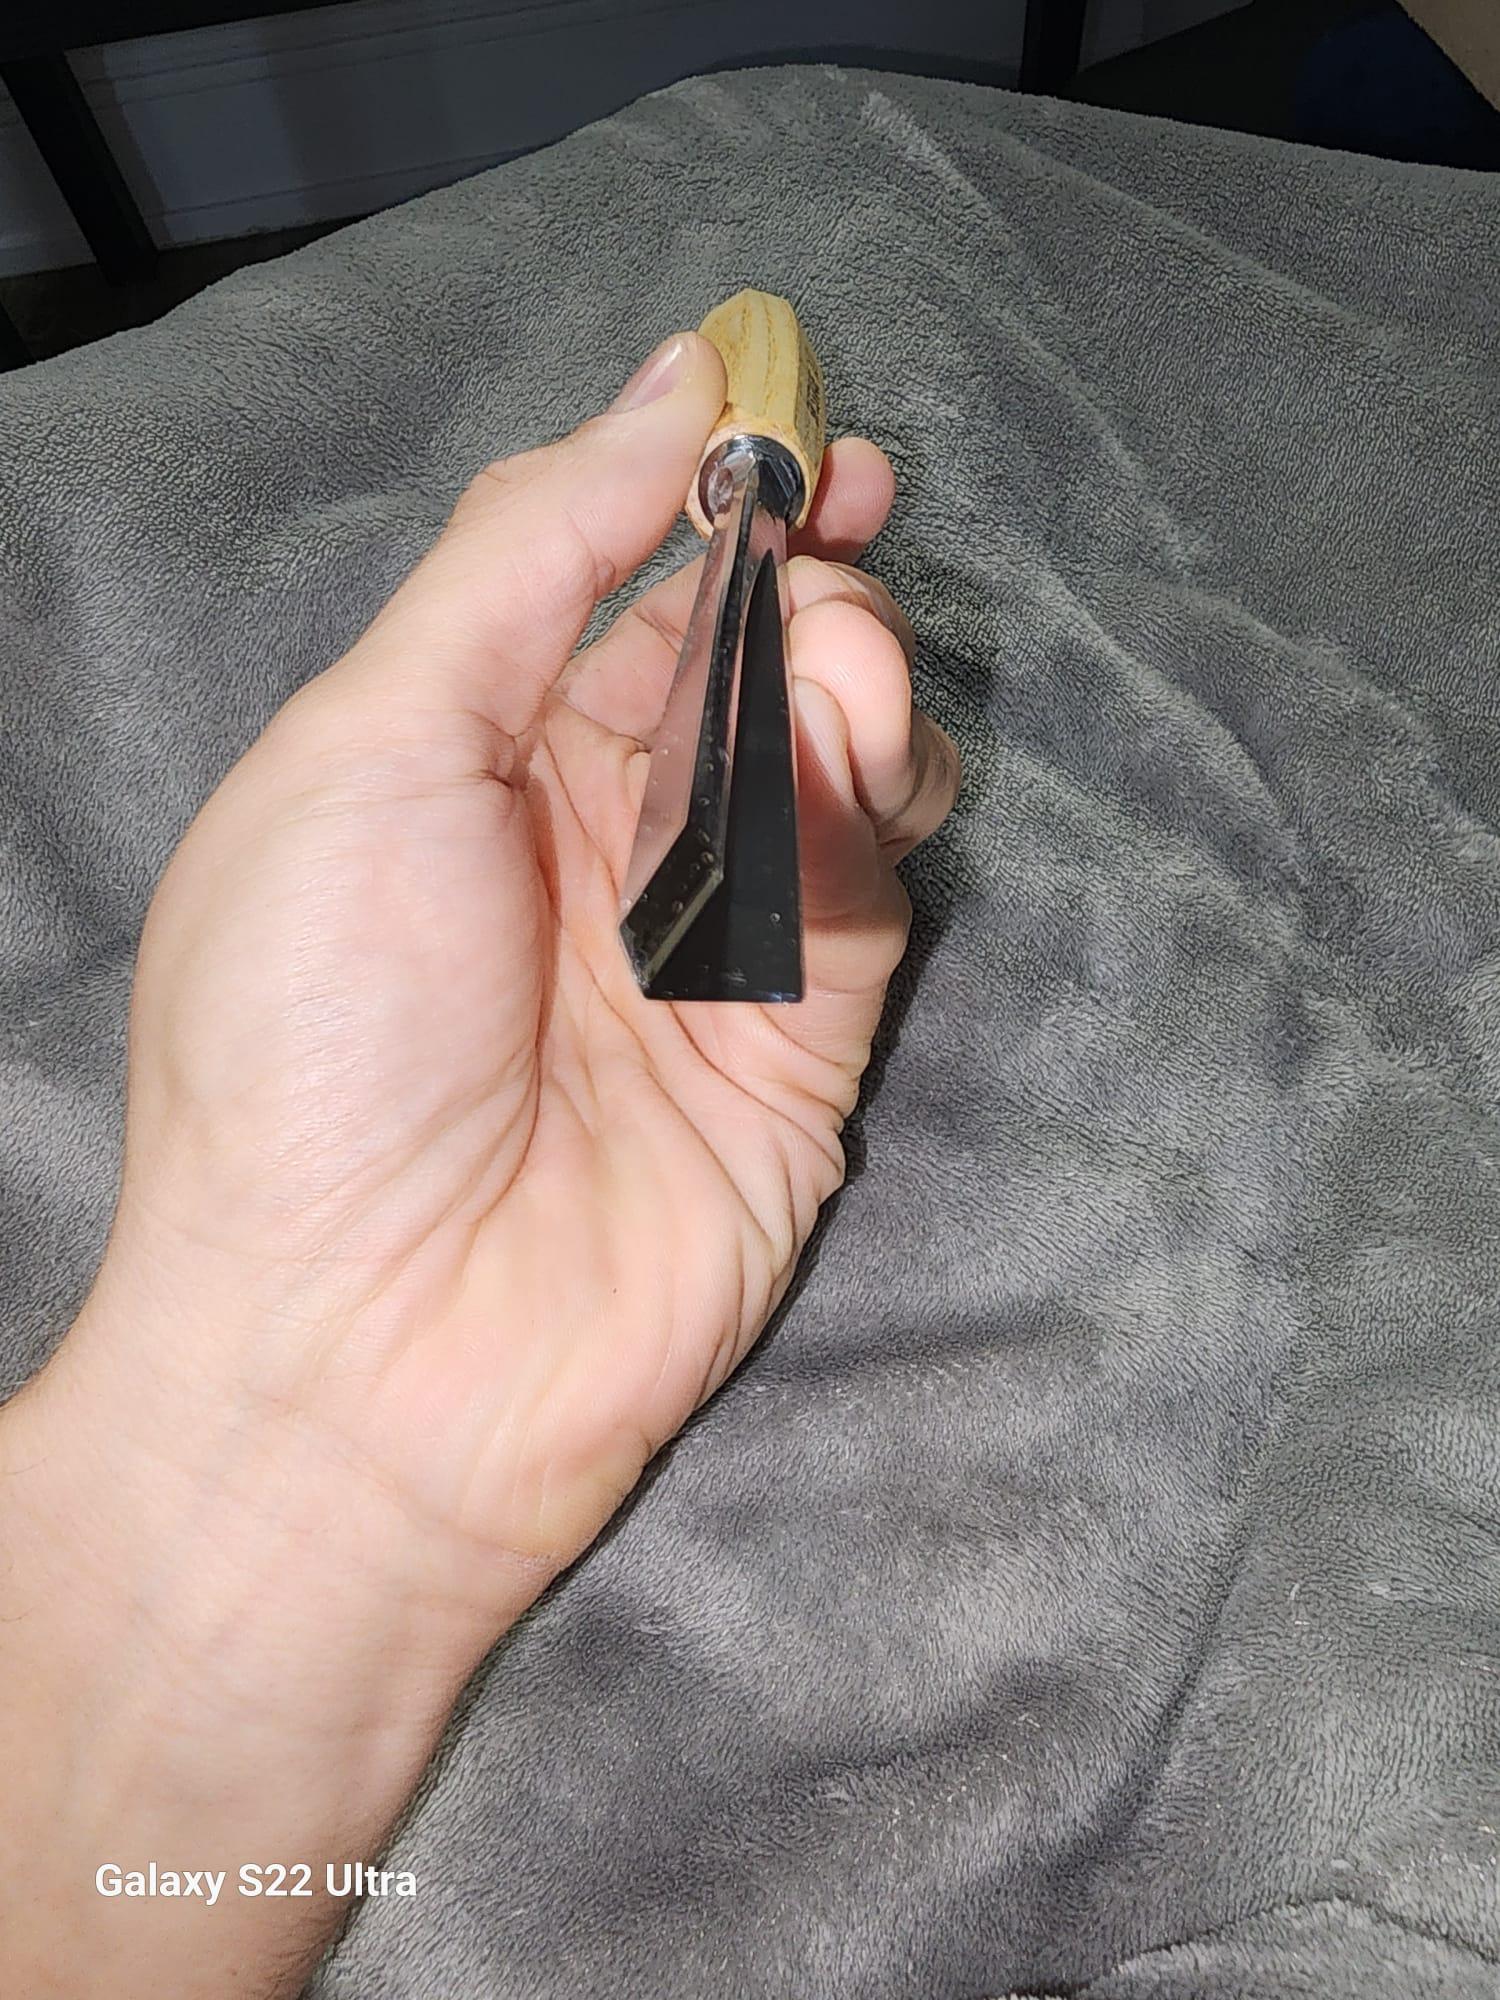
This is where things can be the most daunting. There are thousands of gouges, chisels, saws, and innumerable strange niche tools (ever hear of a scorp?). While I personally have quite a few toys at my disposal, I didn't start out with them; and neither do you. Unfortunately, you won't be able to get away without some specialized ones, but I'll explain which ones you may want and why.
What gouges to get?
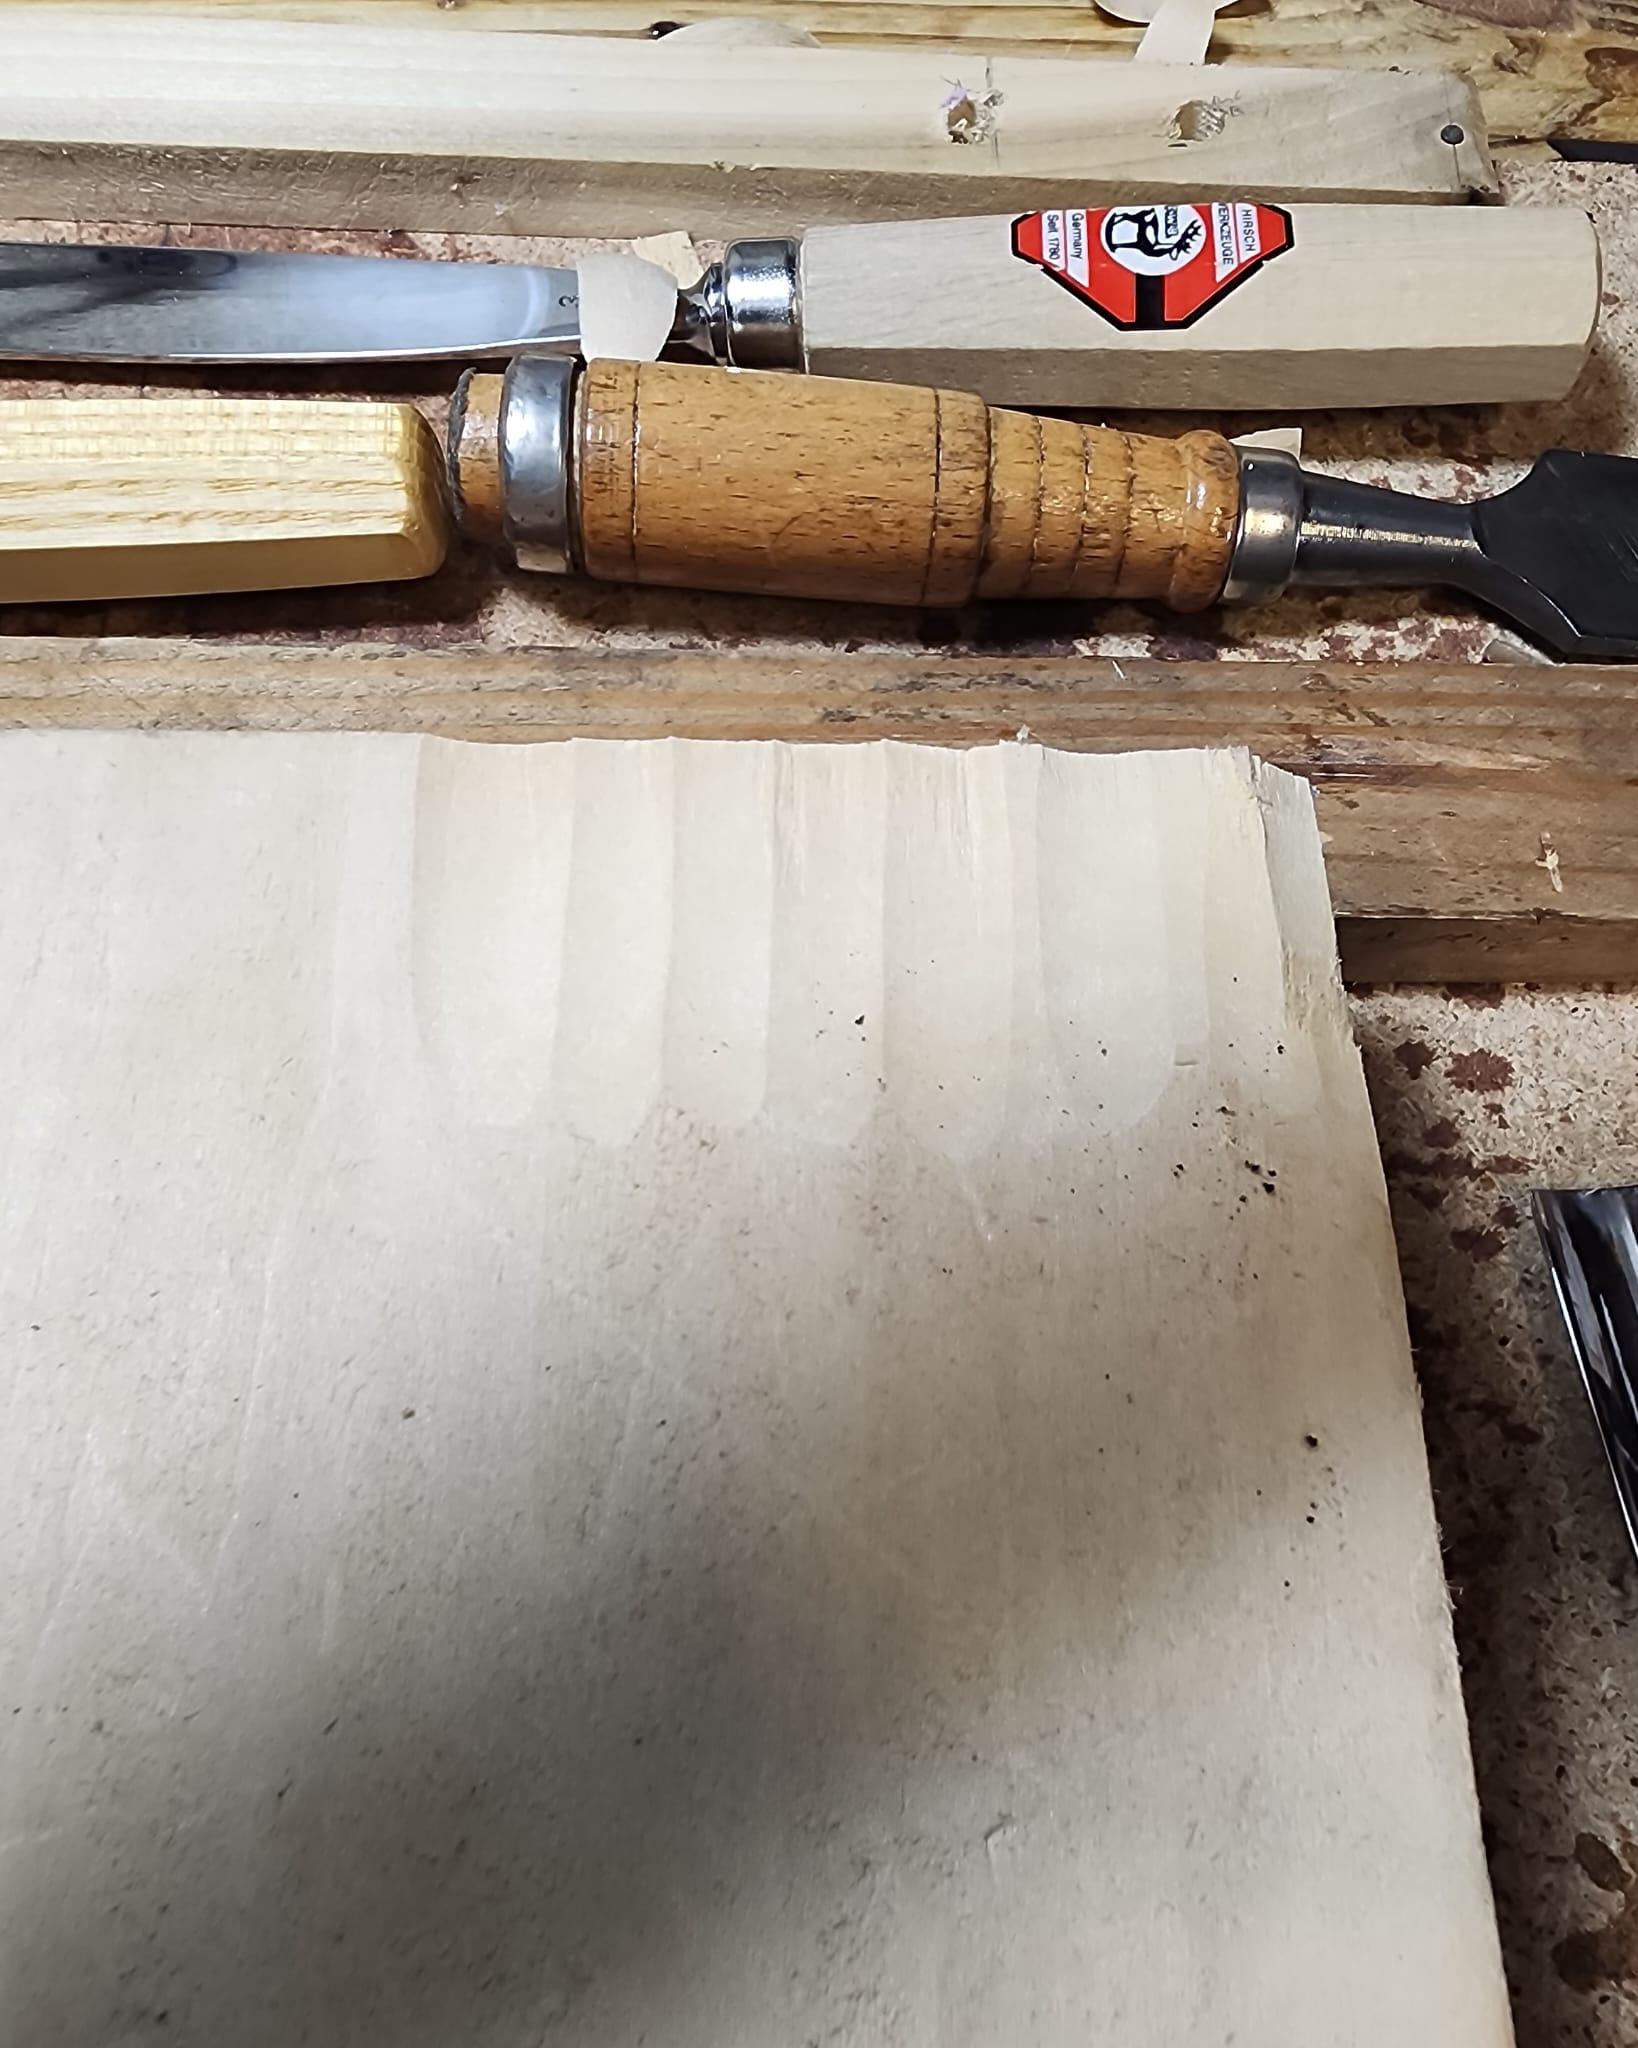
Gouges come in a variety of "sweeps" and sizes. Generally, a gouge will have two numbers; its sweep, often represented with a #, is its radius profile. Followed by its size, usually in millimeters. Regardless of what size a gouge may be, the particular sweep will remain the same. Pictured above are two #7 gouges, one is 20mm and the other is 40mm. You can see though, that the radius is the same. So, when referencing a particular gouge, it will often look like this: 20 mm #7, or the like. You can see that the handle and shaft will often have that information. 20 mm is a good middle ground size for what we need and is great for any mid sized carving project, from masks to bowls. Unfortunately, I must recommend quality gouges like Hirsch or Pfeil (AKA Swiss Made). The quality difference between them and cheaper varieties is just too great. Flexcut is a OK as well, but only for some of their tools. I've used several brands, and have been very disappointed with how easily they chip and go dull. But this is why I try to recommend at least a bare minimum of what you will need, get a few really great tools and get proficient using them.
So what sweep do you need for this? Generally, I would recommend these 3 types: #3, #7, and a V-gouge (sometimes called a parting tool). The #7 is probably the most versatile, it removes material aggressively, but can also cut complex curves easily. The #3 is great for removing harsh edges, but not completely flatten them. It can be used to create low rolling profiles. The V-gouge will be used primarily as a tool to isolate portions of the carving. V-gouges, as the name suggest, have a sharp V shaped profile. Sometimes they have a sweep number, but they are inconsistent with different manufacturers. Alternatively you can use a #11, also called a veiner.
A note about chisels: Most chisels that you get are usually whats called a "bench" chisel. When purchasing special carving chisels, they will usually be lumped in with the gouges. This would be a #1 sweep. The main difference is that a bench chisel is thicker than a #1. There are a few reasons to choose one over the other, but for simplicity, bench chisels will work for us. In all honesty, you can get a good bit of work done with just a chisel. Especially when it comes to removing a lot of the bulk from the piece. It can even be used to cut some of the gentle curves.
A note on sharpening: While I won't cover sharpening and maintenance of your gouges in these instructions, I highly recommend learning about its process. In fact, out of all the the skills to learn in carving, sharpening and honing are probably the most important. A dull tool is more dangerous than a sharp one. You have to work hard to force the tool to cut, this can lead to accidents. Don't forget to strop your gouges often.
Wood Choice
This can also be a bit daunting, but I'll try to keep it simple. There are a few options to choose for beginners but they have their pros and cons. For our purposes, I will be using a 7"x8" piece of basswood that is 2" thick. If you need, you can always laminate and glue pieces together to make them thicker.
- Bass wood - very soft and light, the carvers choice. Not always accessible though, especially in the size we may need. Alternatively, these types of woods are very similar: butternut (a walnut species, not the squash), tupelo, and paulownia.
- Pine - The grain can be tricky. It may seem like a good beginner wood, but does require some skill to properly tame. However, its availability and price make it a good choice if you don't mind the potential for messing it up. This can be useful for practicing, but due to the grain structure, is difficult to transfer techniques to other woods.
- Cedars and Spruce - good traditional woods to carve. Its like a mix between bass and pine.
- Poplar - or at least, what the big box store call poplar. It is a species known as a tulip poplar, neither tulip nor poplar; related more to magnolias. One of my favorites to use. Grain structure can be similar to bass, but it is much harder to carve. Inexpensive, but difficult to get thick pieces; often requiring you to laminate pieces.
- Black walnut - expensive and beautiful, hard, but takes well to being carved. Not recommended for beginners. Keep those tools sharp.
- Oaks and other "hard" hardwoods - for now, I would just stay away from these. These species often require you to have a higher level of tool maintenance; and can easily ruin cheaper tools.
- Balsa - Its tempting, due to its extreme softness, but requires some skill to make it actually look good. It's grain structure can sometimes look like its made of foam. If you've got some laying around, use it for practice.
Secure Your Work
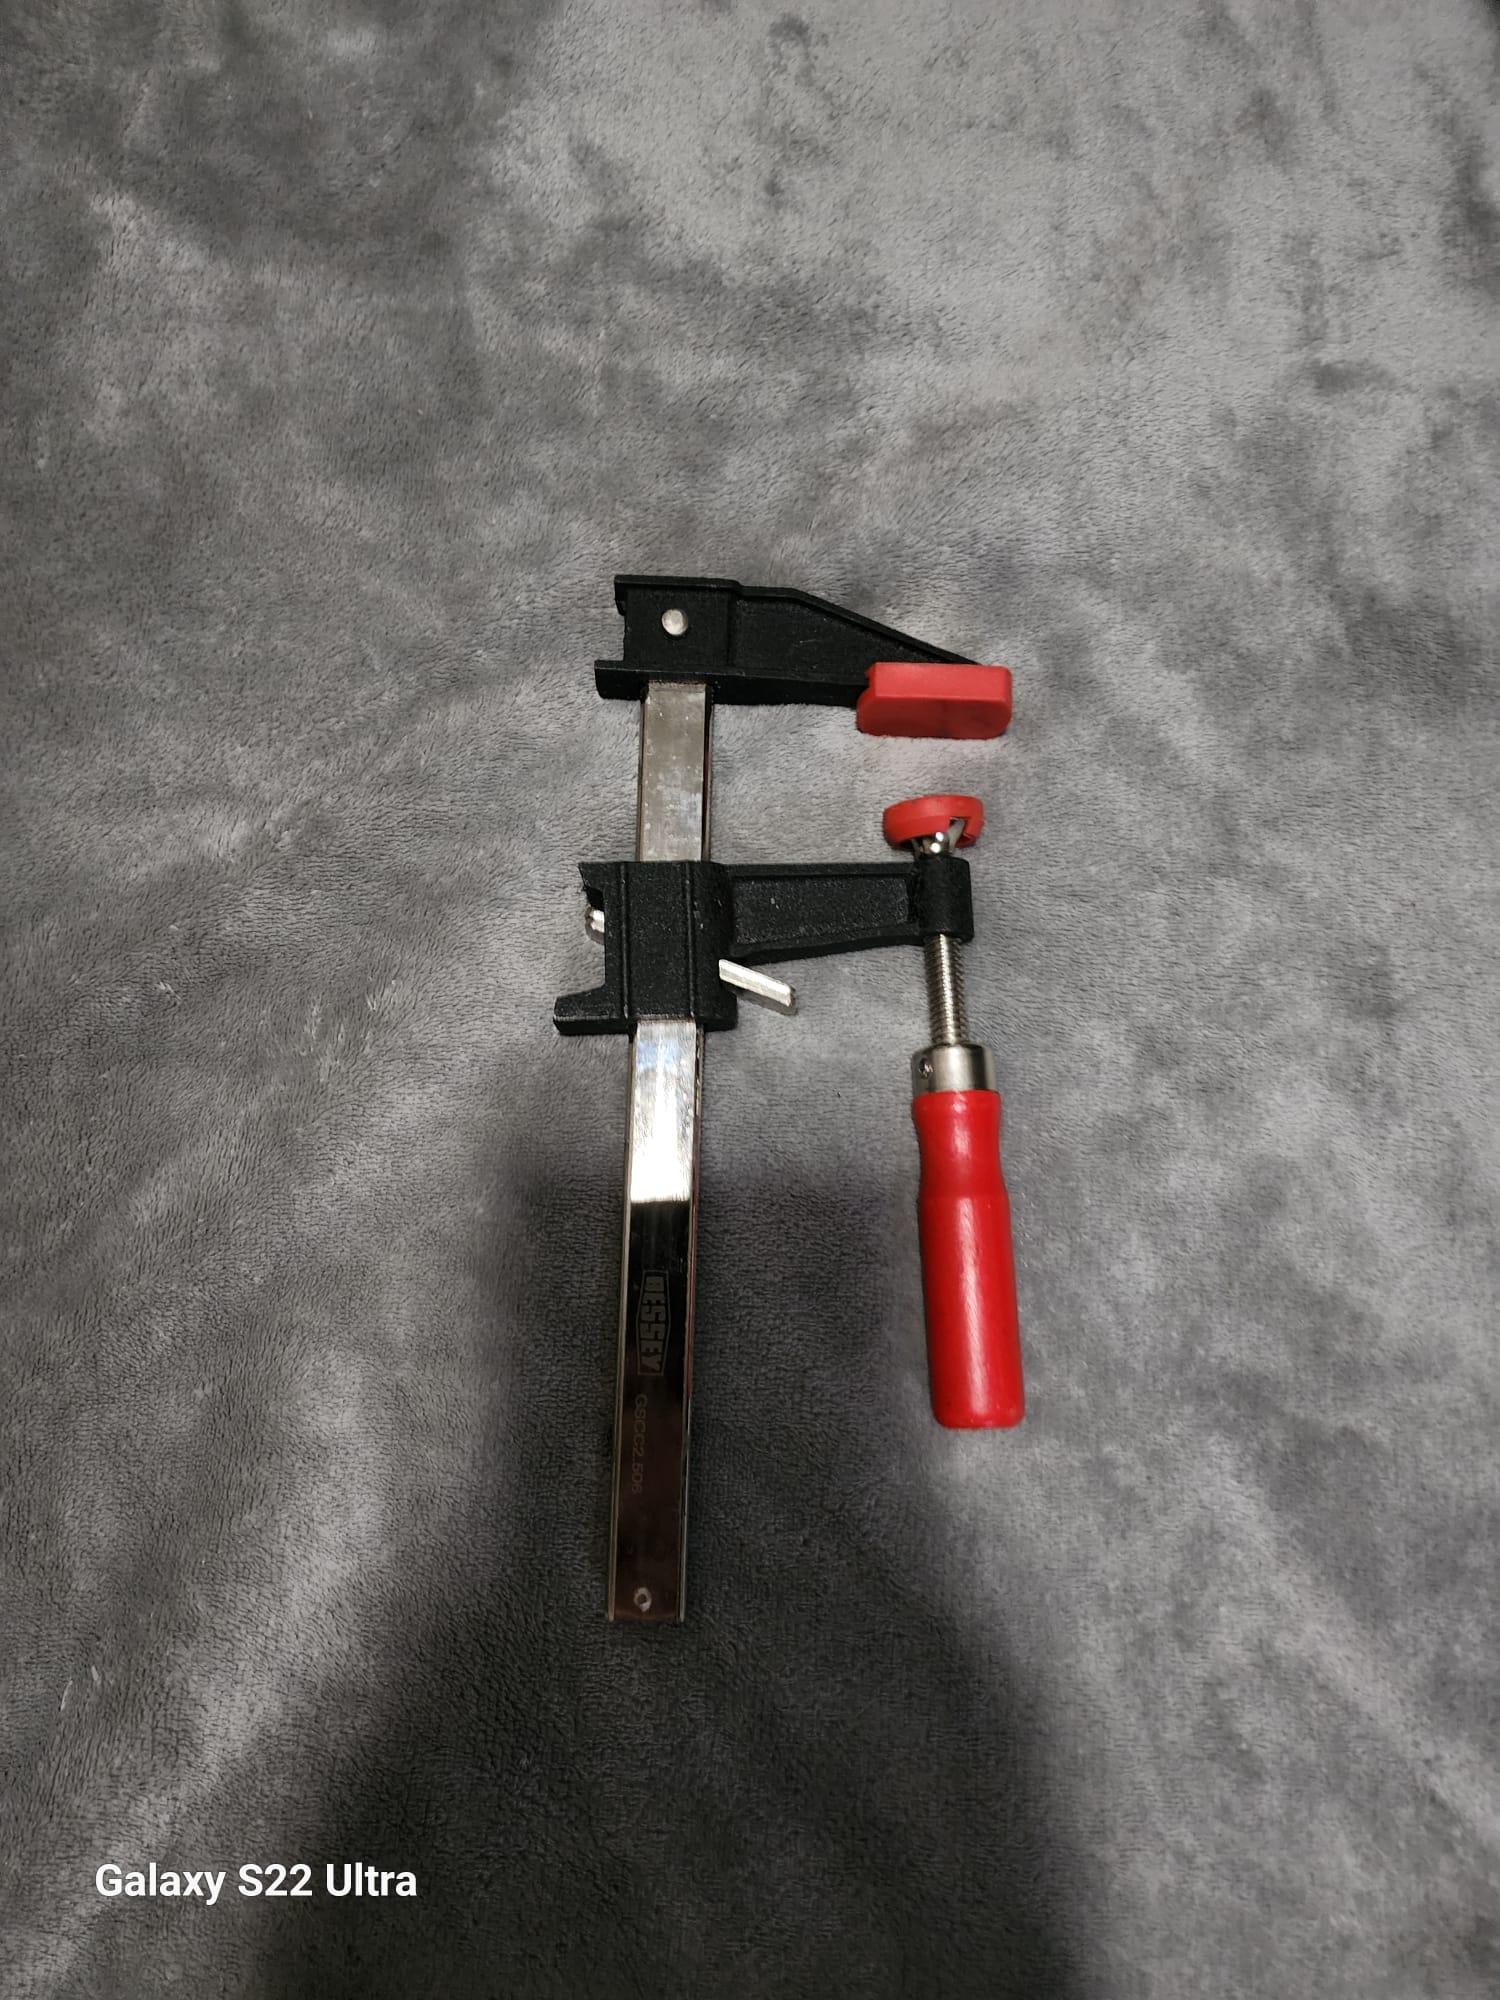
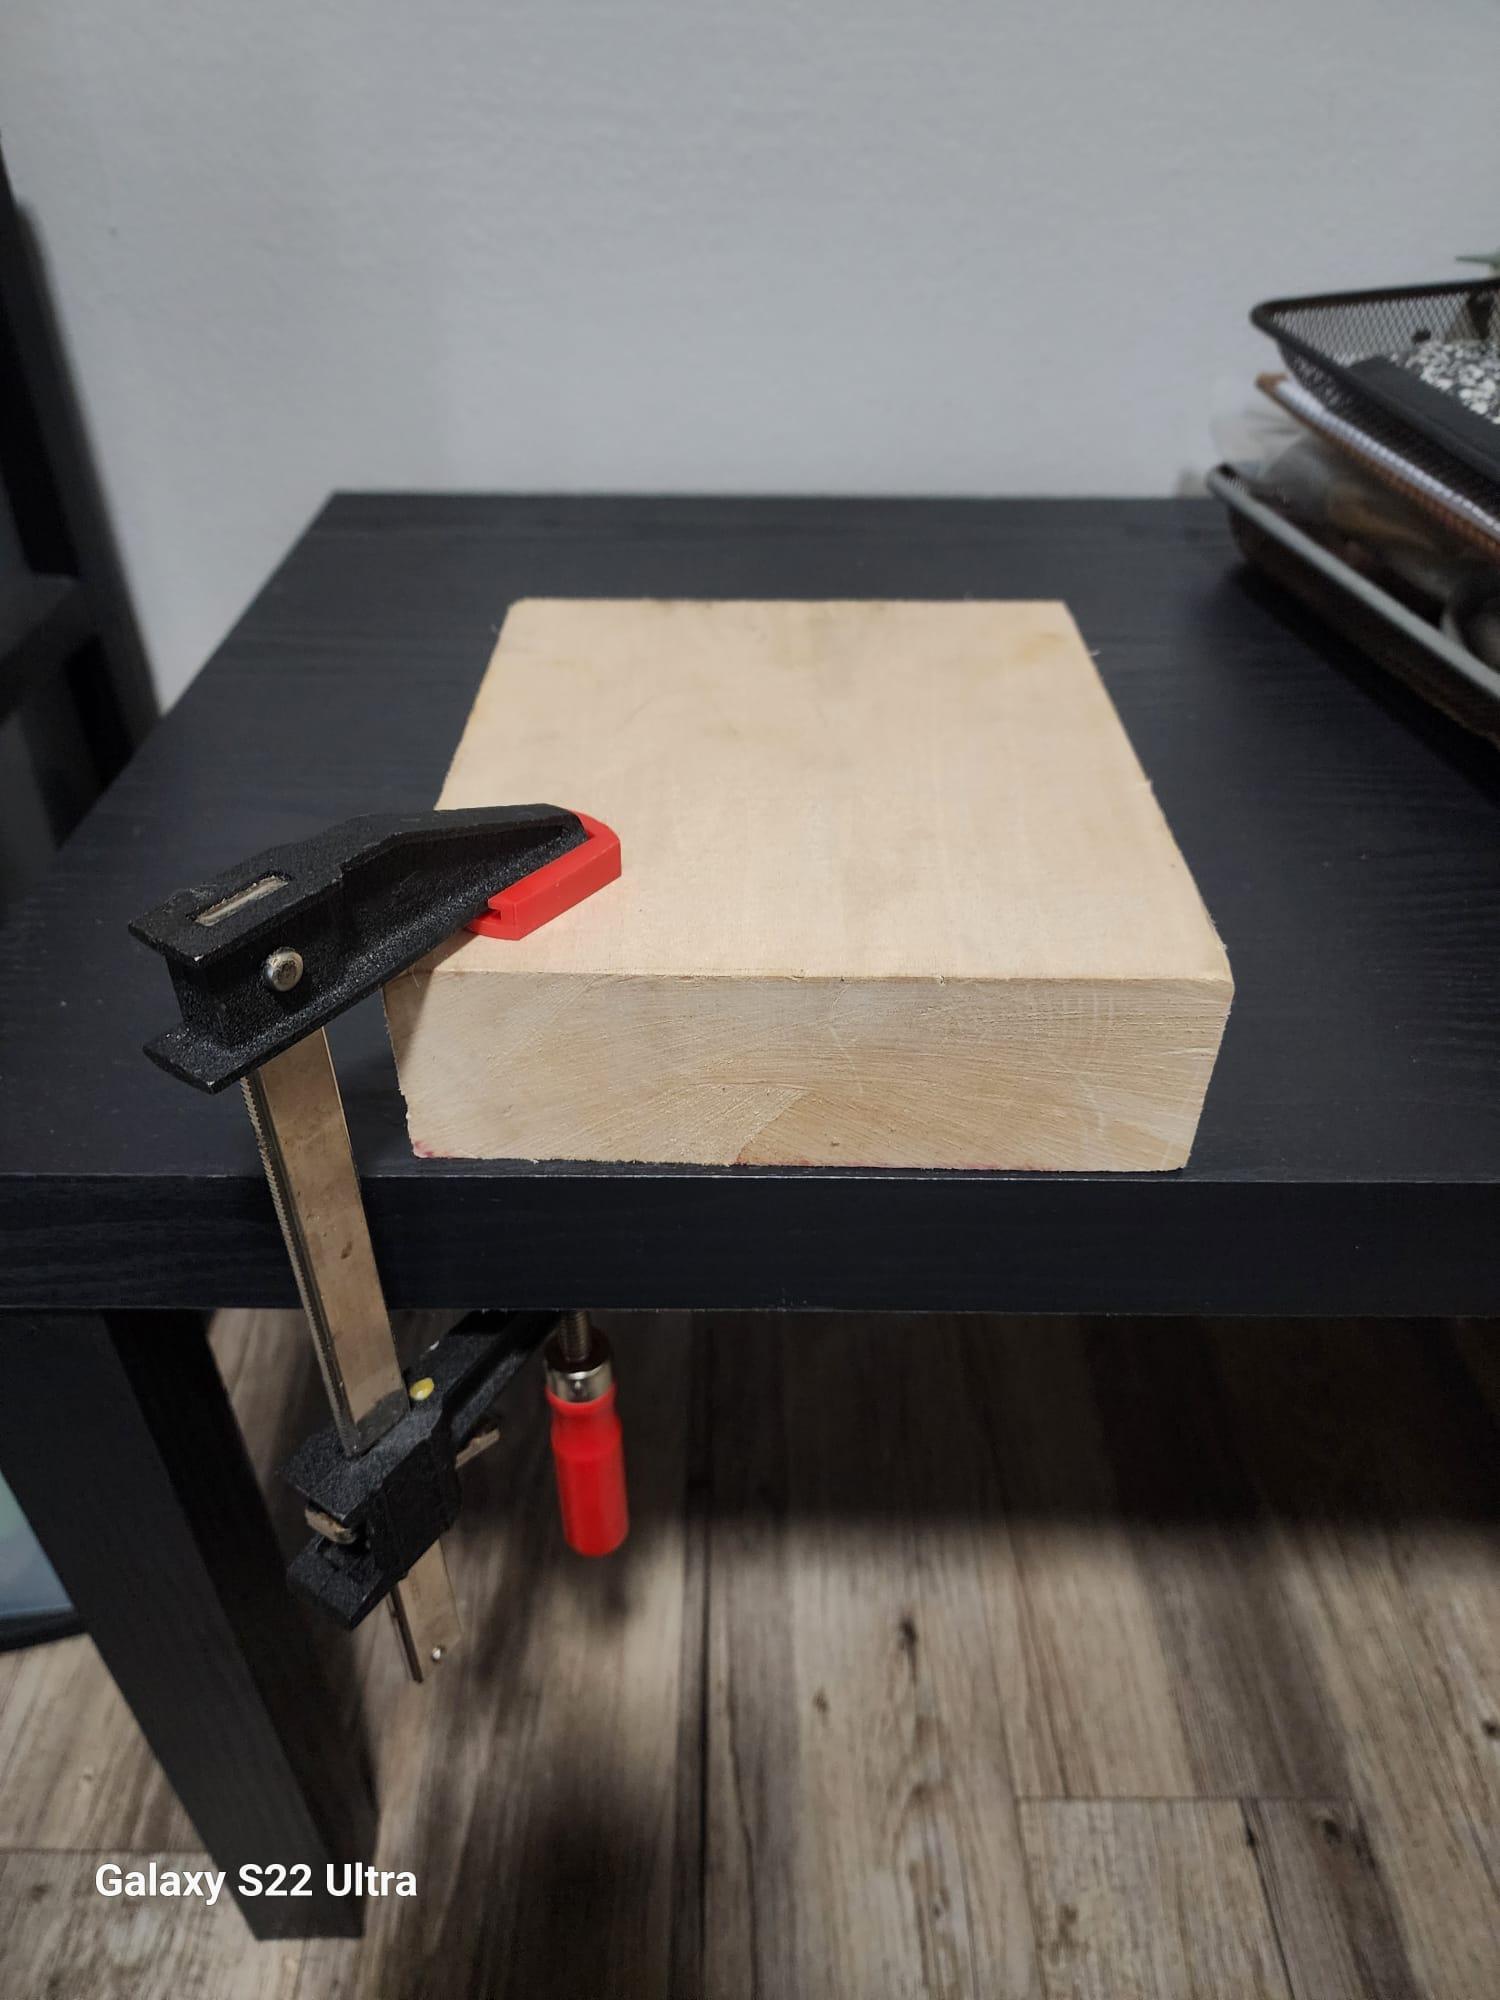
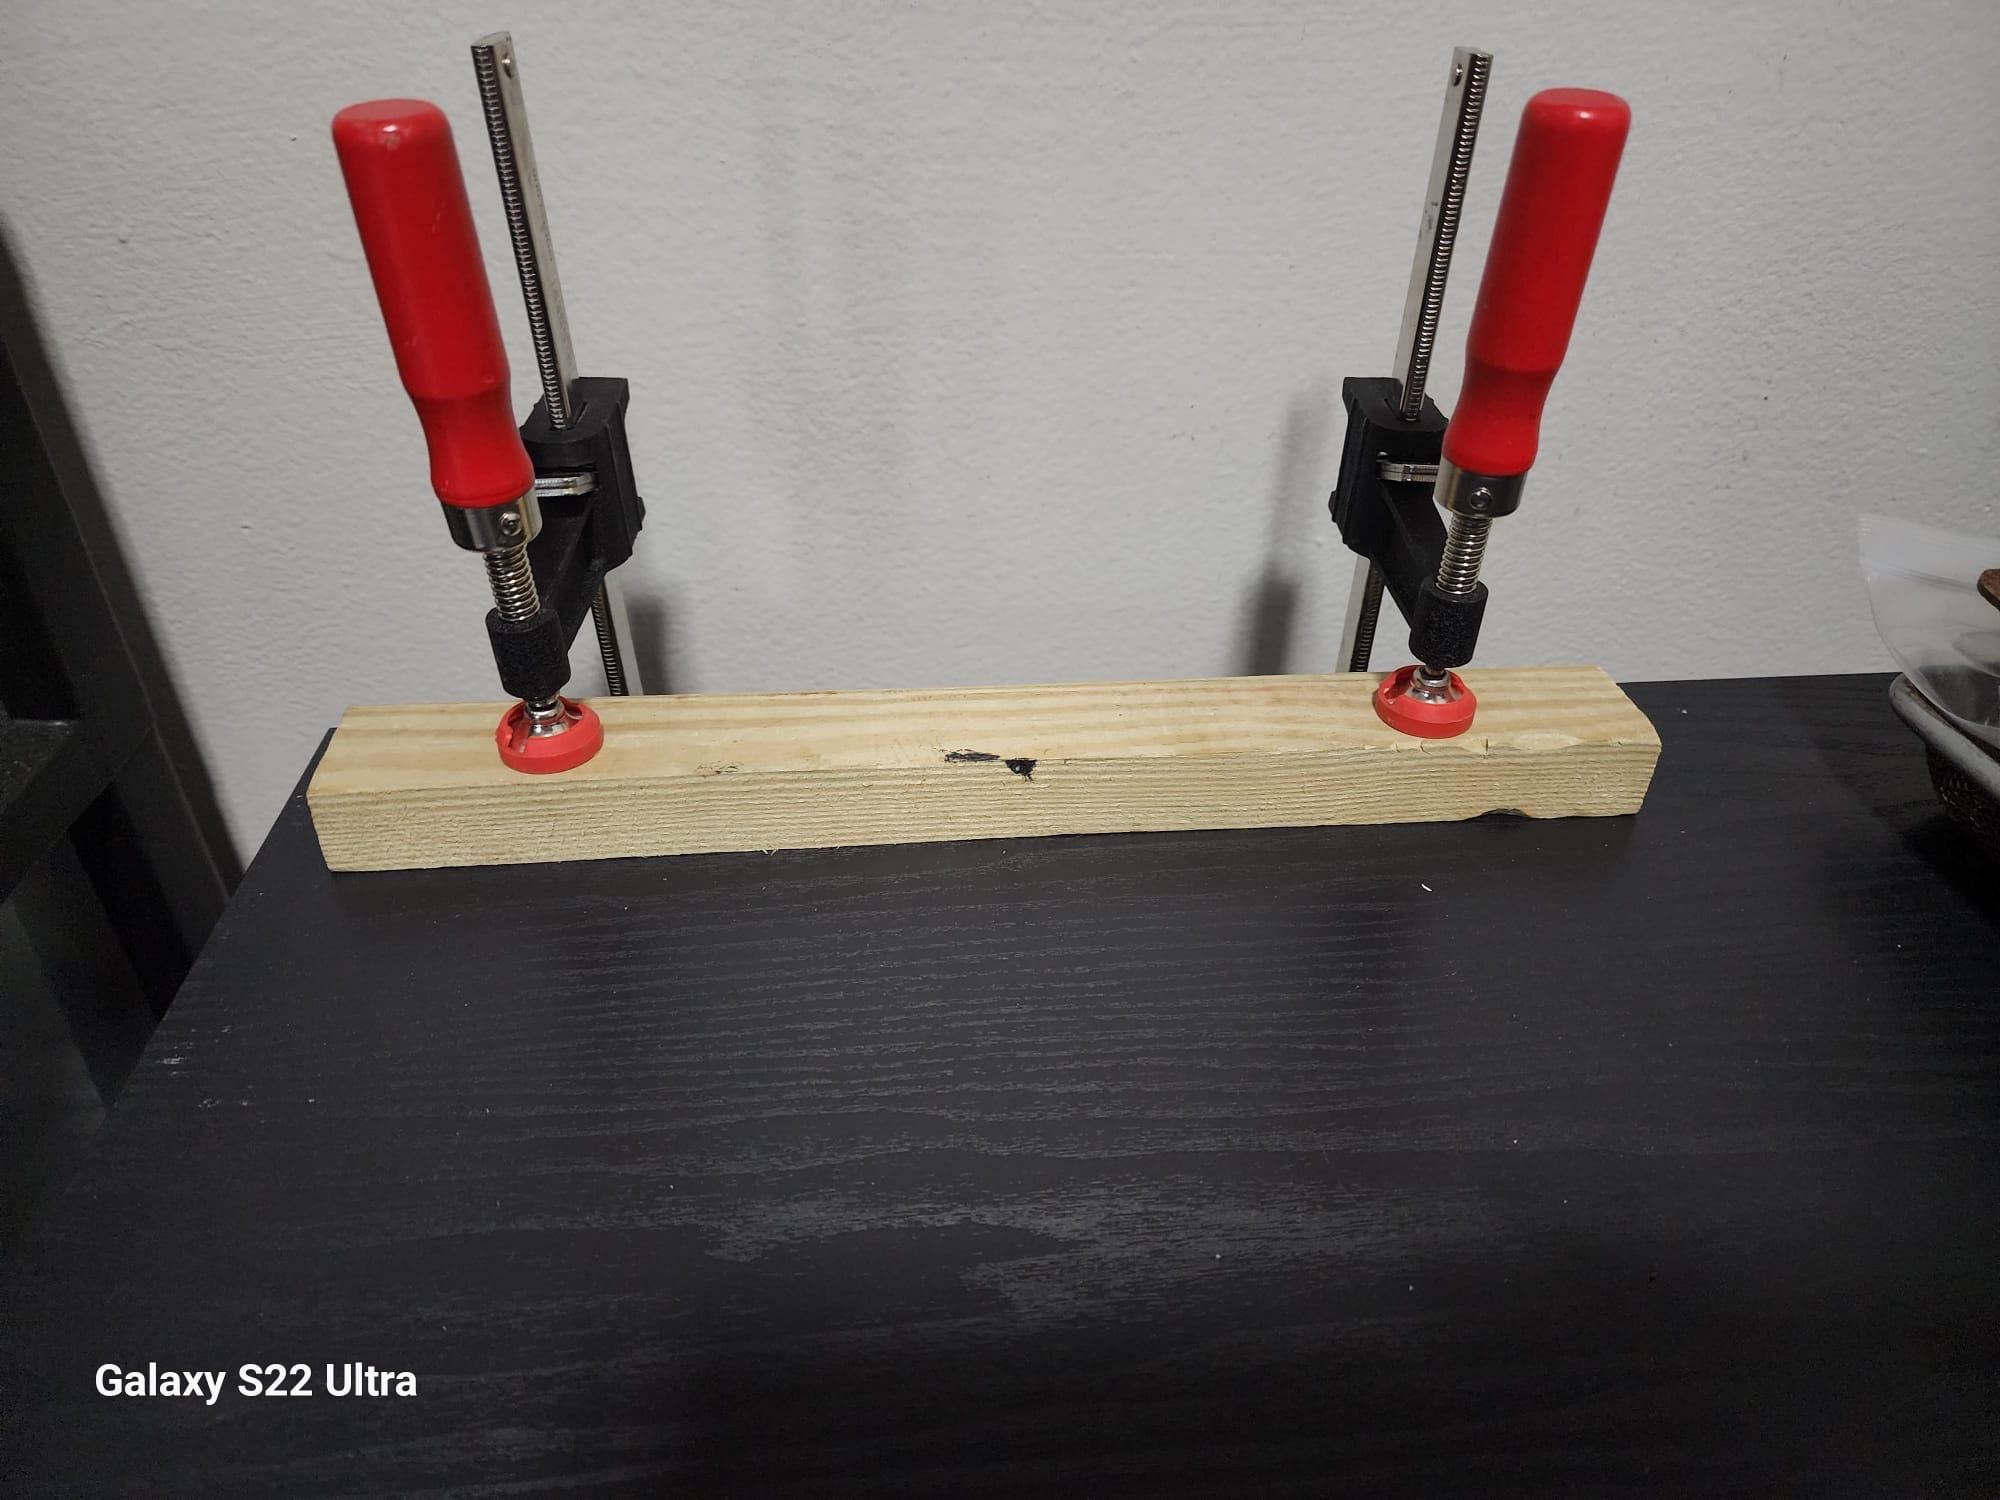
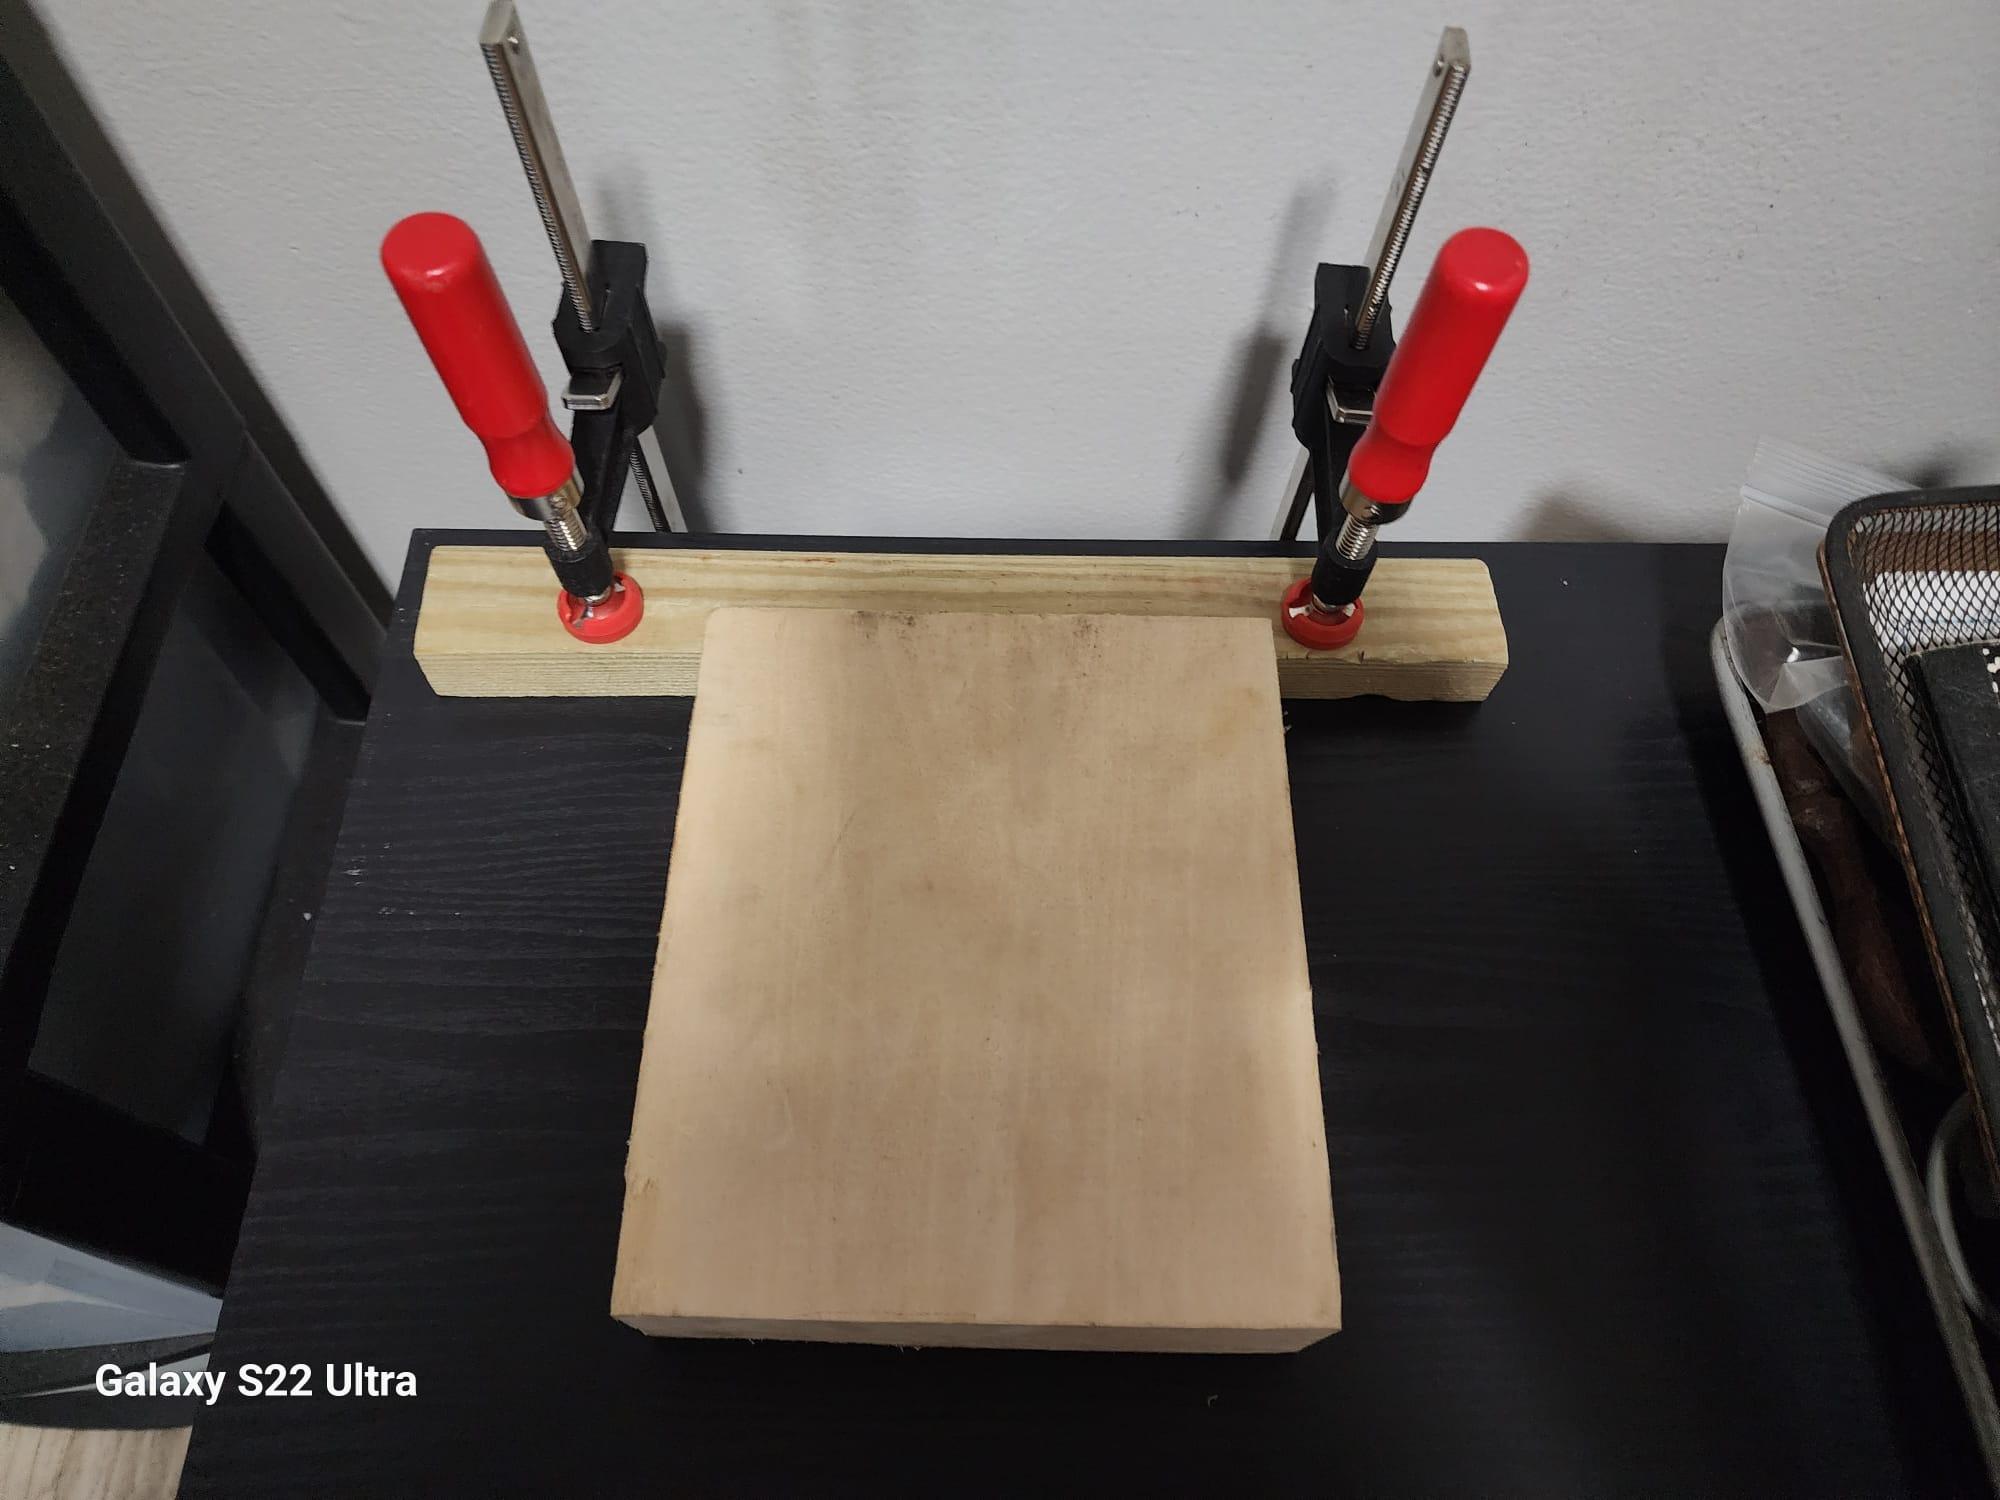
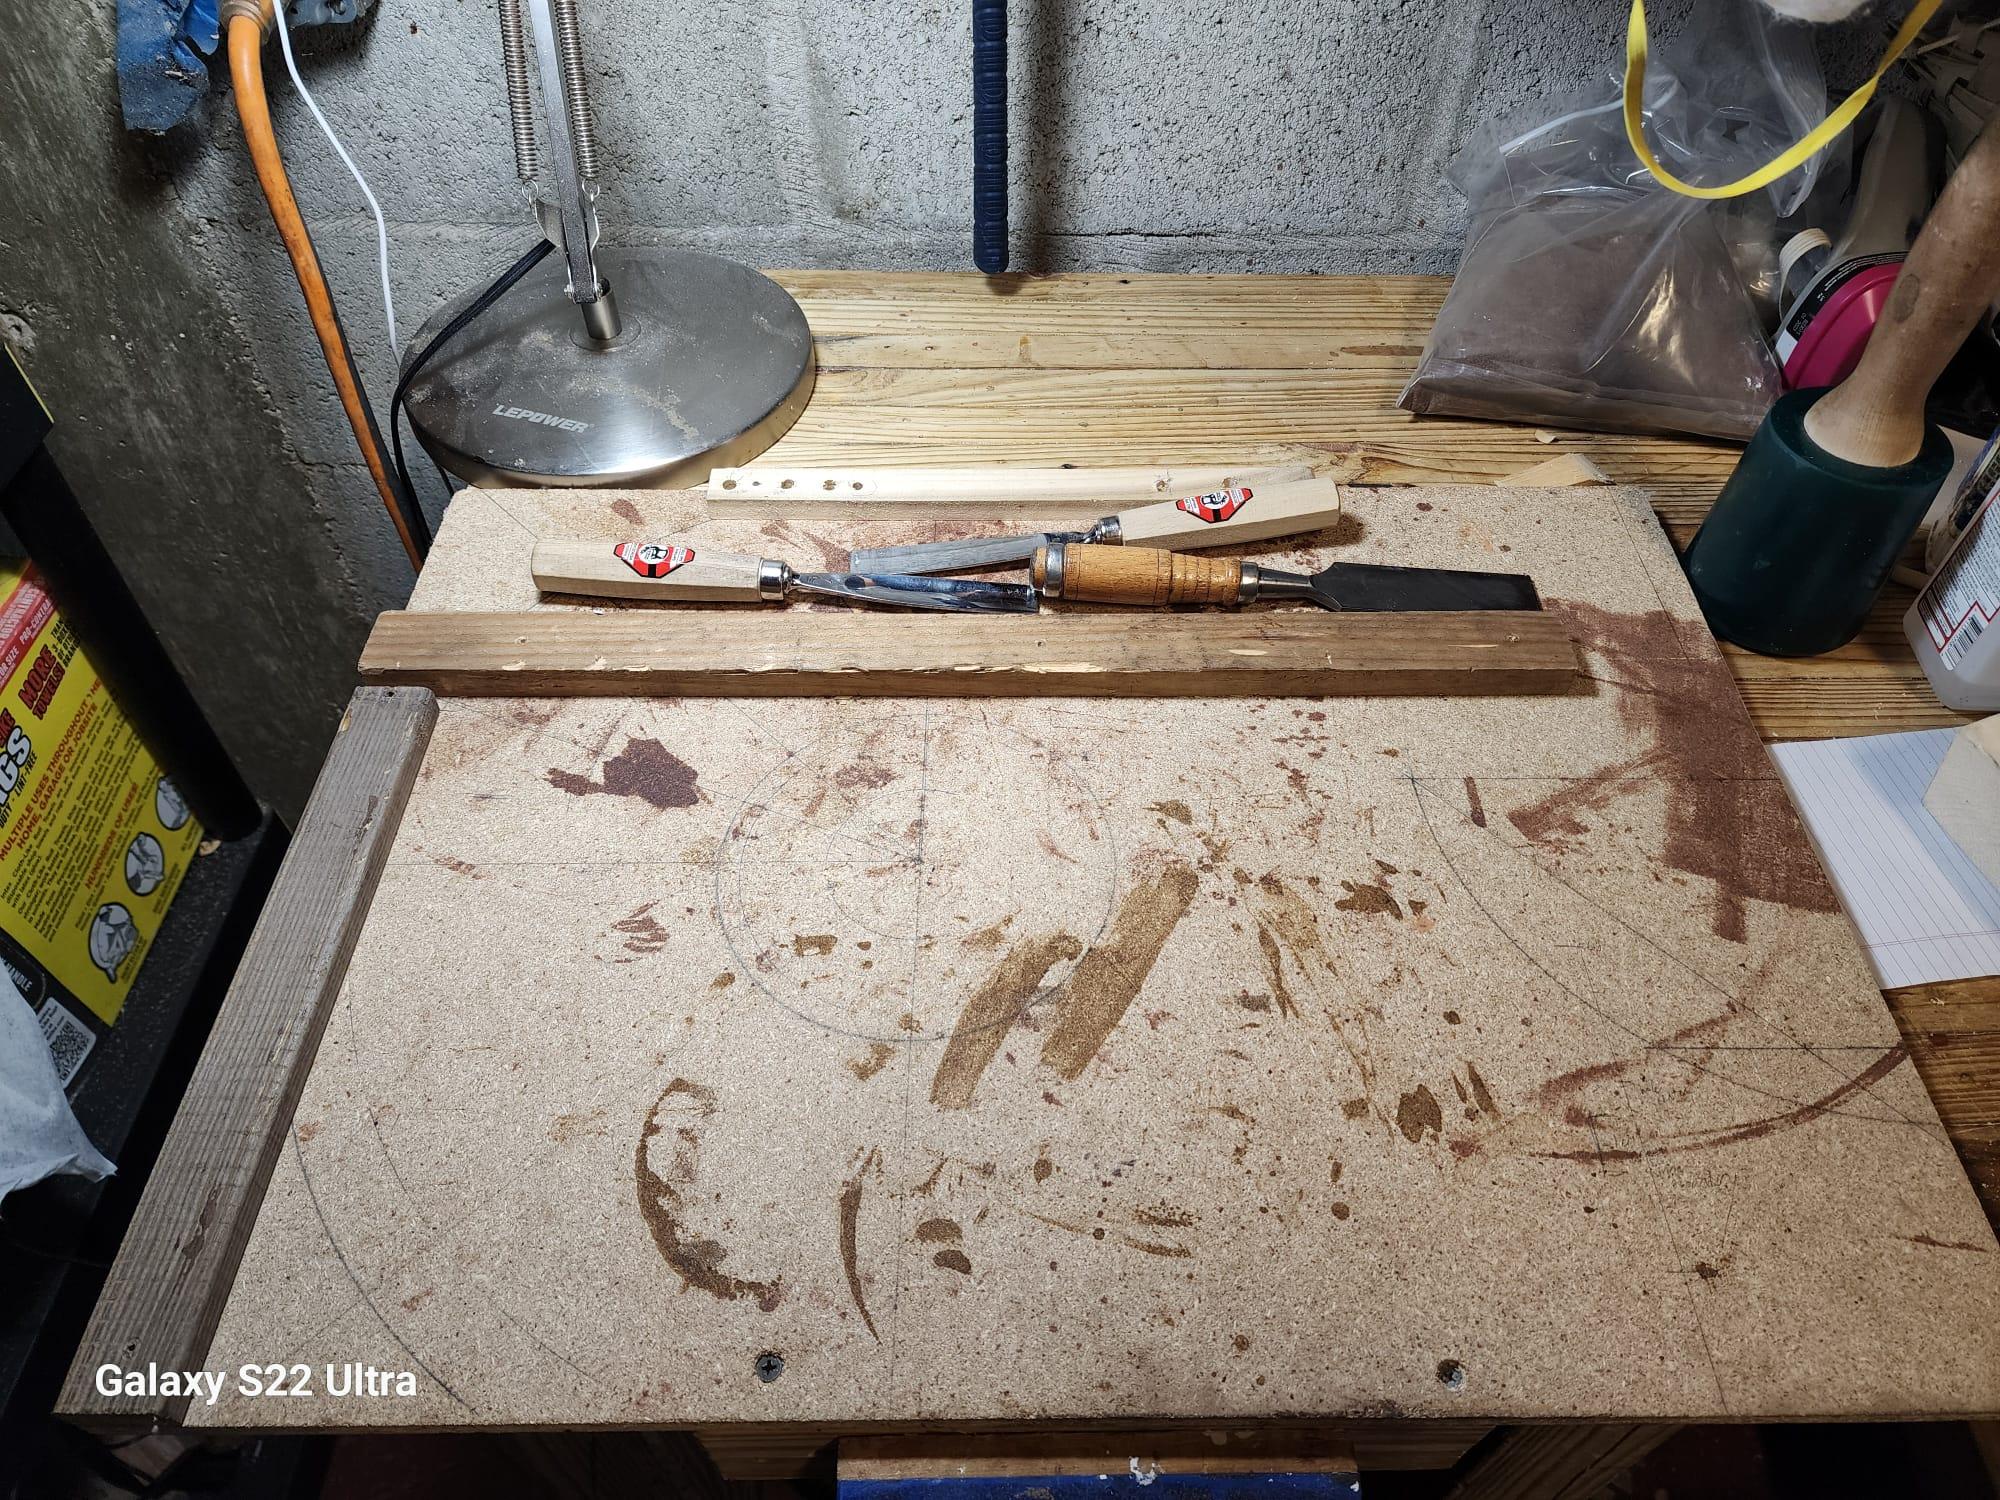
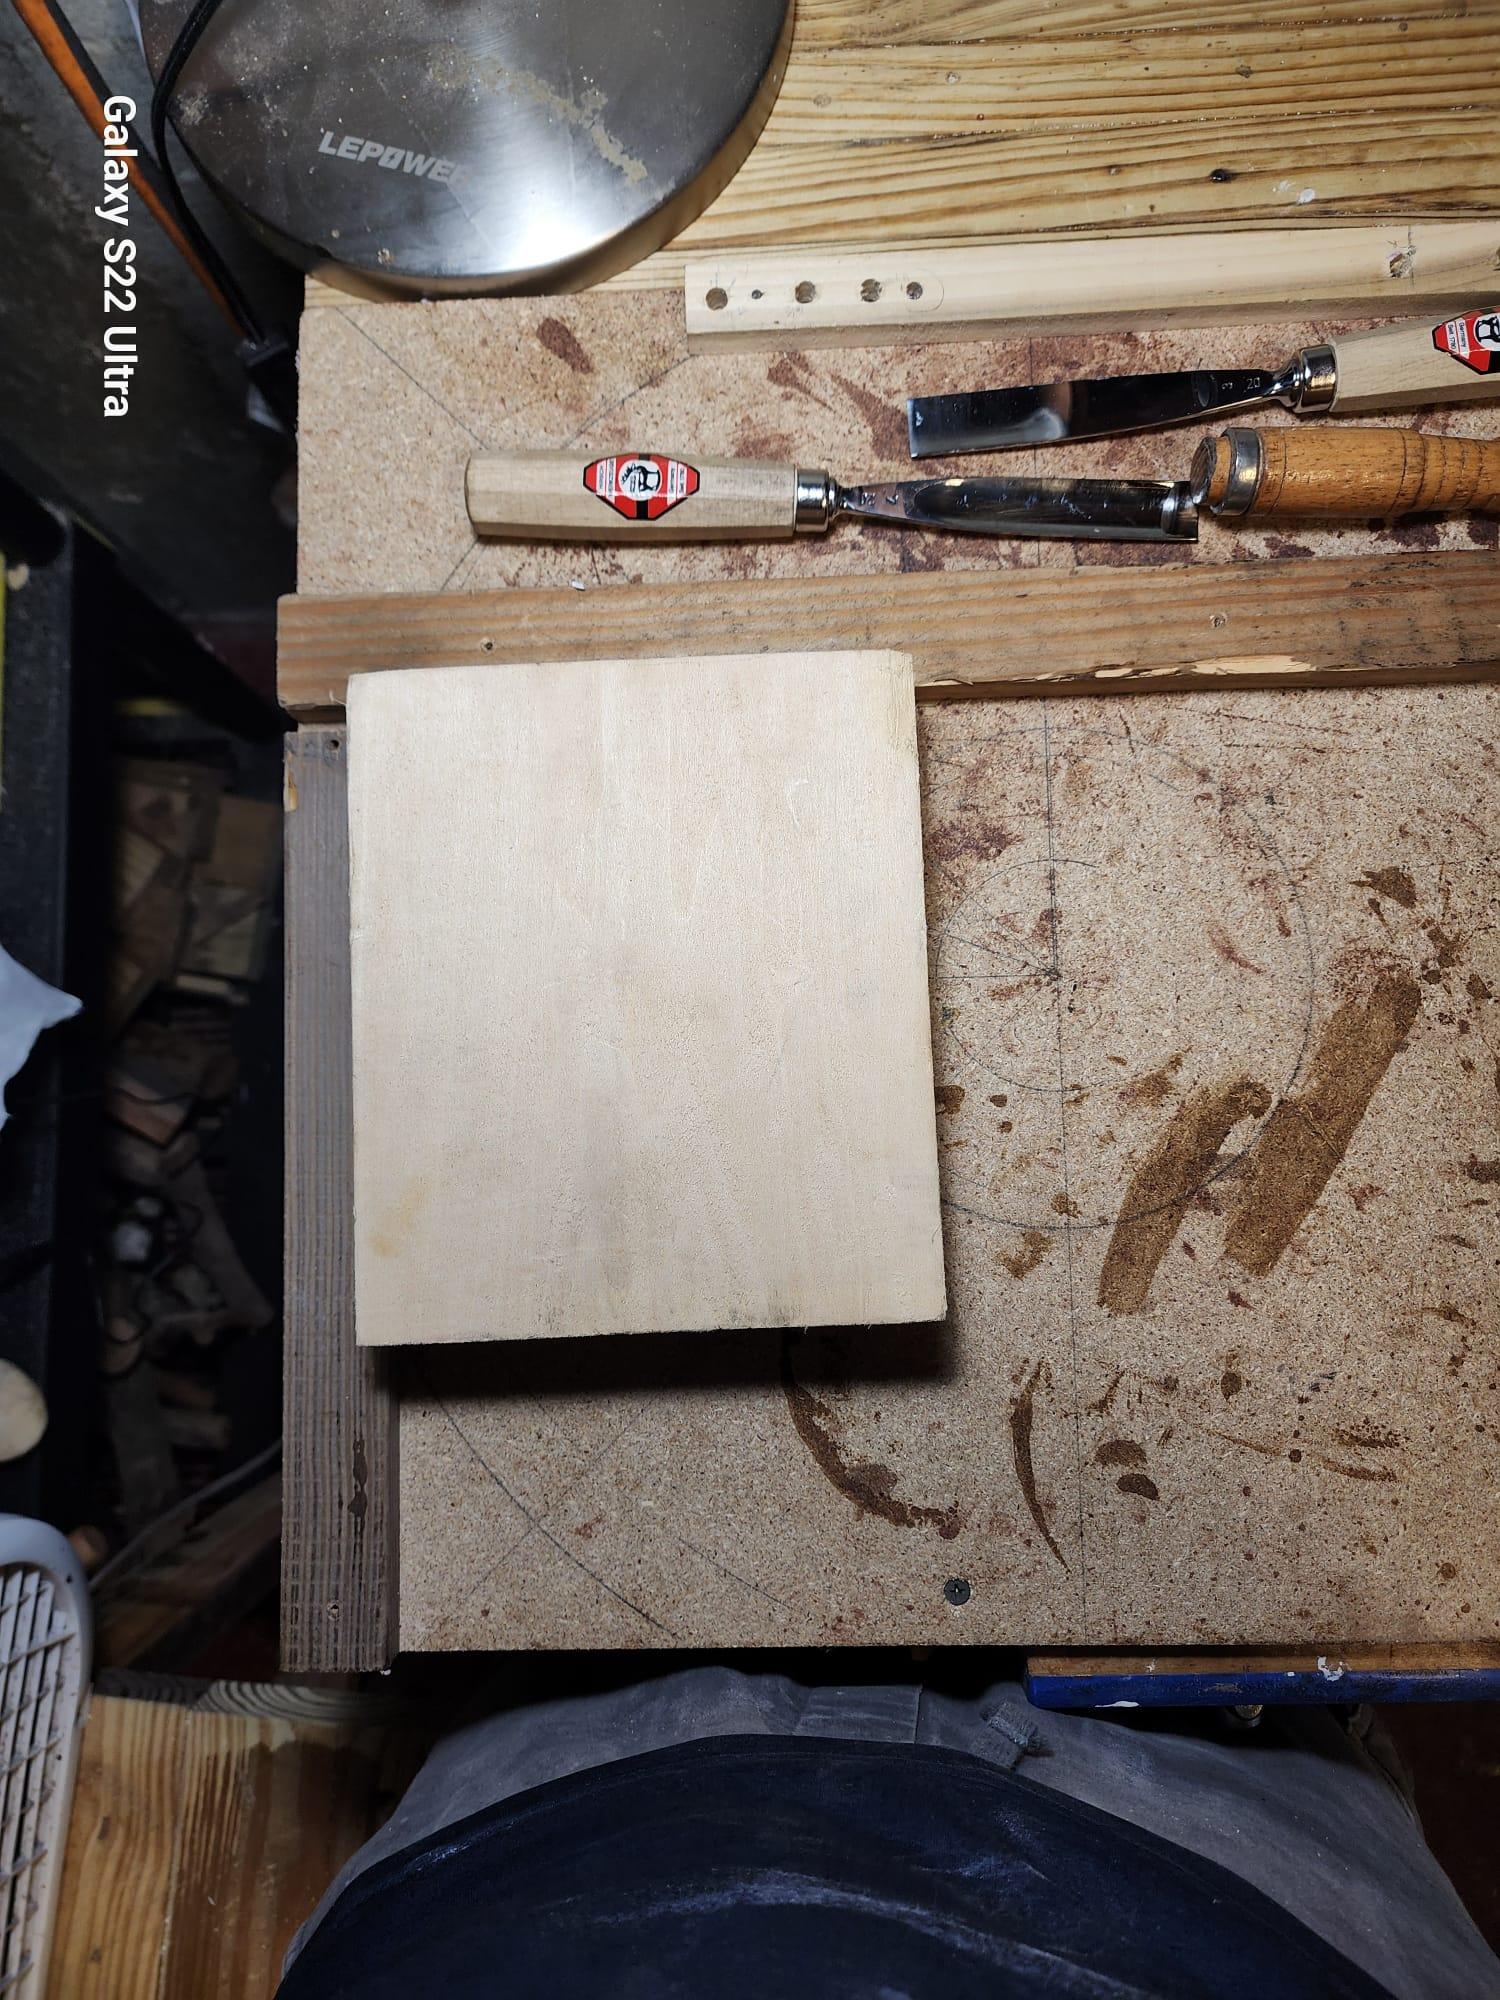
Its very important that your piece doesn't move while working on it. Firstly, make sure you have a sturdy table or bench. The easiest way to secure your piece is by using an F-clamp. Simply tighten it to the table, and its good to go. However, the clamp can get in the way, and the last thing you want is to strike the metal clamp with your gouge. The clamping force can also be problematic when you have the overall shape of the mask complete. The clamp can even potentially snap the mask when it is hollowed out on the reverse. In this case, clamp a piece of flat off-cut to your table instead. This will act as a stop as you push the piece with gouge.
Sometimes though, it will be impossible to carve while the piece is secured or flat to a table. You can cradle the piece in your arms or knees. I recommend you not attempt to use the mallet in these cases. Make sure you have something between the piece and your body that can resist any errant cuts. Only use light passes with the gouge and take your time.
Finally Getting Started
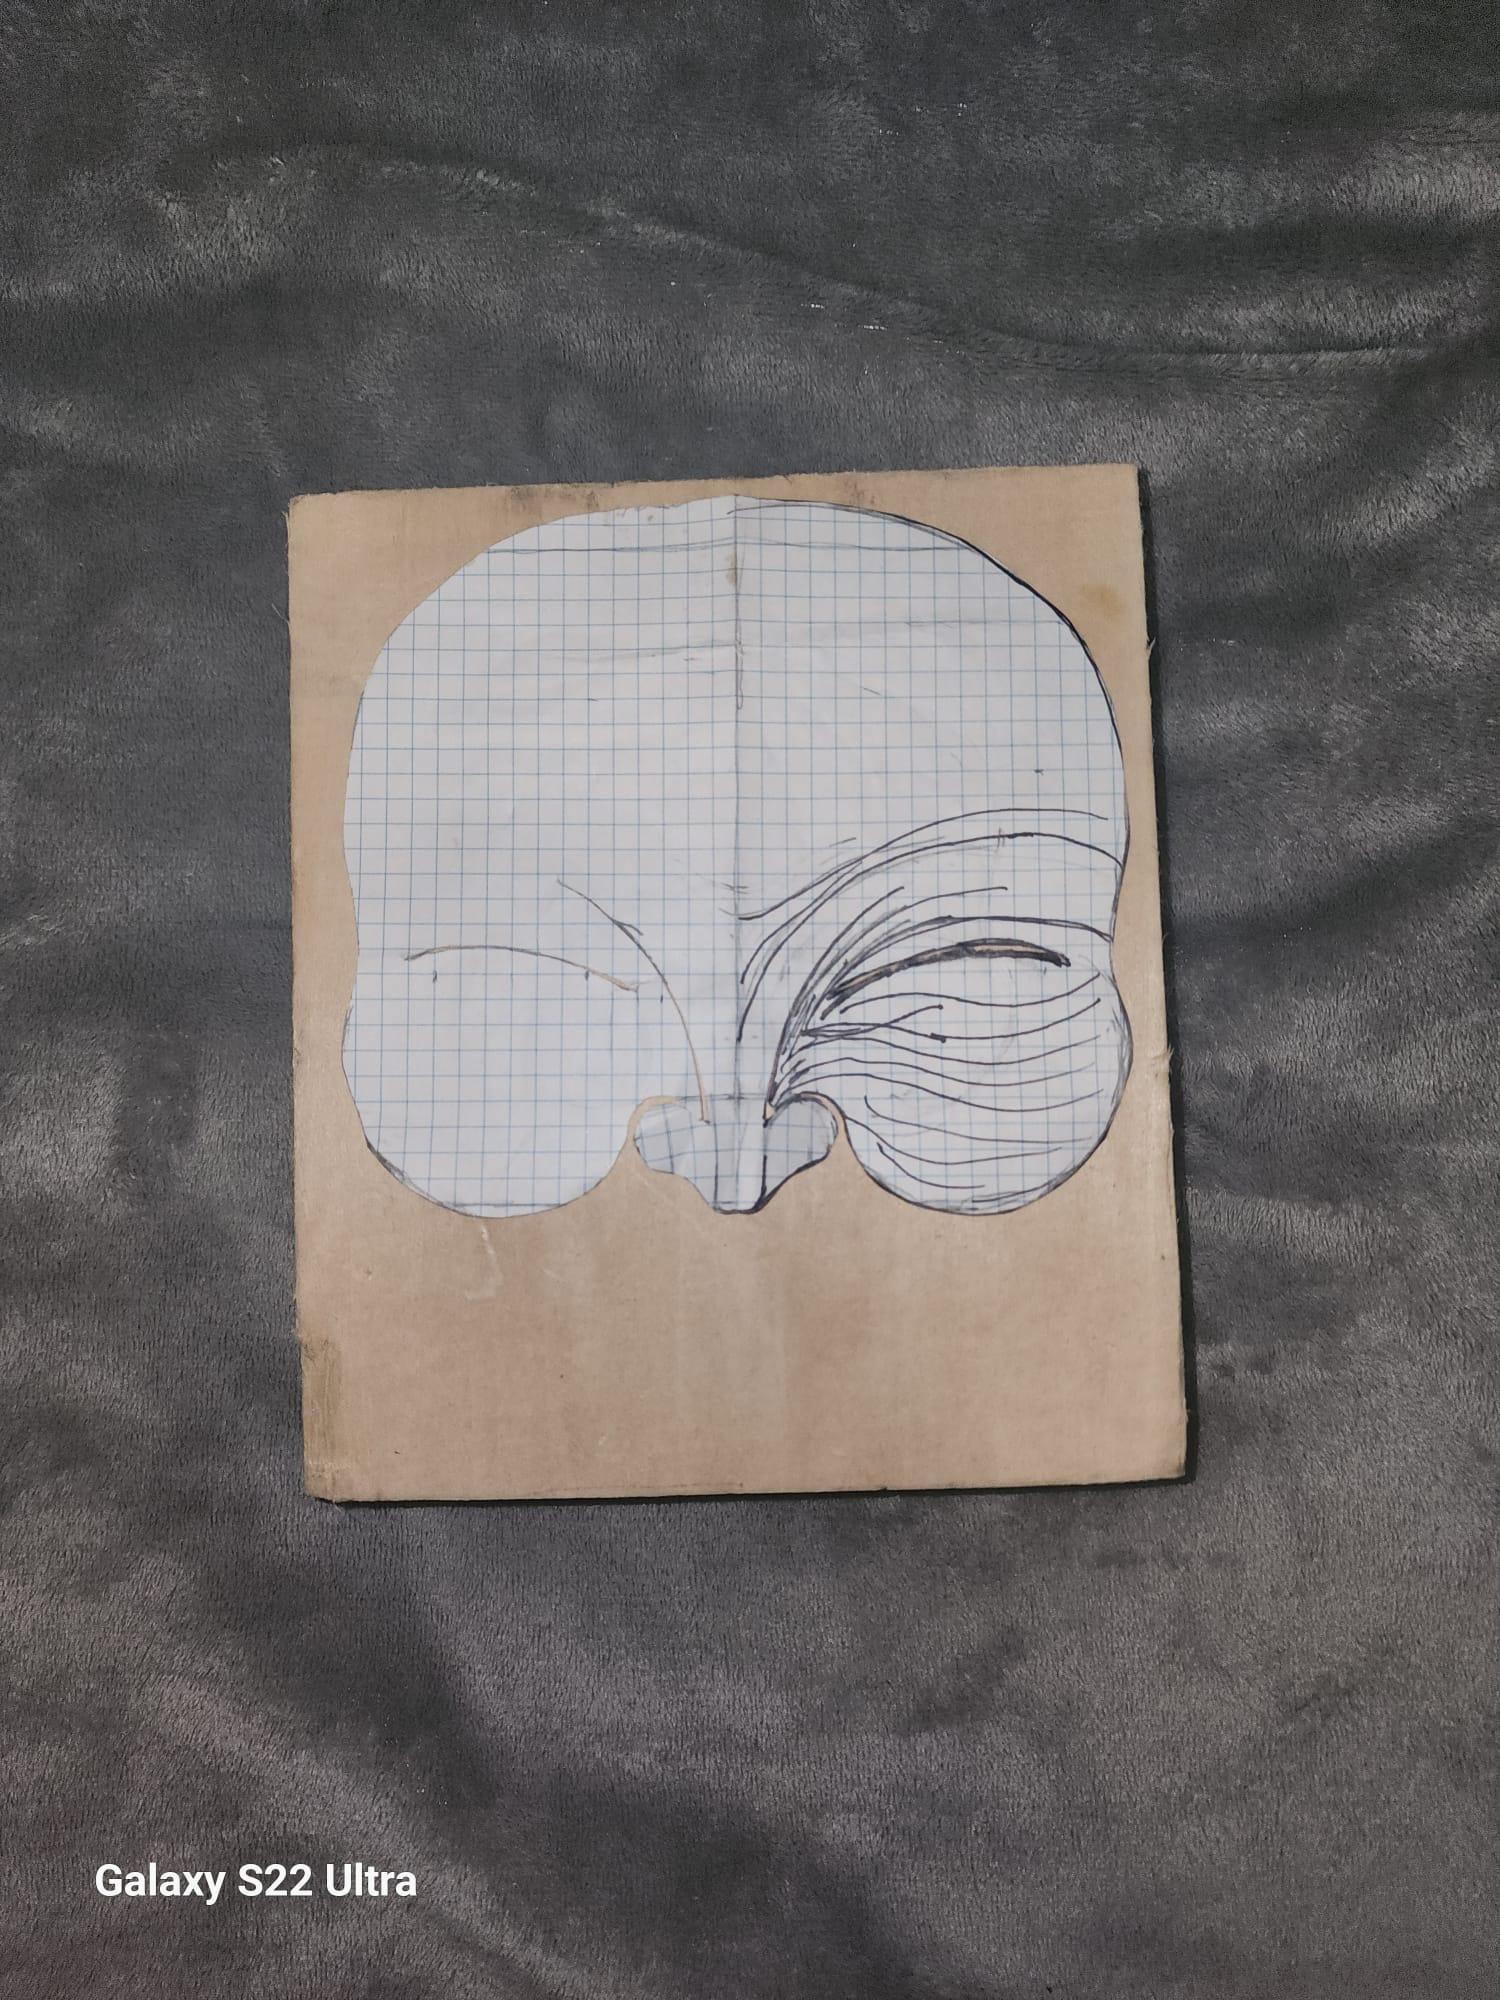
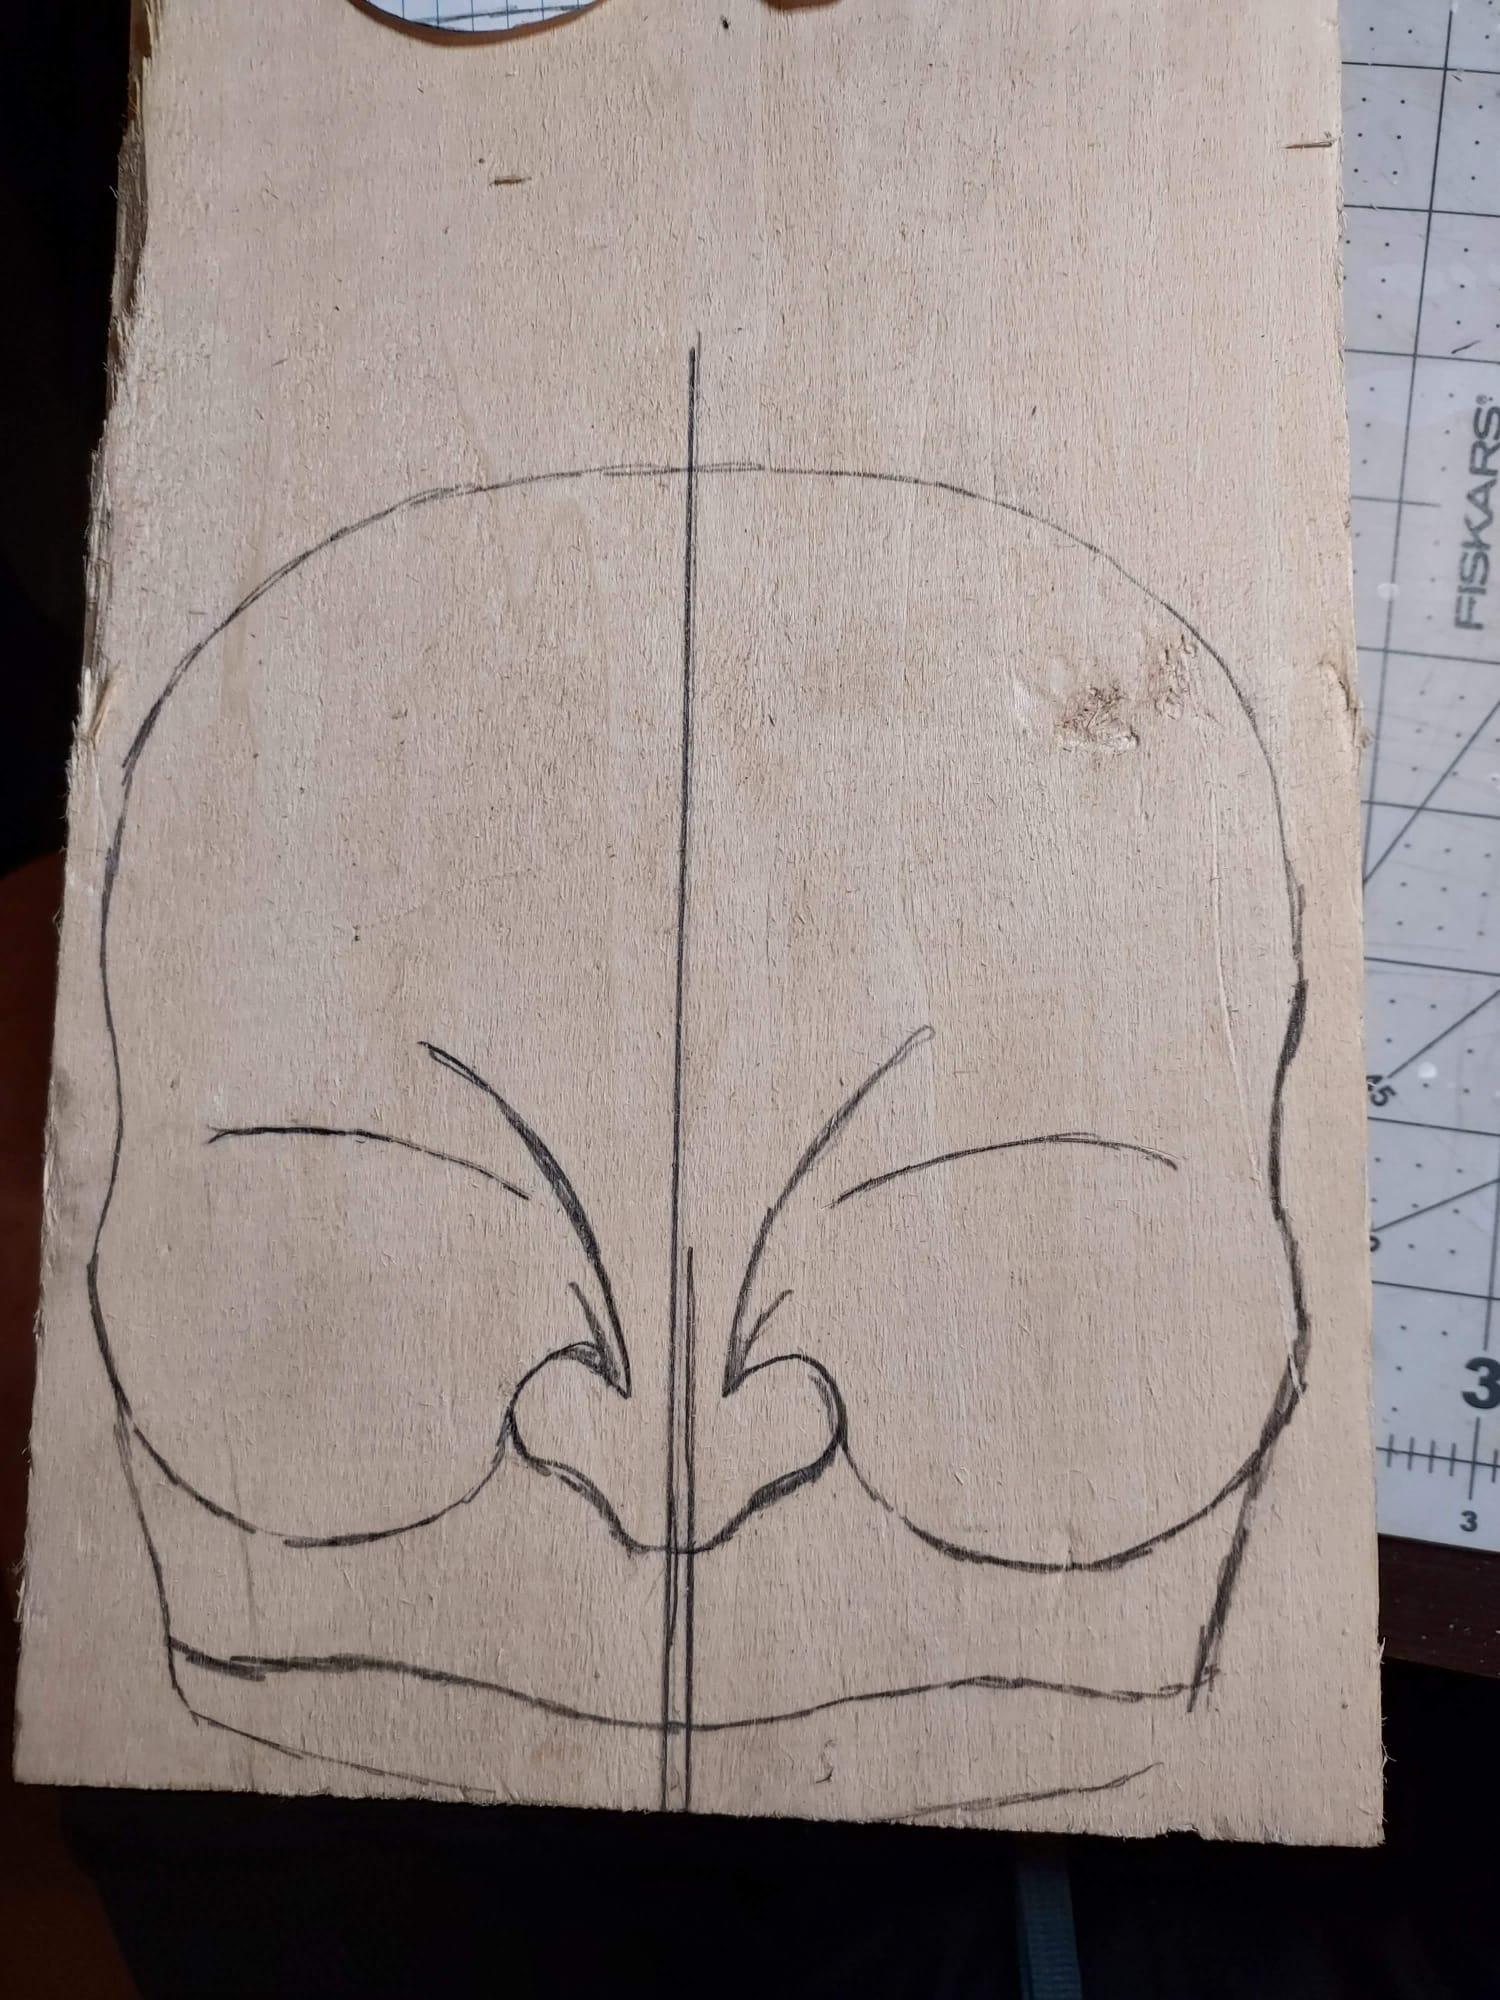
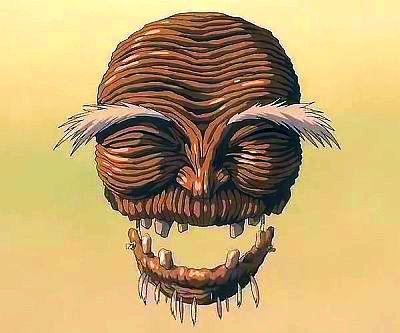
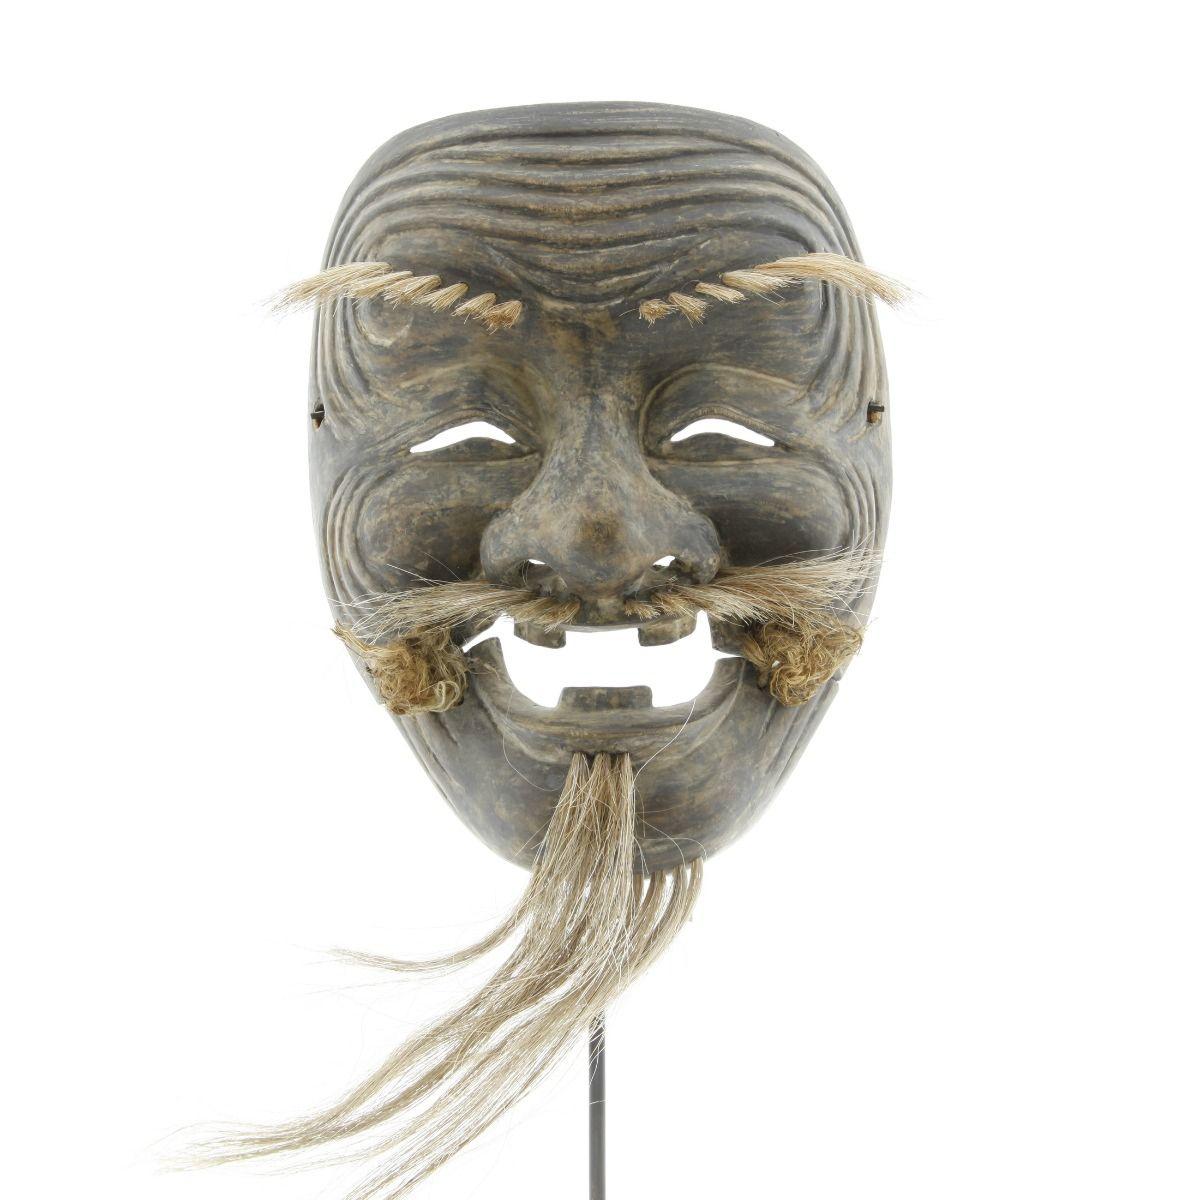
I would recommend making a pattern for this. You may need to reference it over and over again as you go on. Some of you may recognize this particular mask as the stink spirit/river spirit of the Studio Ghibli film "Spirited Away." The spirit's mask itself, based on a Noh mask called okina, which portrayed an old god.
You may notice that the eyes of this mask are very thin. Your mask, however, may have larger eyes. In that case, I would go ahead and drill them out first. It can be a real pain, if after all the work you do, the drill bit blows out part of the mask. For the thinner eyes, we must wait until closer to the end.
Cut Out the Wood
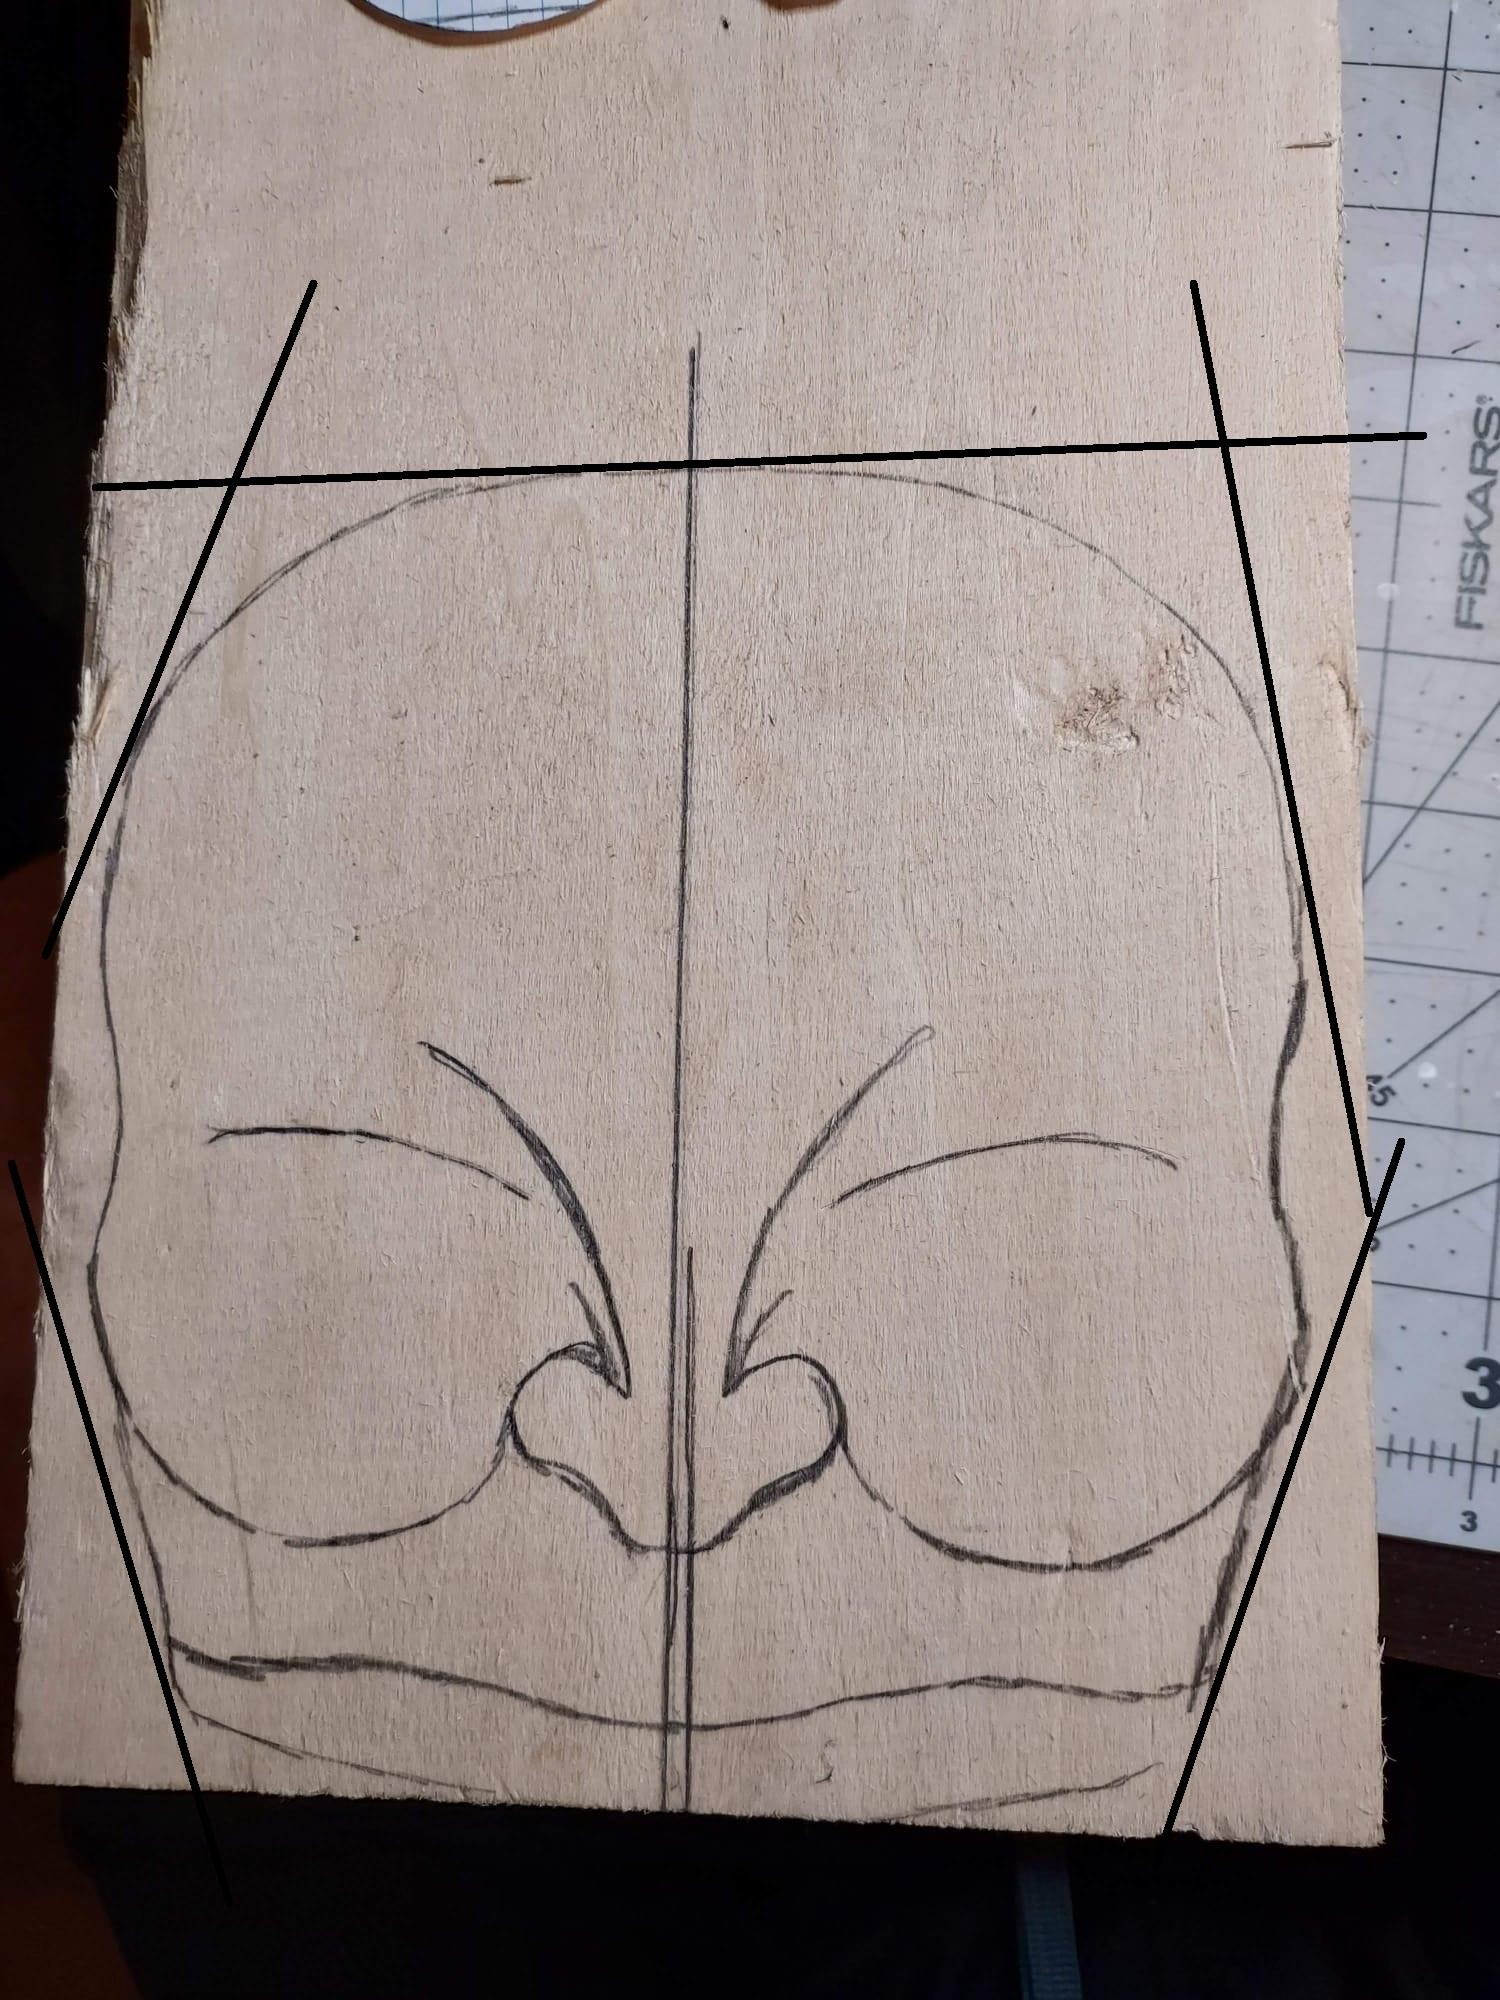
If you have something like a band saw or jig saw, this will be easier. Simply follow the outer most lines. You can also use a coping saw if you have one. If you only have a hand saw, first, cut out the bulk of your piece. Something like the above picture, follow the straight outer lines. From there, you can use your gouge and mallet to cut away at the outer curves.
Isolate the High Points
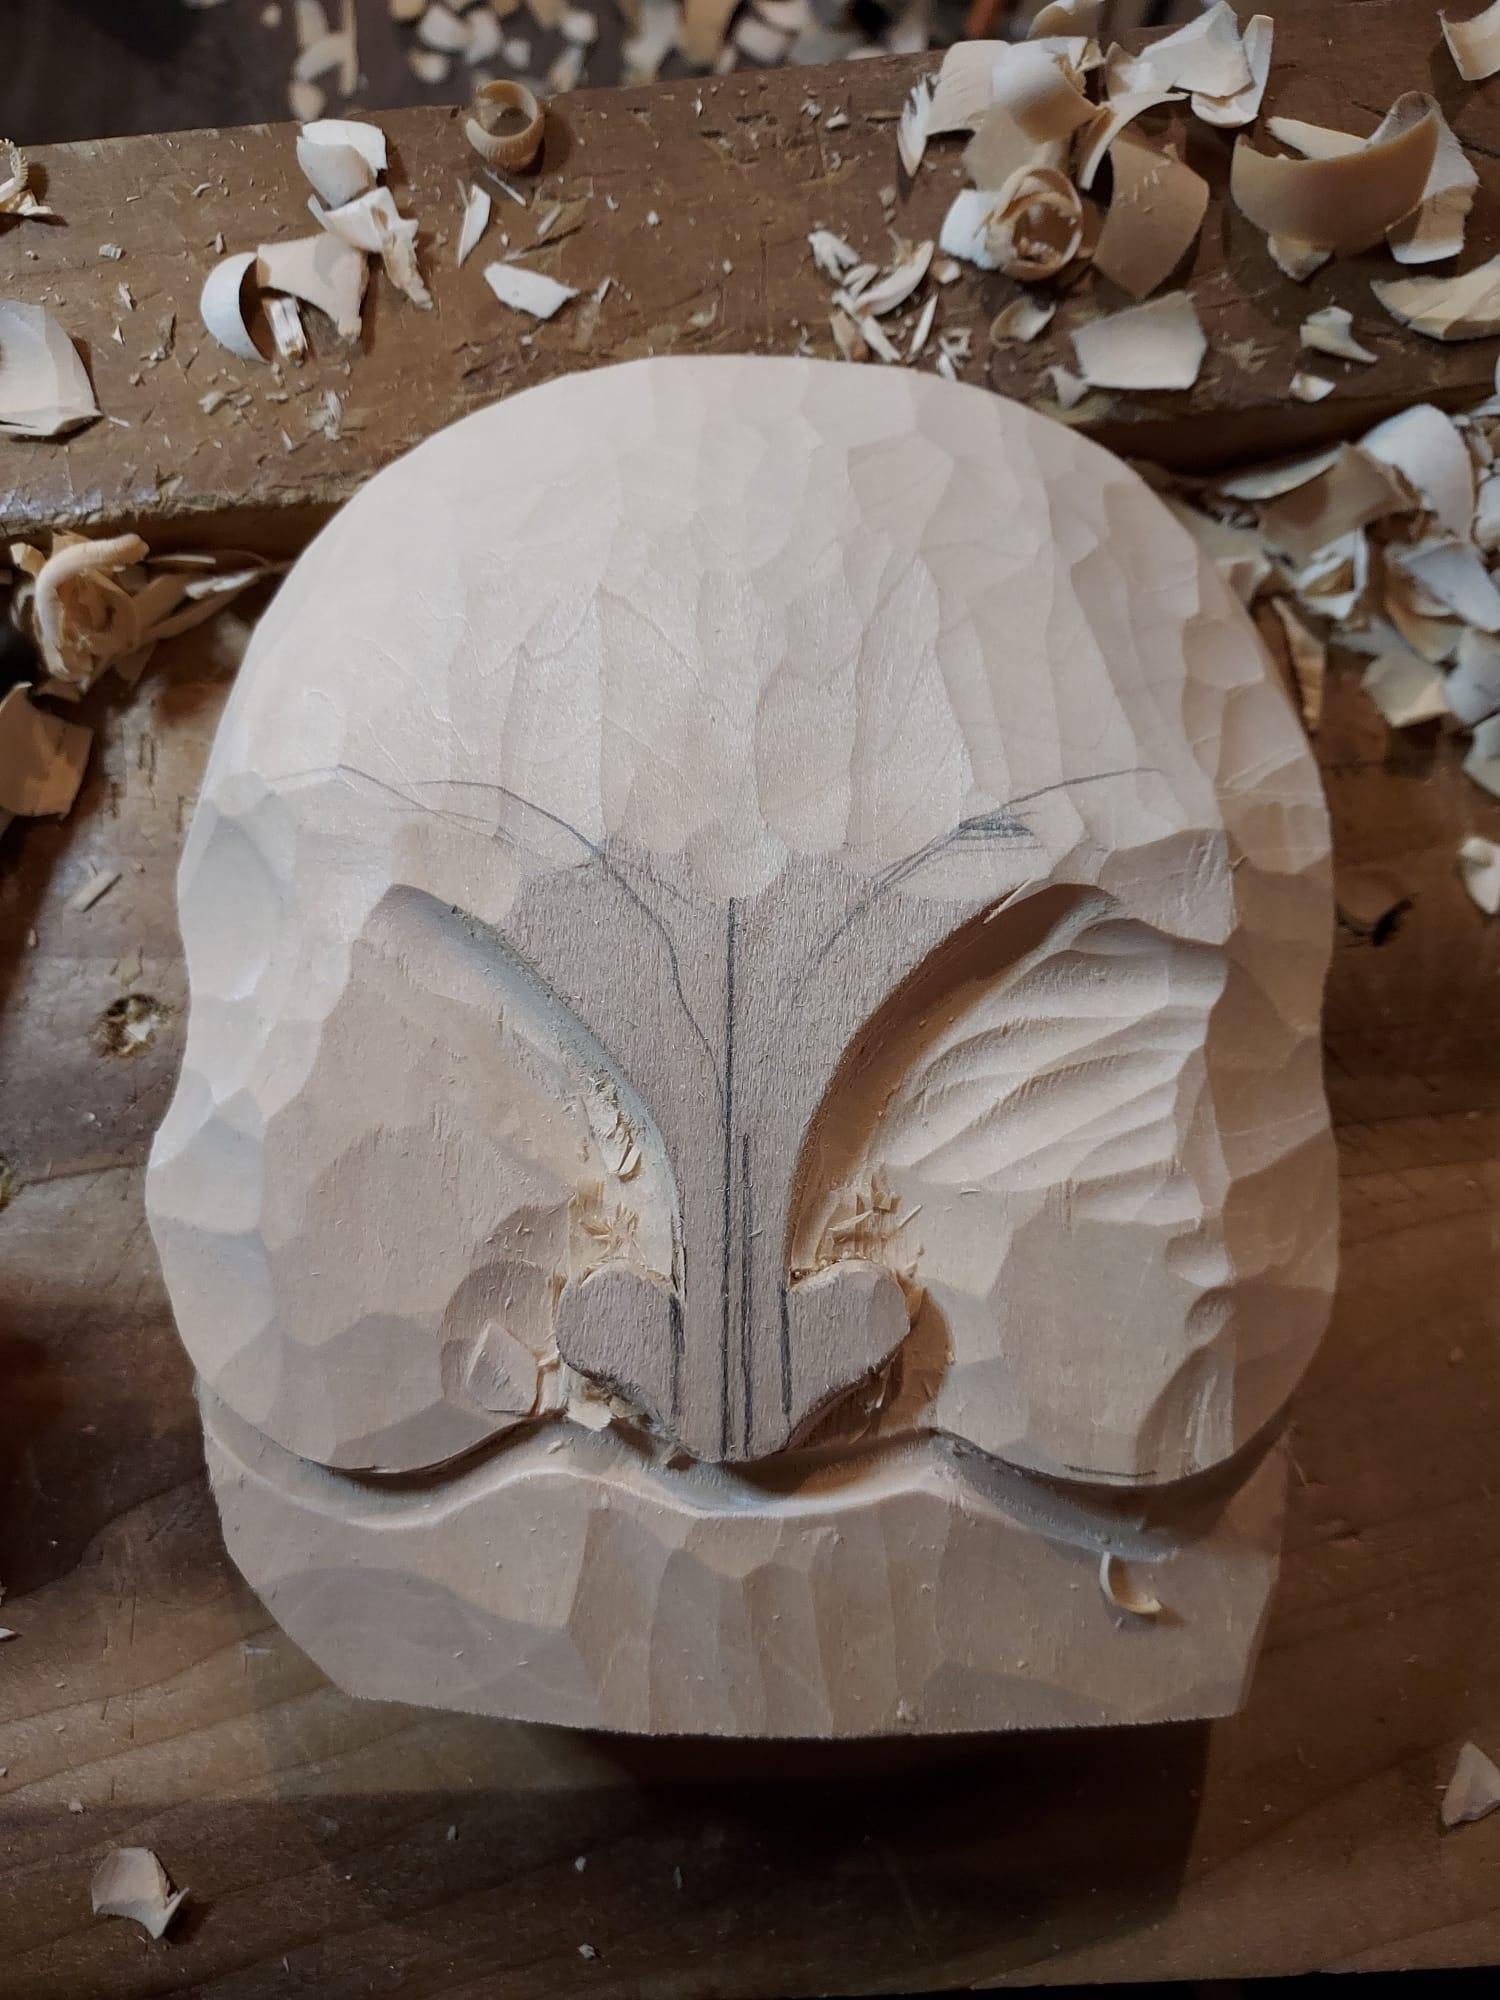
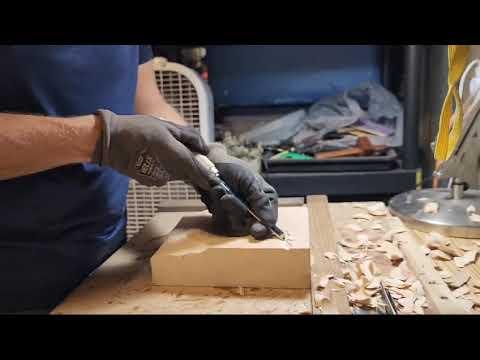
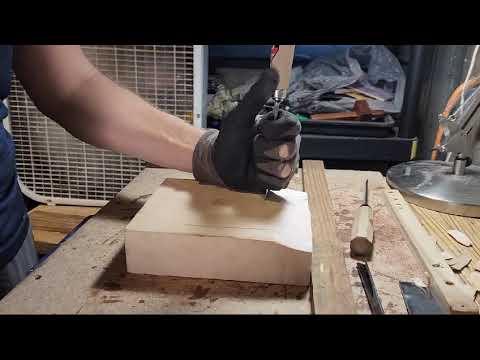
Now, to sculpt the piece, you want to first isolate the highest points. This will typically be the nose, cheeks, and round portions near the eyes. For almost all mask, remember that the tip of the nose is going to be the highest point of the face, followed by the nostrils and forehead, then the cheeks, then the lips and chin, etc. Follow your outlines for these features with either a v-gouge or veiner (see the next step on technique). This is to make sure that you know where to stop. You don't want to accidentally chop off the nose, while working on the forehead. As you can see, the deepest portions for mine are below the cheeks. This mask's nose is also almost flat, so there will not be much of a dip between its tip and the brow ridge. As we go along, we will refine these areas. A lot of the process is isolating depth,then refining.
Using the Gouges
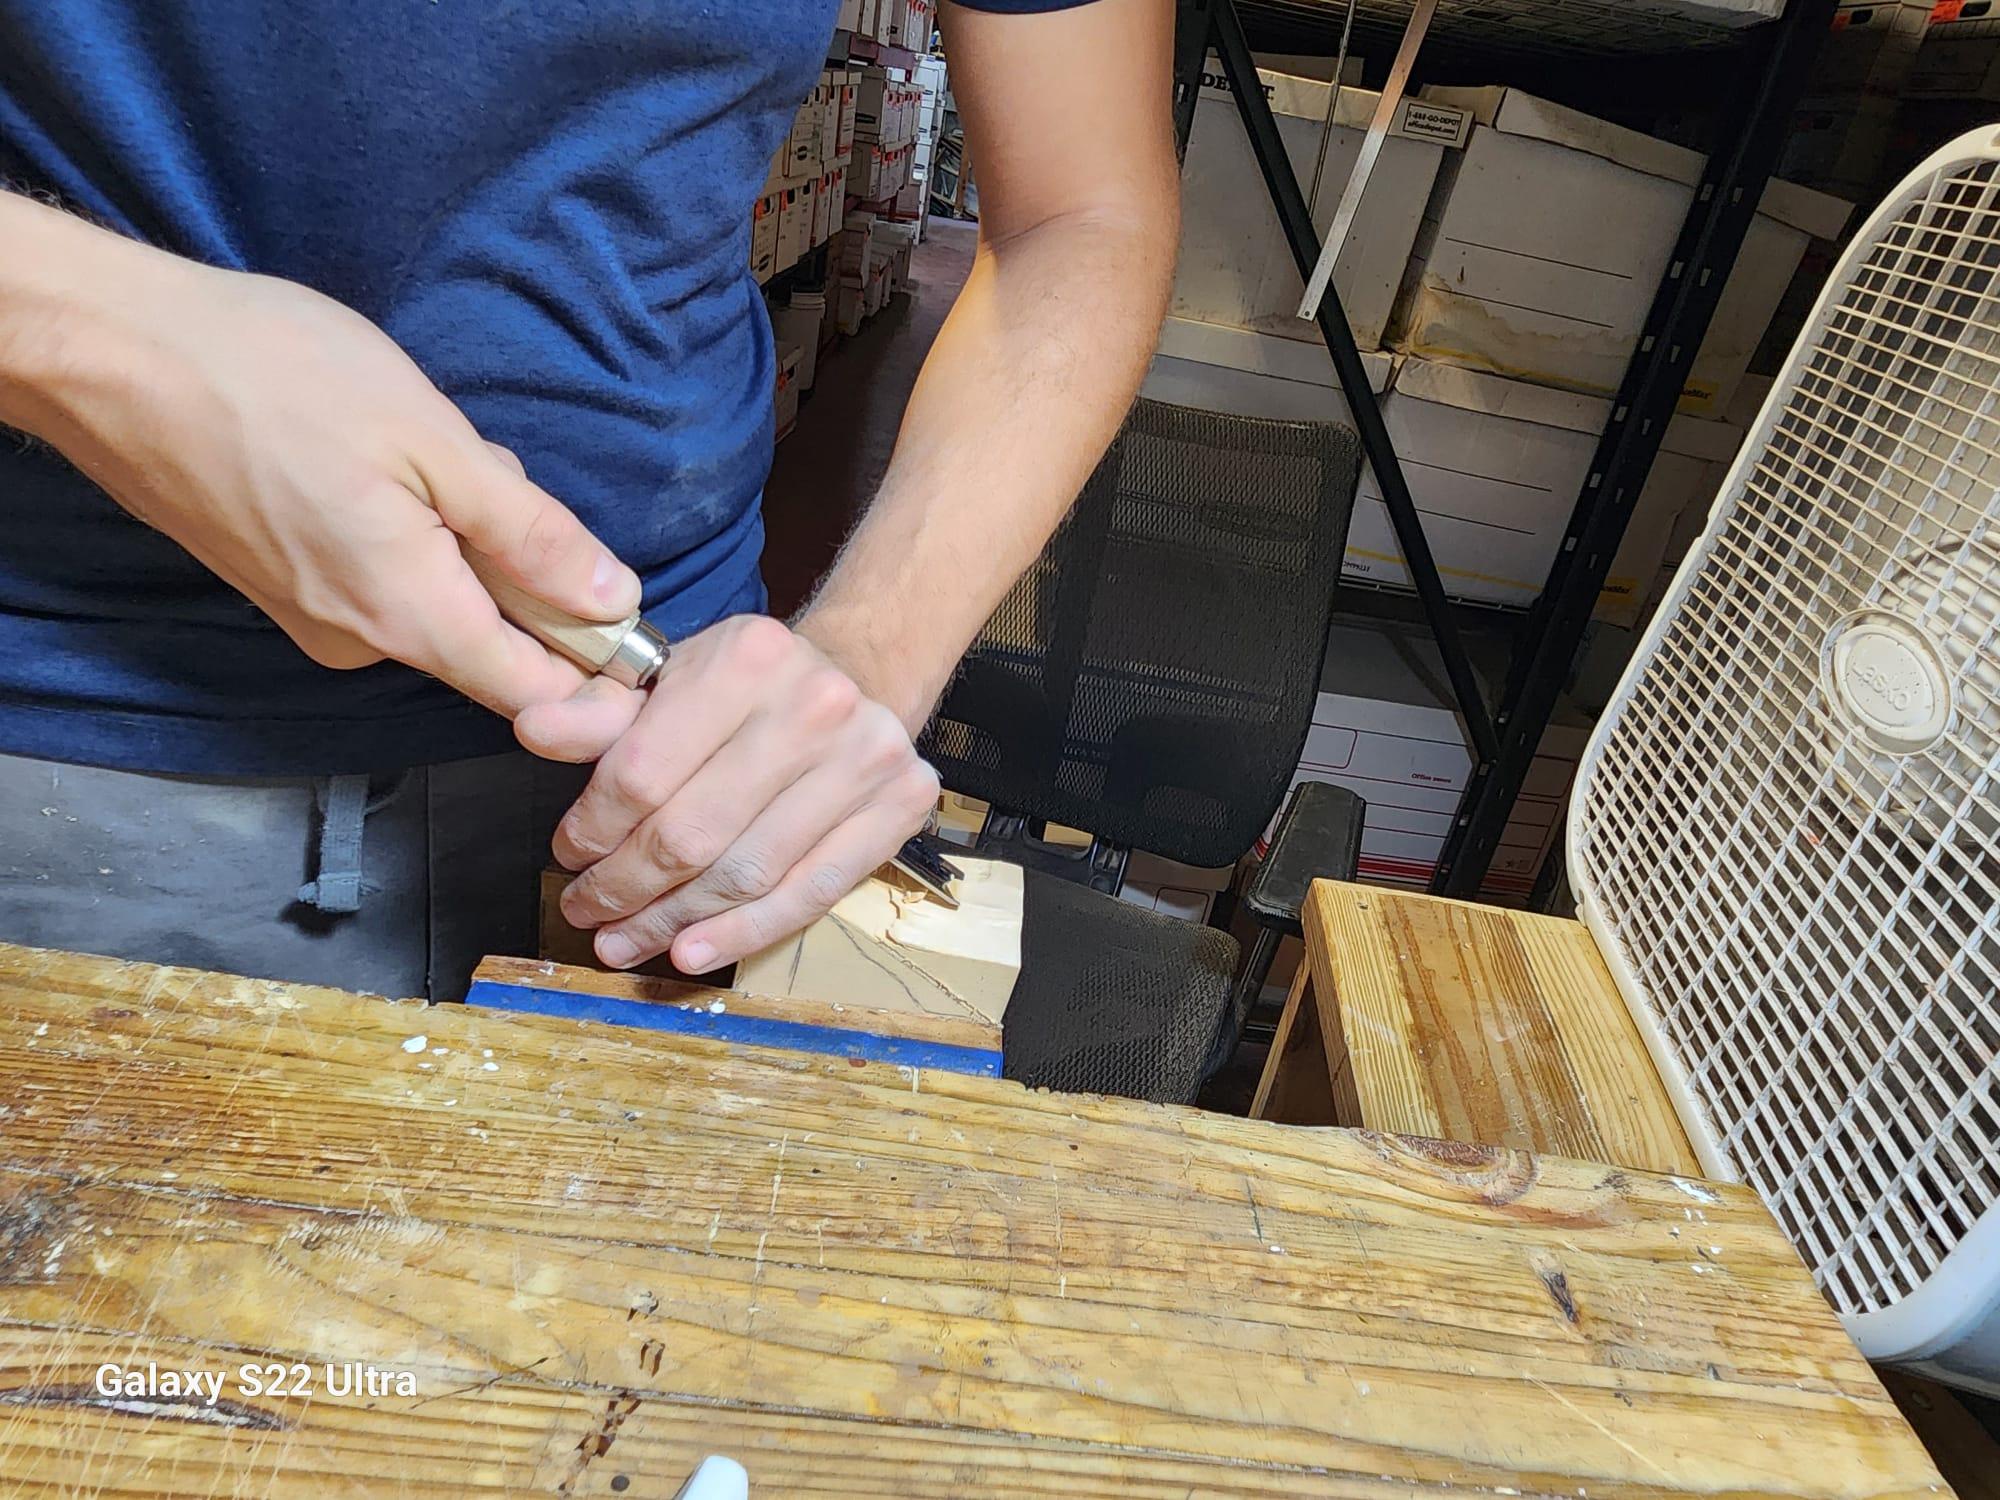
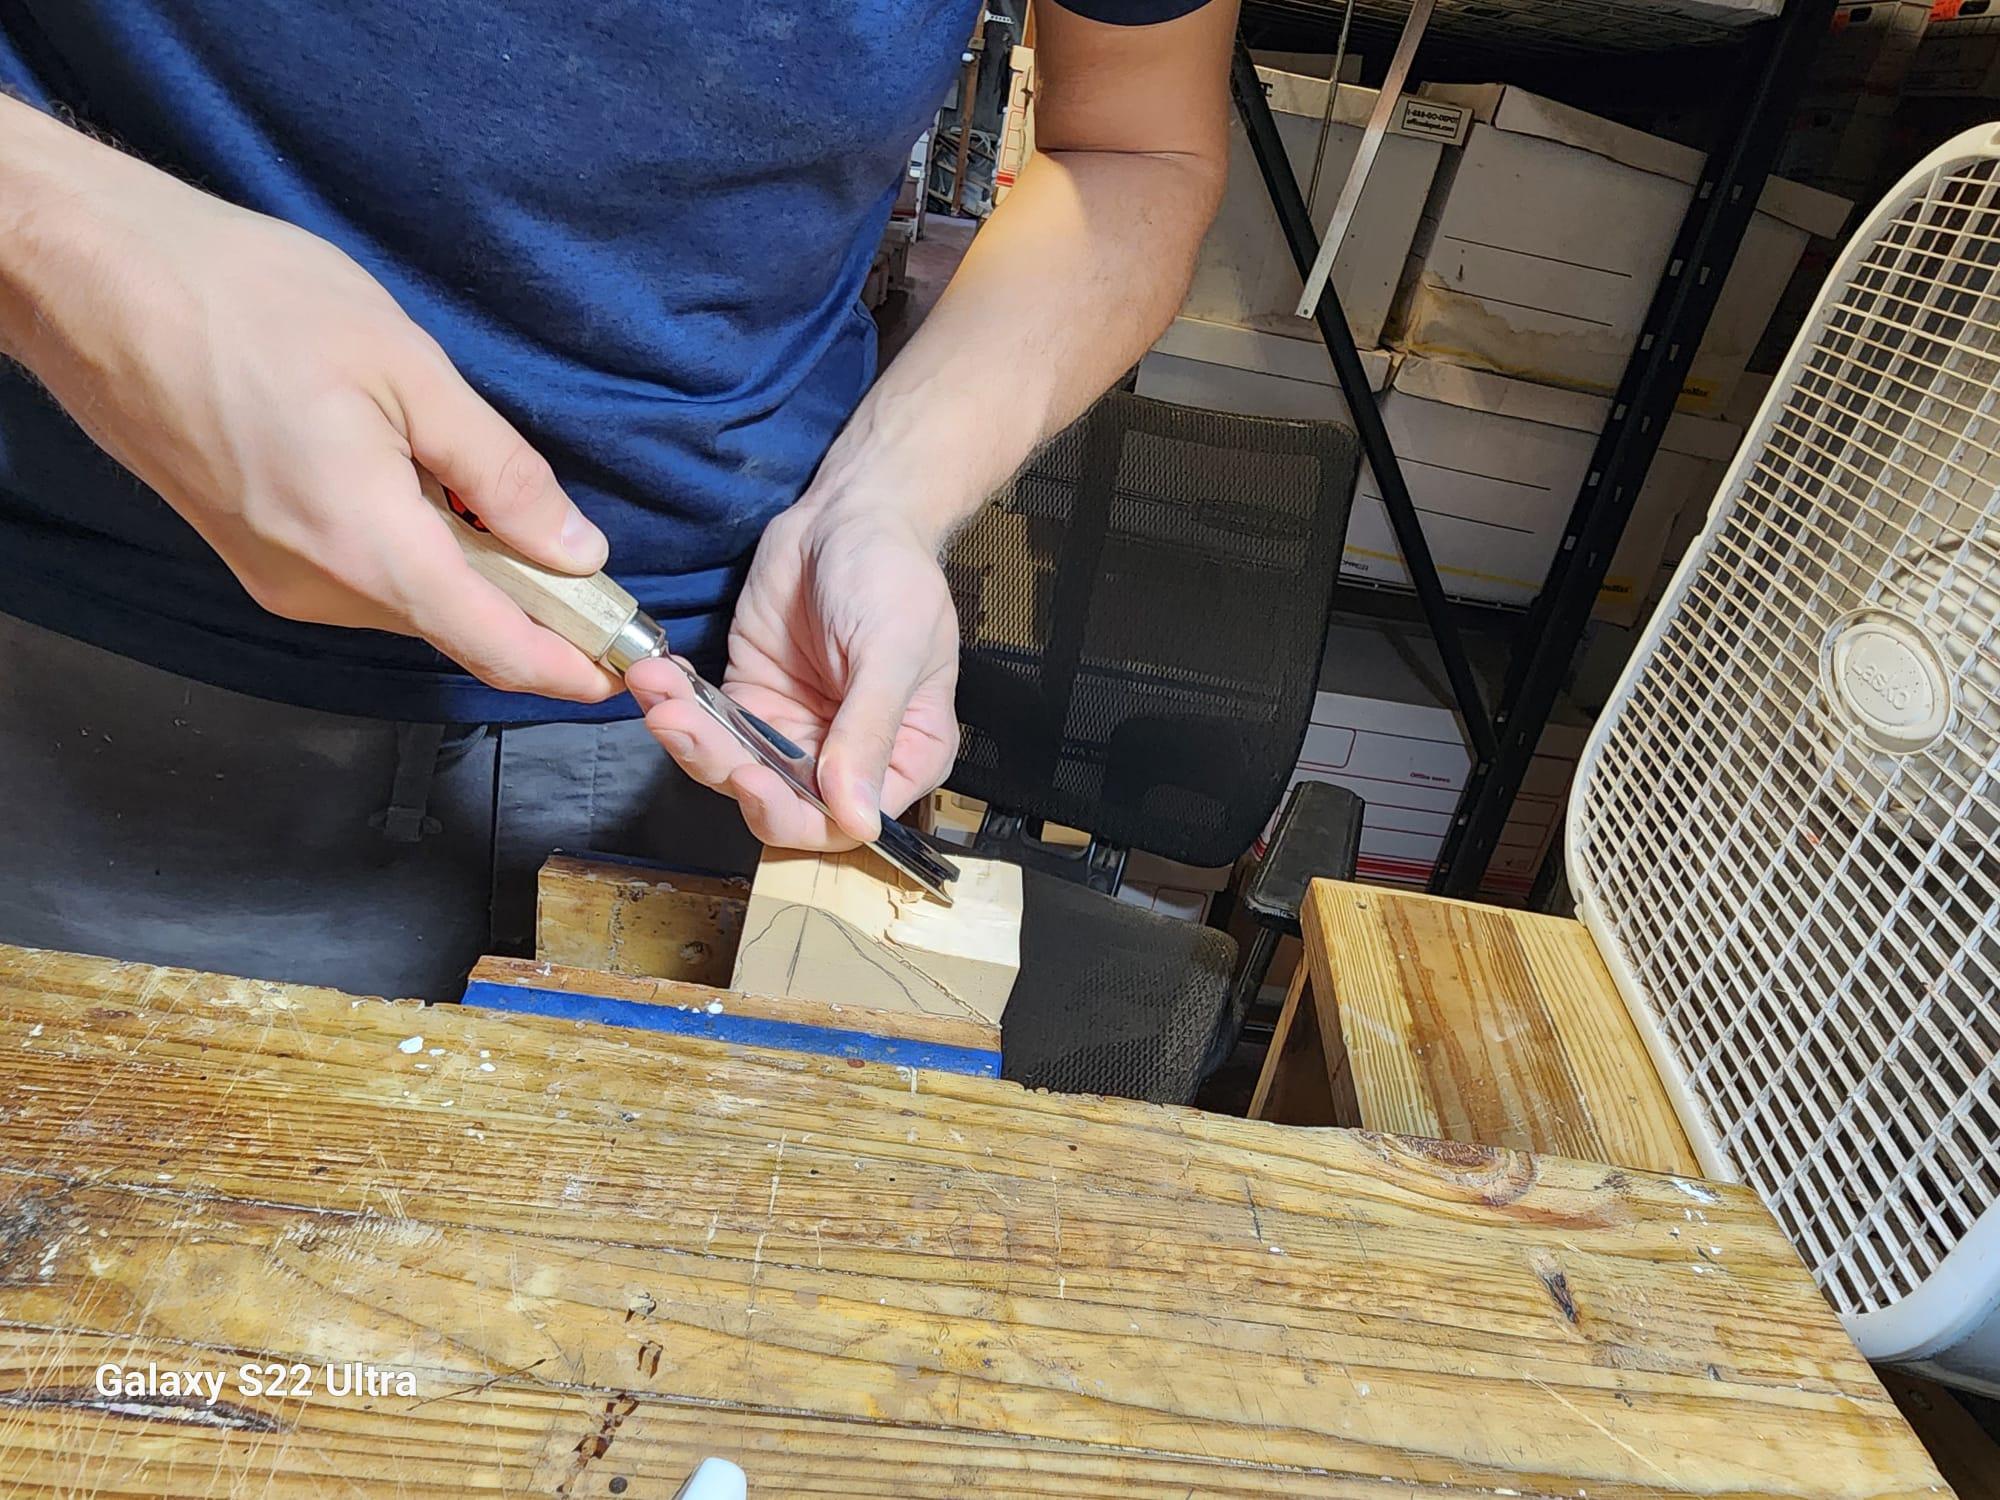
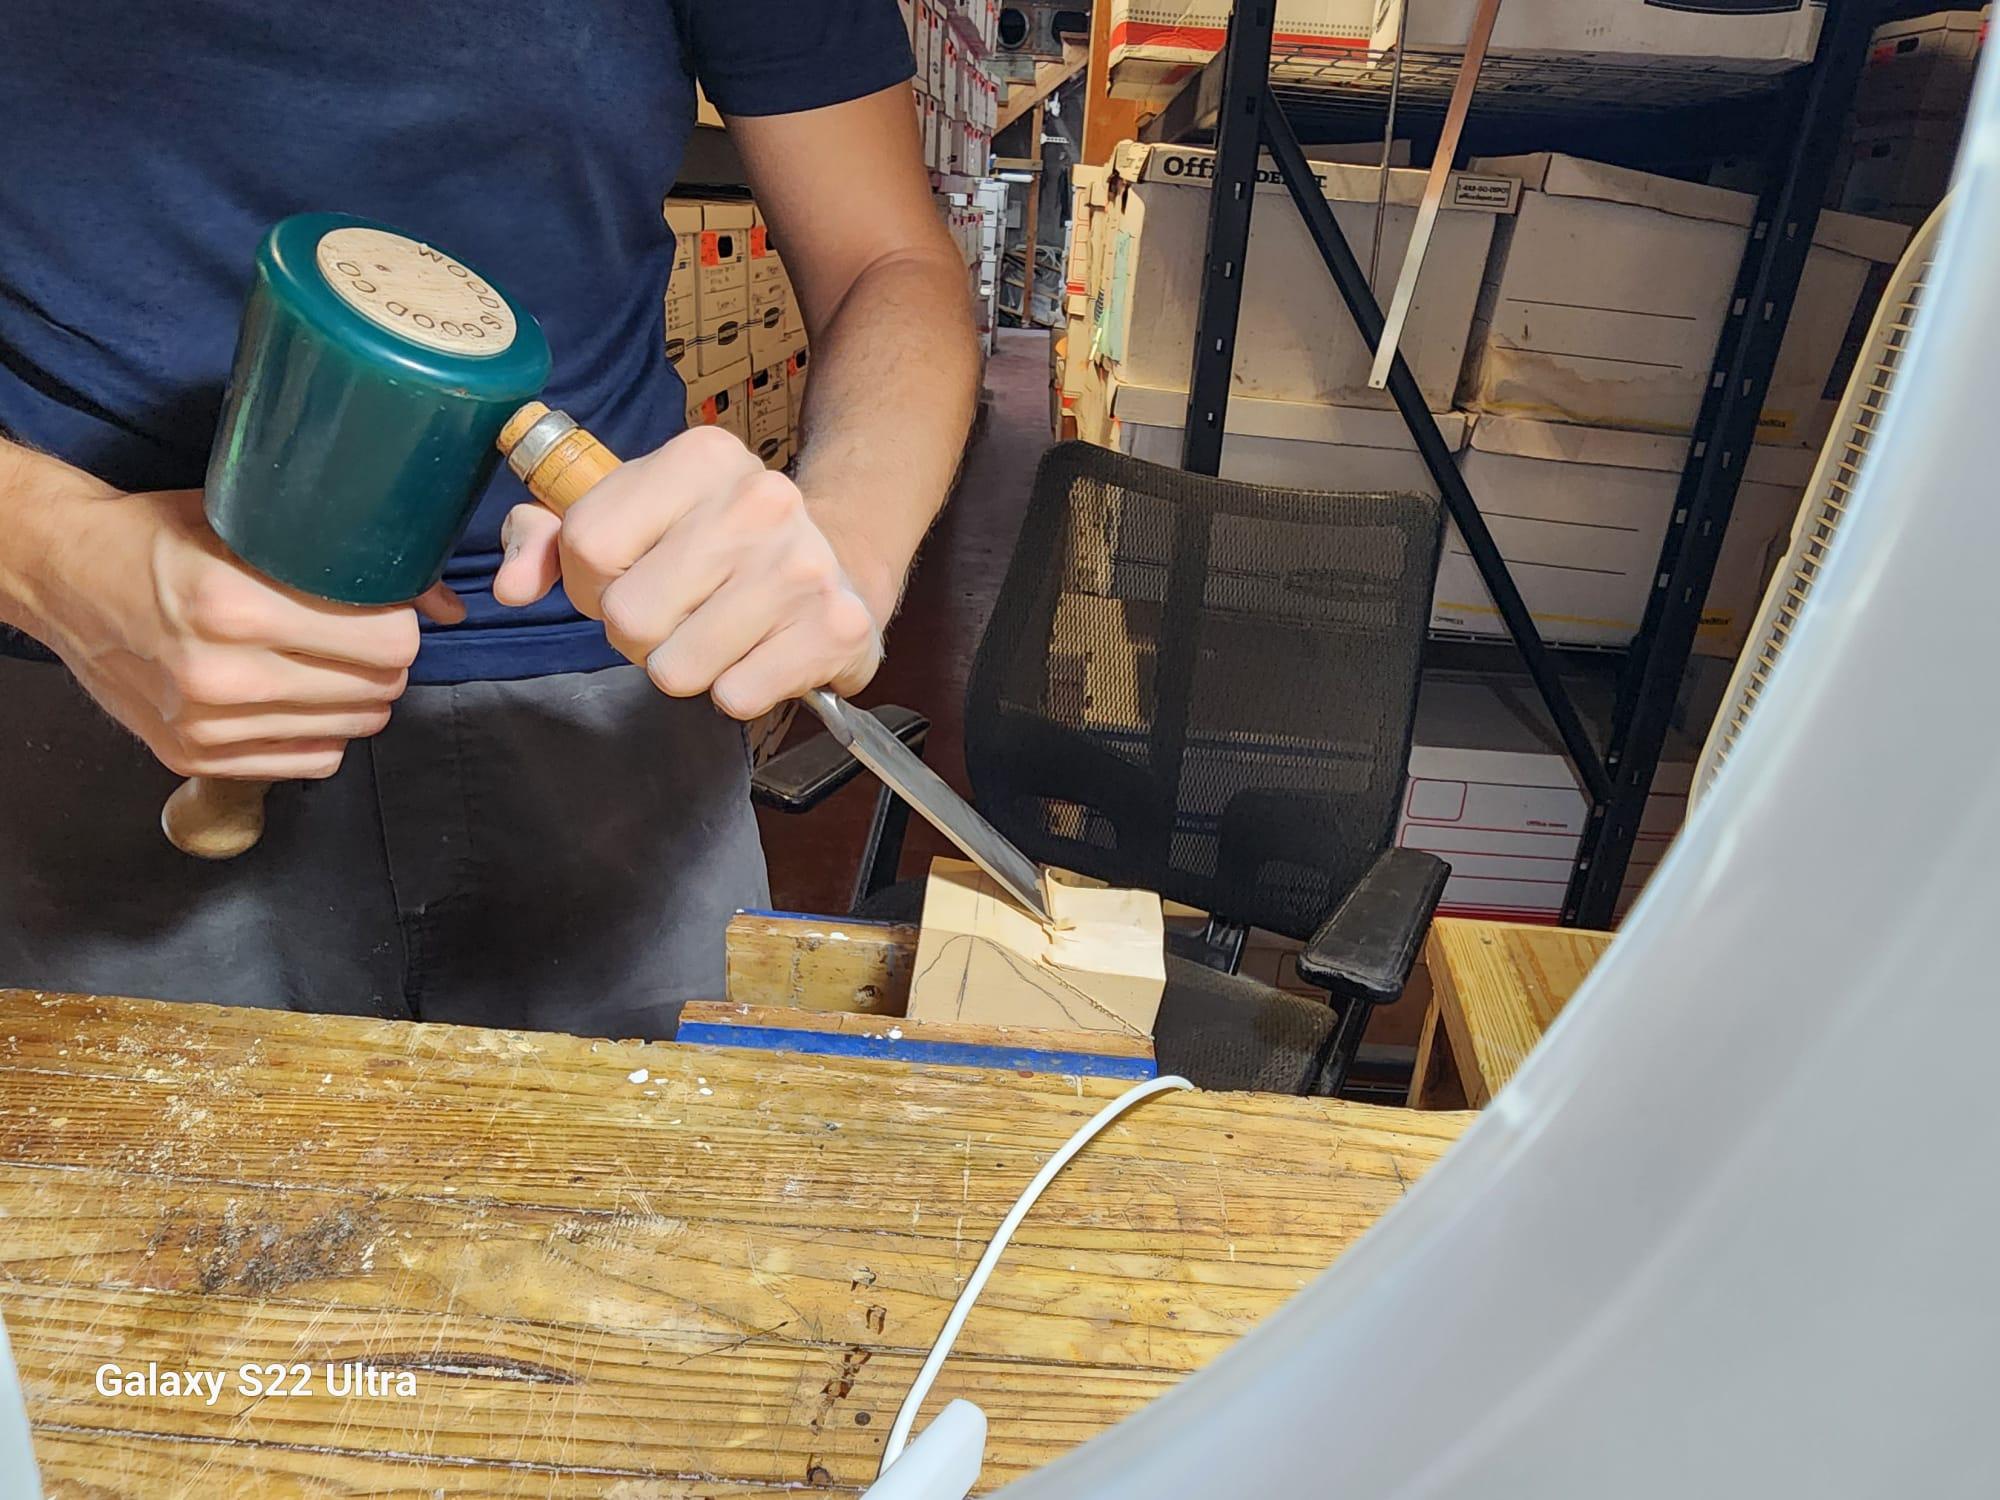
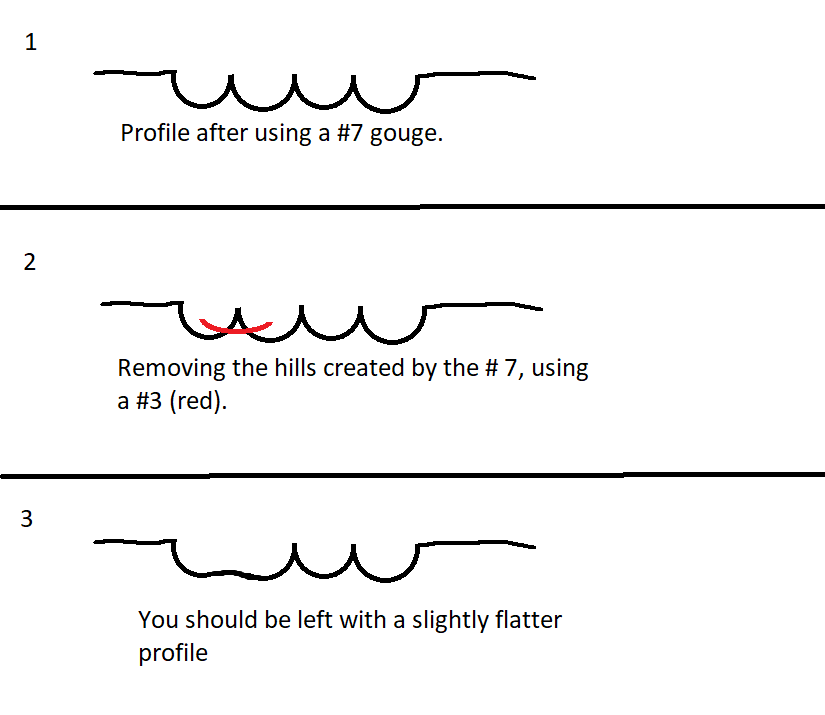
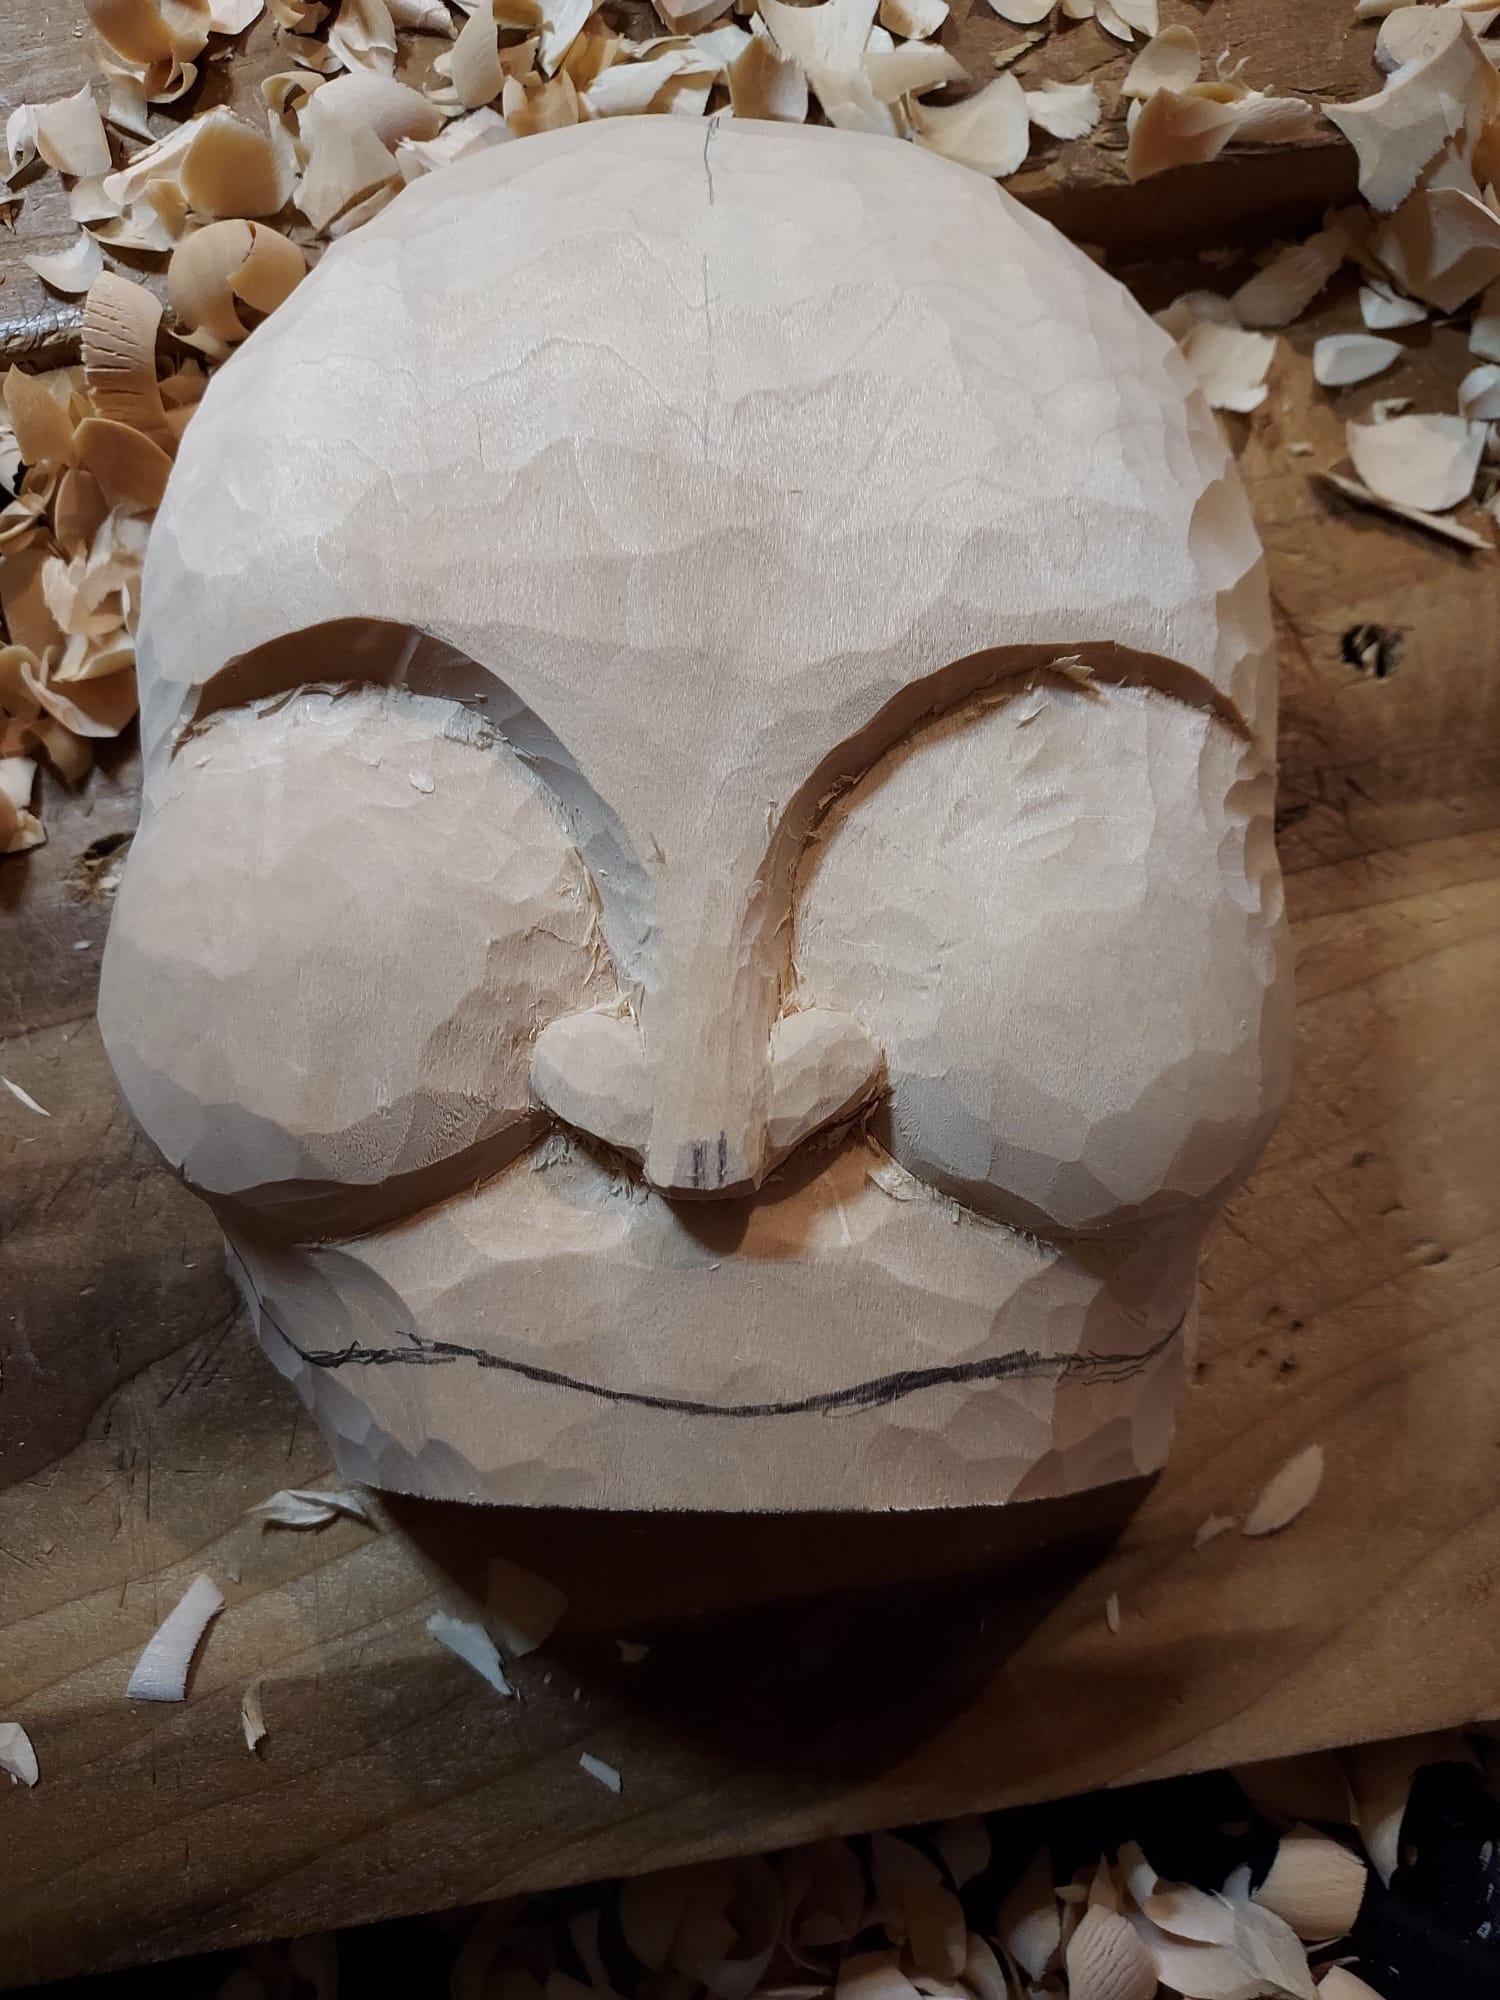
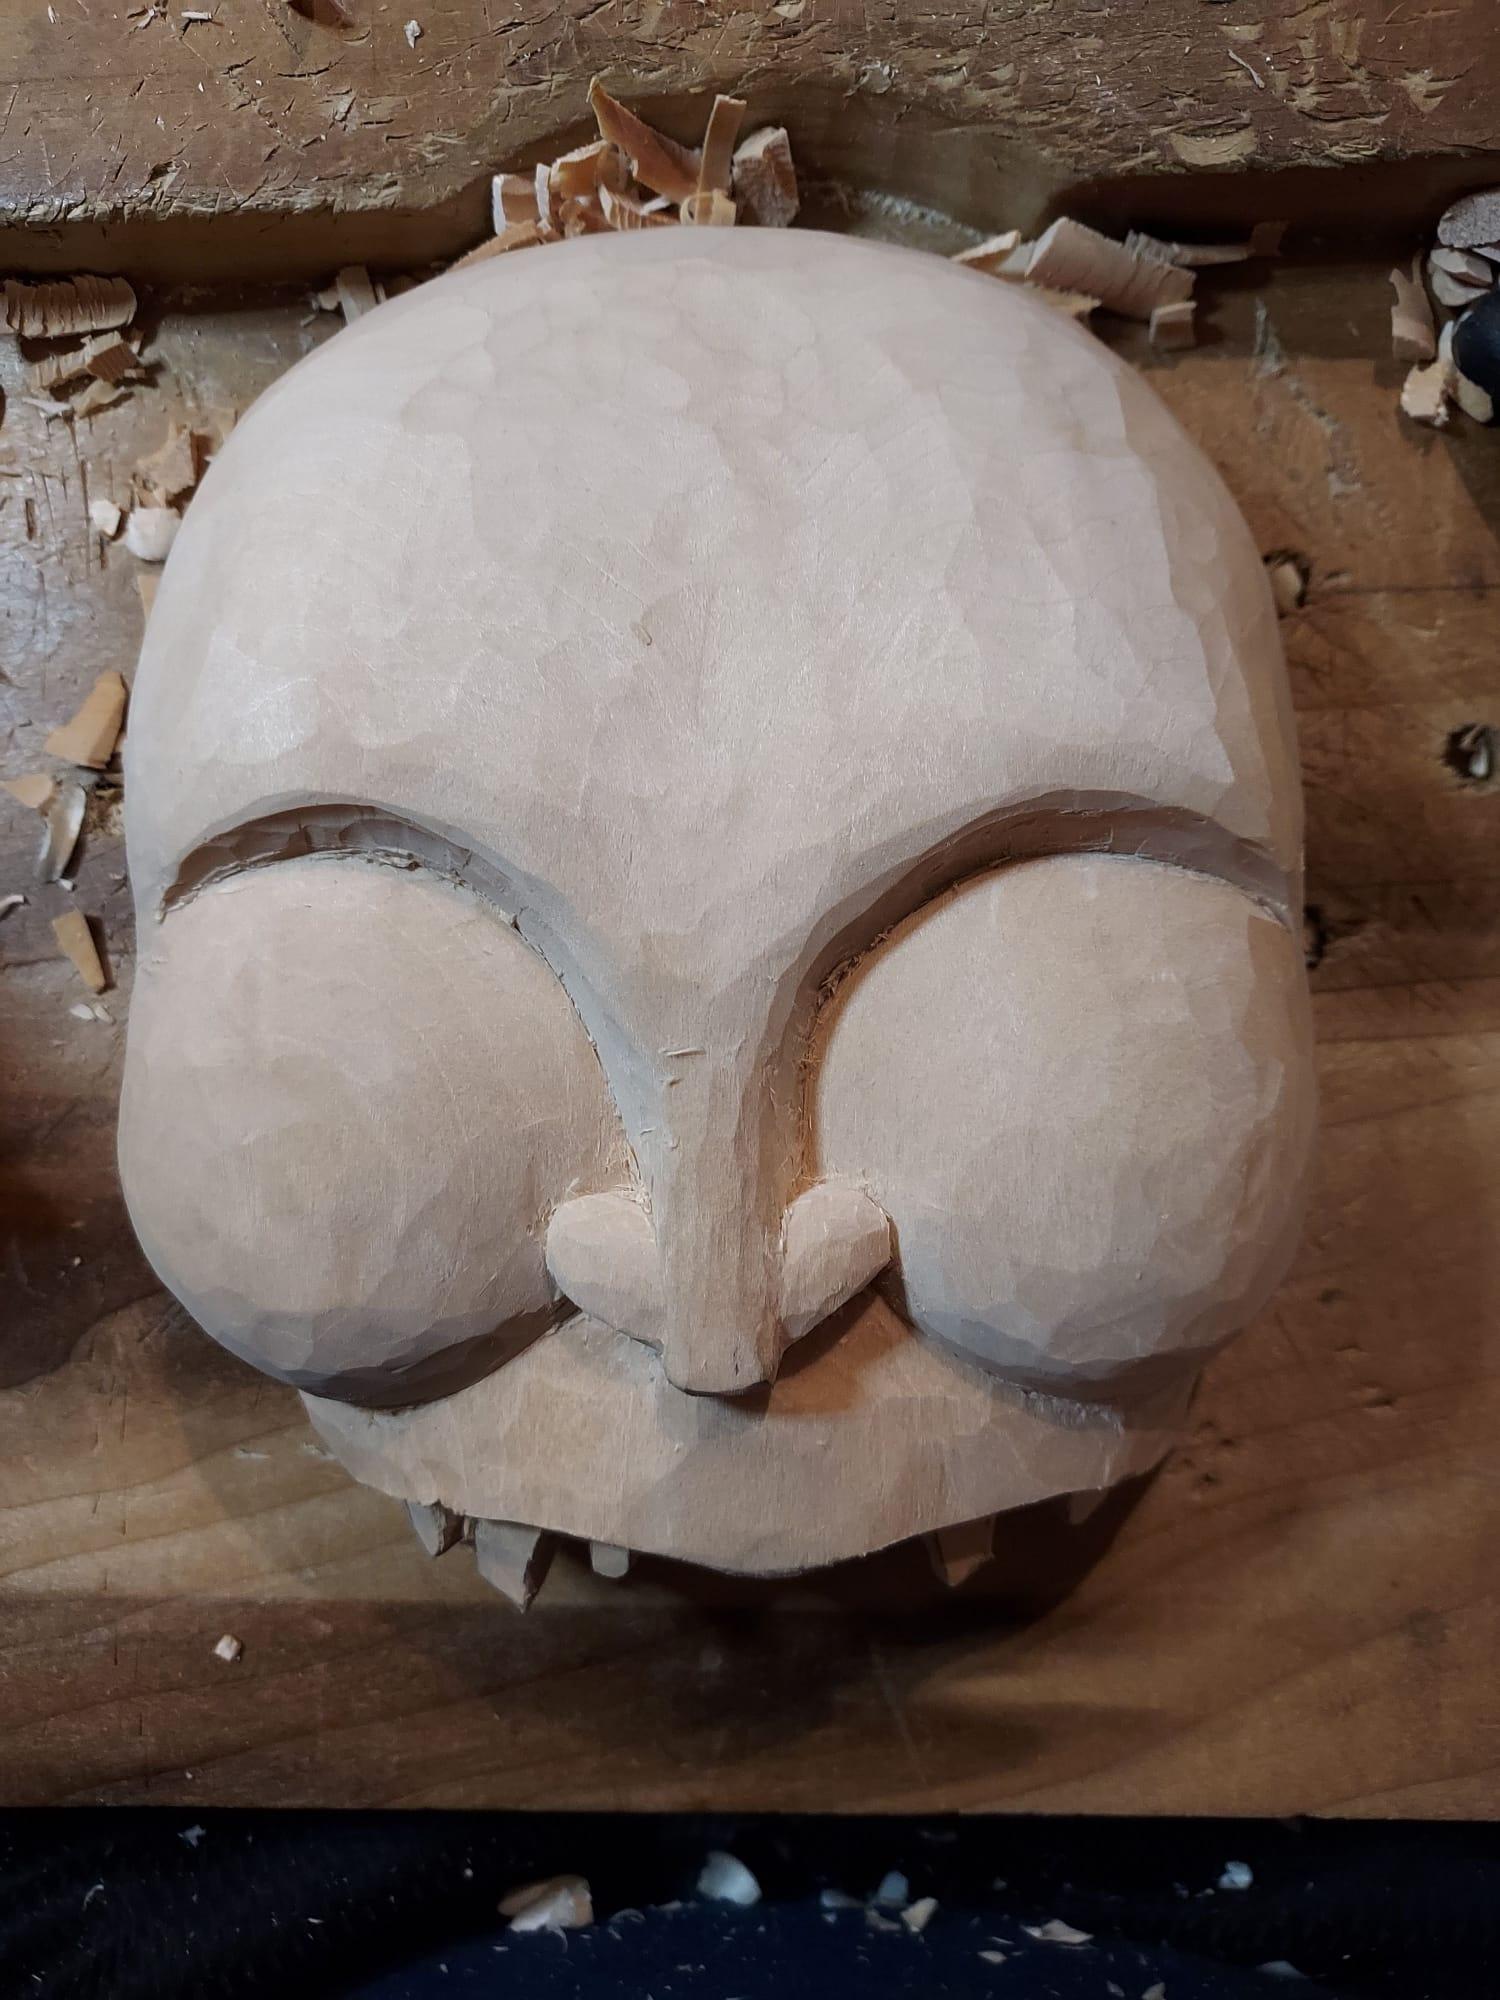
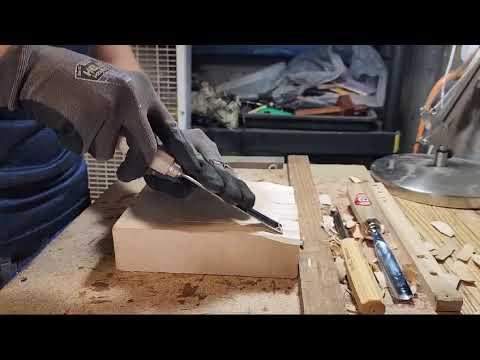
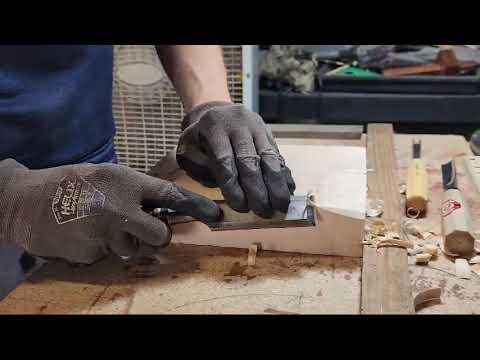
Once we establish our depth lines, we can begin removing the bulk of the material. We can start by using a chisel or a #7 gouge. We can begin by removing the sharp corners from the furthest edges, such as the top of the forehead. For round portion of the eye ridges (orbits), nostrils, and cheeks, hold the gouge straight up and press down with or use your mallet to gently tap. That way, we continue our isolated section further down. Be sure to use your pattern to keep making references. You will notice that the #7 creates quite the trench, we will use the #3 and chisel to clean these up, focus on the "hill" created by the #7. Bring this down even with the "valleys." Now, why wouldn't you just jump straight to using a #3? Well, you could, usually with the help of a mallet. But often times, flatter profiled gouges have a harder time removing bulk. The greater the sweep, the deeper it can take out. Inversely, the higher sweeps can sometimes dig too deeply. This is why we use all three, they are effectively a gentle magnitude from each other. Simply repeat this process as you go.
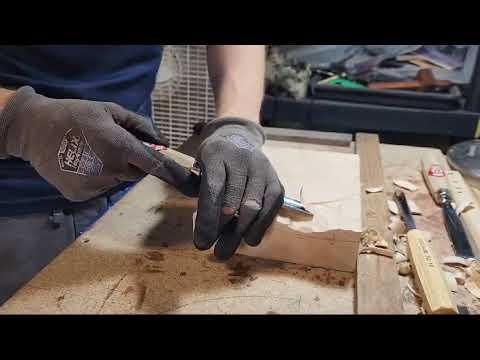
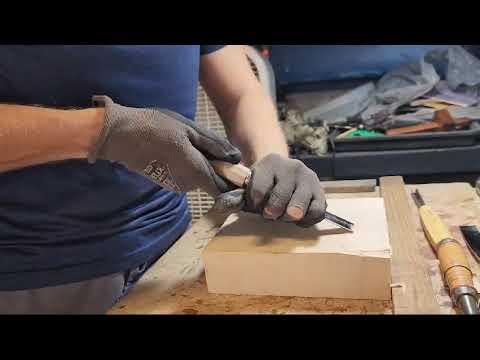
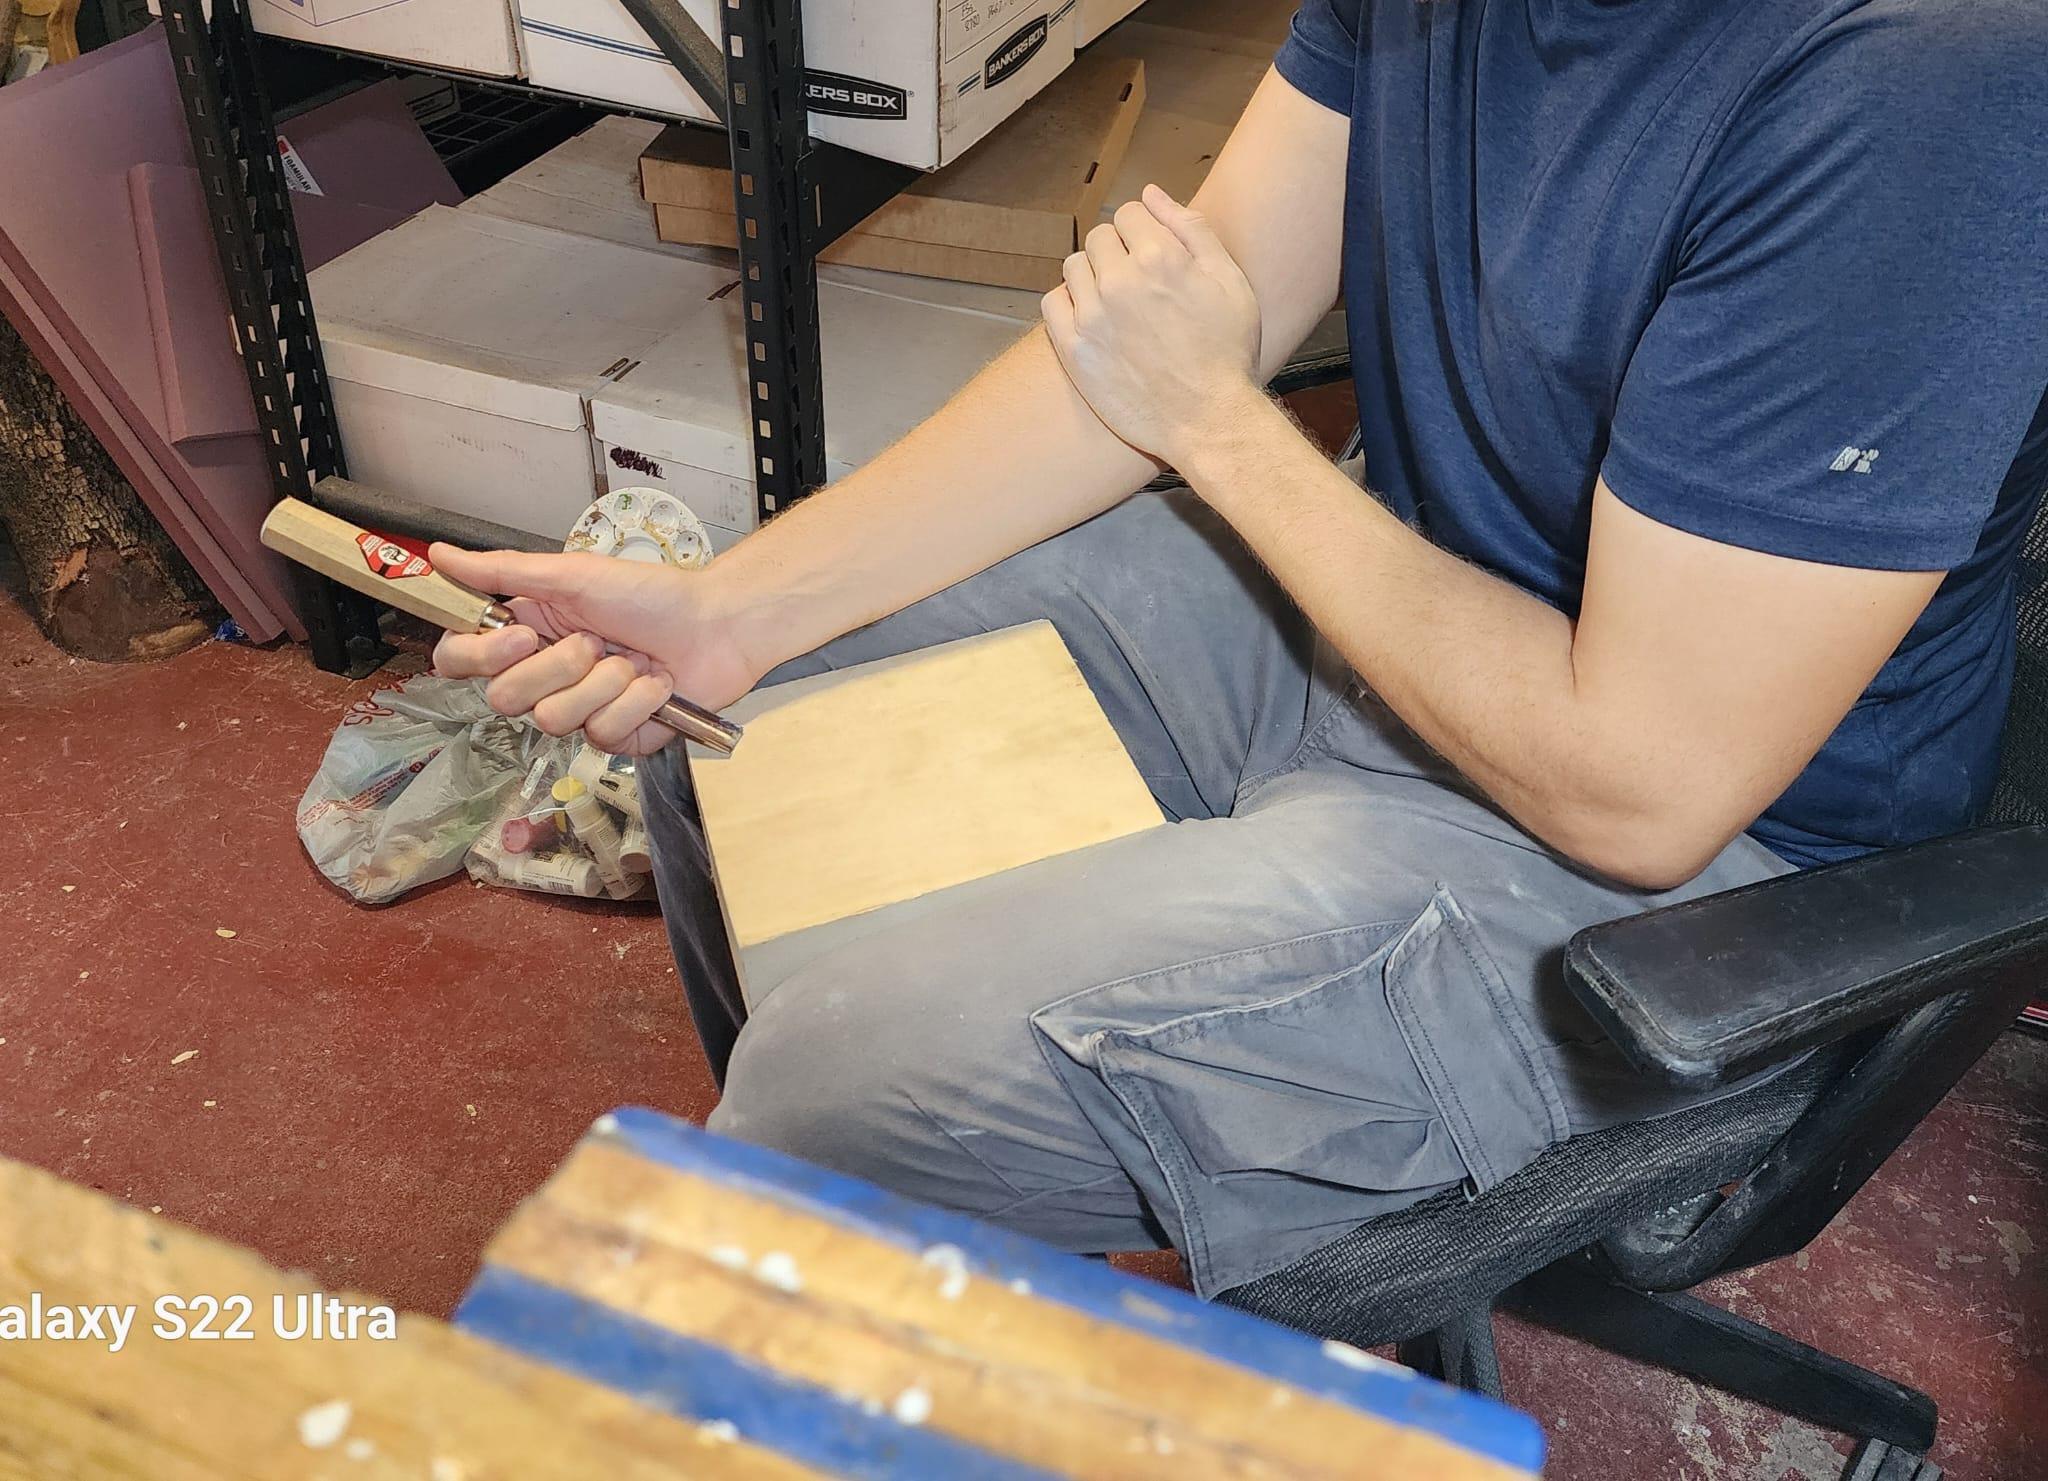
There are two basic methods for using a gouge. Push and mallet. You may start with the mallet, giving gentle but firm taps to coax the blade through the wood. But eventually you will rely mostly on pushing with both hands. However, you can forgo the mallet completely if the wood is soft enough and your tools sharp enough. The first three photos demonstrate basic grips with and without a mallet.
- To use the mallet, simply grip the wooden handle with your off hand and the mallet in your dominate. Position the gouge/chisel with the bevel of the blade facing down. Angle your gouge the way you'd like it go, then gently, but firmly, strike the back of the handle with the mallet. Try not to go at too steep of an angle, you don't want embed the blade. Keep tapping at roughly the same angle and drive the gouge along its path. Repeat this process next to the trench you have made, creating several trenches down to a depth that you want.
- Push method. With your off hand, grip the shaft of the blade firmly. Grip the handle with your dominate hand or put your palm over the back of the handle. Your dominate hand will force the gouge, your off hand drives it. Simply push along the path you want to go. For deeper gouging, use your body weight to slowly push behind the piece. Be careful, shallow cuts near the edges can slip.
Do not pry with your gouge - a few of my videos you may notice that I will lever and flick with my gouge. Just know that the chips of wood at this point are basically free from the piece. I do not, however, use the gouge to pry pieces out; this can easily damage your edge.
Don't forget to strop your gouges often. Keep those tools sharp. A rule of thumb, strop a tool for every 30 minutes of work.
Paring with a chisel - Paring is great technique at several points during the process of carving. It can be used to make very thin cuts for shaping, refining, and cleaning. The grip will be similar to the push method using a gouge. Grip the handle with your dominate hand, but this time use your thumb close to the blades edge to pin it flat to your piece. Or, pinch the blade shaft with your index finger and thumb; using them as a brake while you drive the chisel with the other hand. With a gentle force, push forward removing thin chips. You can also skew the blade slightly and drive it at a gentle angle. This should then slice a bit of wood off, similar to a knife.
Refining and Carving the Reverse
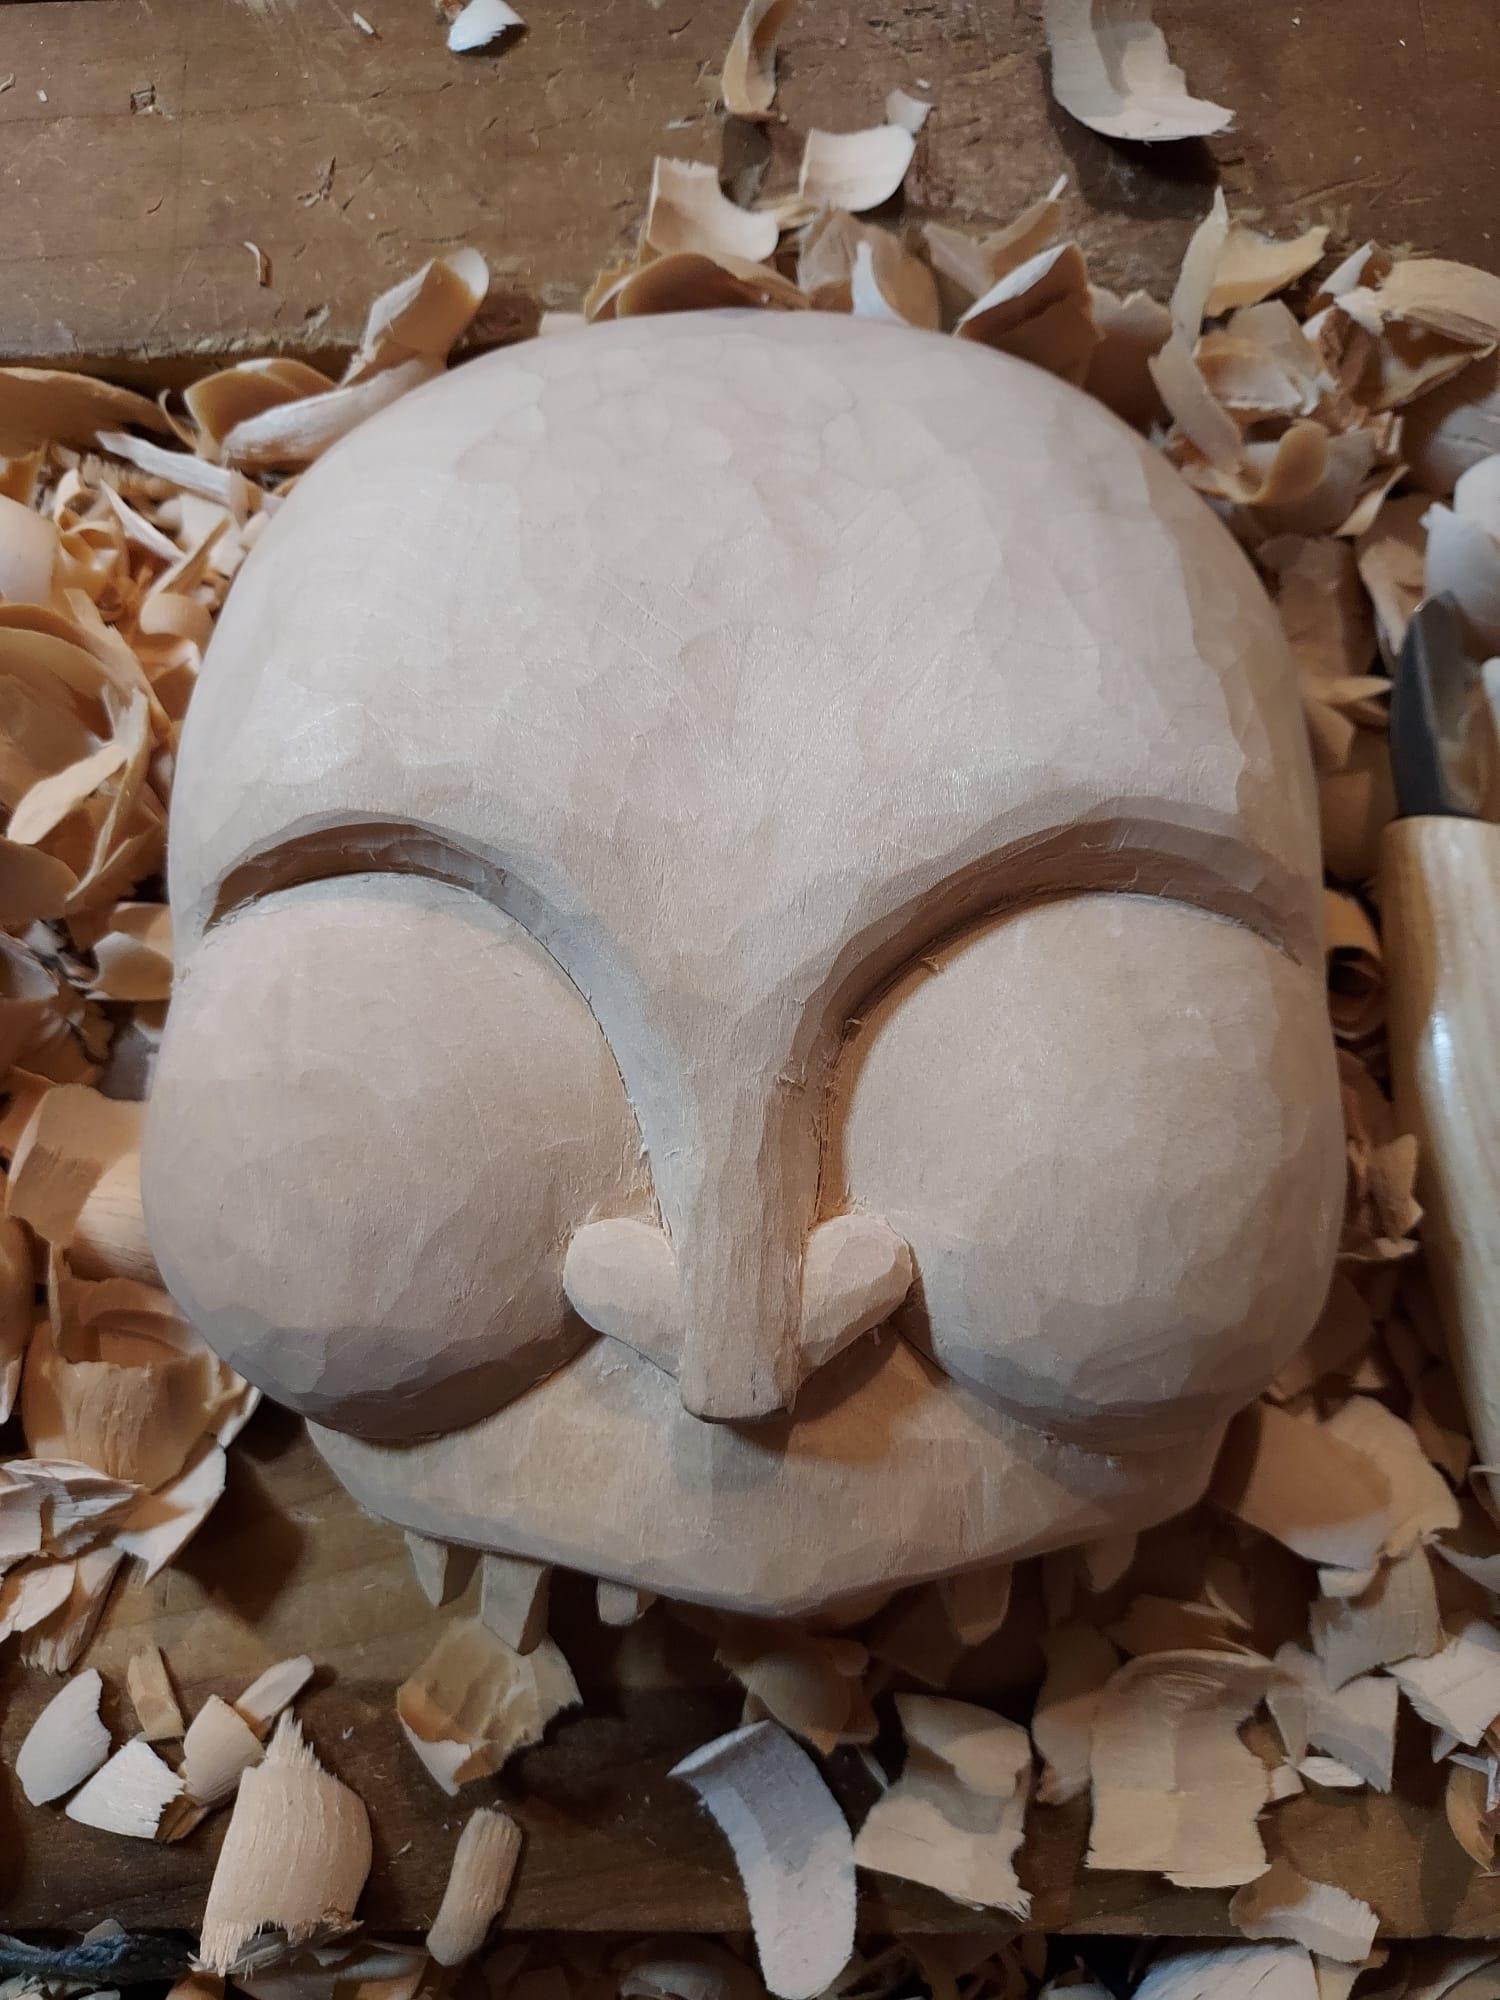
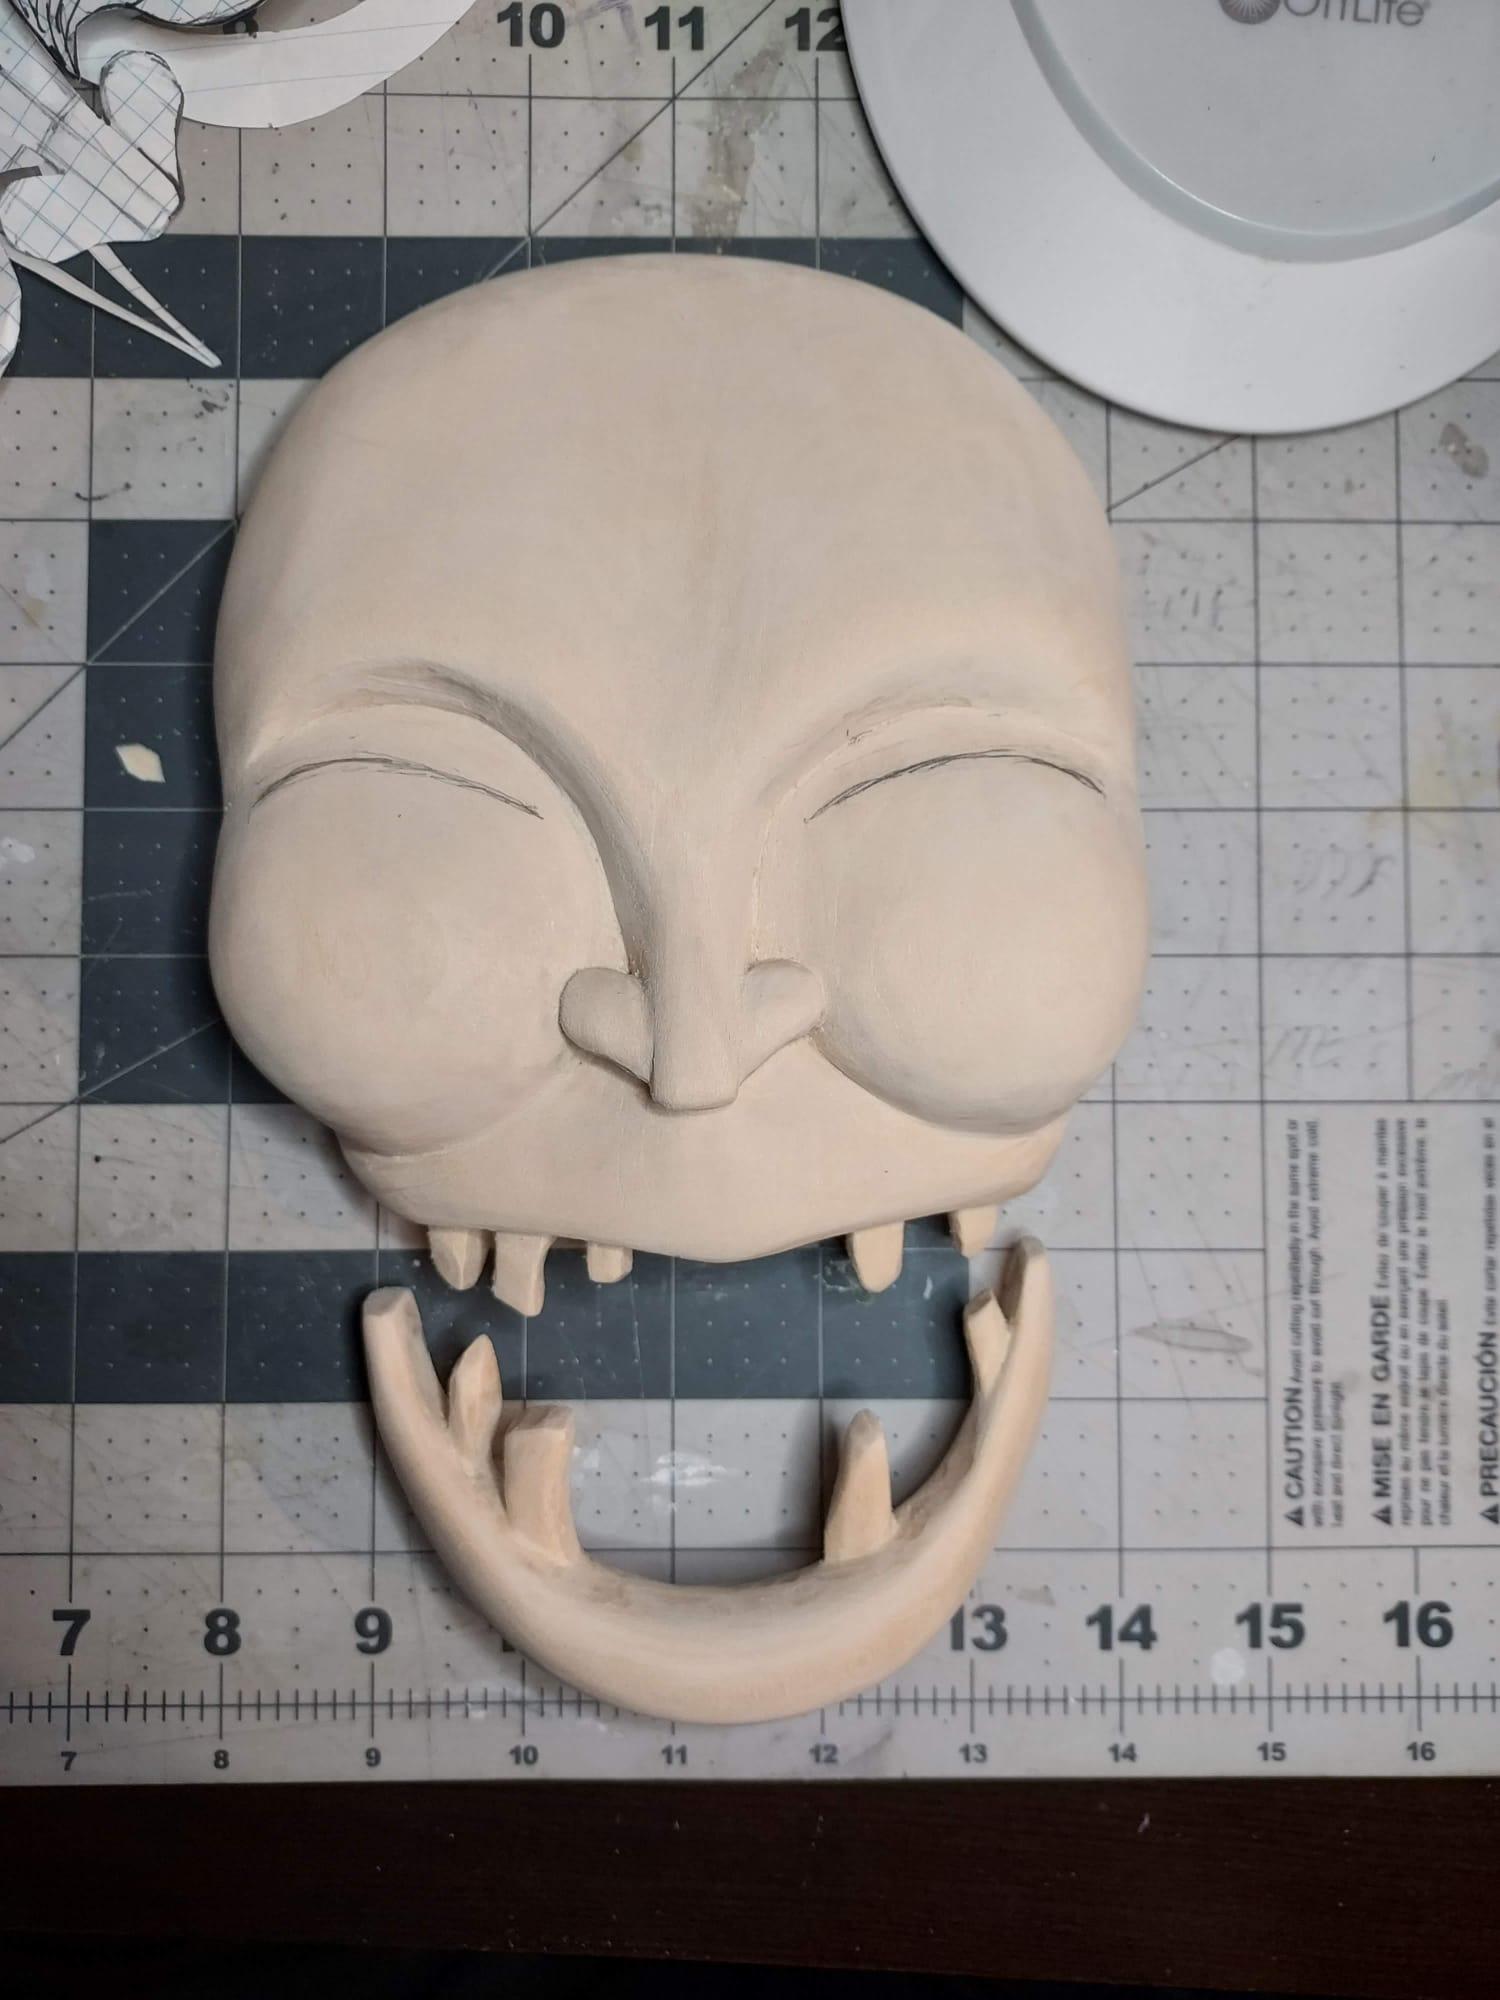
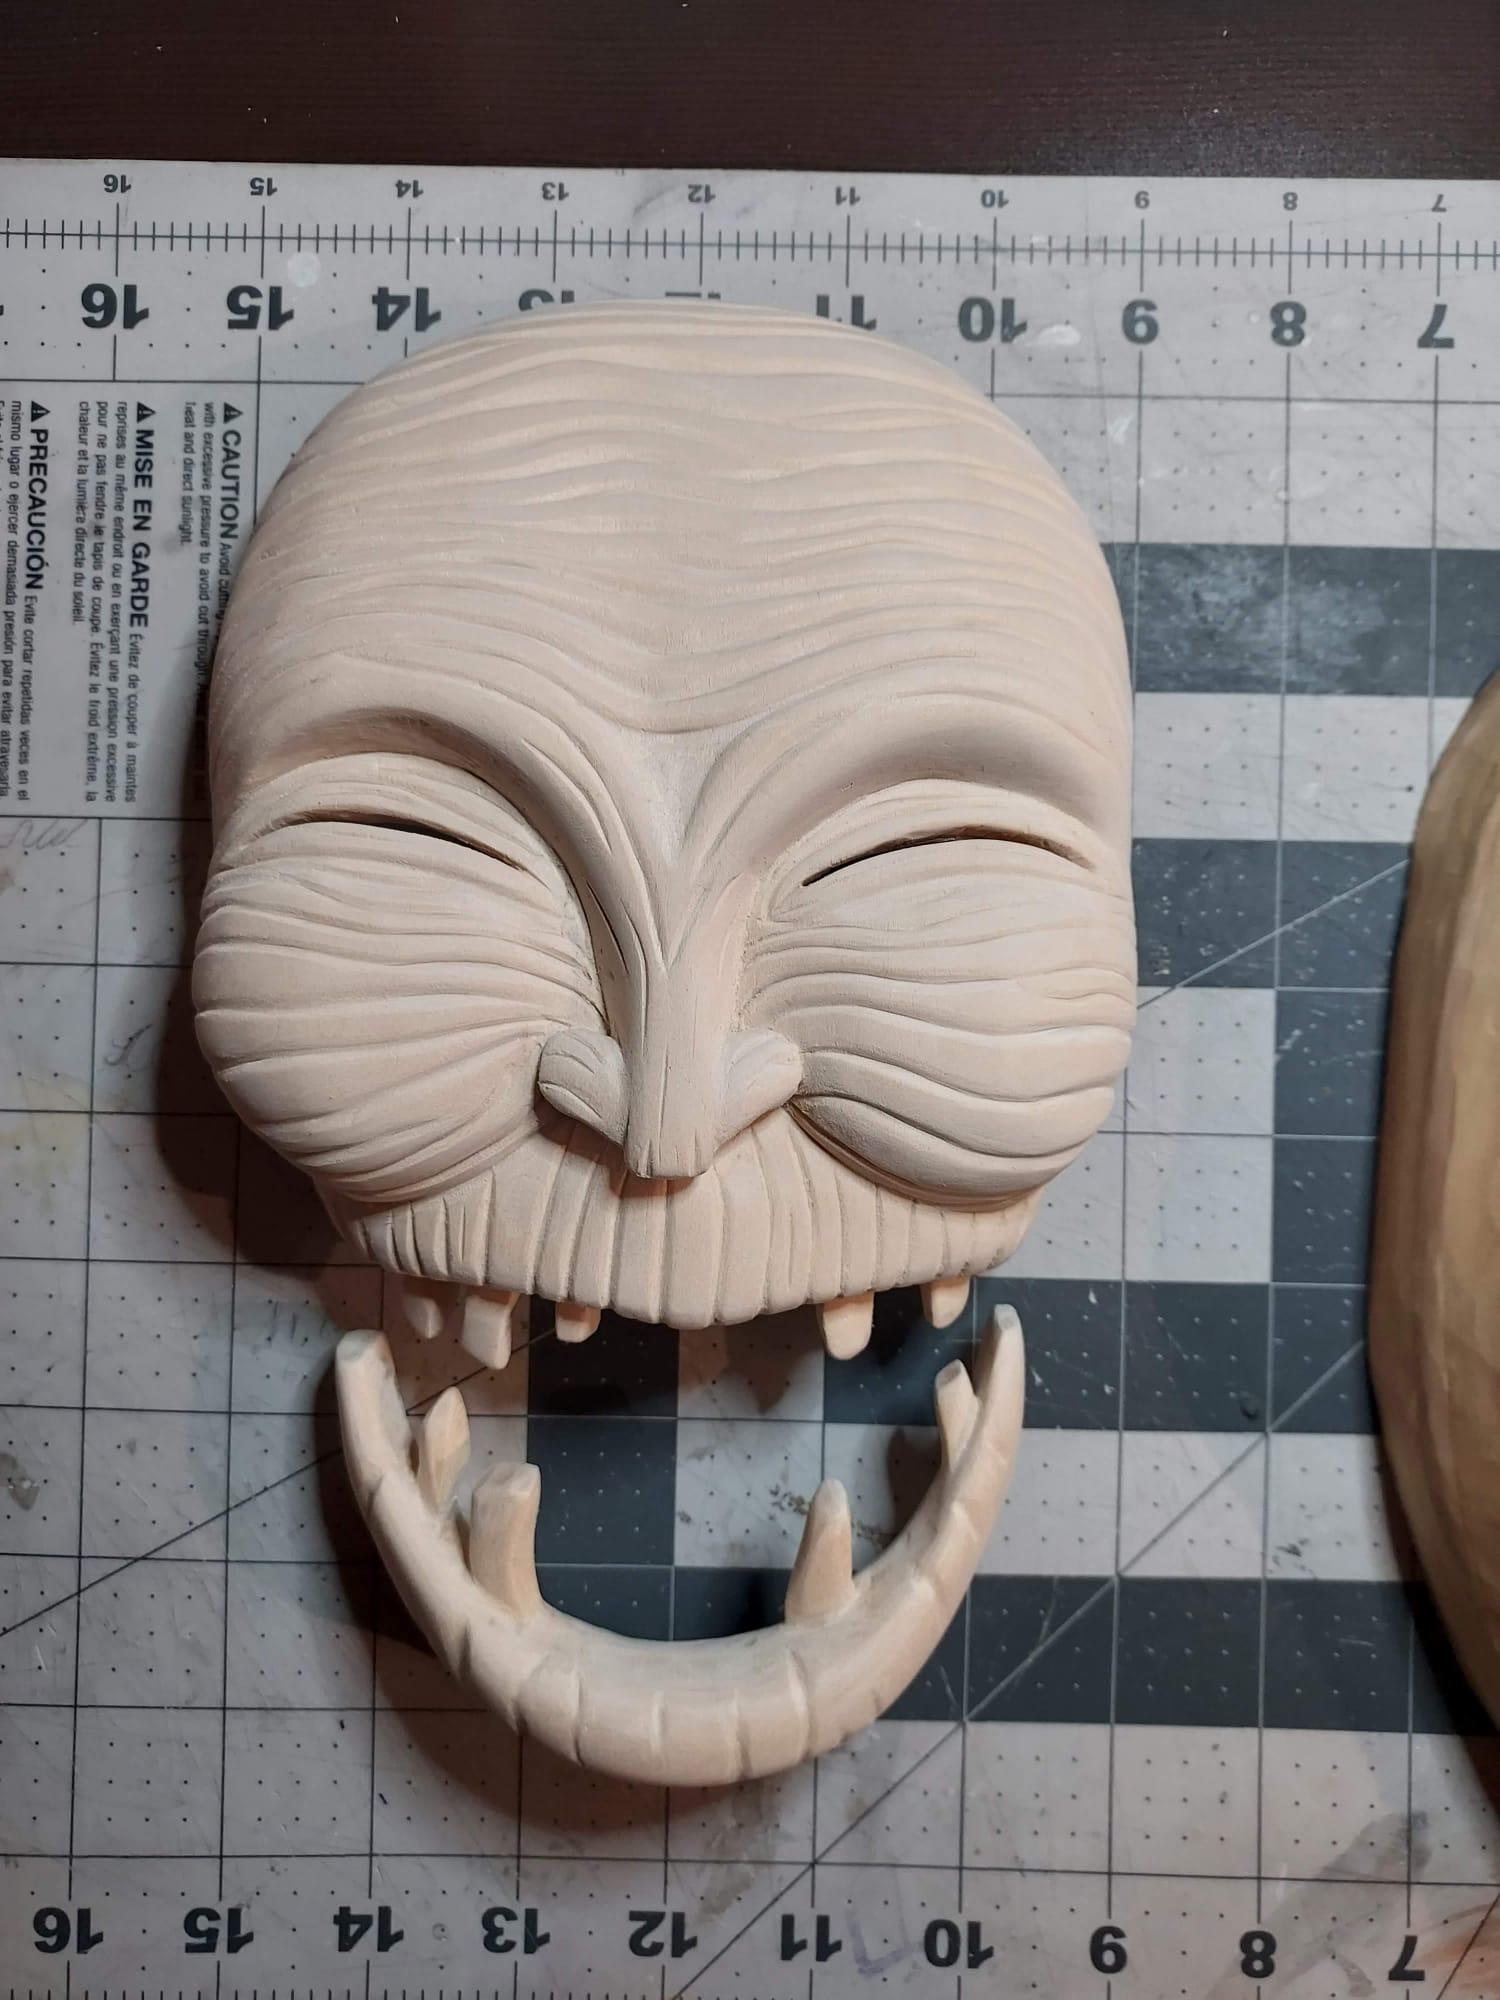
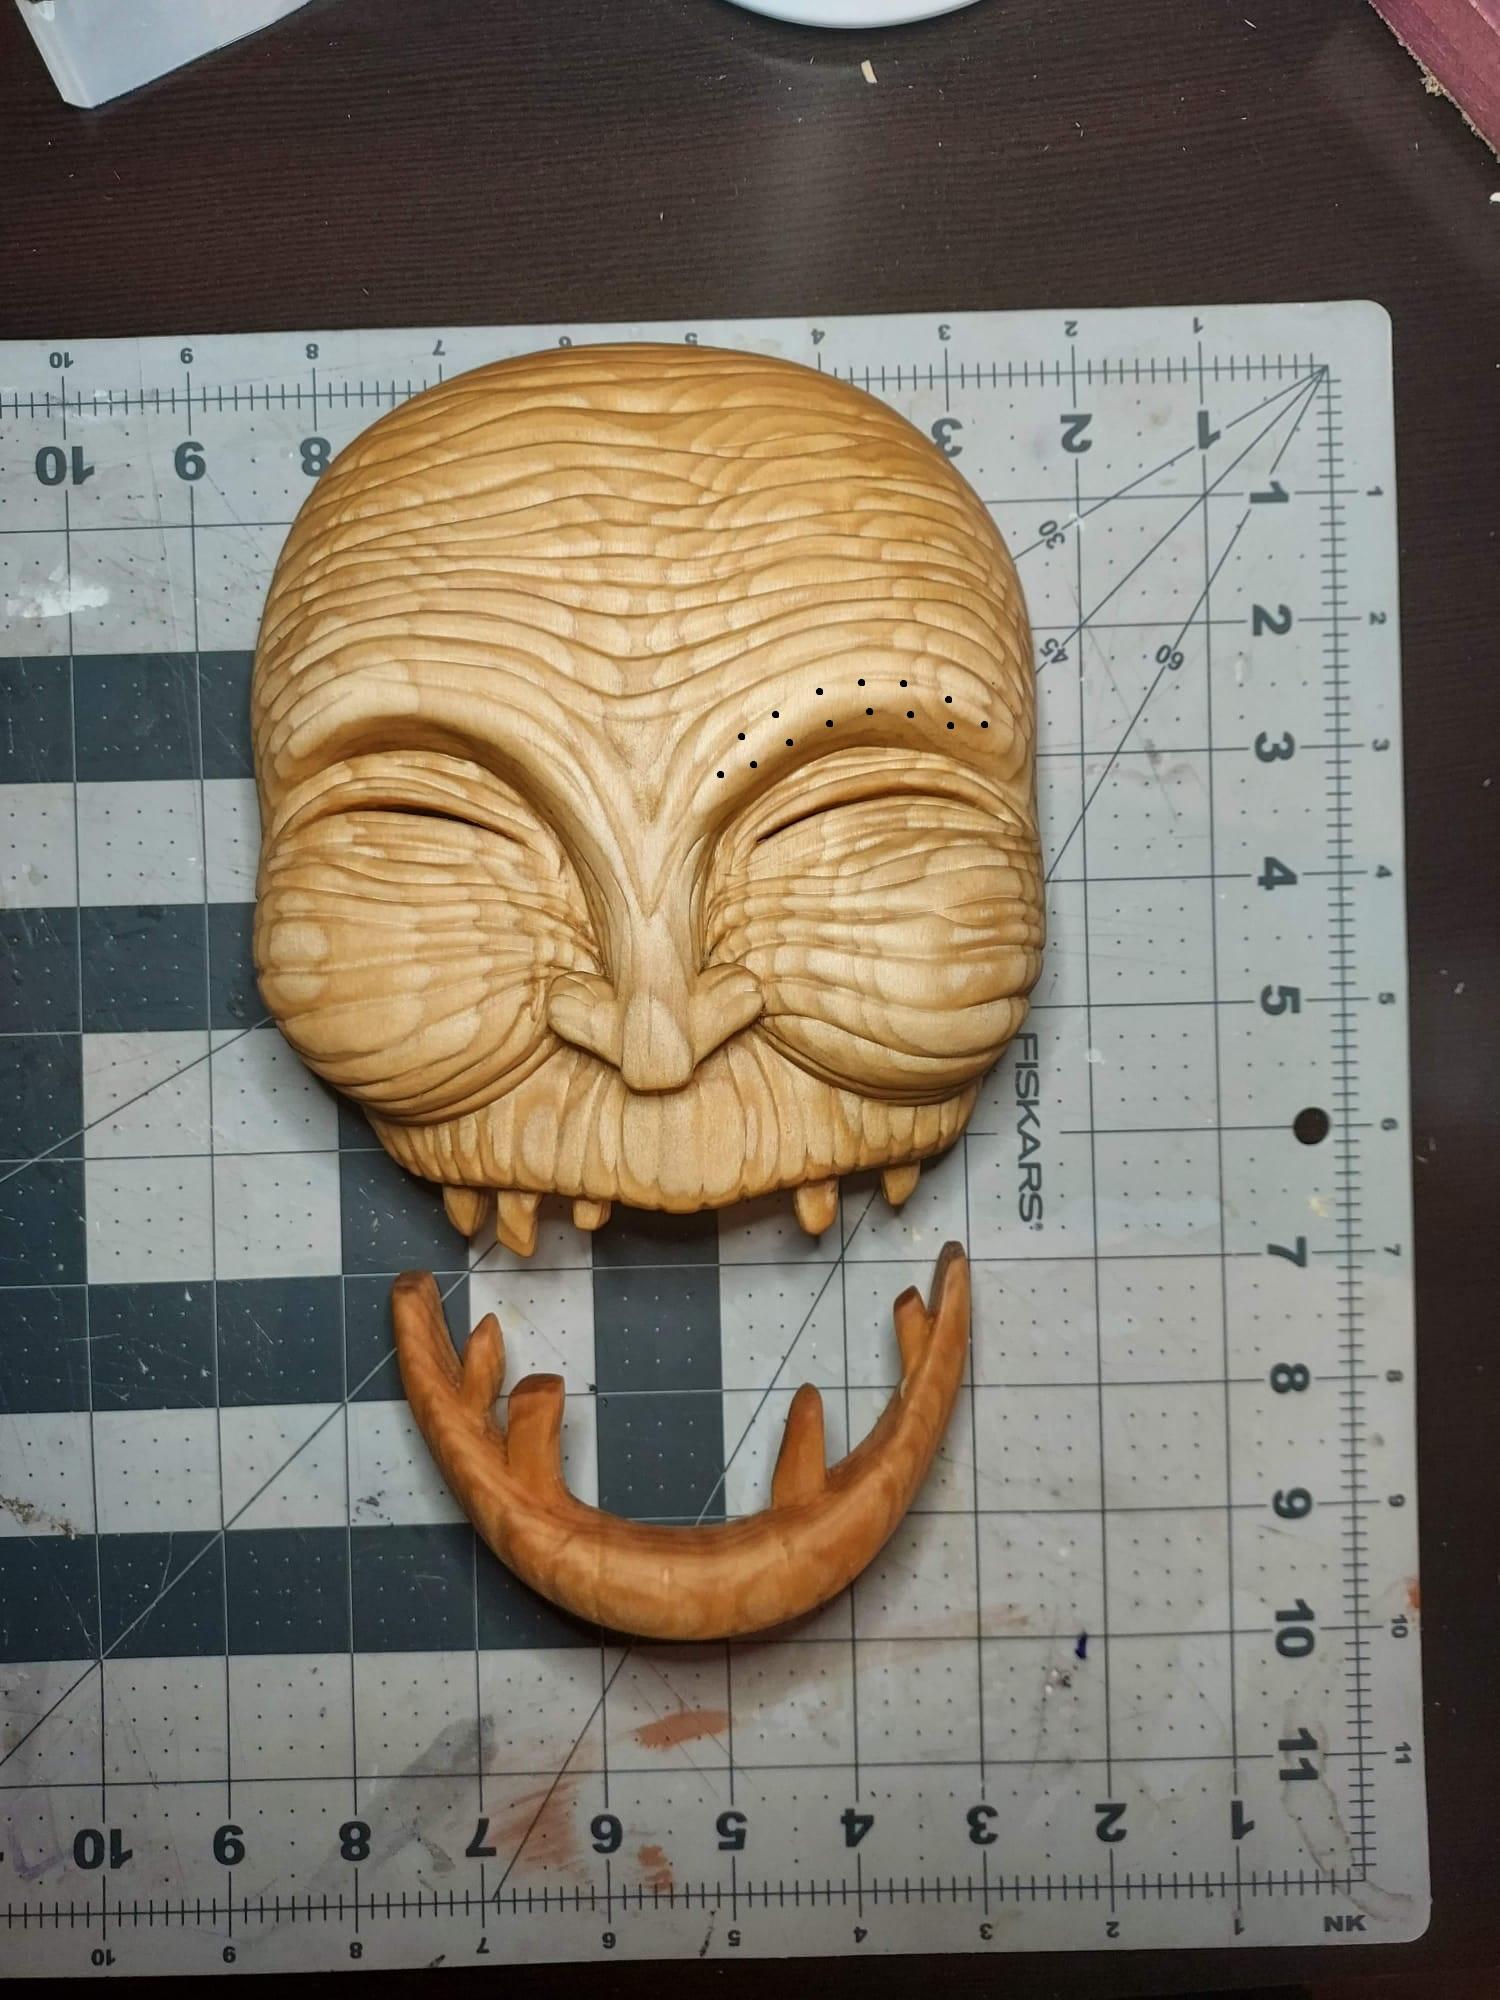
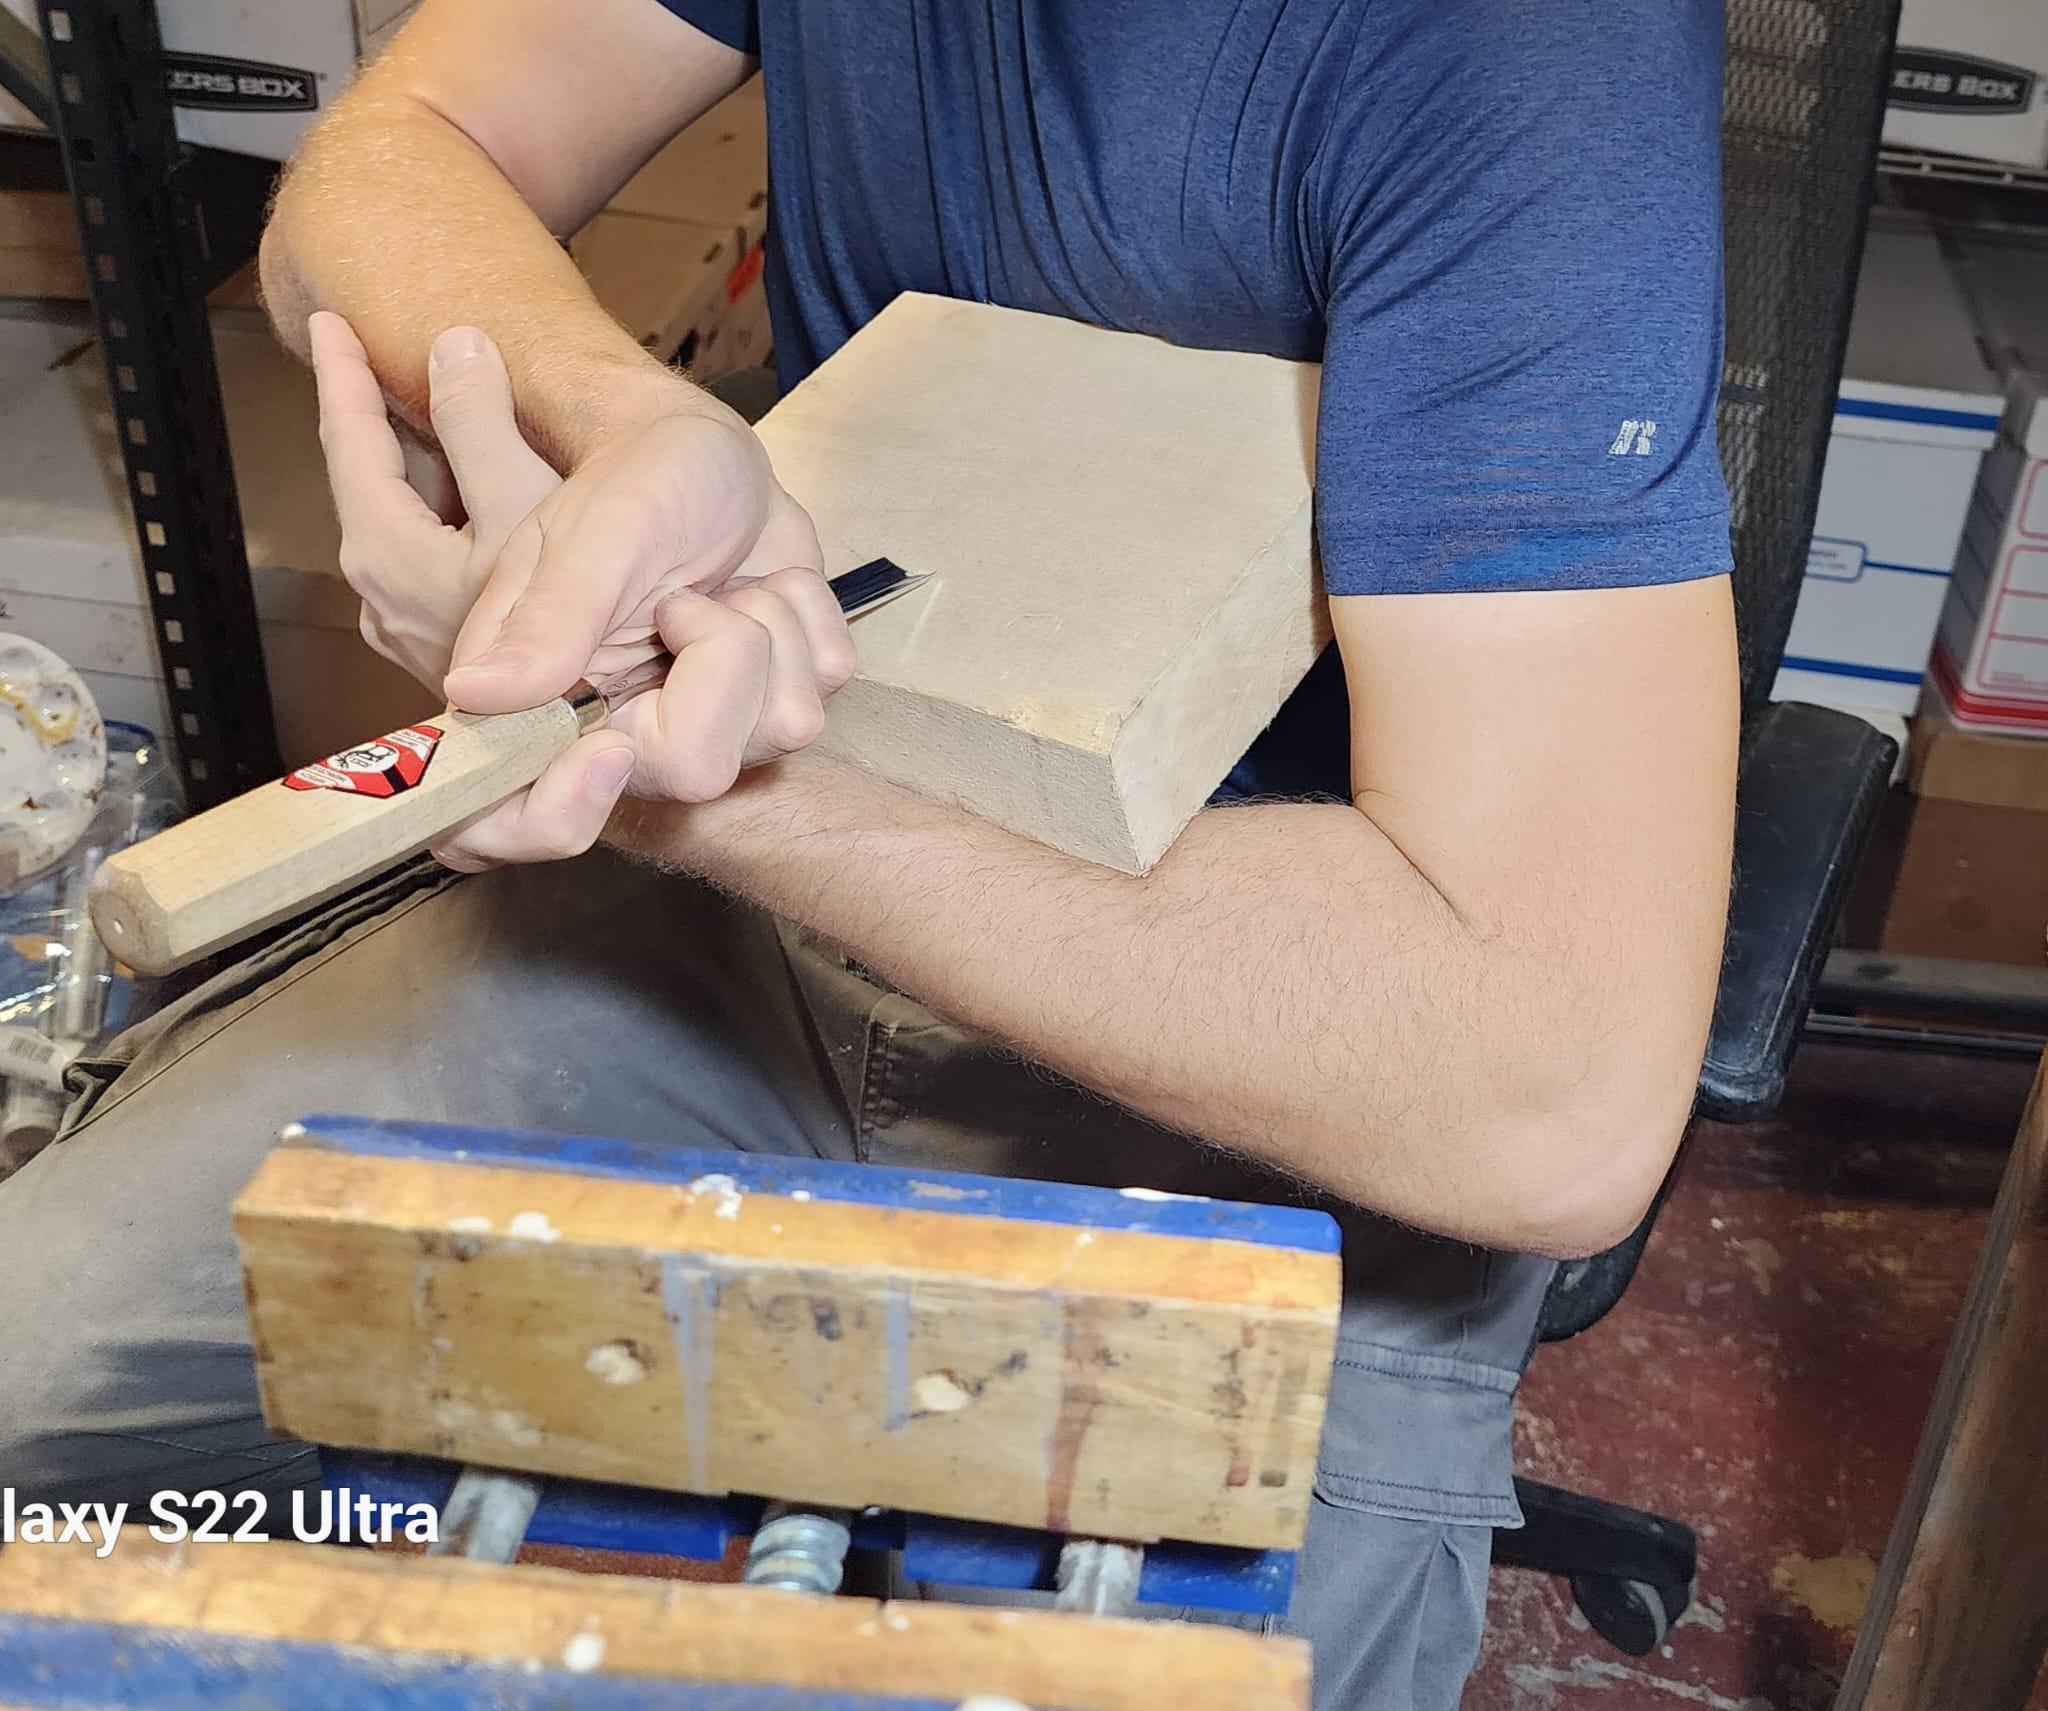
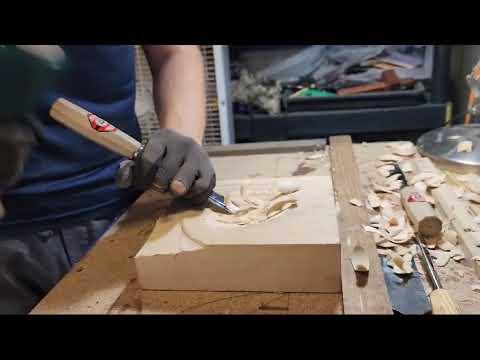
When you are satisfied with the overall progress you've made on the front, this is when you will start to refine the surface. You can now start to add any of the smaller details. Using the chisel and #3 gouge, I begin removing only the most egregious high points caused by the previous carving. At this point, you can use your chisel more like a knife.Grip your chisel by the middle of the blade and gently give it a slight skewed slicing motion, this is called paring. It is also at this point that I may start sanding or using a file. The whole process is about blending these slight undulations into a smooth gentle surface. You have probably been using the gouges with the bevel down most of this time. Another secret of the #3 is its versatility in this clean up. You can flip the gouge over, bevel up, follow some of the curvature. This will allow you to pare similarly to the chisel. Don't forget the chisel paring method as well, to go from the #3's high points to a flatter surface.
At this point, I will sand everything, at least to a 220 grit. From here, I draw on the wrinkles I want to add. Using the v-gouge, gently follow these lines. You're not looking to go too deep, but you can be a inconsistent with the depths. This will make the wrinkles feel more natural. Use your sandpaper to soften the harsh sharp ledges, creating round lines. Remember, wrinkles, not cracks. This process can take the longest, but its worth getting it right.
I also recommend carving the reverse side now. At this point, you probably wont be able to secure this in place. An easy way is to cradle it in your arm or hold it tightly with your knees. Don't attempt to use the mallet, just push the gouges lightly and scoop out with the gouges. Give yourself a little border and follow it. Be very cautious, its easy to attempt to make your mask too thin and accidentally carving through the whole mask. This is especially true for the area around the nose and eyes. If you have a bent or spoon gouge, this is when you would use it. If not, you can follow the same process as before; it will just be a bit difficult to clean this portion out. Because its not always seen, feel free to leave deeper gouge marks (scalloping), instead of a completely smooth surface. This is often part of the appeal, it can really show off that it was made by hand.
It is also at this point that I began cutting out the slot for the eyes. This required me to use my small hand vice drill. I drilled several holes down the line. I then used my smallest chisel to slowly cut away any pieces between those holes. For this type of eye slot, it requires the reverse to be hollowed out first. When enough of the slot is cut, you can slip a piece of sandpaper in and carefully even it out.
Finalizing
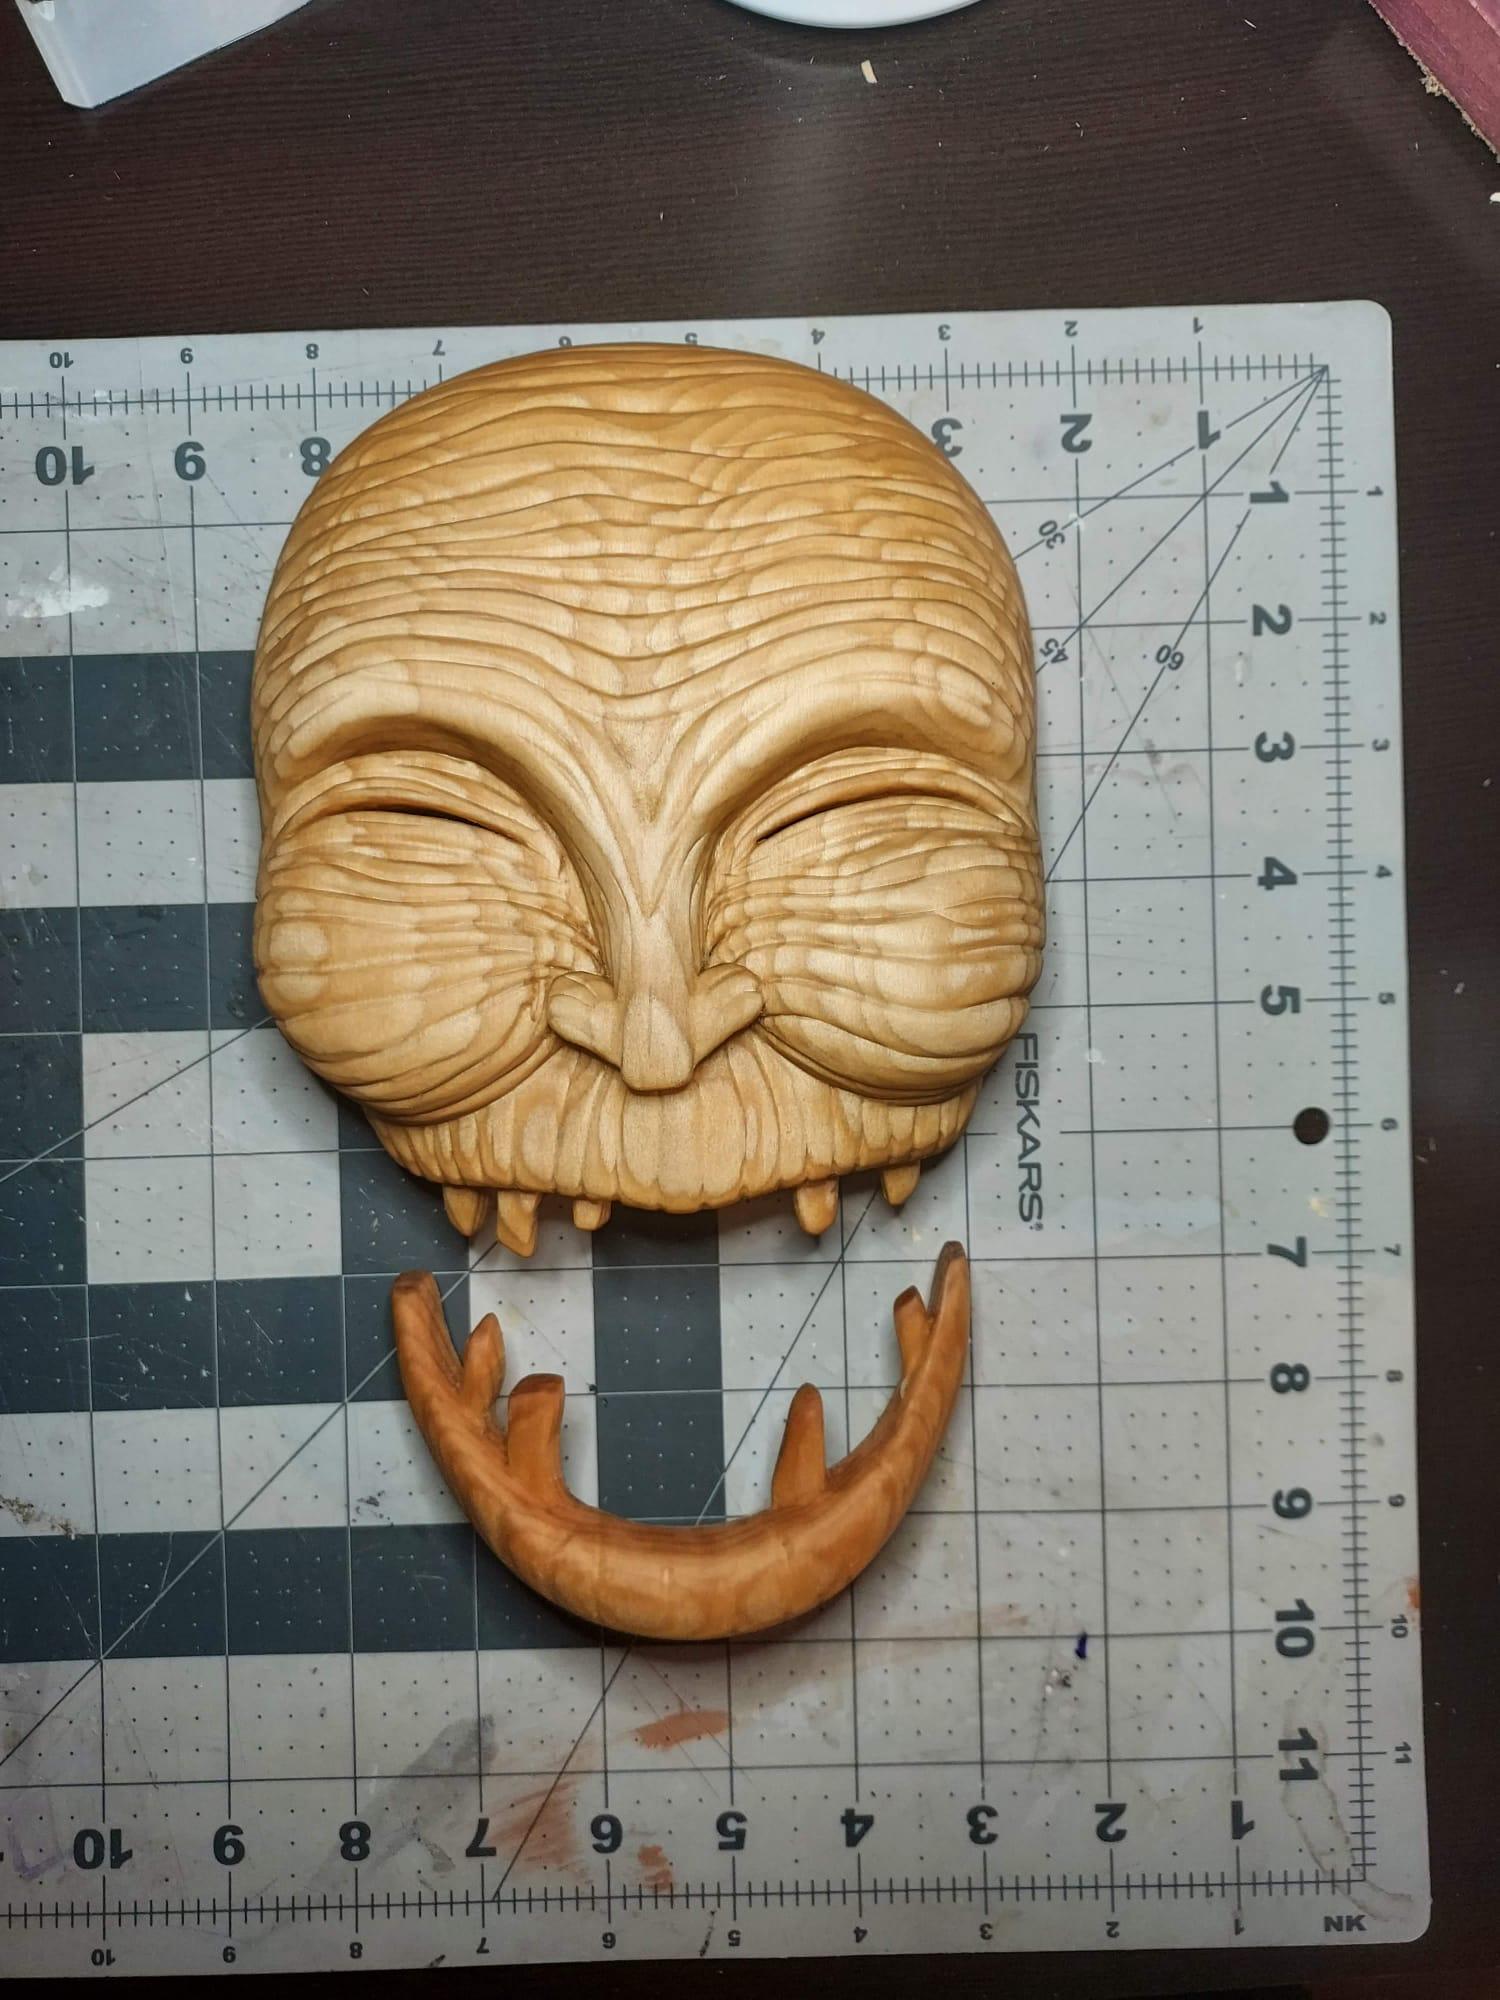
When your done carving, its time to sand. Start with the lowest grits first. Generally, follow the direction of the grain. Use it to blend any excessive high points and do any final shaping with it. You can also fold the paper to get into any creases, such as the wrinkles. When that is done, switch to the next highest grit when and go through the whole process again. You may want to keep gouge marks to give it a "rustic" appearance though. If that's the case, I recommend at least starting with a 220 grit, just to make sure any splinters aren't present. Then go straight to your finish.
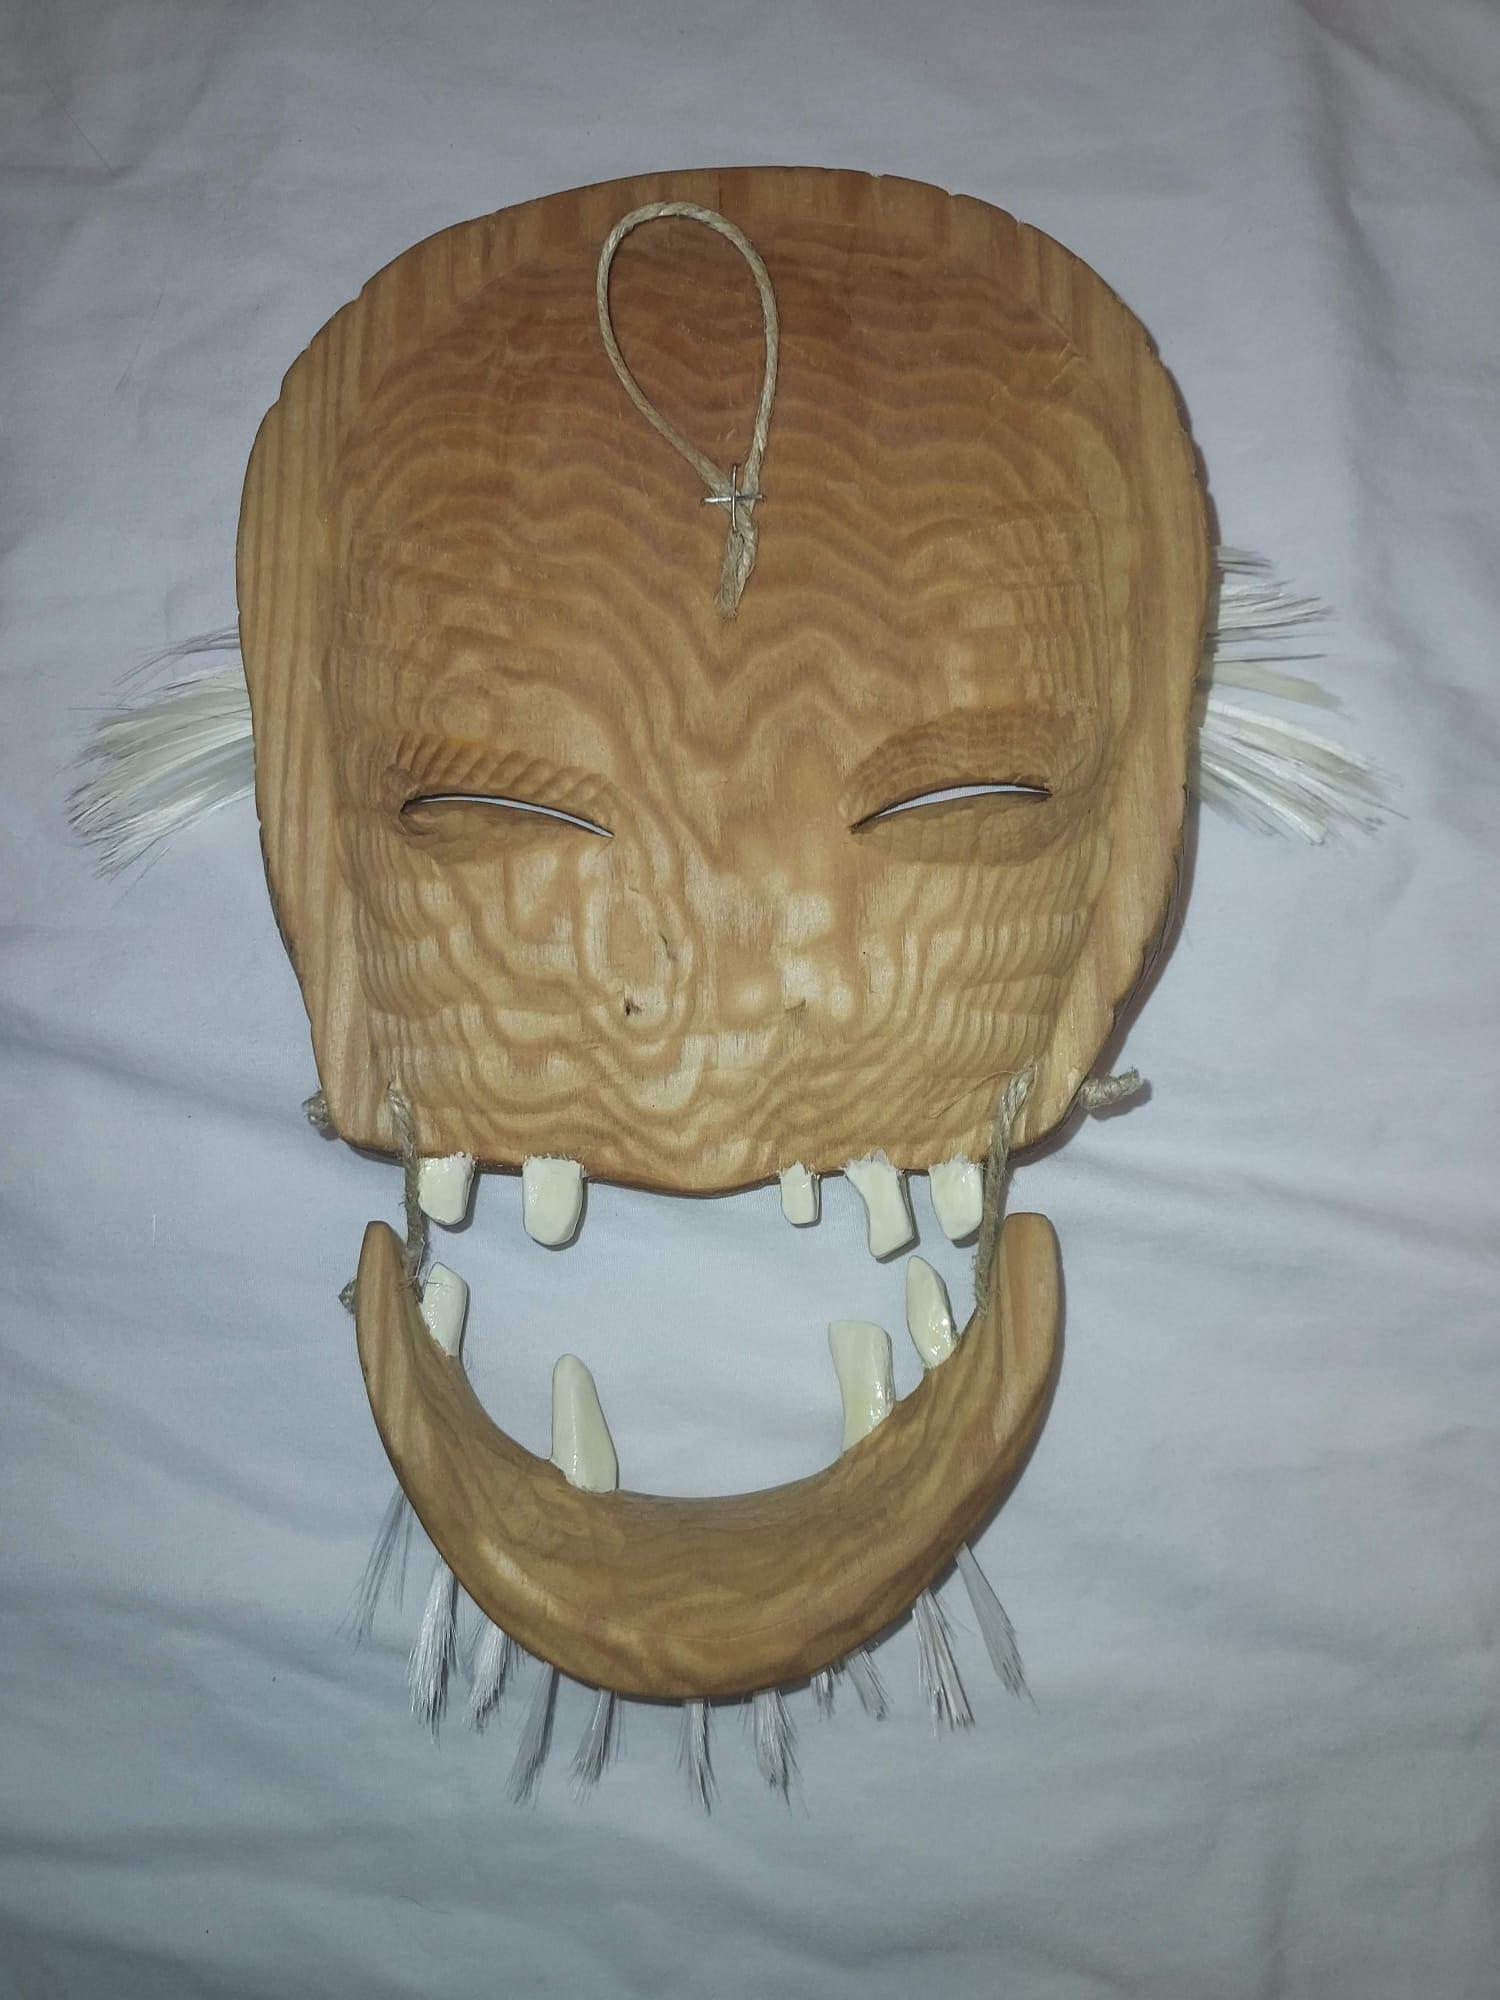
After the final sanding, you can add your finish to it. This piece has a simple finish of boiled linseed oil. But you can use any wood stains, paints, or finishes you like. I prefer anything that may show off the grain pattern. You may have noticed the stark difference between the piece now with oil, versus when it was just sanded. Whatever you use, be sure to let it all dry and cure as recommended by the label. I will typically use a piece of twine and staple a loop on the back to hand it on the wall. You can do this with elastic or leather if you prefer to be able to wear it. After that, you may be finished, but this piece requires a bit more work.
Finalizing Part 2
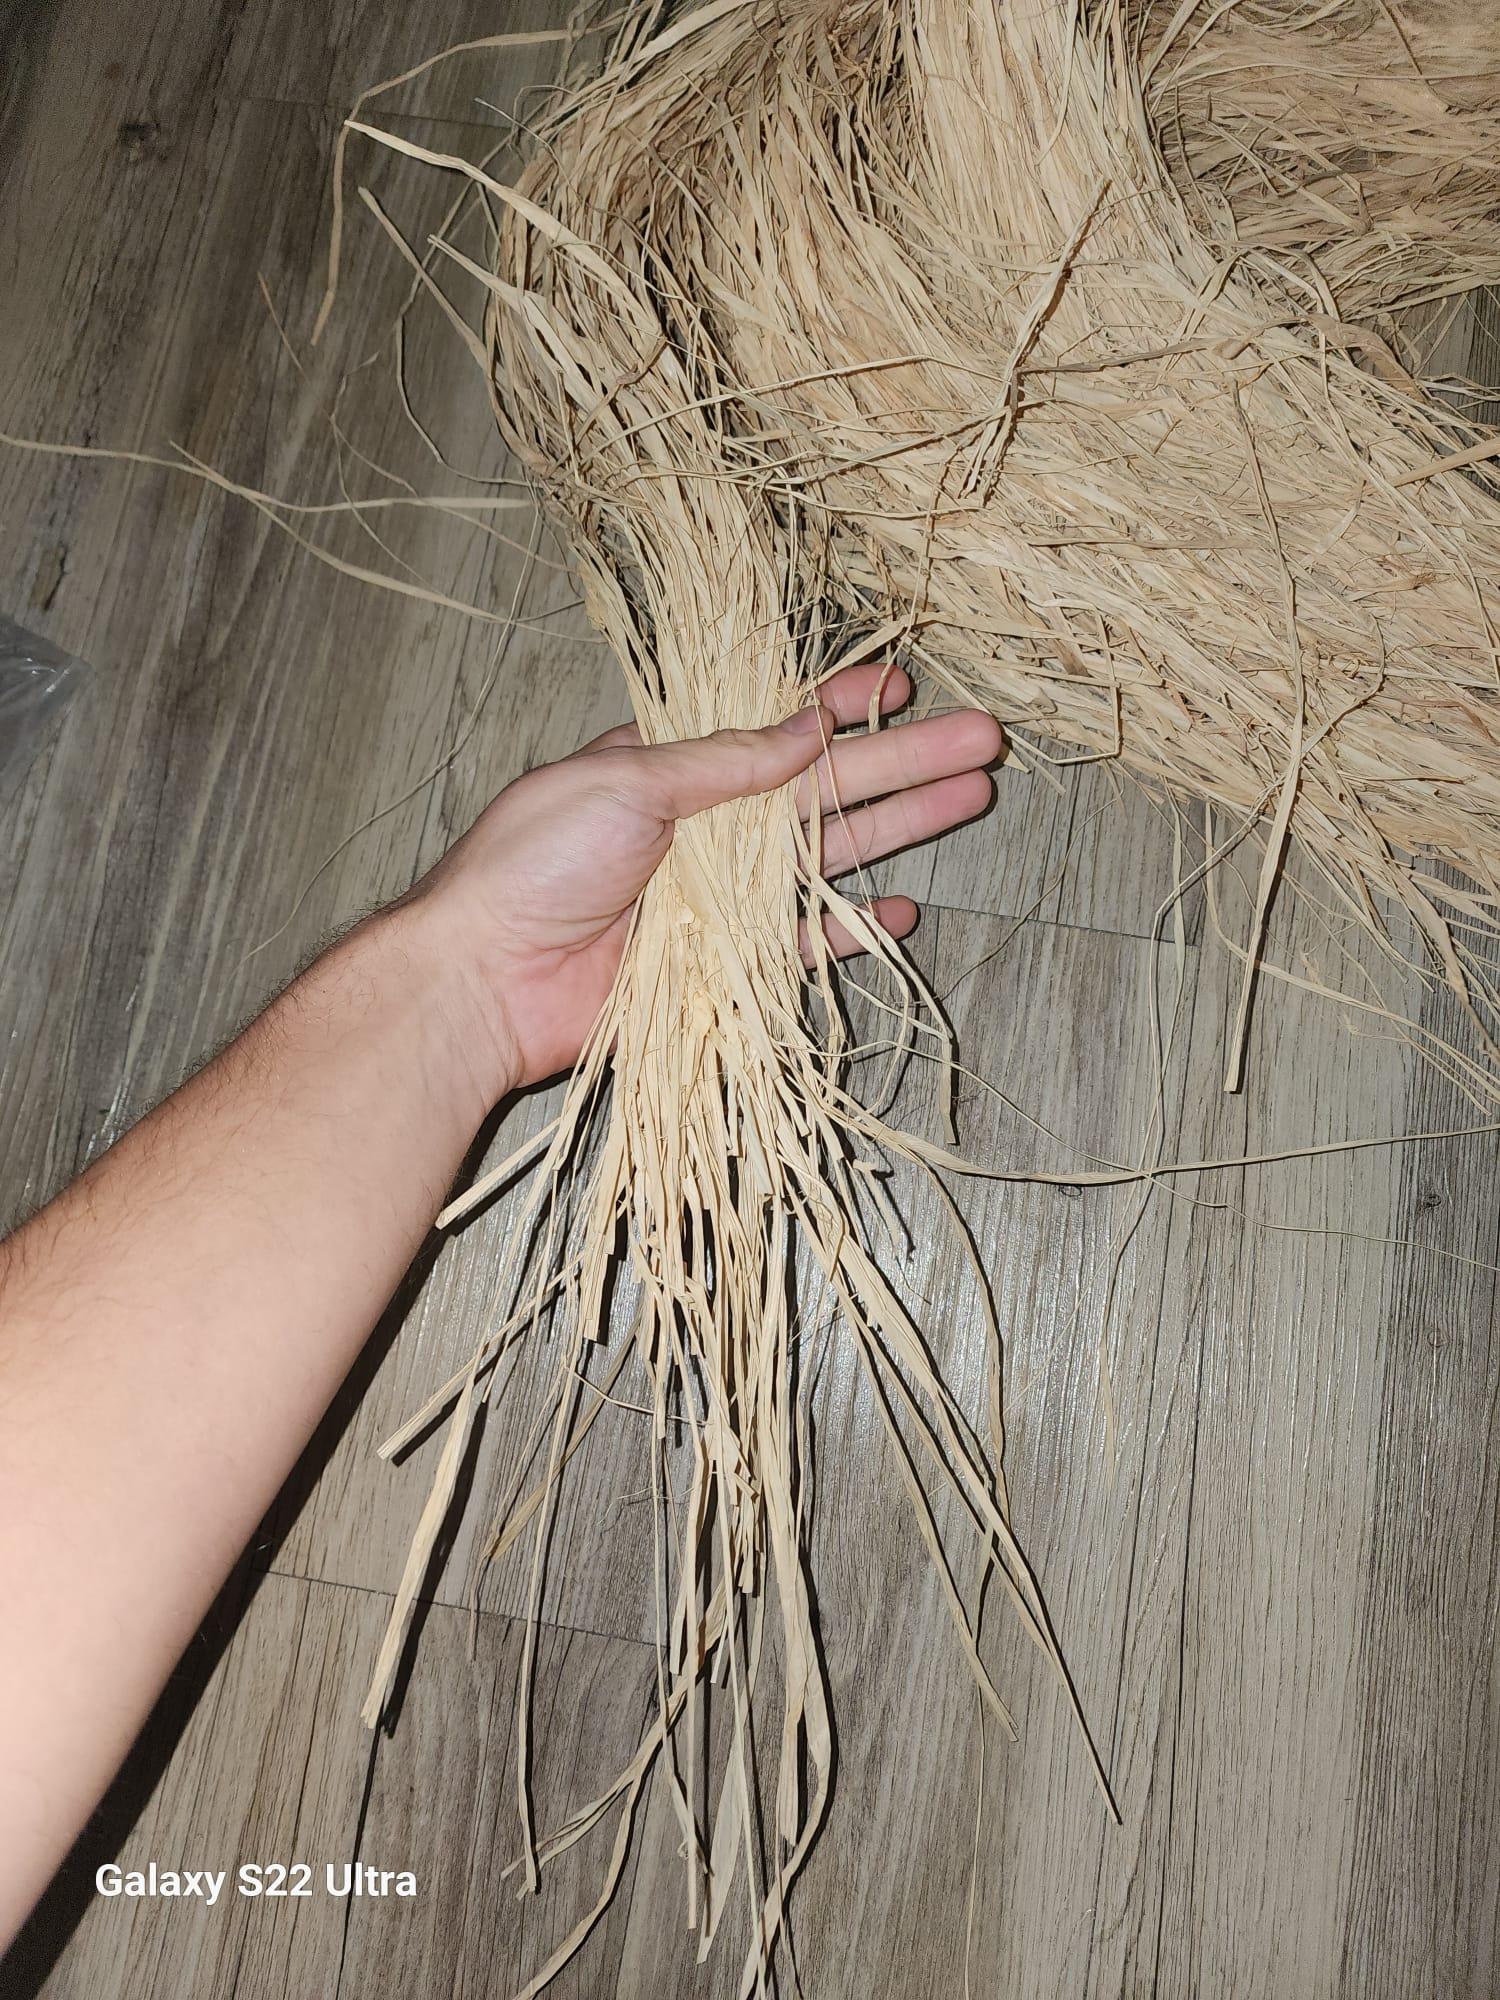
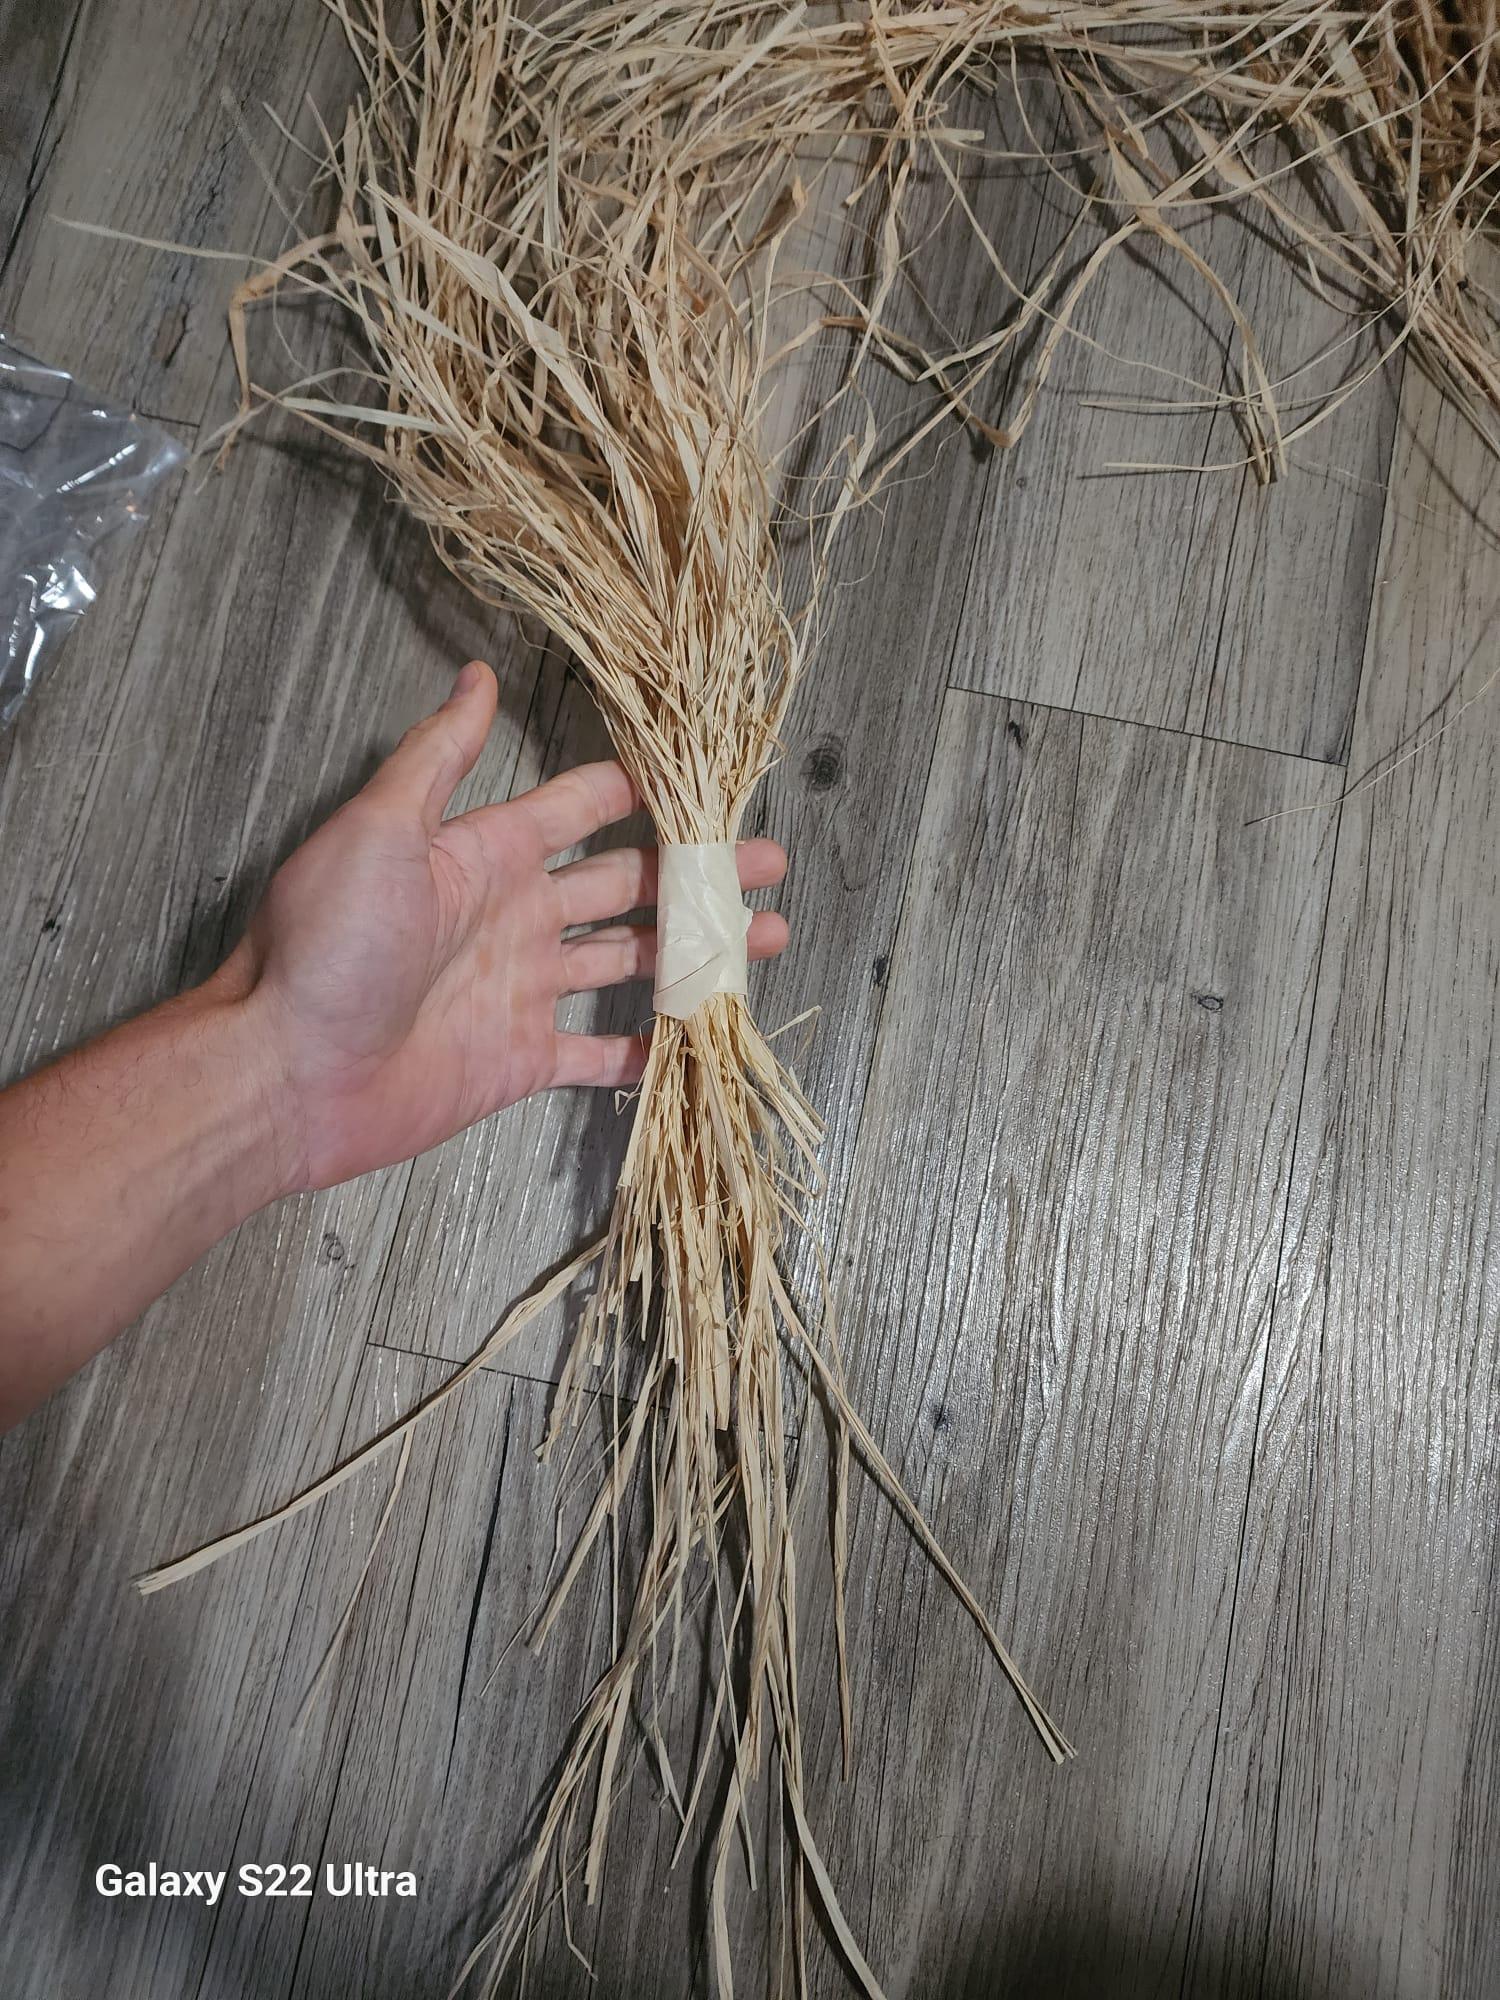
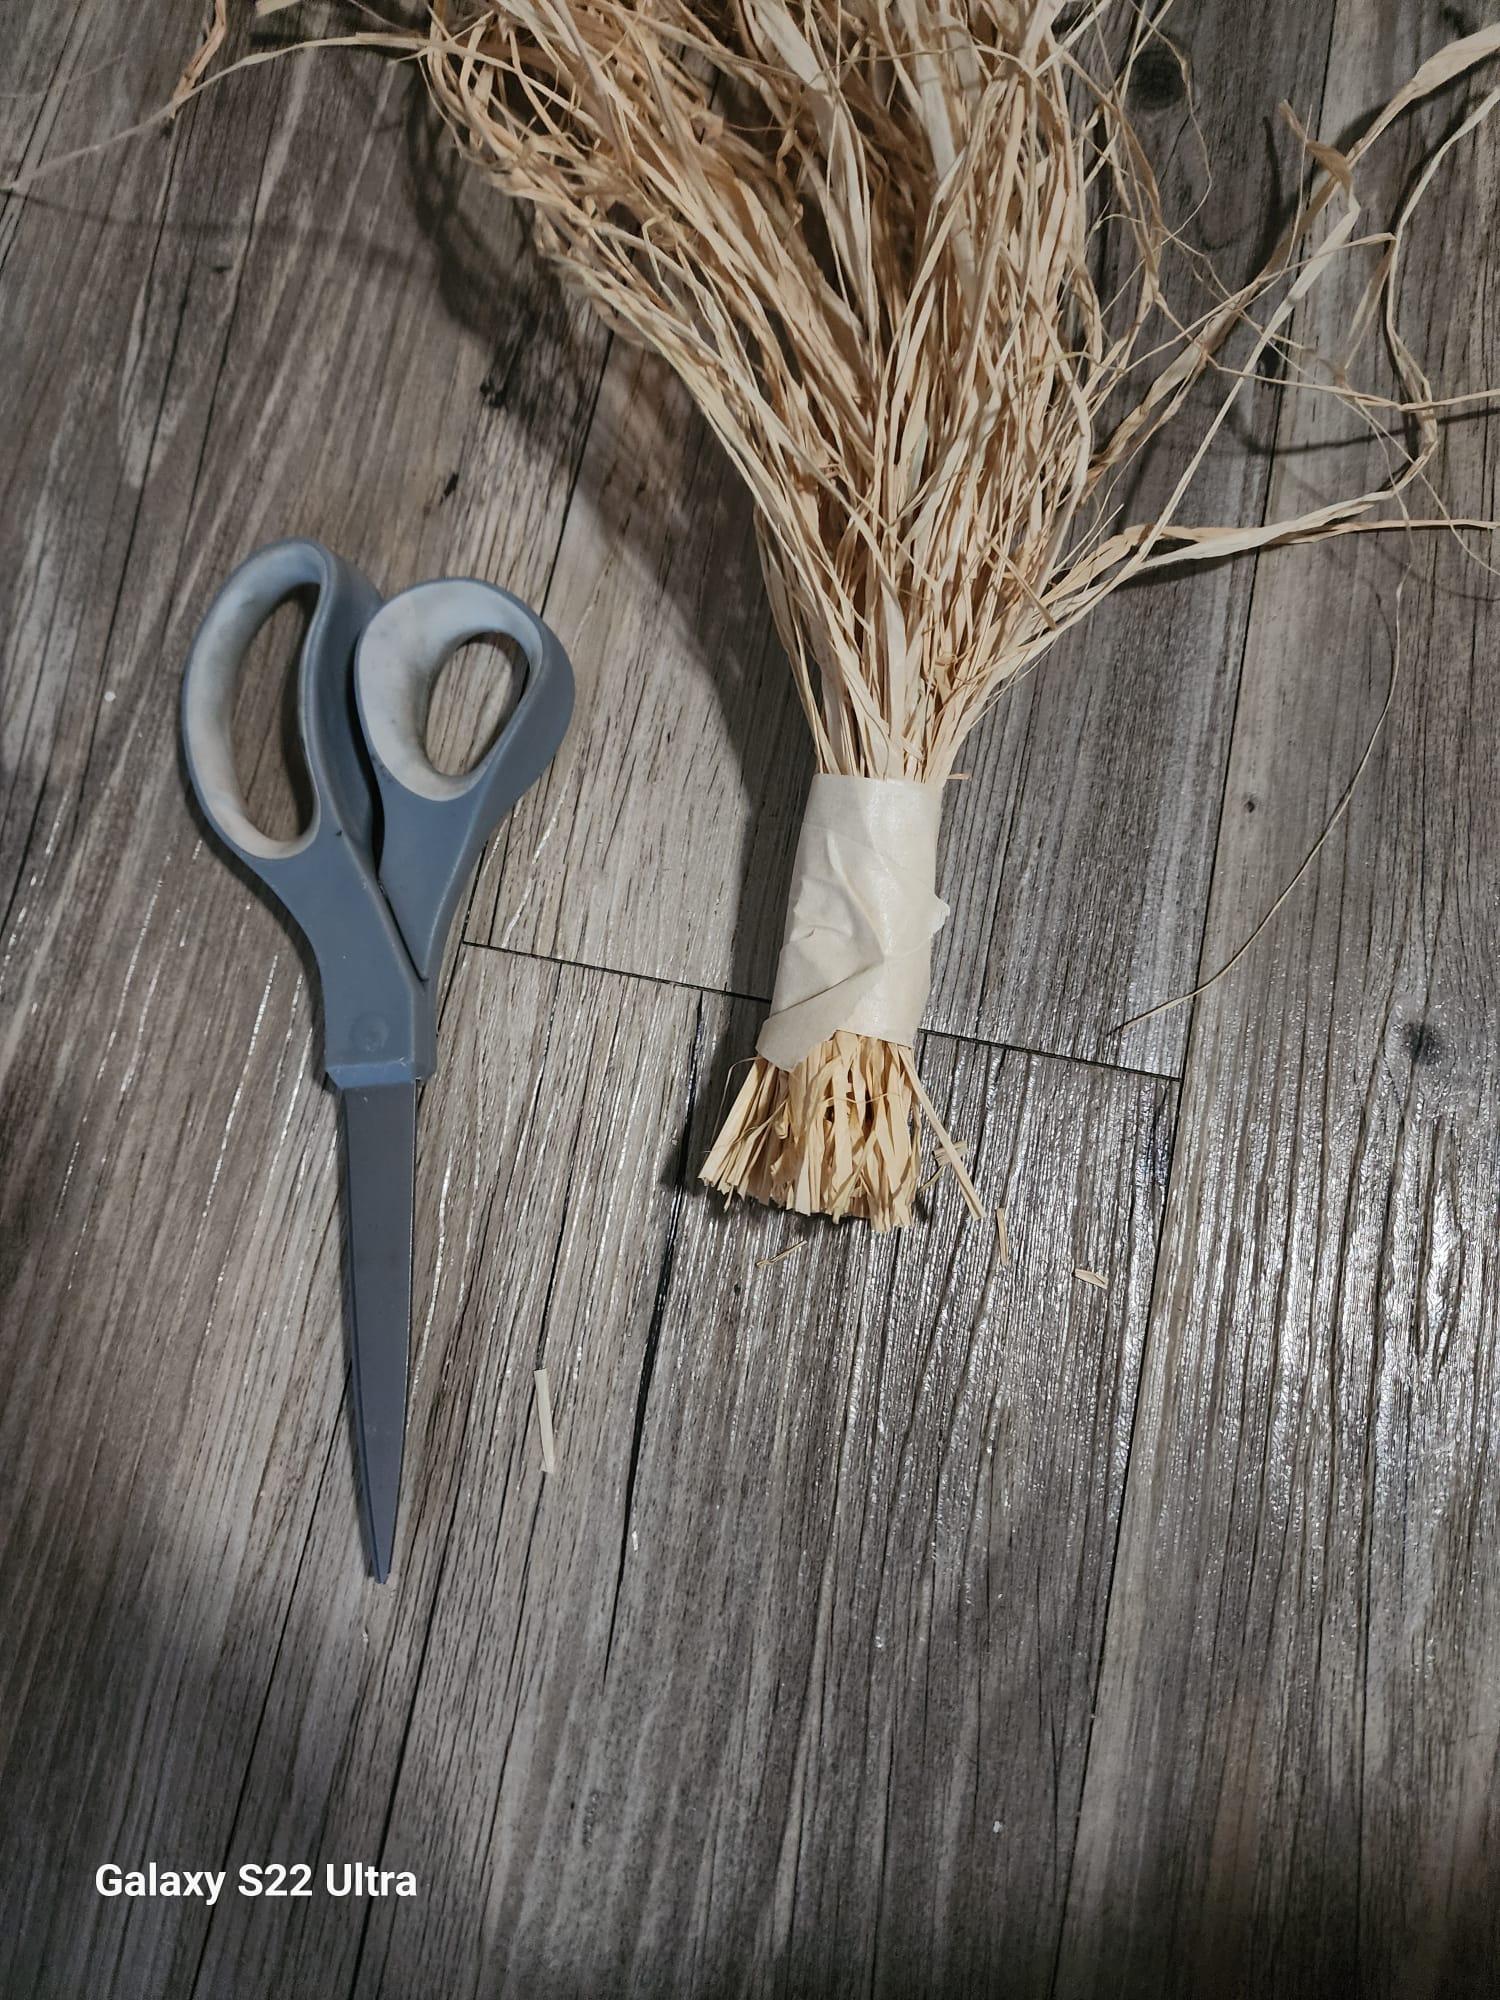
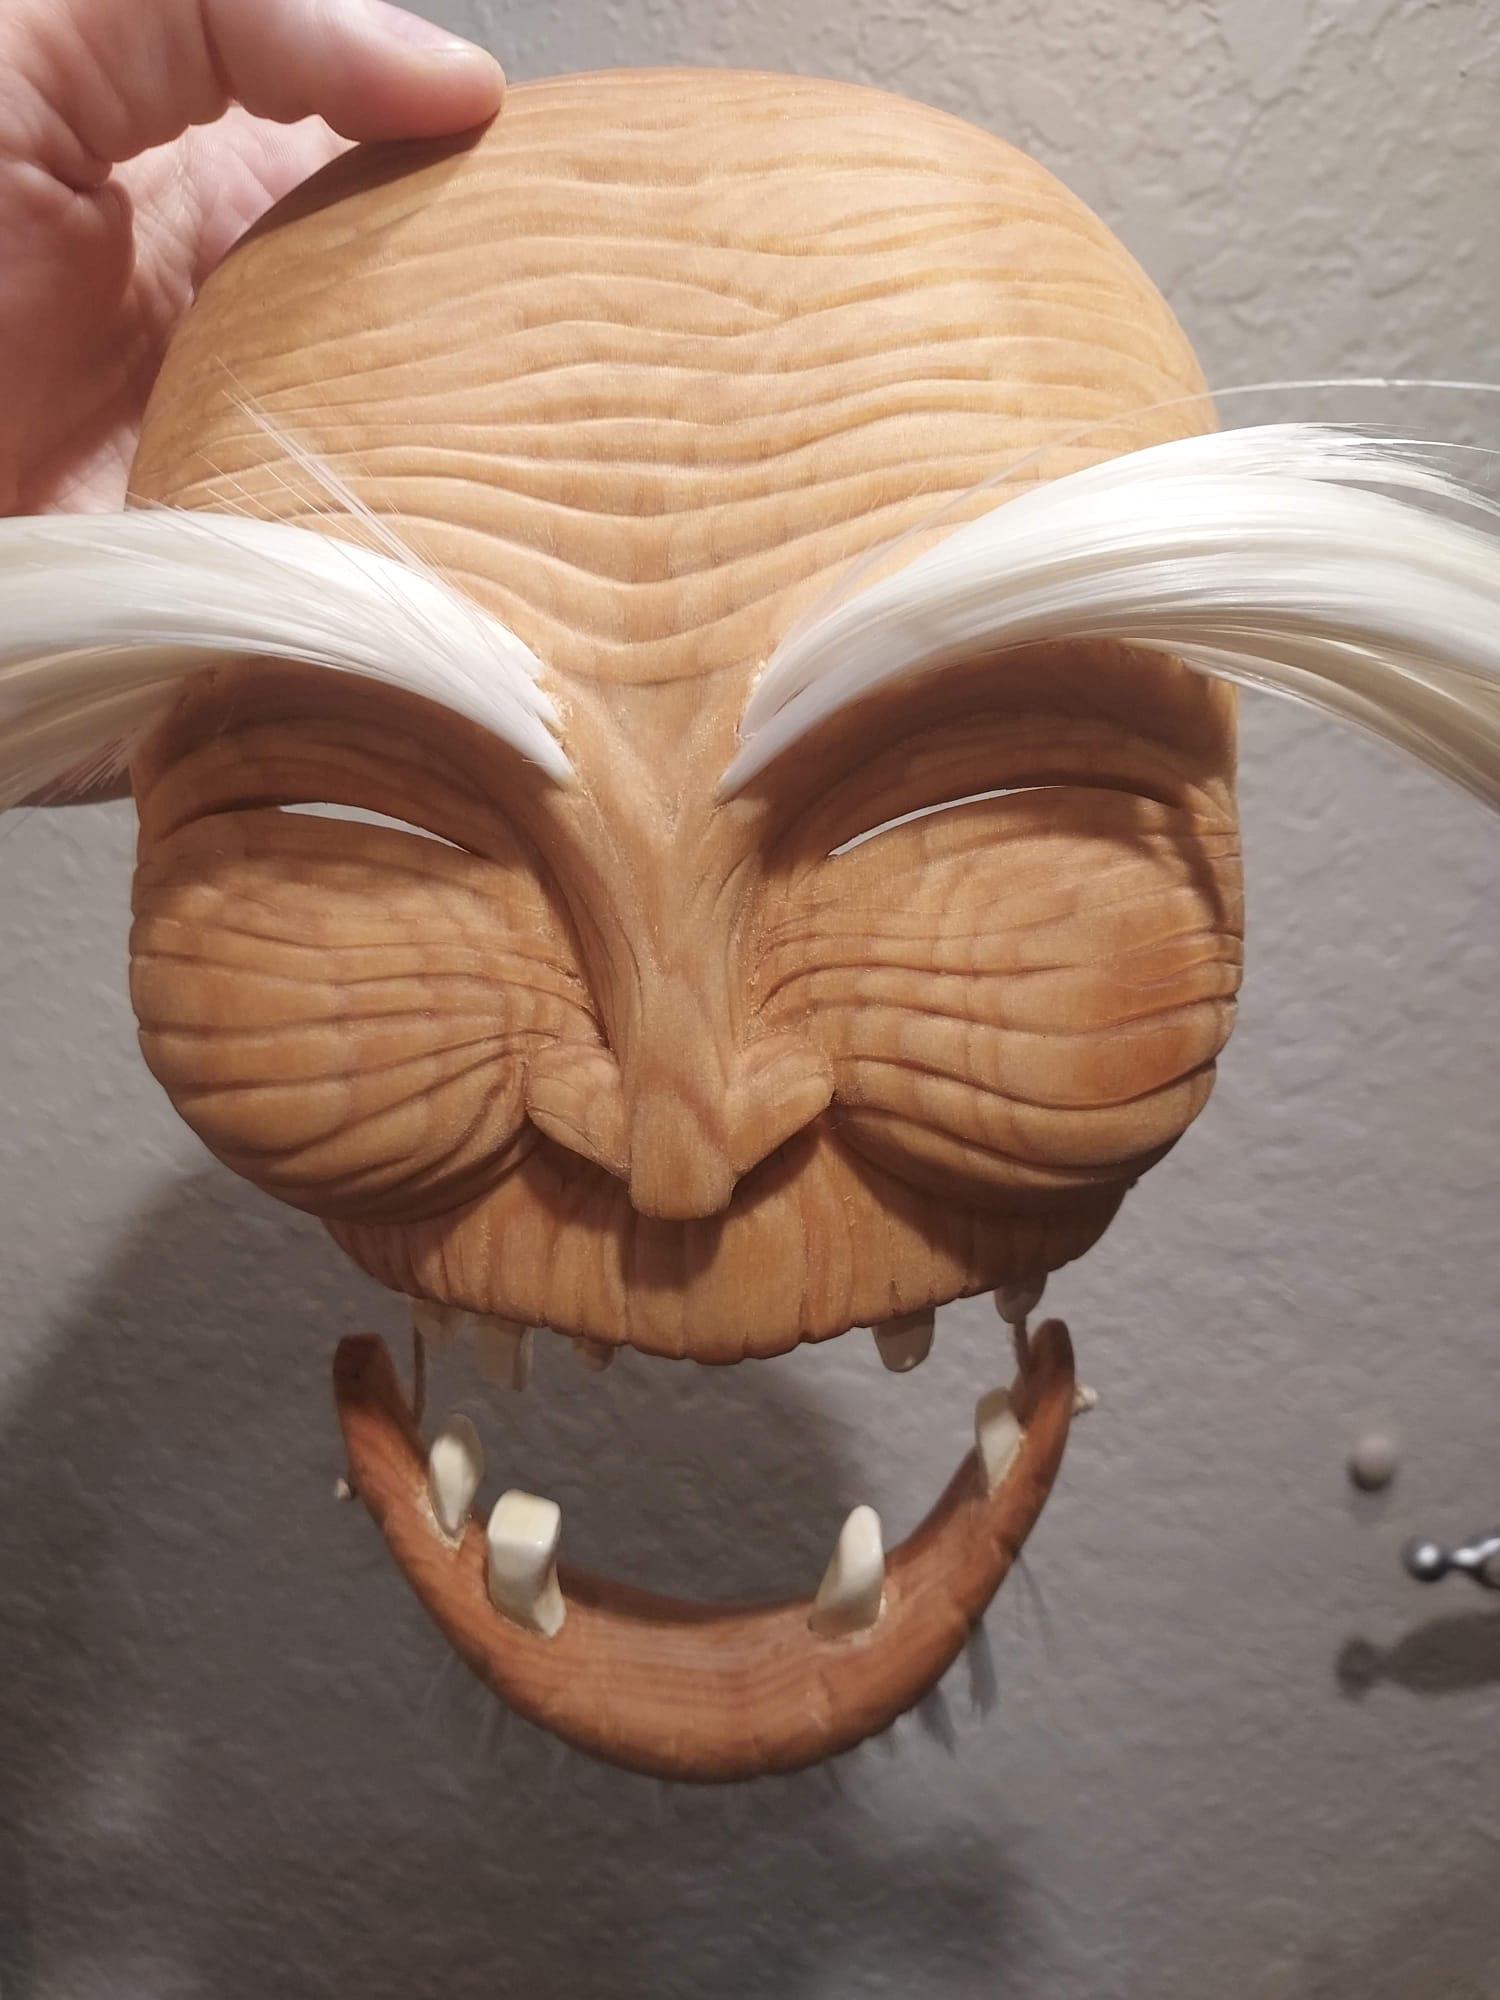
I use a basic off white acrylic paint, to paint the teeth. Very simple process, just use a few thin coats. The tricky part is the eyebrows. I will demonstrate this using larger palm fibers, it will be visually more clear that way. Start by trimming off pieces of hair that I need, wrapping up the tips with painters tape to keep it bundled. You could probably also use rubber bands. I thin carefully add I try to be consistent and bundle up only what can fit in the holes I will be drilling. Dab a bit of super glue to the short edge of the bundle, then give it plenty of time to dry. It took maybe 20 bundles per side. I use my small hand drill and knock a few holes along the brow and chin. For the eyebrows, be sure to drill these holes at a slight ~45° angle, the hairs are should not stick straight out but angle slightly to the sides. Trim the bundles to a manageable size, but keep them a bit long. Trim them to shape after they are put in place.
Make sure your bundles can fit in the holes snugly by dry inserting them. Carefully remove painters tape, the bundles can still be delicate and fall apart. Dab super glue into a hole, starting from the furthest sides, carefully insert a bundle. Work your way from the outside towards the inside, so that the previous bundle does not get in the way. Give them plenty of time to dry. Gently test them, by giving them the slightest of tugs, expect a few strands to escape. If you need, add a thin dab where the bundle was inserted.
Gently comb the brows. You will probably need a firm hair gel to help; I used a brand called Gorilla Snot. Carefully trim the brows to shape. I found that you'll want to keep the strands closest to the nose the longest; the ones nearest the temples, trim short. Slowly blend these, by combing and applying gel until you get a bushy, yet managed look. However, you can trim this as you like.
Finally, I drill a hole on the sides of the upper and lower jaw. Using a piece of twine, I tied the mouth in place.