Getting Started With Raspberry Pi Pico and Micropython PWM + GPIO + ADC +I2C Oled Ssd1306 and Make It All Together
by sam.moosavian in Circuits > Raspberry Pi
2024 Views, 7 Favorites, 0 Comments
Getting Started With Raspberry Pi Pico and Micropython PWM + GPIO + ADC +I2C Oled Ssd1306 and Make It All Together
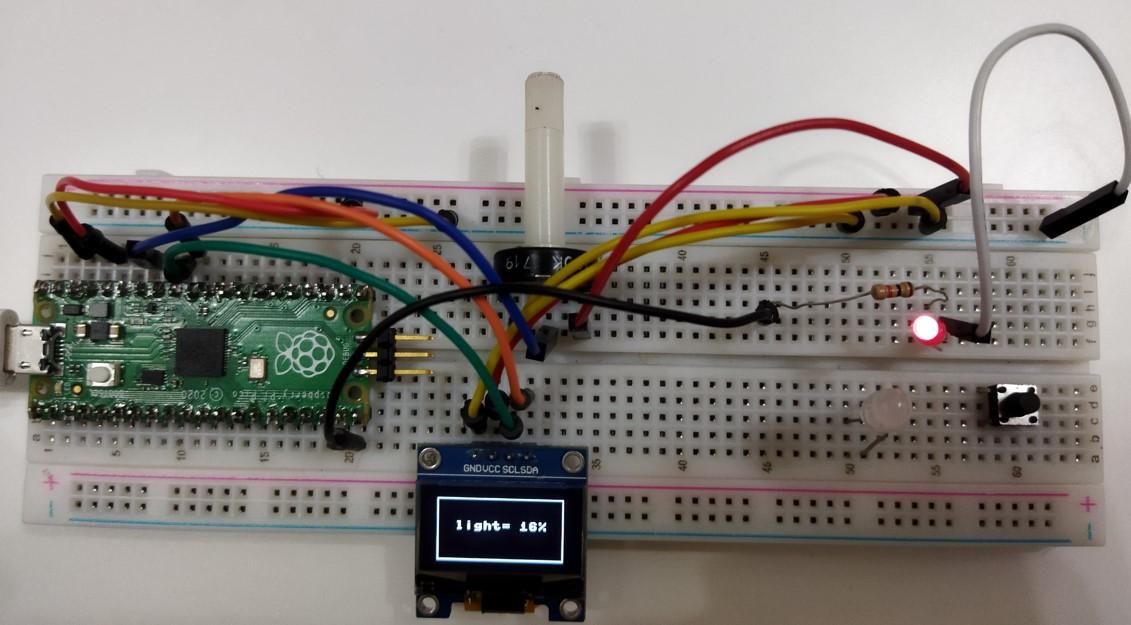
In this tutorial, we are going to learn how to program Raspberry Pi Pico with micropython and Thonny IDE.
After that, we work with pwm, adc, gpio, i2c oled display.
Supplies

Getting Started With Raspberry Pi Pico and Micropython

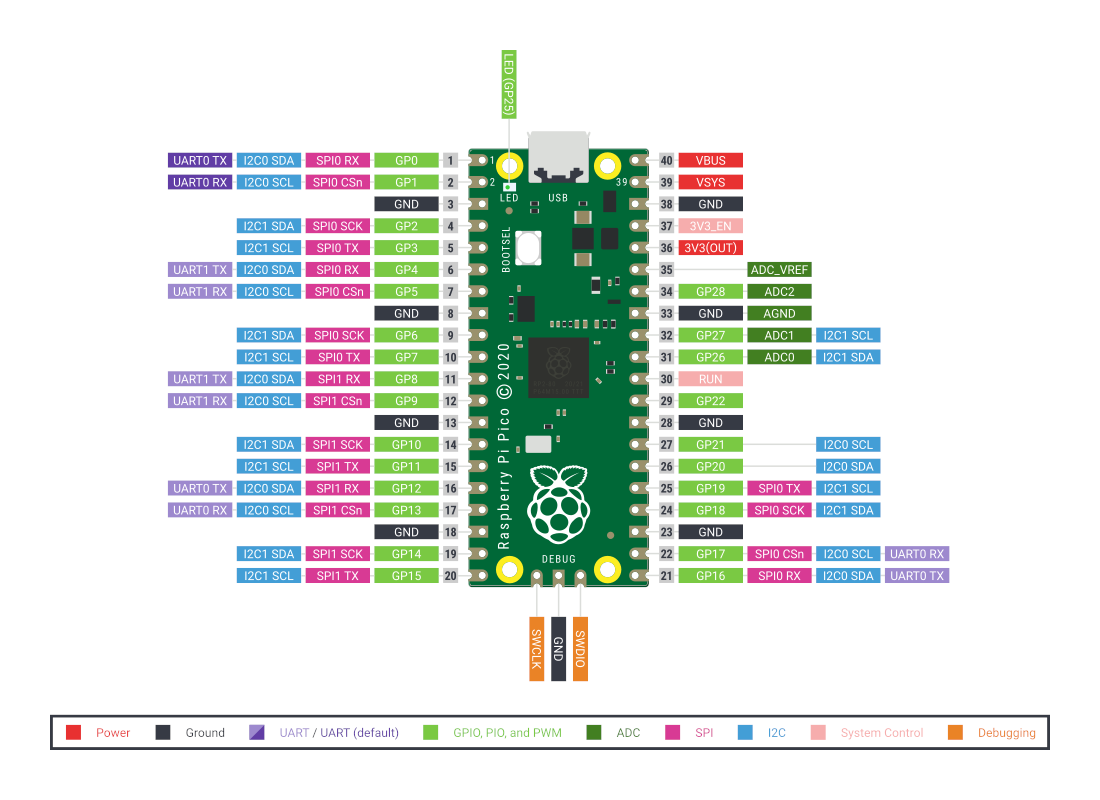
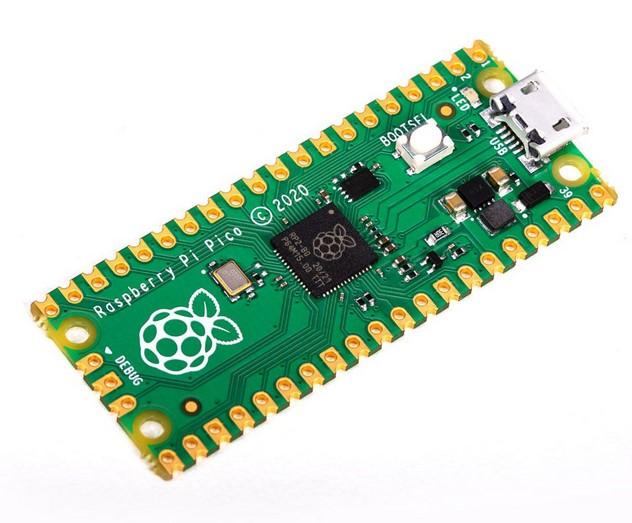
As you may know Raspberry Pi Pico is the first microcontroller from Raspberry Pi foundation and I don't want to talk about the Pico in details here. More information is available in Raspberry Pi website.
Nevertheless, the highlighted feature about this lovely microcontroller is we can program it with micropython and believe me, once you learn micropython and write your first code, you would never drop it!
Where to write micropython?
there are lots of IDEs for micropython out there like VS code with Pymakr extension, pychram with micropython plugin and the most comfortably one Thonny IDE which we would learn in this article.
Starting Thonny IDE and micropython:
- Download Thonny and install it.
- Open Thonny
- Press the BOOTSEL button on the Pico and hold it while you connect the usb cable to the computer.If you do so, RP Pico would be opened as a mass storage device
- In the bottom right-hand corner of Thonny IDE, click on the python version and choose MicroPython(Raspberry Pi Pico) and install it.
Now you are ready to program the Pico.
Blink LED With Raspberry Pi Pico and Learn GPIO
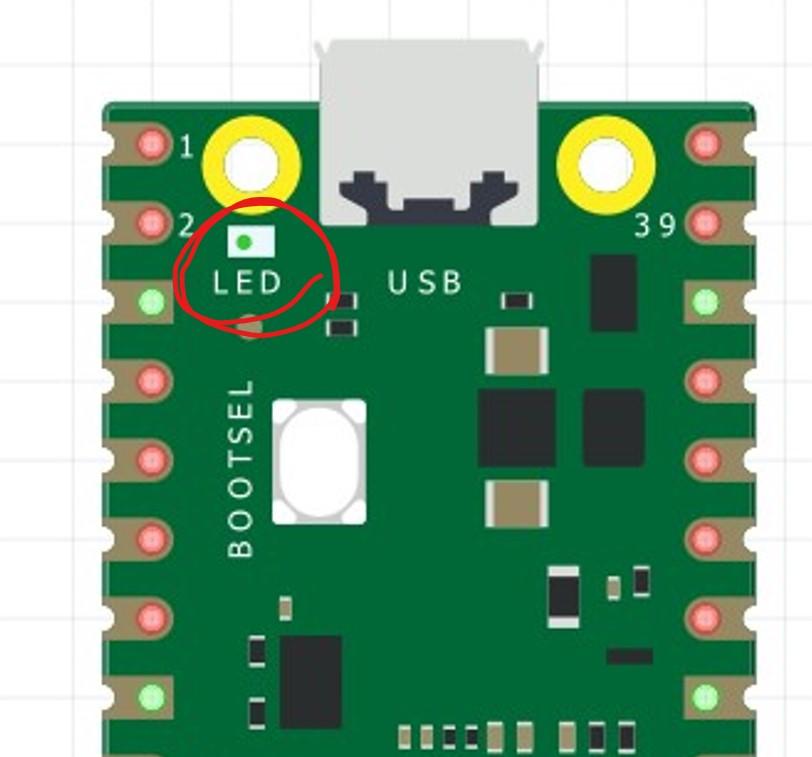
To work with GPIO pins and control them, we should import Pin library:
from machine import Pin
To do works with time like delays, import utime:
import utime
Initialize the pin as output and name it led or whatever:
According to pinout, on board LED is connected to pin 25
led = Pin(25, Pin.OUTPUT)
Create infinite loop to run forever:
to change the state of a pin from 0 to 1 or 1 to 0, use toggle() function. (The "toggle()" would actually NOT(~) the pin value)
to make delay in milliseconds, microseconds and seconds:
utime.sleep_ms() ---- milliseconds
utime.sleep_us() ---- microseconds
utime.sleep() ---- seconds
while True:
    led.toggle()
    utime.sleep_ms(500)           #500 milliseconds delay
Now run the program.The Pico led would blink.
Raspberry Pi Pico Work With Button
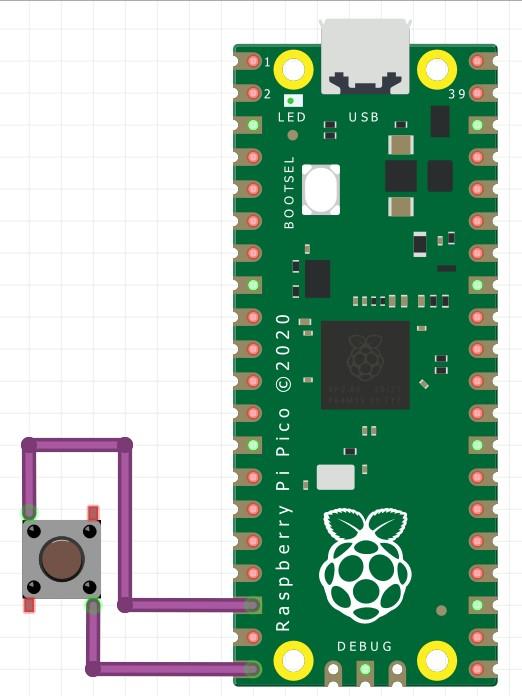
To learn input mode of GPIOs and read the value of pins, we connect a push button to a pin and increase a number whenever the button is pushed so we can see the effect.
As you now the behavior of push button, while the button is pushed, the first side is connected to second side.
We set a pin like #15 as input with integrated pull up resistor. So, normally the pin would be HIGH. The other side of the button is connected to ground; thus, when you hold button the pin becomes LOW.
1) Import libraries and create a variable:
from machine import Pin
import utime
counter = 0
2) Initialize pin 15 as input with pullup and name it button:
button = Pin(15, Pin.INPUT, Pin.PULL_UP)
3)Read state of button pin:
button.value()
create a loop that increase and print counter value whenever you push button:
Remember we need the loop to run when the pin is LOW. So the condition:
not button.value()
while not button.value():
    counter = counter + 1
    print("counter value = " , counter)
    utime.sleep_ms(60)
the delay is to bypass noise caused by button.If you didn't create the delay, the loop would run lots of times with just one push.
Raspberry Pi Pico ADC
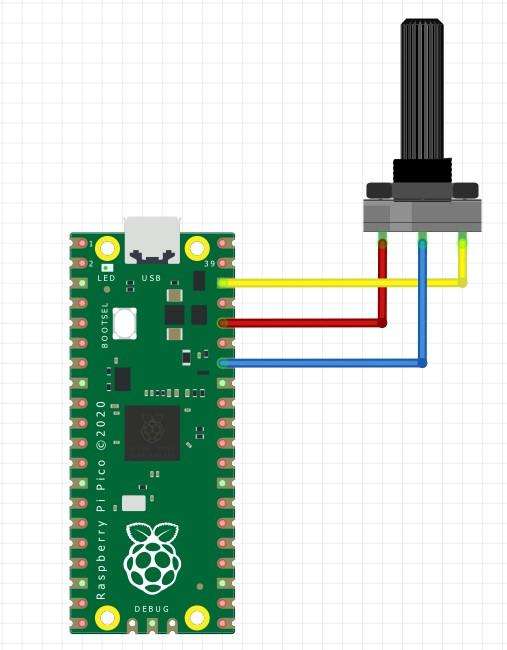
Use ADC in micropython raspbery pi pico is pretty simple.
There are three 10 bit
adc available on pico:
ADC0 ----> GPIO 26
ADC1----> GPIO 27
ADC2----> GPIO 28
Now we try to read the potentiometer value:
import ADC:
from machine import ADC
assign adc conversion to a variable named pot and specify the adc channel(adc0 >> gpio 26):
pot = ADC(26)
To read the adc value use this code:
read_u16()
it reads the value
pot.read_u16()
the value would be approximately between 0 and 65025
Put it in a loop and print the value to see the result:
while True:
    val = pot.read_u16()
    print("ADC =  " , val )
    utime.sleep_ms(100)
Raspberry Pi Pico PWM
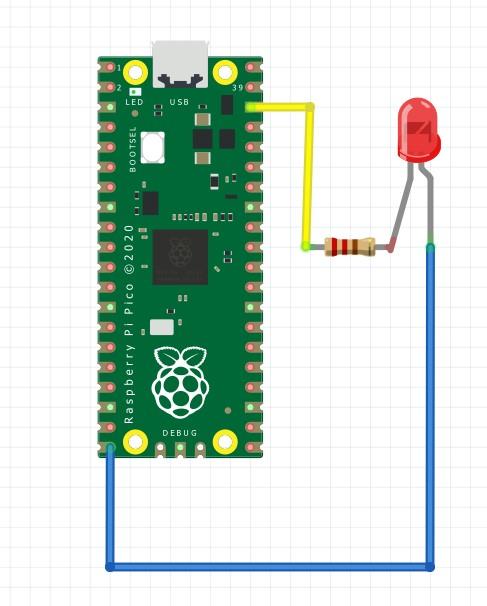
All of the GPIO pins can be used as pwm output.
we would use pwm to control an led light.
import PWN:
from machine import PWM
assign pwm to pin 15 and name it led:
led = PWM(Pin(15))
set the frequency in Hz:
led.freq(1000)
set the dutycycle:
it could be from 0 to 65025 corresponding 0 to 100%
led.duty_u16(1000)
Now in a loop first we increase the dutycycle which leads to increase the light, then we decrease it to 0 again:
while True:
    for i in range(0,65025):
        led.duty_u16(i)
        utime.sleep_us(10)
    for i in range(65025,0,-1)     #step = -1
        led.duty_u16(i)
        utime.sleep_us(10)
Raspberry Pi Pico I2C and SSD1306 OLED Display
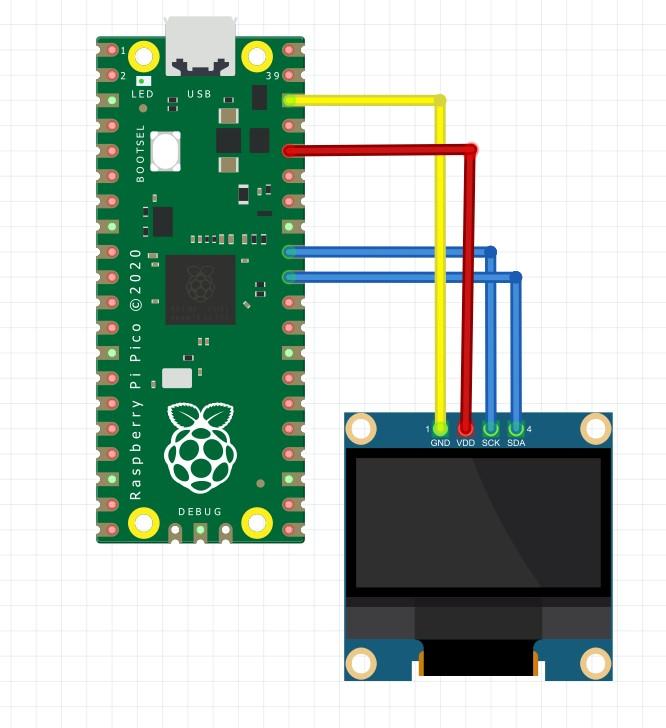
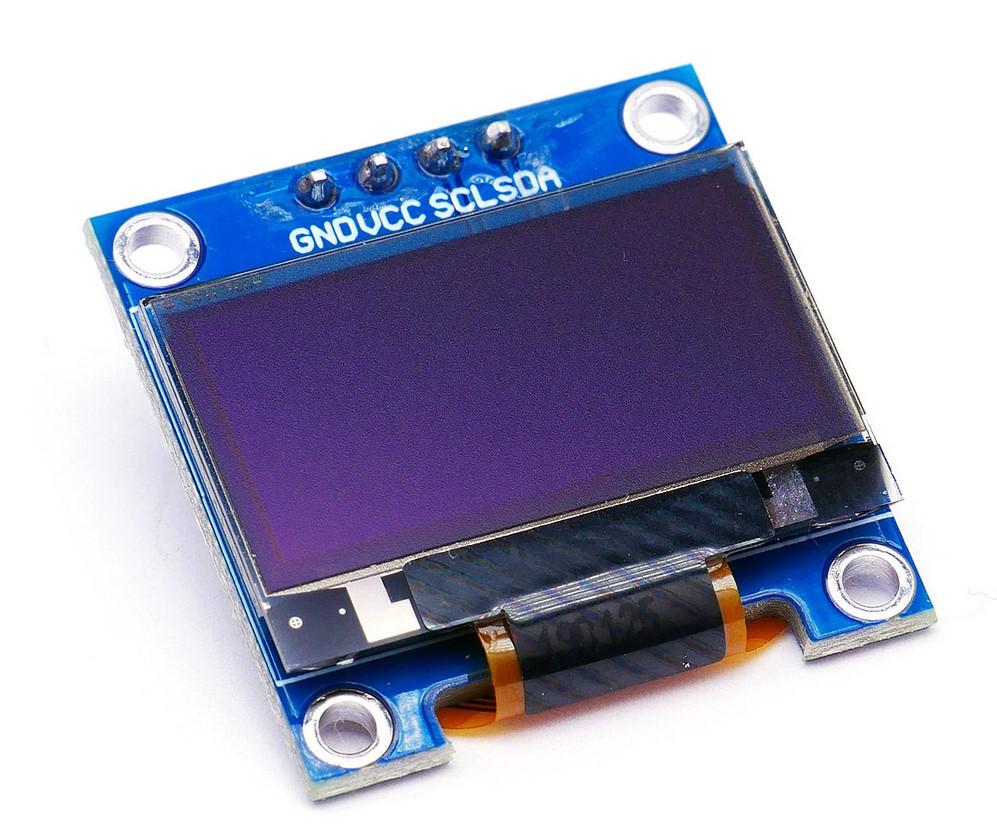
SSD1306 OLED is a tiny useful display that communicates through I2C.It is available in two in the store:
64*128 pixels and 32*128.
To work with it, first we need to add ssd1306 package to micropython:
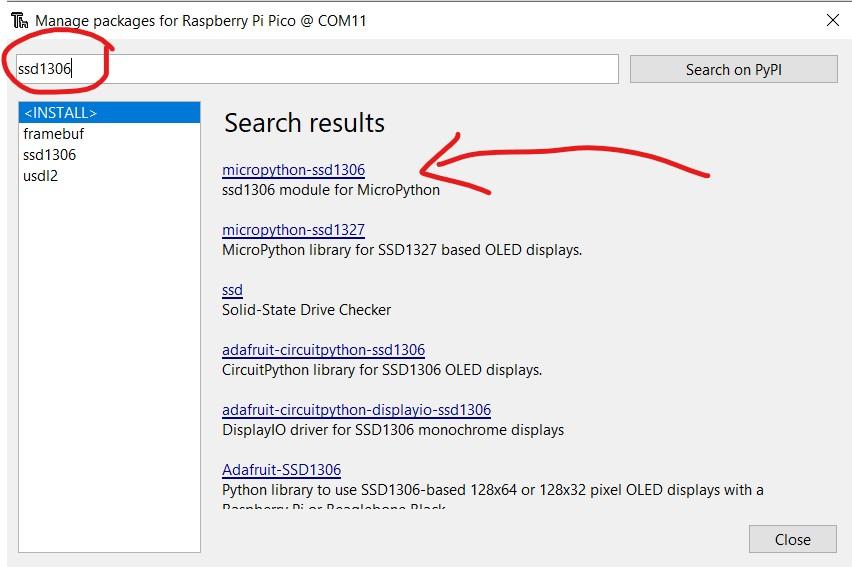
In Thonny IDE go to tools --> manage packages --> search ssd1306 and install ssd1306 micropython
Now we are ready to write the code.
Import necessary libraries:
from machine import I2C, Pin
from ssd1306 import SSD1306_I2C
import utime
Initiate I2C and specify which i2c pins you want to use:
In this case, I use pin 26 and 27 which is I2C1, also name it i2c
i2c = I2C(1, sda = Pin(26), scl = Pin(27), freq = 400000)
Initiate the display and pass the size and the i2c channel to it:
oled = SSD1306_I2C(128,64,i2c)
ssd1306 commands:
remember we called the display "oled"
All commands would actually appear on screen only after you update screen with this command:
oled.show()
To erase the whole screen:
oled.fill(0)
To turn on the whole screen:
oled.fill(1)
To put text on desired location:
oled.text("your text",x,y,1= show or 0= erase)
example:
print string in (64,32) position:
oled.text("HELLO WORLD!" ,64, 32, 1)
To turn on a single pixel on screen in position(100,30):
oled.pixel(100,30,1)
To turn off a single pixel on screen in position(10,30):
oled.pixel(100,30,1)
To draw a horizontal line with specific length and specific start point:
oled.hline(x,y,length, 1=print or 0= erase)
example:
oled.hline(0,0,128,1)
oled.hline(0,32,64,1)
oled.hline(64,60,40,1)
Drawing vertical line is with command oled.vline and the arguments are the same.
To draw a line from (x1,y1) to (x2,y2):
oled.line(x1,y1,x2,y2,1)
example:
oled.line(0,0,64,32,1)
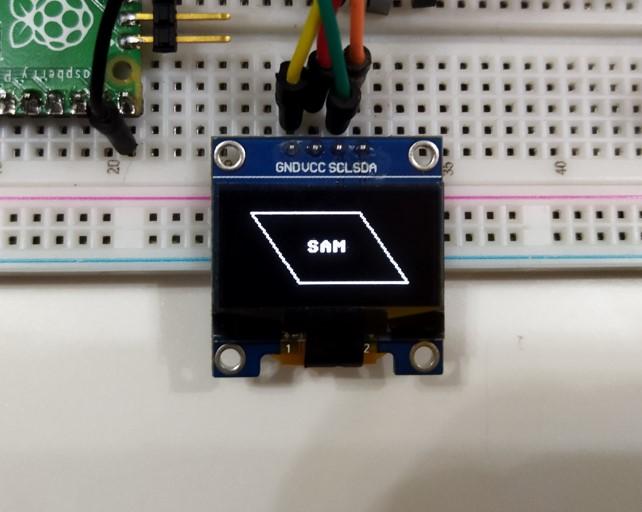
an overall example:
oled.fill(0)
oled.line(15,10,45,54,1)
oled.line(83,10,113,54,1)
oled.line(15,10,83,10,1)
oled.hline(45,54,68,1)
oled.text("SAM",50,28,1)
oled.show()
Put It All Together: Raspberry Pi Pico + ADC + PWM +i2C OLED DISPLAY
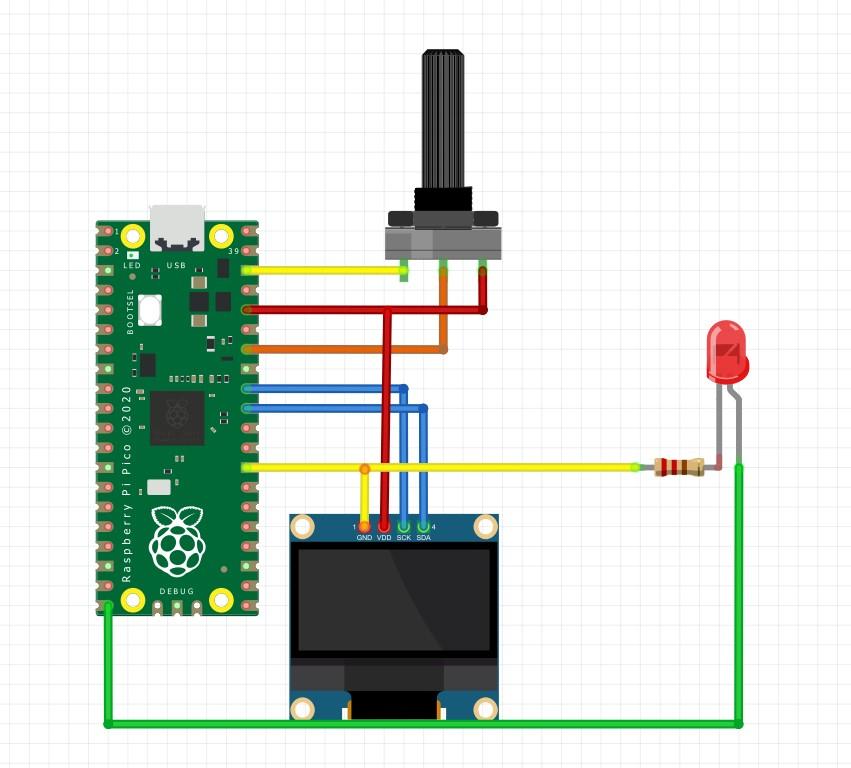
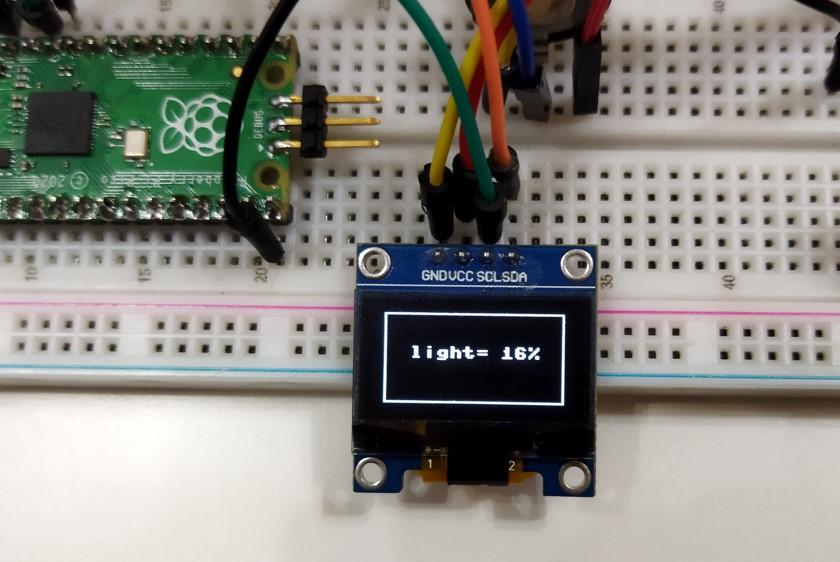
In this step, to practice all features that we've learned so far, we would read a potentiometer, show the value on the oled and control the light of an led.
from machine import Pin, PWM, I2C, ADC
from ssd1306 import SSD1306_I2C
import utime
i2c = I2C(1, scl = Pin(27), sda =Pin(26), freq = 400000)
display = SSD1306_I2C(128, 64, i2c)
adc = ADC(28)
led = PWM(Pin(15))
led.freq(1000)
led.duty_u16(0)
def screen():
display.fill(0)
display.rect(10,5,108,54,1)
display.text(str(int((pot/65025)*100))+ "%", 50, 25, 1)
display.show()
while True:
pot = adc.read_u16()
led.duty_u16(pot)
screen()