Getting Started With ESP8266 / Nodemcu With Arduino IDE
by Utsource in Circuits > Arduino
690 Views, 1 Favorites, 0 Comments
Getting Started With ESP8266 / Nodemcu With Arduino IDE
Things You Need
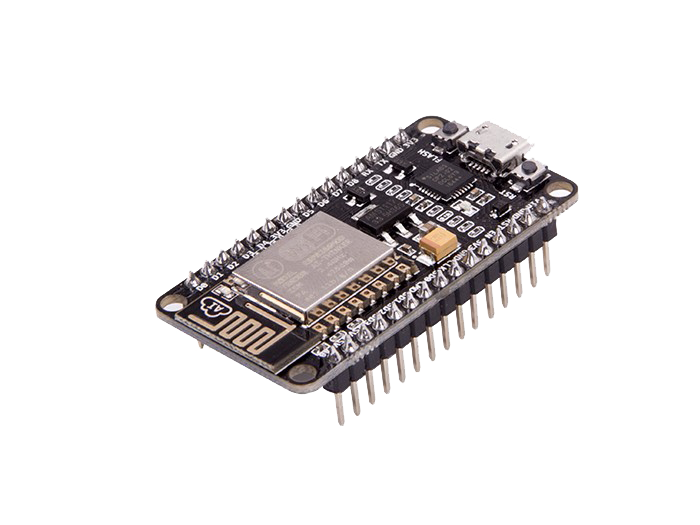
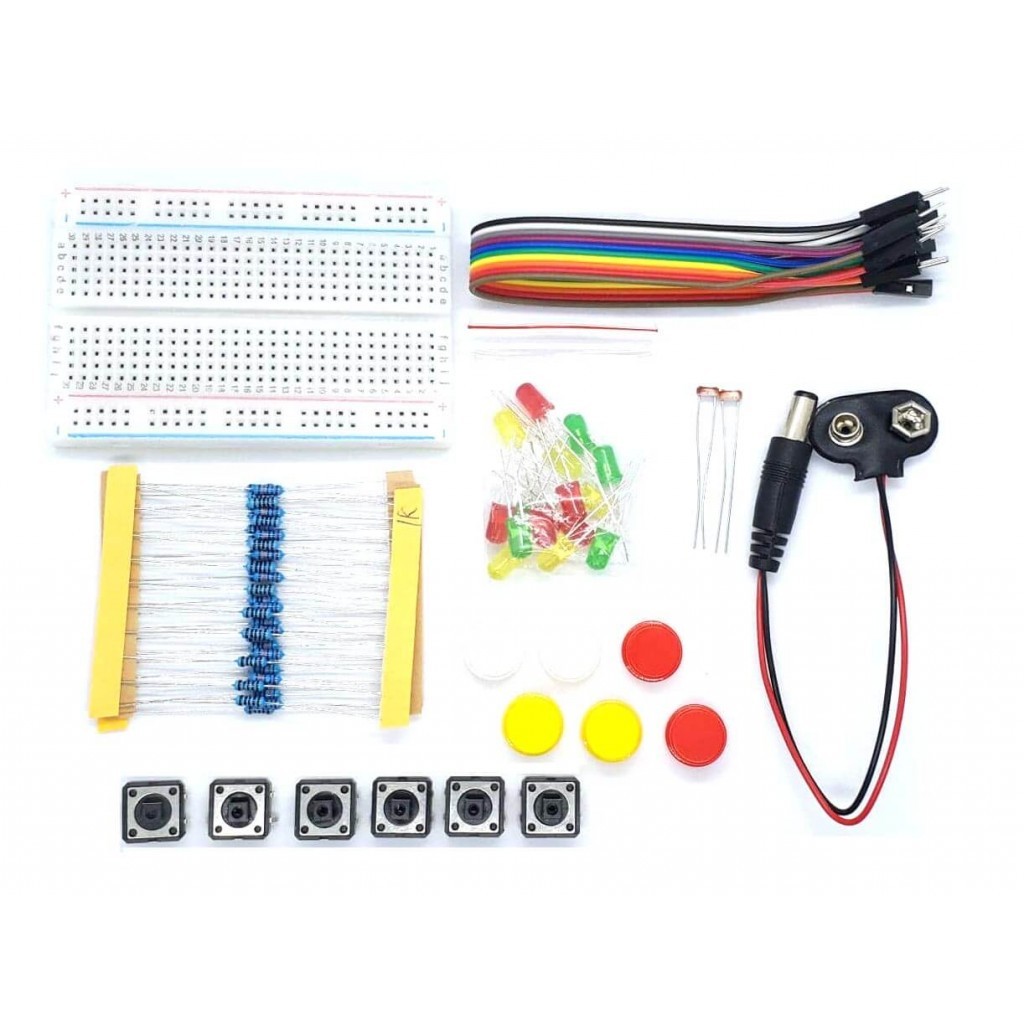
For this instructables we will need following things :
Any esp8266 boards (in my case nodemcu)
Install Esp8266 Boards in Our Arduino IDE
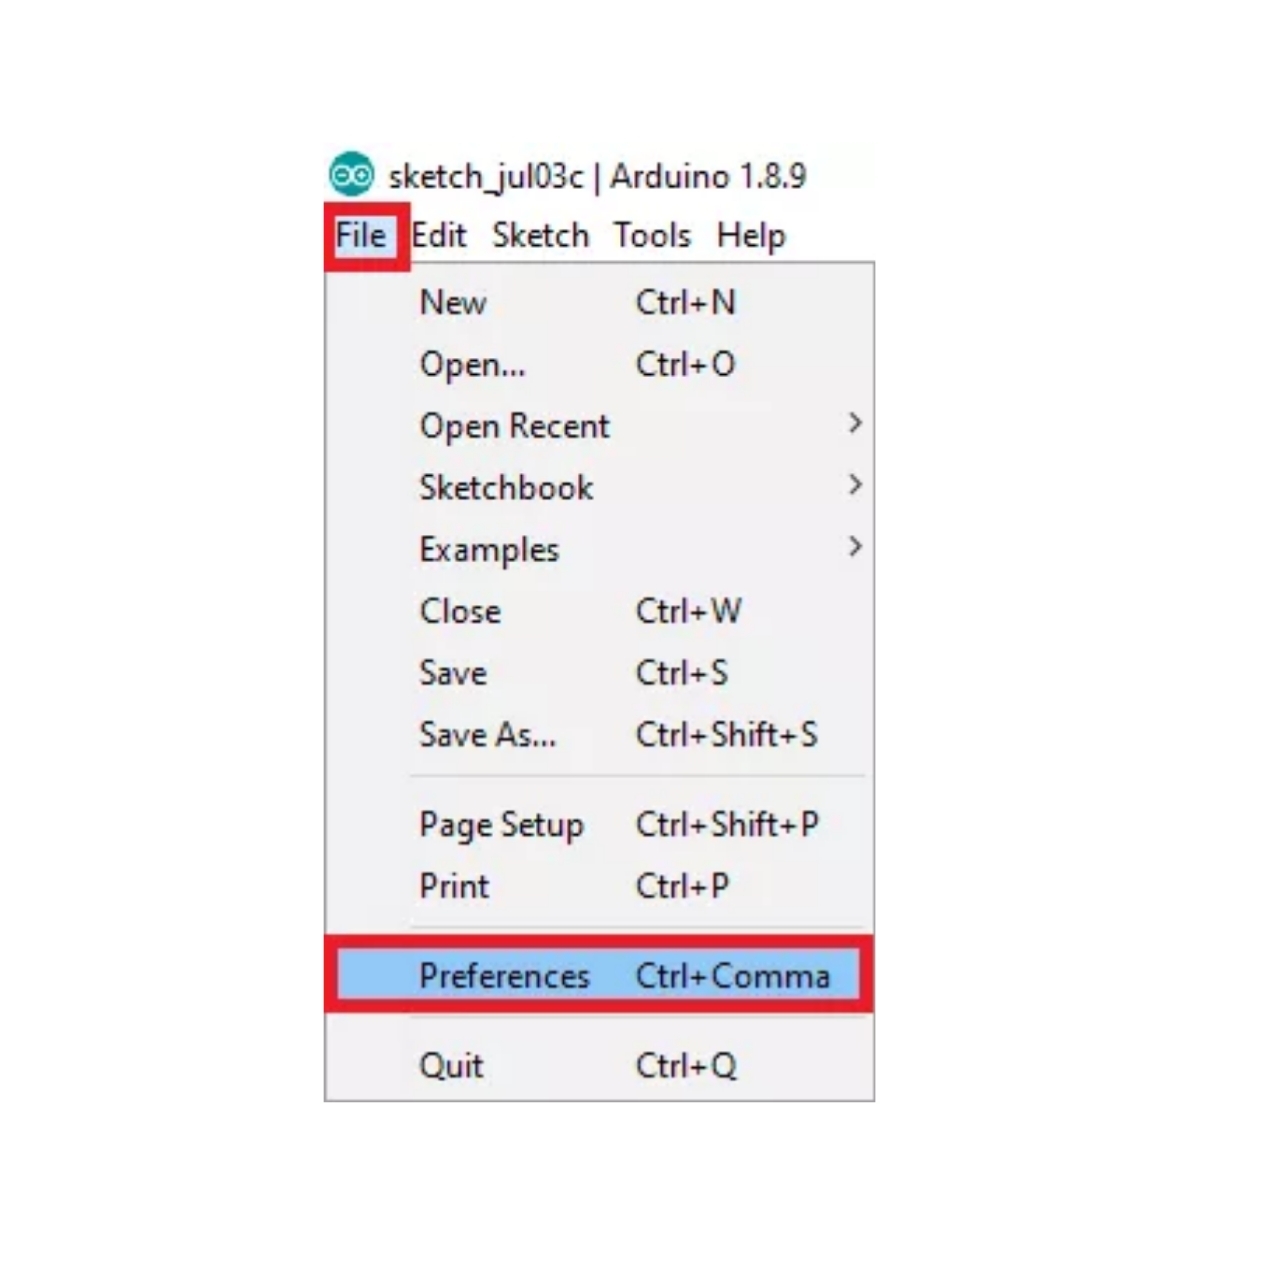
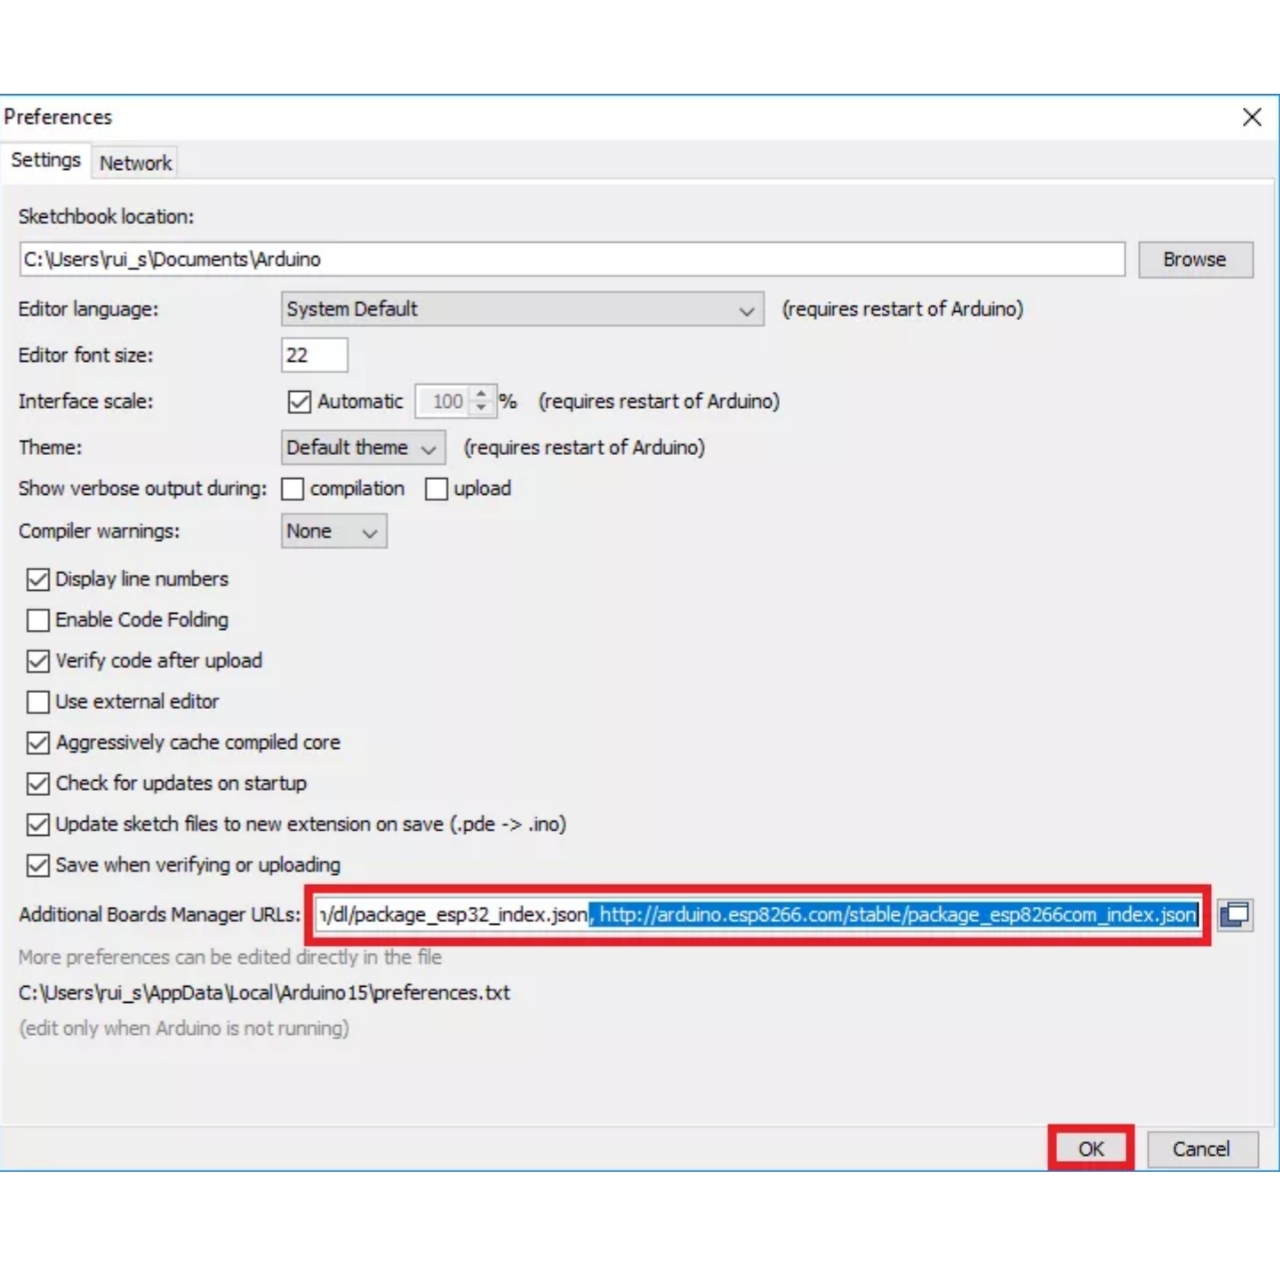
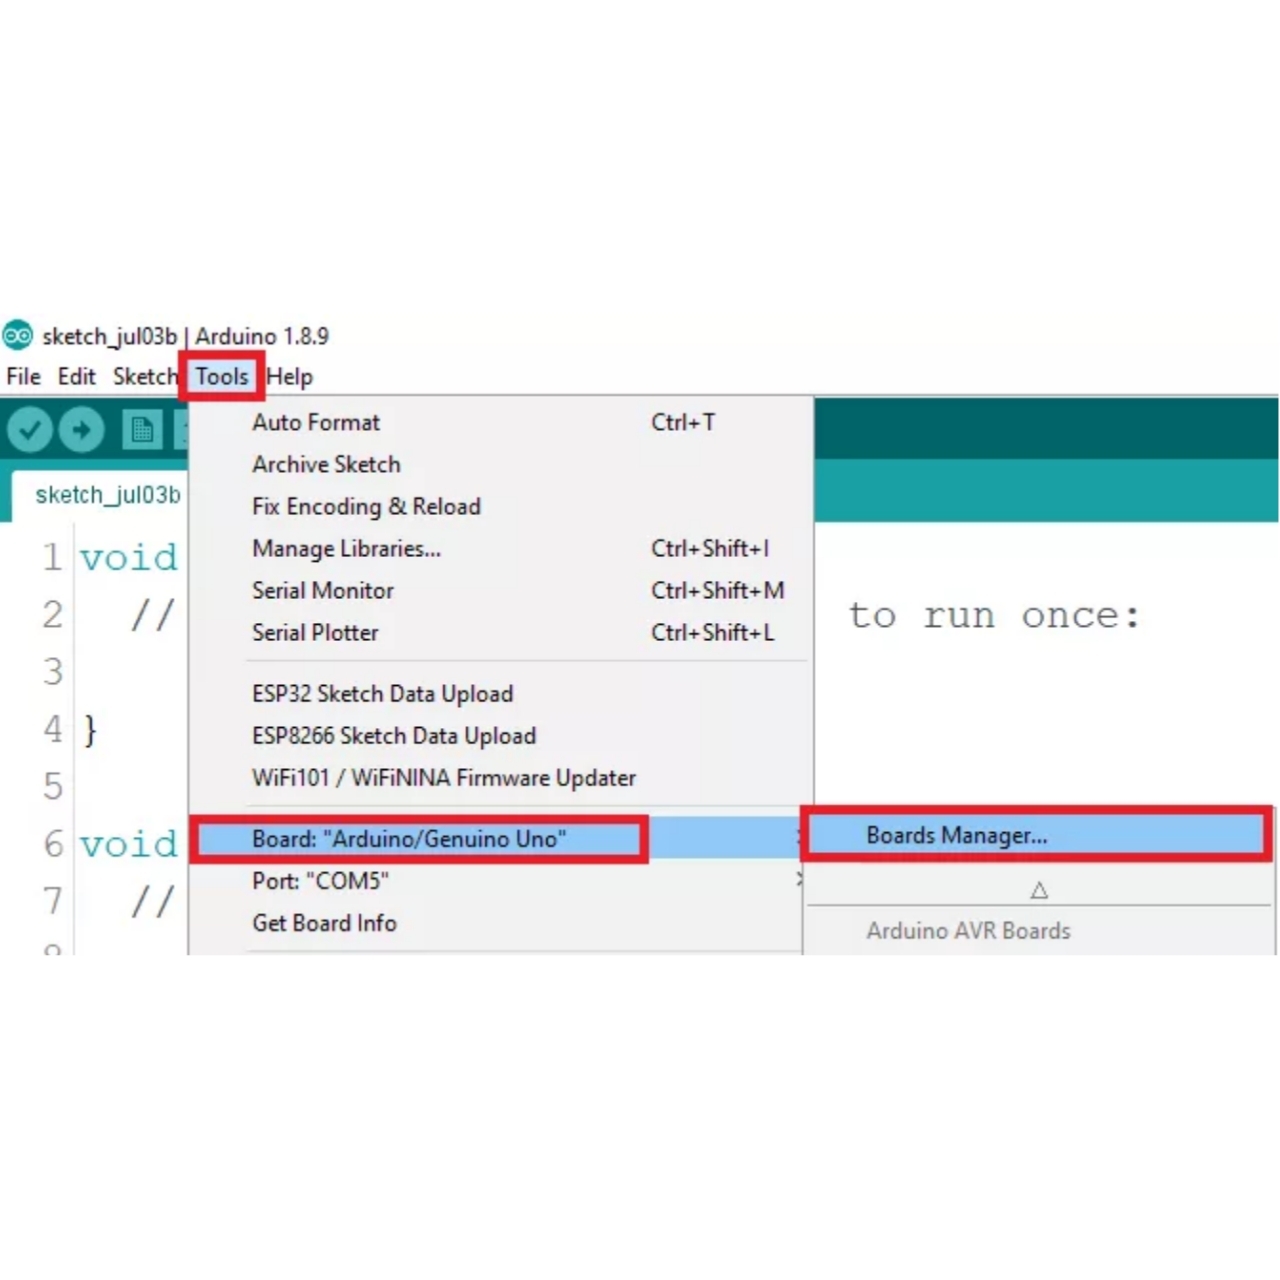
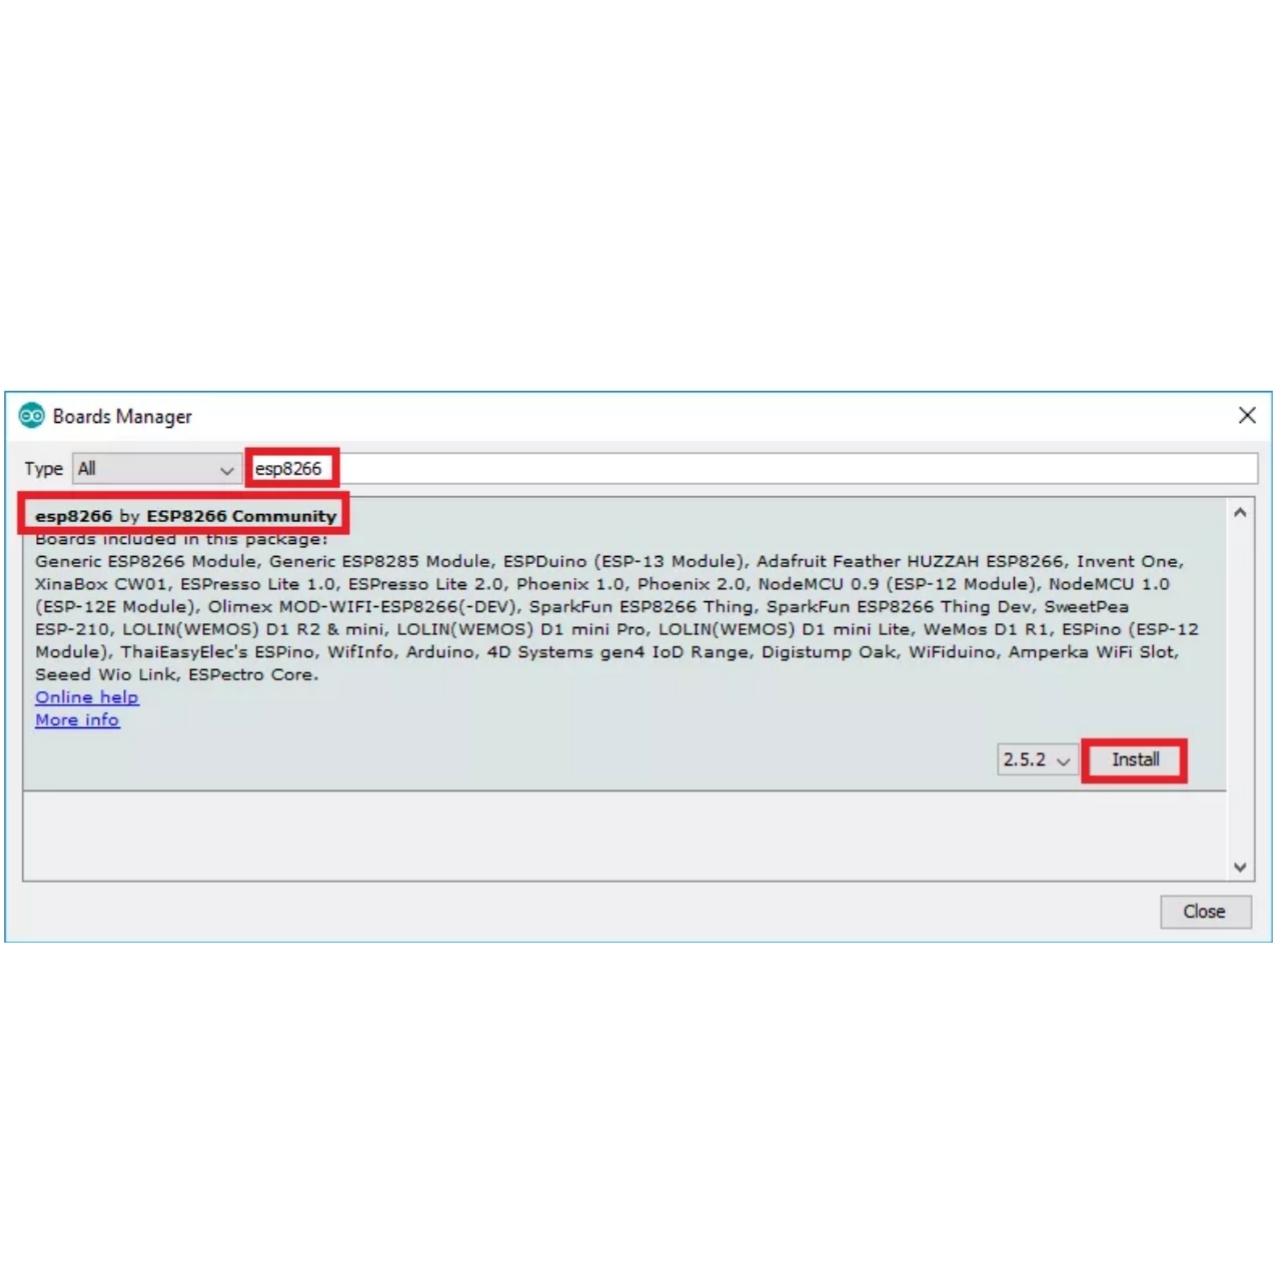
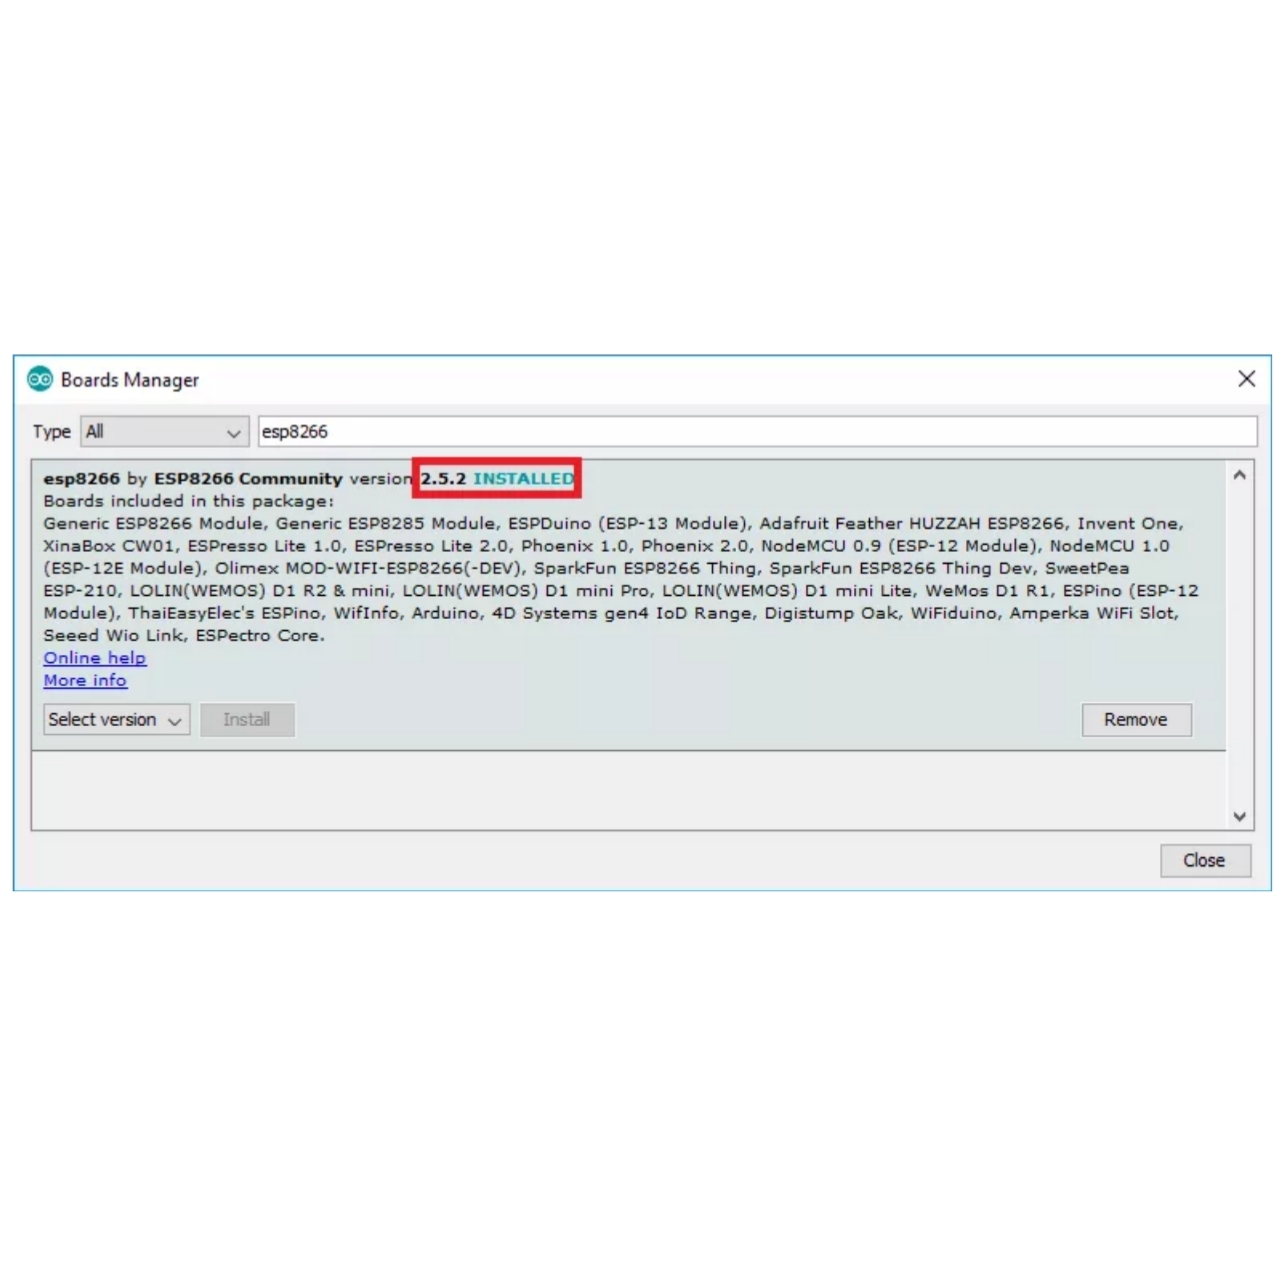
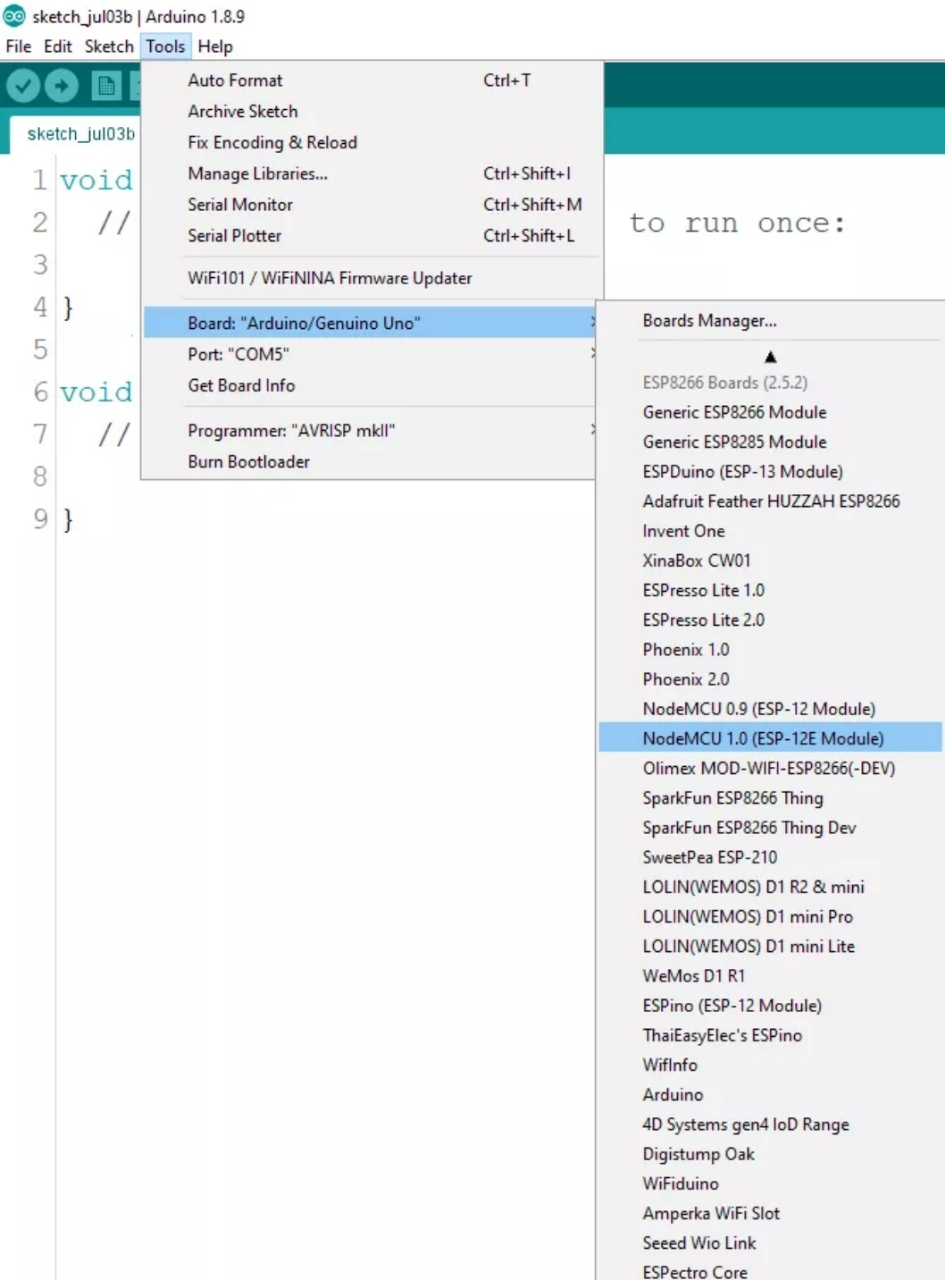
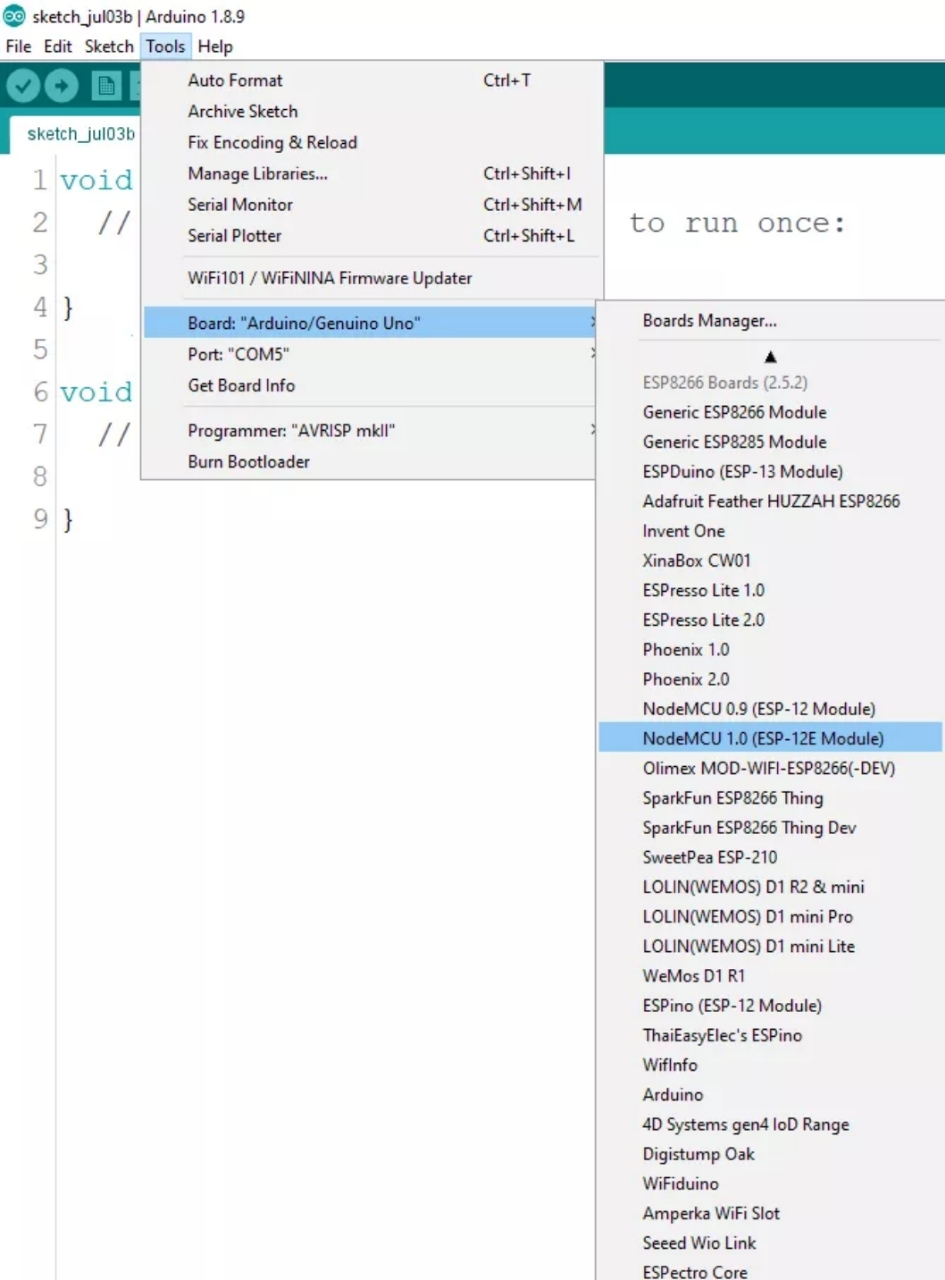
To install the ESP8266 board in your Arduino IDE, follow these next instructions:
-> In your Arduino IDE, go to File> Preferences
-> Enter http://arduino.esp8266.com/stable/package_esp8266com_index.json into the “Additional Boards Manager URLs” field as shown in the figure below. Then, click the “OK”
button.
Note: if you already have the ESP32 boards URL, you can separate the URLs with a comma.
-> Open the Boards Manager. Go to Tools > Board > Boards Manager…
Search for ESP8266 and press install button for the “ESP8266 by ESP8266 Community“:
That’s it. It should be installed after a few seconds.
Schmatics
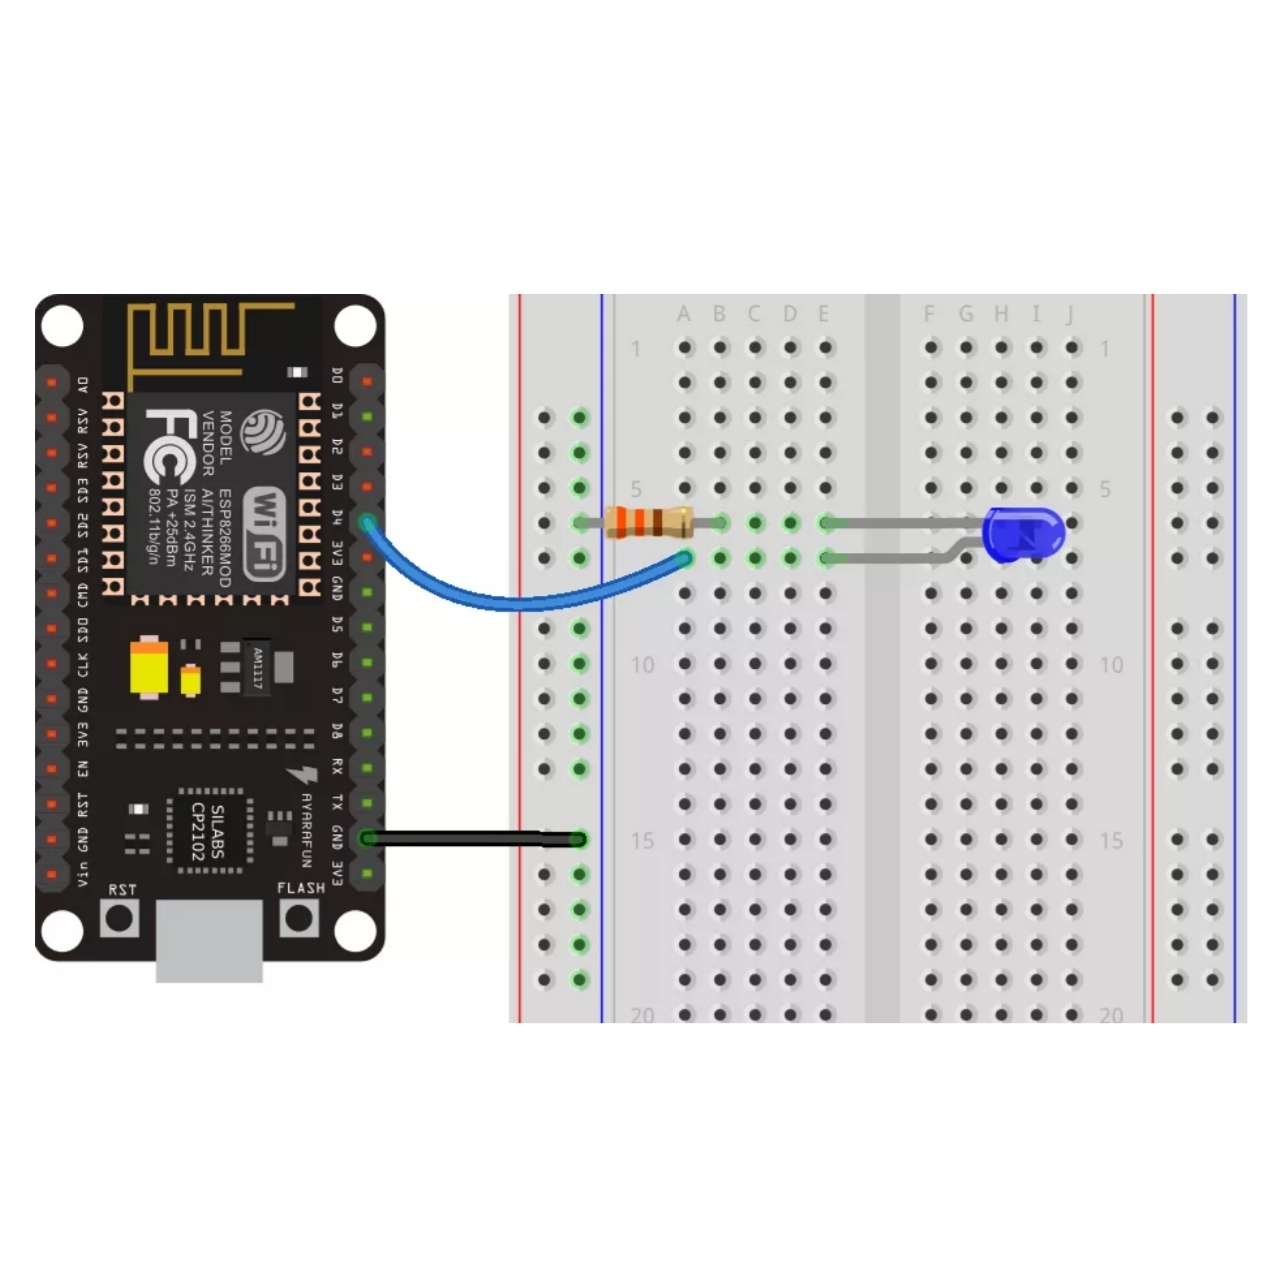
For the first and very simple sketch we will Blink a Led With ESP8266 for that i connected a LED to D4 pin of Nodemcu so please connect a LED to pin D4 of your esp8266 and if your board don't have any D4 pin you can connect it to any Pin but keep in mind whichever pin you connect your LED to , you need to use that pin in Code instead of D4. So please help yourself with above attached schmatics.
Code
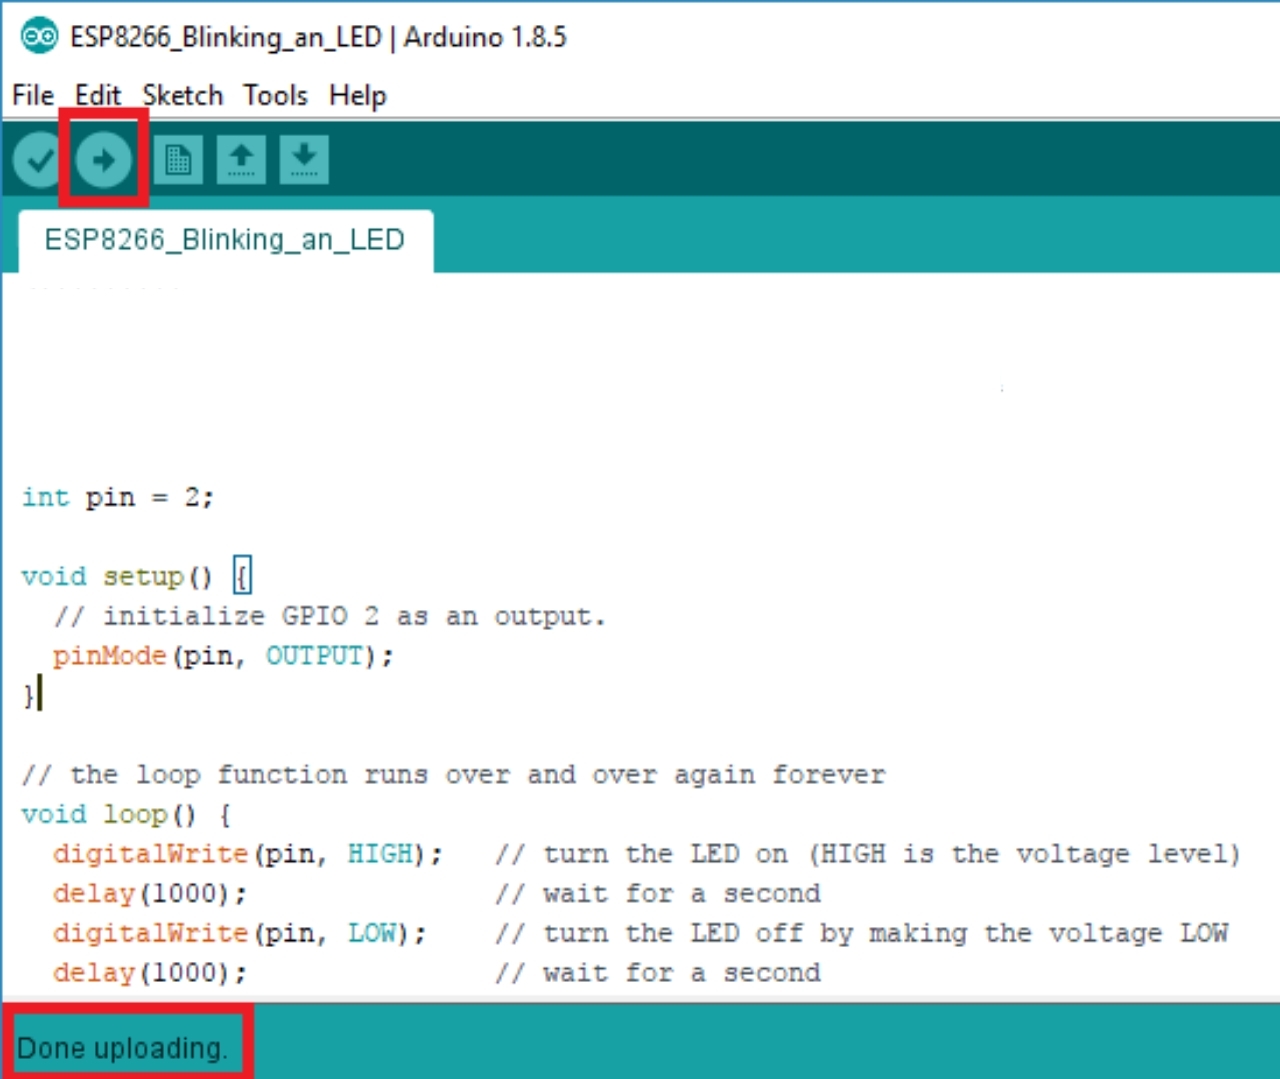
Please copy the following code and upload it to the nodemcu Board :
int pin = 2; // GPIO2 is D4 on nodemcu board
void setup()
{
// initialize GPIO 2 as an output.
pinMode(pin, OUTPUT);
}
// the loop function runs over and over again forever
void loop()
{
digitalWrite(pin, HIGH);
// turn the LED on (HIGH is the voltage level)
delay(1000);
// wait for a second
digitalWrite(pin, LOW);
// turn the LED off by making the voltage LOW
delay(1000);
// wait for a second
}
////////////////////
You can use the above code or you can upload the blink example from arduino ide and put the Led Pin in the code According to your Led connected to your board and after Uploading the code your led will start blinking.
So have fun using esp8266 with Arduino IDE.