Getting Started With CheerLights
by bekathwia in Circuits > LEDs
1075 Views, 8 Favorites, 0 Comments
Getting Started With CheerLights


Today I’m going to show you how to set up your first CheerLights circuit.
CheerLights is a global LED color-sharing platform created by Hans Scharler in 2011. You send it a color, and all the folks with CheerLights will see the new color on their own setups. It used to use Twitter, but now you can control CheerLights using Discord. It’s a super easy beginner IoT project.
Supplies
For this project, you’ll need some RGB LEDs and a wifi microcontroller. I’m using a strip of WS2812 addressable pixels, also called NeoPixels, and an Arduino Nano ESP32 wifi microcontroller board.
Here's a full list of everything you'll need:
- wifi microcontroller such as Arduino Nano ESP32 board or UM TinyPico board
- WS2812b LEDs
- Crinoline tubing, ping pong balls, or other material for diffusion
- Solderless breadboard
- USB C cable
- Wires with female headers
- Zip tie
- Heat shrink tubing
- Soldering iron and soldering supplies
- Scissors
Watch the Video

I made a video explaining the process, check it out!
Getting Set Up

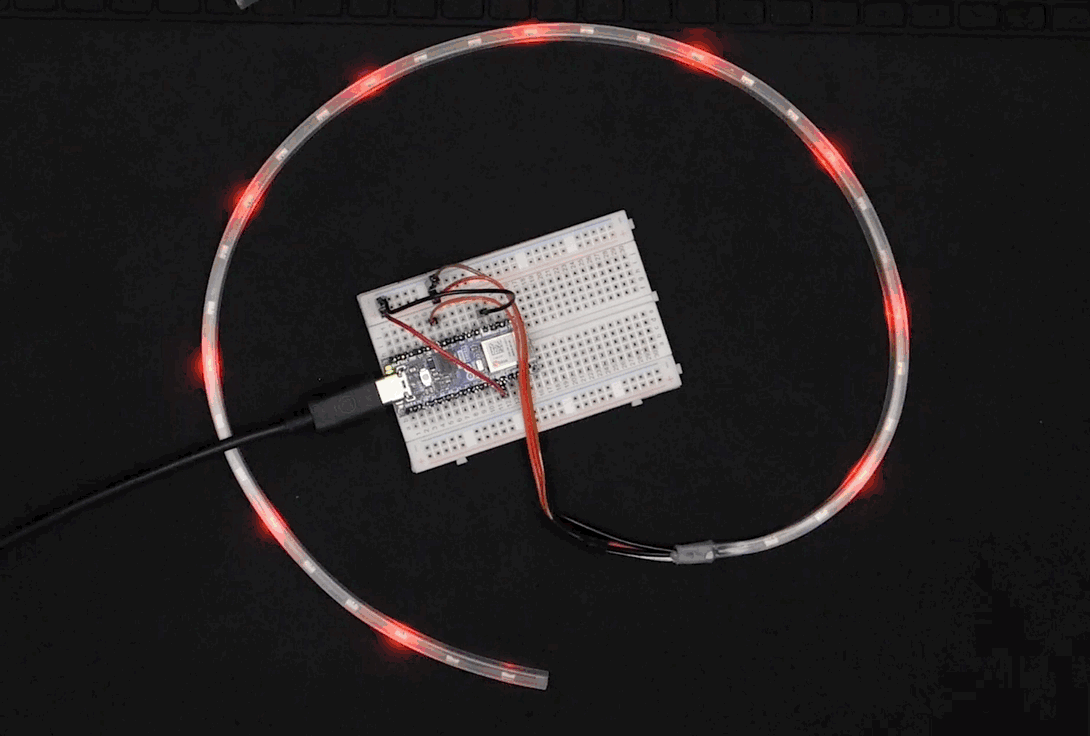
The first step is to make sure your Arduino IDE is set up for your wifi board, which in most cases requires installing another boards package and any drivers necessary for your specific hardware. Since this is an Arduino brand board, the IDE comes with board support already installed. Then you’ll need to install the NeoPixel library, and open up the strandtest example that comes with it. It’s important to run a test sketch on your circuit to verify that you can communicate with the board successfully. Connect your pixel strip to power, ground, and a data output, then make sure your Arduino code references that same output pin. If all goes well, you’ll see the pixels light up. Now you’re ready to move on to the internet code.
Internet Code


I got this code example from the CheerLights github. Even though it says its for the ESP8266, it works fine on the ESP32.
Then I updated my wifi network name and password, as well as the pixel pin, to match my own.
The code periodically checks for updates on the ThingSpeak channel used to communicate the CheerLights color, then sets the LEDs to that color.
Use It


That's all there is to setting up the hardware and software for your CheerLights project. The physical form is up to you. I put my LED strip in a piece of crinoline tubing, then twisted it up into a decorative knot to put on top of my Christmas tree.
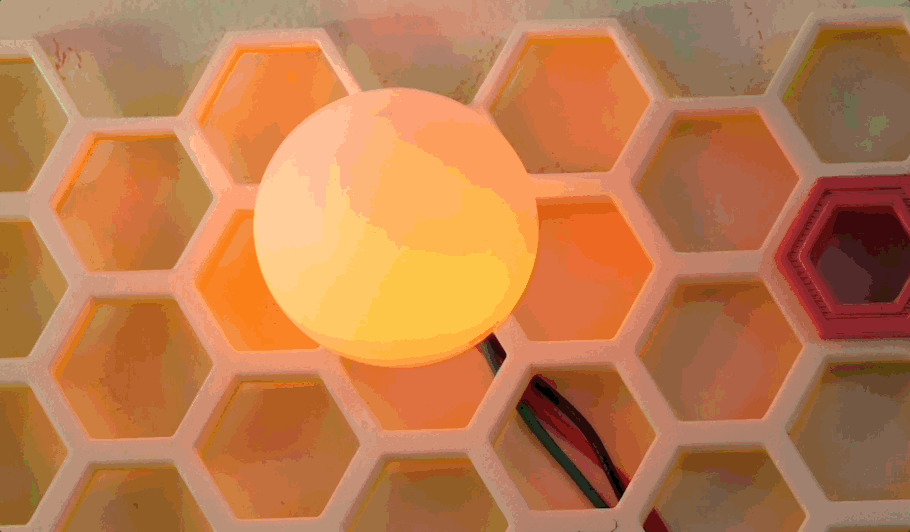
I made a second CheerLights circuit using the TinyPico board and a smaller strip of pixels inside a pingpong ball.
Ping Pong Balls?!


But aren't ping pong balls flammable!? Yes, technically pingpong balls can catch on fire. But not from these regular LEDs. It’s a common misconception that LEDs can get hot enough to set their diffusion on fire– surely some of the super high-power ones could, especially if you didn’t heatsink them properly, but those are not your run-of-the-mill LEDs.
It takes a lot to set a ping pong ball on fire. A casual grazing of it with direct flame from a lighter doesn’t do it, you really have to hold that heat source right on it for quite some time. Admittedly, once it catches, it does keep itself burning for quite some time. They’re made of nitrocellulose and camphor. But could my CheerLights start that fire? No way.
Enjoy!

Having the CheerLights LED circuit around and noticing it change color is really fun, knowing that another person sent that color and is probably looking at their CheerLights right now. And that makes more folks notice theirs, and send a color of their own. Cheer is exactly the word I’d use to describe that feeling of “hey, it changed color!” then immediately pull out my device to send along a color of my own in response, contributing to an ongoing color conversation. It's super fun and easy, and I hope you’ll give it a try.