Getting Started With Cayenne IoT for Raspberry Pi
by Sarath341 in Circuits > Remote Control
1859 Views, 3 Favorites, 0 Comments
Getting Started With Cayenne IoT for Raspberry Pi
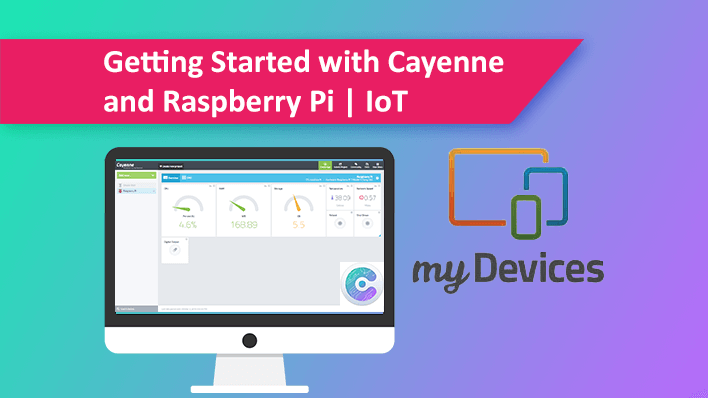
Cayenne is an awesome IoT Application developed for beginners as well as professionals. It is made by myDevices. The best thing about Cayenne is, it doesn’t require any coding. All you need to do is connect your sensors or actuators to the Raspberry Pi and configure it in Cayenne Dashboard/Mobile App. You can create triggers, events, monitoring widgets and more with Cayenne.
The Cayenne supports SBC like Raspberry Pi, Microcontroller boards like Arduino , ESP8266 and LoRa Devices. In this tutorial, we will see a basic LED Control example using Cayenne. I’m pretty sure you can easily understand it and able to make your own IoT Based projects according to your choices.
Check out our FactoryForward Blog here.
Components Required:
Internet Connection
For more tutorials and shopping, visit our website. FactotyForward is an Approved Reseller of Raspberry Pi in India.
Optional:
Cayenne App – Android
Cayenne App – iPhone
Create Account in Cayenne
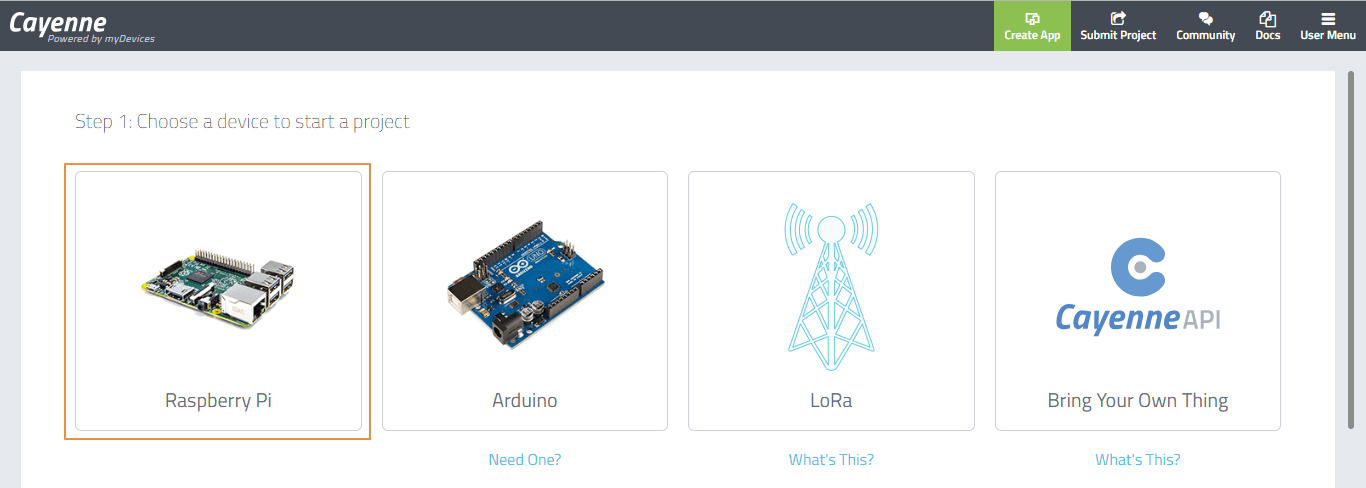
- Create a Cayenne account on https://cayenne.mydevices.com/
- Now you can able to see the Dashboard. Choose your device. Here we are using Raspberry Pi.
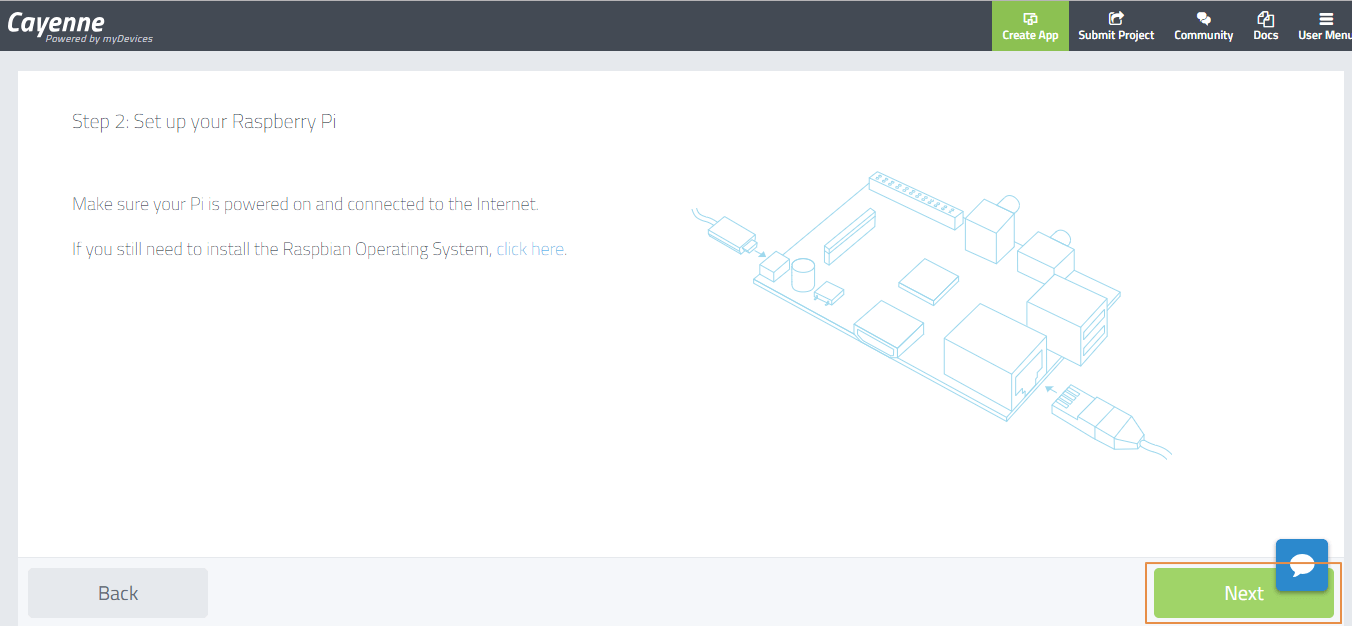
Make sure your Pi is Powerd ON and Connected to the Internet. Click on Next on Cayenne.

Here you can see two methods of verification.
Mobile App: Verify your Pi using the App (connected to the same network).
Command Line: You will get a code displayed on Cayenne, Copy and Run it on the Pi. The Cayenne will be automatically installed. That’s all you have to do. It’s done. In our tutorial, we will verify using Command Line. Copy the code from the next screen.
Open Terminal on Pi. Paste the Code.
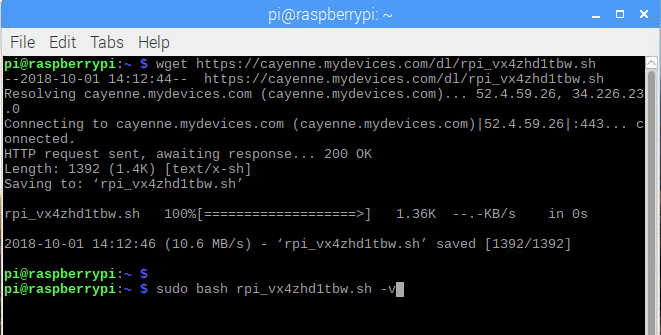
After Installation, You Can Able to See Your Dashboard on Your PC.
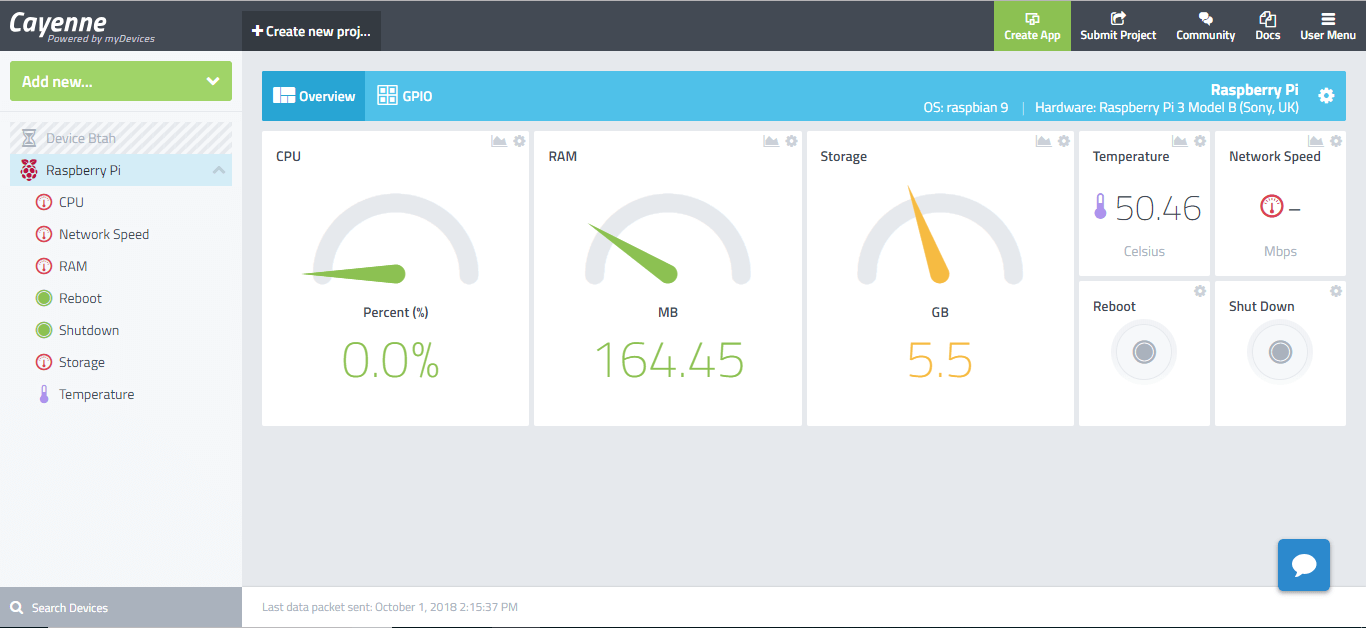
As you can see on the dashboard, you have CPU, RAM and Storage Usage meters. The temperature of Pi, Network Speed, Reboot and Shut Down.
Yes, you can reboot/shut down your Pi from anywhere in the World. You can also click on the cog wheel and schedule the date and time to reboot your Pi.
Let’s Control Our LED From Anywhere in the World With Cayenne.
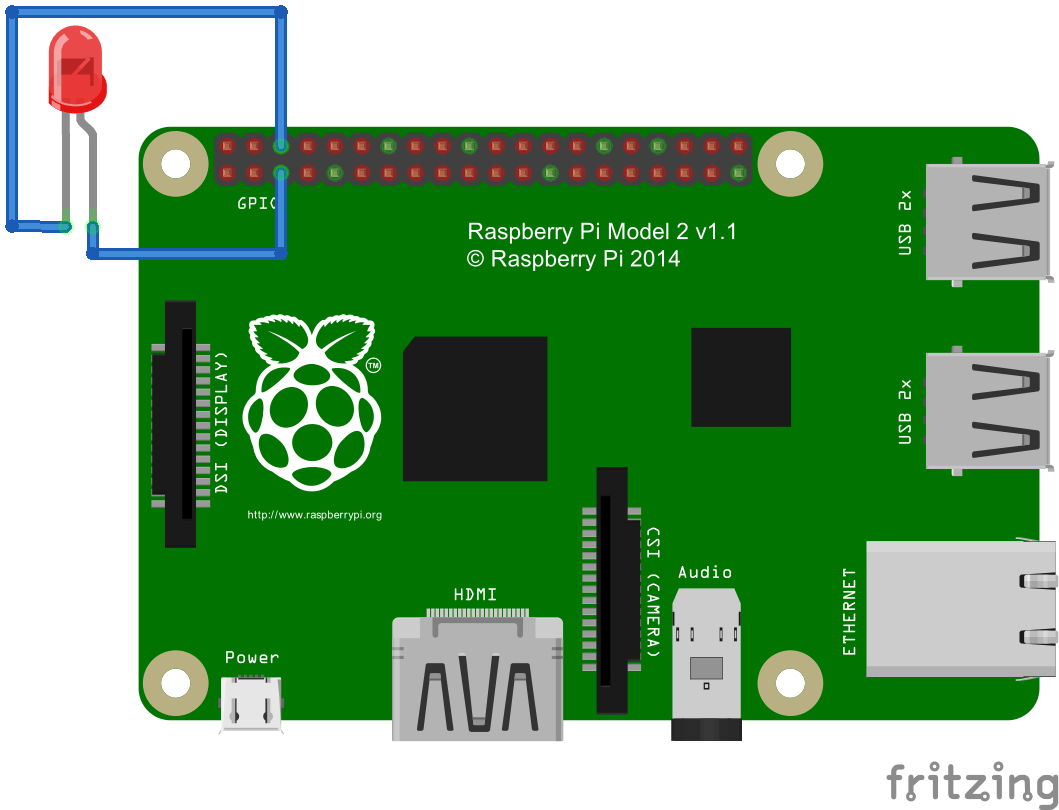
The circuit is very simple; connect your LED on GPIO3 and GND. The pin number mentioned here and in the Cayenne app will also refer to the BCM GPIO Numbering only.
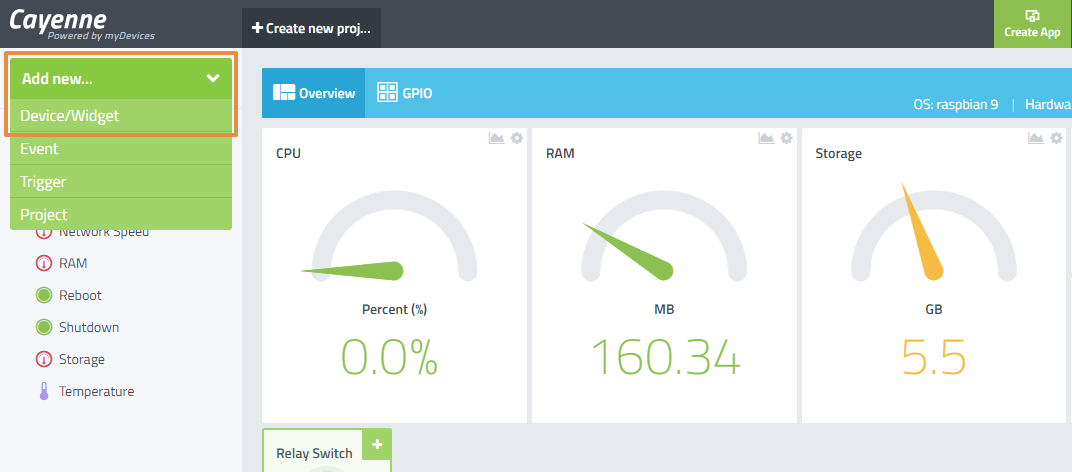
Now go to Cayenne Dashboard, on the left side, click add new drop-down. Choose the first option ‘Device/Widget’.
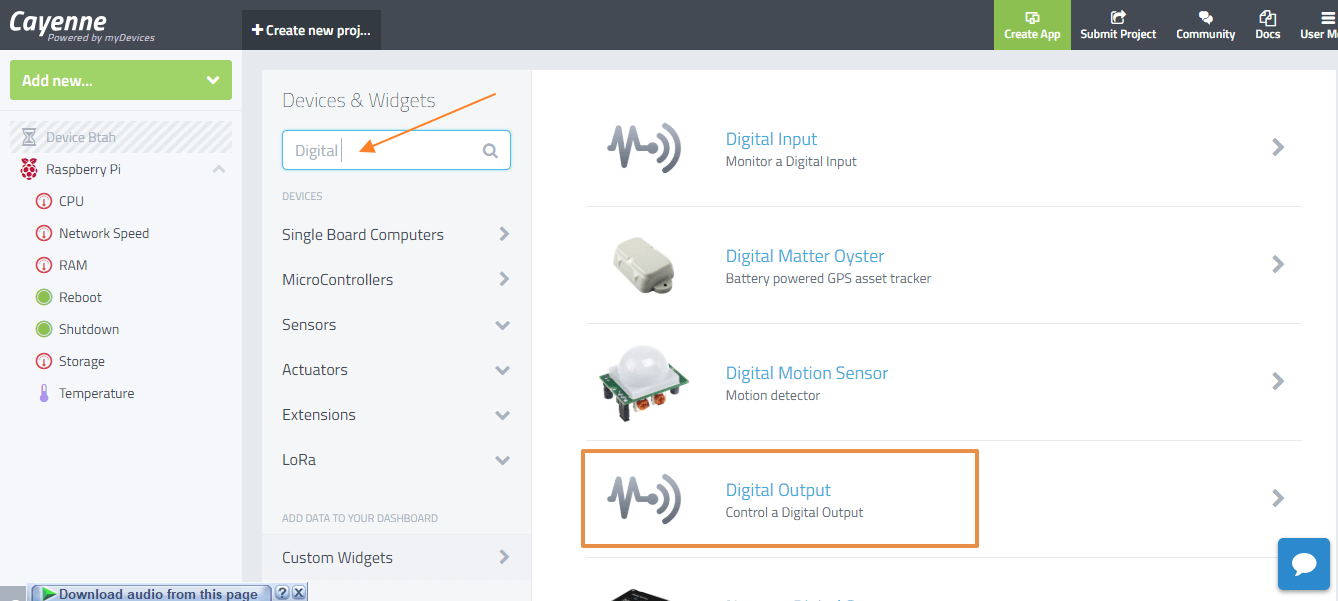
Search for Digital Output on the search bar. On the right side result, click on Digital Output.
Now this shows a configuration of the digital widget. Choose the drop downs and set the following settings.
Select Device: Raspberry Pi
Connectivity: Integrated GPIO
Channel: Channel 3 – It is the GPIO 3 Pin of Pi
Choose Widget: Button
Choose icon: LED (optional)
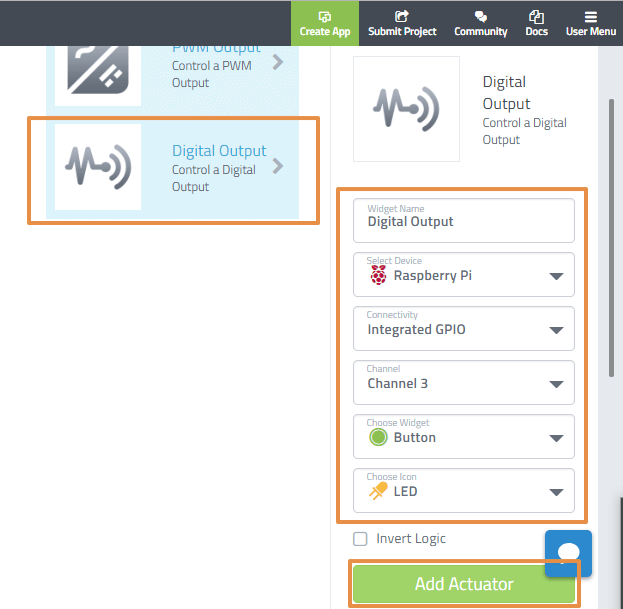
After choosing all configurations, click ‘Add Actuator’ button and it will back to dashboard with your new Digital Output Icon.
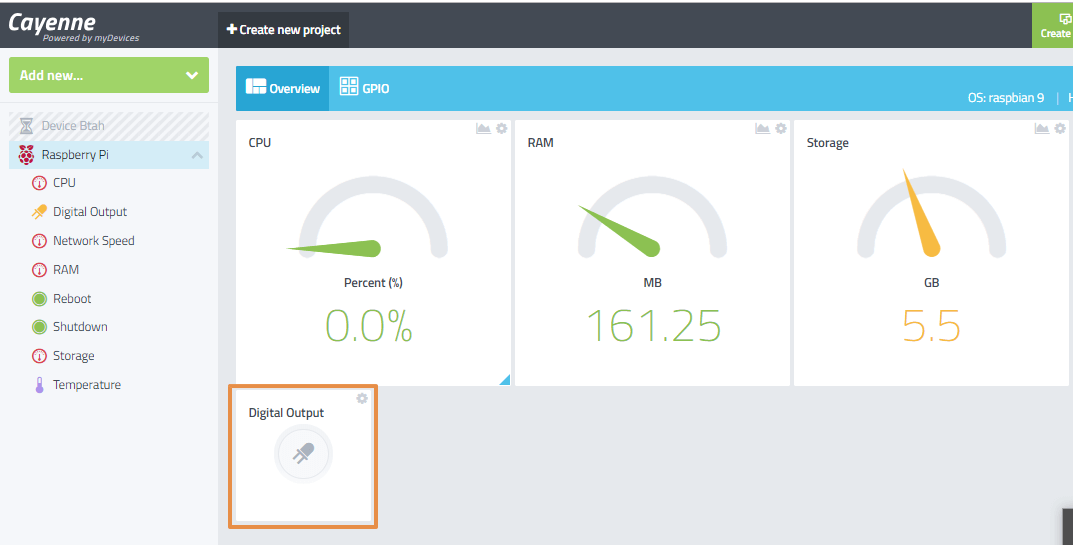
Click on the Icon and You can able to see the LED will be turned ON/OFF accordingly.
