Getting Started

In this fast and furiously fun class, you'll learn how to incorporate light emitting diodes (LEDs) and vibration motors into your 3D prints using Autodesk's free browser-based modeling program Tinkercad and their new circuit assemblies.

This class is for you if you have:
- At least a bit of 3D printing experience
- Little to no experience with electronics
- A desire to dip your toes into the exciting world of adding lights and action to your 3D prints!
If this sounds like you, let's learn a thing!
Supplies
Before we dive into the wonderful world of simple circuits, I'm going to go over the supplies and tools you'll need.
3D PRINTING TOOLS

You can absolutely do this class without actually 3D printing anything or making the circuits, but if you do want to end up with a physical version of your design, here are the tools and supplies you'll need in order to make all the parts.
- 3D Printer*
- PLA filament that matches your printer
- Wide painter's tape
- Credit card for smoothing out the tape on the print surface
- Rubbing alcohol or an alcohol based lens cleaner
- Sharp chisel (optional)
*To read a great overview of good quality hobby 3D printers – and to find info on where to have your pieces printed if you don't own a 3D printer – read through lesson 1 of JON-A-TRON's Easy 3D Printing Class!
CIRCUIT ASSEMBLY TOOLS


The assemblies were designed to be easy to put together. (Nice work Tinkercad team!) So easy in fact, that you only need 2-3 simple tools:
- Wire cutters
- Needle nose pliers
- Wire strippers (optional)
NOTE: If your wire strippers have a wire cutting section, you do not need separate wire cutters.
GLOW ELECTRONIC COMPONENTS

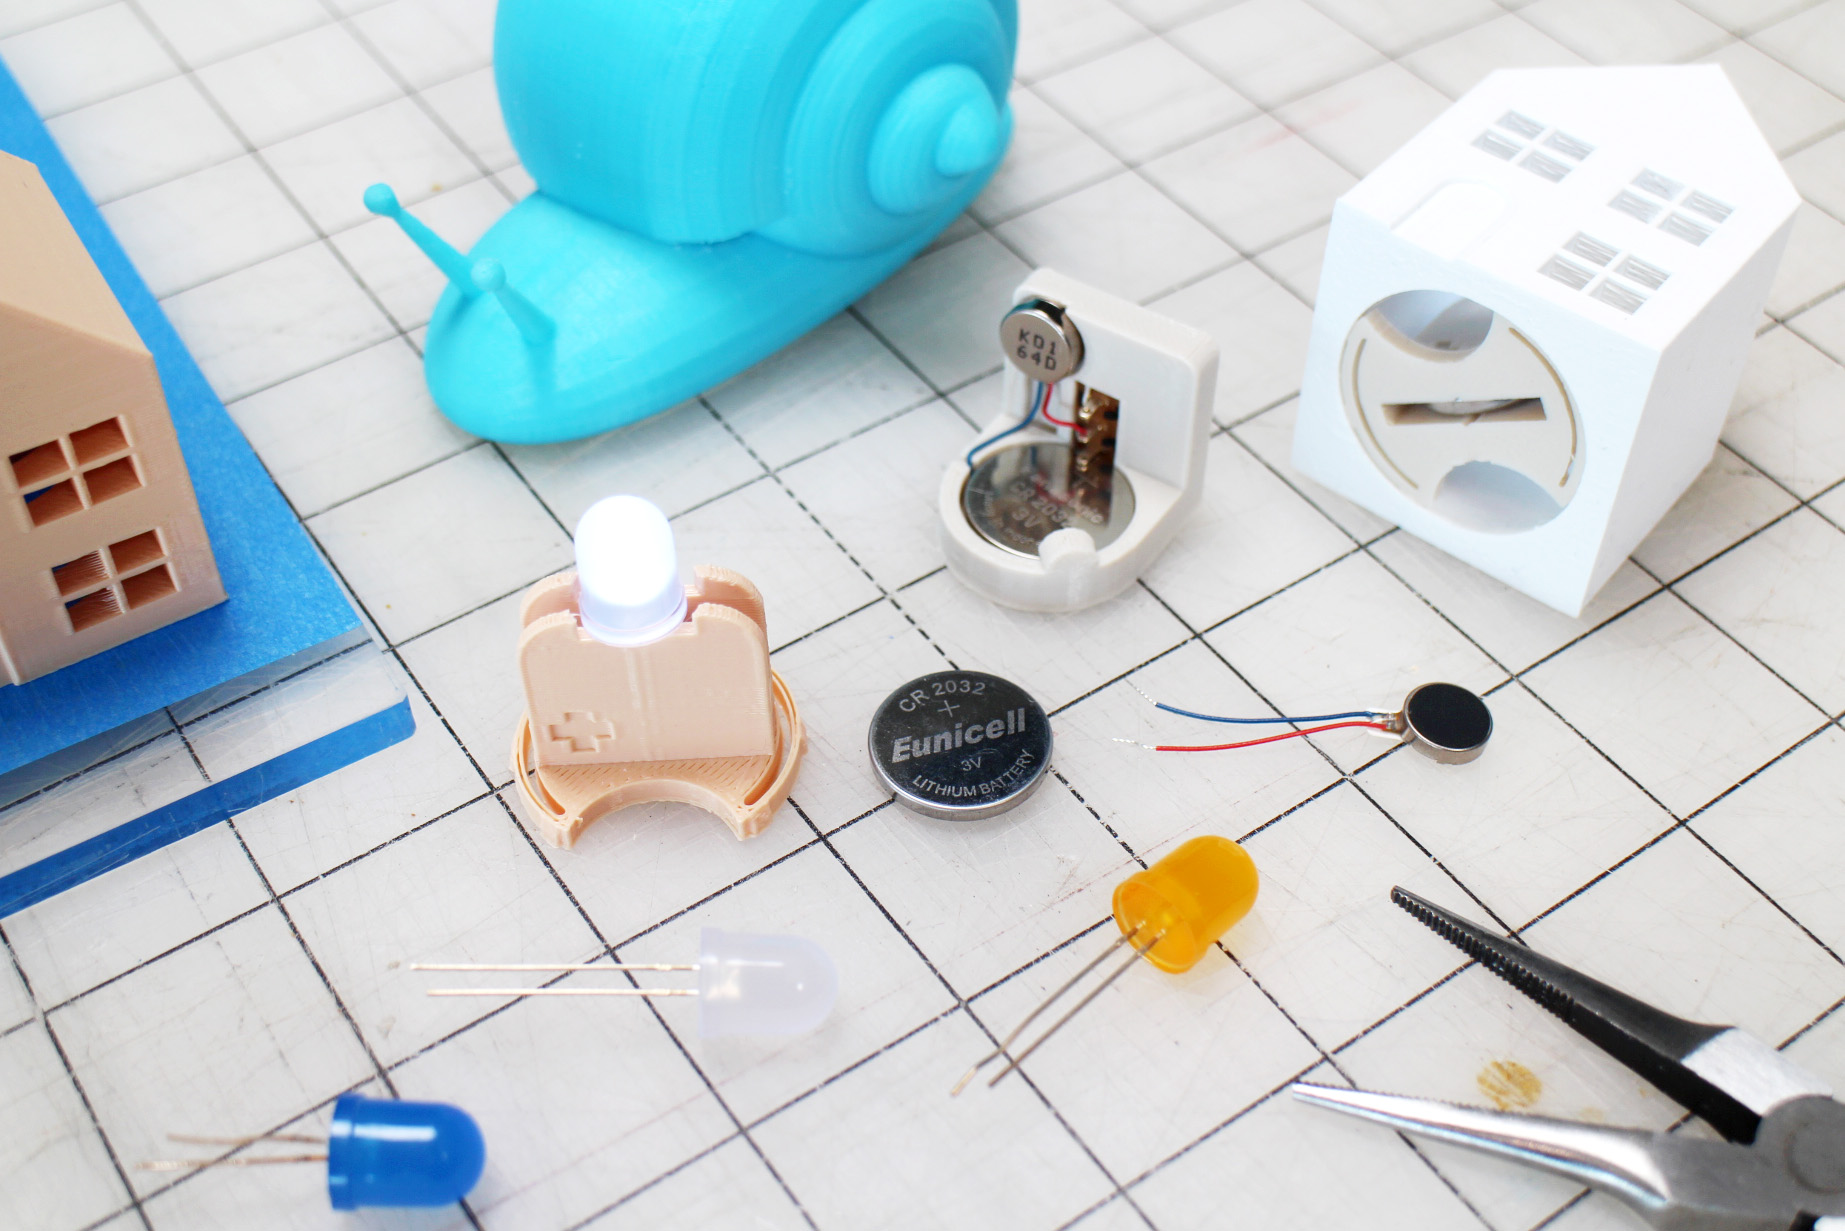
The parts you need to make ONE Glow circuit assembly are:
- (x1) 3V coin cell battery - ($1.95)
- (x1) 10mm LED - ($0.50)
TOTAL COST (before tax & shipping): $2.45*
*Sparkfun prices subject to change over time.
Tinkercad has made it super convenient to shop for the electronic parts for your assemblies by creating a Glow SparkFun cart that has both parts needed already in it. Their cart includes a yellow LED. If you'd like to add a different color to your cart, I've provided the SparkFun links below:
MOVE ELECTRONIC COMPONENTS

The parts you need to make ONE Move circuit assembly are:
- (1x) 3V coin cell battery* - ($1.95)
- (x1) vibration motor - ($4.95)
- (x1) slide switch - ($1.50)
TOTAL COST (before tax & shipping): $8.40**
*Coin cell batteries can cause serious injury if swallowed. Keep coin cell batteries out of reach of small children!
**Sparkfun prices subject to change over time.
Once again, Tinkercad has provided a Move SparkFun cart that is pre-loaded with the parts you need for this assembly – which is awesome.
Where the Circuit Assemblies Live in Tinkercad
I'm going to assume that you have at least a yellow belt in Tinkercad use, so I won't be covering the basic concepts of Tinkercad navigation tools or program functions in this class.
If you have trouble following along, have a quick read through Lesson 2 of my co-worker JON-A-TRON's Easy 3D Printing Class. It covers everything you need to know to get started from scratch in Tinkercad!

OK! To see where the new Circuit Assemblies are located in Tinkercad, create a new design.

In the shapes drop down menu on the right, click on CIRCUIT ASSEMBLIES.

This brings up the 4 assembly pieces: 2 GLOW and 2 MOVE.
There is a circuits electronic components 'holder' and a cutout 'hole' for each assembly. The cutouts/holes are used to create the space in your designs that the printed holder will press-fit into.

Click and drag one or two of the shapes onto the workplane.
You'll notice that a sub-menu pops up with more info when one of the assembly shapes is selected. The most important thing to note at this point, is that the SCALING IS LOCKED on both the holder and the cutout (this is also true for the Move components). What this means is that you can move them up and down and all around, but you can't resize them.
This restriction is in place because specific, real life, electronic components need to fit into the holders, once printed, and the holder needs to fit into that specific sized hole.
NOTE: This will limit the size of your final design if you intend to have the one LED light up the entire object from the inside. But of course there's no rule that says you can't add more than one assembly to a piece if you're making a GIANT print!
In the next two lessons, I'll go over how to add each assembly to a shape/design and how to put all the pieces together once you've printed the holders (Glow + Move) and your designs.