Get Rid of Window 10 Upgrade Notifications!!
by HowTo101 in Circuits > Computers
1446 Views, 20 Favorites, 0 Comments
Get Rid of Window 10 Upgrade Notifications!!
Tired of being asked to upgrade to windows 10 all the time? Not to worry, you can get rid of these annoying notifications for good, I'll show you how
Please subscribe to my channel
Thanks :)
Windows 8/8.1 : Part 1
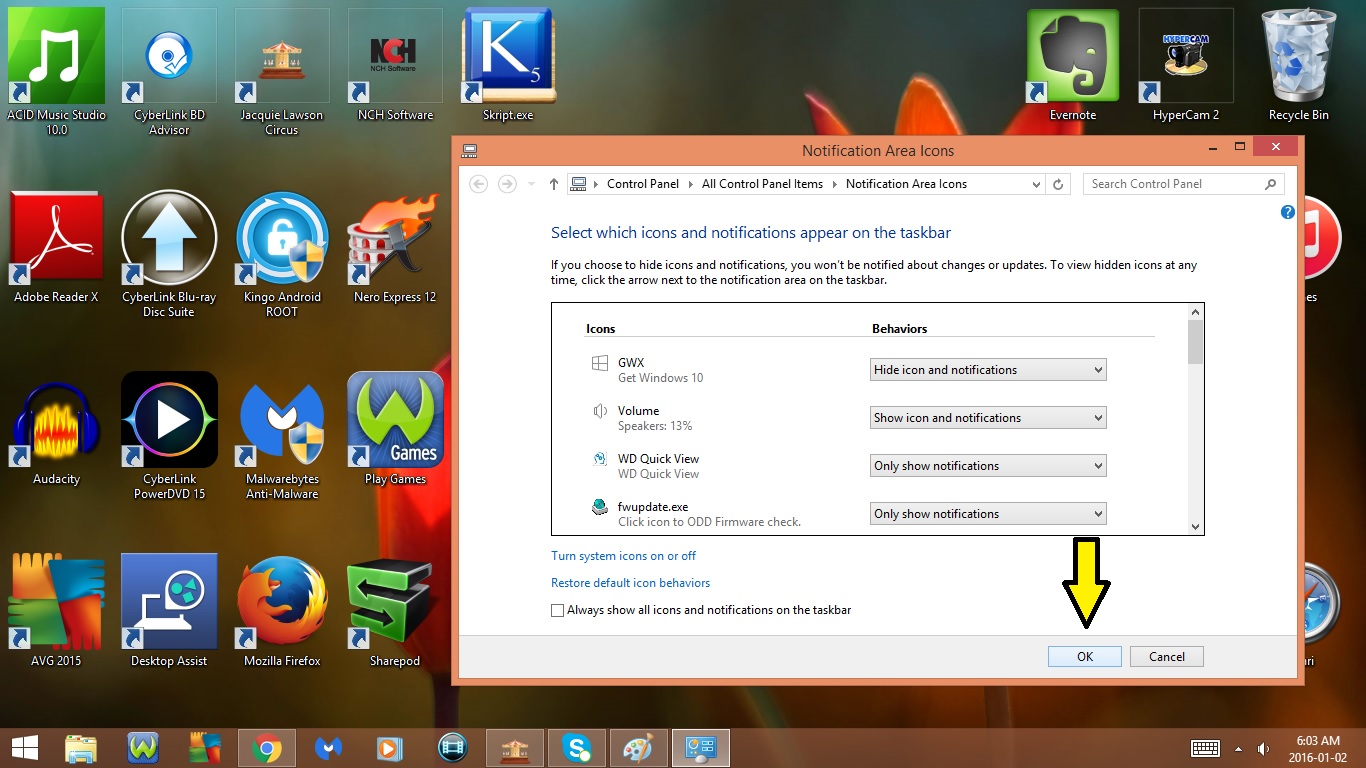
Method #1 : Getting Rid of Notifications Temporarily
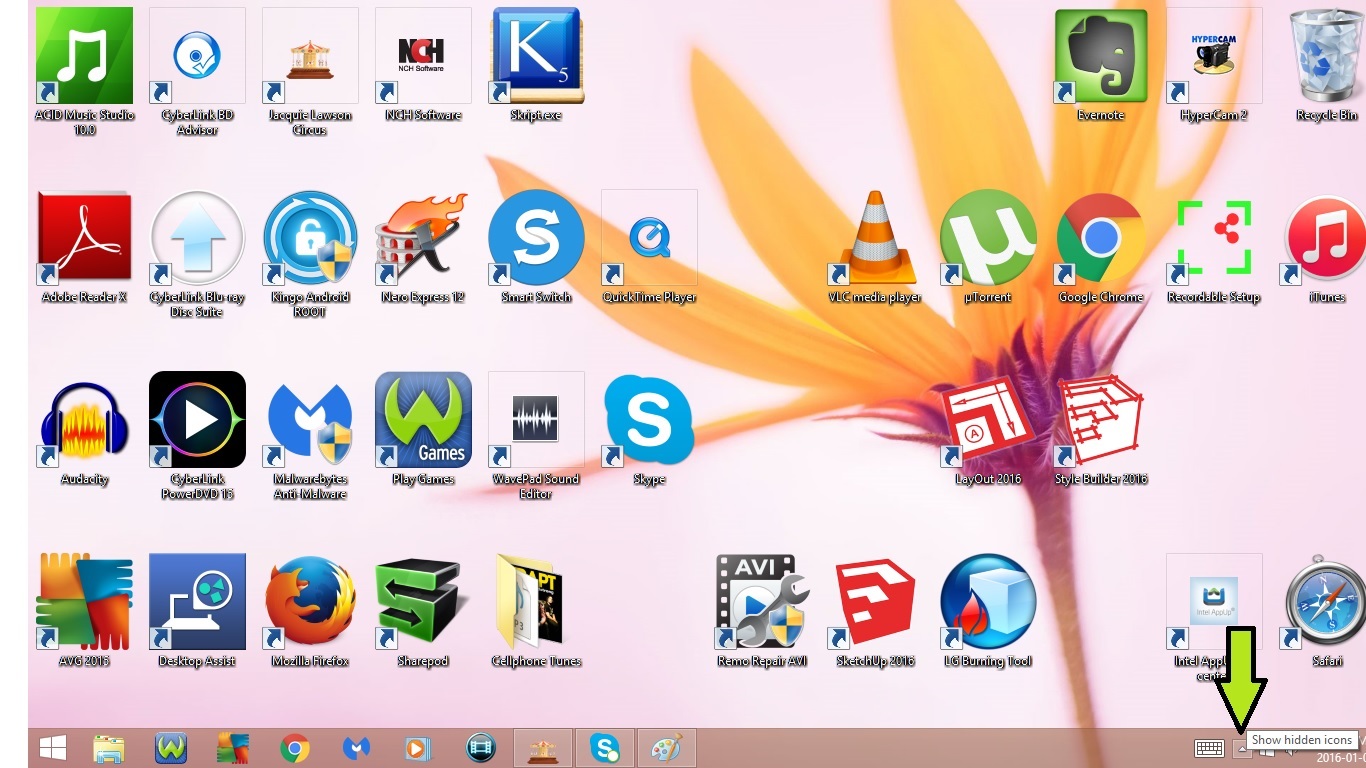
1. Click on the Show hidden icons arrow in the bottom right hand corner
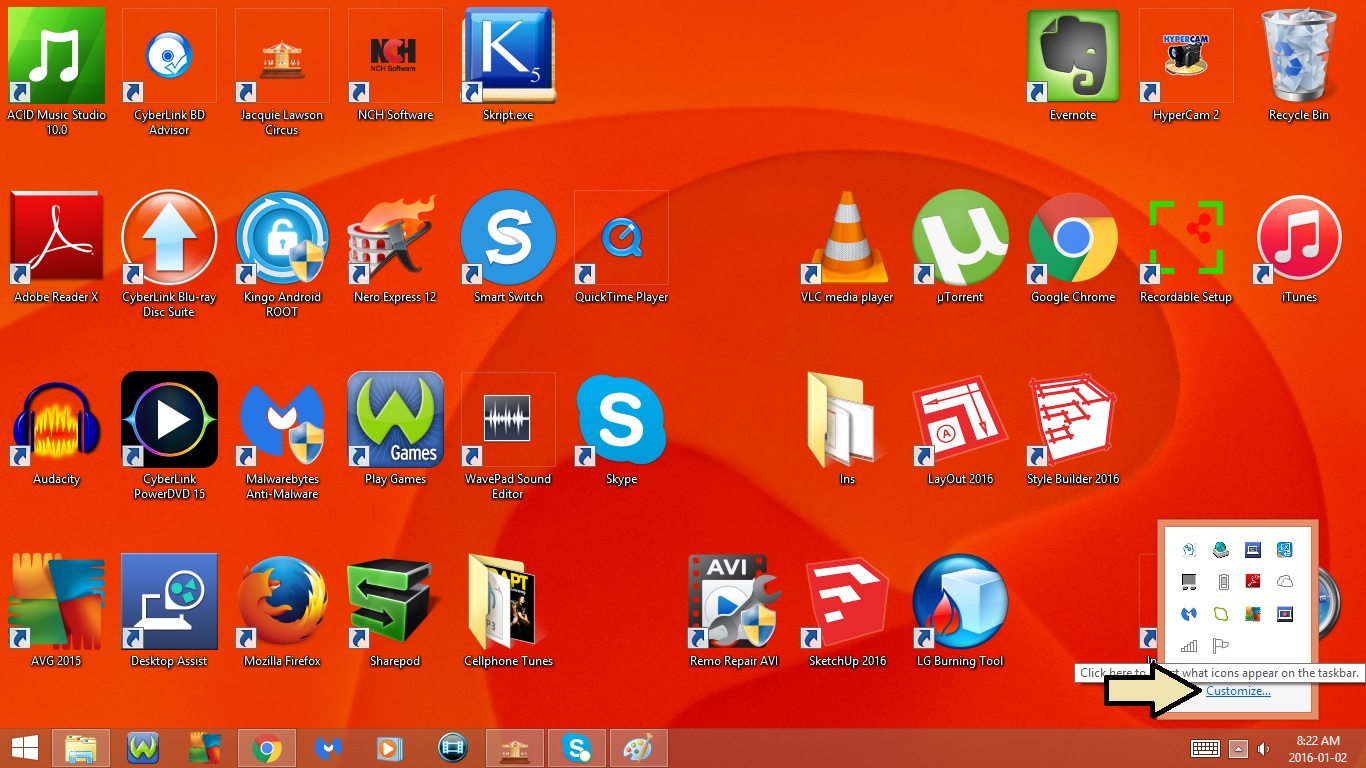
2. Go to customize
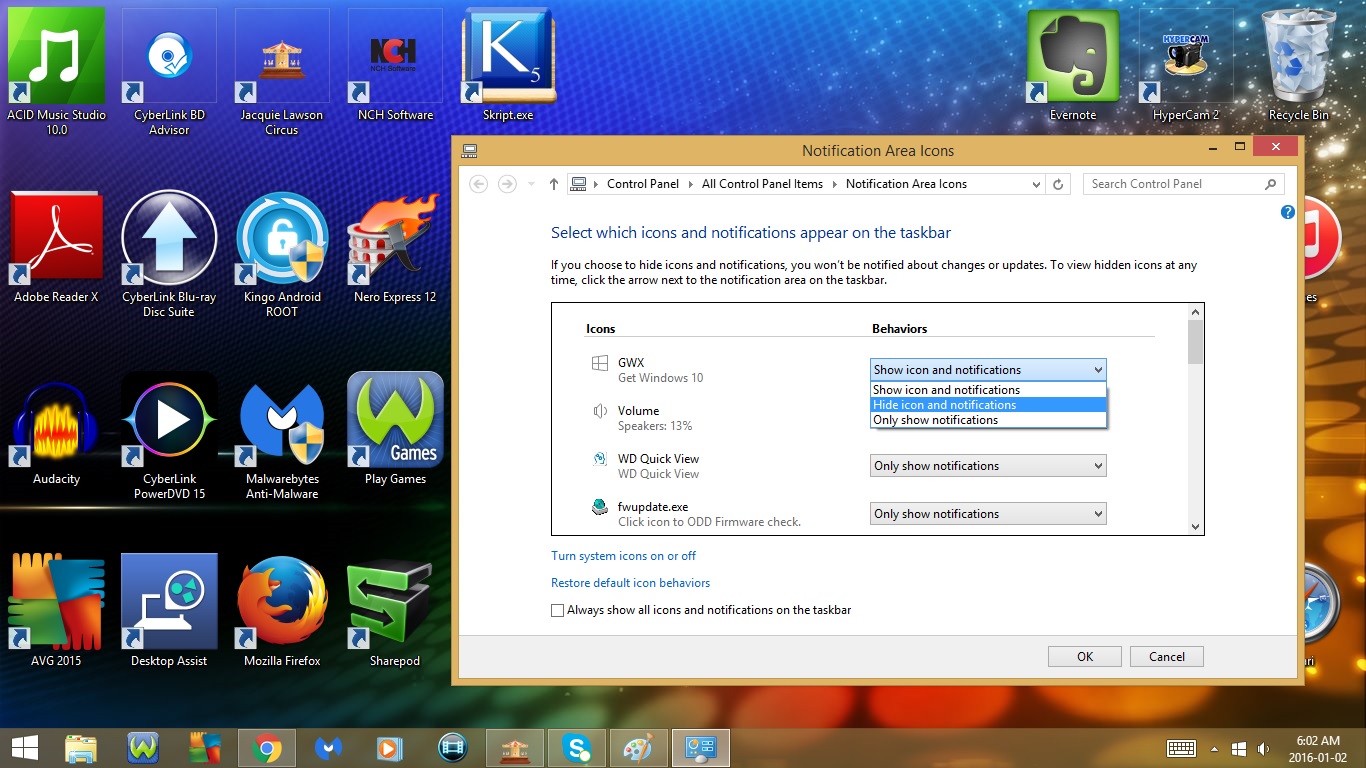
3. Change the behavior for GWX to Hide icon and notifications
- This method will get rid of the notifications while your using your computer, however the notifications will come back again as soon as you restart your computer
4. Click Ok
Method #2 : Getting Rid of Notifications Permanently
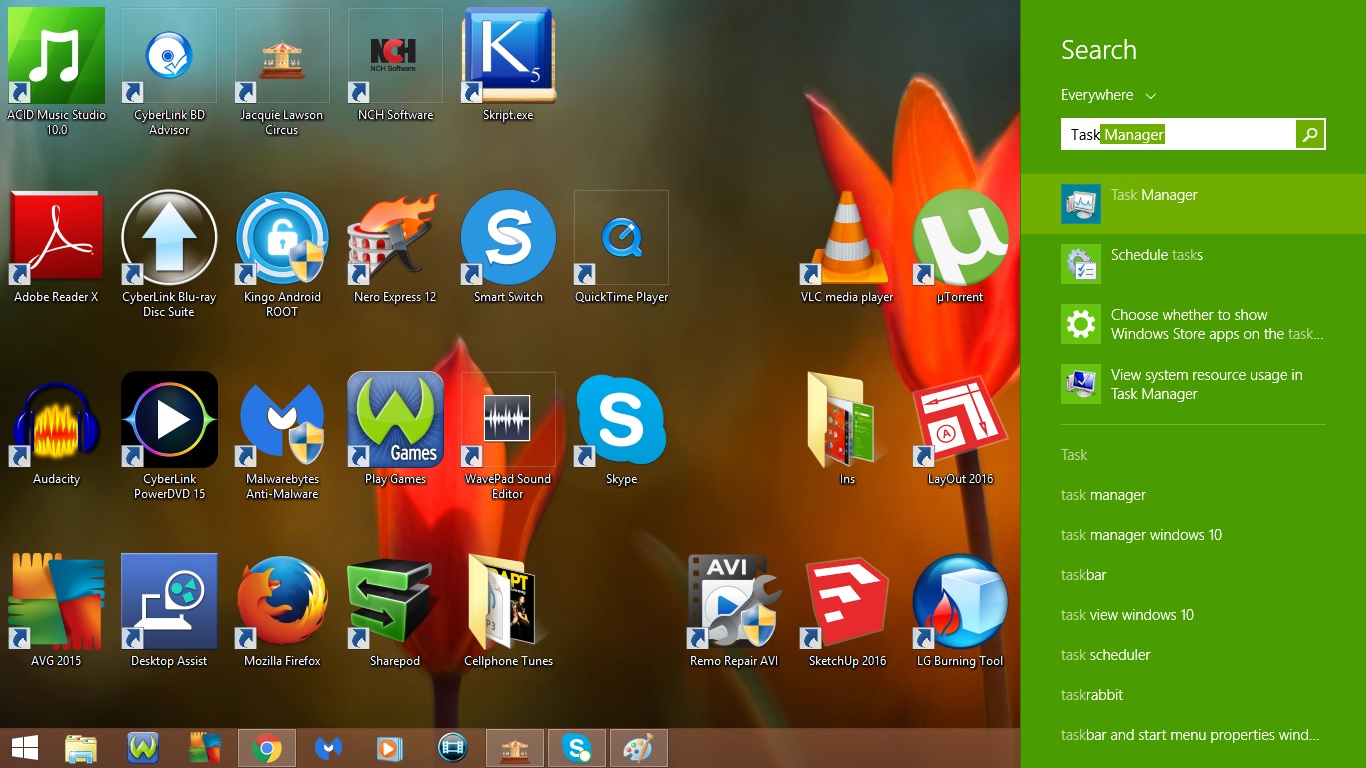
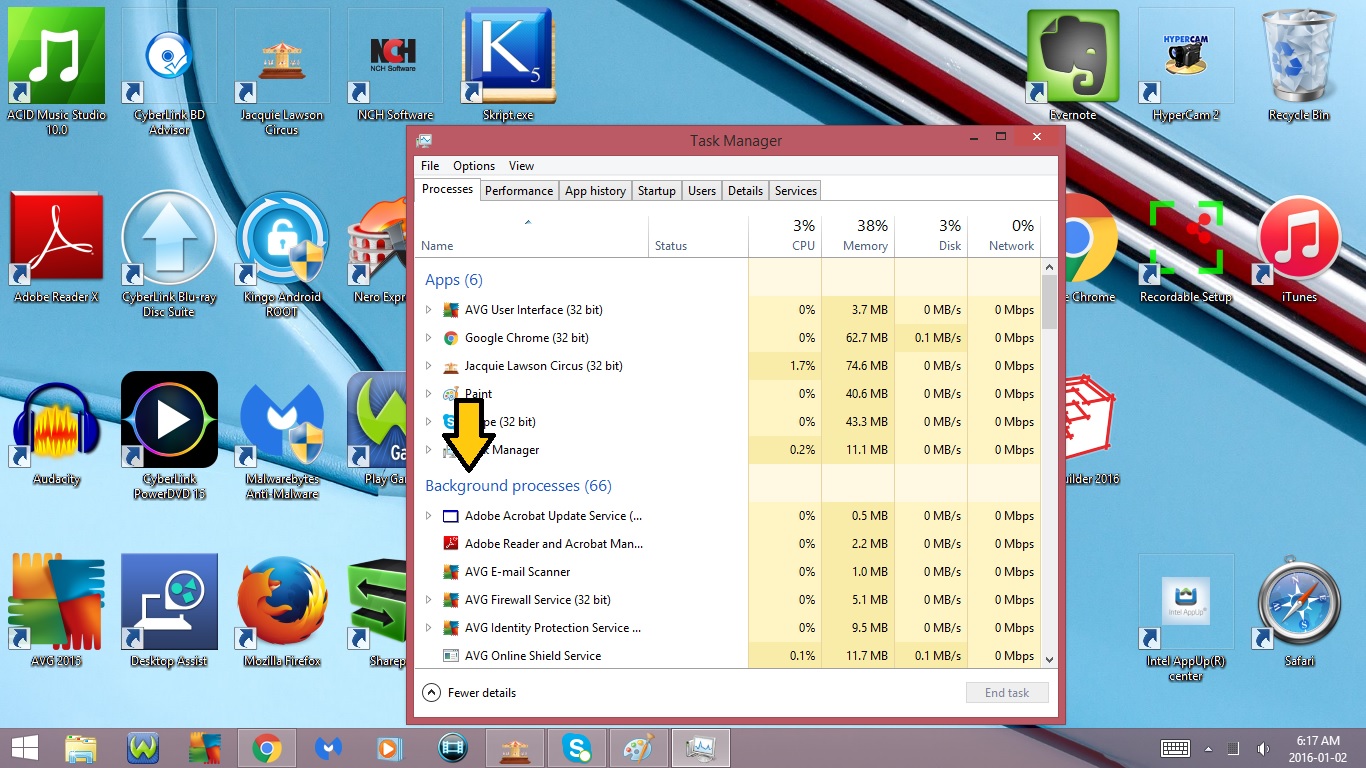
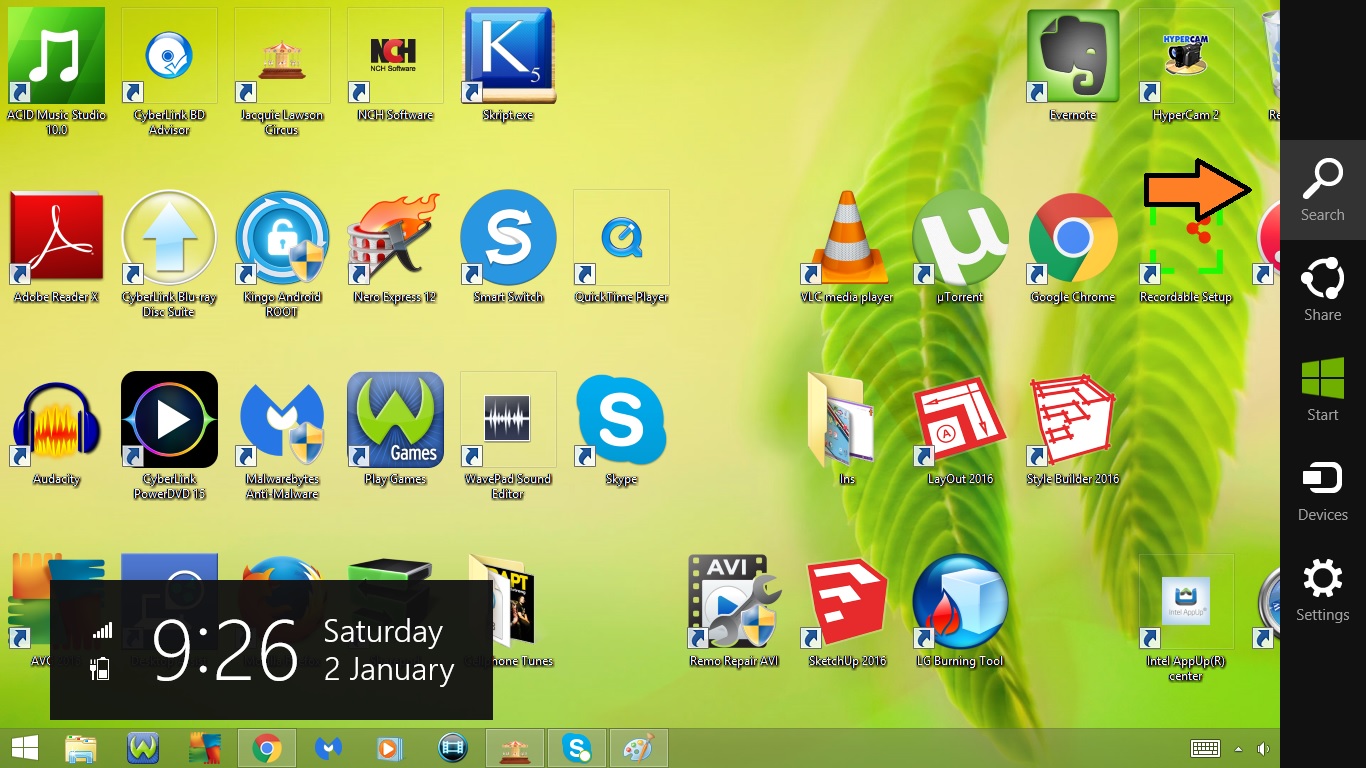
1. Open Task Manager
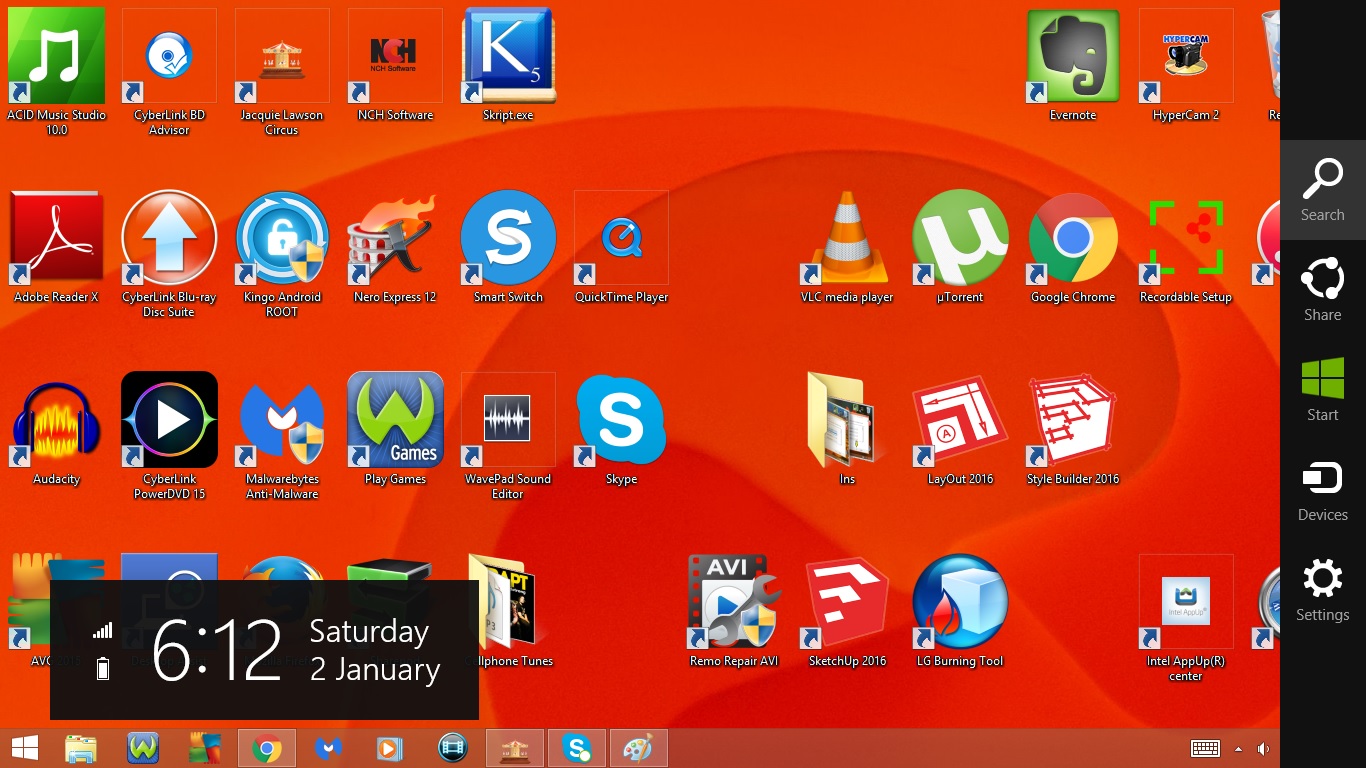
- Open Sidebar
- Go to Search
- Type in Task Manager
- Click on the Icon to open it
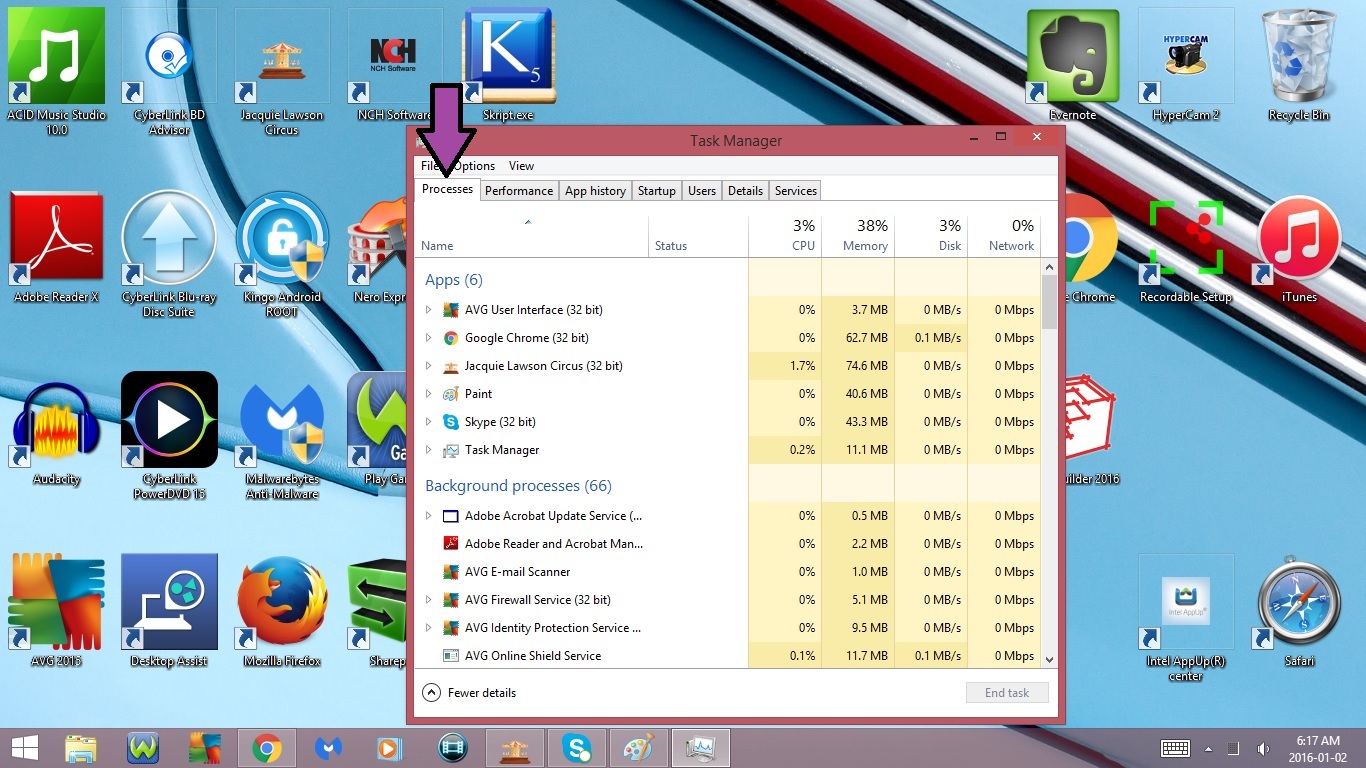
2. Make sure your in the Processes Tab
- Should be the first tab
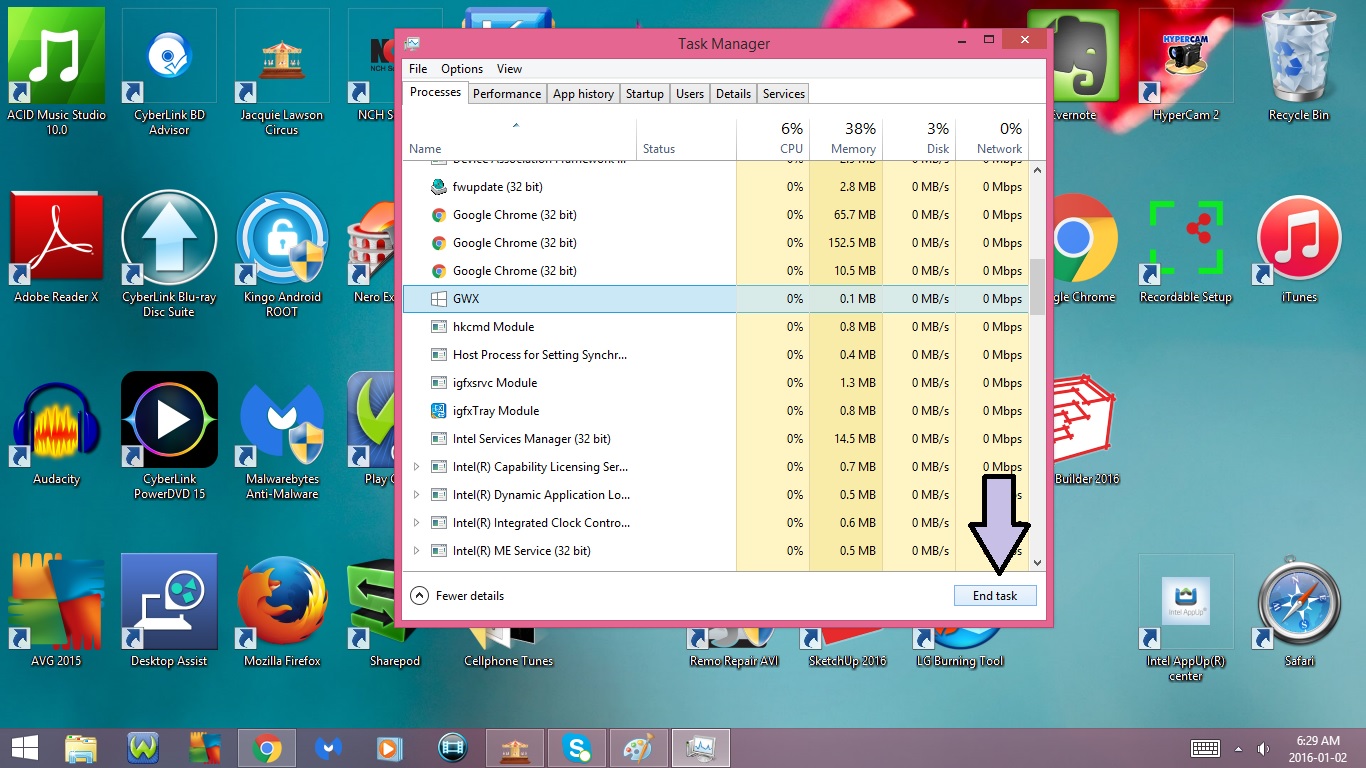
3. Scroll down and look for GWX
- Should be under background processes
4. Select GWX
5. Click End Task
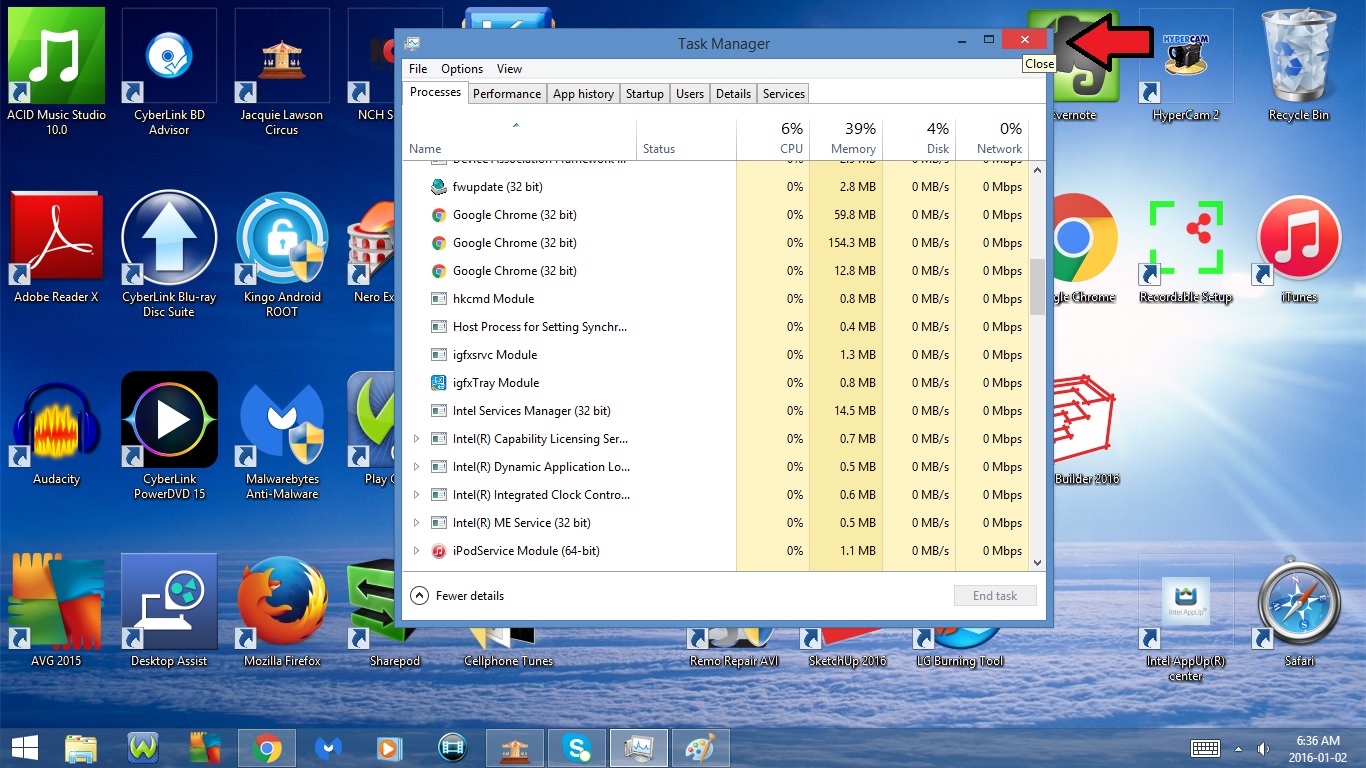
6. Close Task Manager
Windows 8/8.1 : Part 2
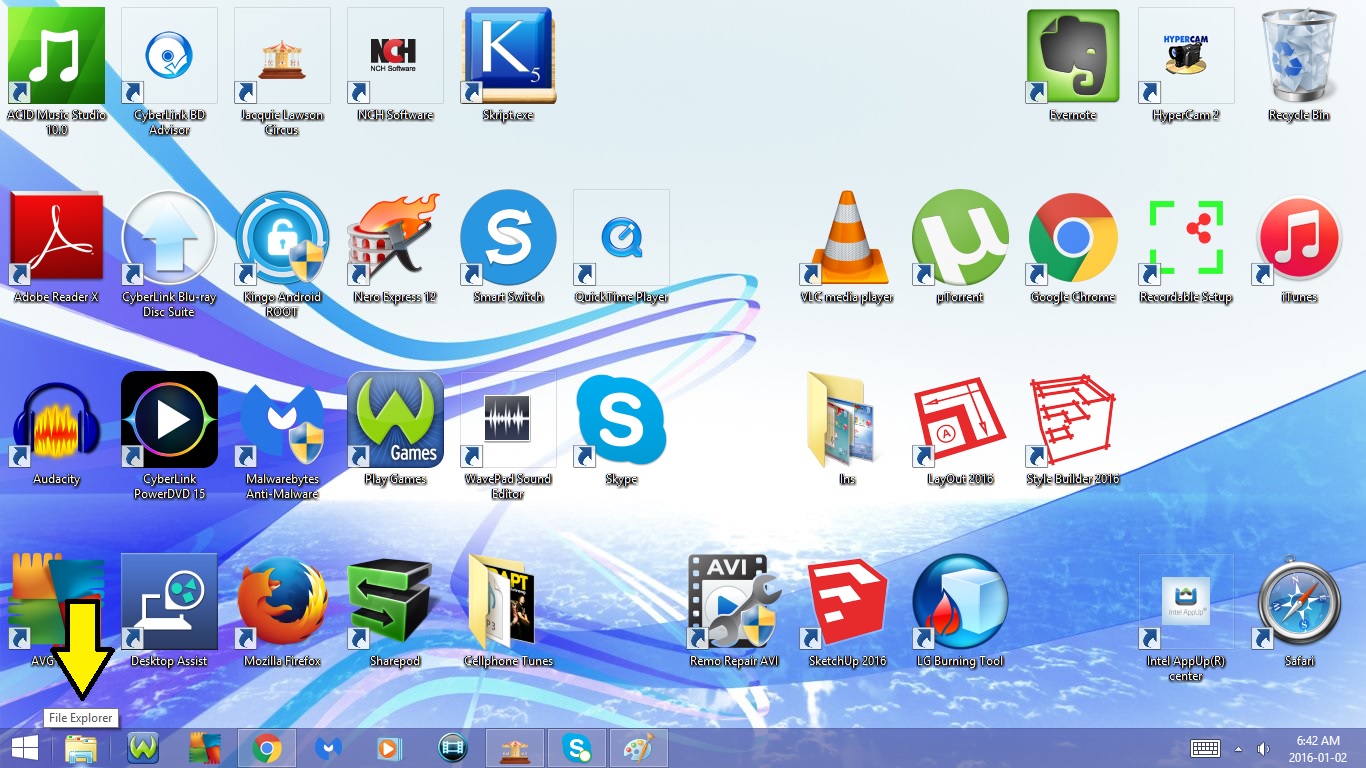
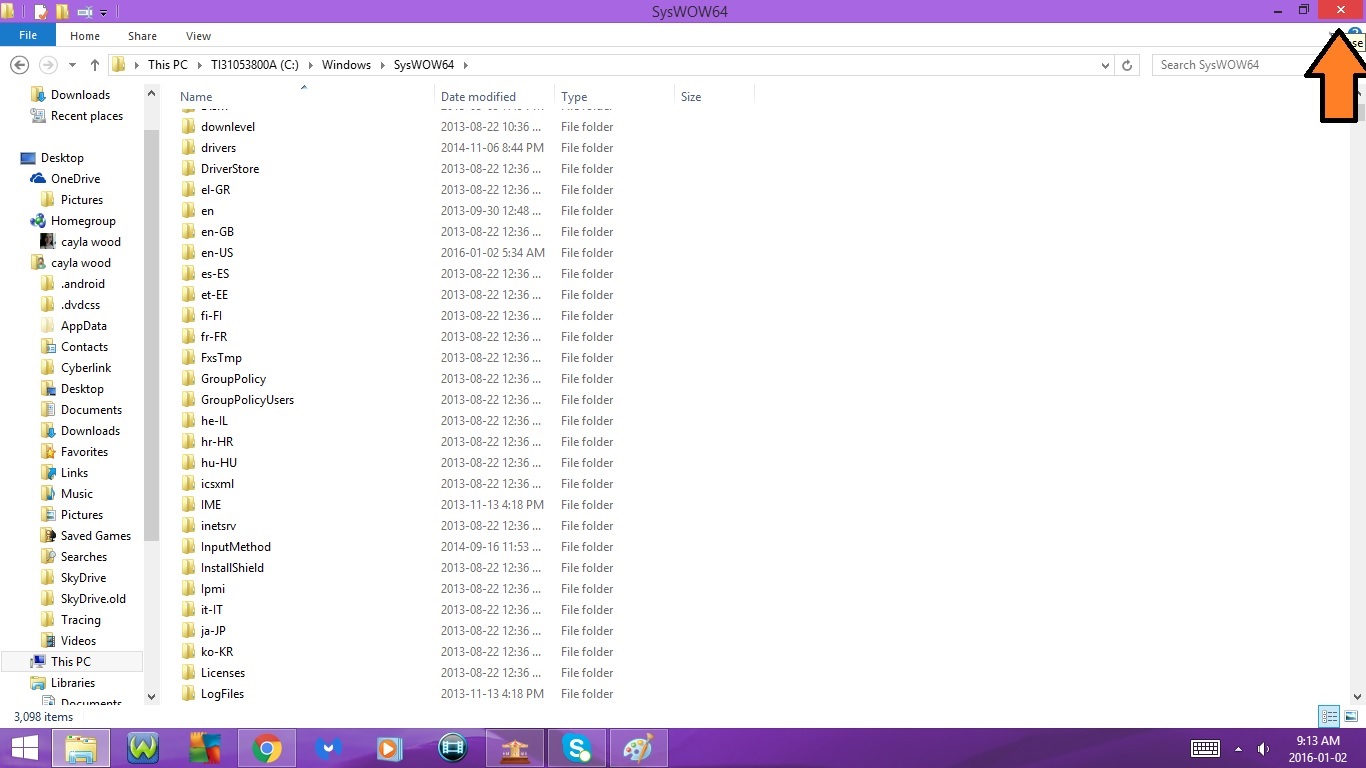
7. Delete the Update
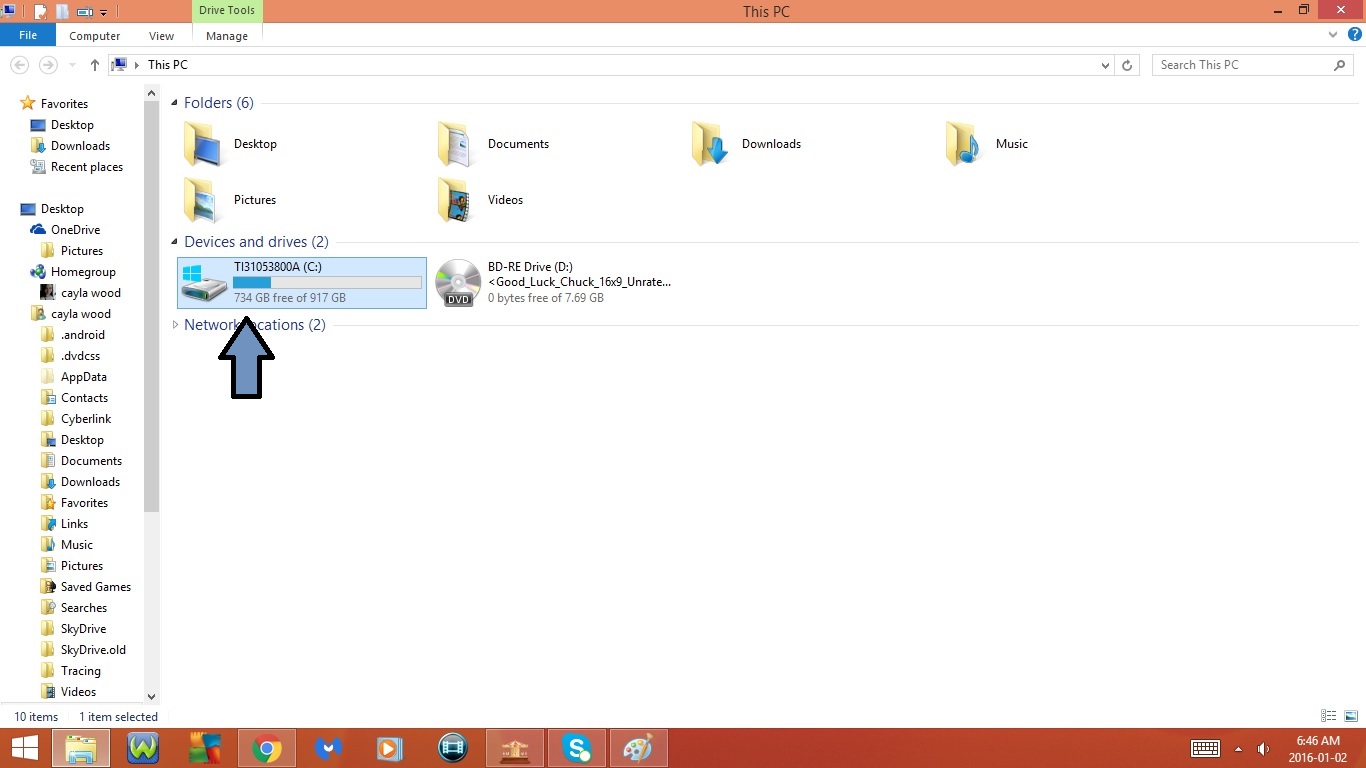
- Open File Explorer
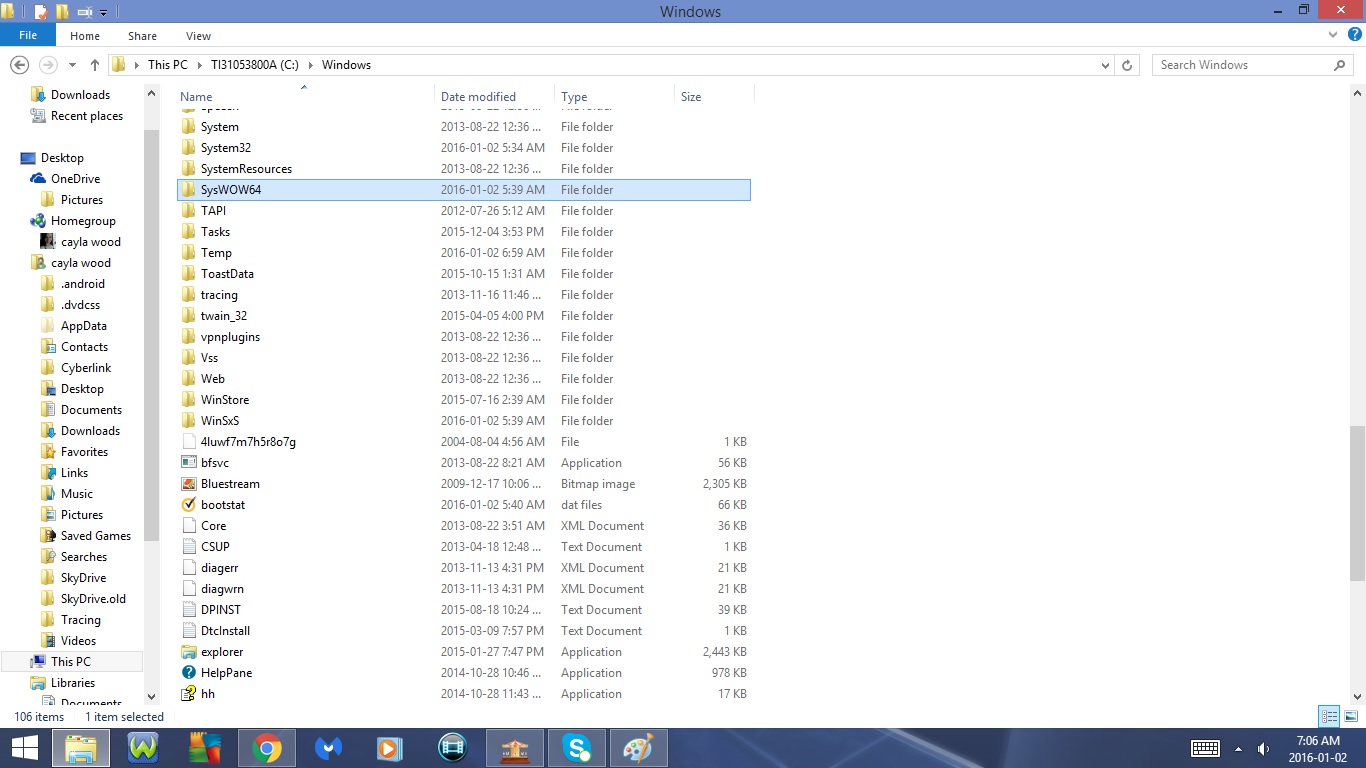
- Go to the C Drive
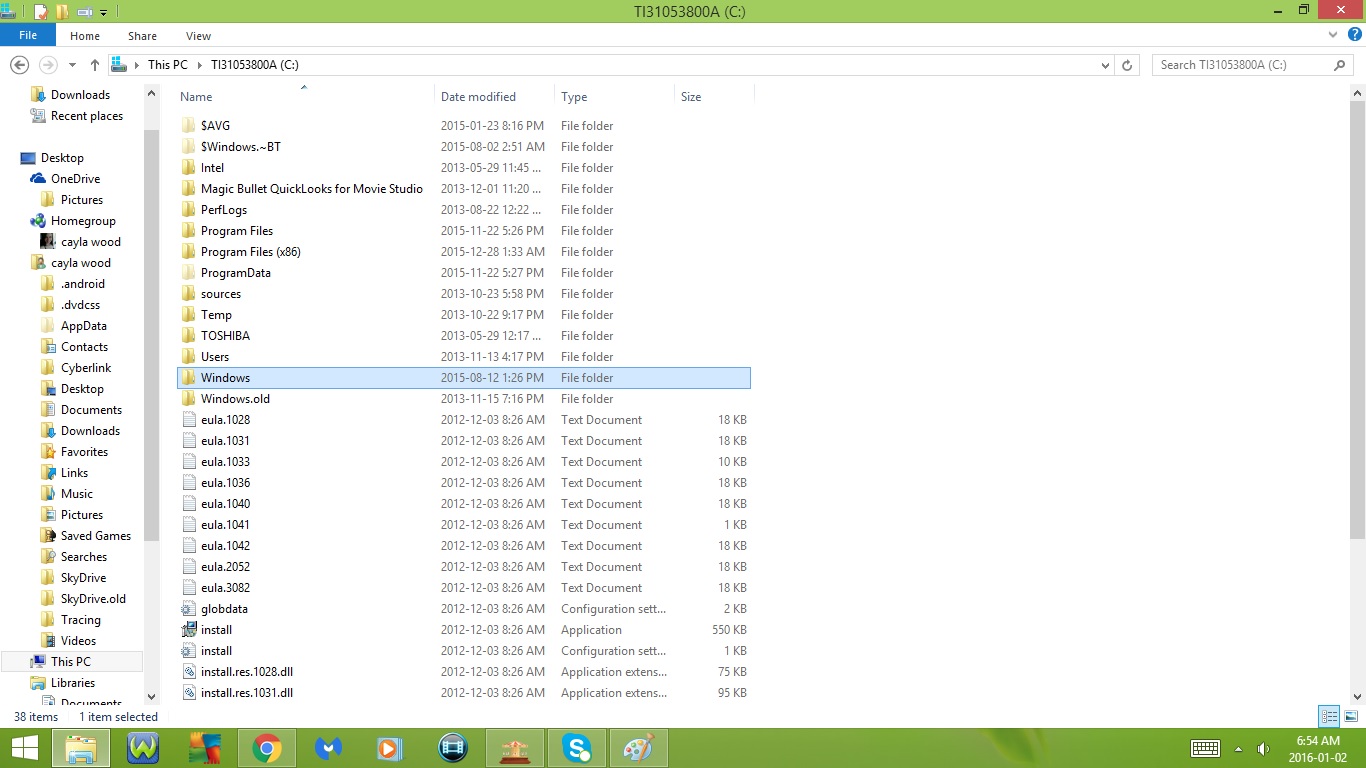
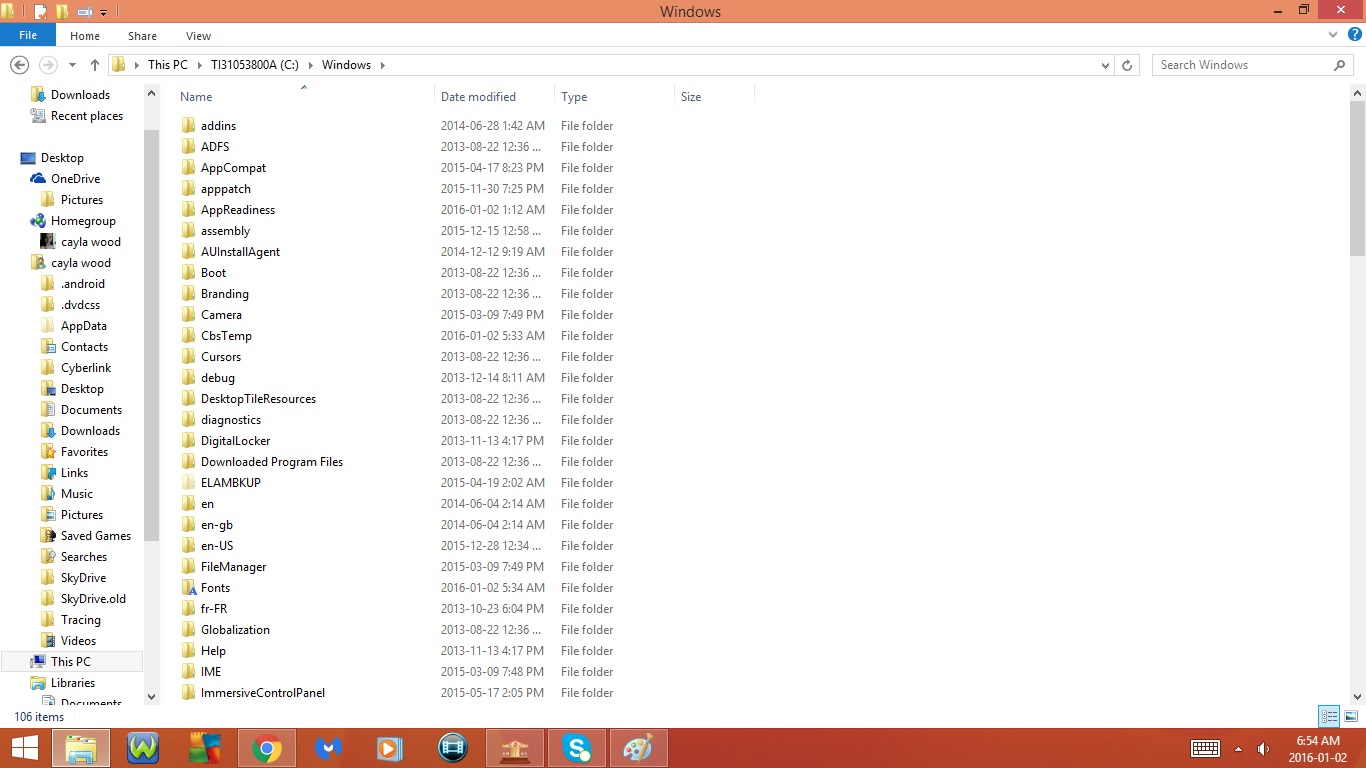
- Go to the Windows Folder
- Scroll Down
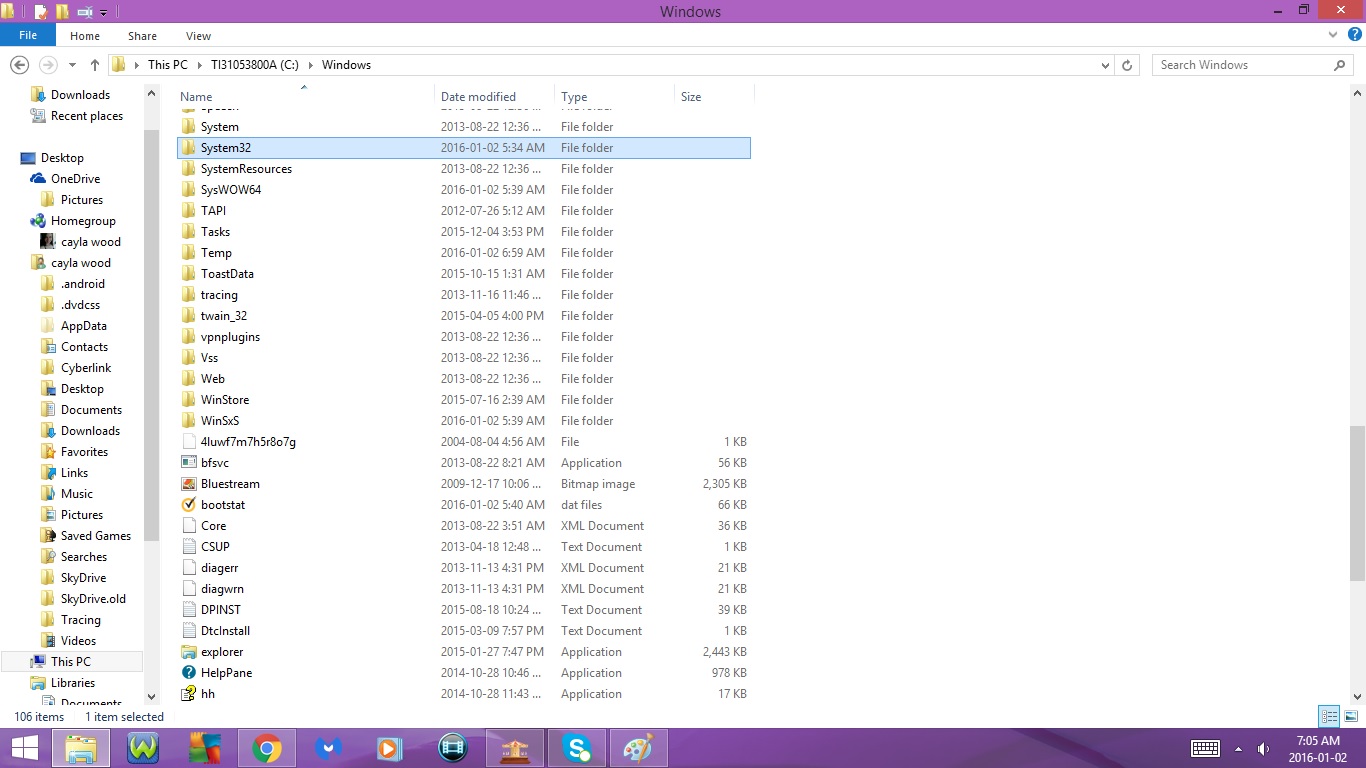
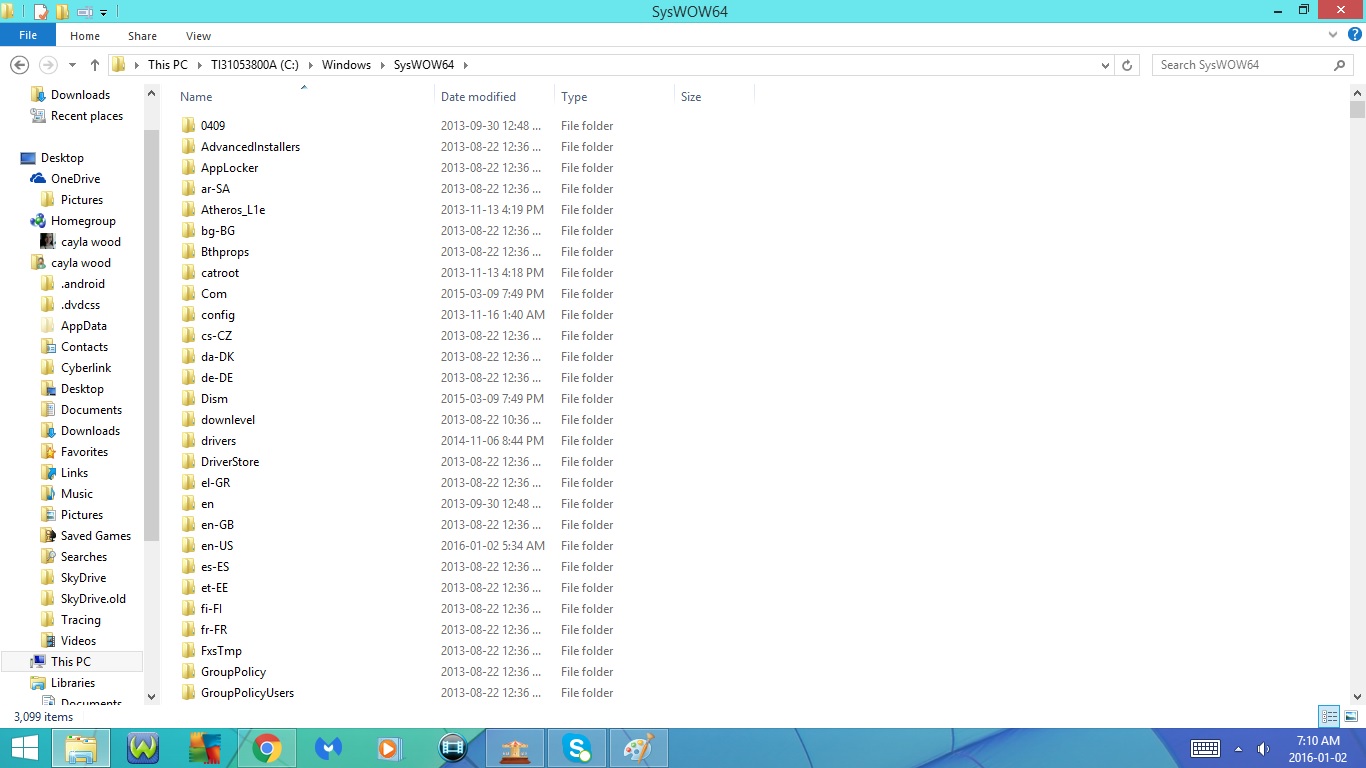
- Go to System32 or SysWOW64 Folder
-- If you have a 32 Bit computer go to the System32 Folder
-- If you have a 64 Bit computer go to the SysWOW64 Folder
- Scroll Down
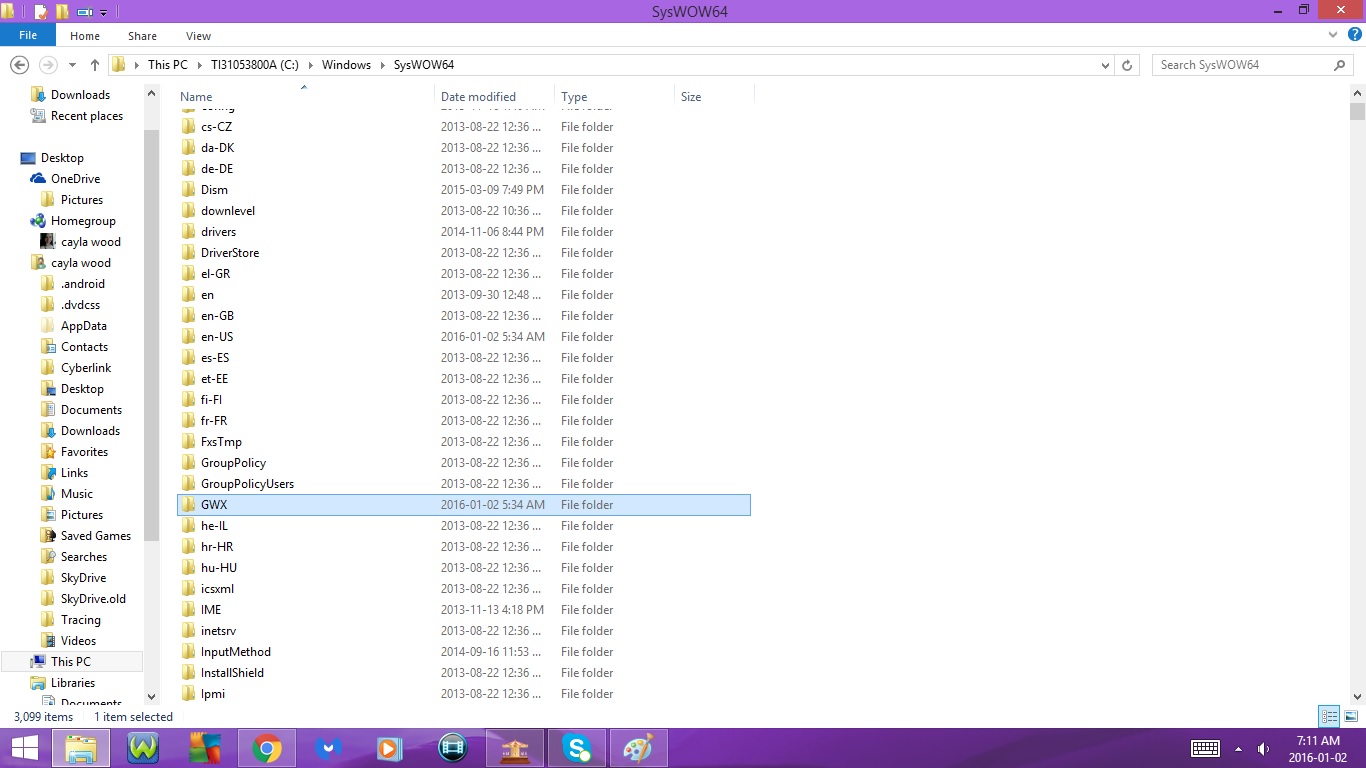
- Go to the GWX Folder
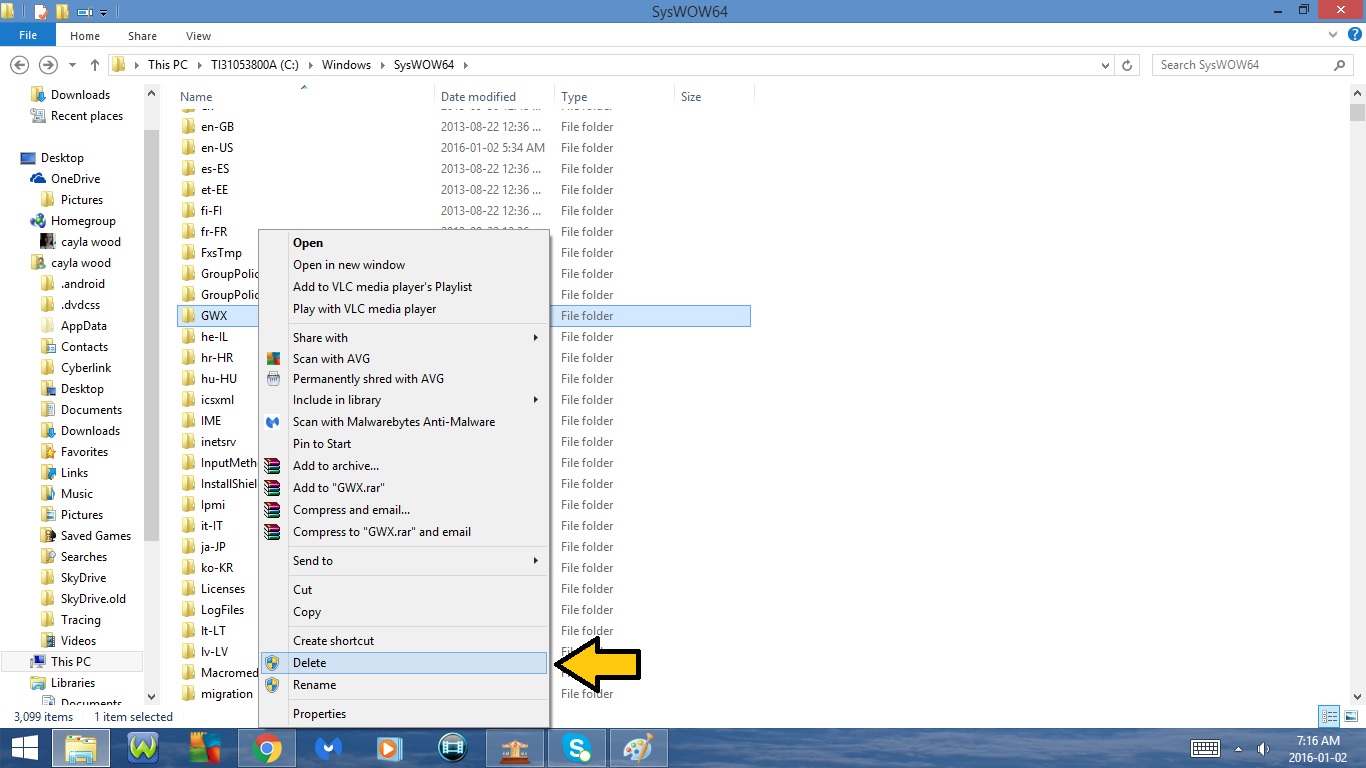
- Right Clck
- Select Delete
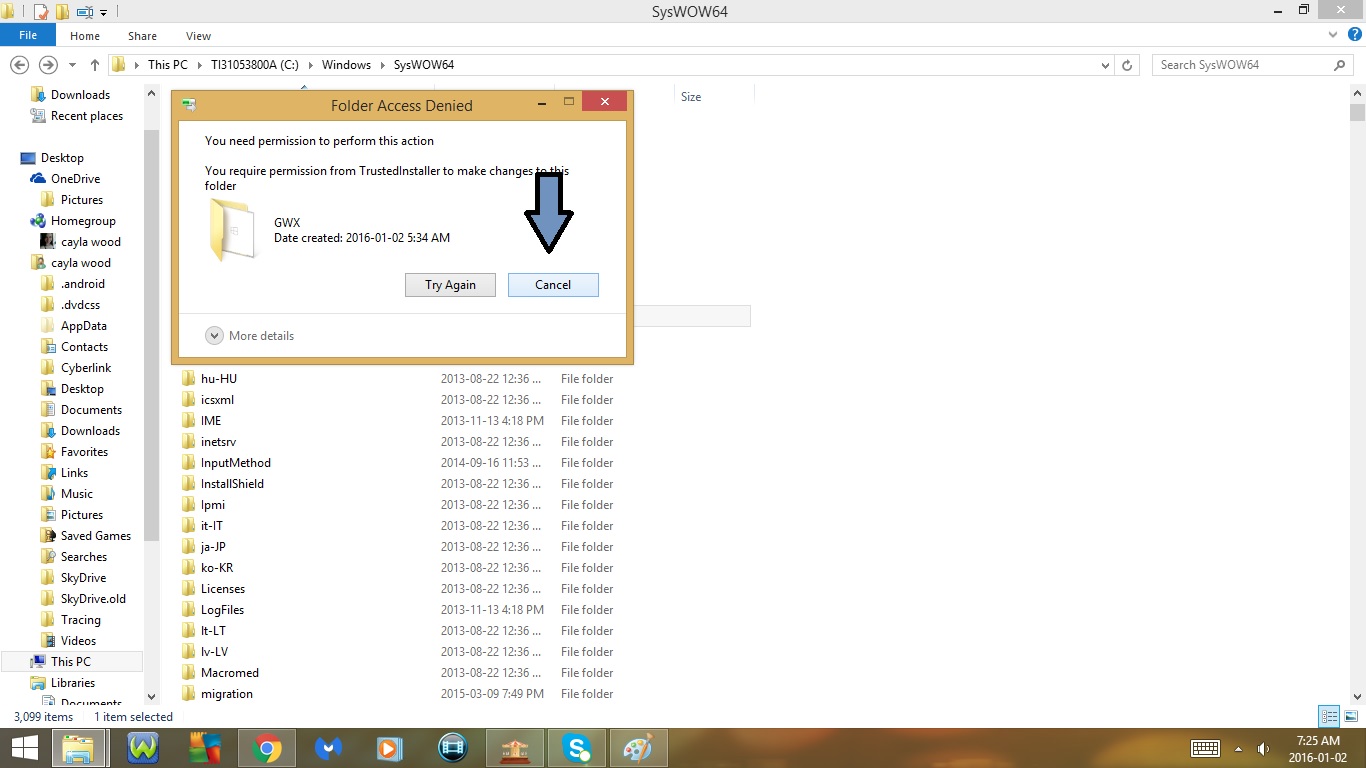
-- You may get a Folder Access Denied Message
-- If you receive this message, you will need to Take Ownership of the folder and grant yourself Full Control Permissions and Rights
- Click Cancel
Windows 8/8.1 : Part 3


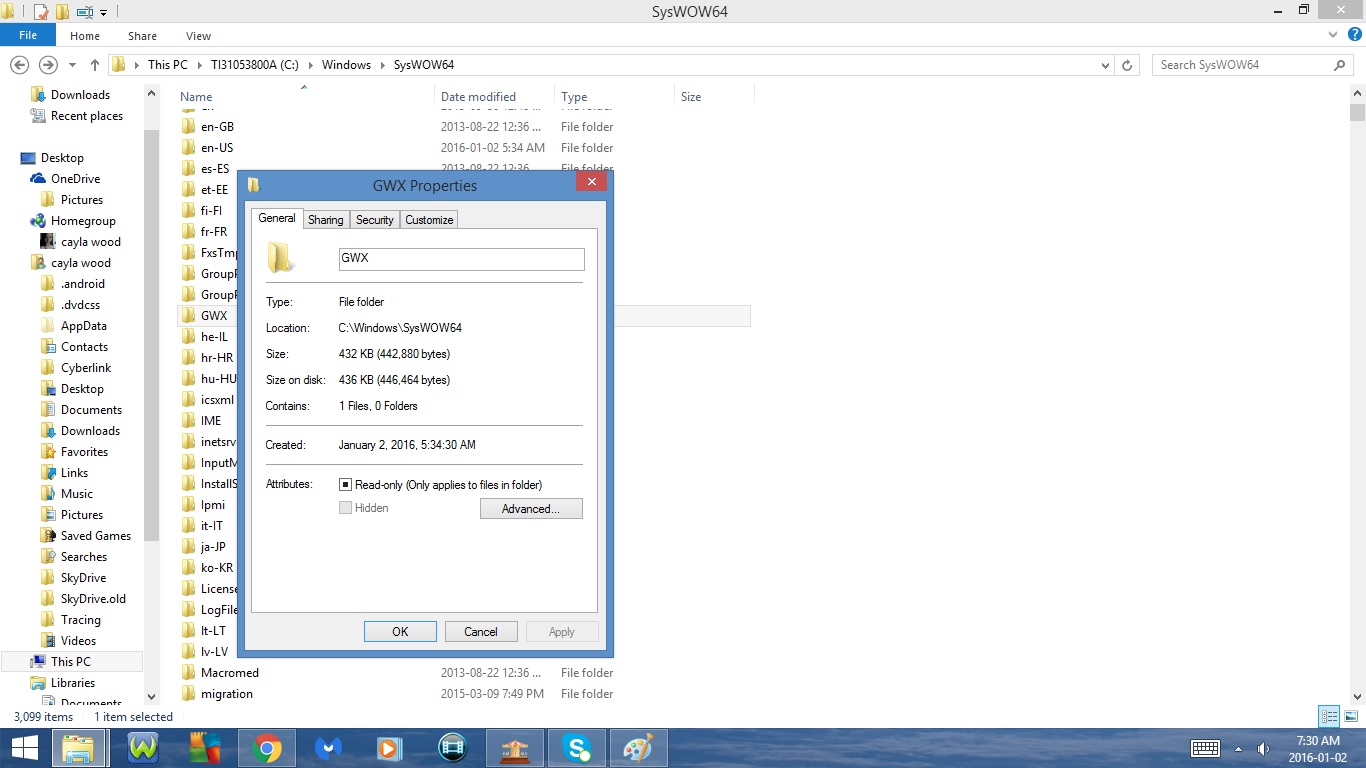
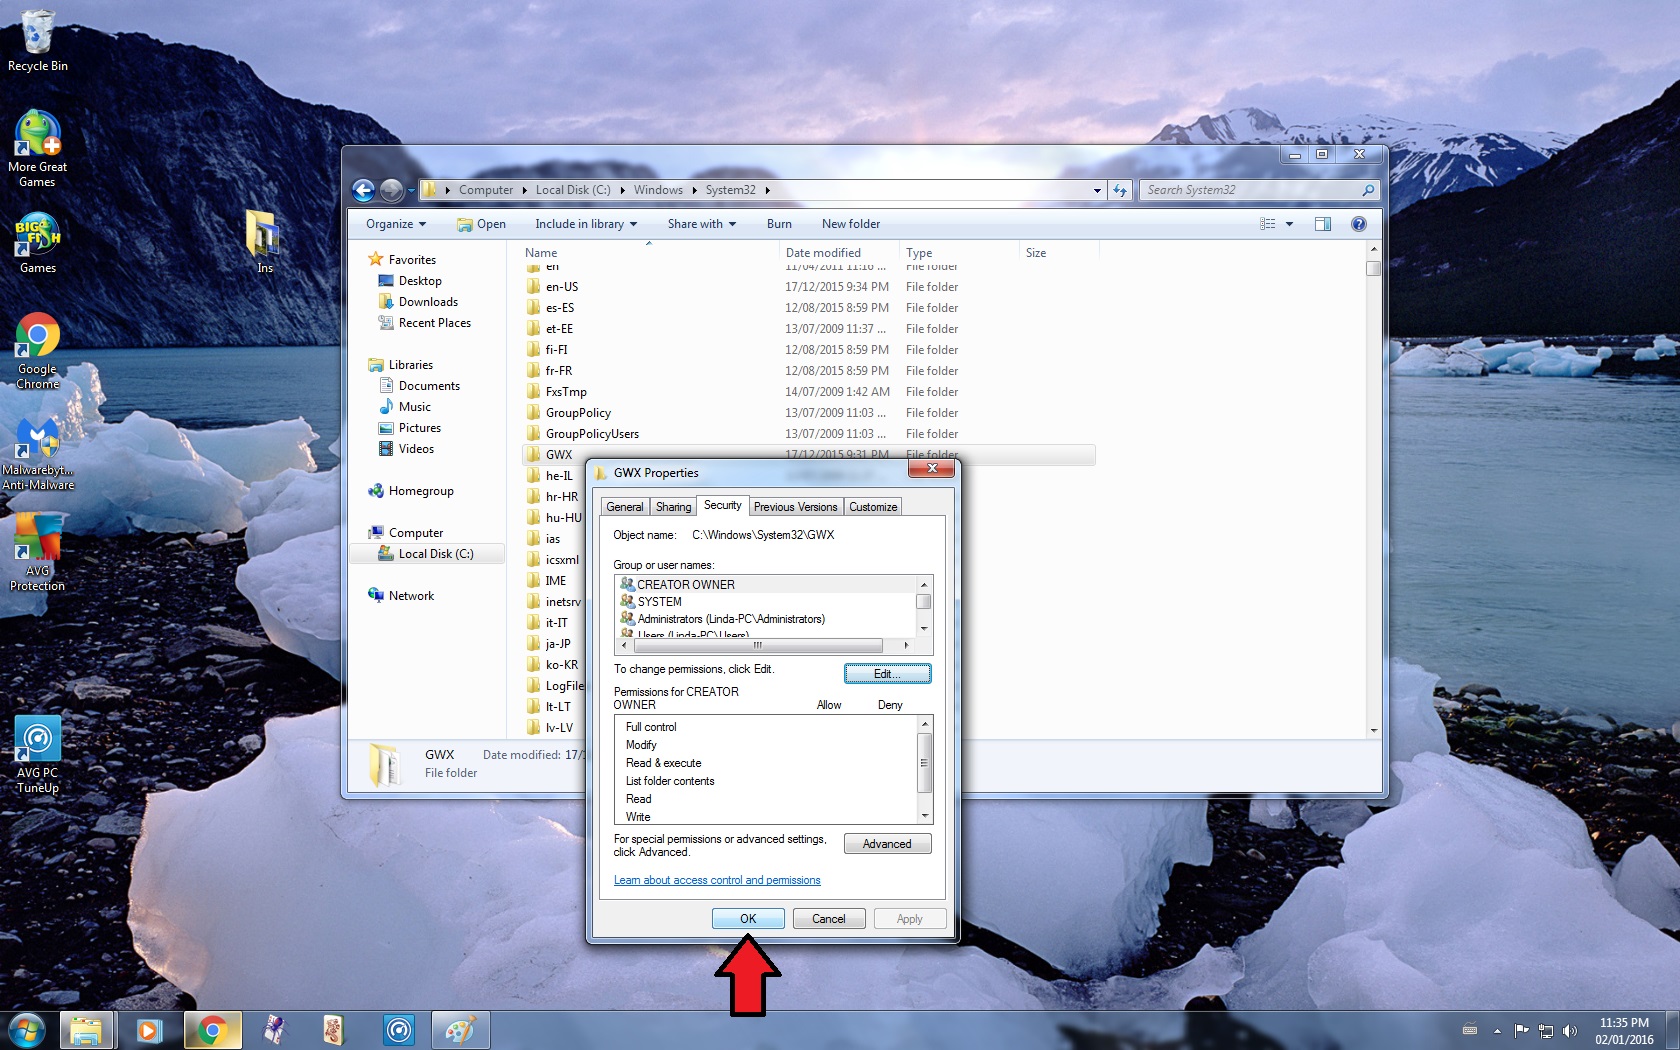
8. Take Ownership of the GWX Folder
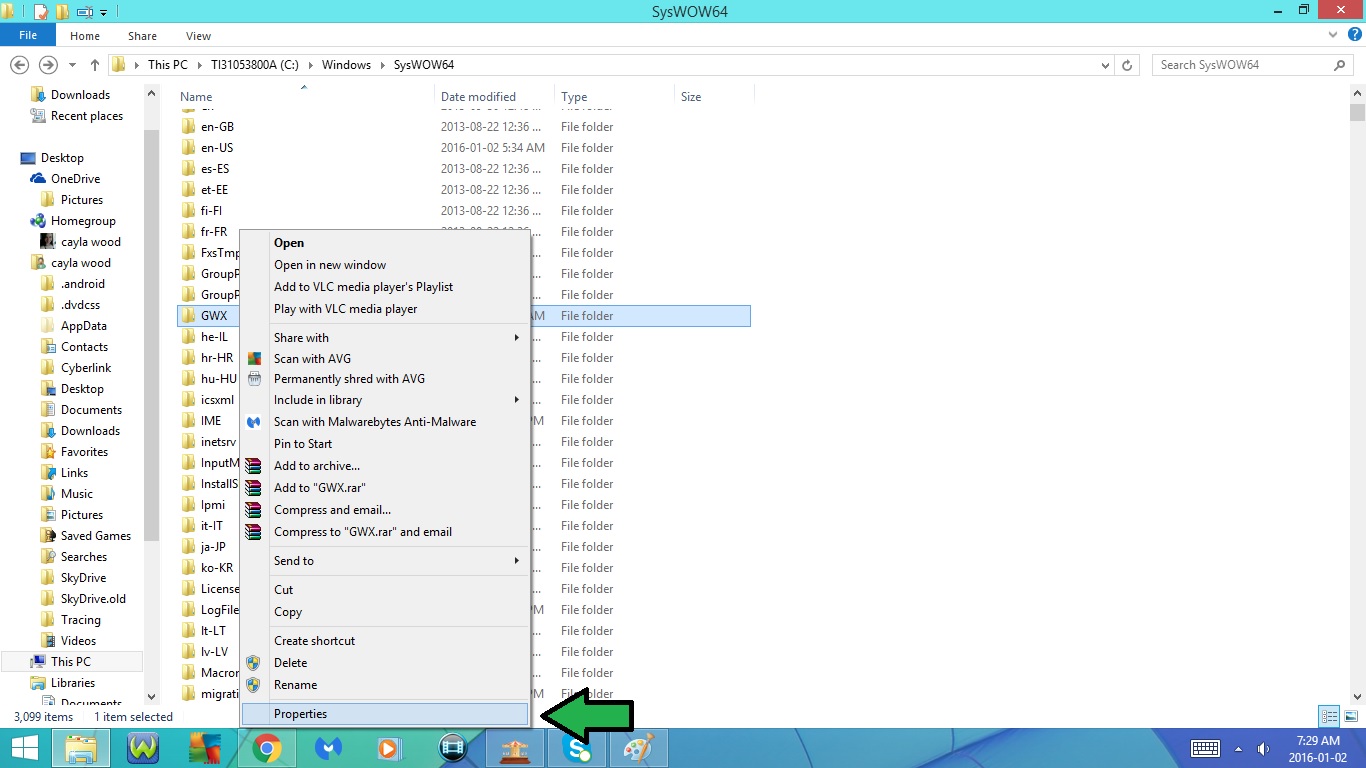
- Right Click on the GWX Folder
- Select Properties
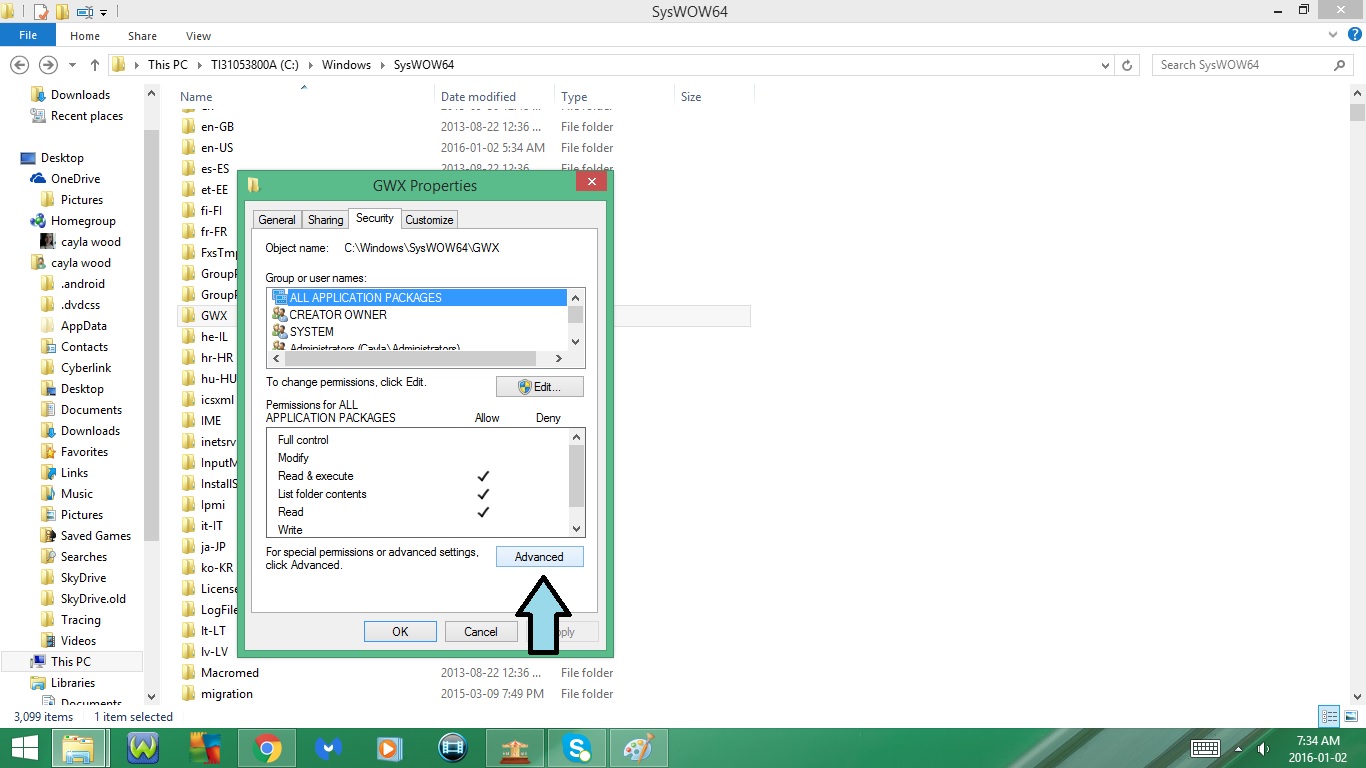
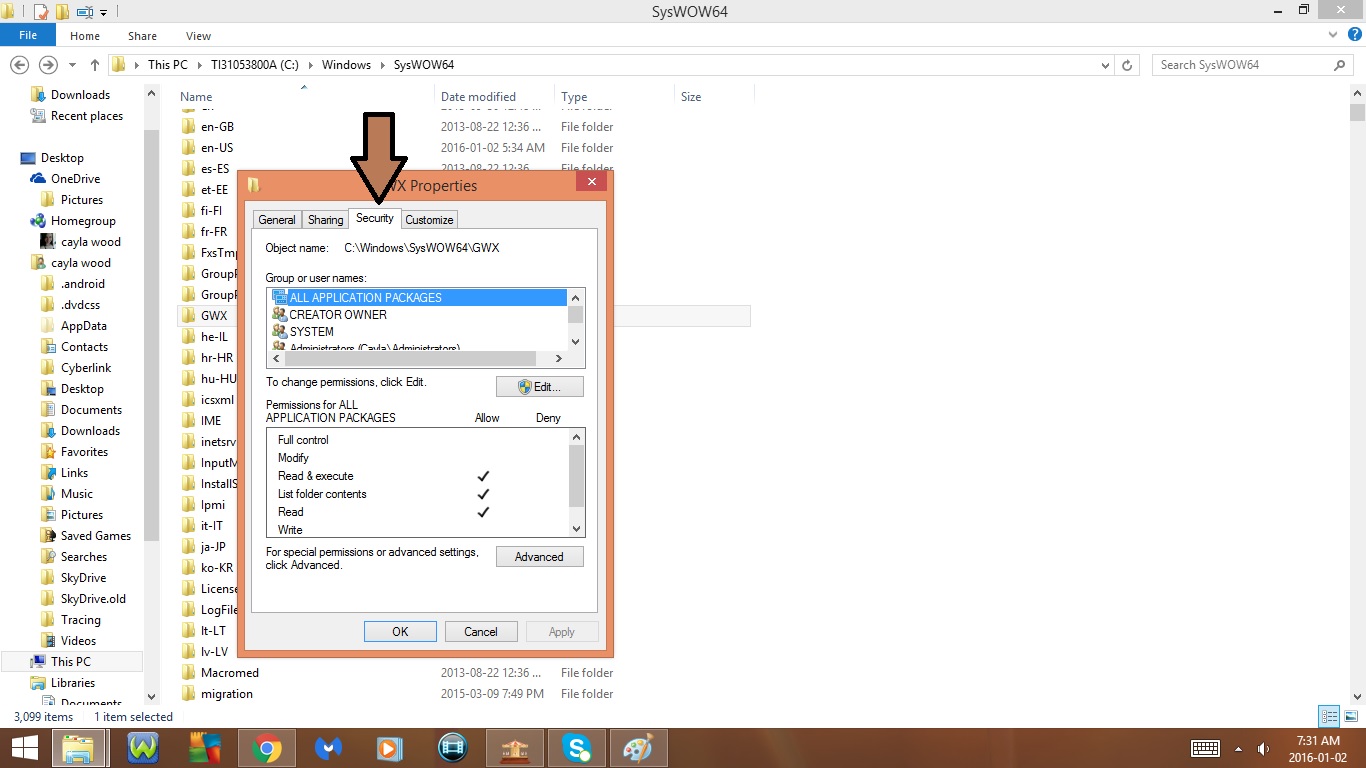
- Go to the Security Tab
-- Should be tab 3
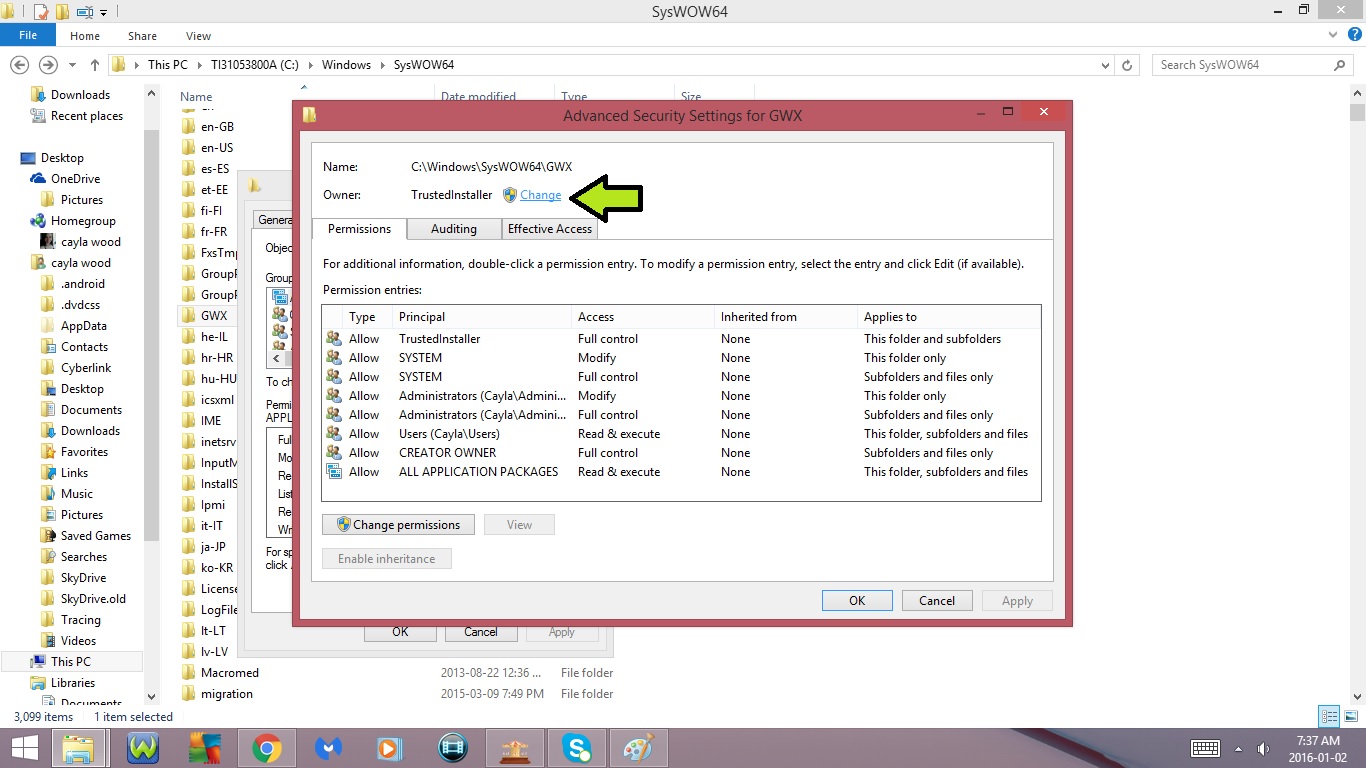
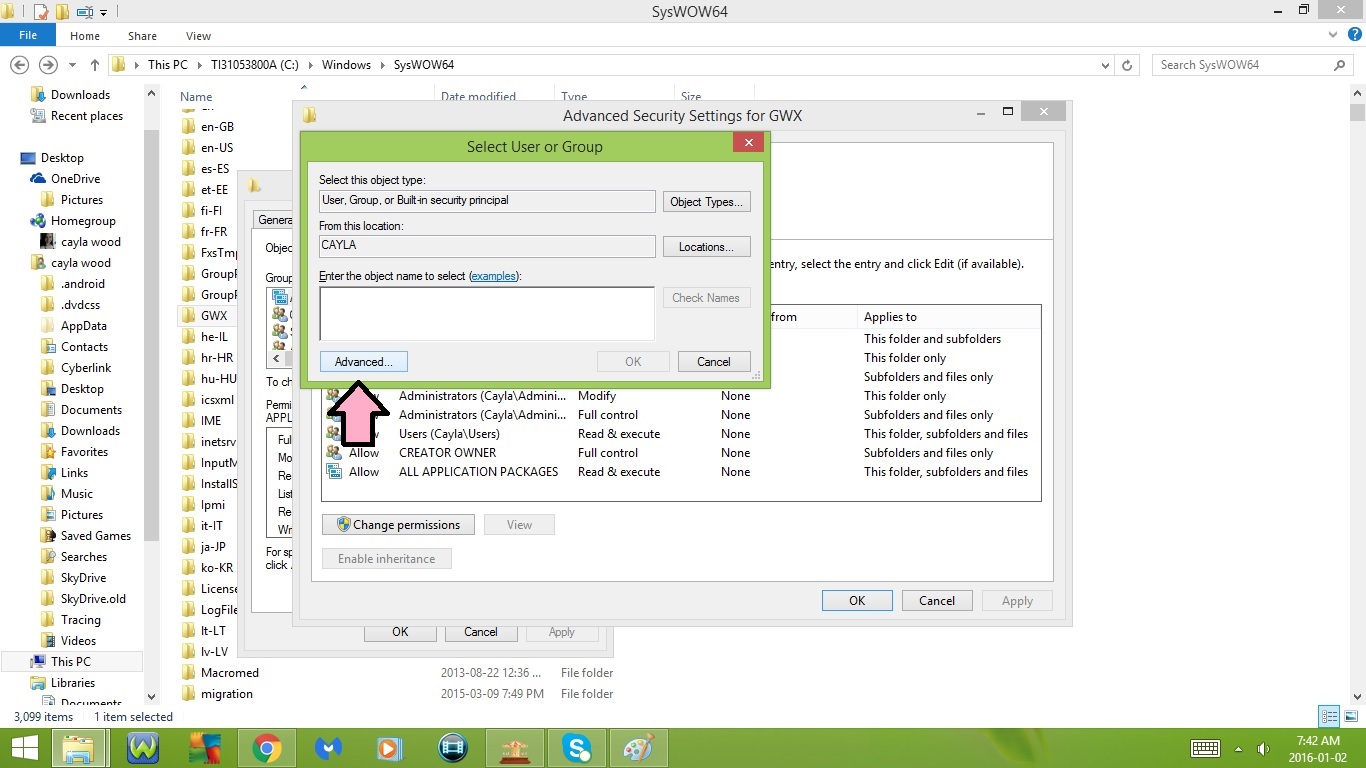
- Click Advanced
- Click Change
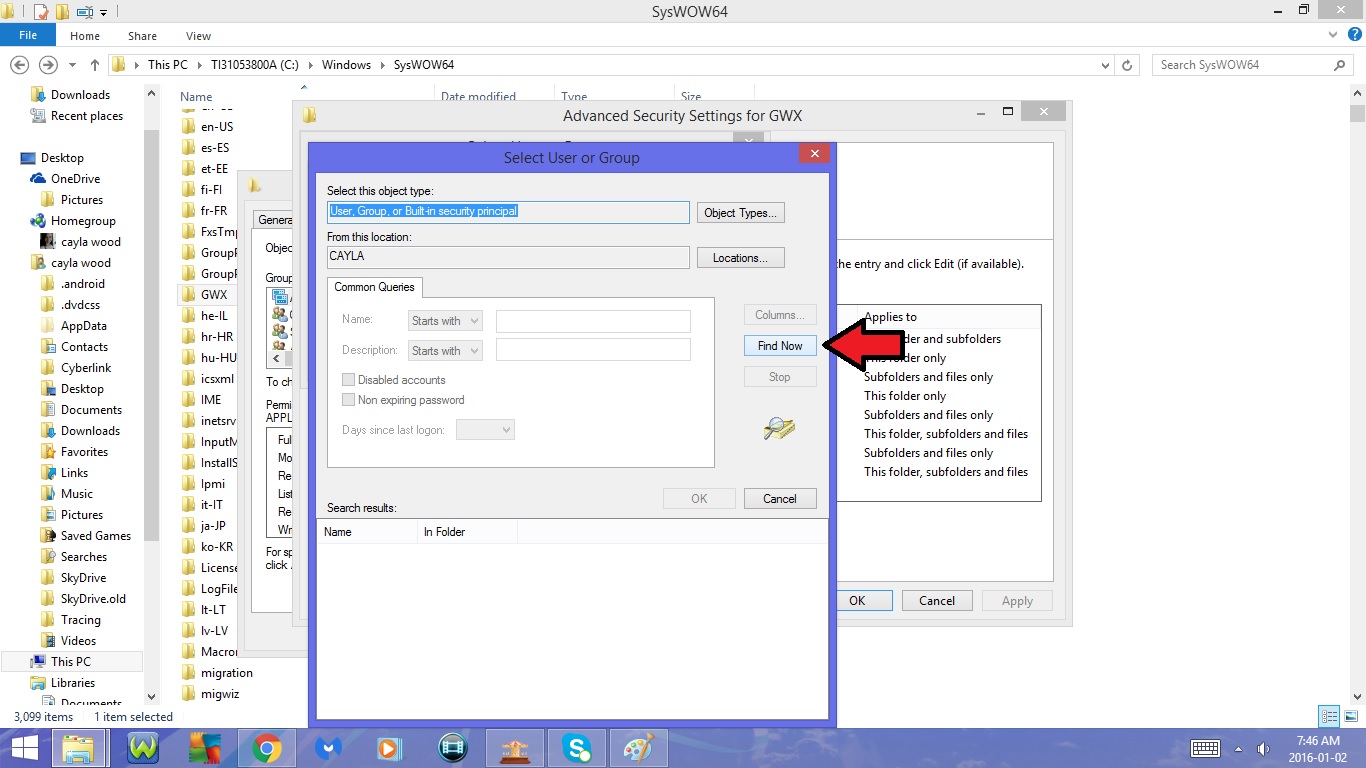
- Click Advanced
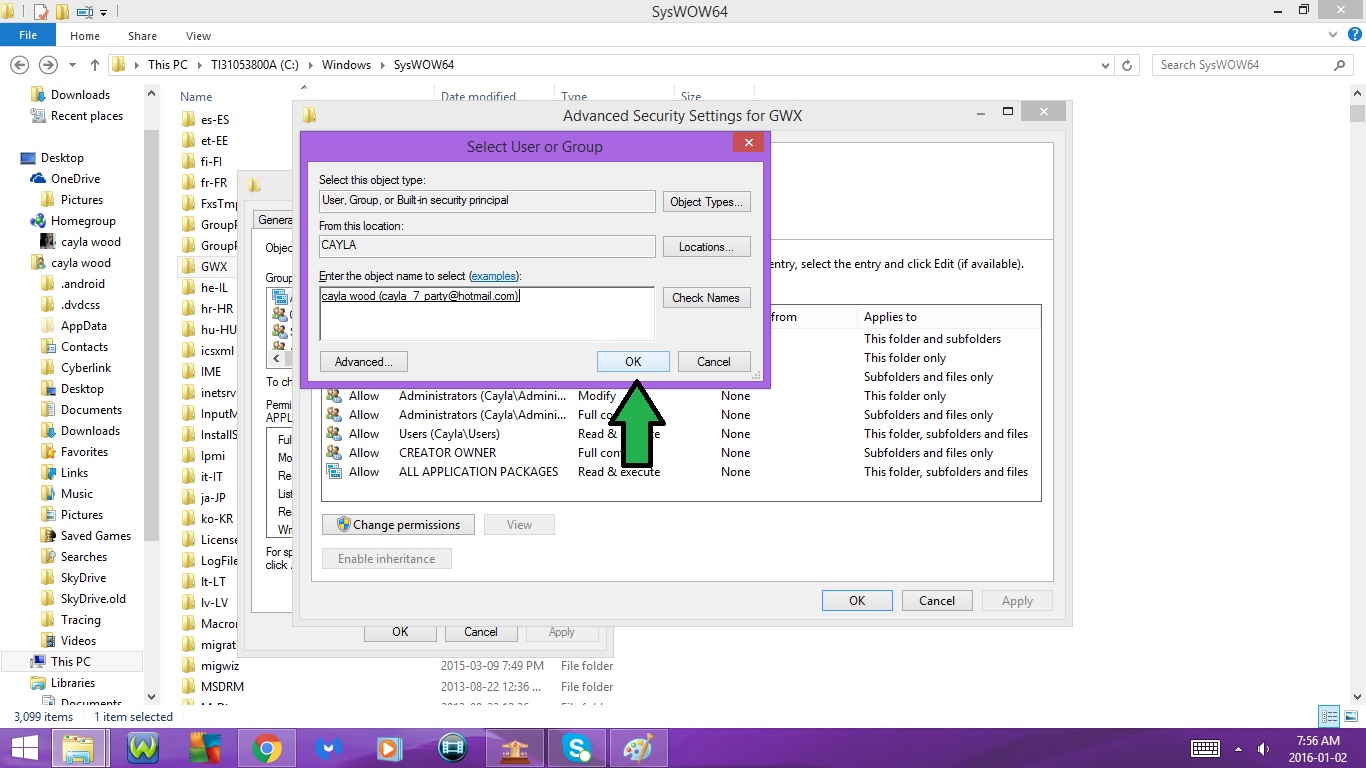
- Click Find Now
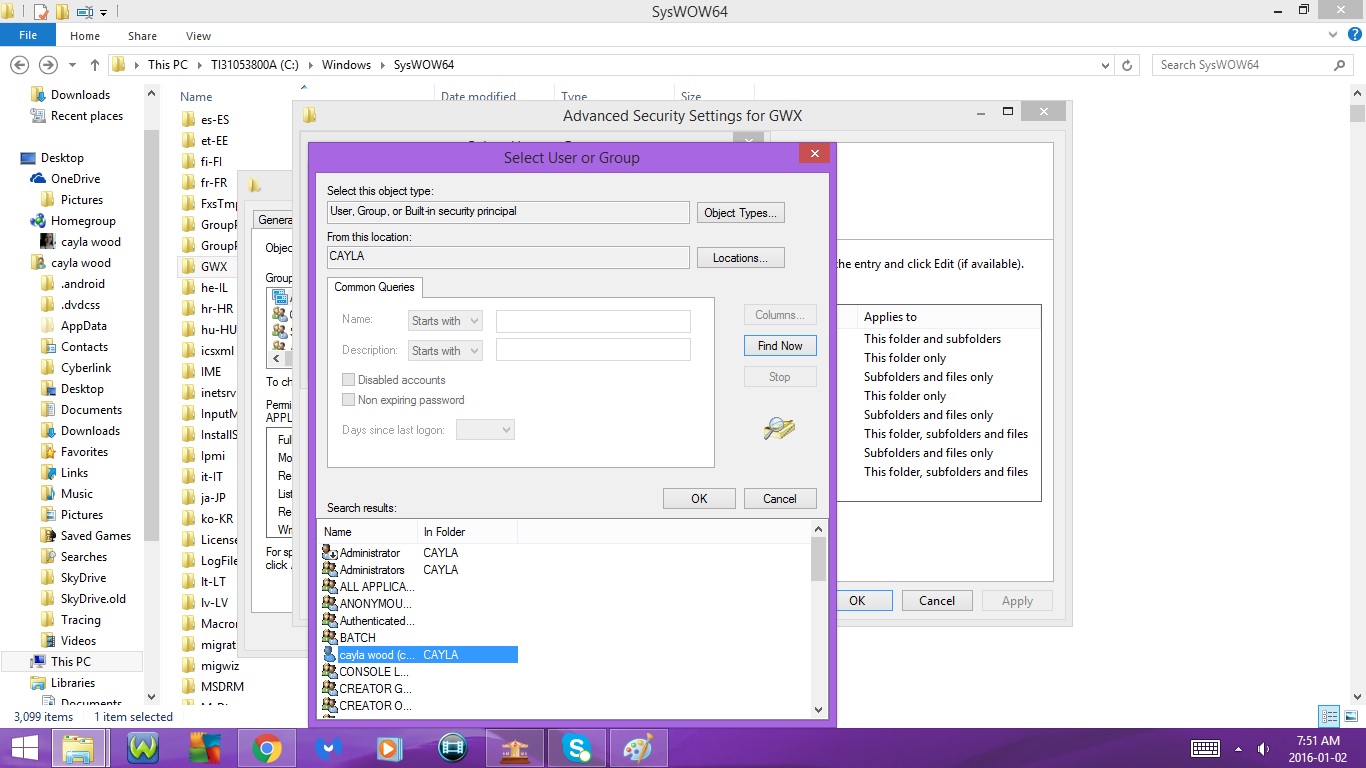
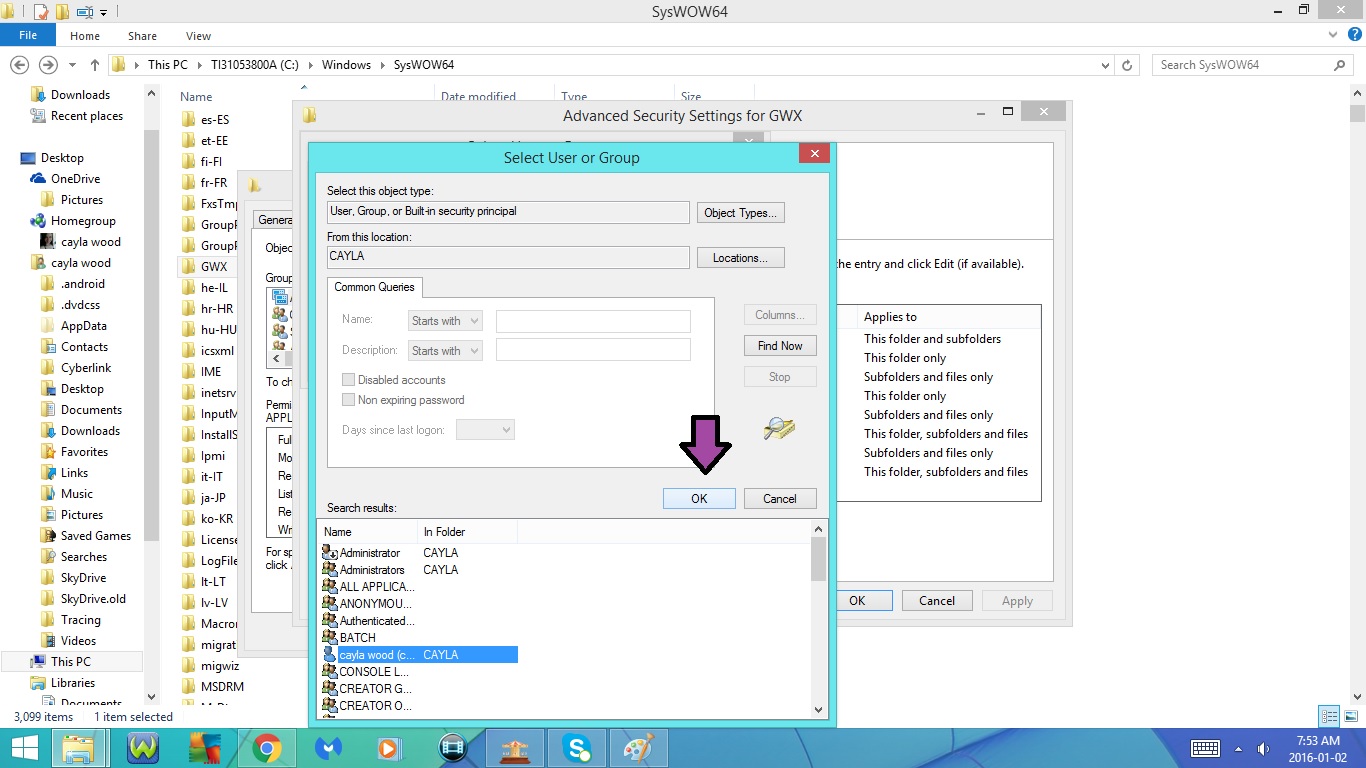
- Select your User Name
-- For some computers you may need to select Administrator instead of your User Name
- Click Ok
- Click Ok again
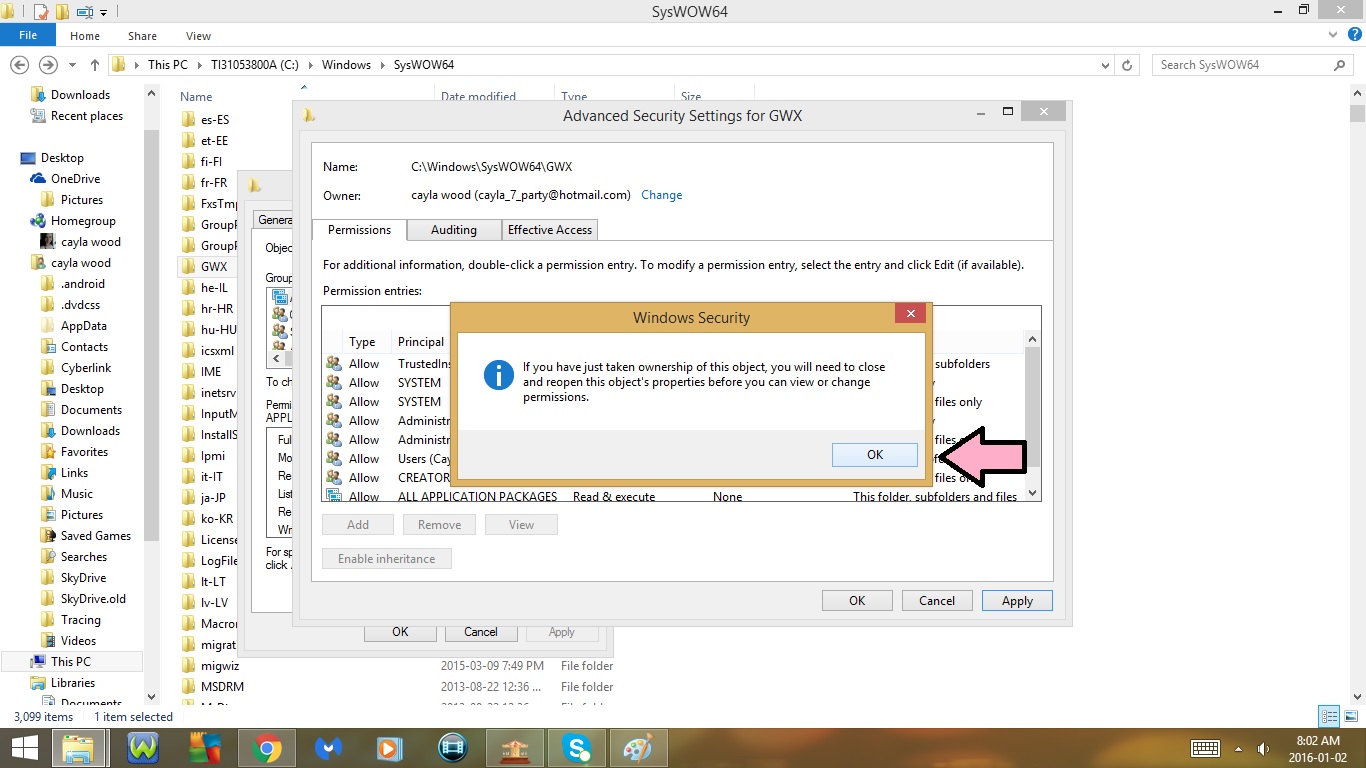
- Check off Replace Owner on Sub Containers and Objects
- Click Apply
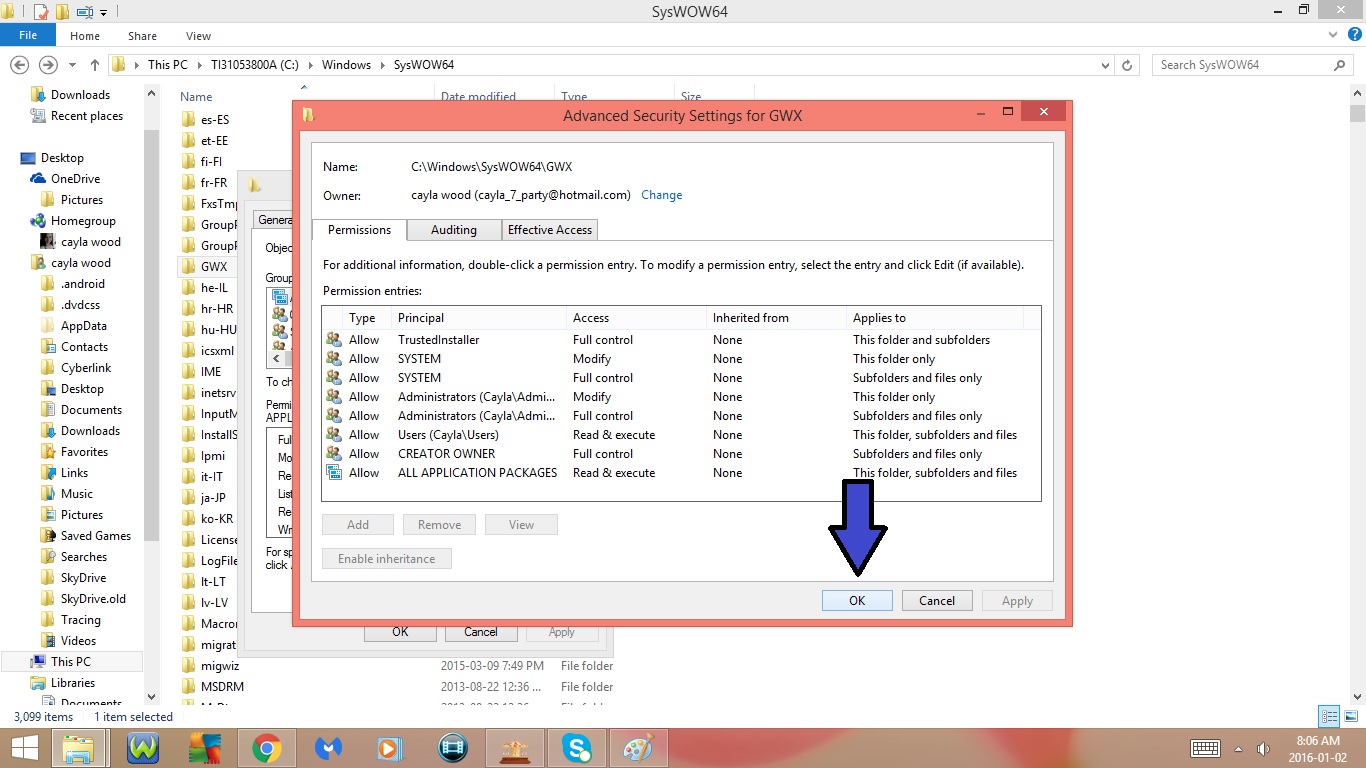
- Click Ok
- Click Ok
- Click Ok agian
Windows 8/8.1 : Part 4


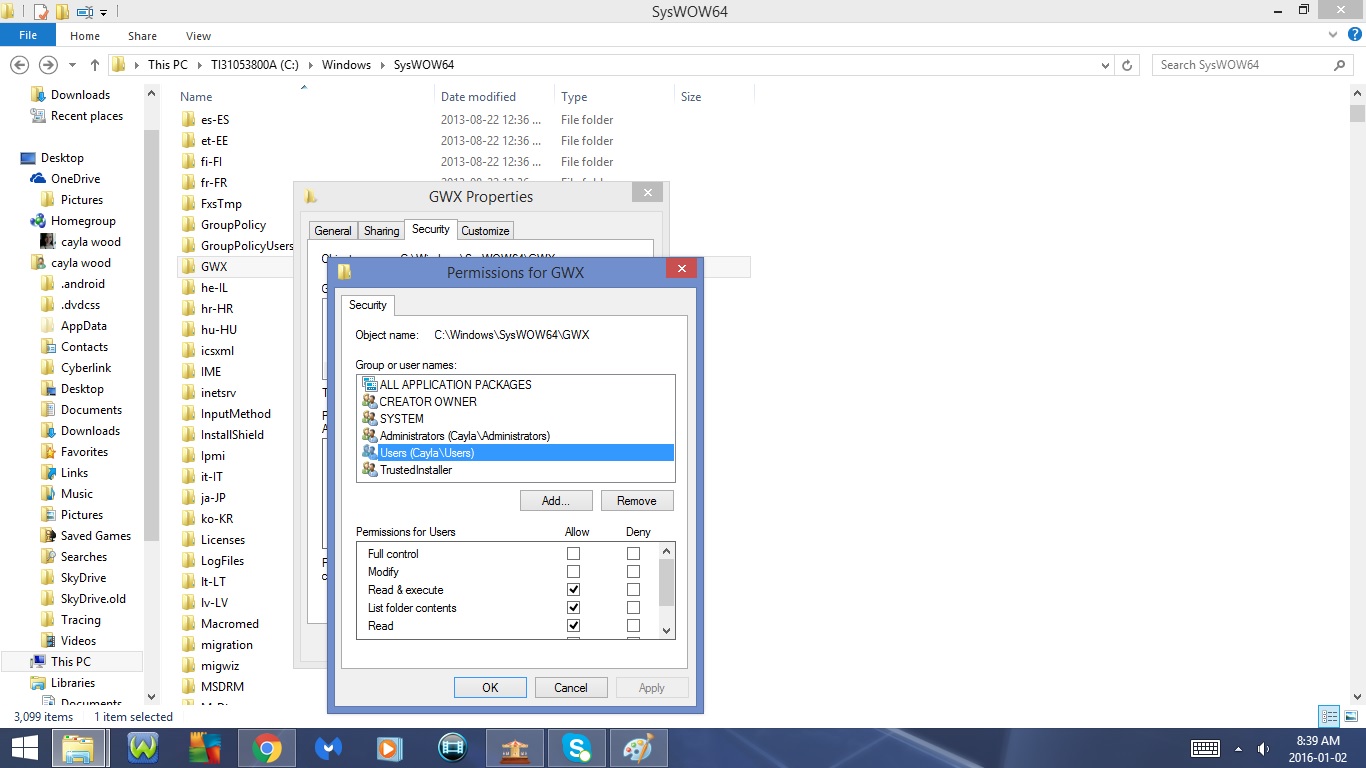
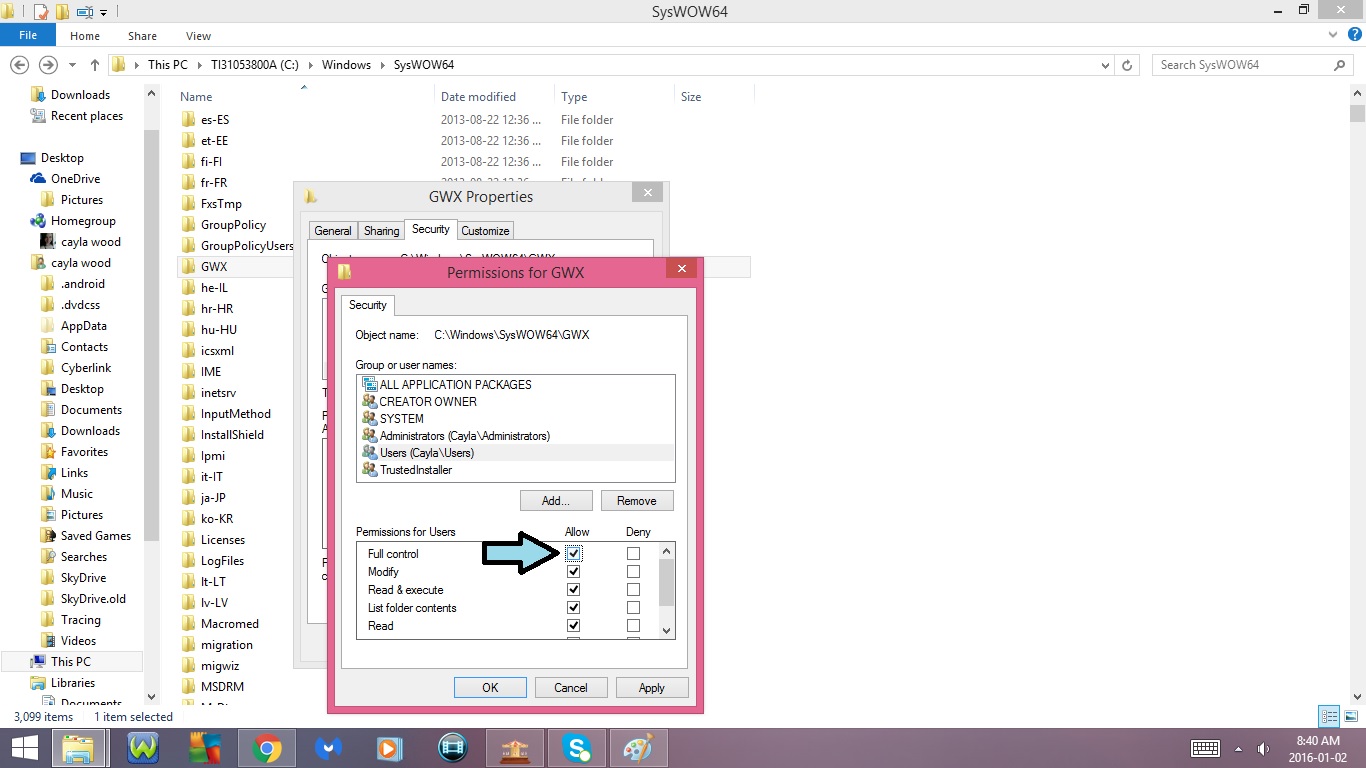
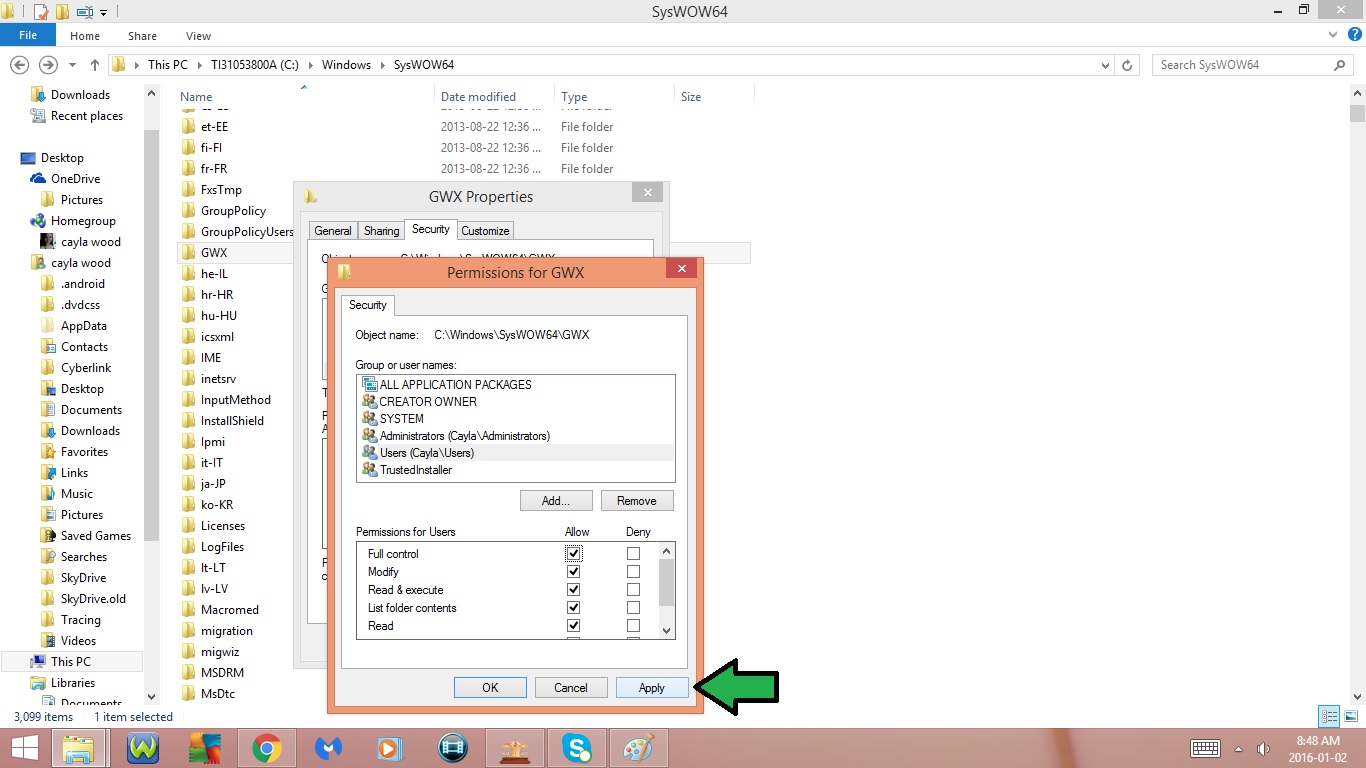


9. Grant yourself Full Control Permissions and Rights of the GWX Folder
- Right Click on the GWX Folder
- Select Properties
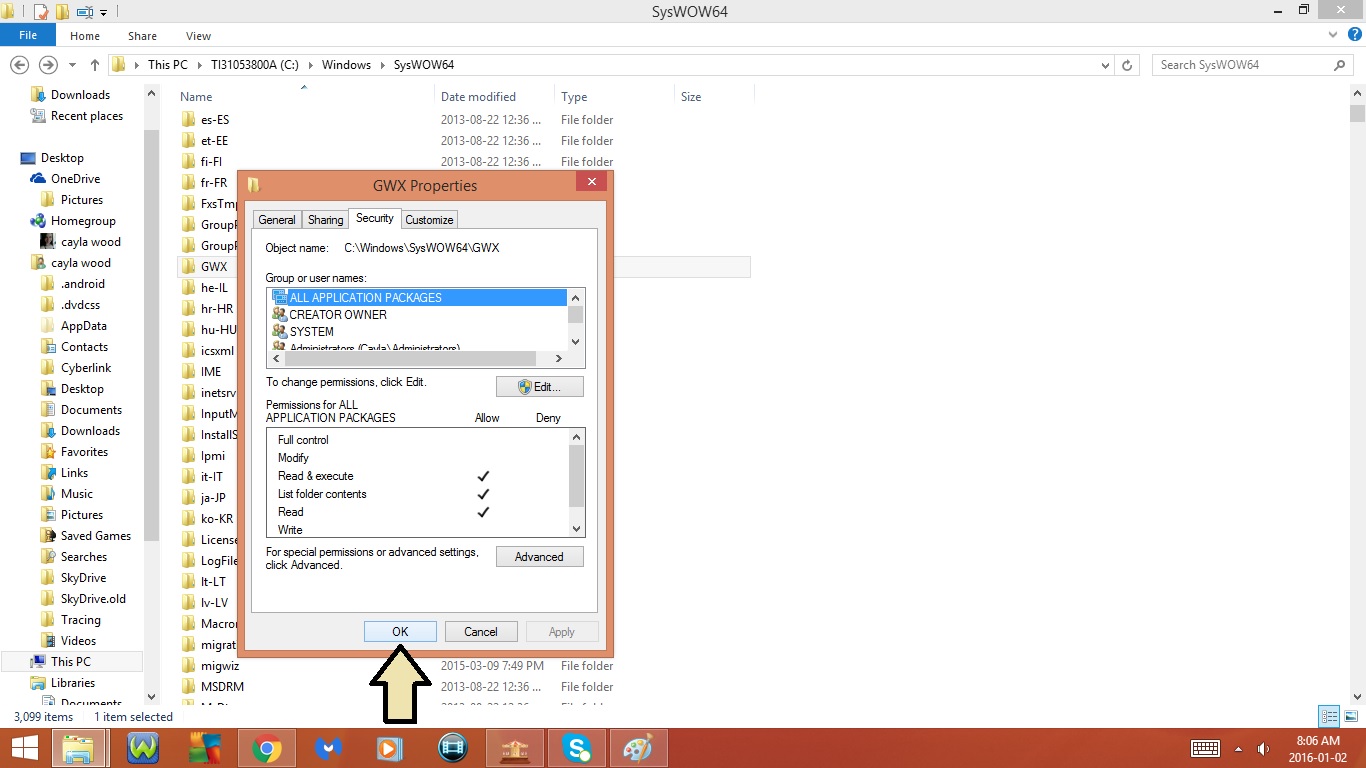
- Select the Security Tab
- Click Edit
- Select your User Name
-- For some computers you may need to select Administrator instead of your User Name
- Make sure the Allow is checked off beside Full Control
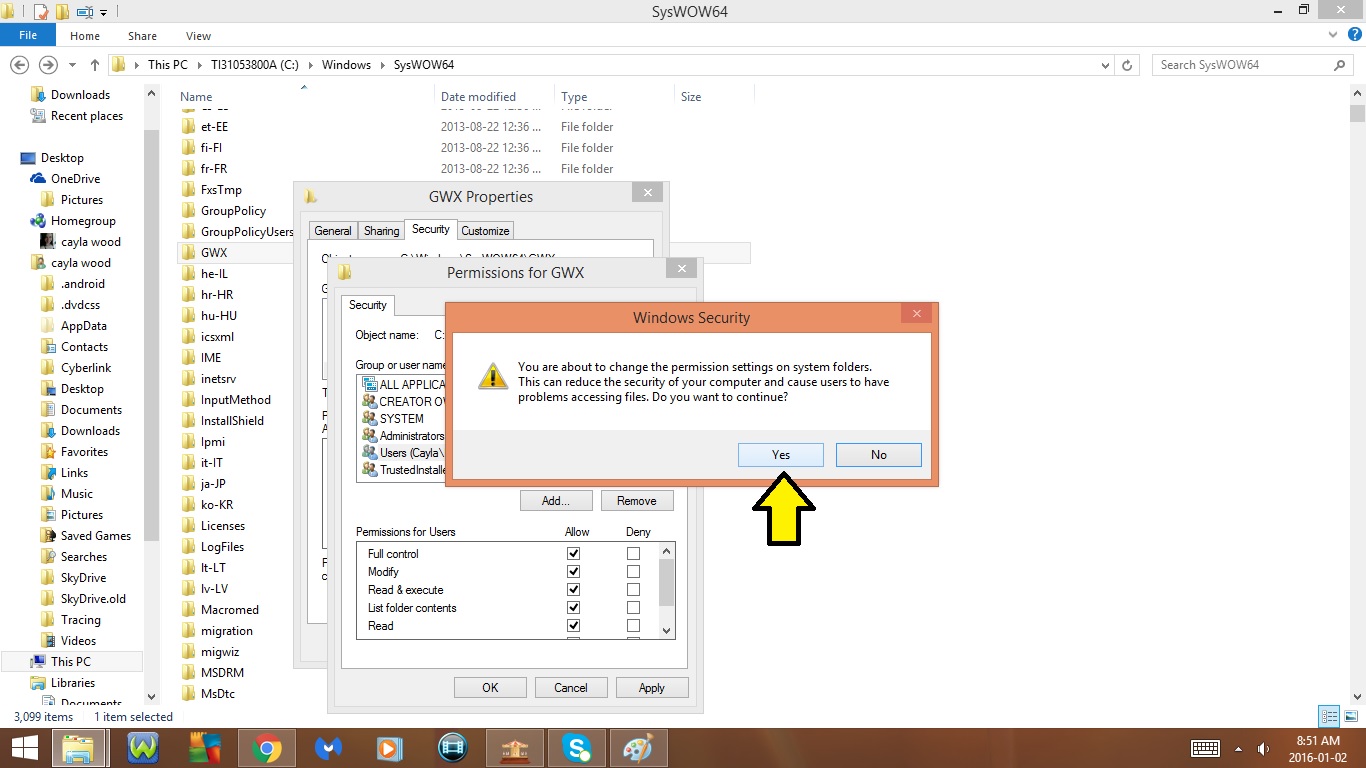
- Click Apply
- Click Yes
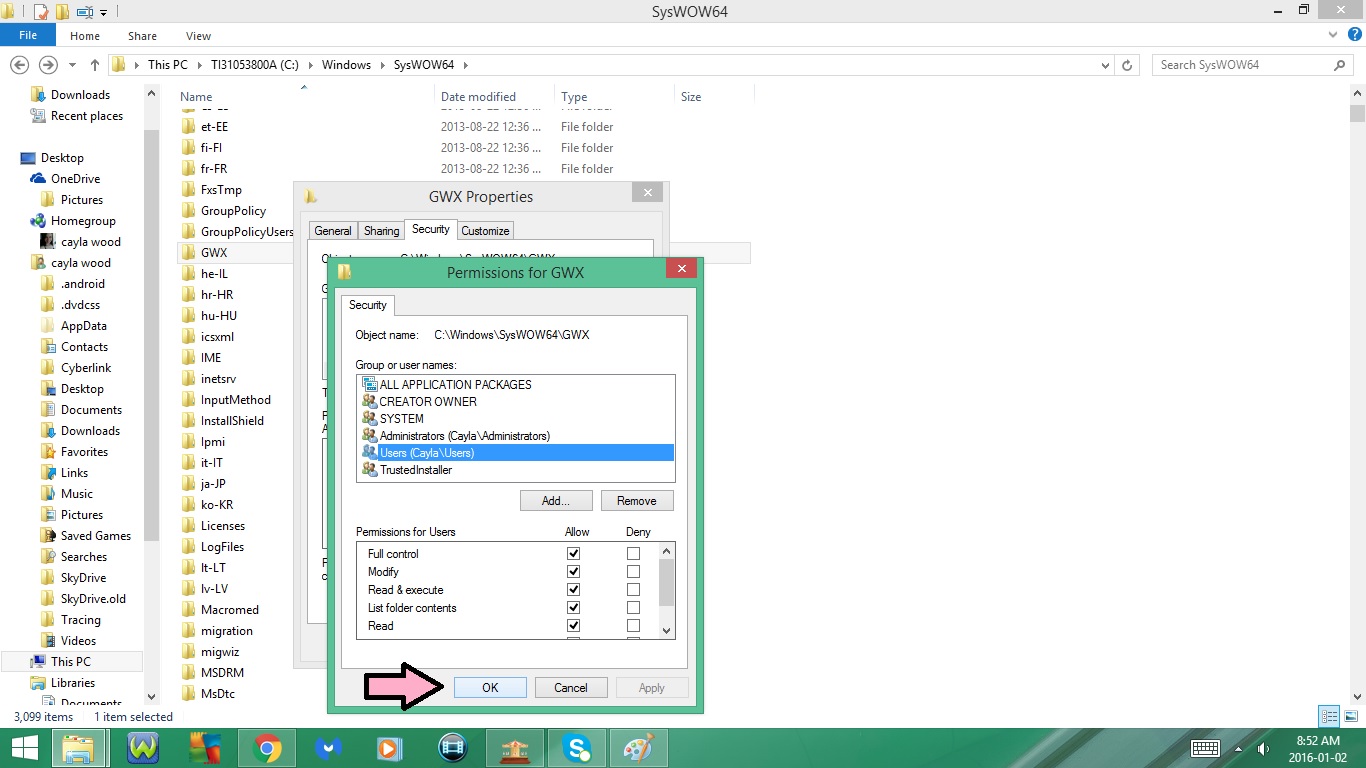
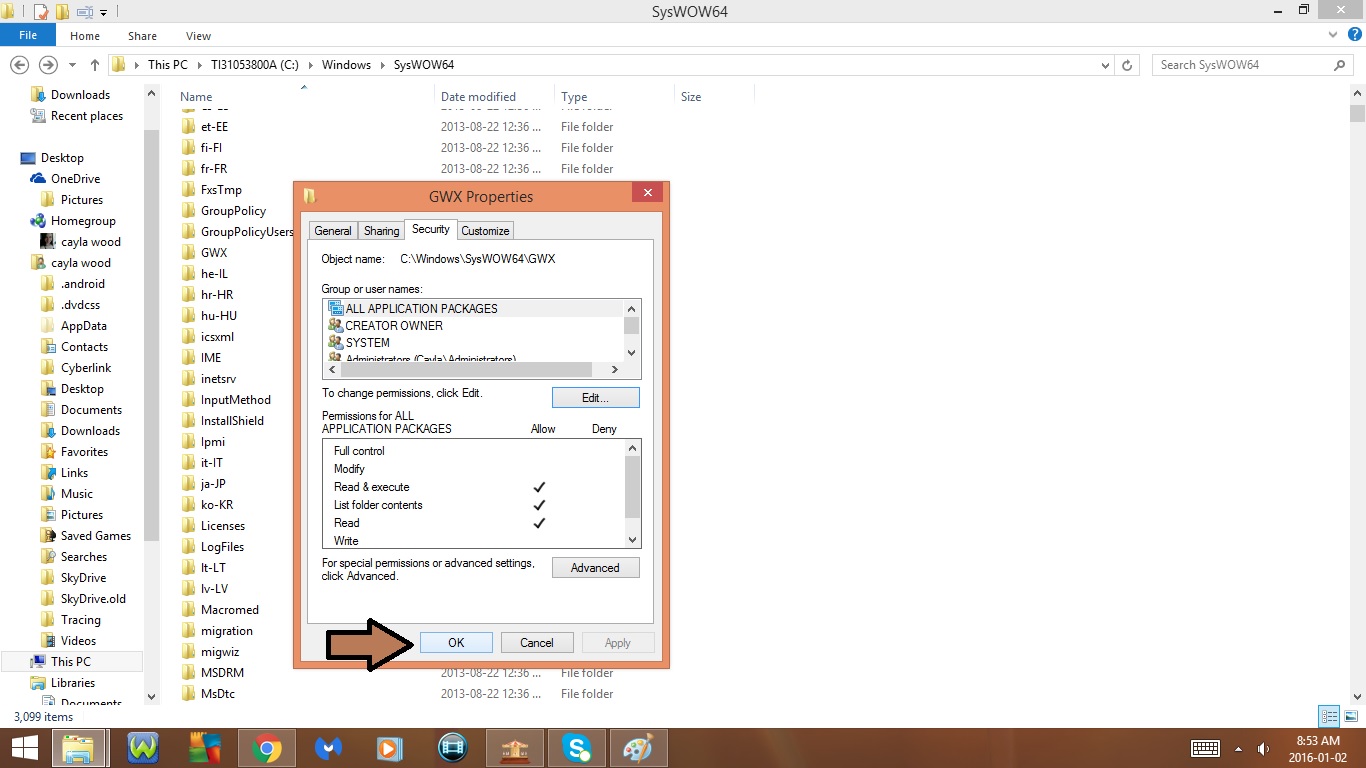
- Click Ok
- Click Ok again
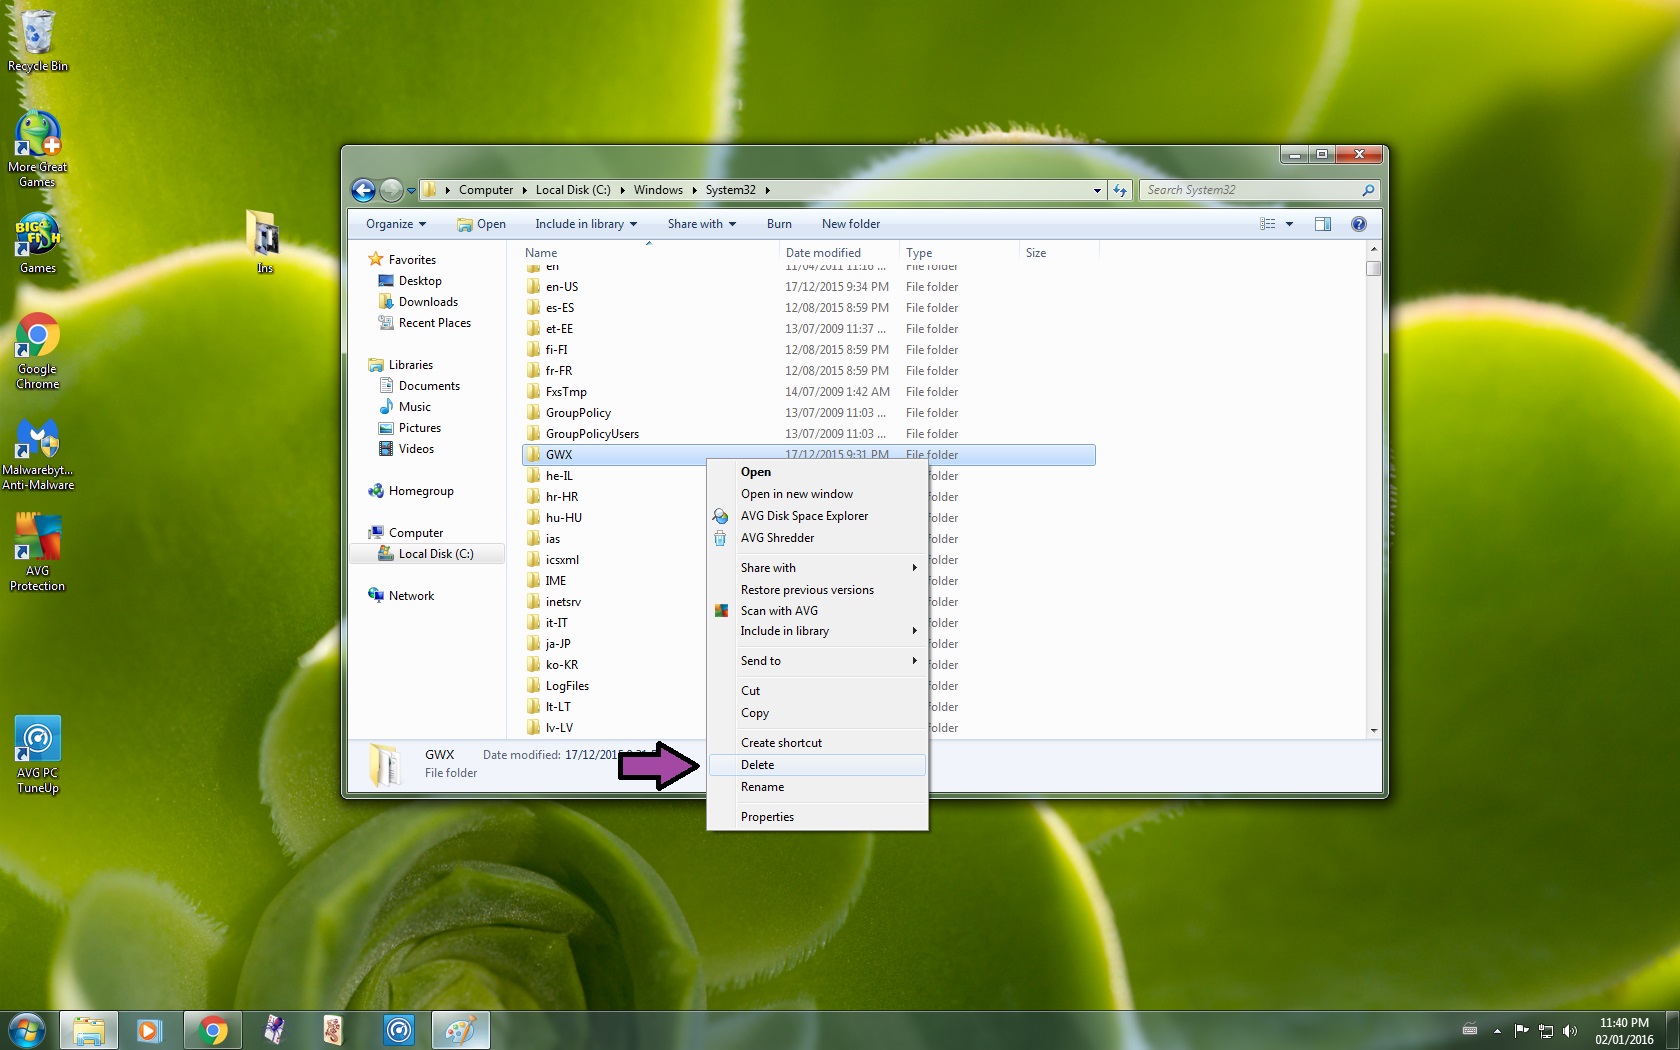
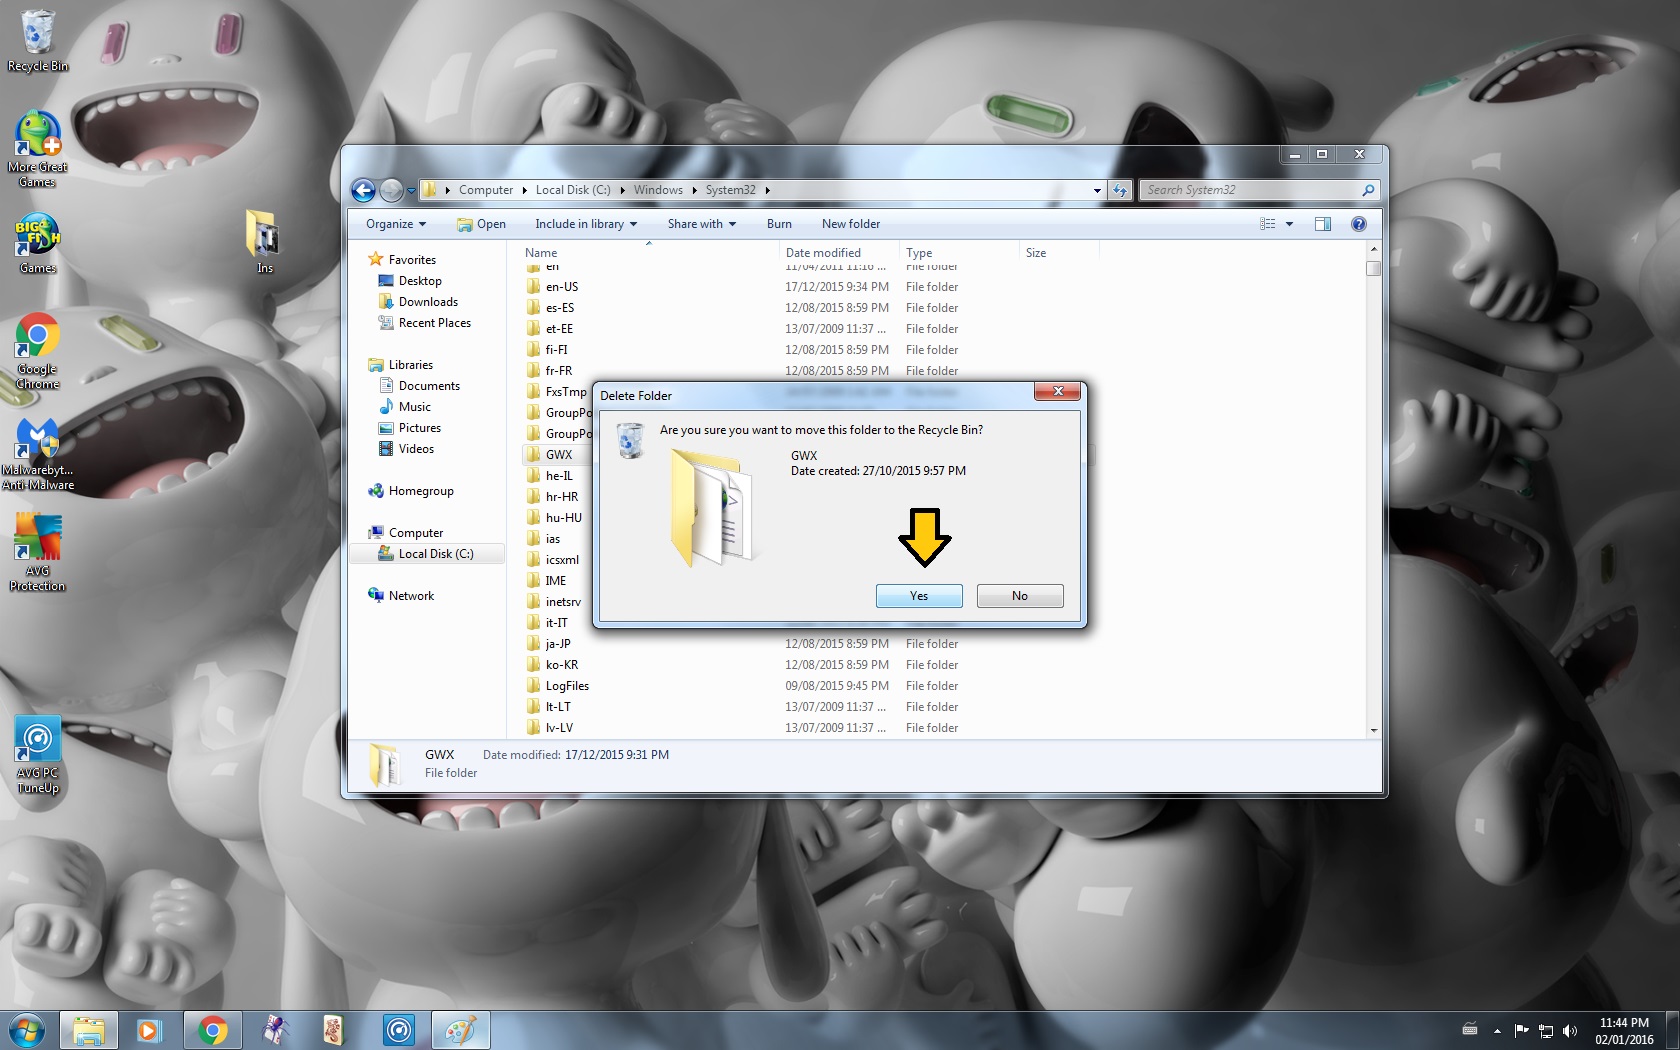
10. Delete the GWX Folder
- Right Click on the GWX Folder
- Select Delete
- Click Yes
- Close Window
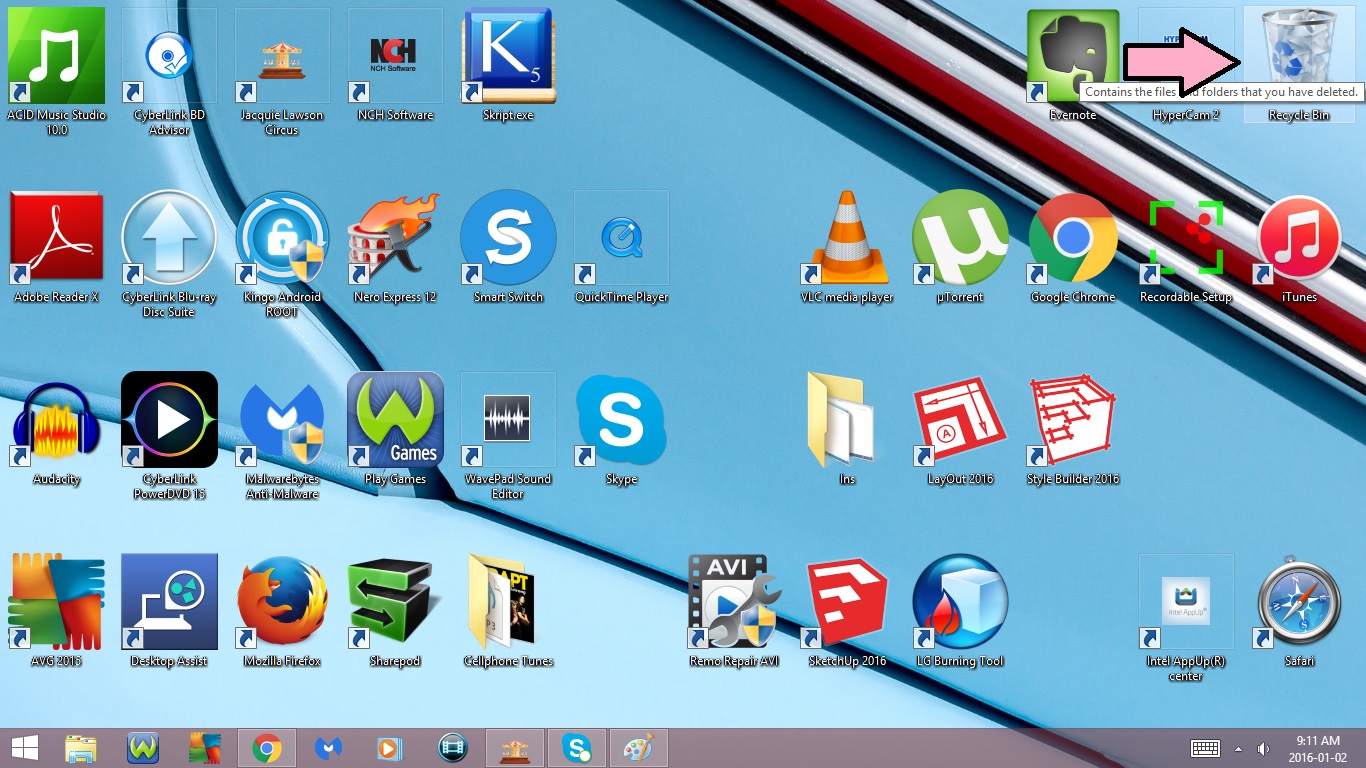
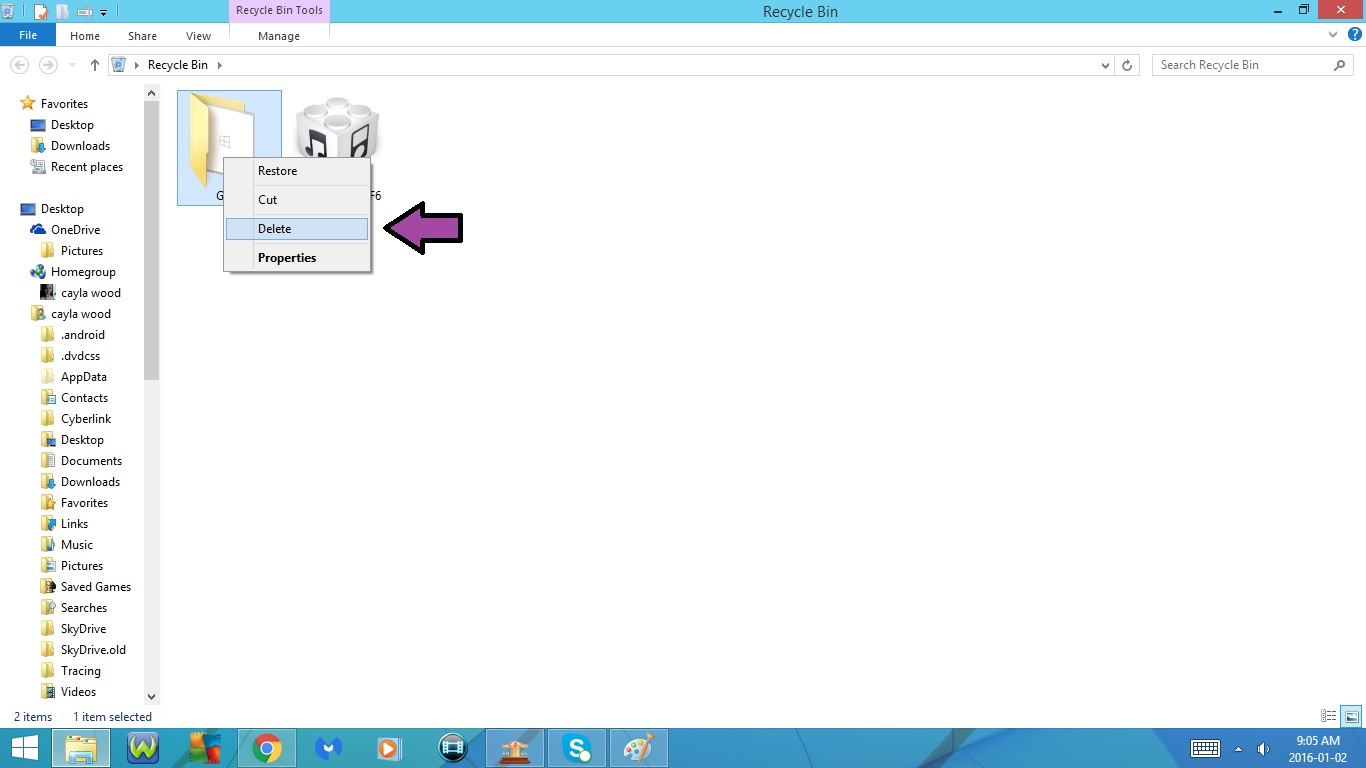
11. Delete the GWX Folder from Recycle Bin
- Double Click on the Recycle Bin icon on your Desktop
- Select the GWX Folder
- Right Click
- Select Delete
- Click Yes
- Close Recylce Bin
Windows 8/8.1 : Part 5


12. Uninstall the Update
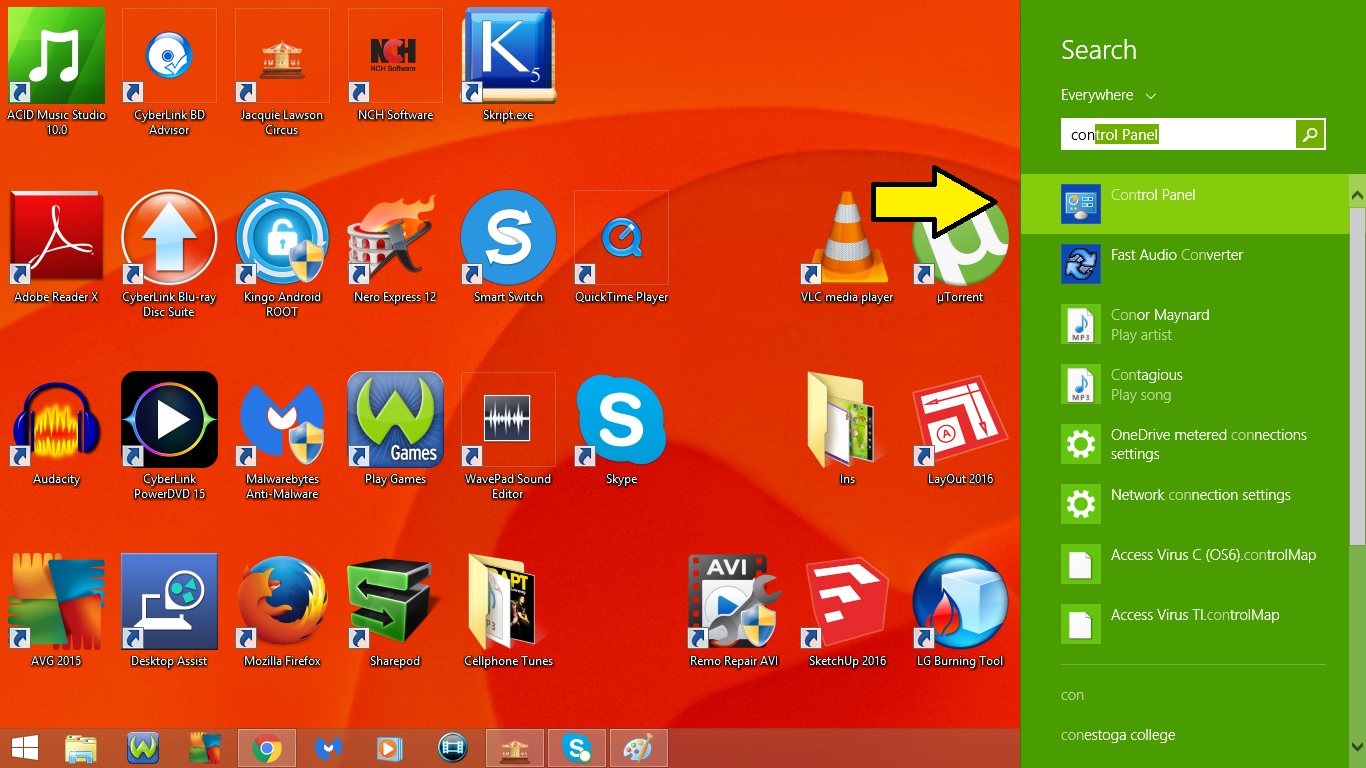
- Open the Control Panel
-- Open the Sidebar
-- Go to search
-- Type in Control Panel
-- Click on the Icon to open it
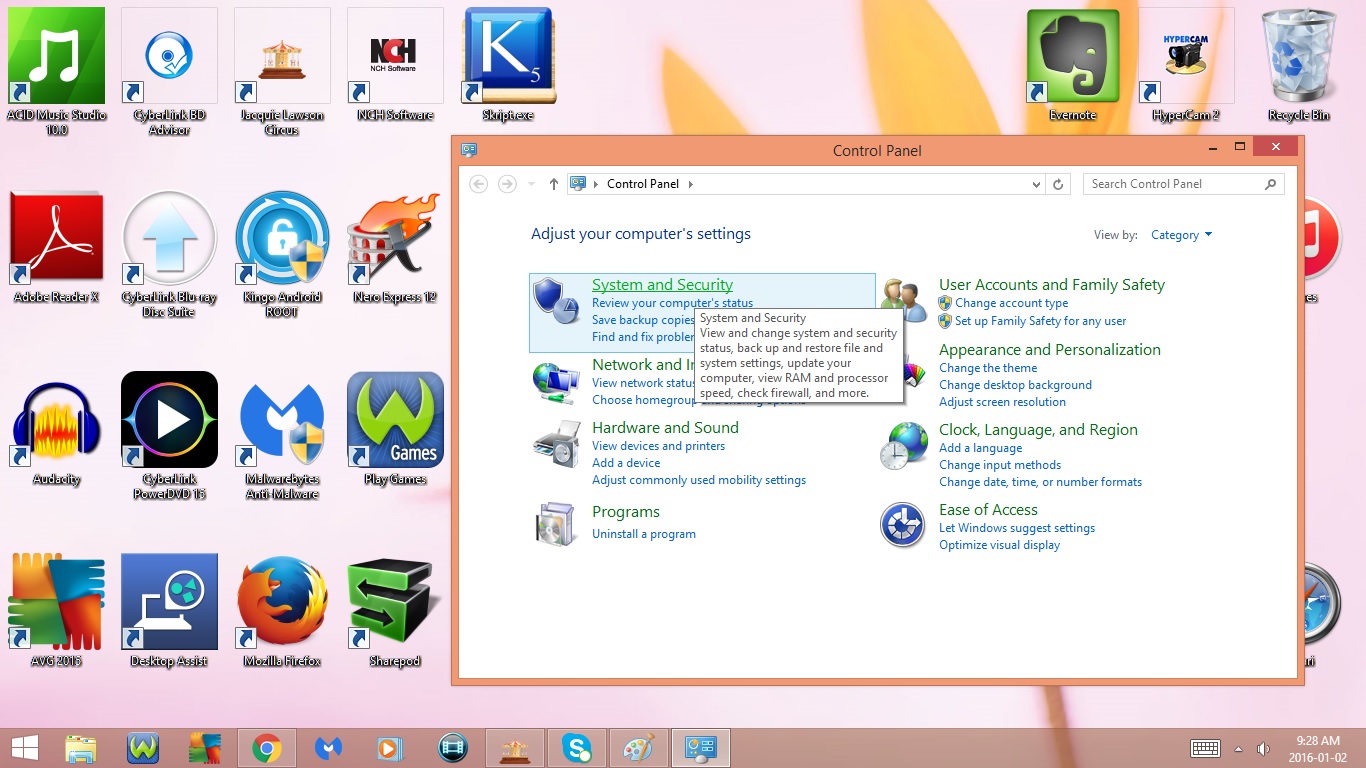
- Go to System and Security
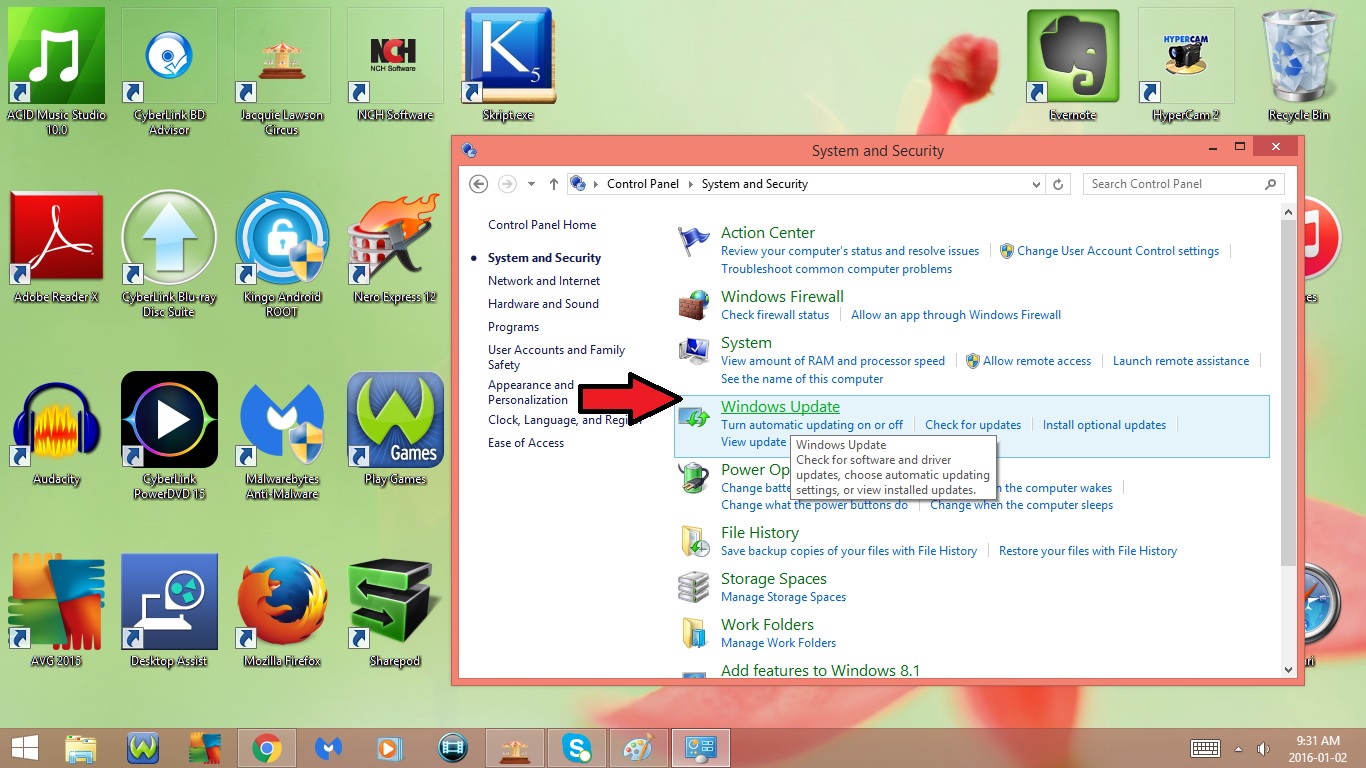
- Go to Windows Update
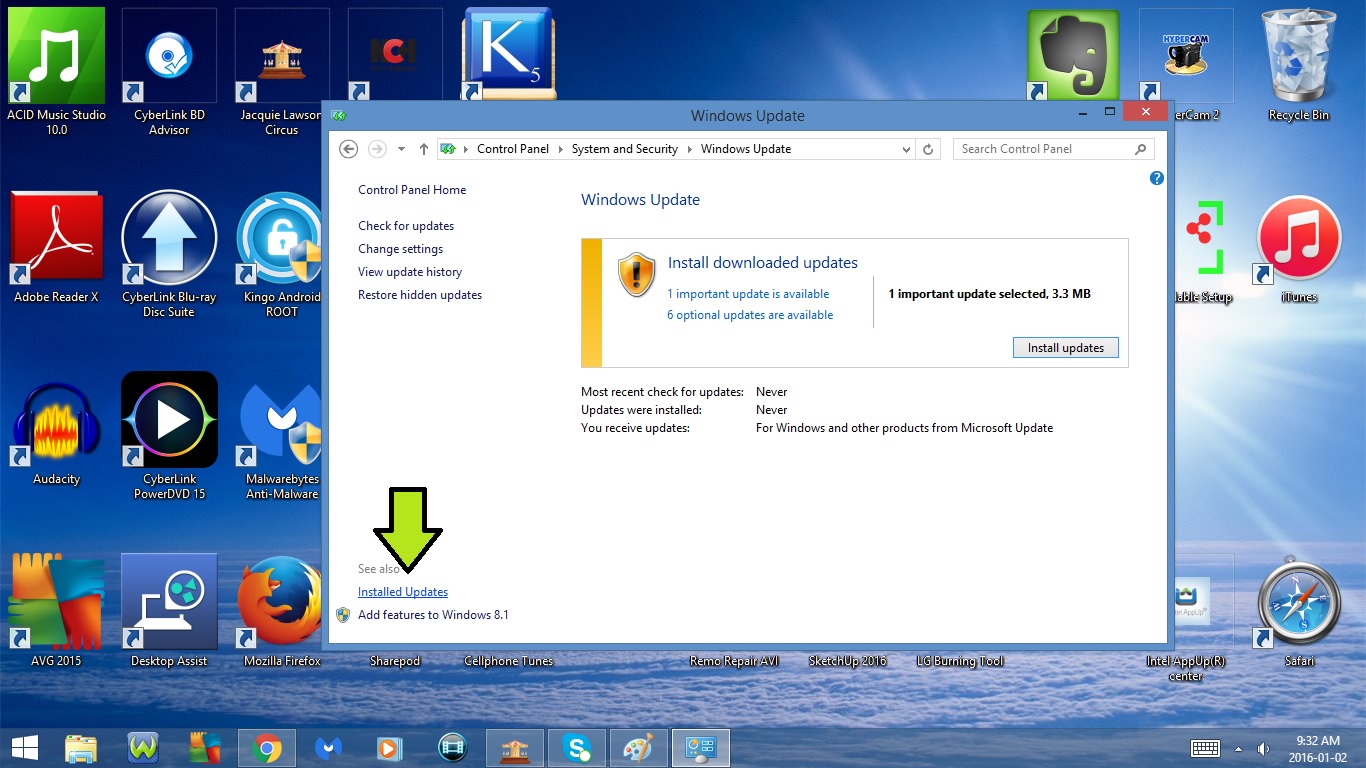
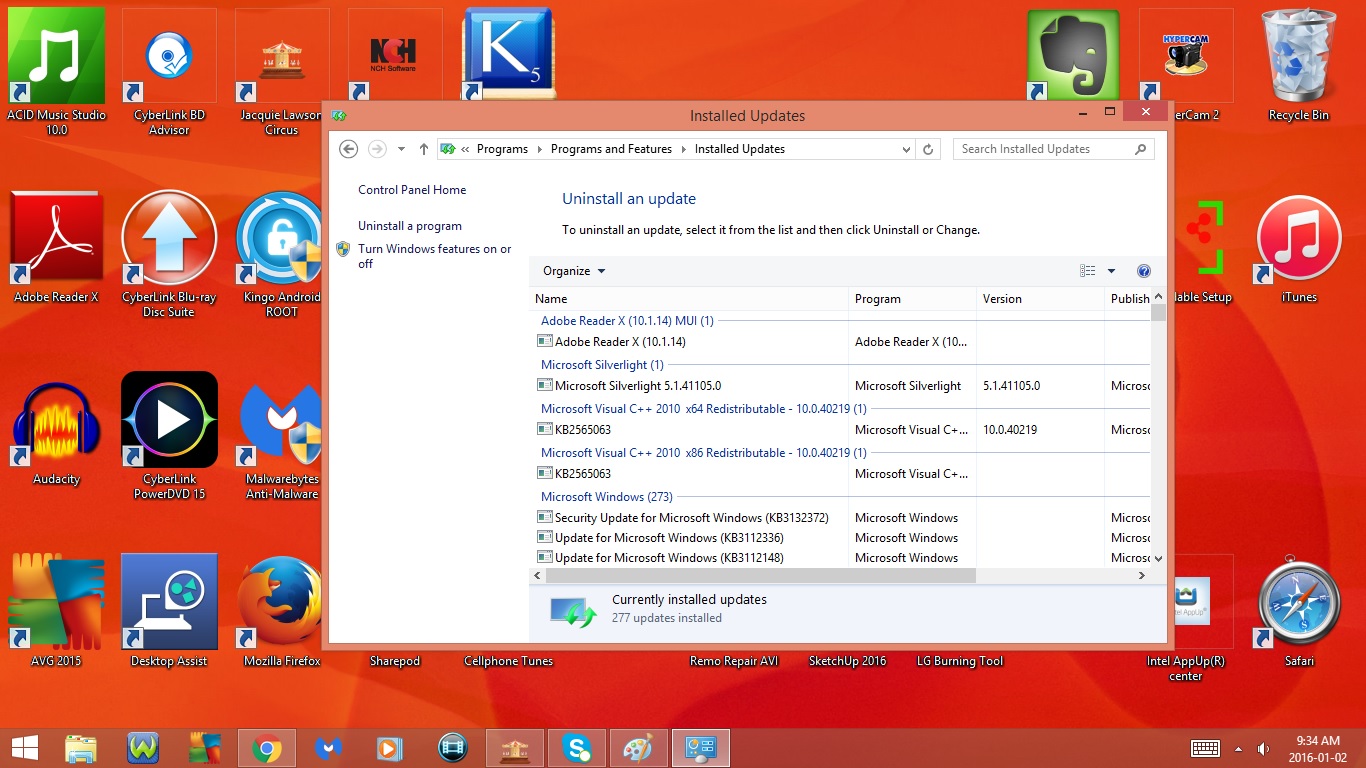
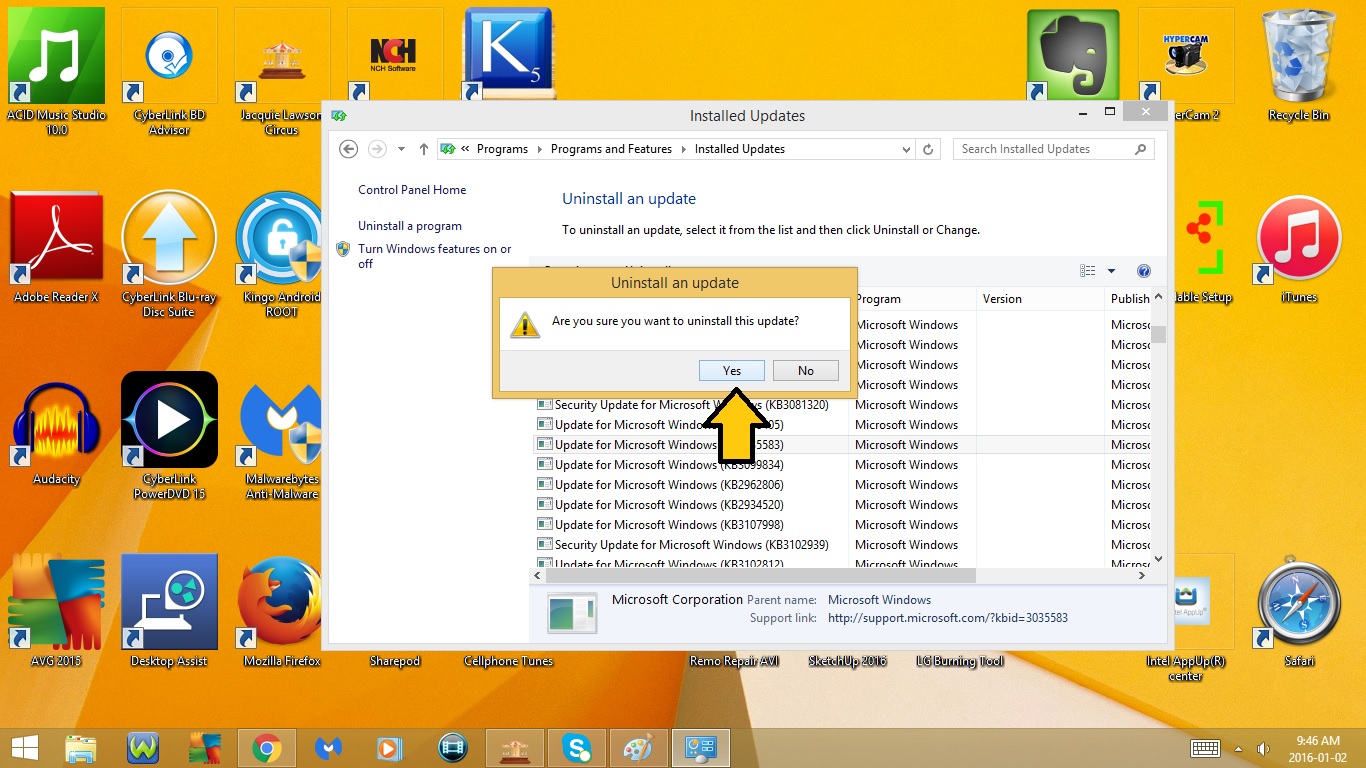
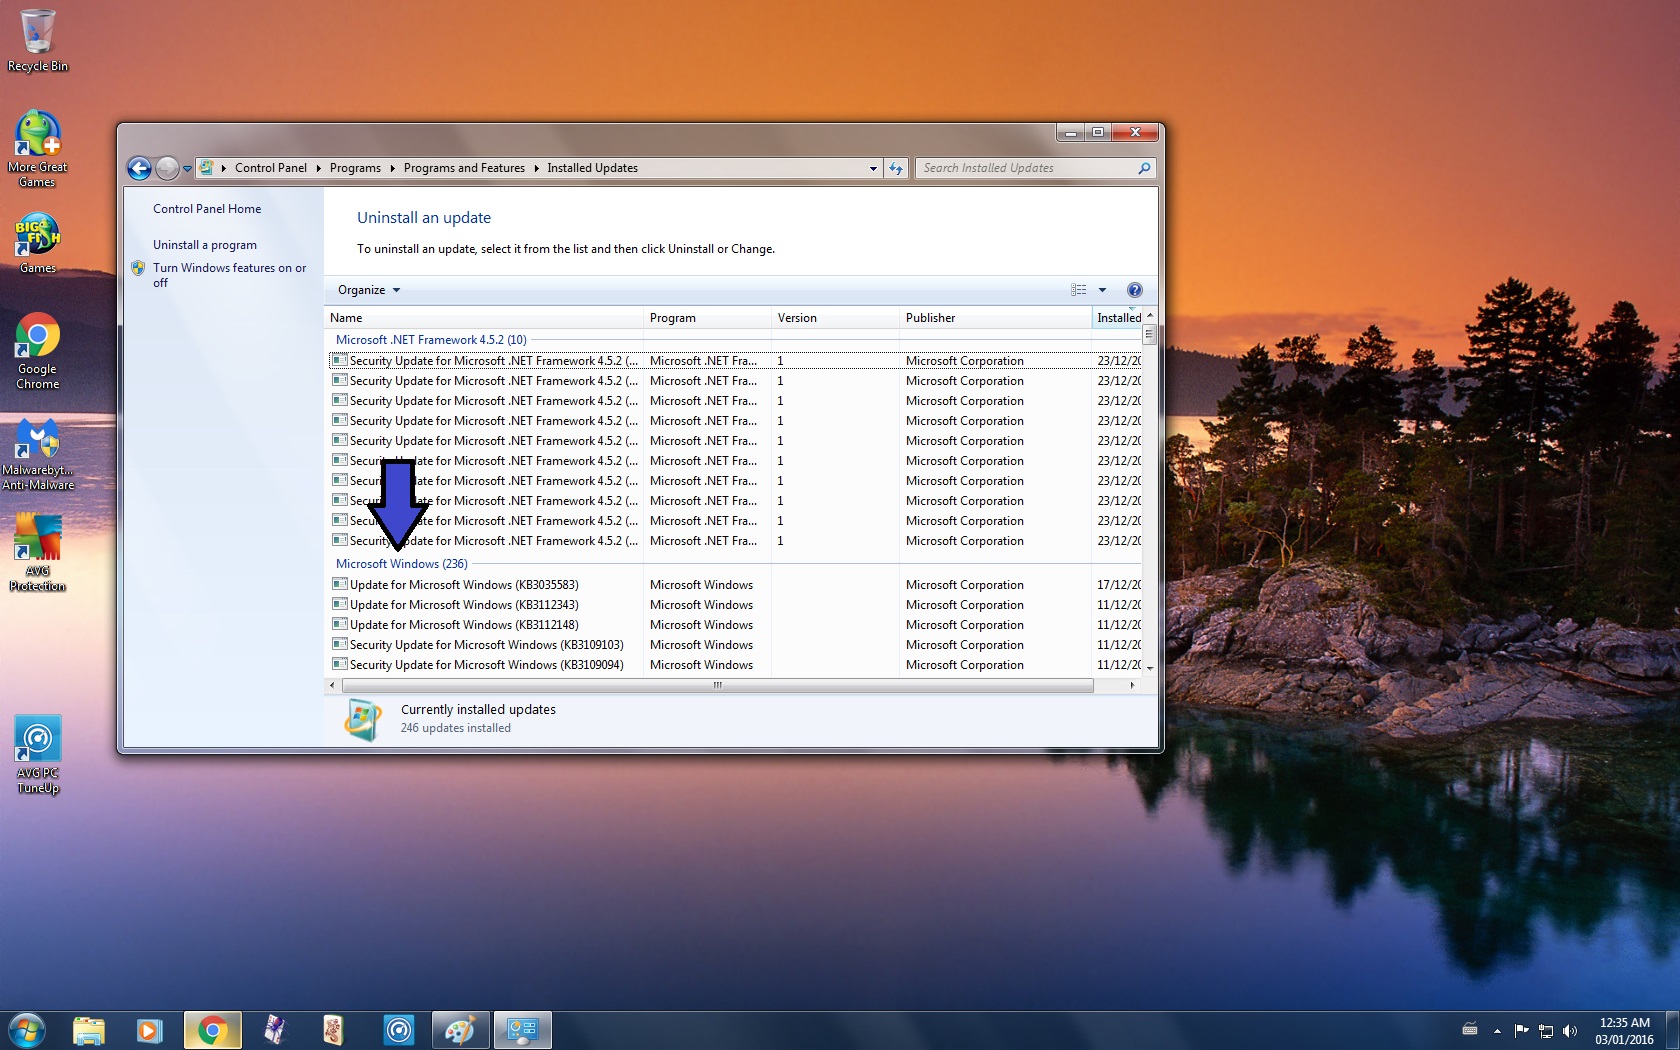
- Click on Installed Updates
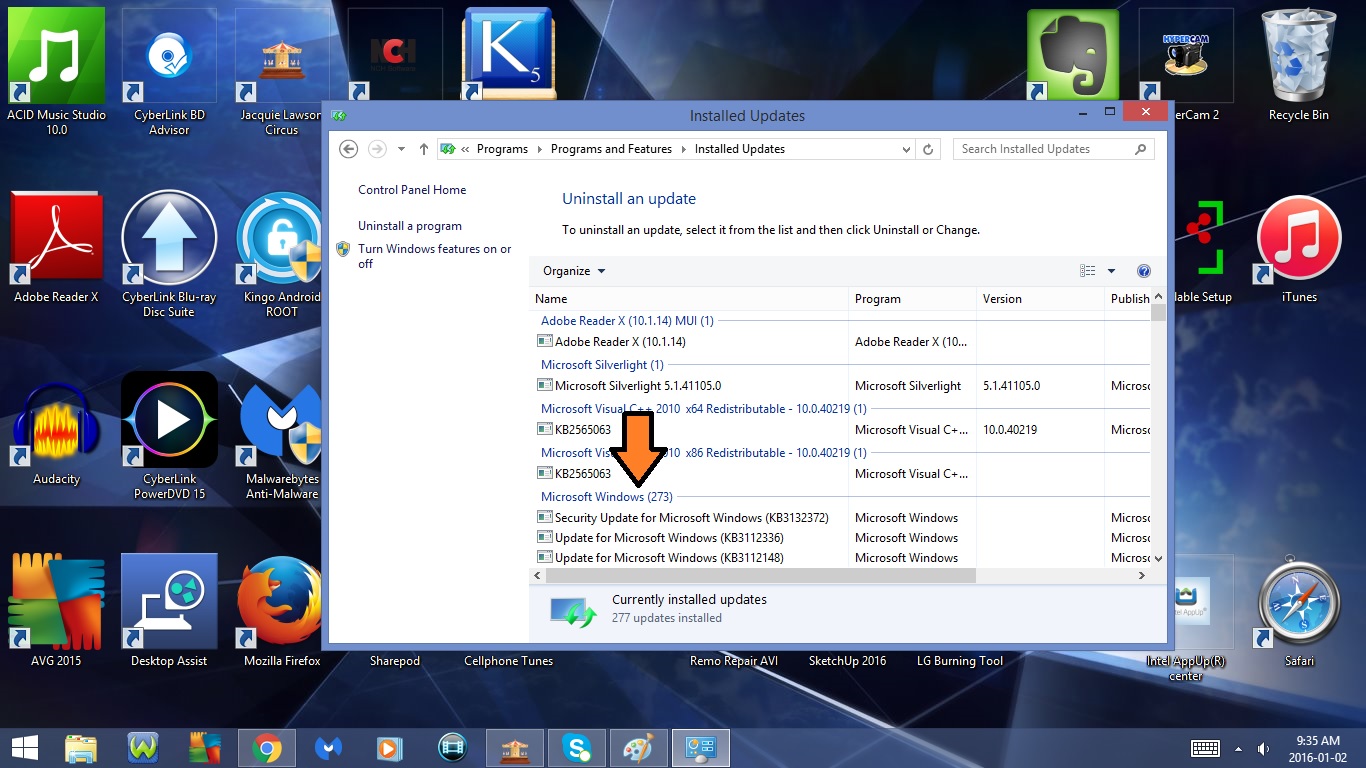
- Scroll down to Microsoft Windows
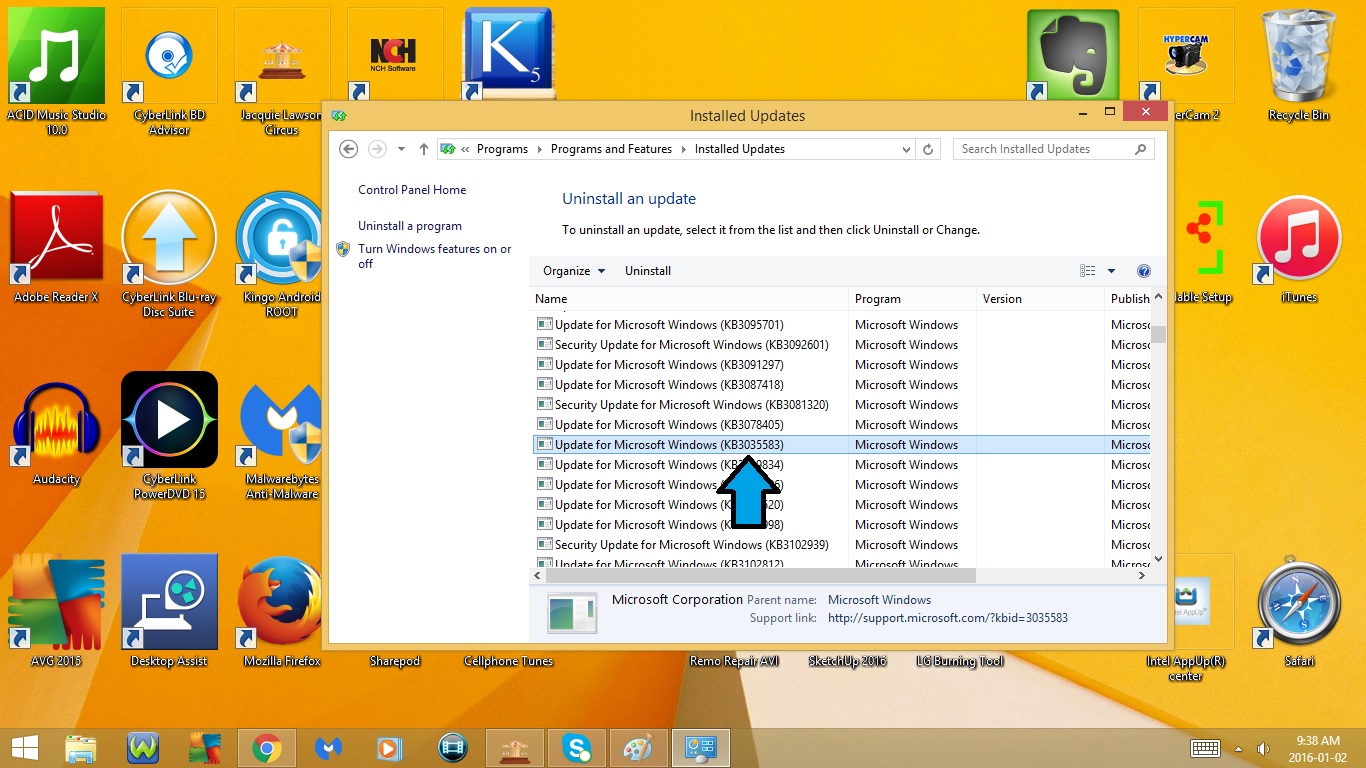
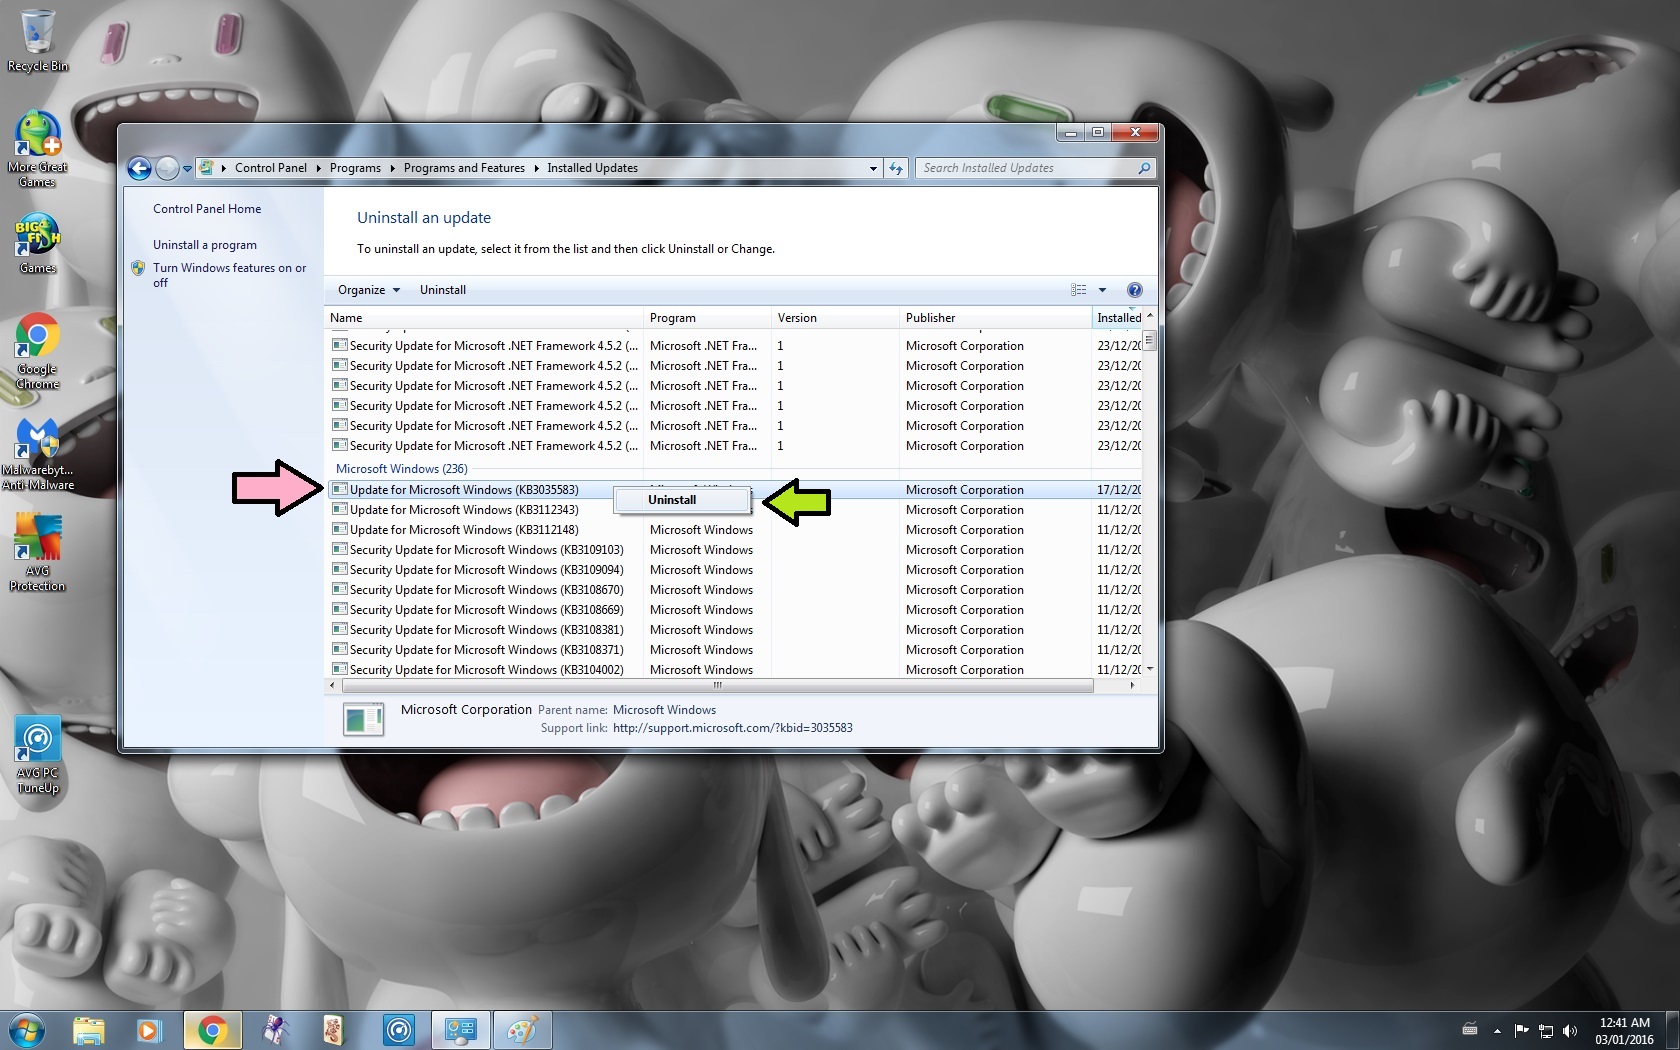
- Select KB3035583
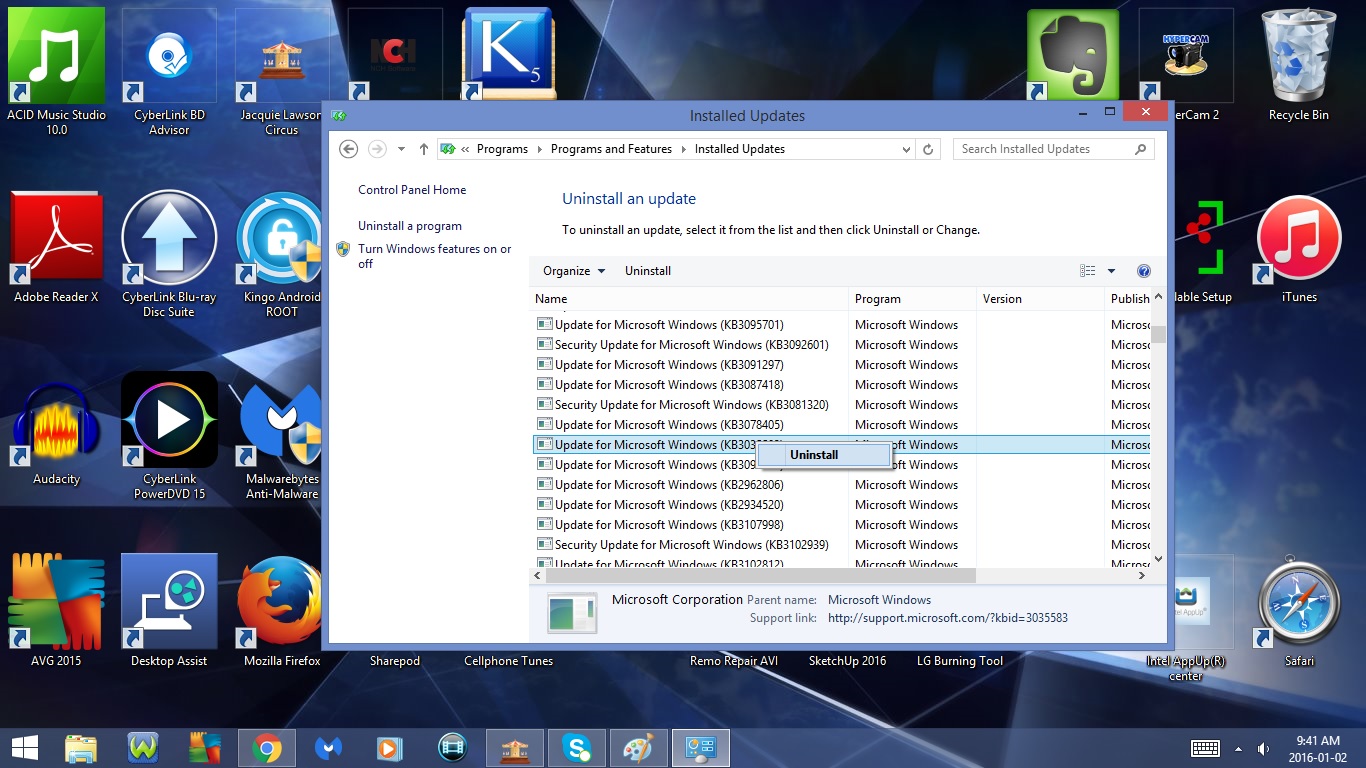
- Right Click
- Select Uninstall
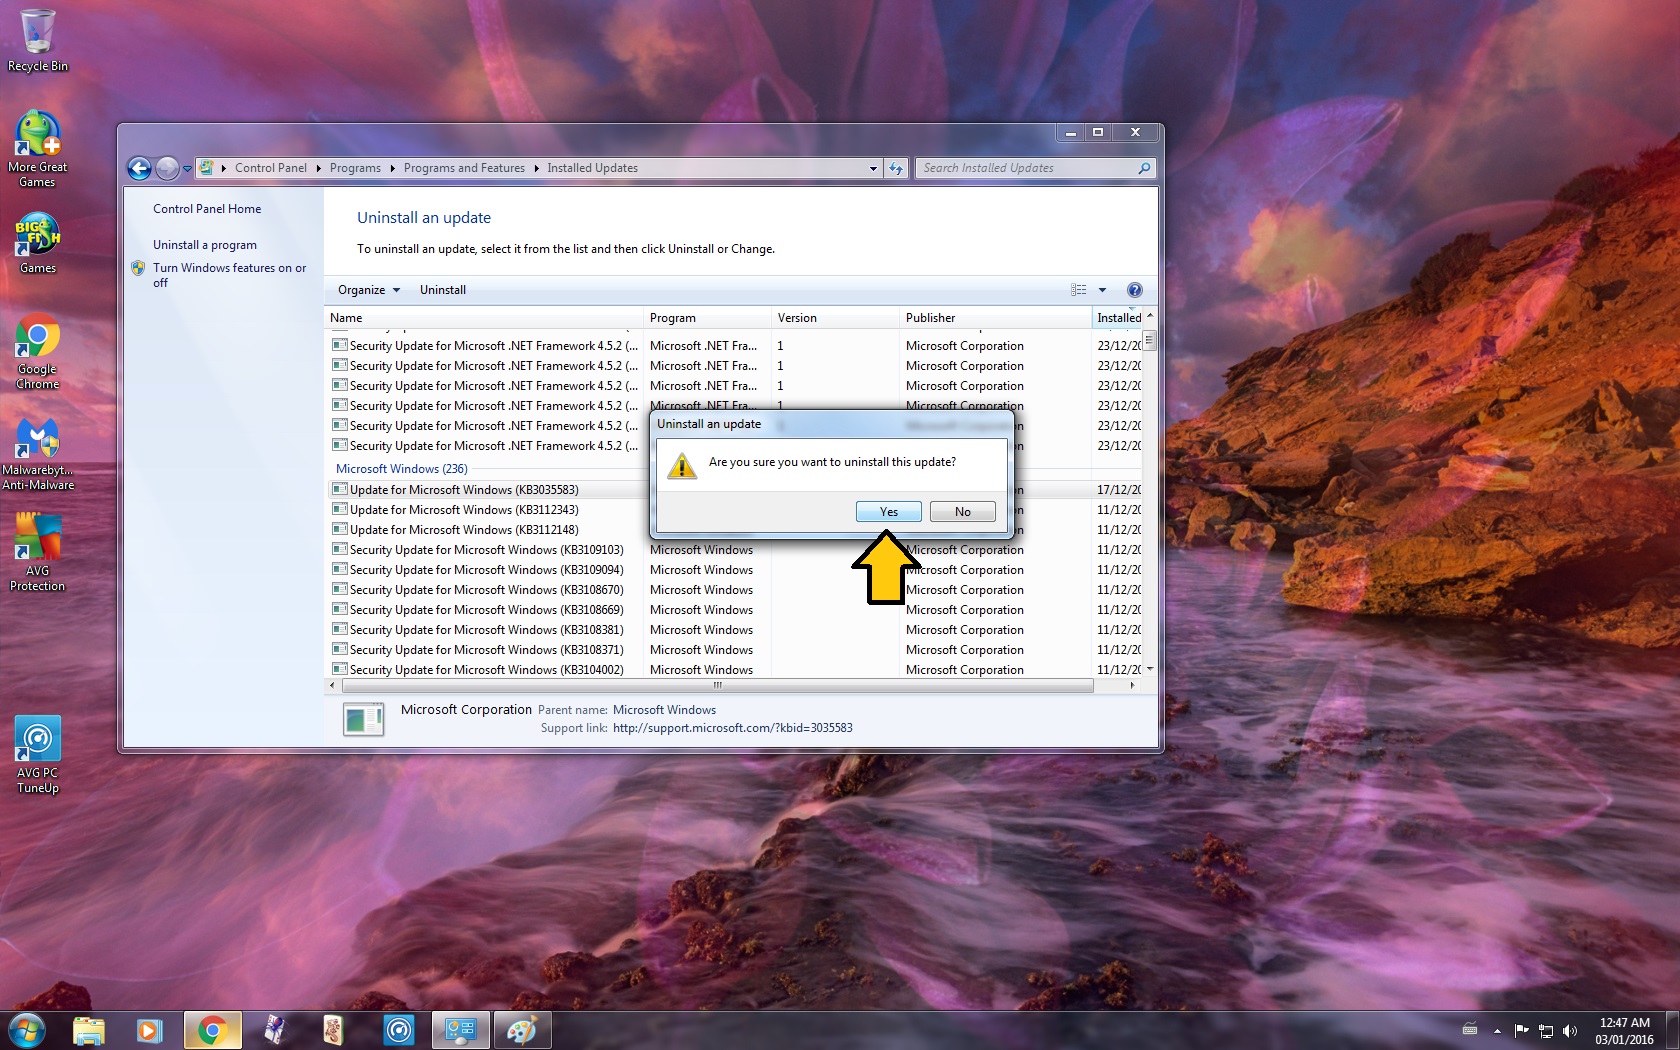
- Click Yes
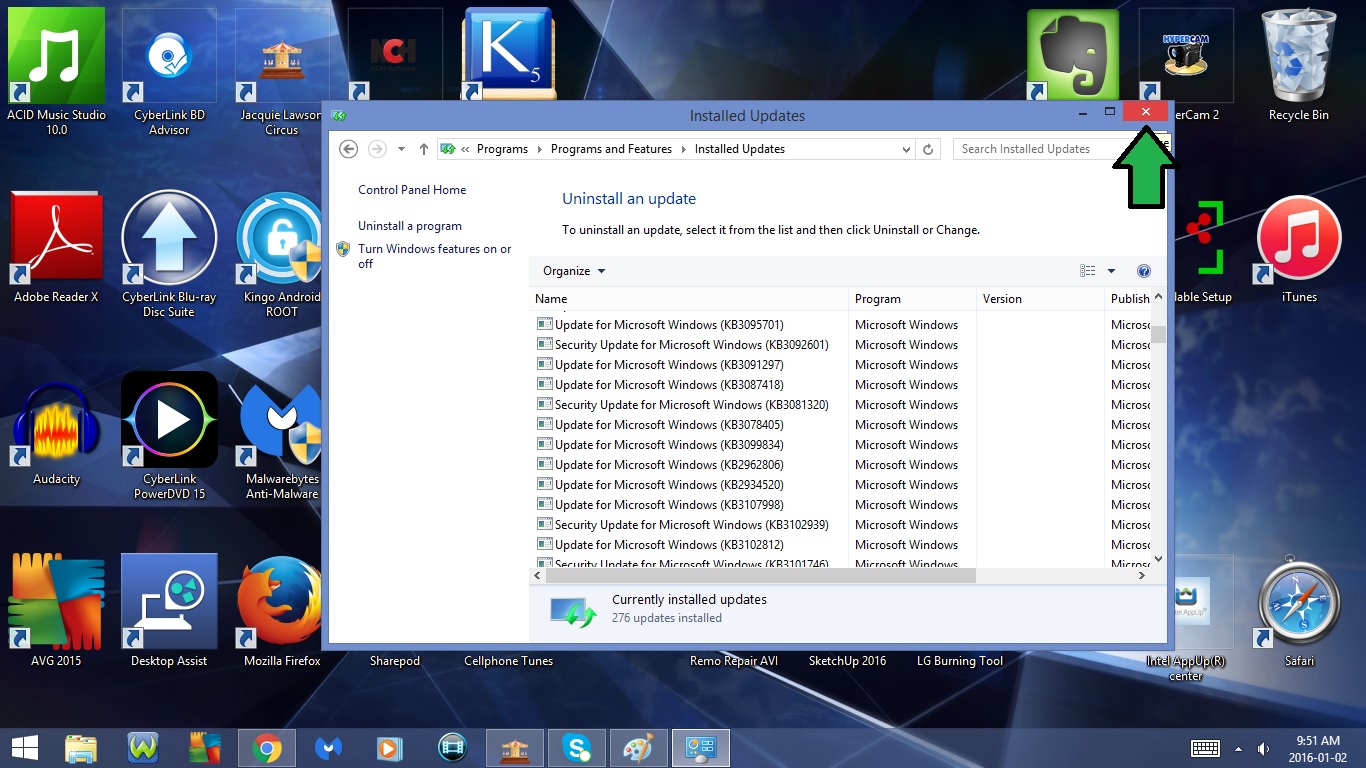
- Wait for the Update to Uninstall
-- If you get a message asking you to Restart Now or Restart Later, be sure to select Restart Later
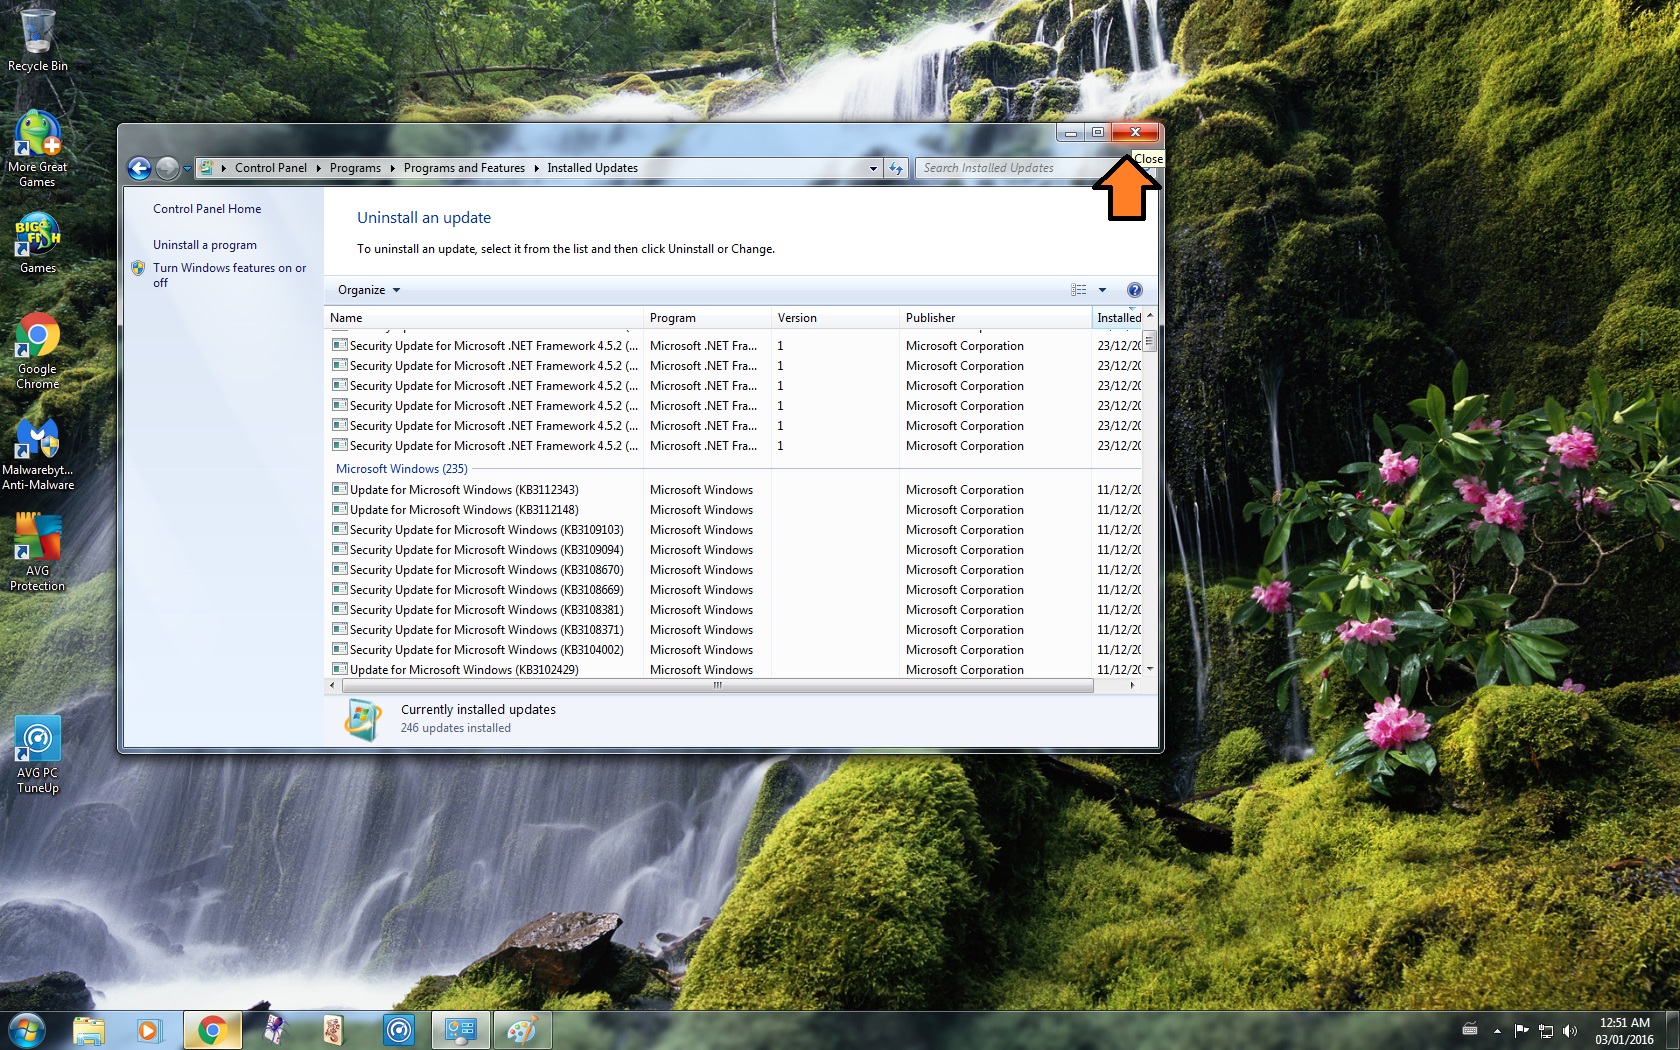
- Close the Window
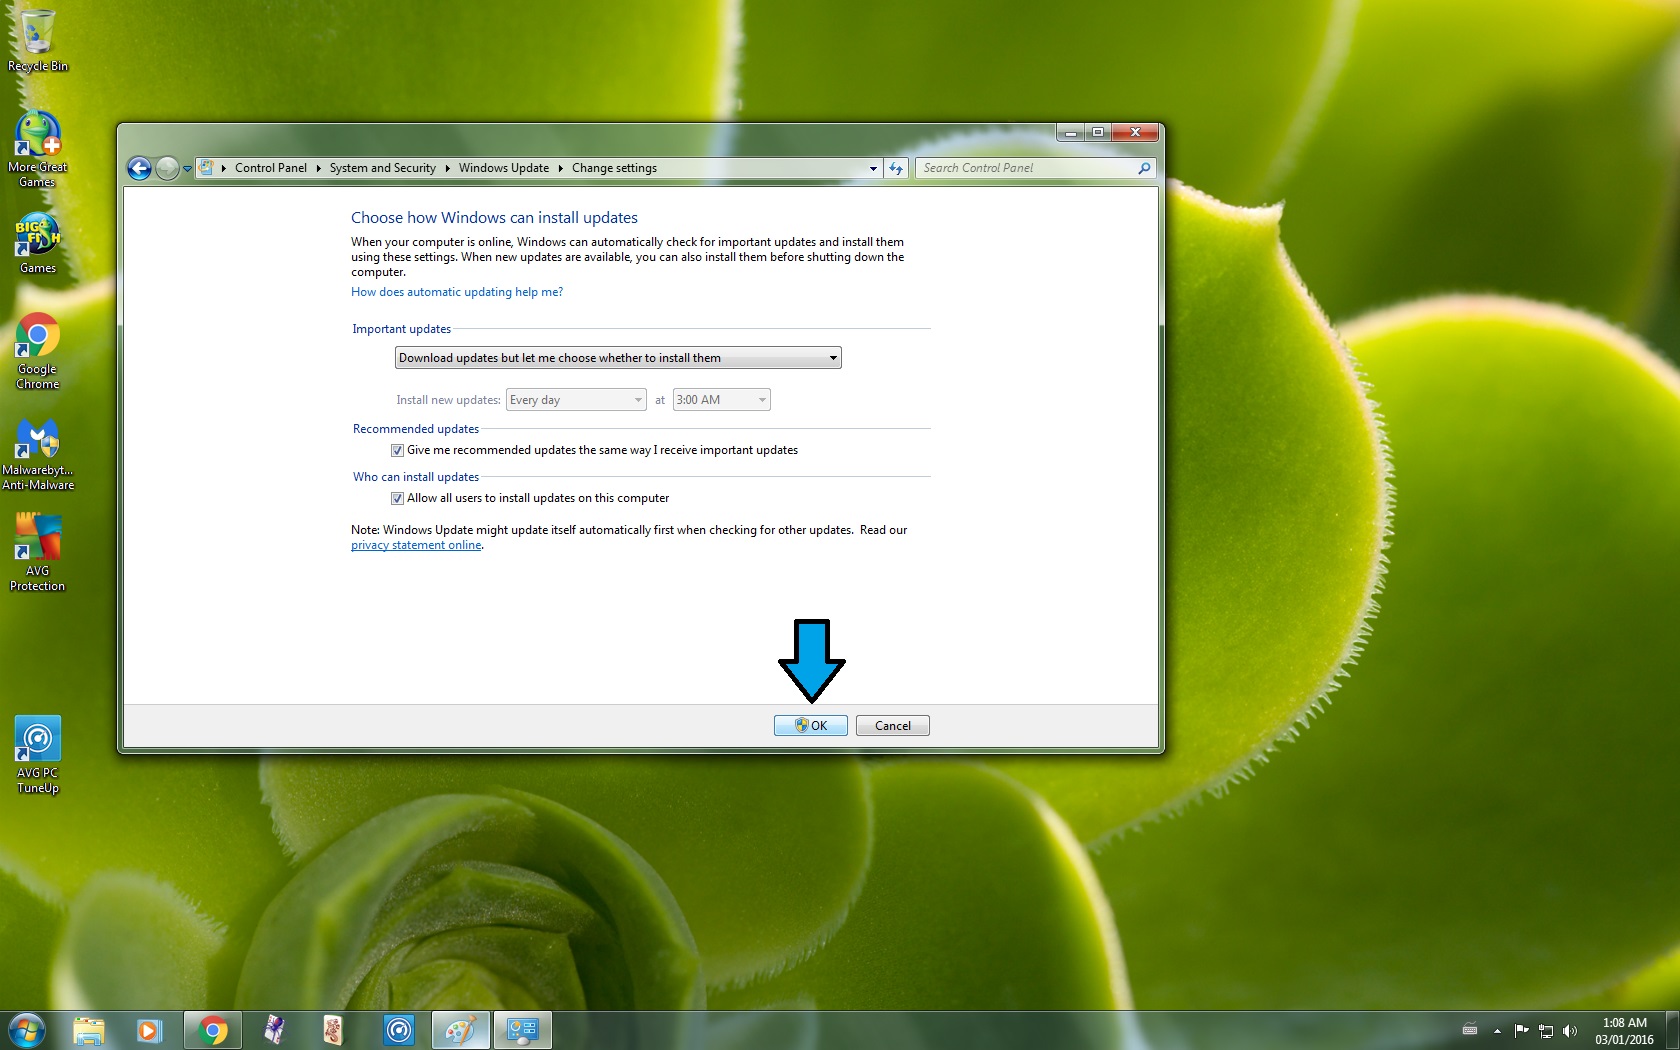
13. Change Update Settings
- Open the Control Panel
-- Refer to Step 12
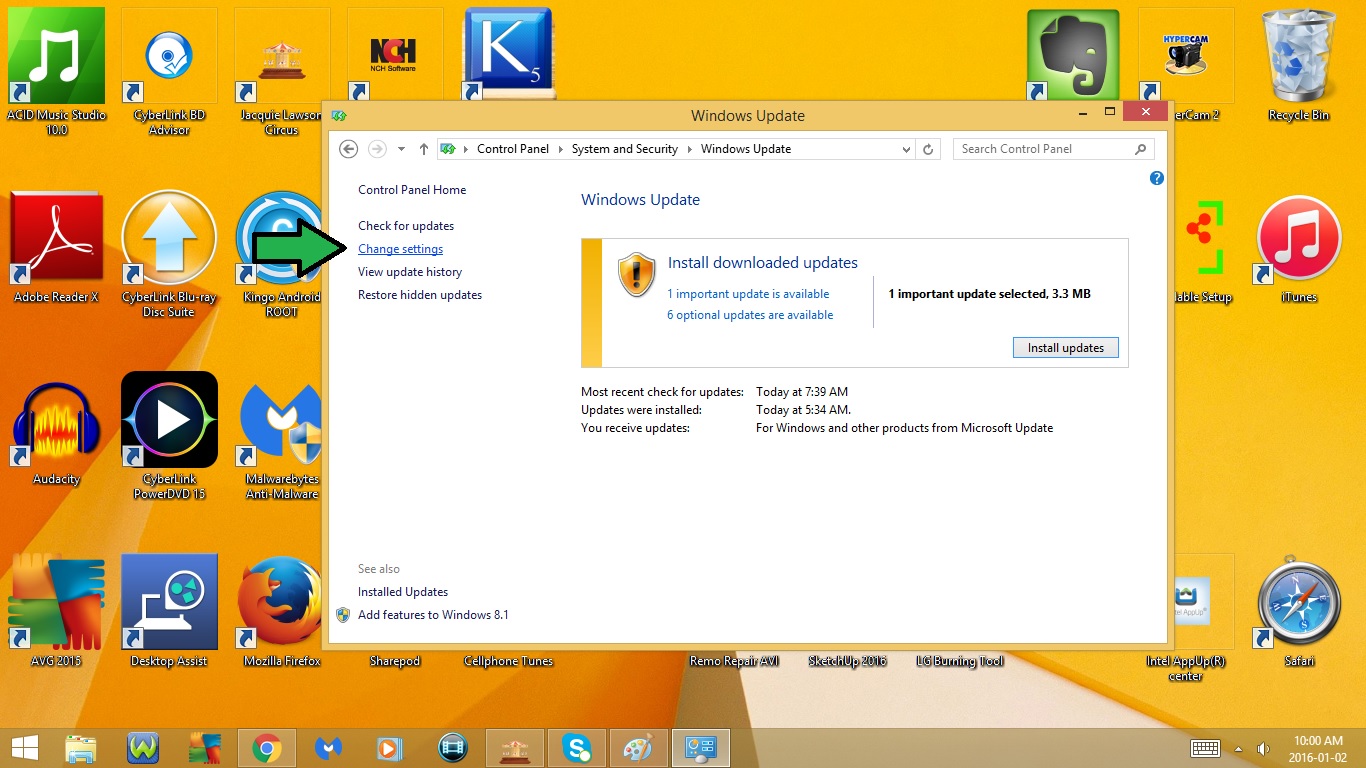
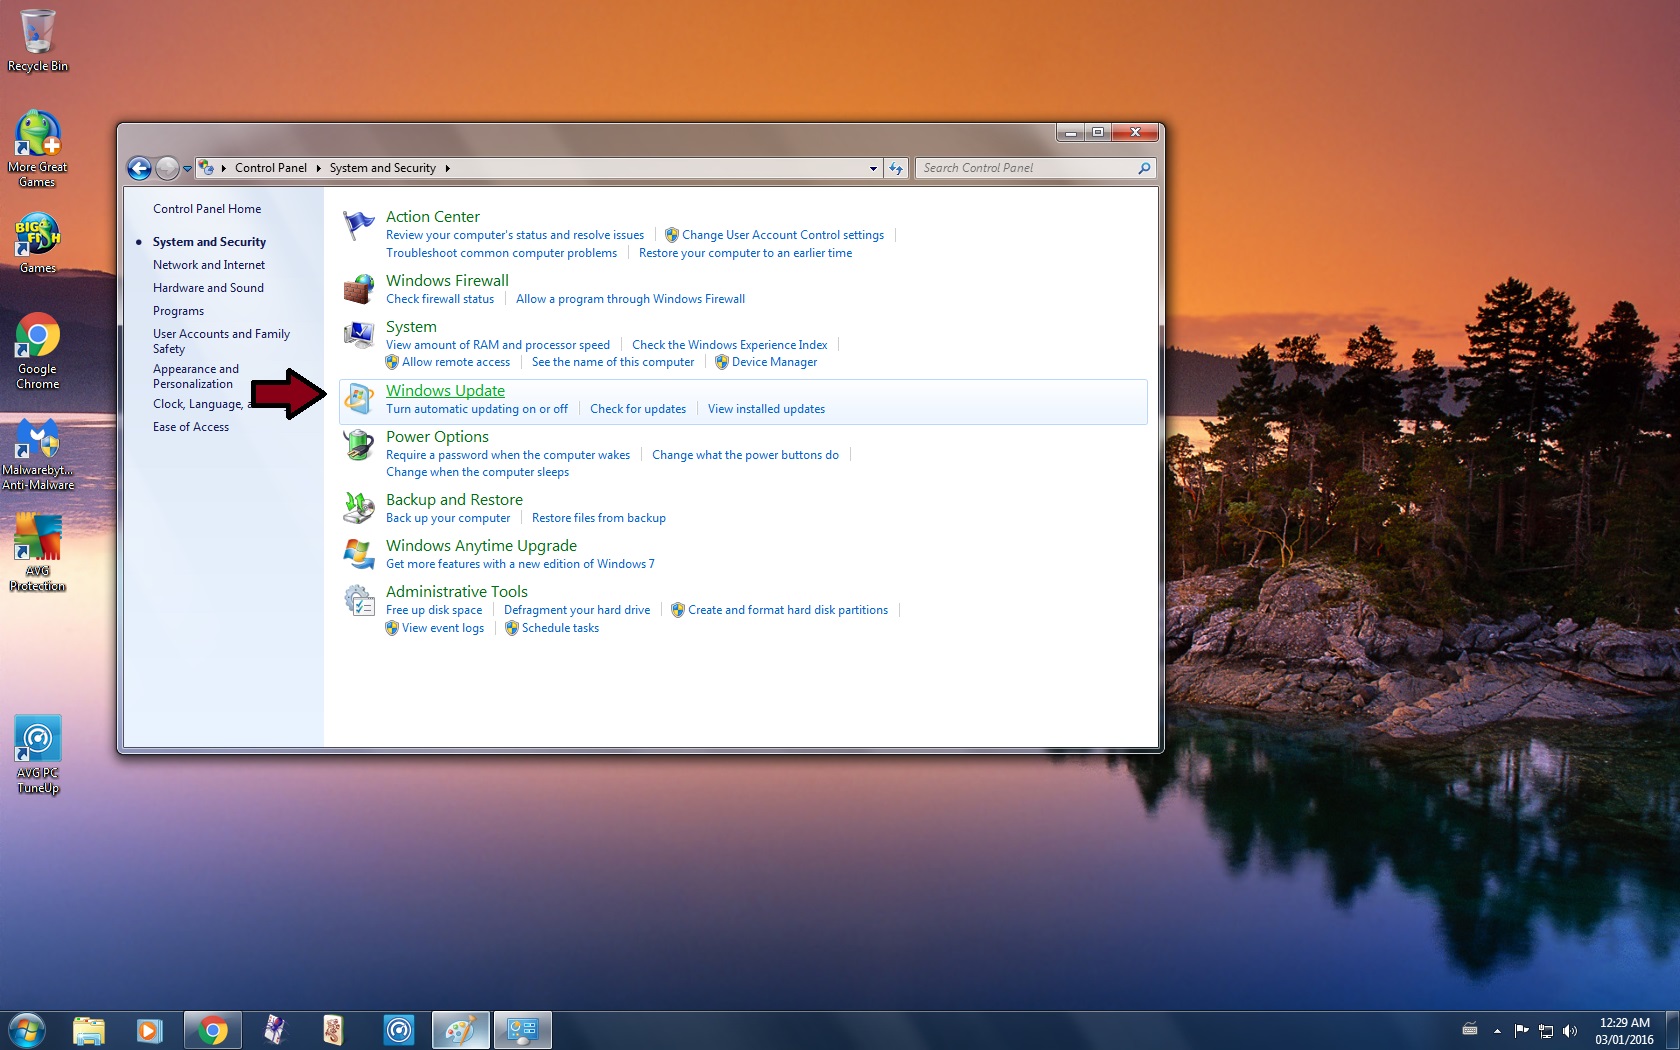
- Go to System and Security
- Go to Windows Update
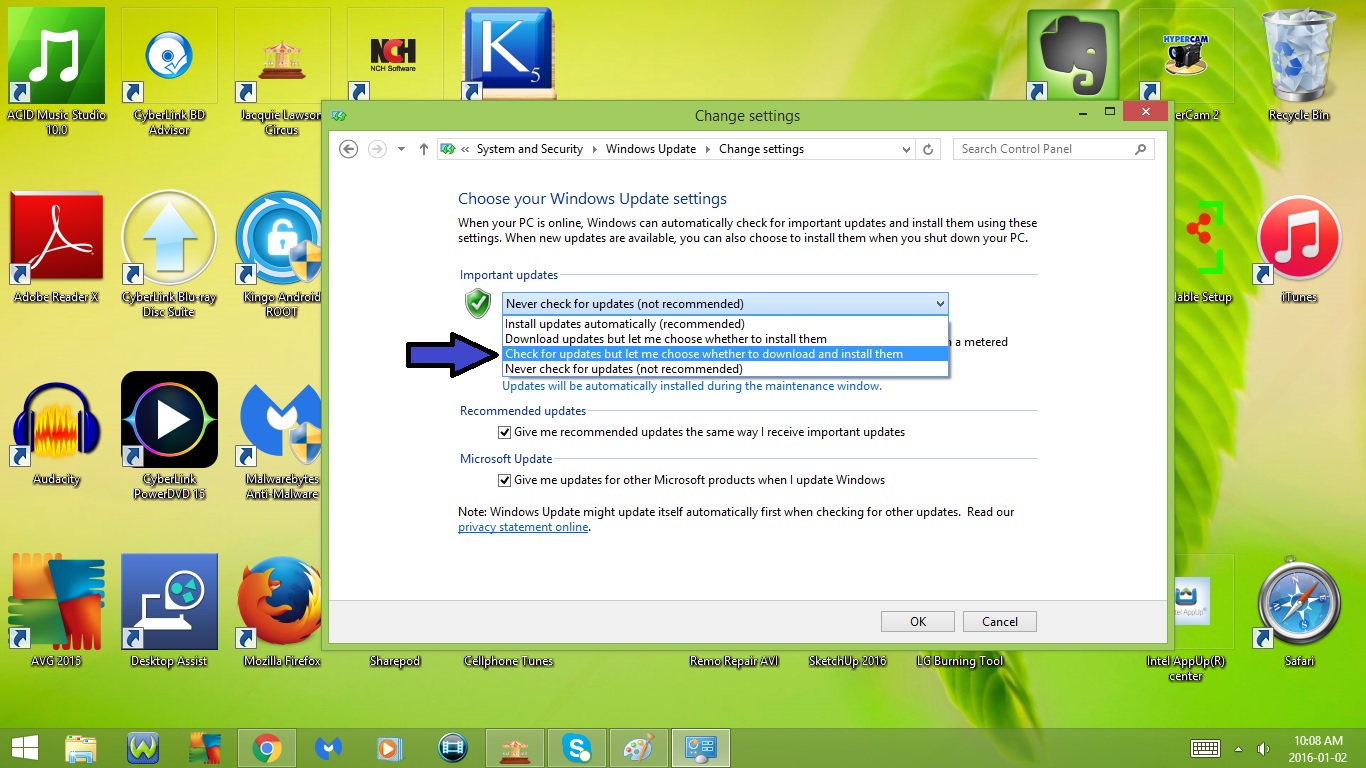
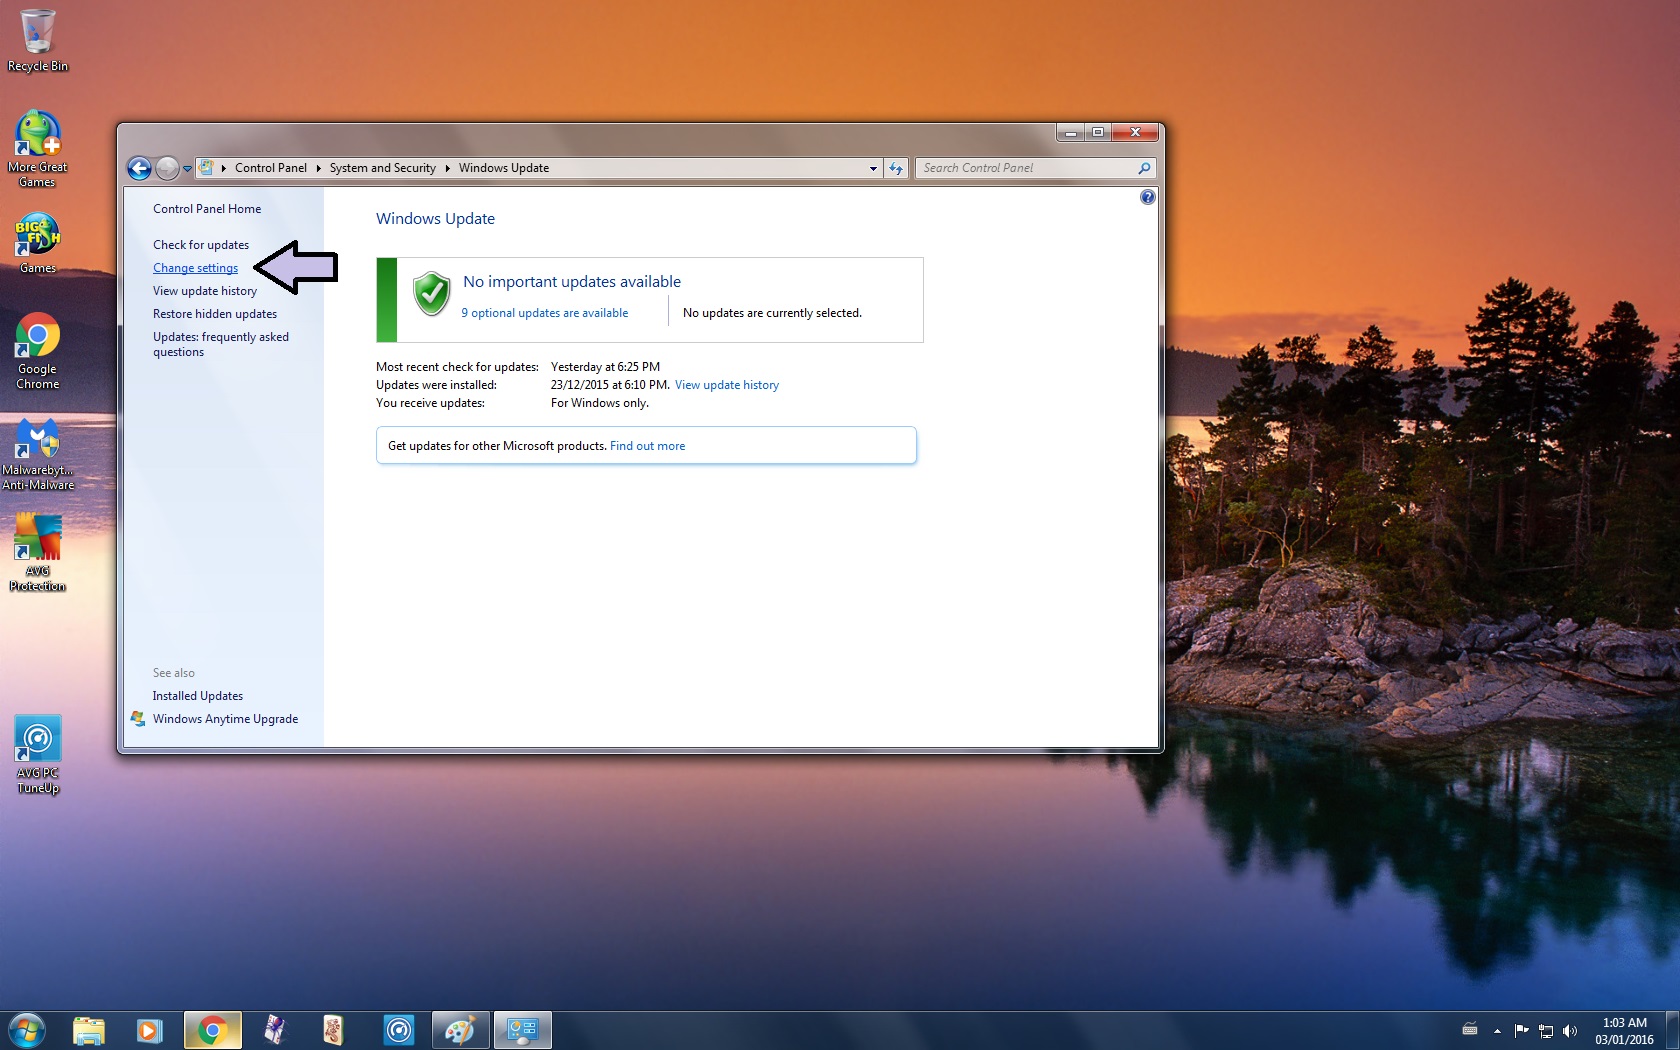
- Click on Change Settings
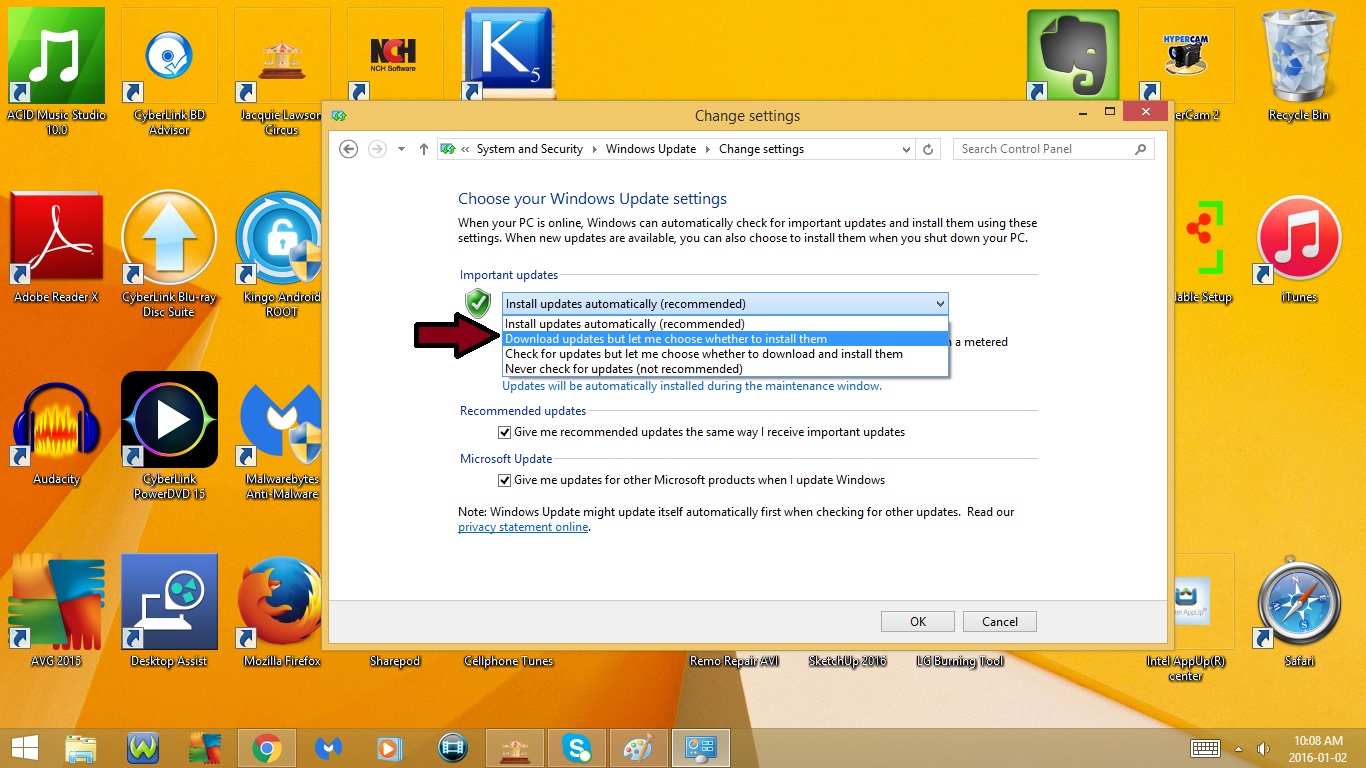
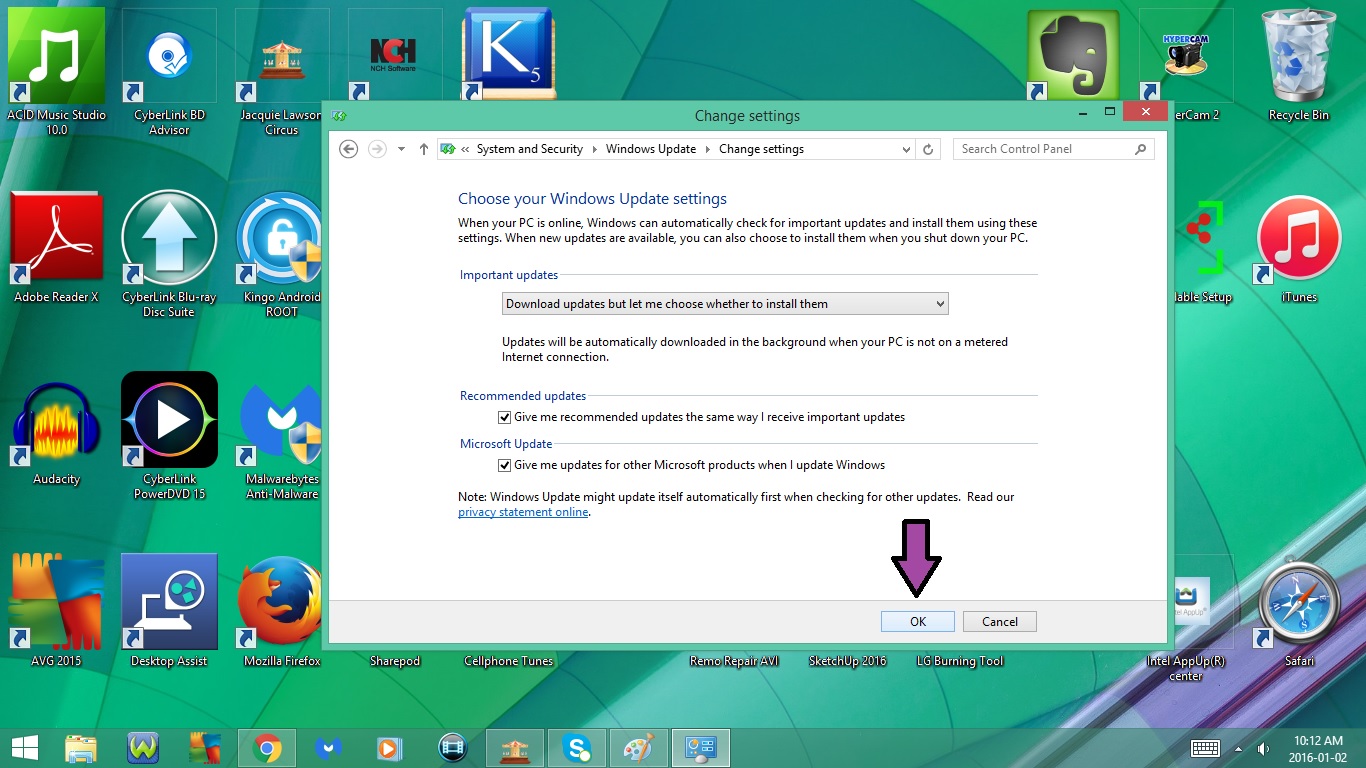
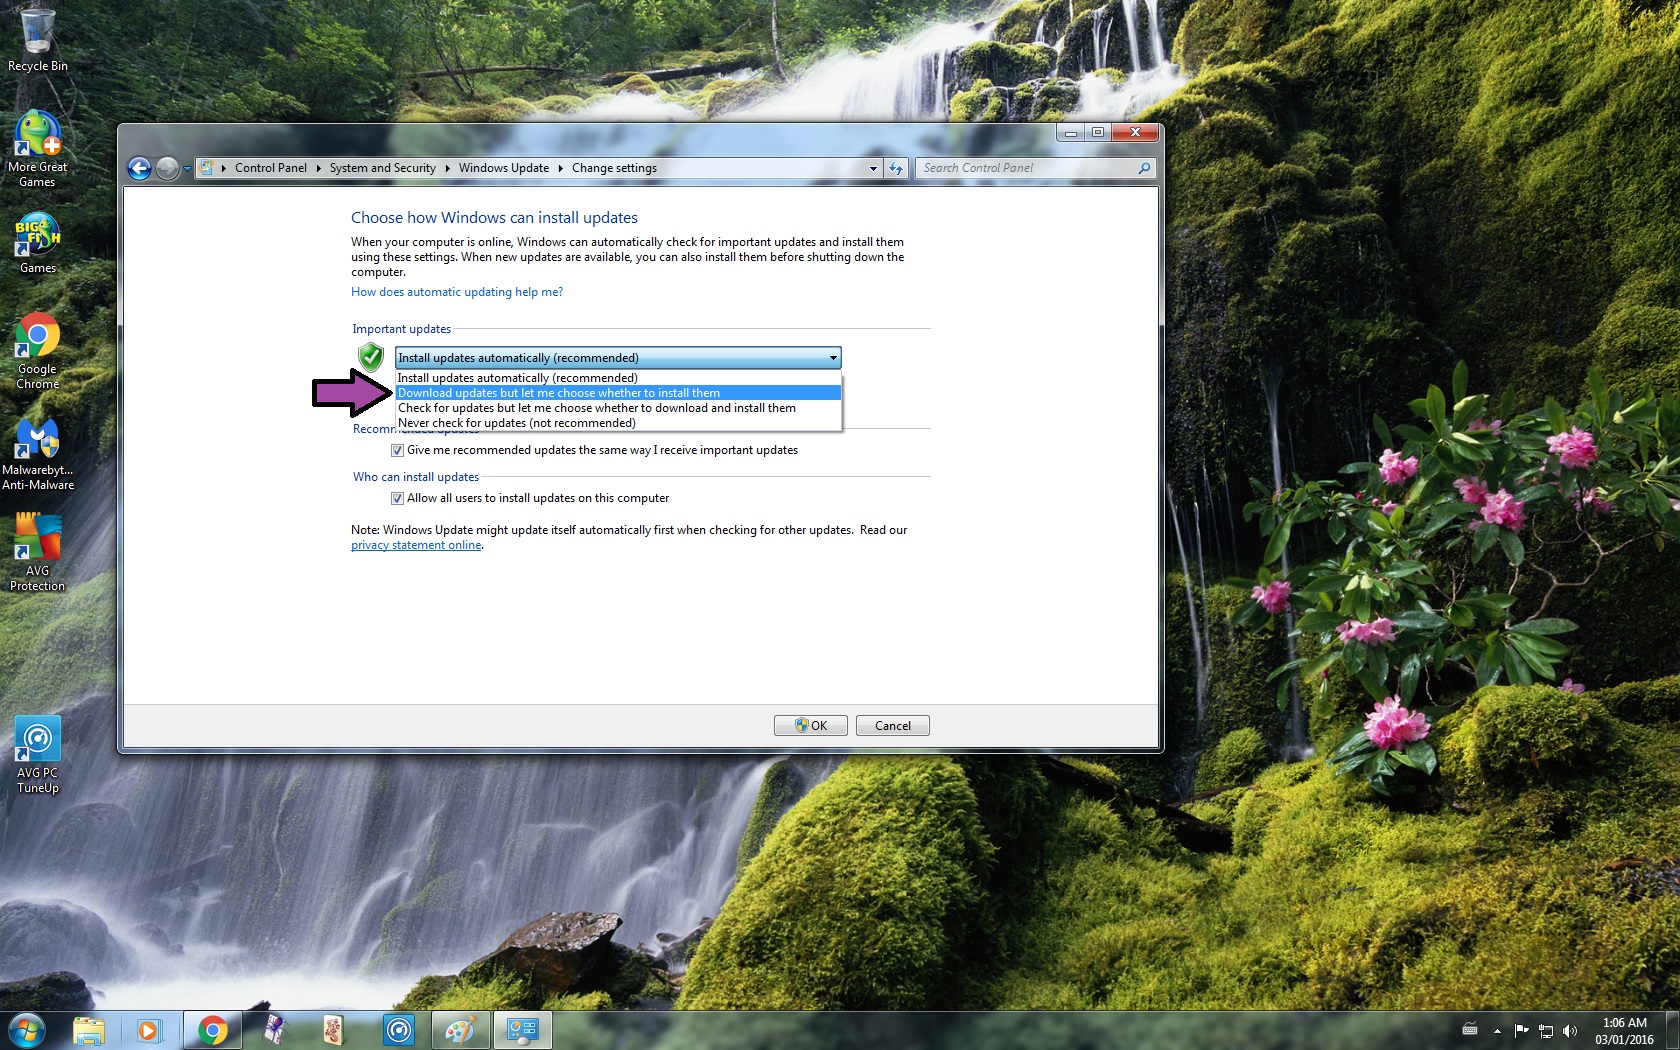
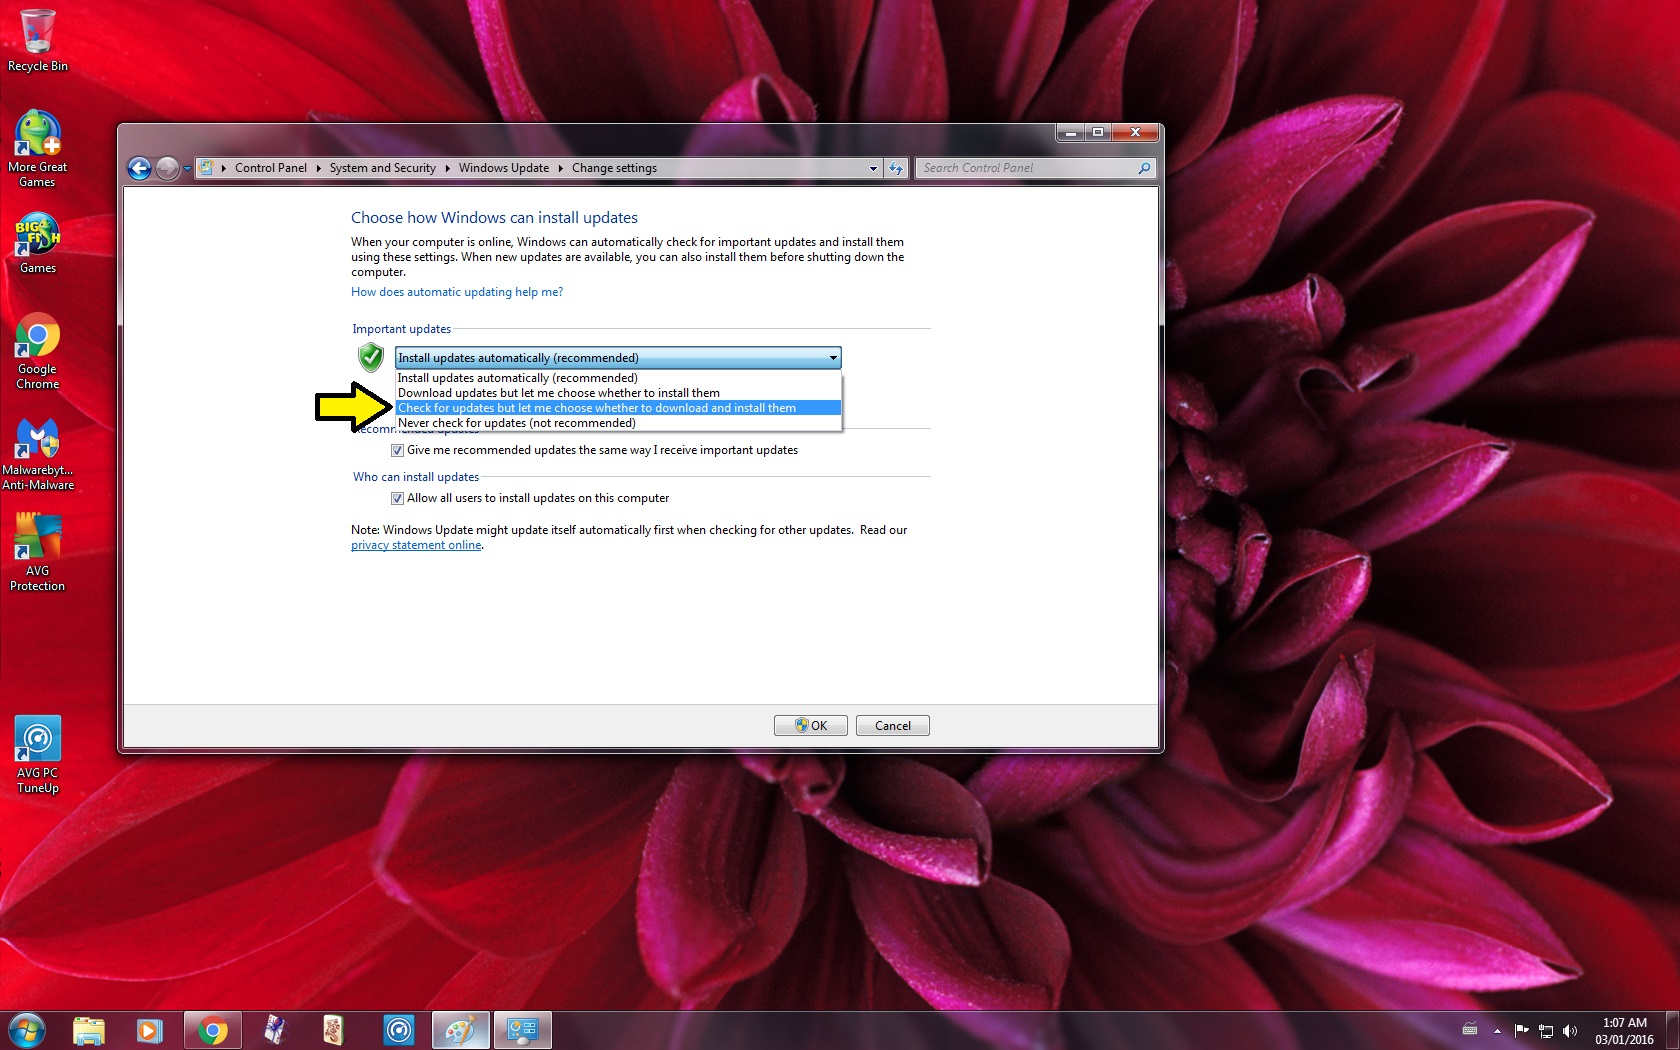
- Change Important updates from Install updates automatically to Download updates but let me choose whether to install them or Check for updates but let me choose whether to download and install them
-- Download updates but let me choose whether to install them is the easiest option
- Click Ok
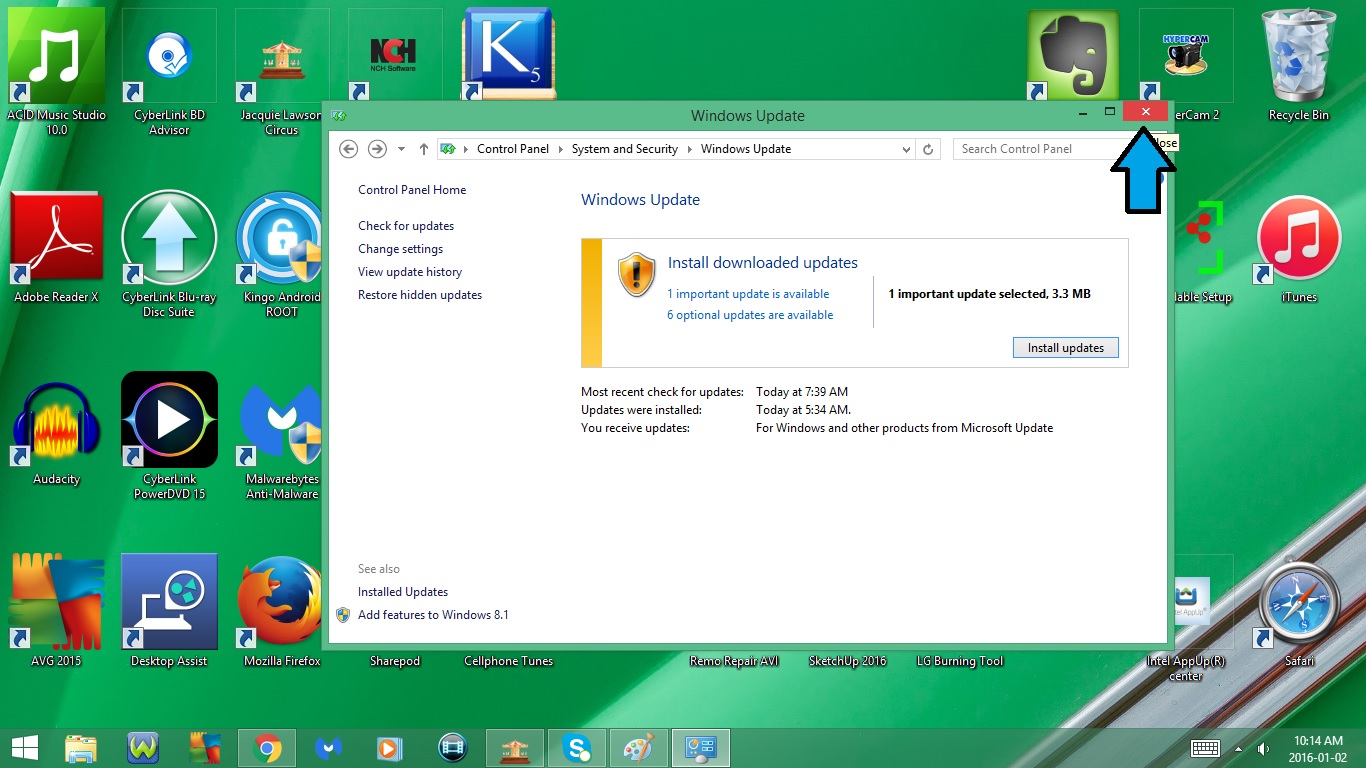
- Close the Window
14. Restart your Computer
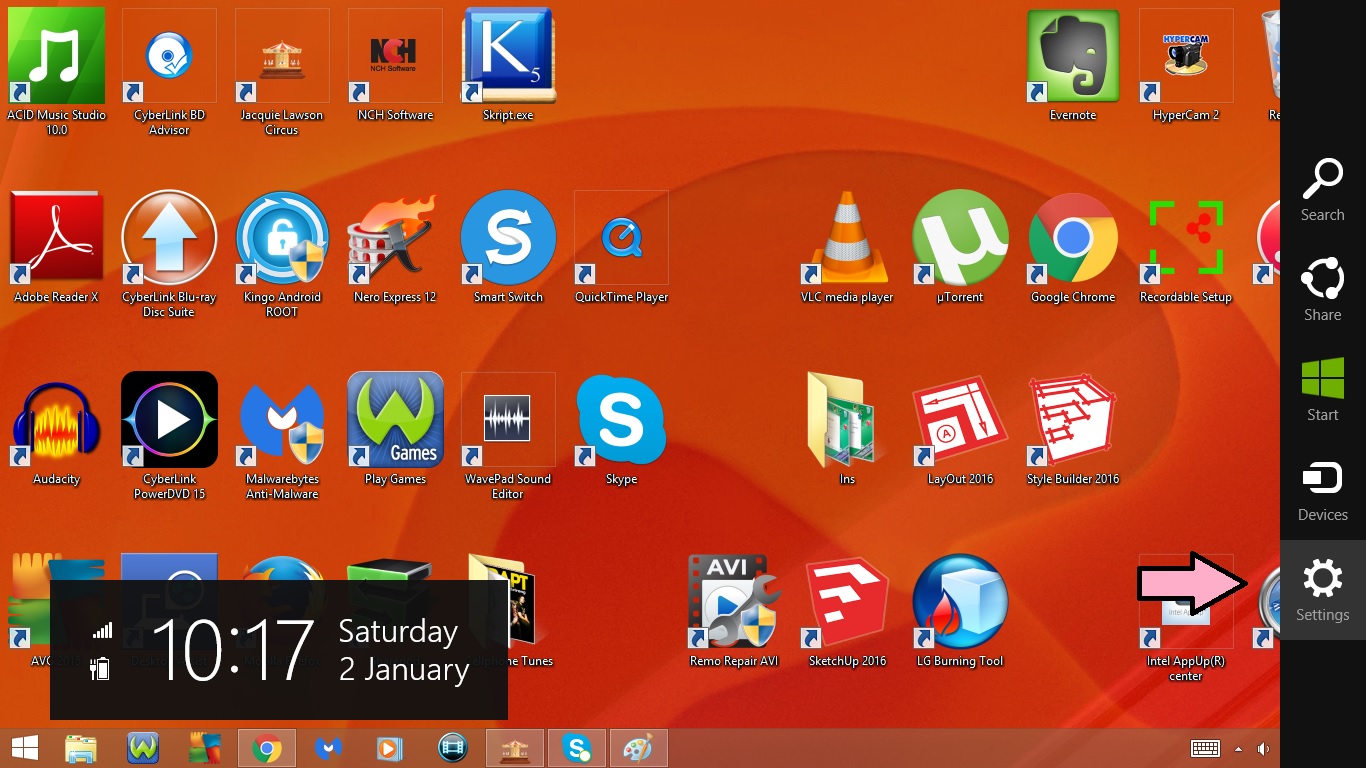
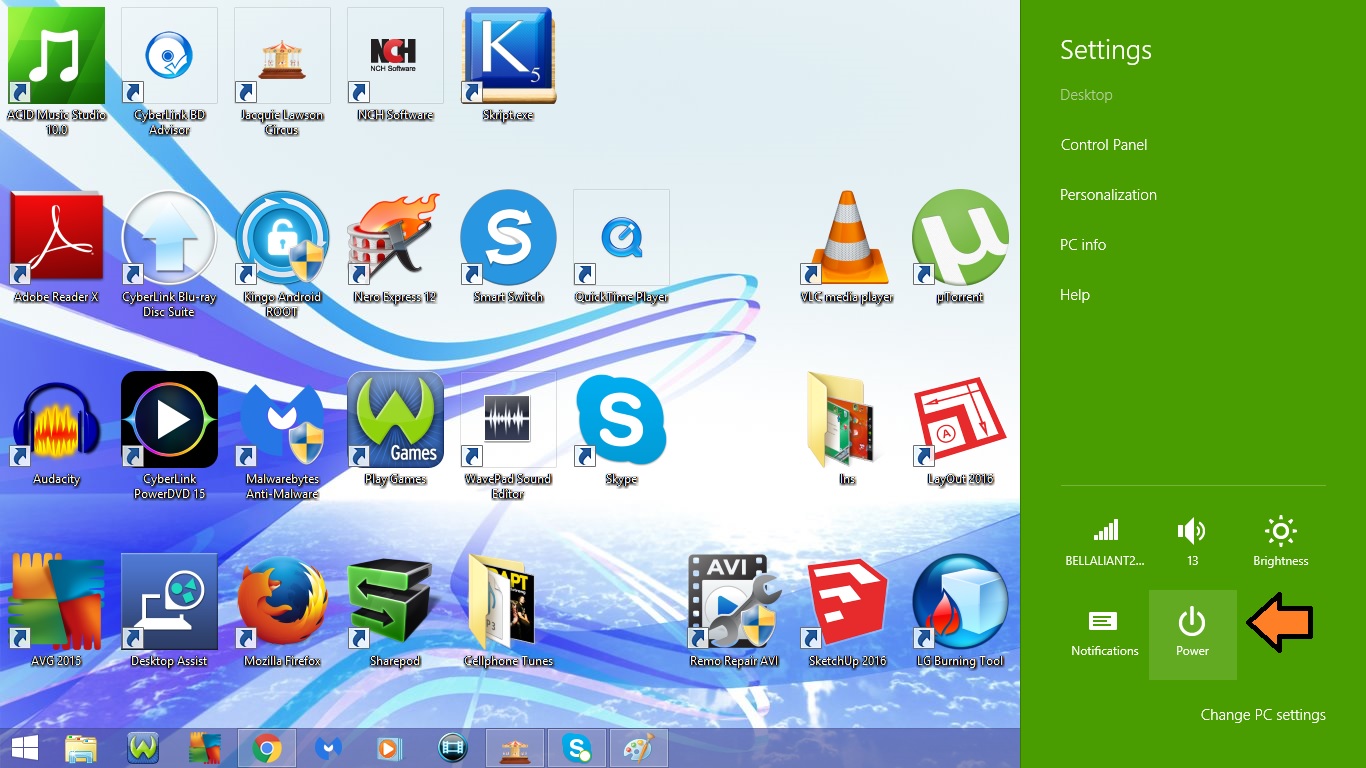
- Open the Sidebar
- Select settings
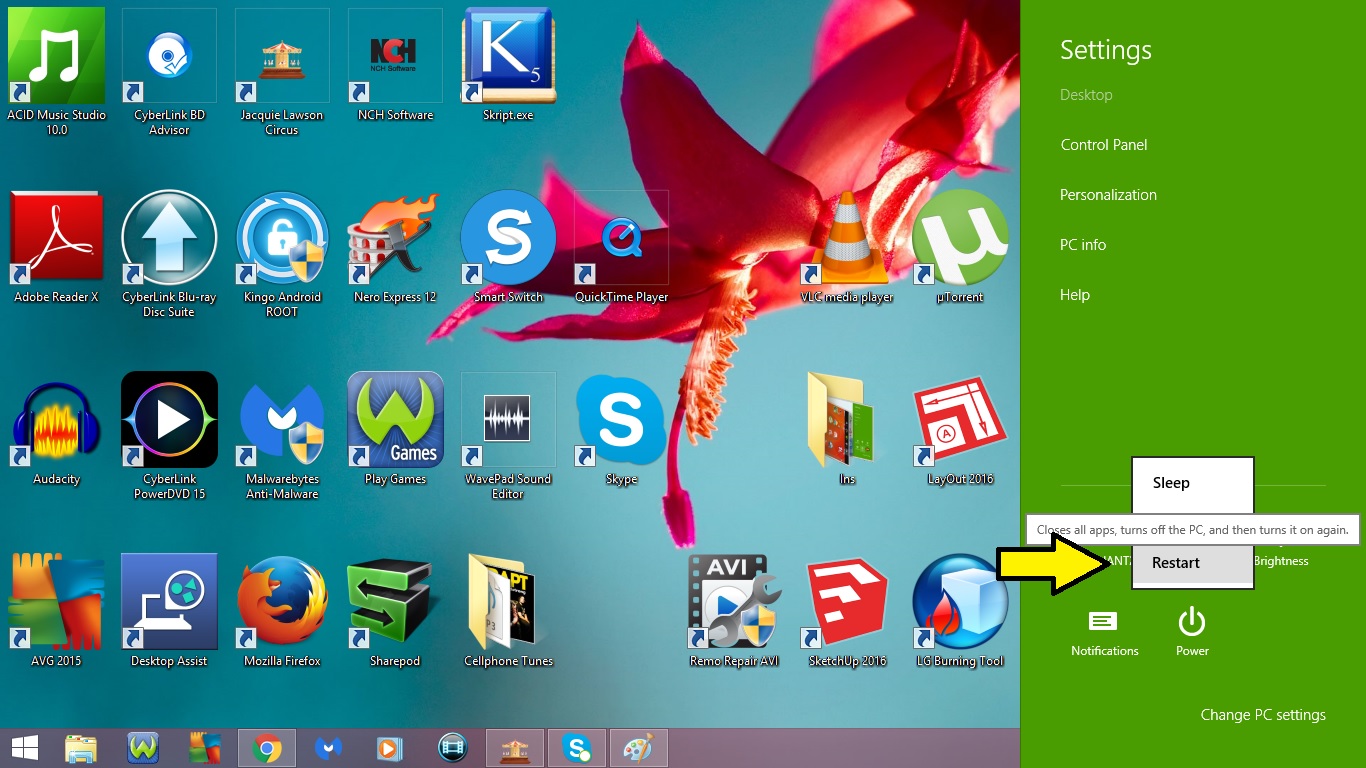
- Click on Power
- Select Restart
-- Once you Restart your computer the Icon and Notifications should be completely gone
Windows 7 : Part 1
Method #1 : Getting Rid of Notifications Temporarily
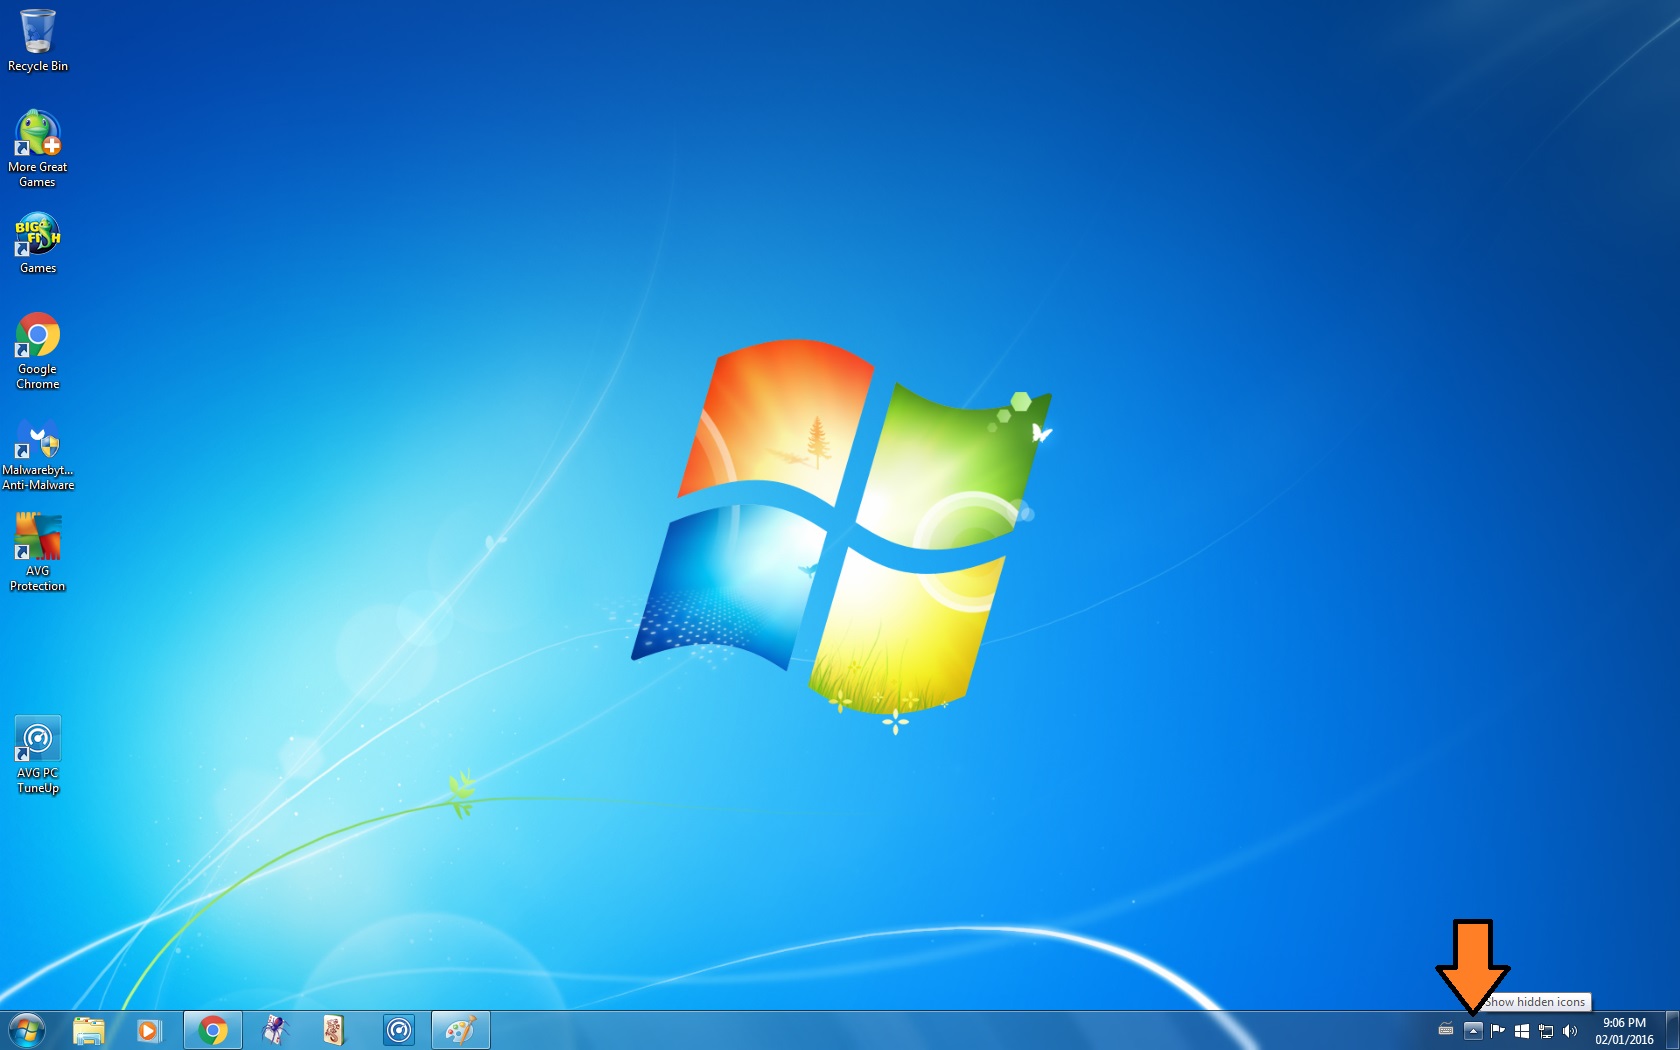
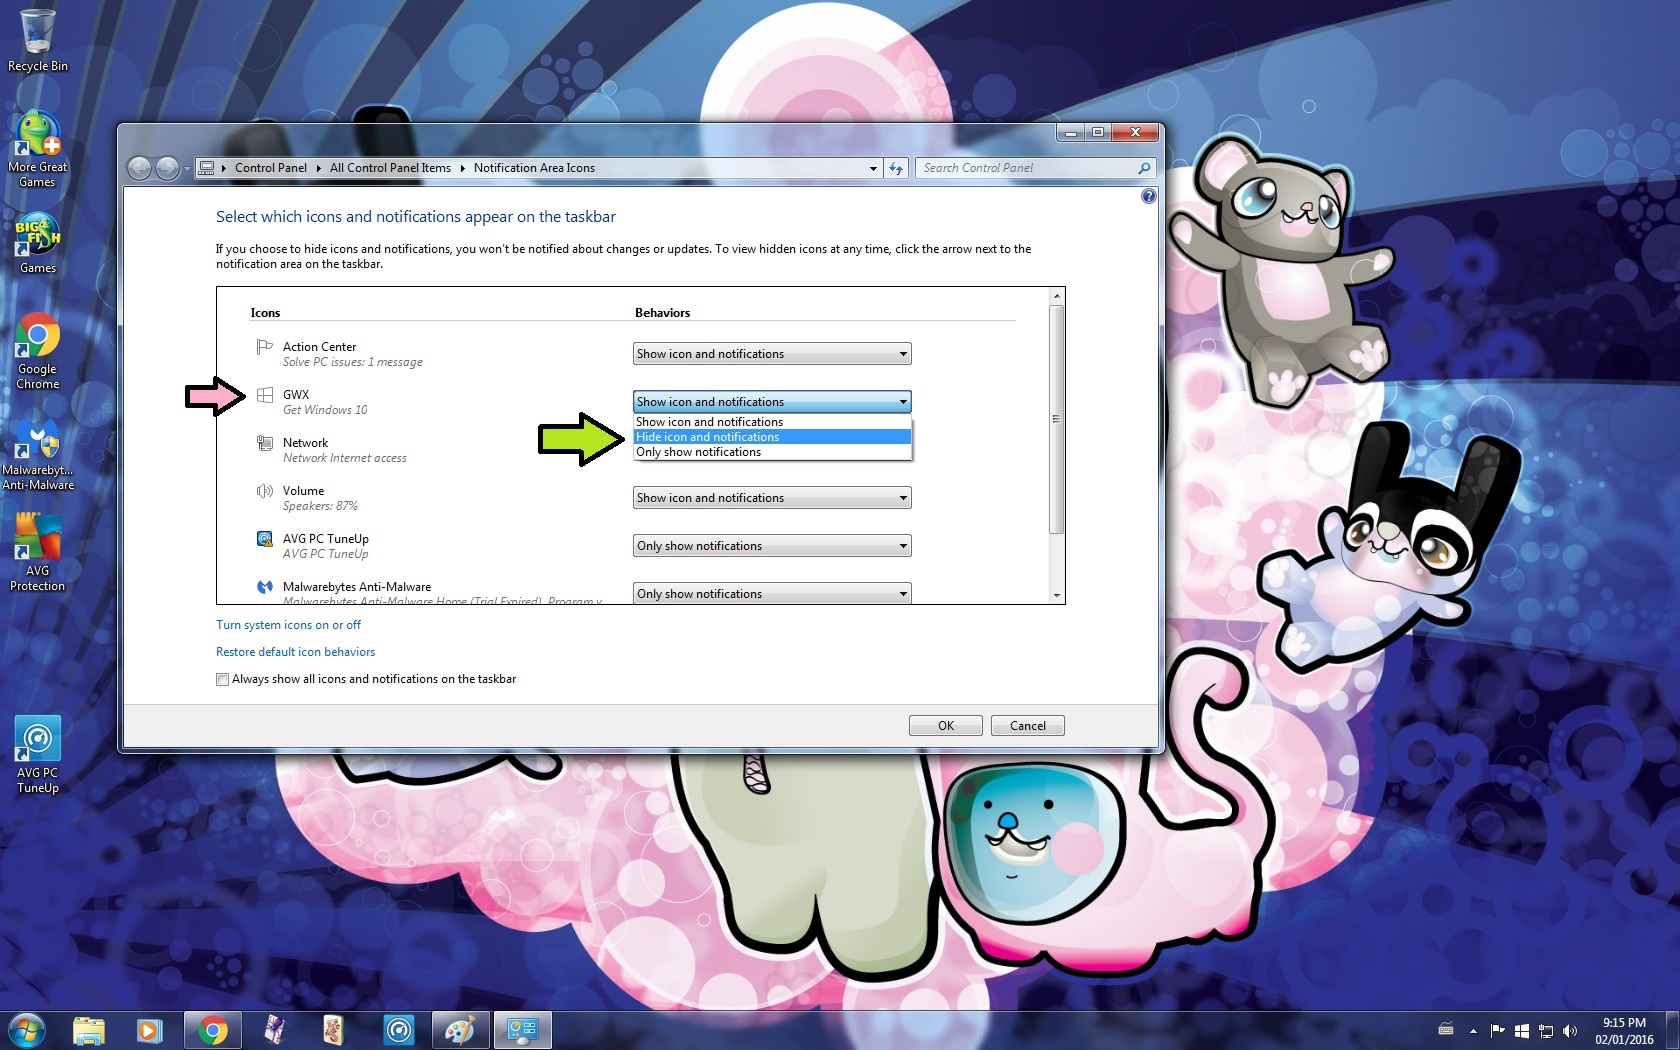
1. Click on the Show hidden icons arrow in the bottom right hand corner
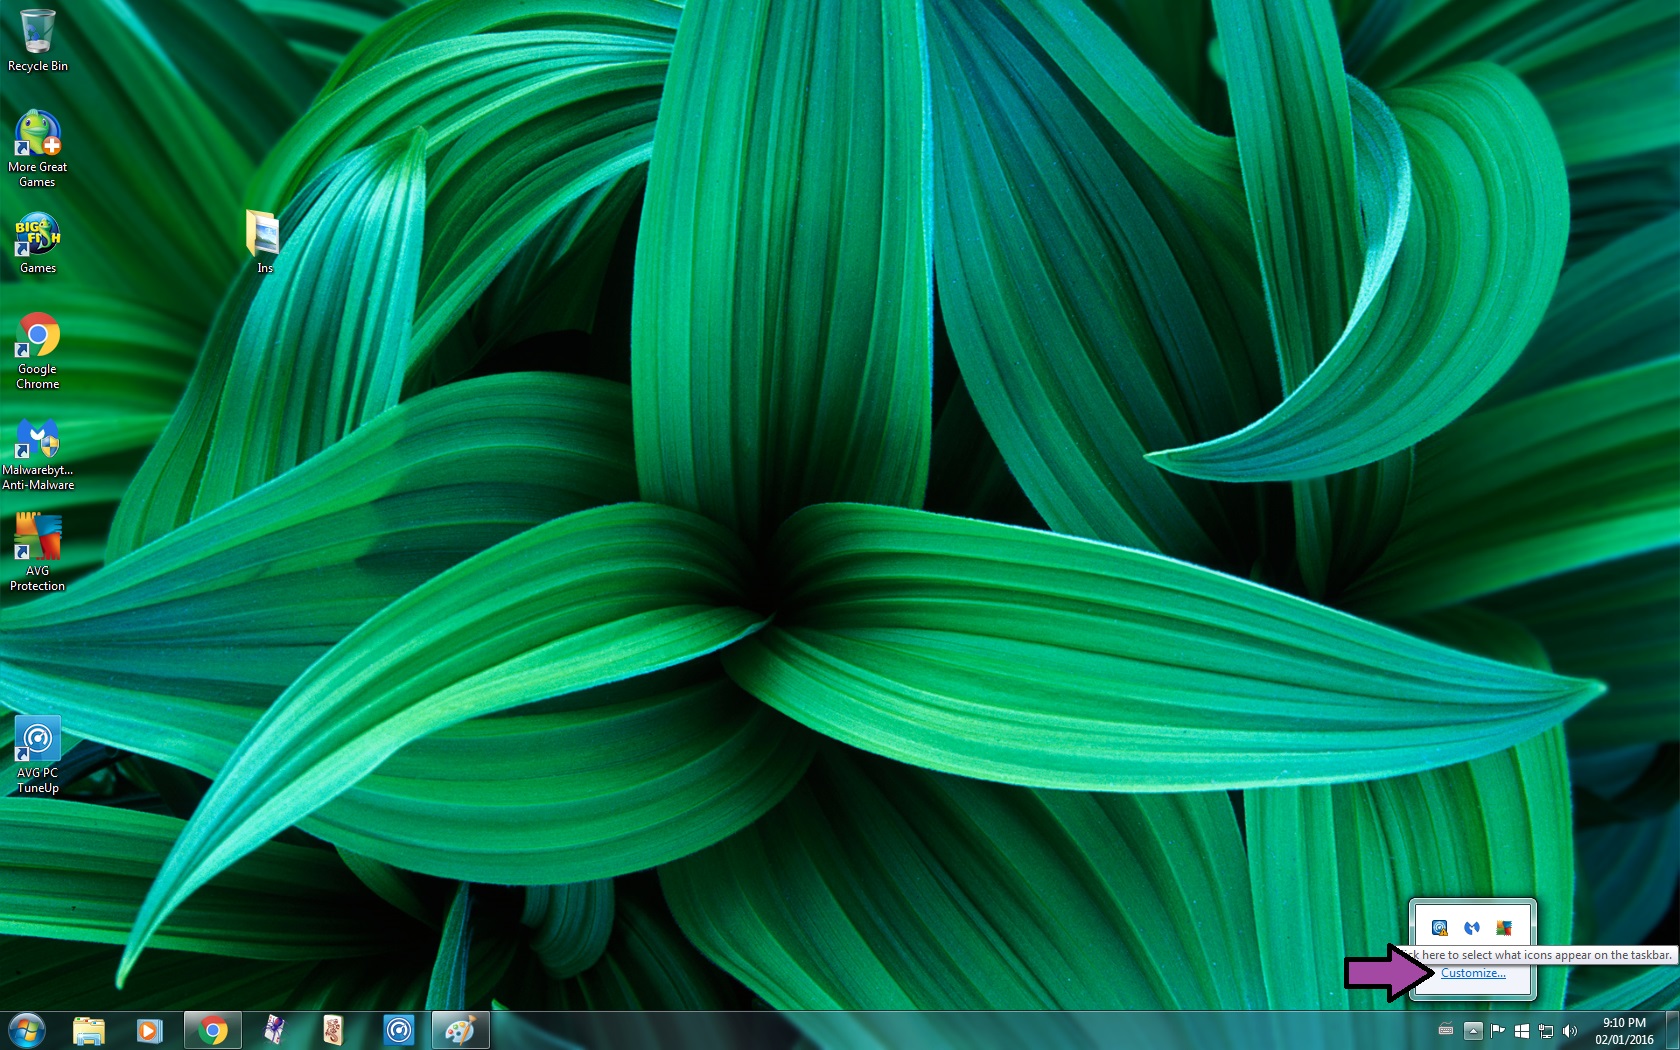
2. Go to customize
3. Change the behavior for GWX from Show icon and notifications to Hide icon and notifications
- This method will get rid of the notifications while your using your computer, however the notifications will come back again as soon as you restart your computer
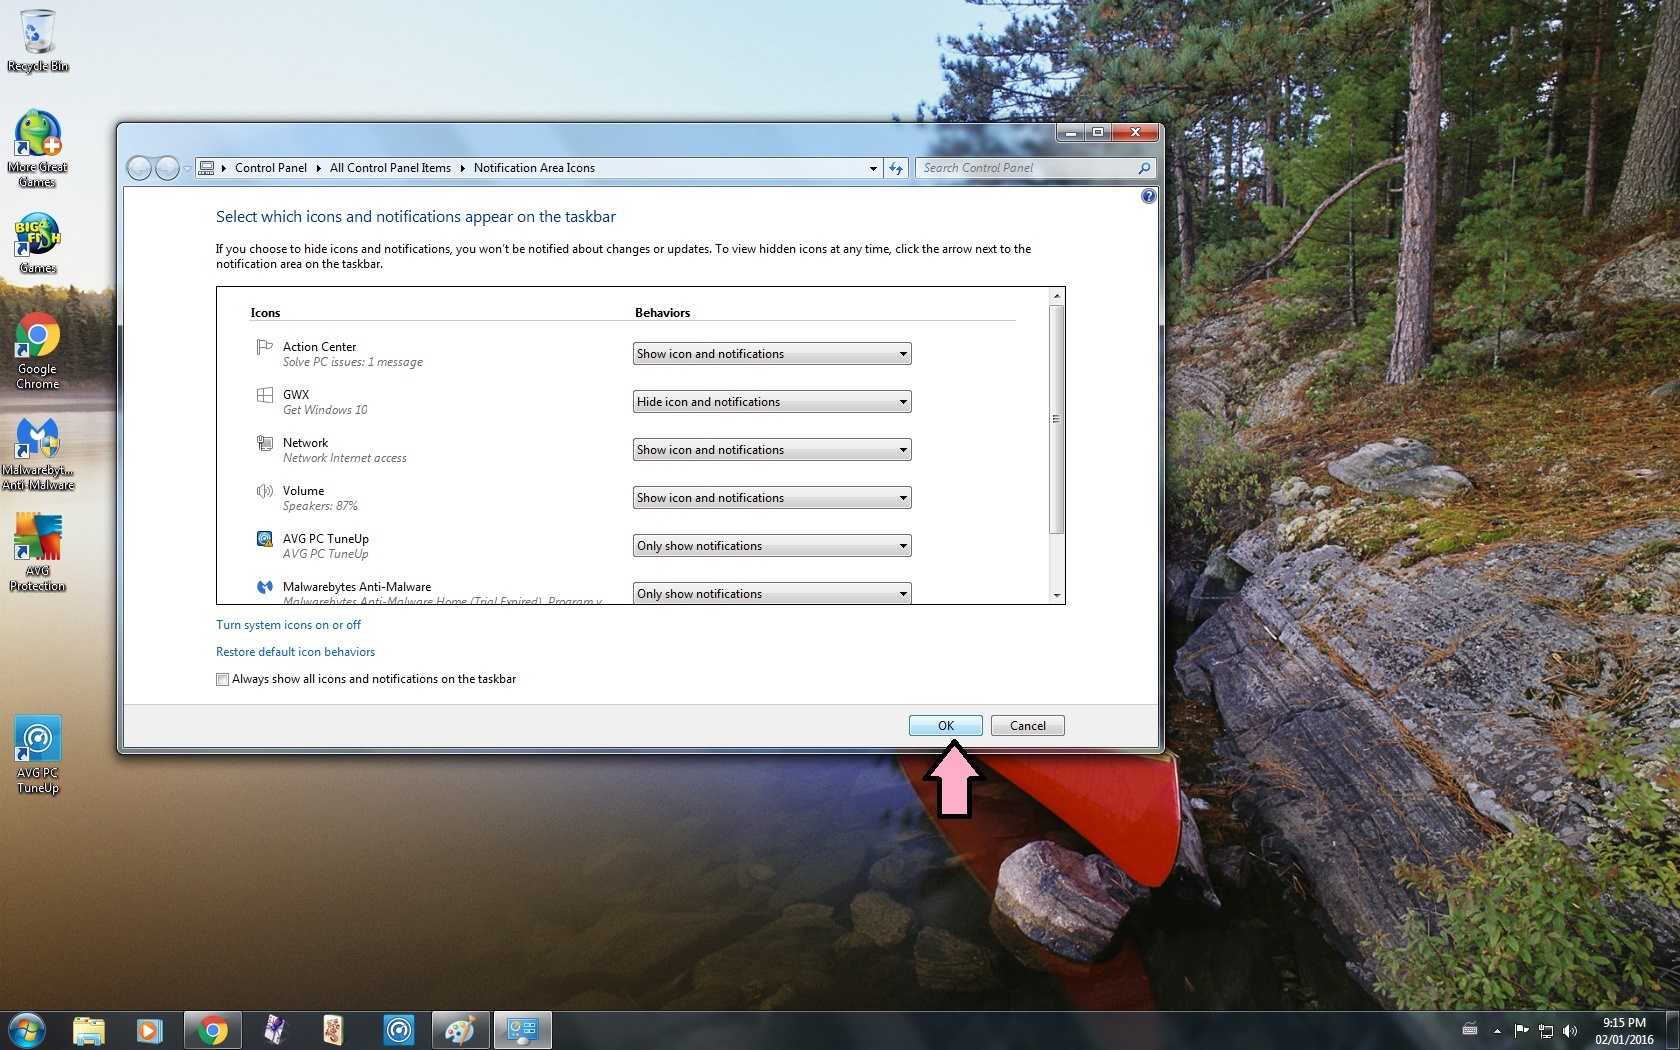
4. Click Ok
Method #2 : Getting Rid of Notifications Permanently
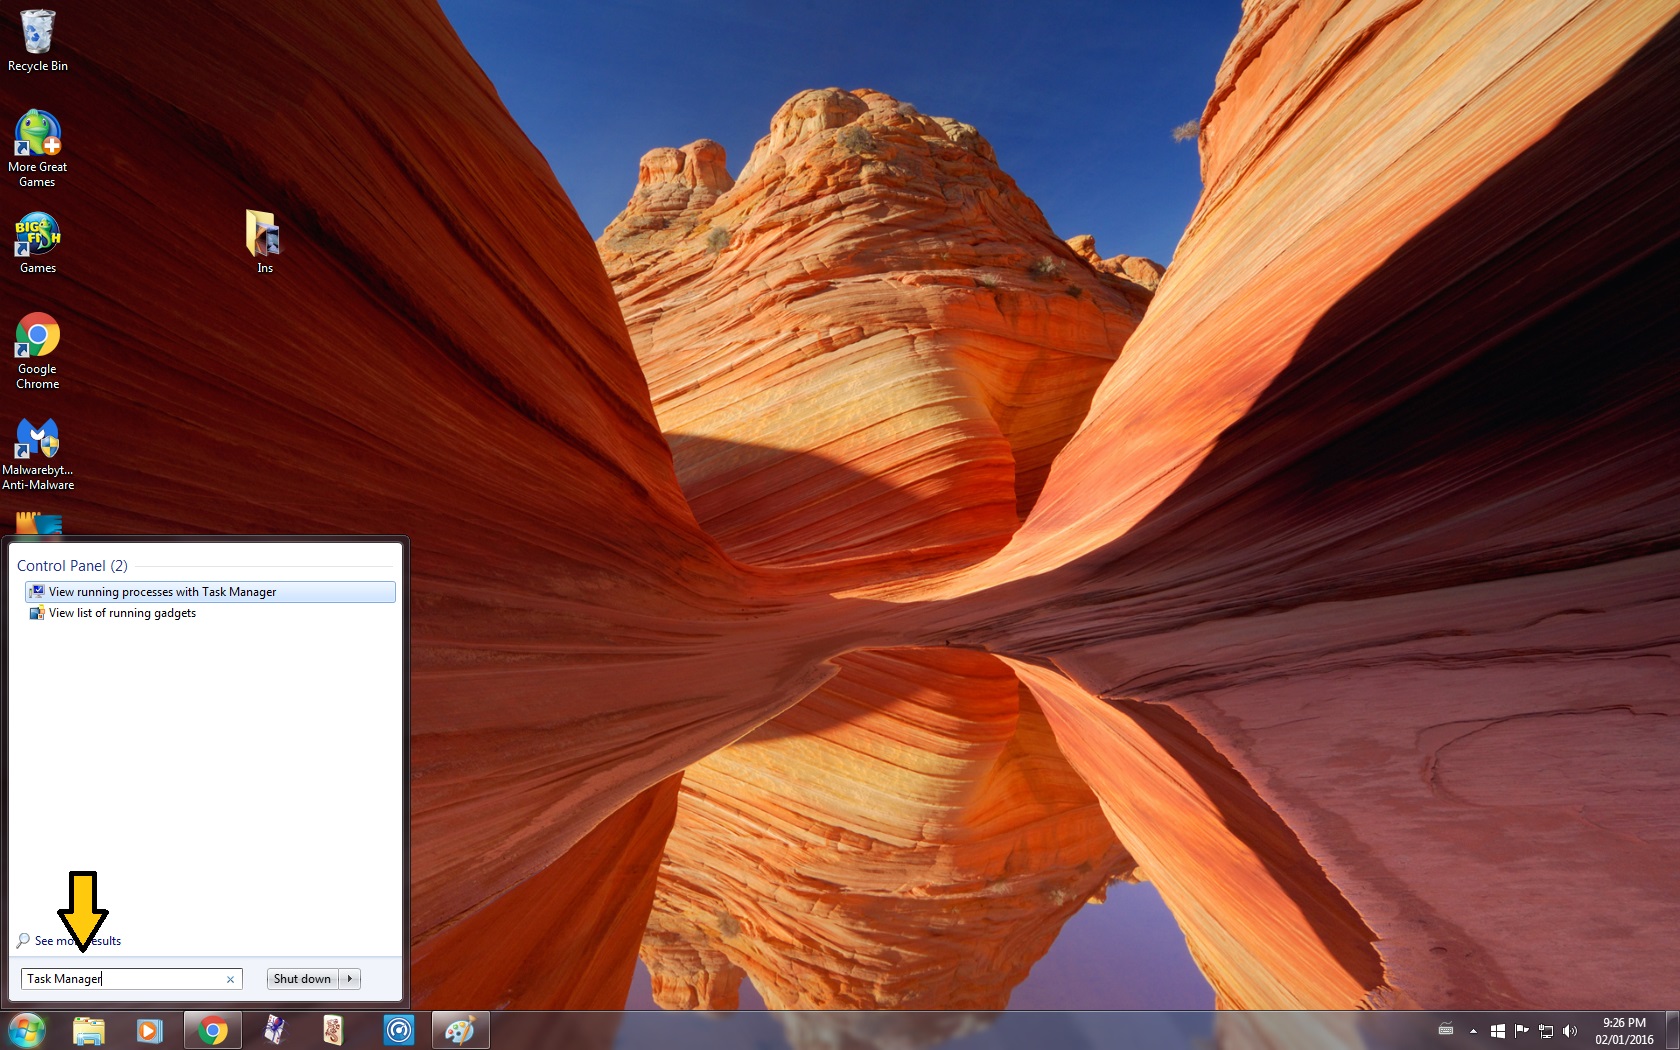
1. Open Task Manager
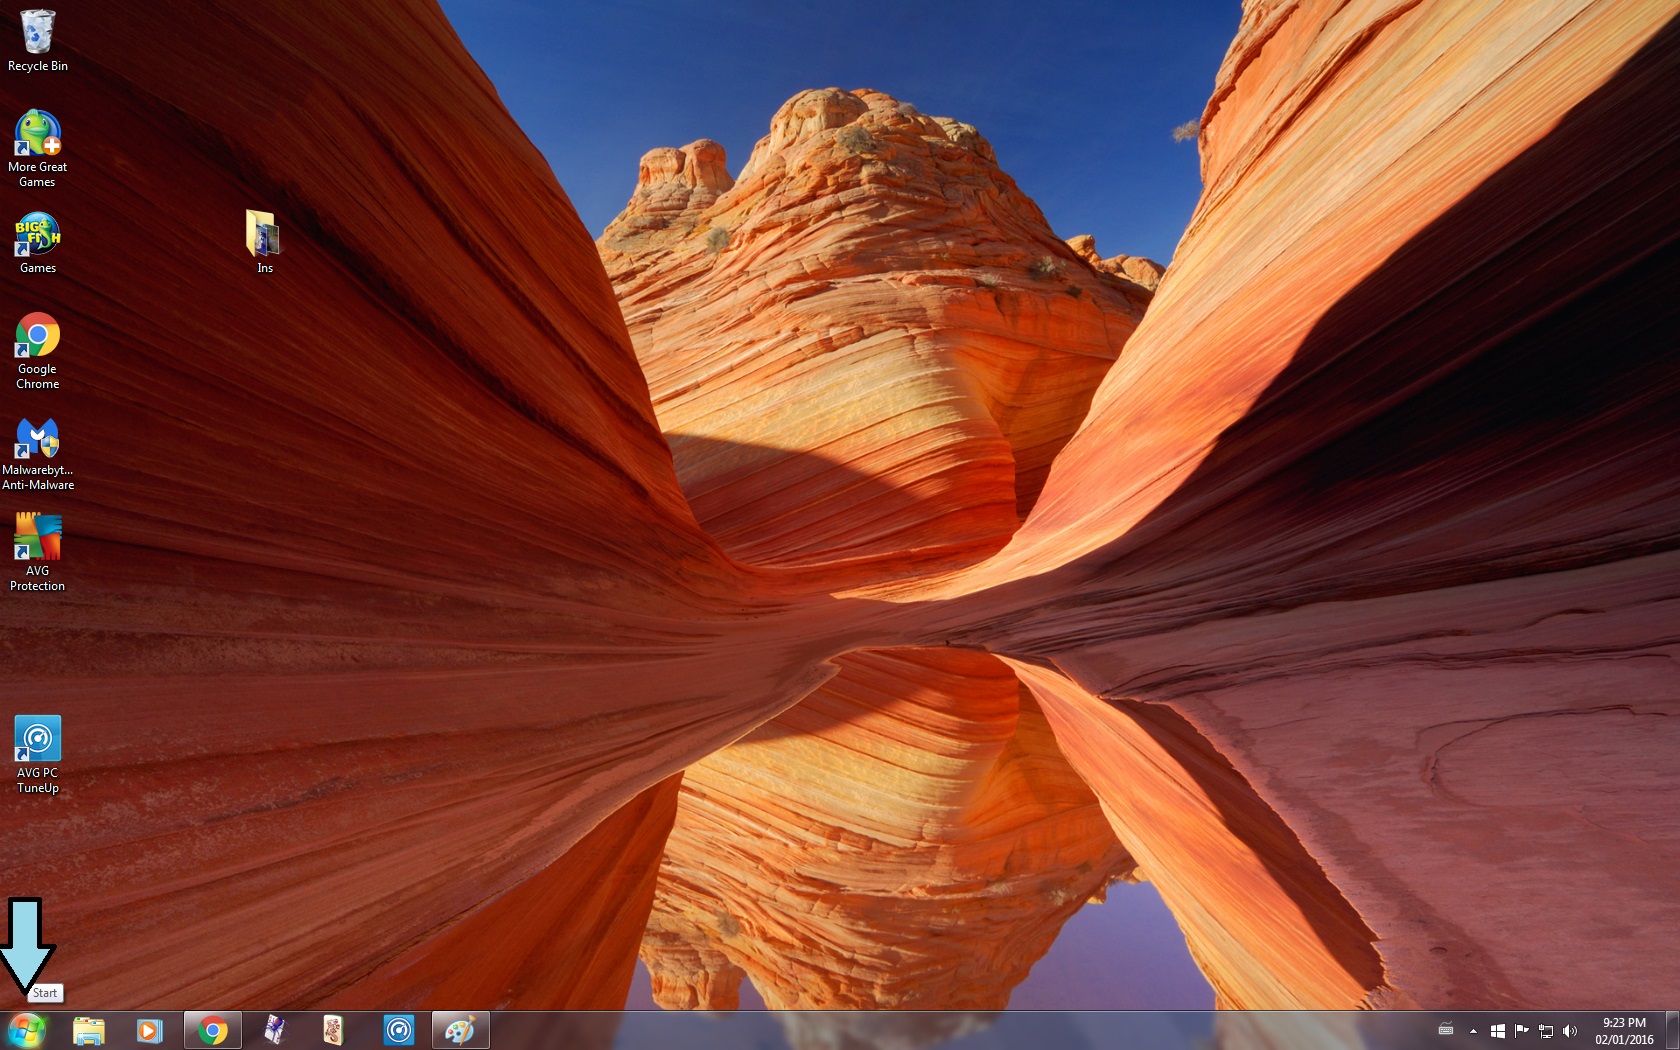
- Open the Start Menu
- Go to Search
- Type in Task Manager
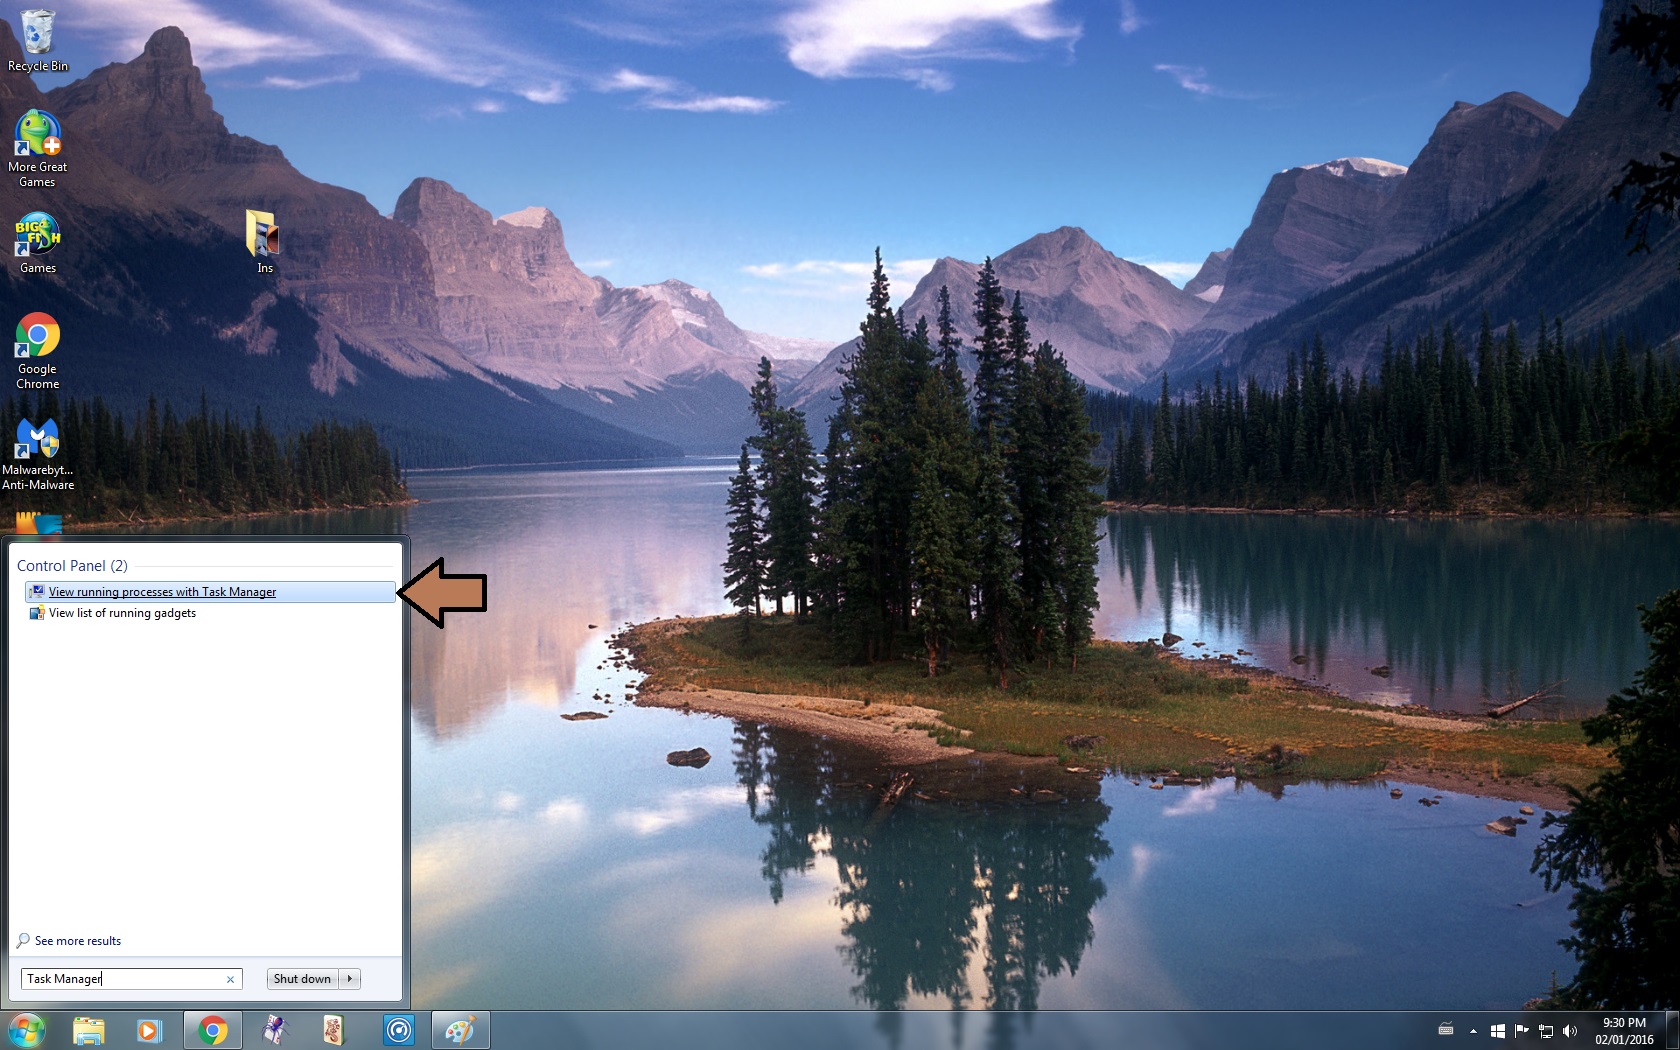
- Click on View running processes with Task Manager to open it
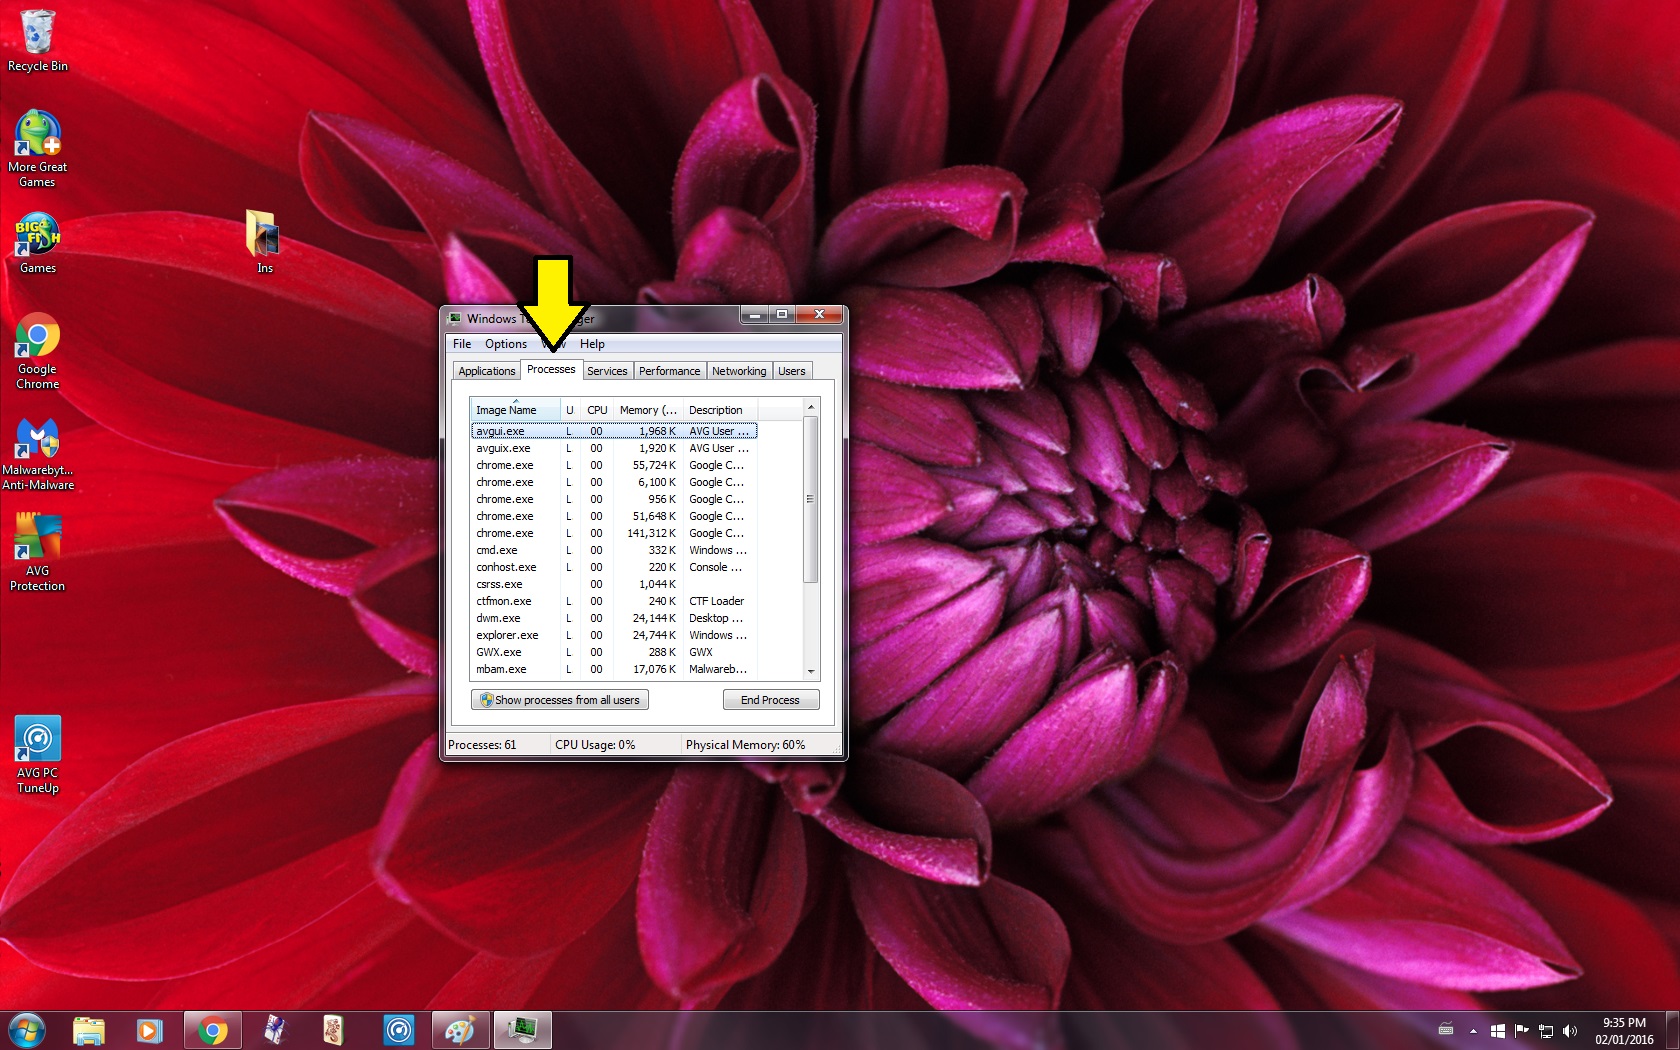
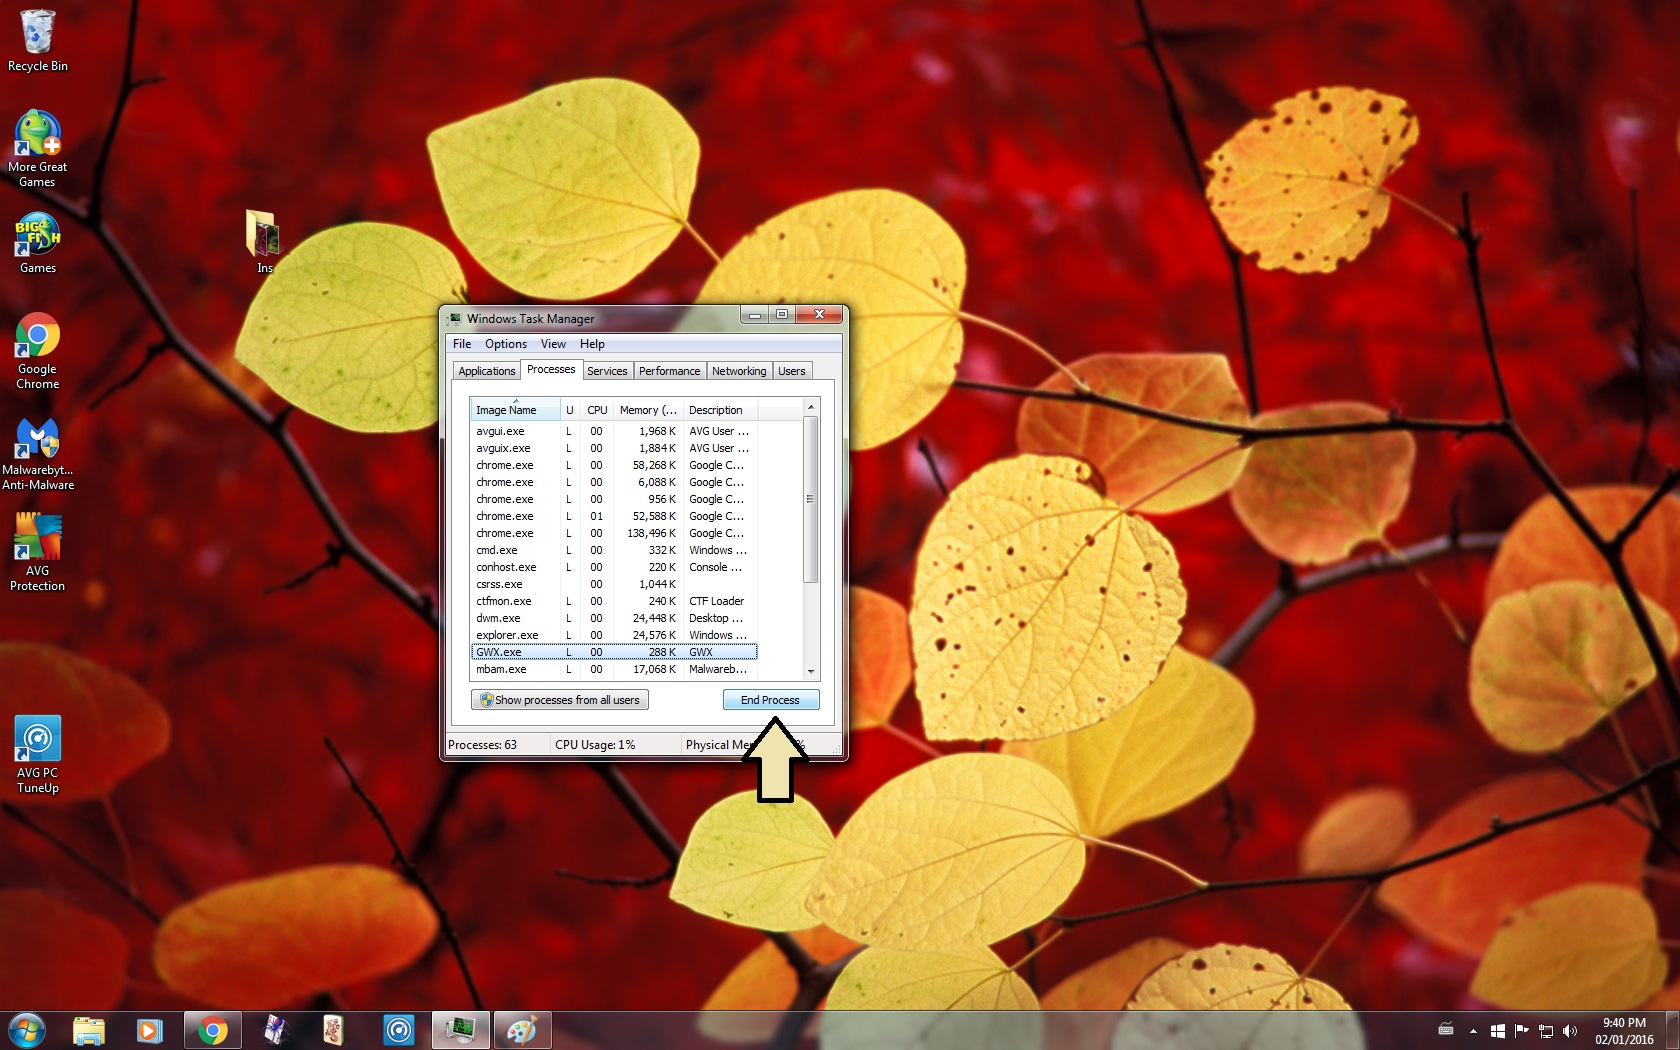
2. Go to the Processes Tab
- Should be the second tab
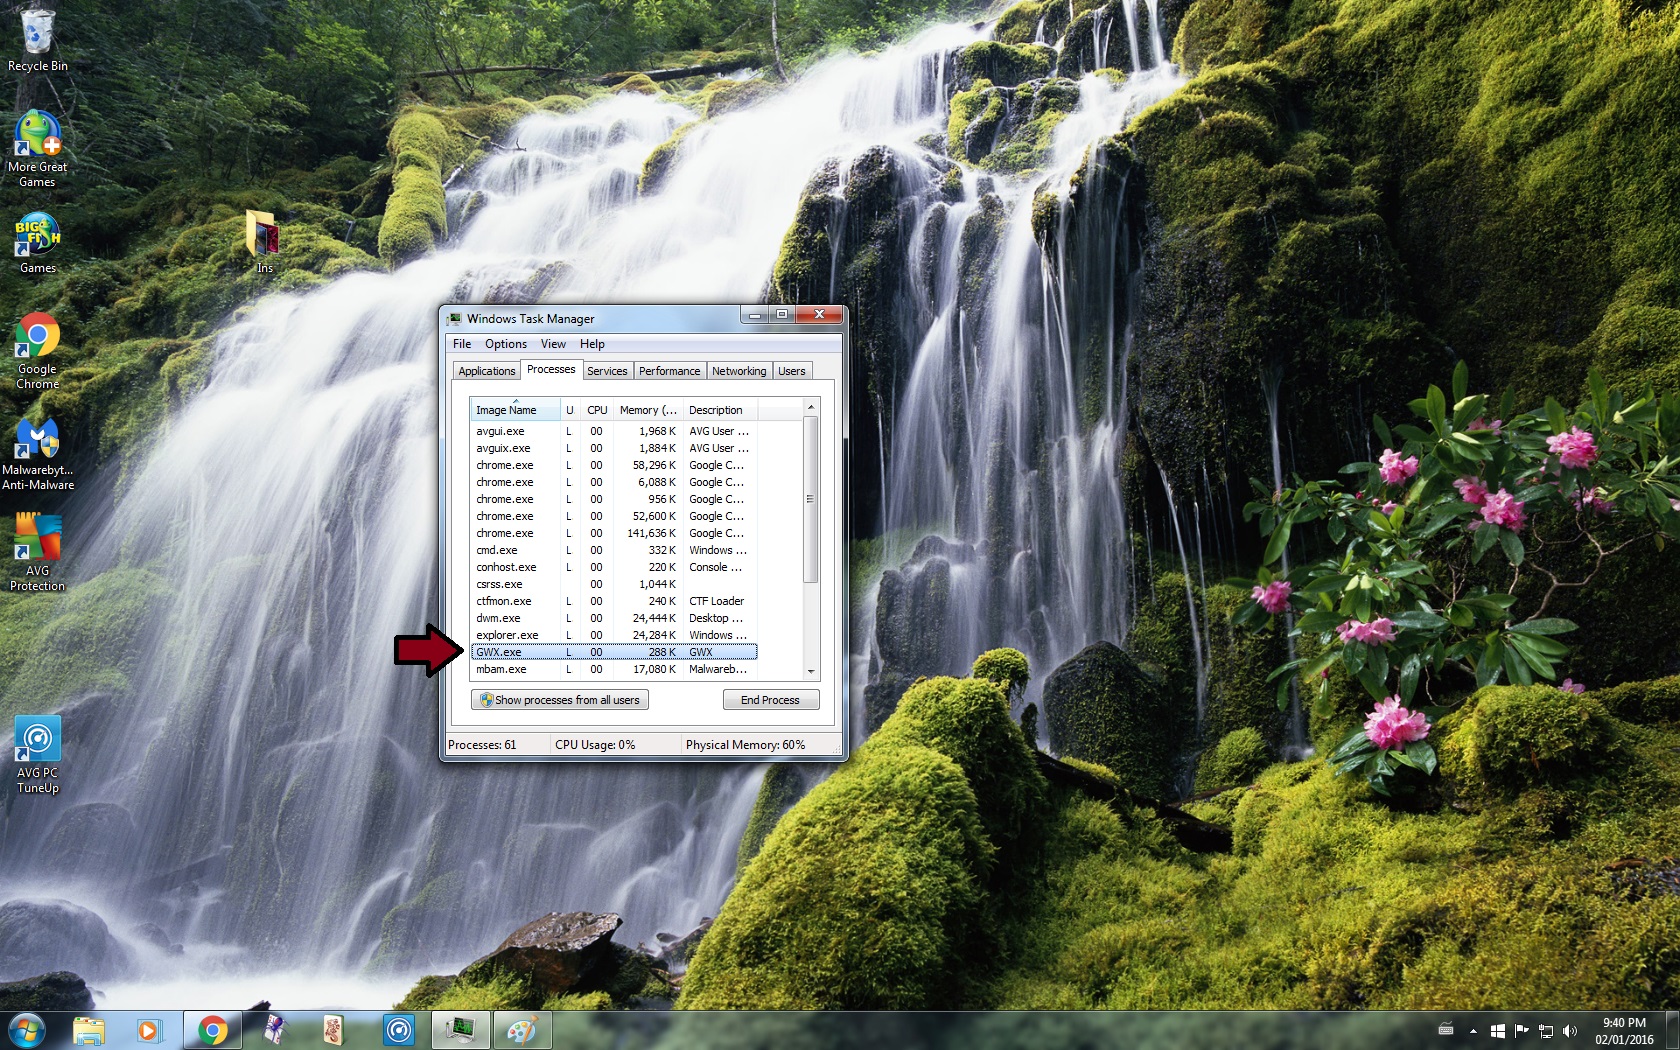
3. Select GWX.exe
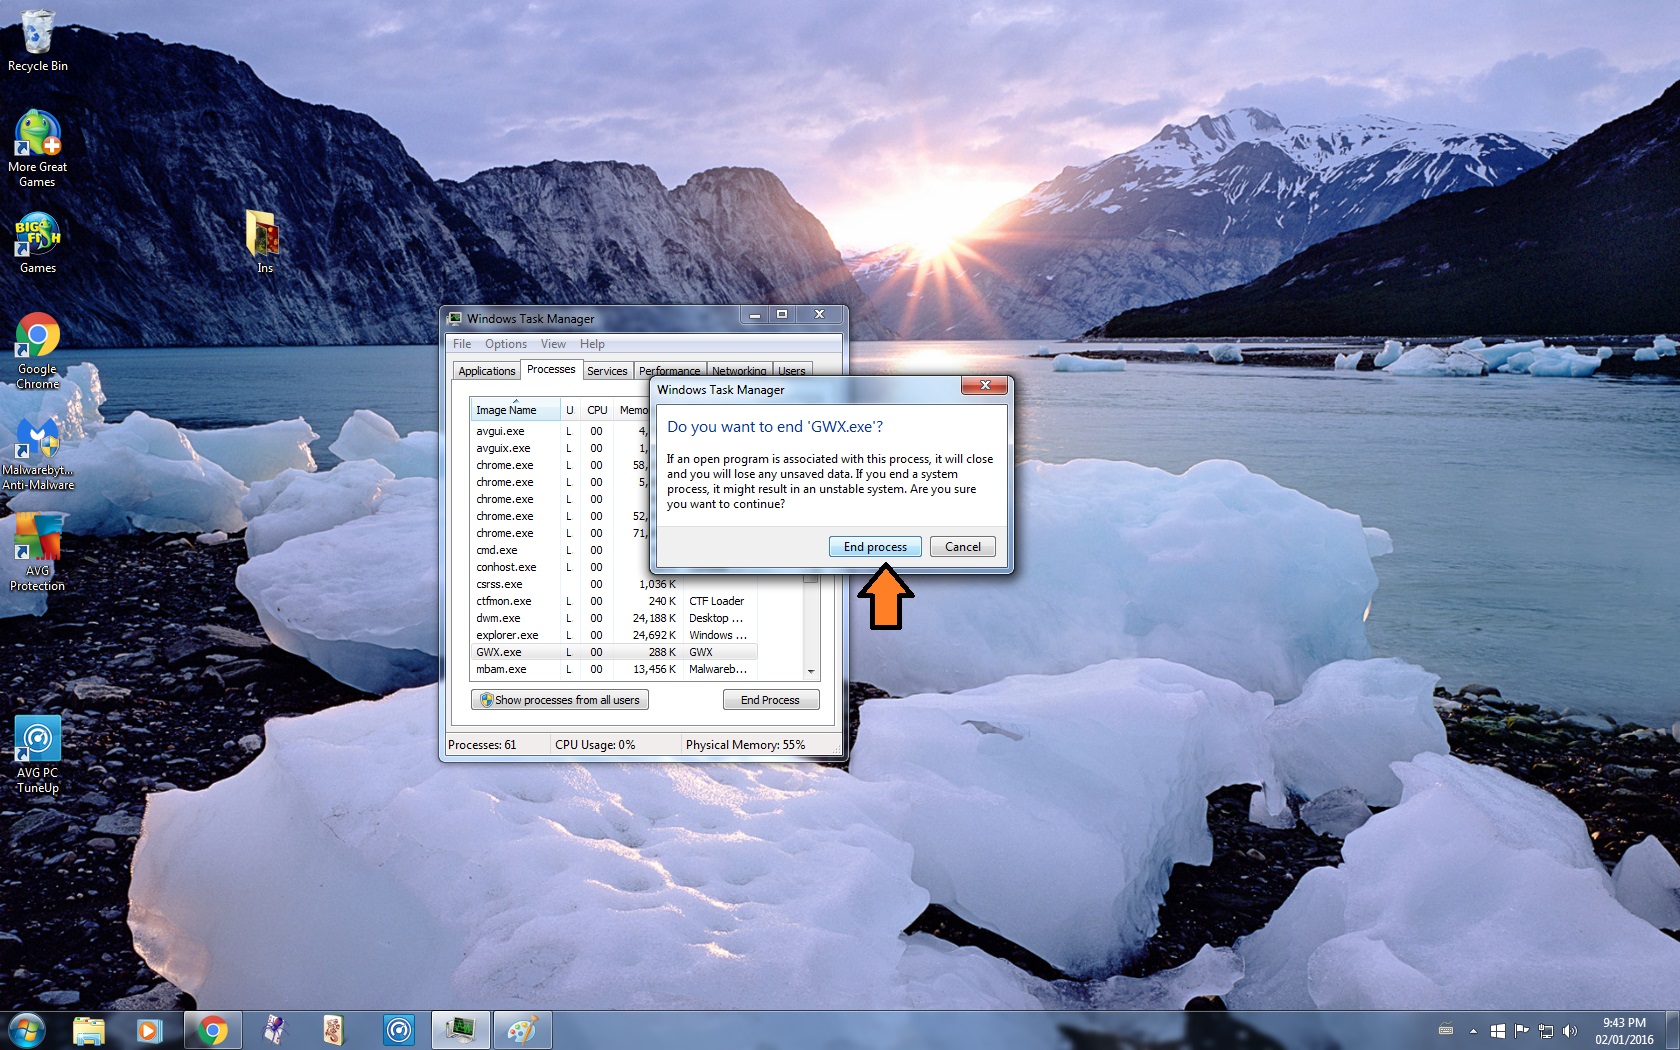
4. Click End Process
5. Click End Process again
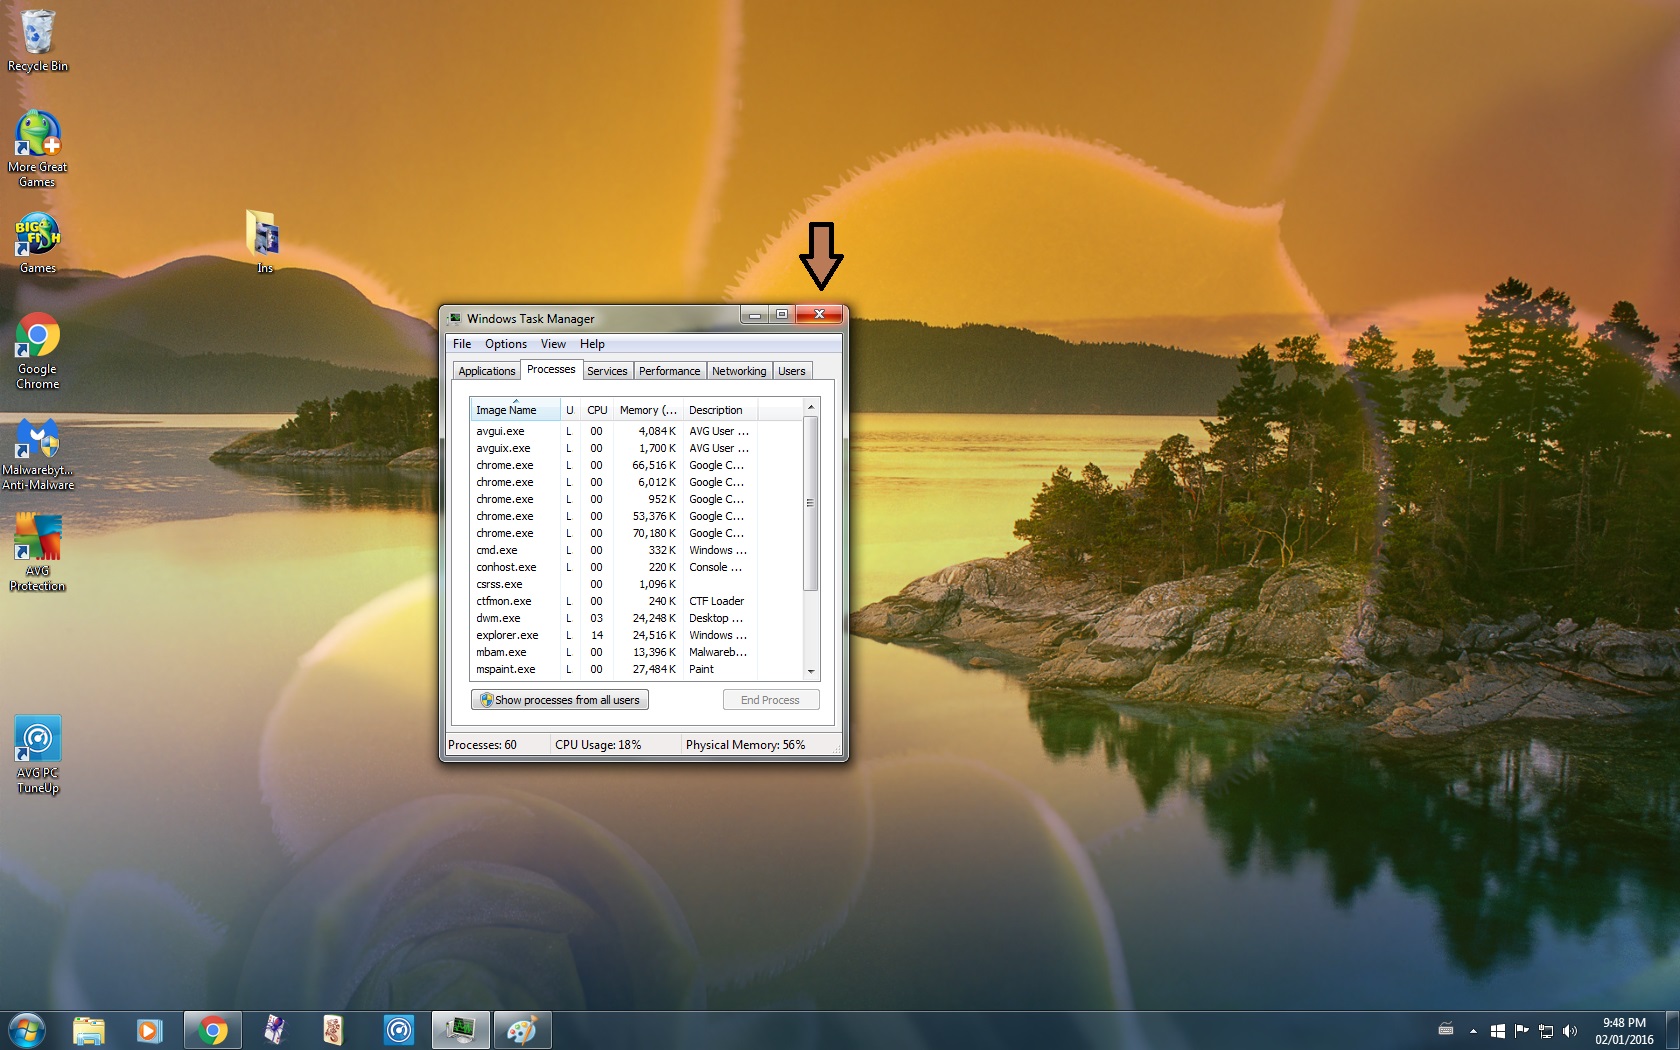
6. Close Task Manager
Windows 7 : Part 2

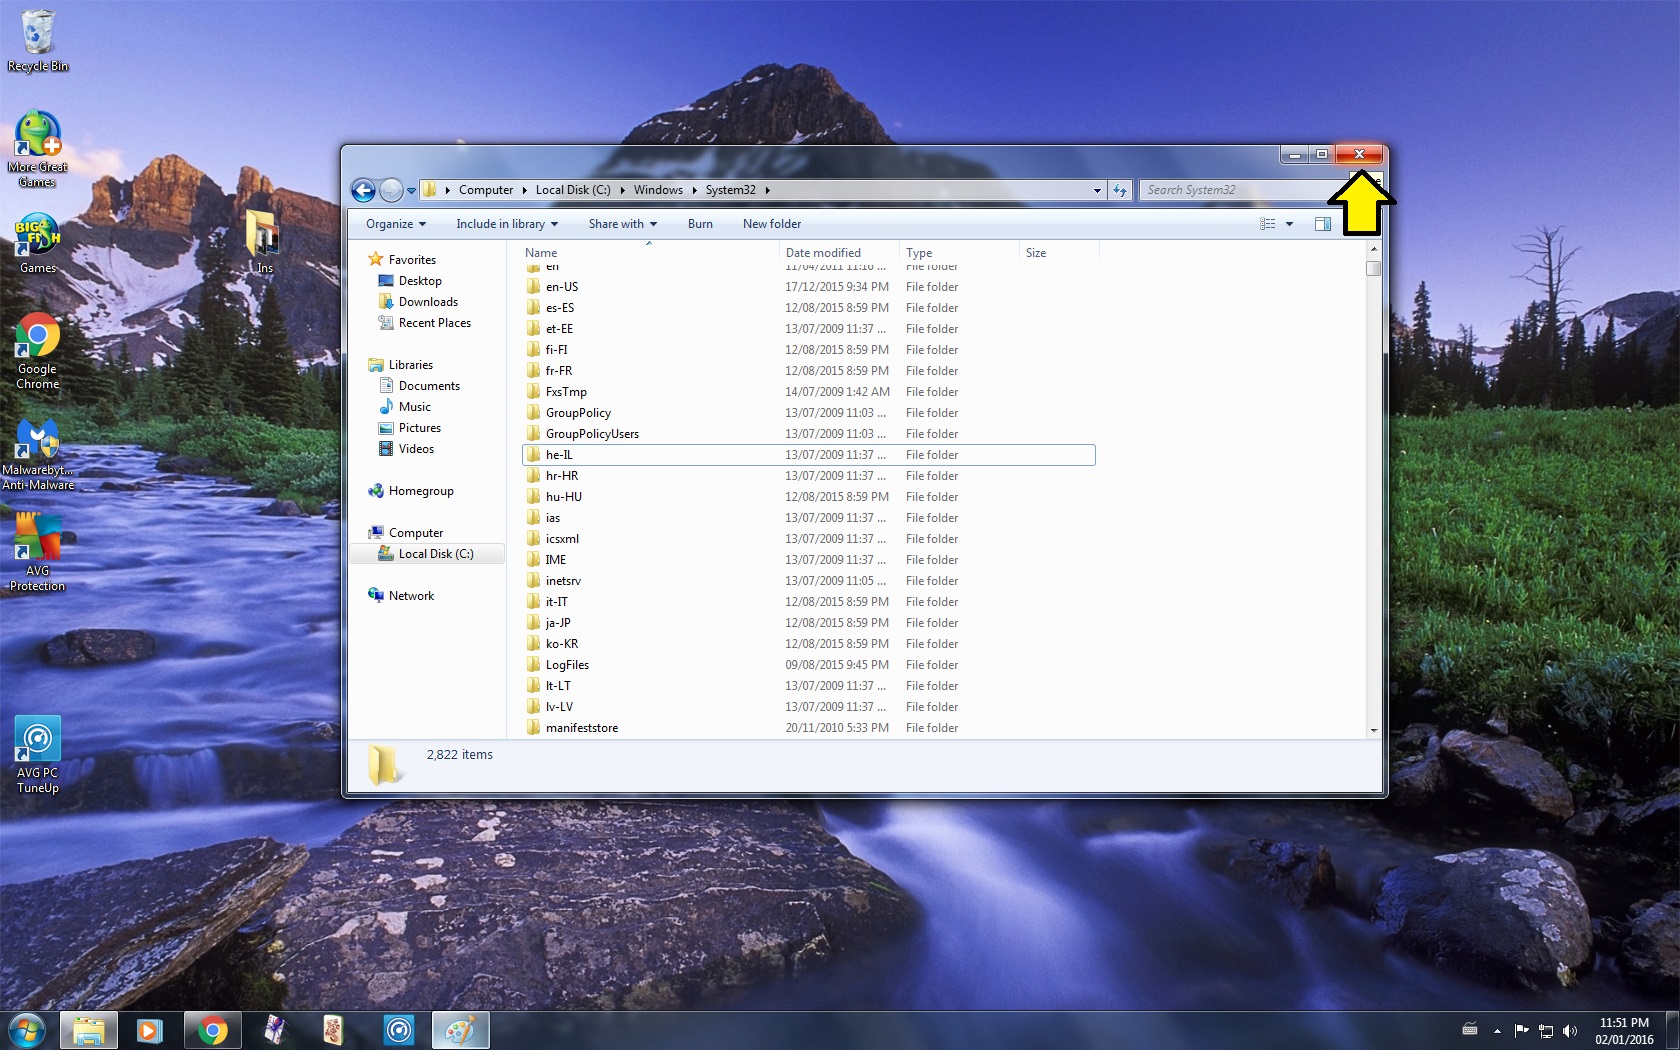
7. Delete the Update
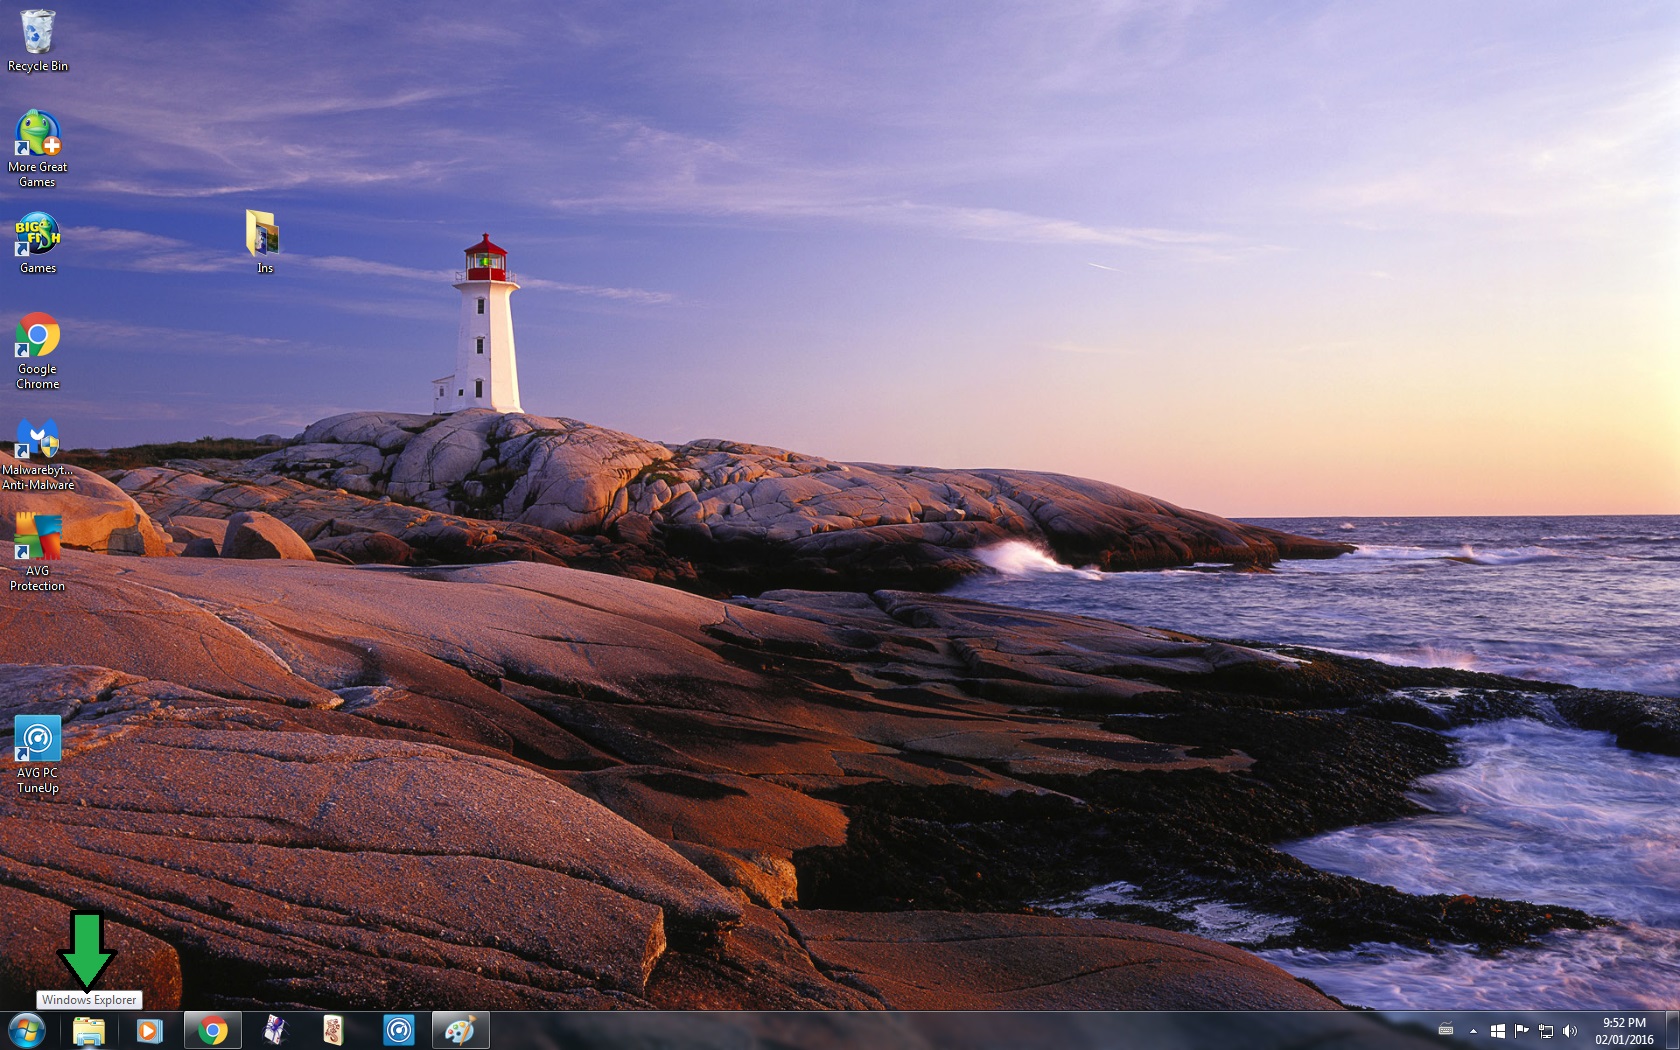
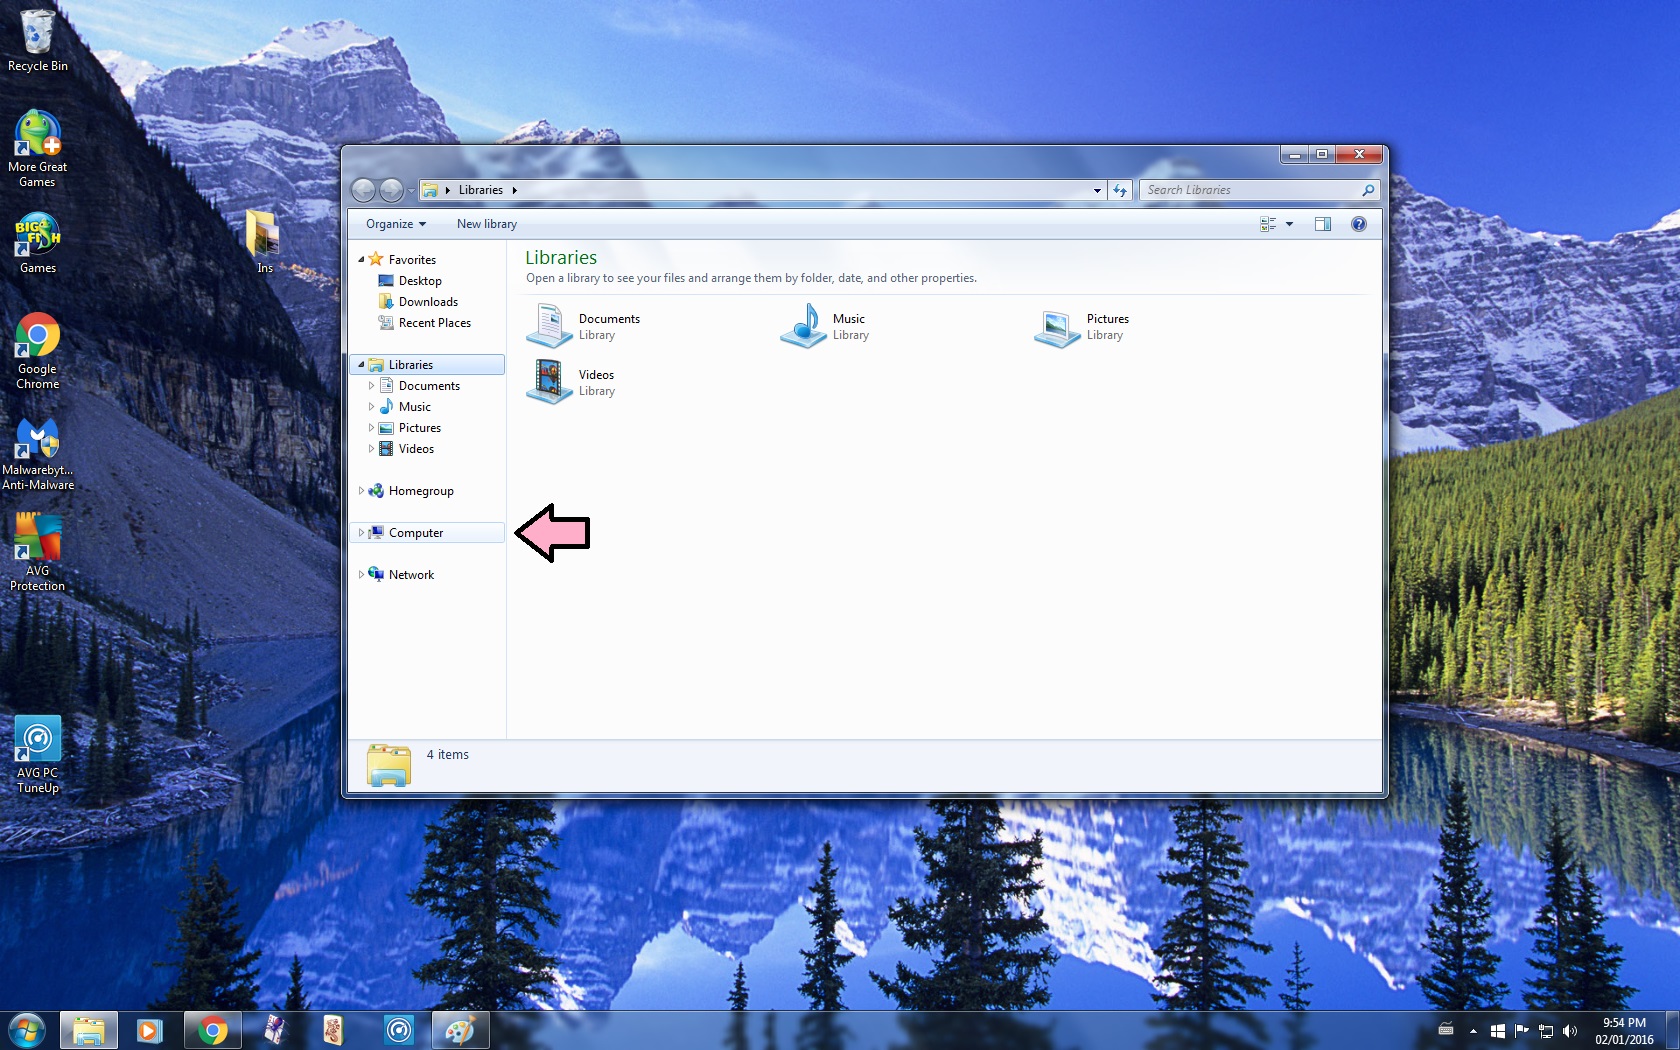
- Open Windows Explorer
- Go to Computer
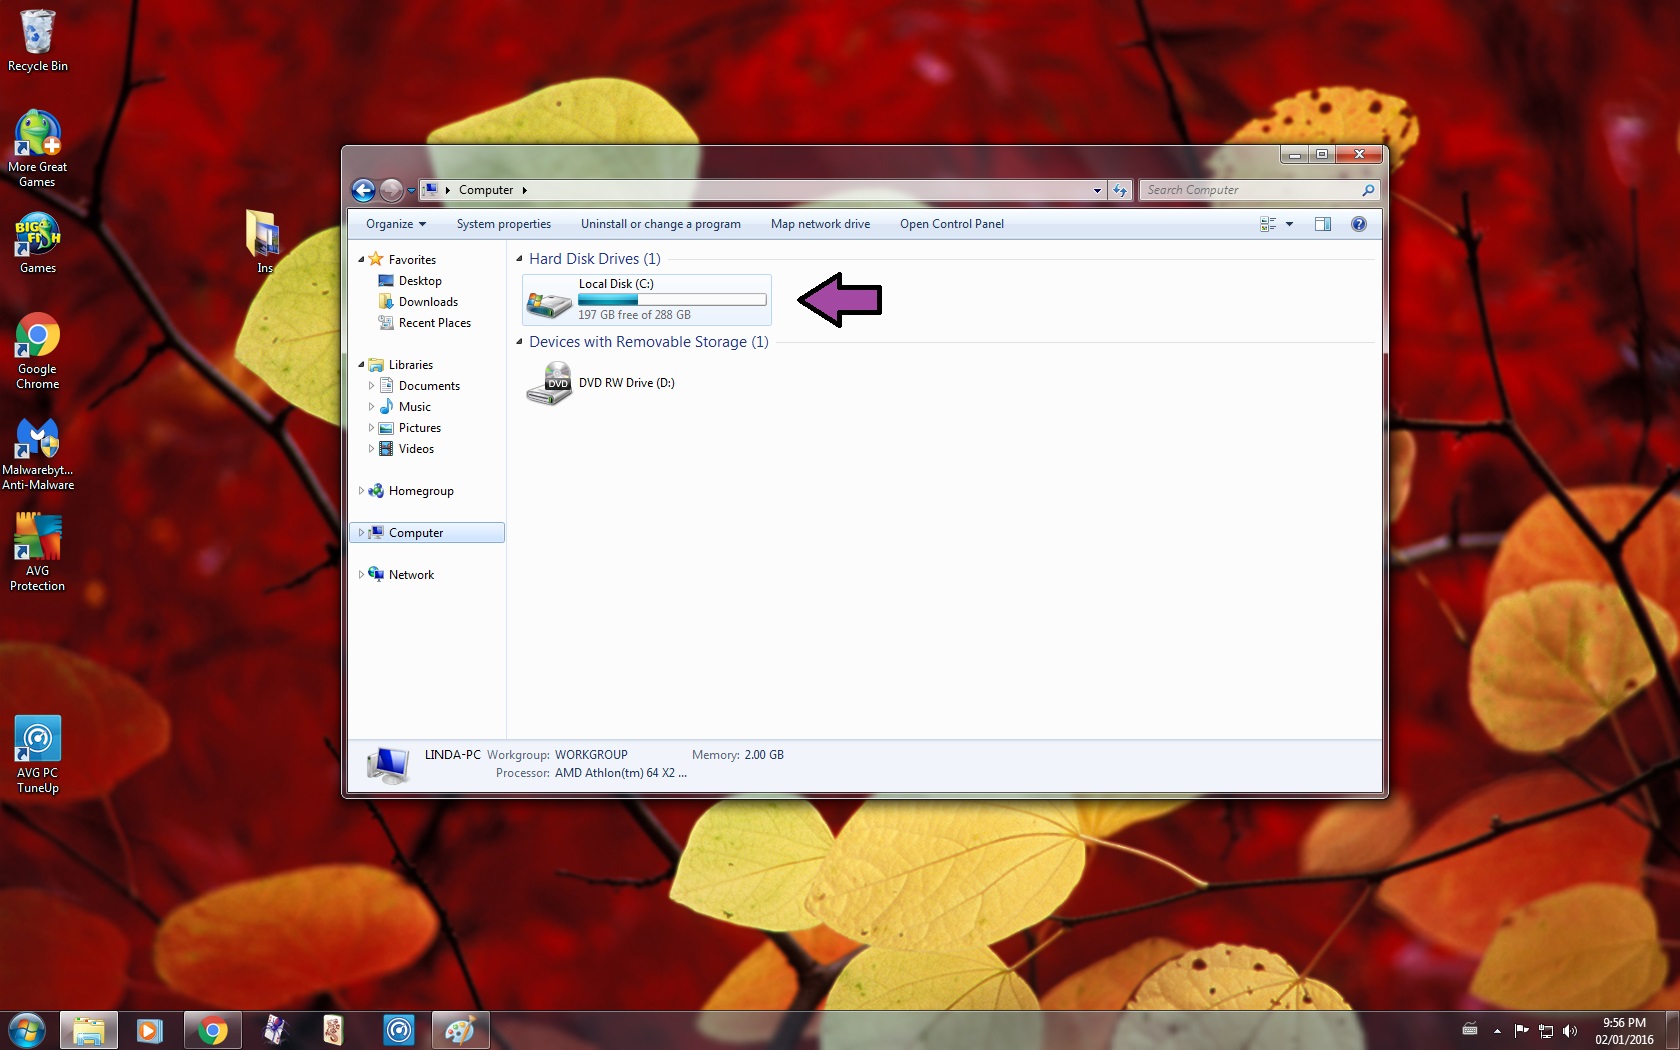
- Select the C Drive
-- Double click on the C Drive to open it
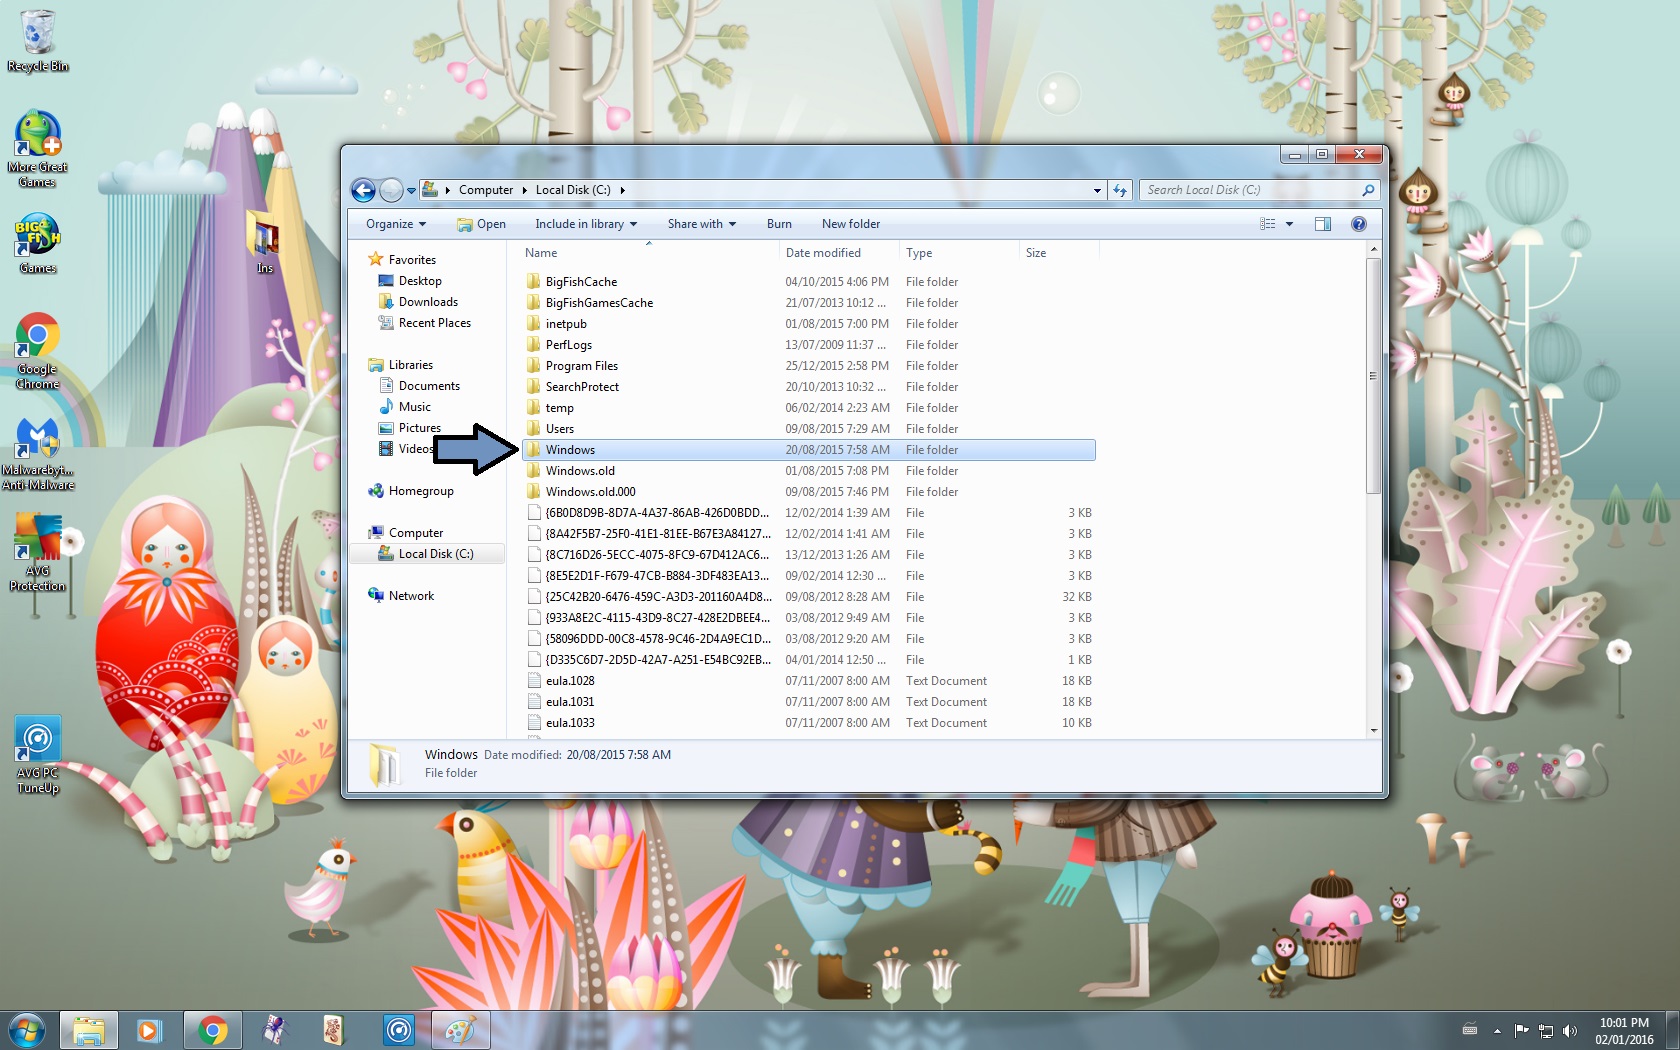
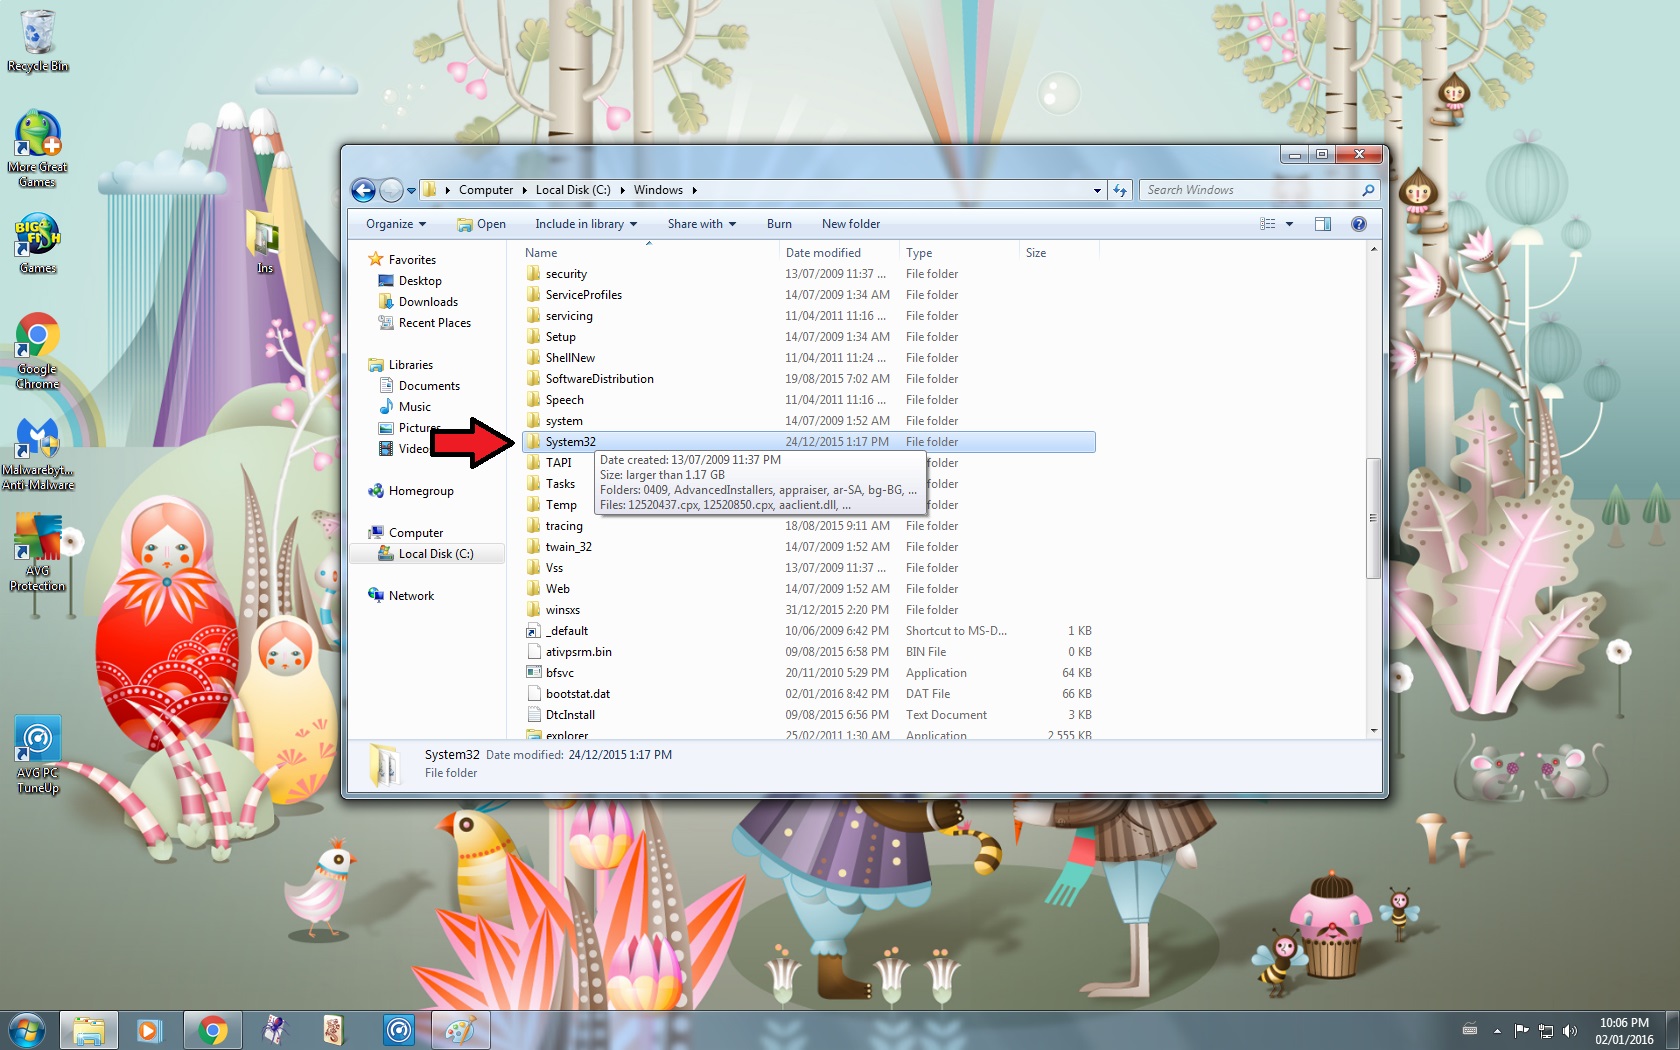
- Go to the Windows Folder
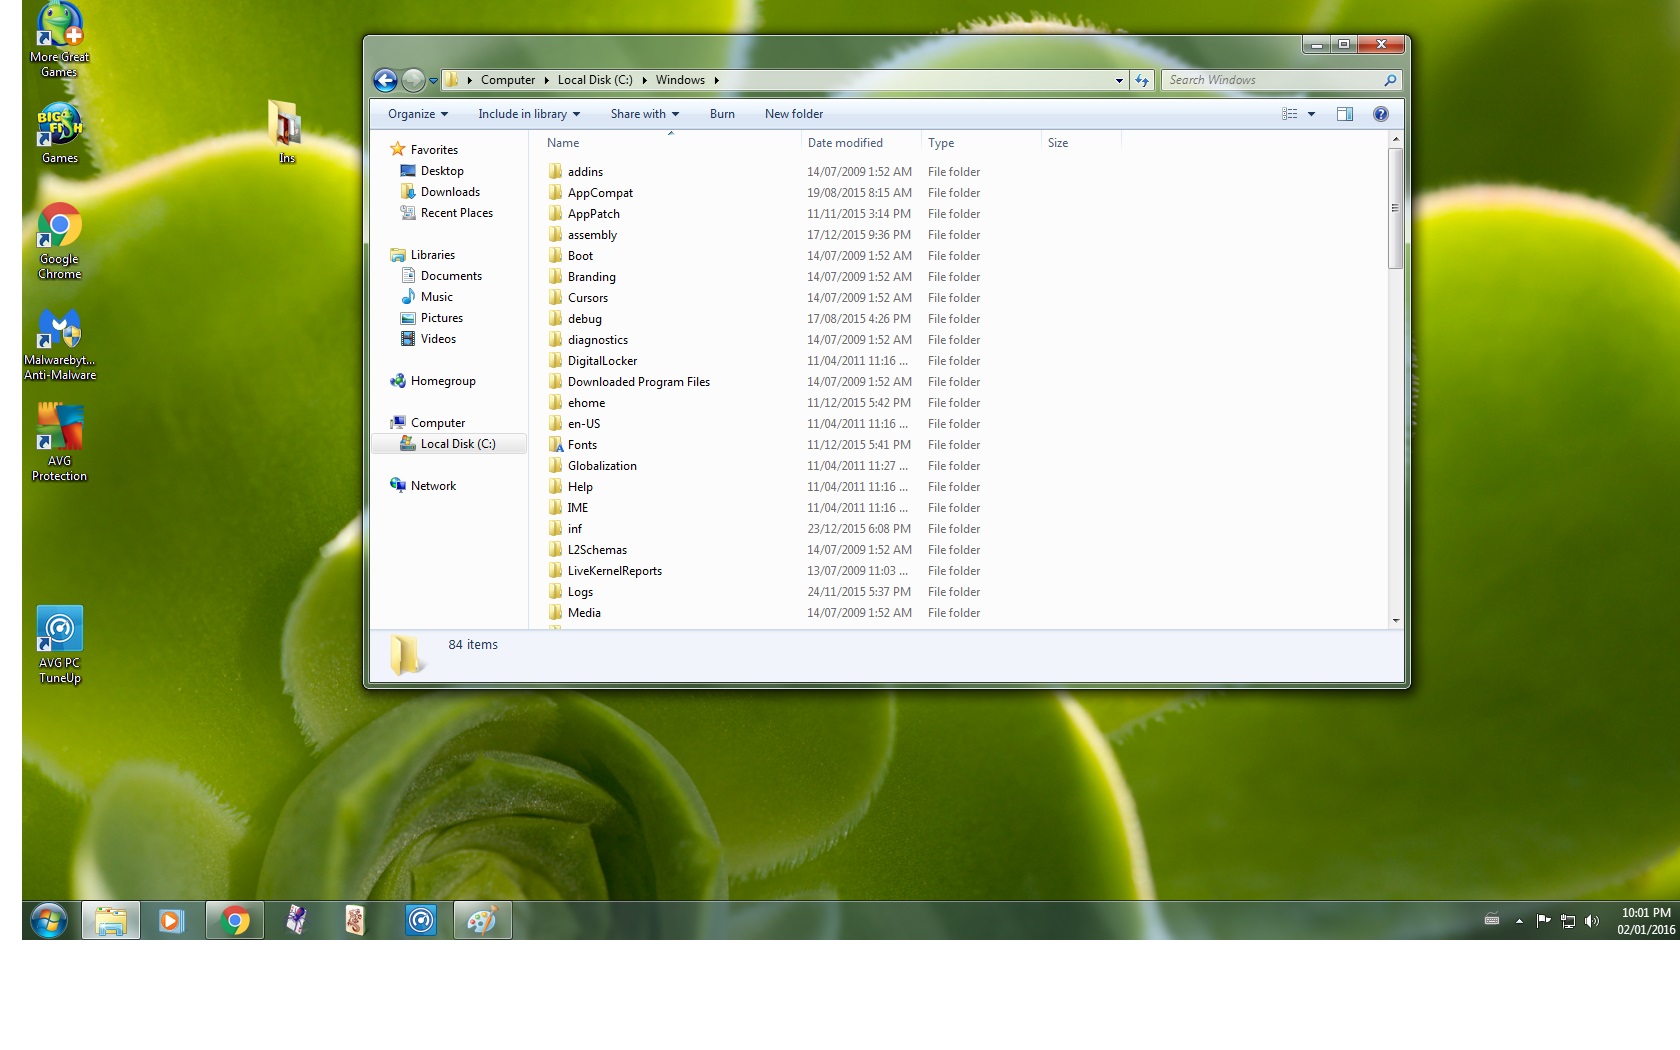
- Scroll down
- Go to System32 or SysWOW64 Folder
-- If you have a 32 Bit computer go to the System32 Folder
-- If you have a 64 Bit computer go to the SysWOW64 Folder
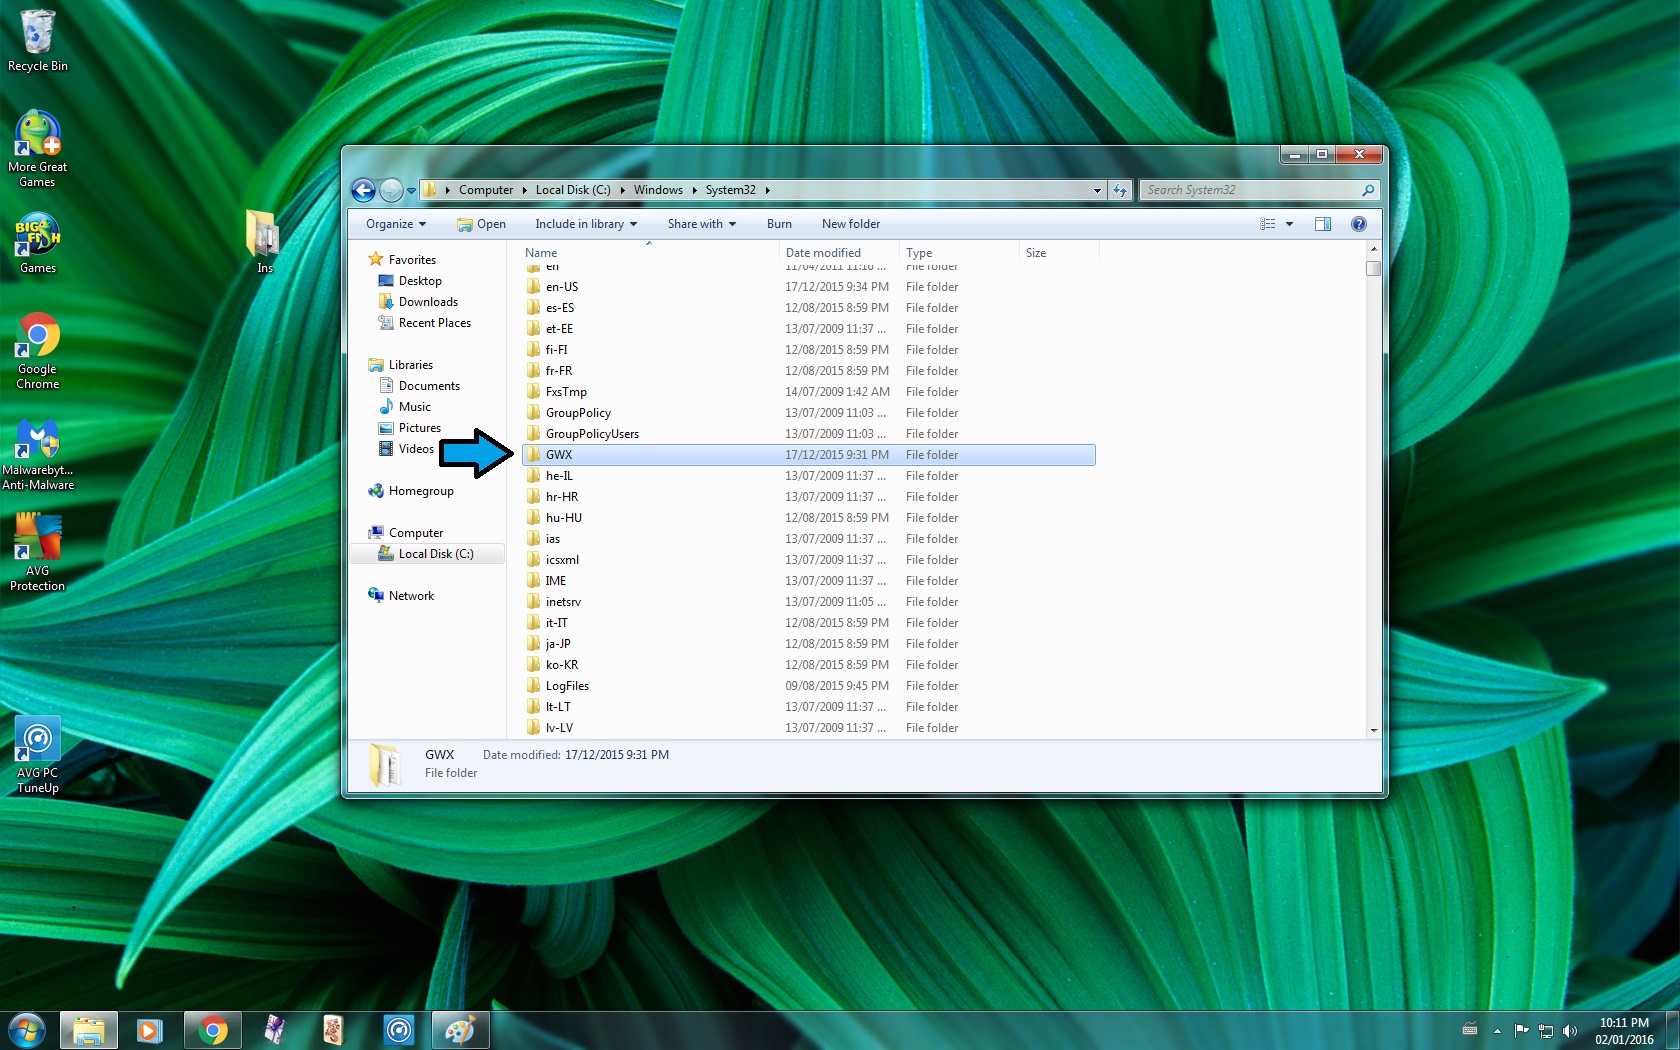
- Scroll down
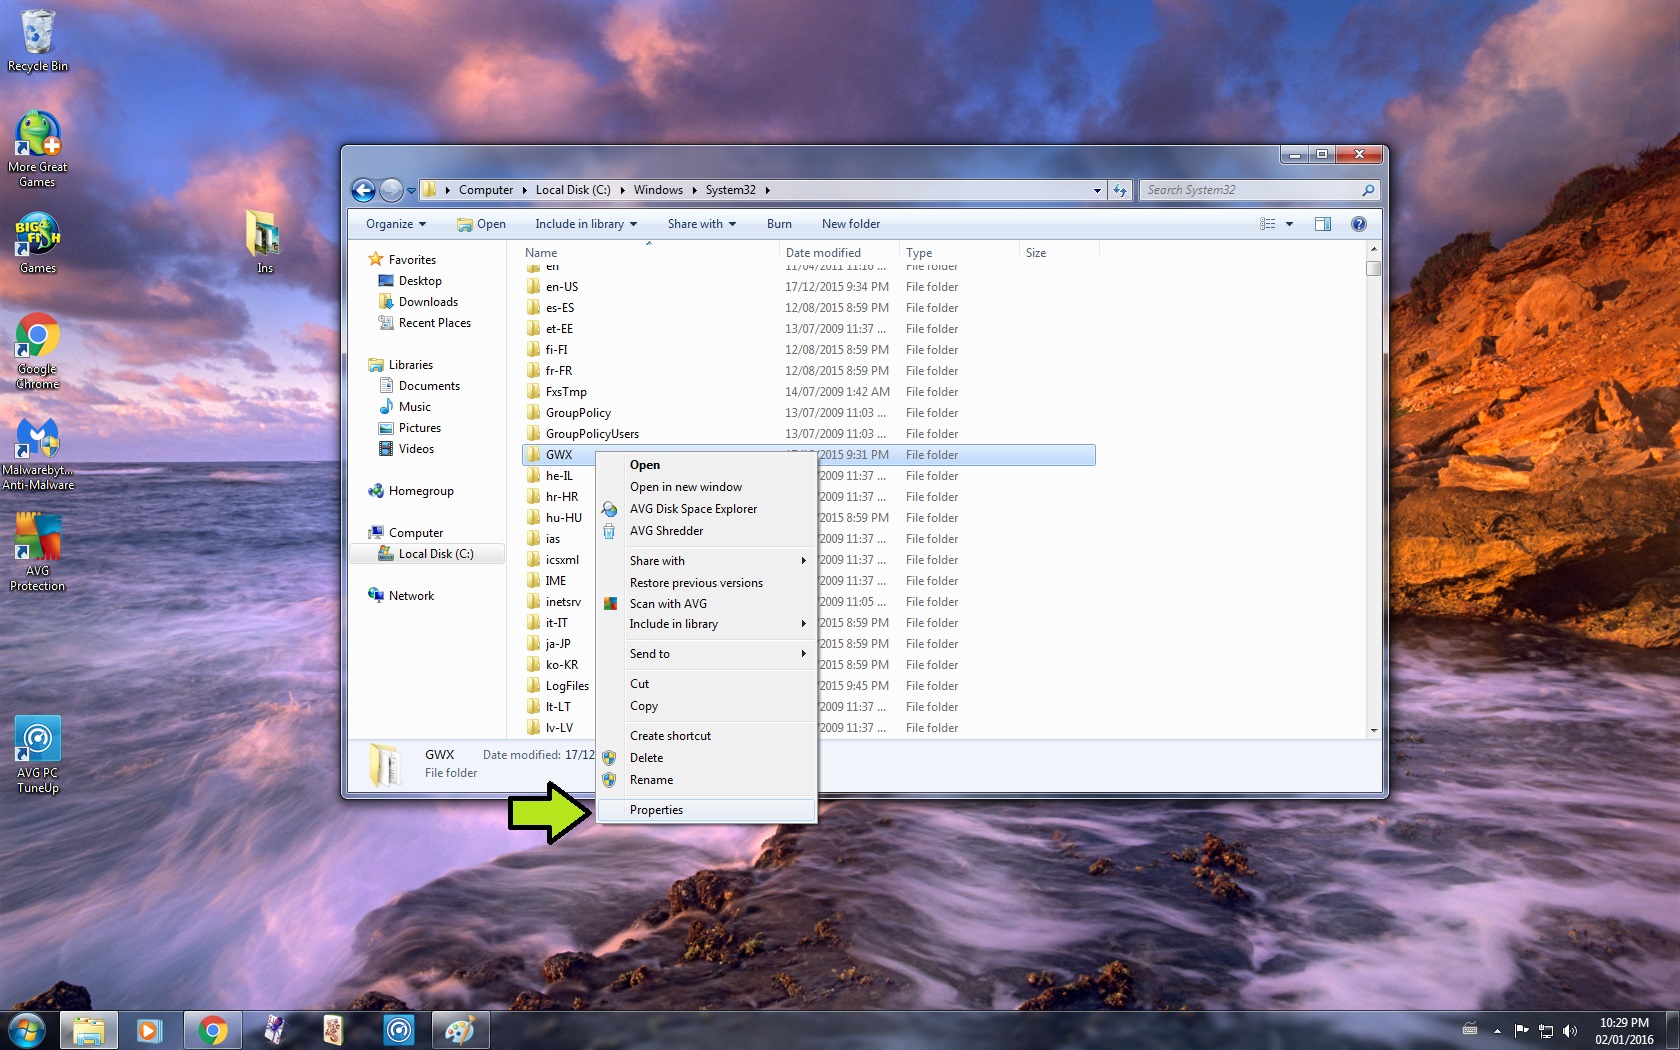
- Go to the GWX Folder
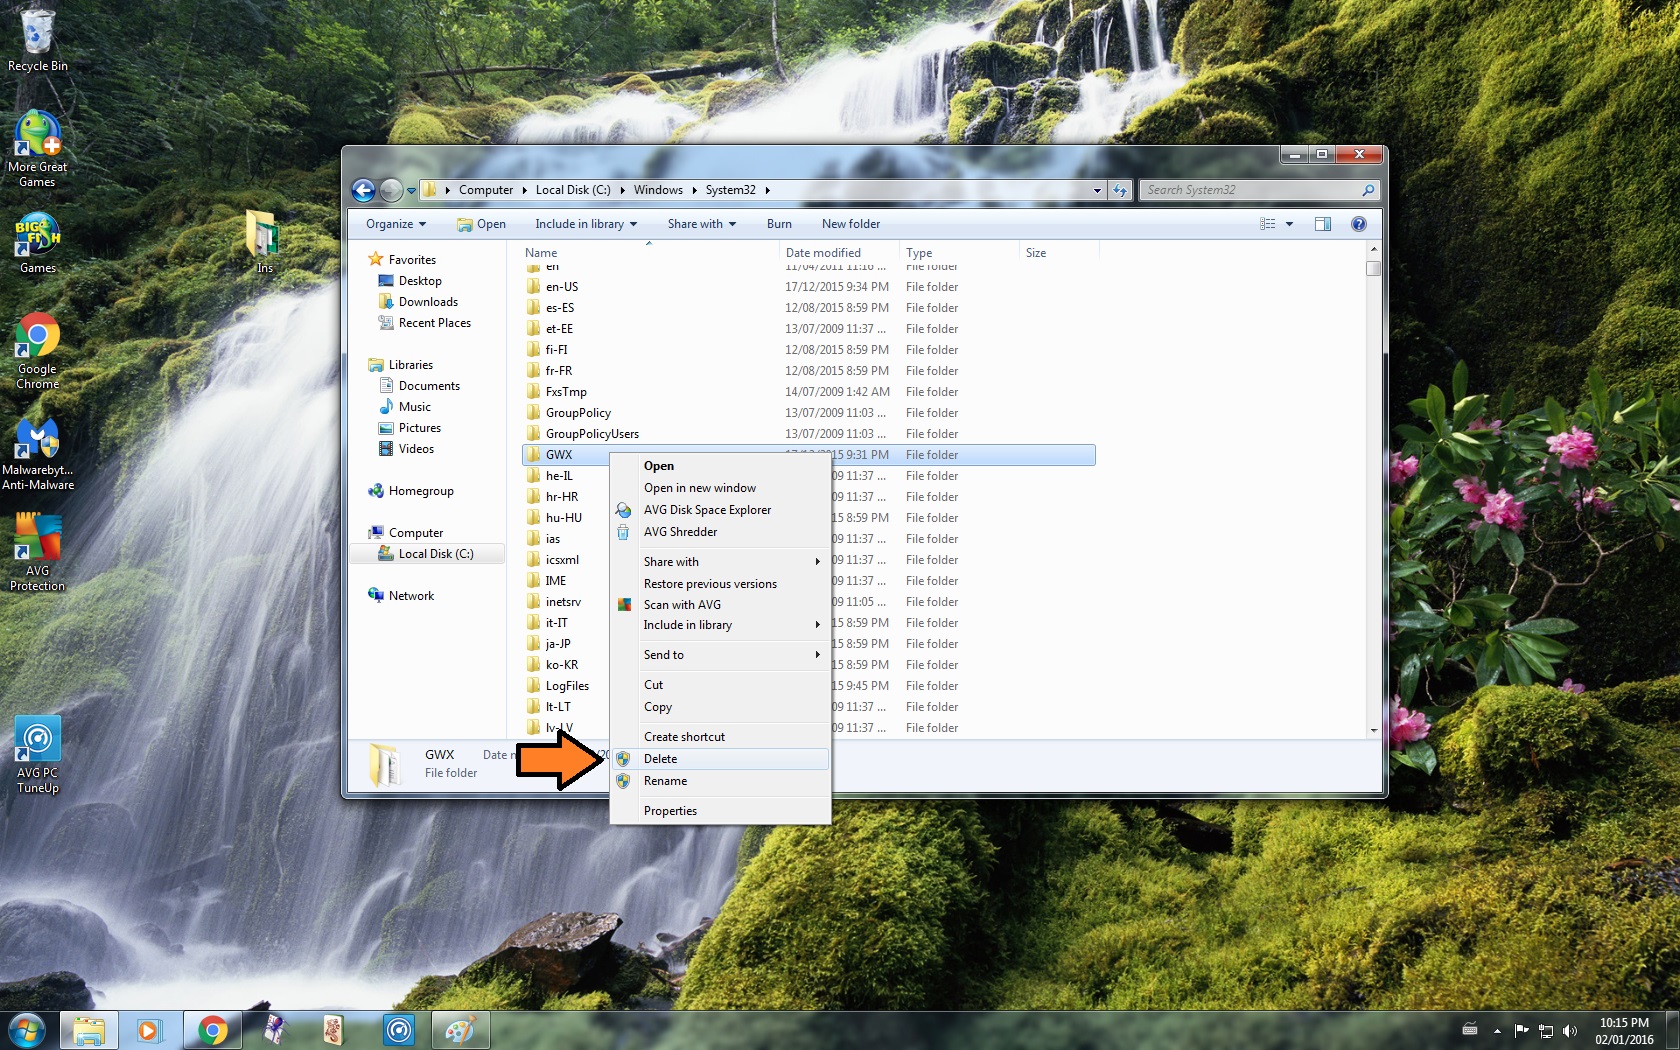
- Right Click
- Select Delete
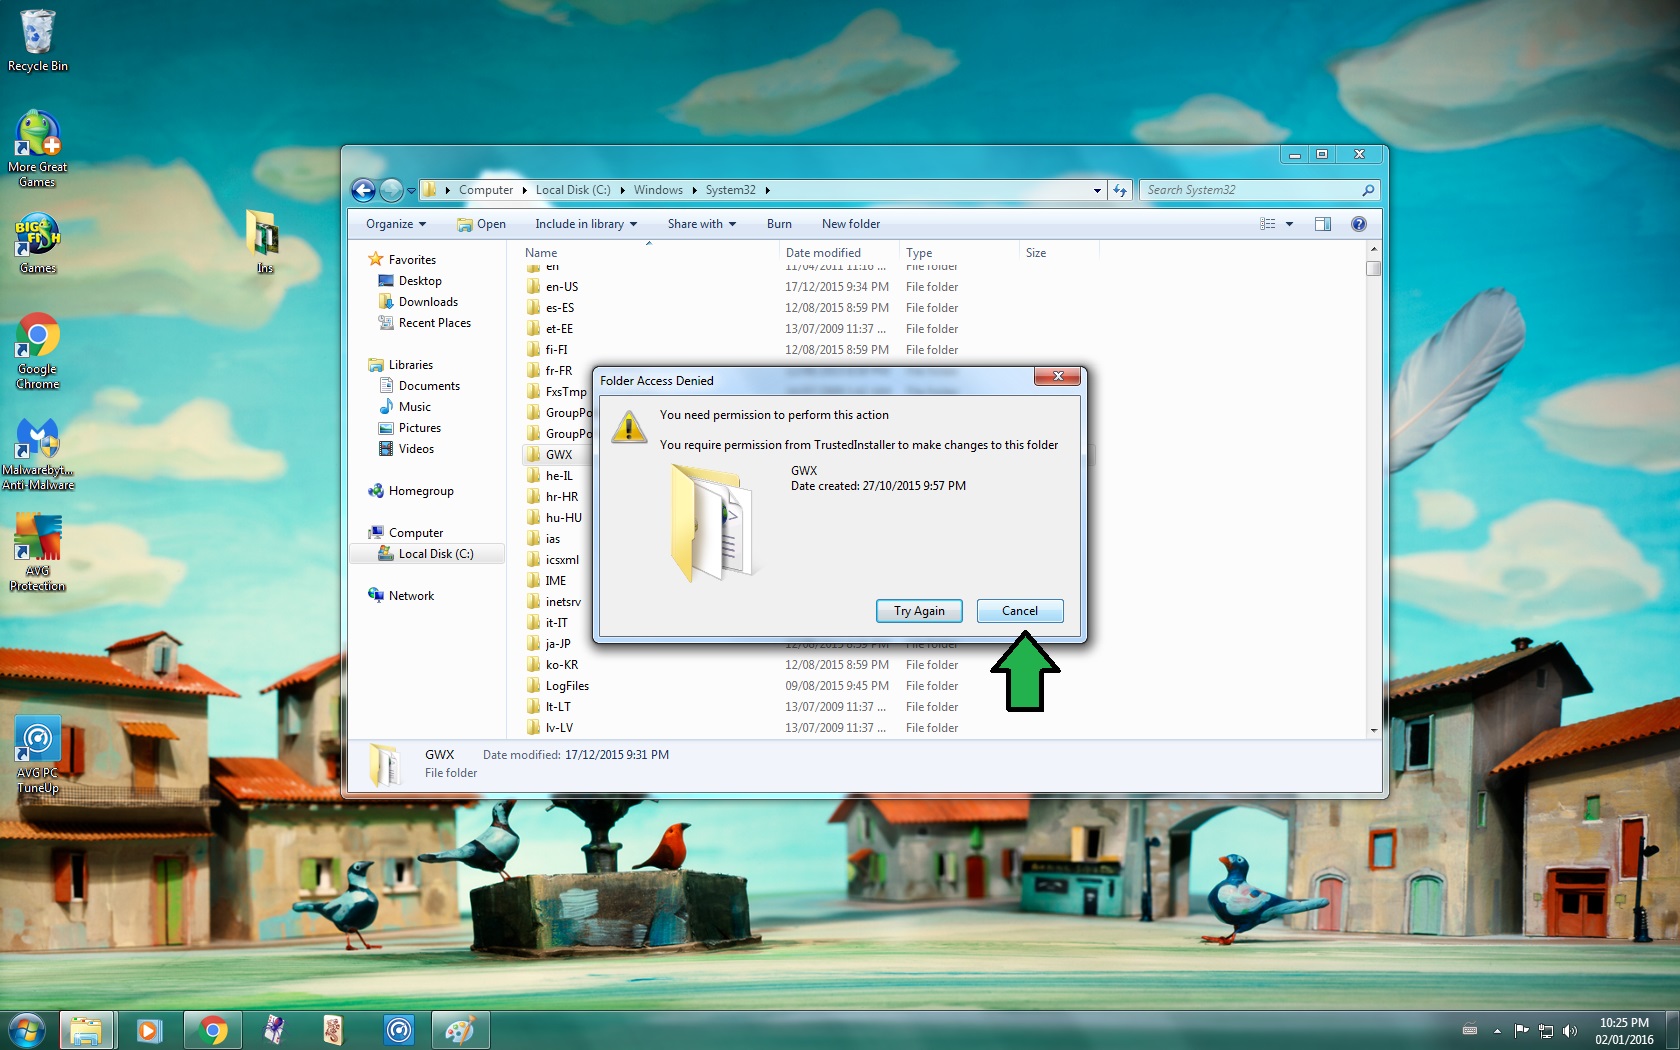
-- You may get a Folder Access Denied Message
-- If you receive this message, you will need to Take Ownership of the folder and grant yourself Full Control Permissions and Rights
- Click Cancel
Windows 7 : Part 3

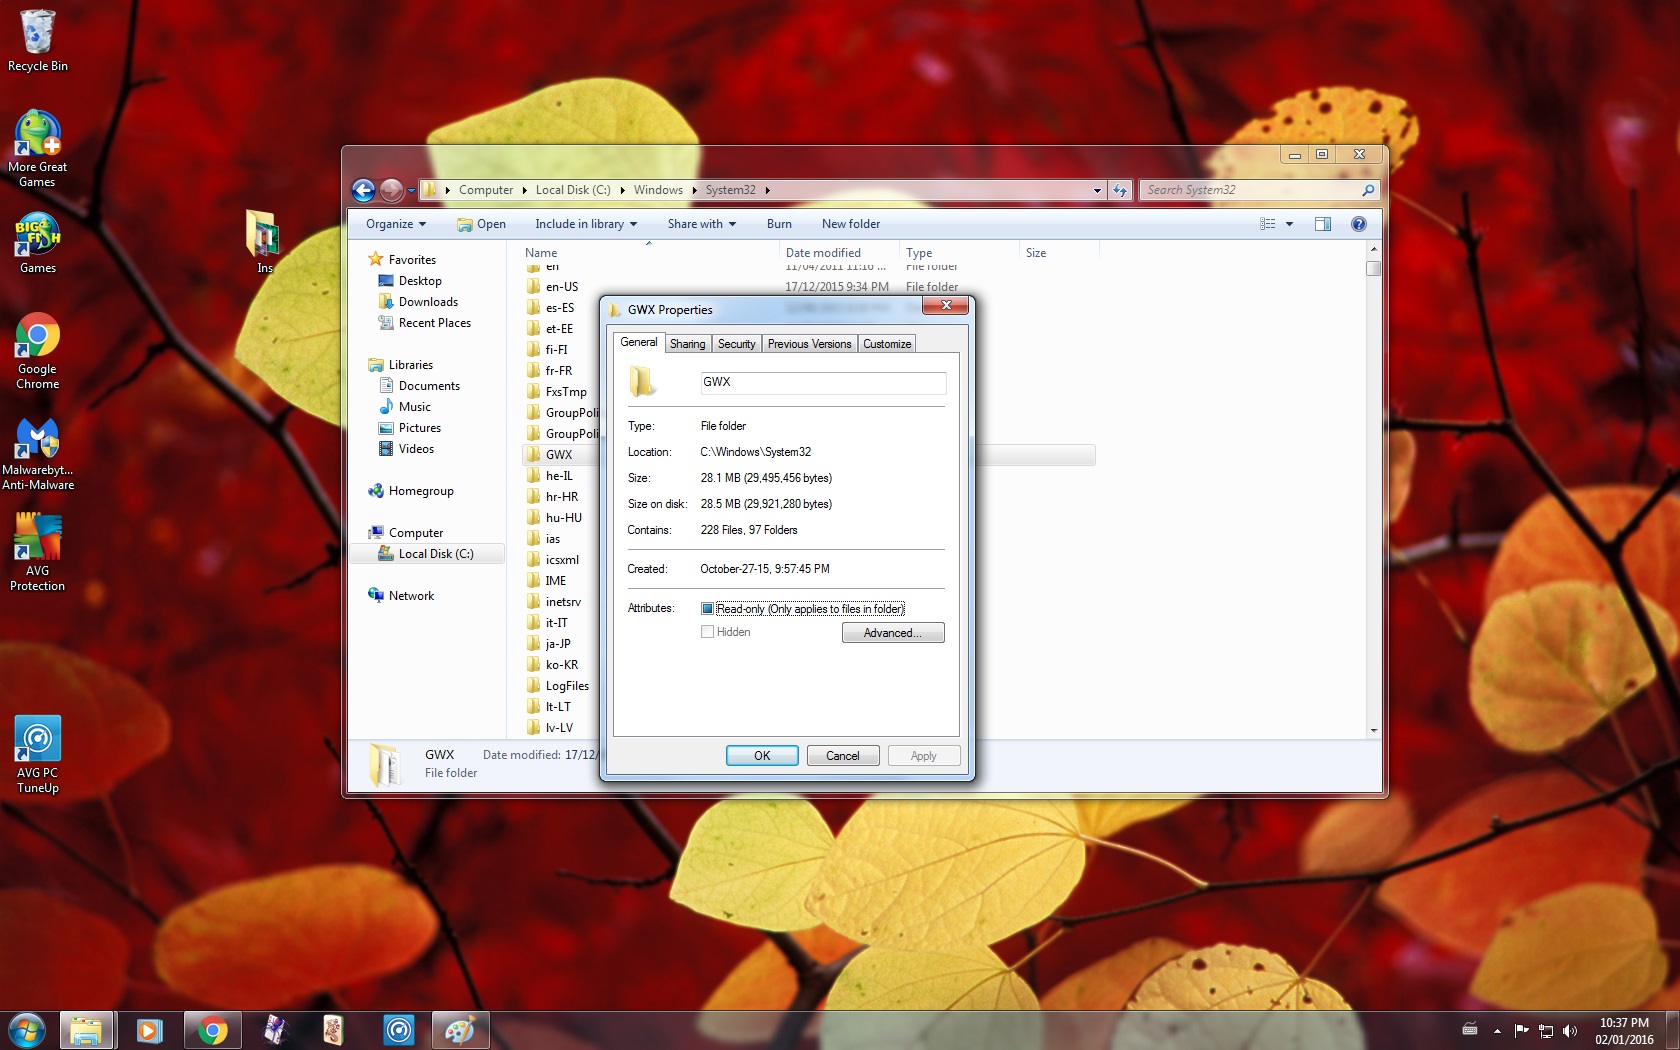

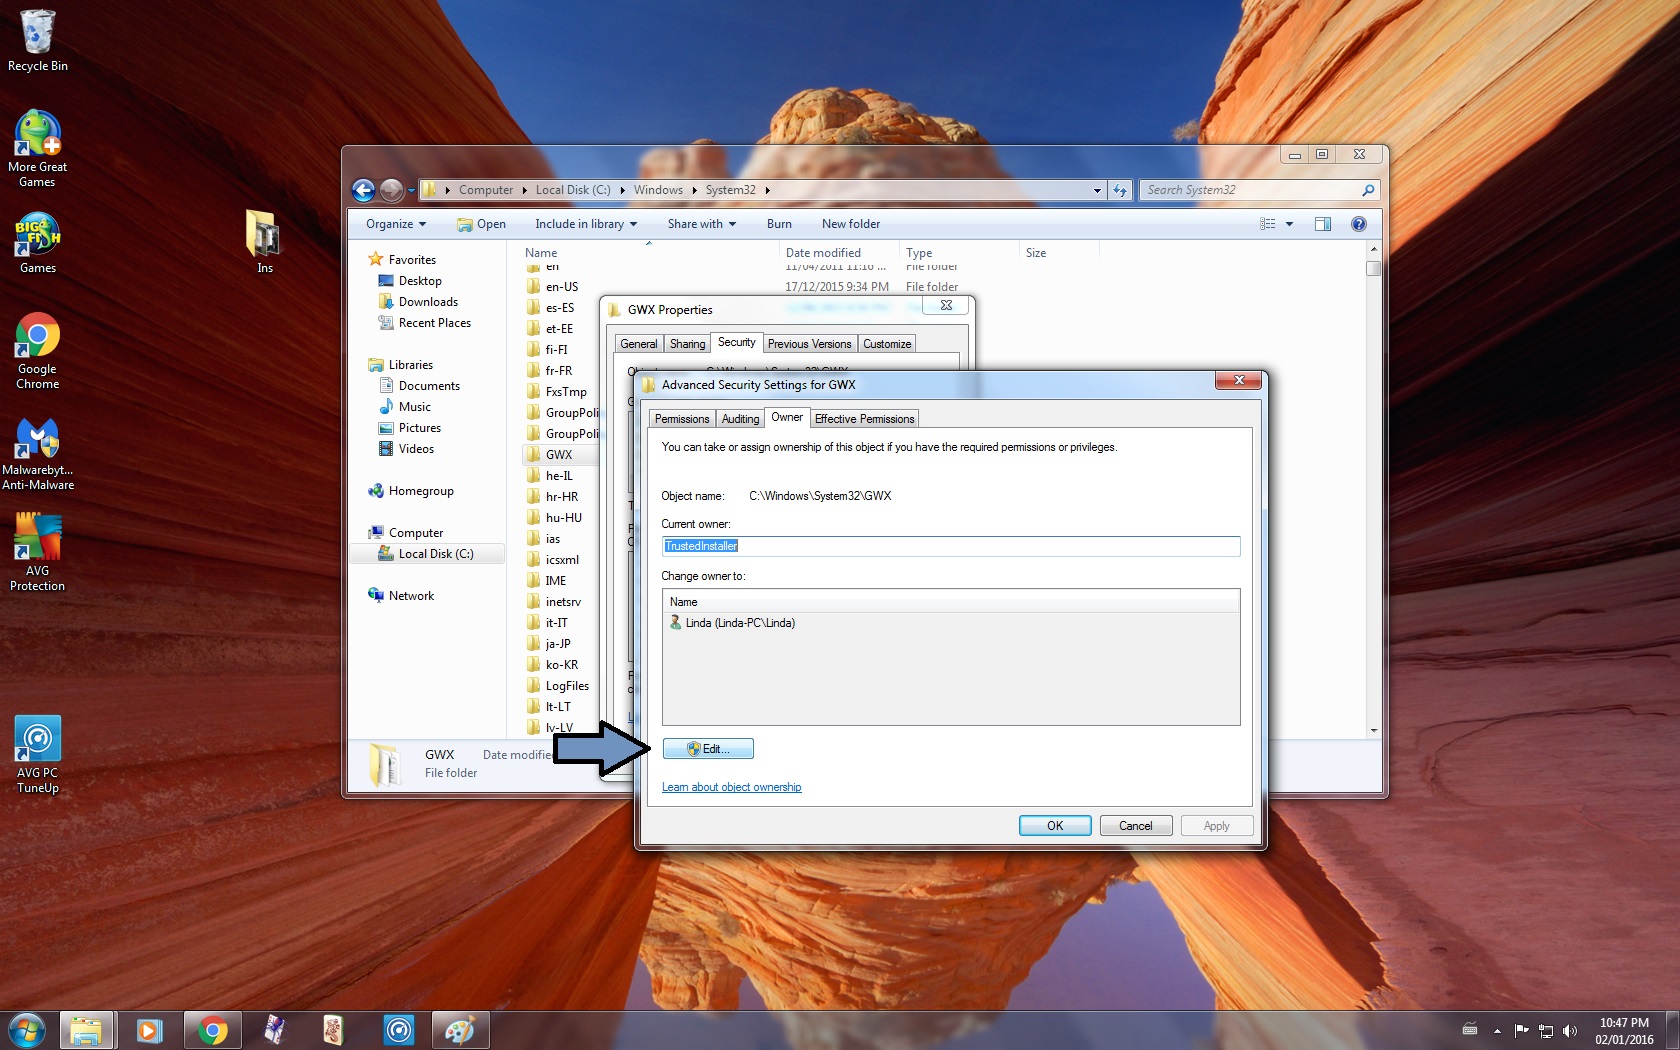
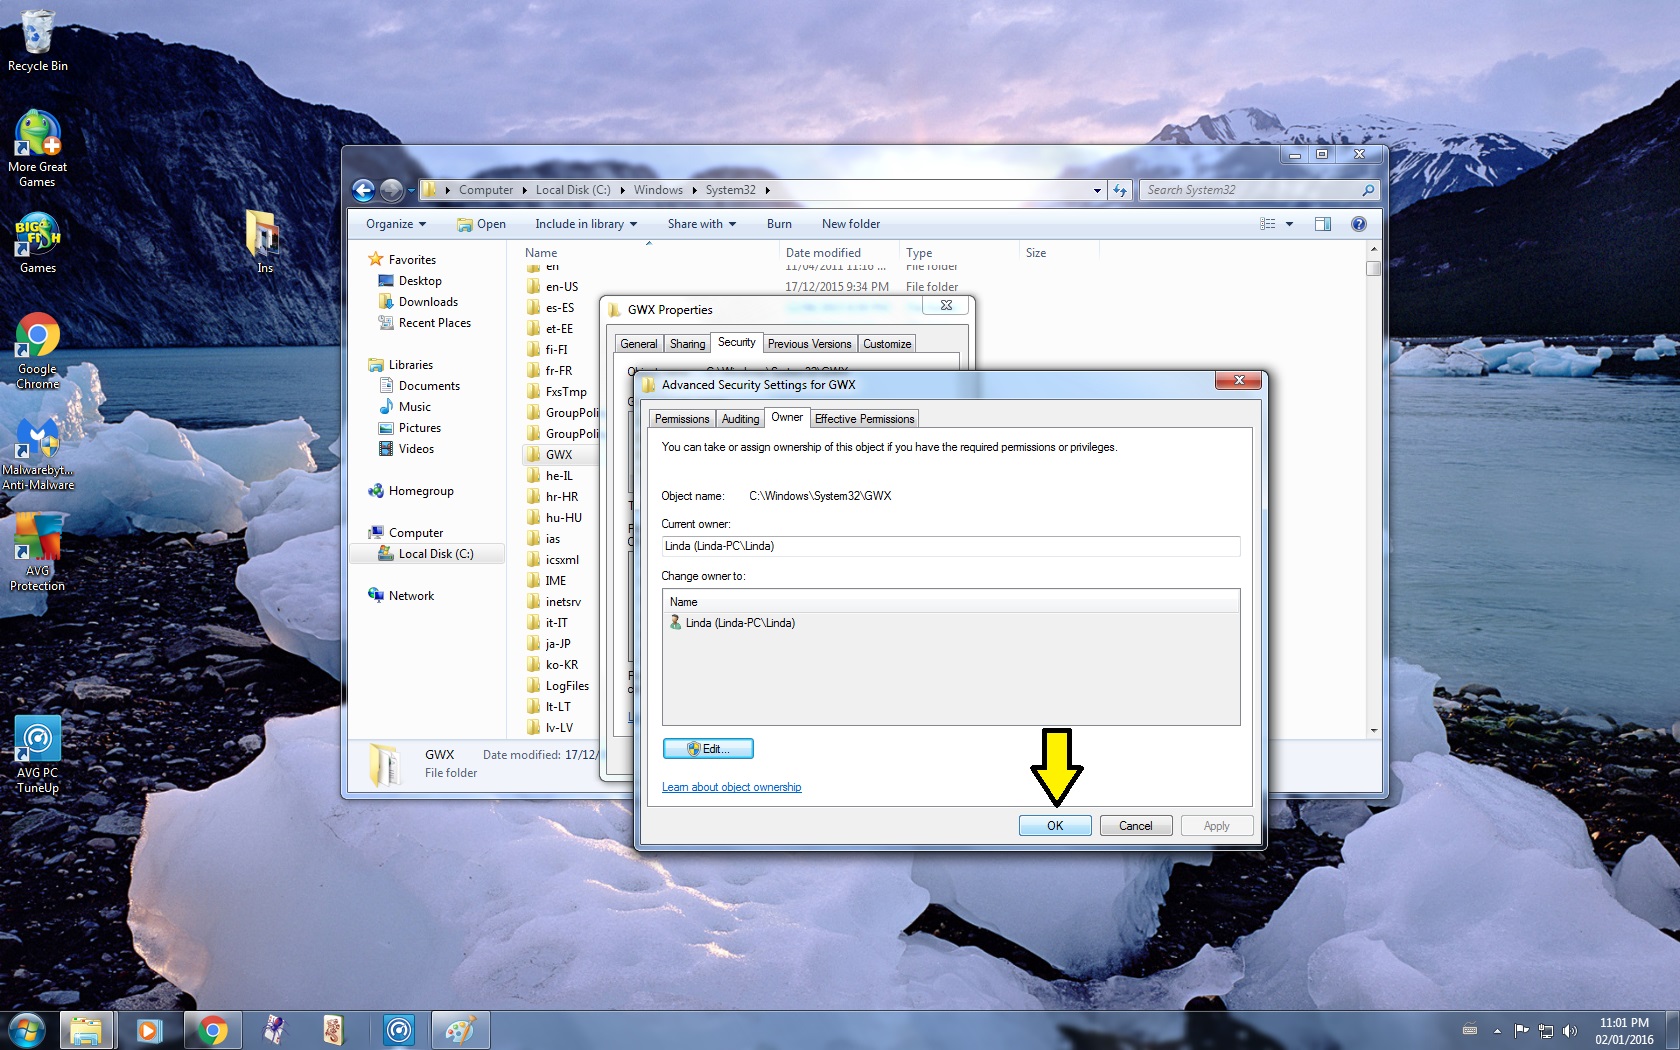
8. Take Ownership of the GWX Folder
- Right Click on the GWX Folder
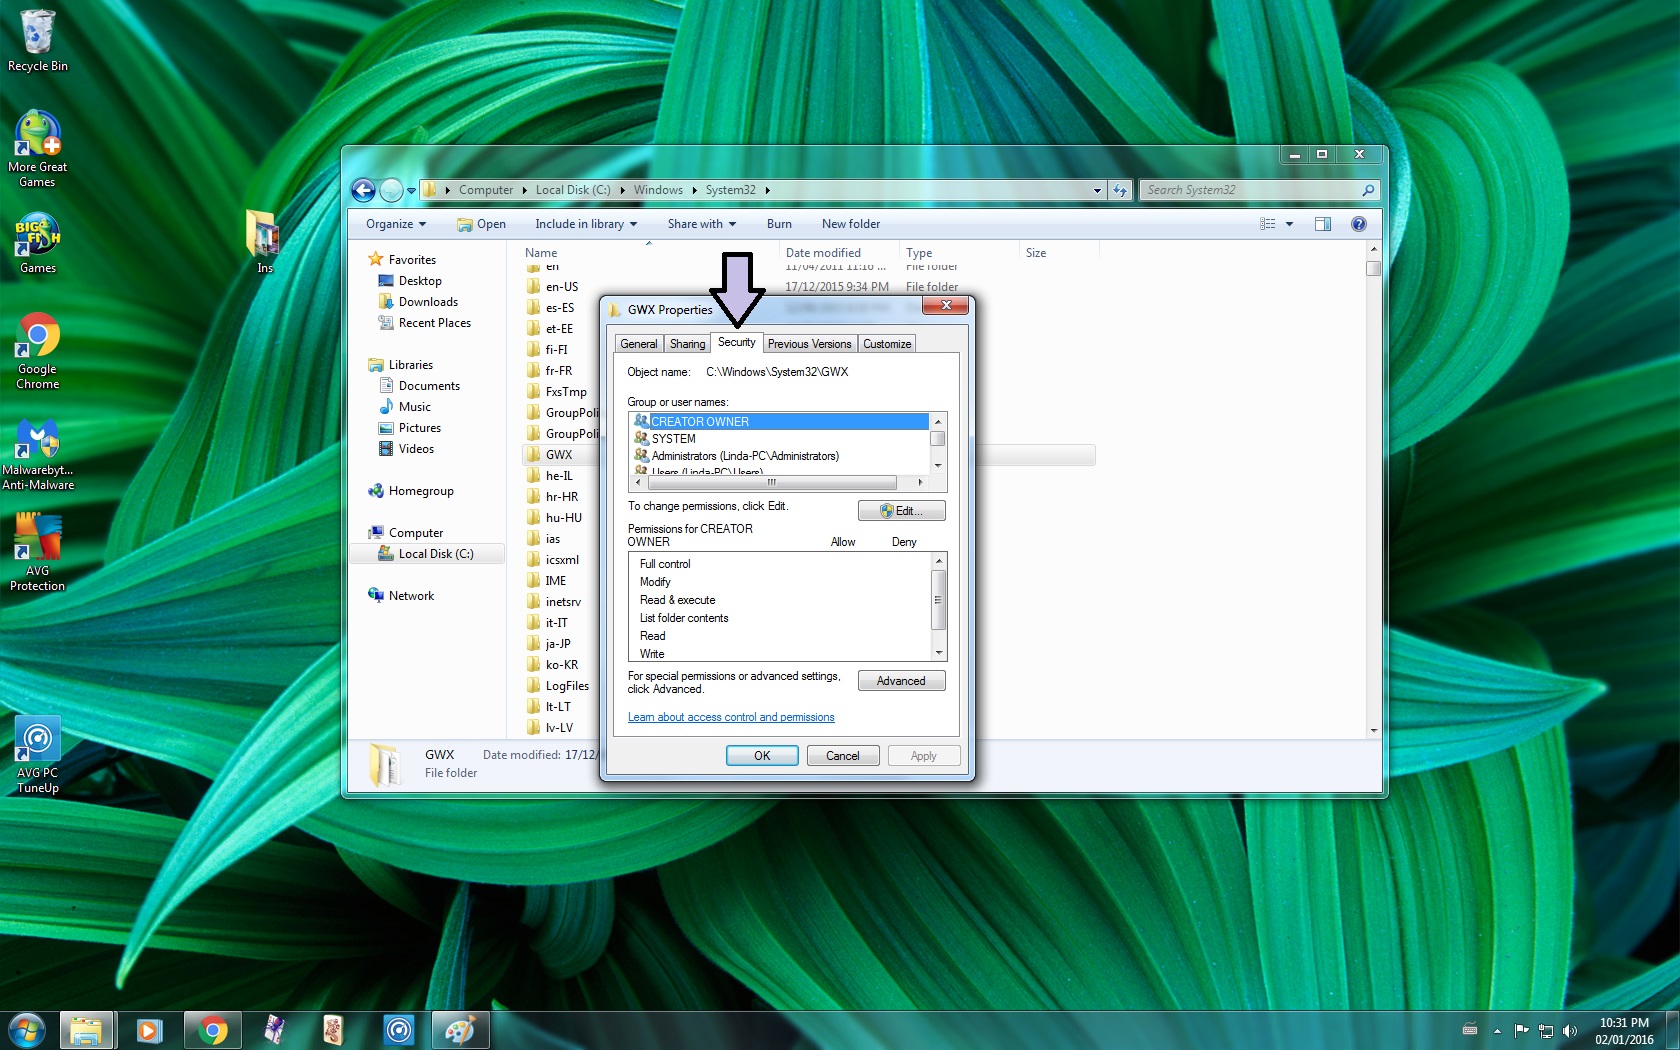
- Select Properties
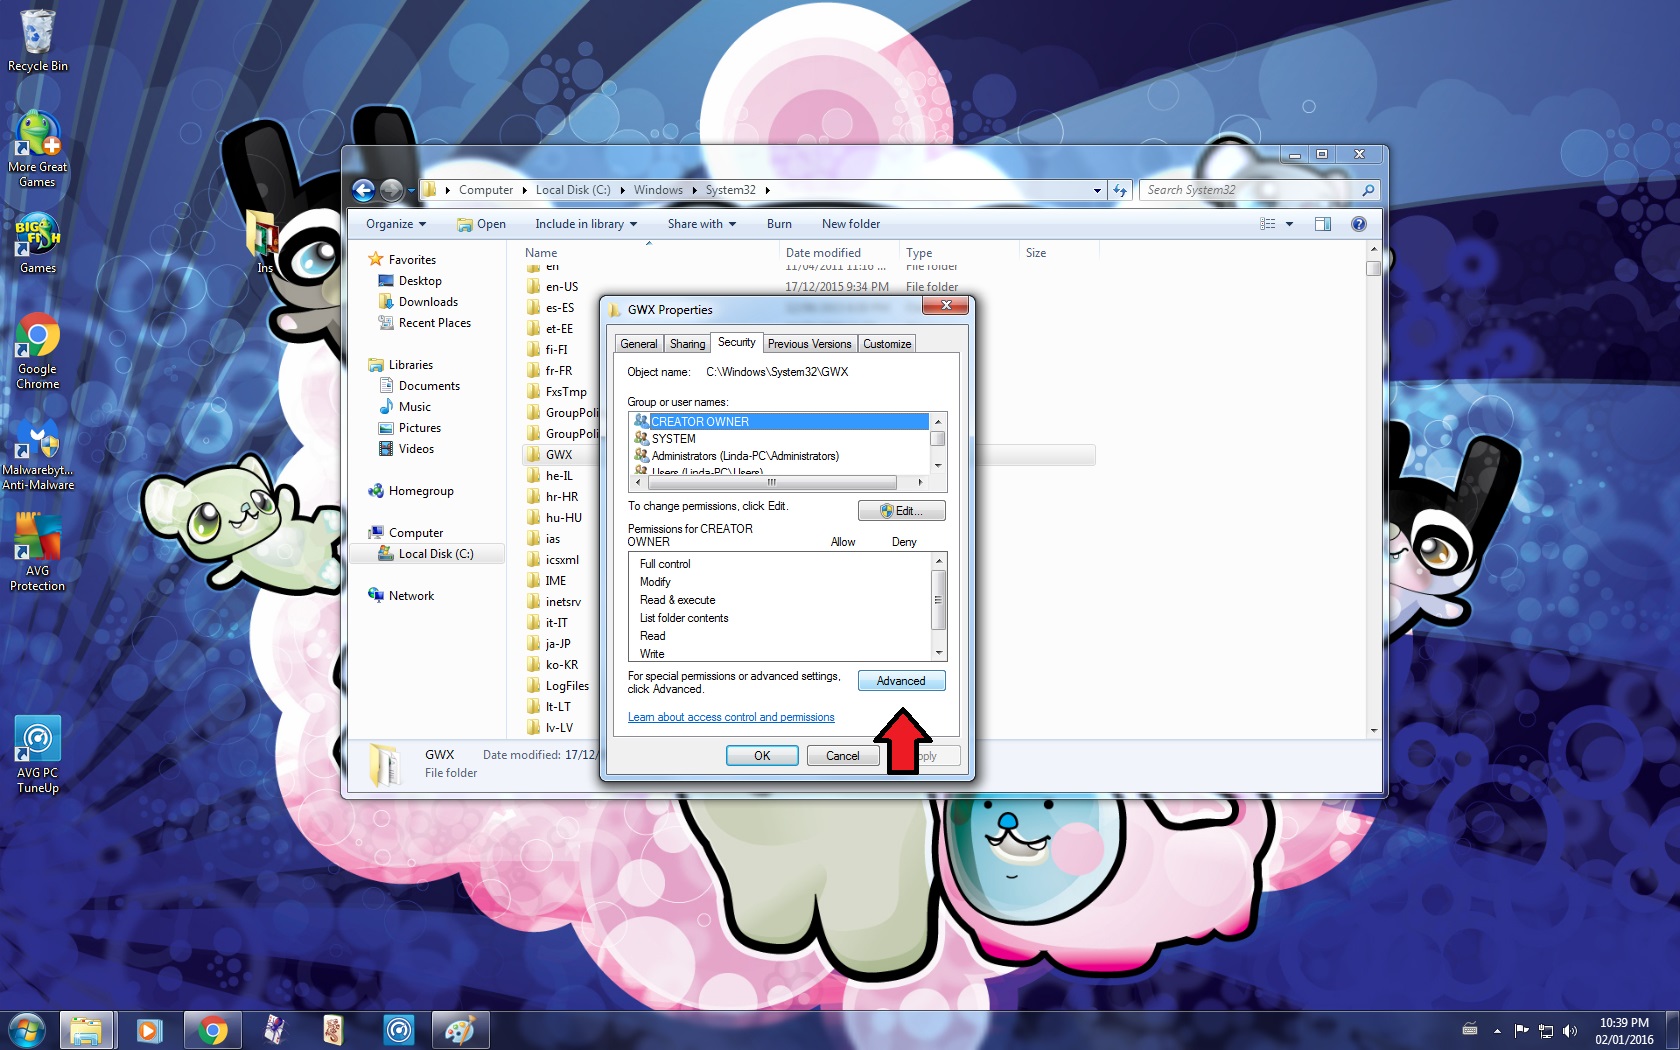
- Go to the Security Tab
-- Should be the third tab
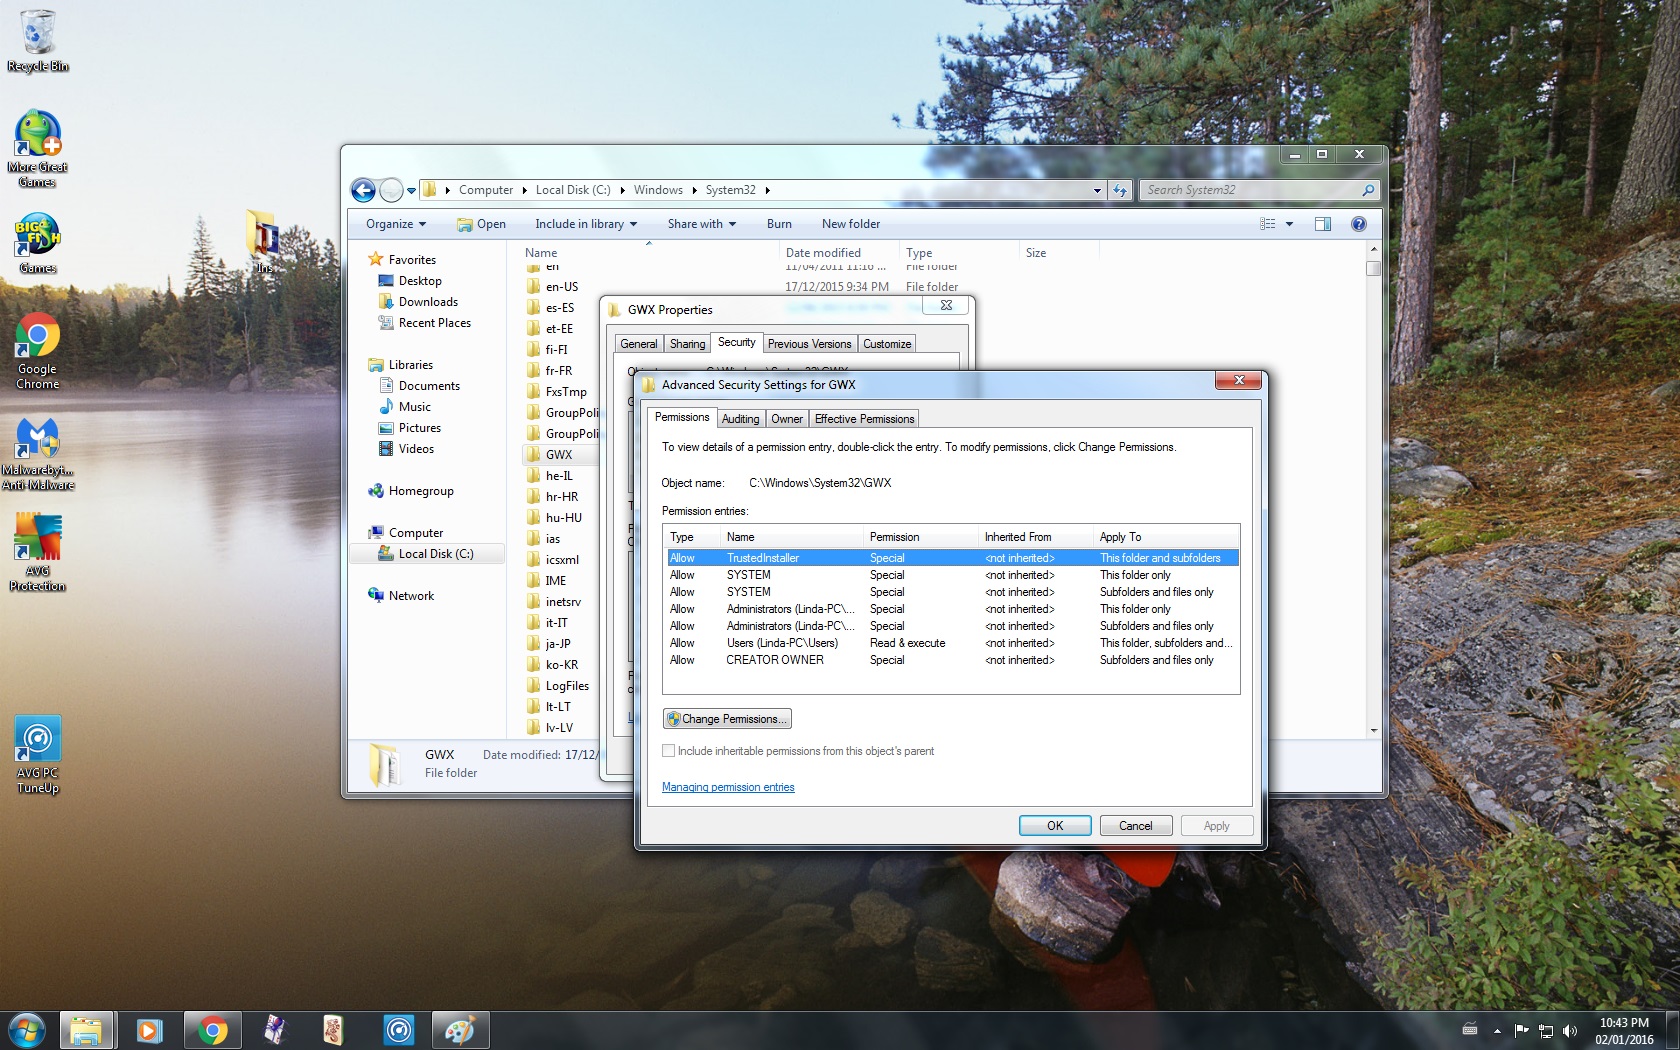
- Click Advanced
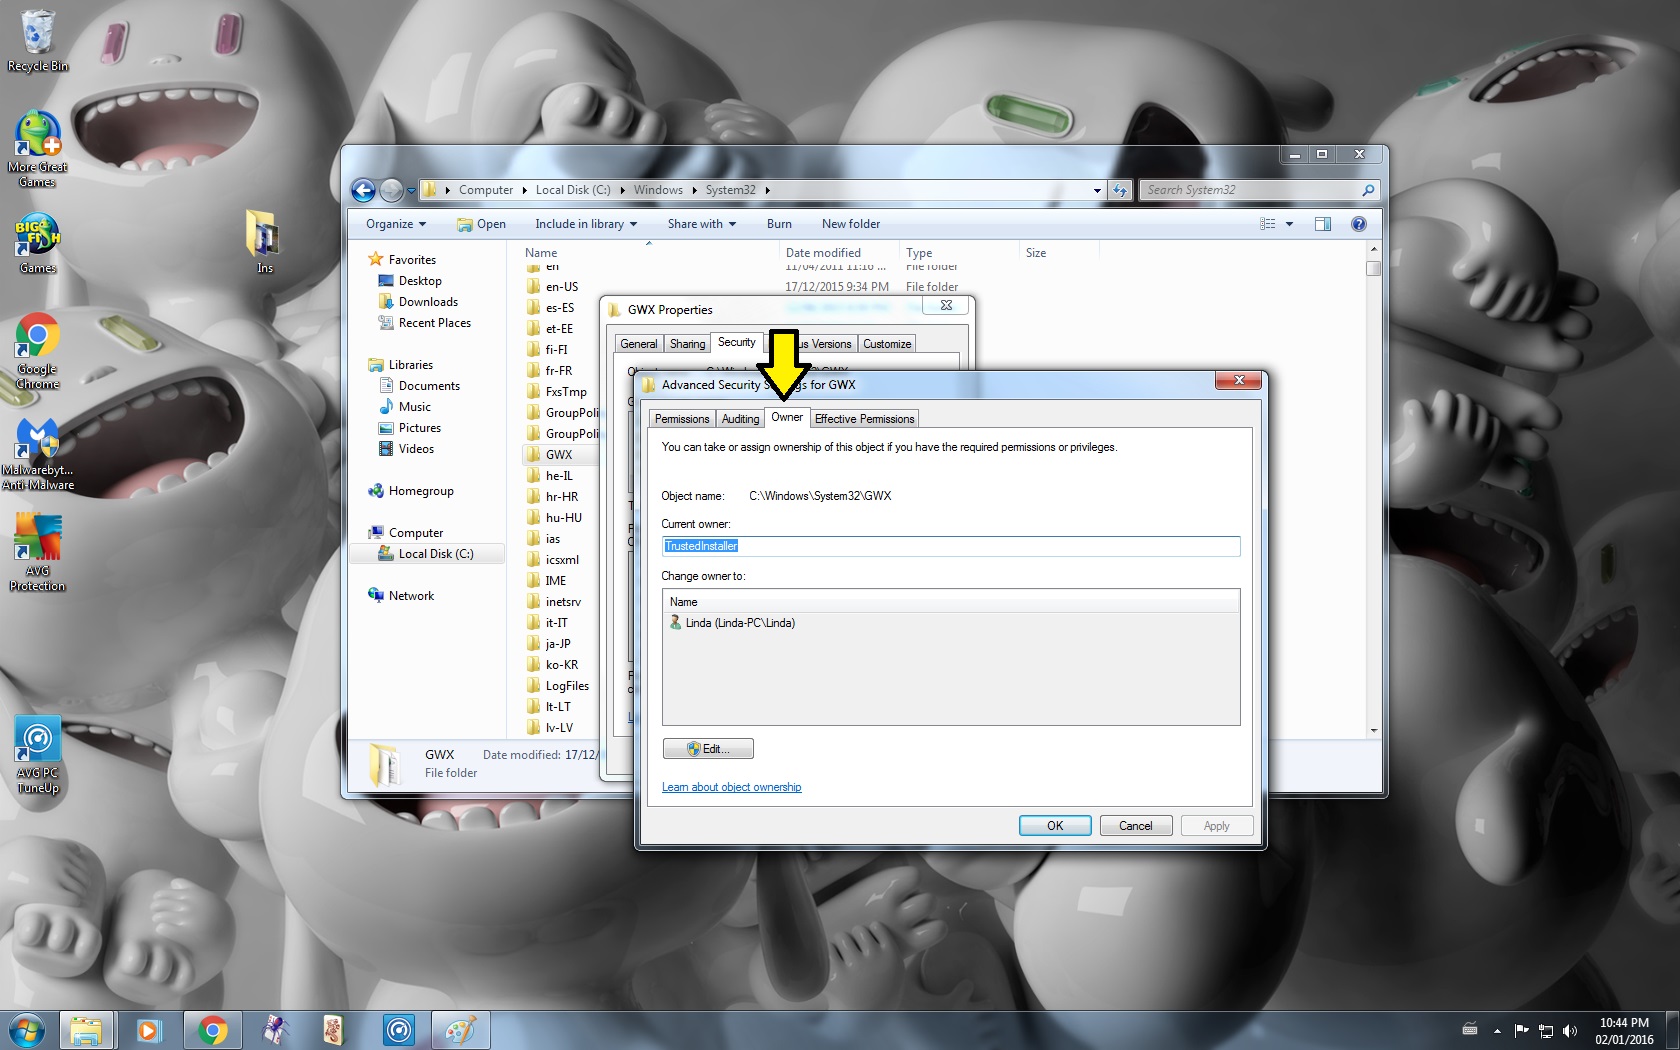
- Go to the Owner Tab
-- Should be the third tab
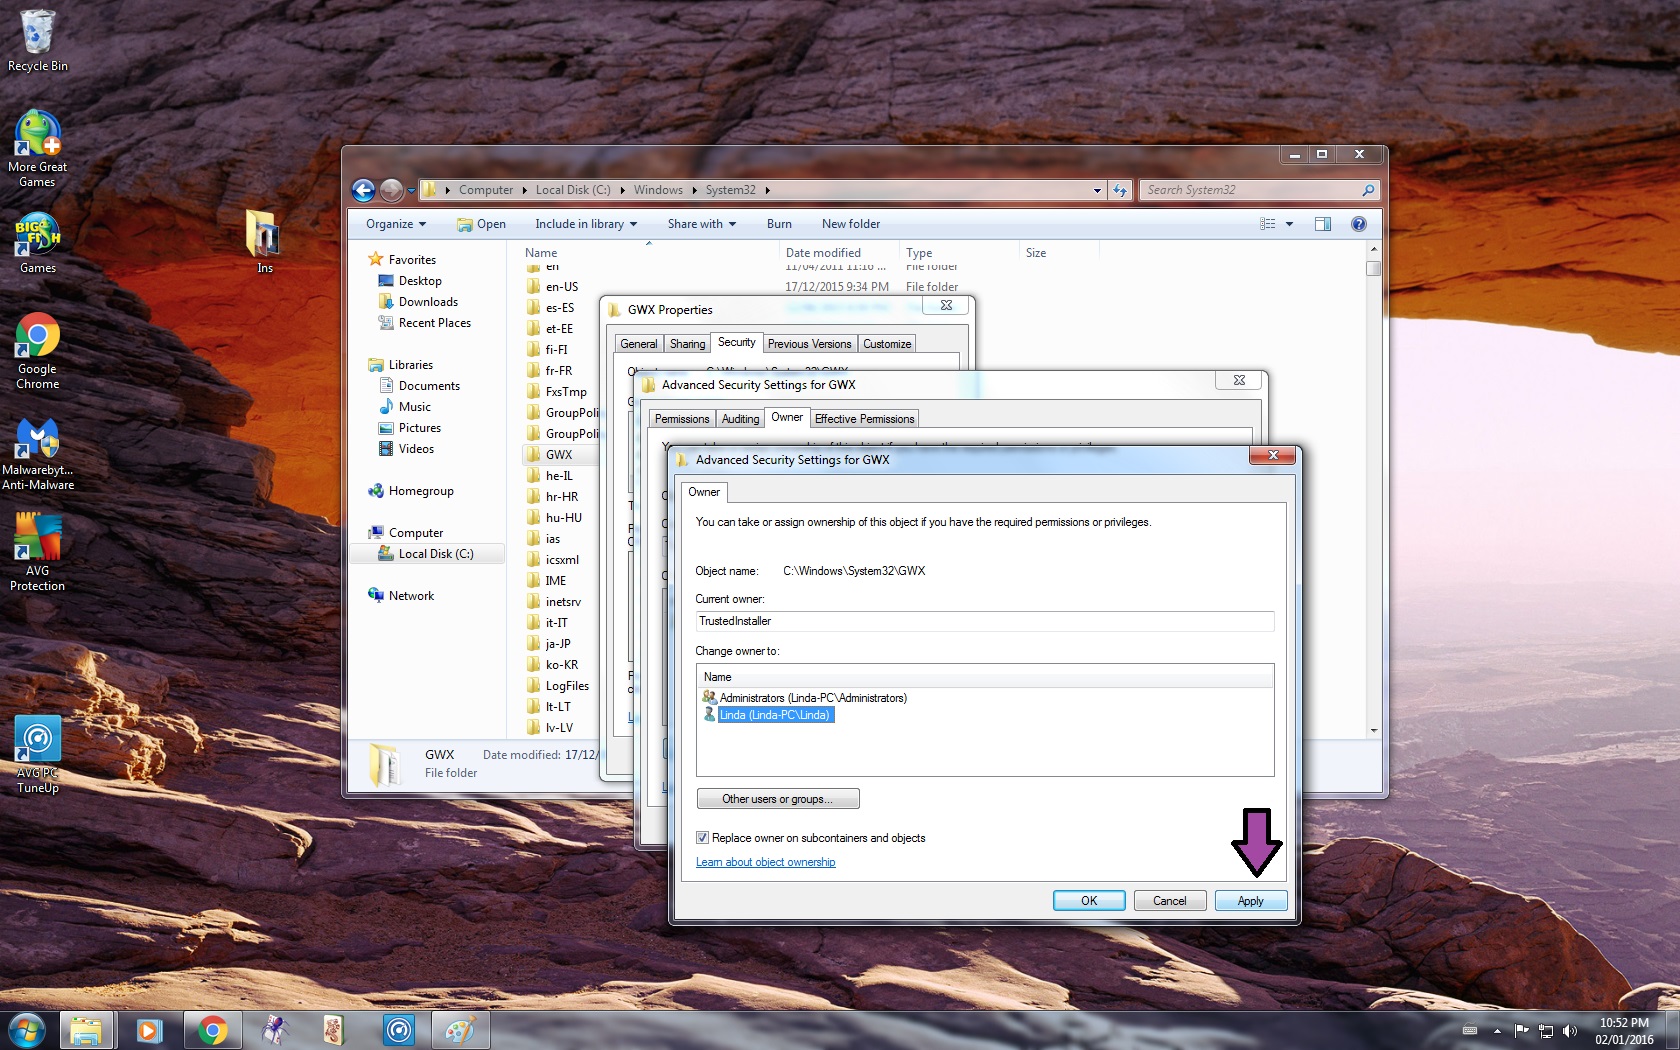
- Click on Edit
- Check off Replace owner on subcontainers and objects
- Select your User Name
-- For some computers you may need to select Administrator instead of your User Name
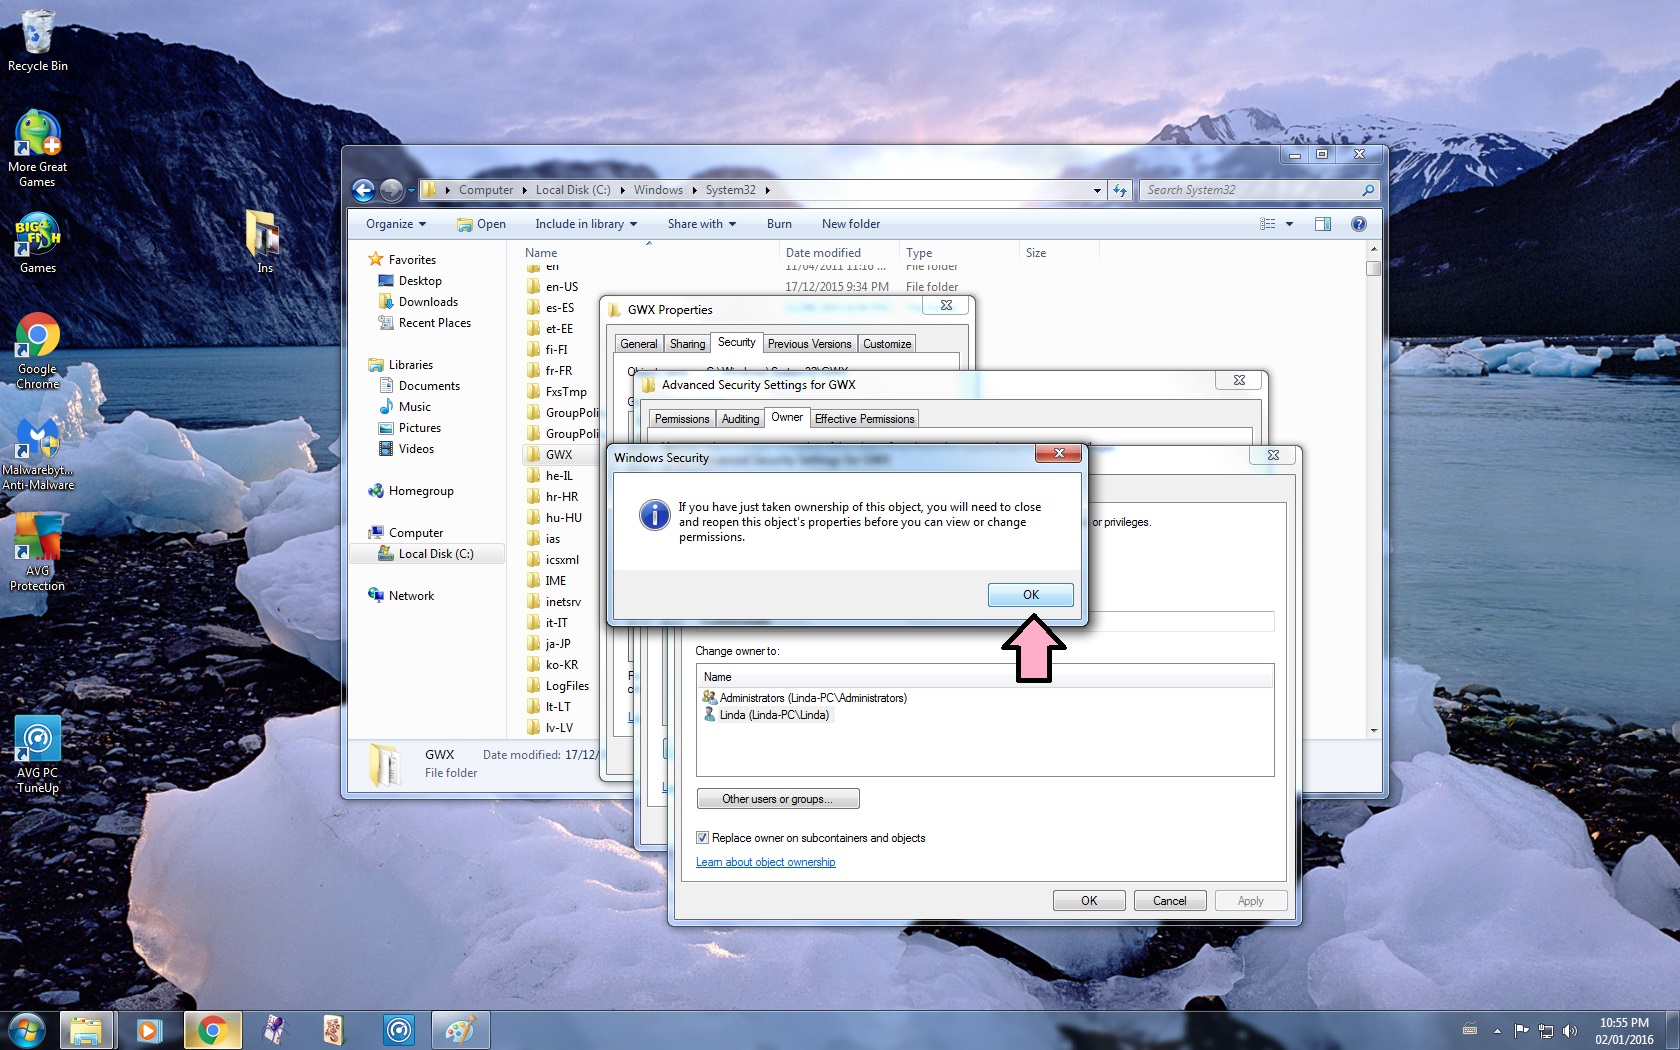
- Click Apply
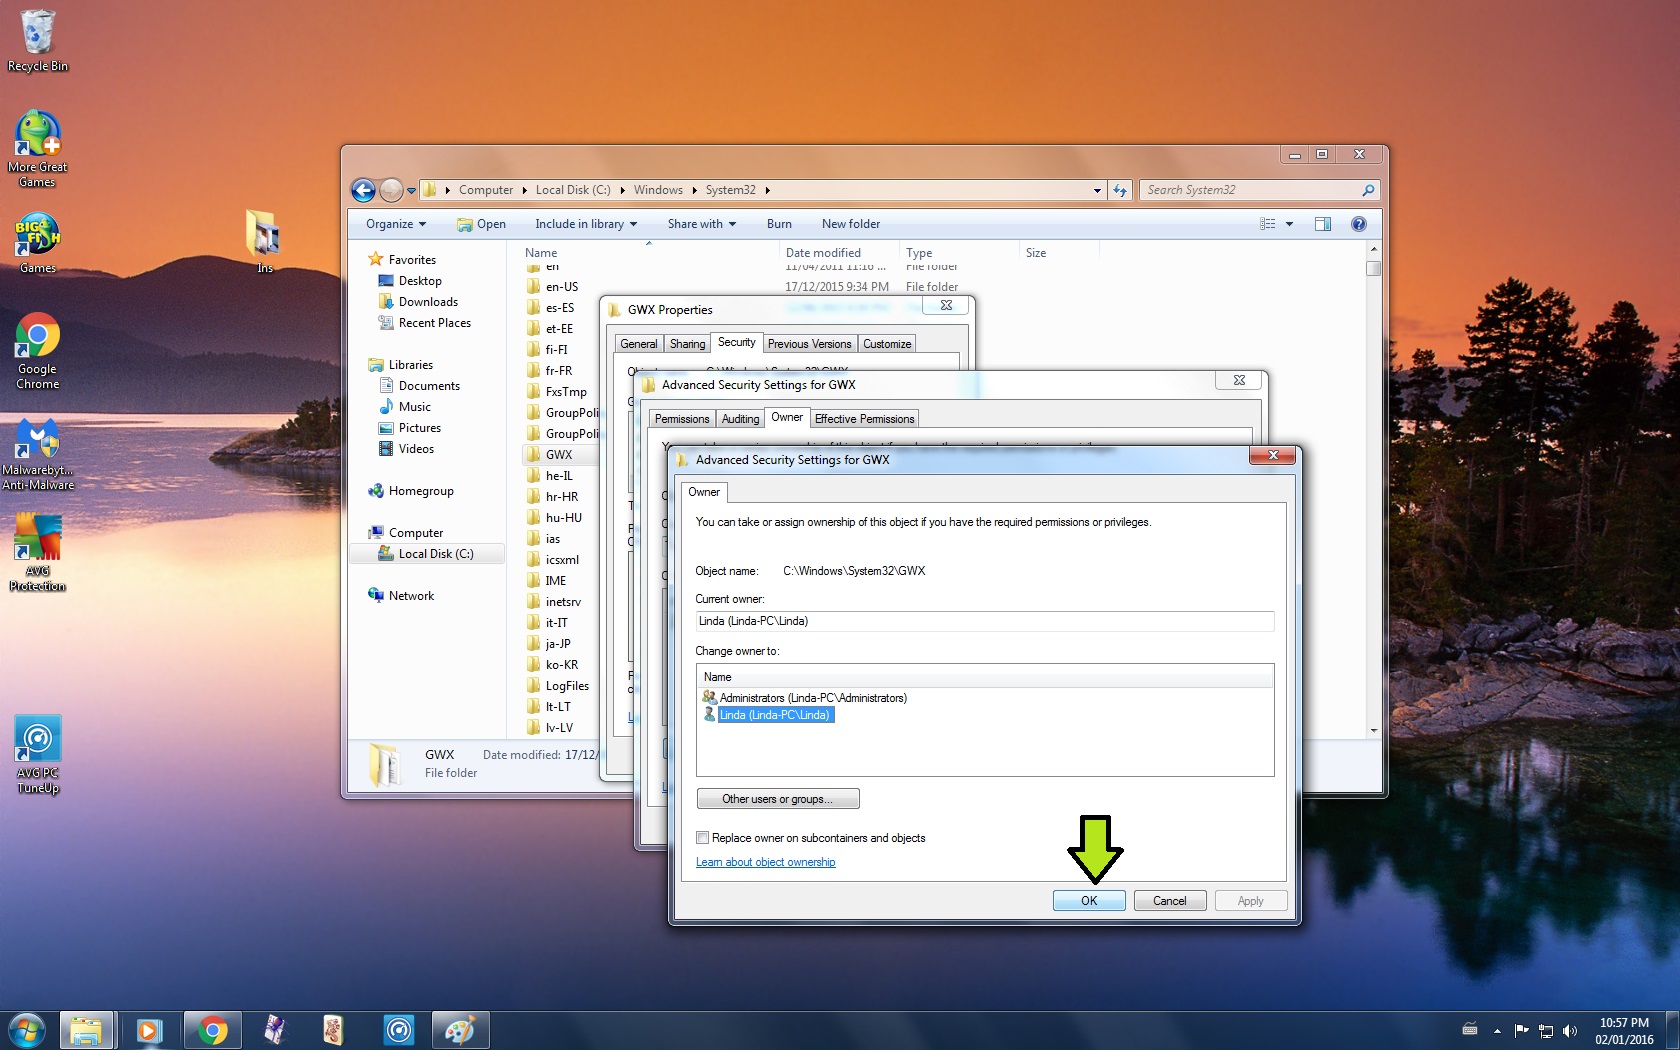
- Click Ok
- Click Ok again
- Click Ok
- Click Ok again
Windows 7 : Part 4

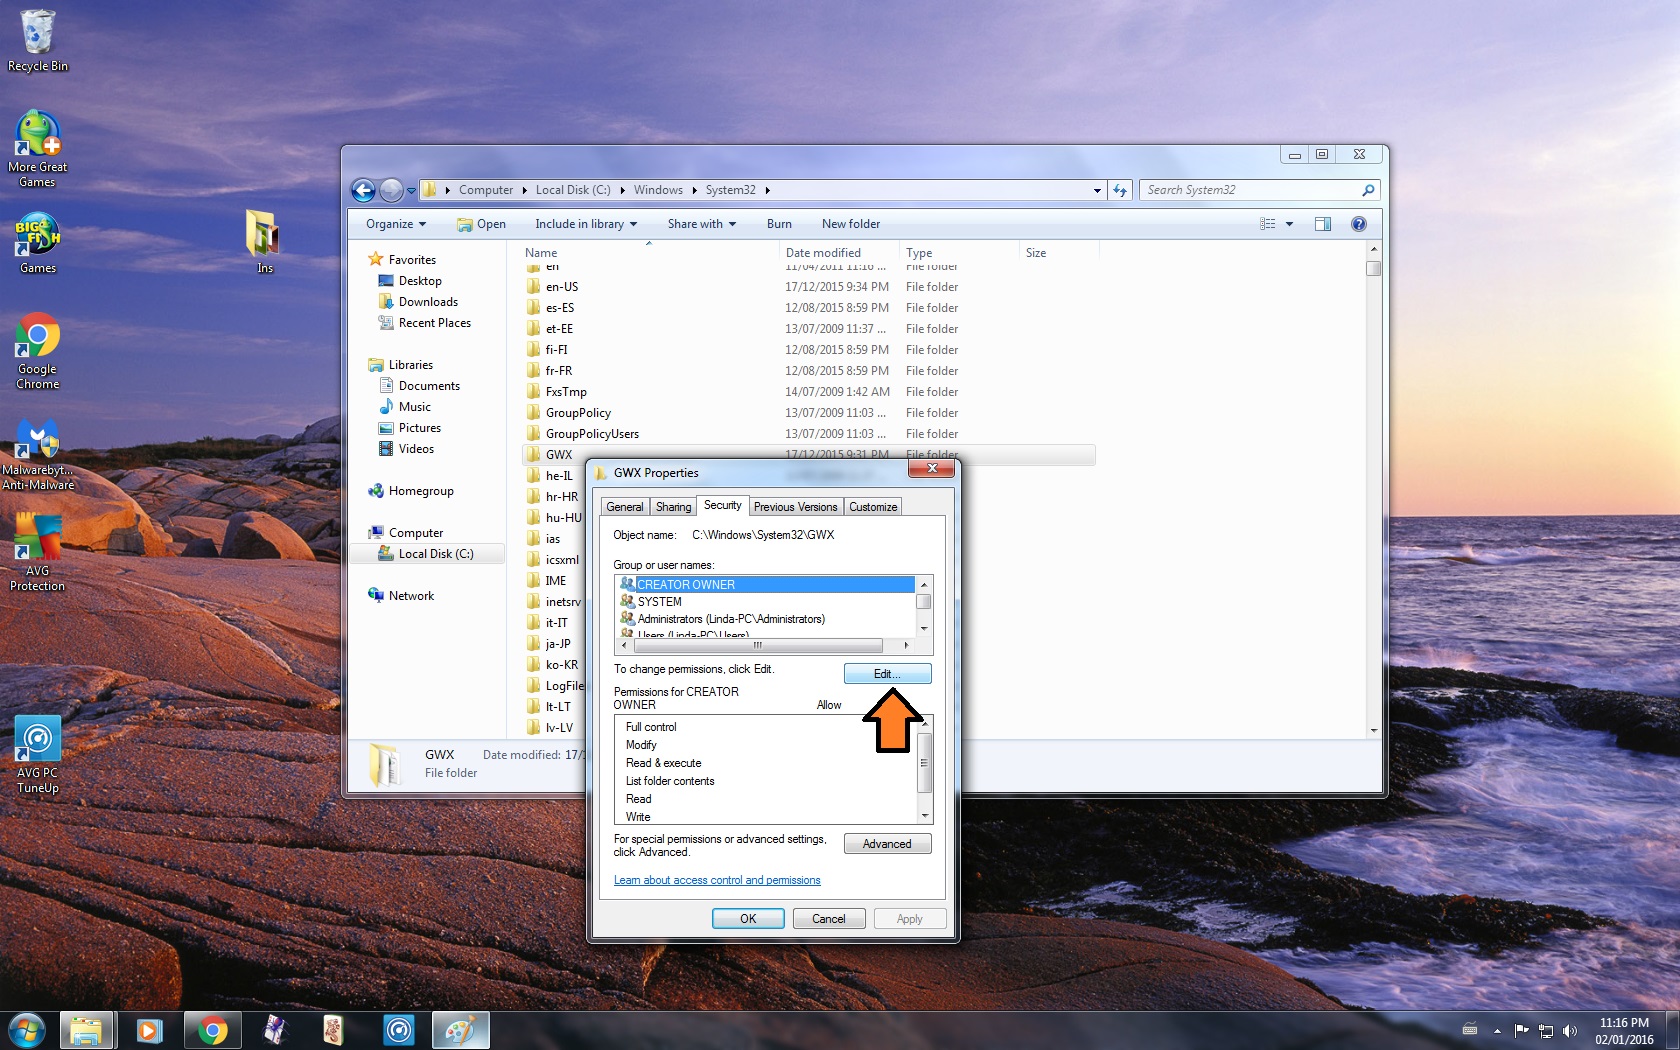

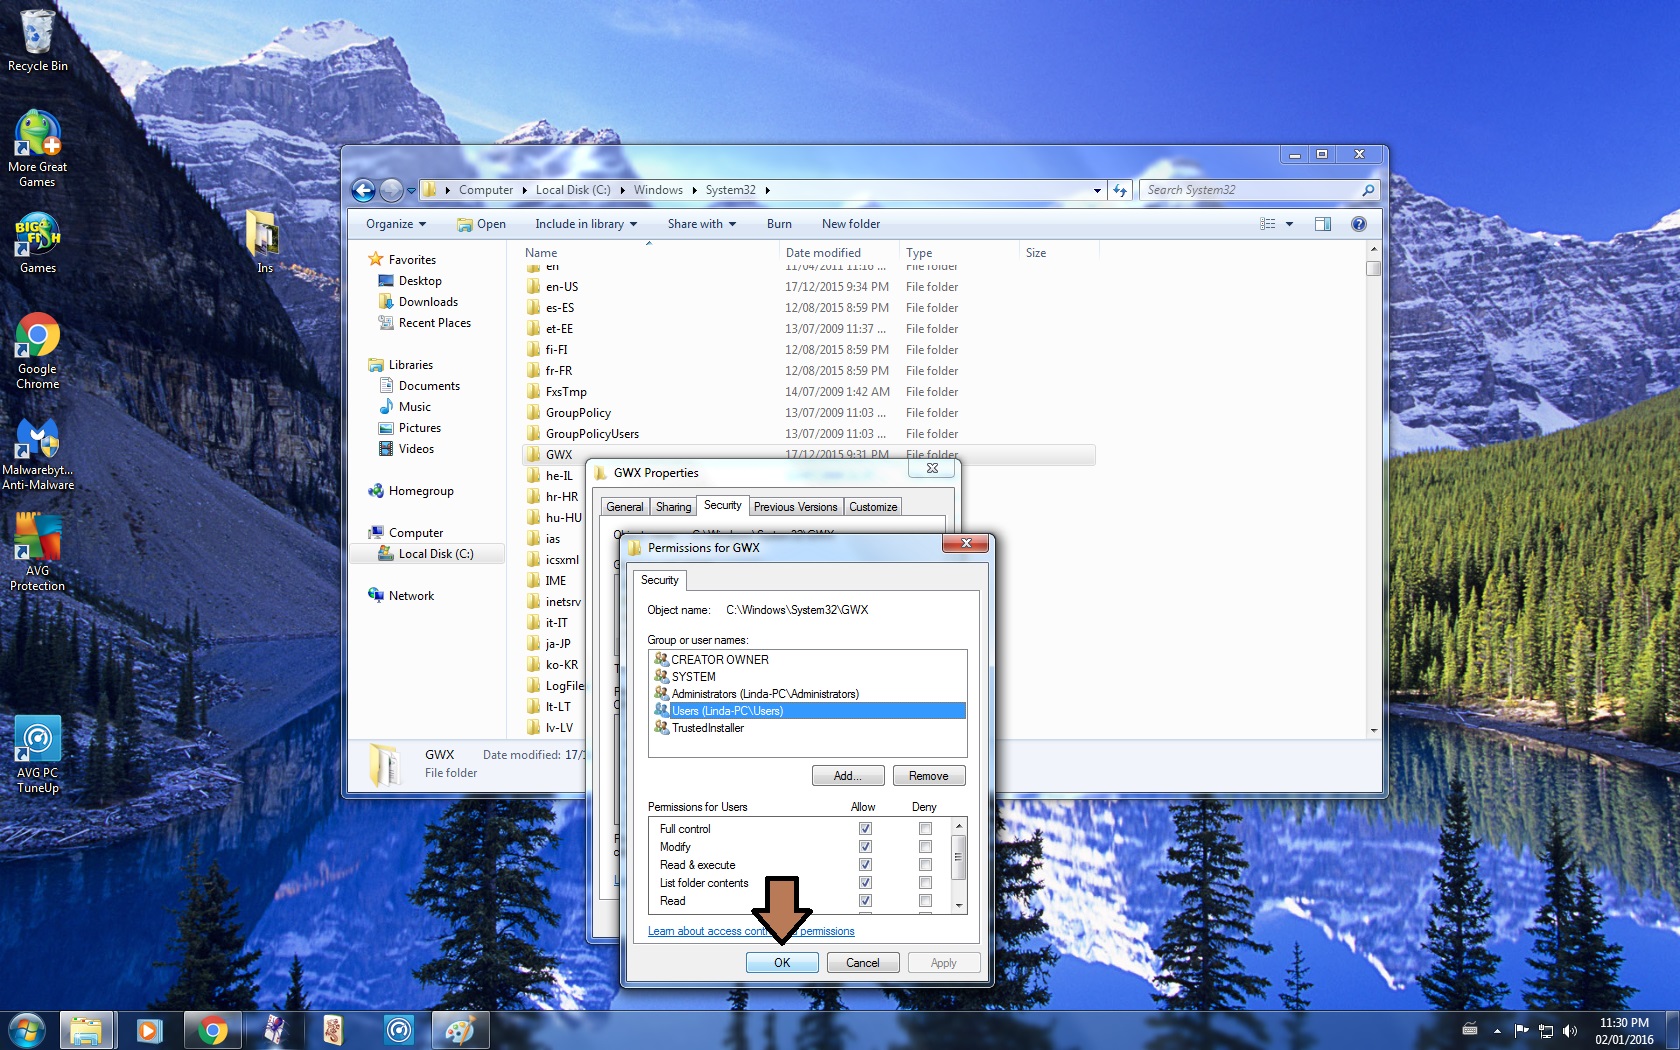


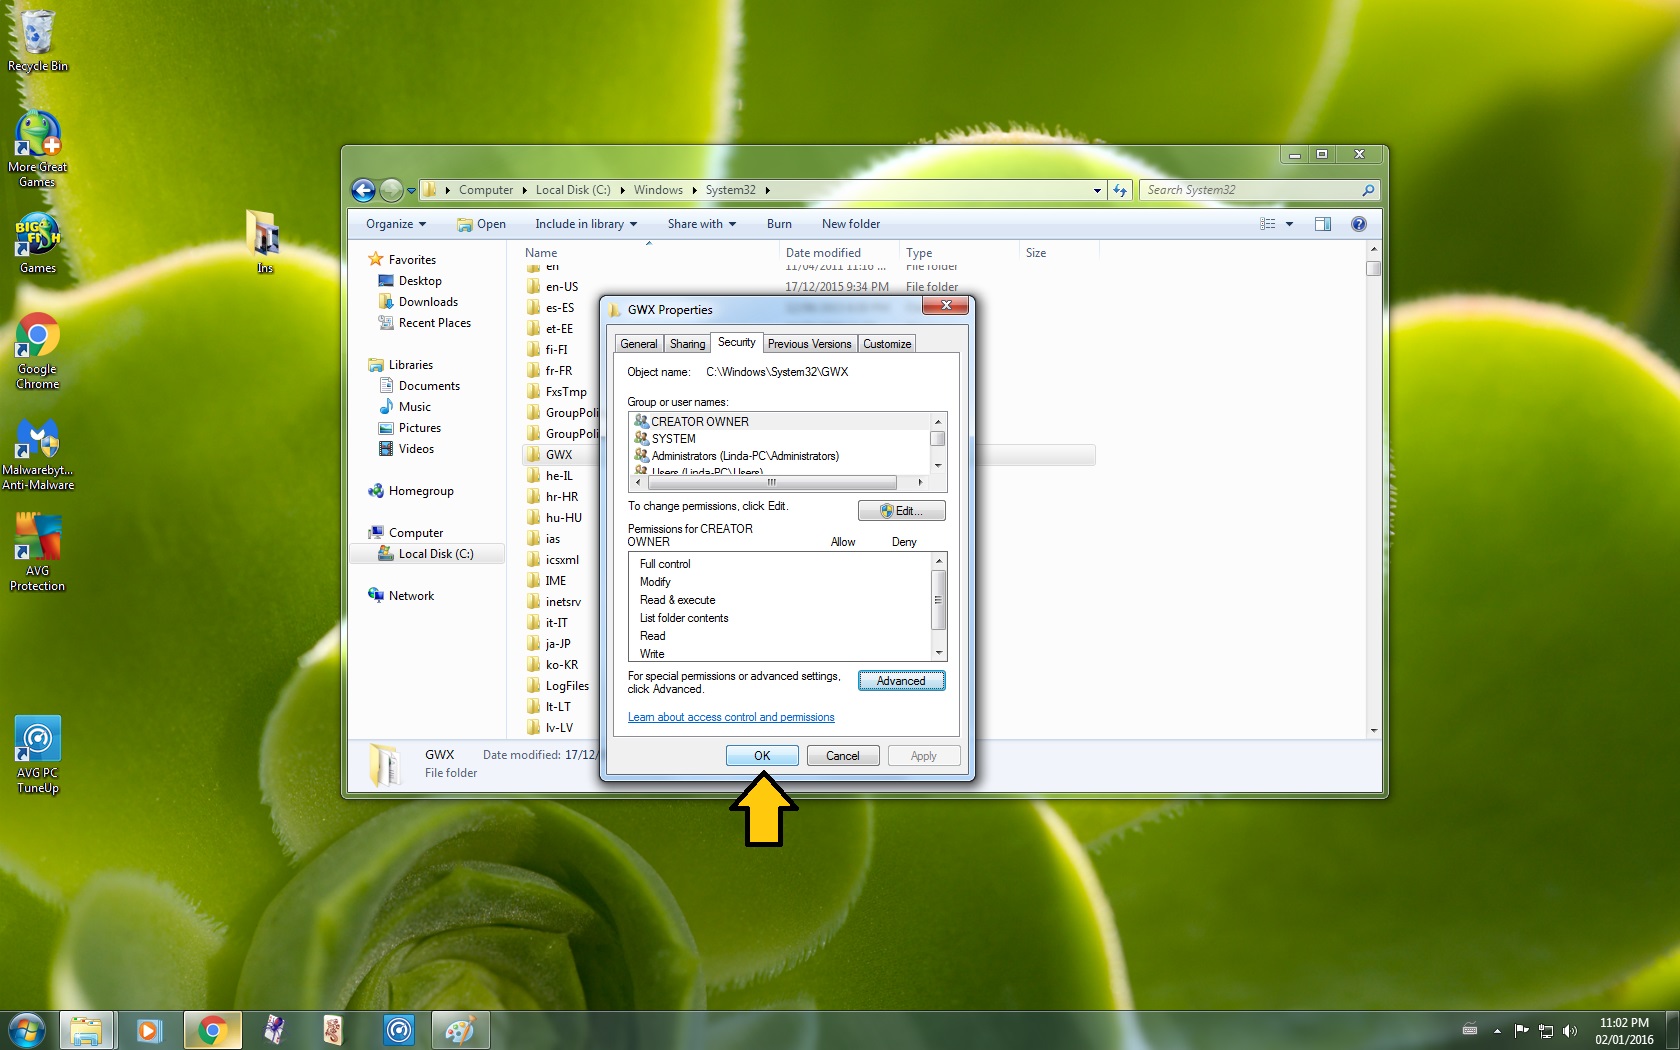
9. Grant yourself Full Control Permissions and Rights of the GWX Folder
- Right Click on the GWX Folder
- Select Properties
- Go to the Security Tab
-- Should be the third tab
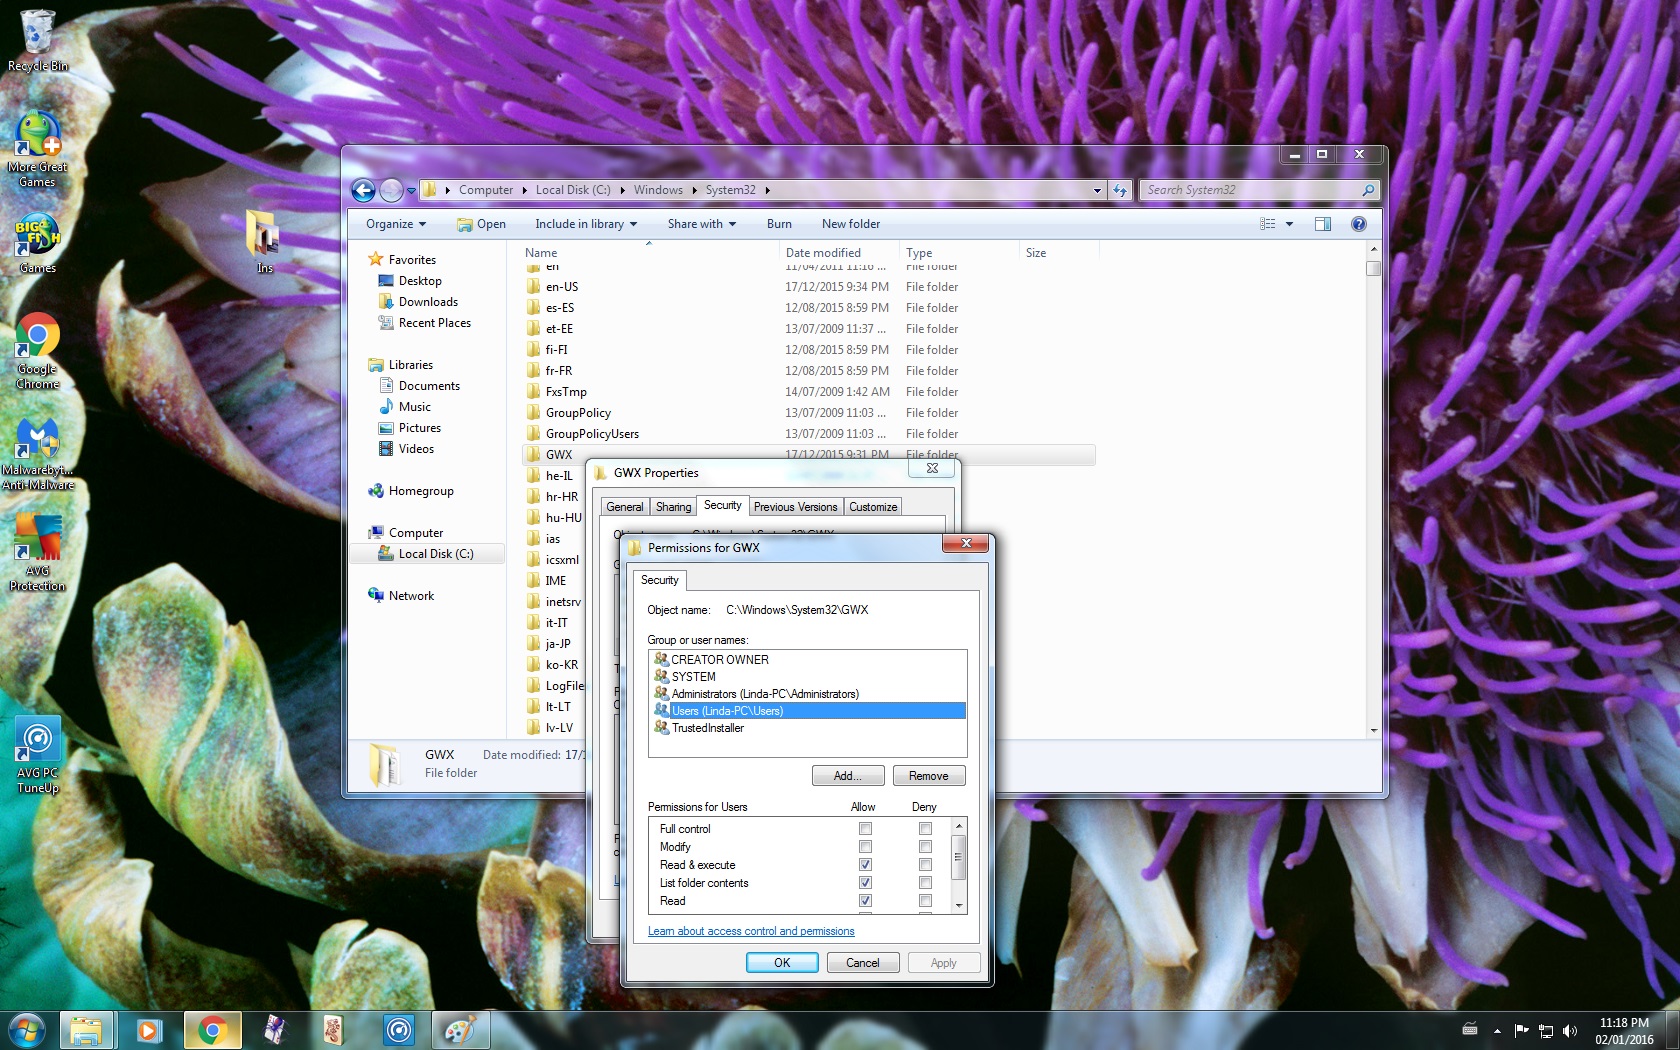
- Click Edit
- Select your User Name
-- For some computers you may need to select Administrator instead of your User Name
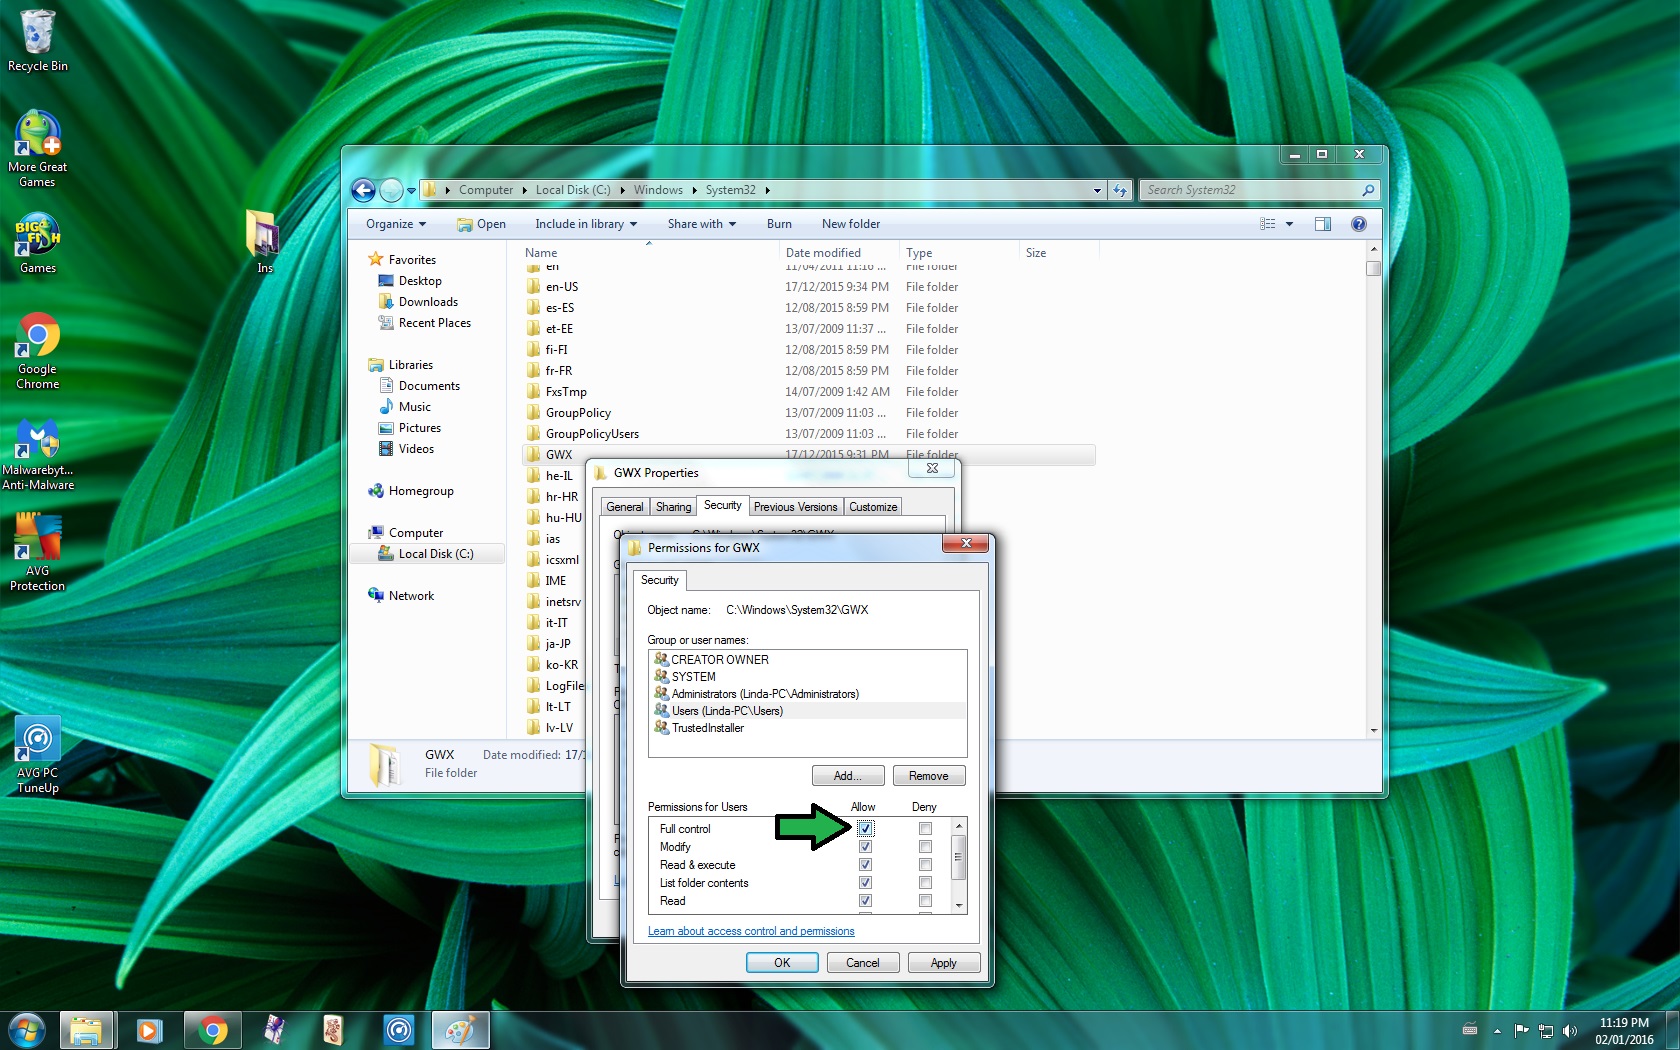
- Check off Allow for Full Control
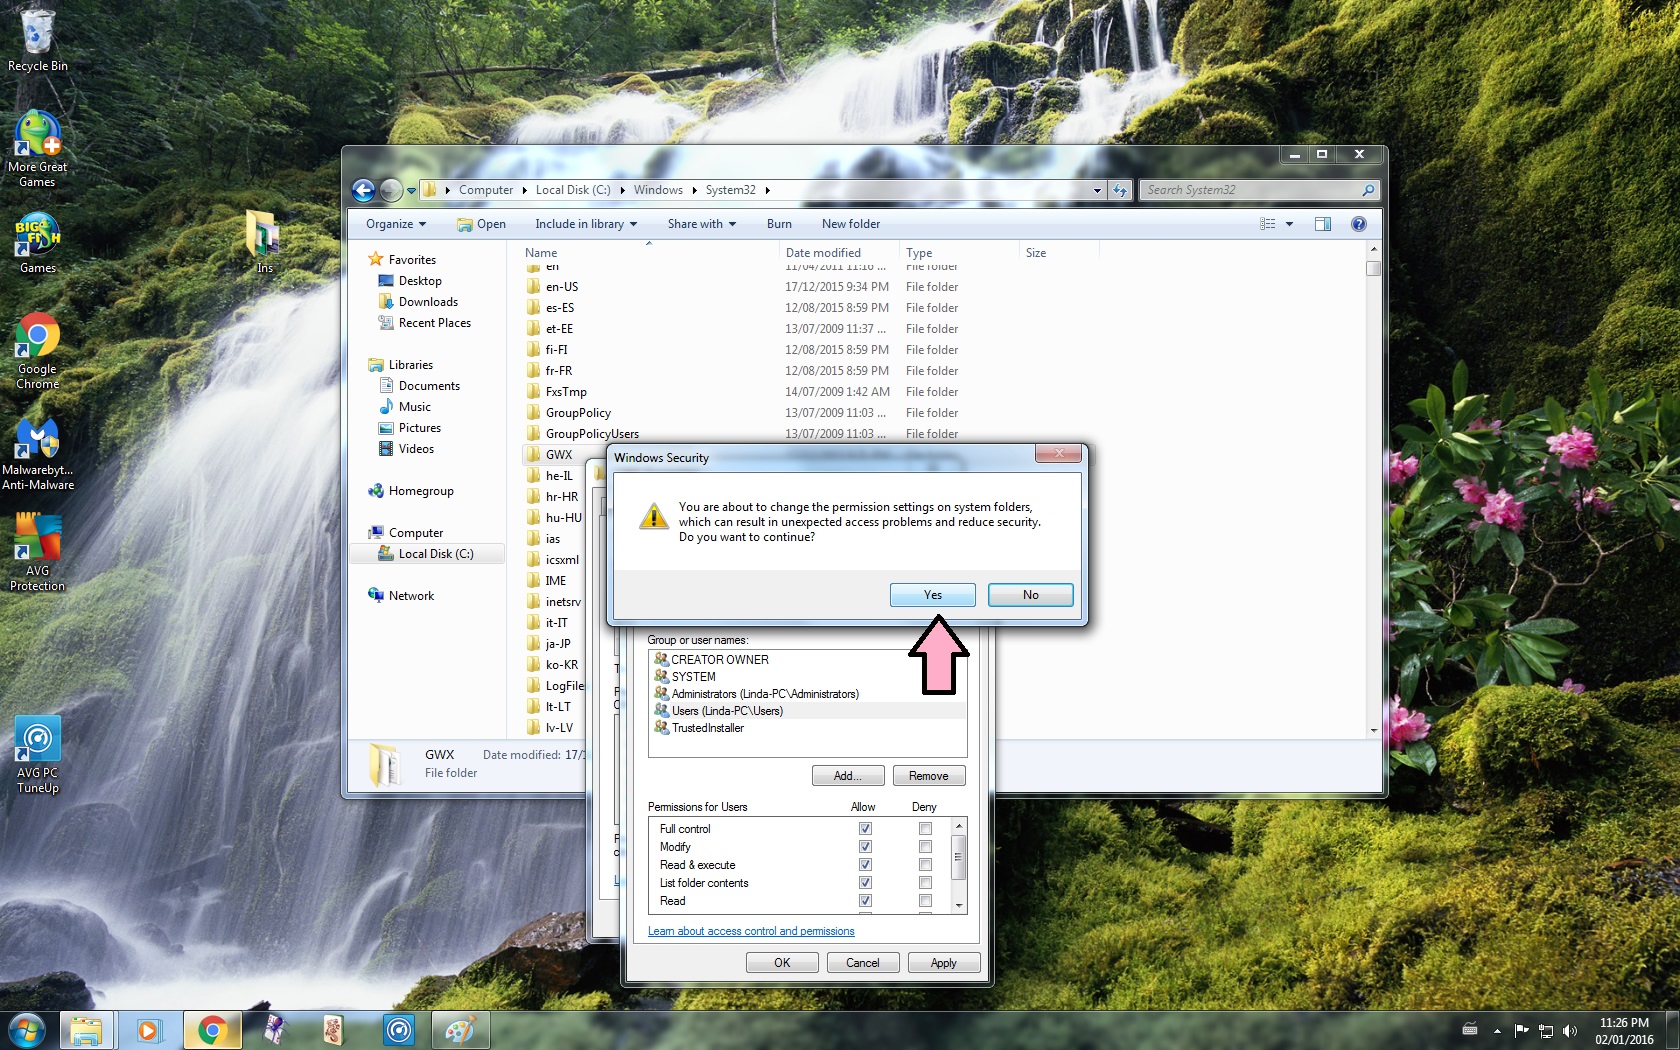
- Click Apply
- Click Yes
- Click Ok
- Click Ok again
10. Delete the GWX Folder
- Right Click on the GWX Folder
- Select Delete
- Click Yes
-- You may get a Folder Access Denied message
-- If you receive this message, Click Continue
- Close the window
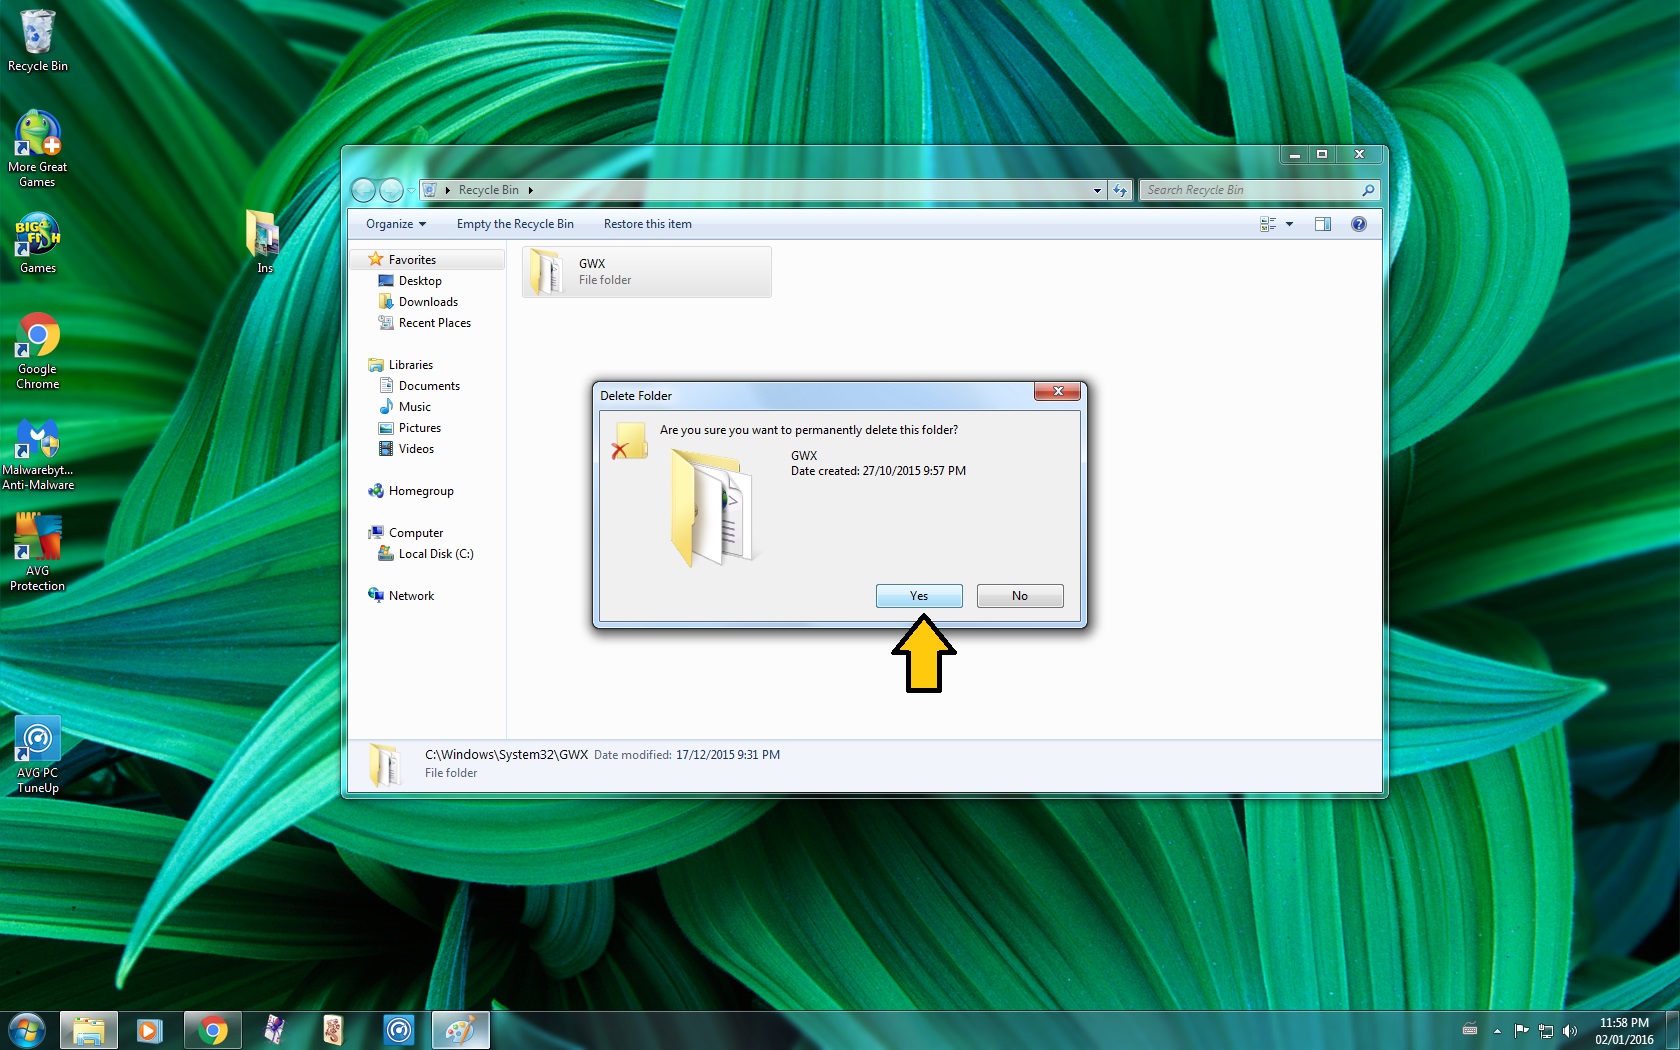
11. Delete the GWX Folder from Recycle Bin
- Double Click on the Recycle Bin icon on your Desktop
- Select the GWX Folder
- Right Click
- Select Delete
- Click Yes
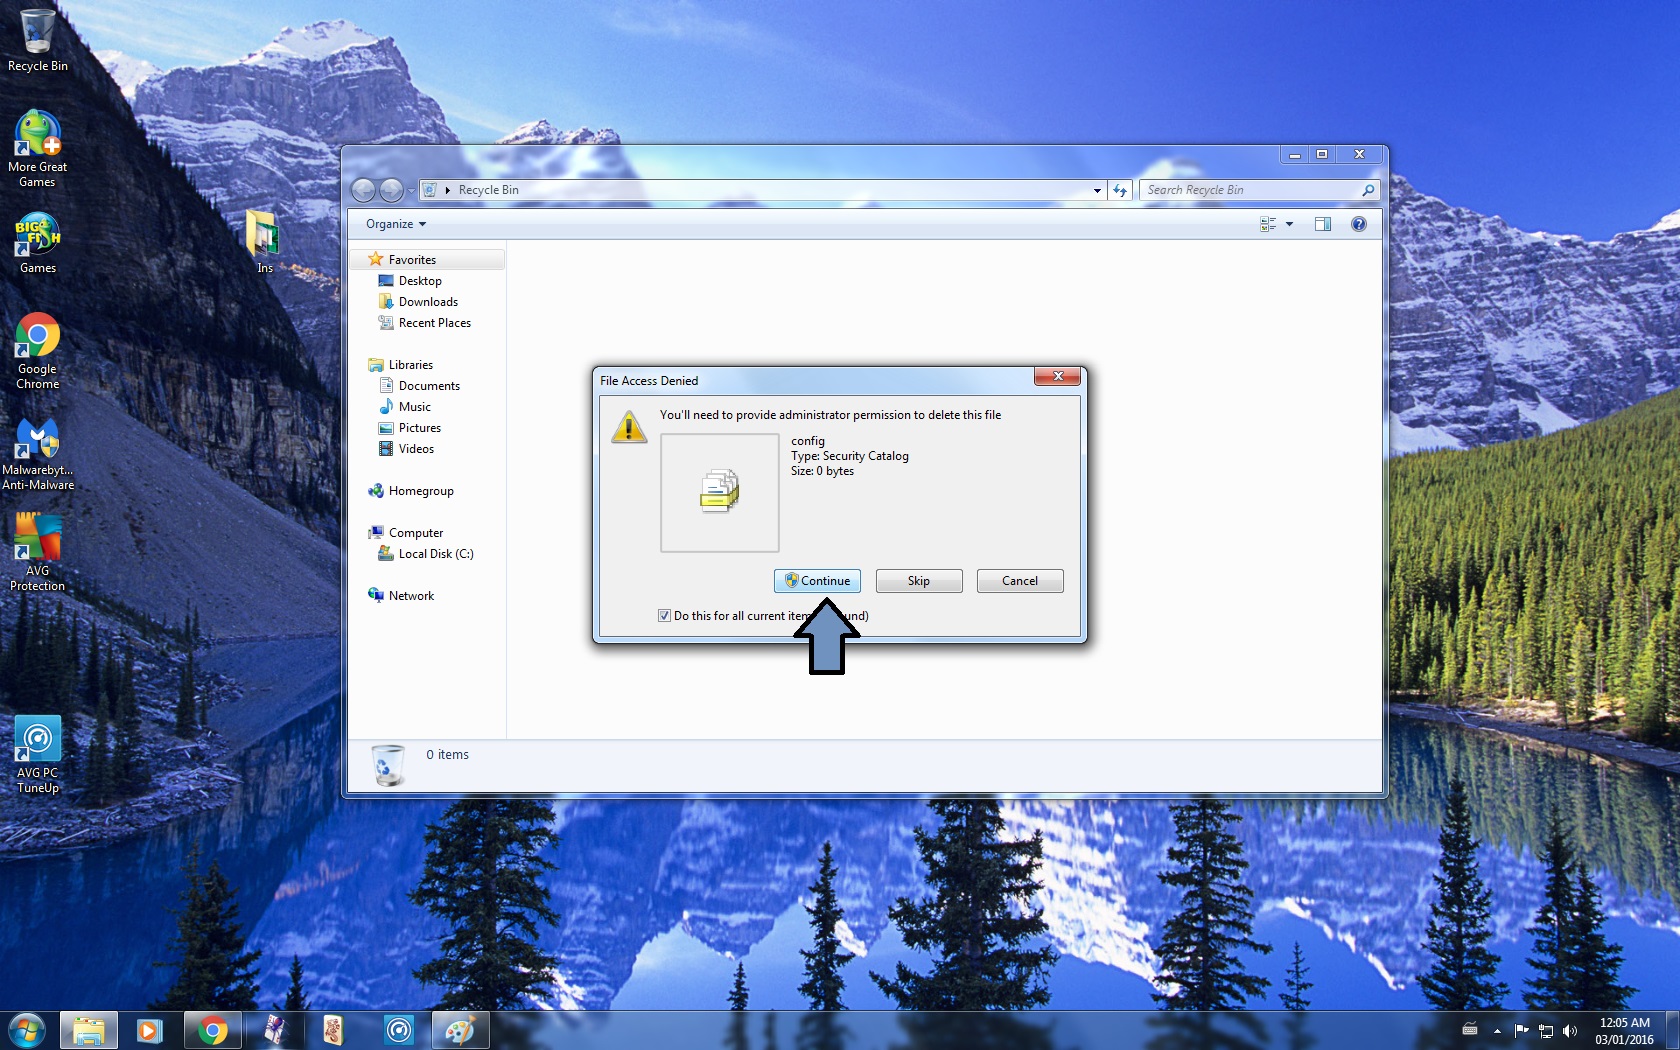
-- You may get a Folder Access Denied message
-- If you receive this message, Click Continue
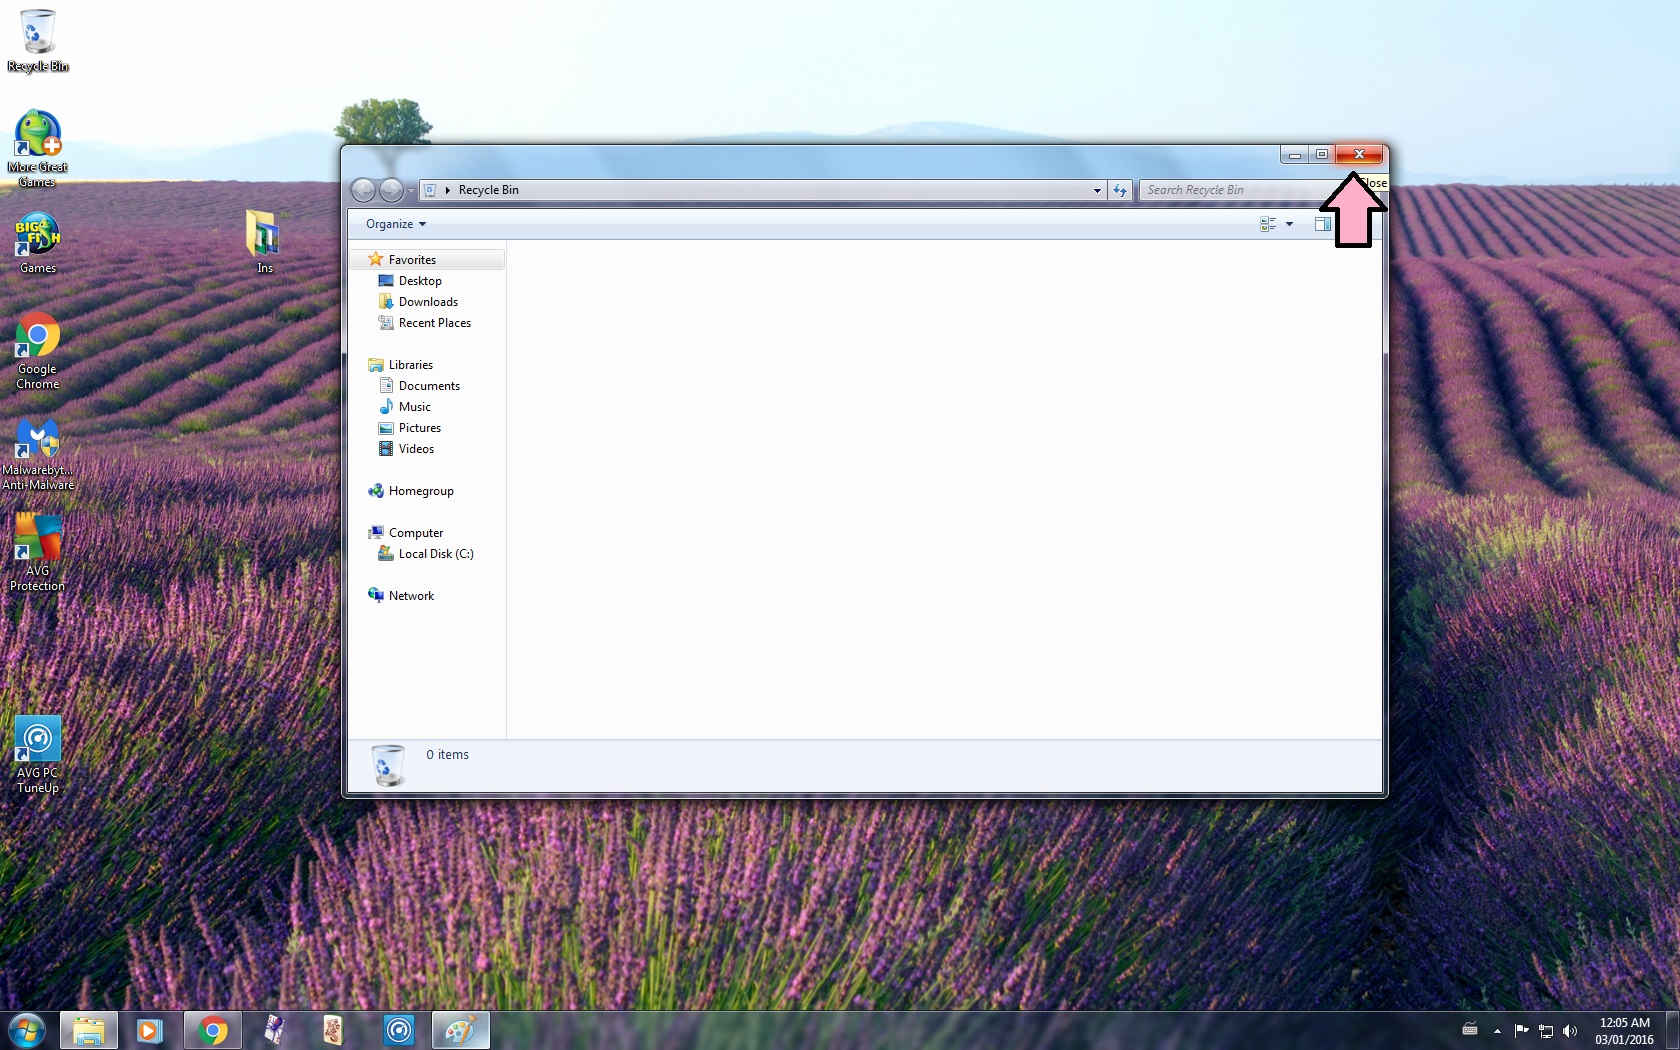
- Close Recycle Bin
Windows 7 : Part 5


12. Uninstall the Update
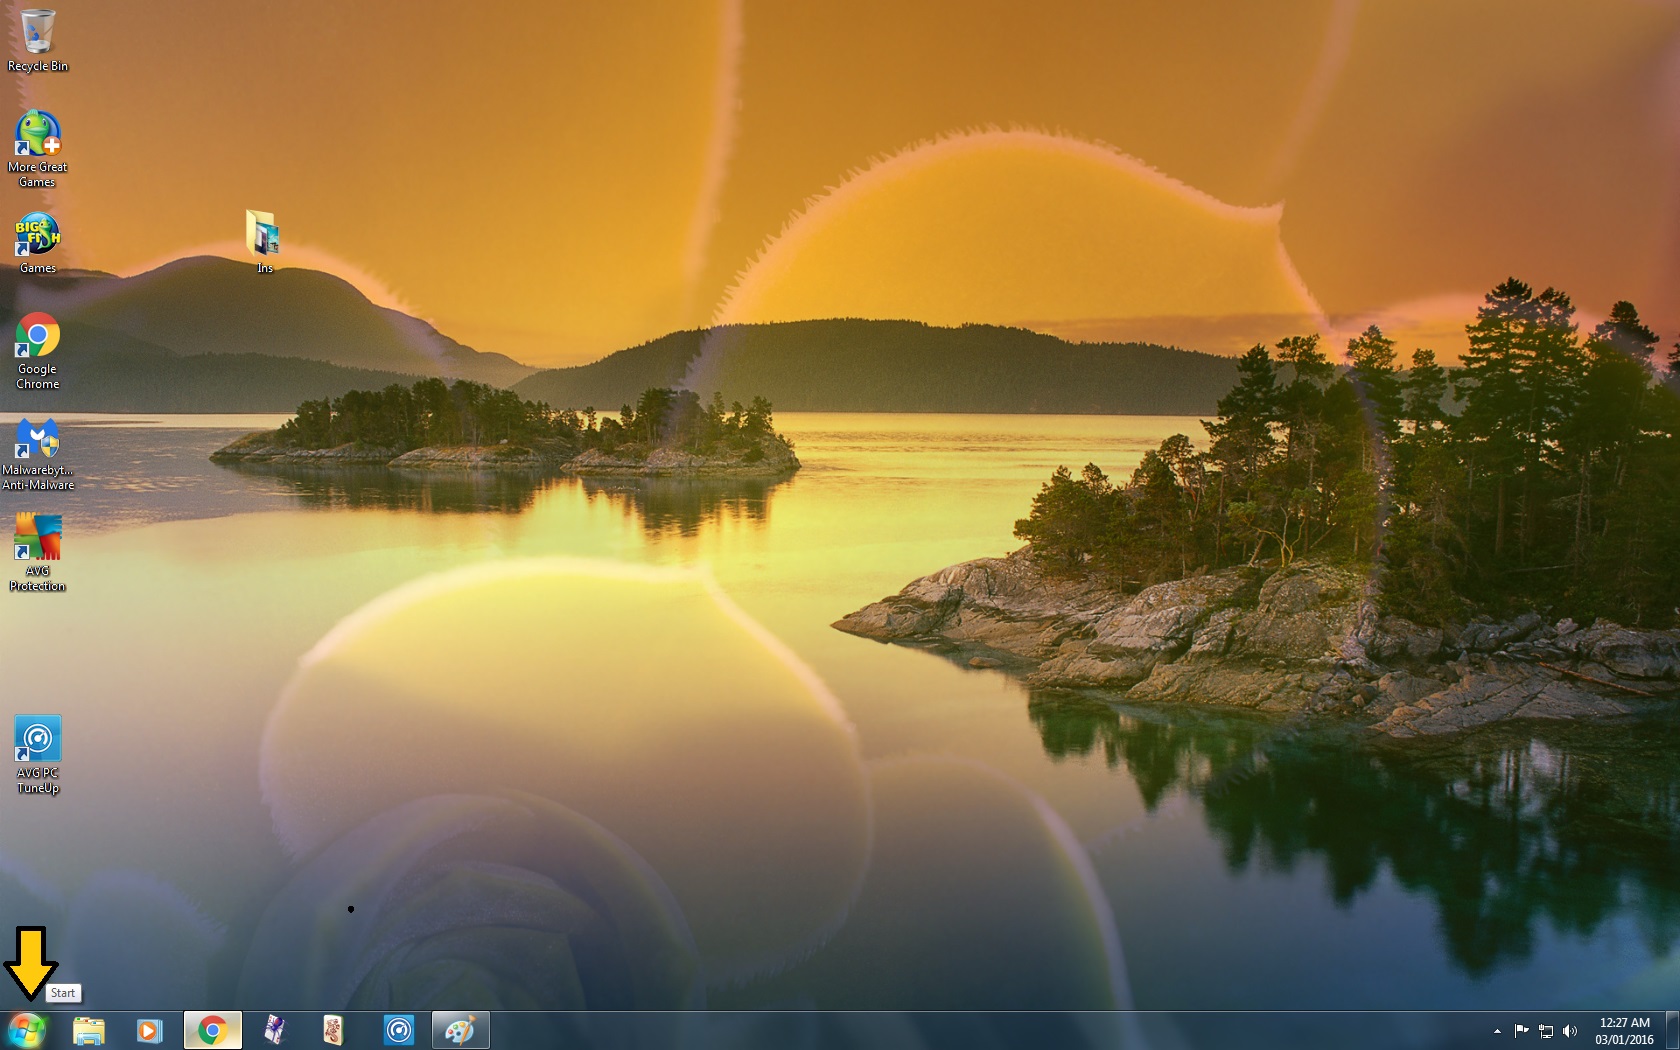
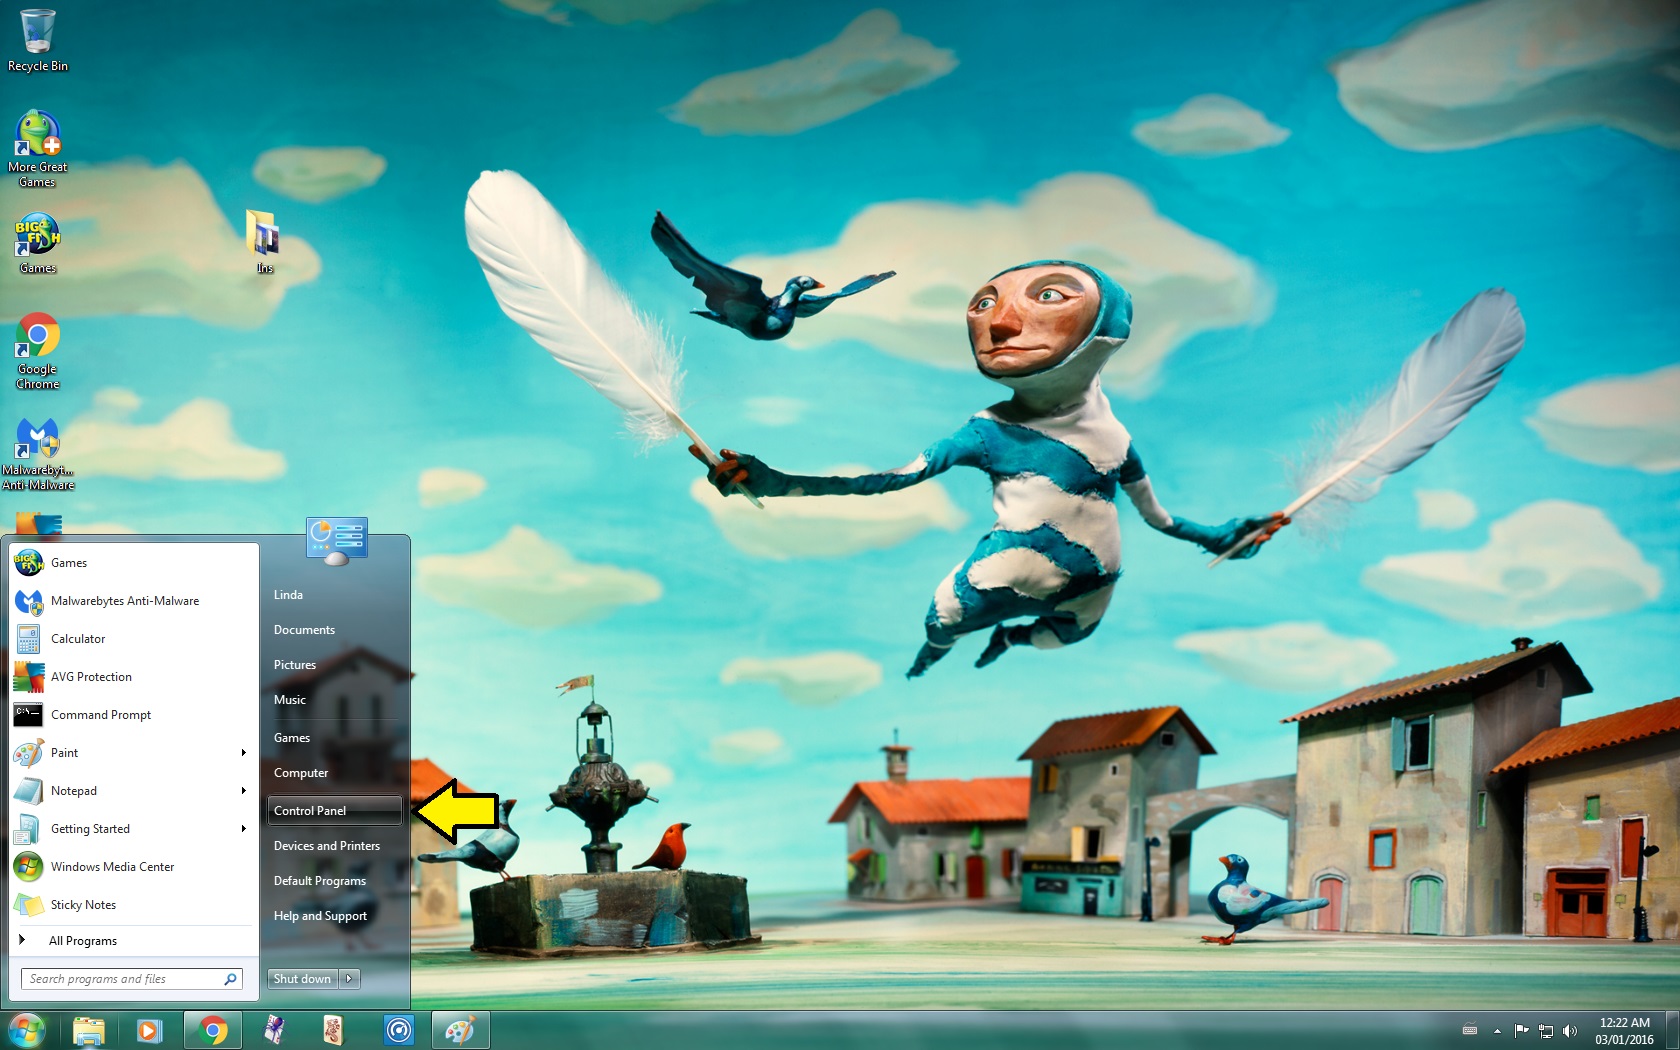
- Open the Control Panel
-- Open the Start Menu
-- Select Control Panel
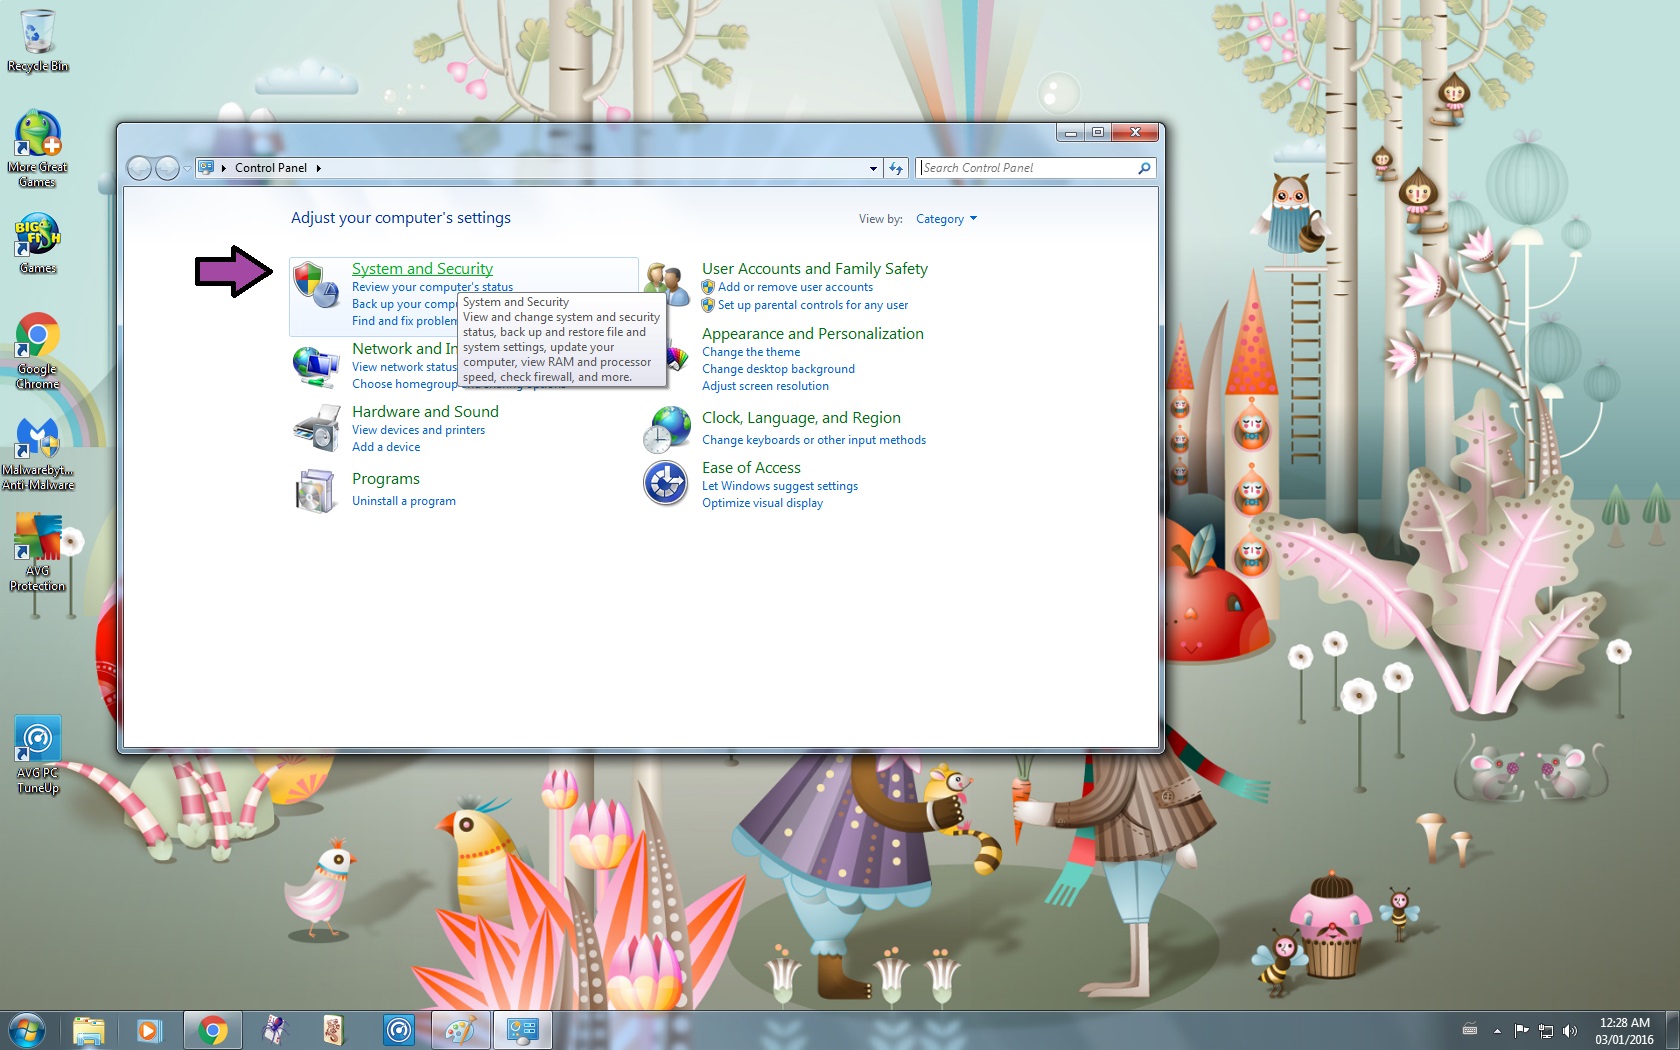
- Go to System and Security
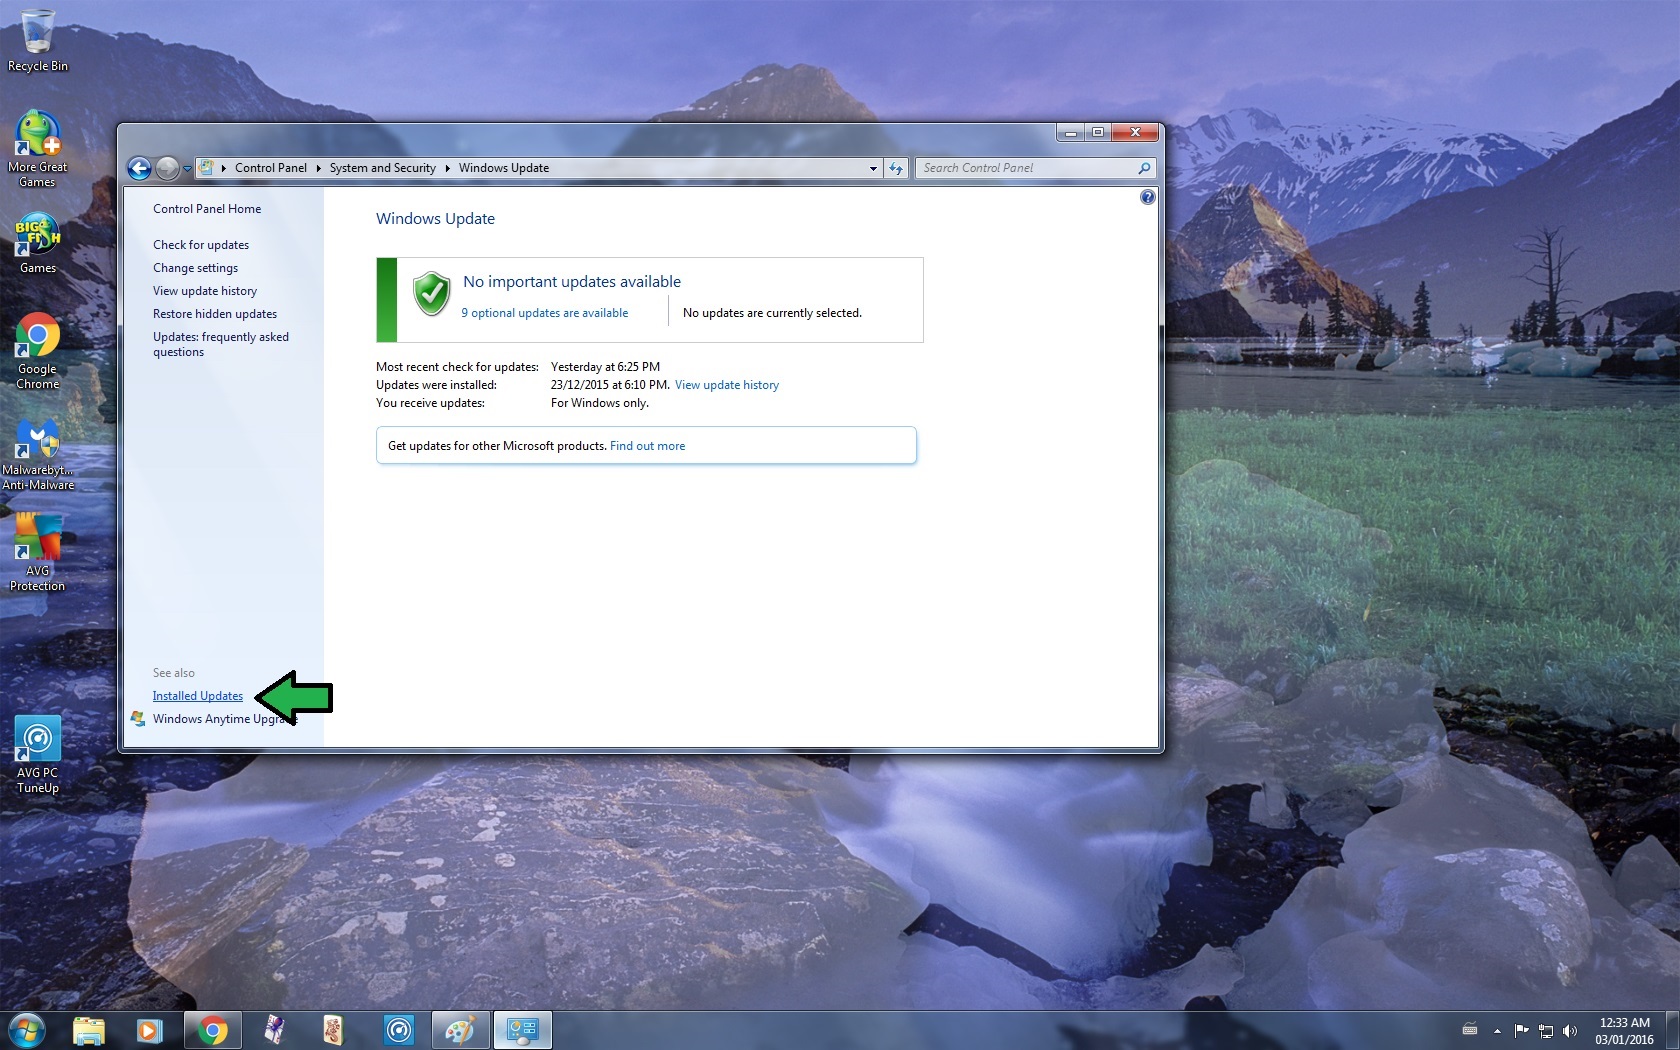
- Go to Windows Update
- Click on Installed Updates
- Scroll down to Microsoft Windows
- Select KB3035583
- Right Click
- Select Uninstall
- Click Yes
- Wait for the Update to Uninstall
-- If you get a message asking you to Restart Now or Restart Later, be sure to select Restart Later
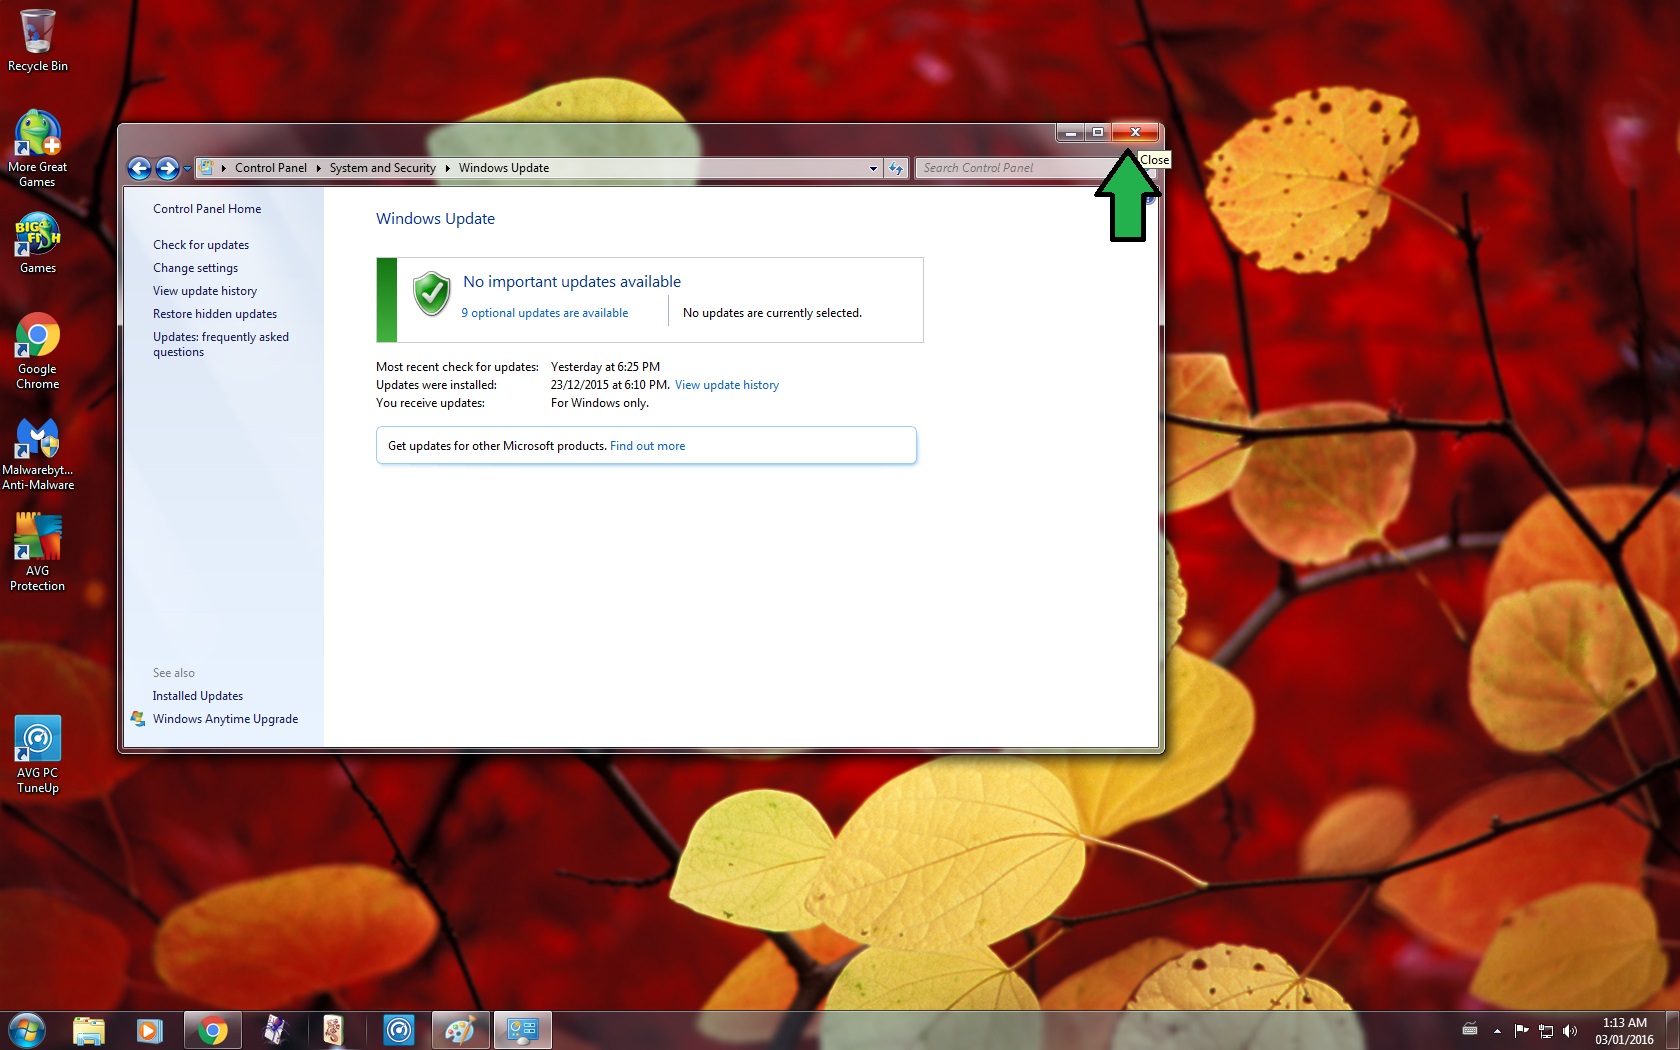
- Close the window
13. Change Update Settings
- Open the Control Panel
-- Refer to Step 12
- Go to System and Security
- Go to Windows Update
- Click on Change Settings
- Change Important updates from Install updates automatically to Download updates but let me choose whether to install them or Check for updates but let me choose whether to download and install them
-- Download updates but let me choose whether to install them is the easiest option
- Click Ok
- Close the window
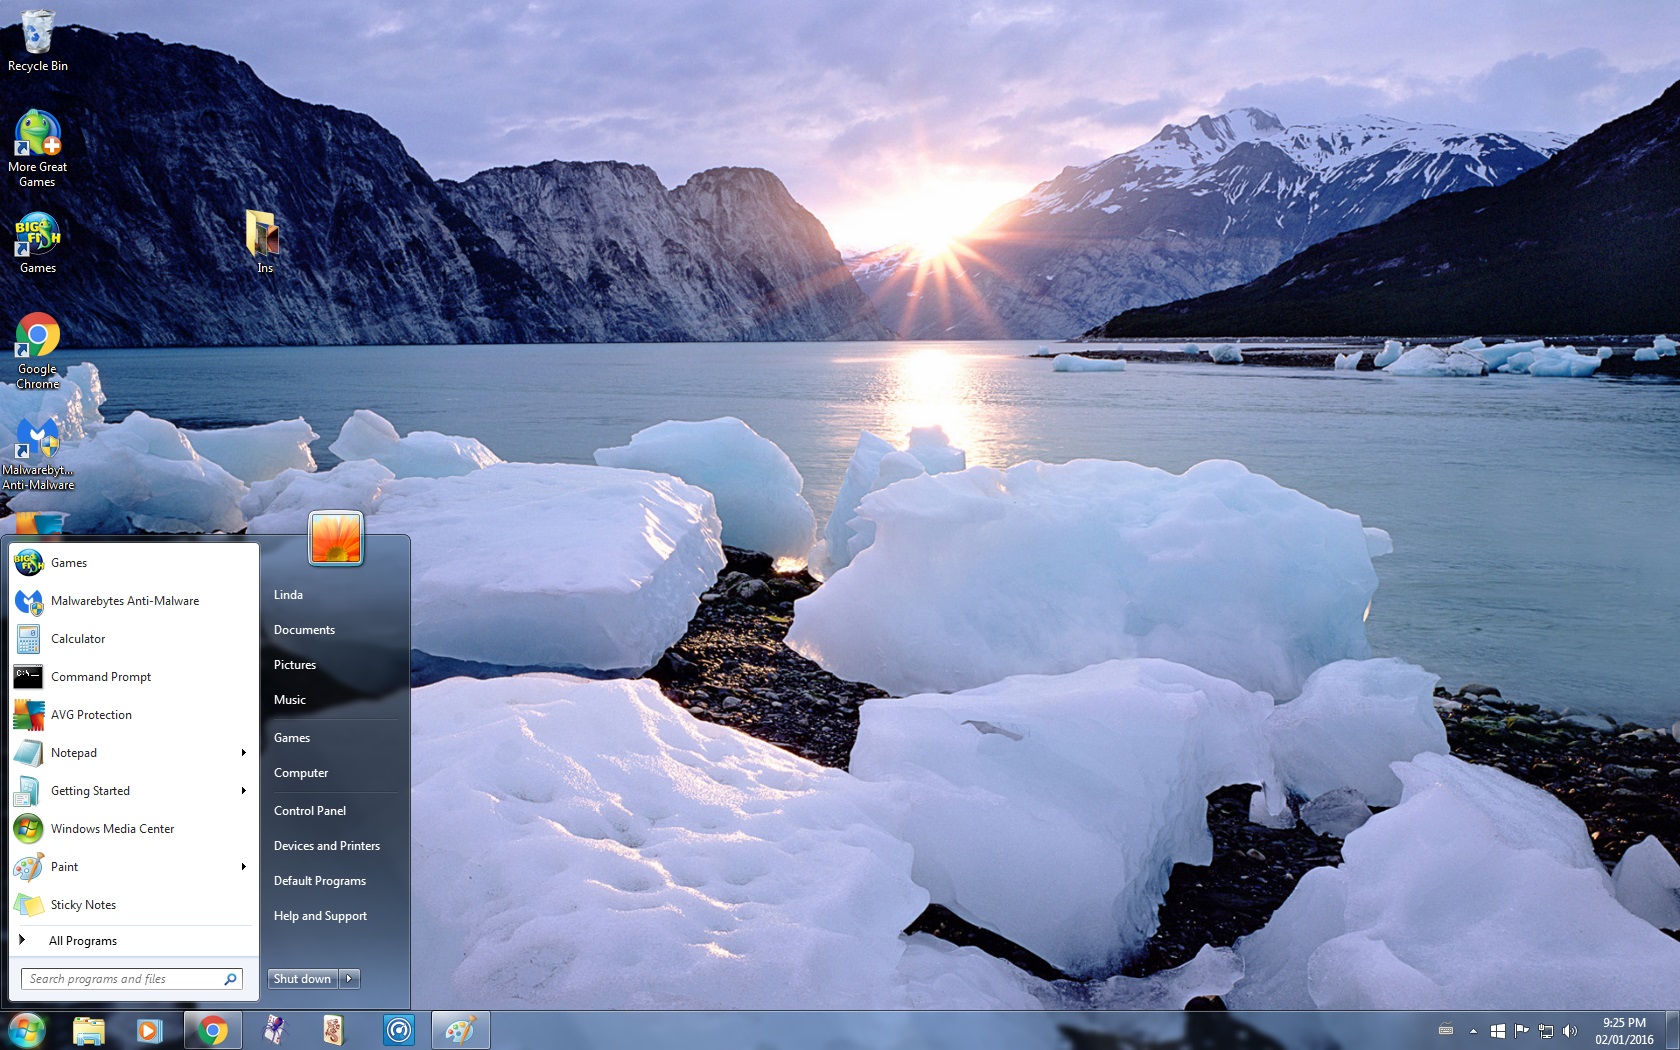
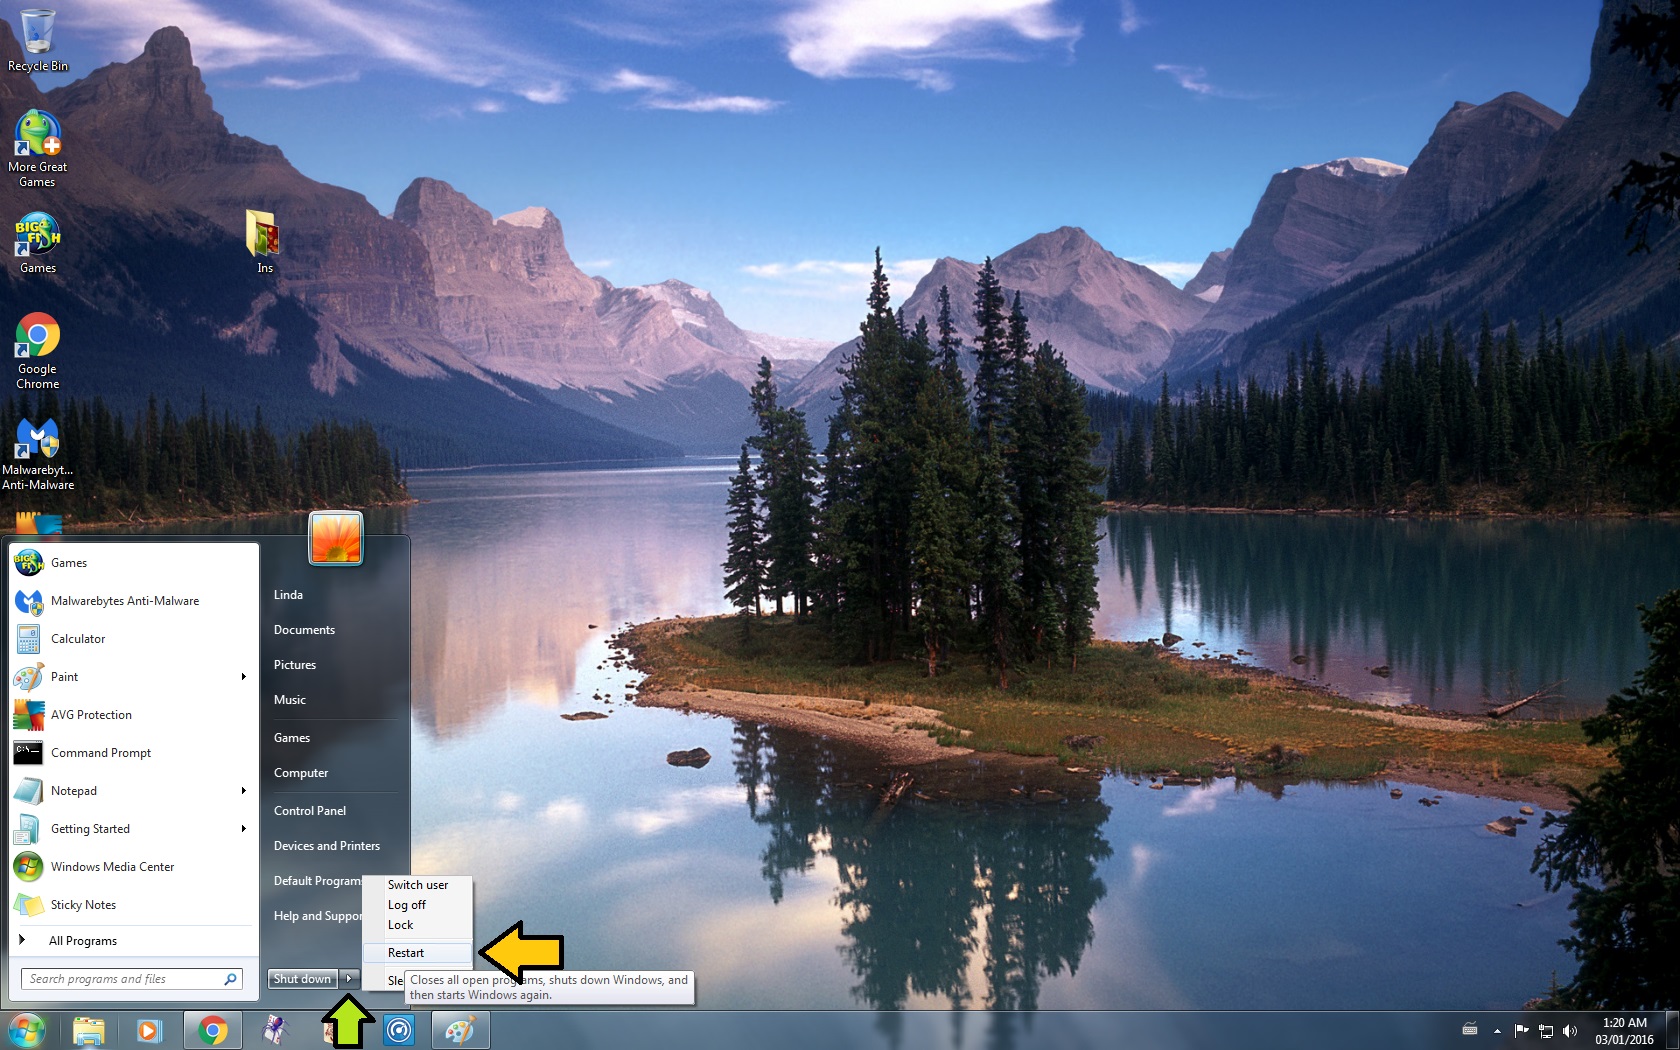
14. Restart your Computer
- Open the Start Menu
- Hover your mouse over the arrow beside Shutdown
- Select Restart
-- Once you Restart your computer the Icon and Notifications should be completely gone