Generated Design: Nintendo Switch Holder
by ArtifyxInnovation in Design > Art
427 Views, 3 Favorites, 0 Comments
Generated Design: Nintendo Switch Holder
.jpg)
Generated Design is the ultimate design collaboration between human and machine, allowing the creation of complex high-performance products otherwise unimaginable through traditional design processes. This project/tutorial will help you peek into the endless possibility of generative design study using Autodesk's Fusion 360. WARNING! For following this tutorial, you should have some familiarity with this software that is both popular and totally free for hobbyists and small companies alike.
By the end of this project, you should be able to properly prepare a generative design study and able to select the best design solution.
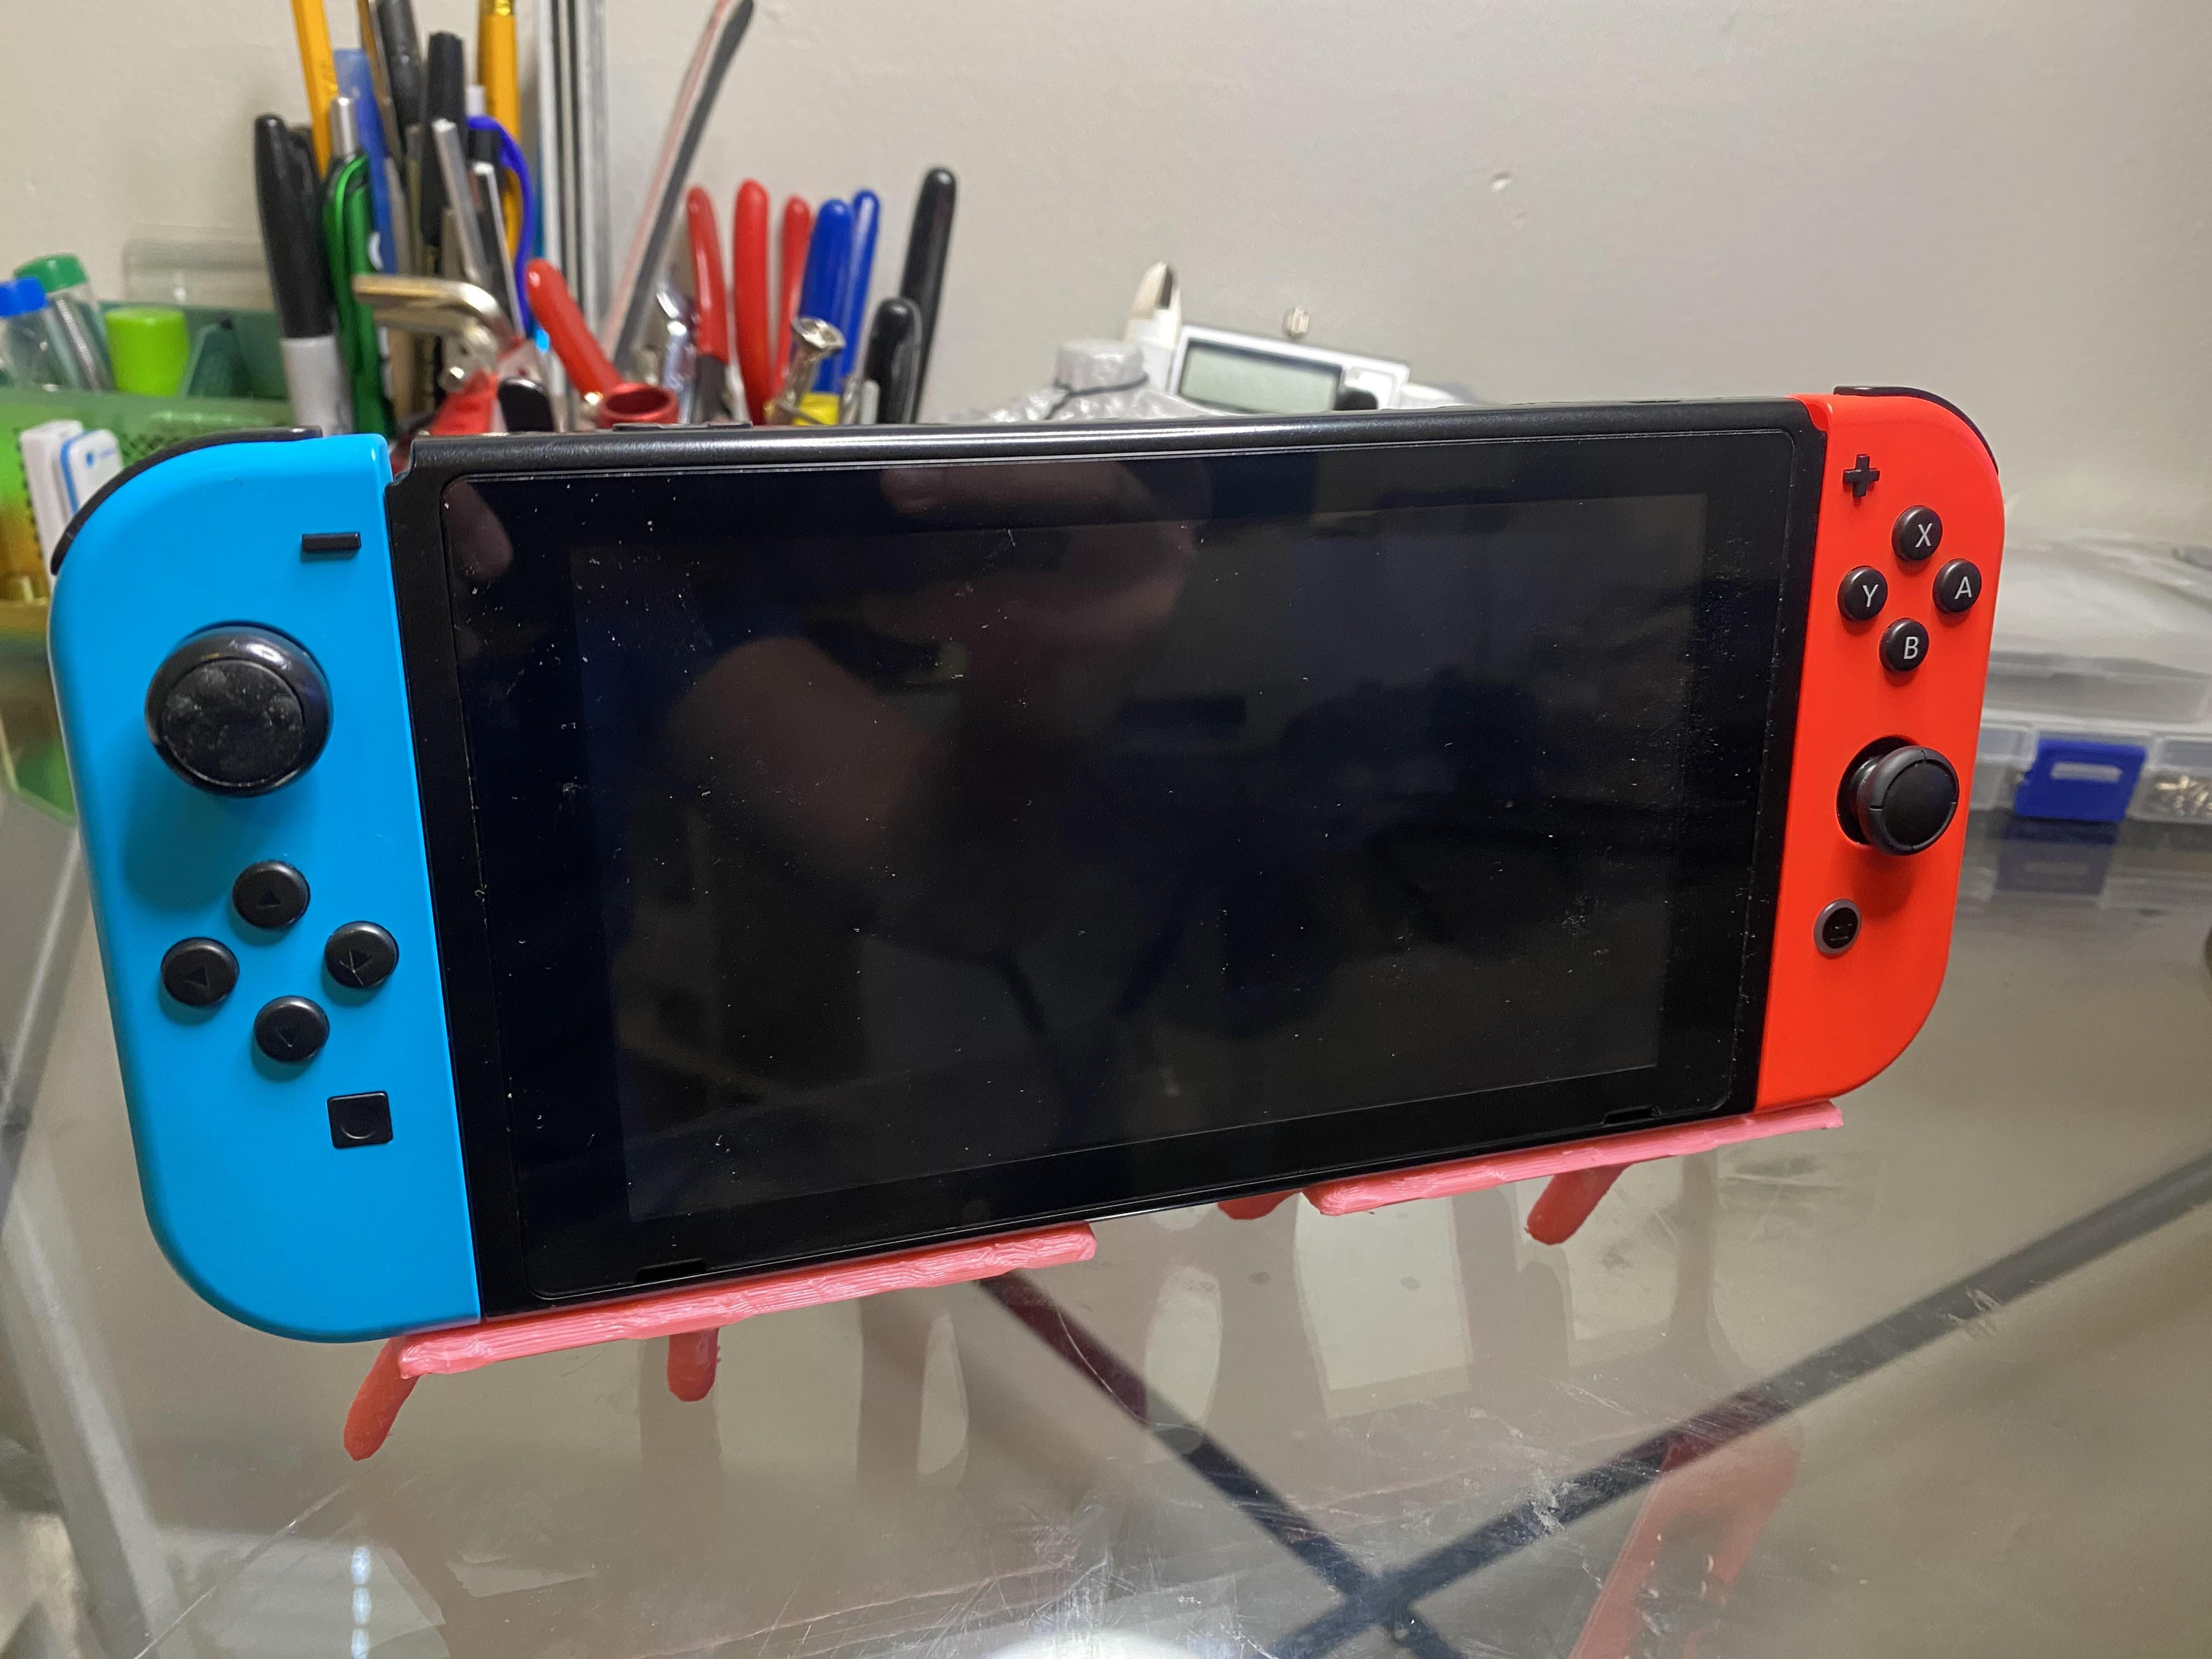
First, let's decide what we are making. I have a switch that I've been playing for a while, but never have a holder to place it when I'm not playing it. So here we are designing and creating a holder for Nintendo Switch.
Supplies
- Account on Fusion 360
- Dimensions of the part you want
- A Fabricator, such as a 3D printer
Preparation
Start by imagining how you want your design to look and function. It's always a good practice starting with the end in mind. For this project, we will need to think how we want the switch to stand? At what angle? How do we want the holder to look like?(how many contacts to the ground)
Creating Geometry
.png)
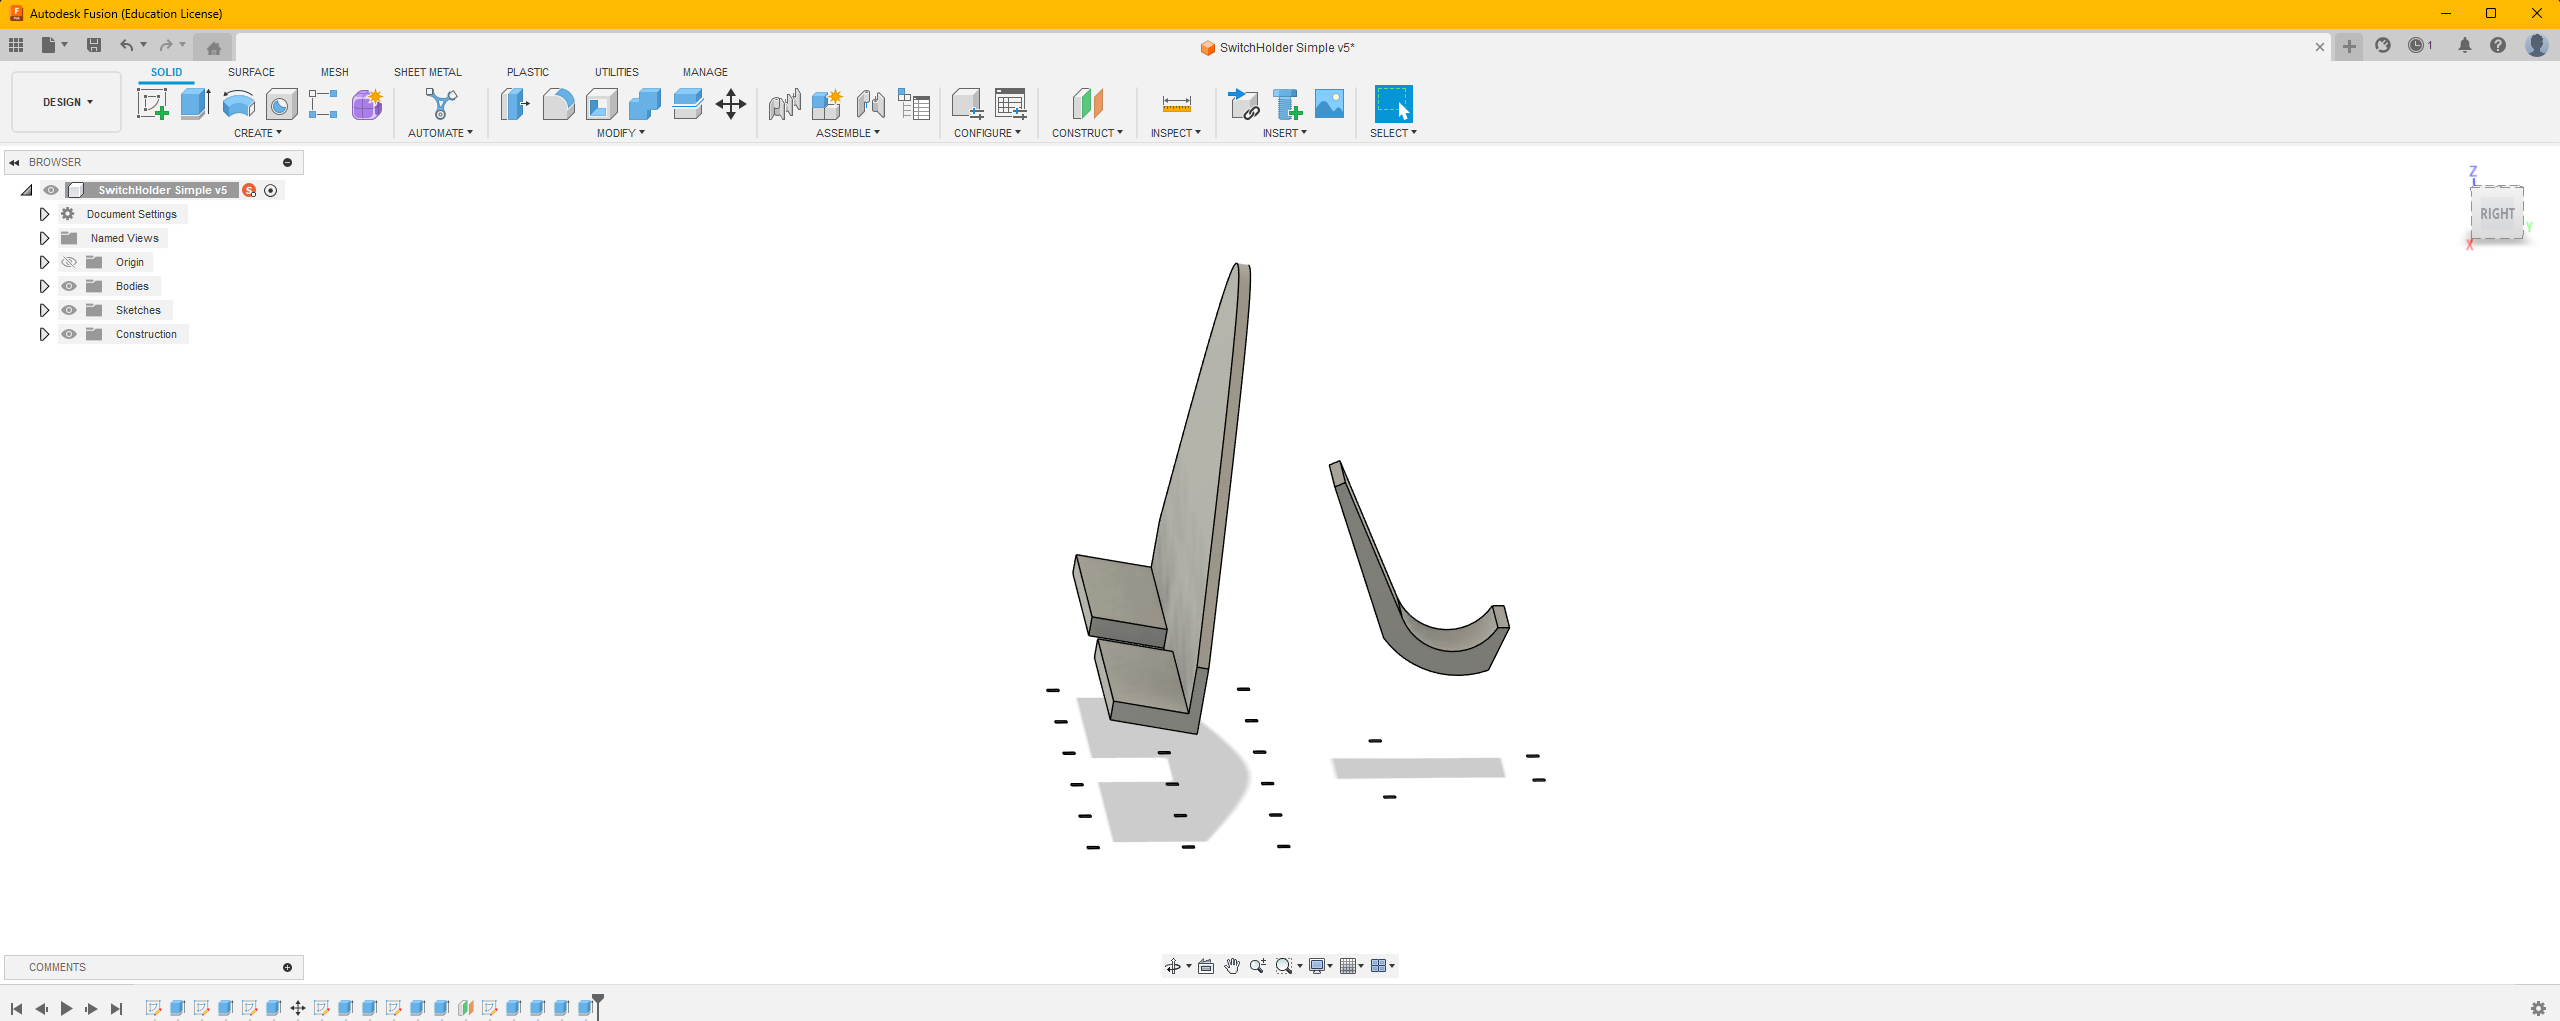
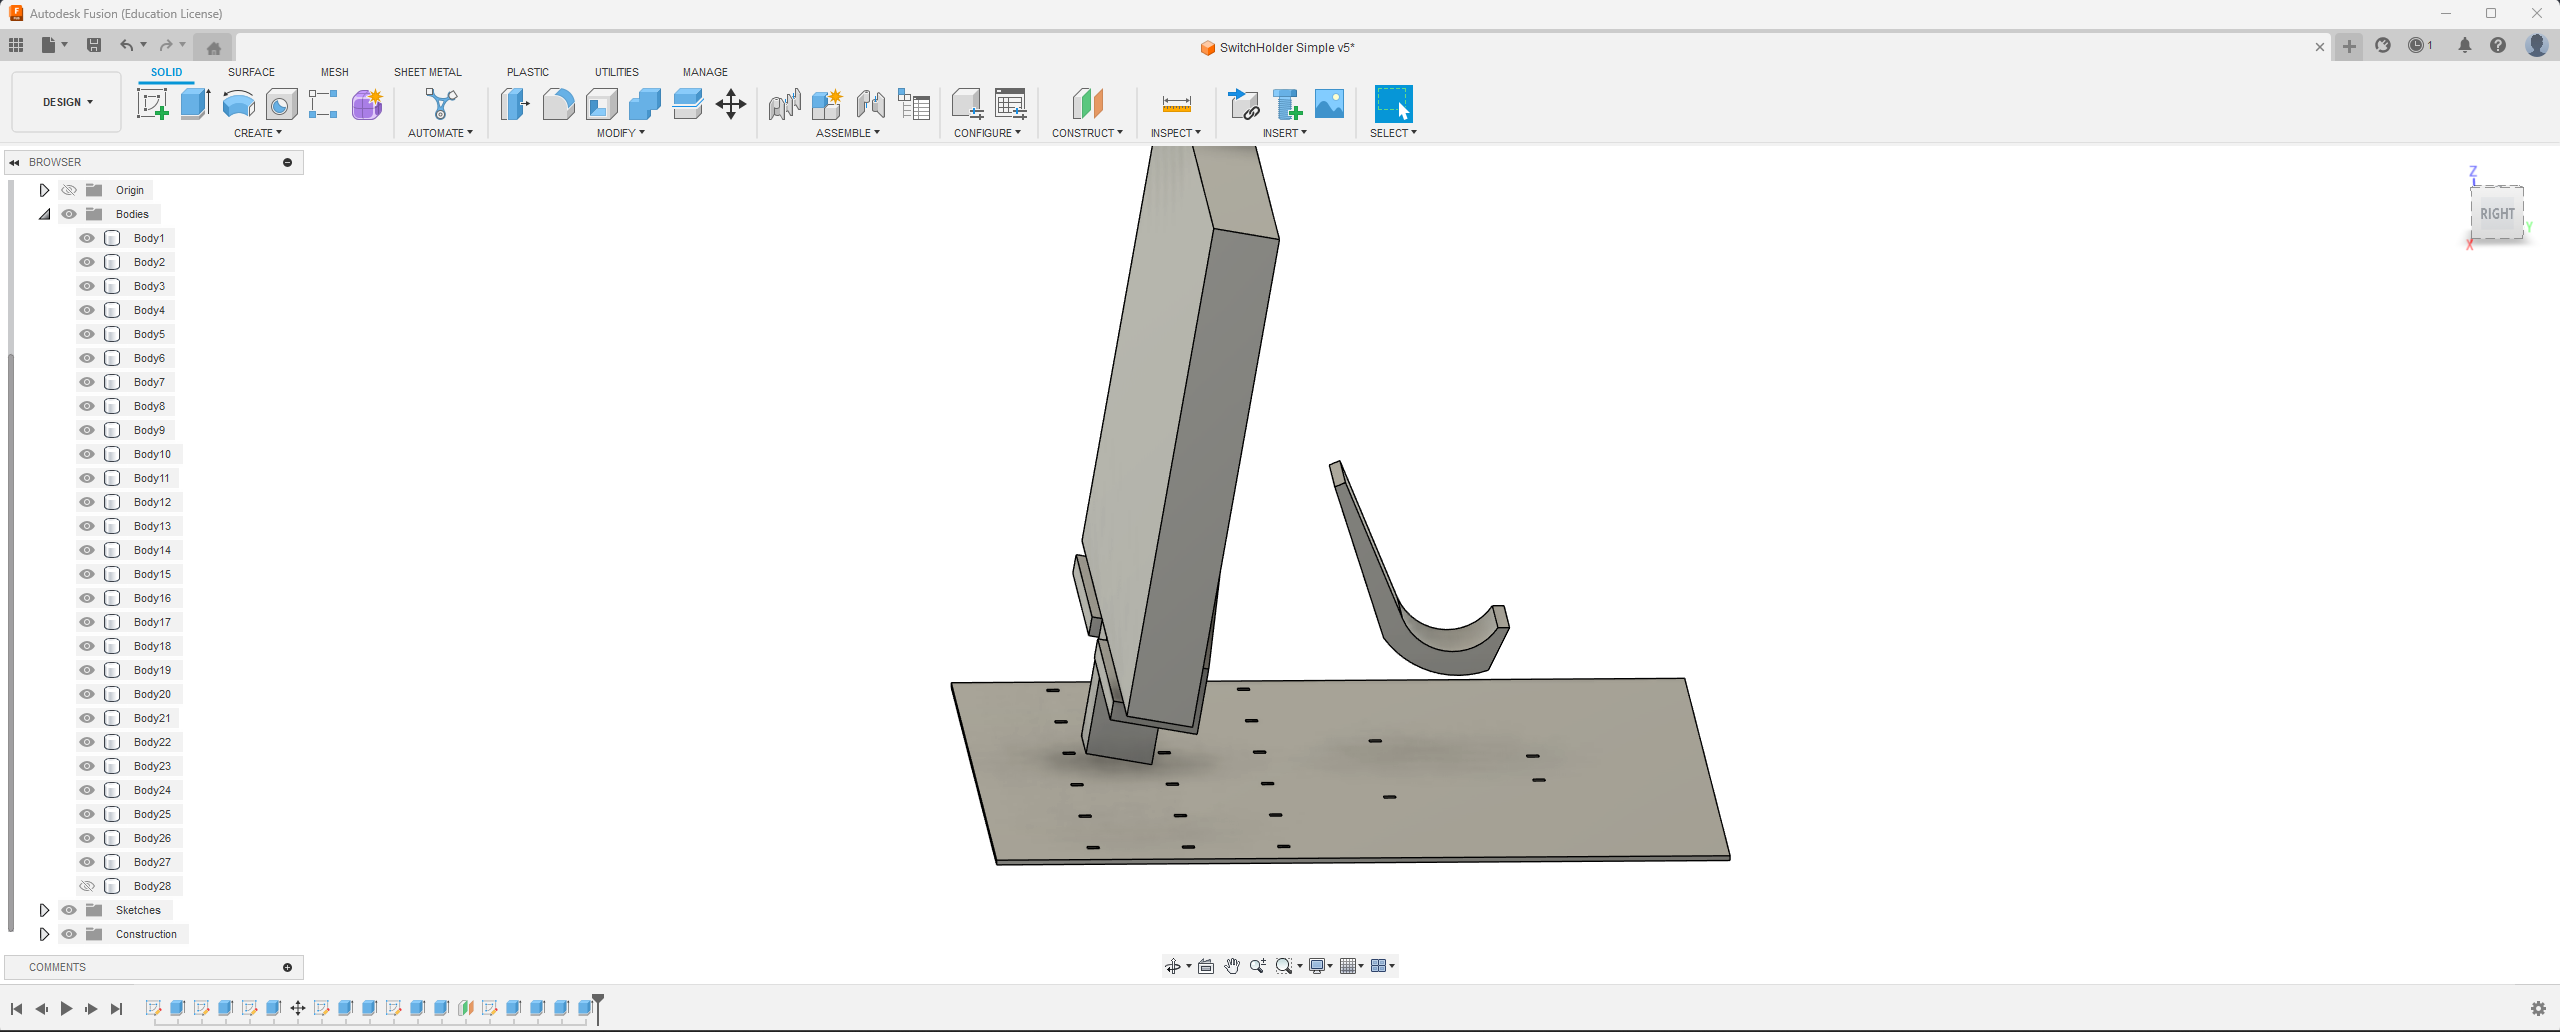
Now we create the basic geometry of the design. We have the holder, the controller holder and the spots where it contacts the ground.
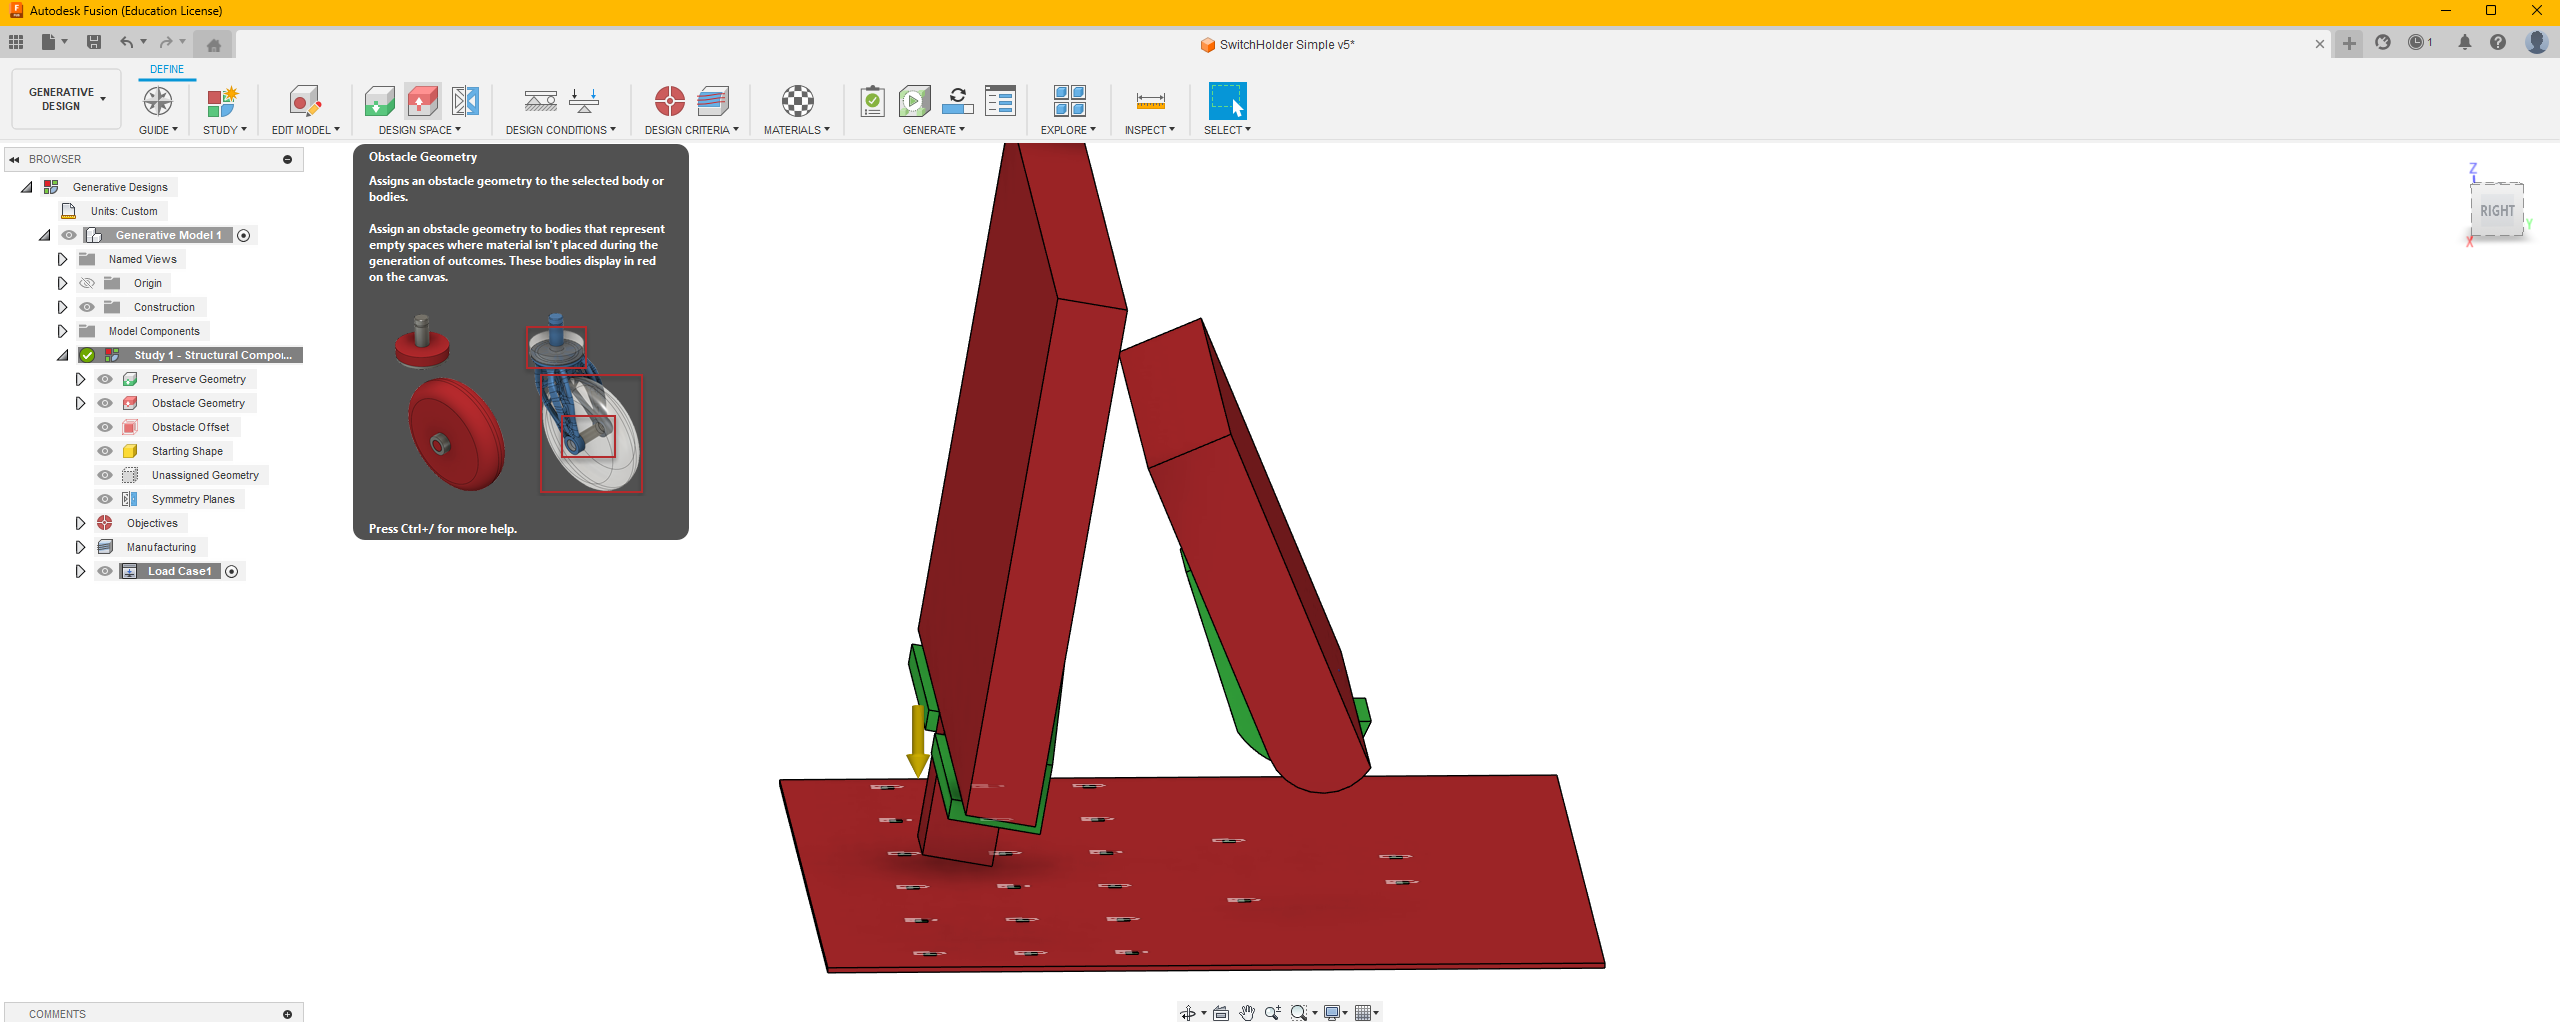
Obstacle Geometry
.png)
Then, we create geometry where we don't want the AI to generate geometry.
Into Generative Design Study
.png)
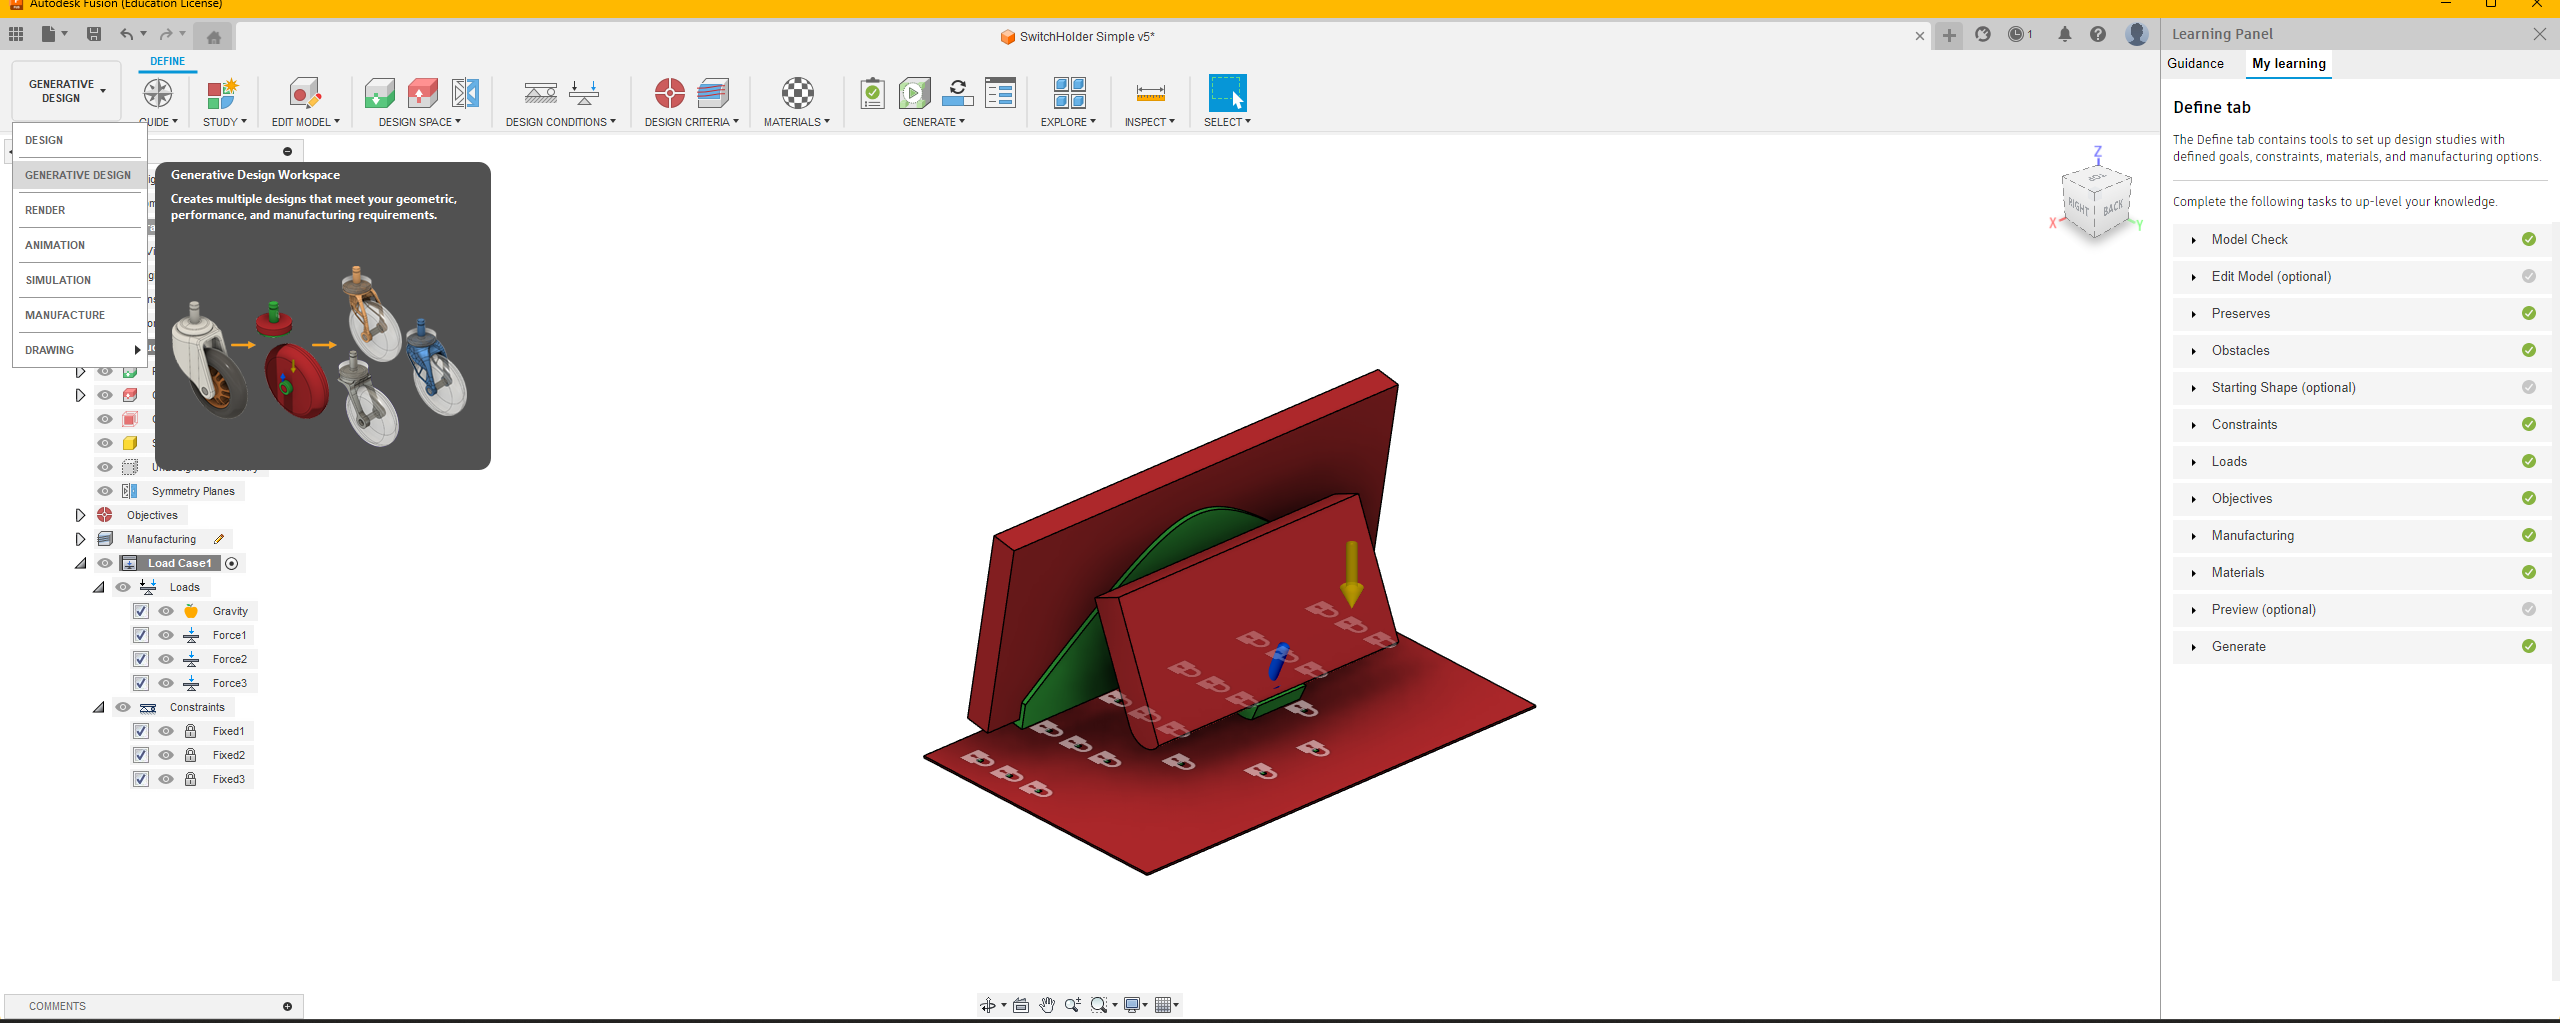
Into Generative Design Study. Fusion 360 is one of the easiest tool to use, they even have a step by step guide and learning panel to help you as you create your design.
Define
.png)
.png)
.png)
.png)
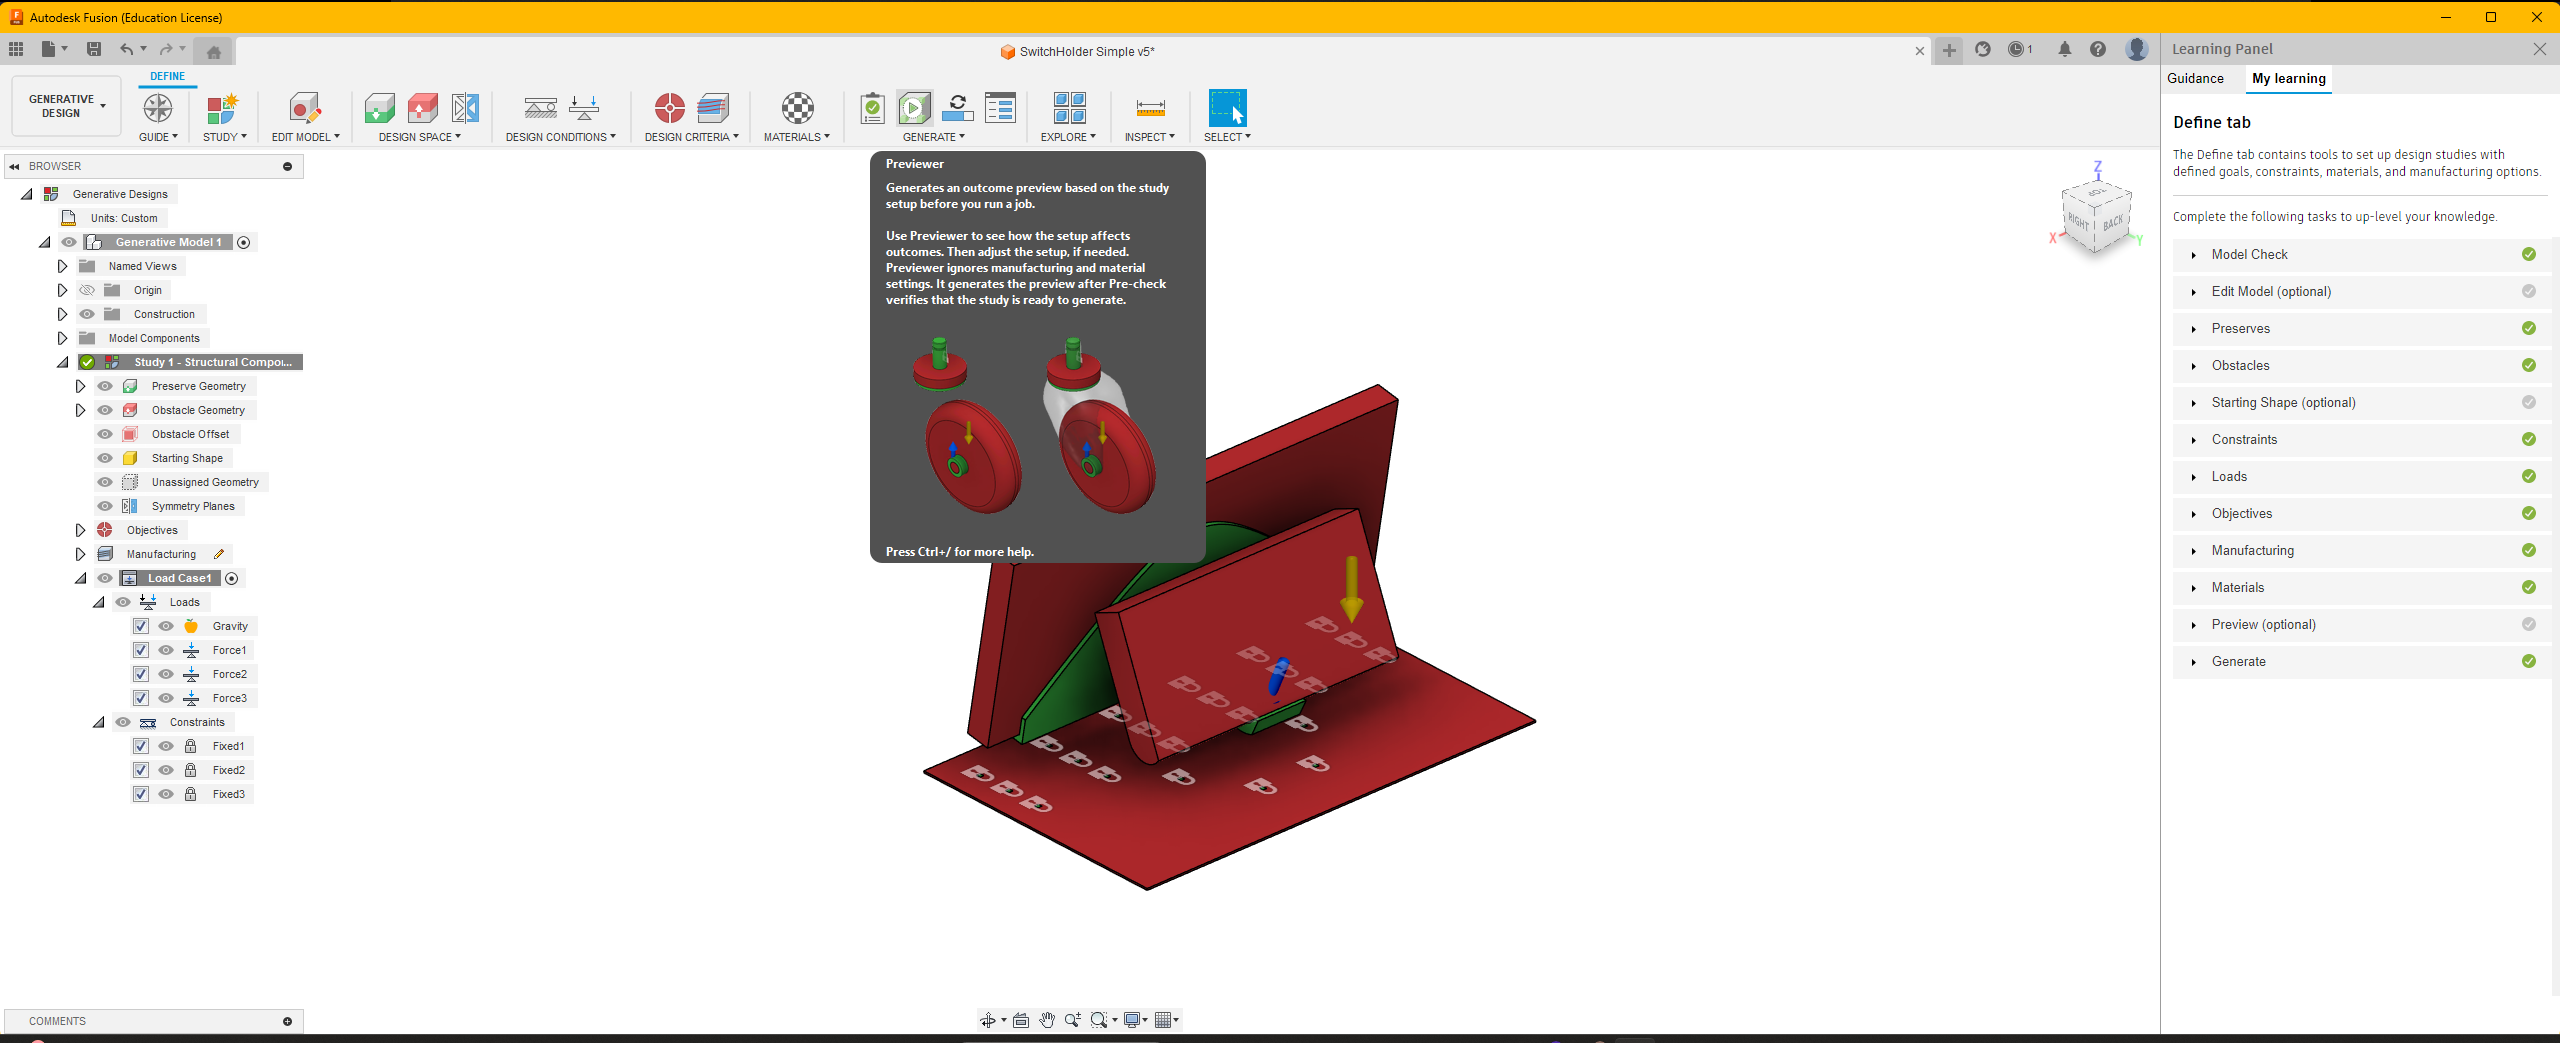
On the top bar, all of the functions are required to create a generative design. From left to right:
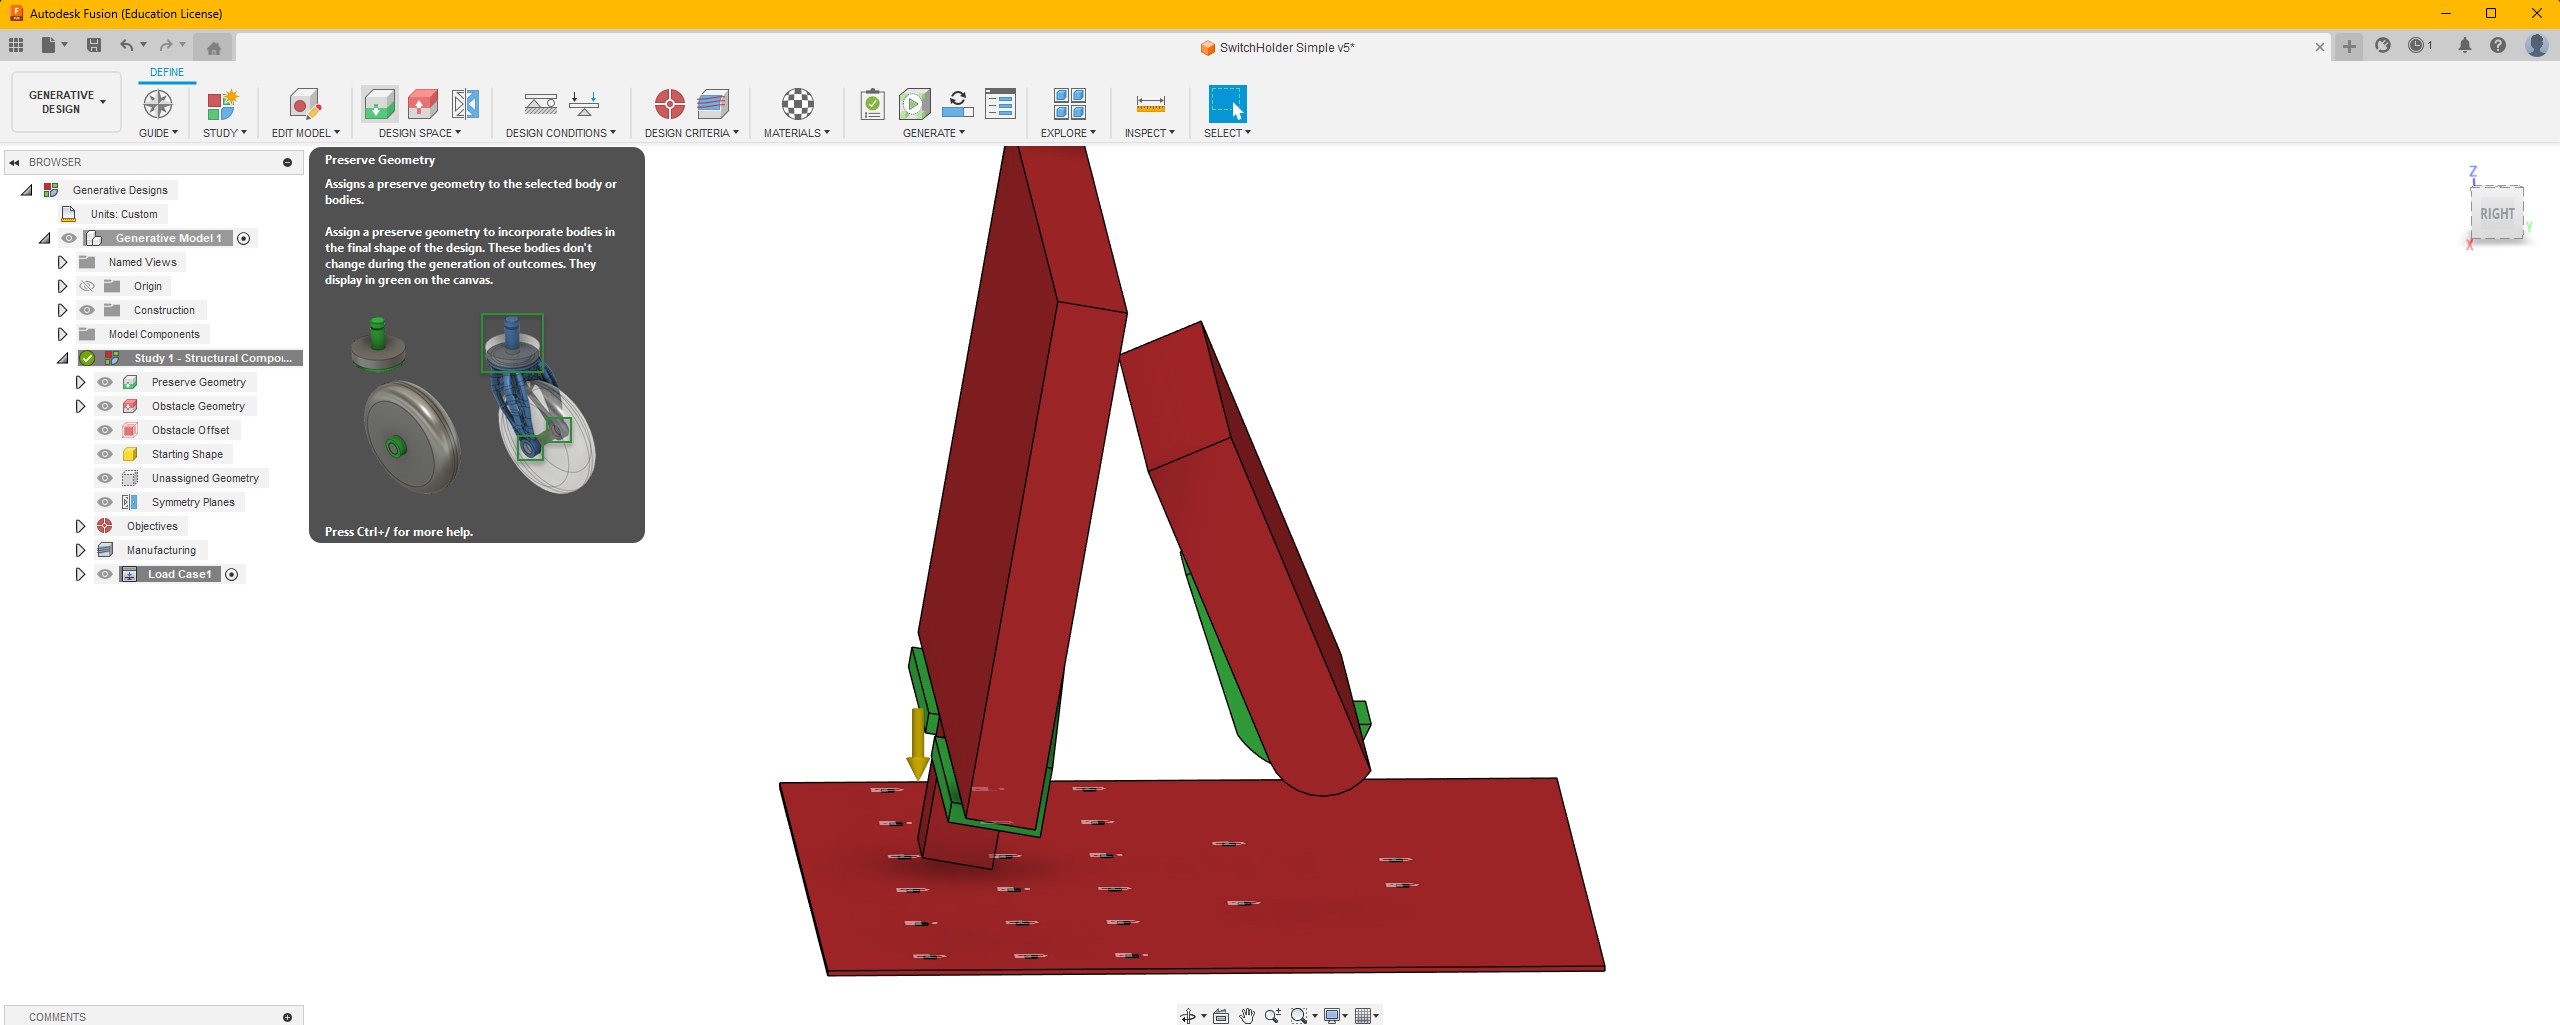
- Preserve Geometry (green): Select the holders and the dots as preserve geometry.
- Obstacle Geometry (Red): Select the switch, controller and the ground and obstacle geometry.
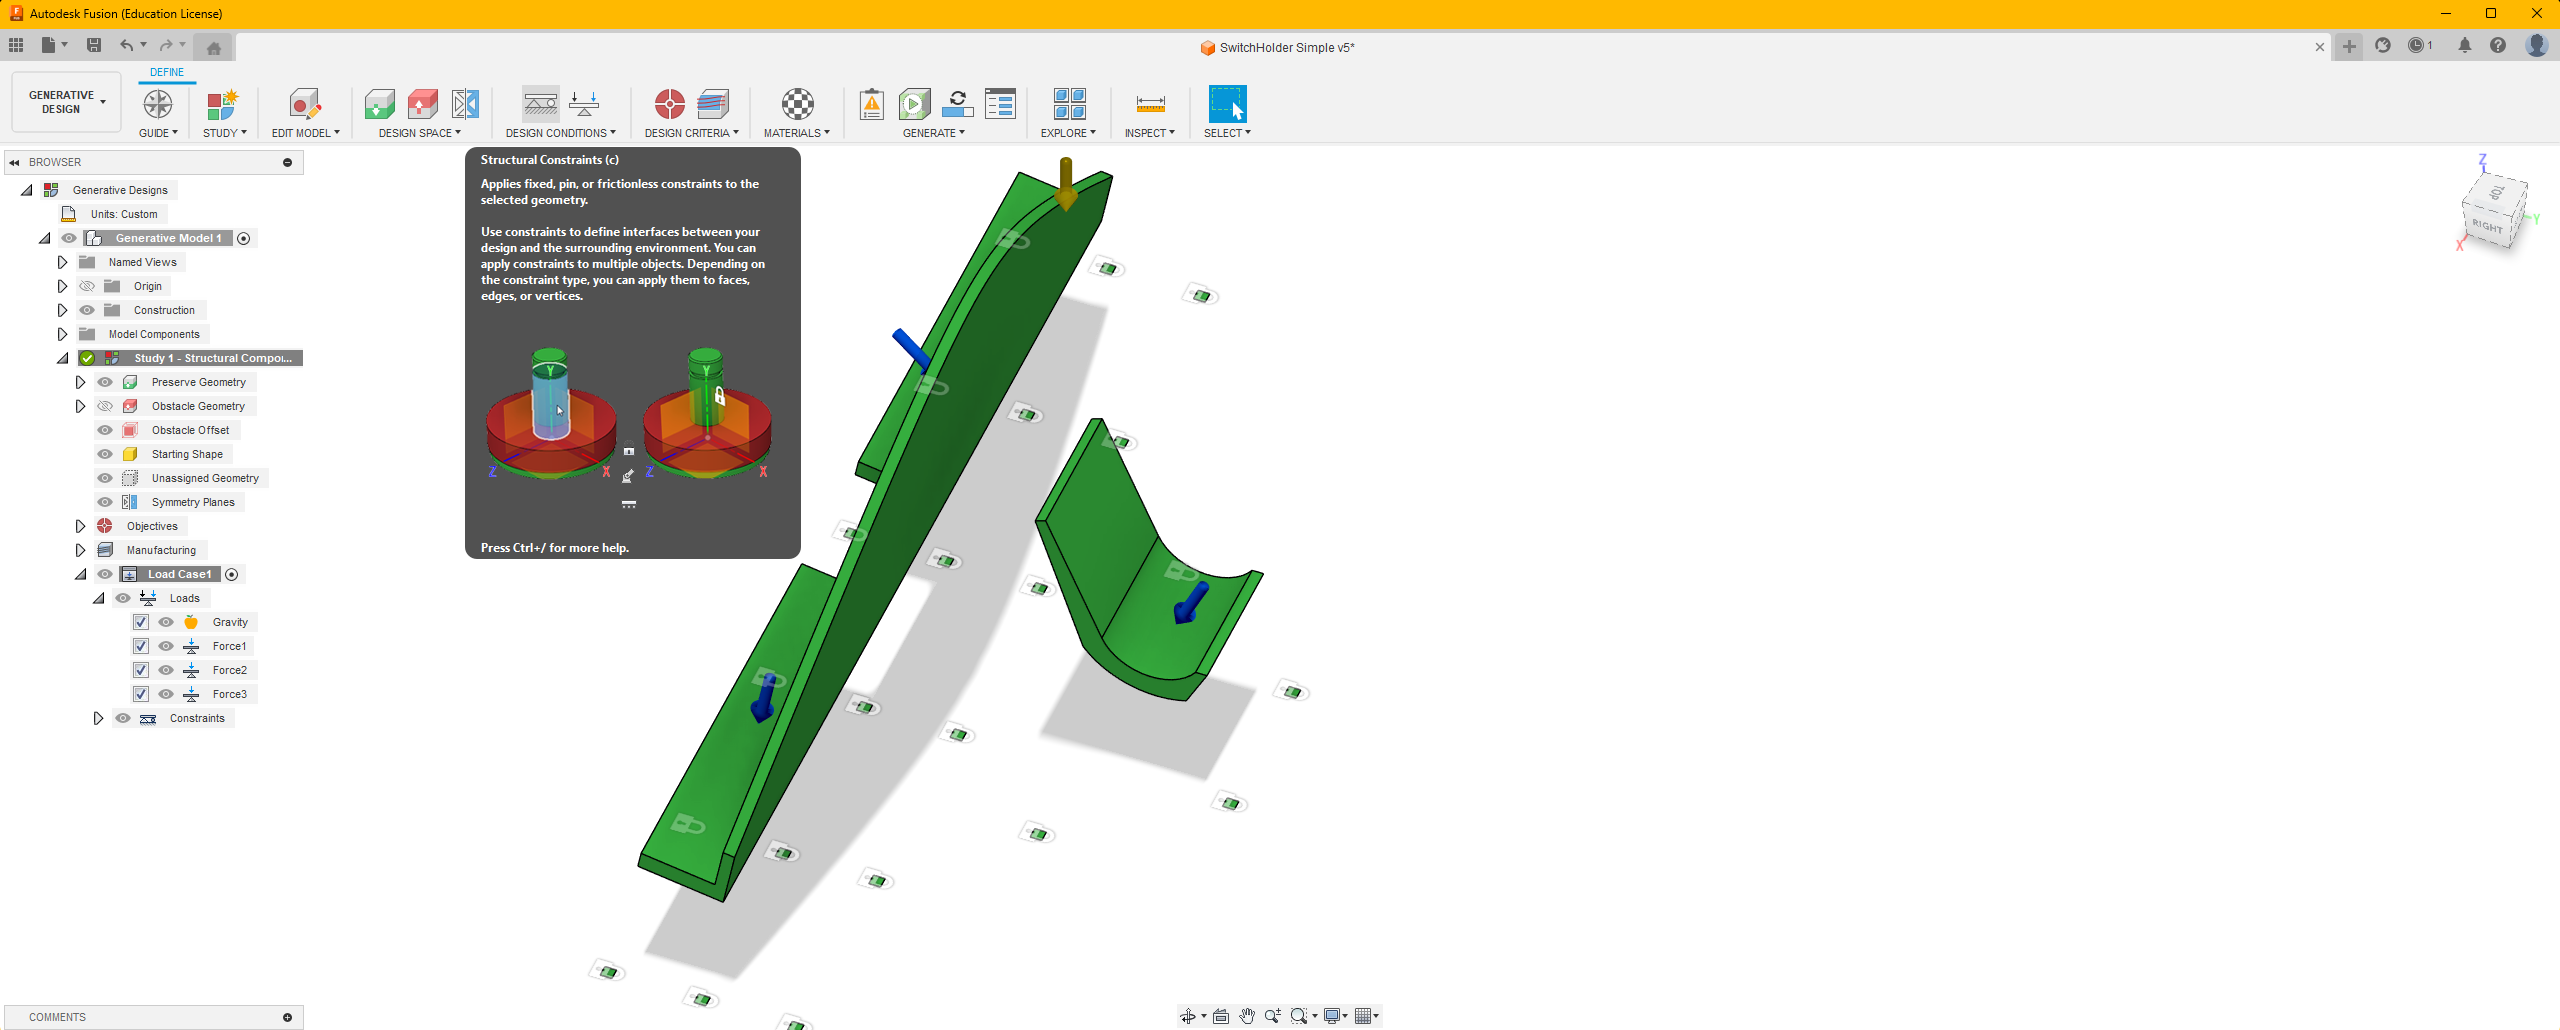
- Structural Constraints (Lock image): Select the dots, this is where the geometry are fixed.
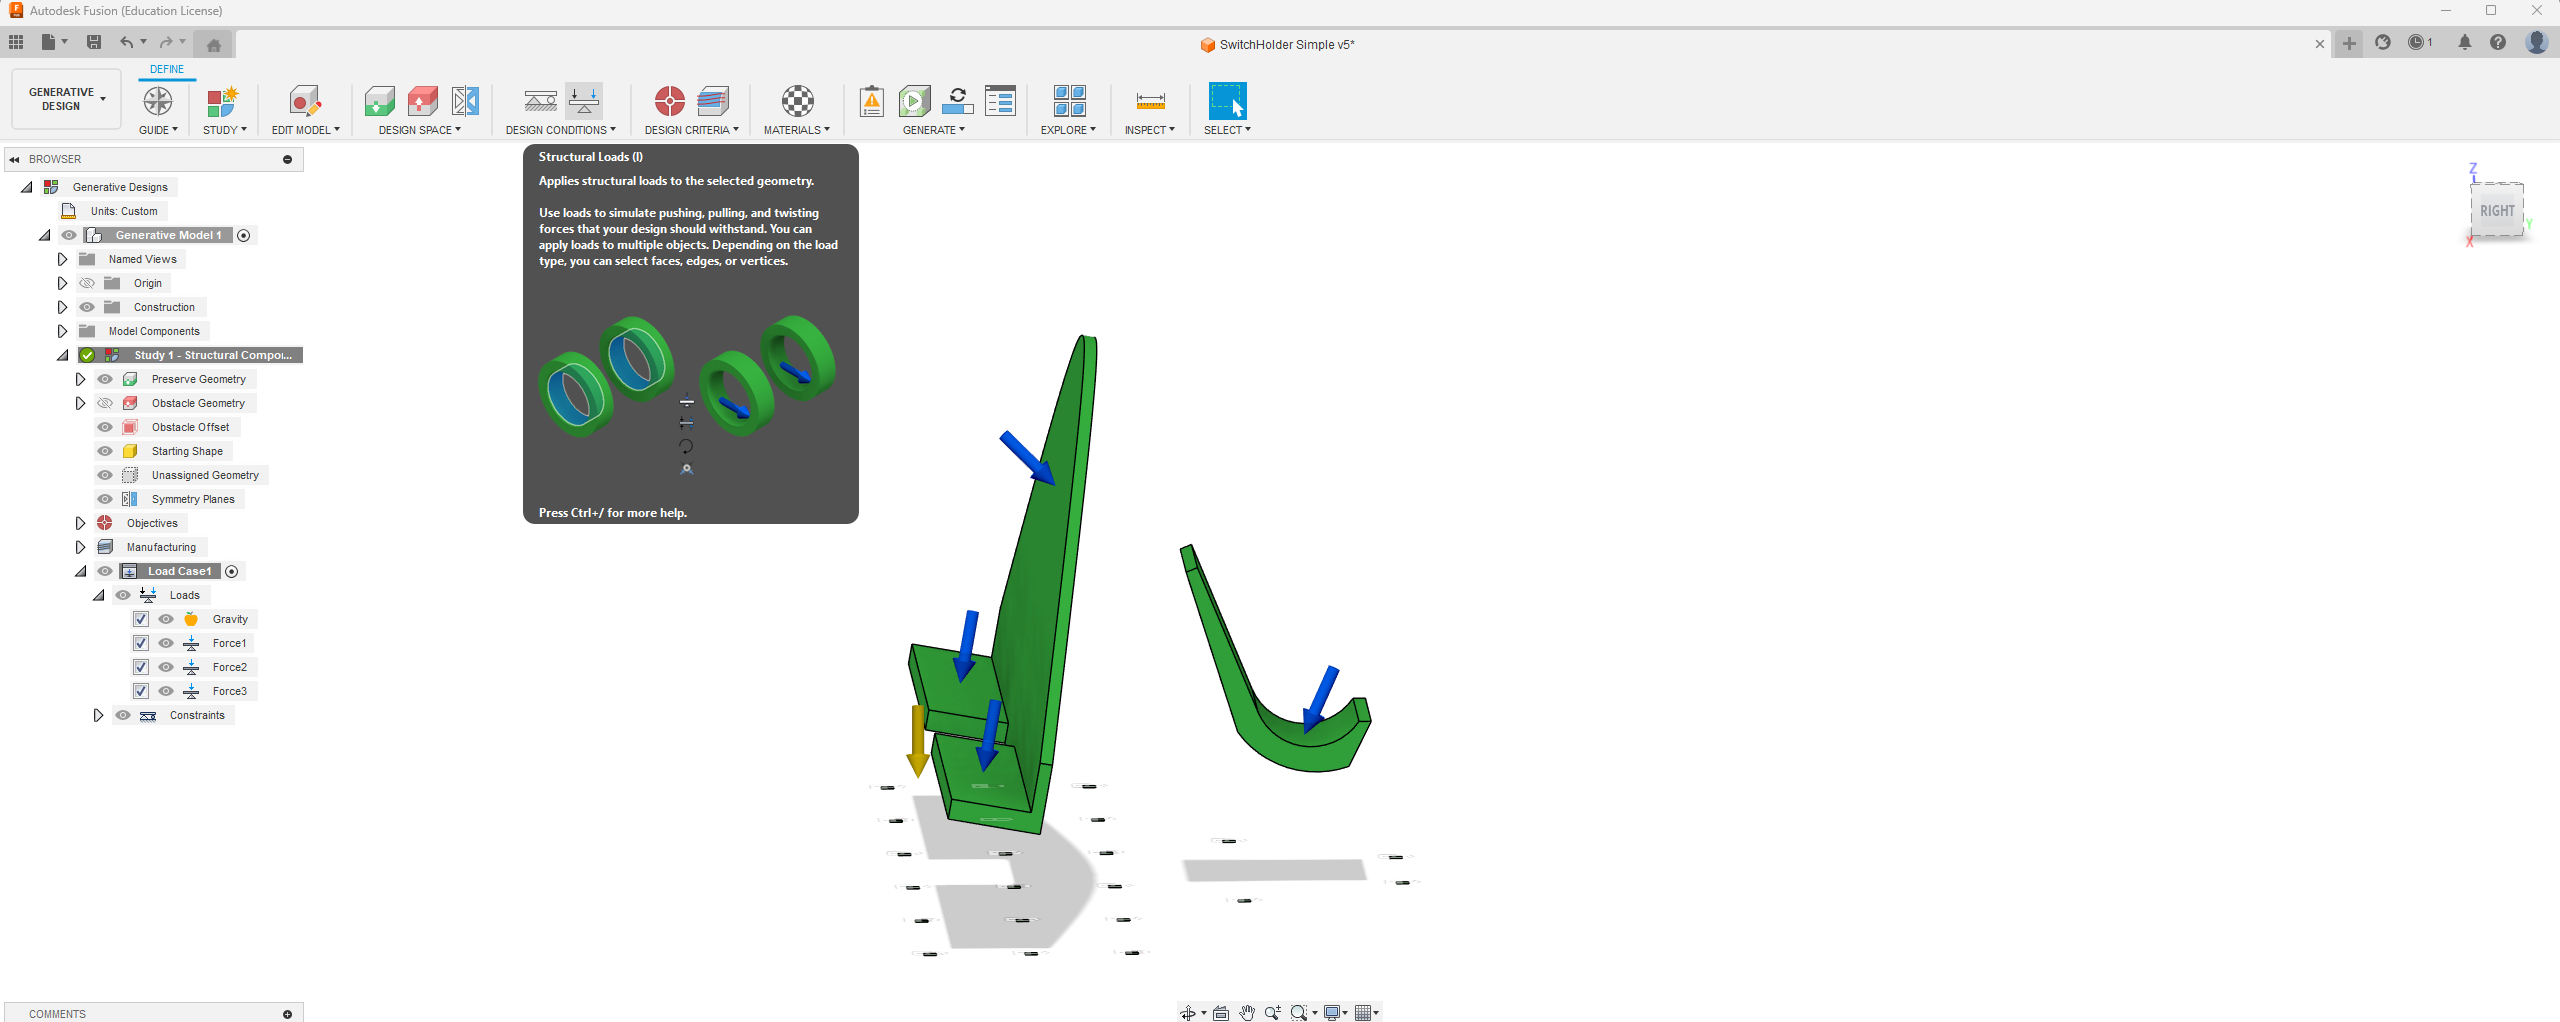
- Structural Load (Arrows): Select the holders and input the weight of the switch and controller. (About 3Nt)
- Objective: Select "minimize mass", to create the simplest and light weight design.
- Manufacturing: For this project we will select "additive".
- Materials: Select ABS plastic.
Generating
.png)
After you have everything set up, you can start the Generating Process.
Explore Solutions
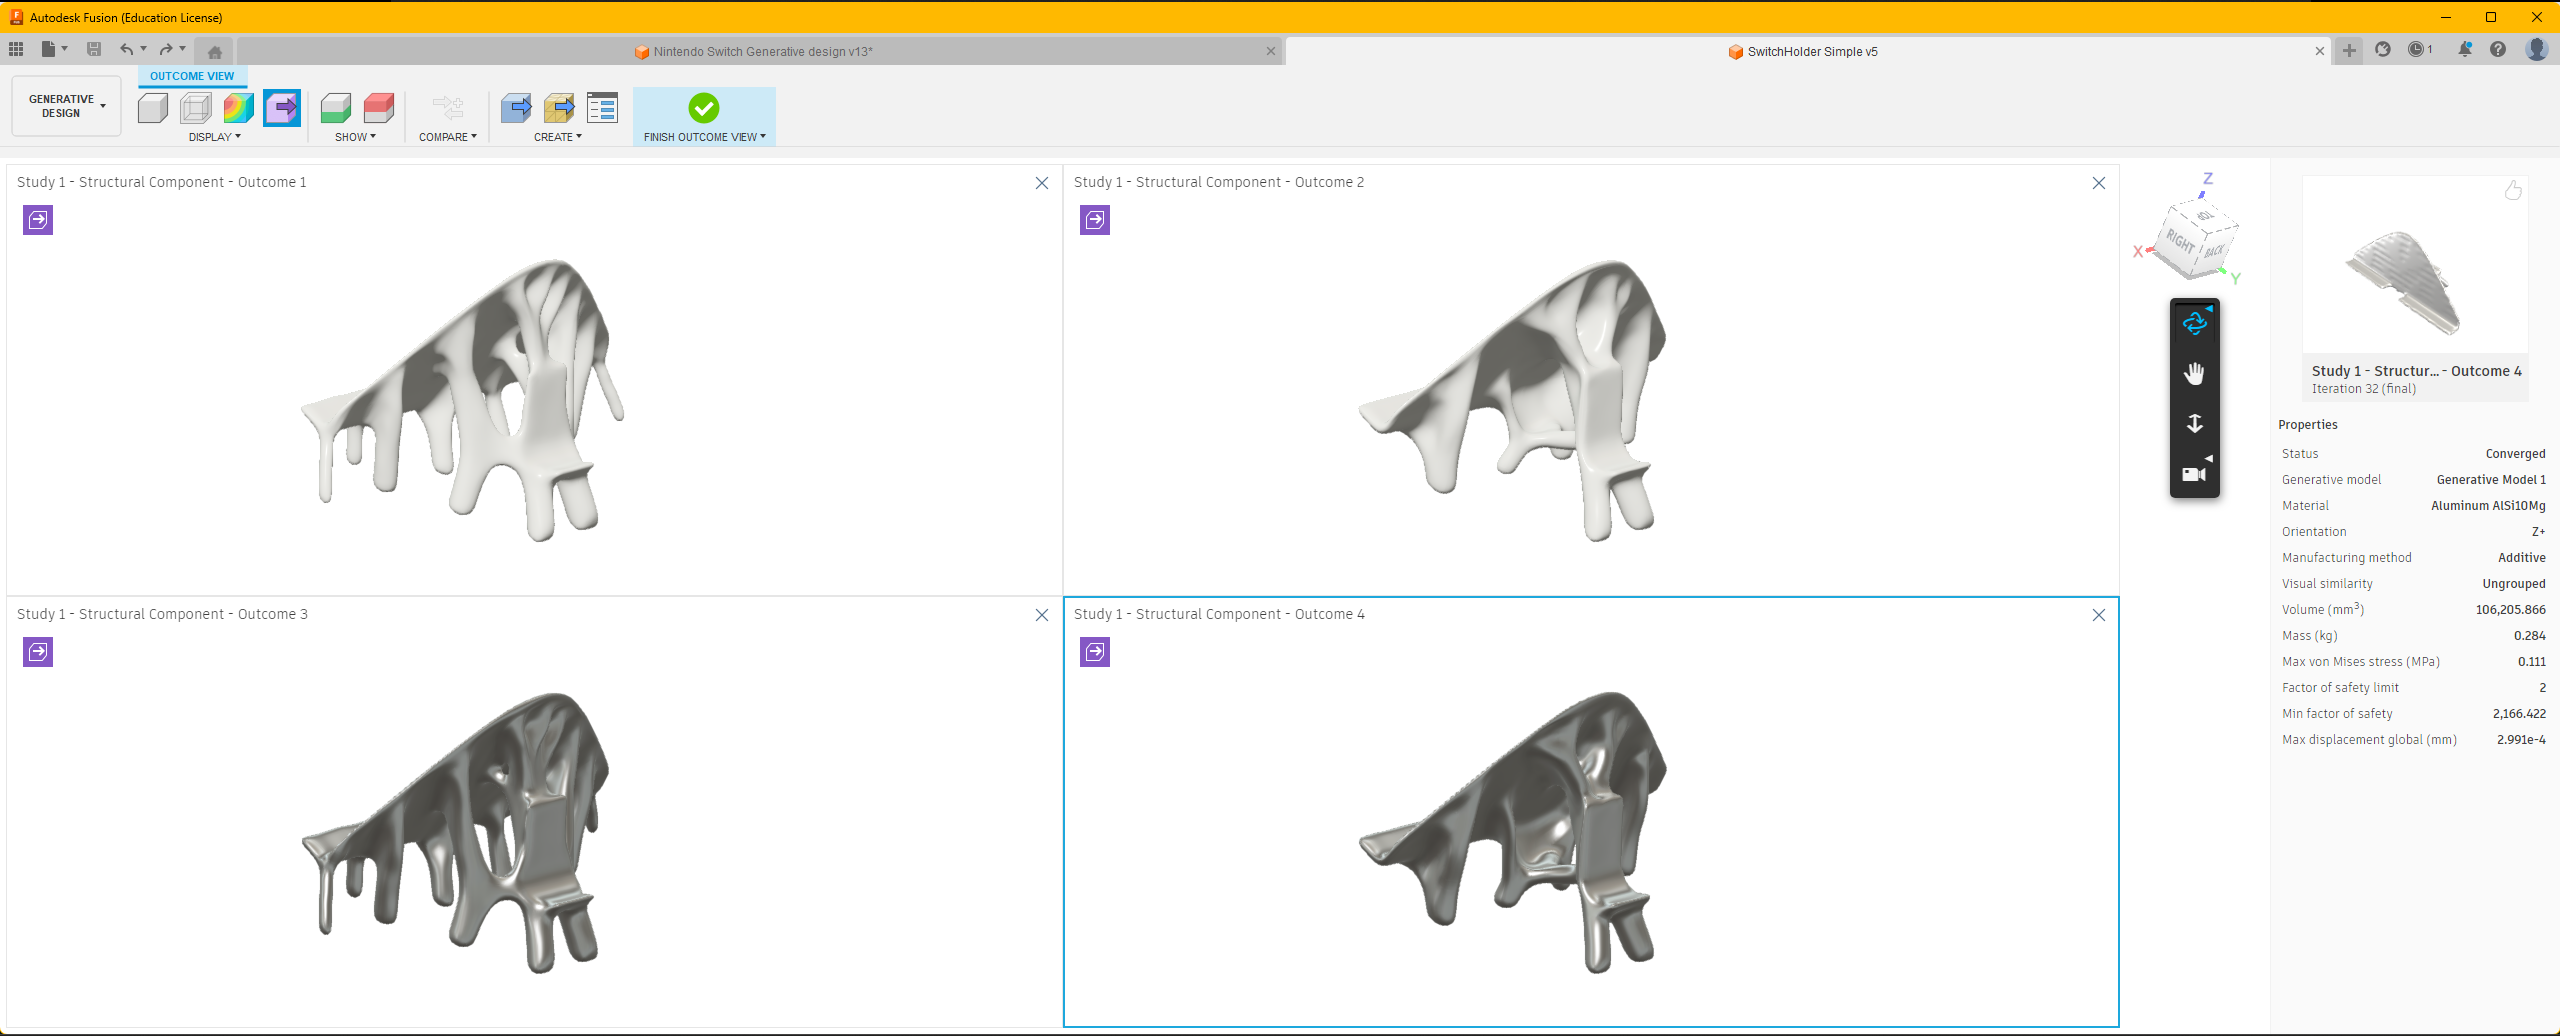.png)
Once finished, the software will form designs solution that works with all the inputs we provided. We can use the explore environment to find the best solution that fits our purpose.
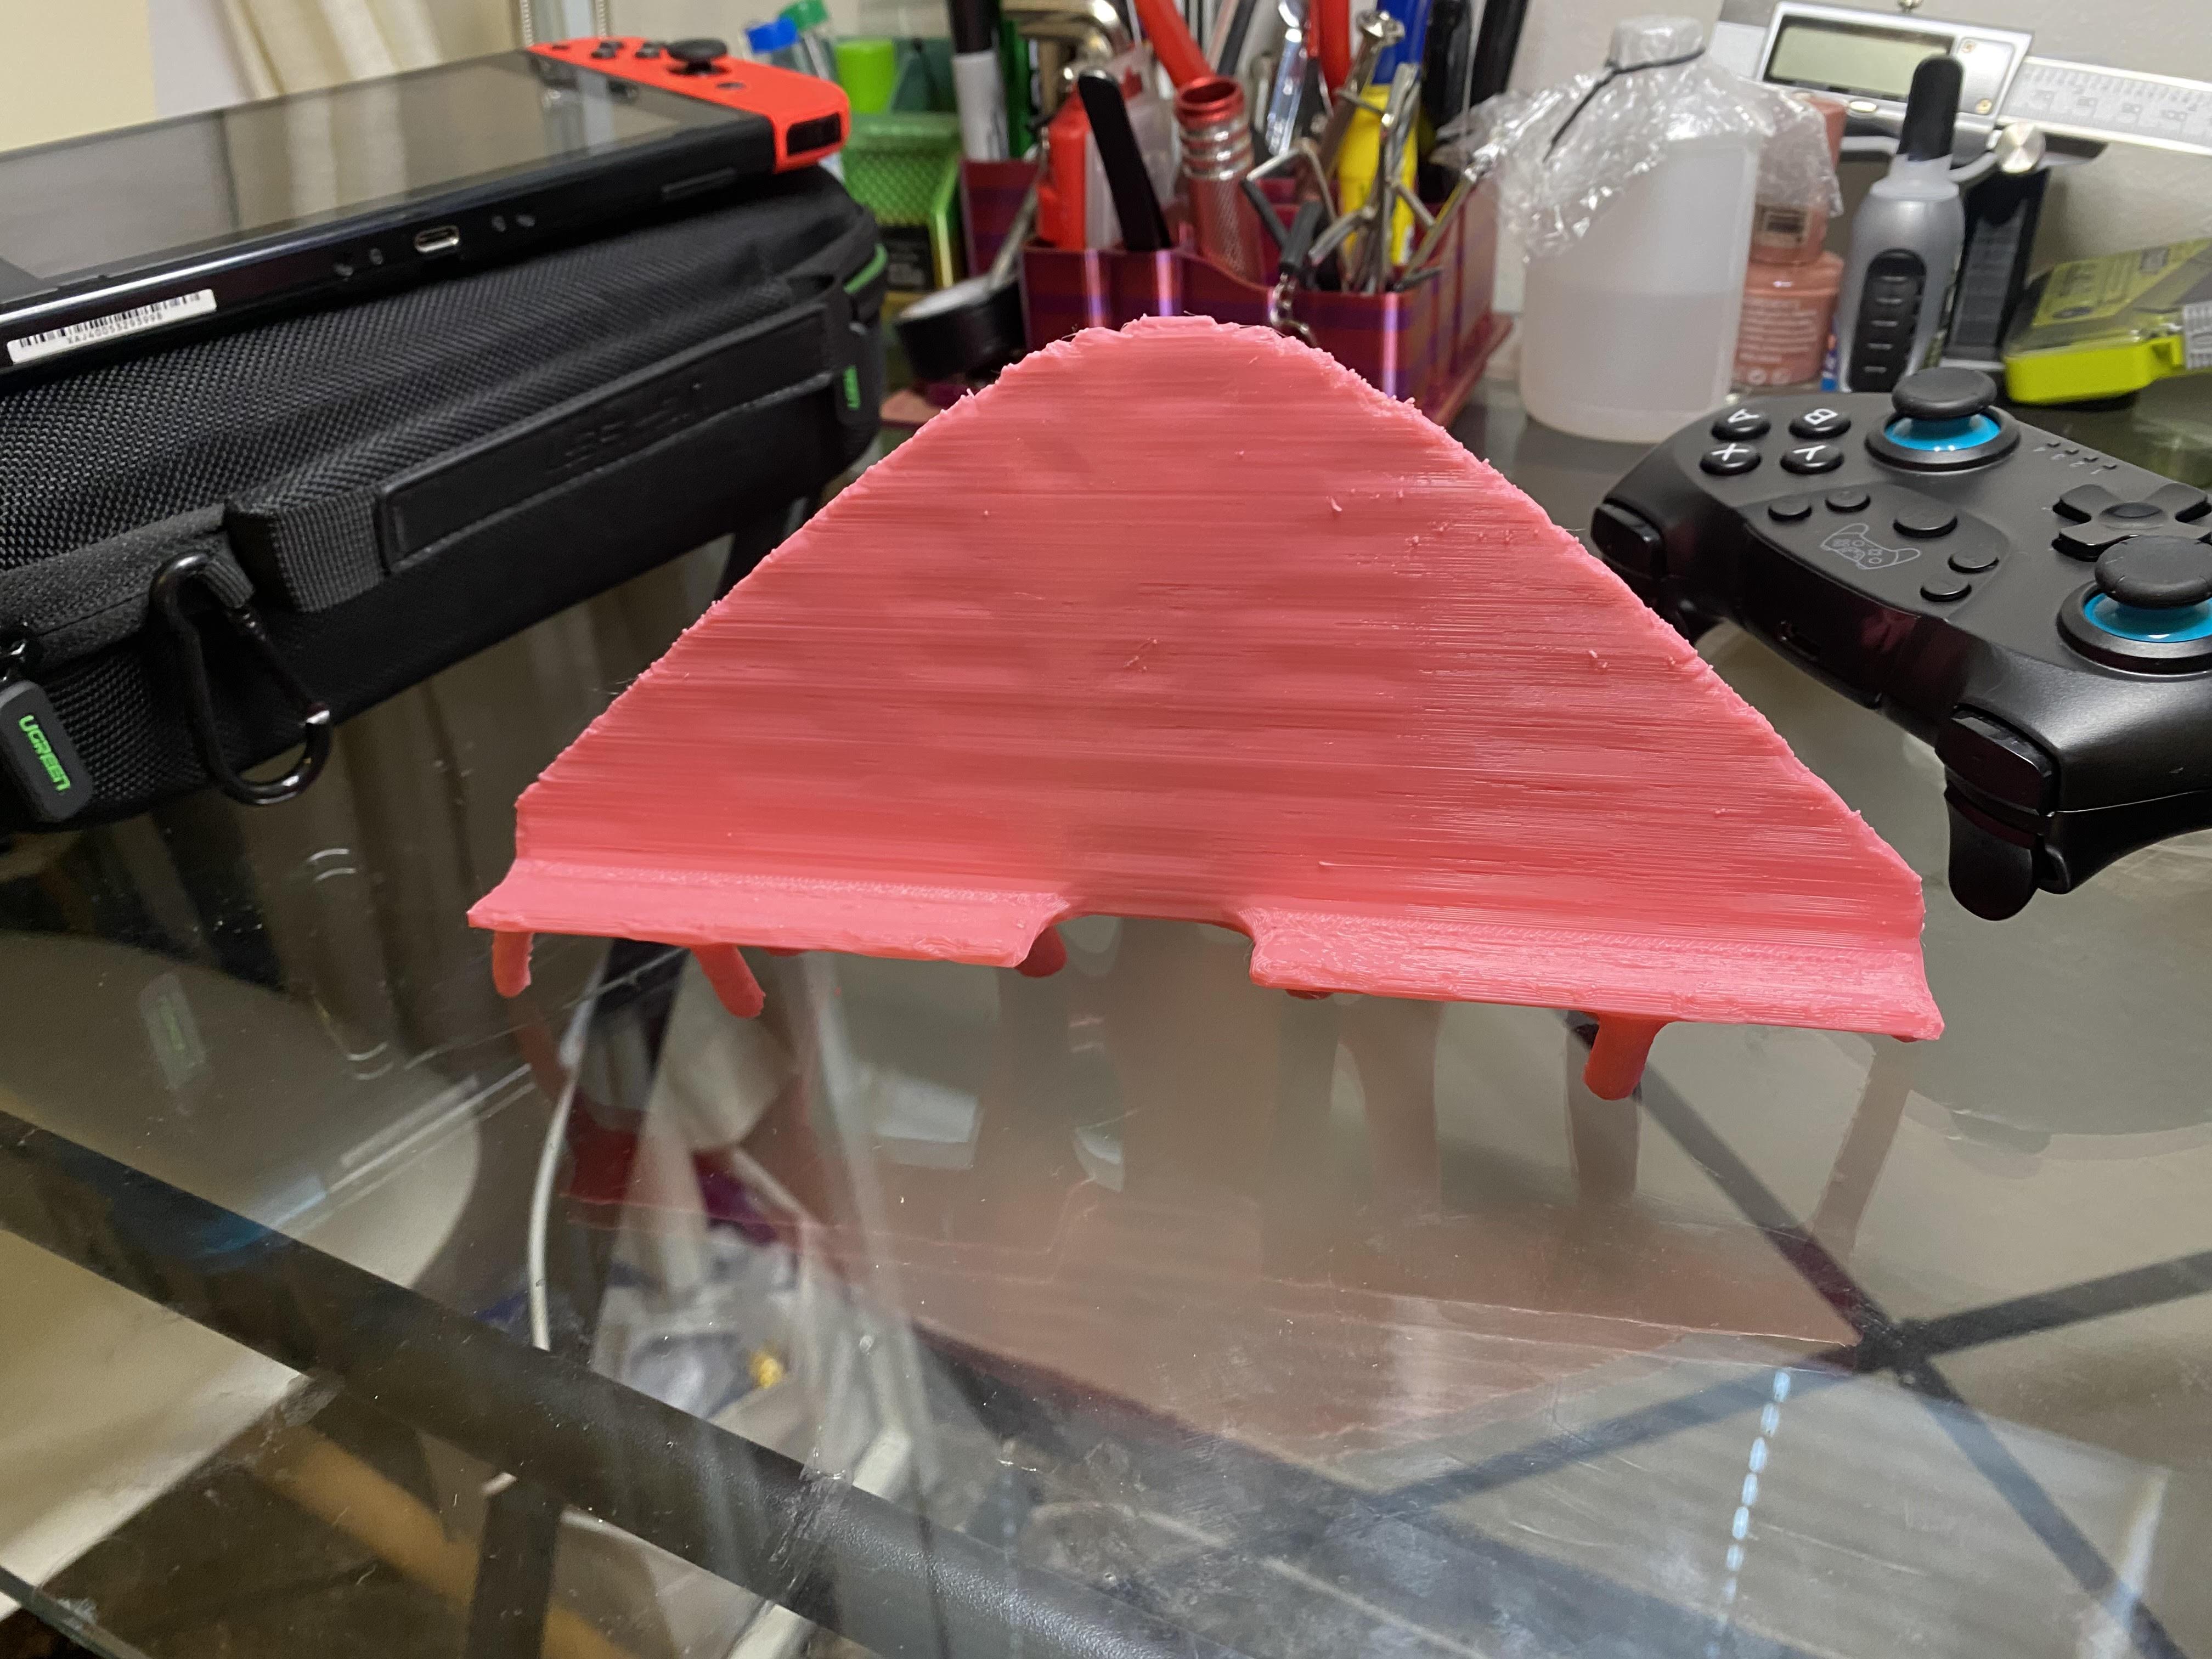
Print It Out and Test It!!
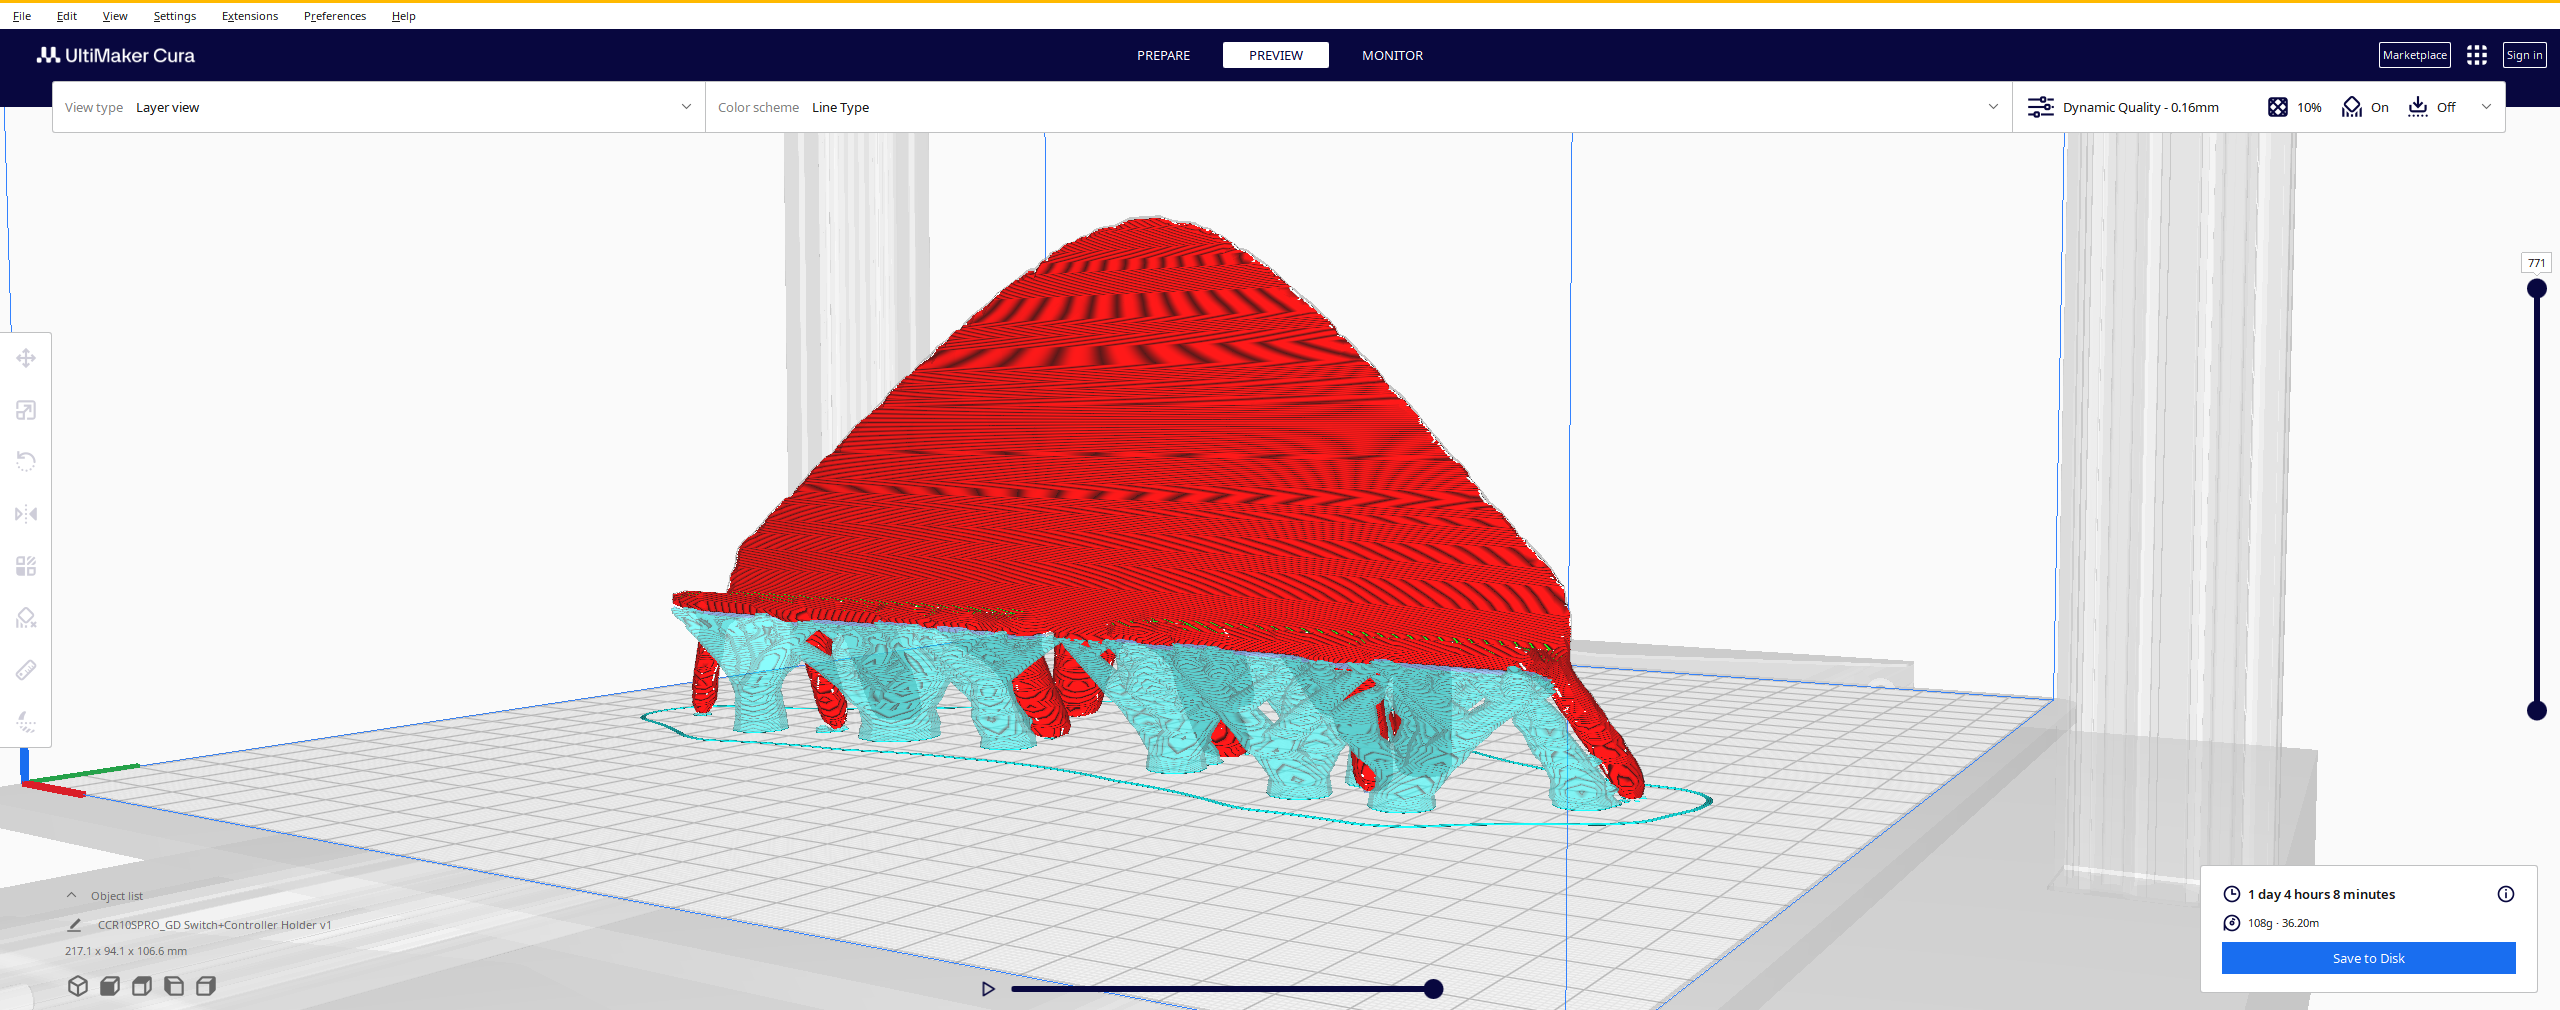.png)
.jpg)
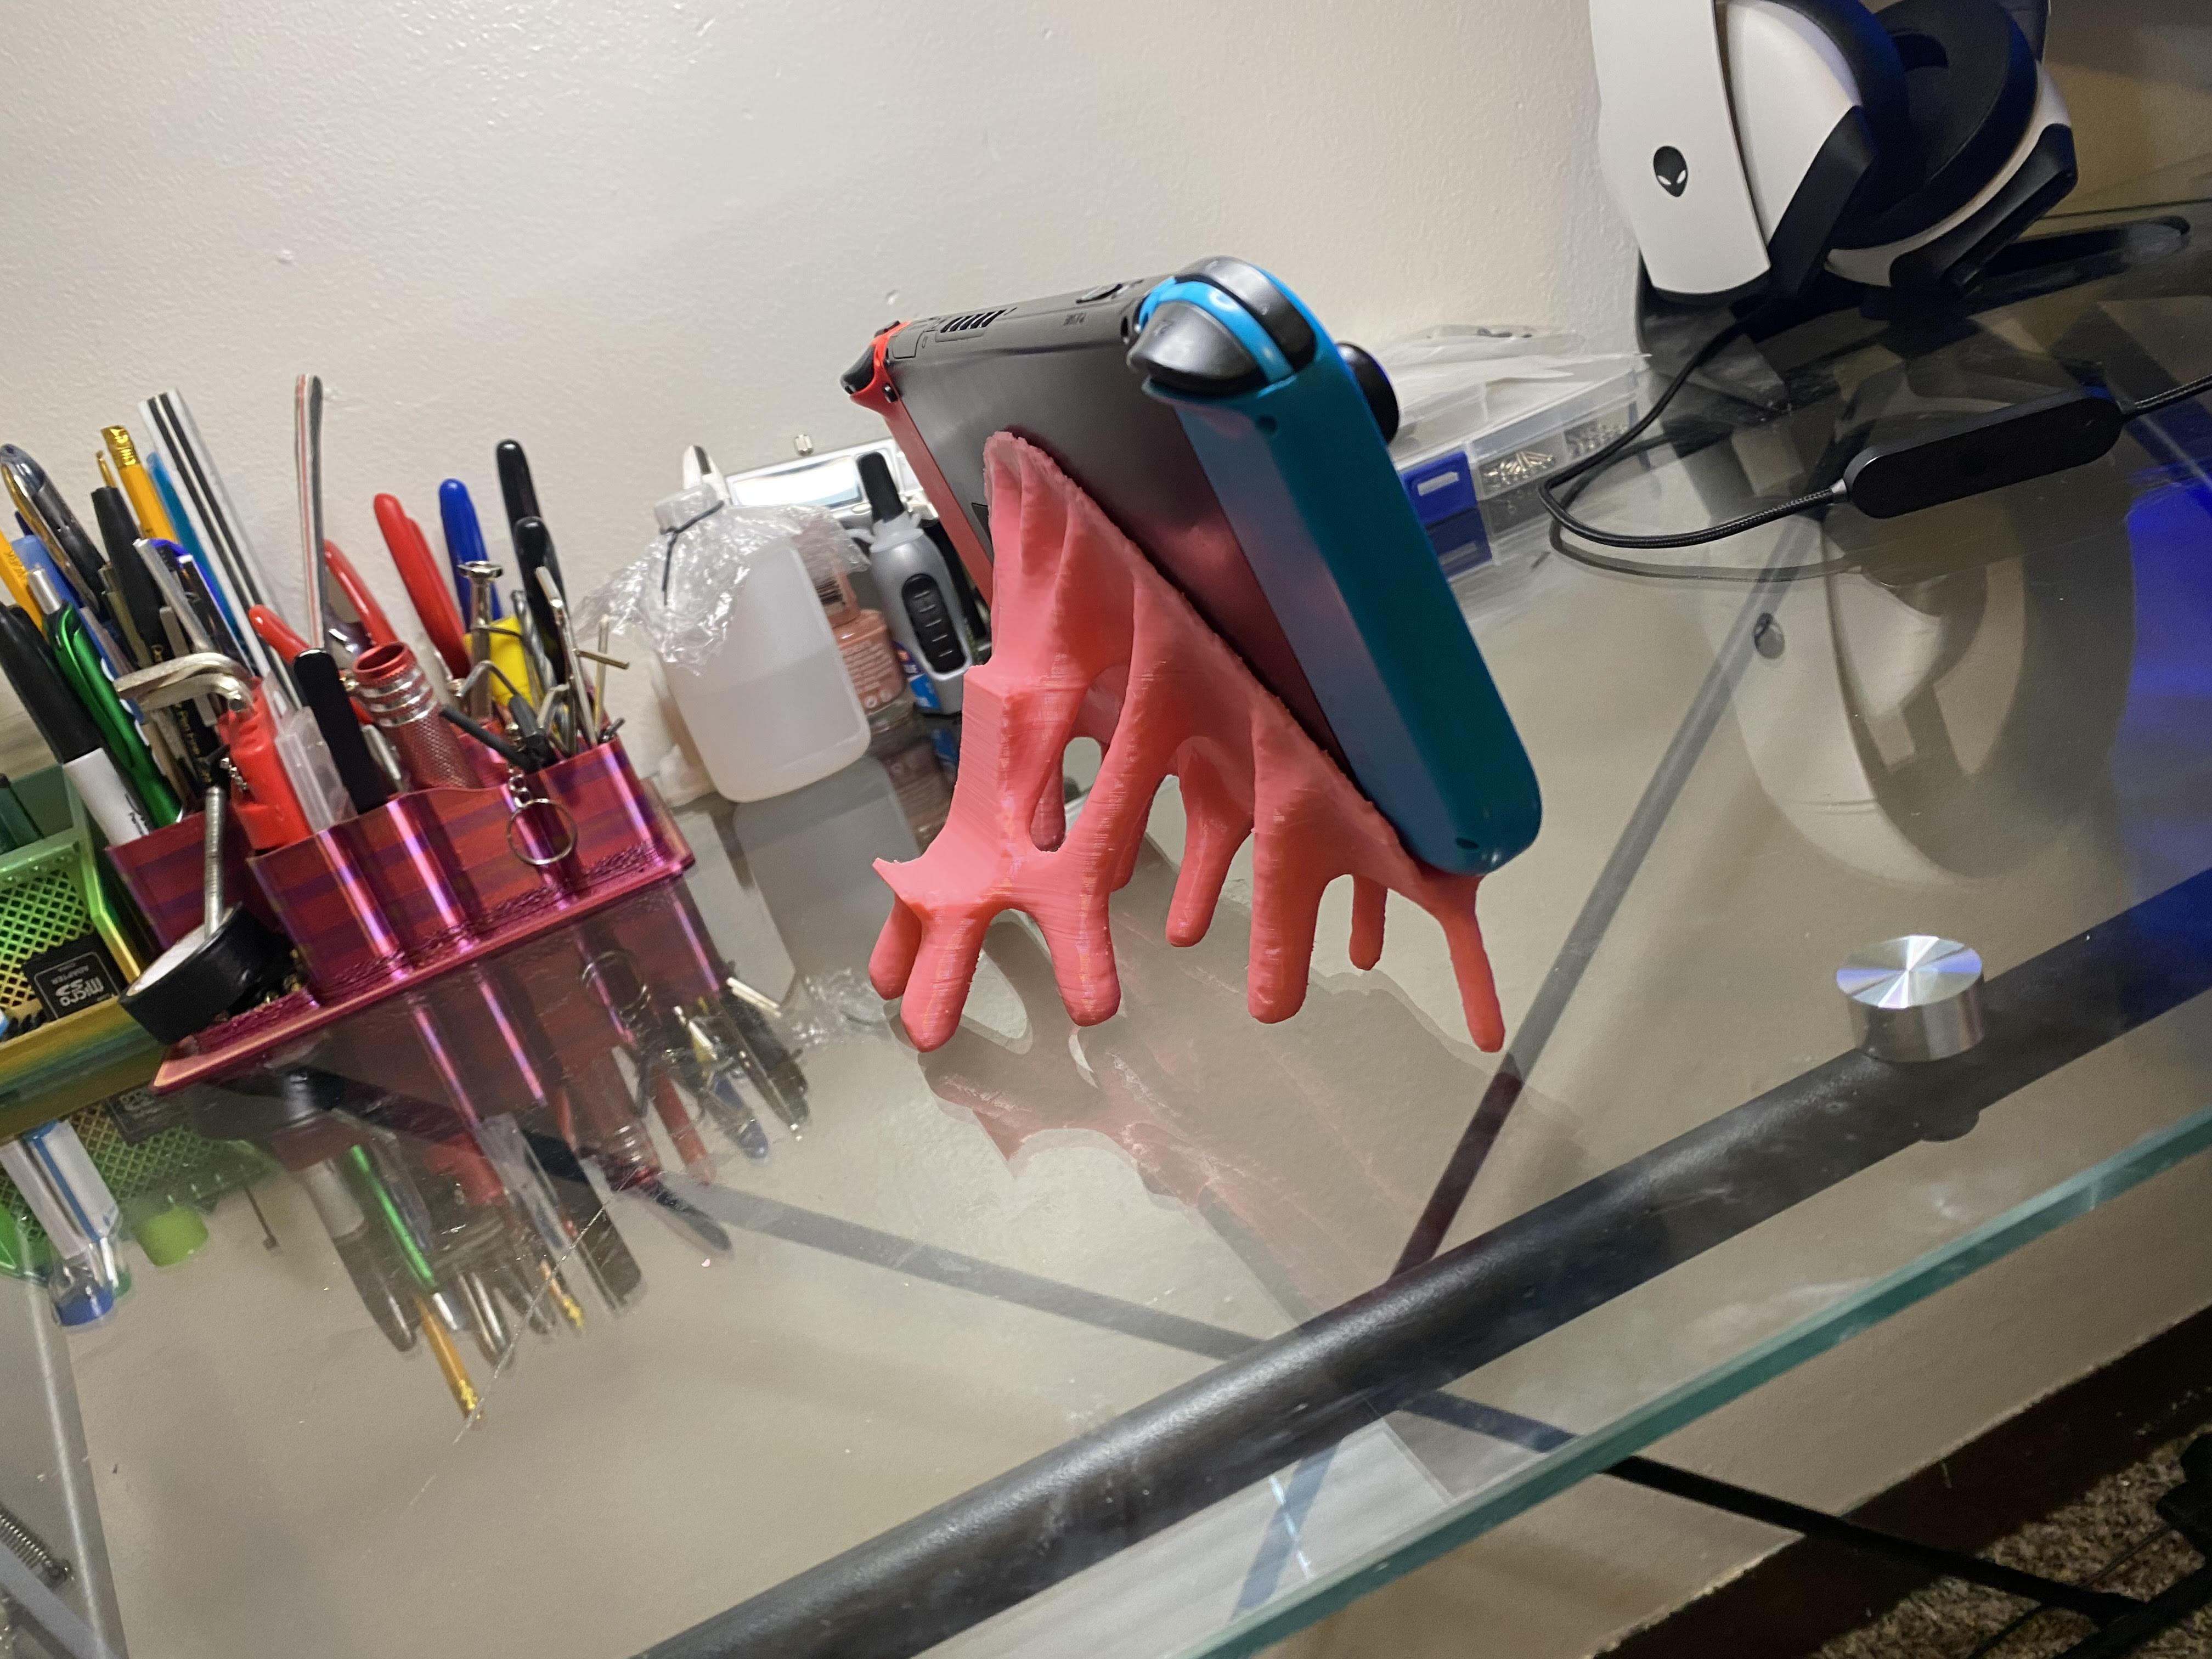
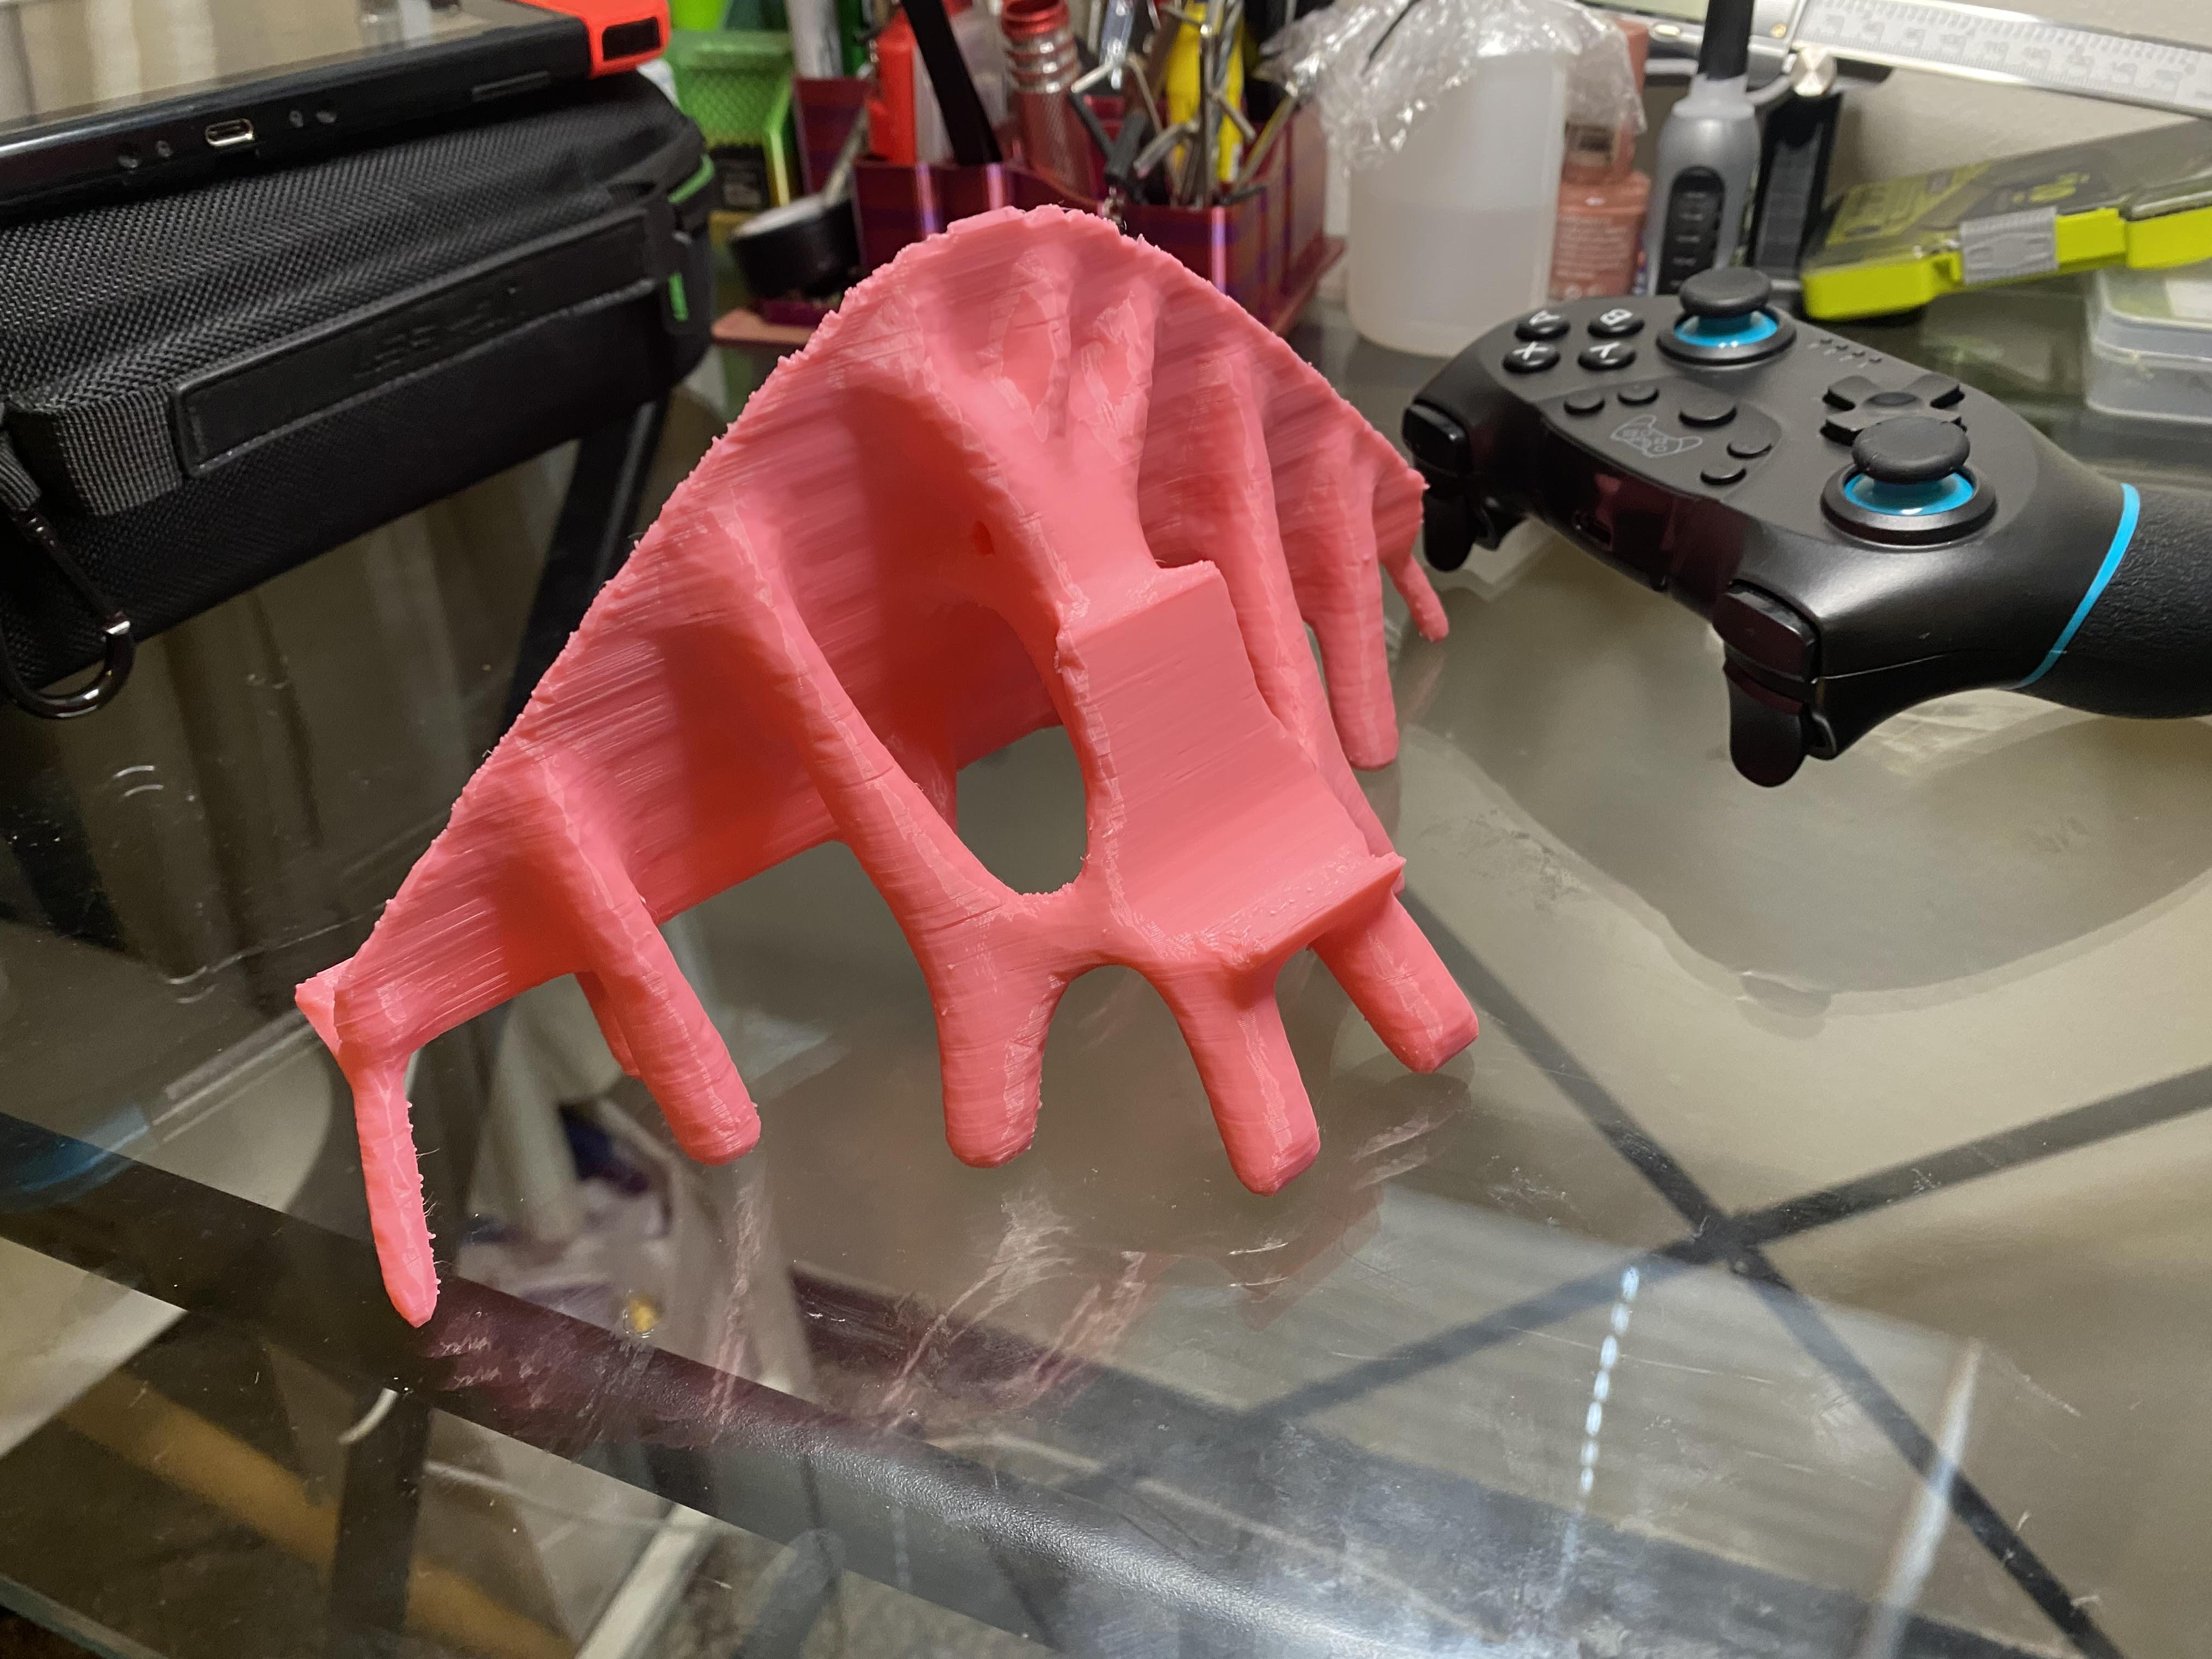.jpg)
Print it out and ENJOY!