Gemini AI Assistant With Esp32
by Arduino_guy in Circuits > Microcontrollers
2940 Views, 17 Favorites, 0 Comments
Gemini AI Assistant With Esp32

As you may have used google's new AI assistant Gemini. A few time ago Gemini's api got out, so this is a project to test the gemini api
why gemini?
- there is a controvercy between google's Gemini and open ai's chatGPT while chatGPT has huge popularity it isn't free.
- where as gemini is free that means we can ask as many questions as we want.
Supplies
- ESP32 dev module
- 2.8 nich tft display
Connection
Getting the Api Key

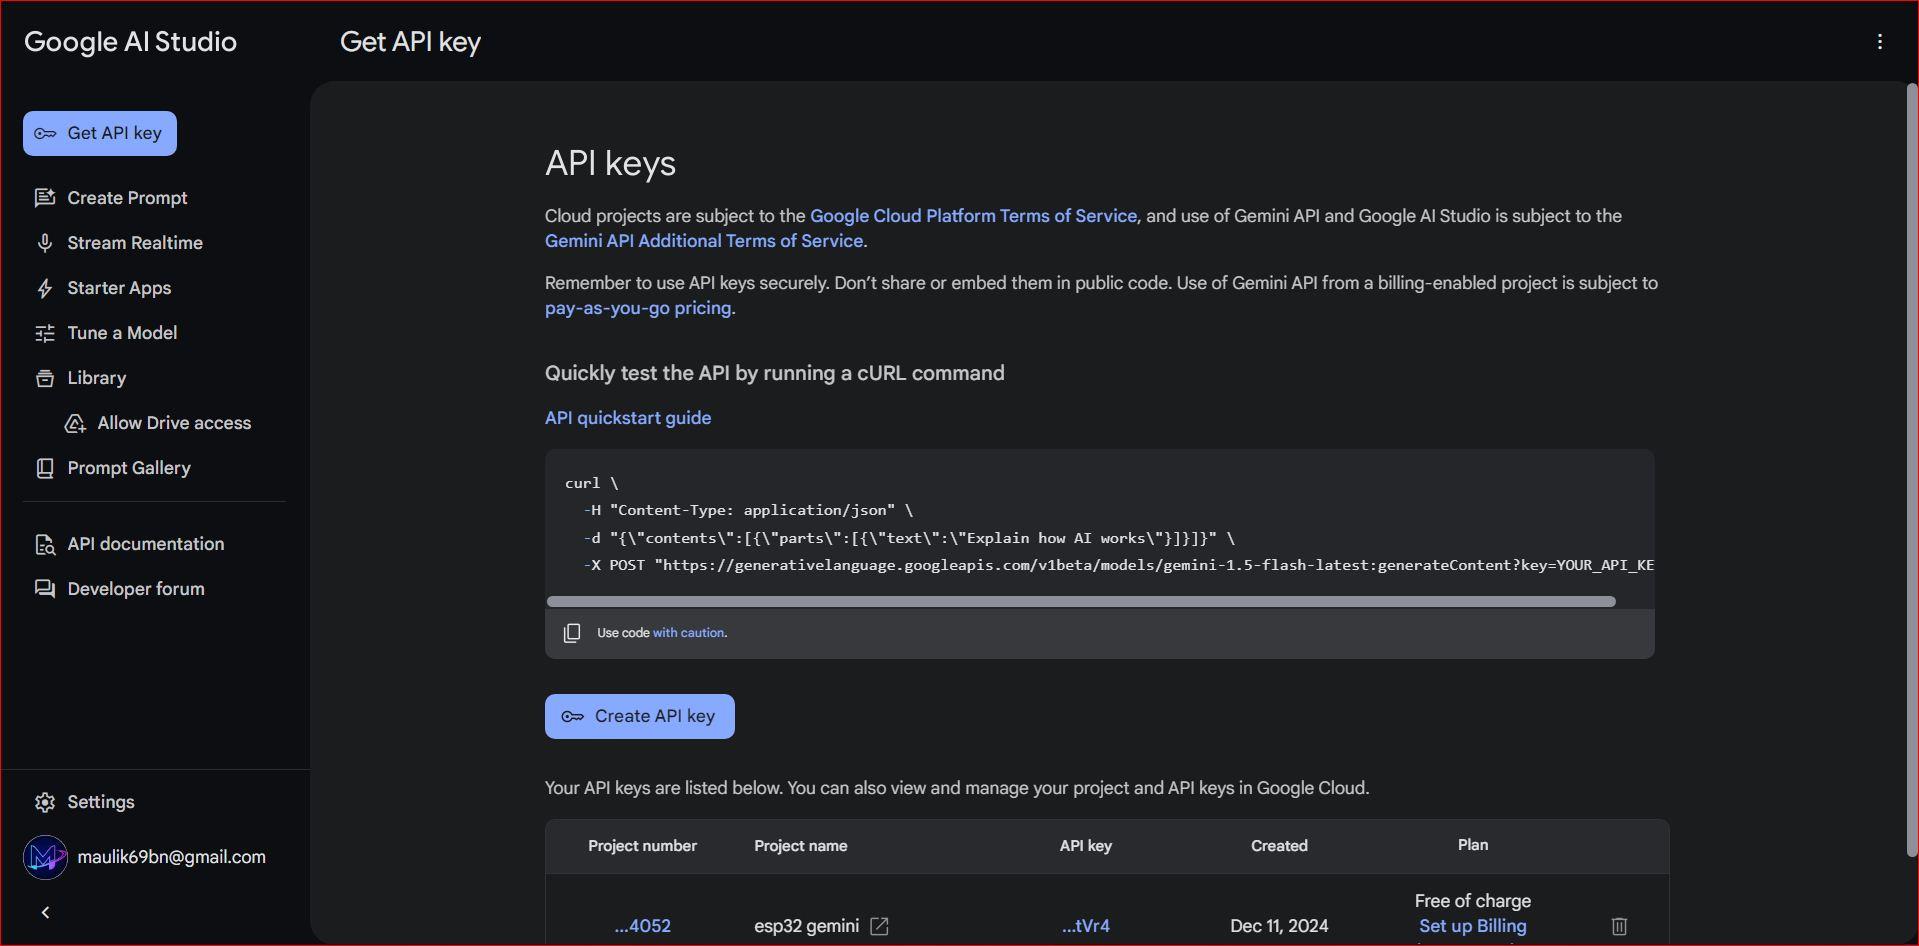
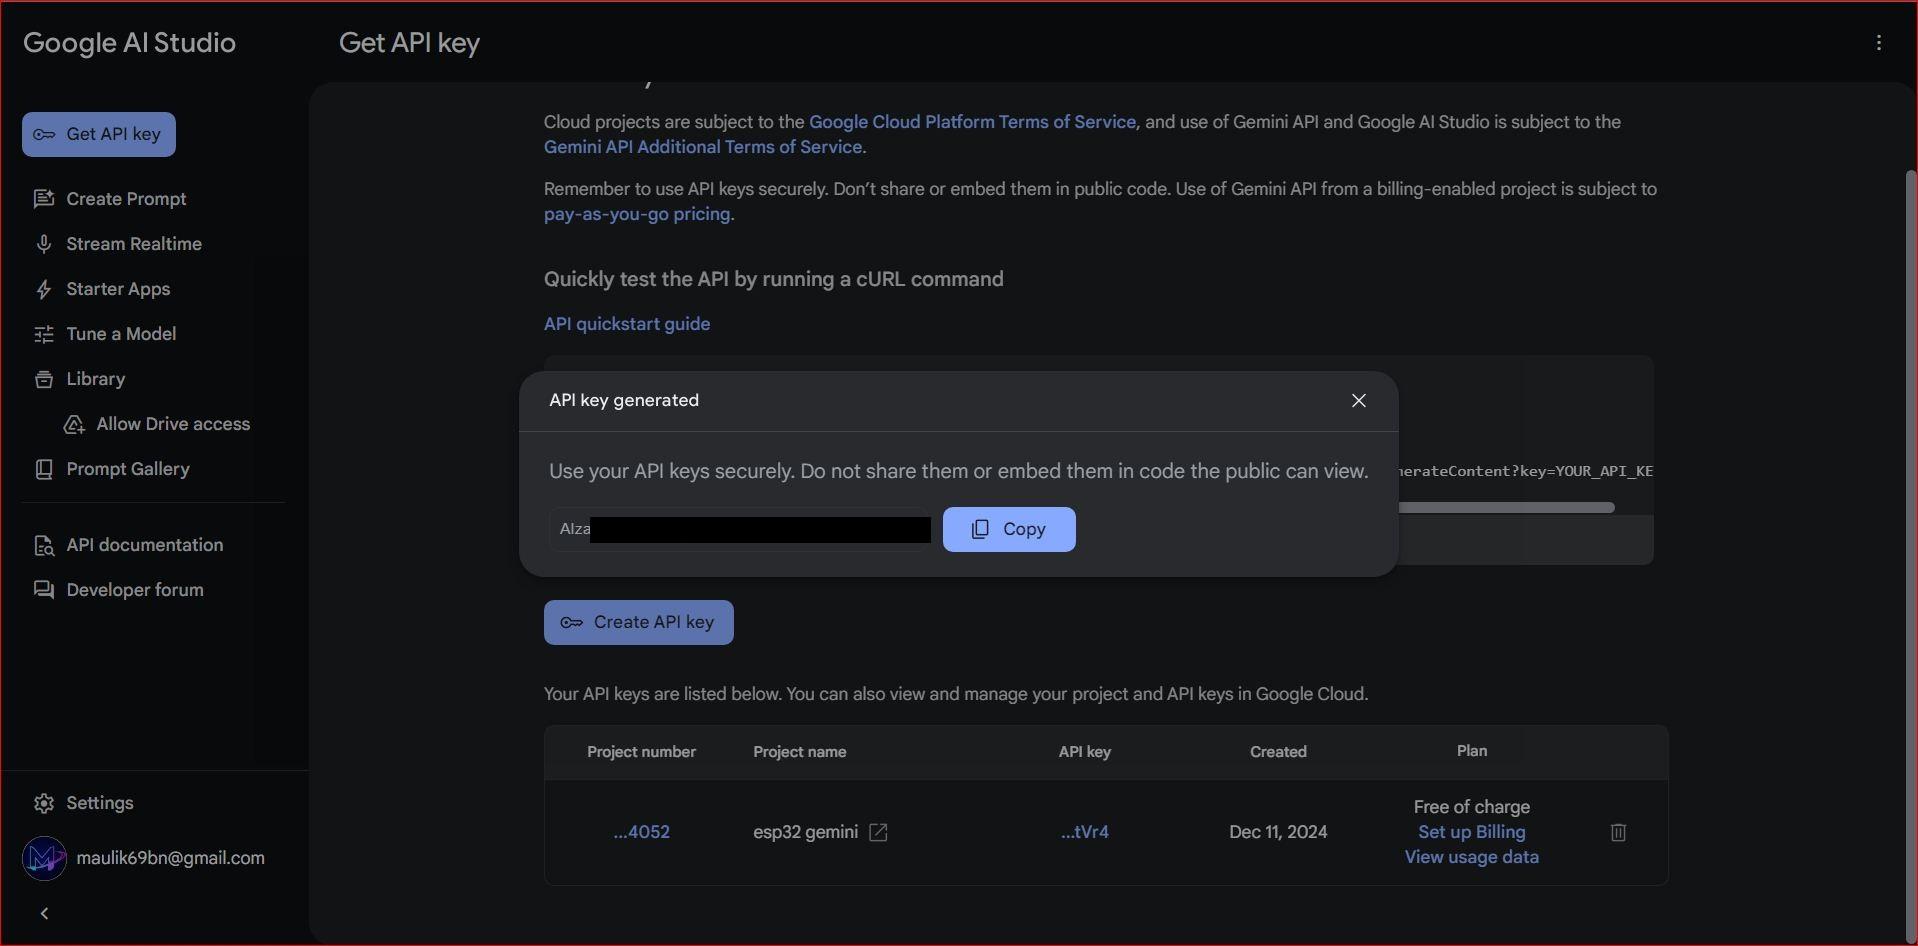
- search for gemini API docs.
- click on "get a Gemini api key".
- then "create API key".
- then click "Create new api key".
- click "copy".
And here you have the API key for gemini AI.
Setting Up the Boards
Skip this step if you have all library and boards installed.
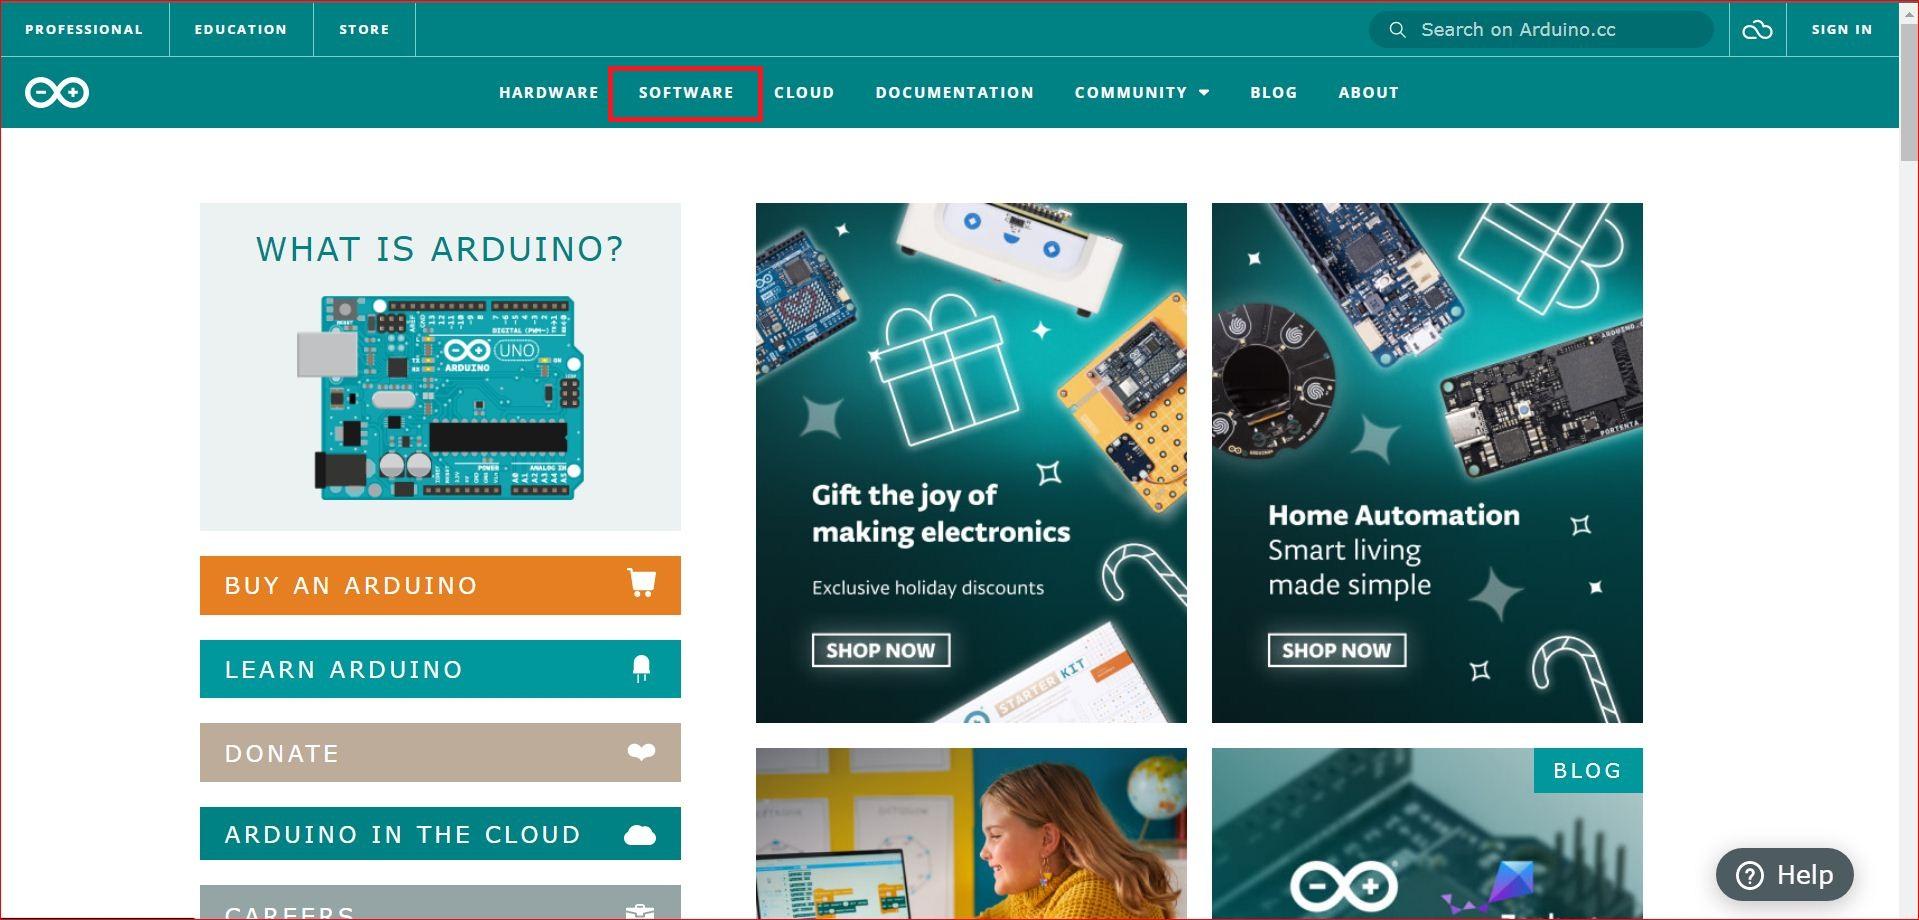
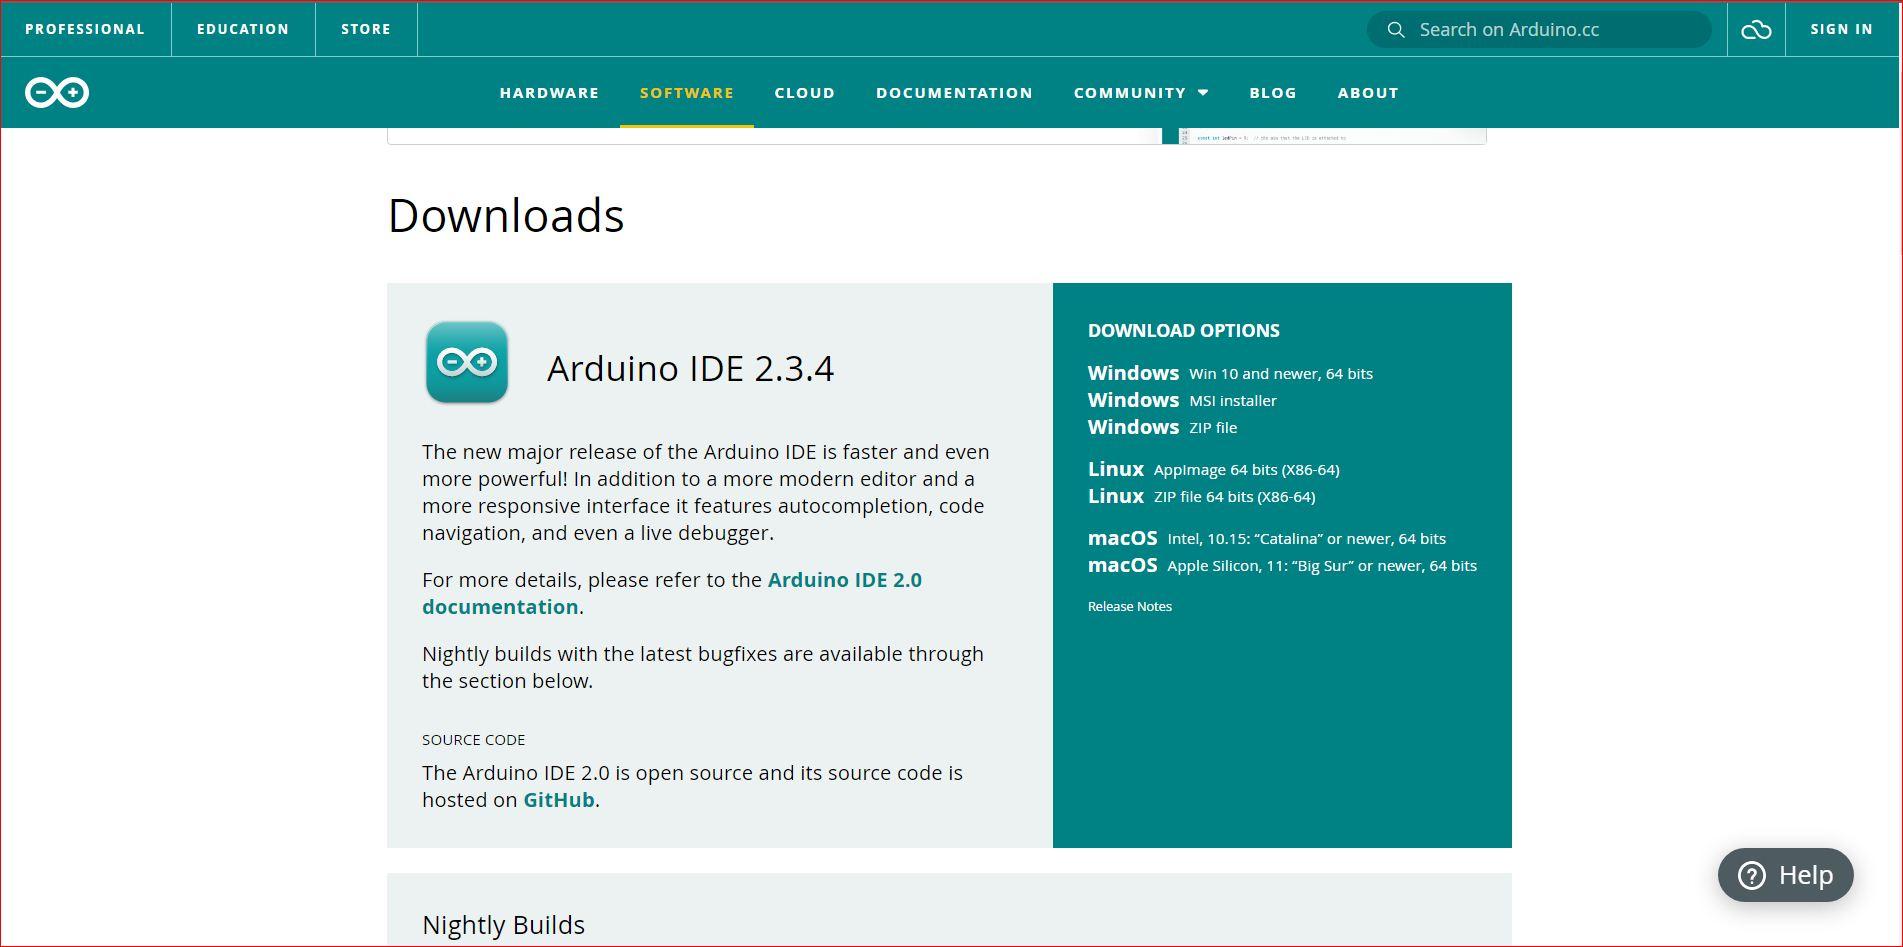
Installing arduino ide :
- go to Arduino.cc
- then click on "software"
- install the software according to your pc.
- after it gets download install it.
Installing esp32 bord manager :
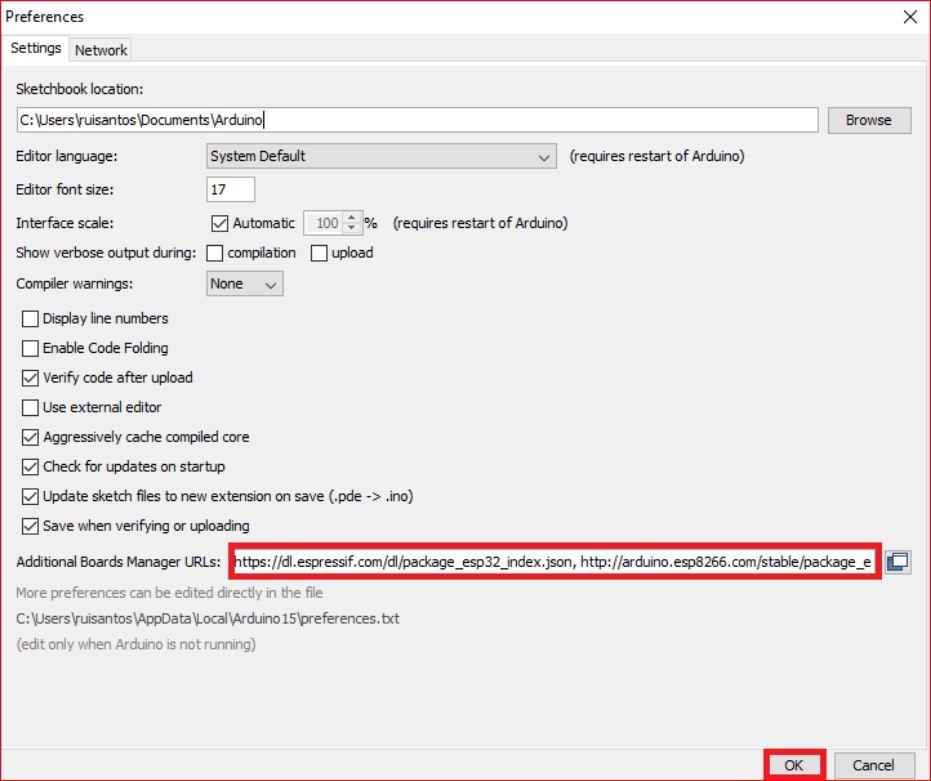
- In your Arduino IDE, go to File> Preferences
- In Additional Boards Manager URL paste this url - https://dl.espressif.com/dl/package_esp32_index.json,http://arduino.esp8266.com/stable/package_esp8266com_index.json
- Open the Boards Manager, Go to Tools> Boards> Boards Manager
- search fo esp32 by Espressif Systems and click install.
All the libraries you will need for this project :
NOTE :- replace the user setup.h file of TFT_eSPI library with the file given below.
User setup file location
documents --> Arduino --> libraries --> TFT_eSPI
Downloads
Code
There are just few changes to be done and you are good to go
- replace the "ssid" with your wifi"s name.
- replace "password" with your wifi's password.
- replace "API" with the Gemini API key got in the 2nd step.
- click on upload.
and there you have the your esp32 runnig Gemini AI.
Downloads
Conclusion
you can aks any question using the serial monitor in the IDE press "ctrl+shift+m" keys to open the serial monitor and after it gets connected to network try asking your question
the answer will get displayed on both serial monitor and tft display.
enjoy.