Gel Dispenser_PC1_Benjamin Gamboa Durand
by Benjamin417 in Circuits > Wearables
67 Views, 0 Favorites, 0 Comments
Gel Dispenser_PC1_Benjamin Gamboa Durand
Hola amigos, hoy vamos a desarrollar un proyecto muy divertido y entretenido para hacer un dispensador de gel paso a paso. Te gustará, "EMPEZEMOS".
Materials
- Computadora (Windows 10)
- Software Autodesk Fusión 360
- Periféricos:
- Ratón
- Teclado
- Imagen DXF
-
Wifi
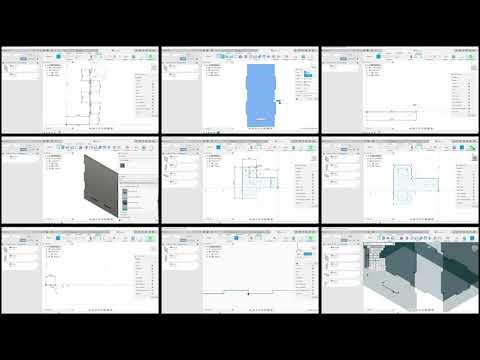
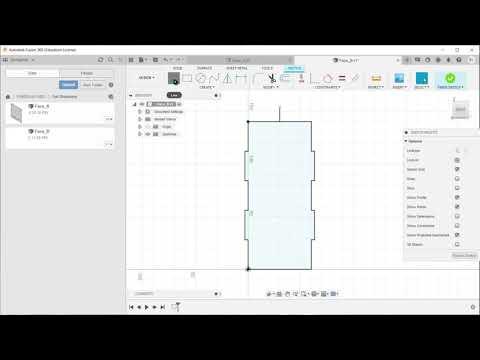
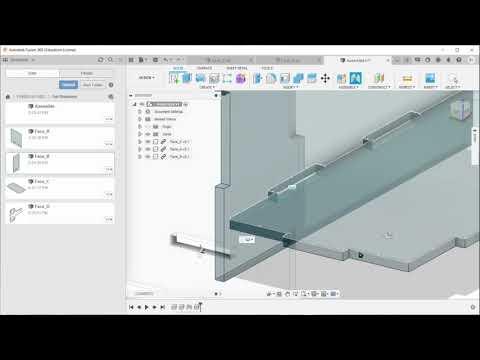
FACE_A


We will start by opening the "FUSION 360" and we will create a folder to file all our faces and others, then we will place ourselves in sketch to develop the Face_A and we will place ourselves in the red and blue axes, and we will follow the sequence that is observed in the video and finally, do not forget to save our Face_A already extracted.
- Do not forget that the tools to use are: LINE-MIRROR-EXTRUDE-APPEARANCE
FACE_B
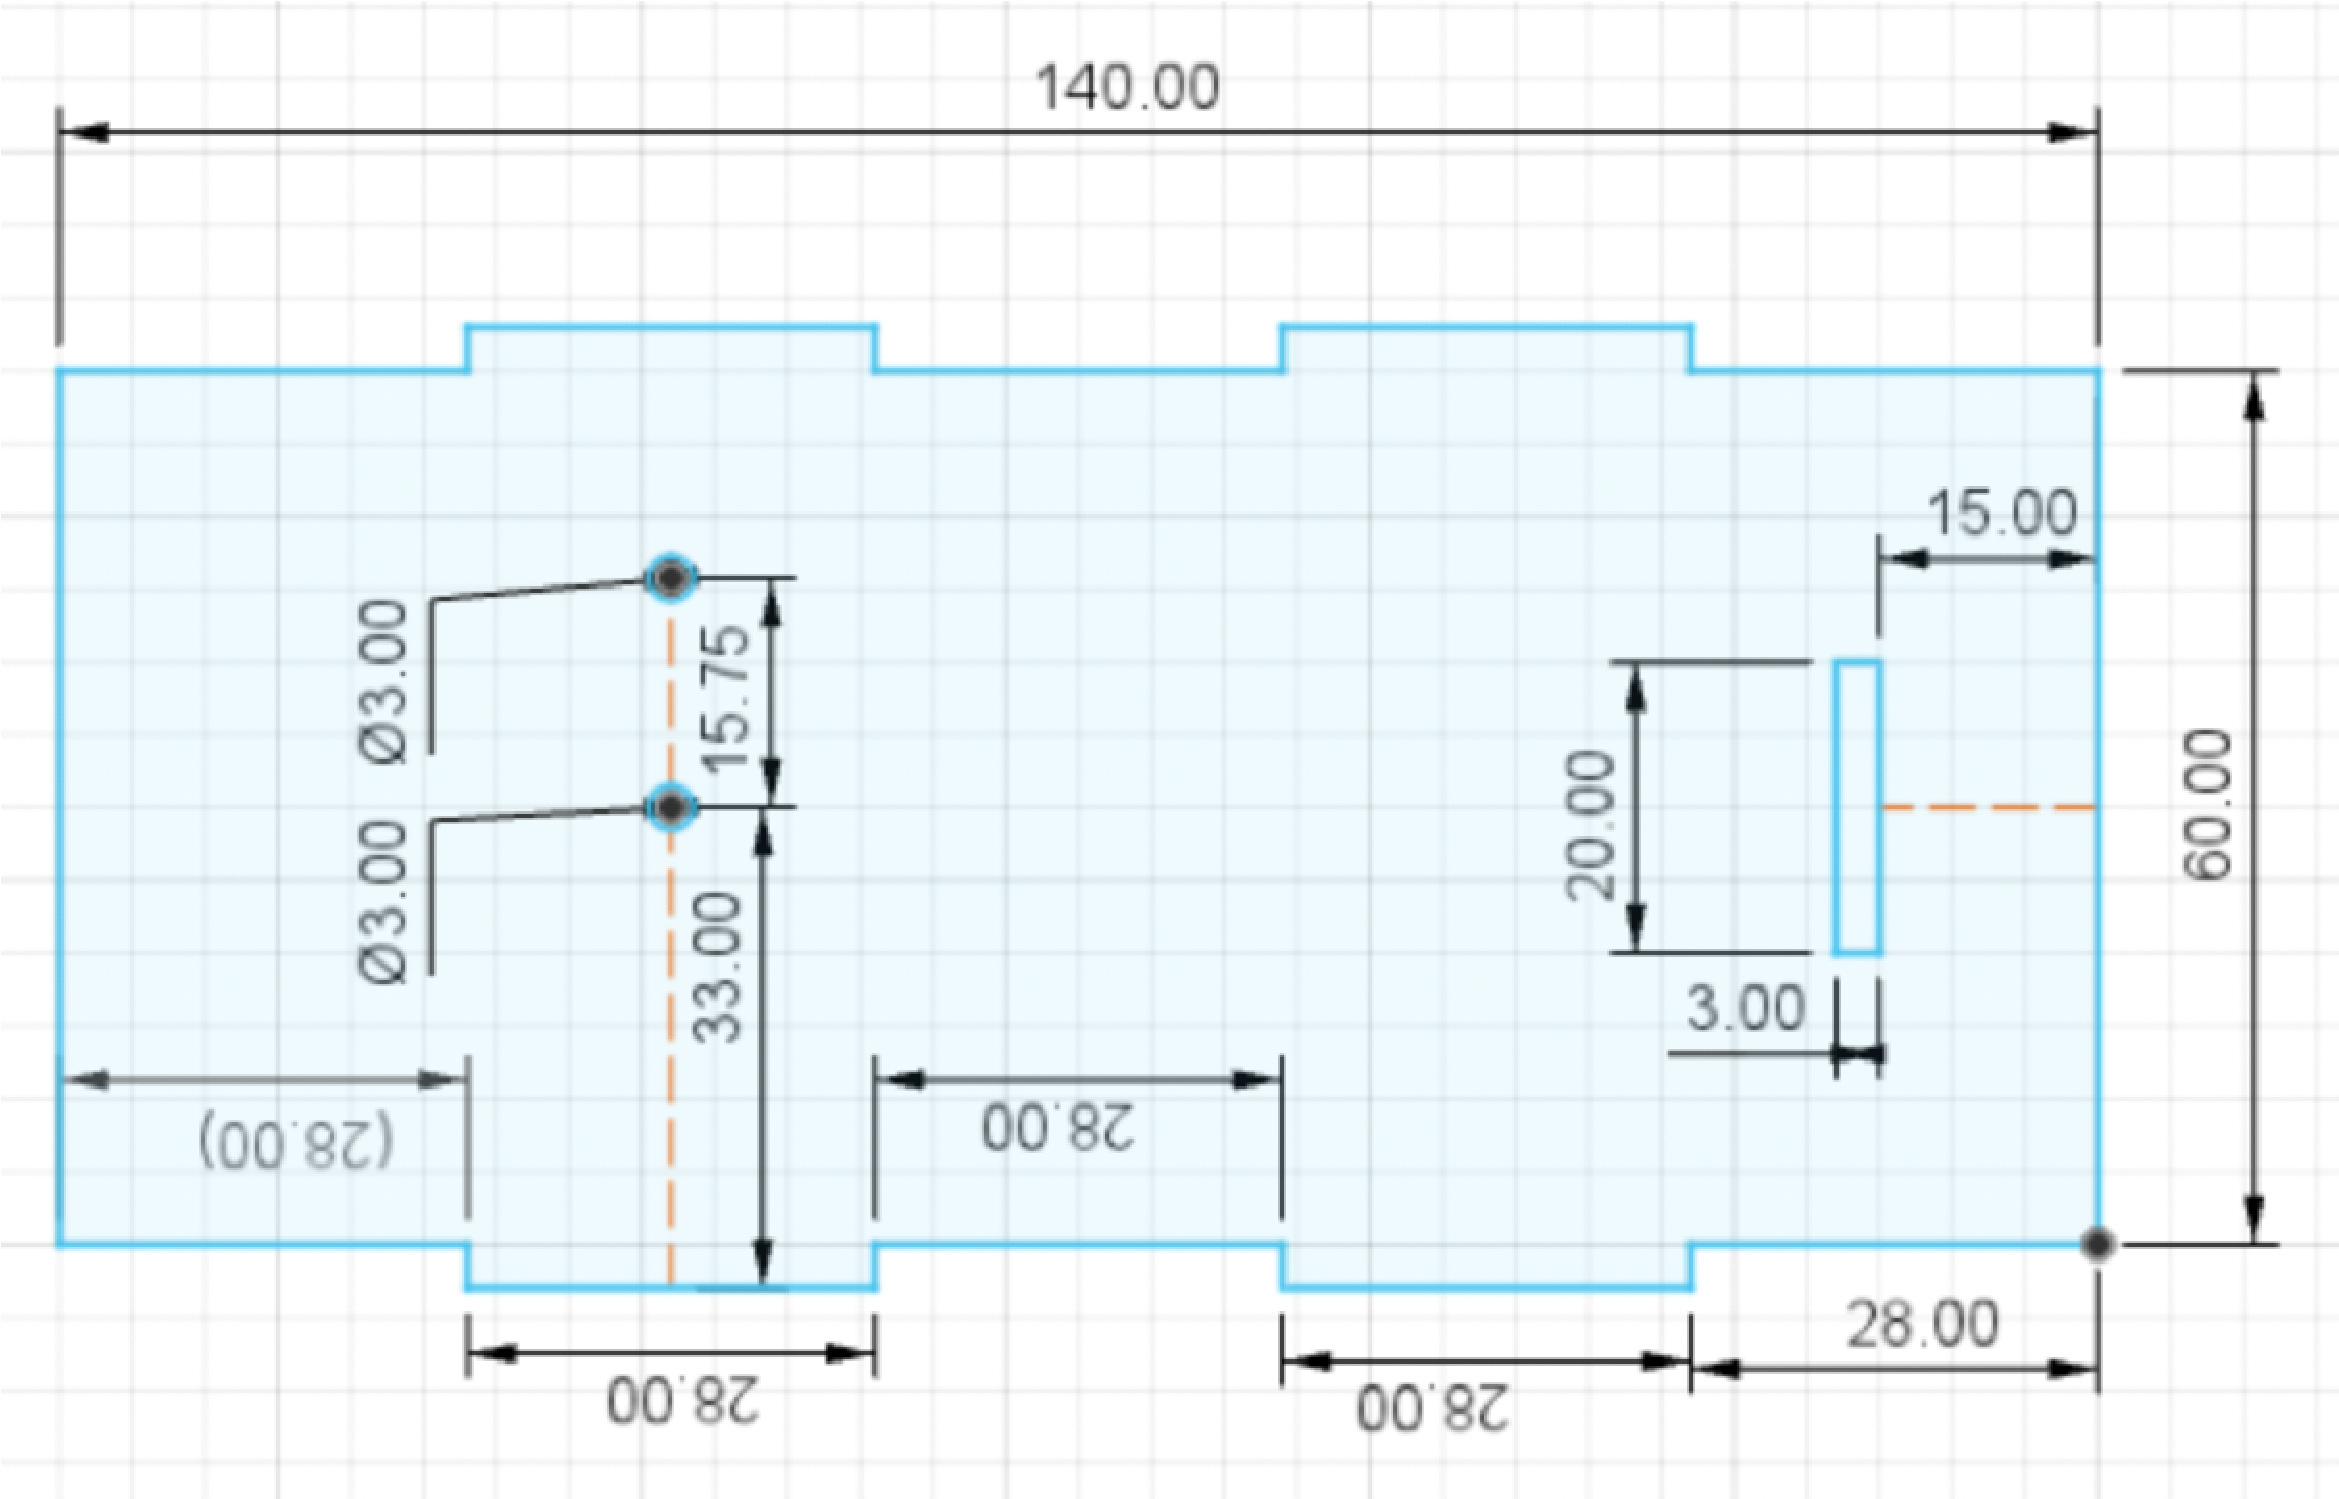
Afterwards, for the_B side we will start by creating a new project where a plus sign is placed at the top right, so on all the sides at the end.
To develop this face we will use the colour axes "Blue and Green".
- Do not forget that the tools to use are: LINE-CENTER DIAMETER CIRCLE-MIRROR-EXTRUDE-APPEARANCE
FACE_C
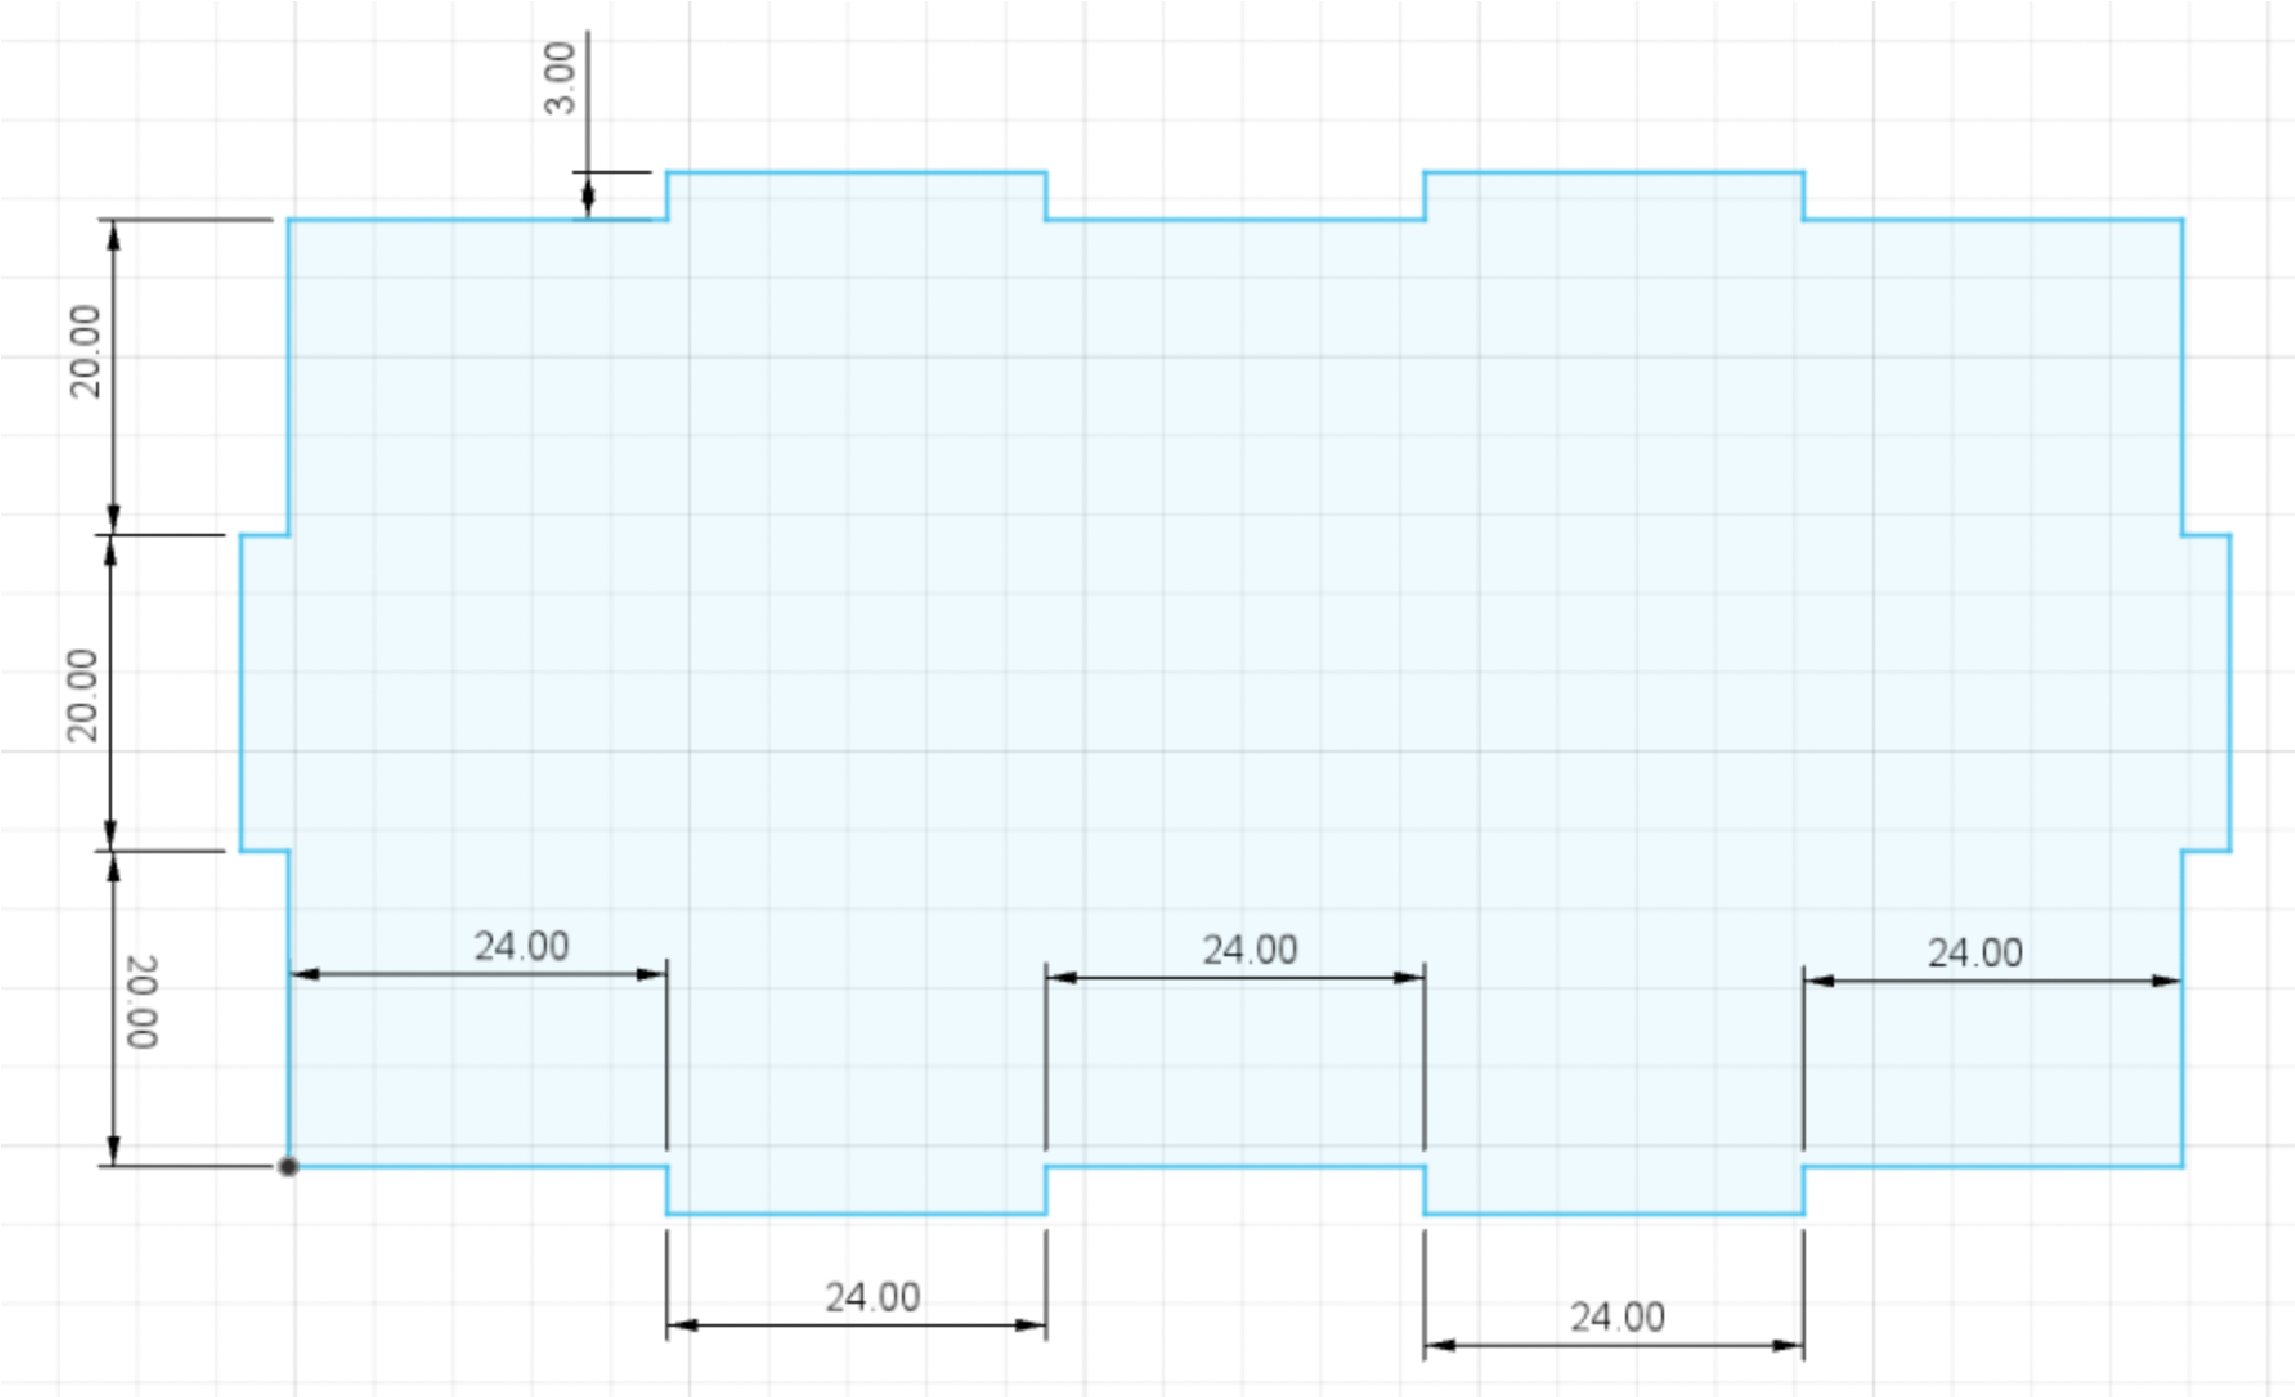
After saving our previous face, we will open a new file for Face__C for this one we will use the colour axes "Green and Red".
- Don't forget to save the Face_C
- Do not forget that the tools to use are: LINE-MIRROR-EXTRUDE-APPEARANCE
FACE_D

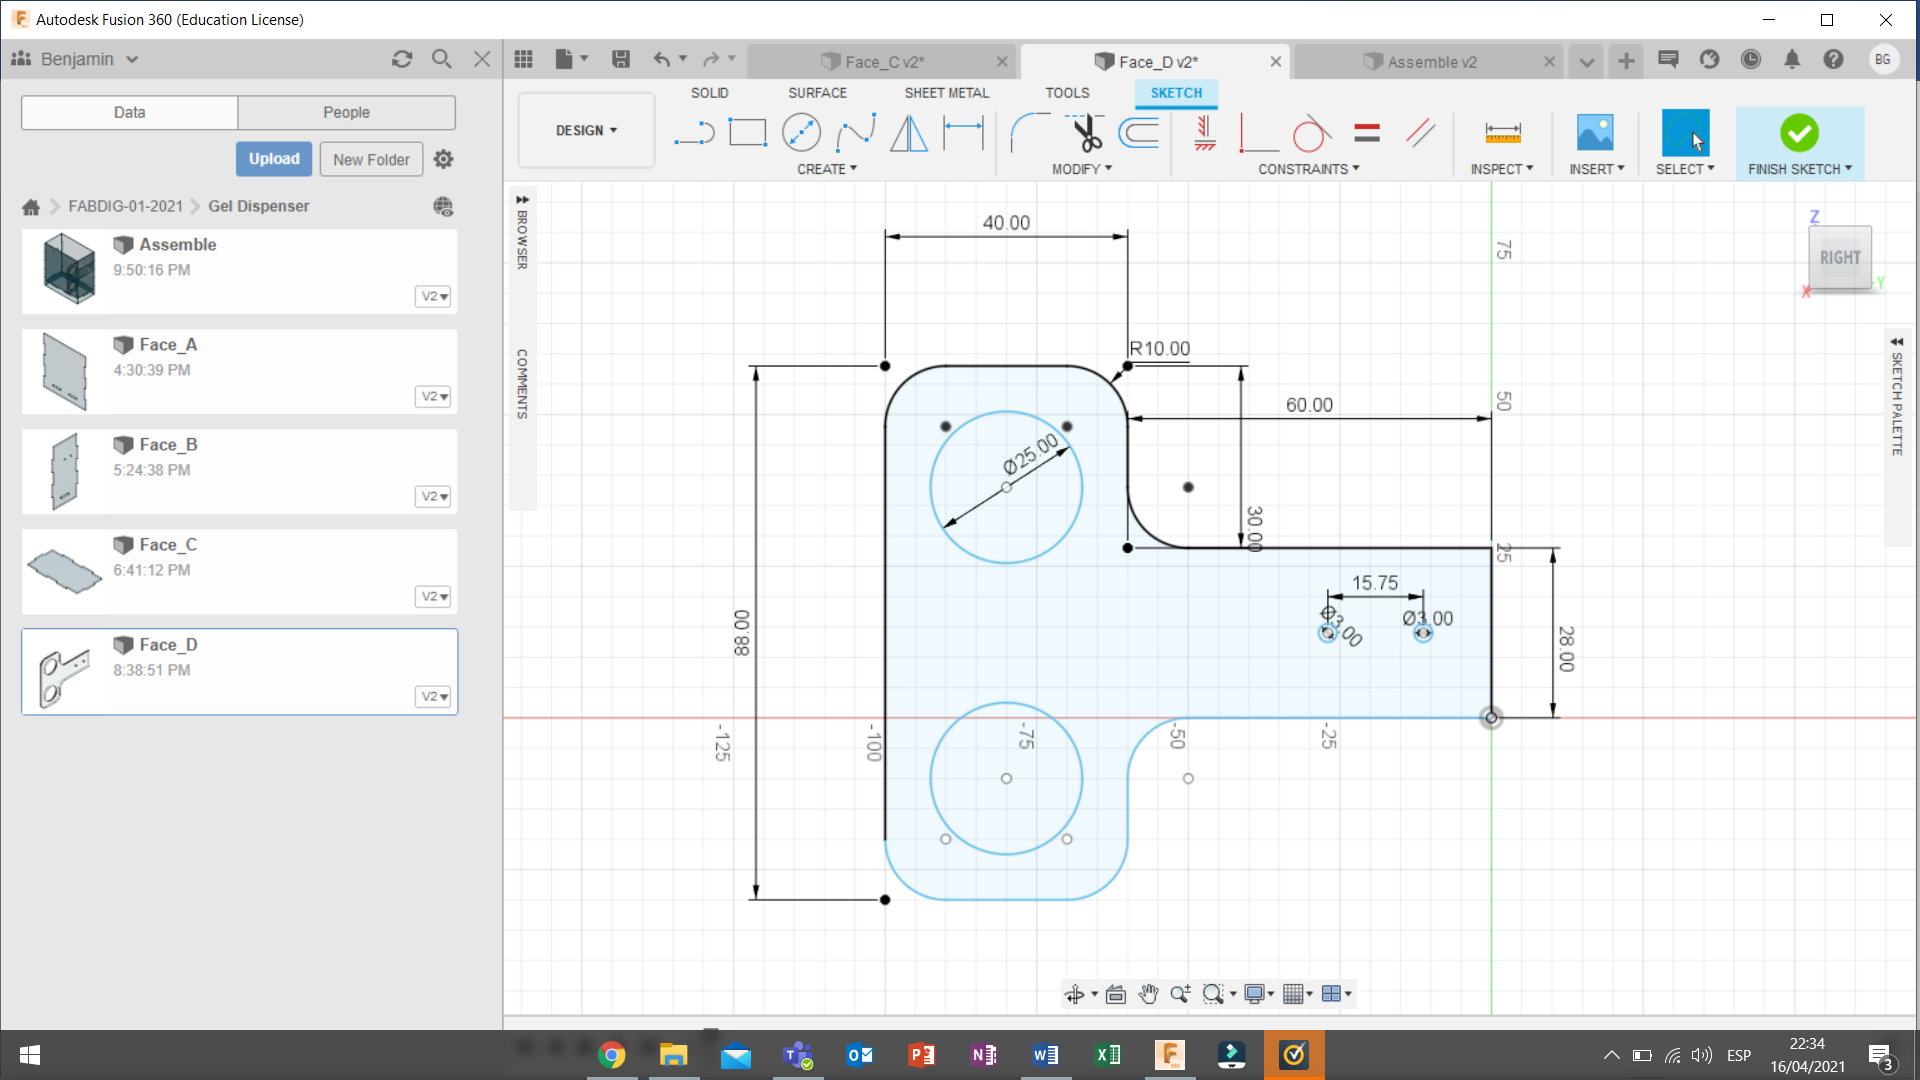
After saving the Face_C, we will finally create our last face for which we will use the colour axes "Blue and Green".
- Do not forget that the tools to use are: LINE- FILLET-CENTER DIAMETER CIRCLE-MIRROR-EXTRUDE-APPEARANCE
ASSEMBLE
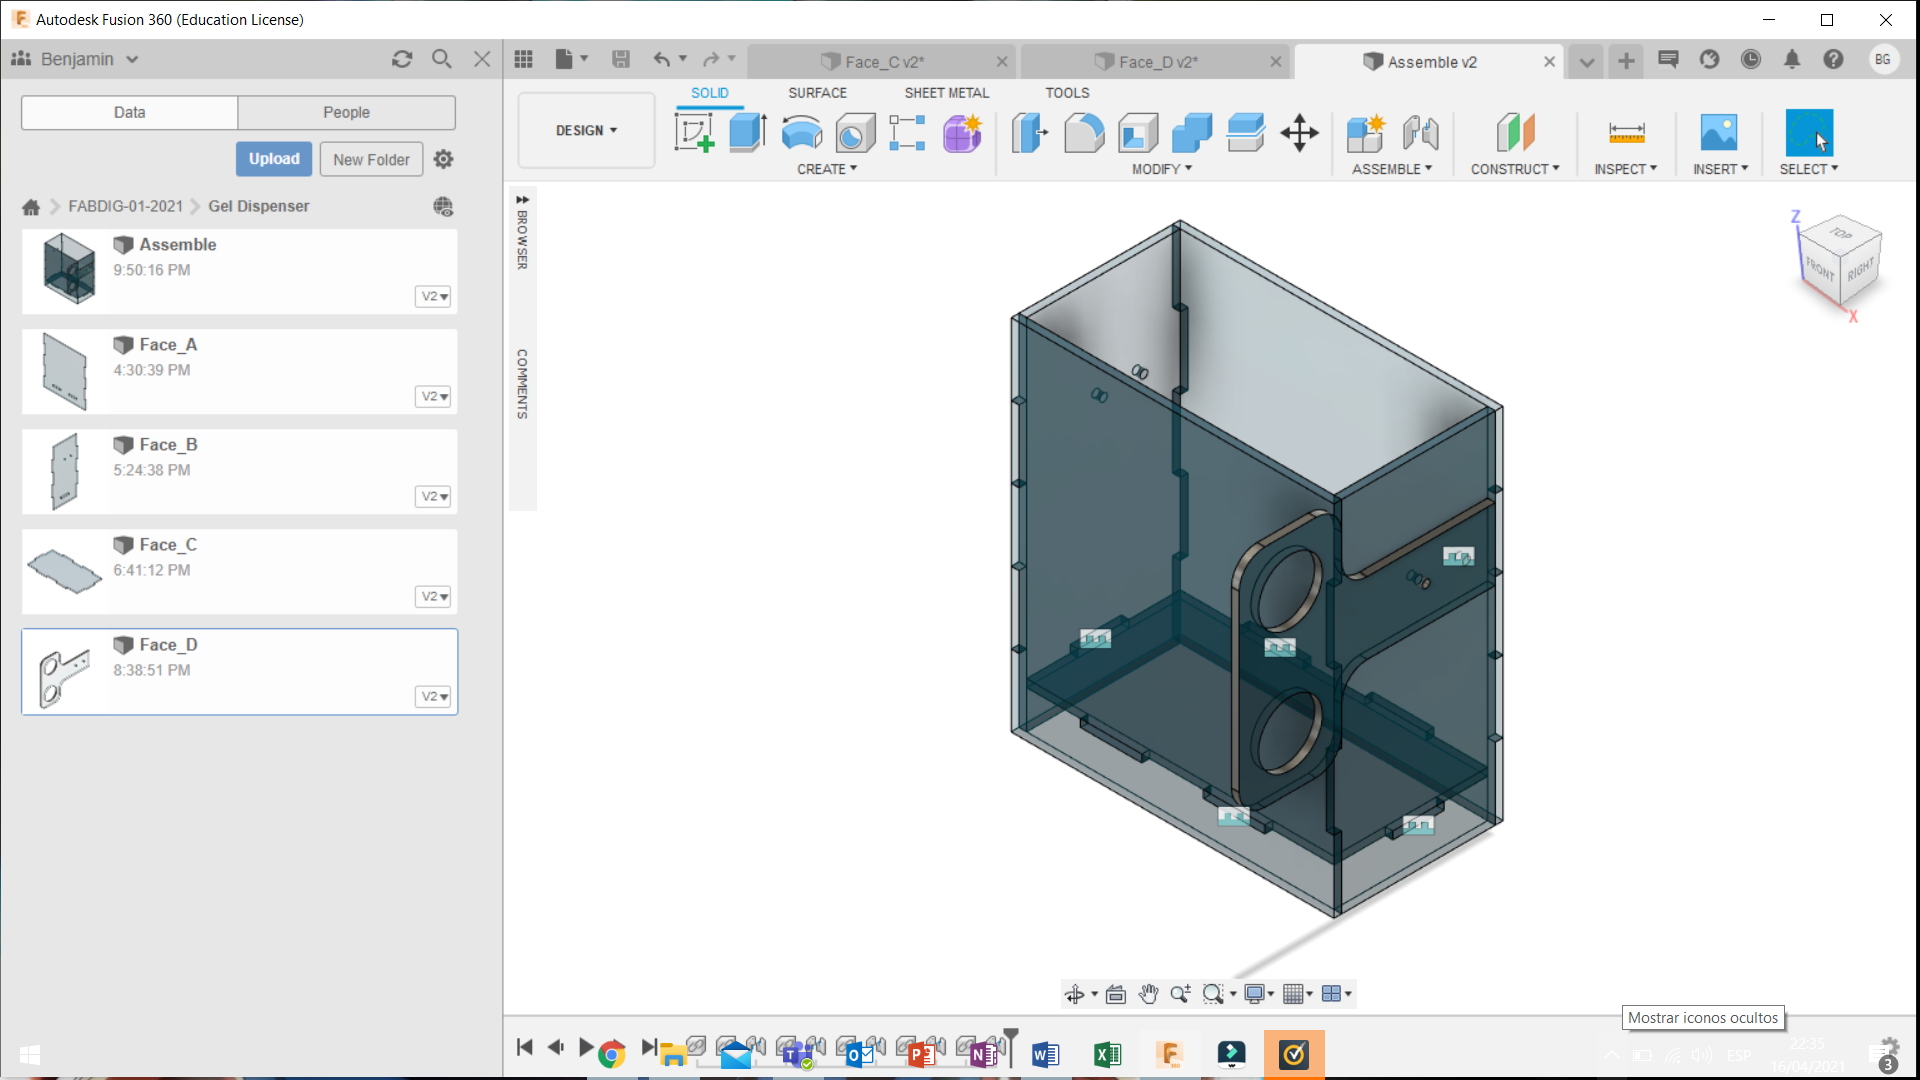
Now coming to our last steps the assembly will be a way to join our faces, we will start placing the base (Face_C) for more comfort and then the Faces_A, Face_B and Face_D at the end, very important to put them in a new file we will use the new drawing from desing giving right click on each Face to be placed.
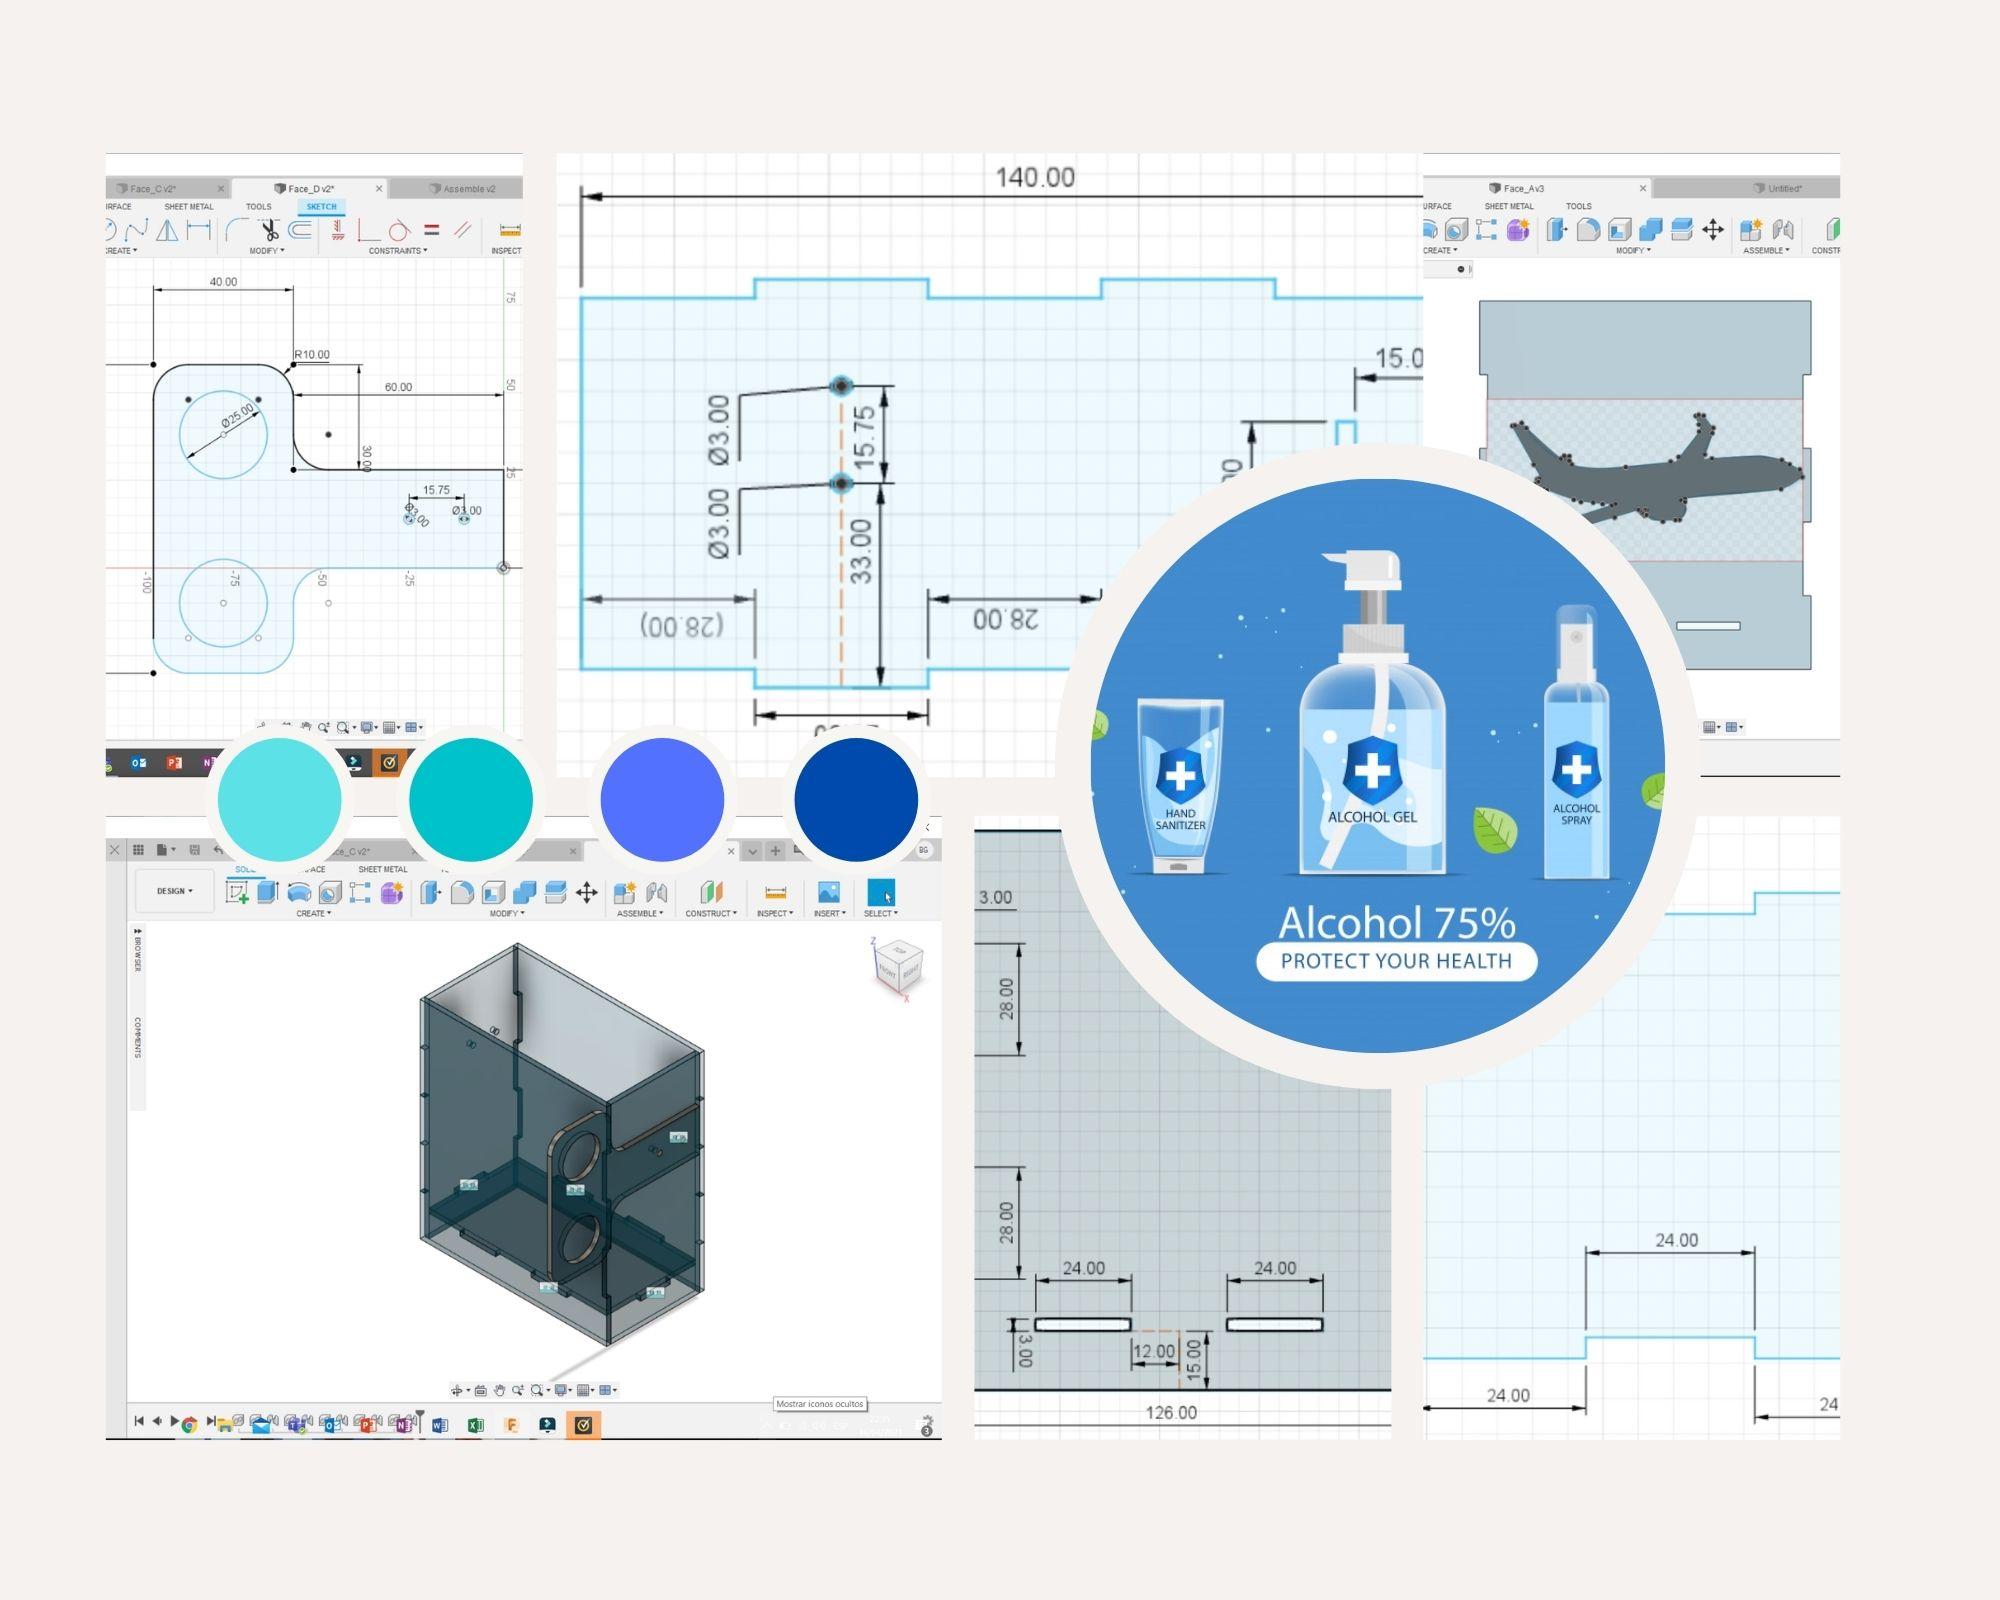
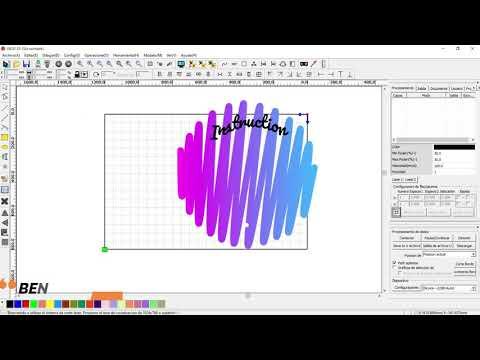
PERSONALIZATION
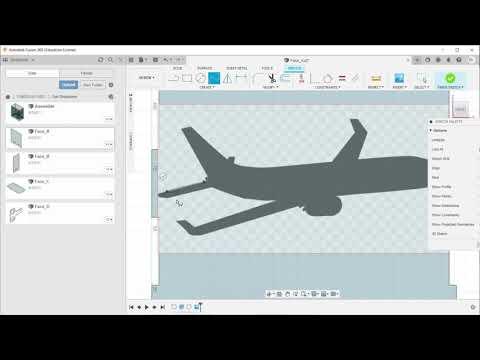
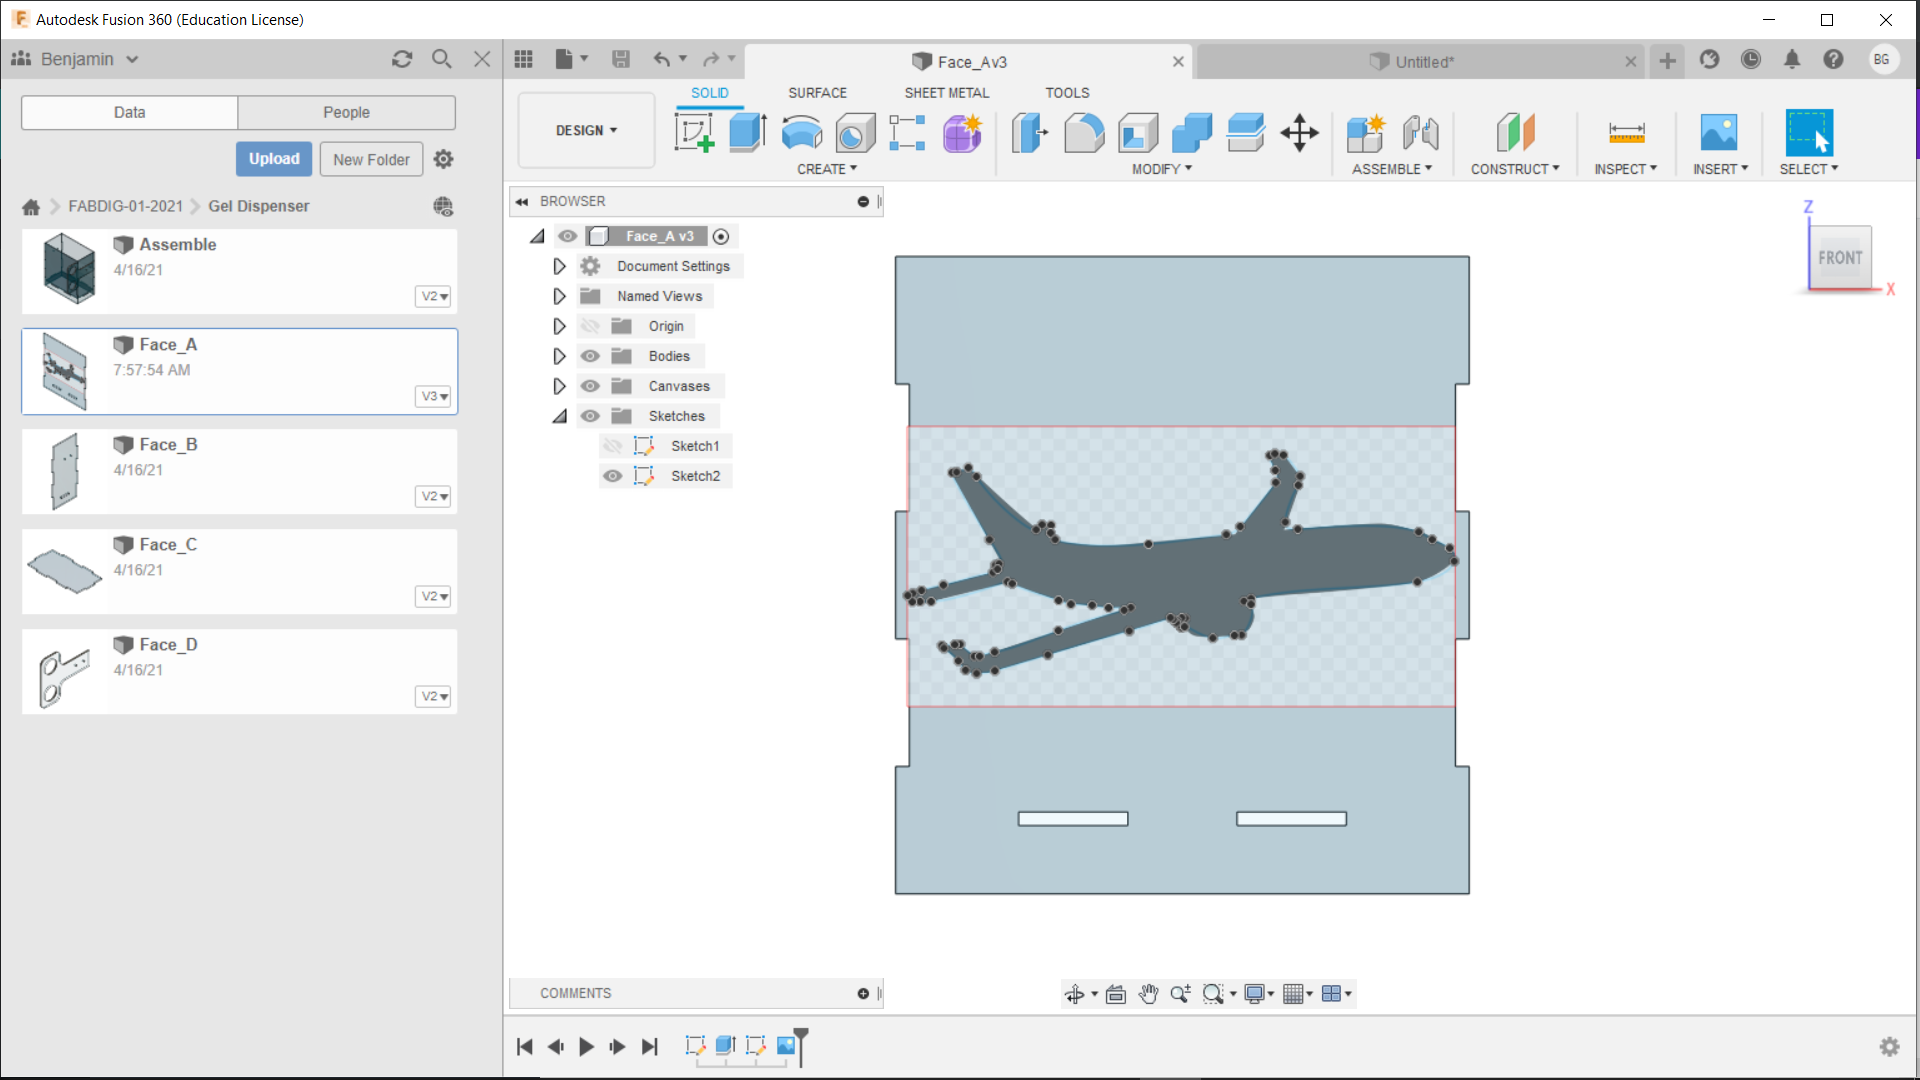
For the personalisation on any of the faces, preferably Face_A, select and place in insert -Canvas and choose the image of preference, then use the Spline tool and select the perimeter of the chosen image.
- Do not forget to put Sketches - sketch 2- Save As DXF to put it to the Laser cut.
- Do not forget to save the file at the end.
- Do not forget that the tools to use are: INSERT-CANVAS- SPLINE-FIT POINT SPLINE
LASER CUT
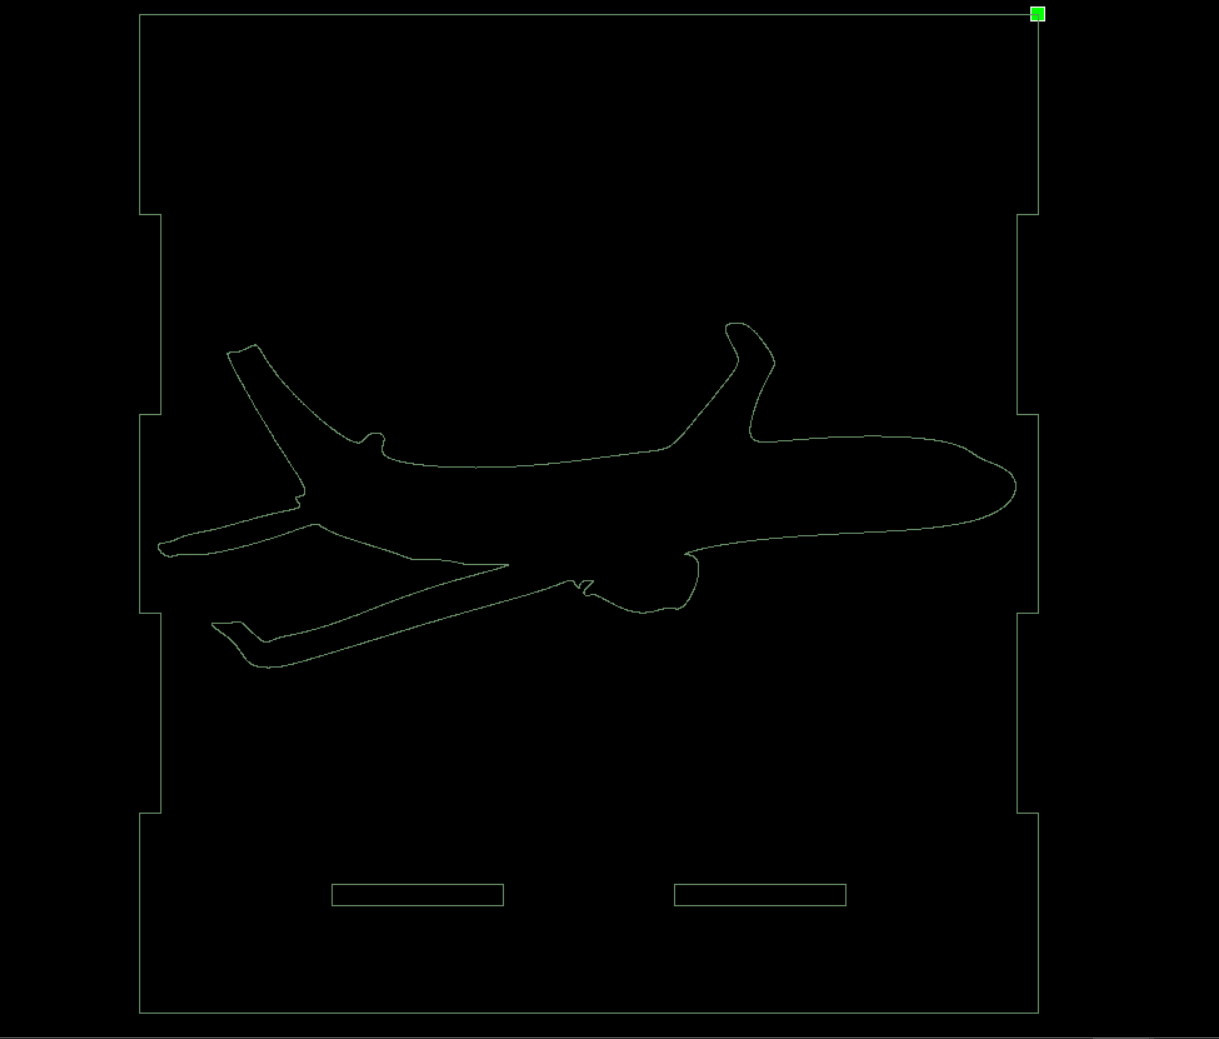
Finally, we will open the RDWorks.v8 program of which I will leave you a link so that you can install the v8 version.
The file that we save in fusion 360 in the customisation section, first we will open the configuration and we will work with a speed of 50, minimum power of 40 and maximum power of 60 and we will see the simulation by selecting the chosen file.
- Download Link
- https://megalaser.com.ar/descargas/