Geing Started With Raspberry Pi Pico on Piper Make Block Coding
by WellActually in Circuits > Raspberry Pi
1624 Views, 10 Favorites, 0 Comments
Geing Started With Raspberry Pi Pico on Piper Make Block Coding
If you own a Chromebook, you know that the Raspberry Pi Pico can only run on Thonny through Linux. But what if you don't want to make your low-end laptop 2000 degrees by getting Linux. Then use Piper make, piper make is a pico compatible browser software that can be used to program, just like micropython.
Supplies
- Pico
- USB
- Breadboard
Software Setup
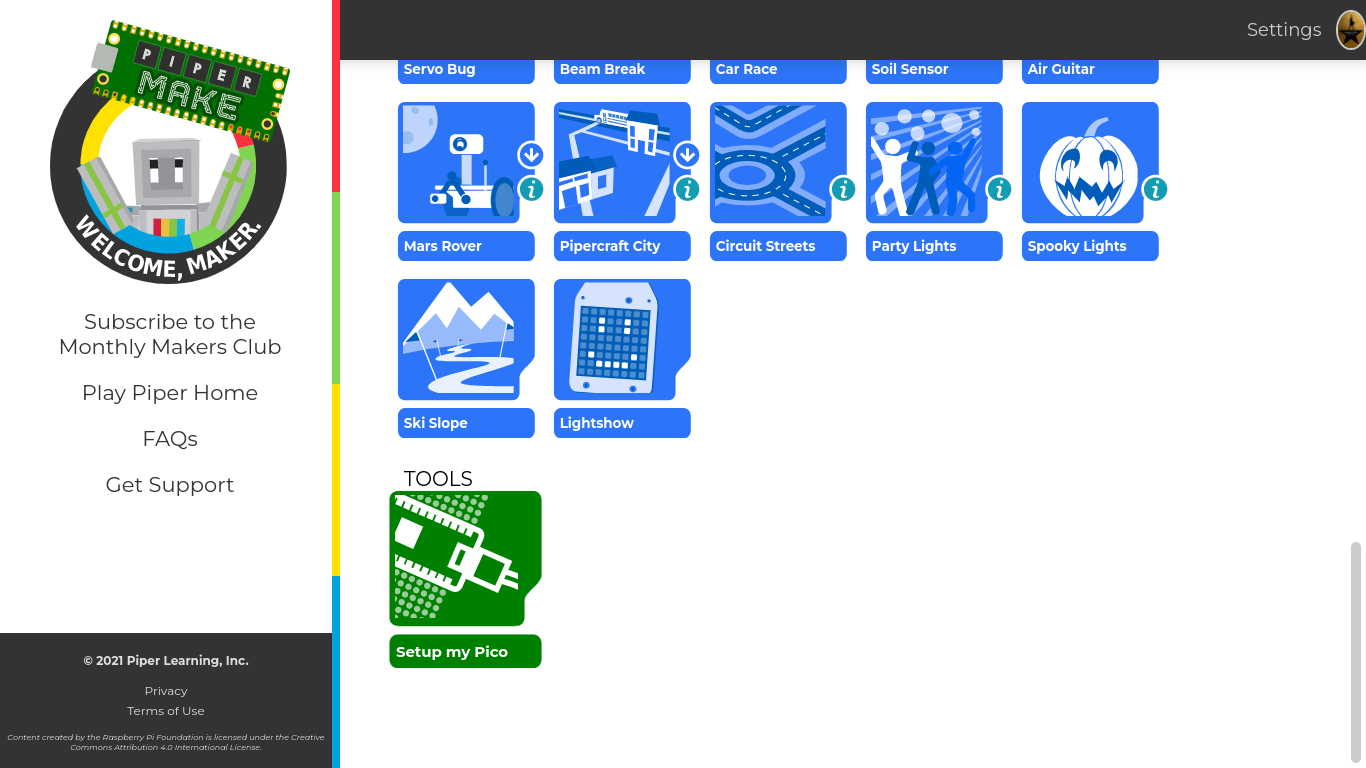
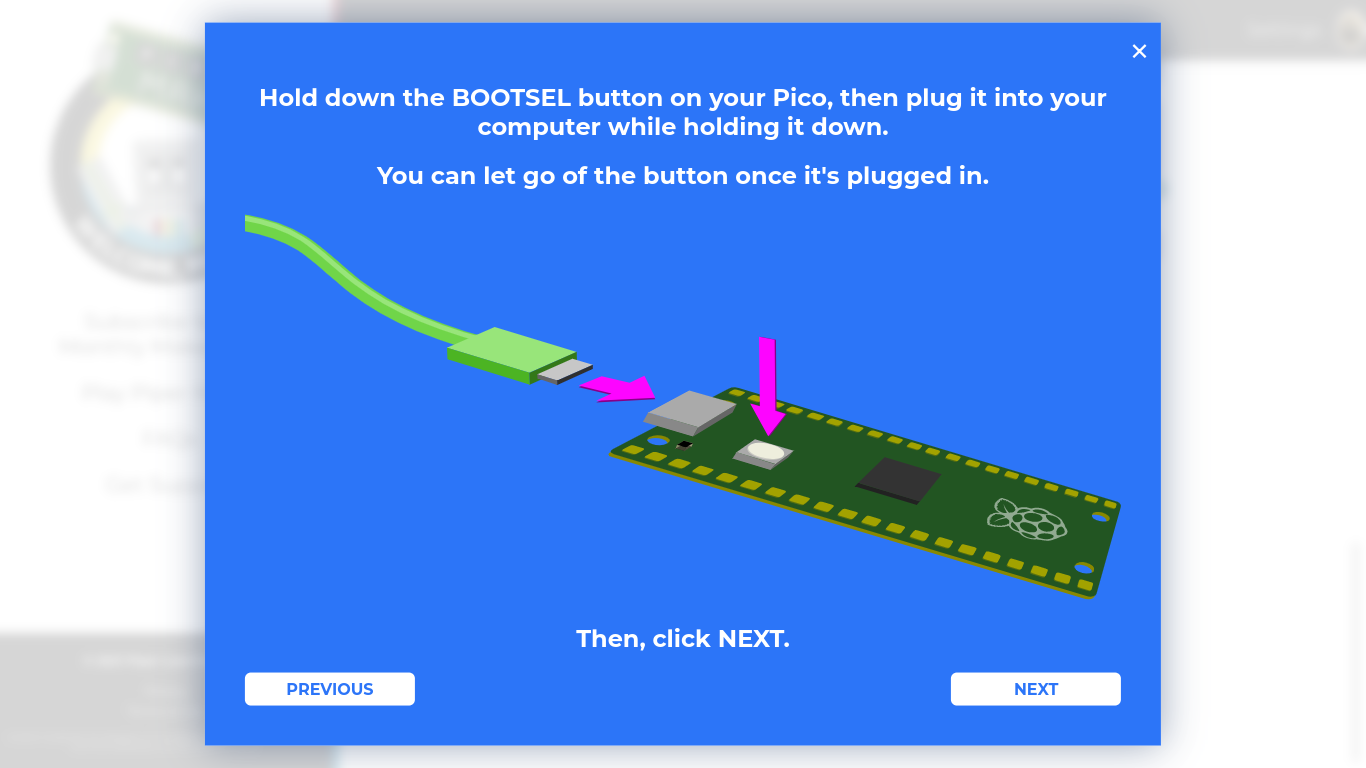
First, go to https://make.playpiper.com/ and scroll down until you see “Set up my Pico” click it, and follow the instructions the website gives you.
Software Use
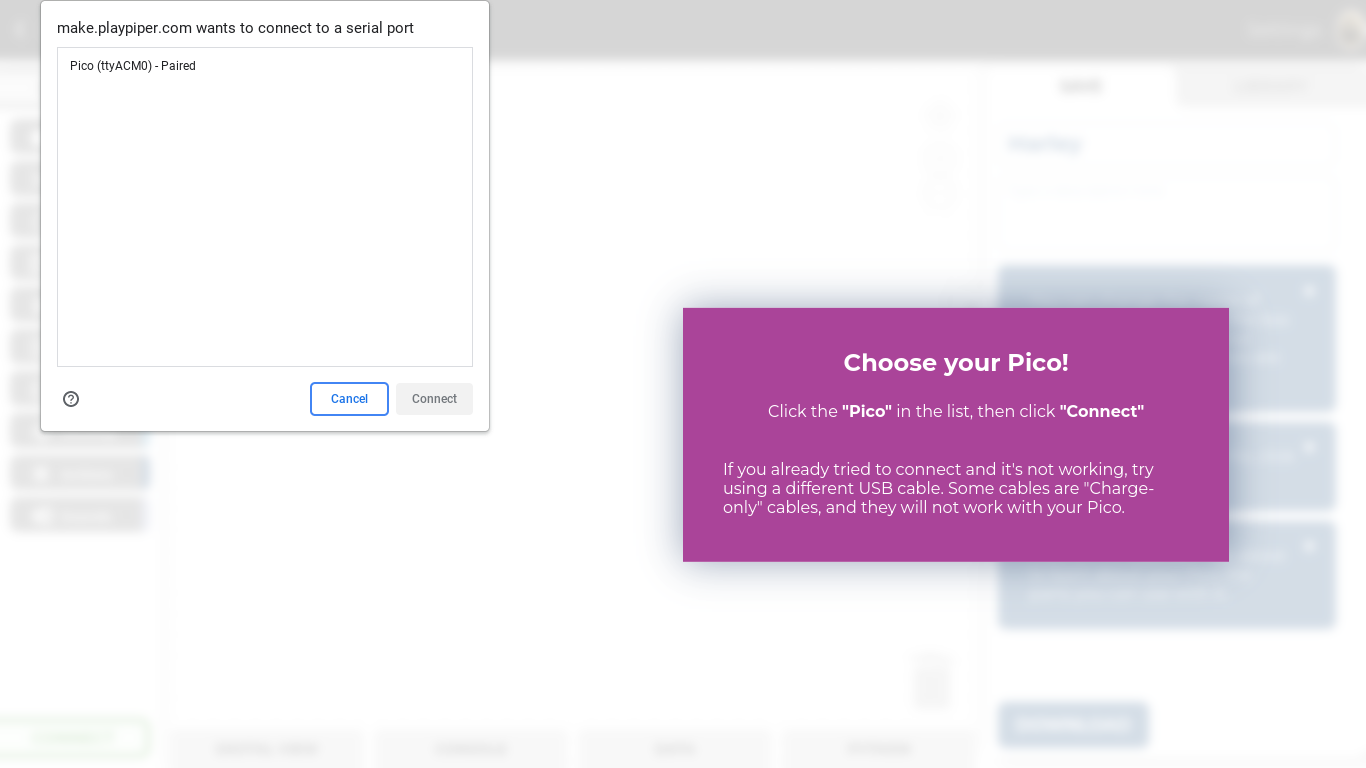
When you're done, scroll all the way up and click “New project,” Then, click “Connect” in the bottom left corner and follow the instruction there.
Blink Onboard LED
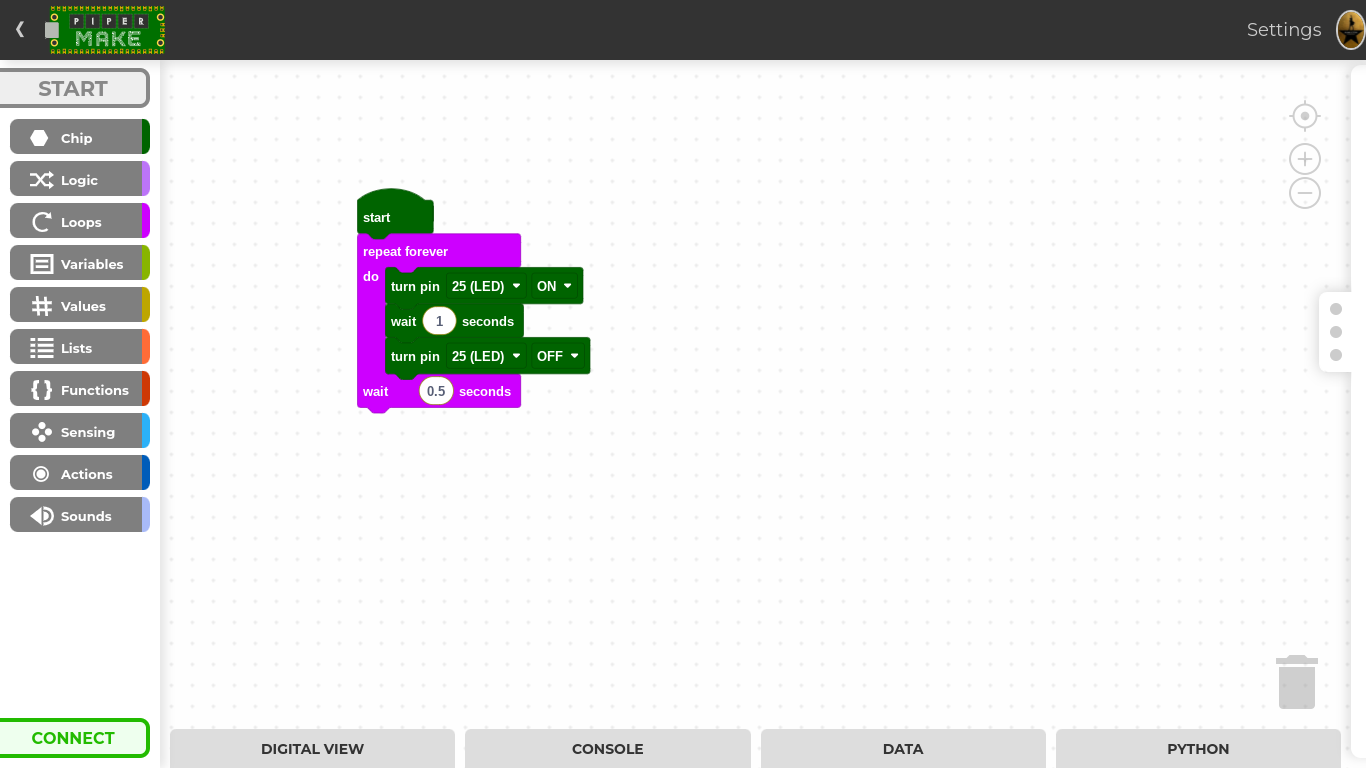
This is a step by step project, on the “Hello World,” of micropython, or in our case, block coding
- Go to the Chip tab and drag out "Start", “Turn pin 0 On”, get two of them, also get "Wait 1 second(s)"
- Go to the Loops tab and drag out “Repeat forever”
- Arrange the code as shown in the picture above
Great! You learned how to use Piper make in this short, 3 step course!