LED Cube Simulation Software
by LizardGecko in Design > Software
6791 Views, 4 Favorites, 0 Comments
LED Cube Simulation Software
I almost finished building my 8x8x8 LED cube and with it came this software for the PC! It helps you create animations and simulates them on a 2D screen before they get uploaded to the 3D one. There is no support (yet) for communicating through the COM port of the PC to an arduino, however it can generate source code that gets hard-coded into the microcontroller controlling the cube, with the click of a button. If you're not that much into reading than skip this instructable and download the software directly. The next steps will only describe how to use it.
Important!
GeckoCube Animator 1.0 [BETA] is a beta version, work progress can be lost and the program may crash unexpectedly. Java is required to run the .jar file.
Download
New Release - Quadrum (with serial support): https://geckoanton.github.io/quadrum/
Old Release: http://bit.ly/geckocubeanimator_beta
Creating Your First Animation
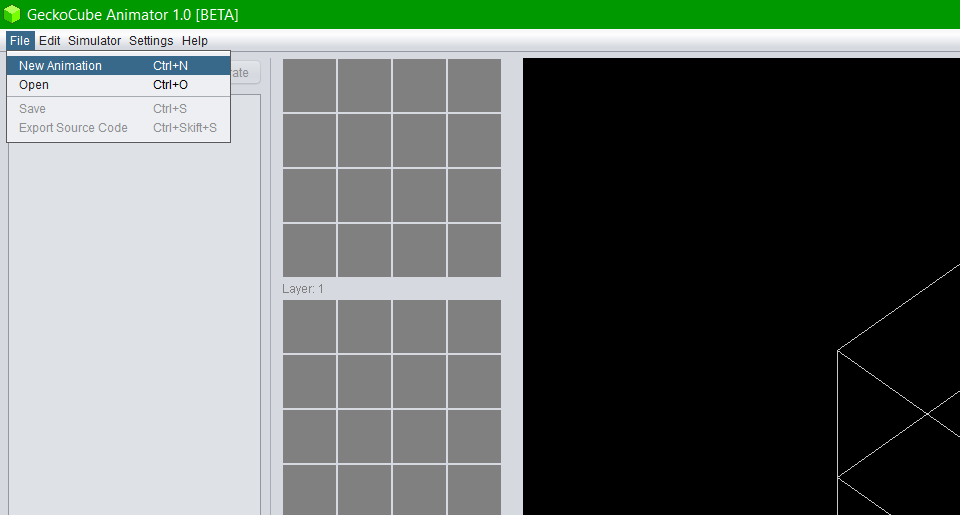
Before you can start animating away you have to create a new animation under File>>New Animation and choose the side resolution of your cube, that is whether it's 8x8x8, 3x3x3 or anything between 2 and 16 for that matter. If the cube only is capable to display one color then make sure the check box 'Unicolor' is selected. Hit create and the animation project will be created.
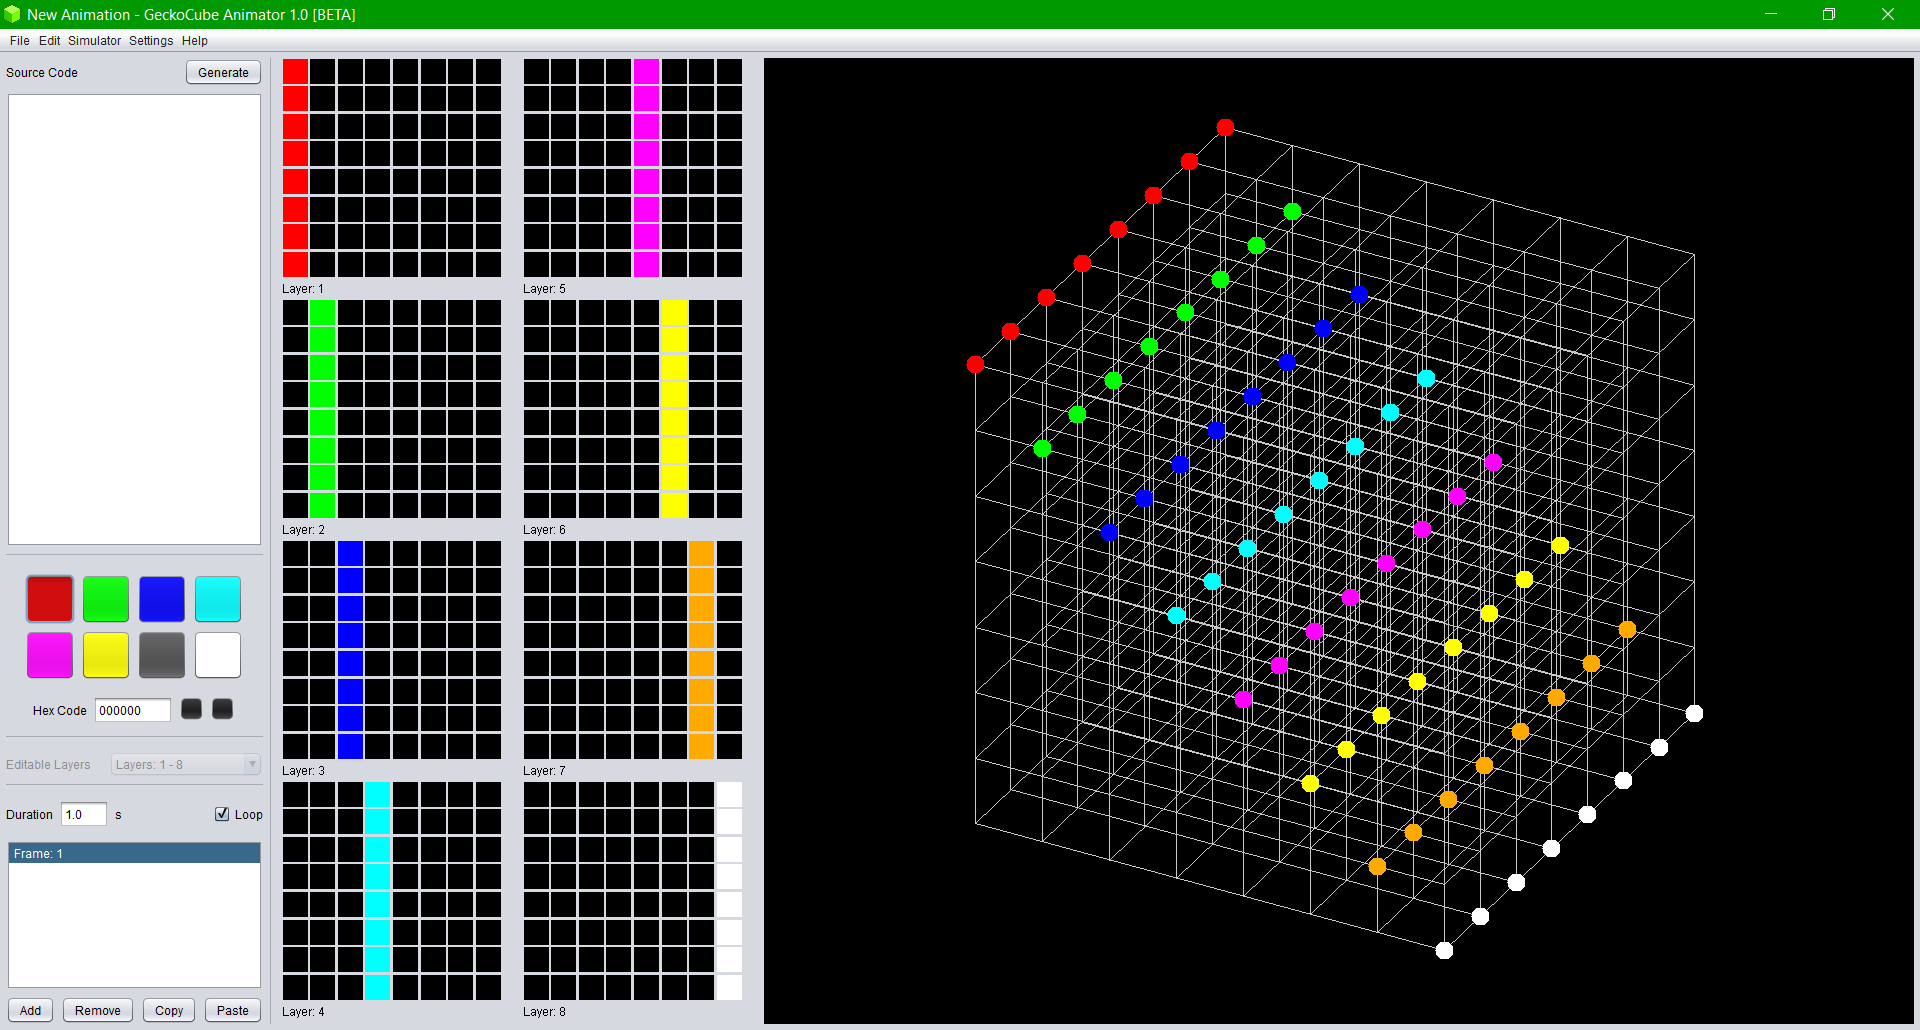
The Animation Tools
On the left of your screen you can find the different tools available for actually making the animation.
Starting from the top, this is the source code generator preview section (and no, I couldn't come up with a shorter name for that), this is where you can generate the source code for the animation as the name suggests. If the animation is longer than 3 frames you will have to use the 'Export Source Code' function under File>>Export Source Code that will generate a .txt file with the code instead.
With the maybe most important part covered we have the color palette right under the source ...whatever... section. Select the prefered color and start painting the pixels to the right, arranged in layers sliced from the cube.
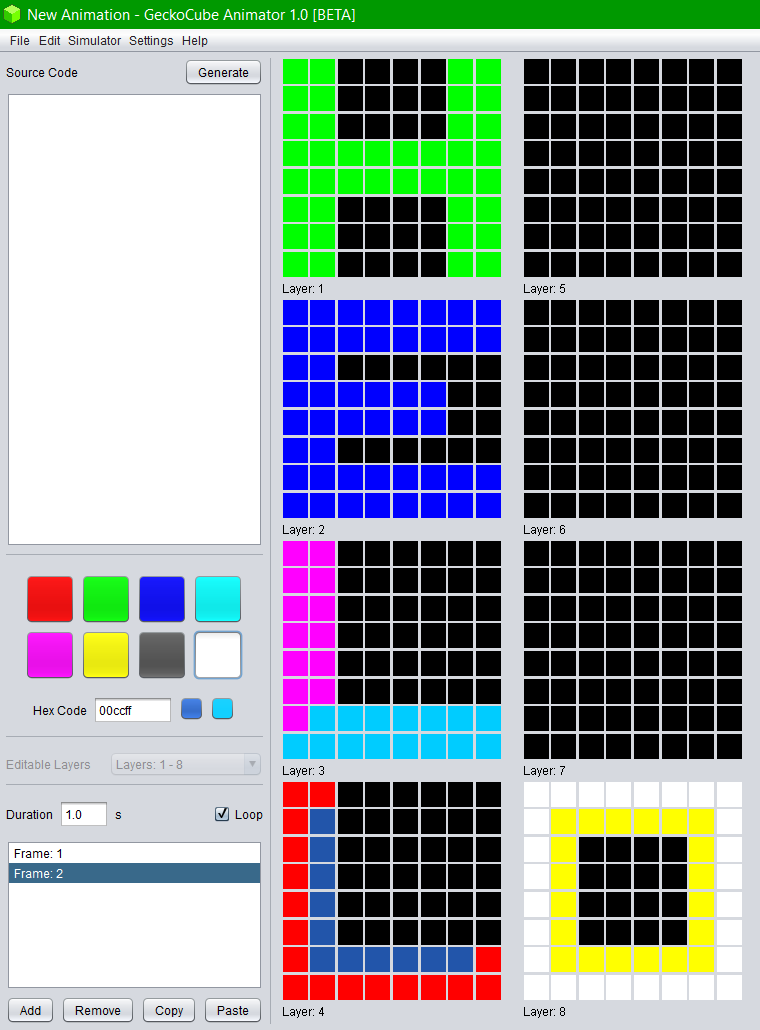
If a custom color is your preferance you can input it in hex format (for example: 'FFAA00' meaning orange) in the custom color text field and press enter. This will change one of the custom color buttons to the right of the text field, select it and start painting. To use the other custom color button you select it before inputing the hex.
Under the color palette we have the editable layers combo box. If your cube is large enough this will be how you select which layers that appear to the right of the animation tools.
And lastly, there is the frames manager. The 'add' button creates a new frame under the currently selected one. The 'remove' button removes the currently selected frame. 'Copy' copies the currently selected frame and 'Paste' pastes it to the currently selected frame. To select a frame you click on it in the frame list. Above the frame list you can input the duration of the currently selected frame in seconds. And remeber to press enter! The 'Loop' check box will surround the generated code in 'while(true){}'.
You are now equipped with the knowledge to start animating, and we are ready to move on to step 2, or wait was it 3?...
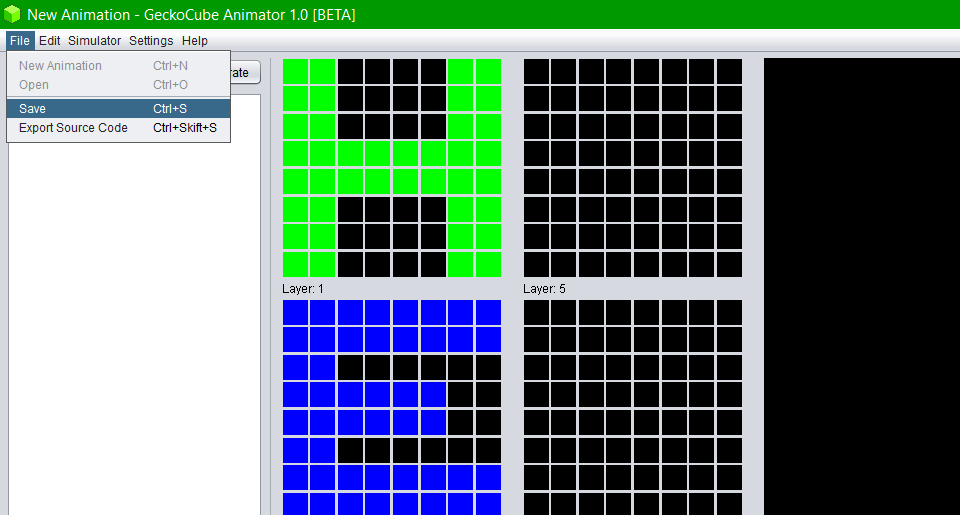
Saving and Opening a Project
Playing the Animation
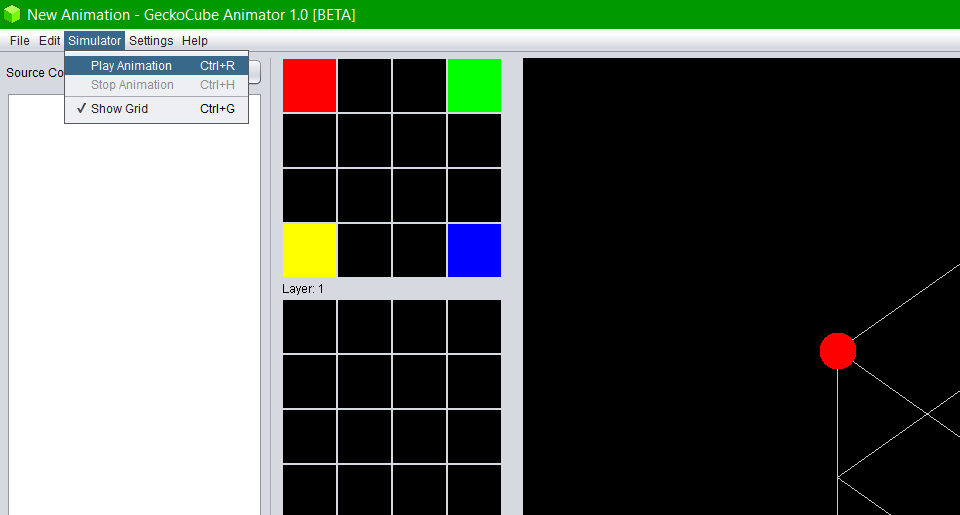
Once you are finished with the animation you can simulate it within the software. Go to Simulator>>Play Animation to play it. To go back to editing go to Simulator>>Stop Animation.
Source Code Generator Settings
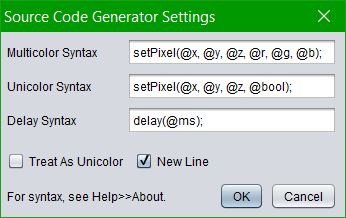
Under Settings>>Source Code Generator you can choose how the generator shall create the code. The thought is that you implement a function like 'setPixel' in the code of the cube that takes in pixel coordinates and color in RGB as input to set that pixel to the passed color, Use something like 'update' after each frame to make the cube display the edited pixels. The following syntax is what is used by the generator:
For multicolor and unicolor:
@x - Replace with x coordinate of pixel.
@y - Replace with y coordinate of pixel.
@z - Replace with z coordinate of pixel.
For multicolor only:
@r - Replace with red color value.
@g - Replace with green color value.
@b - Replace with blue color value.
For unicolor only:
@bool - Replace with 'true' if pixel should be turned on and 'false' if pixel should be turned off.
For delay only:
@s - Replace with delay in seconds.
@ms - Replace with delay in milliseconds.
@us - Replace with delay in microseconds.
See the default settings as an example.
Select the 'New Line' check box if you want the generator to create a new line after each pixel call (setPixel). Treat As Unicolor makes the generator ignore the fact the project is set up for multicolor and generates a code as if it was unicolor.