Game of Thrones Wooden Topographical Map: How to Model and Carve W/ Fusion 360
by Bevelish Creations in Workshop > CNC
7091 Views, 62 Favorites, 0 Comments
Game of Thrones Wooden Topographical Map: How to Model and Carve W/ Fusion 360


Hey guys, first of all, the thumbnail for the project says I failed, and it's NOT a clickbait, I promise! Second of all, this writeup serves to complement the Youtube video to dive deeper into the techniques I used and cover more in detail on my settings and why I chose them. Reading this and watching the video will definitely help to give you the full scope of the story.
Long story short, I've been wanting to learn 3D carving using my CNC for awhile, but never had the time. The purpose was so that I could add the technique as another tool under my belt for my furniture designs. With all the hype around Game of Thrones past few months, i thought it'd be as good of a time as any to just dive into it so I could make a topographical Game of Thrones map. I've never used any of the softwares in the video/Instructables, so if you see something that was wrong, please feel free to chime in!
Materials
Total lumber used: (20"x30"x1.5") This is dependent on the model size you plan to make
Tools
1/4" Solid Carbide, Spektra™ Coated Downcut CNC Bit No. 46202-K: (http://bit.ly/2WiFctH)
1/16" Solid Carbide Spektra™ Coated 3D Carving Ball Nose Bit No. 46282-K: (http://bit.ly/2WpaLCb)
Amana Tool PR1040C Electro-Blu Carbide Tipped Prestige 10 Inch 40T Saw Blade: (http://bit.ly/315Due0)
Adobe Illustrator
Fusion 360 (Free)
Blender (Free)
Instant Meshes (Free)
Trace Profile of Map in Illustrator
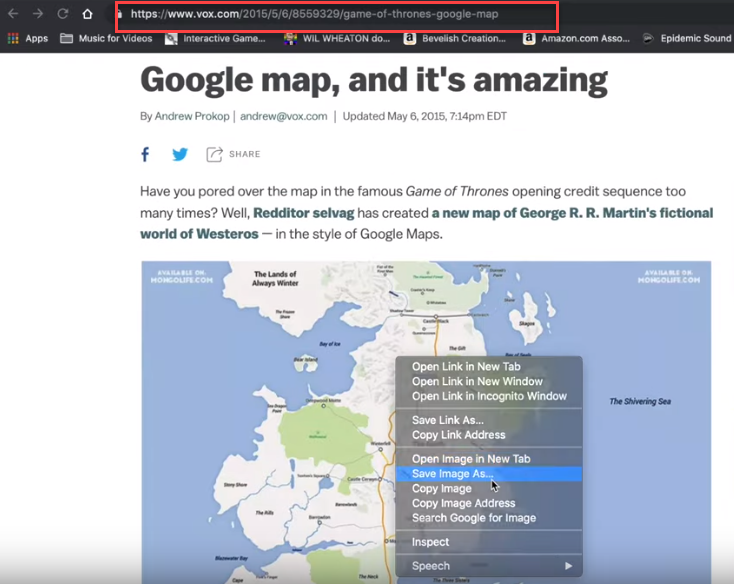
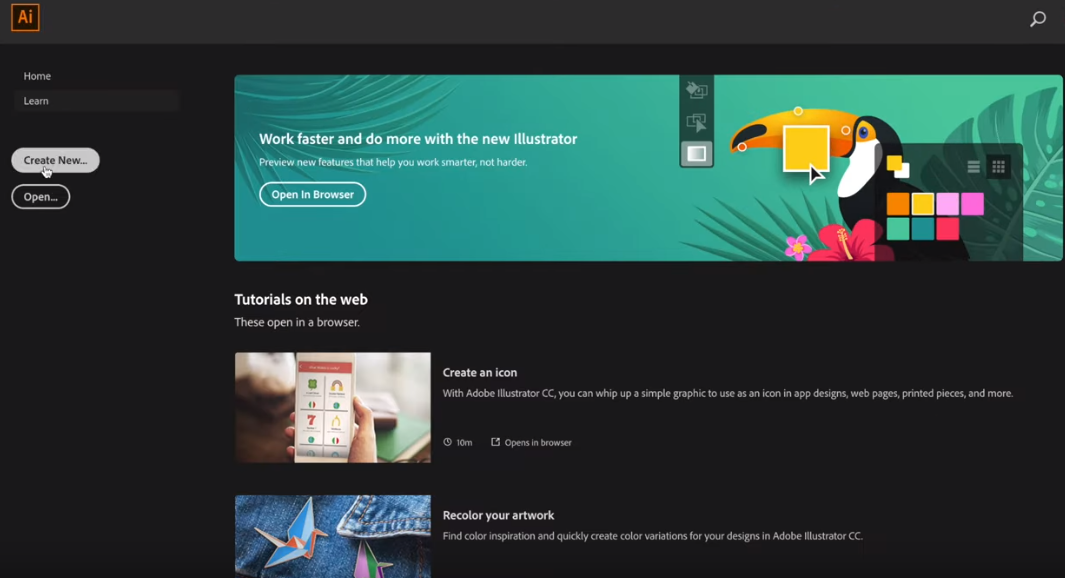
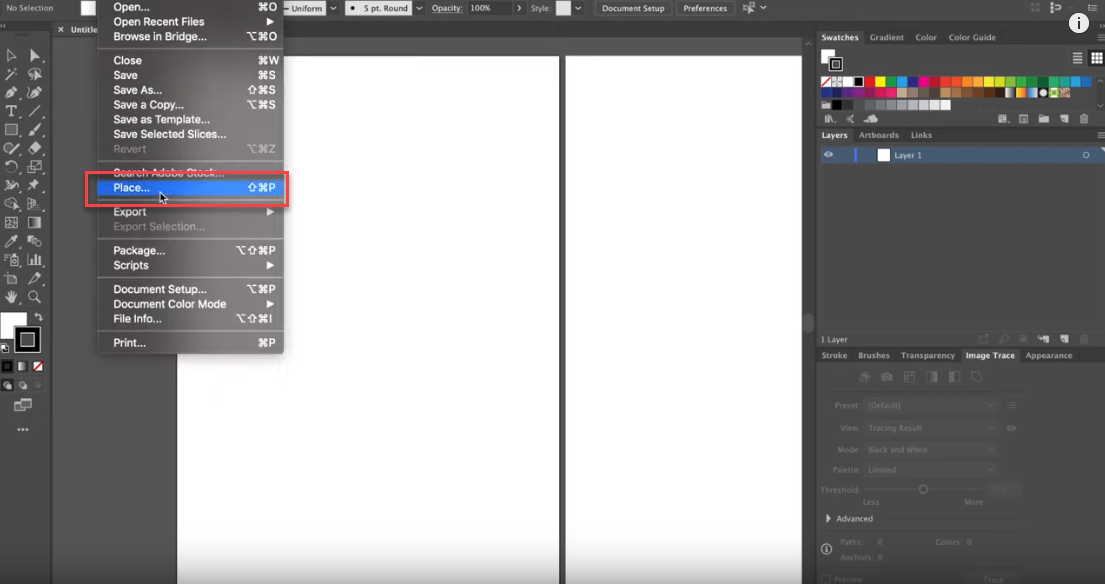
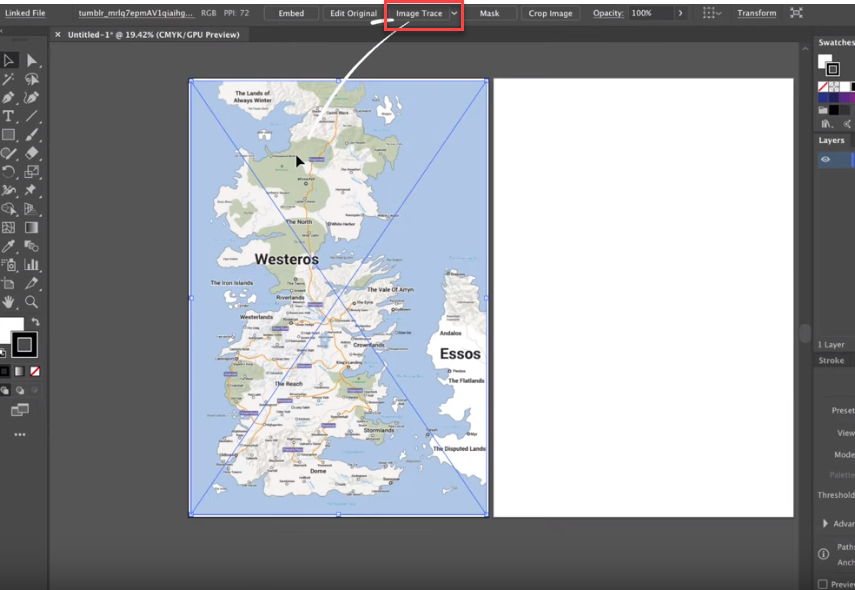
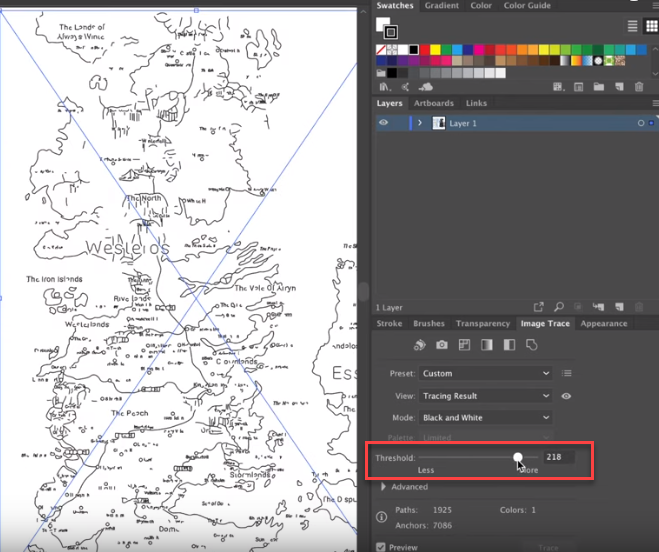
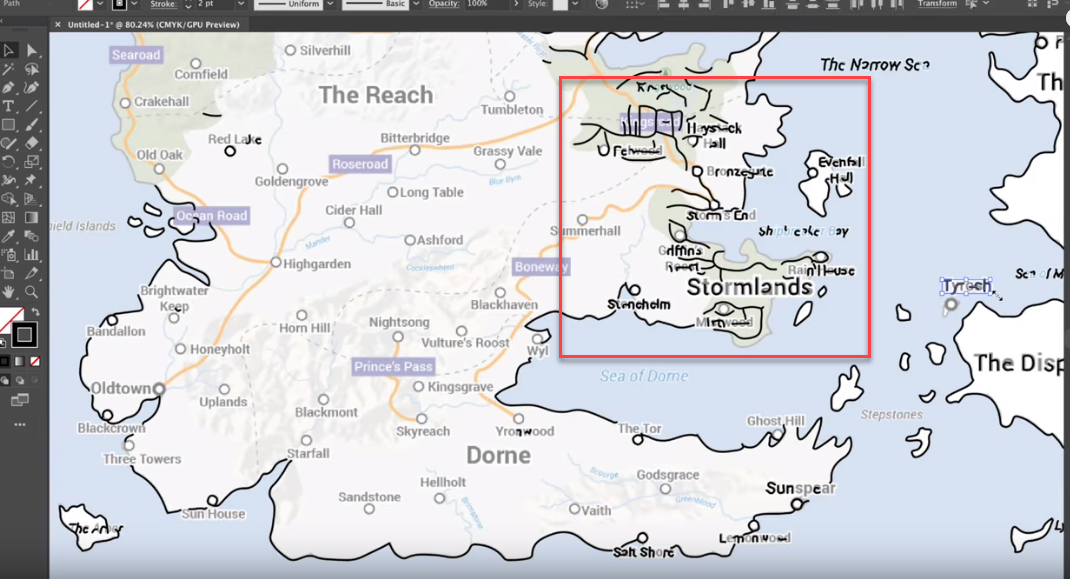
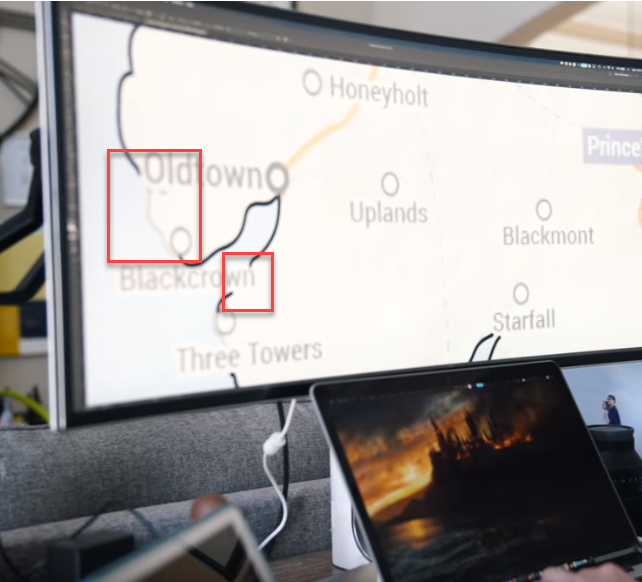
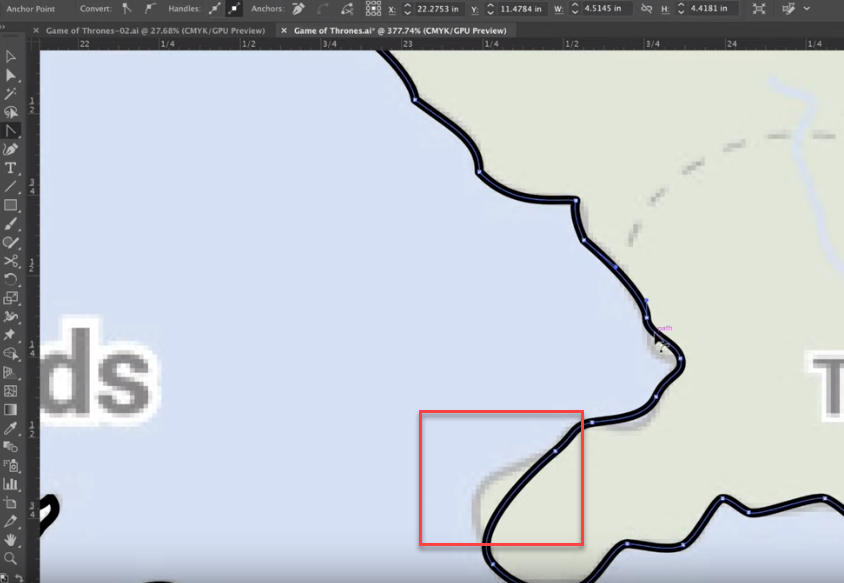
The very first thing I did was look around the internet for a Game of Thrones map that I liked. I found one that had both Westeros and a good portion of Essos where most of the TV show took place in. After saving the image, I opened up a new workspace in Adobe Illustrator. Under File, I clicked on Place to import the image of the map onto the Artboard. Illustrator has a function called Image Trace, which can be found at the top that will allow the program to automatically generate a vector image. However, with any automated tools like this, it's never perfect. I've circled some examples in the images above. So I went in and deleted all the vectors I didn't want, and then added in the ones that were missing. Once the final vector profile is completed, save this off as a .svg file.
Important: All the loose vectors must be removed and the vector profile must be closed (no disconnects) before we can proceed to the next step.
If you're like me and have never used Adobe Illustrator before, I found a great tutorial series on Youtube. After going through the series, I felt like a pro! (j/k)
Here is a link to that tutorial:
Importing Vector File Into Fusion 360
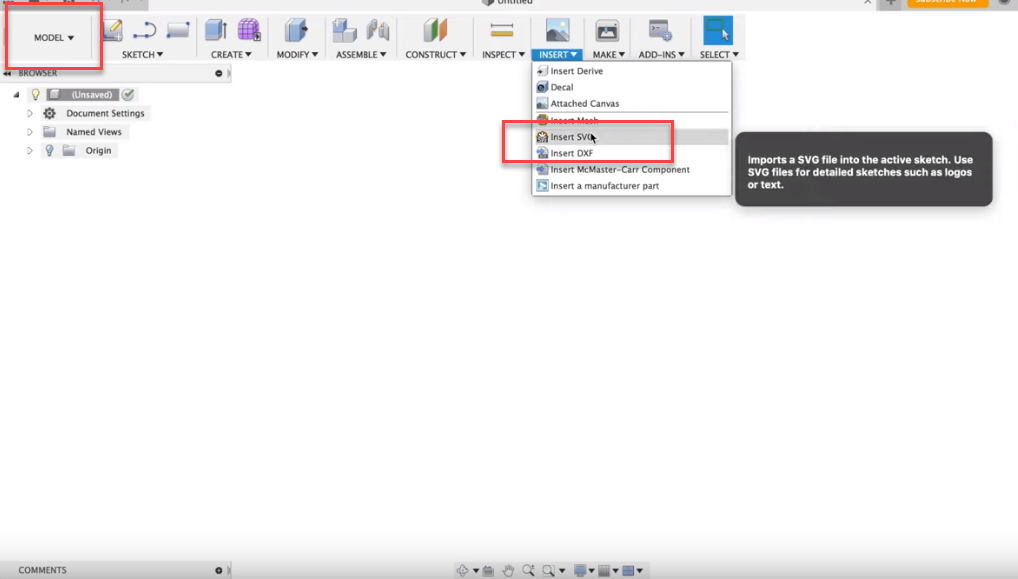
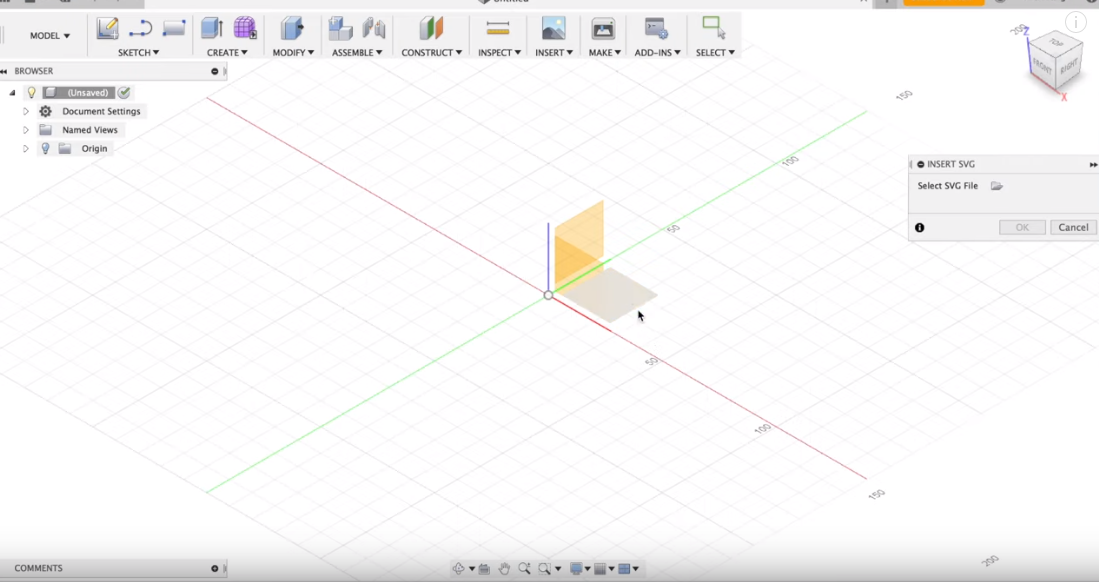
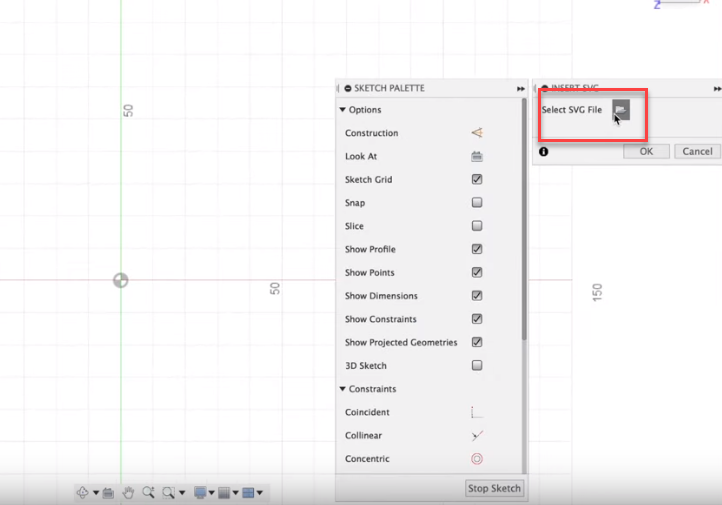
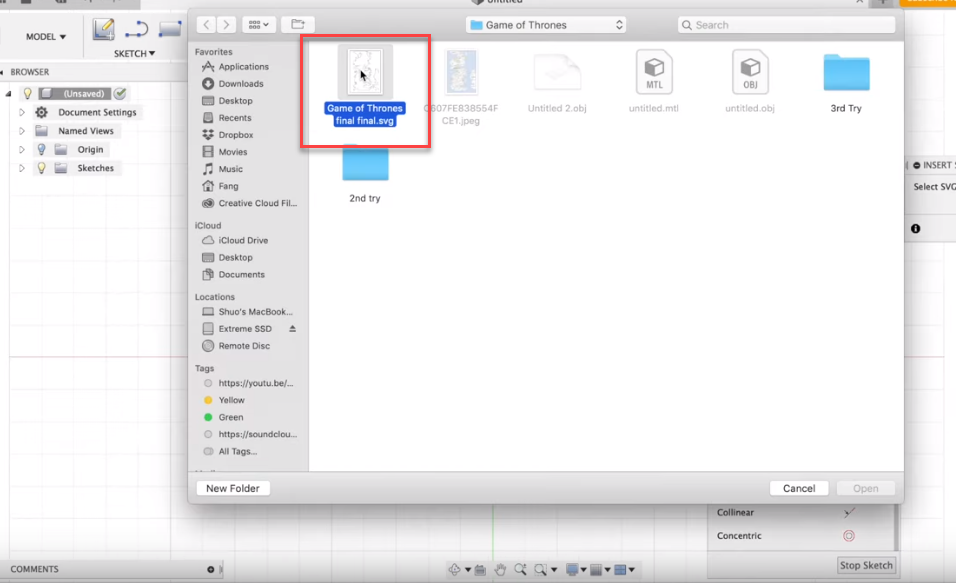
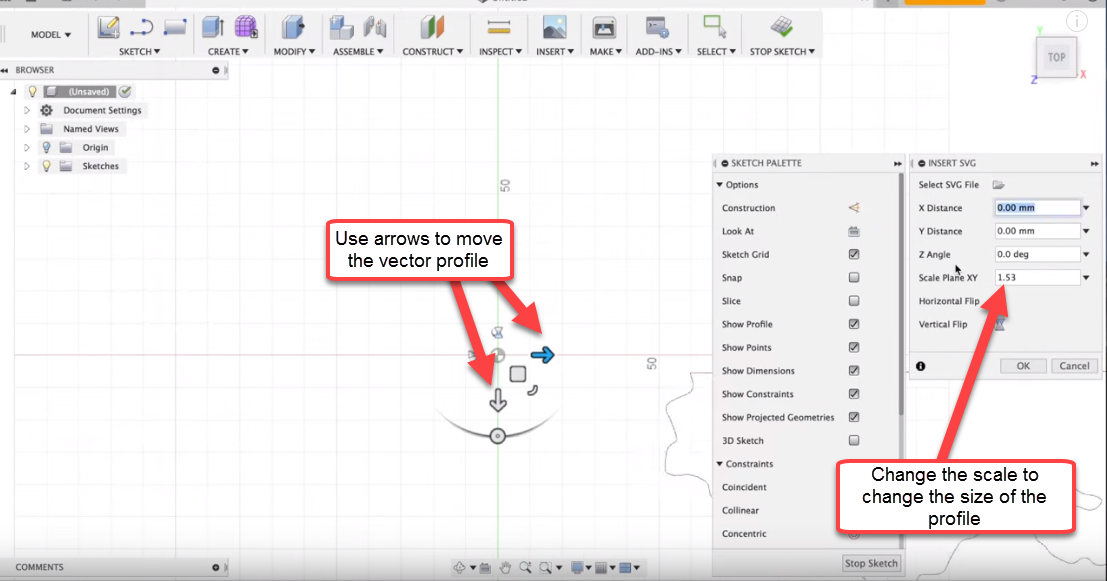
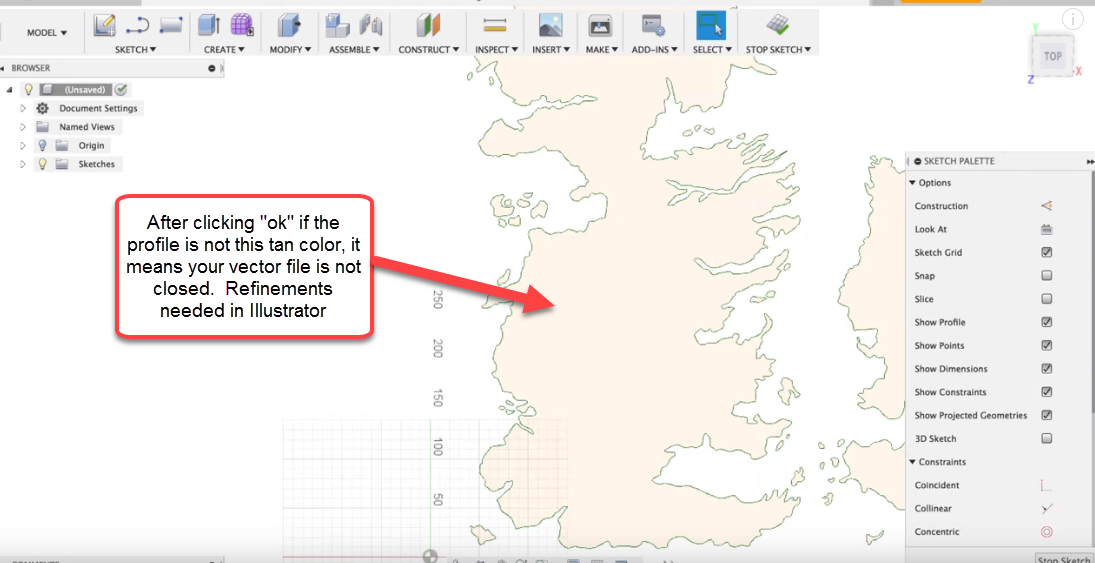
Next, I proceeded with importing the vector profile into Fusion 360.
- Under the Model workbench, click on INSERT and then select Insert SVG.
- Select the plane you'd like to place the vector profile. For me, i chose the XY plane since that's how the workpiece would be on my CNC bed.
- Click on the folder icon next to Select SVG File to open up the vector file saved from previous step.
- Once the vector file has been loaded, you will see options to move the file within the workspace. Use the arrows to adjust the position of the file and use the Scale Plane XY option to change the size of the vector file.
- I moved the vector file so that it is placed in the upper right quadrant, and I scaled the vector file to be about 730mm tall since the capacity of my CNC is 780mm. I left some room to add materials around the map.
- Click OK.
Note: If after clicking OK, your vector file does not turn into that tan color like in the image above, it means your vector profile is not closed. Please go back to Step 1 and close the disconnect.
Getting Terrain STL Data
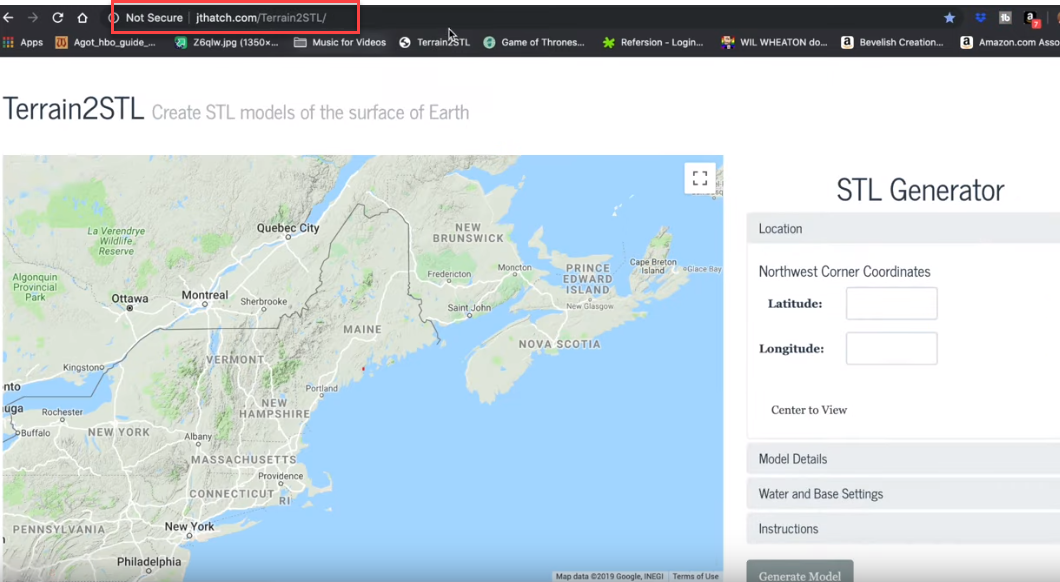
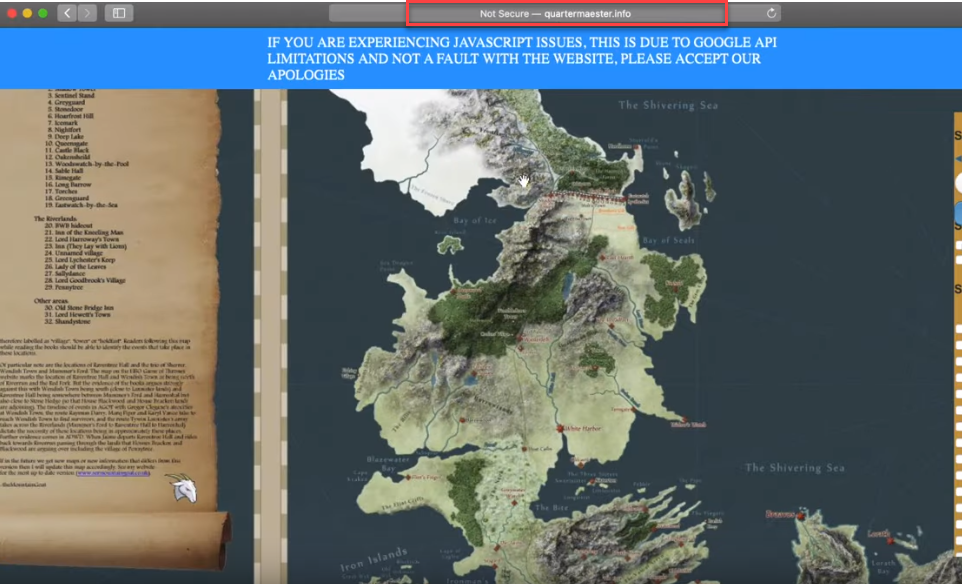
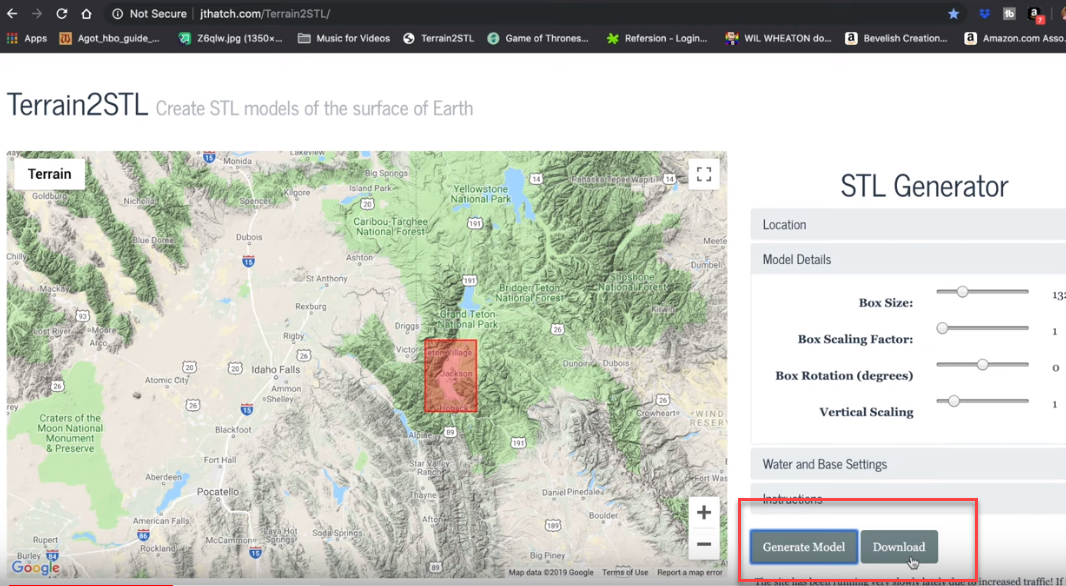
This section has the least steps, but it took me a long time to do. Basically, I want to use real world terrain surface on my final carve so it looks most natural versus something I'd create on my own. But at the same time, I want to make sure the terrain matches as closely as possible to the actual Game of Thrones map. Well...the Game of Thrones map is obviously fictional, so every map I found on the internet was a little different, but the rough area of where mountains were located was mostly the same.
To get real world terrain data, I went to a website called Terrain2STL which has geographical data around the world. Then I went to another site called quartermaester.info to get the most "accurate" Game of Thrones map I could find. Then I went back and forth between these two sites looking for mountain shapes on the real map that matched the shape on the fictional map.
Once I found an area that I liked, I clicked on Generate and then Download to save the STL file.
Note: I first did this for only the northern half of Westeros, and then repeated this step for the Southern part of Westeros and Essos. There are three main reasons I did this:
- It's nearly impossible to find terrain profiles that matched the entire Westeros
- Even if you found some terrain profile that matched, the STL file will be so large that the next steps will cause a lot of problems, and will require a lot of computer processing power/time to fix the mesh
- Even if the mesh was processed without problems, modeling it in Fusion 360 may cause small problems that needs fixing, and the processing power/time required to fix something this large will make you want to throw the computer against the wall. (...trust me)
Cleaning Up .STL File (Part I)
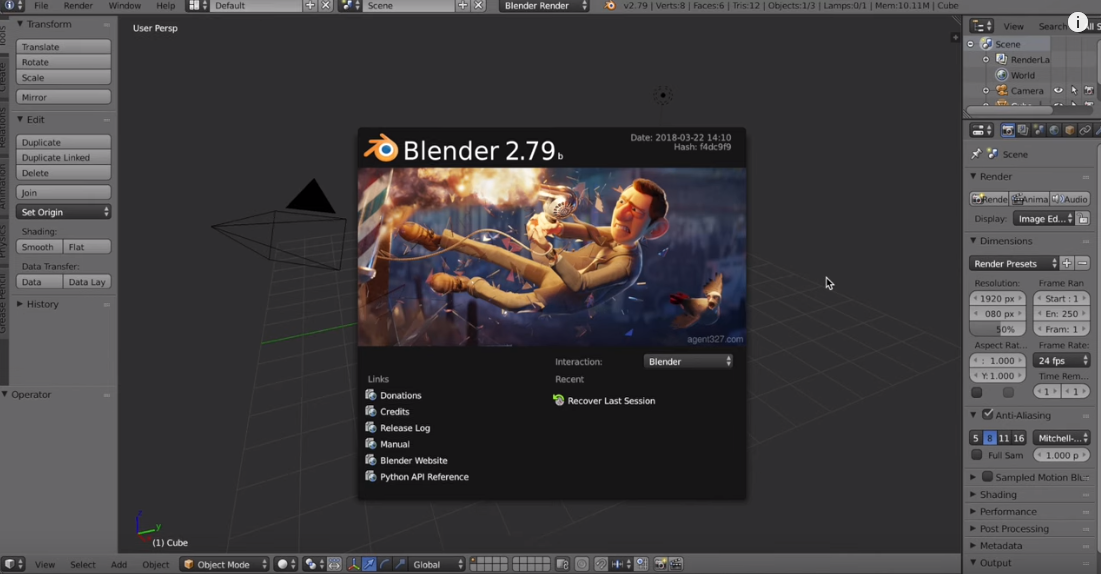
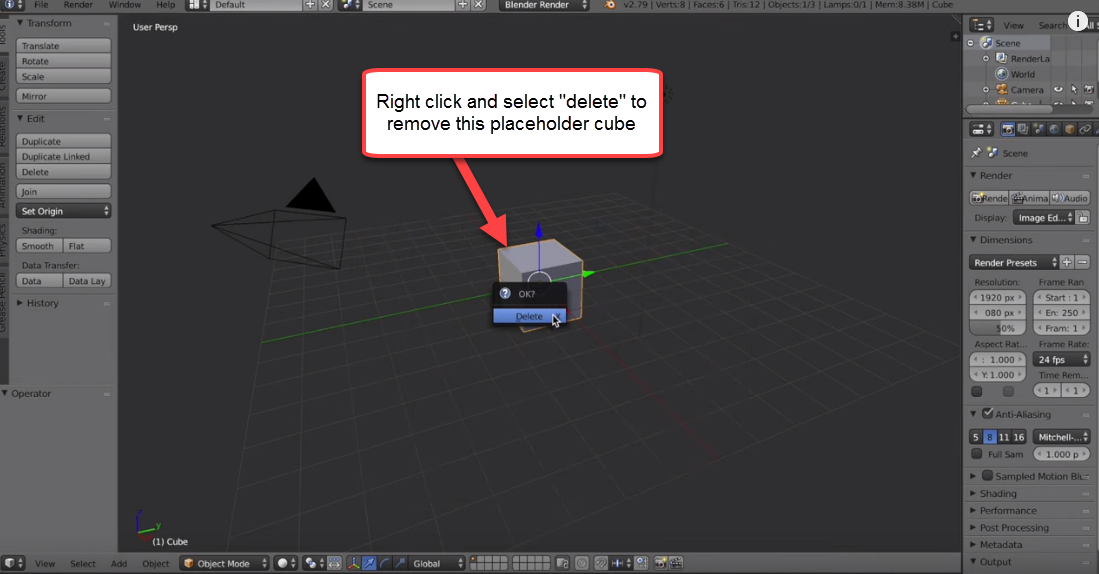
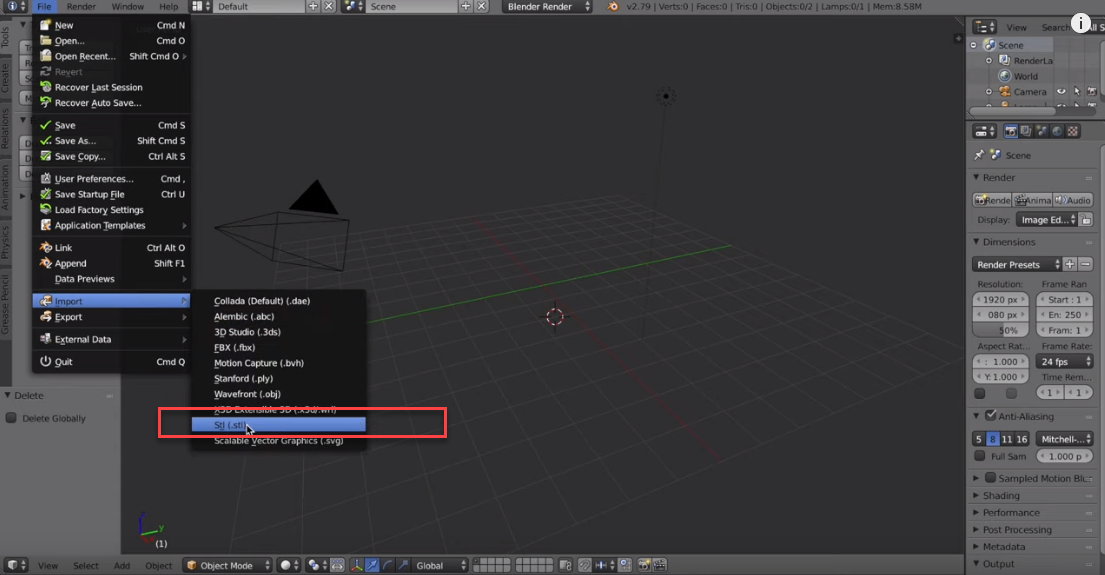
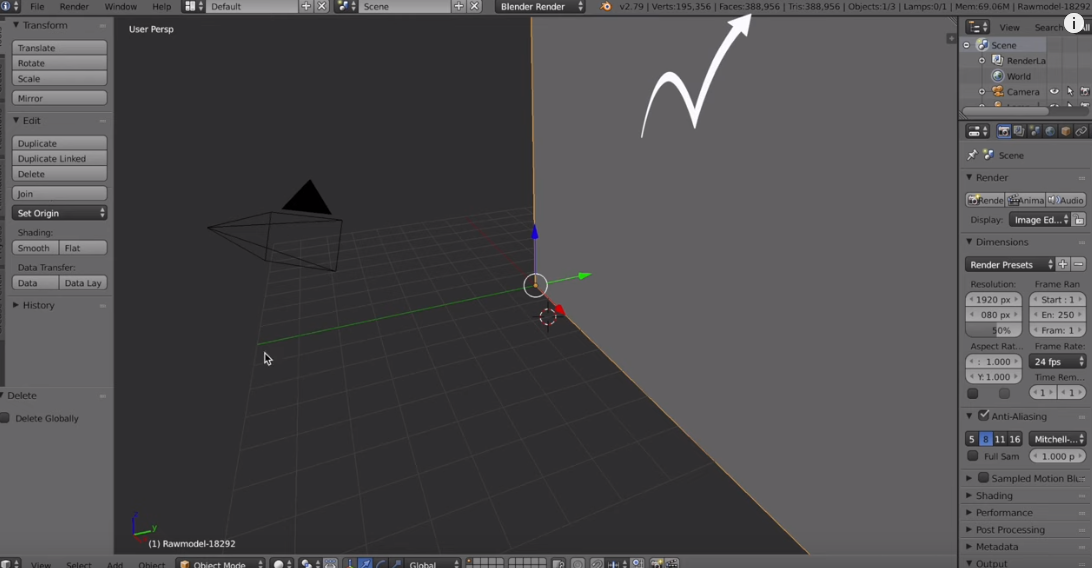
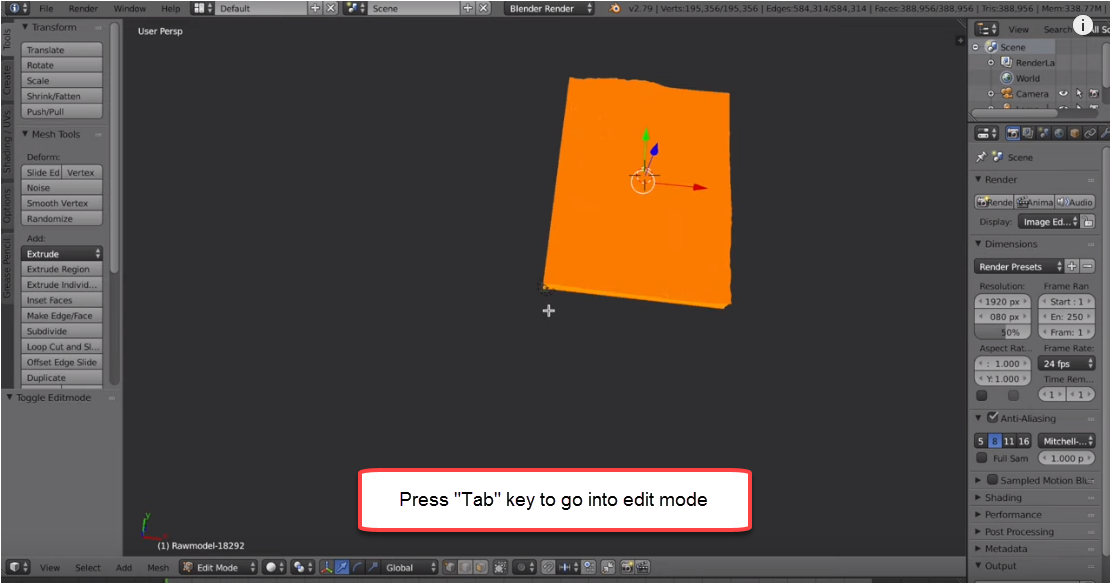
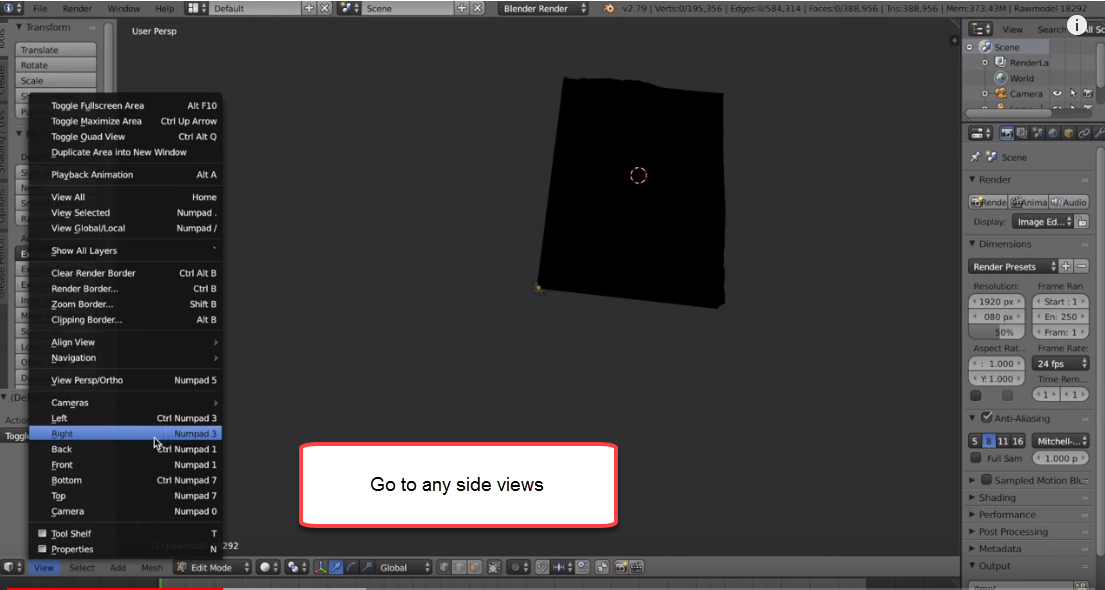
Unfortunately, I couldn't just import the .STL file downloaded previously into Fusion 360. It has way too many faces for Fusion to handle. I want to reduce the number of faces in the model without losing all the detail and smoothness. To do this, I will have to convert the current triangulated mesh into a quad mesh. Even if Fusion could handle it, there are problems with the mesh that we'll need to fix first, such as duplicate vertices and faces. To clean up the mesh file, I used a free software called Blender.
Upon opening Blender, there's a default cube in the middle of the screen which is just a placeholder model. Simply right click on it to bring up the delete menu, and delete it.
Next, go to File ---> Import ---> .stl to import the mesh previously downloaded from Terrain2STL.
Once the file is imported you can see that the current mesh has almost 400,000 faces, and Fusion 360 limit on meshes is 20,000 faces. If we had simply reduced the number of faces in the mesh, a lot of details would be lost. To get around this, we will convert this file to a quad mesh in Instant Meshes in the next step, but first let's continue cleaning up the file.
The first thing we'll need to do is remove the four side walls on this terrain surface, so that Instant Meshes can use this file in the next step. To do this:
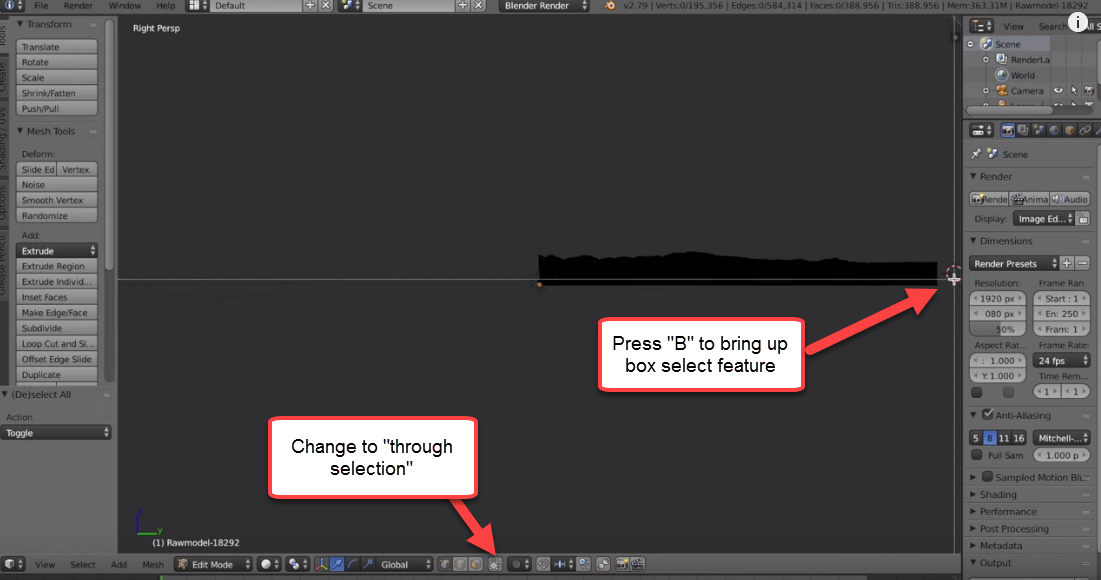
- first click the "tab" key on the keyboard to go into edit mode.
- Select any of the side views.
- Change the click mode to "through click" as shown in the image above.
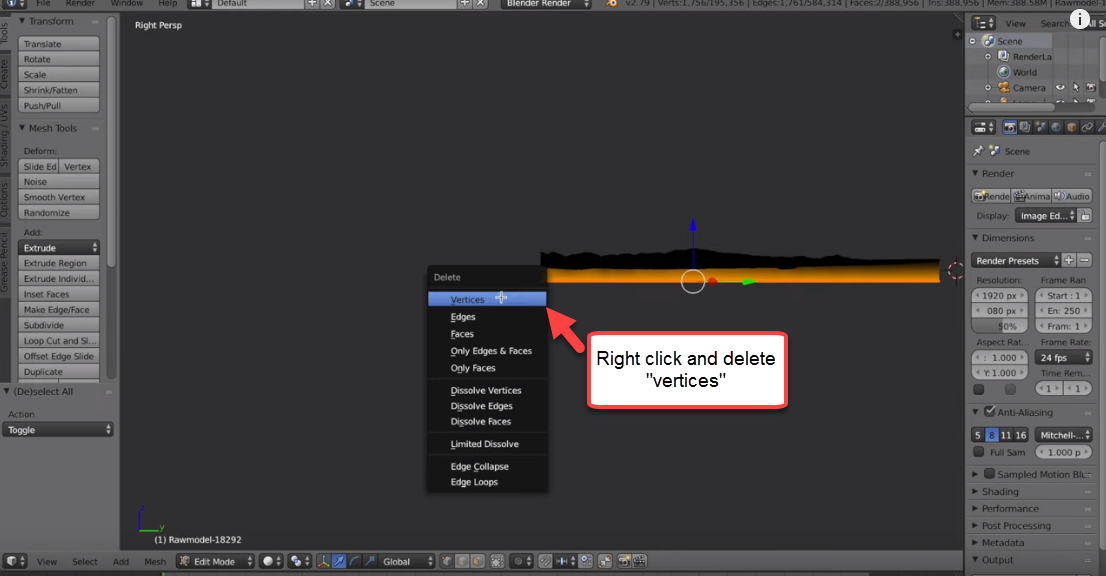
- Click the "B" button on the keyboard to bring up "box select". Now just drag the box around the bottom edge of the model
- Right click and select "vertices" to delete the walls
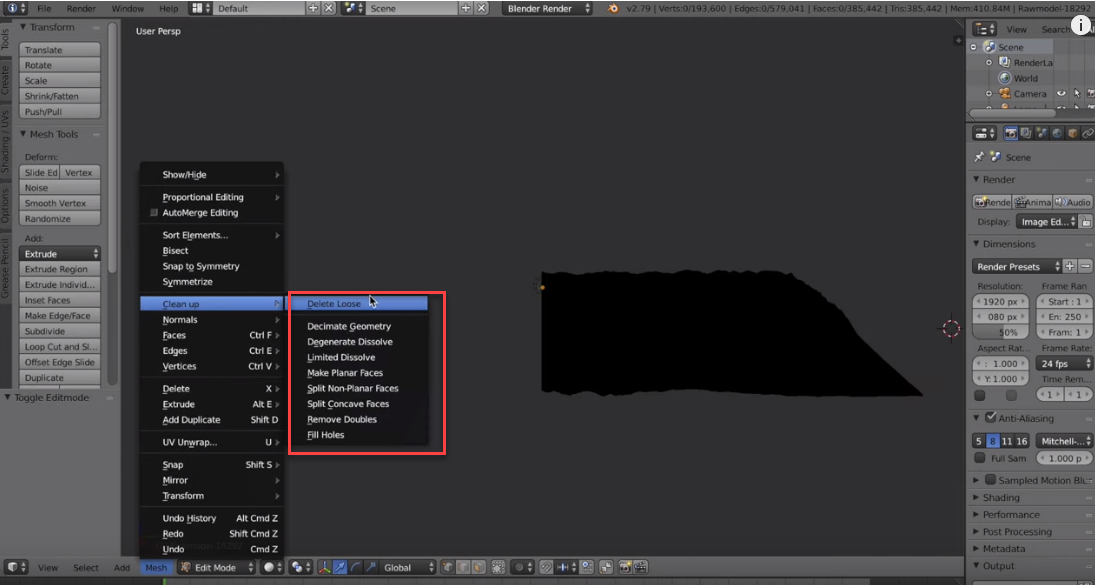
Once the walls have been deleted, go to the bottom menu and select Mesh ---> Clean up ---> Delete Loose to remove any loose faces and vertices. Go through the rest of the clean up menu to remove any remaining items such as duplicate faces and vertices. What you are left with should be a clean model of the terrain surface ready to be converted to a quad mesh in the next step. Save this file as a .obj file.
Cleaning Up .STL File (Part II)
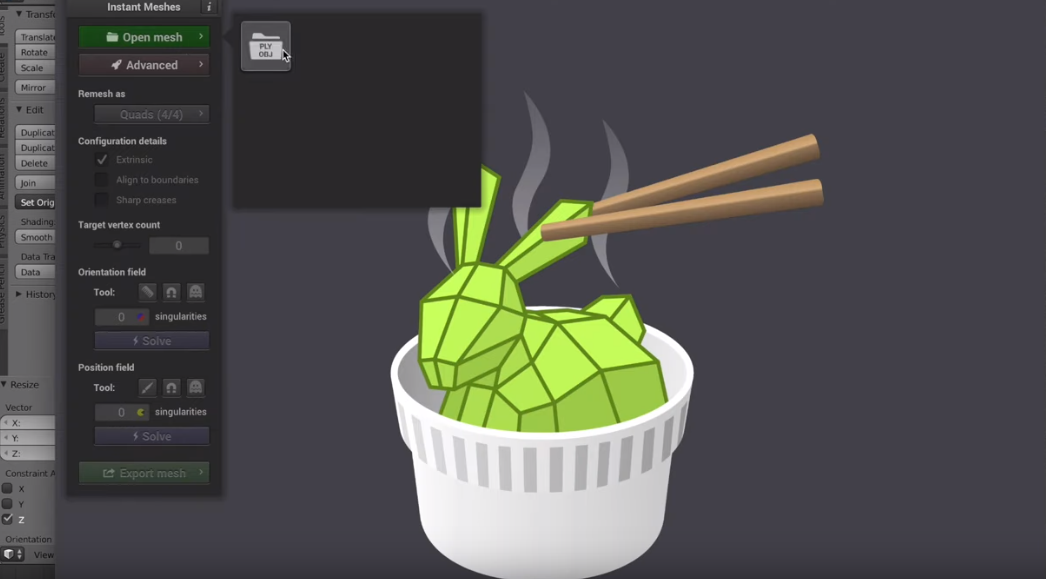
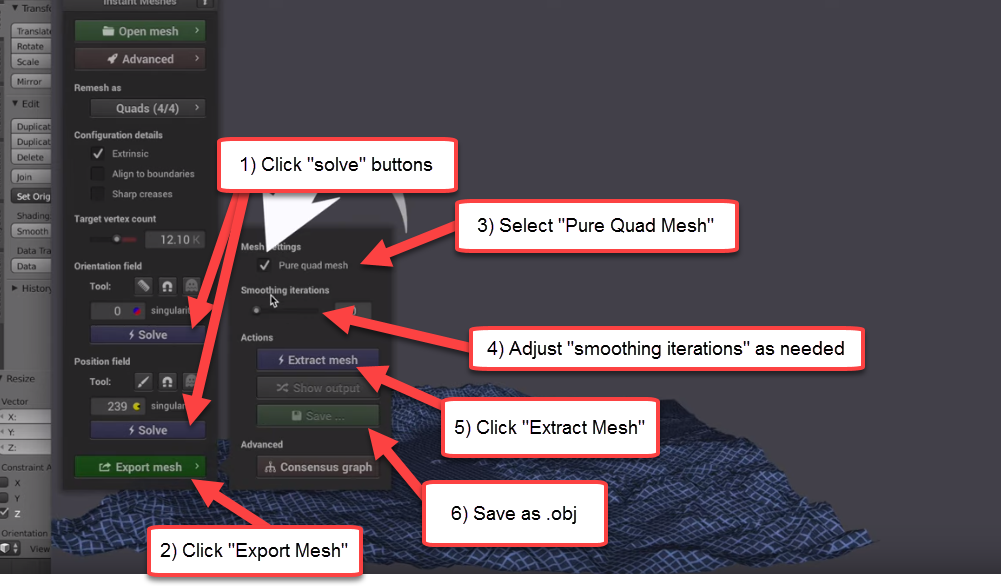
This step will be fairly straightforward, thankfully. First import the previously saved .obj file into Instant Meshes.
- Click the two "solve" buttons from top to bottom.
- Click "export mesh". This will create an "approximate" mesh for you to look at and make adjustments as necessary. Just leave everything as default
- This is most important. Make sure the "pure quad mesh" box is checked.
- If the mesh isn't smooth enough, you can play around with the slider to do some smoothing iterations
- Click "extract mesh" to generate the final quad mesh
- Save this as your final .obj file.
Now we're ready to do some modeling in Fusion 360!
Modeling Terrain Mesh on to Map Boundary (Part I: Convert Mesh to BRep)
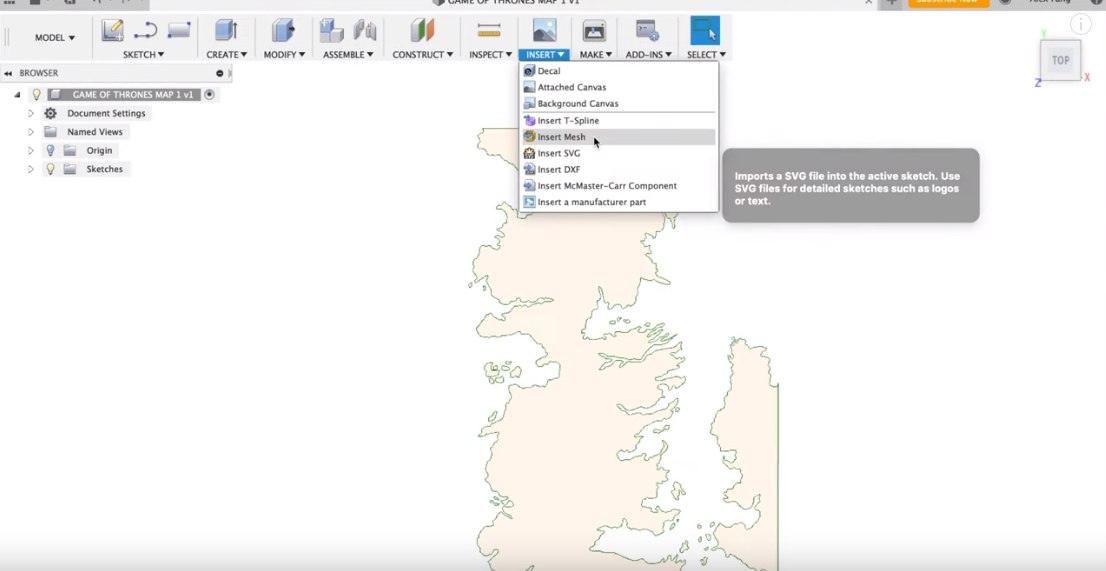
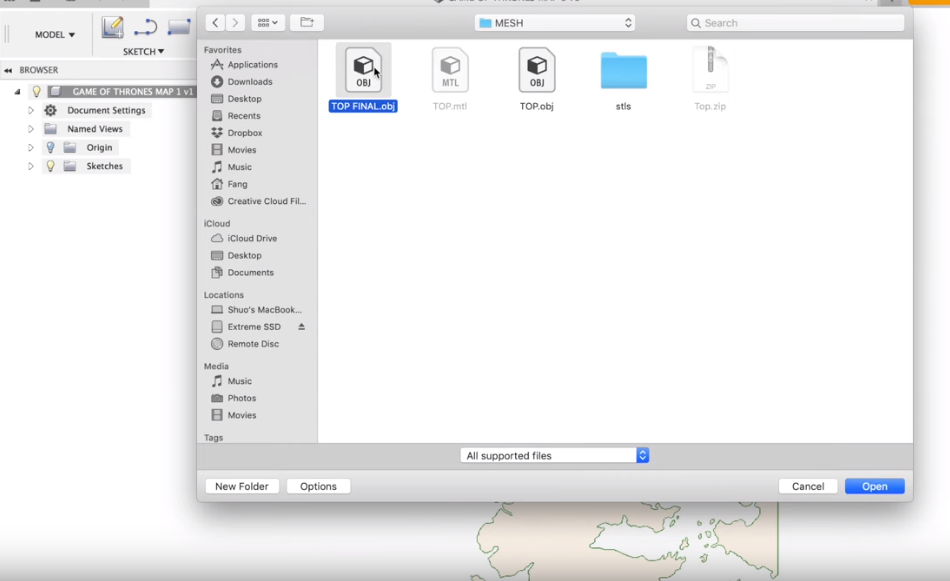
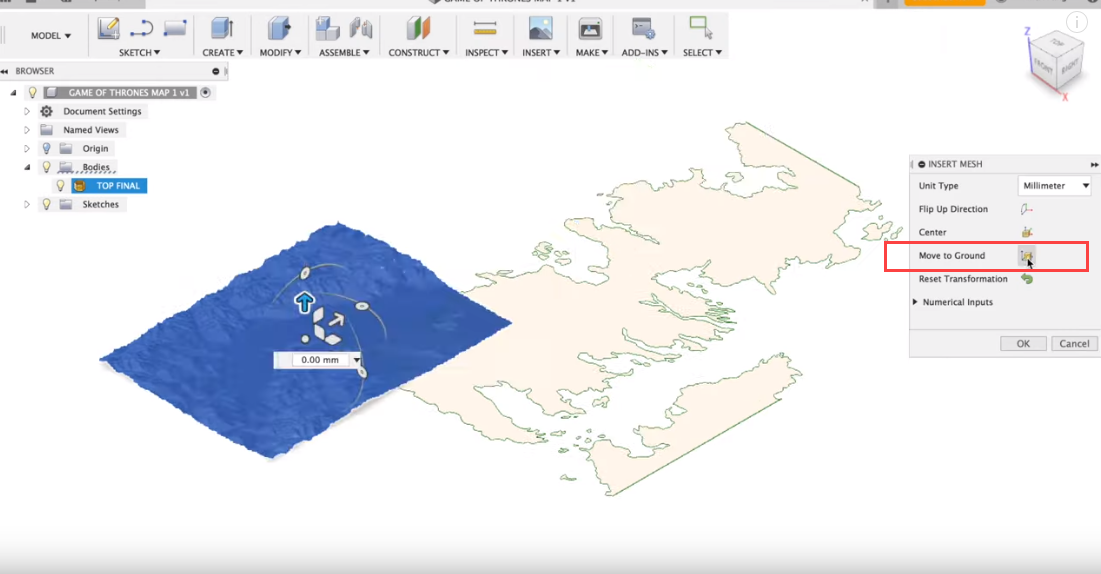
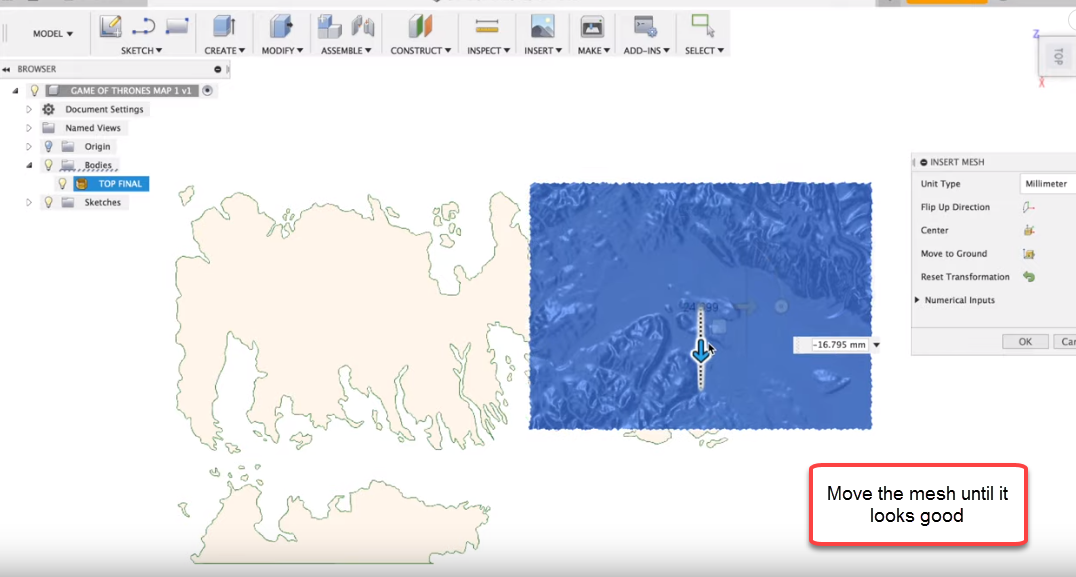
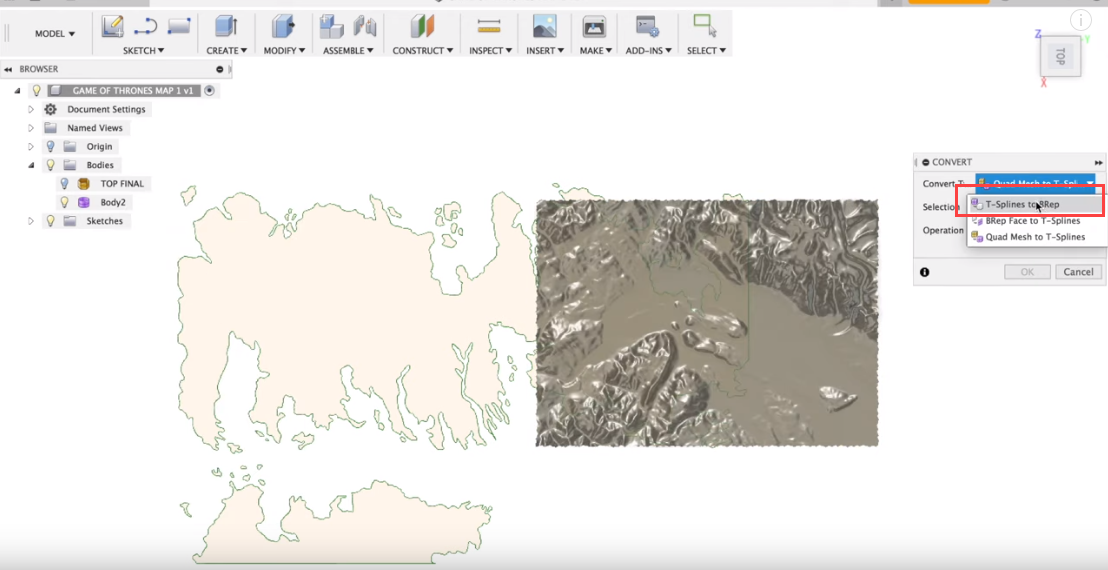
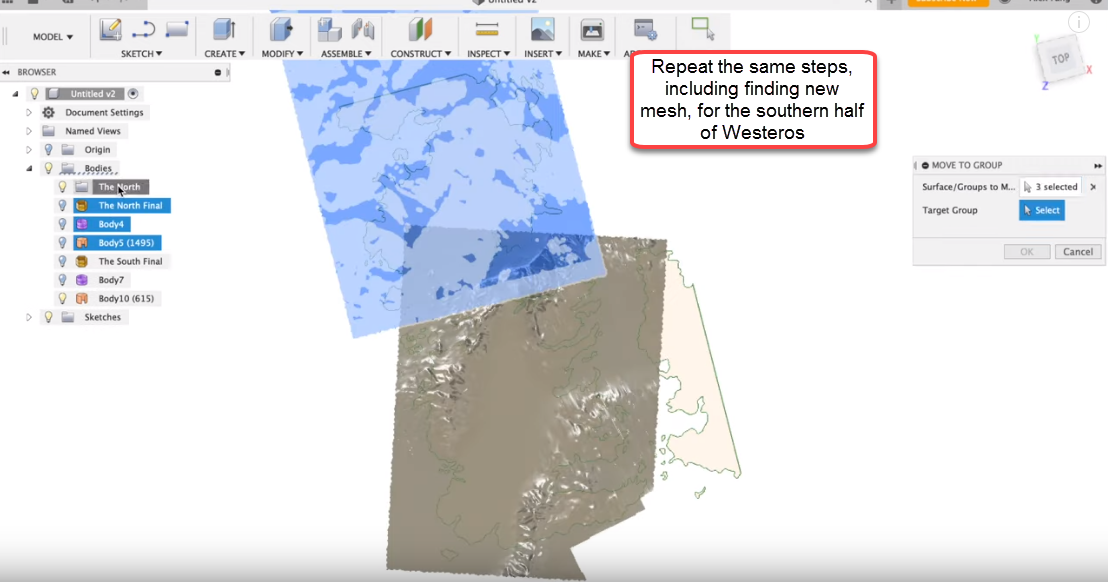
After importing the previously downloaded .stl file into Fusion 360, I moved the mesh to the location I wanted by first clicking on "move to ground" button in the pop-up. This aligns the bottom surface of the mesh with the base plane that the map boundary is on. Next, use the arrows to move the mesh to its proper location, in this case this is only for the northern half of Westeros.
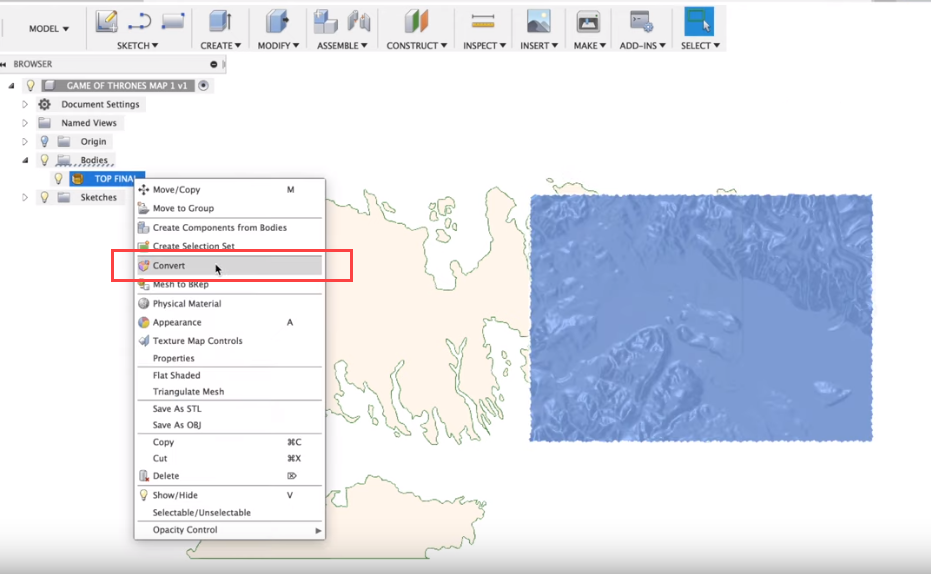
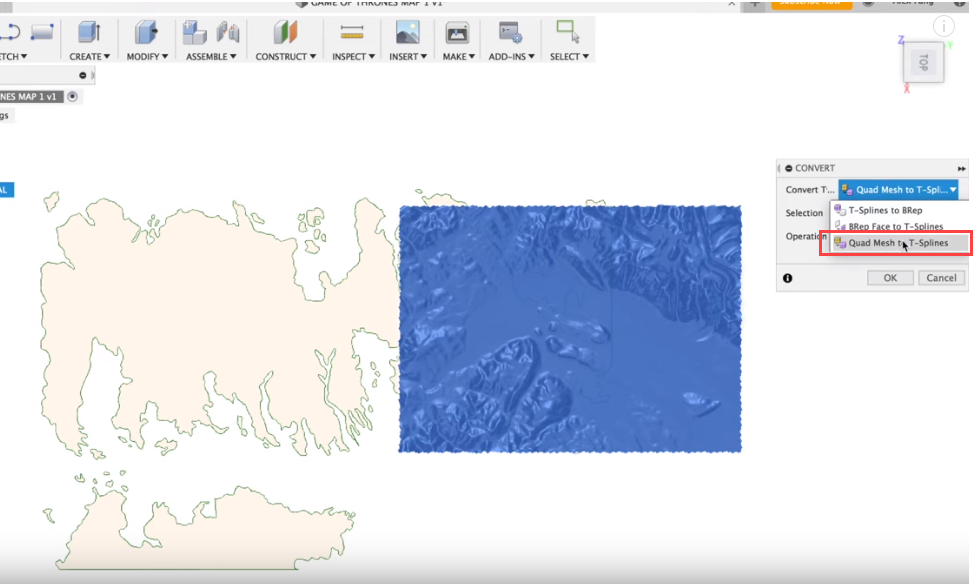
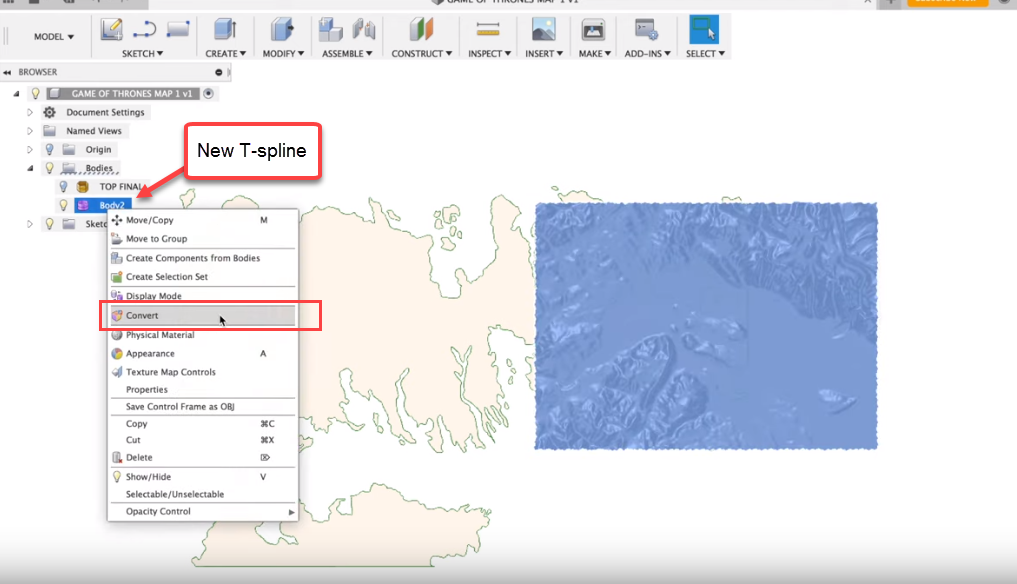
However, we can't start modeling anything yet. The mesh data needs to be converted to a BRep (solid). To do this, right click on the model in the tree and select "Convert". Then in the pop-up menu select "Quad Mesh to T-Splines". This step will turn the Quad Mesh into a completely smooth, curvature continuous, ‘Watertight’ Nurbs surface model which can then be, to ‘Brep’ (Solid) models for use in Fusion 360. Once this is done, go to the tree on the left hand side and right click on the new T-Spline surface and click "convert" again and select "T-Splines to Brep". When this process is done, I now have a solid surface for me to model with Fusion 360 modeling functions.
Repeat steps 3-6 with the southern half of Westeros.
NOTE: If you get an error during the conversion process, Fusion 360 will actually highlight the problem areas. If you close the error box the highlight will disappear. If there is an error, look around the mesh for red surfaces (it can be small sometimes). You can simply highlight the problem area and delete that portion of the mesh. Rerun the conversion.
Modeling Terrain Mesh on to Map Boundary (Part II)
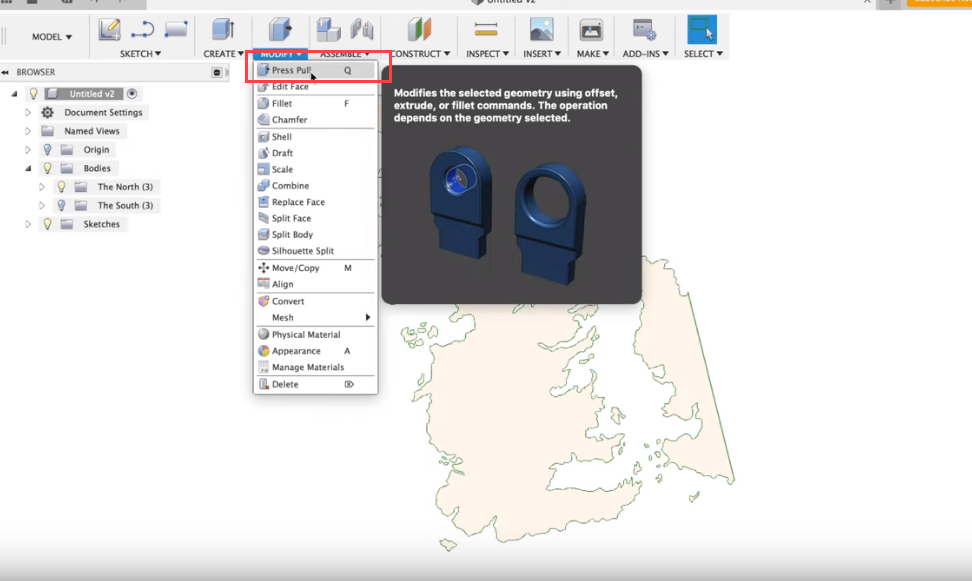
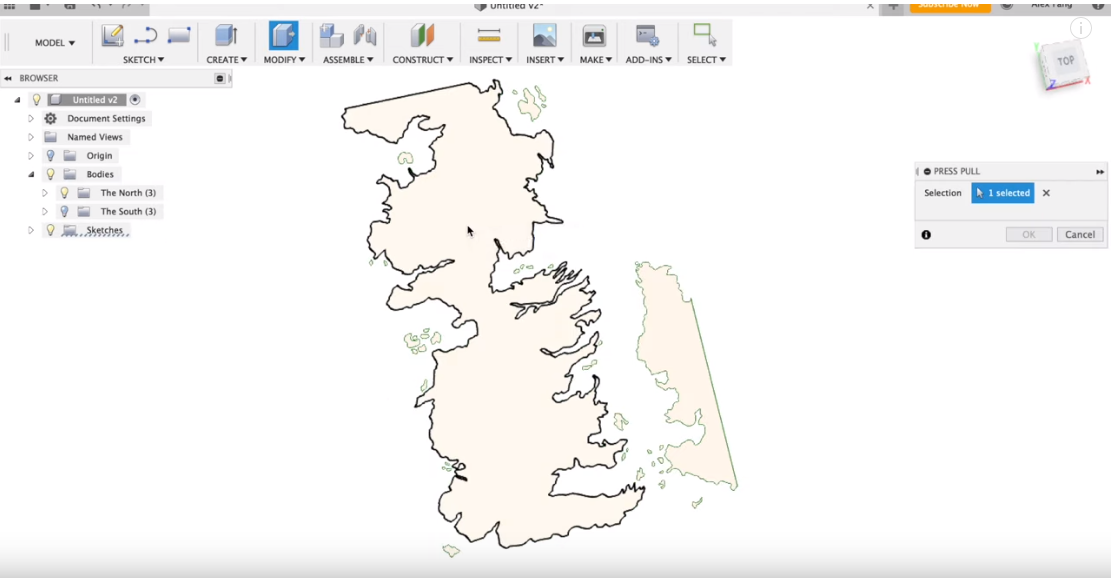
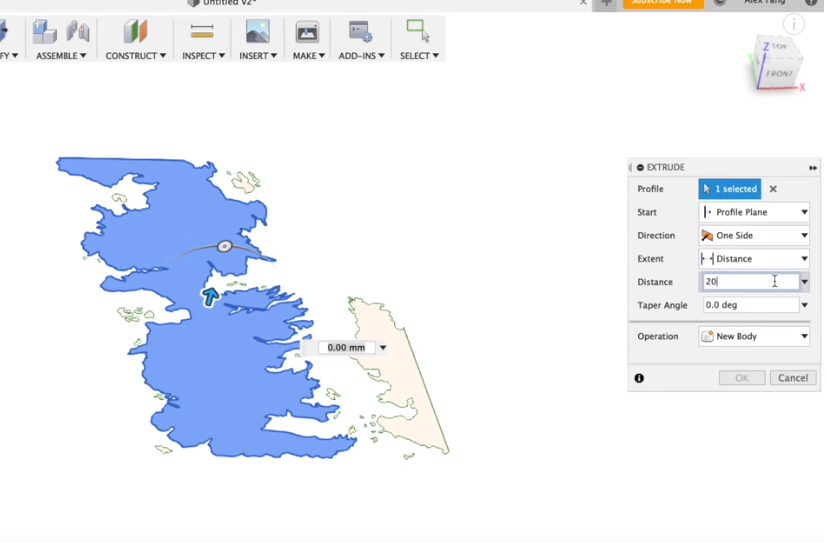
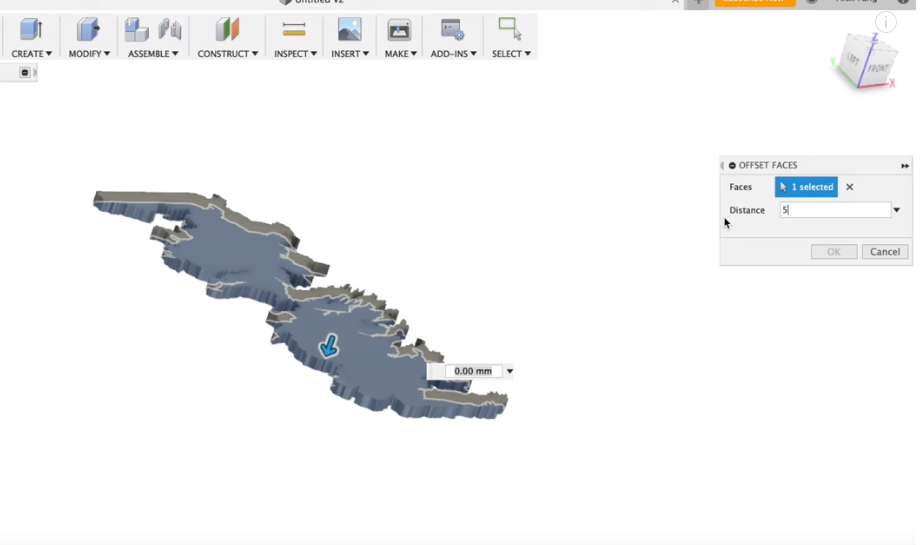
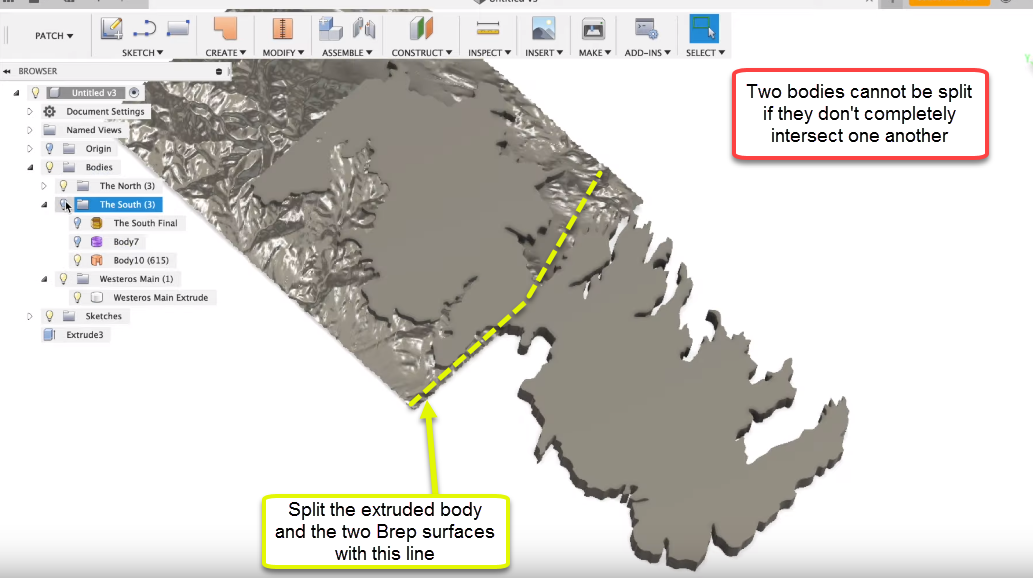
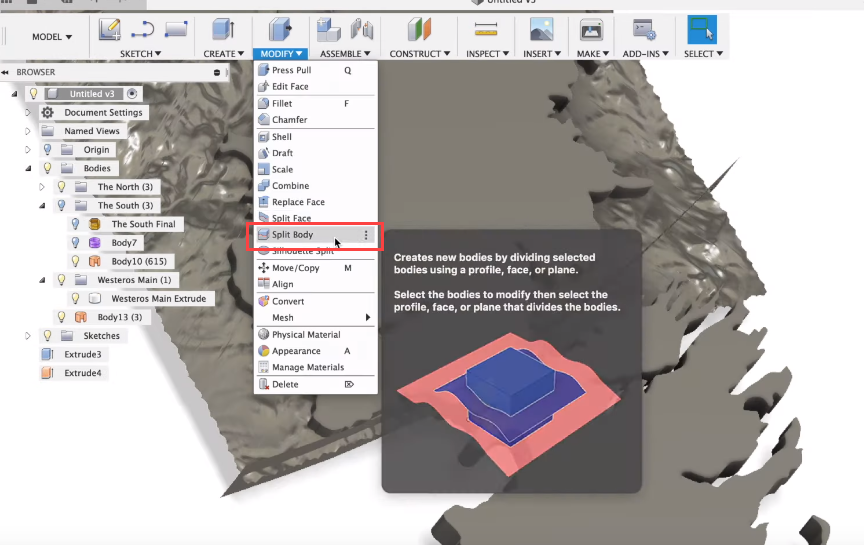
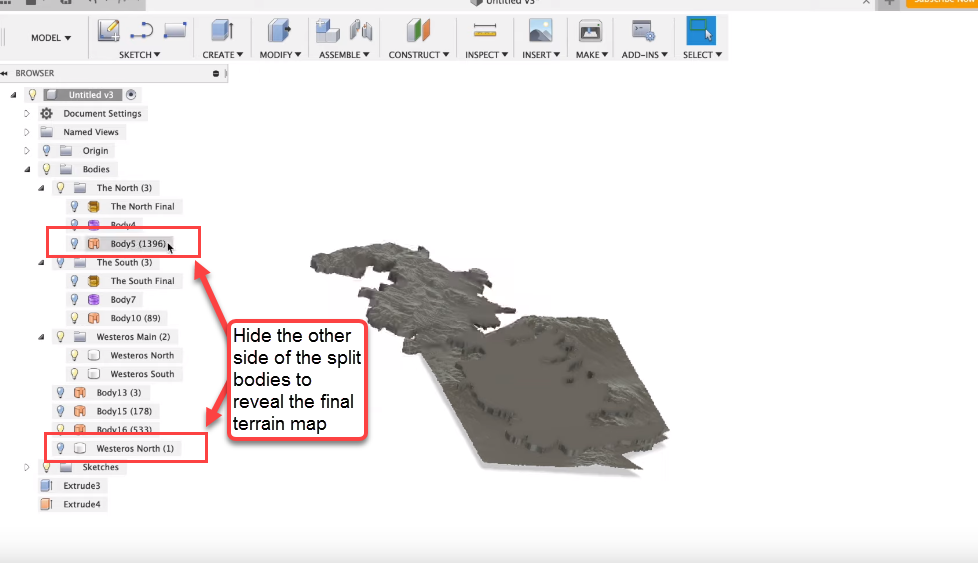
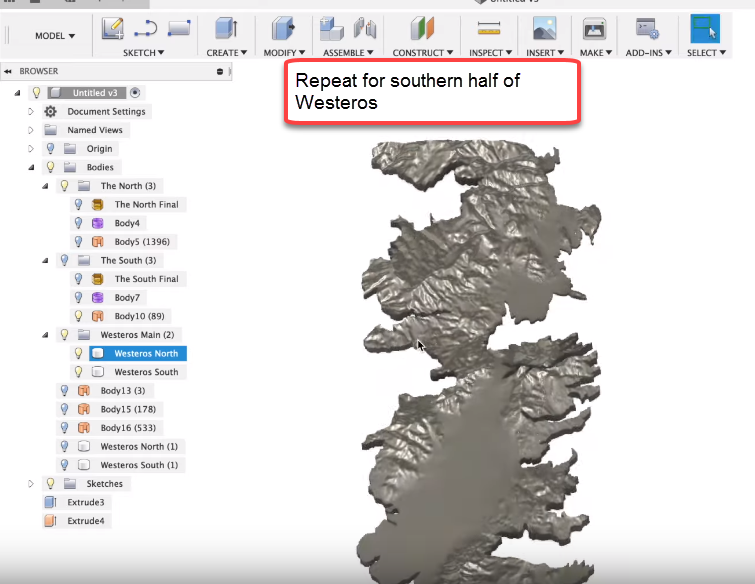
Alright, this step is long, but this is where the magic happens, so bear with me. I started by making the surface of Westeros into a solid body by going under the "Modify" tool tab and selecting "Press/Pull", then pick the map of Westeros. Then pull the top and bottom surfaces, making sure that this body will completely cover the BRep on top and bottom.
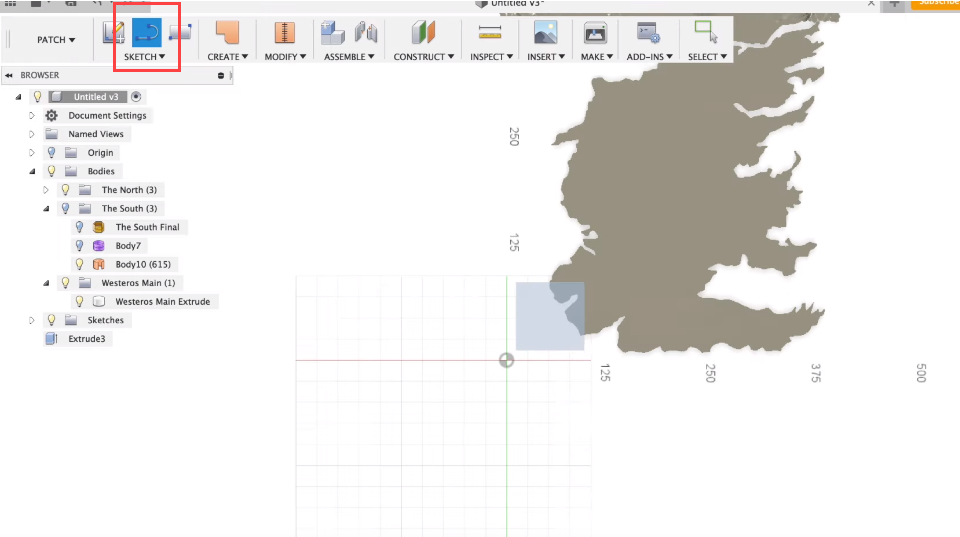
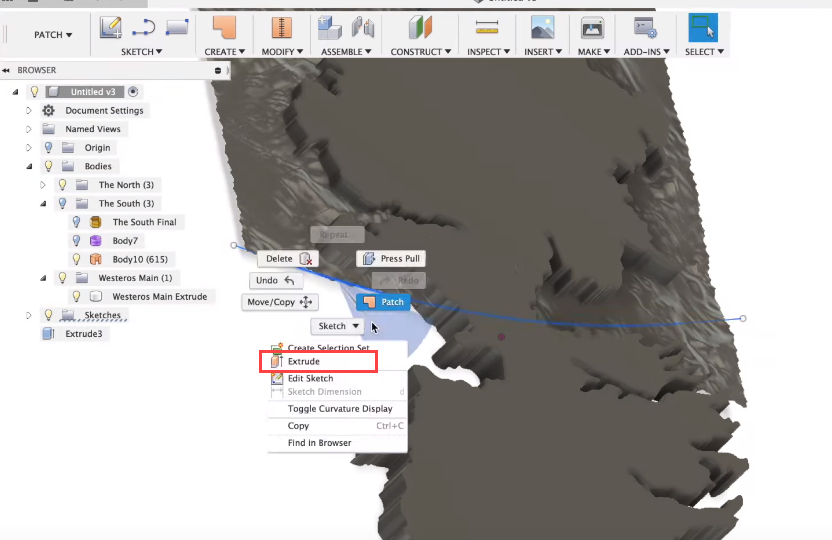
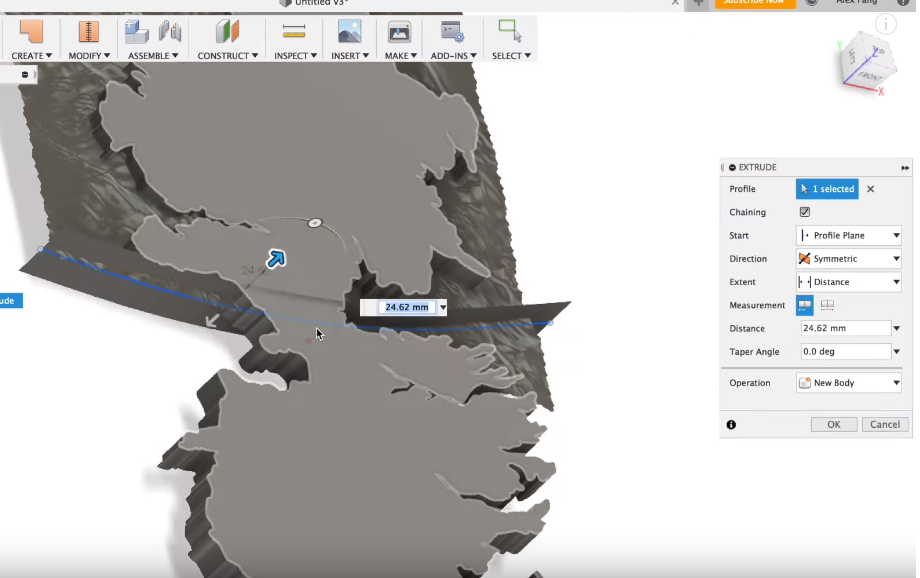
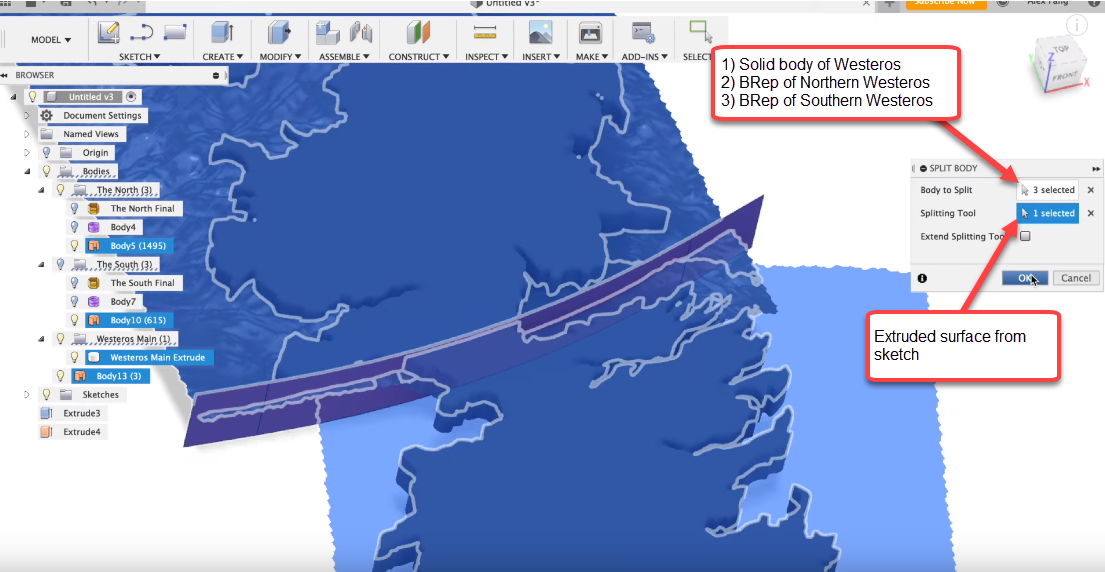
Because we are working with two different BReps, one for northern Westeros and one for the south, I also needed to split the solid body into two. Also, in order to combine the BReps with the solid body, the two must intersect each other. So I found a line where all three bodies intersected one another and split them along that line by first drawing a line in a sketch, then right clicking that sketch to extrude it. This extrusion becomes a surface, which can be used to split the three bodies. Make sure this extruded surface completely intersect the bodies that needs to be cut. To split the bodies, click on "Modify" and select "Split Body". In the pop-up box select the 3D body of the map and the two BReps for "Bodies to Split", and then select the extruded surface for "Splitting Tool". Click OK and now there will be four solids.
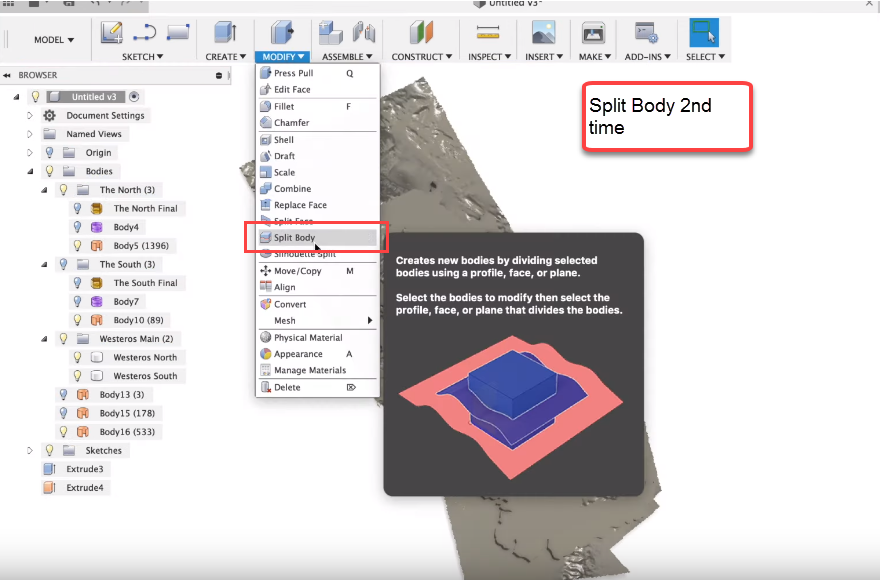
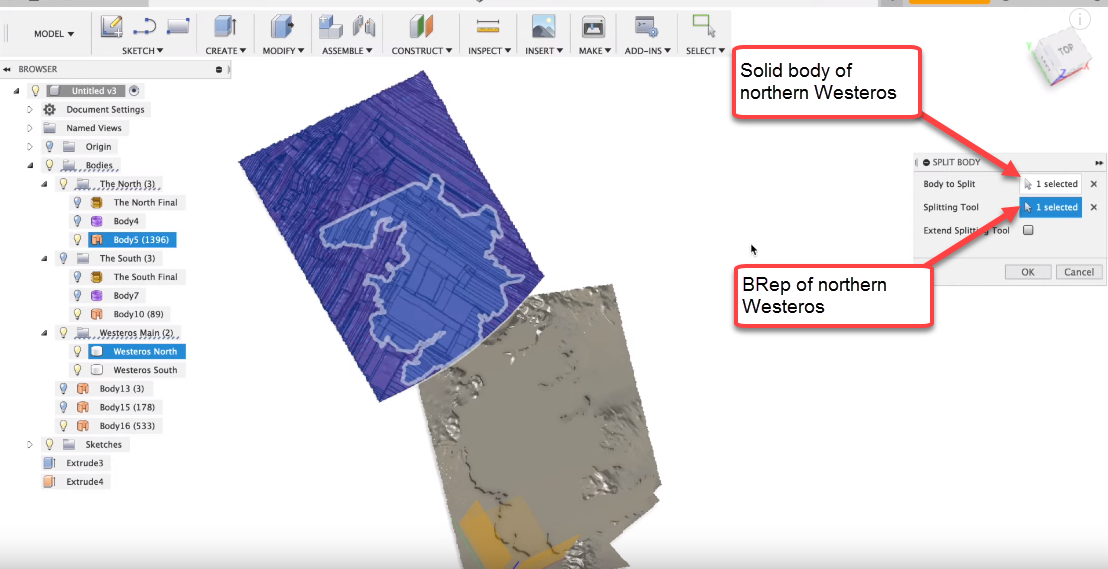
I used the "Split Body" tool a second time to combine the solid body and the BRep terrain surface. In the pop-up box I selected the northern Westeros body for "Body to Split" and then selected the northern Westeros terrain BRep for "Splitting Tool". Click OK. Now I went to the tree on the left to hide the residual bodies from the split function. Voila! Now I've got a solid model of the northern Westeros with terrain!
Just repeat these same steps for the southern half of Westeros. After the residual bodies are hidden a complete terrain model of Westeros will be revealed!
Keep repeating these steps for Essos and all the small islands. I did find a mesh specifically for Essos, but I just used the same BReps for the small islands.
Finish Up Modeling
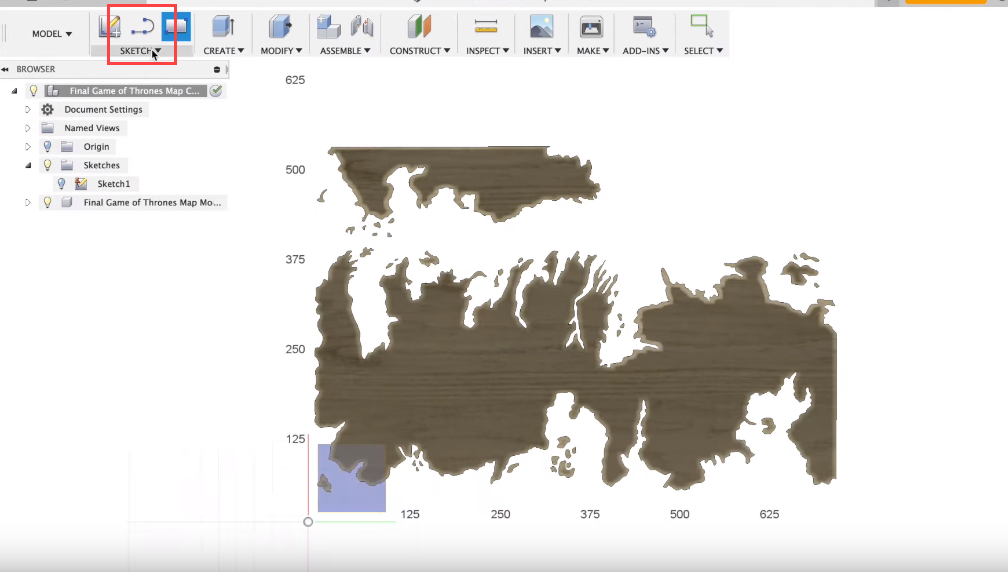
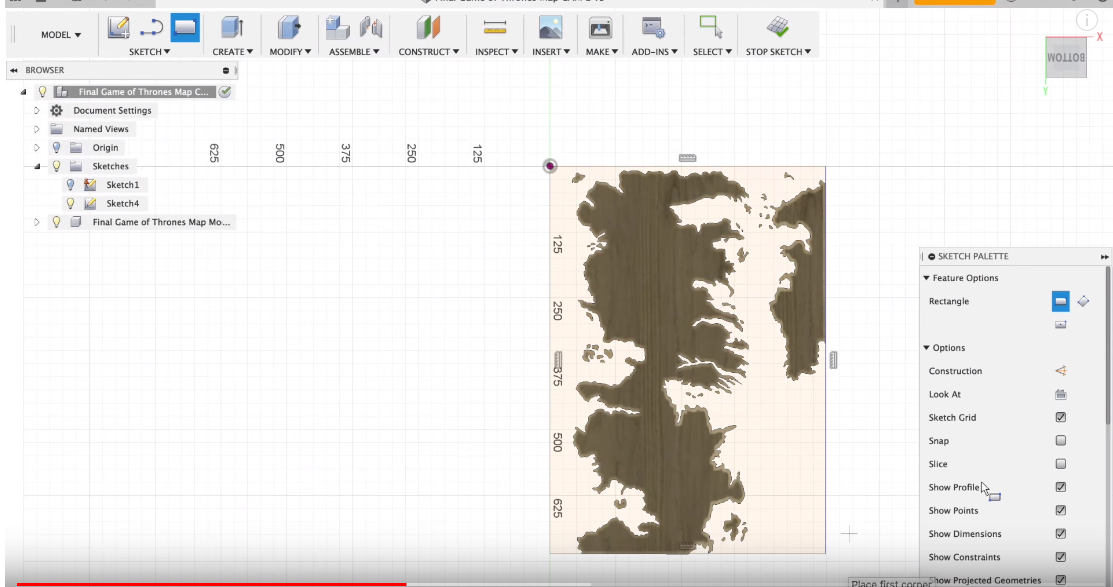
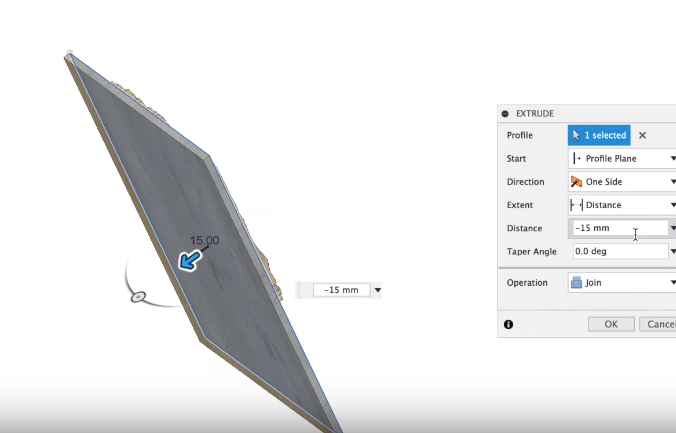
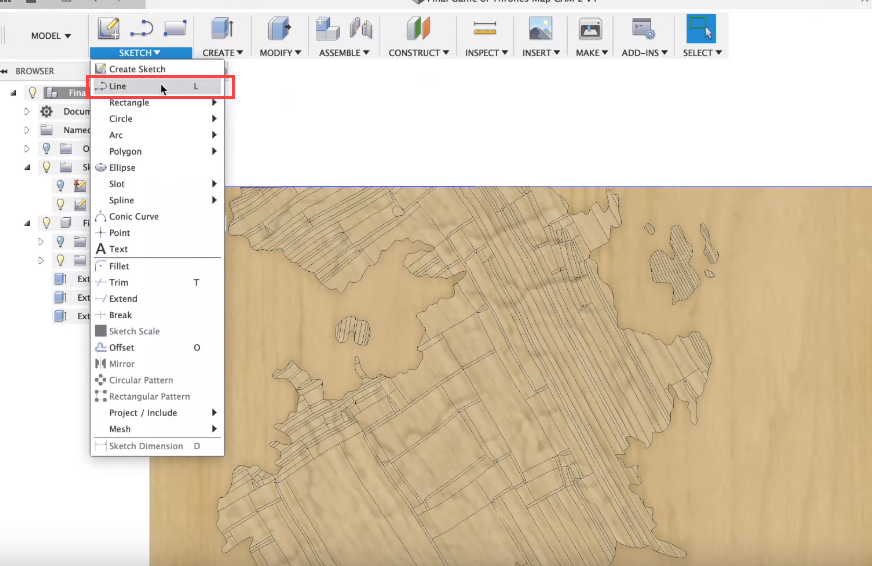
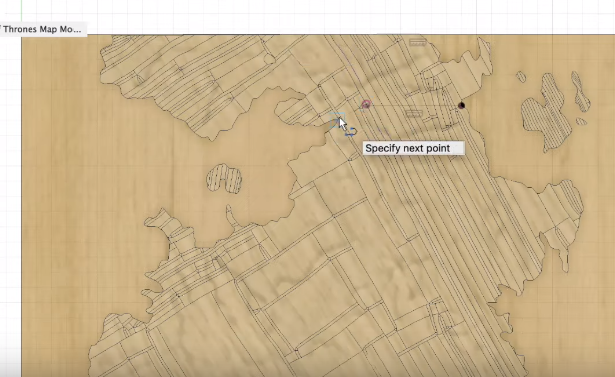
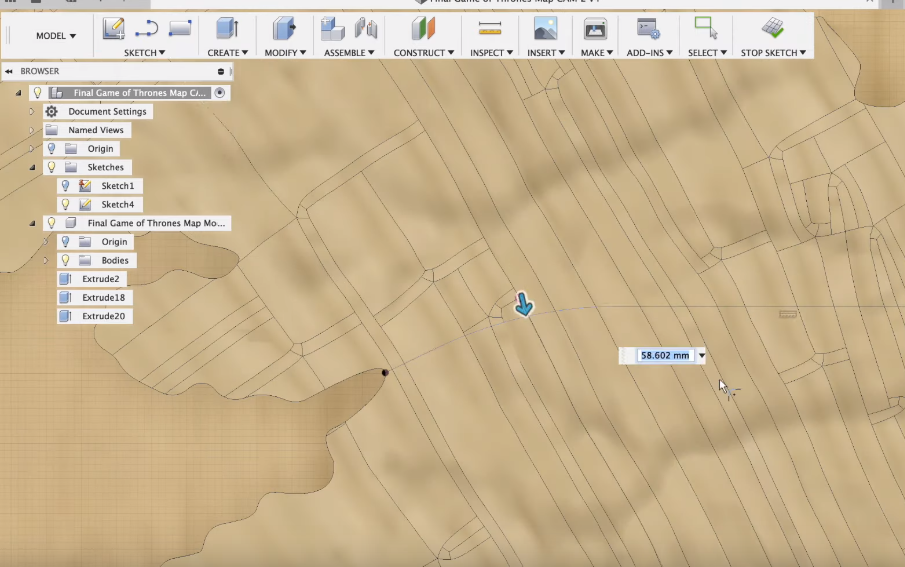
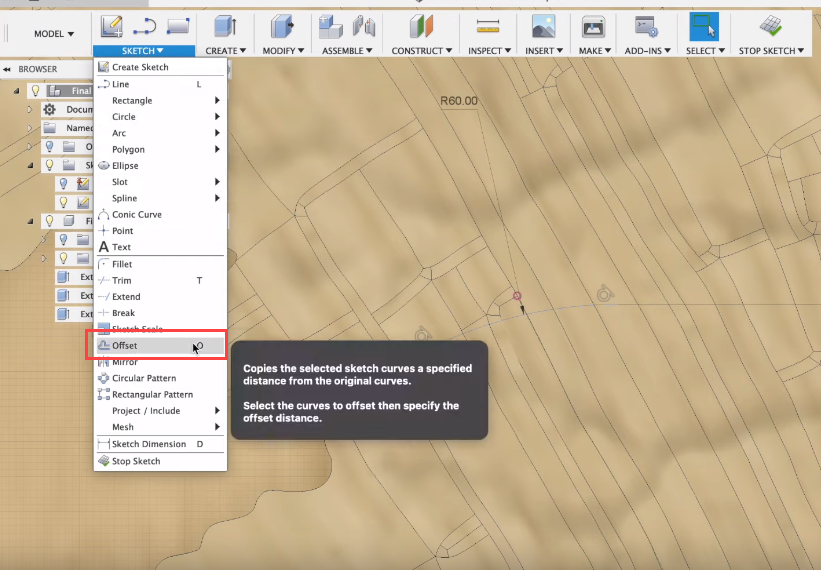
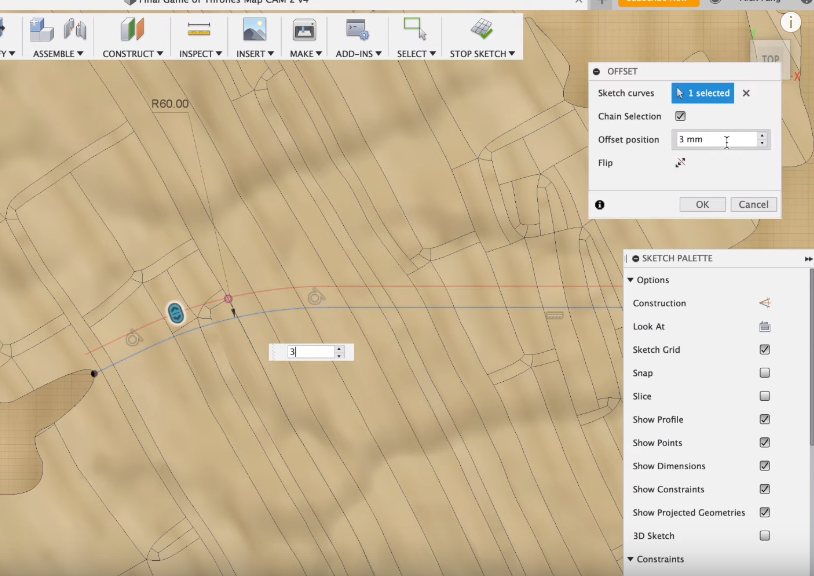
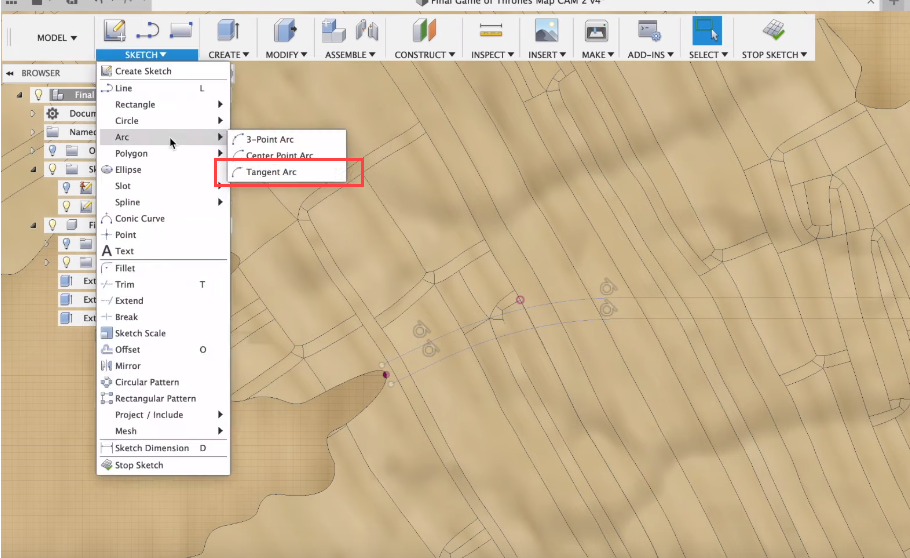
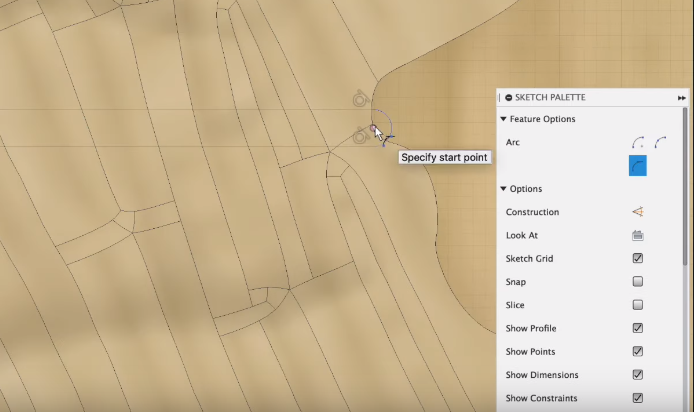
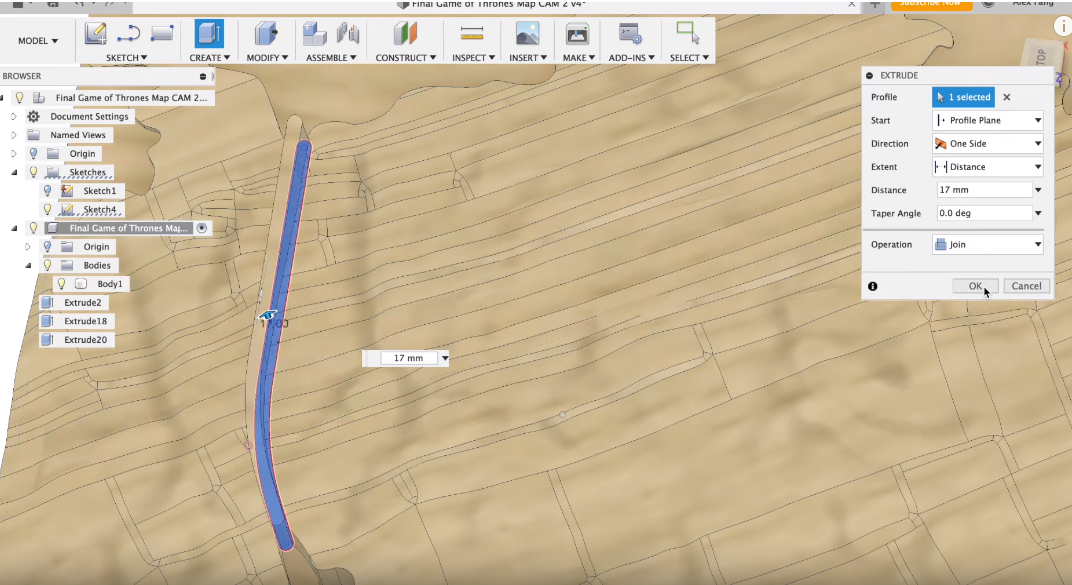
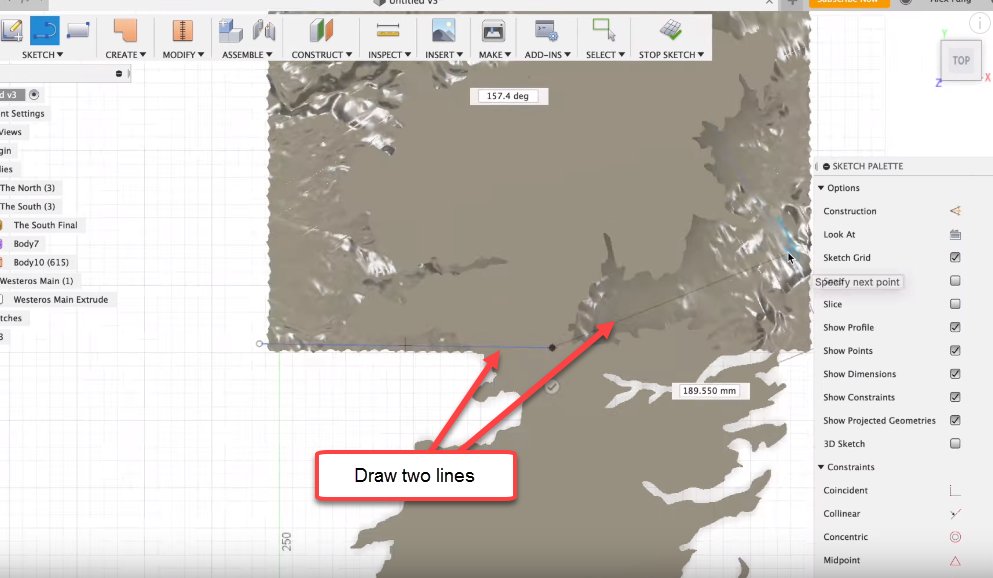
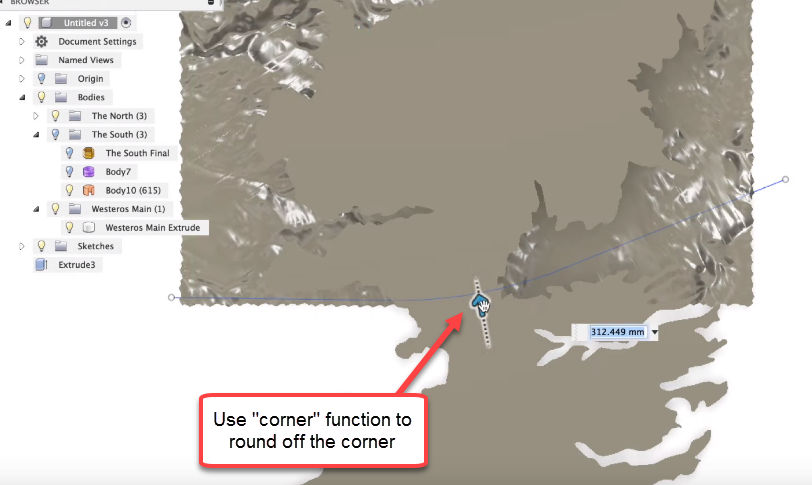
With the most difficult and most time consuming portion of modeling completed, it's time to add on some small things. I wanted to carve the map out of one piece of stock and have all the land pieces connected when complete. So in the model I added a base to the model by sketching a rectangle and then extruding that. The last thing I did was add the Wall in the north, once again using a sketch and extruding it. To make the wall, I once again referenced the quartermaester.info website to see the location and shape of it, then drew two lines and added a fillet to round out the corner. Using the "offset" function, I paralleled the line to create the width of the Wall. To connect these two lines, I used a "tangent arc" to create rounded ends to these two lines. Lastly, I extruded this sketch to make the Wall.
CAM (Part I: Initial Setup)
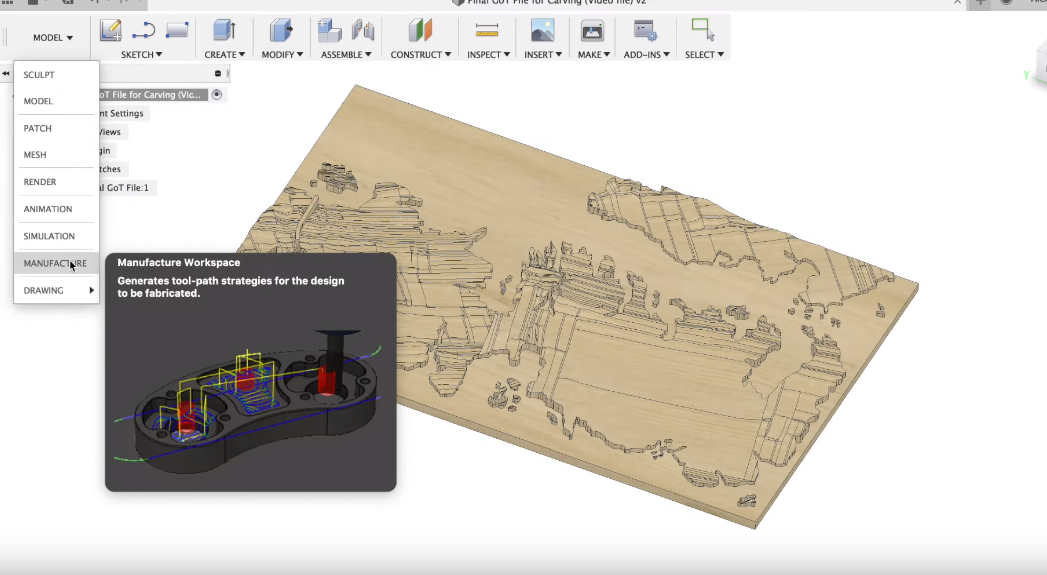
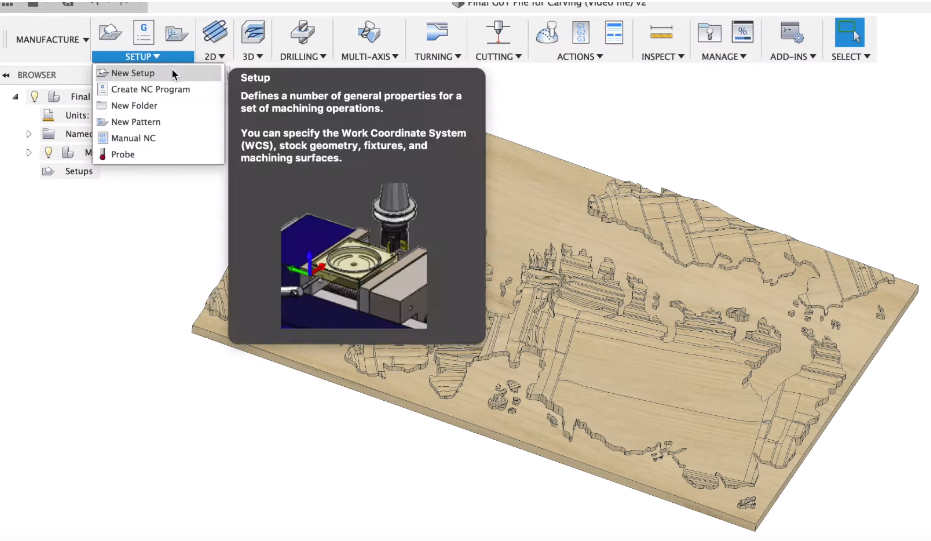
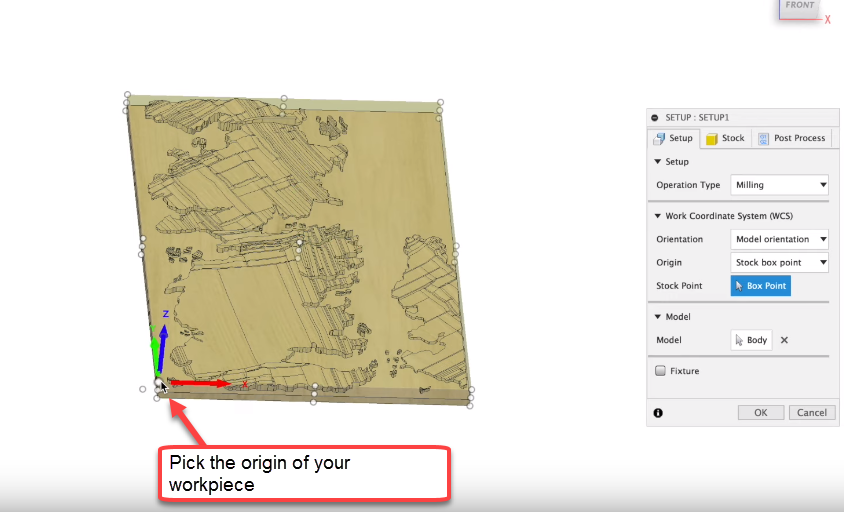
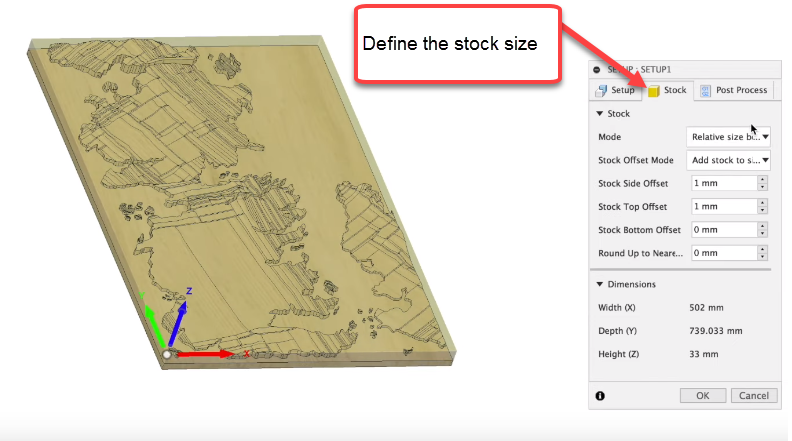
Finally, it's time to start setting up the CAM process. To begin, I first switched from the "Model" workbench over to the "Manufacture" workbench. Next, I clicked on "New Setup" under the "Setup" tab. This is where I'll define the origin and size of my stock. First, I defined the origin of my stock which will be the home location of my CNC. I like to use the bottom left corner of the top surface, but others like to use the mid-point of their stock. This is up to whatever you like. Next, under the "stock" tab I defined the size of my workpiece. The choice is up to you to accept the default size, or you can add offsets. If all values are set at zero, the size in the box is the minimum stock size required to mill your model. I added 1mm to both the sides and the top just for tolerance since I plan to cut my stock to this size.
CAM (Part II: Adaptive Clearing)
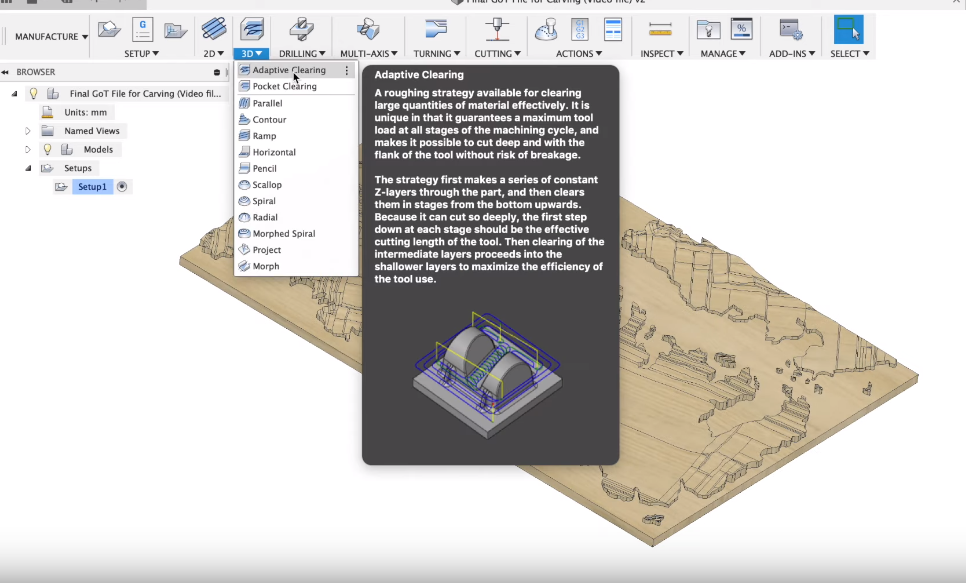
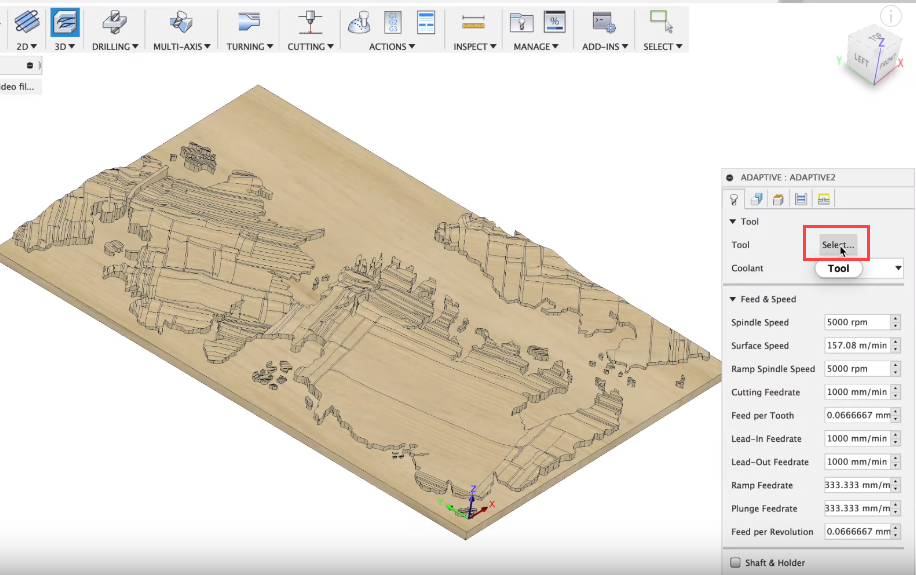
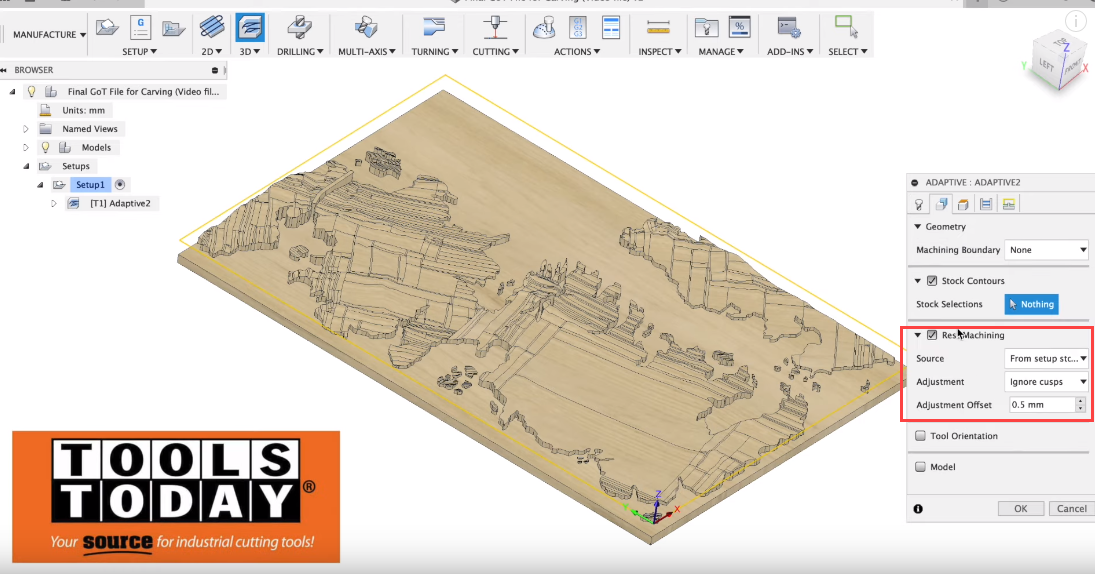
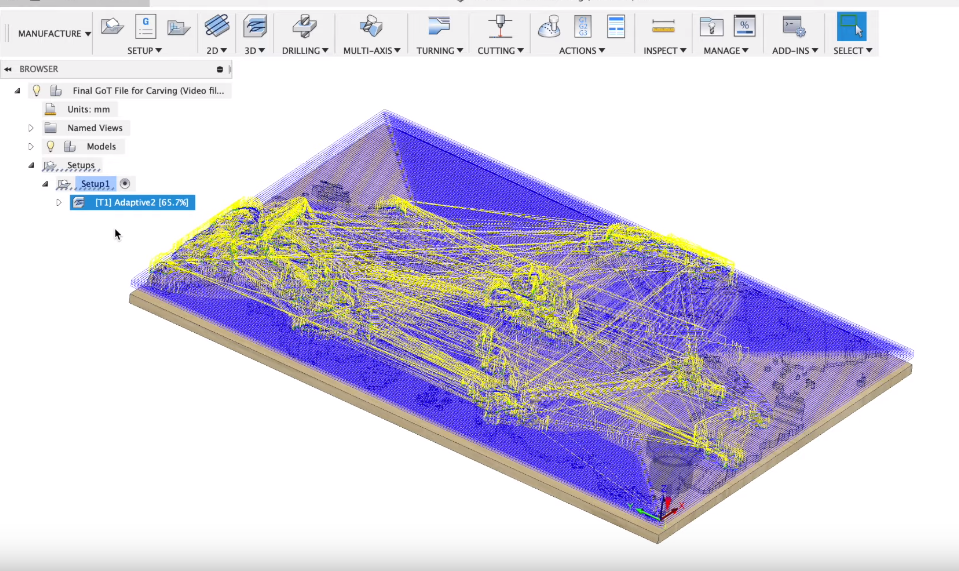
Now it's time to set up the tool paths to cut out our model on the CNC. There are many different 2D and 3D toolpaths to choose from. Fusion does a great job explaining each one if you hover over them. The first tool path I used was a 3D Adaptive Clearing. This toolpath is a roughing pass which creates the most efficient way to clear out large amounts of materials.
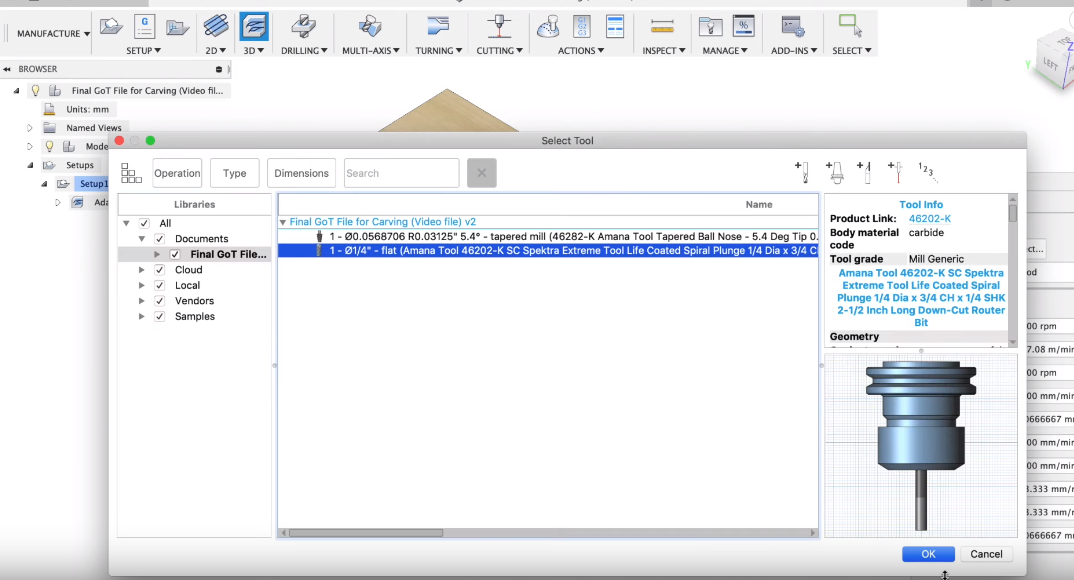
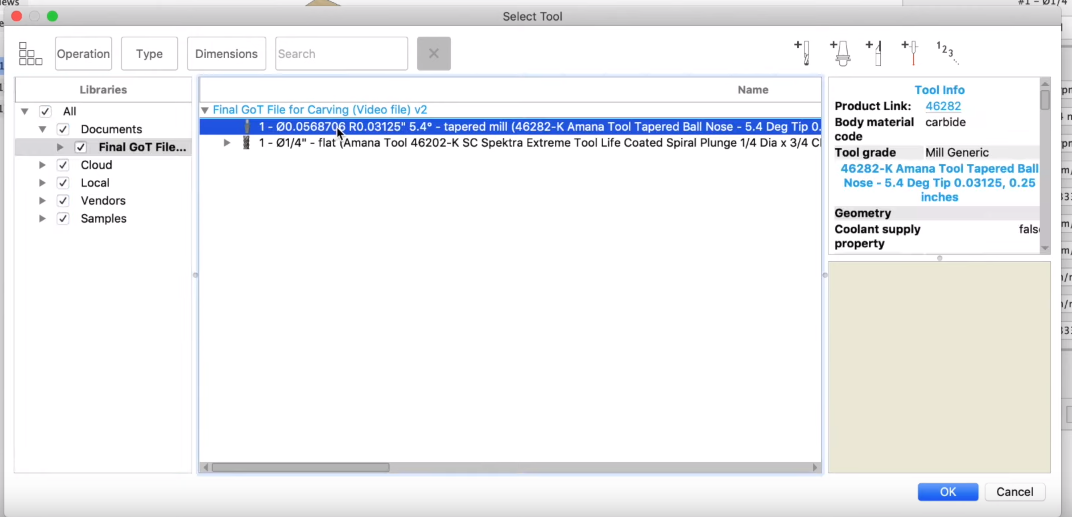
Under the first tab of the pop-up box, I selected the tool used for this operation. I picked an Amana Spektra 1/4" flat end mill provided to me by Toolstoday. You can actually download the entire CNC bit tool library from Toolstoday's website, which contains the bit sizes and recommended cut settings. Then just upload the tools library into Fusion 360.
Next, under the "Geometry" tab I checked the box next to "Rest Machining". I'm actually not 100% sure if it's necessary to select this option on the very first process since I was milling the entire stock anyway. Rest Machining actually means "machine the rest of the part", so what it does is it will machine the areas that the tool in the previous step could not reach. Since this is the very first step, I selected "From set up stock" under "Source". I left the rest of the boxes as default.
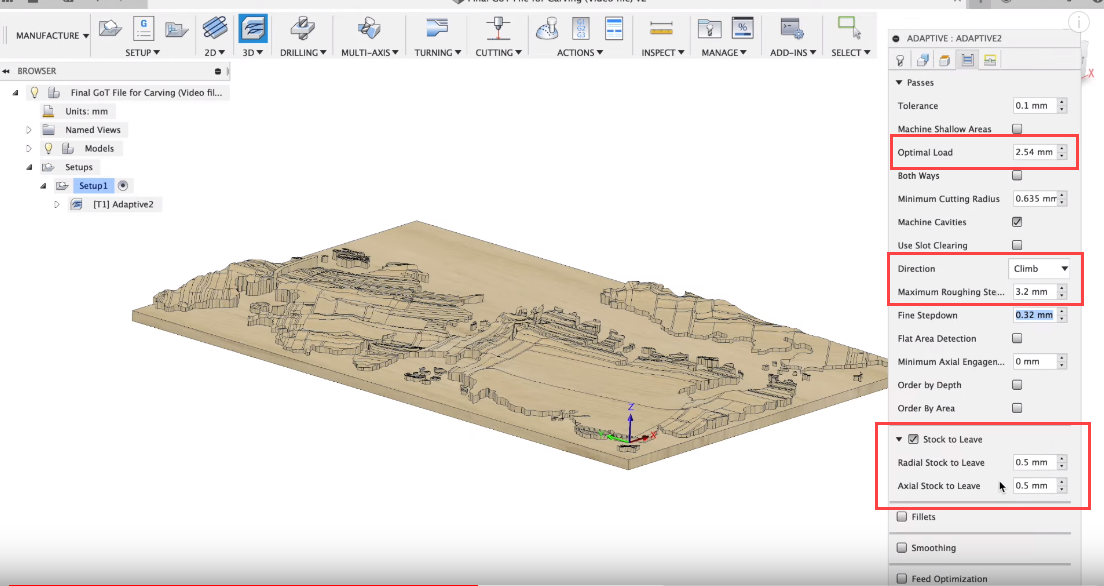
The fourth tab is called "Passes", this is where I can set up the settings for the cuts. The "Optimal Load" is also the "stepover" of the bit, which is how much the bit will cut into the material. I left it at the default 2.54mm (0.1"), you can change this depending on your material, your machine, and the bit used. With "Adaptive Clearing" the system will apply the best loading for the cut that it needs to make so it is not a constant stepover. For the "maximum stepdown" I chose 3.2mm (1/8") which is 1/2 of the cutter diameter. Even though the Amana Spektra bit is rated for a step down equal to the diameter of the bit it'll be too much to handle on my X-Carve. Finally, at the bottom you'll see a "stock to leave" option. I left this at 0.5mm because this will not be the last operation. I want to leave some material there for a finishing cut.
Now click ok and Fusion 360 will begin generating the tool path.
CAM (Part III: 3D Parallel)
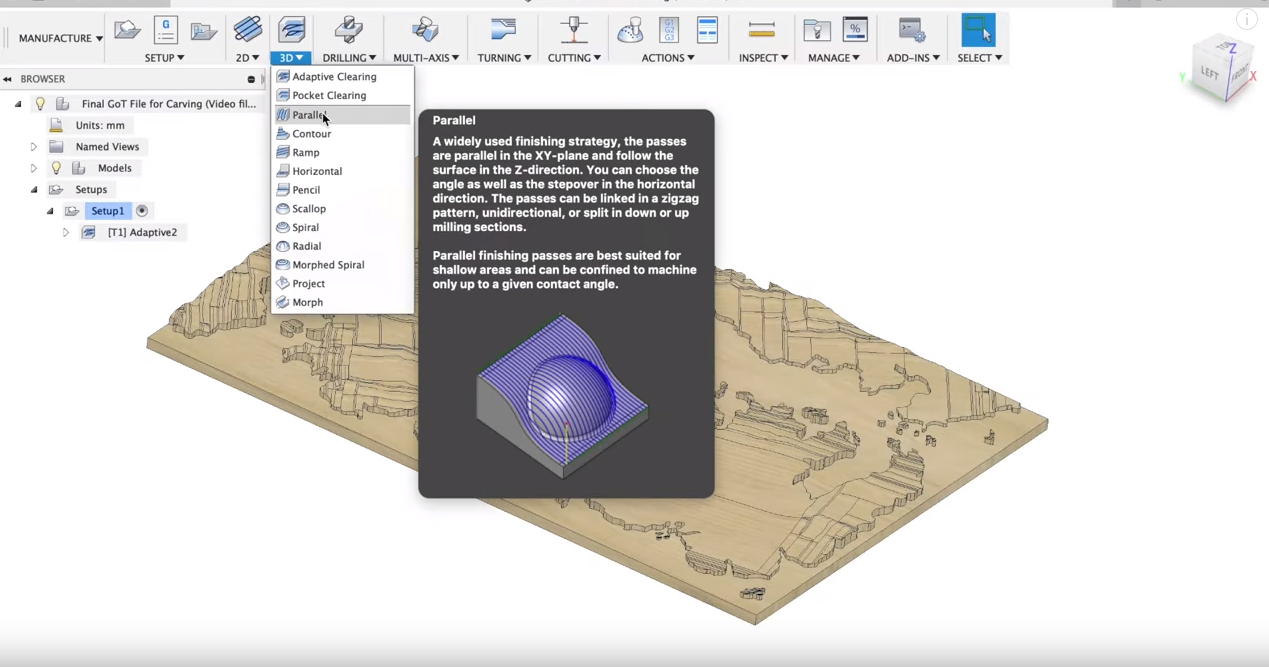
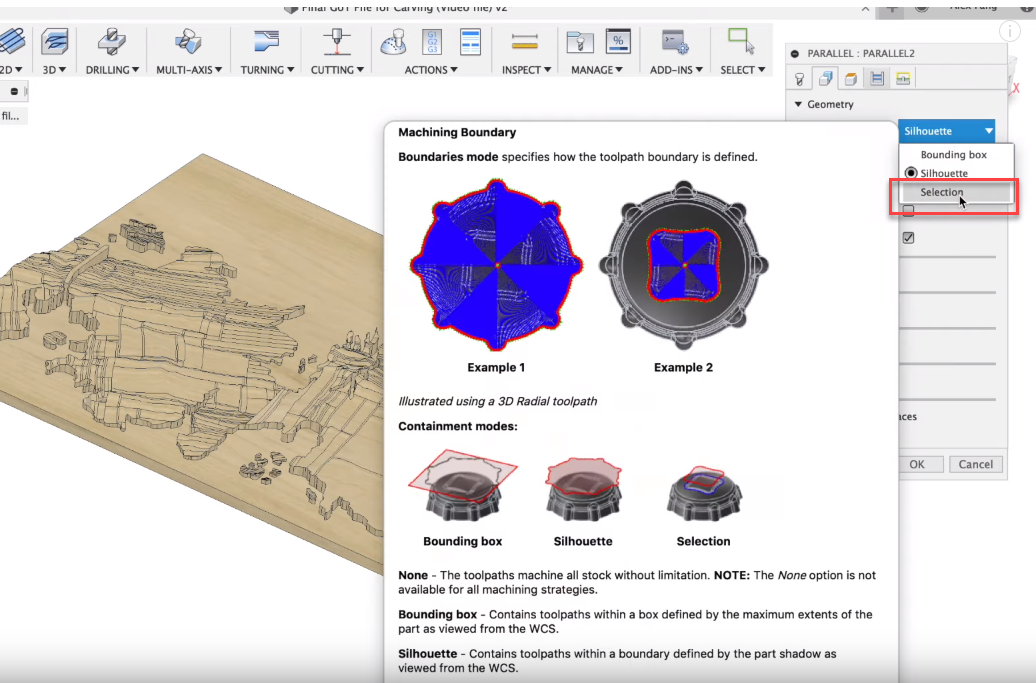
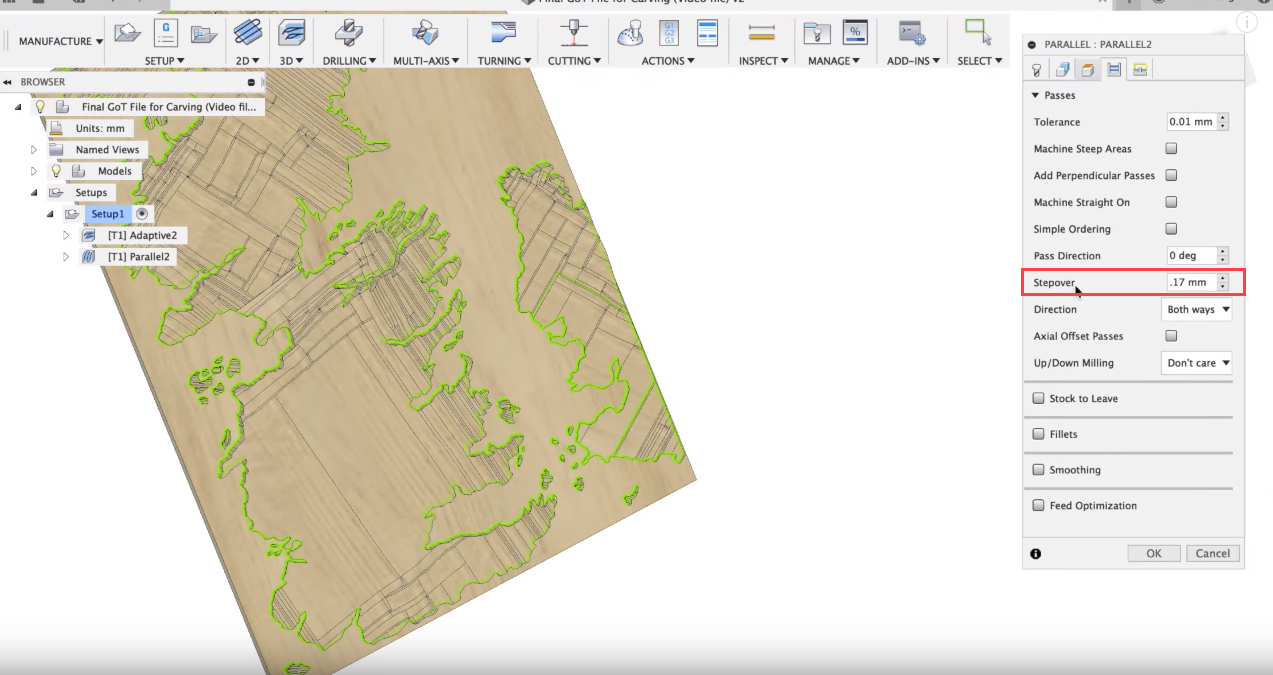
For the finishing pass, I used a 3D Parallel pass. This is the operation best used for rounded areas. The previous "adaptive clearing" pass will leave a stair-step shape down areas that are curved. The parallel pass is what will connect those stair steps to create the curvature.
Once again, the first thing I did was select the tool. For this I used Amana Spektra 1/16" Ball Nose 3D Carving bit sent to me by Toolstoday.
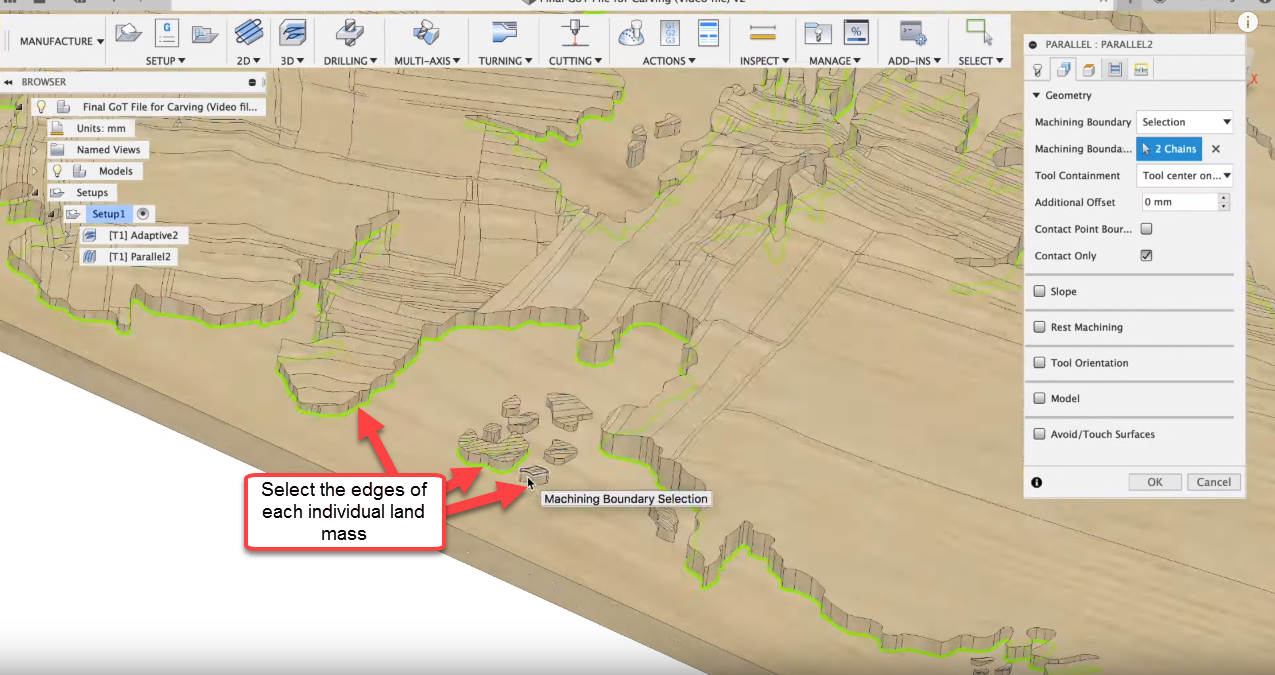
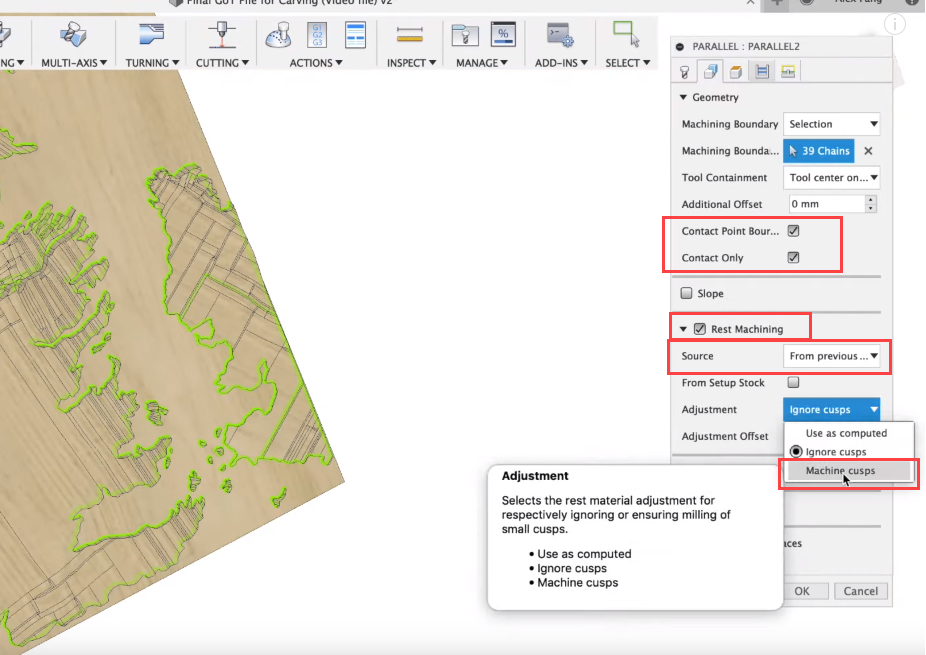
In the "Geometry" tab, the first thing I did was change the "Machining Boundary" to "Selection" and then went around the model to pick all the borders around the individual land masses. If I don't do this, the bit will cut around the entire model which will make this operation much much longer than it needs to be. Next, under the same tab select "Contact Boundary", which will make the model dictate the tool contact points, instead of the tool centers. If this is left unchecked the tool centers are forced to be inside the boundaries. If there are any variations to the faces around the edges, there will end up being leftover materials or the tool may machine outside of the boundaries. Next, select "Rest Machining" and this time pick "From previous step", so that the tool path will machine only the areas that were not machined previously. Under "Adjustments" I selected "machine cusps" to ensure that all the small stair-step shapes will be milled from the previous operations.
Under the "Passes" tab, the only thing I changed was the "stepover" which I set to 0.17mm (~0.006"). For a finishing bit like this, it's best to stay around 8-9% of the cutter diameter. I went slightly over just to keep machining time down. When completed, click OK.
CAM (Part IV: 3D Contour)
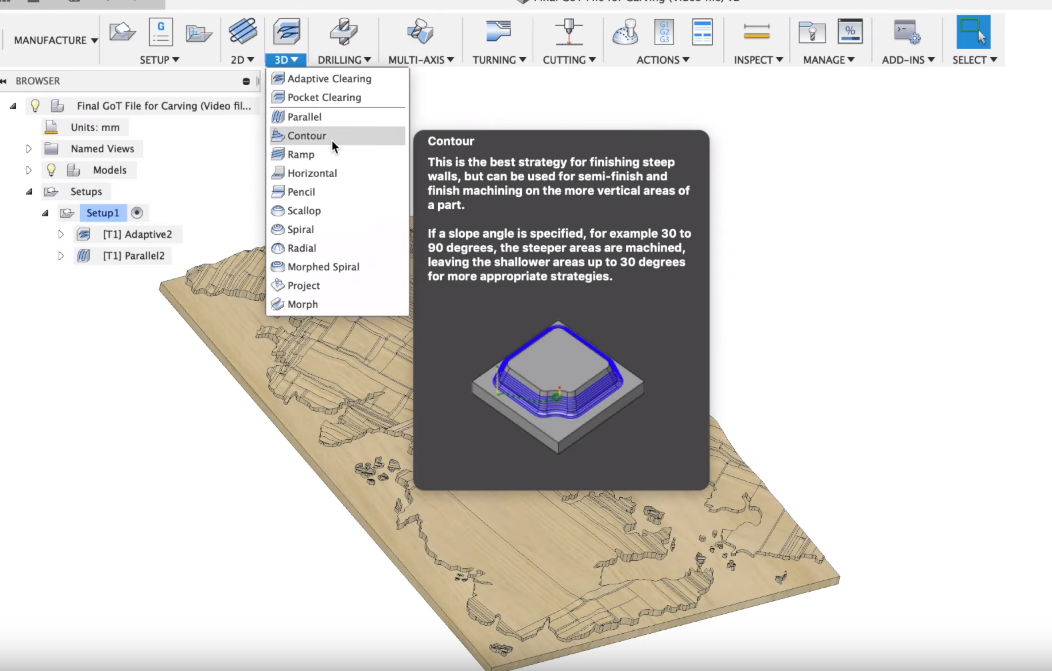
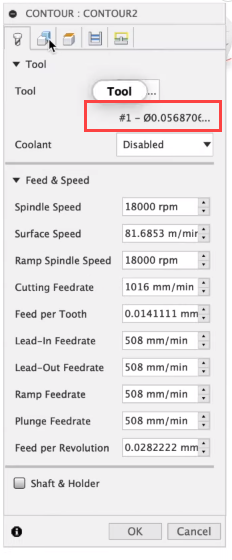
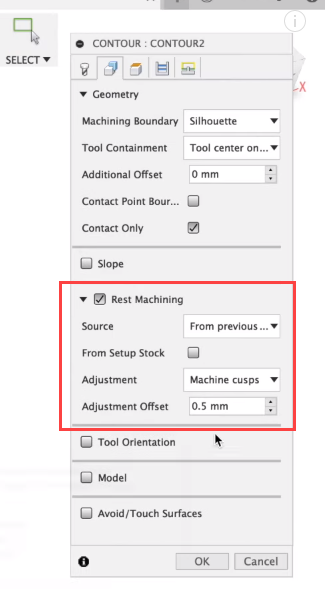
The very last step is the 3D Contour. This is the best step used for cutting steep areas. I used this step to mill out all the small details around the land masses that the 1/4" flat end mill could not get to previously.
For this step, I kept the 1/16" bit used previously. The only settings I changed was enable "Rest Machining" and selected "From previous step". The rest of the settings were all kept default.
Click OK and we're near the finish line!
CAM (Part V: Generate G Code)
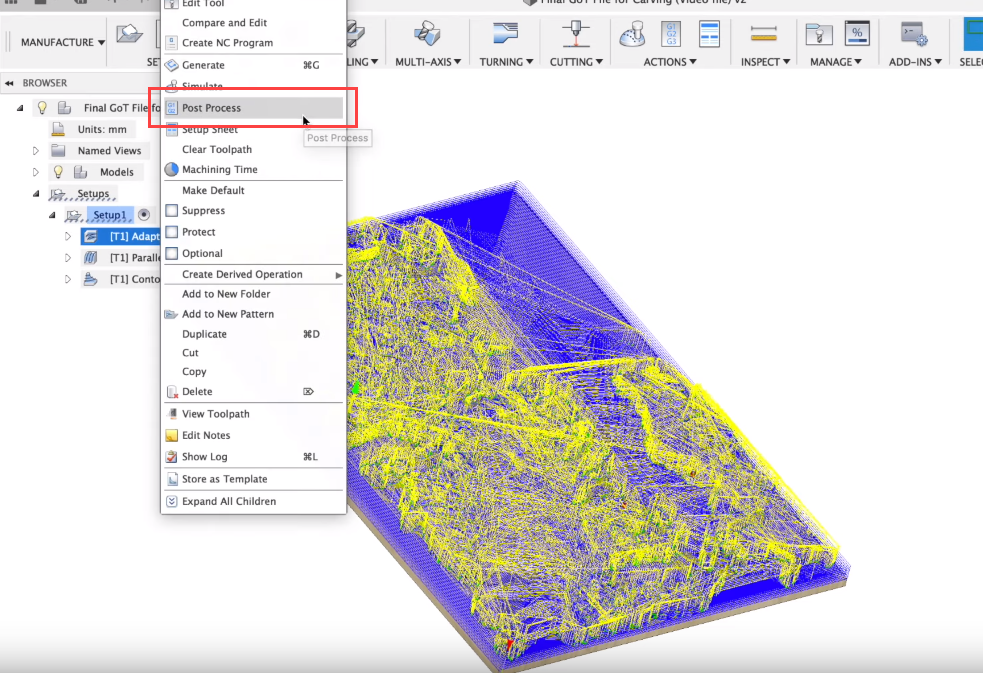
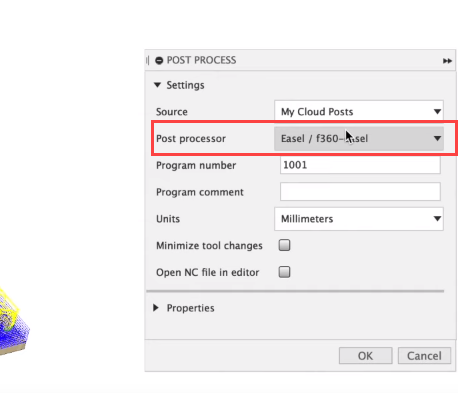
The final step in Fusion 360 was to generate the G code. Don't worry though, we don't need to do any coding! G Code is simply the "directions" that Fusion 360 will export out to your specific machine control software to begin cutting. Since each machine control software has its own language, make sure to select the proper one when exporting. For me, that's Easel. So under "Post Processor" choose "Easel". If you can't find Easel under the drop down menu, you will have to download the file from the Inventables website and upload it into Fusion 360 first.
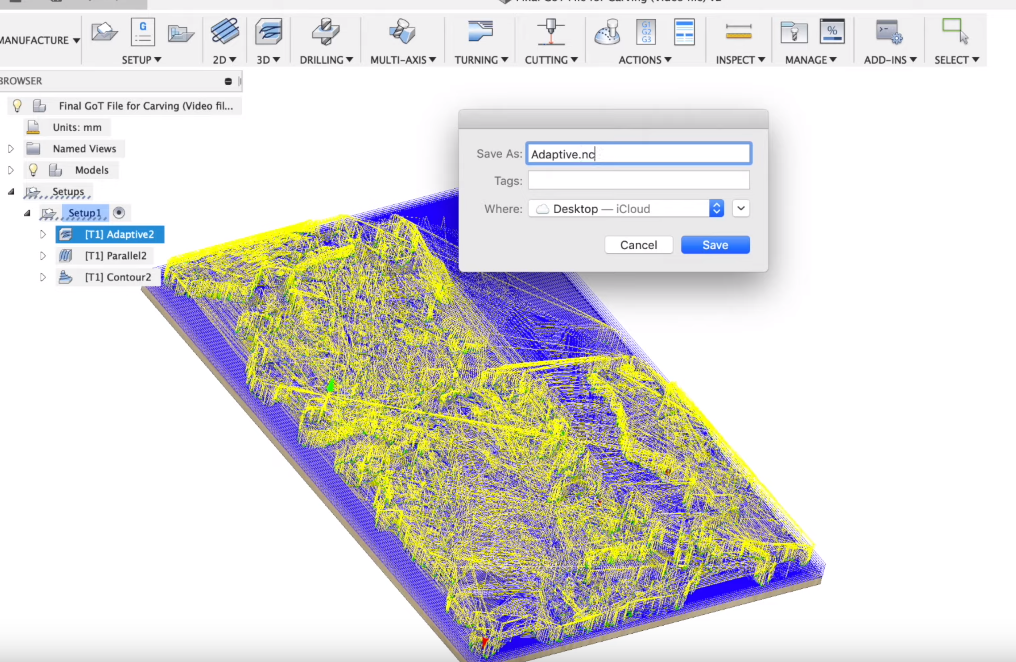
Since the X Carve will not be able to switch out tools automatically, the best way to export the G Code is to save each milling process individually. In the image above, I'm showing me saving off the Adaptive Clearing process. Just do this separately for the rest of the tool paths.
Making Stock
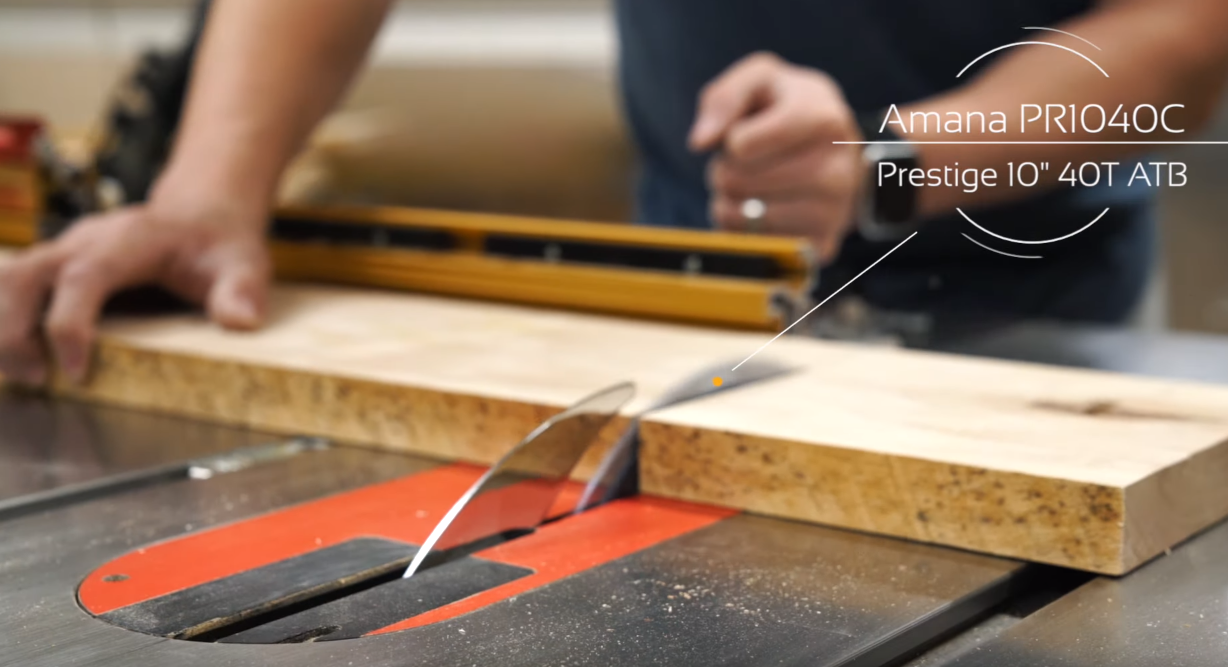
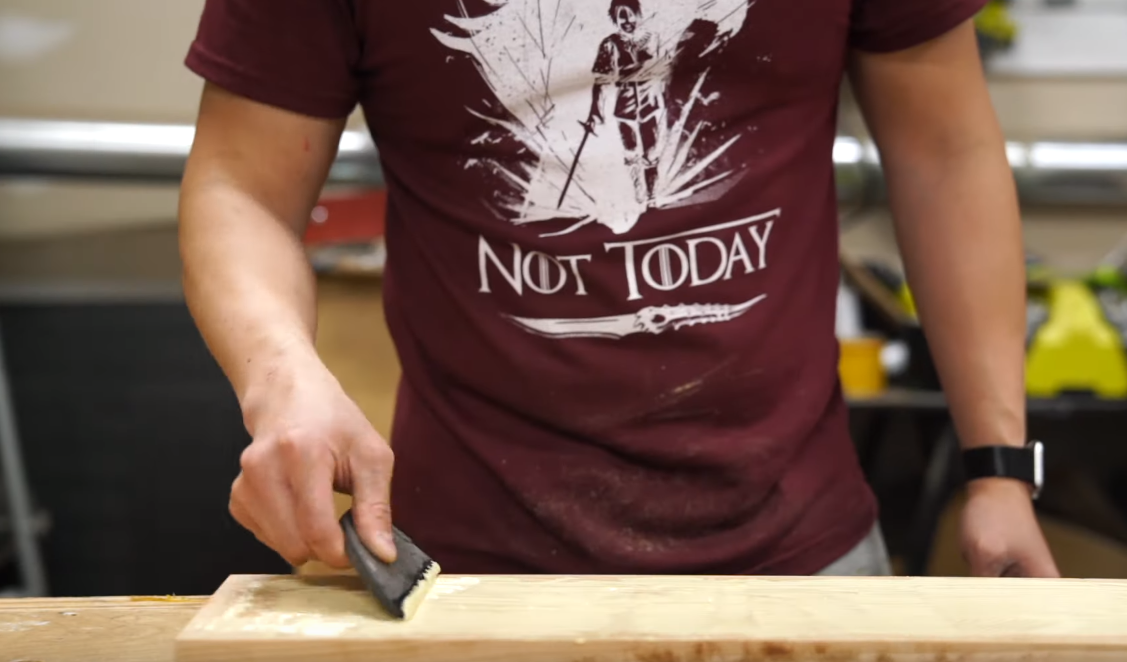
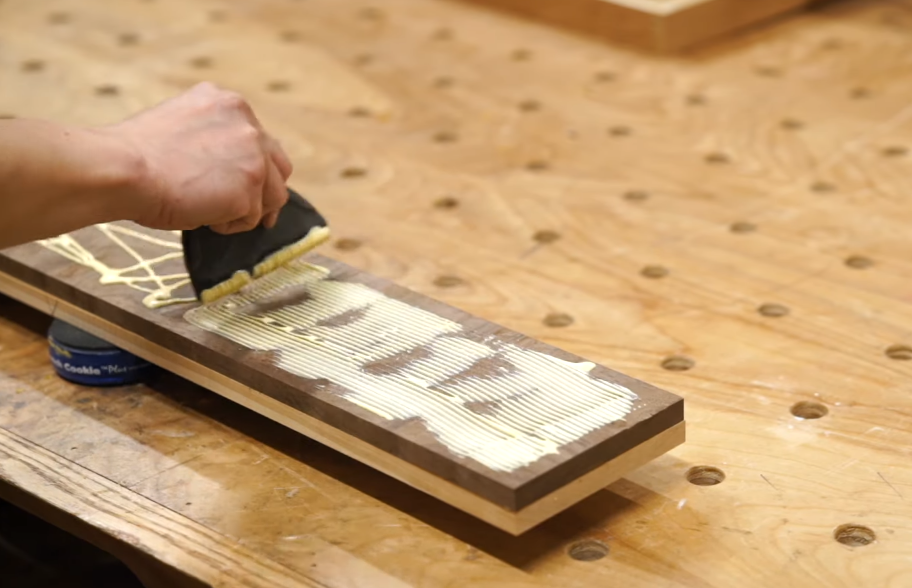
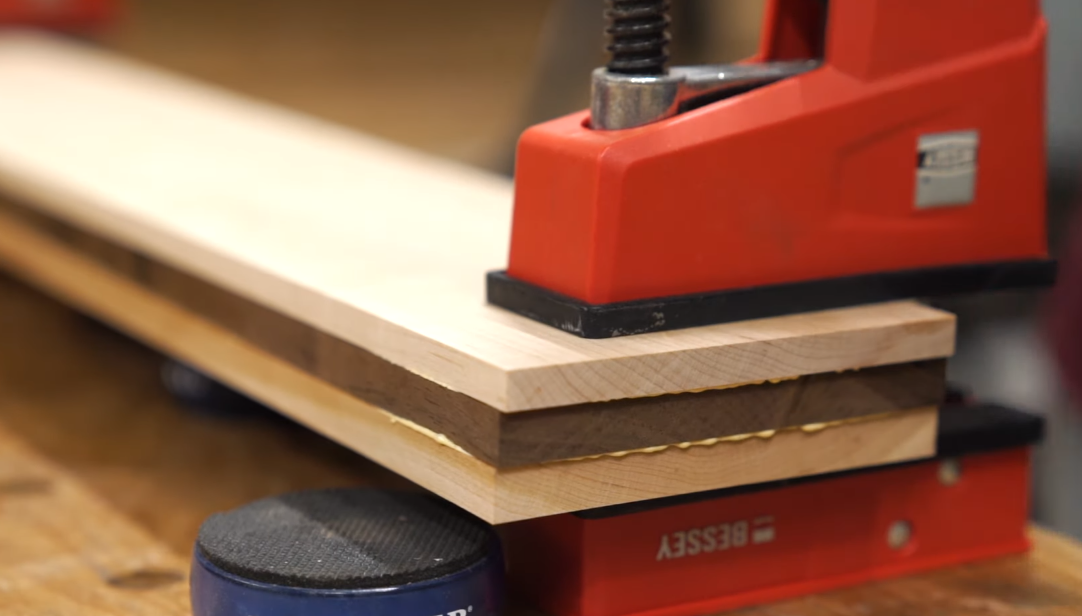
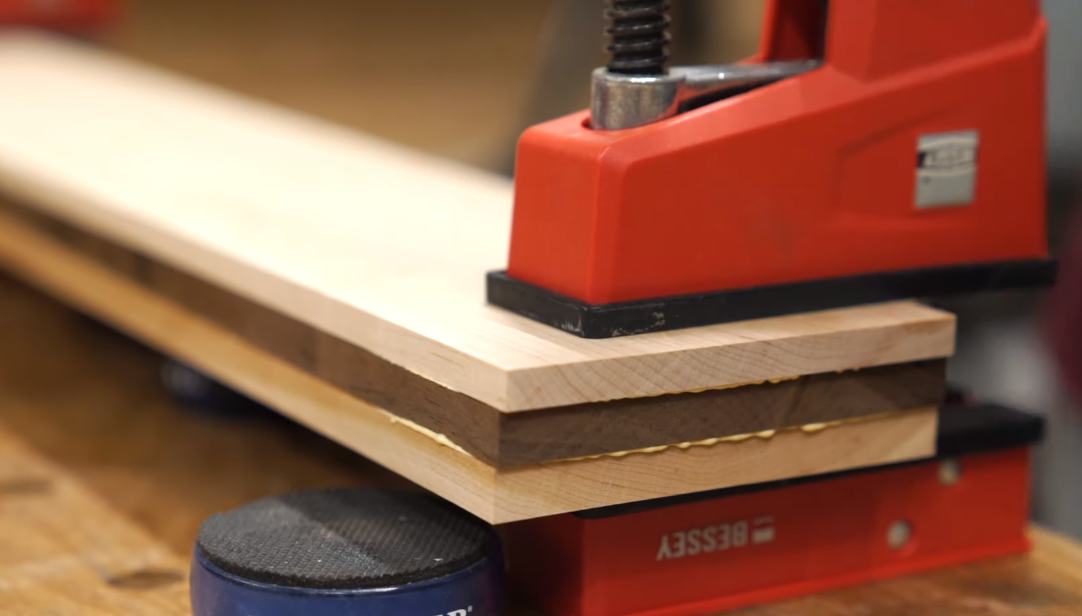
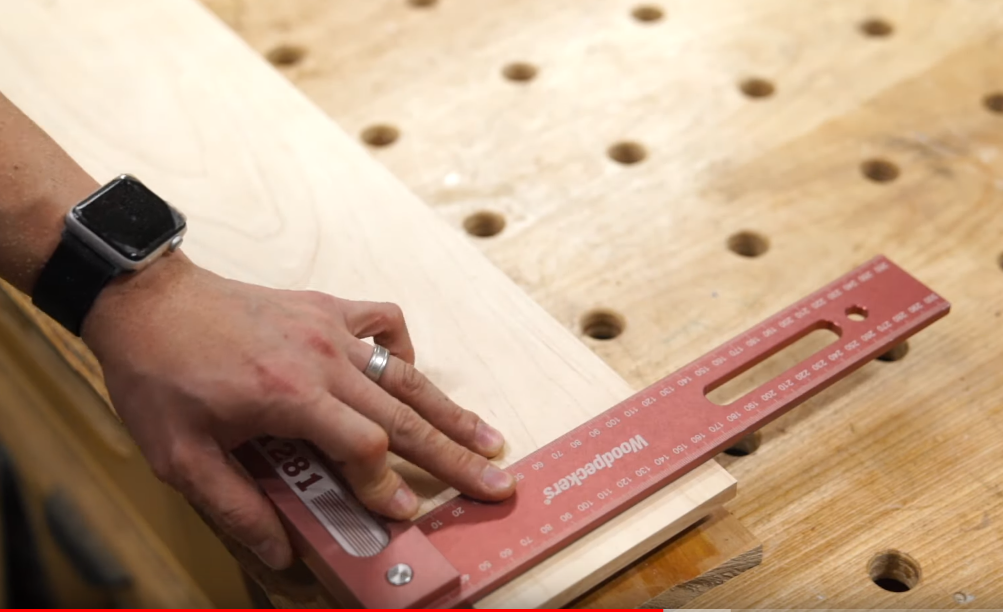
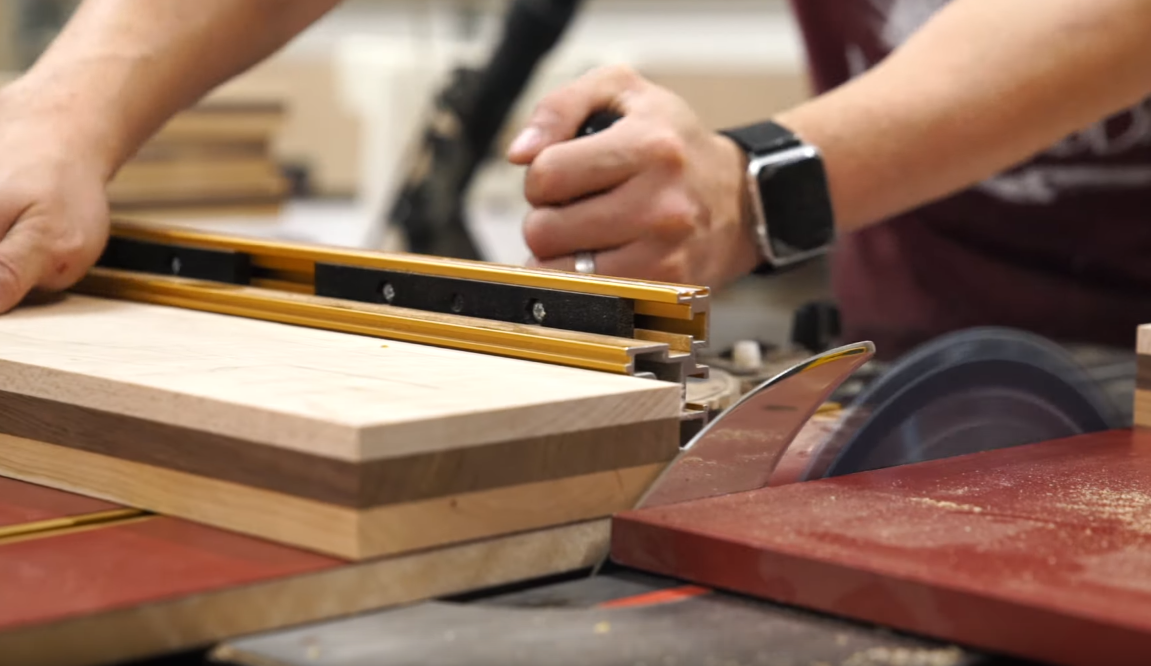
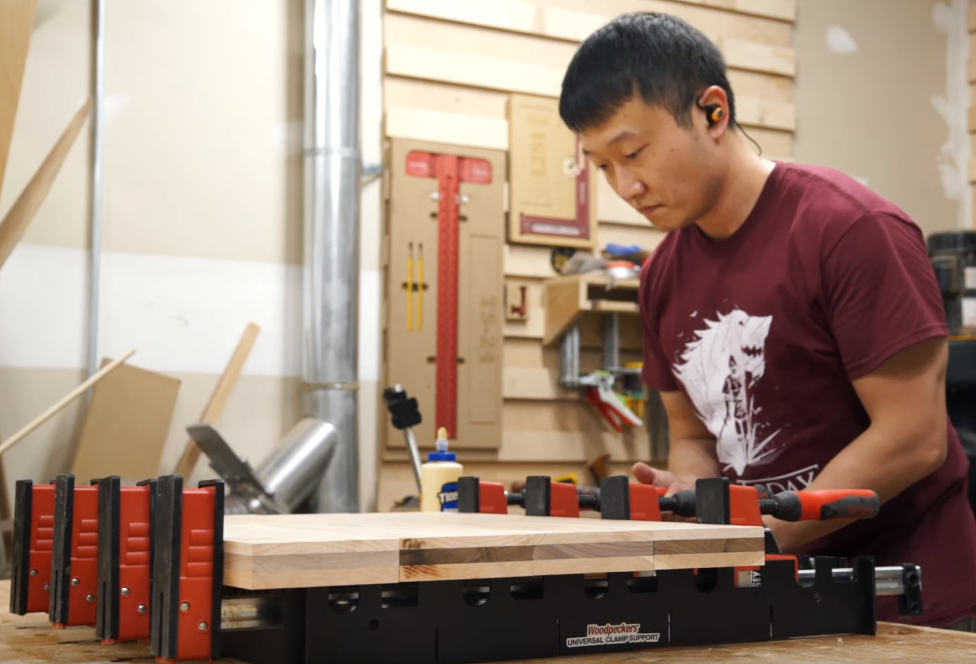
Alright with days (weeks?) working in the computer environment, it's finally time to go to the shop! I milled up some maple, walnut, and cherry lumber to make the stock. The reason I used three different types of lumber was because I hoped to create some depth after the part was completed, with the maple at the highest point of the mountains, like snow. After flattening the lumber pieces, I glued them up face to face first. The next day I came back to flush up all the panels and cut them to their final width and lengths. Finally, I glued up the stacks edge to edge to make the final piece of stock.
Begin Cutting!

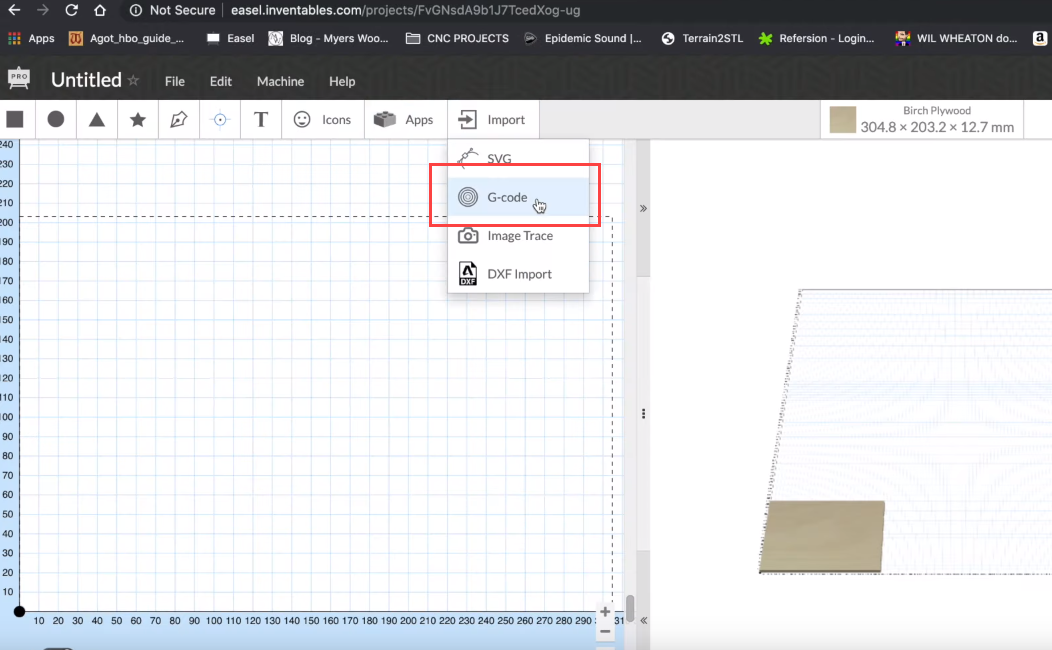
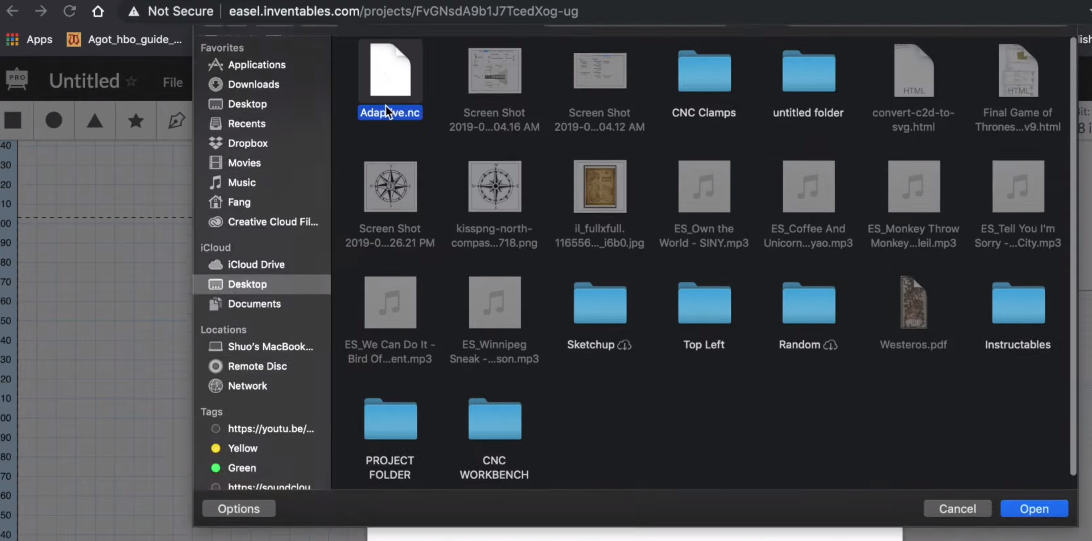
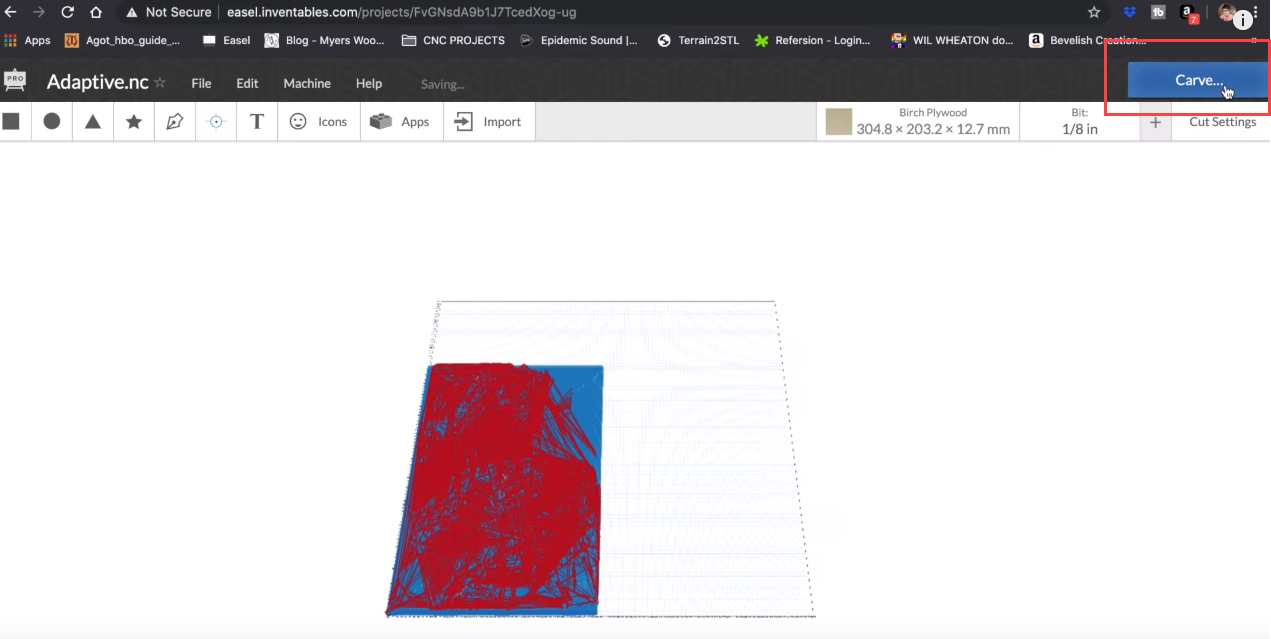
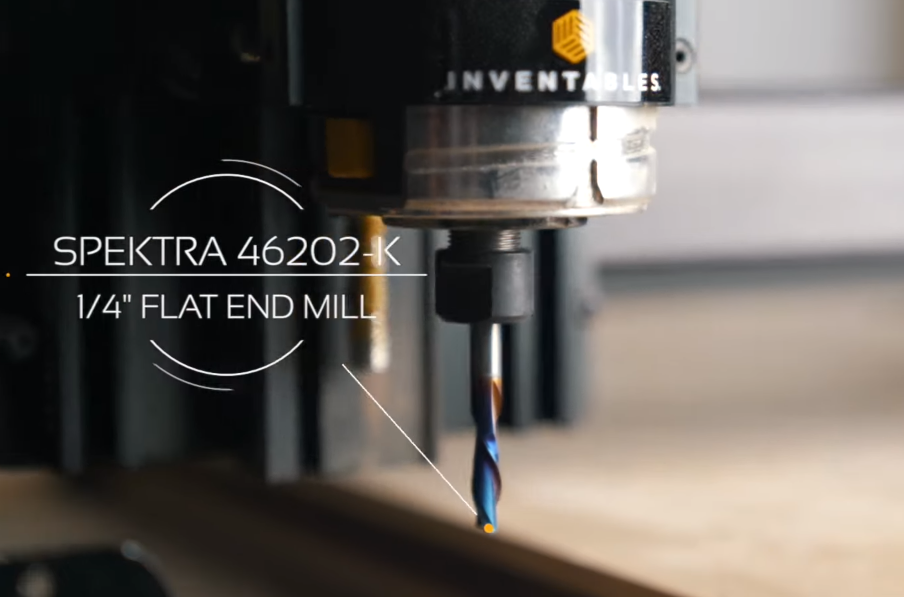
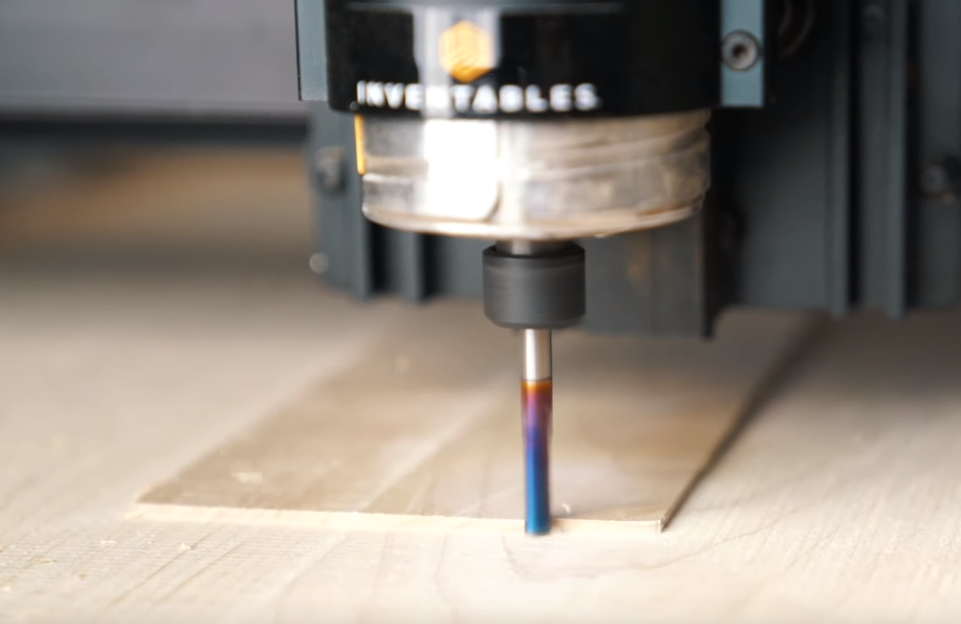
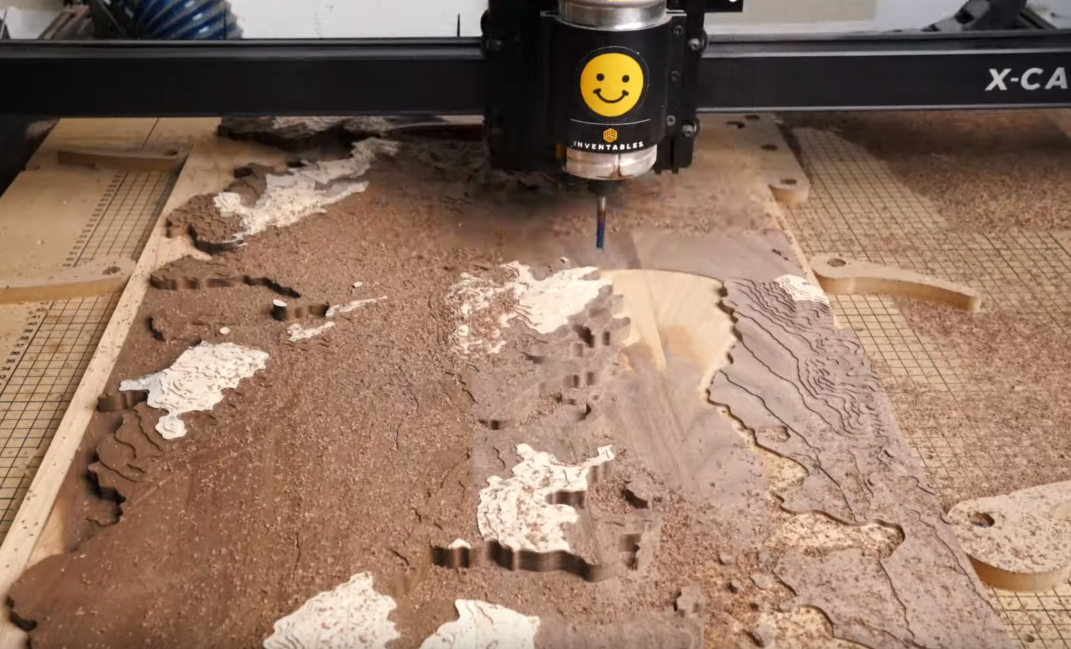
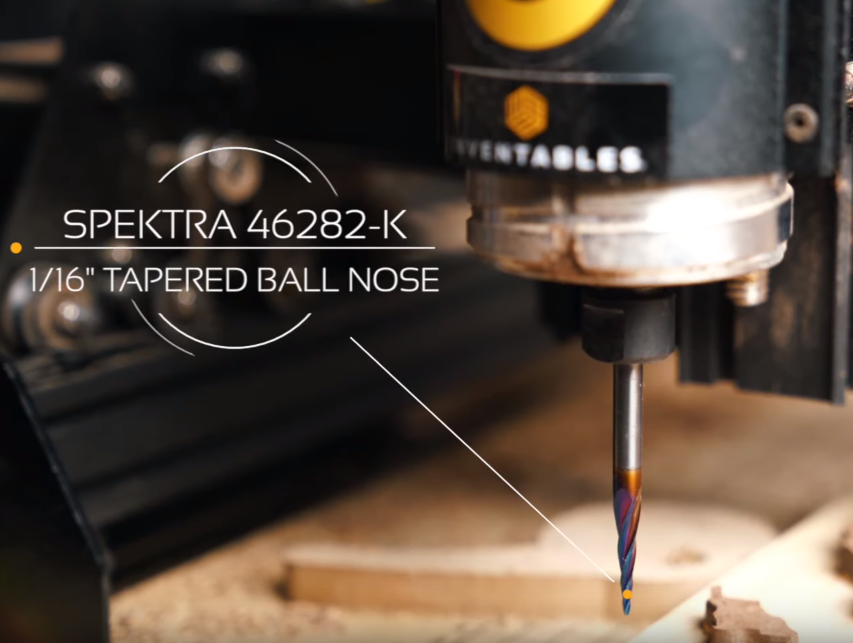
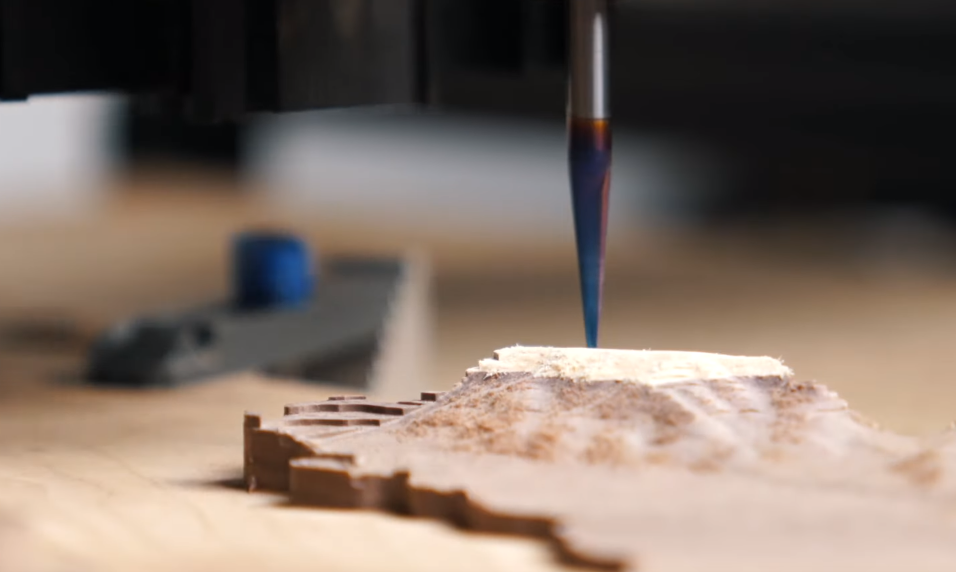
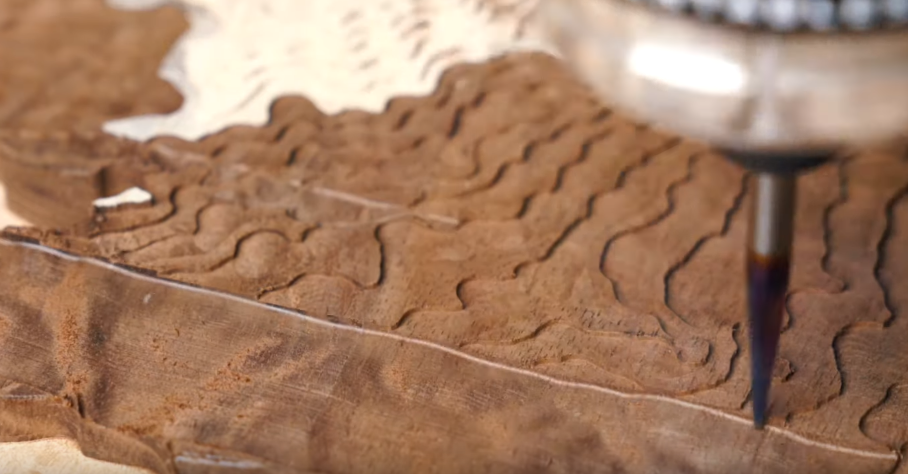
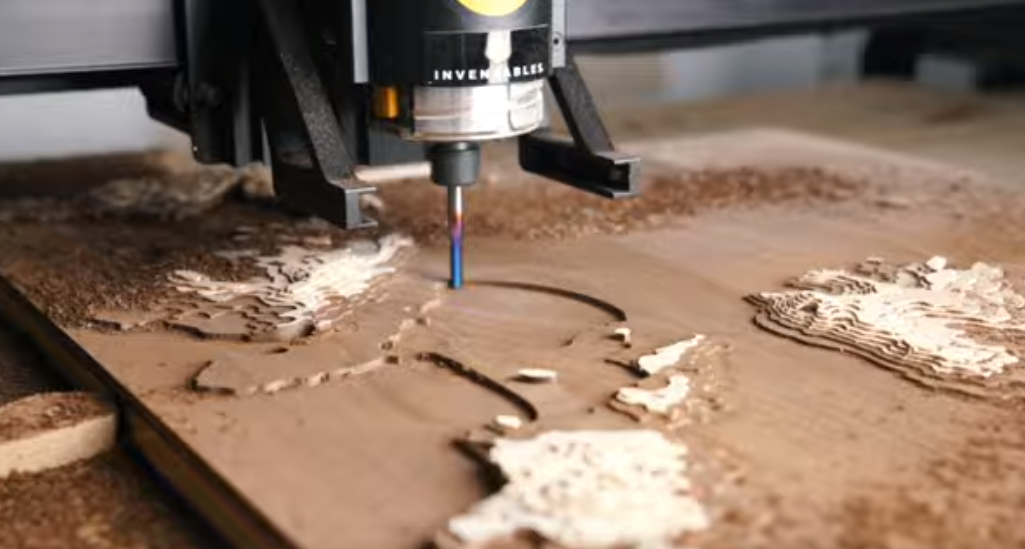
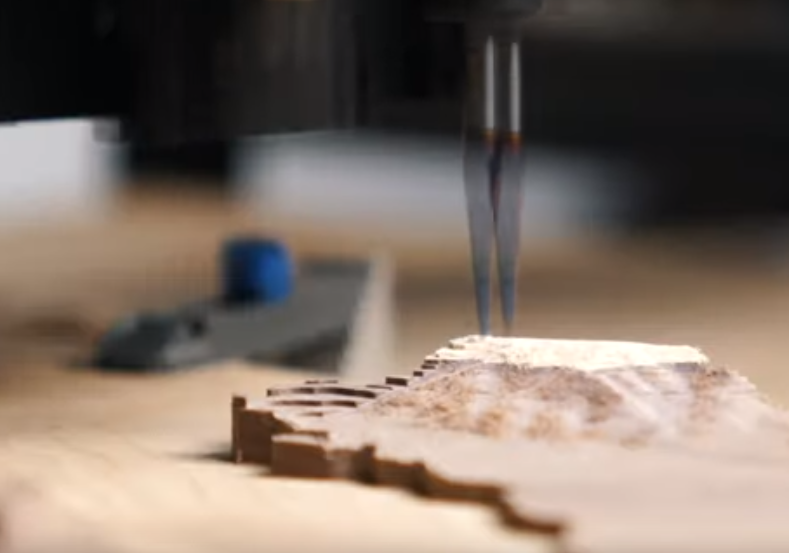
With the stock clamped down in the machine, it's time to start carving. I opened up Easel, started a new project, and imported the G Code into it. The first G Code I imported was the one for adaptive clearing. Once that step is done, I imported the 3D parallel pass, and so on. Here are some stills from my video showing the tools doing their job! Check out the video to see what I was talking about regarding the "stair step" shapes left by the 1/4" end mill, and how the 1/16" ball nose bit cleaned things up! It's really cool to watch in 200x speed!
Afterword
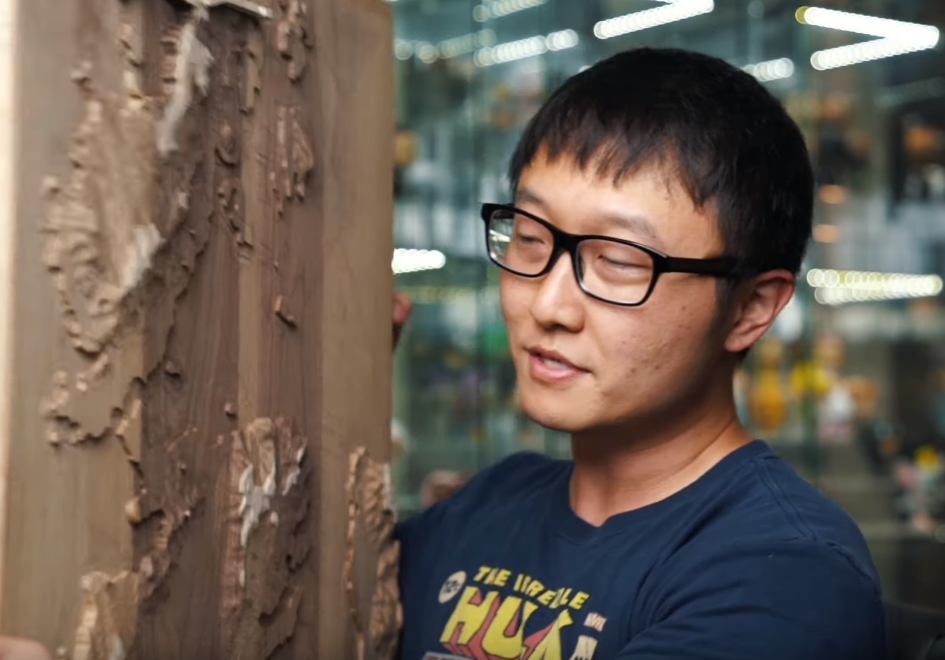

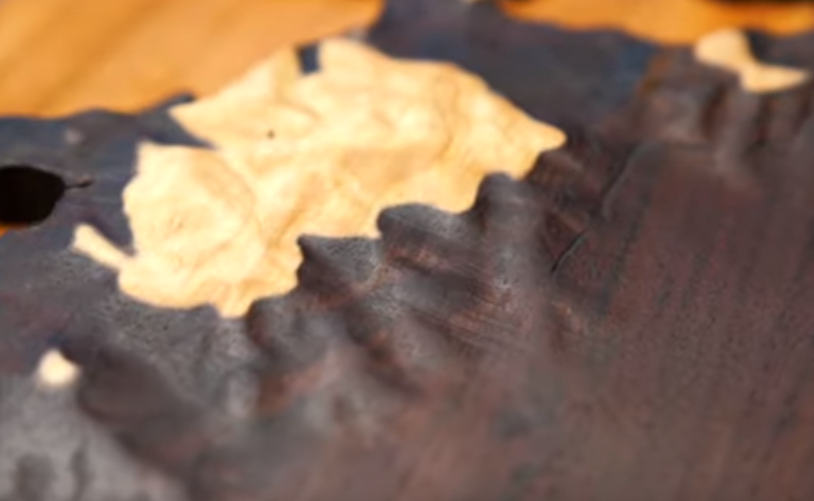
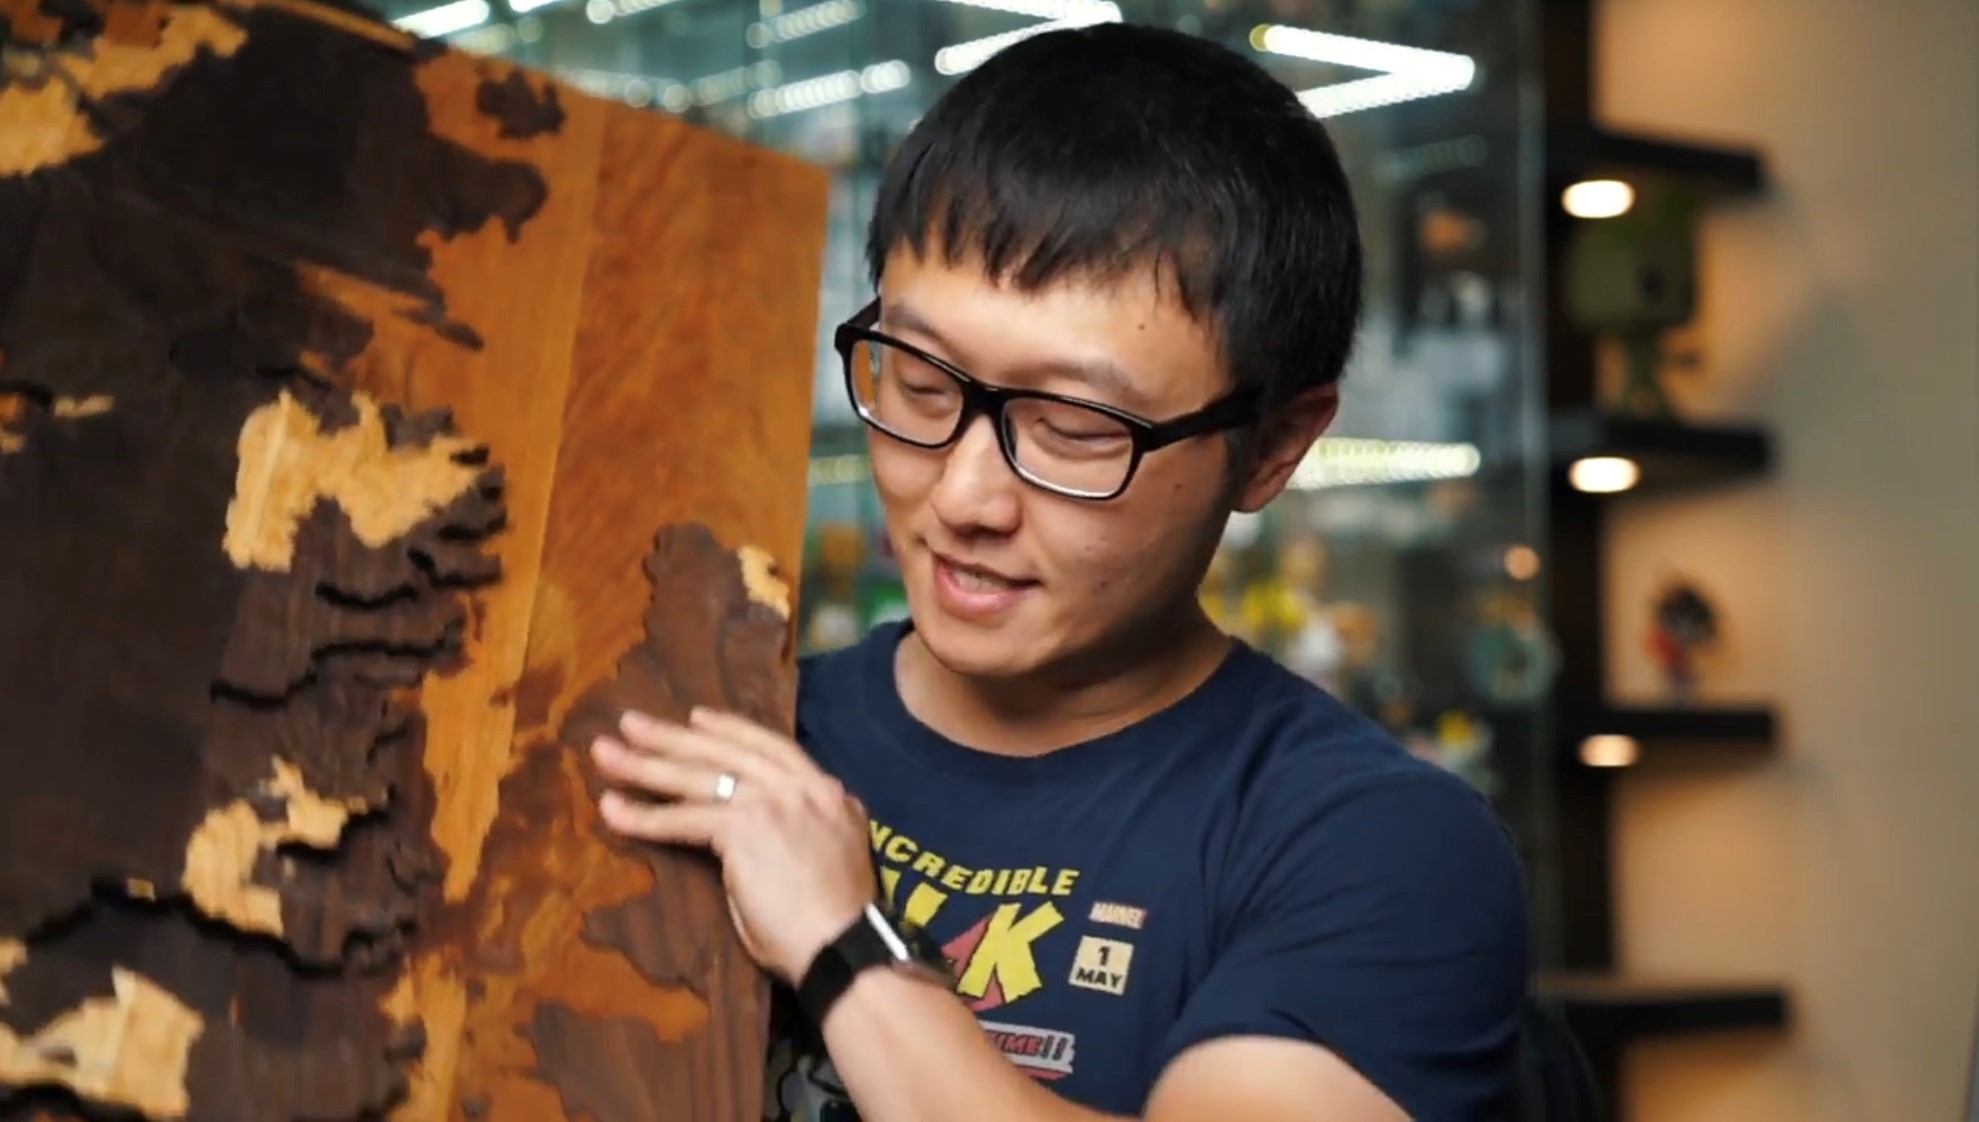
Alright, so if you've watched the video or follow me on Instagram you probably know this project didn't come out the way I had hoped. In the video I discussed what the problems I faced, how I tried to fix them, and my takeaways. It's too long to write here, so if you want to learn what some things to watch out for, please check out the video :) Even though the project "failed", I think it was also a success because I learned A LOT! And I can't emphasize that enough. I have never used Adobe Illustrator, Blender, Instant Meshes, or Fusion 360 before. So as a "maker", I think I just added some very valuable tools to my belt.
The failures in the project occurred in some oversight as a woodworker, because I guess I was just too excited to get things done after spending a month learning how to create the model. Another reason the project failed was due to the tool limitations. But I've recently found out that the problems I faced with my CNC is a "normal" occurrence and people who have used $30,000 industrial CNCs have faced the same issues.
I'll leave this Instructables here and hope that it will provide value to many people in the maker/diy space who have been wanting to learn something like this.