GOOGLE ASSISTANT CONTROLLED SWITCH USING NODEMCU
by Kaustav Nandy in Circuits > Microcontrollers
47931 Views, 38 Favorites, 0 Comments
GOOGLE ASSISTANT CONTROLLED SWITCH USING NODEMCU
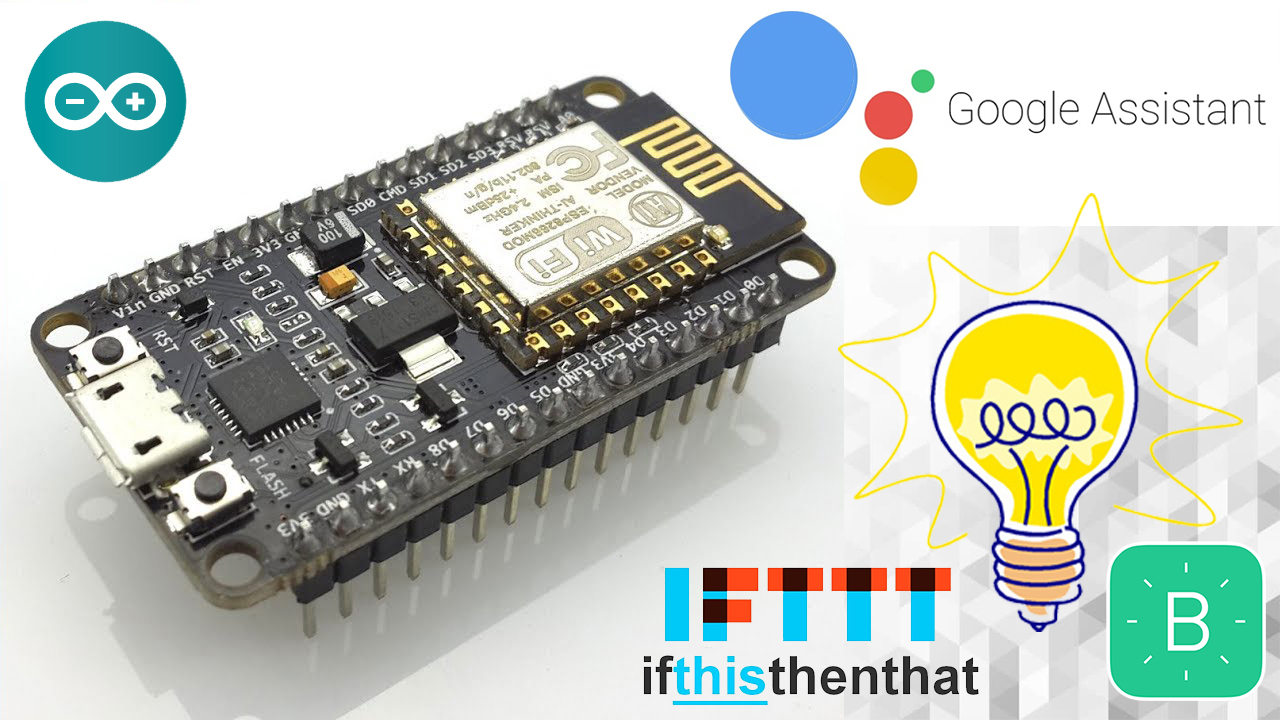
Wouldn't it be great to Turn things on or off with the help of Google assistant..!!!
So In this Instructables, I will show how to control any electrical appliances with the help of Google assistant, just like Amazon's Alexa.
A lot of commercial devices already exist in the market for such application but, I wanted to have my own simple and low cost device and its always fun to learn new things. :)
Take a look at my steps below to make your own smart switch.
Video (How It Works)

Take a look at the video above for a quick look at how to the device works !
Parts and Tools Required
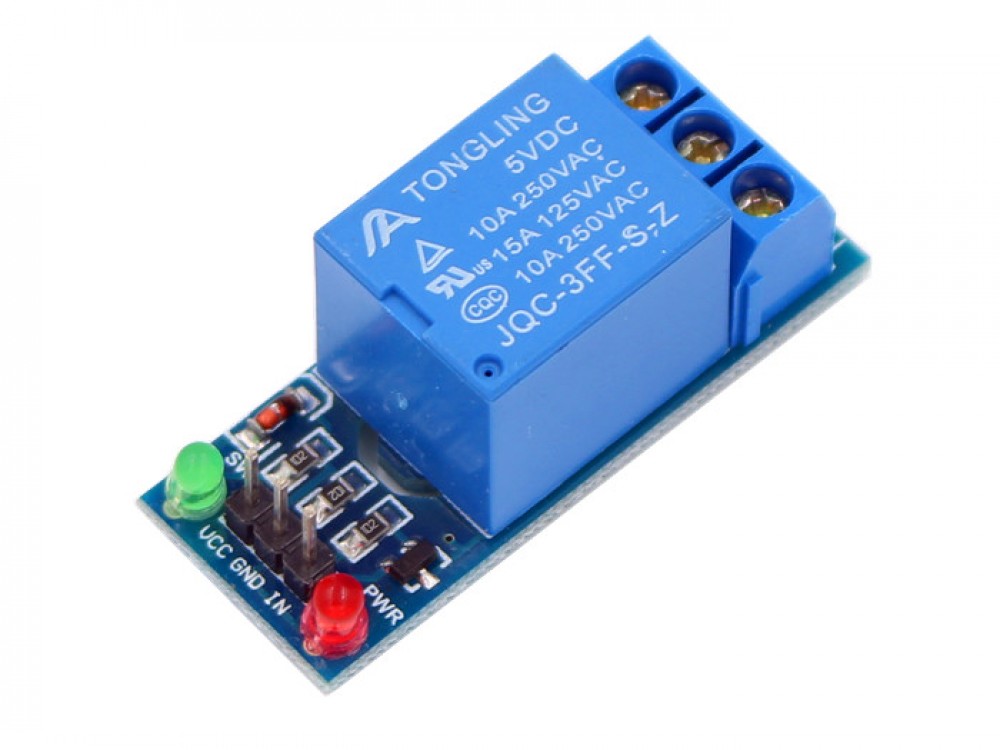
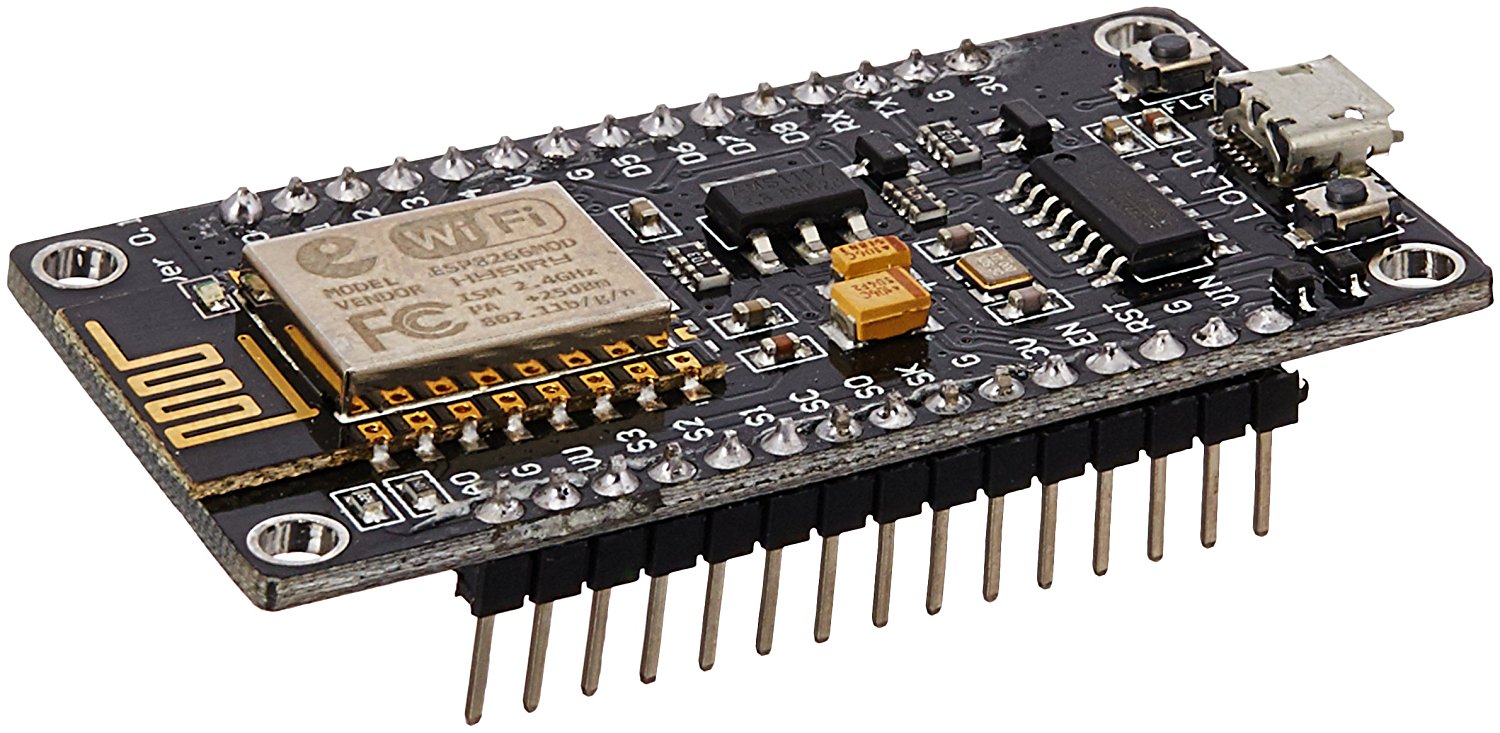

Components List
1. Nodemcu
2. Relay Module (depends upon the number of devices you want to control)
3. Male-Female Jumper Wires
4. LED (for checking initial connections)
5. Prototype Board (if needed)
6. AC Socket Outlet and AC Plug
7. DC Power supply ( 5V source for Nodemcu and Relay module)
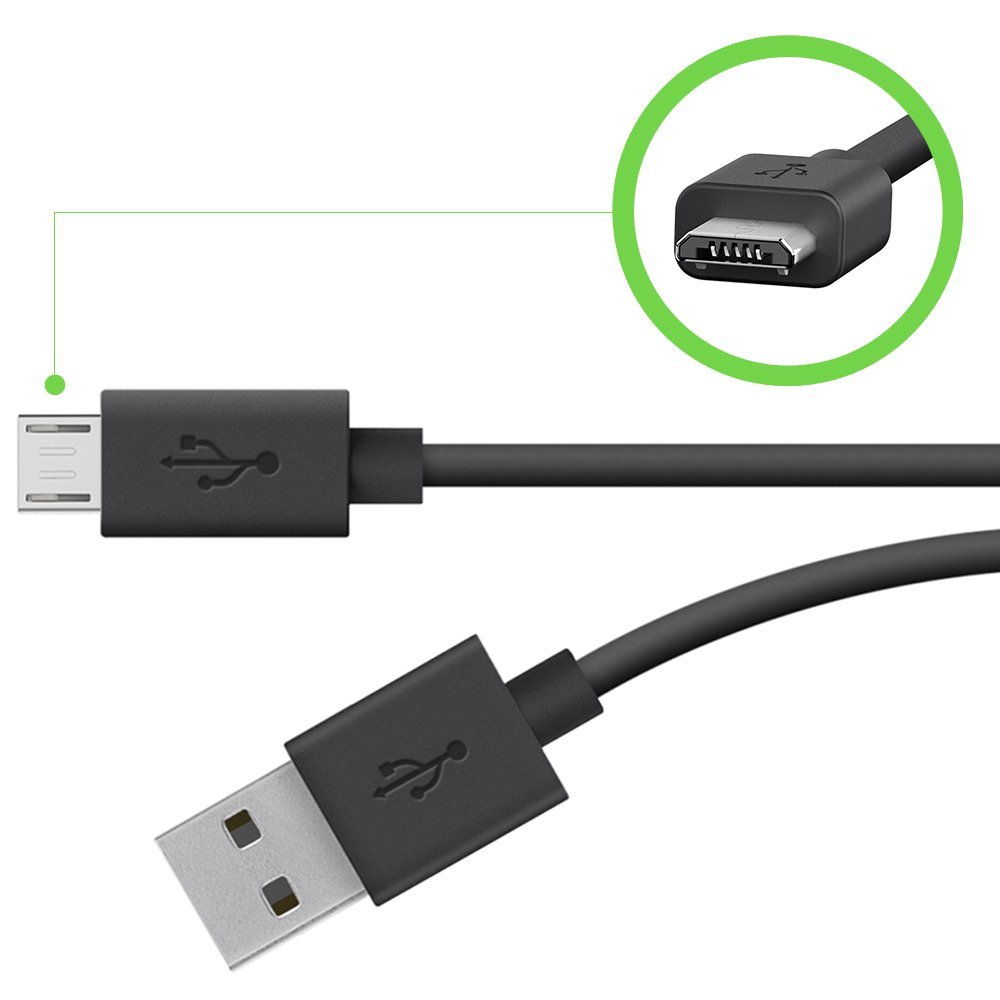
8. USB cable for Nodemcu
Tools List
1. Soldering iron
2. Wire Cutter
3. Screw drivers
4. Multimeter
5. AC insulation tape
Blynk App Setup
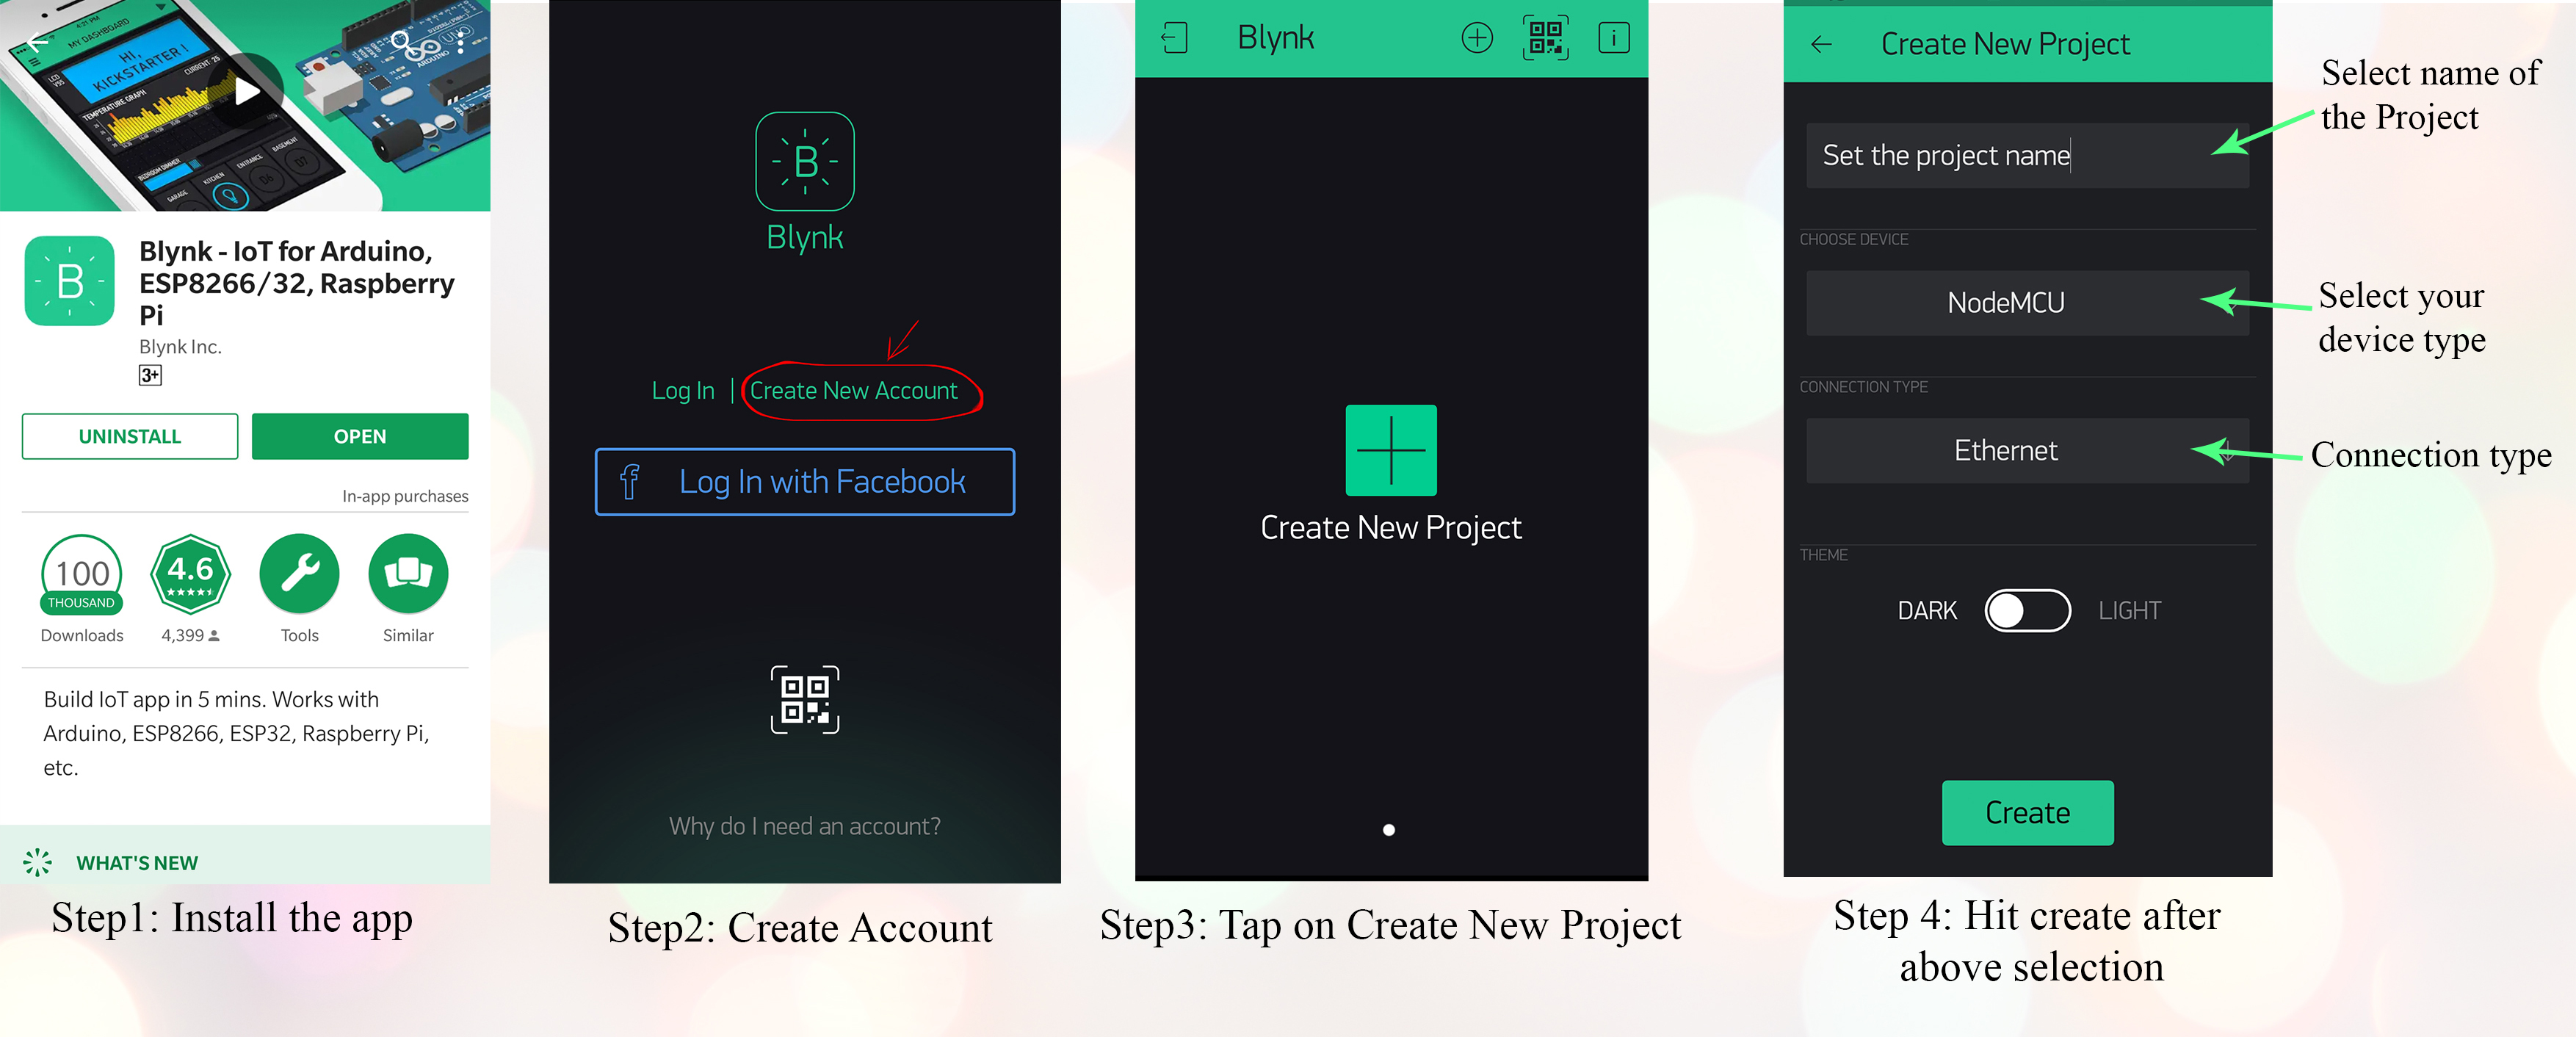
steps ( for detail guide )
1.Download the Blynk app for iOS or Android according to your device
2. Create your Blynk Account
3. Tap on create a New Project
4. Now Choose Your Hardware ie Nodemcu for this case (Blynk Supported Hardware ) and then select type of connection.
5. Now copy your Auth Token (it is a unique identifier which is needed to connect your hardware to your smartphone) or you can mail the token to your mail address
Setting Up the Switch on Blynk
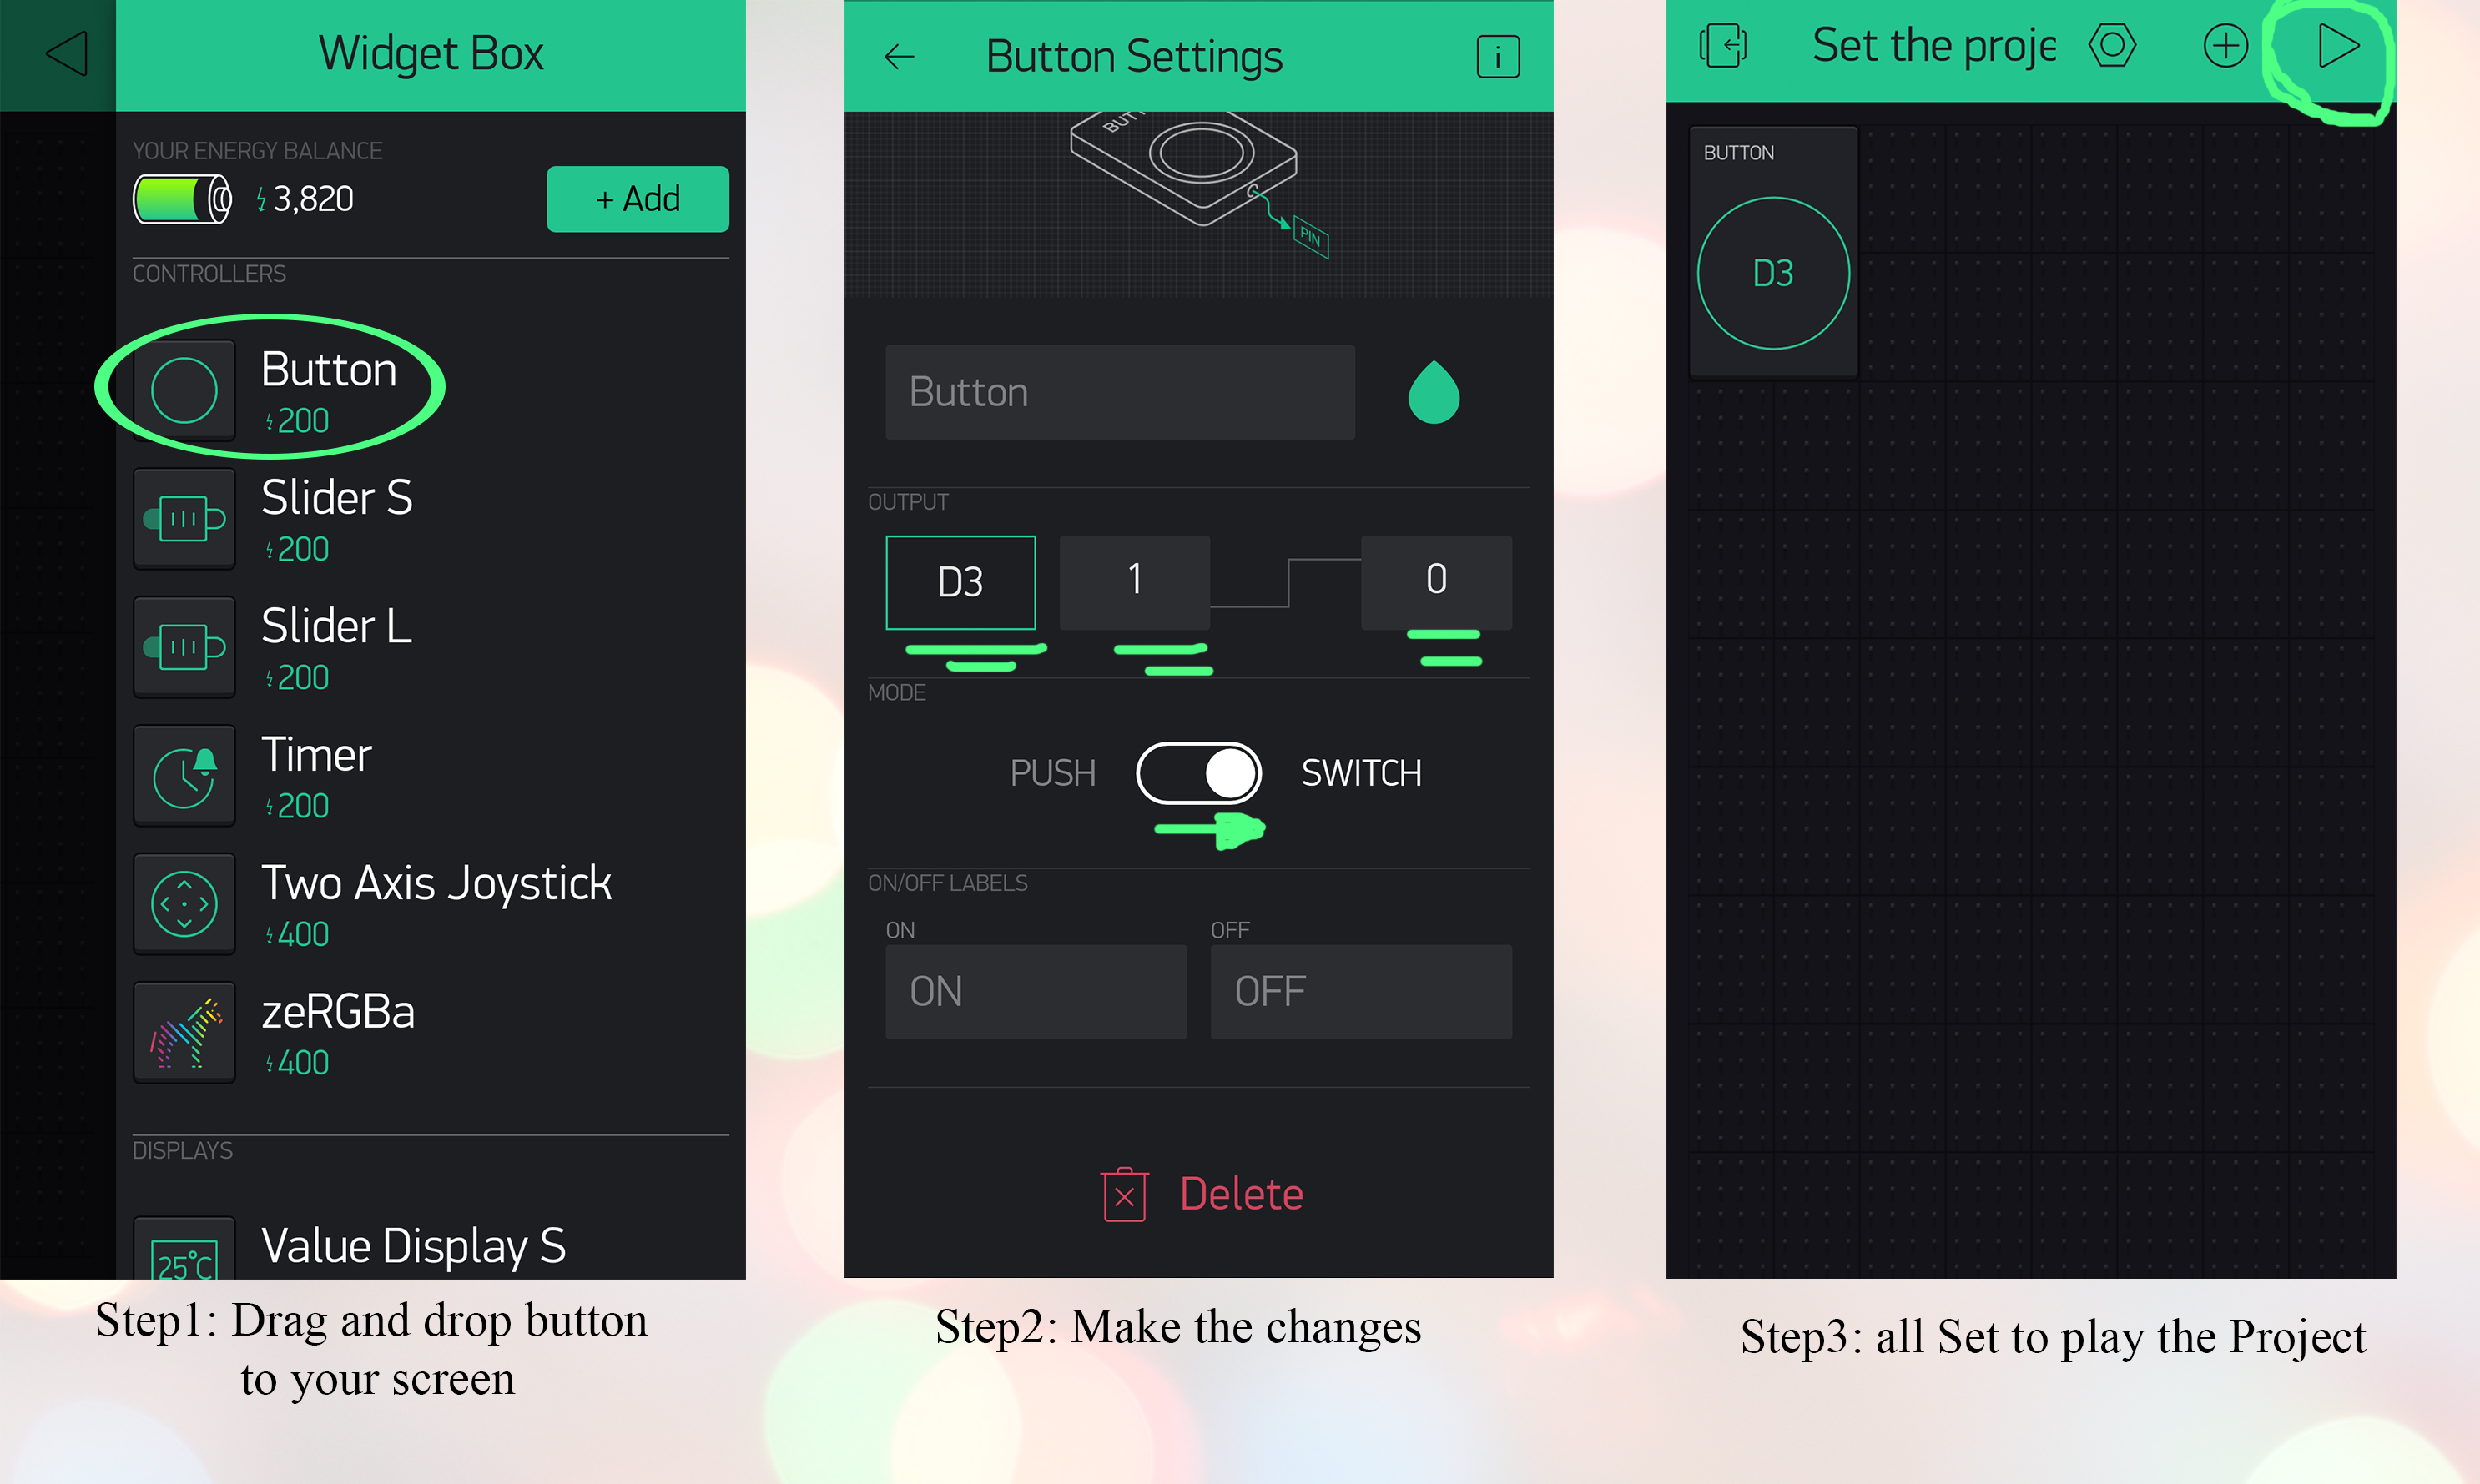
Steps
1. Tap anywhere on the canvas to open the widget box.
2. Drag and drop "Button" on your screen
3. Now tap on the button and make the change as shown in the image instruction ( make the slider from push to switch and I selected D3 pin for this project but any other pin can be selected)
4. you can tap on "play" to run the project
Setting Up Nodemcu and Blynk on Arduino IDE
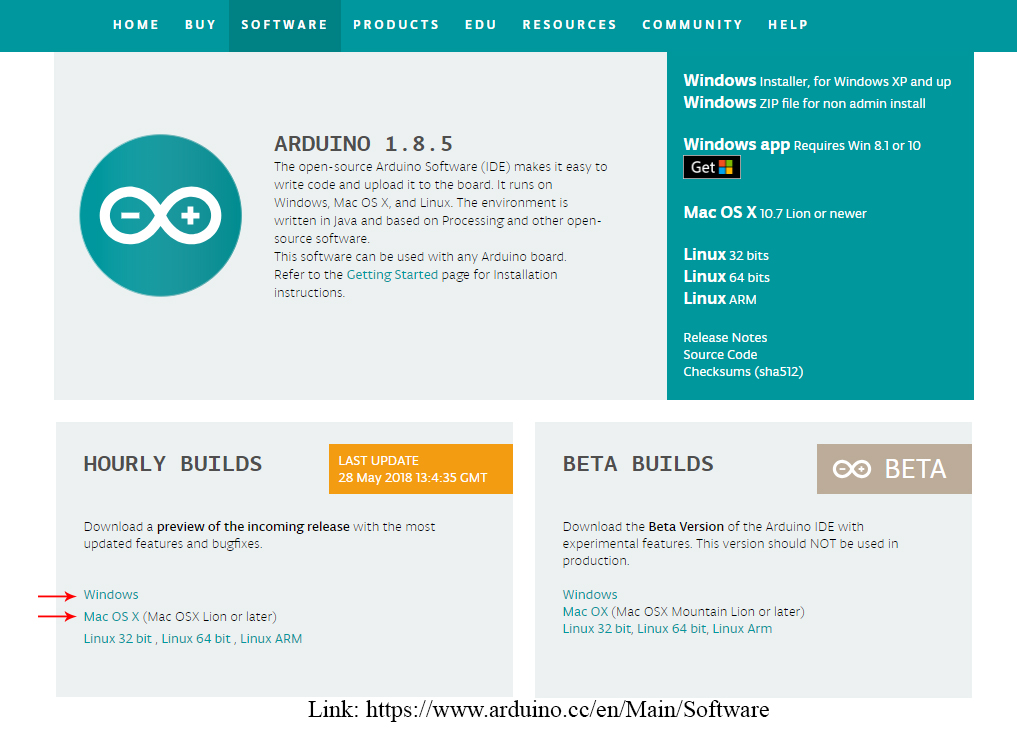
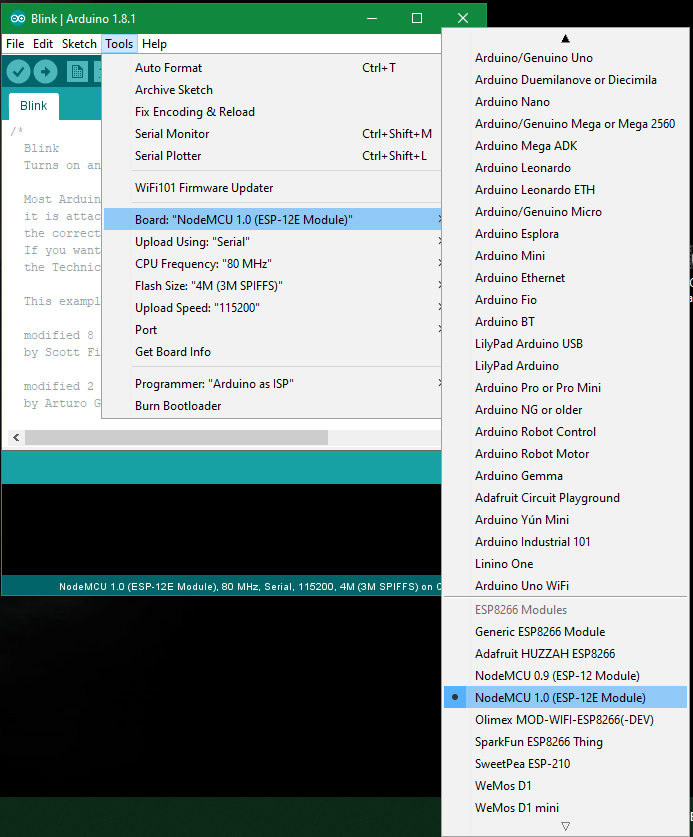
Steps
1. Install the Arduino IDE ( Link : https://www.arduino.cc/en/Main/Software )
2. Now install the Nodemcu library ( Ref video link: https://www.youtube.com/watch?v=RVSCjCpZ_nQ )
3. Now install the Blynk library ( Ref video link: https://www.youtube.com/watch?v=Ea0y1ExNNnI )
4. Now open Arduino IDE and change the following settings, Tools → Board → NodeMCU 1.0
Programming
Steps
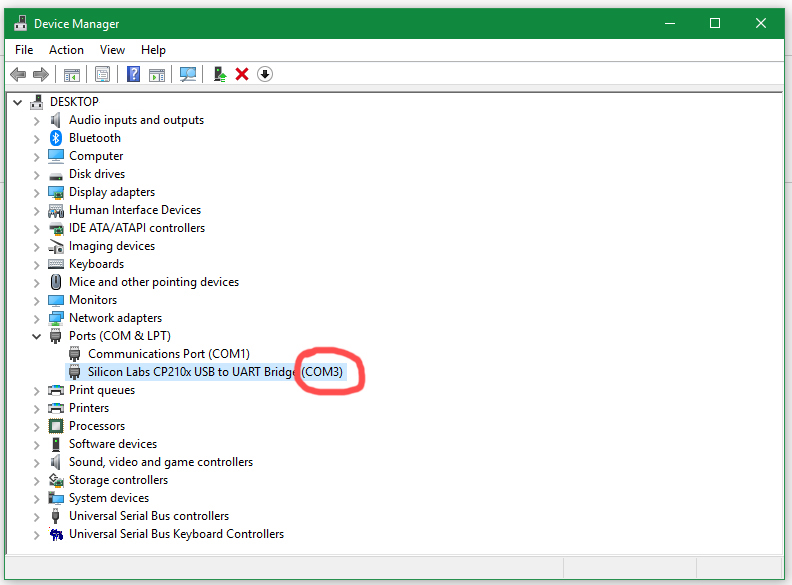
1. Connect the Nodemcu to the pc with help of USB cable
2. Now open Device Manager of your computer and note the COM port number
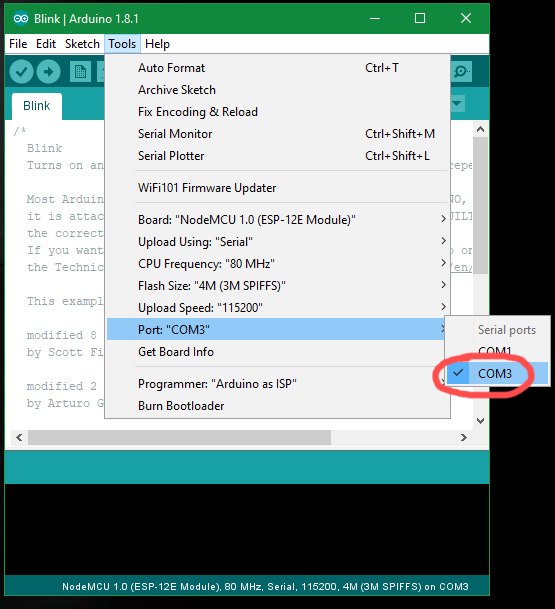
3. Now open Arduino IDE and go to Tools to select the desired COM port number as shown in the image
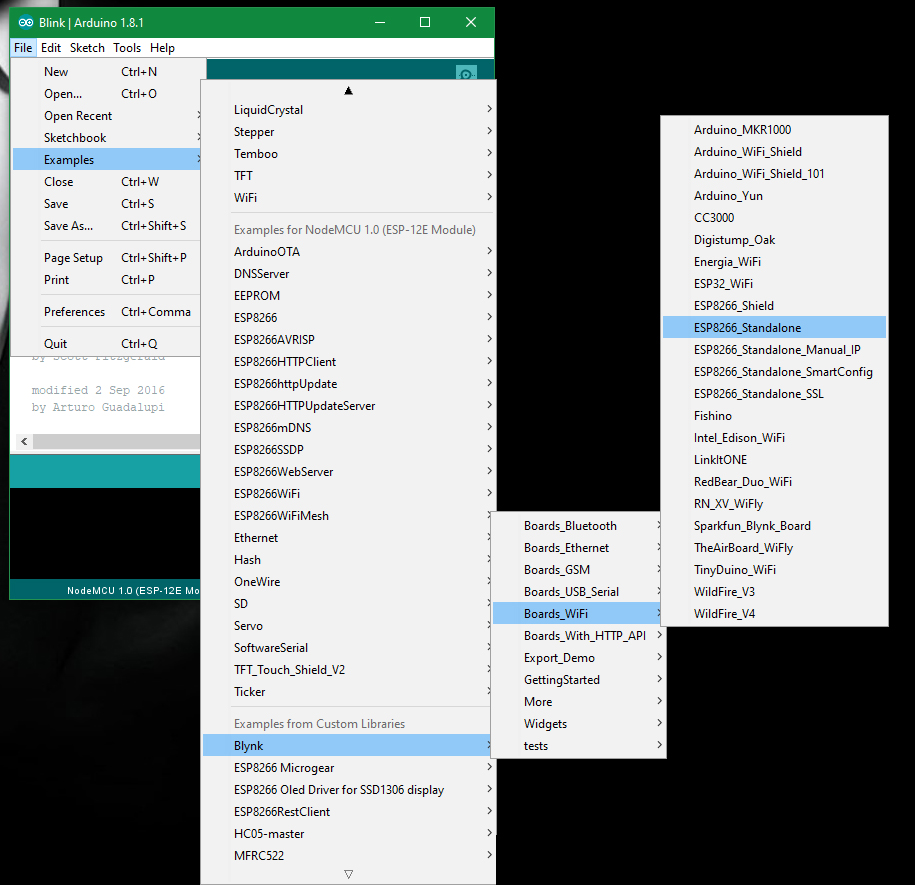
4. Programming
now go to, File → Examples → Blynk (may need to scroll down) → Boards_WiFi → Esp8266_Standalone
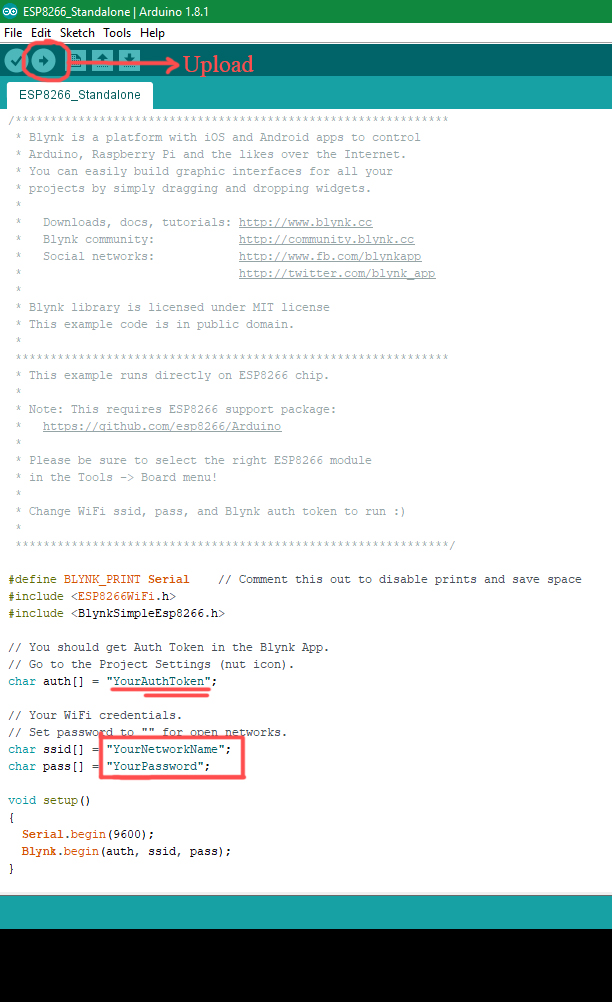
5. Now you need to change three things on the program and your are done, add the AuthToken copied earlier from the Blynk app, now add the ssid name and password that is your WiFi id and password
6. Now press the upload button on the software it may take some time
Circuit Diagram
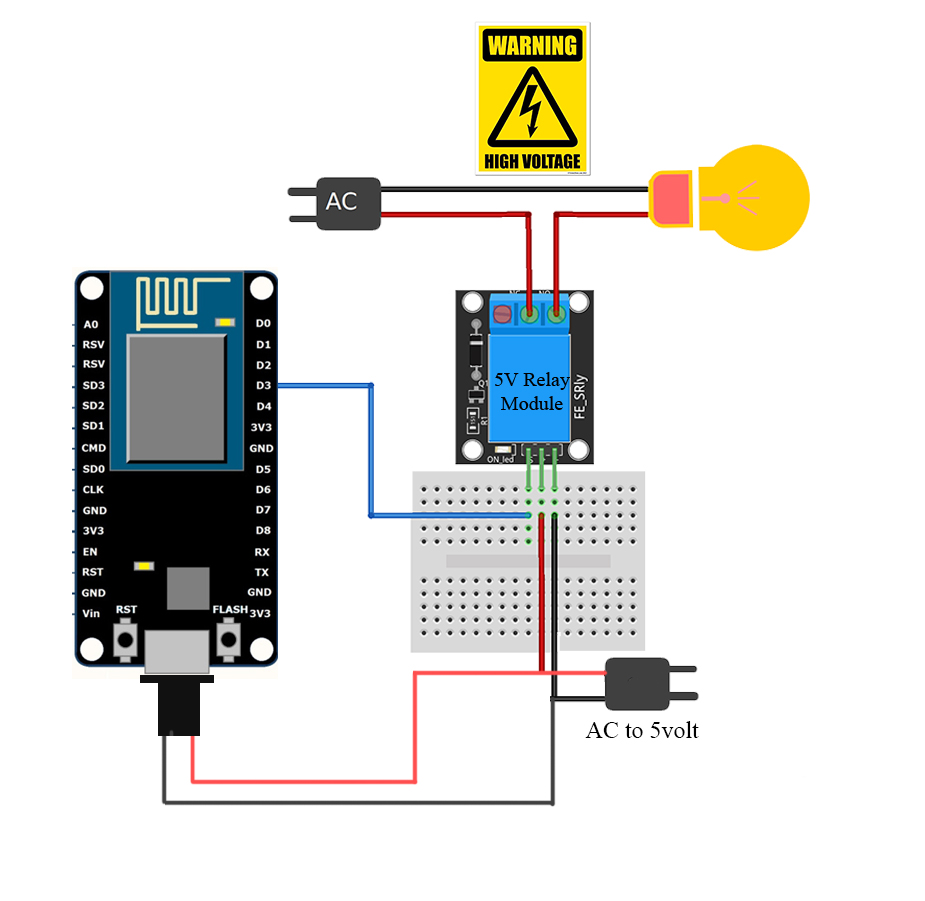
Make the connection according to the diagram given above and work safely while working with high voltage. If you want you can skip the relay section and control low voltage devices using transistor or MOSFET ( as shown on the video by controlling LED )
Linking the Device With Google Assistant


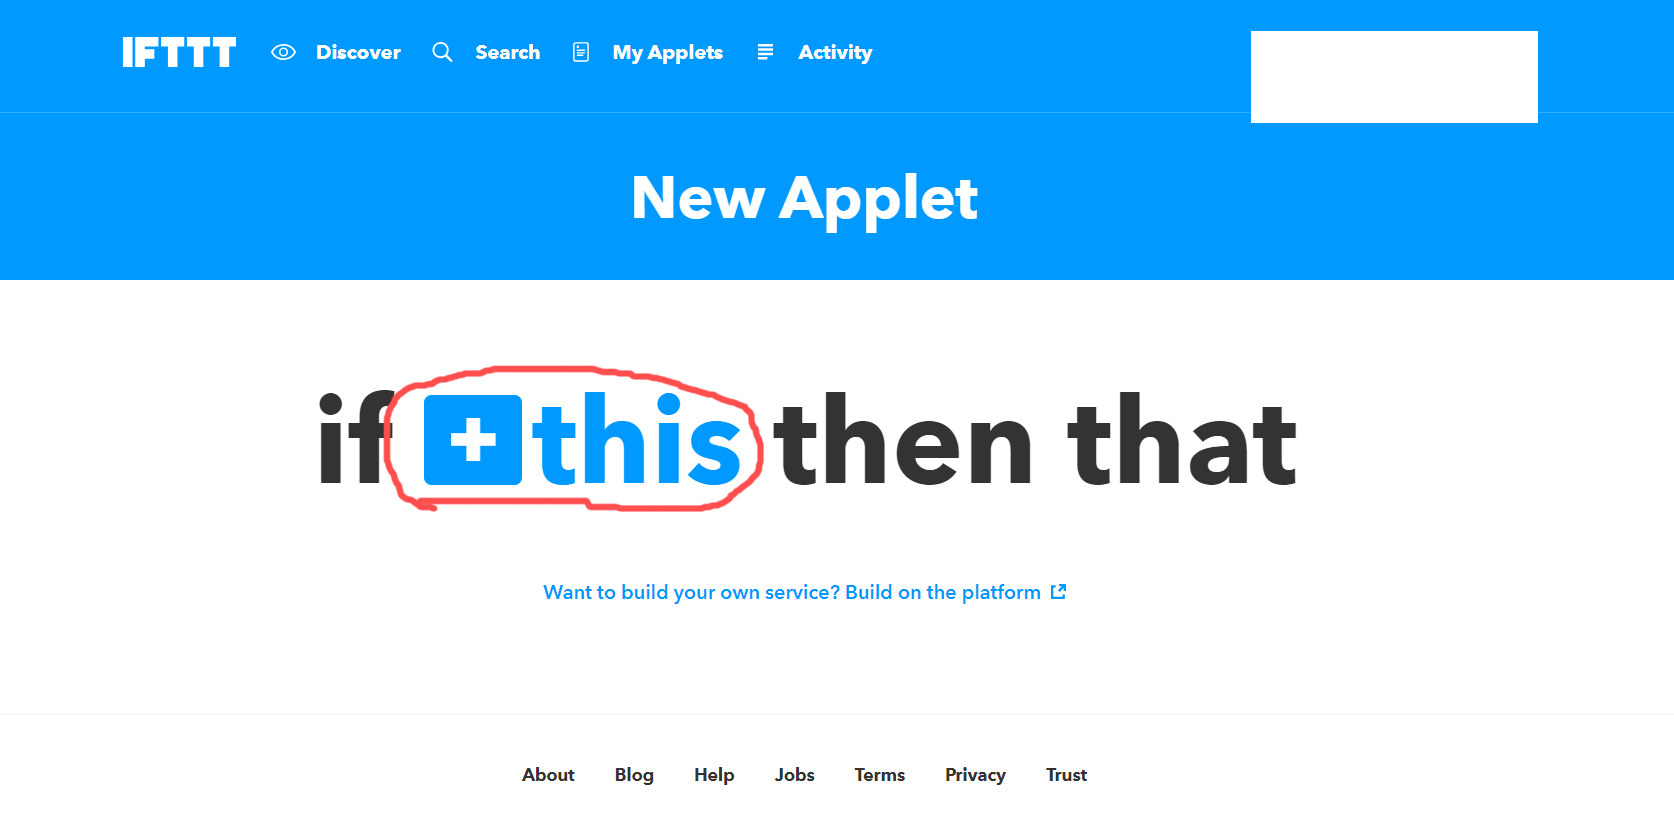
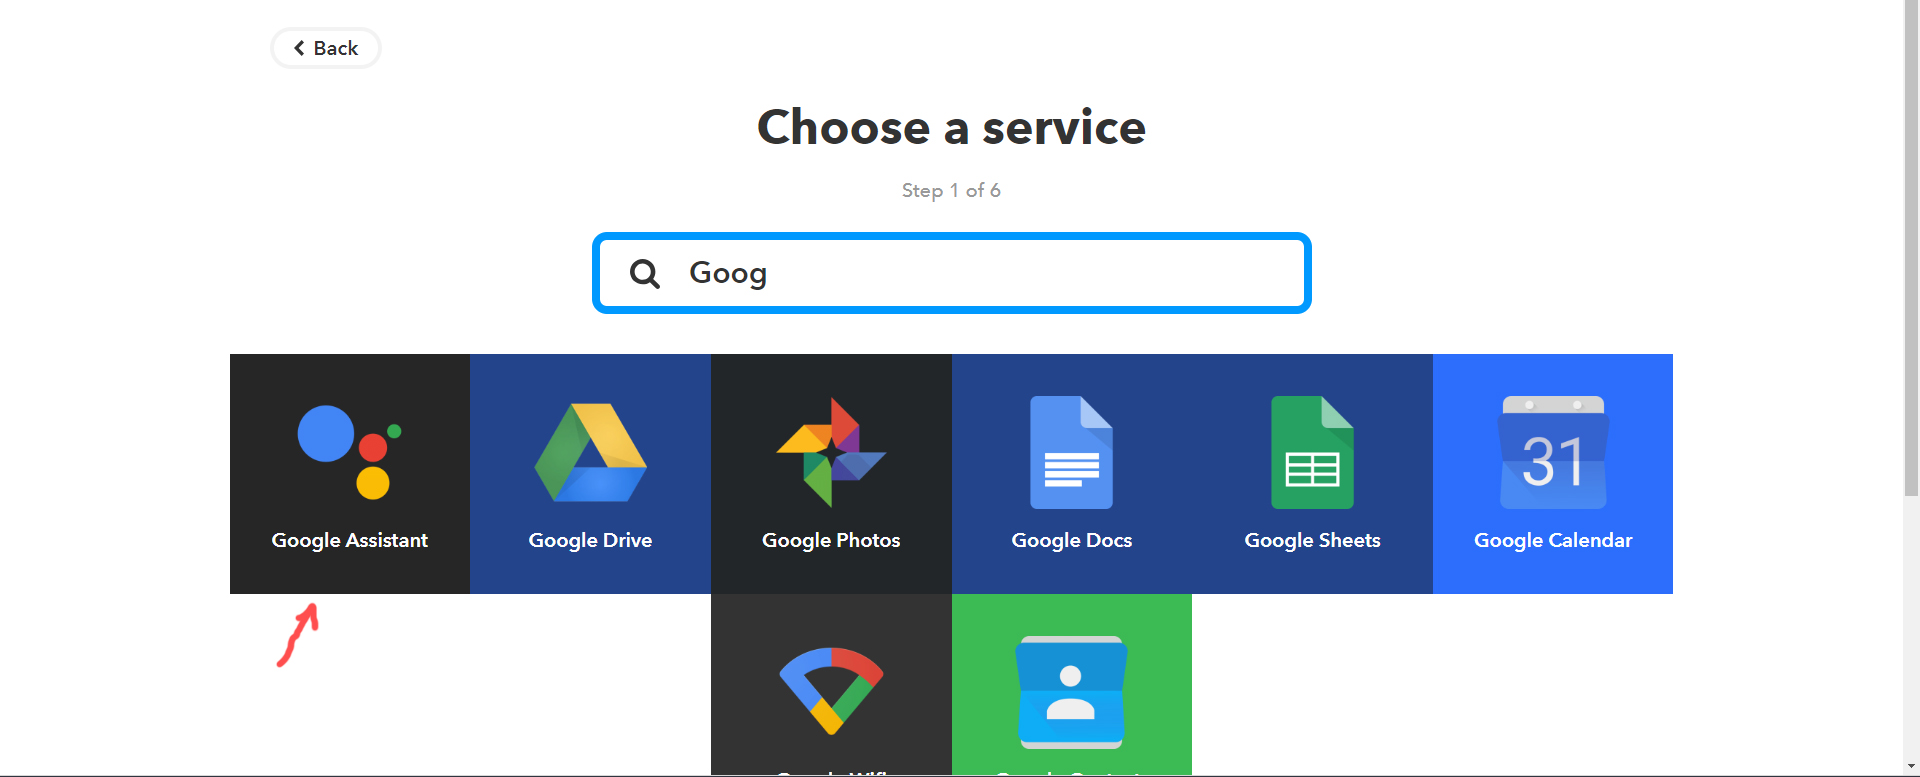
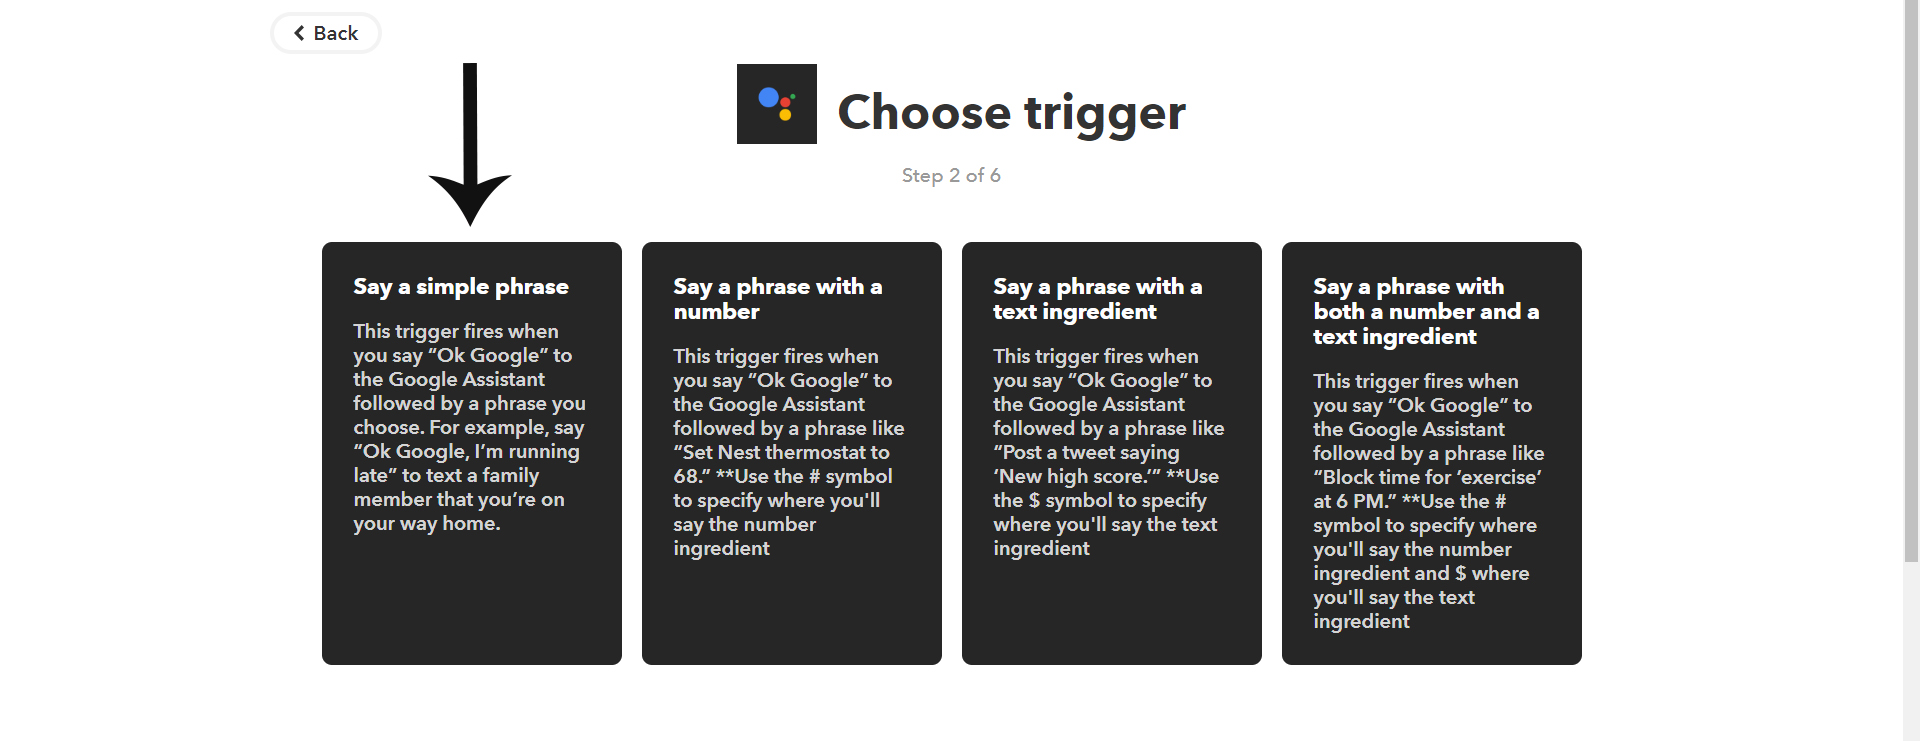
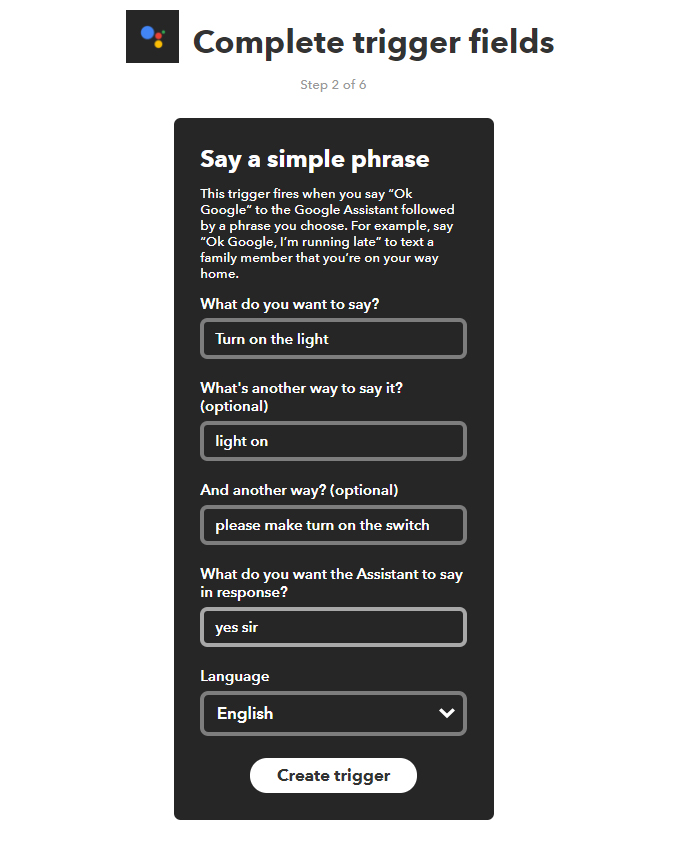
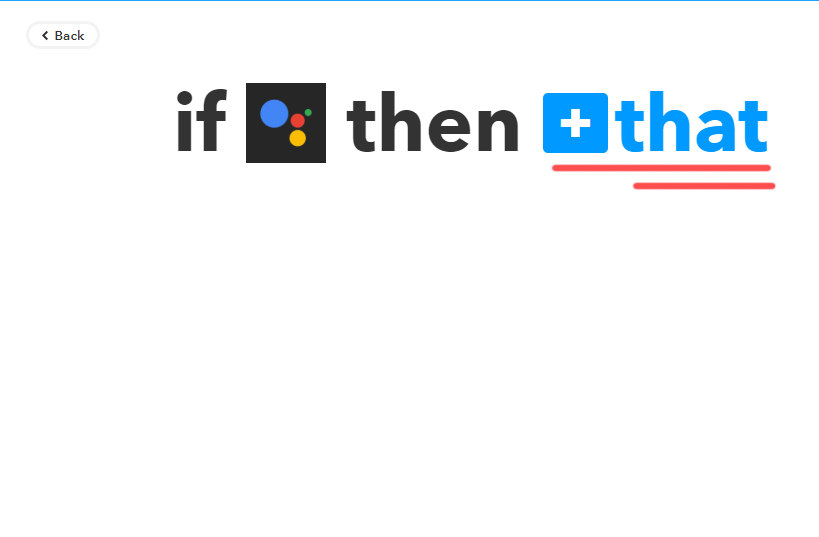
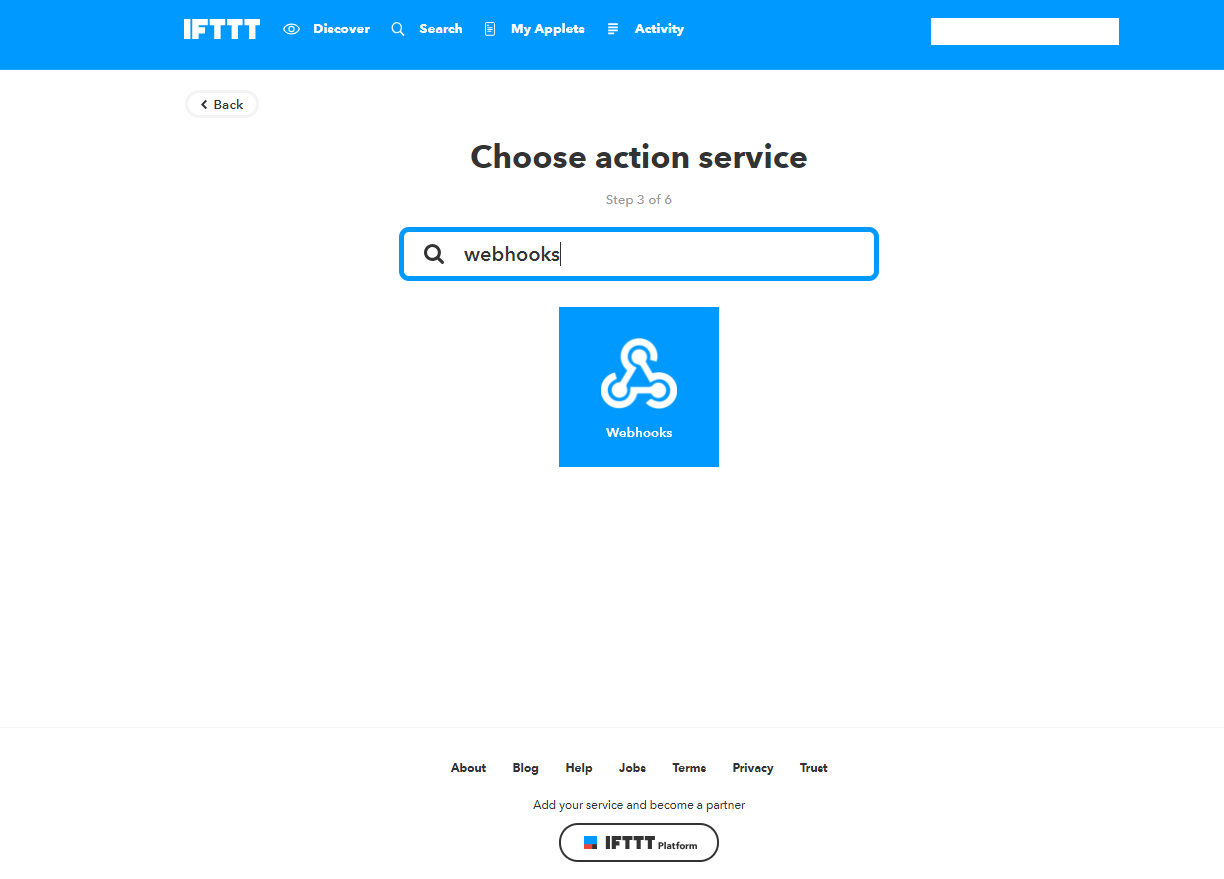
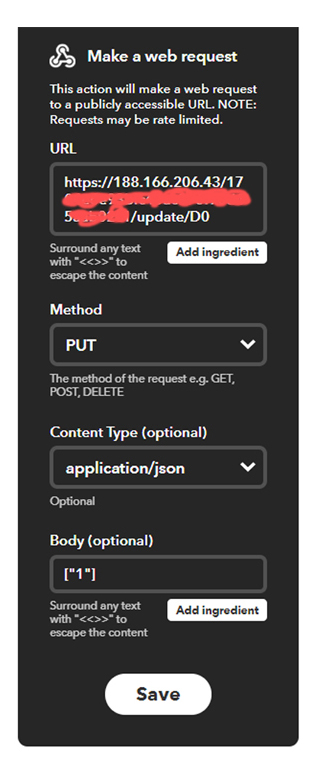
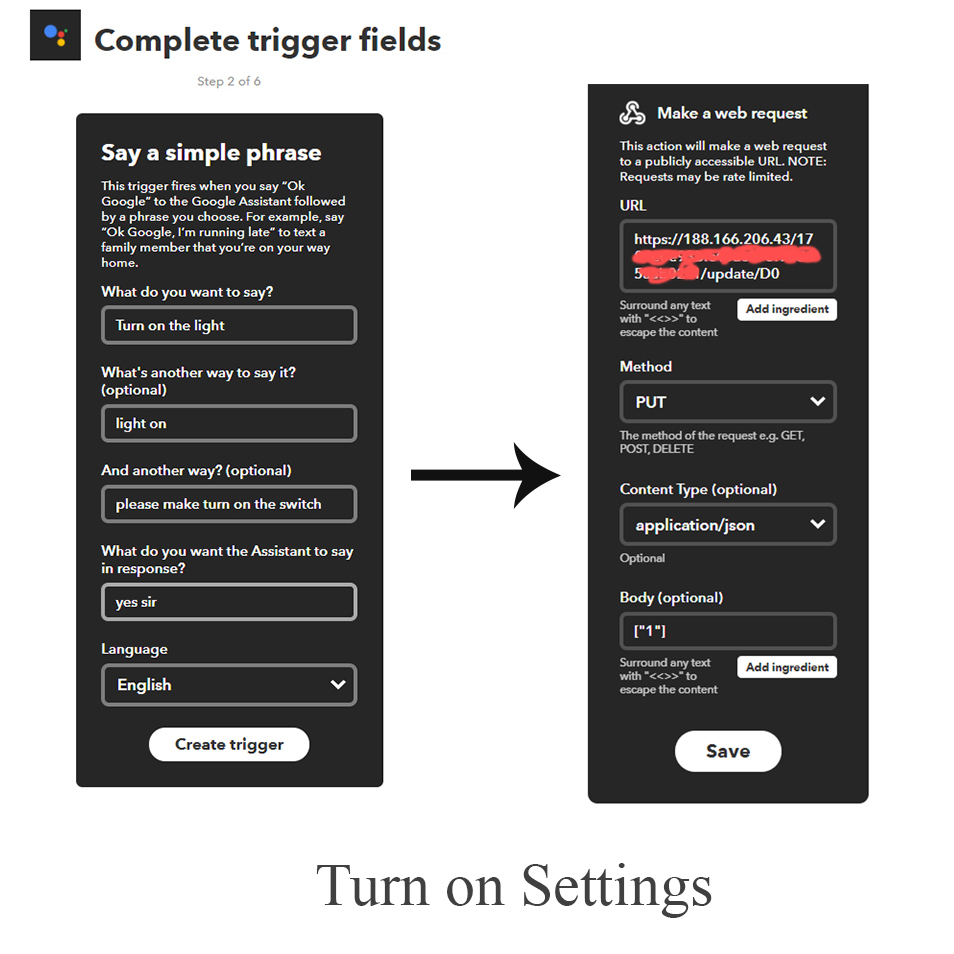
Now for controlling the appliances over the internet using Google Assistant you need to the following steps.
1. Go to website of IFTTT ( https://ifttt.com )
2. Signup using your Google account ( same google account that you are using with the Google Assistant )
3. Once you are signed in, click on "My Applets" and select "New Applet"
( by this we will trigger to turn on the light)
4. Now click on "this" and in the search bar search for "Google Assistant" and tap on it
5. Once you are in click on connect and give permission
6. Now select the trigger, here i selected the first option "Say a simple phrase" and on the next page do as shown in the above image. the command will be given by you to the assistant.
7. Now the trigger is created then select "that"
8. Search for "Webhooks" and connect. Then fill the data according to the above image
URL : " https://188.166.206.43/Auth Token/update/D0 "
(D0 is the pin D3 of Nodemcu equivalent to arduino uno's pin out) for turning on use ["1"]
9. Now hit "Finish"
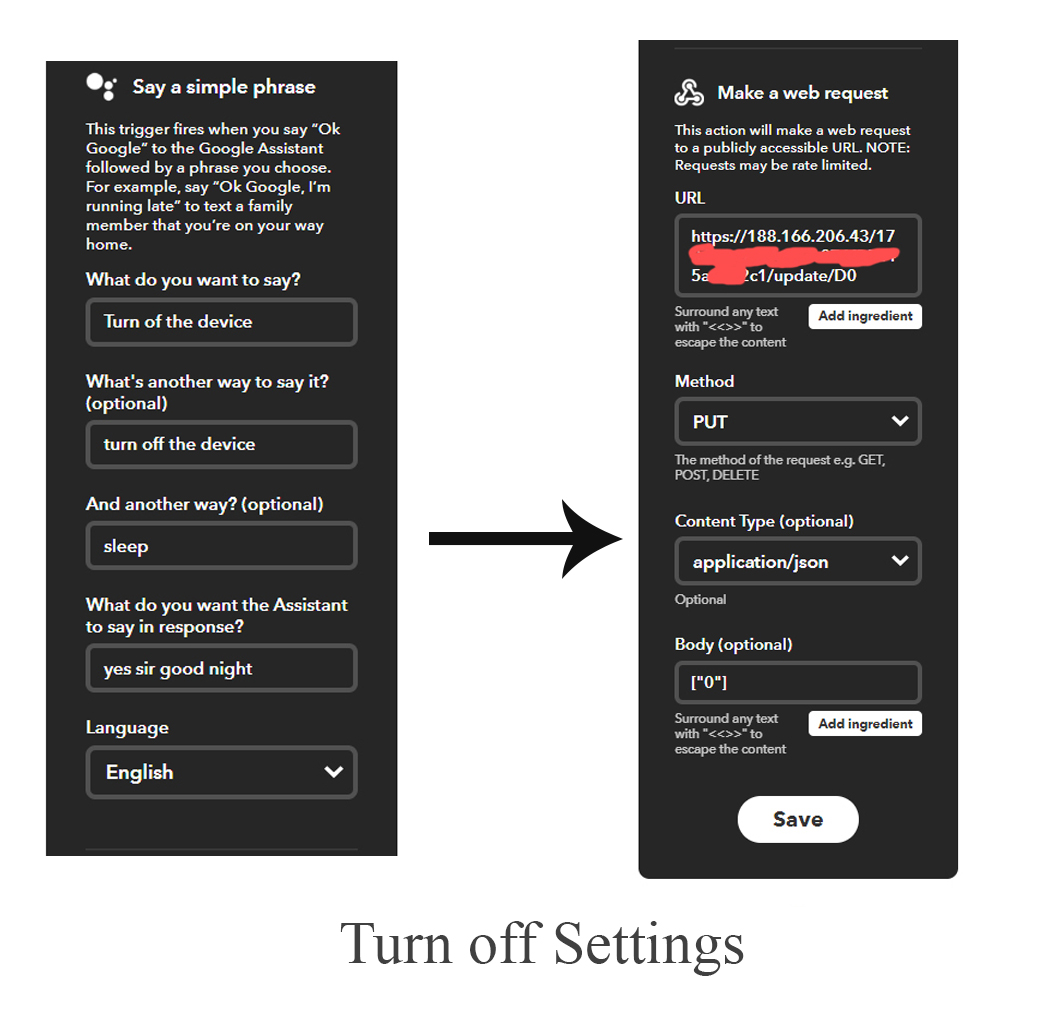
10. Now create another new applet in the same way described above to turn off the light. The process is same as above
click on "My Applets" and select "New Applet" → click on "this" → search for "Google Assistant" → select the trigger → "Say a simple phrase" and on the next page do as shown in the above image → the trigger is created → select "that" → Search for "Webhooks" and connect. Then fill the data according to the above image URL : " https://188.166.206.43/Auth Token/update/D0 " (D0 is the pin D3 of Nodemcu equivalent to arduino uno's pin out) for turning off use ["0"]→ Now hit "Finish"
#Please go through the above images for better understanding.
Its Done ....!!!! :)
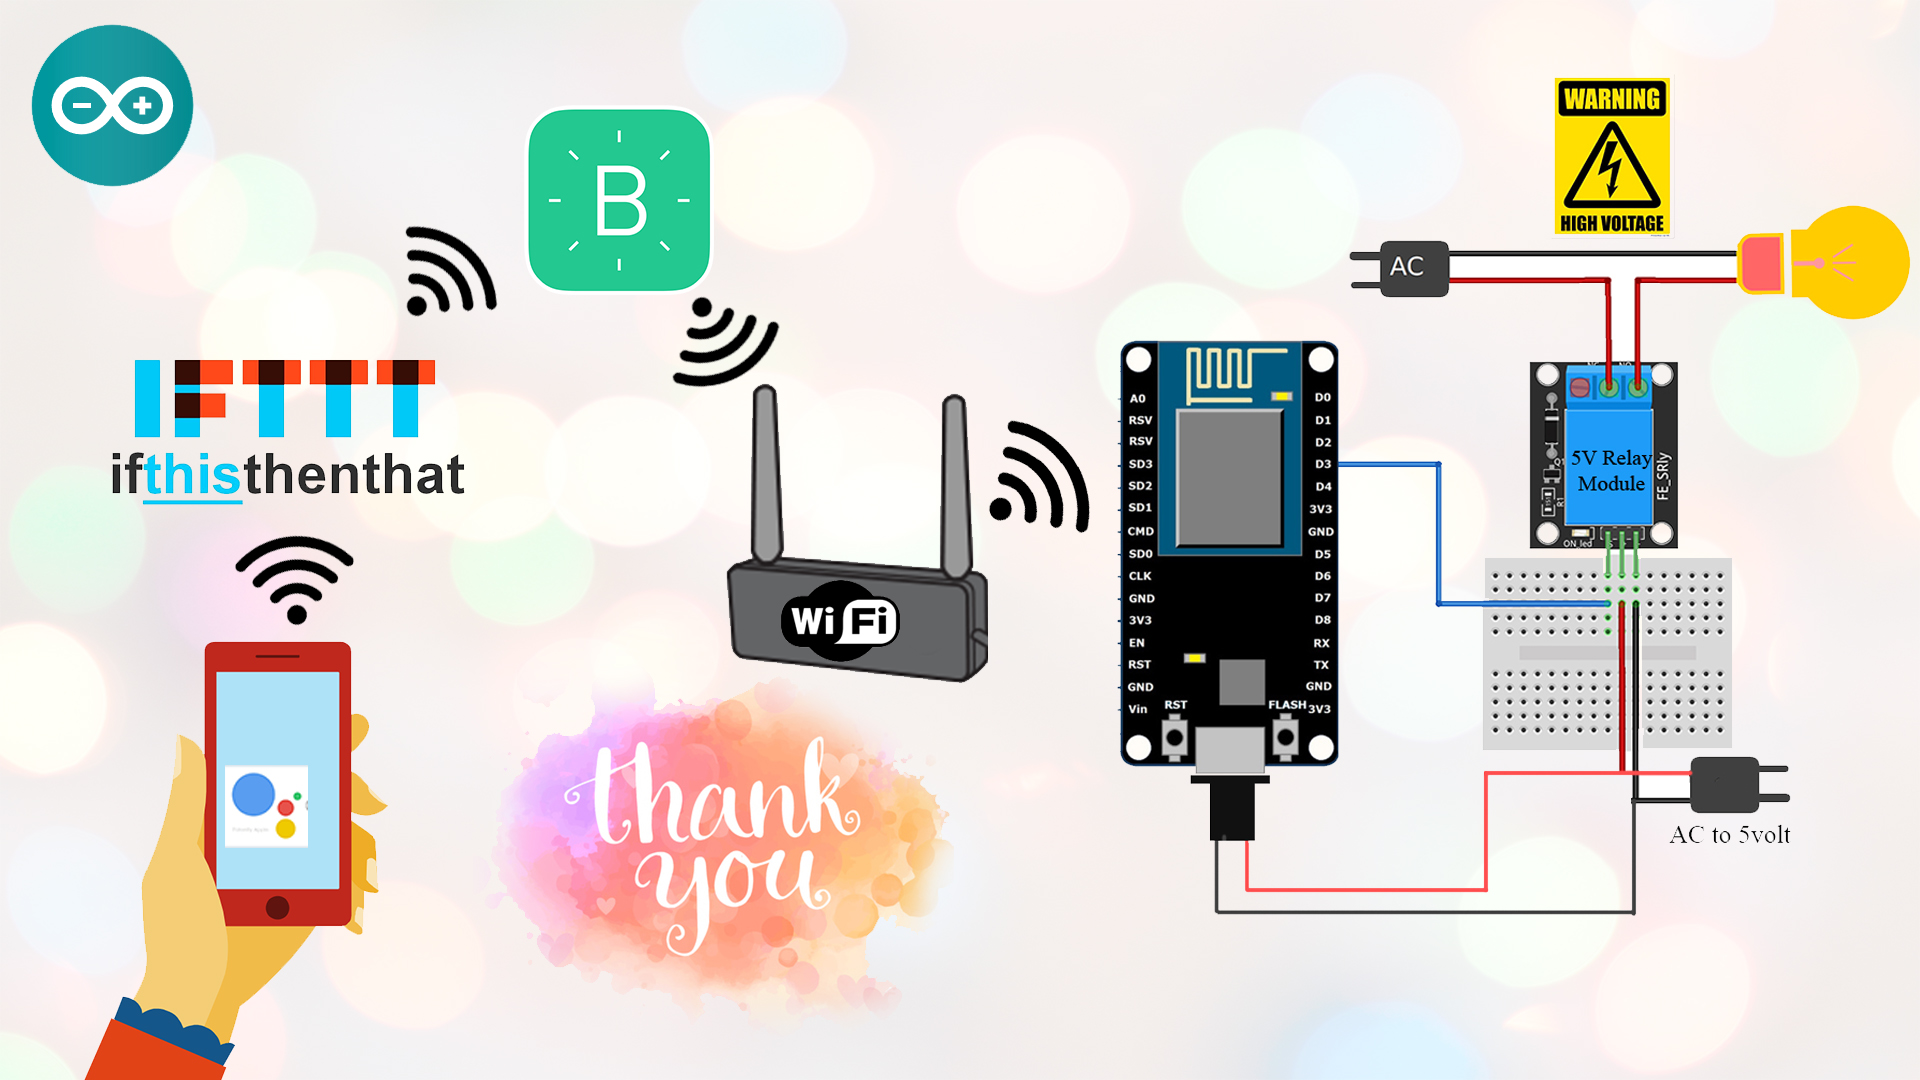
Its done. Its a very simple as well as very cool project to try.
Thank You