GNU/Mood
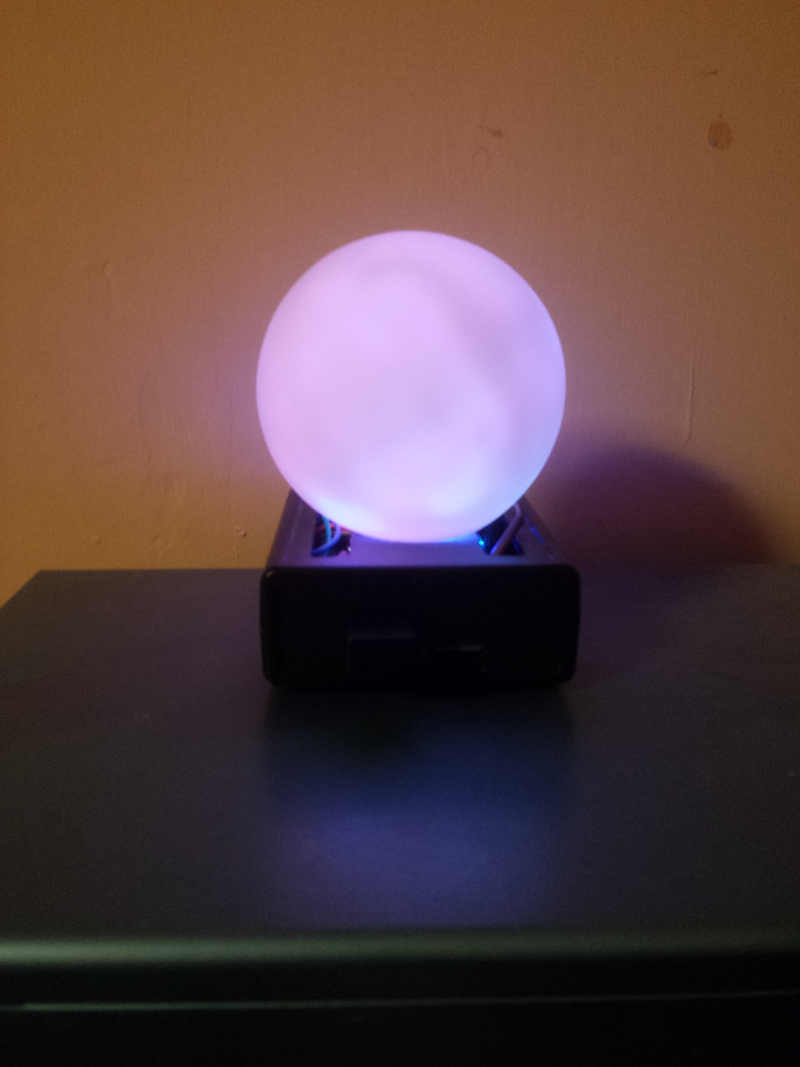
GNU/Mood is a mood ball hack where the colour LEDs are controlled by sentiment analysis of your GNU Social timeline. It reads the last few entries in your timeline and extracts three mood dimensions:
- Egocentrism: Talk about yourself versus talk about others
- Valence: An indicator of positive or negative affect. Happyness or sadness.
- Gender: Feminine or masculine related words or names
These measures are then turned into LED illumination values to produce the colour of the ball, which changes slowly and almost imperceptibly.
GNU/Mood can also be "triggered" if it detects certain key words within the timeline. This causes it to pulsate slowly and soothingly, guiding the user into a more blissful state of mind. You can also set it to turn off and then back on again at certain times of day so as not to disturb your sleep.
What You'll Need
You will need the following things to build GNU/Mood:
- 1 x Beaglebone Black (wireless or with a compatible wifi dongle)
- 1 x Beaglebone Black case (Choose your favourite or 3D print one)
- 1 x micro/mini USB cable (the type which usually comes with a Beaglebone Black)
- 1 x 5V 2A power supply for the Beaglebone Black
- 6 x Dupont Cables male to female Jumper GPIO Wire Ribbon
- 1 x Ultrabright 3V red LED
- 1 x Ultrabright 3V green LED
- 1 x Ultrabright 3V blue LED
- 1 x LED Mood Ball Lamp
- 1 x microSD card (8GB or larger, class 10)
- 1 x Small amount of bubble wrap packing plastic
- 1 x Superglue
You will also need these tools:
- Precision screwdrivers
- Junior hacksaw
- Pliers
- Drill
Wiring Up the LEDs
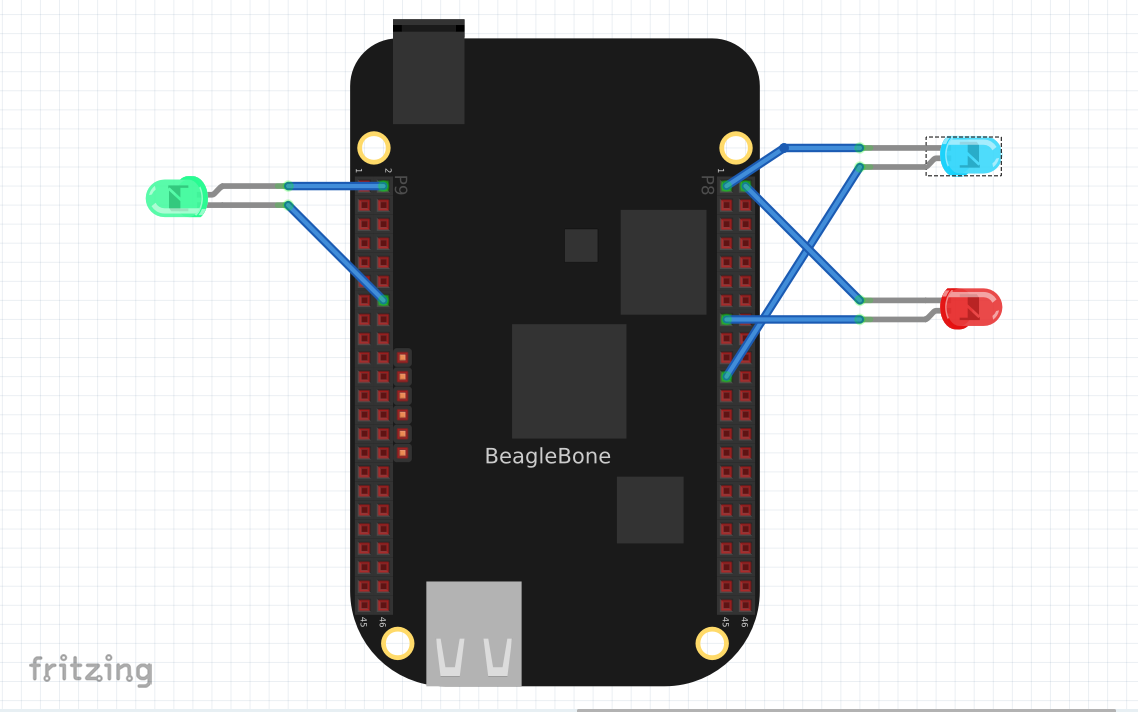
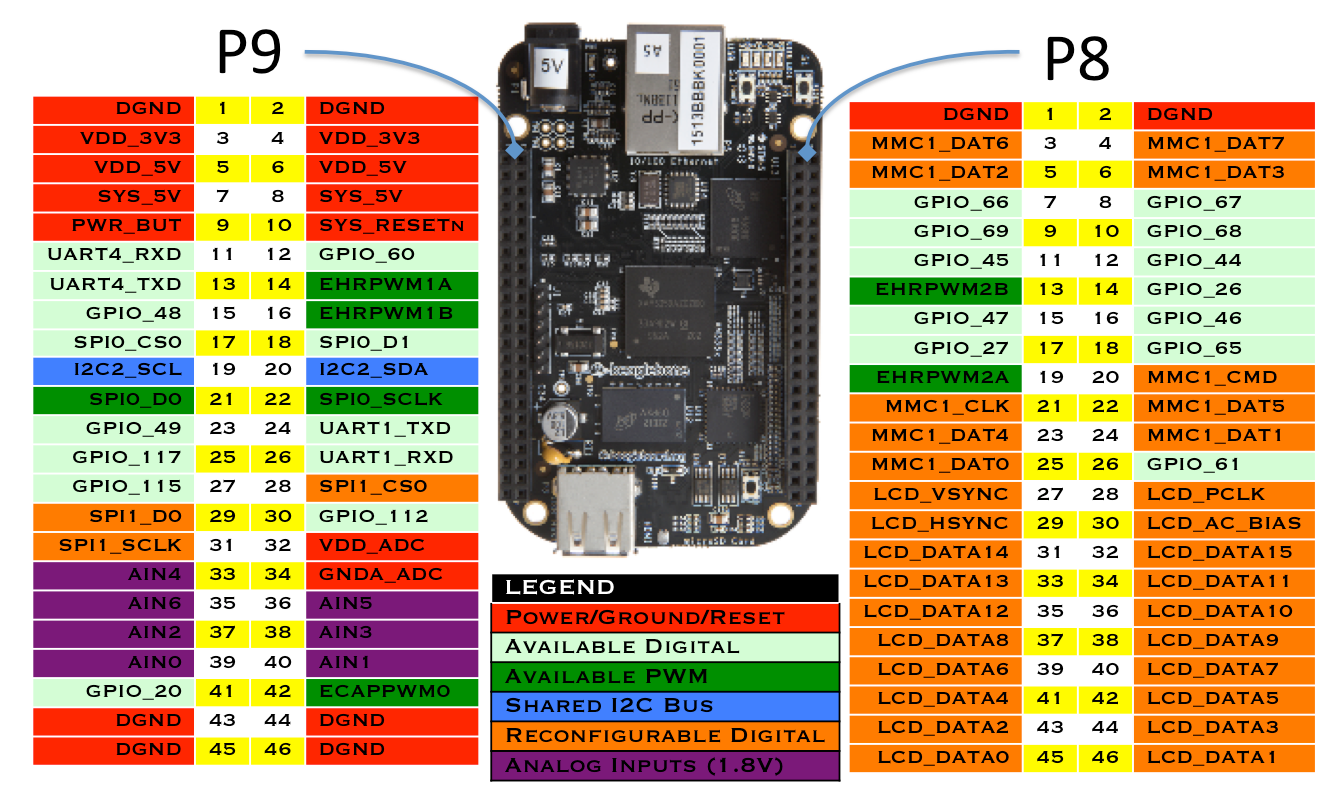
Connecting the LEDs to the Beaglebone Black is very simple and no resistors should be needed. You can either solder the LEDs to the dupont cables, or just inserting them into the female sockets is usually good enough.
The header and pin number are given below. See the reference diagram above to locate the right pins.
- Red: header P8 pin 13
- Green: header P9 pin 14
- Blue: header P8 pin 19
Preparing the Mood Ball
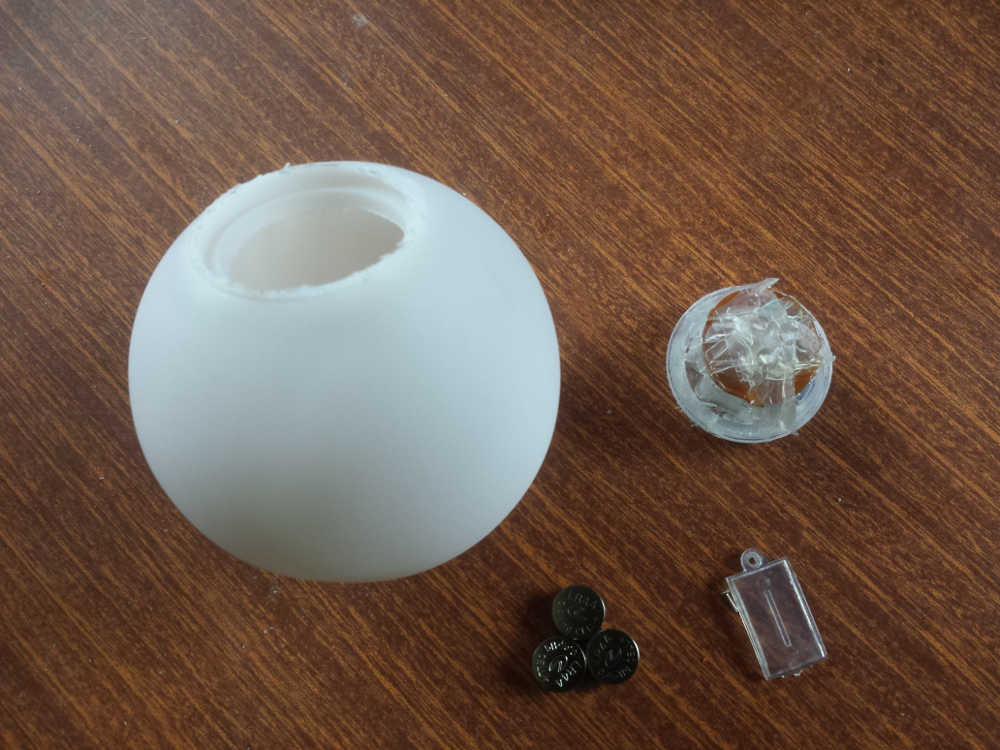
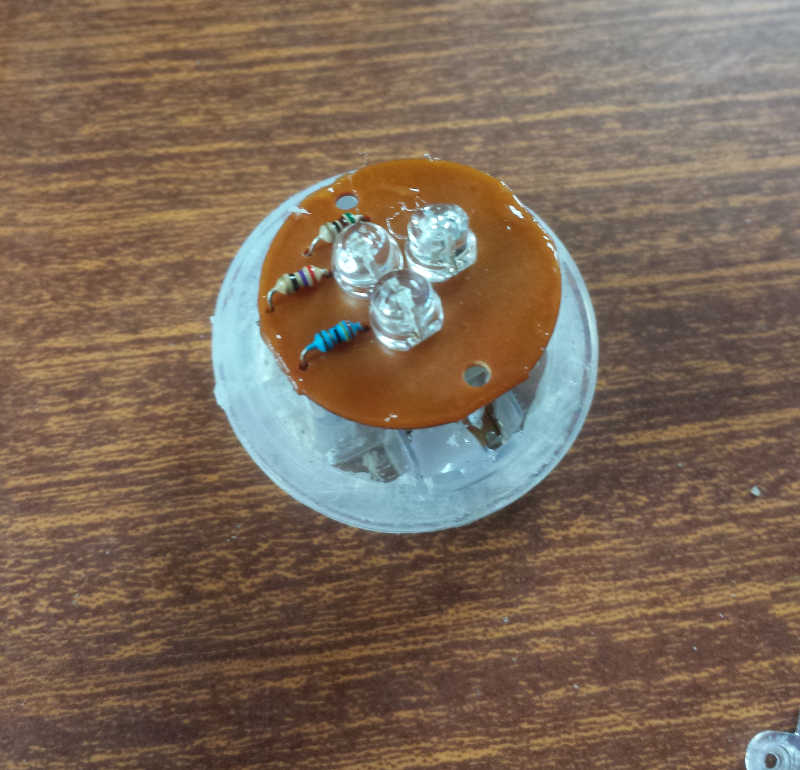
Use a precision screwdriver to remove the batteries from the Mood ball.
With a junior hacksaw cut around the bottom of the mood ball to loosen the electronics section. Make sure not to scratch the surface of the rest of the ball. Once it's loose enough it can be carefully pulled out with pliers.
The existing electronics aren't needed, but you may wish to salvage the LEDs from it by de-soldering them. For an easy life, just use new LEDs if you have them available. They should be the ultra bright type and any physical size will do.
Installing the Software
The Beaglebone Black comes with an existing operating system installed, but the 4GB onboard flash storage may not be enough for the new software and so it's better to install the operating system onto a microSD card instead.
Download the latest Debian firmware image and copy it to the microSD card. The command will be something like:
    sudo dd if=[image filename] of=/dev/sdX
    sync
Where sdX is the microSD drive on your laptop/desktop. You can find out what this should be just by removing the microSD card then running:
ls /dev/sd*
Then inserting the microSD card and running the same command again. Typically this will be *sdb*, *sdc*, *sdd*, etc. Once that has coppied insert the card into the Beaglebone Black and connect it to your laptop/desktop with the USB cable. If you're using an external wifi dongle then also plug that into the Beaglebone Black. After a few minutes you will then be able to ssh into the Beaglebone Black with:
ssh debian@192.168.7.2
The initial temporary password is usually *temppwd*. Change it with the command:
passwd
Then set up the wifi connection with:
    sudo connmanctl
    connmanctl> technologies
    connmanctl> tether wifi disable
    connmanctl> enable wifi
    connmanctl> scan wifi
    connmanctl> services
    connmanctl> agent on
    connmanctl> connect wifi_[somenumbers]
    connmanctl> quit
If the connect command worked then your Beaglebone is now ready for wireless operation. Disconnect the USB cable and plug in the external 5V power supply. After a few minutes once it has booted again you can ssh back into it with:
ssh debian@beaglebone.local
Note that you will need to have avahi/mDNS configured on your system to be able to do this. Now run:
    sudo apt-get update
    sudo apt-get upgrade
    sudo apt-get -y install build-essential git
    sudo apt-get -y install curl libcurl4-openssl-dev ntp
    git clone  https://github.com/bashrc/libbbb
    git clone  https://github.com/bashrc/libgnusocial
    git clone  https://github.com/bashrc/gnu-slash-mood
    cd libbbb
    make
    sudo make install
    cd ../libgnusocial
    make
    sudo make install
    cd ../gnu-slash-mood
    make
    sudo make install
    sudo cp daemons/gnu-slash-mood.service /etc/systemd/system
    sudo mkdir /var/lib/gnu-slash-mood
    sudo nano /var/lib/gnu-slash-mood/config.txt
Add the following, setting your details as needed. The off and on values are the hours of the day when GNU/Mood should turn off and then turn on again so as not to disturb sleep (0 is midnight).
    username = [myusername]
    password = [password]
    domain = [GNU Social domain]
    off = 0
    on = 7
Now enable the daemon:
    sudo systemctl enable gnu-slash-mood
    sudo systemctl start gnu-slash-mood
You can check that the daemon started correctly with:
sudo systemctl status gnu-slash-mood -l
Once the software is running you should see that the LEDs initially flash and then transition to a stable colour.
Final Assembly
Mount the Beaglebone Black into its case. Usually it's fastened down with four screws.
Drill three (or as many as needed) holes into the top of the case so that the LEDs can poke through. One possible way to do it is with six small holes which then fit the LED terminals.
Scrumple up the bubble wrap and put it inside the mood ball. The bubbles will cause light from the LEDs to be diffracted in all directions, giving a more uniform colour and avoiding any isolated spots of colour.
Fit the top of the case to the bottom, then place the mood ball over the LEDs. Check that it illuminates as expected.
Glue the mood ball to the top of the case with some superglue.
GNU/Mood is now ready for moodyness.
Security Tips
Everyone is paranoid about the internet of hopelessly insecure things. To improve the security of GNU/Mood you can do the following:
    ssh debian@beaglebone.local
    sudo nano /etc/ssh/sshd_config
Set the following:
    PermitRootLogin no
    PermitEmptyPasswords no
And if you are using ~/.ssh/authorized_keys then set:
PasswordAuthentication no
Save and reboot the Beaglebone.
Customising Trigger Words
You can customise the words which cause GNU/Mood to pulsate.

    ssh debian@beaglebone.local
    sudo nano /var/lib/gnu-slash-mood/triggers.txt
An example triggers.txt file might look like:
    stallman
    systemd
    DRM
    #NSFW
    proprietary
Any changes you make to the trigger words should be picked up on the next update of the mood ball, which happens every few minutes. You don't need to restart the daemon.