GIMP - Color Picker in Action
by mihgasper in Design > Digital Graphics
2473 Views, 3 Favorites, 0 Comments
GIMP - Color Picker in Action
Everybody heard about PhotoShop, extremely useful editing tool. Less people know about GIMP, a free alternative with numerous powerful features. Unfortunately GIMP seems too complicated to beginners and in this instructable I will show how you can instantly use it for simple editing of your photos, graphics, scans etc. I will use a real life example, very familiar to so many bloggers.
I occasionally collaborate at a blog, dedicated to vintage illustration, and we decided to present several illustrators of legendary Water Babies to wider audience. One of today almost unknown, yet in his times extremely popular artists is Edward Linley Sambourne (1844 – 1910). Author of text is Charles Kingsley (1819-1875). This very same book was first published in 1885.
According to the date of publishing and death of both artists the text and the illustrations belong to Public Domain. Whole book is available online:
https://archive.org/details/waterbabiesfairy00kin...
All pages are scanned and can be downloaded in JPG format:
Crop the Image!
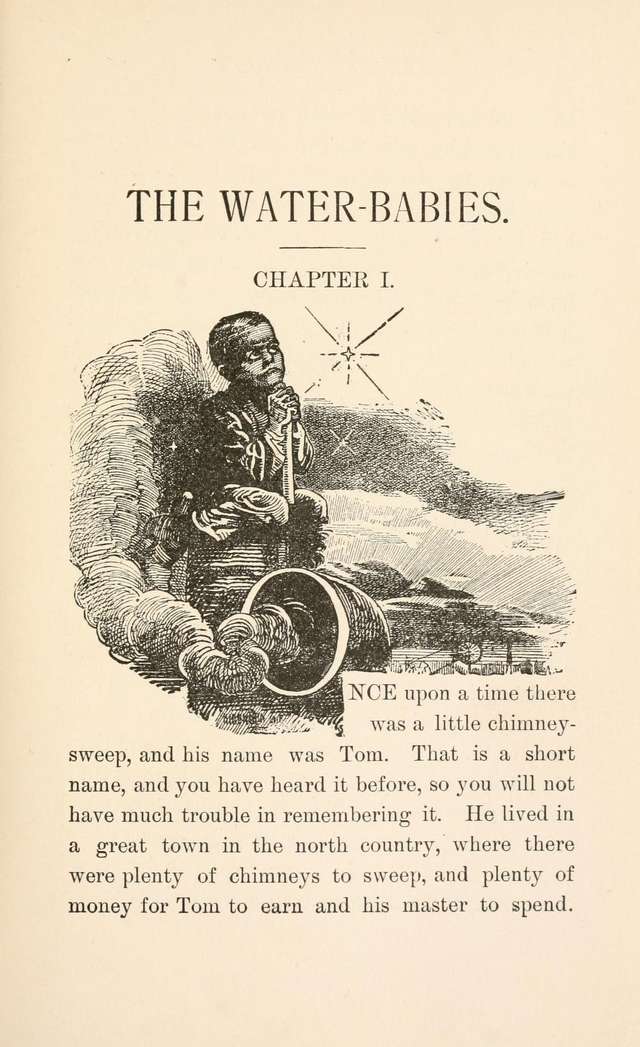
Identify a Problem
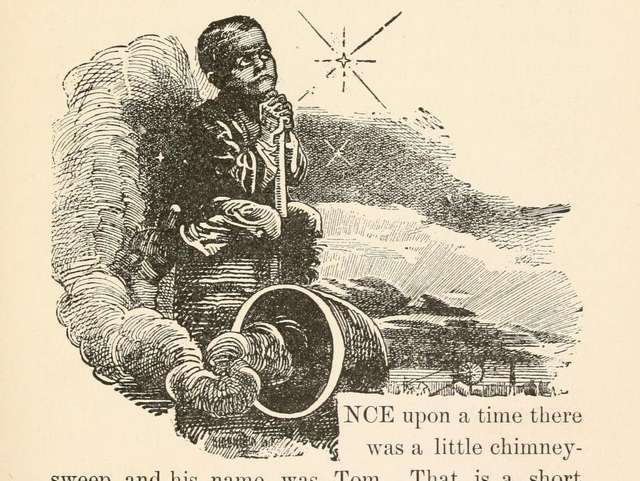
If we want to present only illustrations, we need to crop them out of text.
Graphics and Text Can't Be Easily Separated

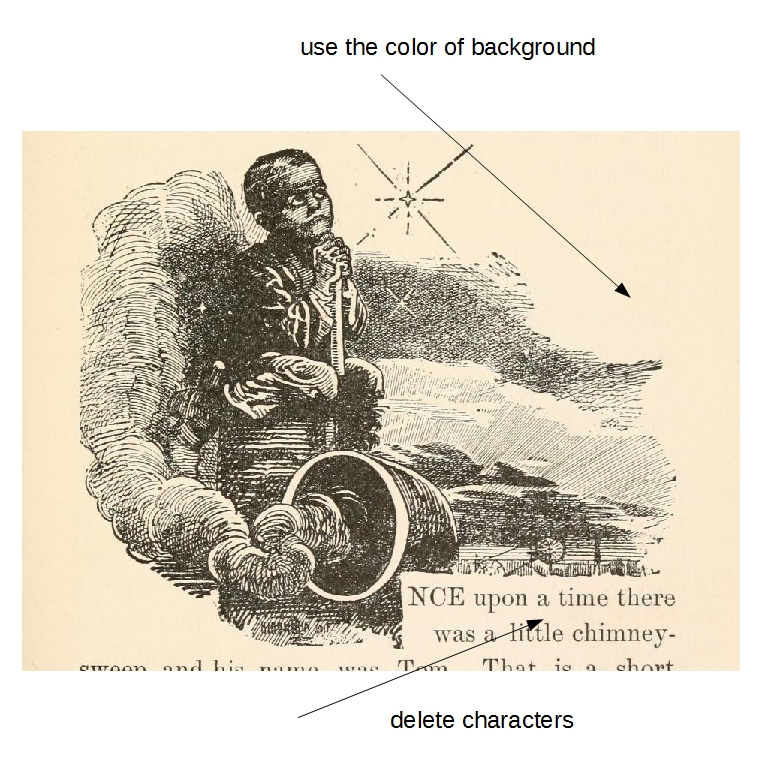
As we can see, we have a problem, because text and graphics can't be easily separated.
Can Color Picker by GIMP Help?
Of course excessive characters can be erased in several ways, but we would like to keep nice slightly brownish background of old paper. Our tool of the day - called Color Picker - enters!
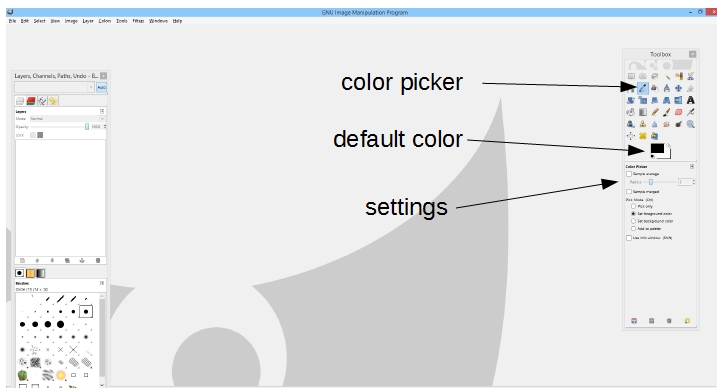
There are three arrows in the picture:
First is showing location of the Color Picker in Toolbox.
Second is showing a square with default color of color picker. When you start GIMP, this is always black.
Third is showing settings for this tool. You can play with numerous options. Hours of fun guaranteed, but we won't go into details.
Select Color
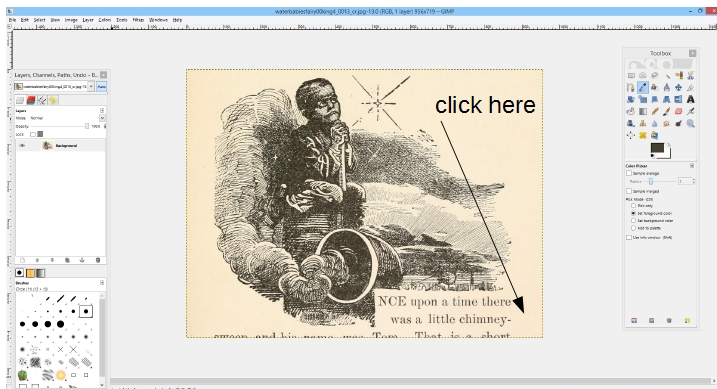
When a picture is loaded (main menu: File - Open) and Color Picker is selected, we just move with mouse pointer to the color we would like to use for covering text. It's best to pick a color as close to text as possible, because the shades of yellow in such scans may vary a lot from one corner to another and we don't want to have colorful stripes distracting attention of the viewer from the illustration.
Just click and it's done.
Check If Background Color Changed
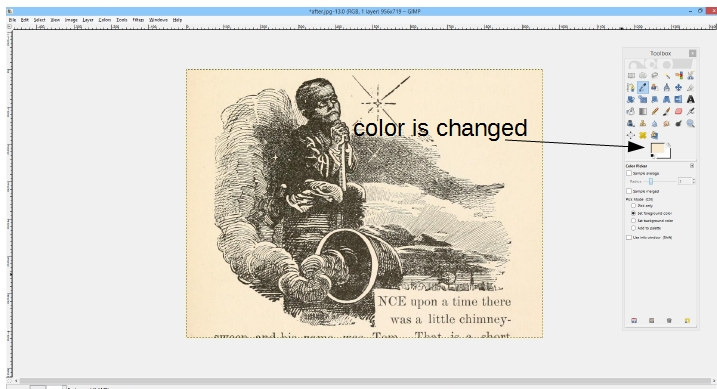
Did you notice a color in the square, displaying the 'picked color' changed?
Now we need to switch to another tool. Something to color with. While after picking the color several tools can be used, we'll use only one, probably the easiest and most intuitive of all. This is a Paintbrush.
Select Another Tool: Paintbrush
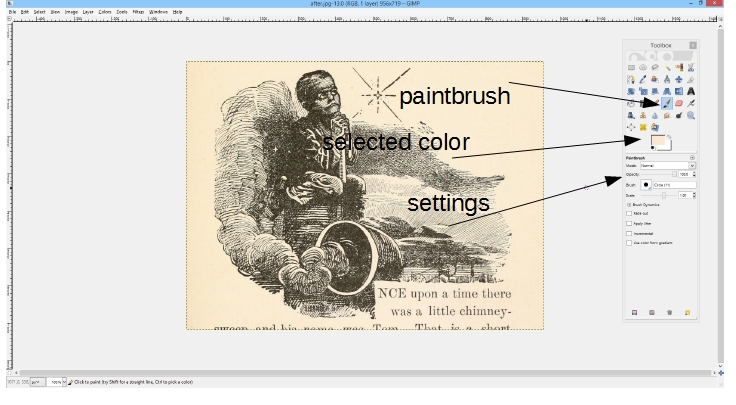
Again, we have three arrows:
First pointing to location of Paintbrush.
Second showing a square with the color, which Paintbrush will use. It was selected by a Color Picker.
Third is showing the settings for the tool. Another great option to spend hours experimenting, but this time we'll use one of possible choices to improve the paintbrush.
Resize Paintbrush
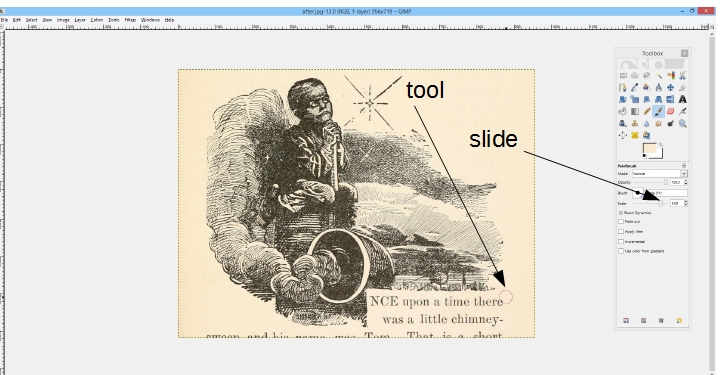
Default size of Paintbrush is not good enough for use, so we'll make it bigger with a handy slider. We can enhance it up to ten times. We can also reduce it, by the way.
Brush Over Characters
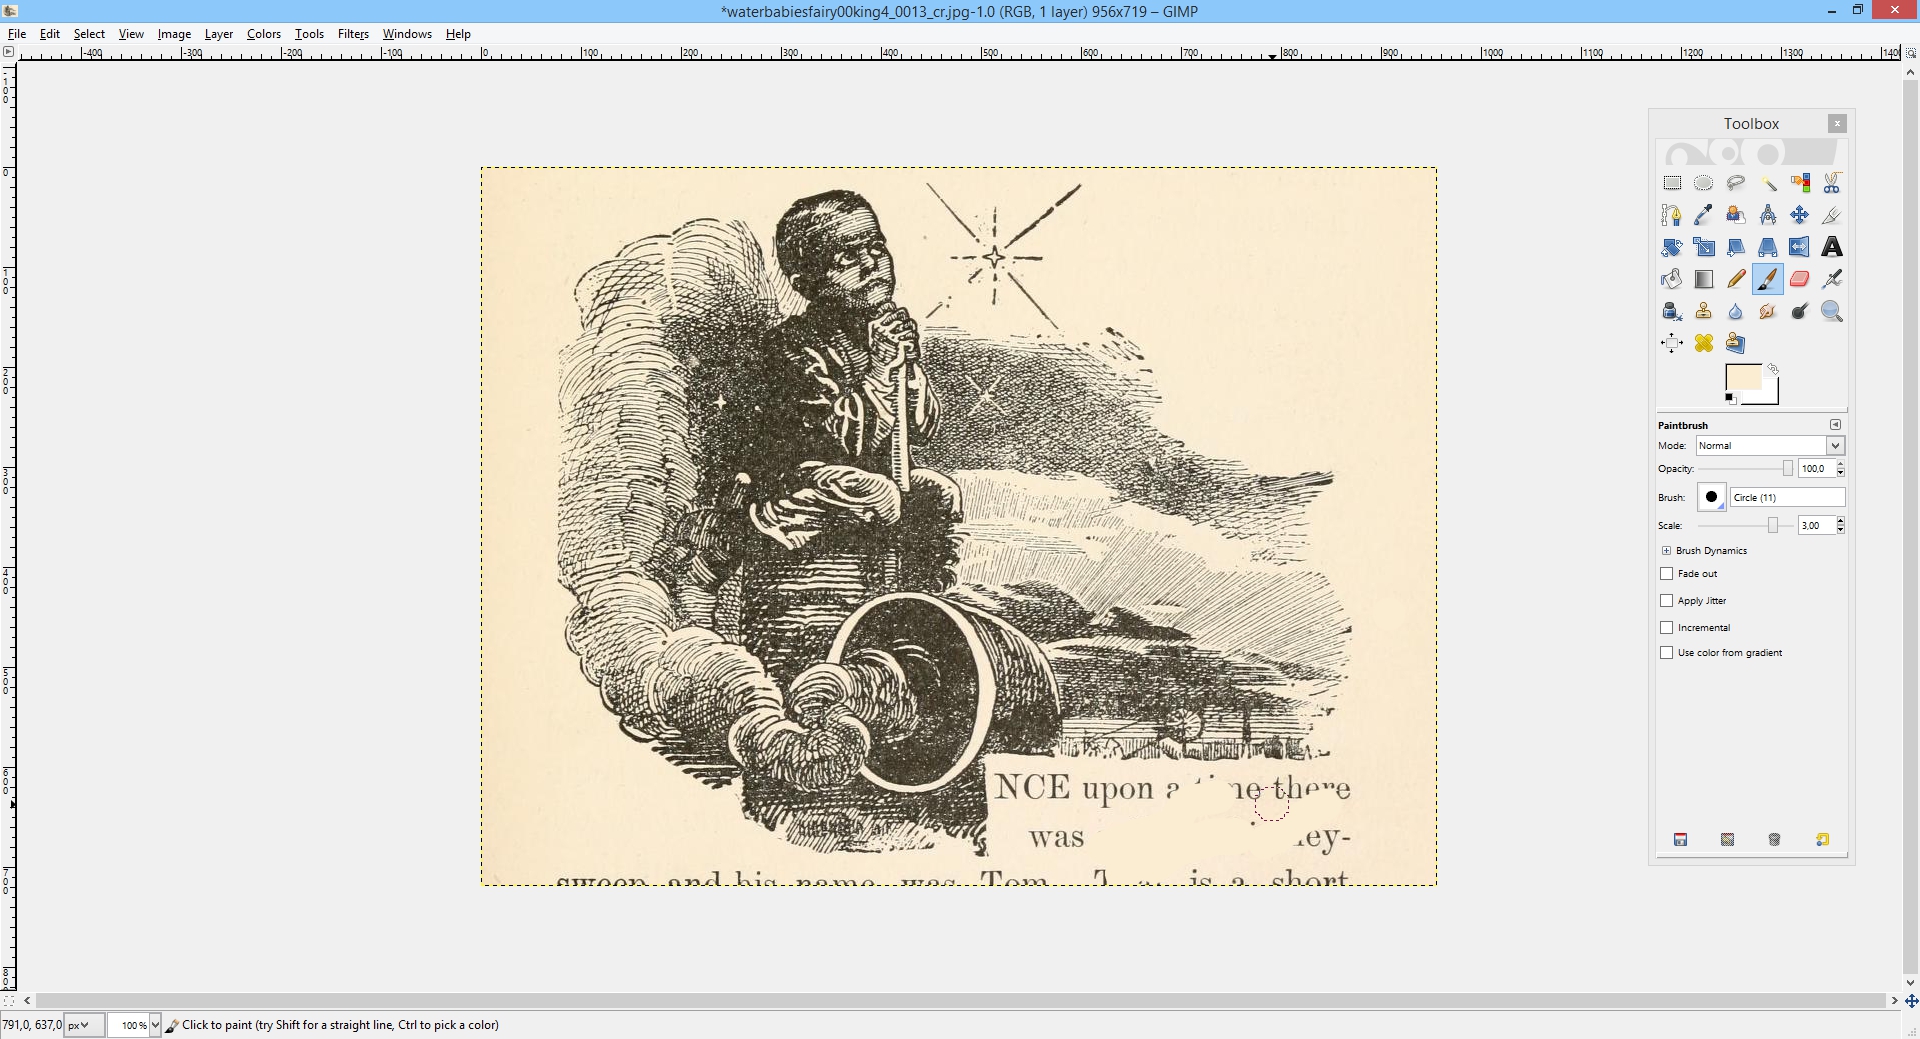
Here we can see Paintbrush in action, partly 'erasing text', what in reality means we covered it with color of the background.
Only few second after we are done!
Upload the Edited Image to Your Blog
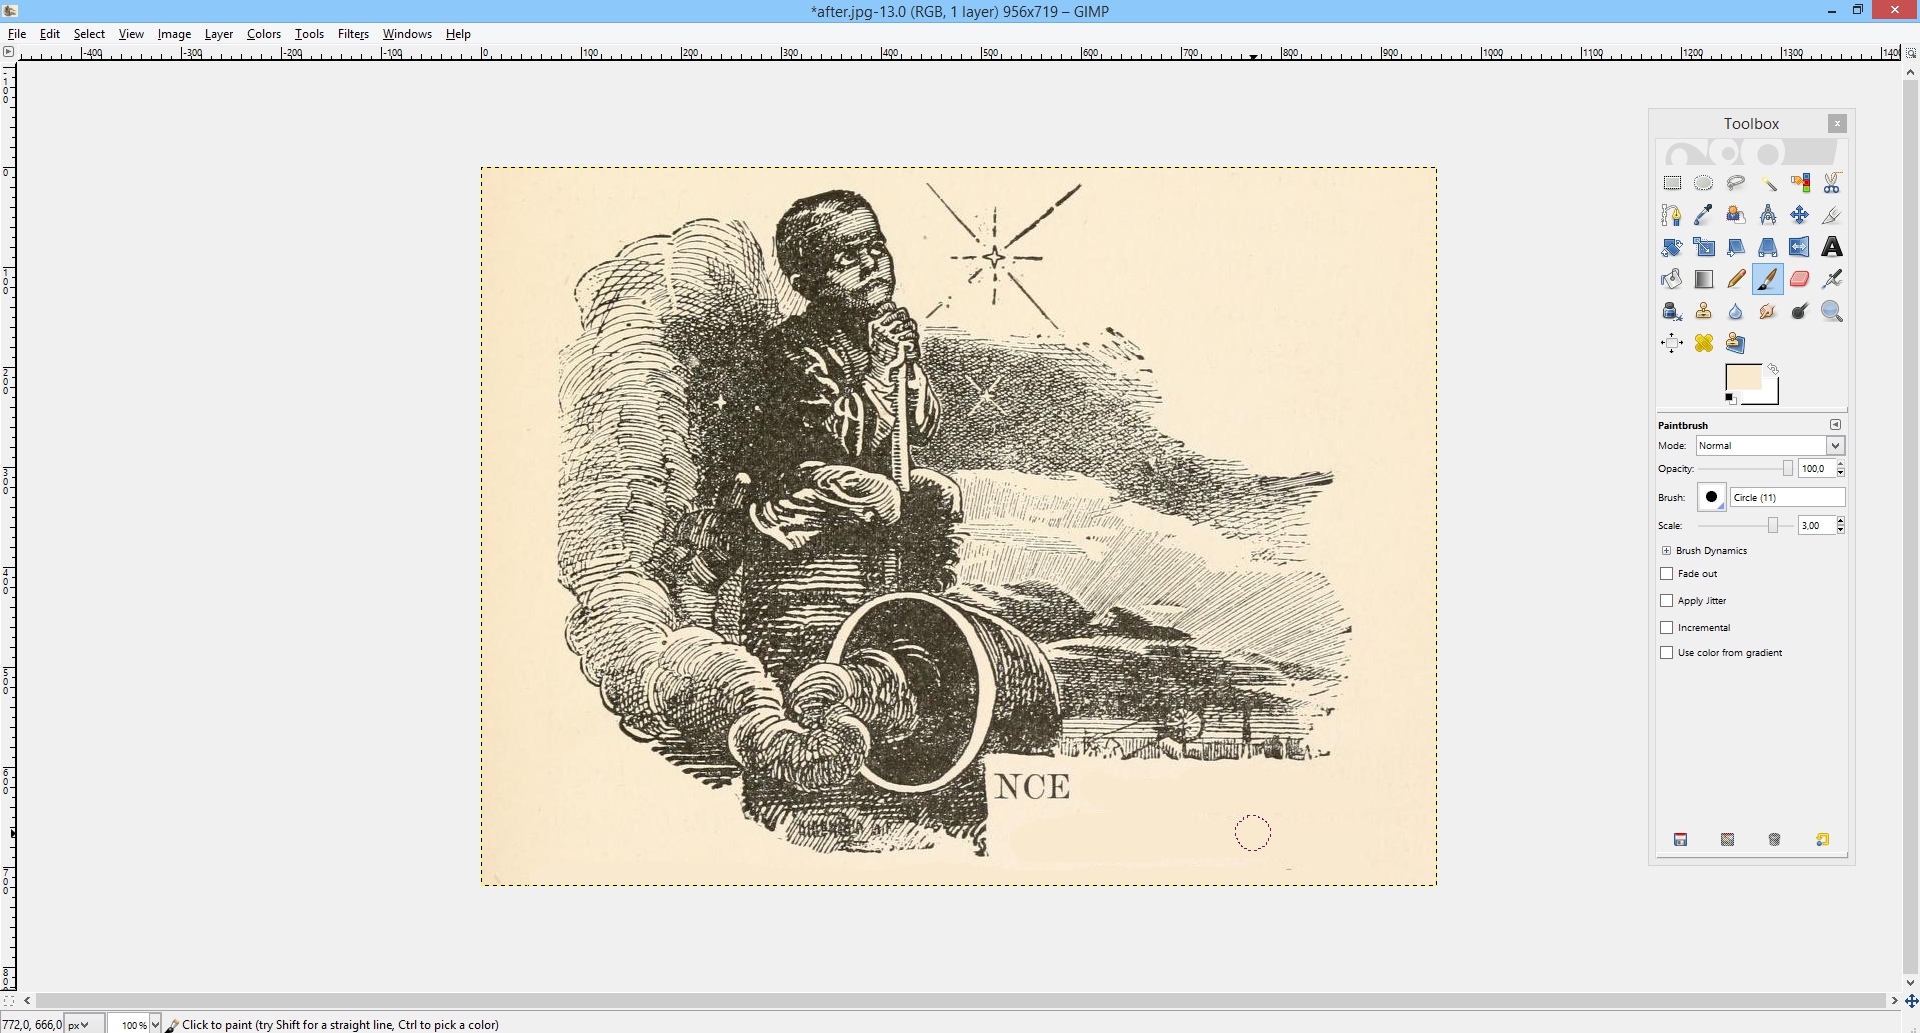
Now only few hundred similar pictures more and our post is done... You can check it here:
https://topillustrations.wordpress.com/2015/06/28...
GIMP can be downloaded here:
http://www.gimp.org/downloads/
I hope you find this instructable useful!