GIF Head Swap
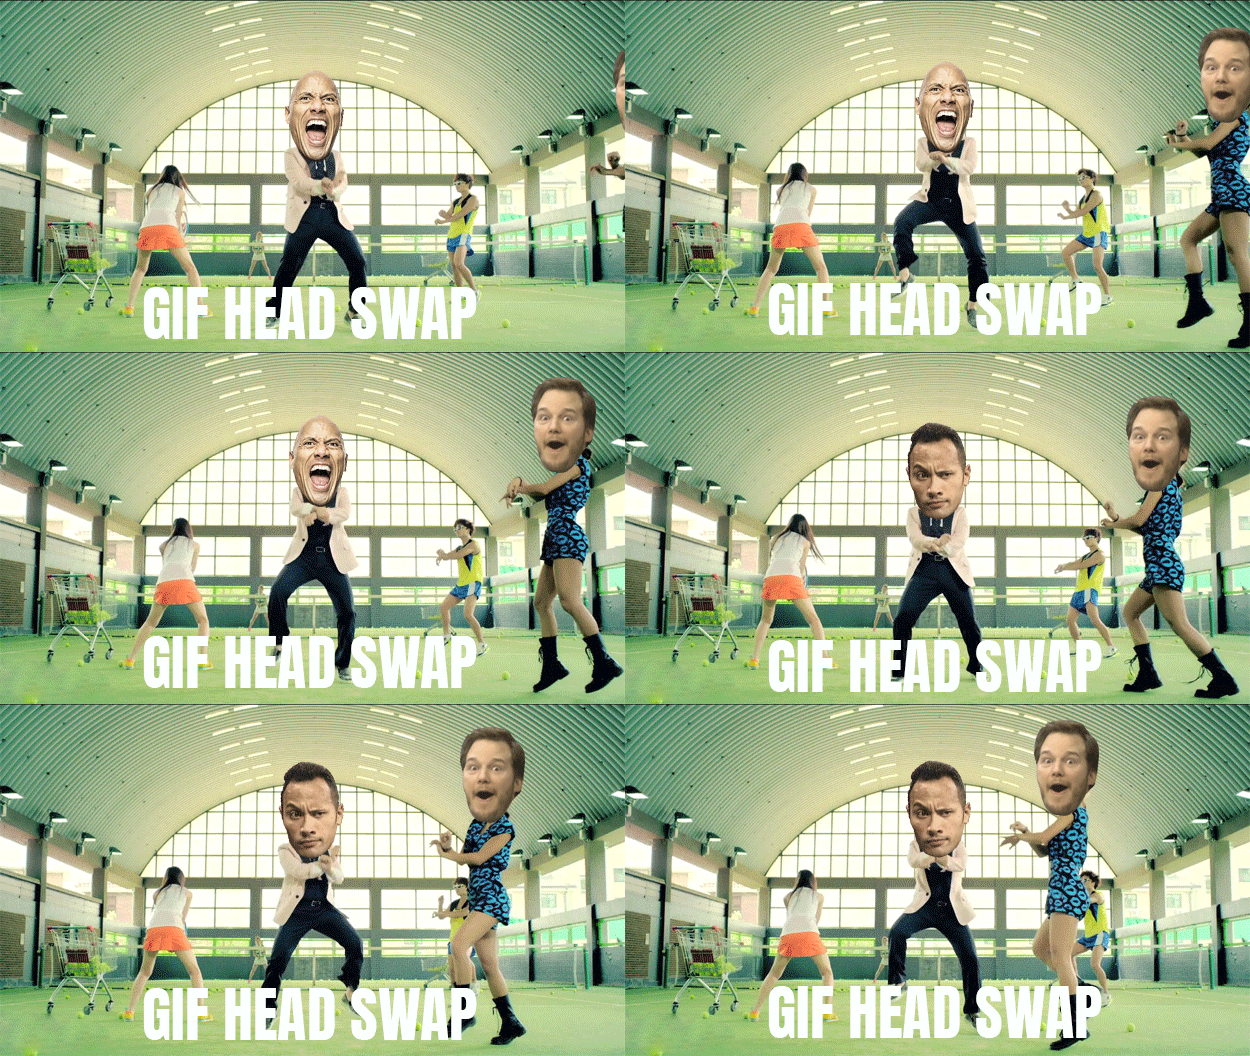
What better way to show people how to alter GIFs than with GIFs!?
In this Instructables I'm going to show you how to take your favorite GIFs and swap some hilarious heads onto them. In the example above, I've taken an Oppa Gangnum Style GIF and replaced the heads with Dwayne "The Rock" Johnson and Chris Pratt. Because the faces don't change size or get covered by anything, swapping heads is extremely easy in this GIF. We'll briefly cover how to do more complicated head replacements further below.
For people who already know how to make GIFs and understand their mechanics in Photoshop, this Instructables is going to be a breeze. For the rest of you this is going to be a bit trickier to understand at first, but once you can wrap your head around it you will be pros in no time! In this Instructables I don't spend too much time explaining how GIFs work, as the goal of this tutorial is to show you how to alter them and not create them, so if you find yourself scratching your head here are some excellent resources to get some base knowledge:
https://helpx.adobe.com/photoshop/how-to/make-anim...
Materials

Photoshop, which you can get a free trial of from Adobes website. Alternatively, you can use Gimp although I have not personally tried it.
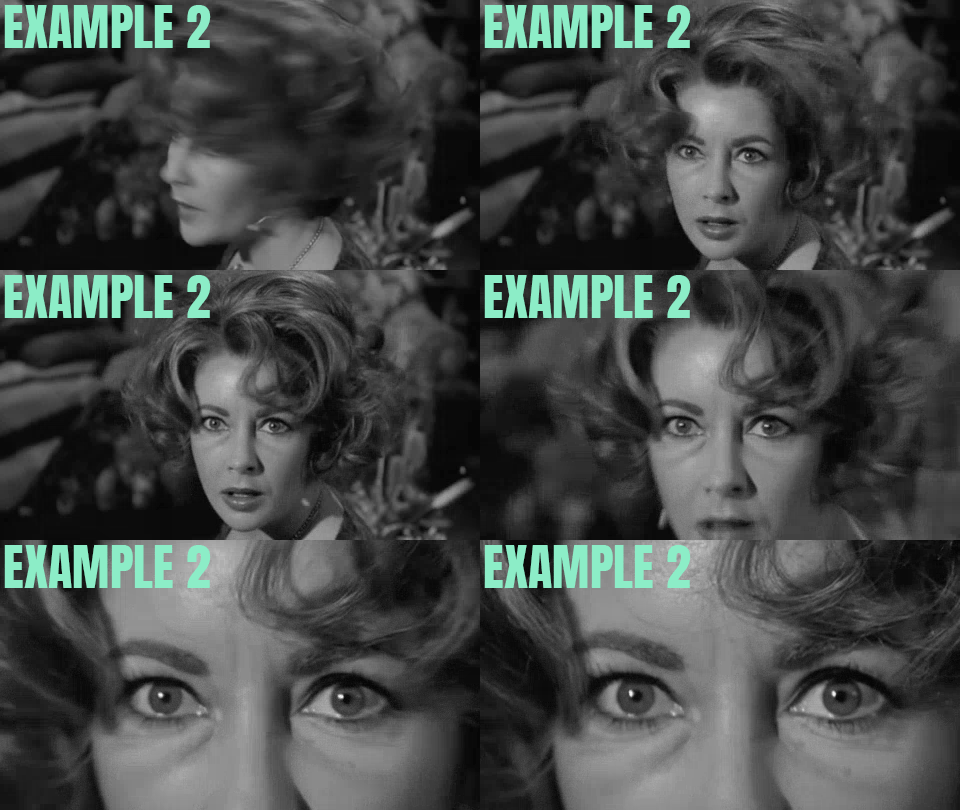
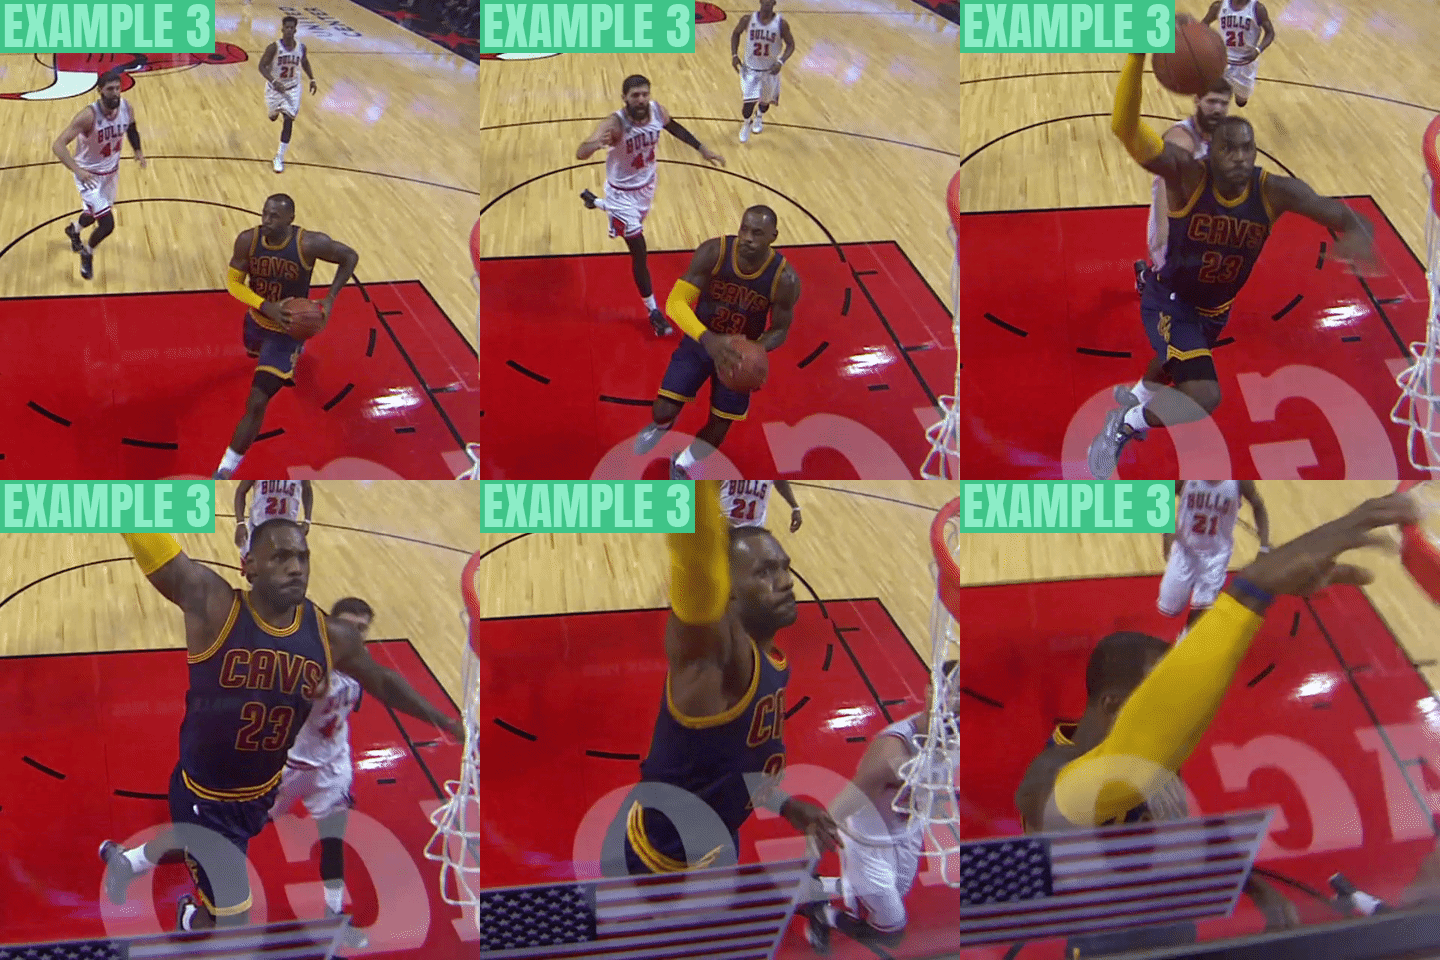
GIFs. The GIF you choose should depend on the amount of work you want to do. There are many websites, such as Giphy, which are dedicated to GIFs but I prefer to simply search for my GIFs in google images. Below I've described GIFs that I've created from easiest to hardest to work with. Above are the corresponding GIFs for each example.
Example 1. The face in this GIF never changes size or orientation and is never covered up by anything. This is the easiest because you will only need one picture per face and you will only be translating it around.
Example 2. The face in this GIF changes size and/or orientation, but is never covered up. This is harder because as the face size increases or decrease you will need new copies of the picture to match the size (I'll briefly explain this in 4th step).
Example 3. The face in this GIF changes size and/orientation and is covered up at certain points. This is hardest because not only do you need new pictures as the face size changes, but you will have to edit the pictures that are covered up so that the don't block what's behind them (I will also briefly explain this in the 4th step).
Pictures. When choosing pictures make sure that they are taken from the correct perspective. For example, if you have a GIF seen from a top angle, you will want a picture to match that angle. The best pictures are expressive and well lit.
Extracting the Face
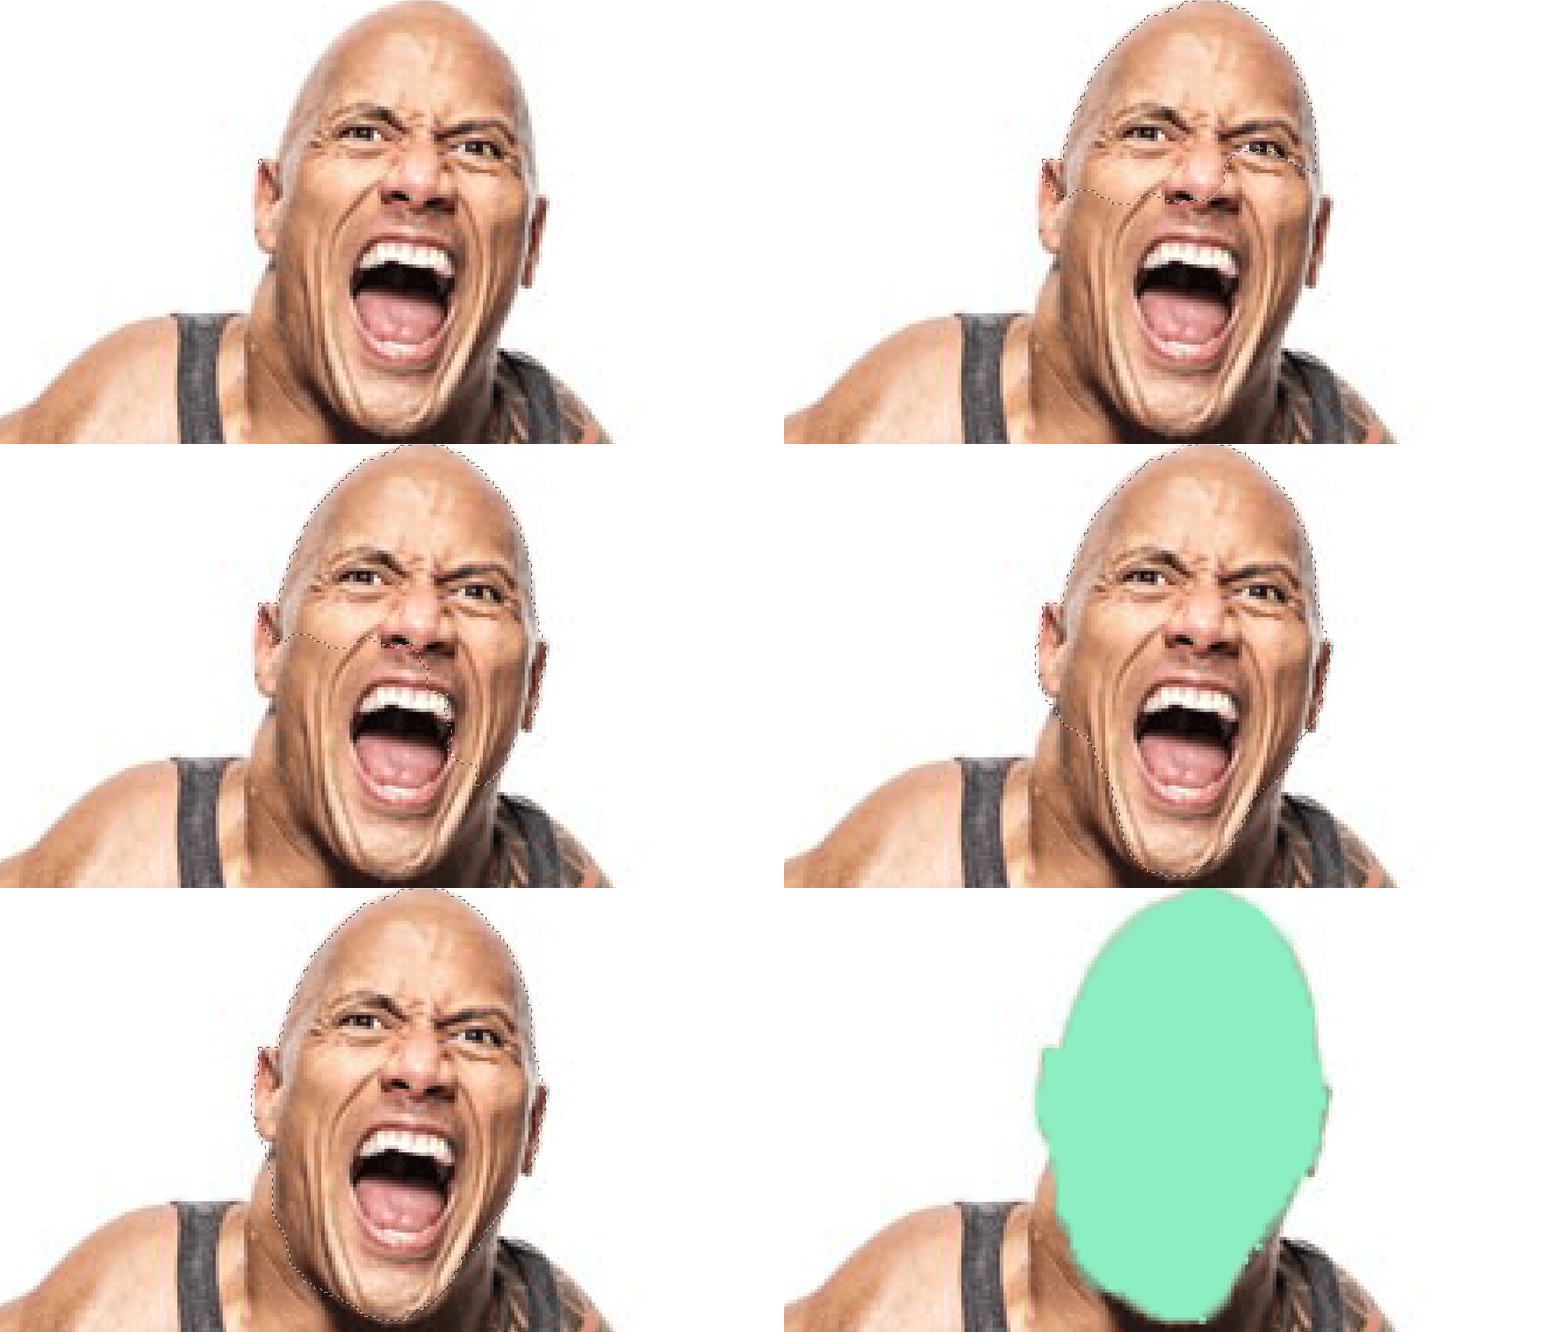
To get just the face you want to use, open up your picture in Photoshop. Using the quick select tool click (W) and drag on the face. This will create a selection around the desired face. If a message appears saying that you can't use quick select because your image isn't in RGB mode then go to Image -> Mode -> RGB. If you accidentally selected more than you wanted, you can hold Alt (this will make the quick select negative) and click and drag on the areas you don't want to include. When you are satisfied copy this selection (Cmd/Ctrl + C).
Adjusting and Translating the Face
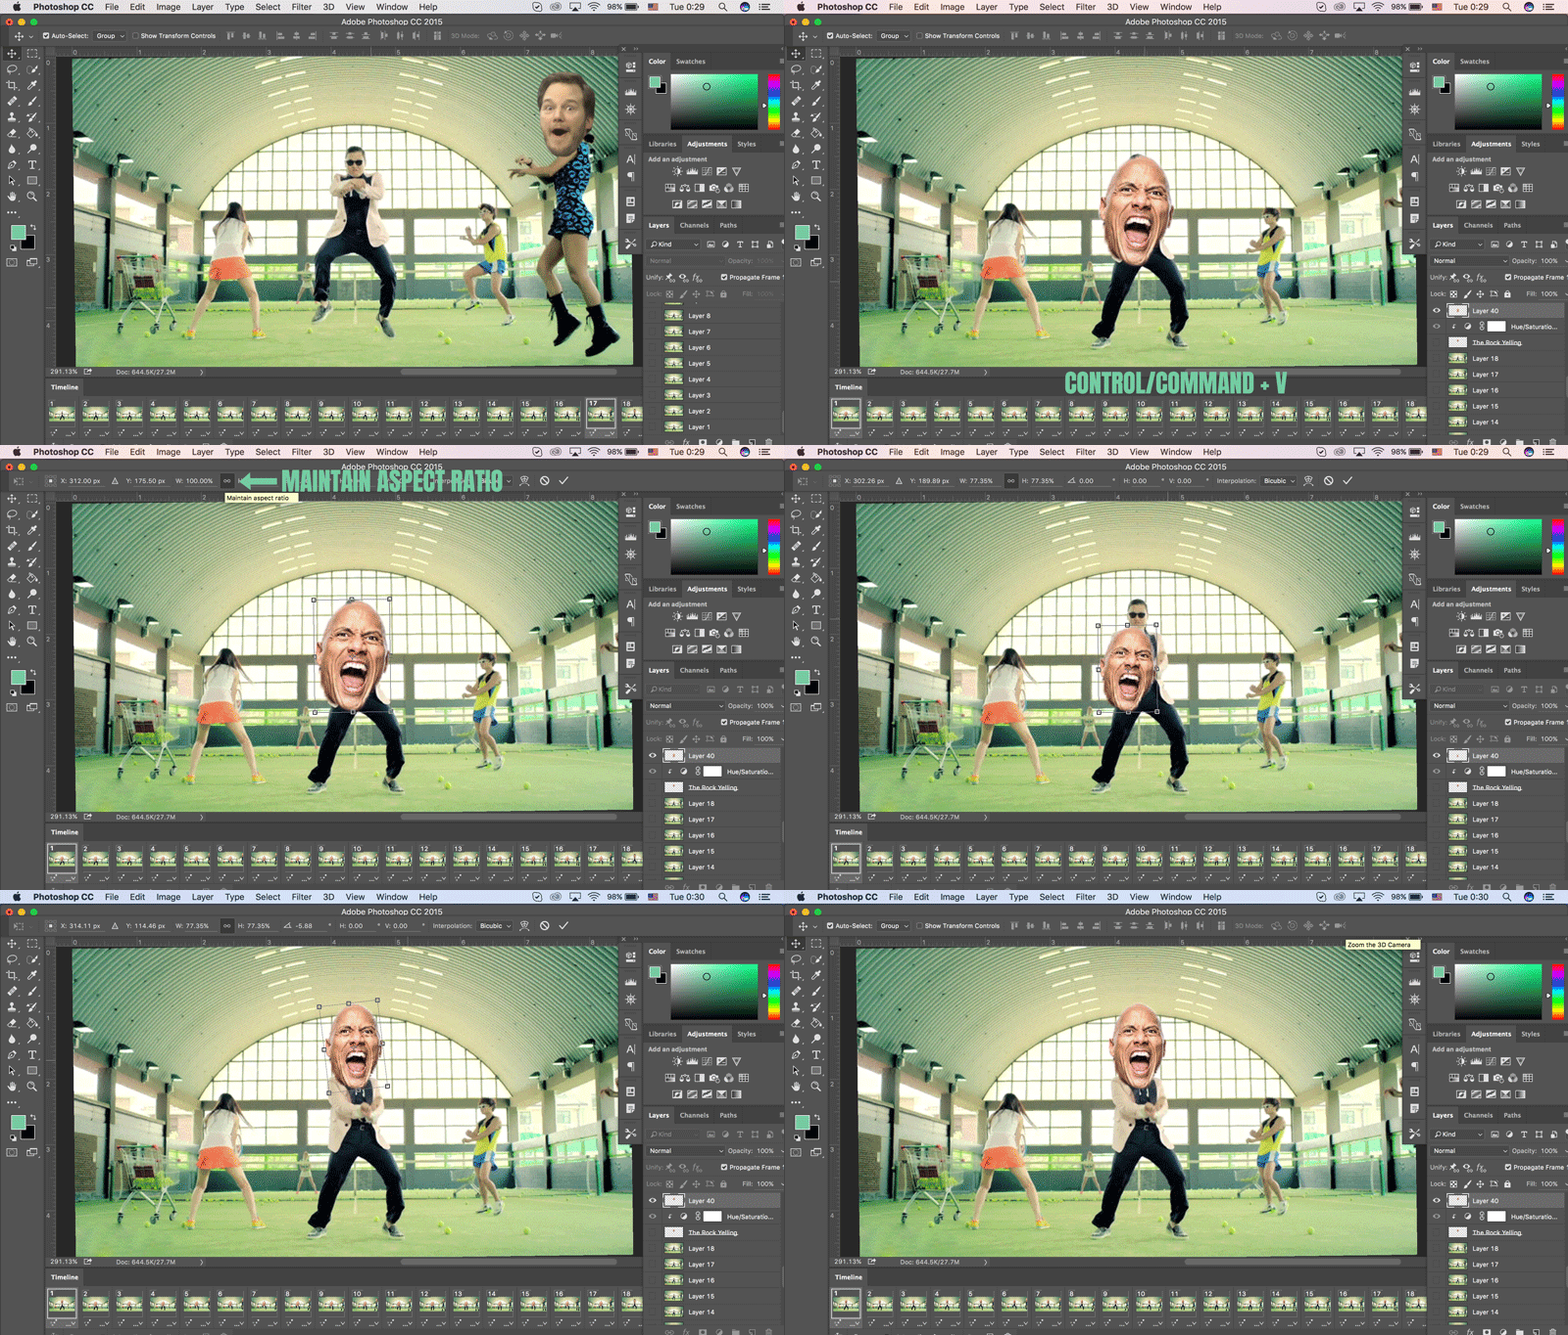
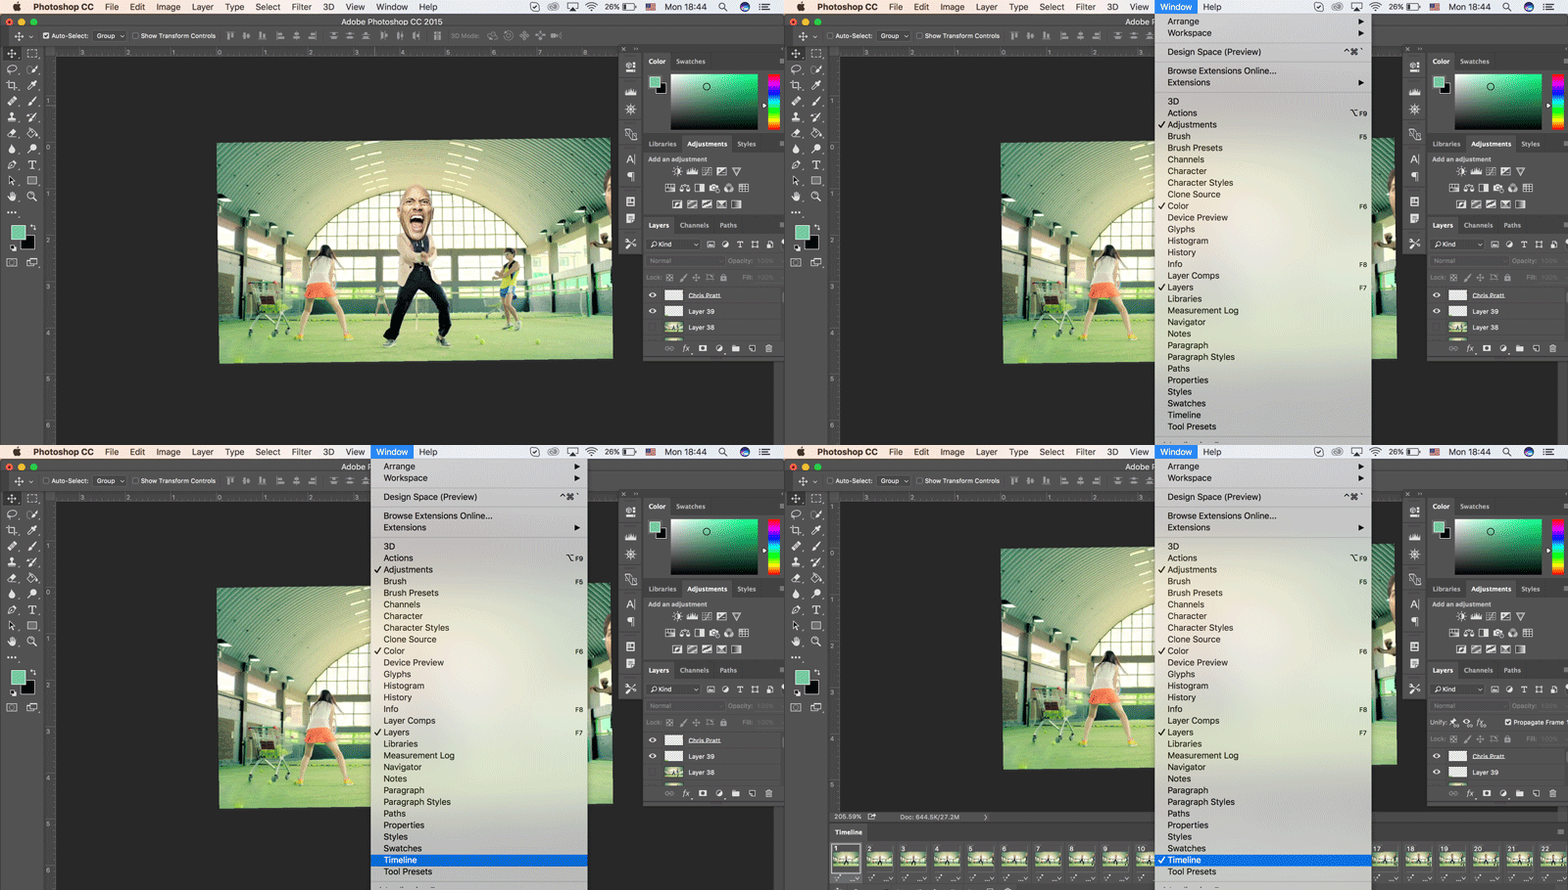
Now open up your GIF in Photoshop. Before we get started I want to familiarize you with the layout. On the right you should have your Layers Display which will show you all the GIF layers and any additional layers, faces, and text you add. On the bottom you should have the Timeline Display, which only shows you the frames of the GIF and gives you the option to play the GIF. Just so you know, when you play your GIF in Photoshop it will be a lot slower than the final product, so don't worry. If you are missing the Timeline Display go to Window -> Timeline. Each frame in Timeline has a corresponding visible layer in Layers Display.
Ok now select the first frame in Timeline and paste the face from the previous step (Cmd/Ctrl + V). This should create a new layer in the Layers Display. You want to make sure this layer is above all the other frames in the Layers Display; it will only appear on the frames on which it is above. Now click (Cmd/Ctrl + T) to change the size and rotation of your photo. When changing the size make sure you click the "Maintain Aspect Ratio" box at the top to keep your photo in the right proportion.
When making changes to the size and rotation of the face, it doesn't matter what frame in the Timeline you are on, because the changes will affect all the faces in all the frames. However, when translating the face, the frame you are on absolutely matters. Always start with the first frame because any translation on the first frame will affect all other frames but not vice versa. For example, if you translated the face on every other frame and then went to the first frame and moved it, the faces on all the other frames would be offset by the amount you moved the face in the first frame. To get a better idea of what I mean, move the face on the second frame, then move it on the first frame, and go back to the second frame to see how it affected it. To recap: changes in size and rotation of the head can be made on any frame and will affect the size and rotation of the head in all other frames. However, translation of the head in the first frame will translate the head in all other frames, but translation in all other frames will not translate the head in any other frames.
Once you have correctly adjusted your photo on the first frame, then move on to all the other frames and translate the head accordingly. To help with translation it can be helpful to open up a grid by going to View -> Show -> Grid. Changes in translation are automatically saved so you just need to keep going through each frame and adjust them to your satisfaction. It may help to lower the opacity of the frames you are translating so that you can see the original head behind frame. If you do lower the opacity make sure that you lower it on the first frame so that it affects all frames.
PRO TIP: Lower the opacity of your huge head's frame and place the huge head's nostrils over the eyes of the head you are replacing. Because it is larger they should align pretty well and will provide an excellent method to keep the movement of your huge head smooth. You can do this even if the huge head seems too low or too high on the body because afterwards you can just go to the first frame and raise/lower the head to your liken (which will will affect the head in all other frames as well).
Special Circumstances

Like I said I will briefly cover more complicated examples. I'm leaving on a flight the night I post this Instructables so I hope to go more in depth on this part of the process when I return home.
Switching between Heads:
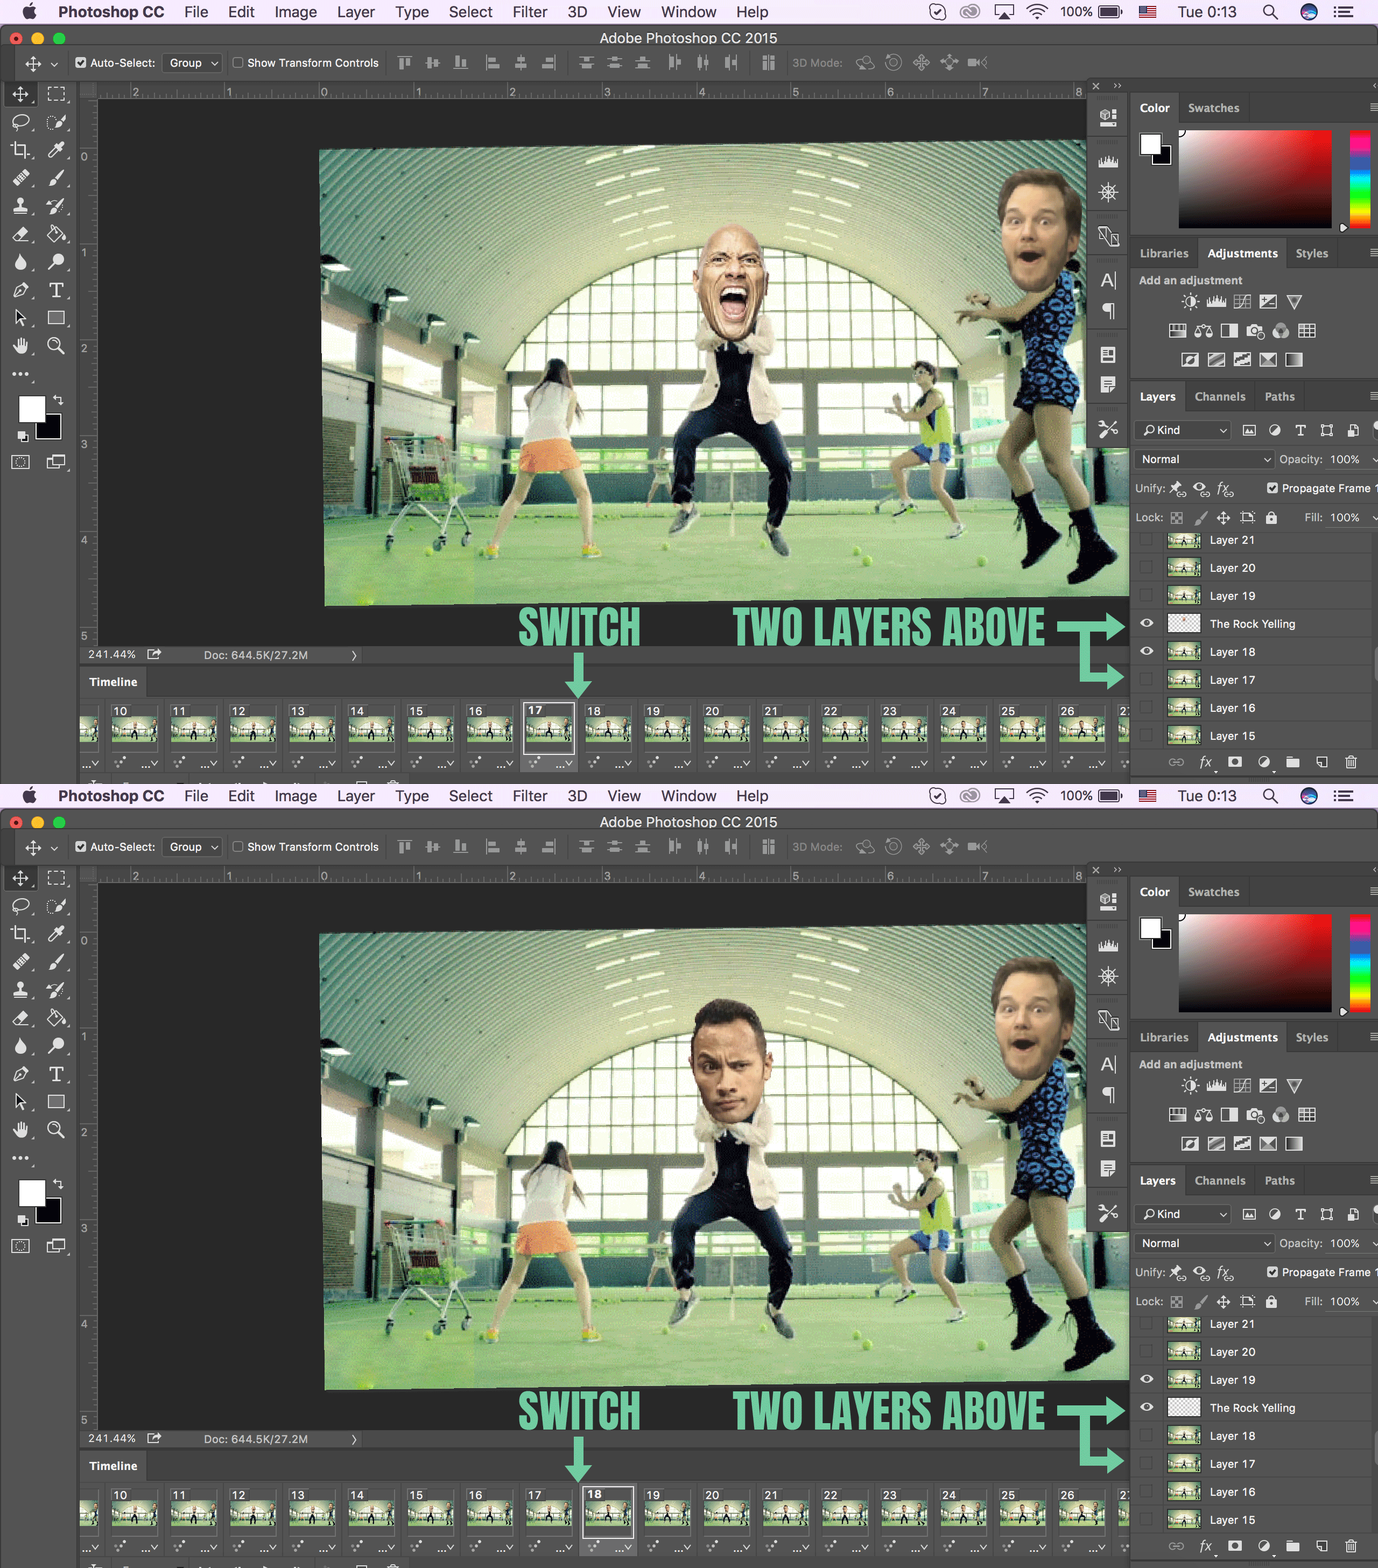
In my GIF of The Rock I used two different faces. For this circumstance you will paste both heads on the first frame of timeline. From here you can go to Layers Display and drag the first head layer two layers above the last layer you want it to disappear. I know this is confusing so for example, The Rock changes heads after frame 17. So I took the first head layer of The Rock and dragged it above Layer 18 of the GIF in the Layers Display. If you only drag it above layer 17 it will disappear BEFORE frame 17, not after.
You will then want to hide the second head until the switch so you can either A.) go through each frame on Timeline before the switch and click the eye icon in Layers Display to hide it or B.) drag the head offscreen on the first frame of Timeline and then move all the layers onscreen in the subsequent frames following the switch. I personally used method B for the switch although I would not recommend this. I recommend you use method A for switching heads and save method B for heads that start offscreen and move on screen (for example Chris Pratt).
Heads Changing Sizes and Covered Faces:
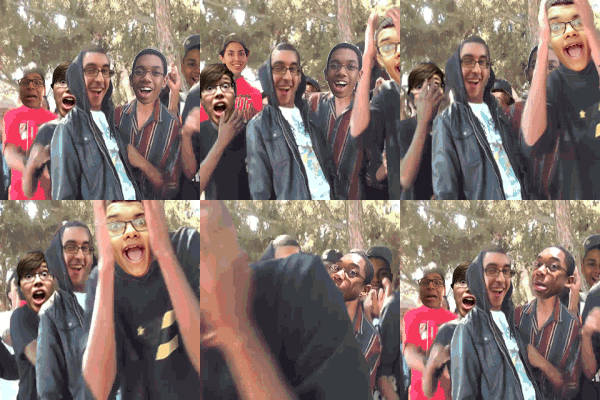
This example is seen in the last GIF above which I took and replaced with the faces of my friends (Look at the guy who runs across the screen increasing in size and putting his hands over his face). For this circumstance you will have to create a brand new layer of the head every time it is covered or increases in size. Usually we would only copy our head selection onto the first frame of Timeline but now we have to copy it onto each frame there is a change. After copying the head you must change the size and/or erase any part of the head that is to be covered. To make erasing easier, lower the opacity of the head so that you can see below. For example, if I have a hand covering my face I would lower the opacity of the head, erase where the hand is below, turn the opacity back up, and voila it looks like the hand is now covering the head.
Saving and Exporting
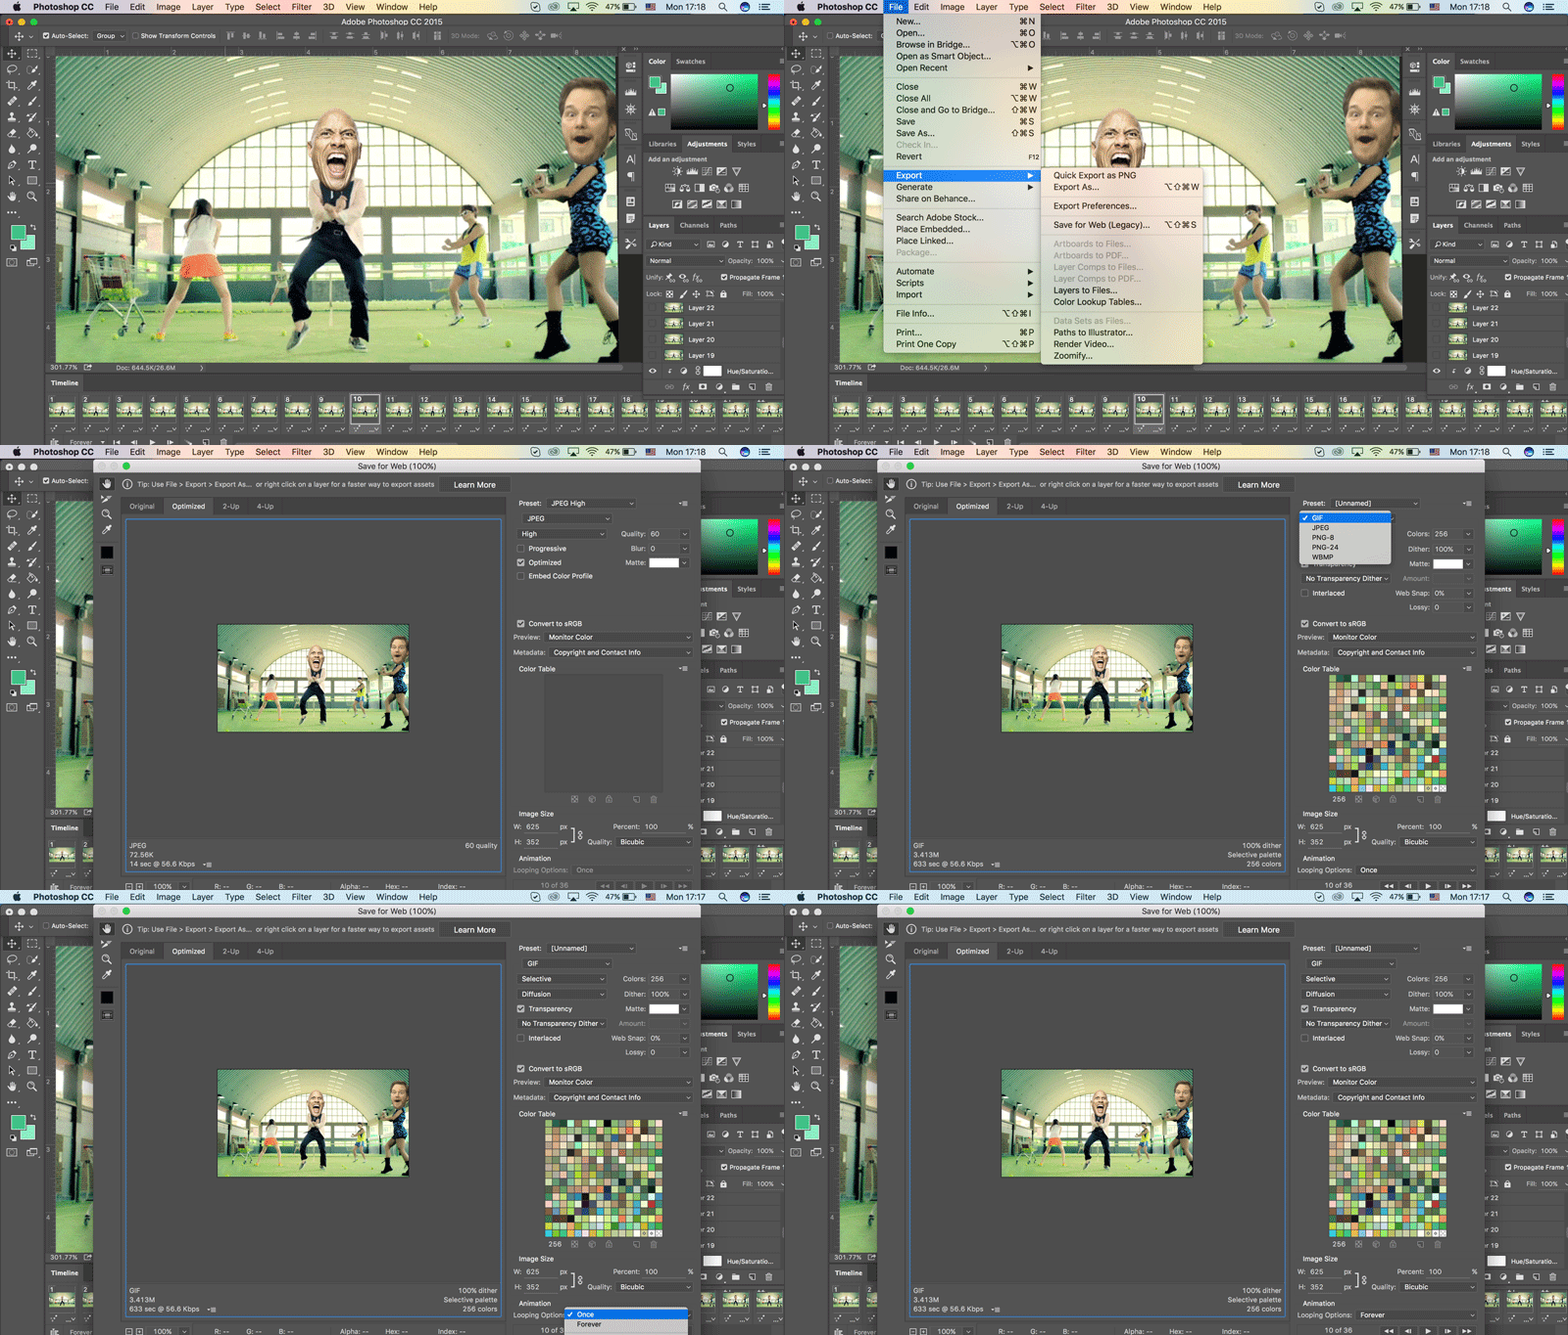
Bravo! You've done the hardest part! Now we save our work one last time and export our image!
Go to File -> Export -> Save for Web (Legacy) or press Shift + Option/Alt + Command + S
Select GIF and under looping options select Forever. Click save, name your GIF, and select a destination.
Congrats you just successfully altered your first GIF! To enjoy your work find the file, right click, select "open with" and select a web browser (I use Chrome). This will option a web page with your GIF playing forever :)
If you have any questions please comment below and I'll answer your questions to the best of my ability!