MIDI Drum Machine Costume


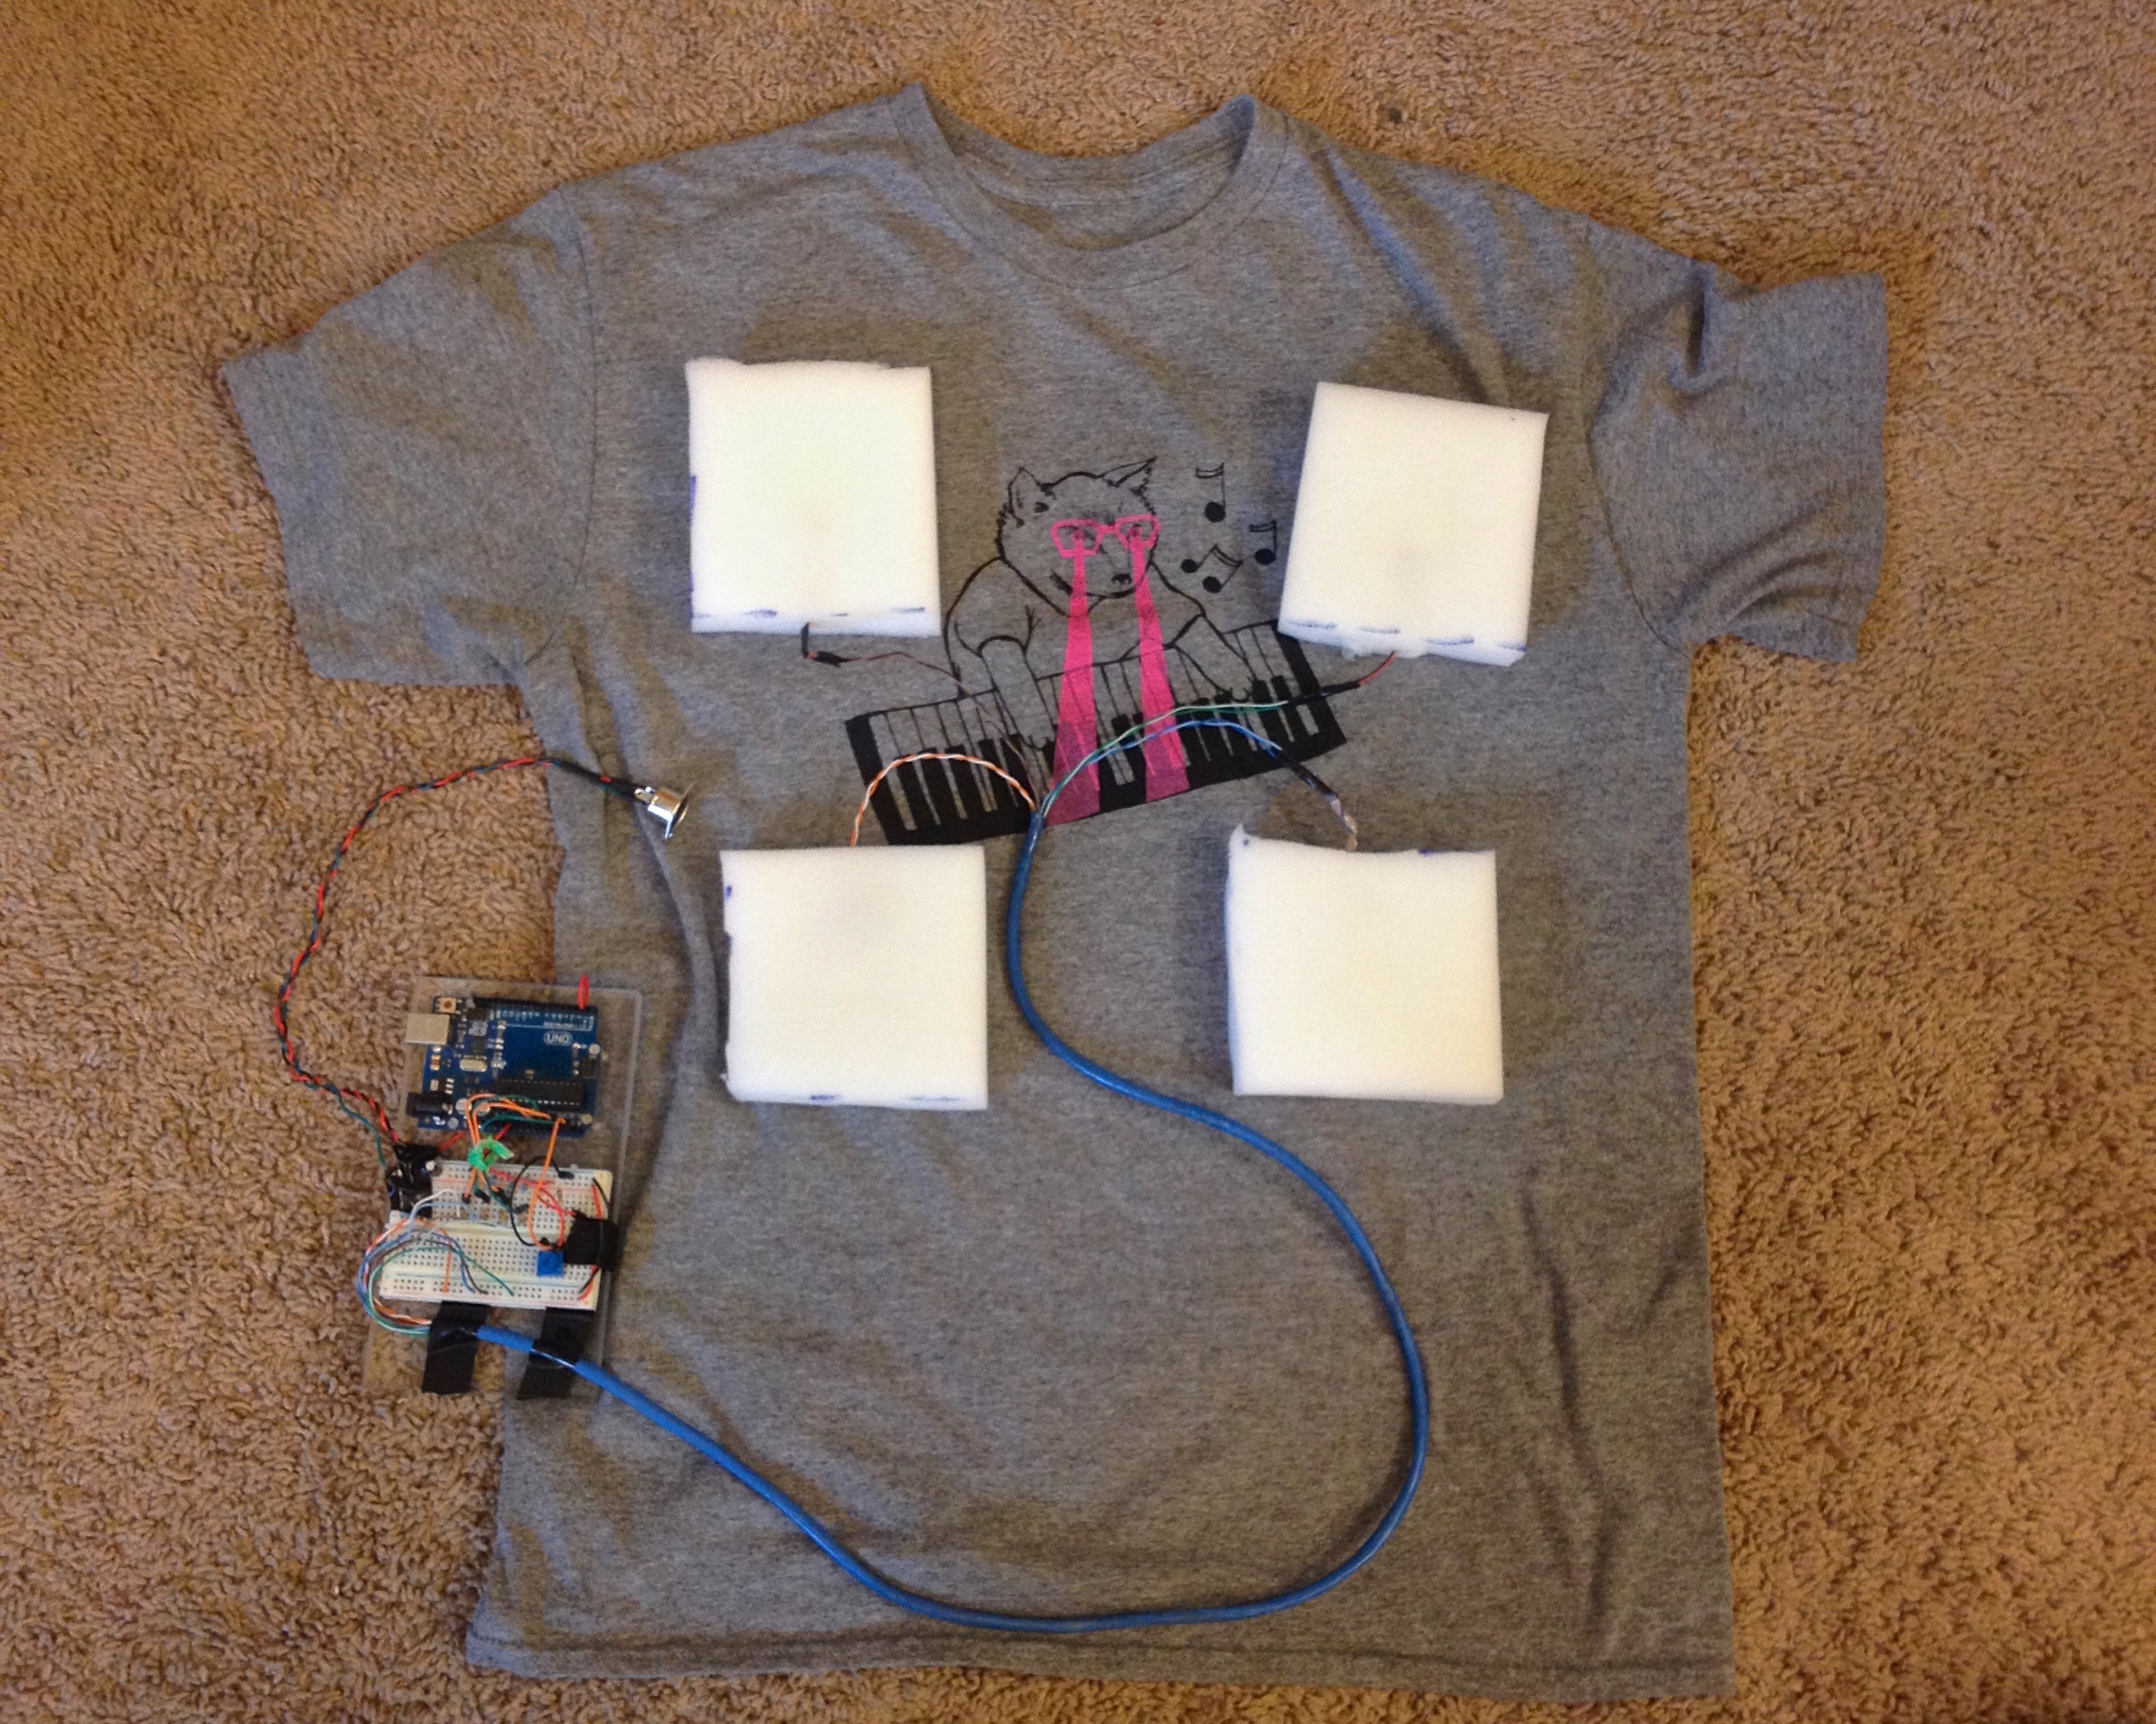
Here's the plan: build a functional, Arduino-powered, MIDI-enabled, interactive drum machine costume in 48 hours. Easy, right? Actually, it's not too bad!
After giving up on building a functional Flux capacitor for Halloween, the idea of a drum machine costume came to me out of the blue. I had played around with both Arduino and MIDI in the past, but had never combined them into a single project. When broken down into its individual components, the project really isn't too complicated.
After searching Instructables for a bit, I came across a very well-written tutorial from amandaghassaei that made the process of producing MIDI on Arduino much more manageable. I suggest you check it out! I also found a helpful online lab from NYU that described working with MIDI and Arduino.
Here we go!
Project Overview and Parts List
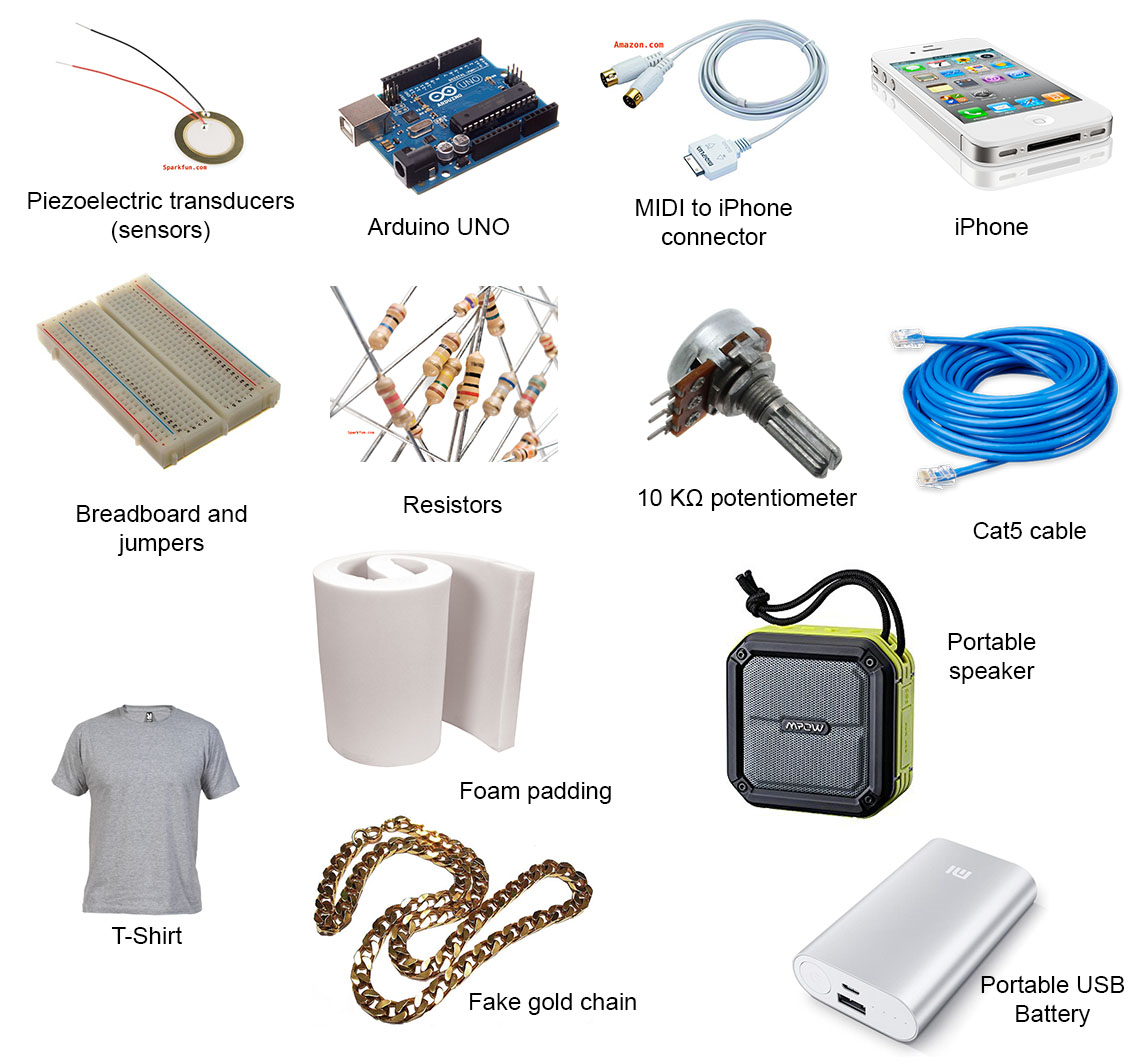
The main components of the system are shown in the picture above.
Devices
- Arduino Uno (Amazon)
- iPhone (Or any sort of iOS device. iOS is actually super friendly with MIDI)
- Bluetooth speaker (Amazon)
- Portable USB battery (Amazon)
- You should also be able to power the Arduino off of a 9V or a few AA's in series, but I found powering the Arduino over USB with a backup battery to be the easiest method.
Electronics
- (4x) piezoelectric sensors (Amazon)
- (1x) female MIDI jack (Amazon)
- (1x) MIDI to iPhone adapter cable (Amazon)
- I have an old iPhone so I had to get a 30-pin cable. The equivalent lightning connector is probably out there somewhere.
- A few resistors (Amazon)
- (4x) 1 MΩ, (4x) 10 KΩ, (1x) 220 Ω
- (1x) Breadboard and jumper cables (Amazon)
- (1x) 10 KΩ linear potentiometer
- (1x) Cat5 or 6 cable
Costume
- T-Shirt
- I recommend using a shirt one size larger than you normally wear.
- 1/2" thick foam padding (Got mine from Hobby Lobby for cheap)
- Fake gold chain (Also cheap from Hobby Lobby)
Tools
- Soldering iron and solder
- Glue gun
- Heat shrink tubing
- Electrical tape
Connect Sensors to Arduino
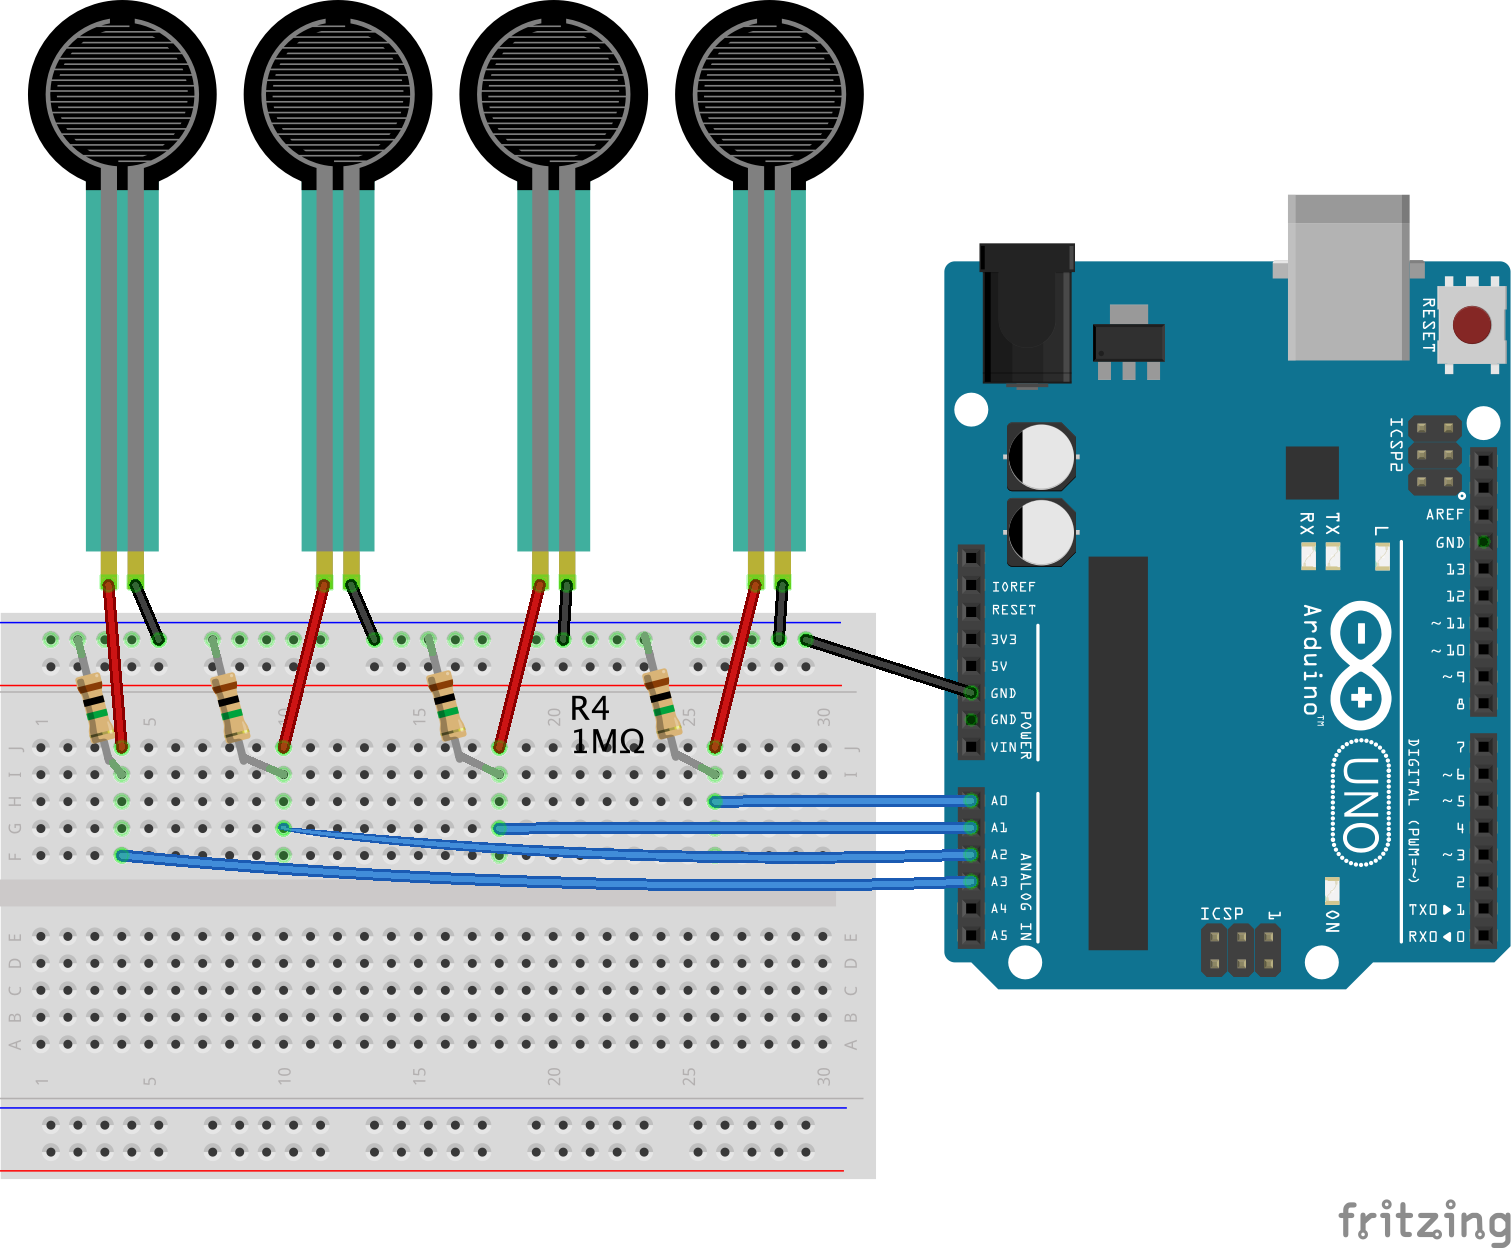
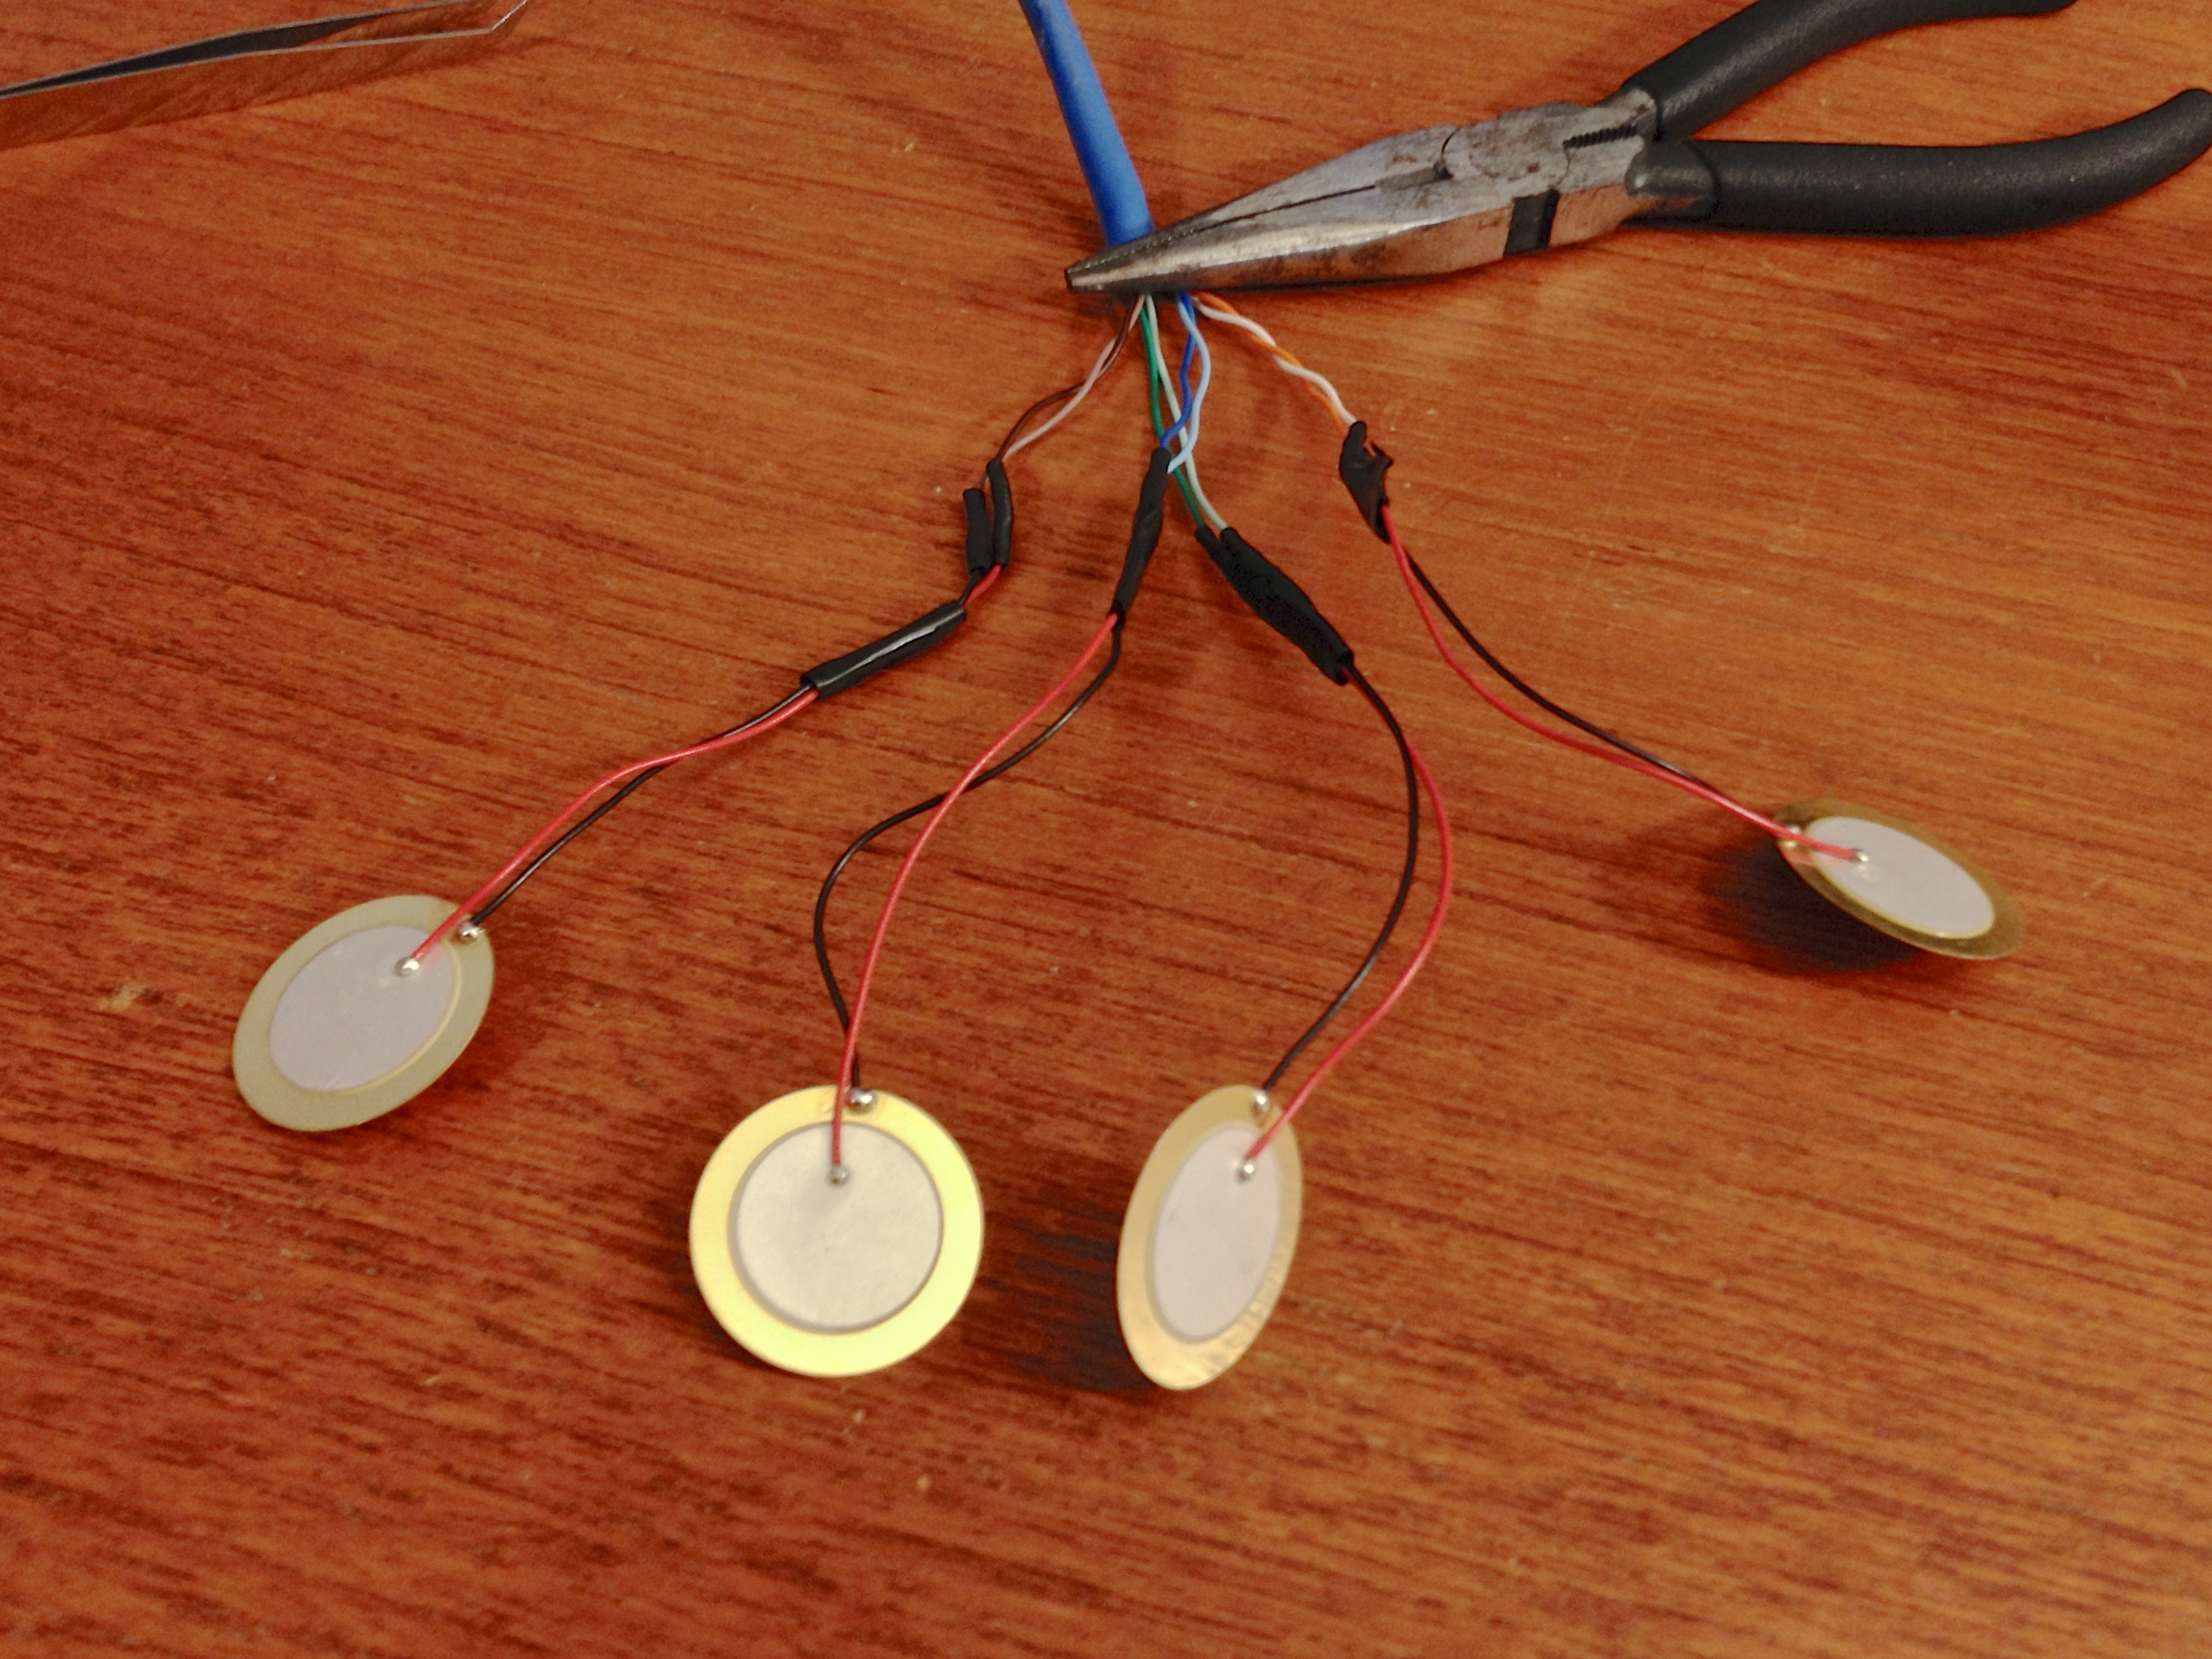
We'll begin by building a small circuit that allows us to detect when the piezoelectric sensors are tapped. Because our final product is a wearable costume, we need to connect the sensors with plenty of length. Cutting up a Cat5 cable is a convenient way to add multiple long wires to a circuit.
Here are the steps:
- Cut off at least 3 ft of the Cat5 cable, stripping the ends of each wire on either side
- The cable needs to be long enough to connect from the sensors to your Arduino, all within the costume. So make sure its long enough! You can always cut it shorter.
- As shown in picture above, solder the 4 piezoelectric sensors to the 4 pairs of twisted wires from the Cat cable.
- Add heat shrink tubing if desired. And I mean, who doesn't desire more heat shrink tubing in their life?
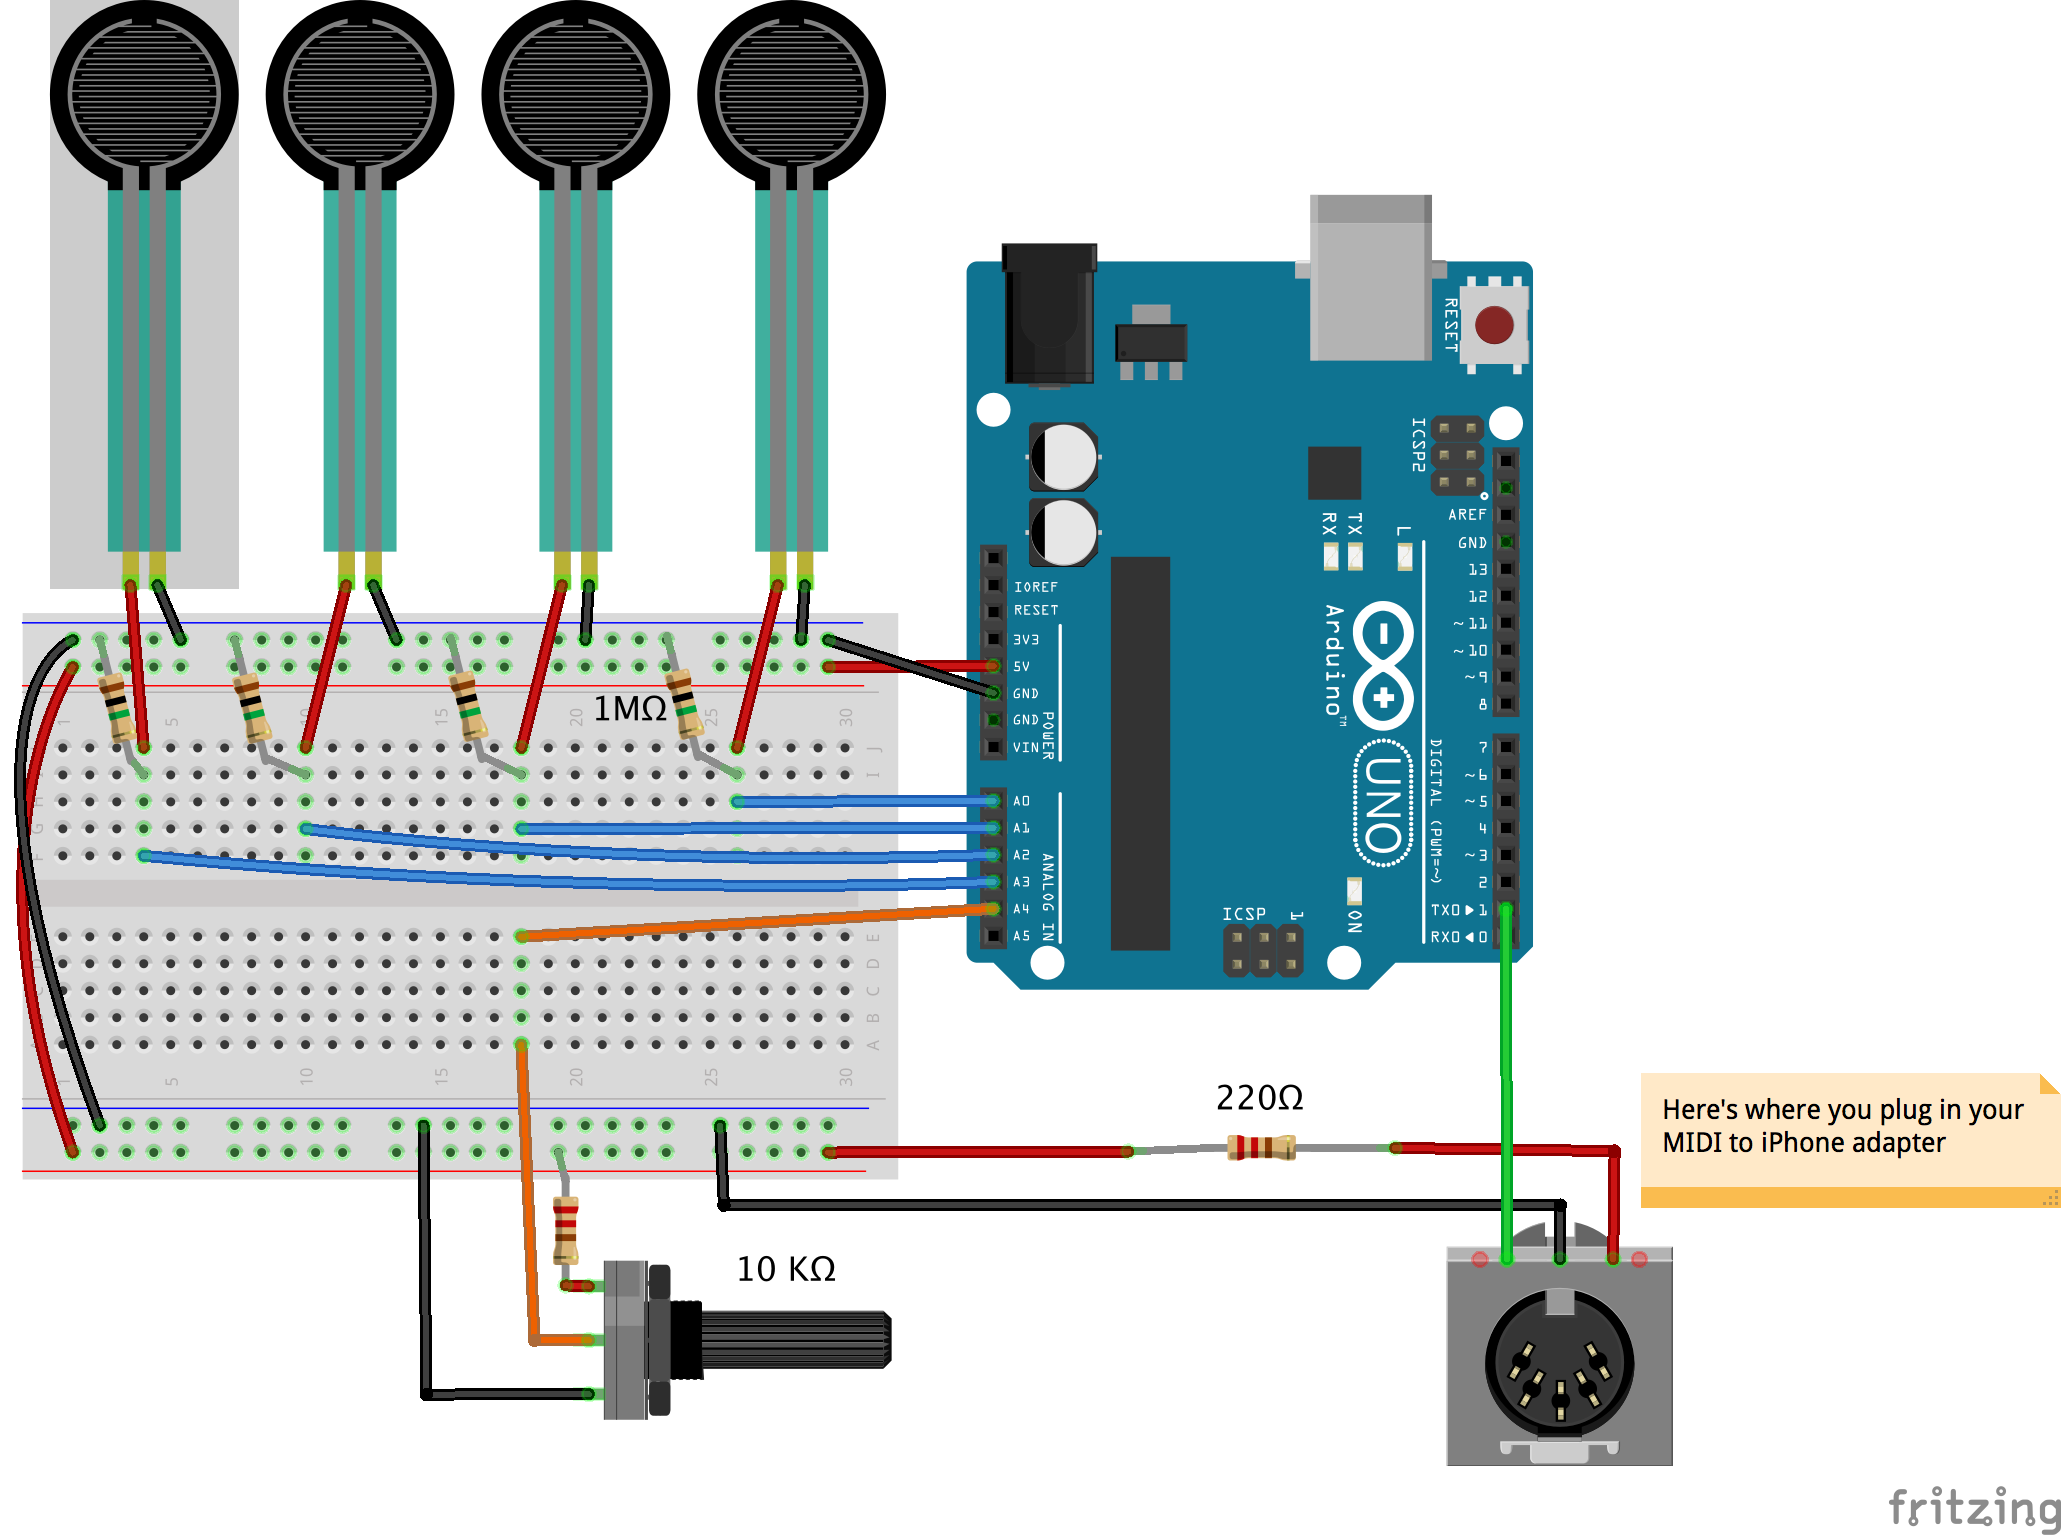
- Connect the ends of the piezo sensors (using the new Cat5 endings) to your breadboard and complete the rest of the circuit as shown in the schematic above
- Add solder to the exposed ends of the Cat5 cable so that they'll stick into your breadboard.
- With the circuit assembled, connect your Arduino to your compute via USB, and load the attached code (ReadSensors.ino) onto your Arduino UNO
If you've set the circuit up correctly (and I haven't overlooked any of my own mistakes while writing this tutorial...) the built-in LED on your Arduino (pin 13) should blink every time you tap one of the piezo sensors.
Good job, you're making progress! Isn't this exciting?
Troubleshooting
If the LED isn't responding to the piezo sensors, make sure you are actually talking to the Arduino from your computer. If the 4 sensor layout is too much, try stripping down to just one and modifying the code appropriately. The polarity of the piezo sensors shouldn't make a difference in this application, but try flipping them around if you're curious.
Downloads
Output MIDI From Arduino
Now that we're able to sense inputs from the piezos, we want to be able to output MIDI from the Arduino. We'll use the MIDI adapter cable to send the MIDI signals into an iPhone running Garageband (or any MIDI app).
We will keep the piezo sensor circuit from Step 2 intact and add a MIDI output jack and linear potentiometer. The piezo sensors will trigger our MIDI signals, and the potentiometer will allow us to change the MIDI note values.
Here are the steps:
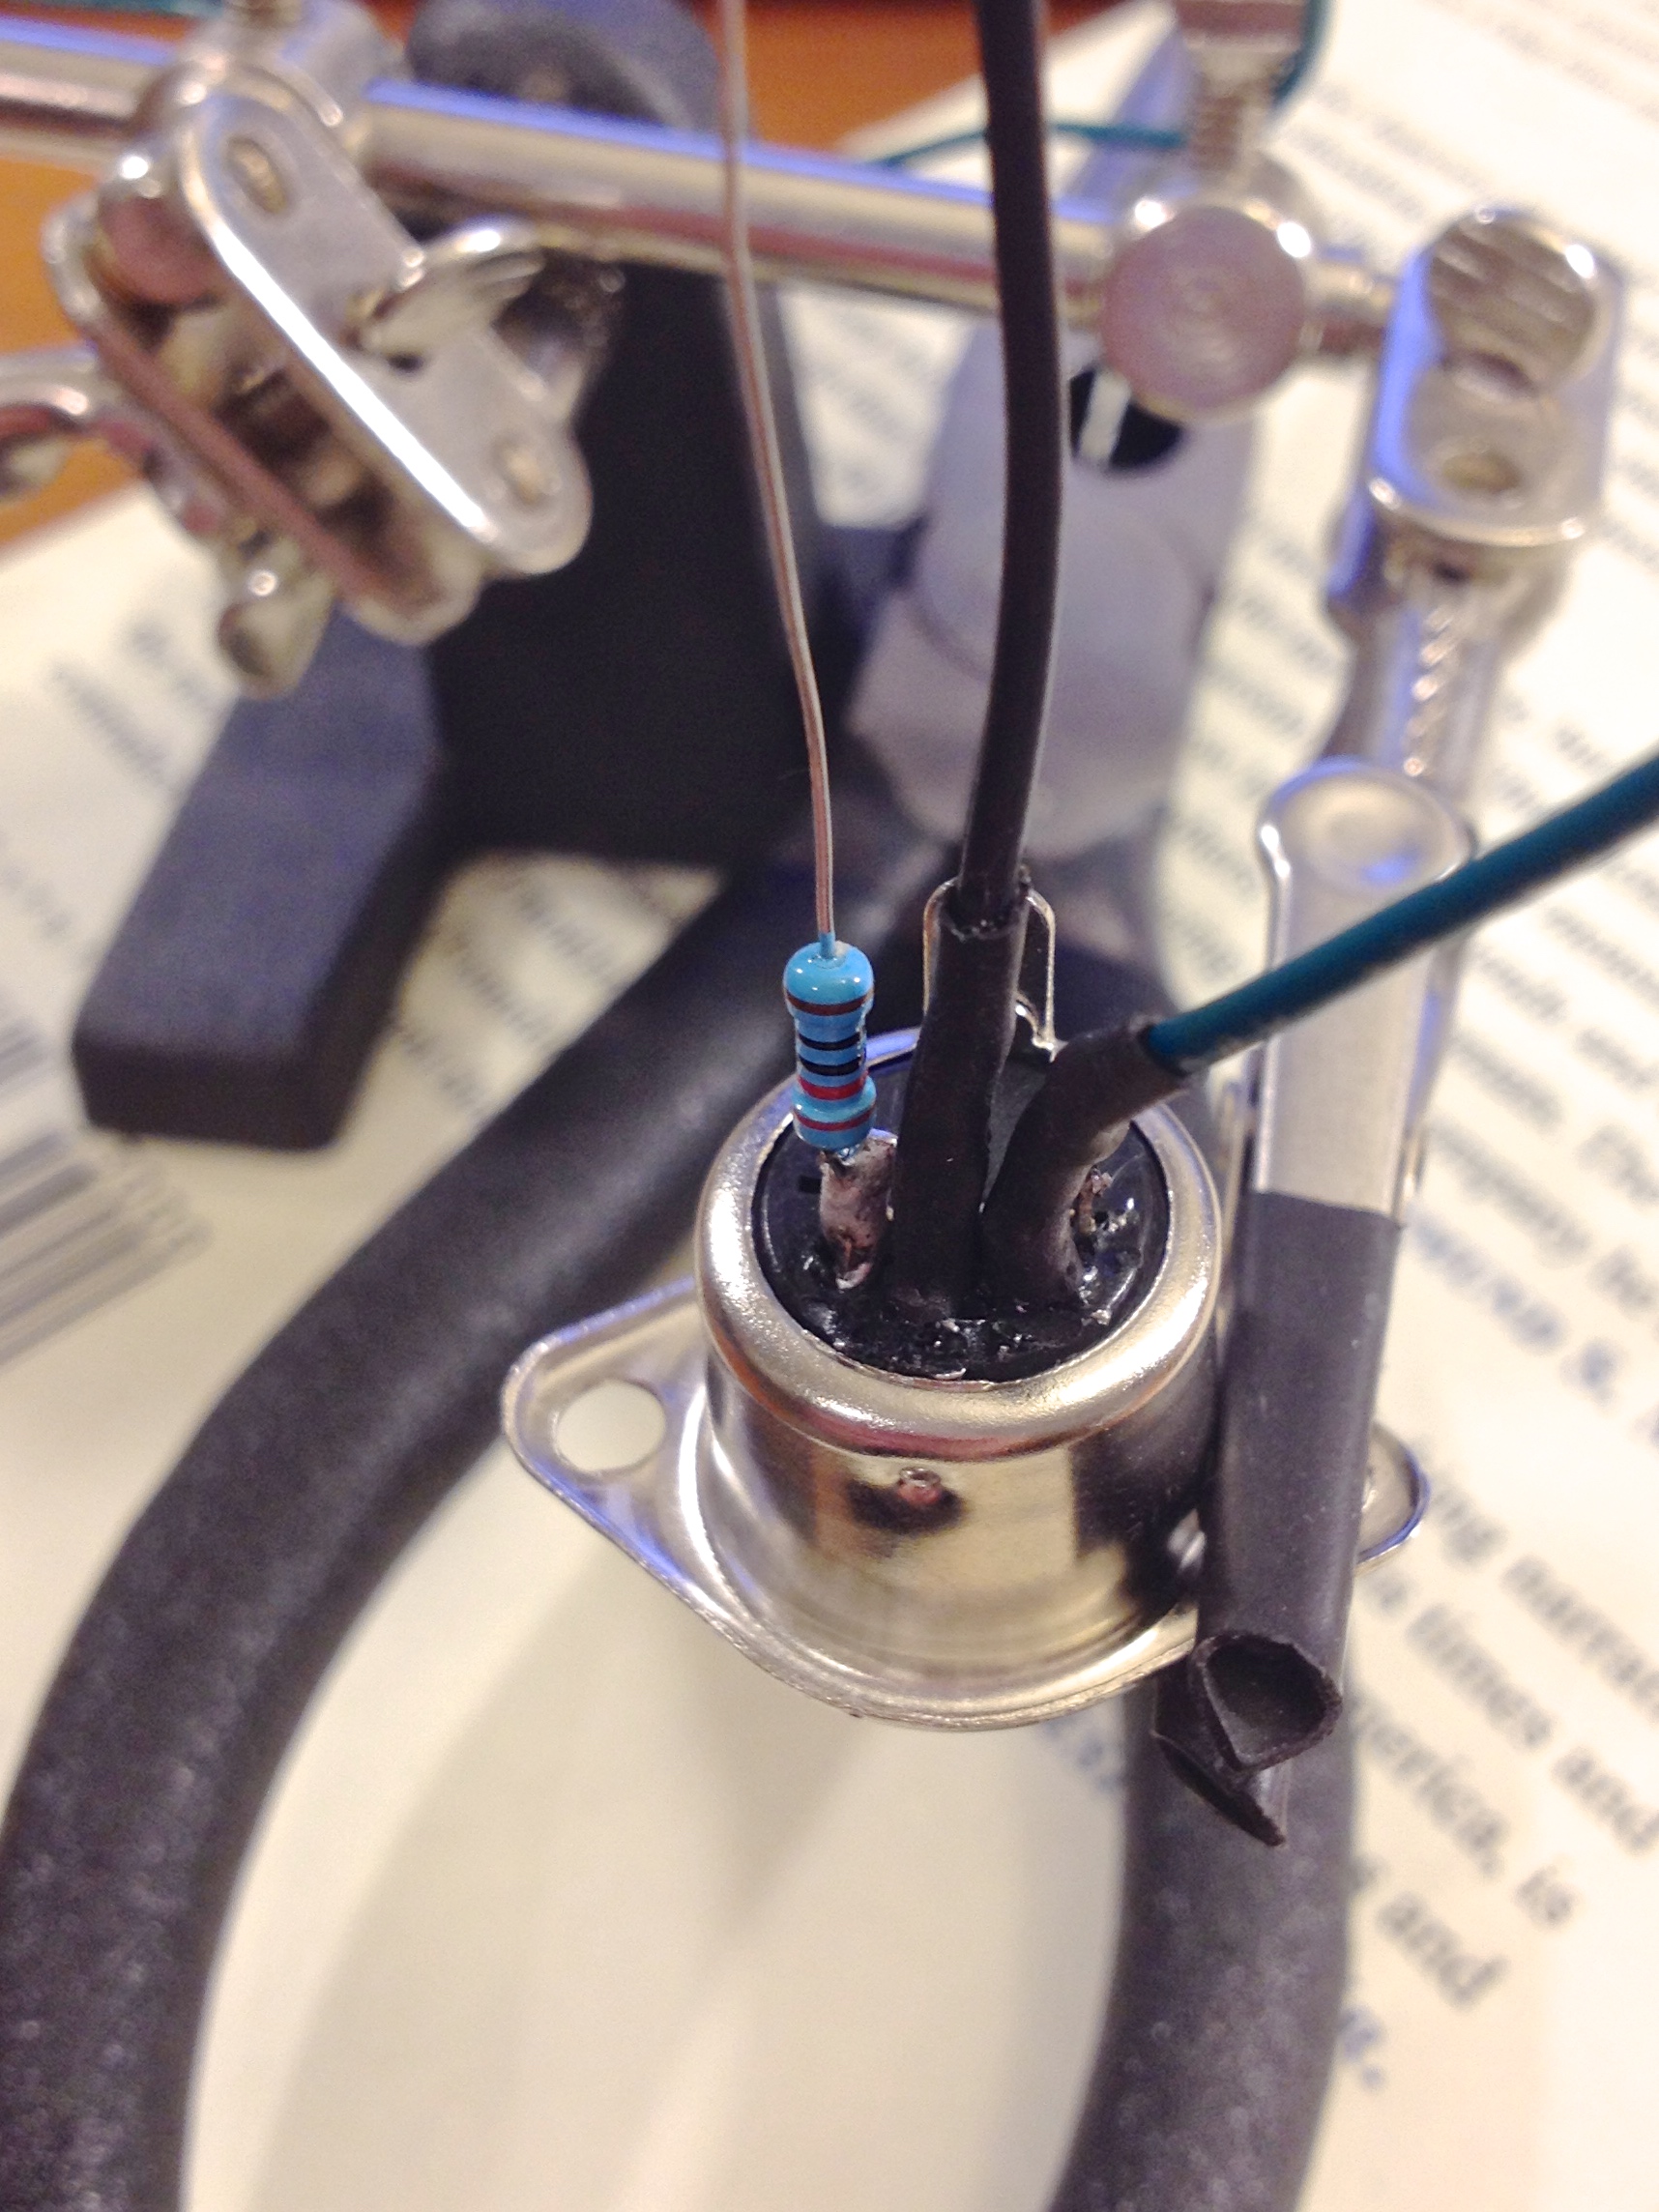
- Following the schematic above, solder a 220 Ω resistor to pin 4 of the MIDI connector. Solder about 1 ft of wire for ground and data to pins 2 and 5 respectively.
- Cut off about 2.5 ft of the Cat5 cable and strip the ends on 3 of the wires inside.
- The wires must be long enough to reach from your shoulder to your back plus a bit of length for slack.
- Solder a stripped Cat5 wire to each of the terminals on the 10 KΩ pot. As shown in the schematic, connect one outside pin of the pot to ground, the middle pin to A4 on the Arduino, and the other outside pin to 5 V via a 220 Ω resistor.
- Once the circuit is assembled, load the code from this section (OutputMIDI.ino) onto your Arduino.
- Plug one end of the MIDI adapter cable into the soldered MIDI jack and the other into your iPhone. Start Garageband on the iPhone
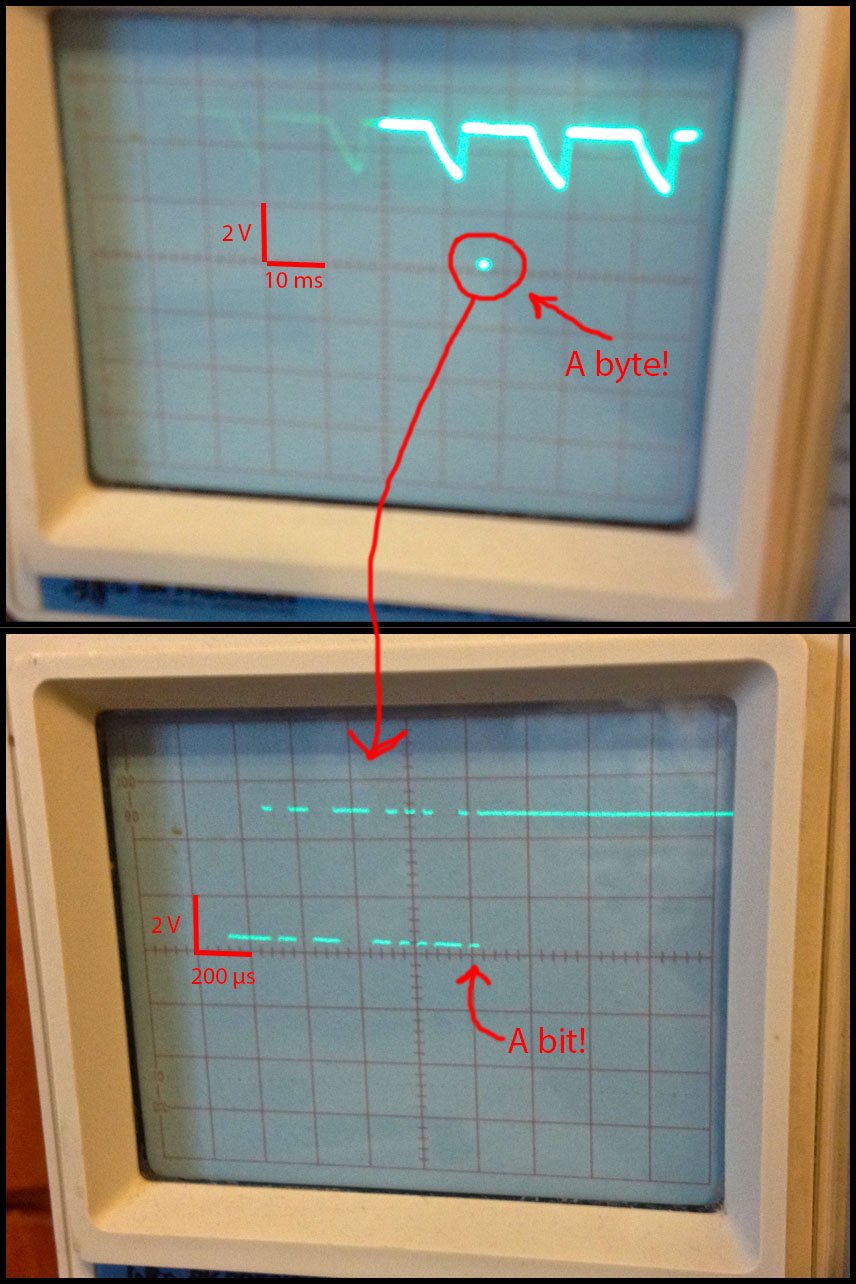
If the circuit is assembled correctly and the code is loaded onto your Arduino, we should be in business. Try tapping one of the piezo sensors. Is your iPhone playing sounds in response? Hopefully! Turning the pot should also change the sounds triggered by one of the pots. If you're curious, I included a picture of an oscilloscope measuring the output on the MIDI data pin. It's pretty cool to see the bytes and bits fly by in real time!
Downloads
Assemble the Costume

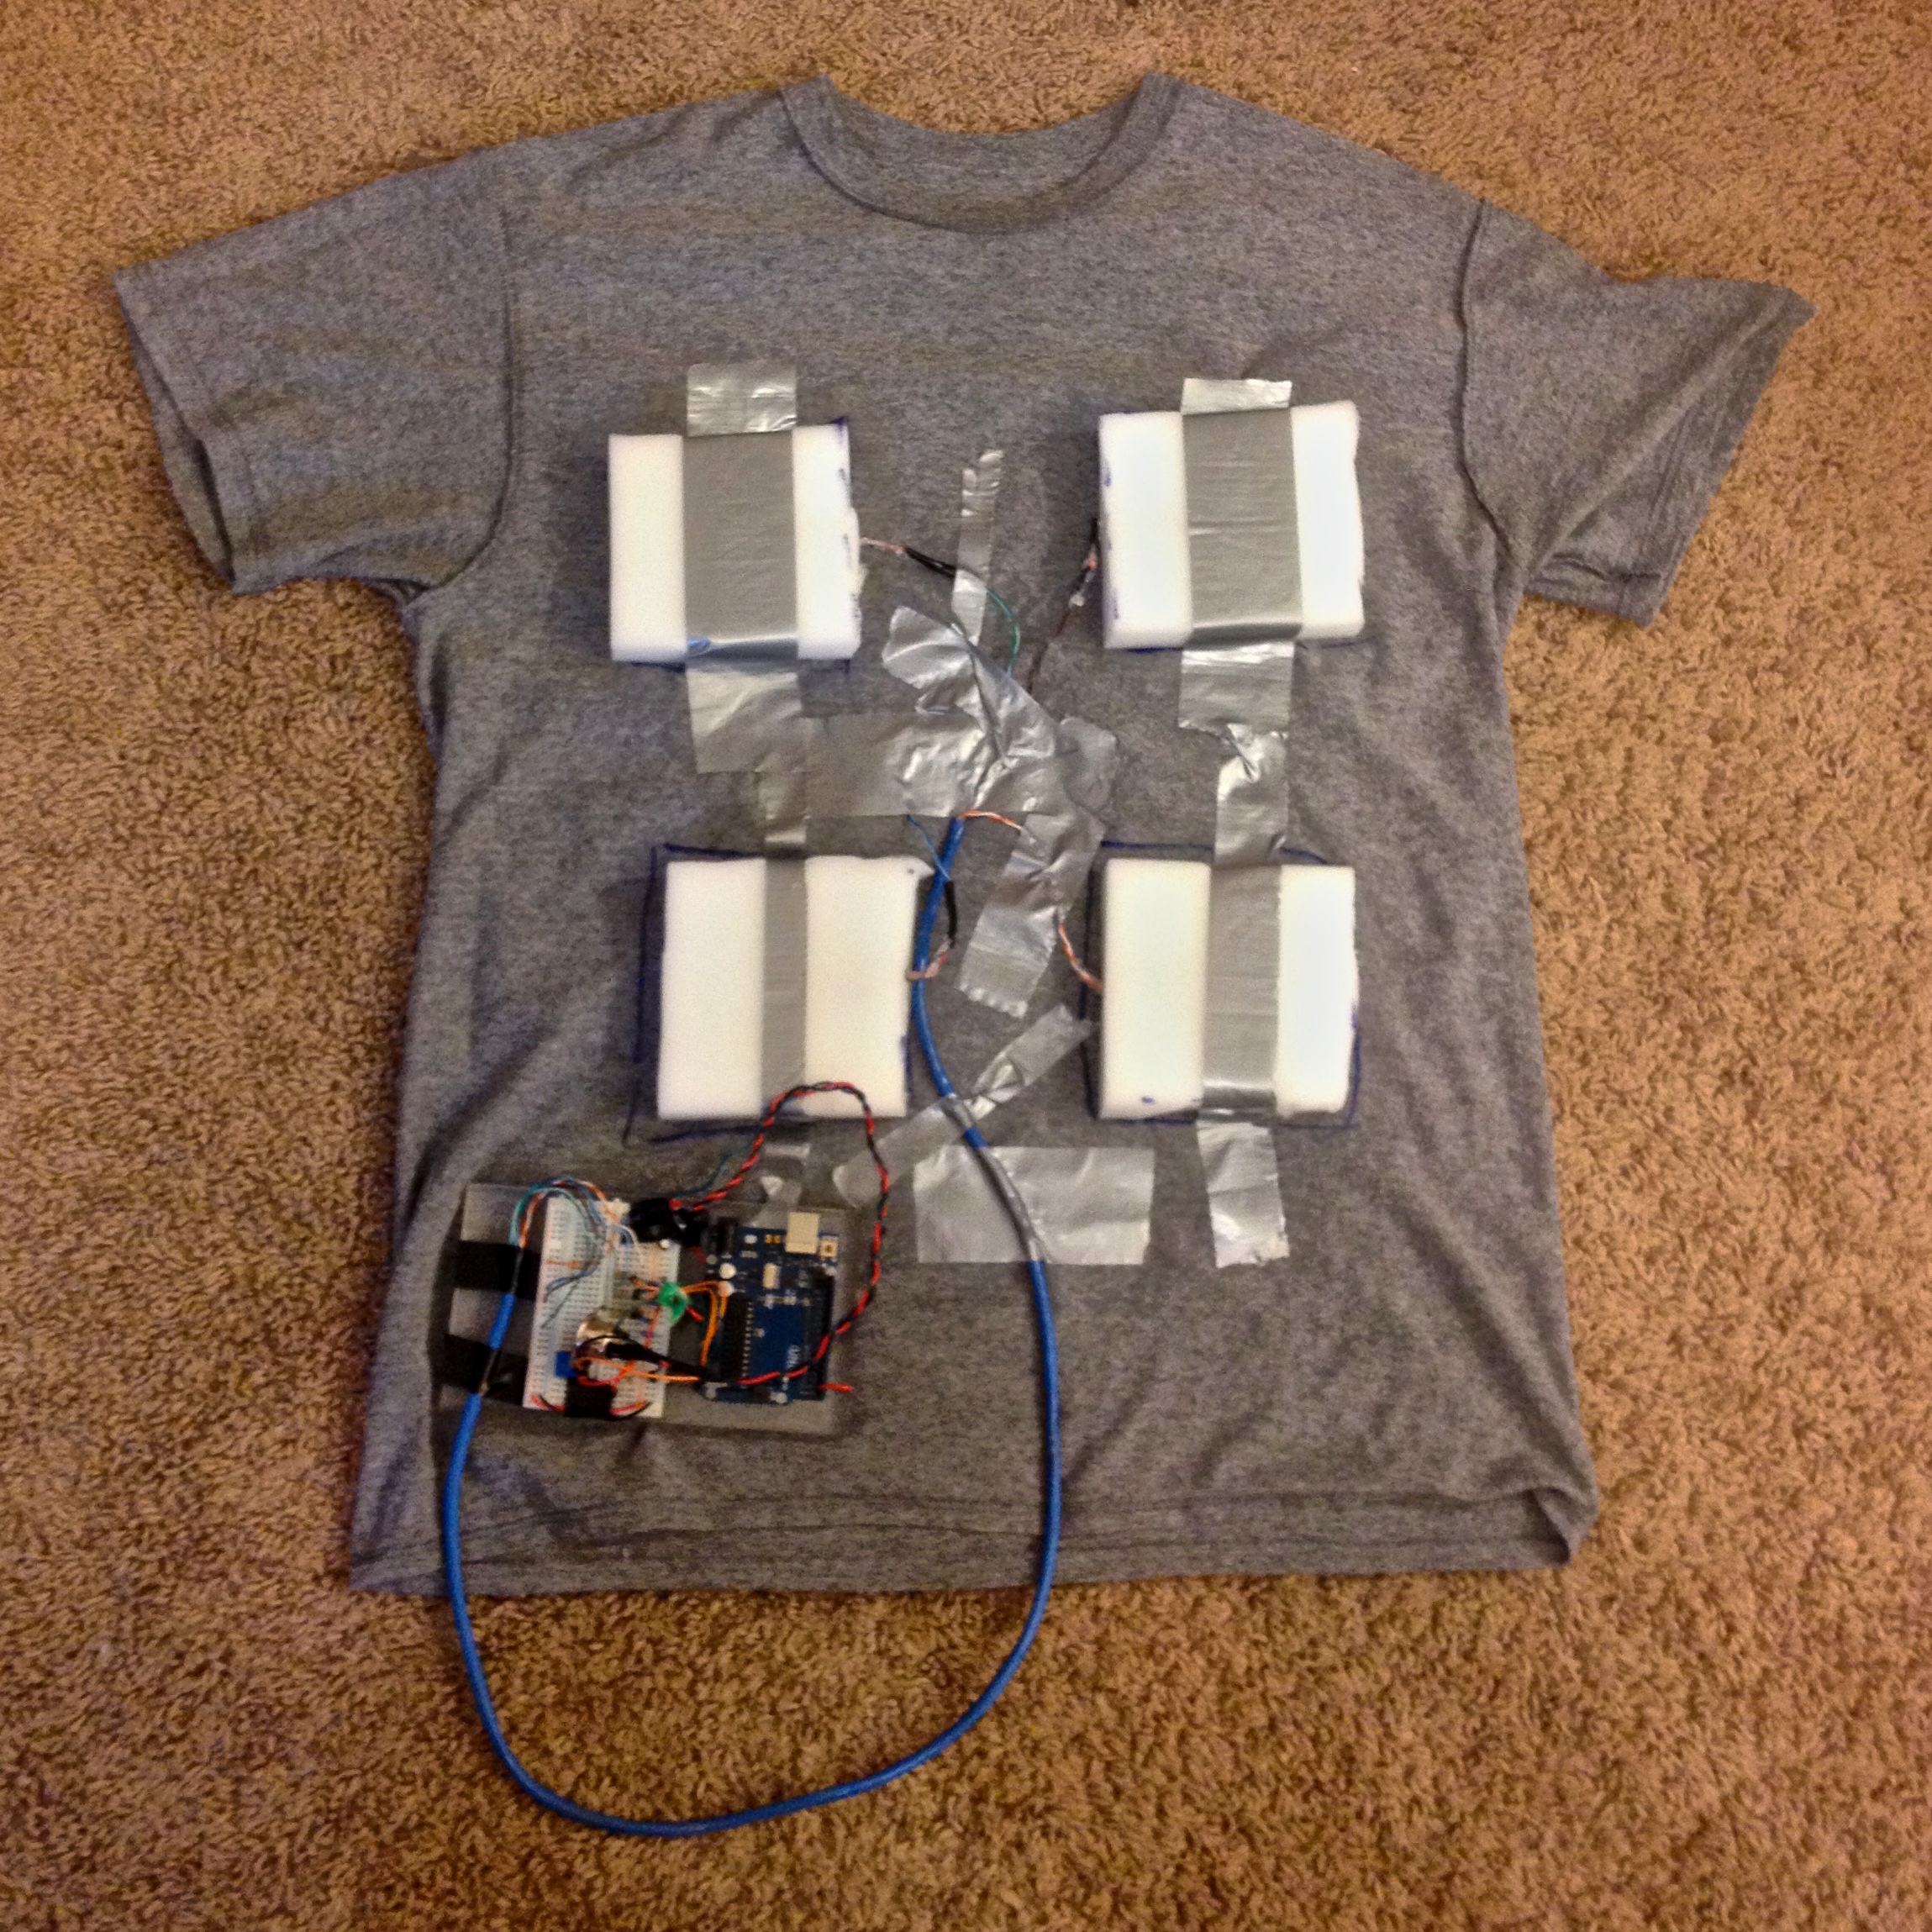
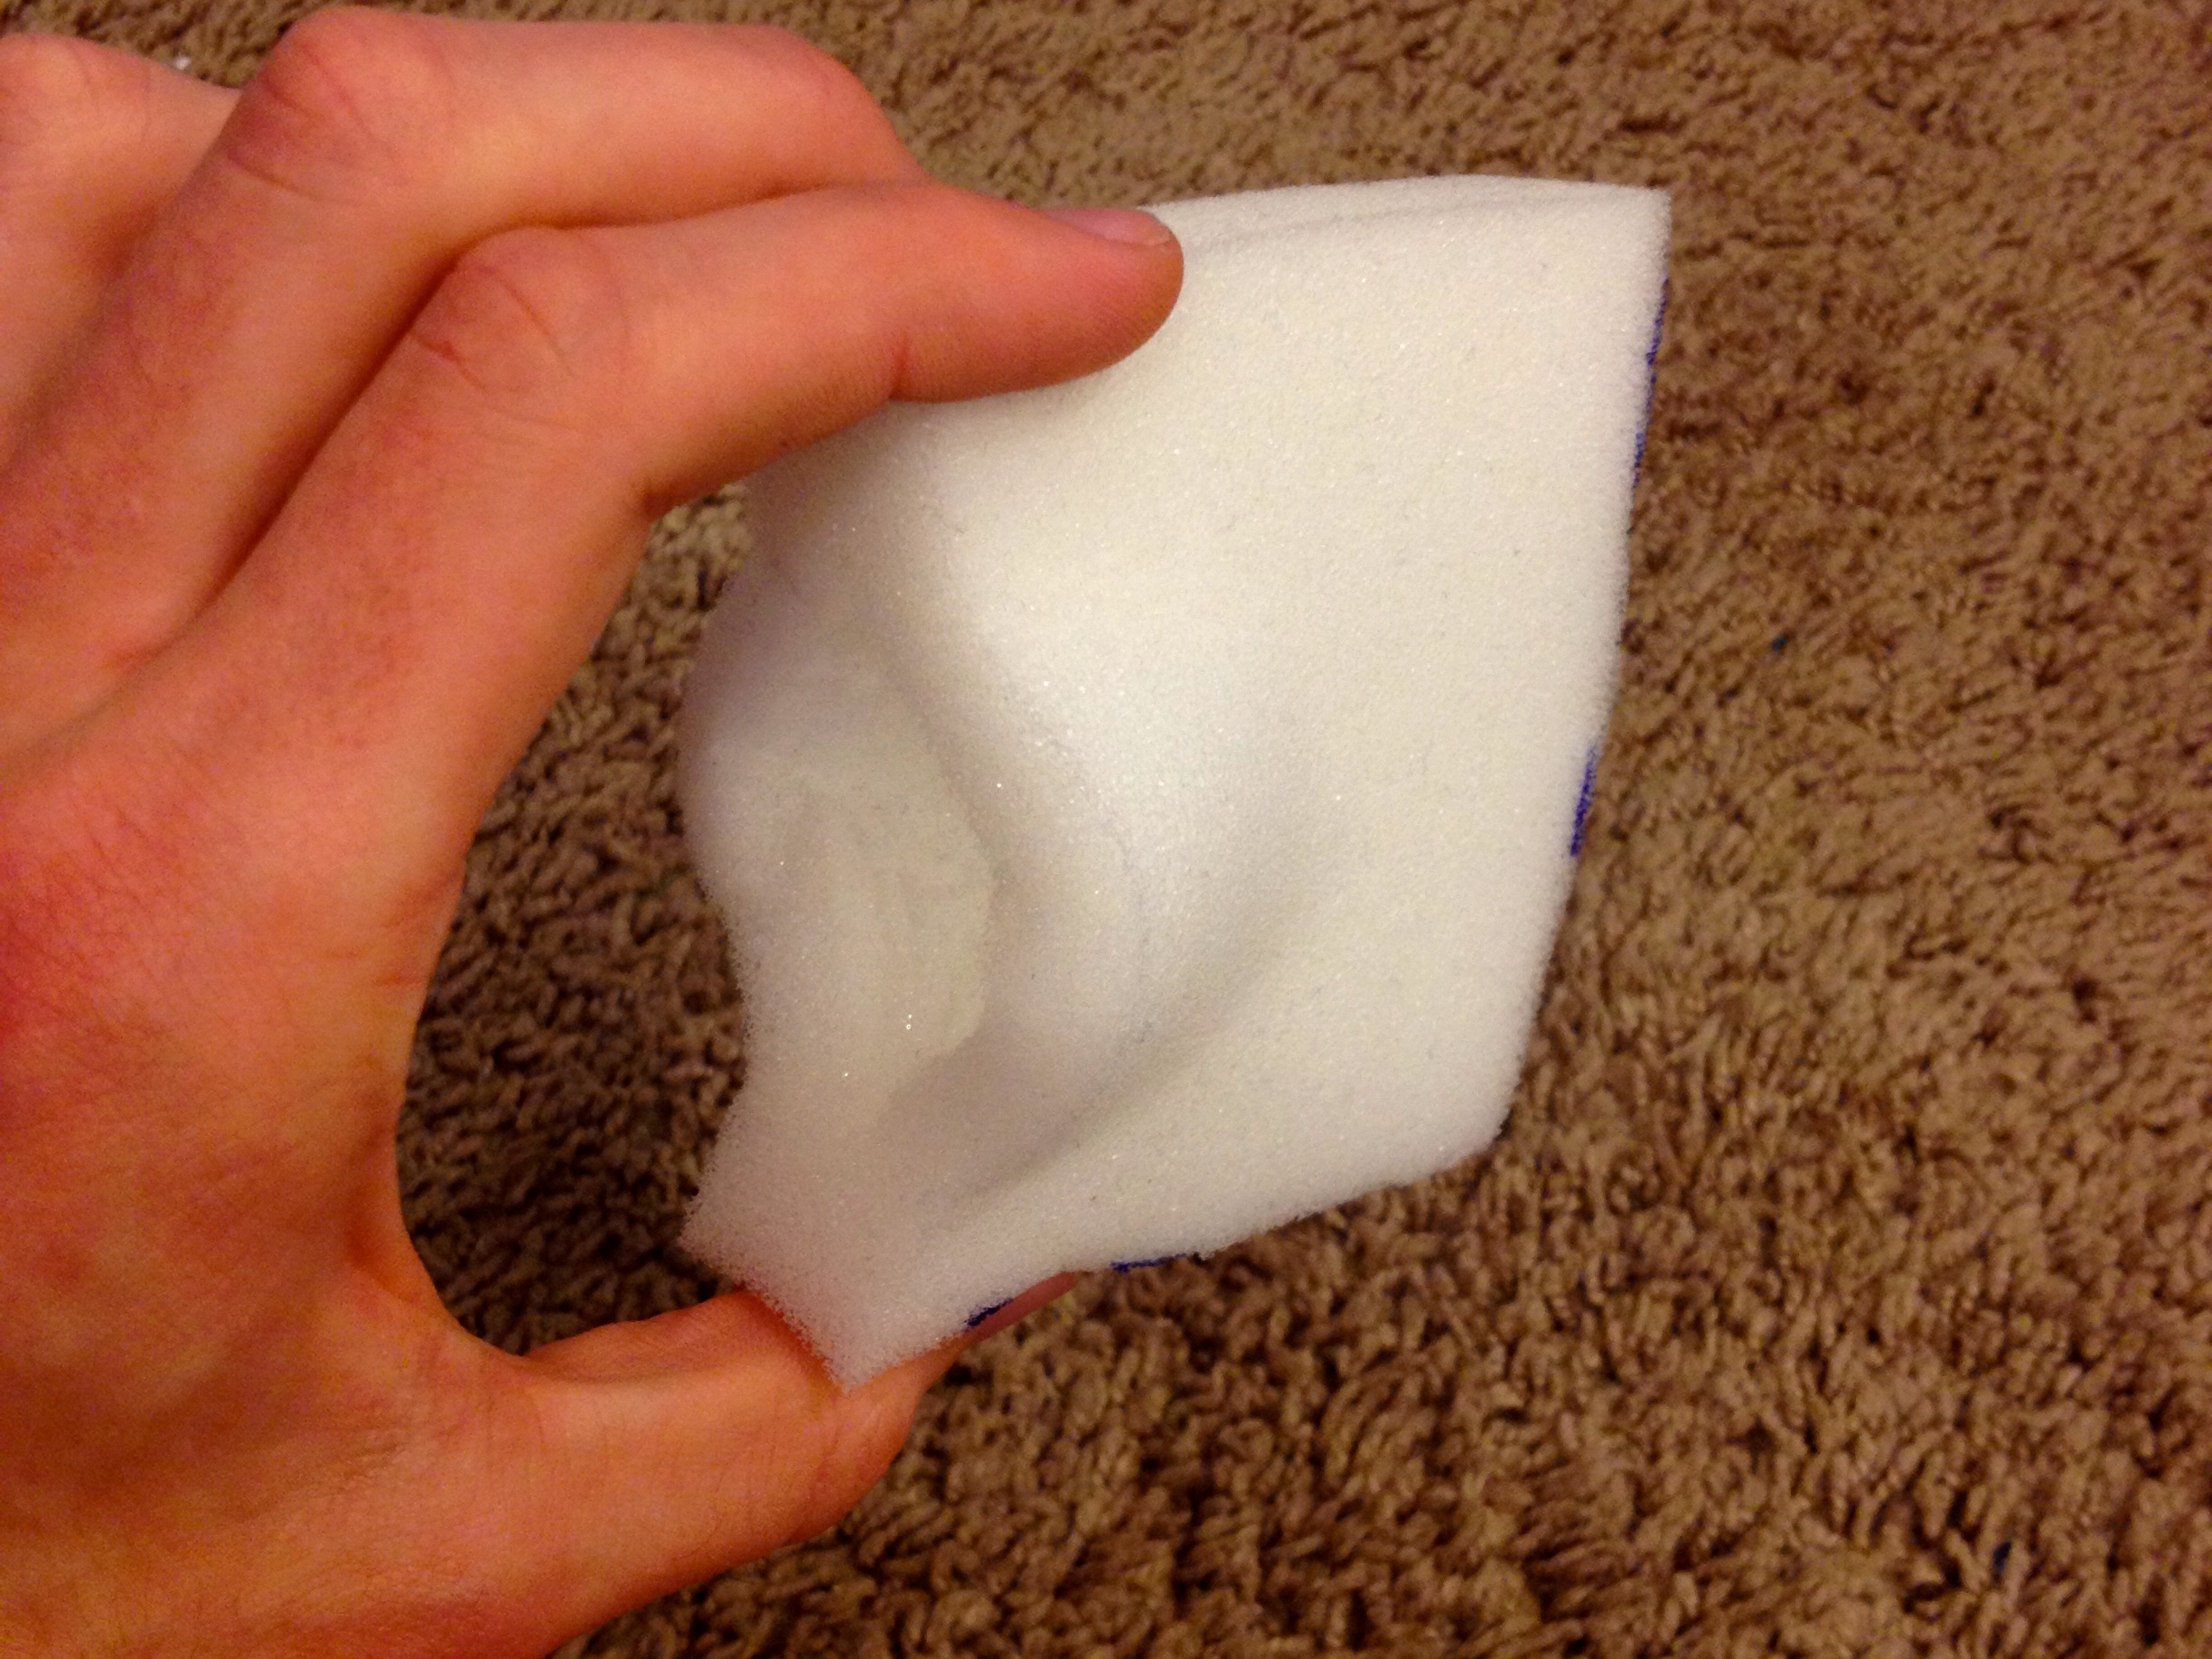
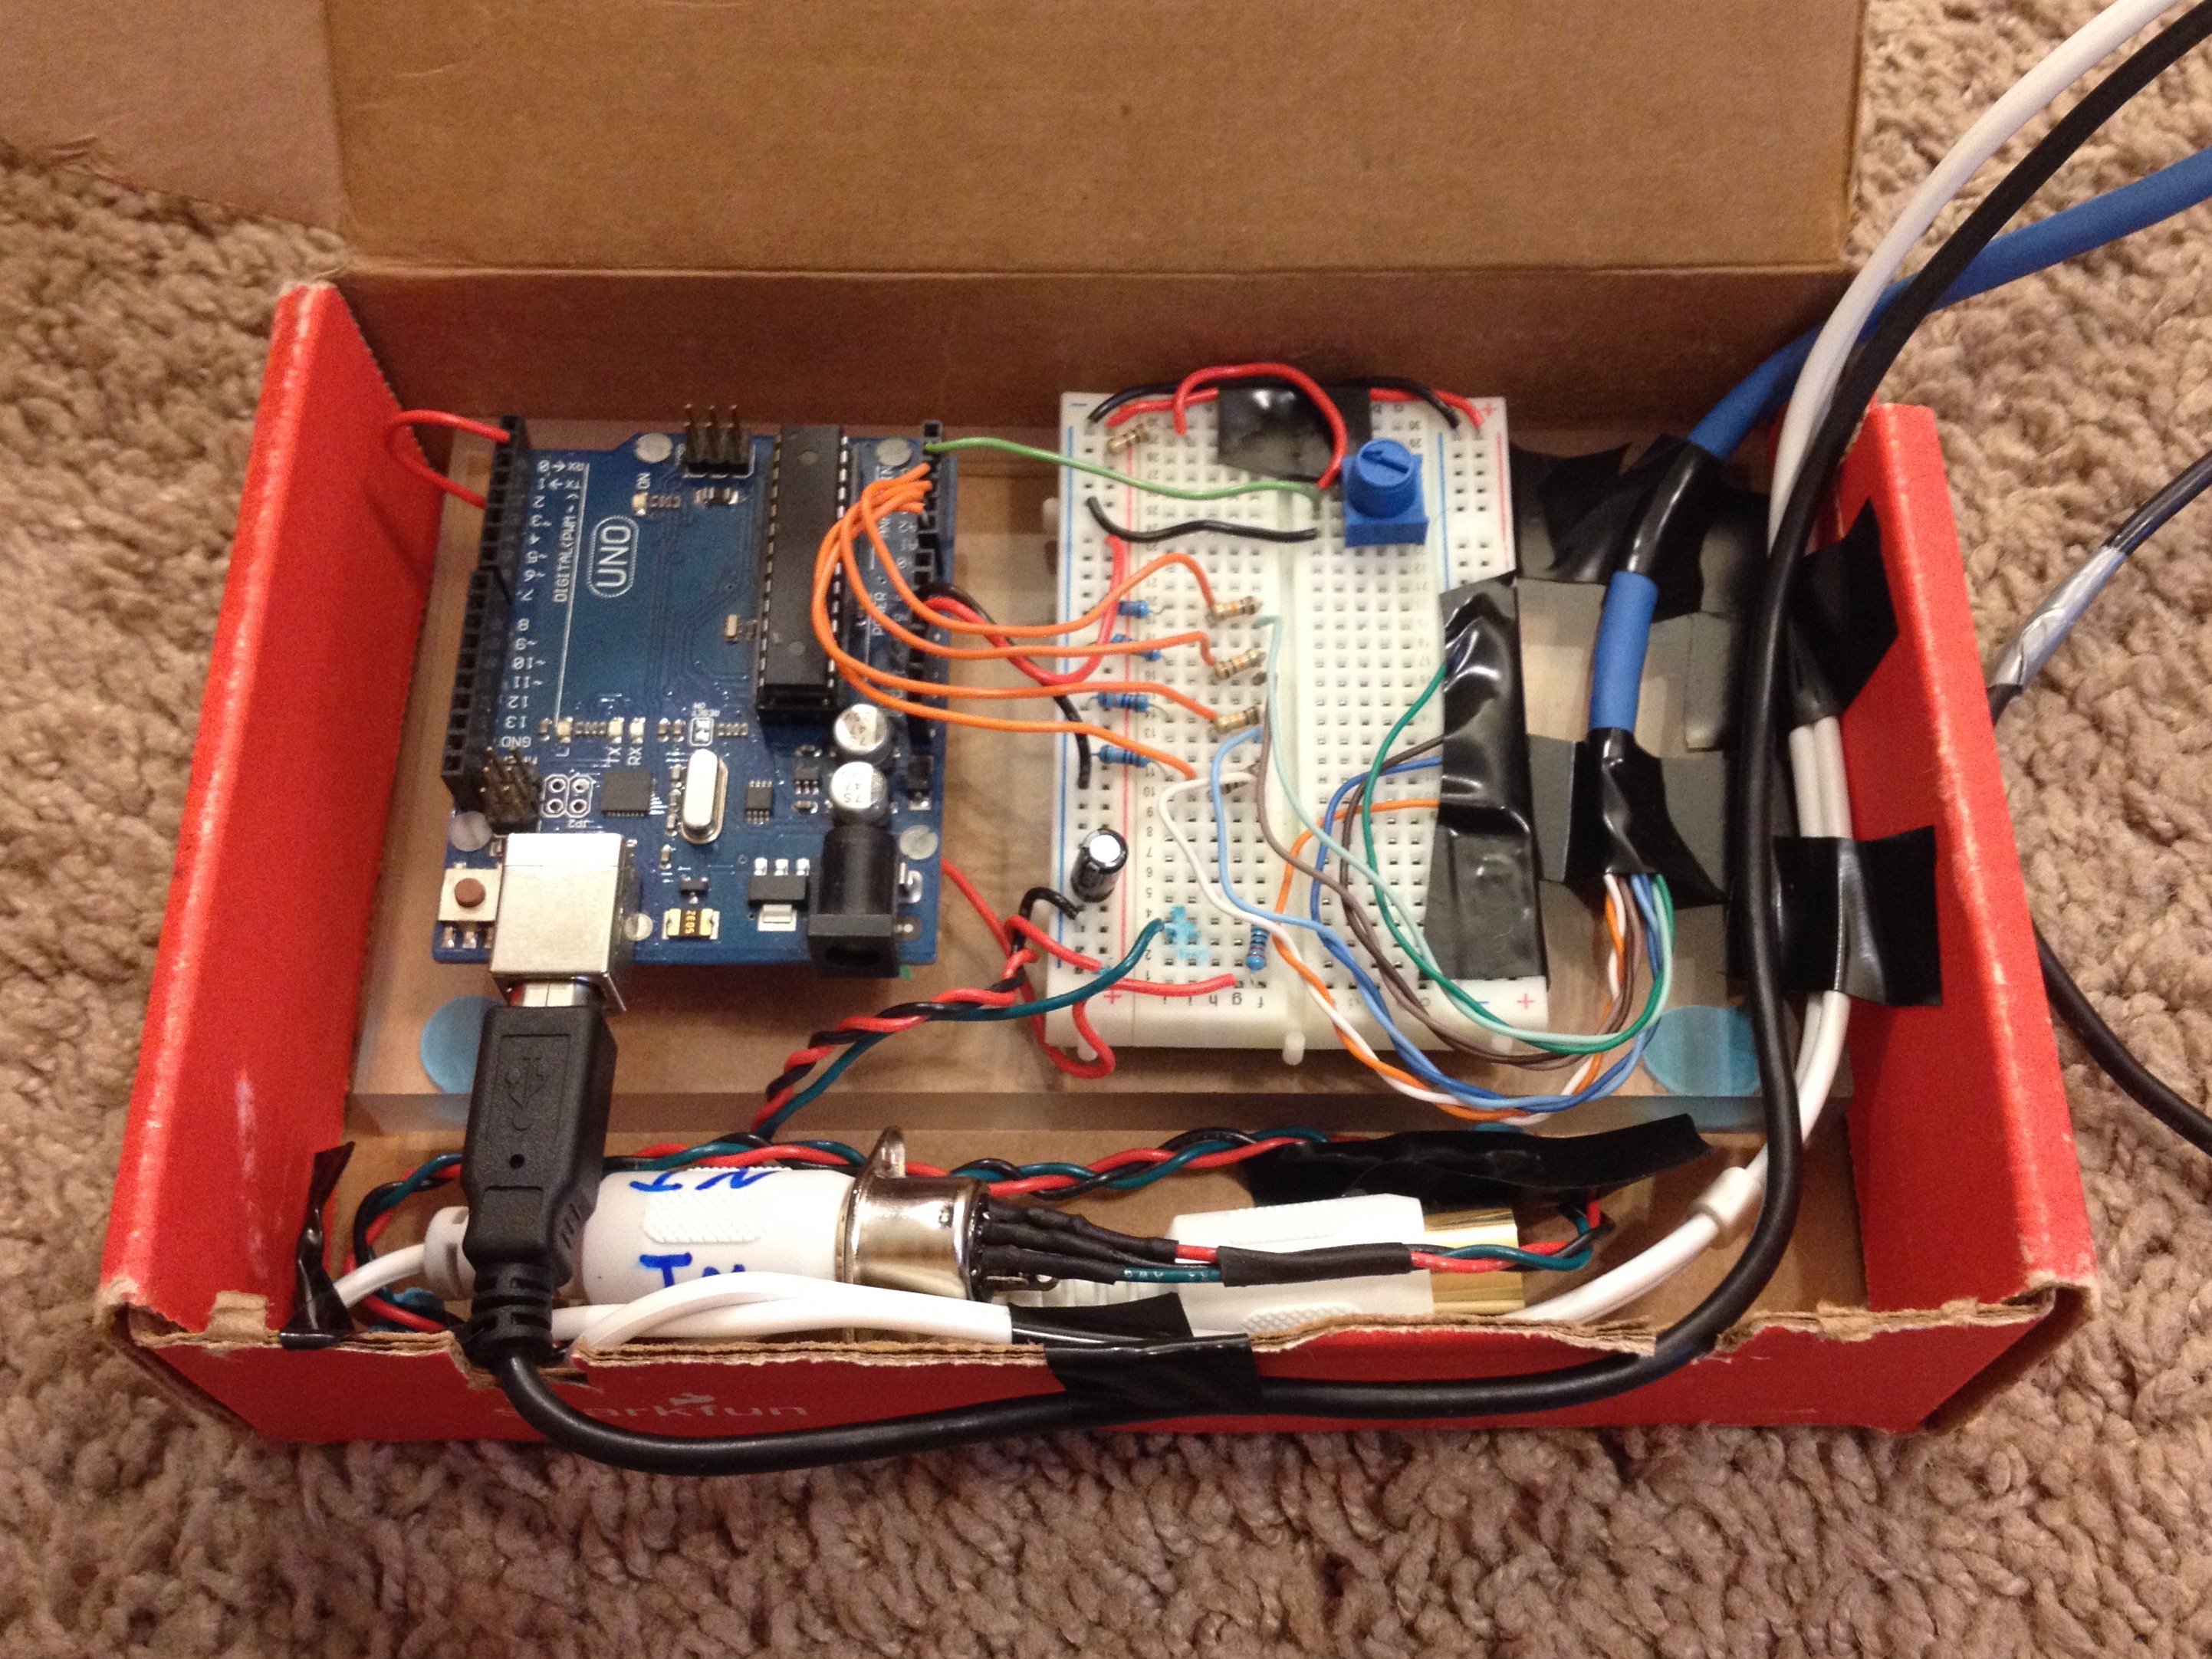
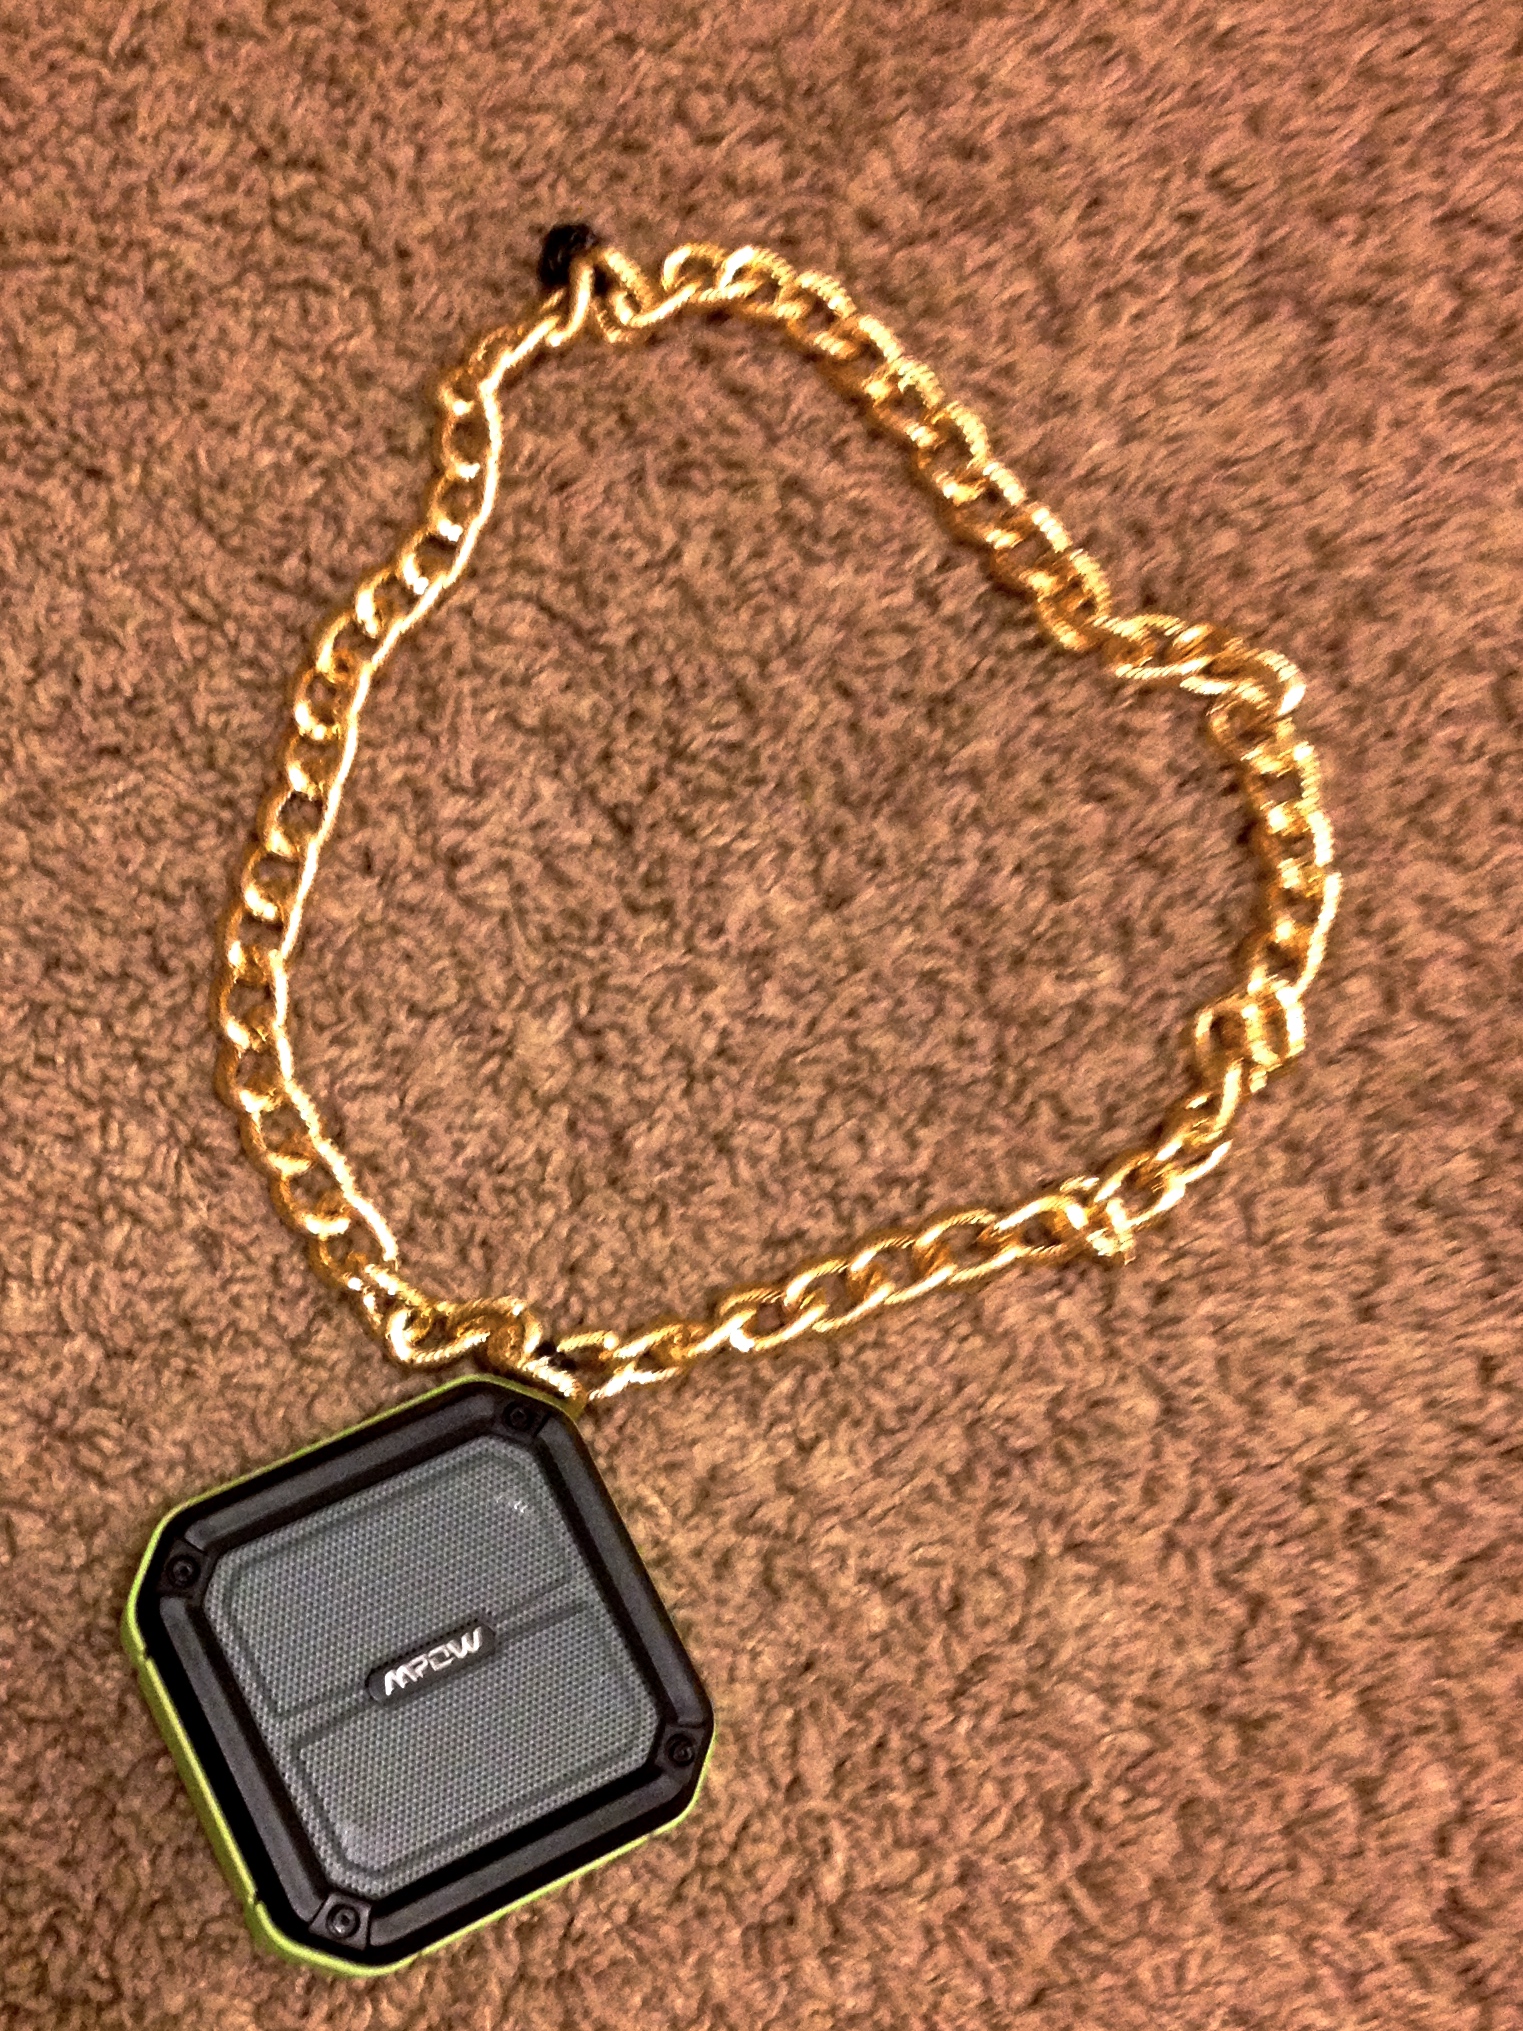
Now that we've got the main components of our electronics working (piezo sensors and MIDI output), we can start on the construction of the actual costume. In case you were worried we wouldn't be using hot glue during this tutorial, don't worry. We'll use plenty of hot glue.
Here are the steps:
- Fold the shirt inside out. Place cardboard or something like it inside the shirt to avoid the hot glue bleeding through onto the front.
- For real, make sure don't let the hot glue bleed through.
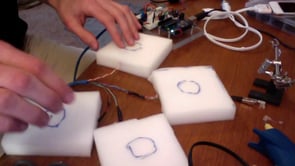
- Cut four 3.5 inch squares out of the foam padding. Hollow a space out of each square as shown in the picture. That's where we'll stick the piezo sensors.
- Insert a piezo sensor into each foam square, and then seal off the slit in the foam with hot glue.
- Hot glue the four squares into a square grid on the inside front of the T-shirt.
- Pay careful attention to where you're placing the foam squares. I placed my top row too high the first time and had to tear the squares off to move them lower. I recommend centering the grid of four squares over the abdomen. At the very least, you can go for this effect.
- Reinforce with duct tape as needed.
- Cut a small hole in the shoulder of the T-shirt and glue the potentiometer in place. Run its Cat5 cable along the inside of the shirt to the waist.
- You can use a small square of cardboard inside the shirt to stabilize the pot.
- Find a small cardboard box to fit your Arduino into.
- Sorry, this step is going to involve some exploration on your part. Good luck.
- Attach the Arduino box to the inside back of the T-shirt. I had a few velcro strips lying around so I hot glued those to the box and the shirt, and that connection held up well.
- Again sorry, this step is going to take some ingenuity on your part to fit your situation.
- I recommend putting the box higher up on the back of the T-shirt so that there's room to tuck in the bottom of the shirt.
- Use a solid core wire (or whatever you come up with) to attach the portable speaker to the gold chain. Wear this necklace with pride.
Okay, if everything has gone according to plan, you should have a setup that looks at least vaguely similar to the picture of the shirt above.
Test It Out!

Once you have the costume assembled, upload the final form of the code (MIDI_DrumMachine.ino). There's quite a bit going on in the code, but it hopefully shouldn't be too difficult to debug if necessary.
With the code uploaded, follow these steps:
- Put on your costume.
- Or don't, whatever.
- Start Garageband on the iPhone.
- Connect your iPhone's audio output to the speaker, either with Bluetooth or an audio cable
- Connect your iPhone to the circuit using the MIDI cable adapter.
- Power on your Arduino using the portable USB battery.
- Wait a couple seconds. While you're waiting, pat yourself on the back for making it this far.
- Hit those sensors!
Okay, you should have a fully functioning drum machine costume! Do you? Does it work? I hope so!
I've included a video of me trying out my own setup once I was finished. Now if only I actually knew how to play the drums...
Downloads
Suggestions / Troubleshooting
I ran into a number of issues while working on this project. Here's a list of a few of the ones I had to tackle. I hope this can help you avoid making the same mistakes!
I put various versions of my code up on GitHub, so you can play around with what's there if you're curious.
Arduino
- The MIDI baudrate is 31250 and the serial communication with the computer is 9600. Keep this in mind if you print to the Serial Monitor while debugging the code!
- The Arduino's Tx LED only lights up when the Arduino is plugged into a computer over USB. When ran off a battery, it will still transmit over the Tx pin, but the LED will not light up.
- This is probably because my connector was likely faulty, but I couldn't power the Arduino off of a 9V battery. I found powering the Arduino off of a portable USB battery to be the simplest and most reliable solution.
- Power issues can lead to really strange issues that are hard to debug. Always make sure the power source you're using is reliably powering the Arduino.
- Make sure you leave time to test out the code for your costume before wearing it out in public. Keep in mind that you most likely won't be able to reprogram the Arduino once you head out with your costume.
Audio/Bluetooth
- Bluetooth audio output from Garageband on the iPhone is possible but you must set Bluetooth as an audio output within the Garageband app.
- Also, using Bluetooth results in a small but noticeable lag. I suggest keeping an audio/aux cable on hand in case you'd like to reduce the latency.
- The code is designed to change note volume with the intensity of the sensor hits, but in a loud setting it's probably best to just set all notes to the max, 127.
Helpful Links
- Sparkfun MIDI Tutorial
- Supplying power to Arduino
- Another MIDI controller tutorial
- MIDI connector specifications
Realistically, I know some of these steps may have been lost in translation. I'd be happy to try and help anybody troubleshoot this process. Just leave a comment on the page, and we can try to get your project working! Good luck, let me know how it goes!