From Angriness to Chilling Watching TV - a Funny Rube Goldberg Machine
by yohad in Circuits > Arduino
1079 Views, 25 Favorites, 0 Comments
From Angriness to Chilling Watching TV - a Funny Rube Goldberg Machine

Have you ever studied for an exam and find yourself losing your mind? Wouldn't it be nice to have someone to tell you to take a small break while entertaining you? As a computer science students, we decided to take over the reins and take care of the mad students (and also everyone who finds himself being angry).
In short, whenever you become mad and shout out loud, your Adafruit Circuit Playground Express will recognize your mood and start a long chain which will keep you entertained and at the end will turn on your TV, signal you to take a small break and relax!
So... a lot of random stages are about to come during the chain, but a smile at the end is promised :)
The Scenario:
- You become mad and as a result find yourself shouting out loud.
- The CPX (i.e. Adafruit Circuit Playground express) recognizes you being mad and asks ChatGPT for a random funny joke.
- The joke is being sent to your personal email address, while the CPX starts blinking, notifying you about the new mail received.
- You read the joke, take a smile and press any physical button on the CPX.
- The CPX stops blinking, sending to a telegram group of your friends a message telling them you're really mad and asking them for three names of relaxing songs.
- To keep you and your friends entertained, a link to a random funny GIF is also sent in the telegram group.
- Your friends start sending names of songs which they think might relax you. For each song sent:
- the song will be added to a dedicated playlist in your Spotify account.
- Your CPX will play a tone indicating a new song was added to your playlist.
- Information about the newly added song will be recorded into a dedicated Google Sheets document.
- After three songs have been sent by your friends, a lovely melody will be played by the CPX and it will turn on your TV!
Supplies


Hardware Components
- Adafruit Circuit Playground Express board
- ESP8266 ESP-12E CH340G
- Micro USB cable
- Battery cartridge + 3 AAA batteries
- Internet access
- A TV and a TV remote
- A PC
Accounts for the following services
Software Components
Before you start
Make the following connections from the ESP8266 to the CPX:
- ESP8266: GND -> CPX: GND
- ESP8266: VCC -> CPX: VCC
- ESP8266: RX -> CPX: TX(A7)
- ESP8266: TX-> CPX: RX(A6)
Setting Up Arduino IDE
2. Install relevant drivers for the ESP8266 boards to your Arduino IDE.
3. Install SAMD board manager (first step in the attached link).
4. Connect your CPX to your PC using the micro USB cable.
5. Choose the board you work with:

6. From Arduino IDE toolbar, choose the serial port matching your CPX

Blynk - Configuring Environment
1. Sign in to your Blynk account and choose the "Templates" option from the side bar.
2. Click on "New Template" button and fill it out with the following values:

3. From the top menu, click on Datastreams.
4.Click on New Datastream button and select Virtual Pin.

5. Fill in the form according to the following image:

6. Click on Create button at the bottom of the form.
7. Now you should have a virtual pin called V0 named "CPX Input Noise or Button Pressed".
8. Repeat bullets 4 - 7 once again, creating a virtual pin with the same configuration as before, and name it "Email Received Notification".
9. Repeat bullets 4 - 7 for the third time, creating a virtual pin with the same configuration as before, and name it "Song Received Notification".
10. Click Save on the top right of the screen. The datastreams window should look exactly like this:

11. On the left panel, click on Search and then choose New Device.
12. From the new opened screen, choose From template.
13. A new form will be opened. Choose the template named "TVMad" and press Create button.

Configuring Make Webhook
Make
1. Sign in to your Make account and choose Scenarios option from the left panel.
2. Click on Create a new scenario button.
3. Click on the big plus (+) icon in the middle of the screen and choose Webhooks from the menu.

4. Choose Custom webhook option.
5. Click on Add and fill out the opened form as following:

6. Click on Save, and then on Copy address to clipboard.

Blynk
7. Go back to Blynk, choose Settings option from the left panel and then Webhooks option from the subpanel.

8. Click on Create Webhook and fill the form according to these configurations:


Note: Under the URL field paste the address you copied at bullet #6 from Make.
9. Click on Test webhook button and look for a success message:

10. Click on Create Webhook.
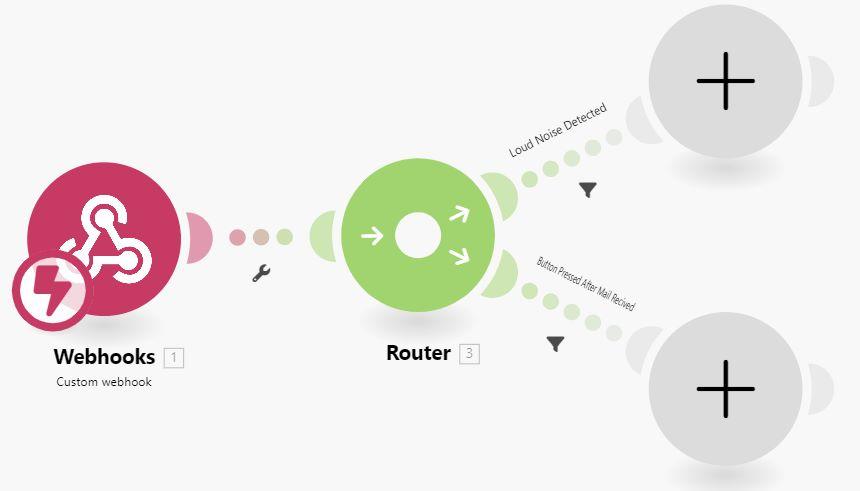
Make - Adding a Router With Conditions
1. In the button panel, under Tools category, choose Flow Control button and choose Router from the popup menu:

2. Connect a line between Webhook and Router models.
2. Click on the plus sign (+) in the middle of the router icon.
3. Click on the wrench between the router and the upper empty module and choose Set a filter.
4. Fill in the popup form according to the following image:

3. Click on the wrench between the router and the lower empty module and choose Set a filter.
4. Fill in the popup form according to the following image:

You should end up with a scheme looking like this:
Make - Sending a Joke Via Gmail
Creating a ChatGPT module
1. Firstly we should generate an API key to allow Make send ChatGPT queries in the name of our ChatGPT account. Go to the following link and sign in using your ChatGPT account.
2. In the opened window, click on Create new secret key button, and copy the generated link to your clipboard.
3. Go to Make and press on the upper empty module (the upper logo with plus (+) sign).
4. Choose OpenAI GPT-3.

5. Choose Create a Completion.
6. Click on Add button.
7. Under API Key field, paste the key you copied to clipboard at bullet #2, and click Save.
8. Fill in the popup form according to the following image, and press OK:

Creating Gmail module
9. Connect a new module to the right of the ChatGPT module and search for "Gmail".

10. Choose Send an email.
11. Click on Add, choose Show advanced settings and fill in your Client ID and Client Secret which can be generated using the following guide:
12. Fill in the popup form according to the following image, and press OK:

Now your Make scenario should look like this:

Make - Creating a HTTP Module
Getting your Blynk authentication token
1. Go back to your Blynk dashboard, in the side bar choose Search button and then click on your device.

2. Go to Device Info tab and copy your Blynk authentication token:
#define BLYNK_TEMPLATE_ID "YOUR TEMPLATE ID"
#define BLYNK_DEVICE_NAME "TVMad"
#define BLYNK_AUTH_TOKEN ">>>Your authentication token is here. Copy this value<<<"
Getting IP address of the Blynk server matching your region
3. Open CMD from your PC (on Windows OS - search for "CMD").
4. Write the following line in CMD:
ping blynk.cloud
5. Save the IP address from which you get a reply (for example, in the following image the address is 128.199.144.129)

6. Connect a new module to the right of the Gmail module and search for "HTTP".
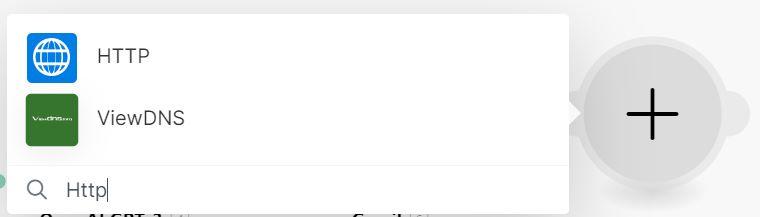
7. Choose Make a request.
8. Under URL field, write the following address:
http://<IP_ADDRESS>/external/api/update?token=<YOUR_BLYNK_AUTH_TOKEN>&V1=1
Make sure you replace <IP_ADDRESS> with the address you found at bullet #5, and replace <YOUR_BLYNK_AUTH_TOKEN> with the value you copied at bullet #2.
9. Click Save and make sure your scenario looks like this:

Make - Sending Telegram Messages Using a Bot

Now we will set up a bot which will ask our friends for some songs to be added to our playlist while keeping them a bit entertained :)
1. Sign in to your Telegram account, search for "BotFather" account and start a chat with it.
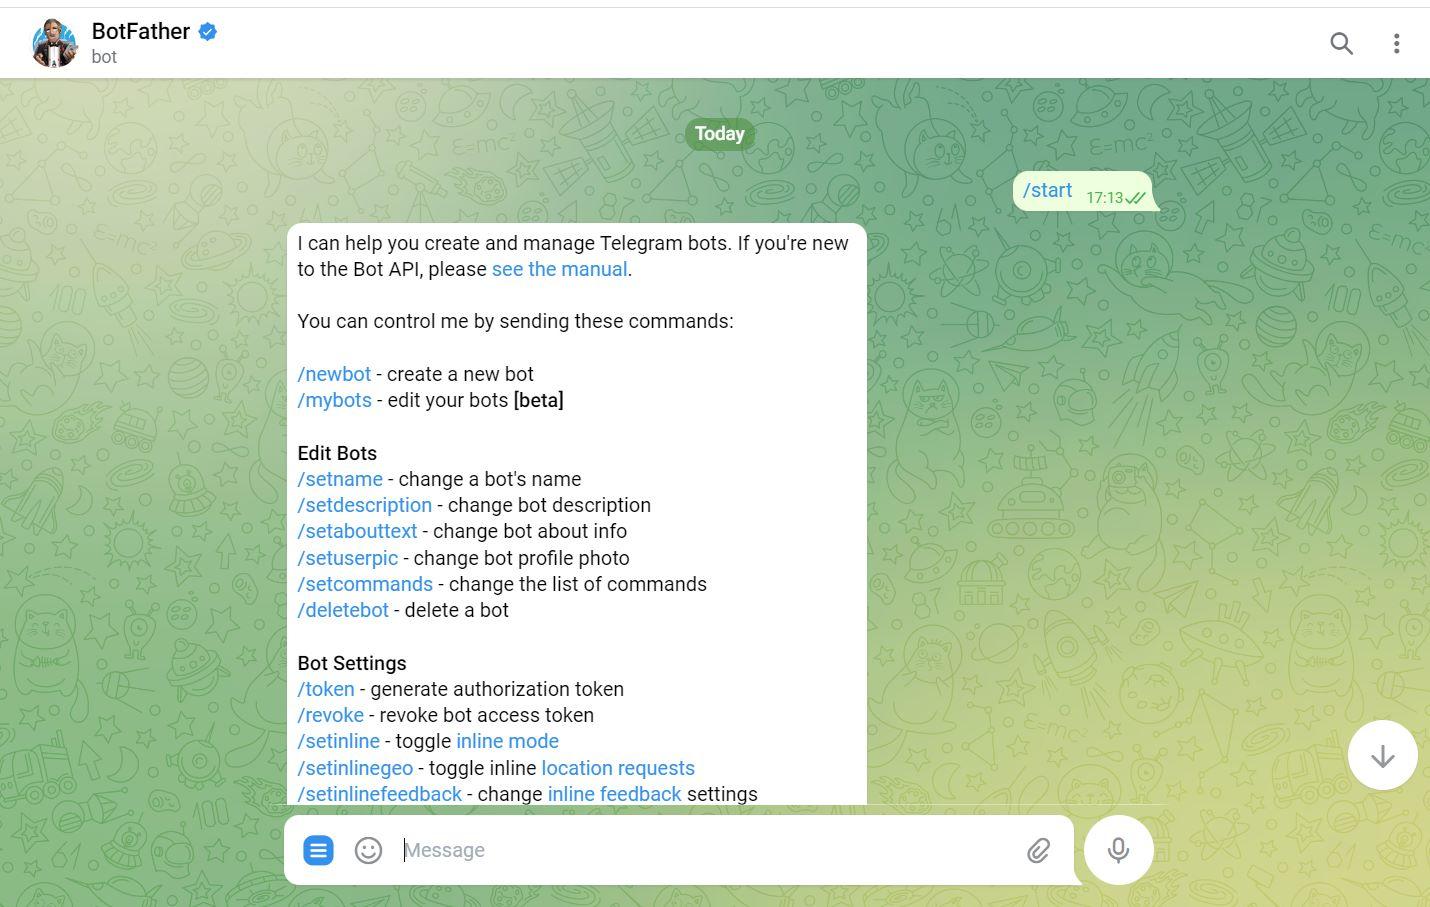 2. Send the following message to BotFather:
/newbot
3. Send to BotFather the name you like for your bot.
4. Send to BotFather the username you choose for your bot.
5. Copy the HTTP API token received by BotFather.

6. Create a new Telegram group, name it as you like and add your friends and your bot to the group, give the bot admin privileges.
7. Add to your group also a bot named "RawDataBot". As soon as it will be added, it will send a message containing your group ID (which is a negative number).

8. Go to Make and press on the lower empty module (the upper logo with plus (+) size).
9. Select Telegram Bot and then choose Send a Text Message or a Reply
10. In the popup window, click on Add and under the Token field paste the token you copied at bullet #5. Click on Save.
11. Fill in the new popup form according to the image below and click OK button:

12. Add another Telegram module which will be connected to the right of the previous Telegram module which we just created.
13. Select Telegram Bot and then choose Send a Text Message or a Reply.
14. Fill in the new popup form according to the image below and click OK button (link to the random funny GIF generator: https://codepen.io/yohad/full/ExproxK):

15. Save your changes so far (click on Save button in the button bar), set your scenario scheduling setting to Immediately as data arrives and turn it on.

Congratulations! We've finished our first scenario. If you did everything correct, your Make scenario should look like this:

Make - Spotify Flow
Let's create a new scenario for appending to your Spotify playlist the songs your friends suggested you in Telegram!
1. On the left panel in Make, click on Scenarios, then choose Create a new scenario, select Telegram Bot and then choose Watch Updates.
2. Click on the Telegram module, choose Add and under Connection field choose your already configured Telegram connection. Click OK to save your settings.
3. Add a new module connected to the right of Telegram Bot module, choose Spotify, then choose Search Tracks option.
4. Click on your newly added Spotify module, in the popup window choose Add and Save. You'll be requested to log in with your Spotify account.
5. After you've logged in to your account, fill the popup form according to the following image:

6. Add a new module connected to the right of Spotify Search Tracks module, choose Spotify and choose Add an item to playlist. Same as before, choose your Spotify account and fill the form as the following image:
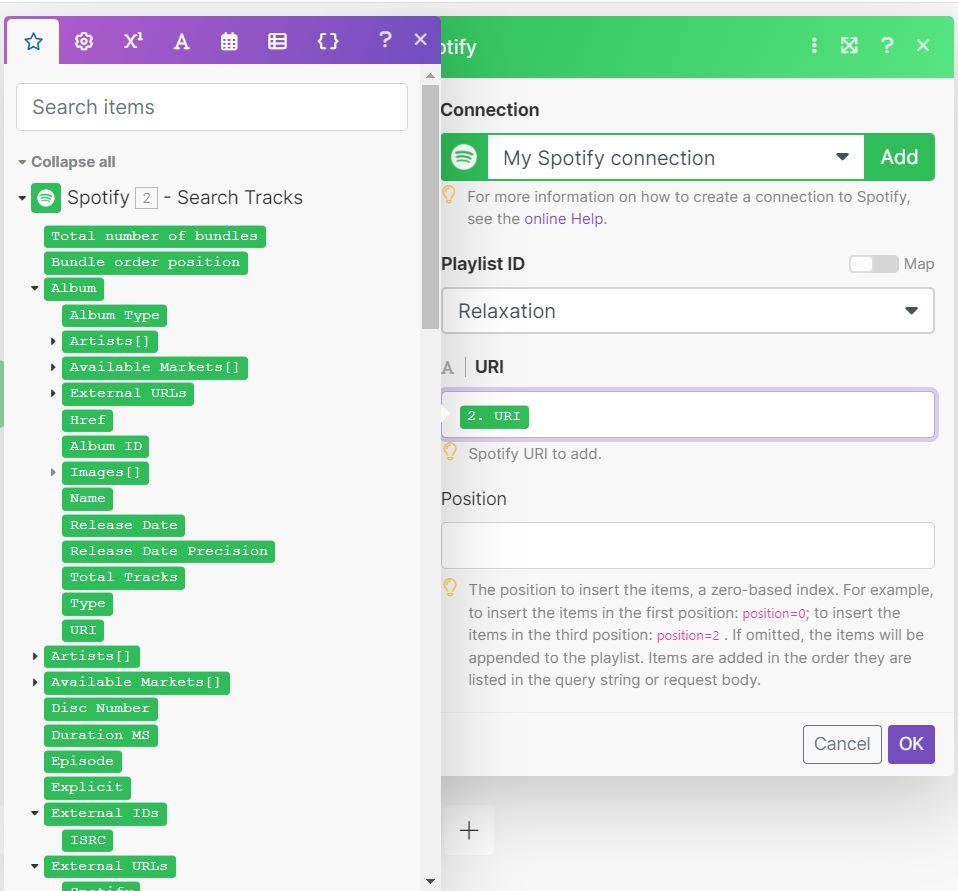
Note: Under Playlist ID field make sure to choose the playlist to which you want your friend's suggested songs to be added to.
Notify Whenever a New Song Is Added
So now songs which are sent by our friends (even by partial name) will be added to your Spotify playlist as well.
However, we would like to:
- Notify in your Telegram group about the exact song which was added.
- Inform the CPX that a new song was added so it can make a sound and count it (turning on your TV when it counts 3 songs).
- Maintain a Google Sheet table with information about every added song.
Let's go into some technical details :D
Telegram notification
1. Add a router to the right of your lastly added Spotify model. The router should have 3 endpoints.
2. For the first router endpoint, choose Telegram and then in the popup menu select Send a text message or a reply.
3. Configure the popup form according to the following configuration:

CPX notification
4. For the second router endpoint, choose HTTP and then in the popup menu select Make a request.
5. Click on the newly added module and in the popup window, under the URL field, copy the URL we already built in Step 6: Make - Creating a HTTP Module, replace the substring V1 with V2. It should look like this:
http://<IP_ADDRESS_FROM_STEP_6>/external/api/update?token=<YOUR_BLYNK_AUTH_TOKEN_FROM_STEP_6>&V2=1
Google Sheet update
6. Create a new empty Google Sheet
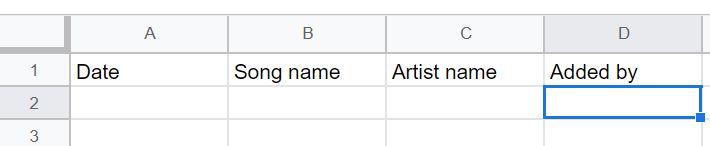
7. Fill first row according to the following image:
8. For the third router endpoint, choose Google Sheets, then select Add a row.
9. Click on the newly added module and in the popup window, click on Add, then on Save and log into your Google account.
10. Fill the new popup form according to this photo:


11. Save your changes so far (click on Save button in the bottom bar), set your scenario scheduling setting to Immediately as data arrives and turn it on.
That's it for Make!
If you did well so far, your second scenario should look like this:

Finding the Infrared Signal Used to Turn on Your TV
So... in order to turn on the TV, we have to understand what is the frequency of the infrared signal sent from the TV remote control to the TV itself when pressing on the power-on button.
In order to do it we should upload a sketch to the CPX which makes our CPX an infrared signals sniffer!
Here are the steps to achieve it:
1. Download the attached Infrared_Read.ino file.
2. Open this file in your Arduino IDE and upload it to your CPX by pressing the Upload button.

3. Open Serial Monitor.

4. Put your TV remote control in front of your CPX and press on the power-on button.

5. Copy the line you got in the serial monitor:

Downloads
Configuring and Uploading Software to the CPX
- Download the attached files: TVMad.ino and NokiaRingtone.h file (credit goes to robsoncoutu from Github for the nice Nokia ringtone)
- Open these files in your Arduino IDE.
- In TVMad.ino:
- Update lines 2-4 with your Blynk template ID, Blynk device name, Blynk auth token. Those values can be found in Blynk website: Go to Blynk dashboard, on the sidebar choose Search, then select your device and choose Device Info tab. Under FIRMWARE CONFIGURATION you will see all the needed information to fill.
- Fill in your network name and network password in lines 7-8.
- Fill in your TV protocol data you got at step 10 in lines 11-13:
- For instance, in the example shown at step 10, lines 11-13 would look like this:
                  #define MY_TV_PROTOCOL RC5
                  #define MY_SIGNAL_BITS_COUNT 13
                  #define POWER_ON_SIGNAL 0x180C

Once you completed the steps above, you can compile and upload the code to your CPX by pressing the UPLOAD button in your Arduino IDE.

Bonus
1. If you want to change the number of songs your friends need to send you in telegram until the CPX turns on your TV, change the value of line 25 (default is 3):
#define NEEDED_AMOUNT_OF_SONGS 3
2. If you want to change the color of your LED color, change the value of line 26 to the RGB code of your desired color (a converter from color to its RGB code can be found here).
#define NEOPIXELS_COLOR 0x00FF00 // Green
Positioning Your CPX
Let's connect our CPX to batteries so it won't have to be connected to PC in order to run.
We will do it by inserting 3 AAA-batteries into the batteries case and connecting the batteries case's JST-PH 2 pin connector to the CPX (see image below).
Now, place the CPX in front of your TV so the TV can get signals from your infrared transmitter.

Well Done! Time to Have Some Fun
Congratulations! You've successfully make your own Madness-to-TV funny Rube Goldberg Machine.
Don't forget to get sometimes mad and shout out loud ;)
We hope you'll enjoy it!