Frog Phone Charger and Glasses Holder
by apgoldberg in Workshop > 3D Printing
2512 Views, 18 Favorites, 0 Comments
Frog Phone Charger and Glasses Holder
The Story:
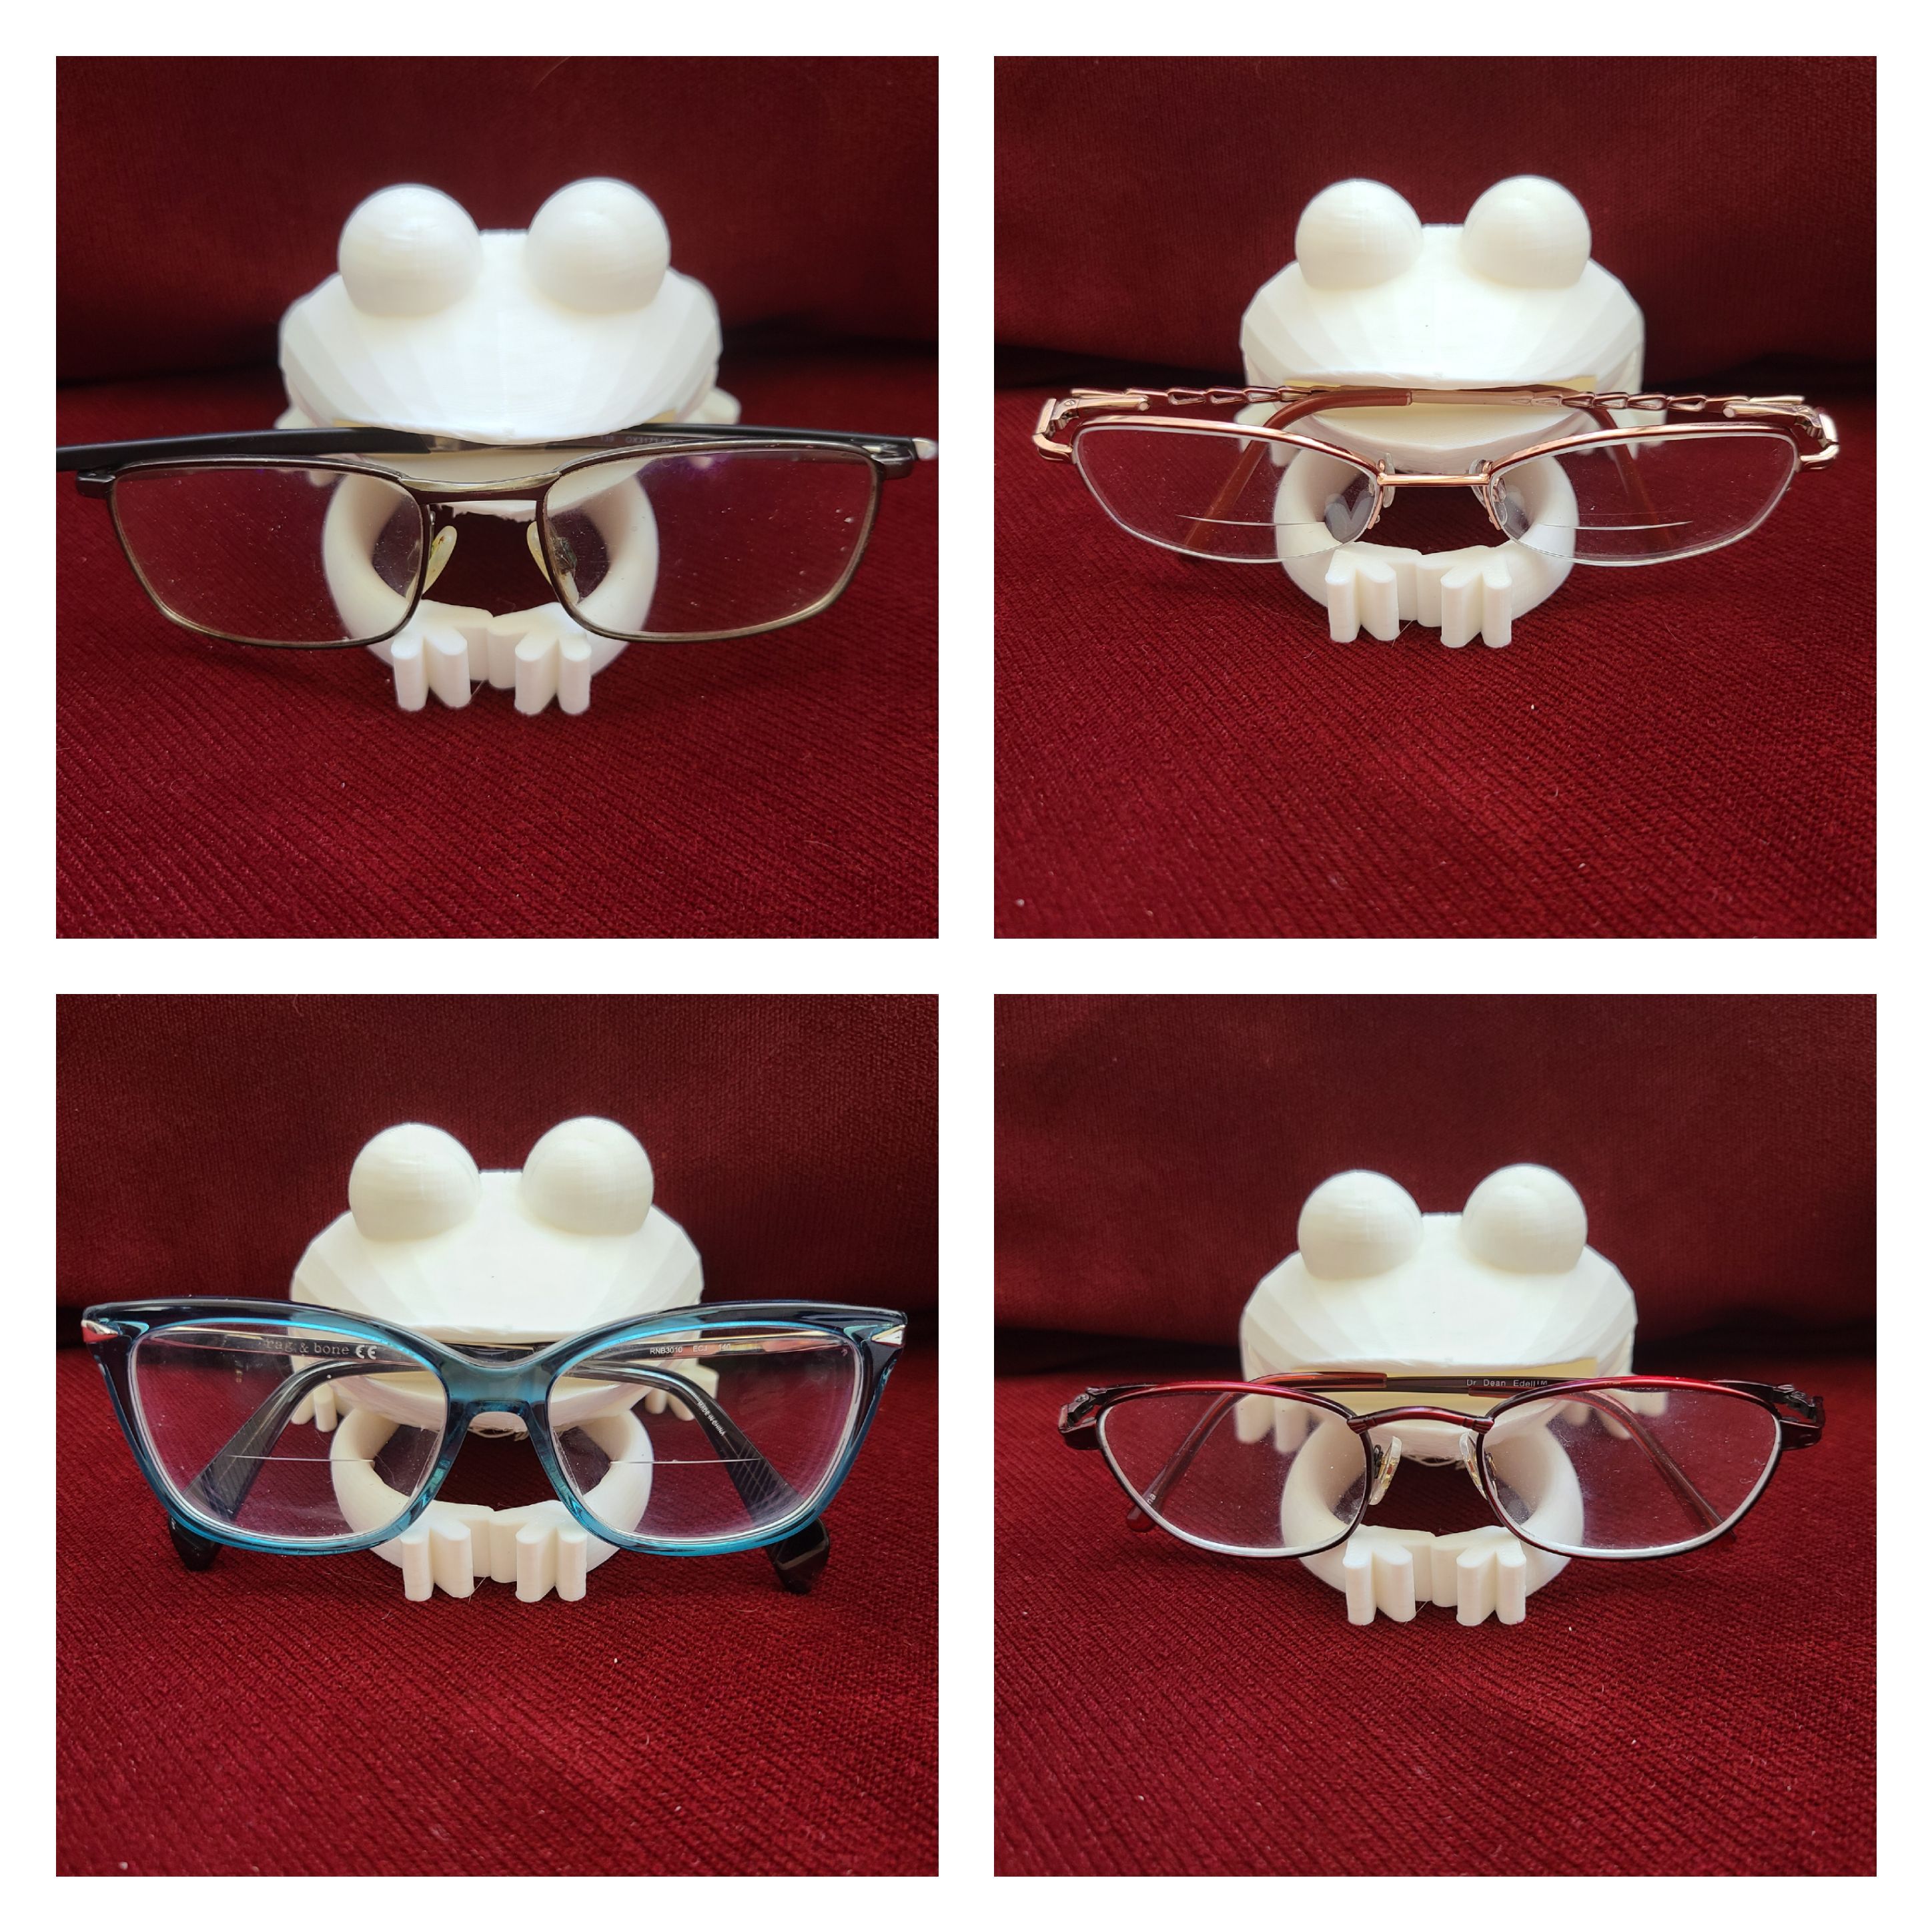
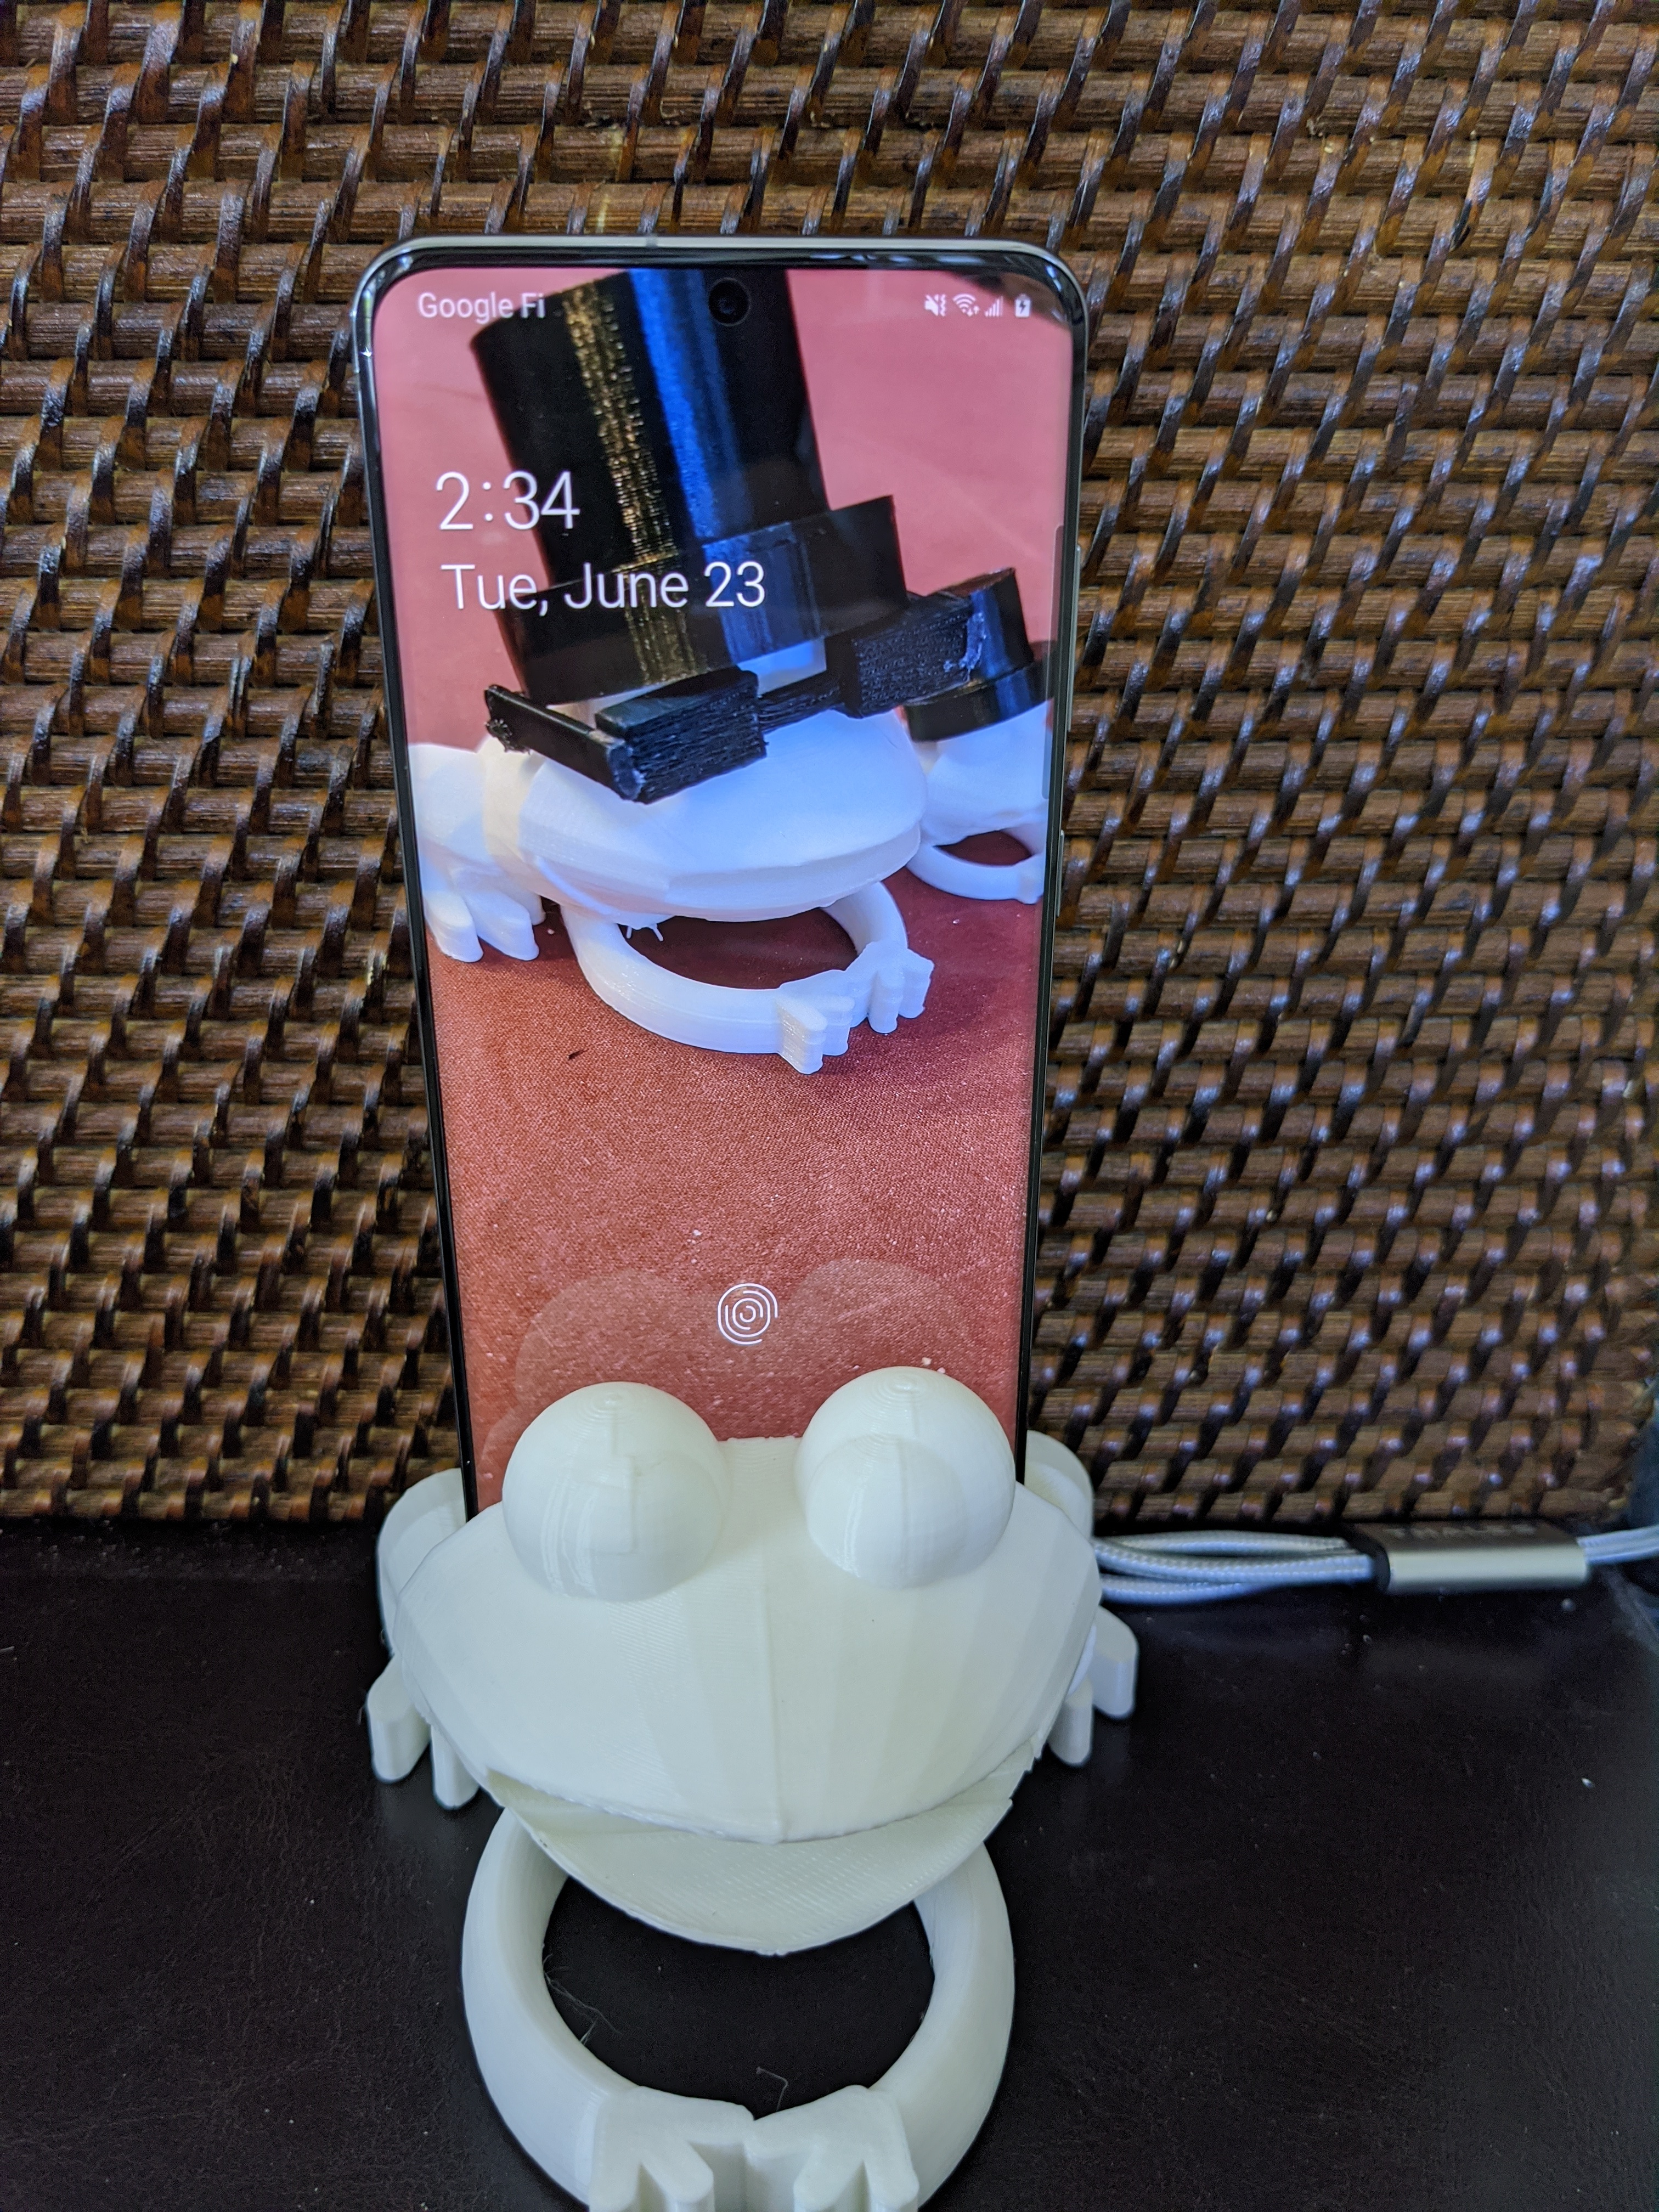
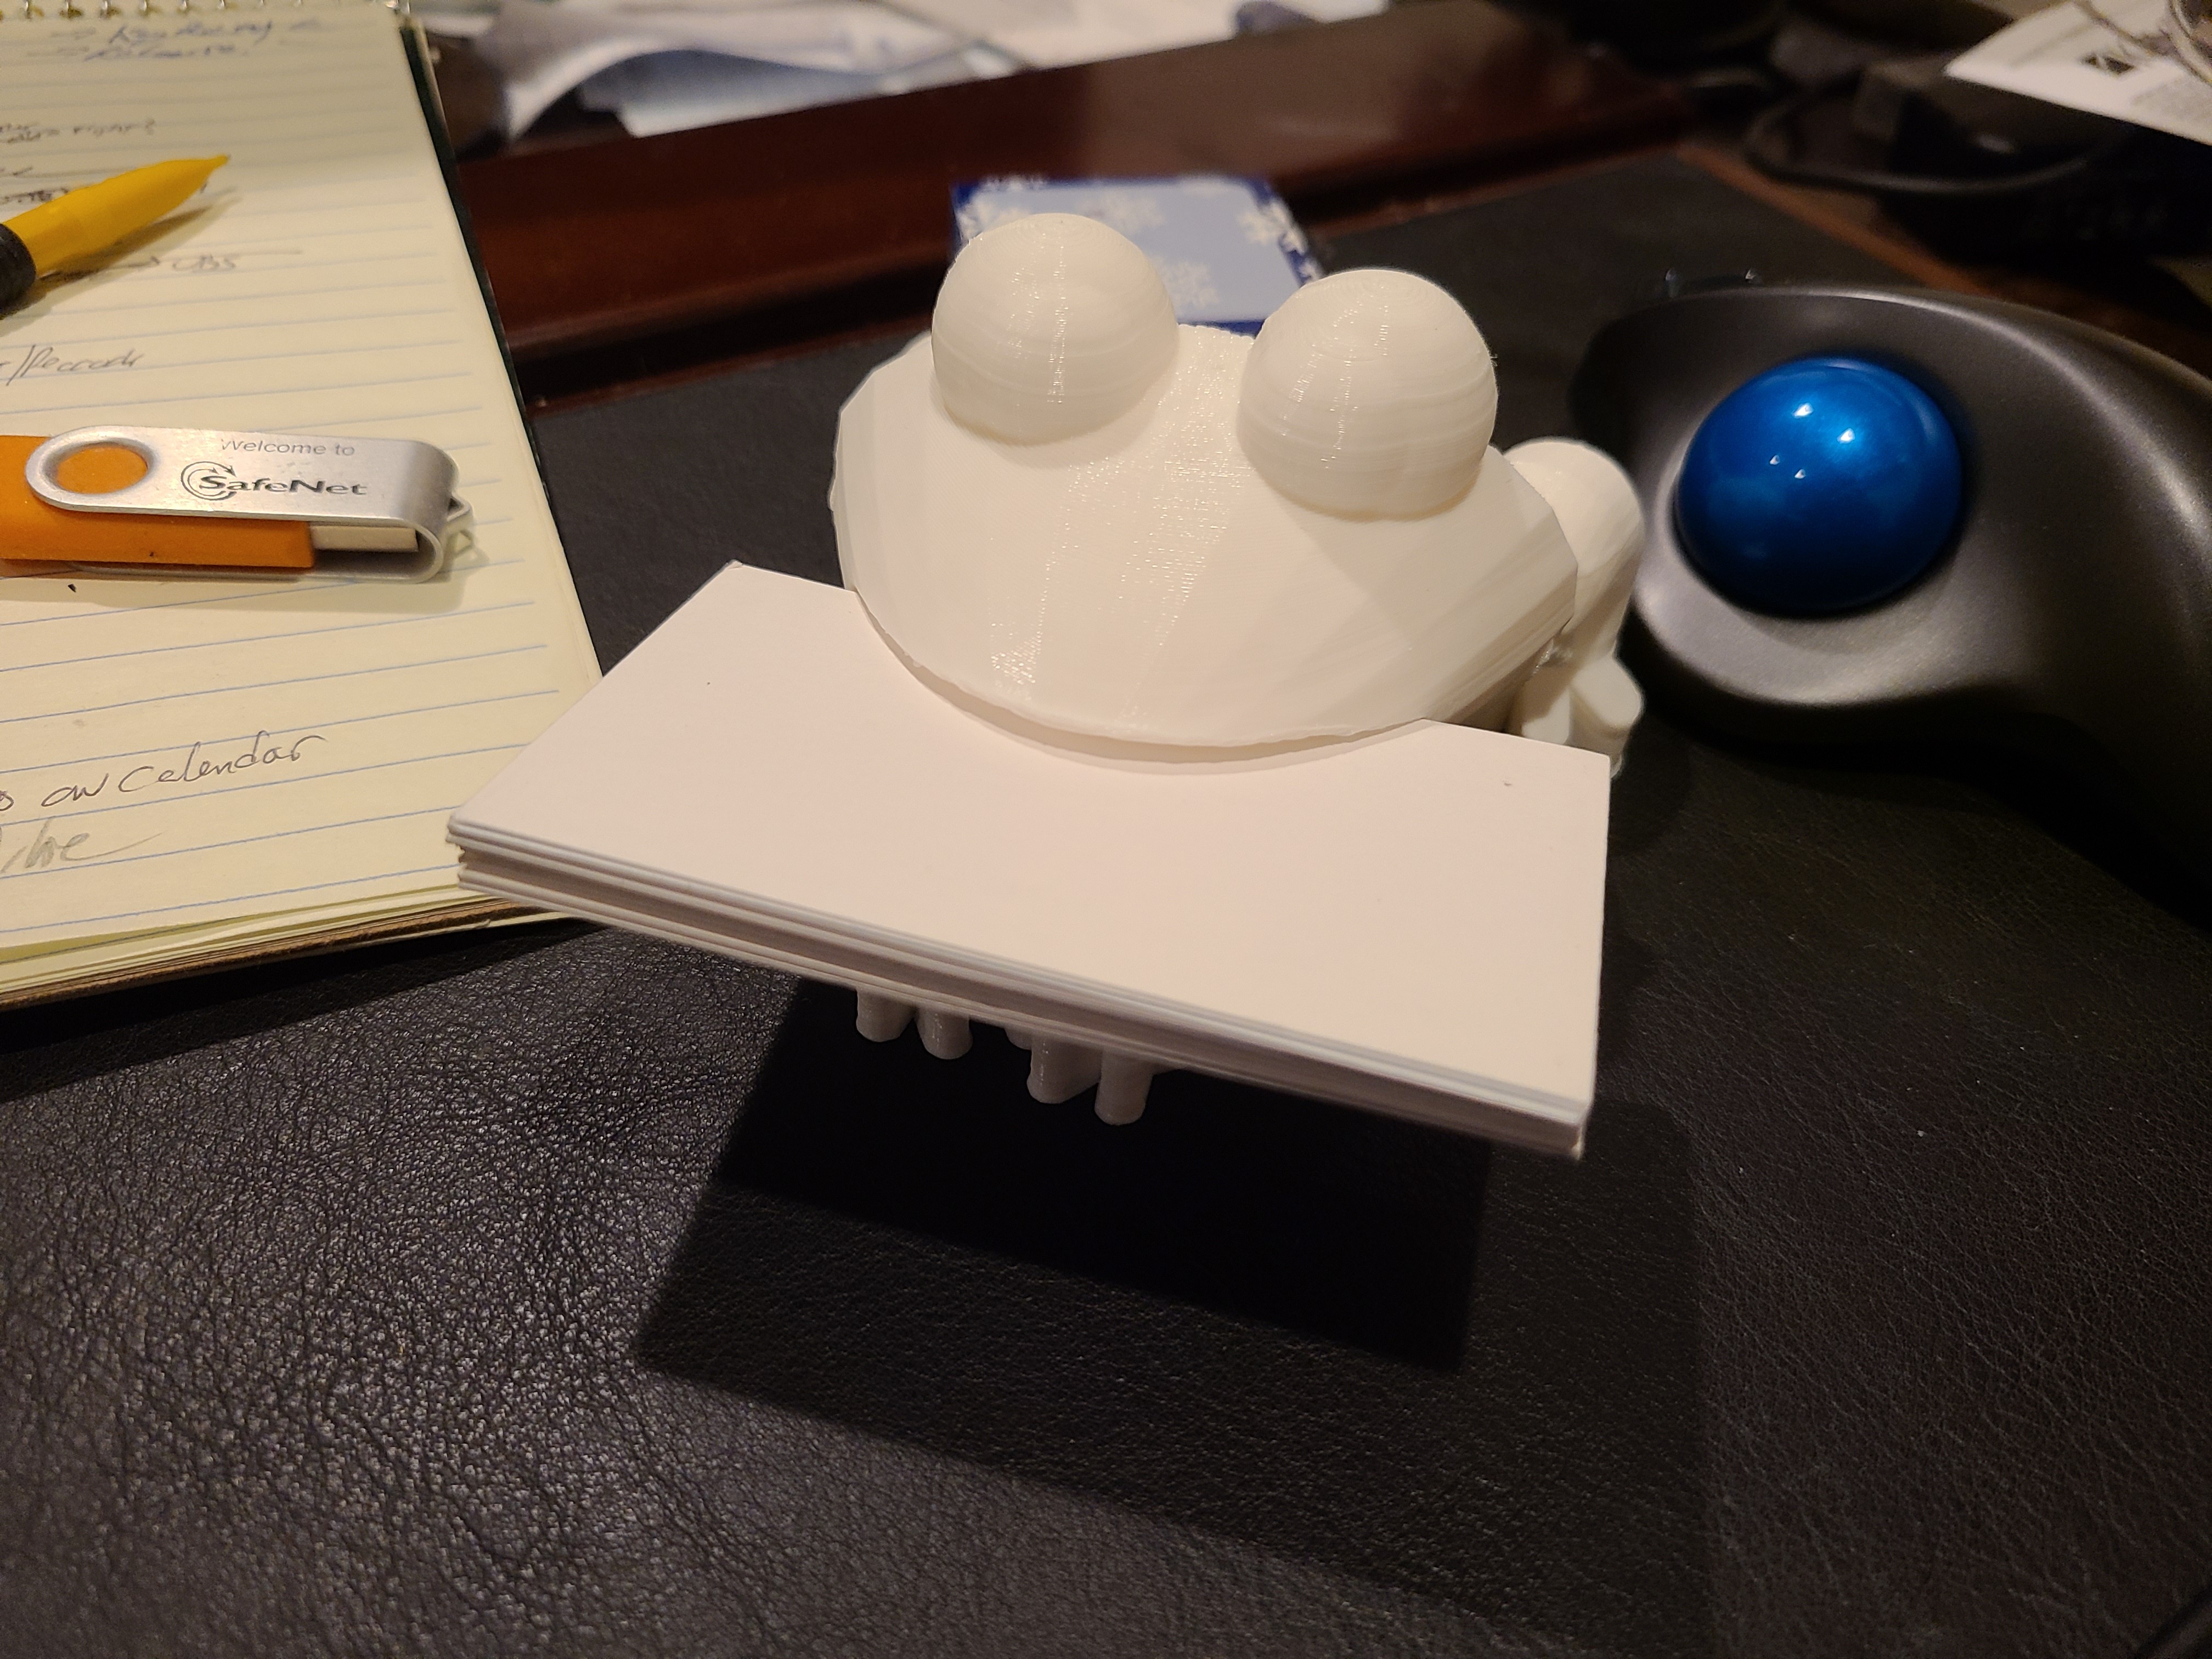
Since quarantine started, my dad has had to work from home. He often leaves his phone and glasses on the desk in our office, and because we share the office they often end up buried under a pile of someone else's papers. In order to help him out I gave him a frog phone and glasses holder for fathers' day! When he goes back to work and doesn't need to worry about his glasses being buried, he can use it as a business card holder! In this Instructable I'm going to show you how to make the frog for yourself in Tinkercad as well as how to customize it to work with your phone and glasses. If you'd like to build from a new design start with step 1. Or, make a copy of my frog design on Tinkercad and skip to step 5 to learn how to customize it for yourself.
Supplies
- Tinkercad access
- 3D printer
- A basic understanding of Tinkercad (if needed this video gives a basic overview)
Frog Head
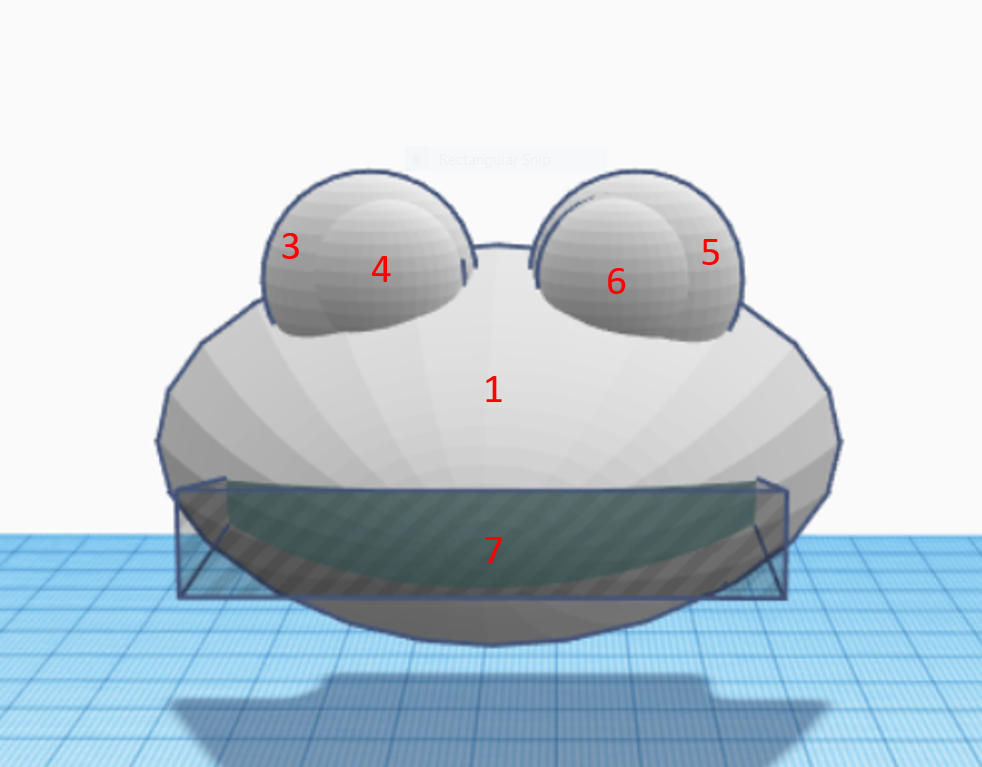
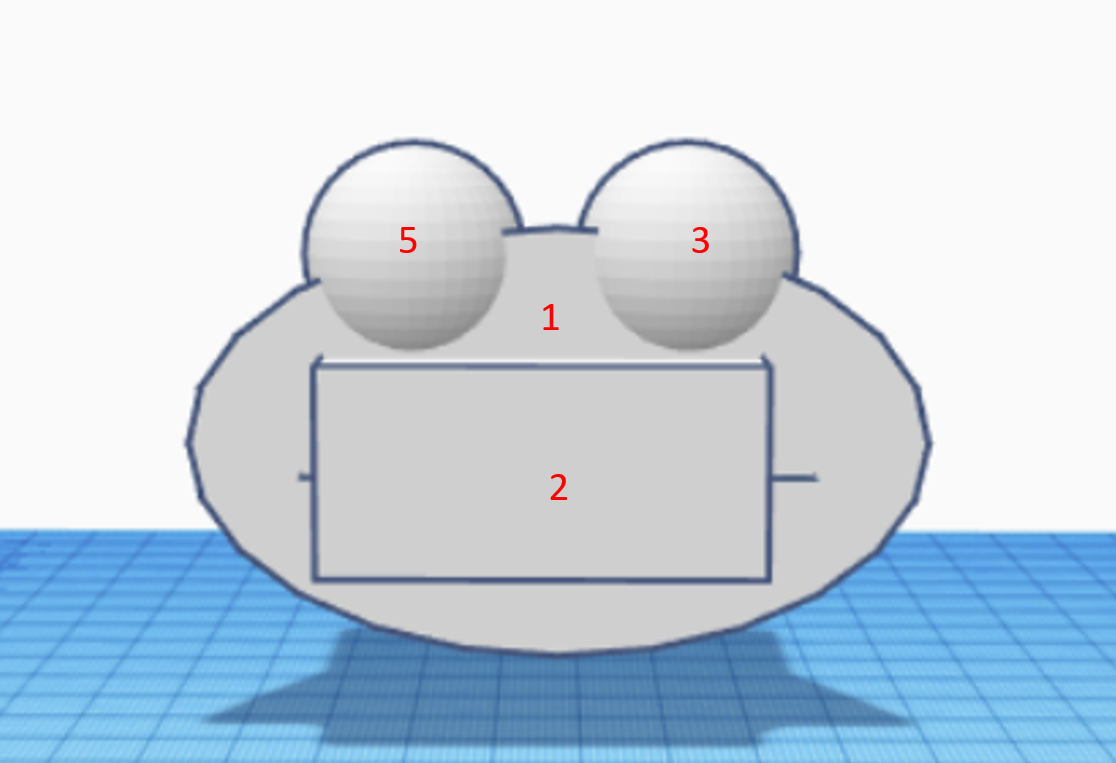
The first step is to construct the frog head! The head is made up of 7 Shapes. All measurements are in millimetres.
Shape 1: Paraboloid, rotate 90 degrees, scale height-50, width 86.25, depth 50.
Shape 2: Box, scale height-24, width 51.2, depth 22.09, center on the back of shape 1.
Shape 3: Sphere, diameter 25.5, align as seen in the image using the box as a reference. It should slightly hang off the back of shape 1.
Shape 4: Sphere, diameter 19.25, align as seen in the image (this is the second part of the eye).
Shapes 5 and 6: Select Shapes 3 and 4 and Duplicate (ctrl+d) then move them symmetrically onto the other side of the head.
Shape 7: Wedge, choose the Hole option, Rotate -90 degrees keeping the vertical face perpendicular to the plane, scale height 10.5,width 60, depth 51.25, center align and move so that it barely peeks through the back as seen in the image.
Frog Body
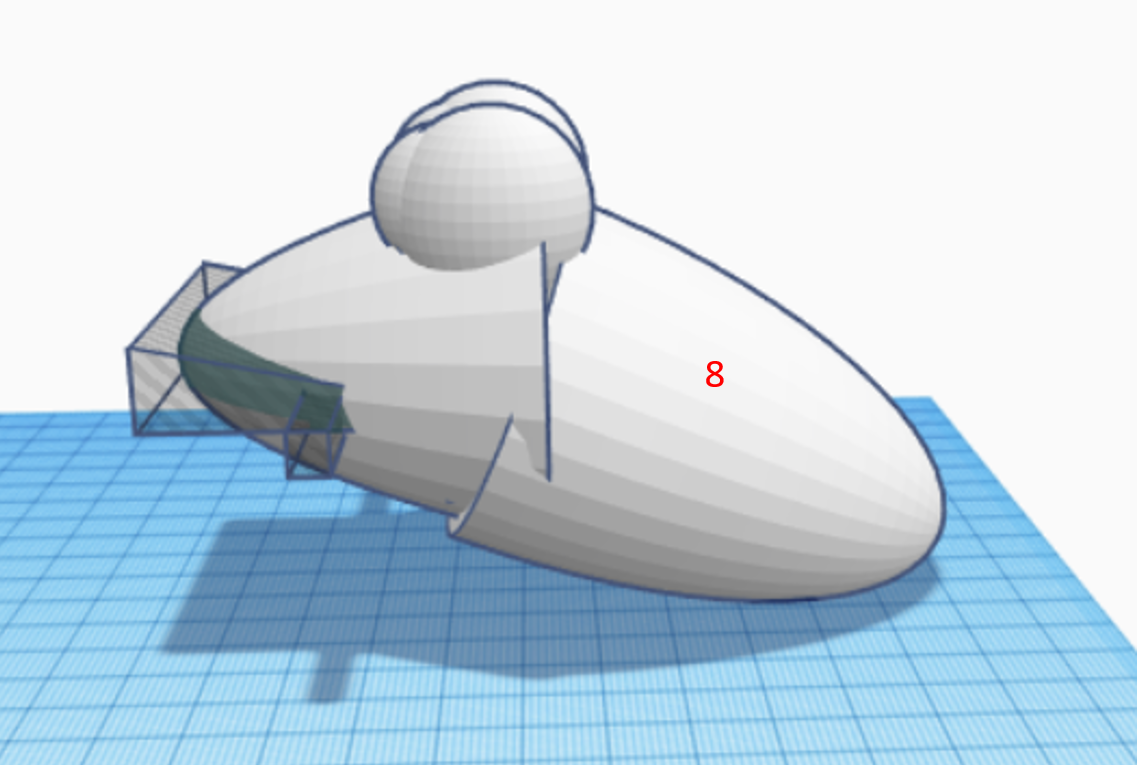
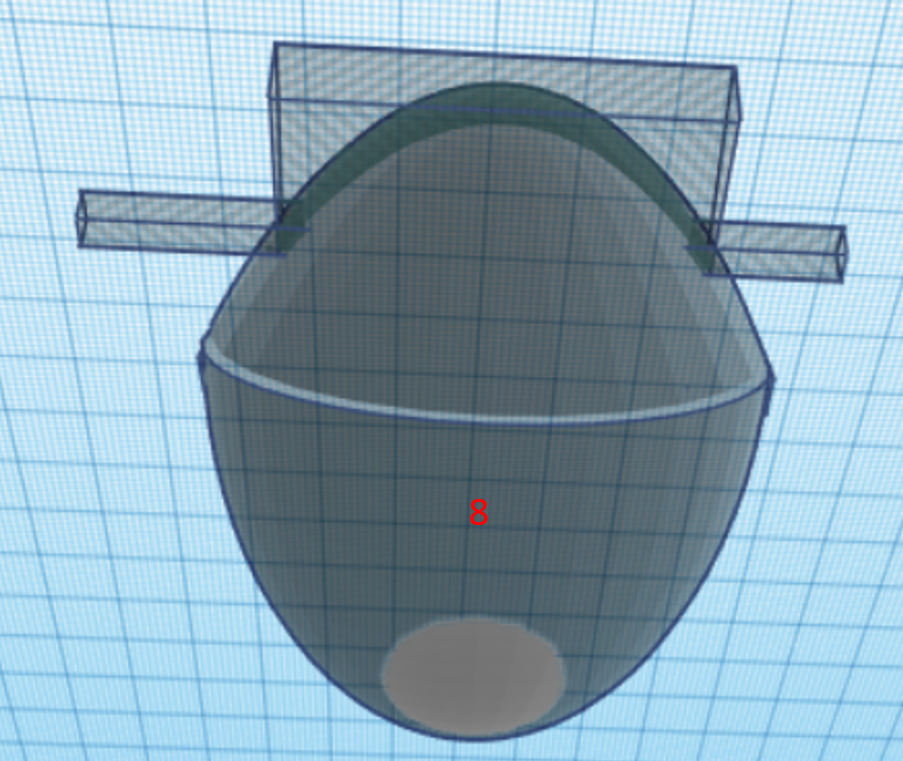
Shape 8: The frog body is only one Shape, but it's a bit complicated. Because of how Tinkercad works when scaling rotated Shapes it's important to scale the Shape before rotating it. Add a Paraboloid and scale it height 66.67, width 83.25, and depth 47.5. Now rotate the Shape -112.5 degrees. Then align it as seen in the image. It should be -2 mm down and center aligned with the head.
Frog Legs
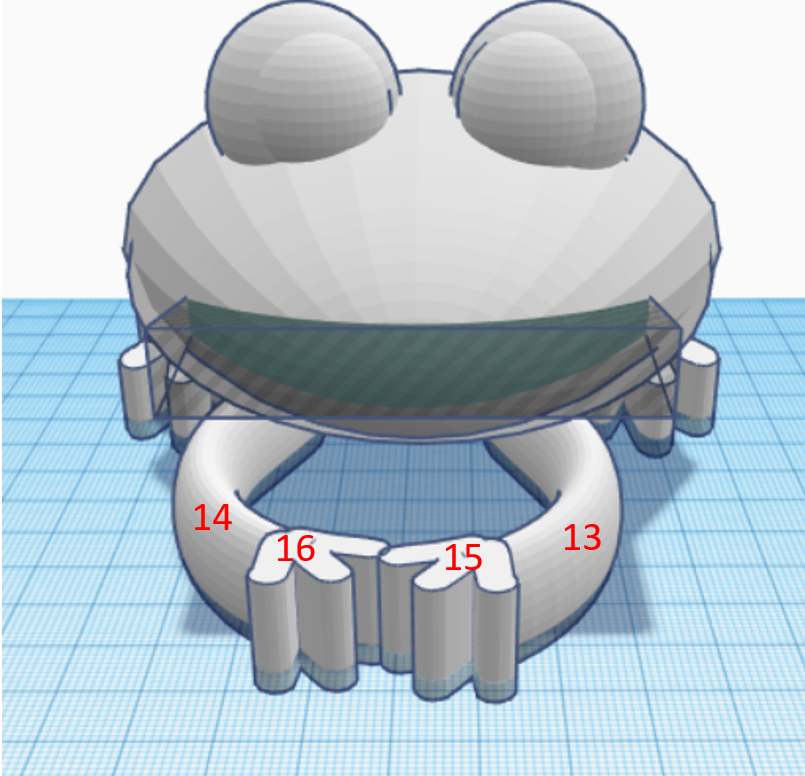
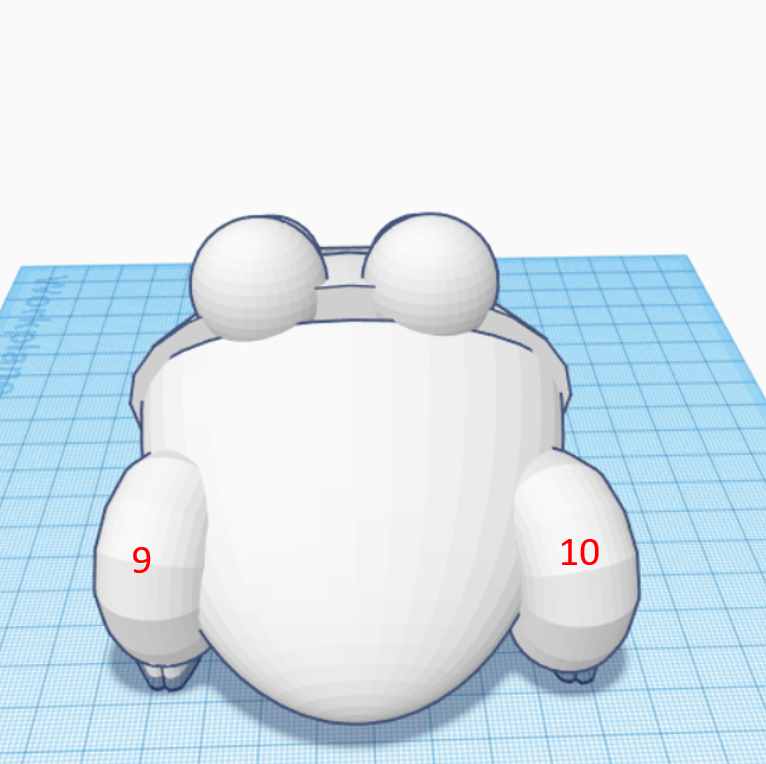
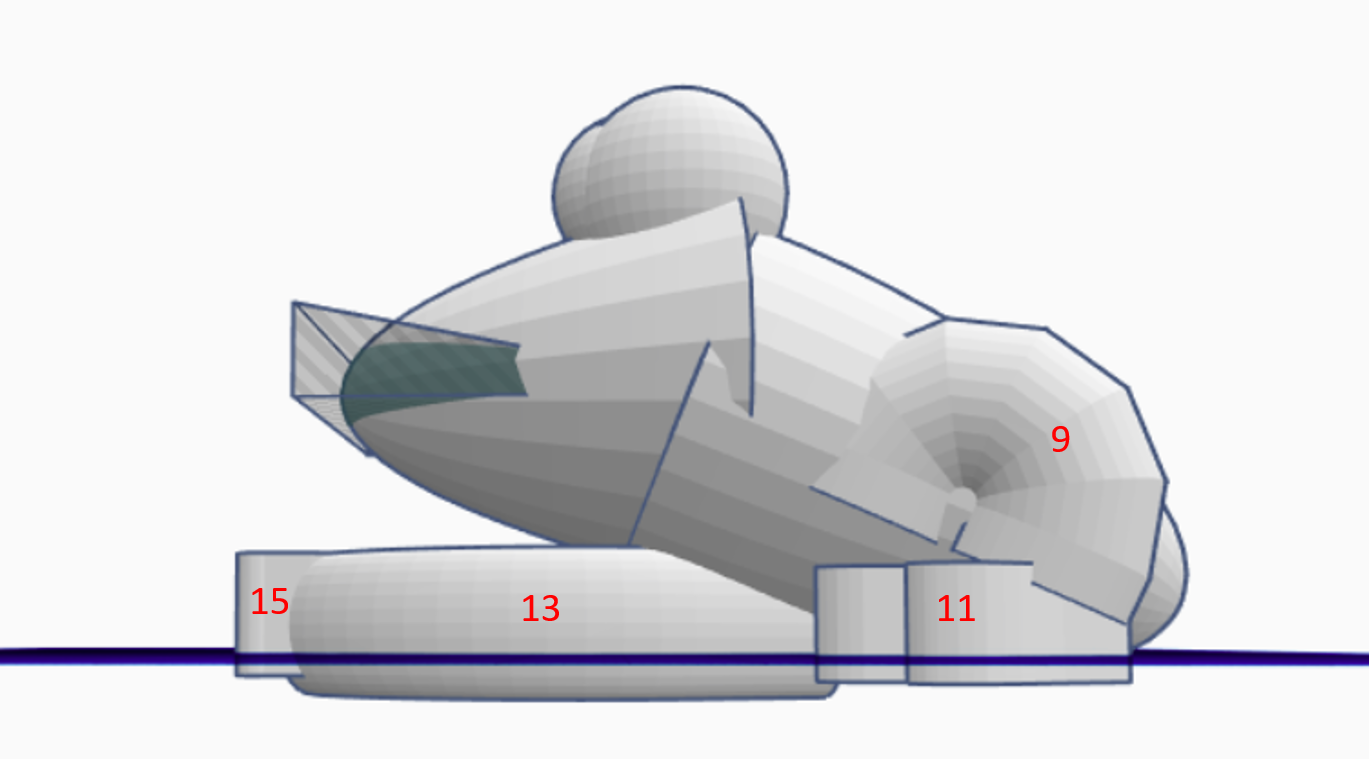
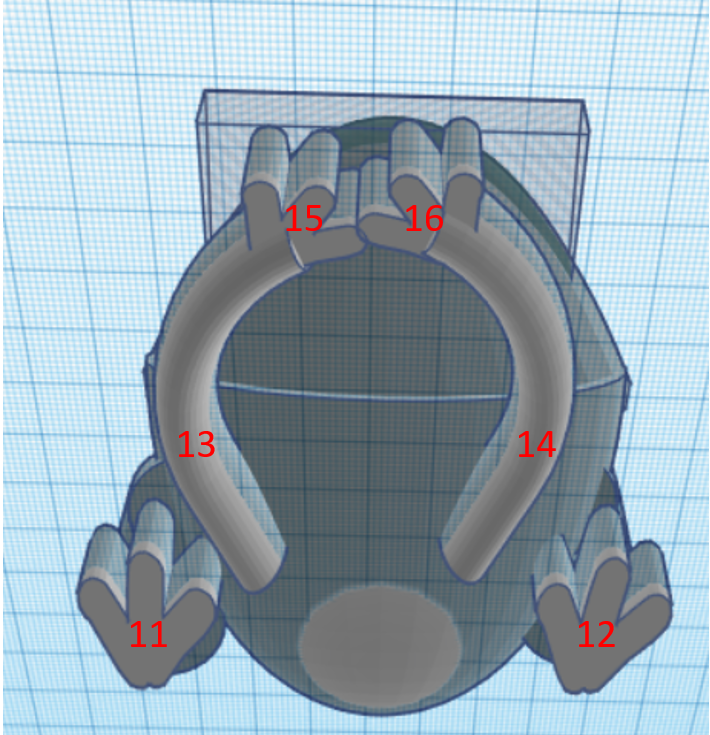
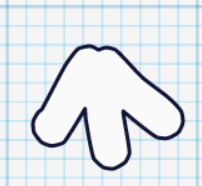
The frog legs use the Bent Pipe and Scribble Shapes, the Bent Pipe Shape can be found under Featured Shape Generators. To make the Scribble use the image as a reference, you probably can't make it exactly the same, but as long as it looks froggy, it's good!
Shape 9: Bent Pipe, set to 30 (any large number works this is to get rid of the pipe hole), set the Arc Diameter to 1, rotate 90 degrees so the flat side is down, scale height 27.34, width 25.1, depth 40.75, rotate 22.5 degrees so the flat parts are no longer parallel to the ground, then on the final axis rotate 15 degrees, move it to where it is seen in the images.
Shape 10: Move Shape nine symmetrically to the other side of the body.
Shape 11: Scribble, this Scribble is just 3 lines, because the exact scribbles will vary the necessary scale may vary too, my back foot is scaled height 11.92, width 22.44, and depth 33.26. It's not necessary to use this exact scale, it's likely best to size it yourself. Align as seen in the image.
Shape 12: Move Shape eleven onto the opposite side of the body.
Shape 13: Bent pipe, set the lead in length to 10 and the lead out to 0, set the outer pipe width to 5, rotate 90 degrees level to the plane, scale height 17.5, width 24.4, and depth 70.61. Orient as seen in the image.
Shape 14: Move Shape thirteen onto the opposite side of the body.
Shape 15: Scribble, use the same Scribble from Shapes 11 and 12, I scaled it to height 15, width 16.25, depth 13.62. Rotate inward 30 degrees.
Shape 16: Move Shape fifteen onto the opposite side of the body.
Platform Hole
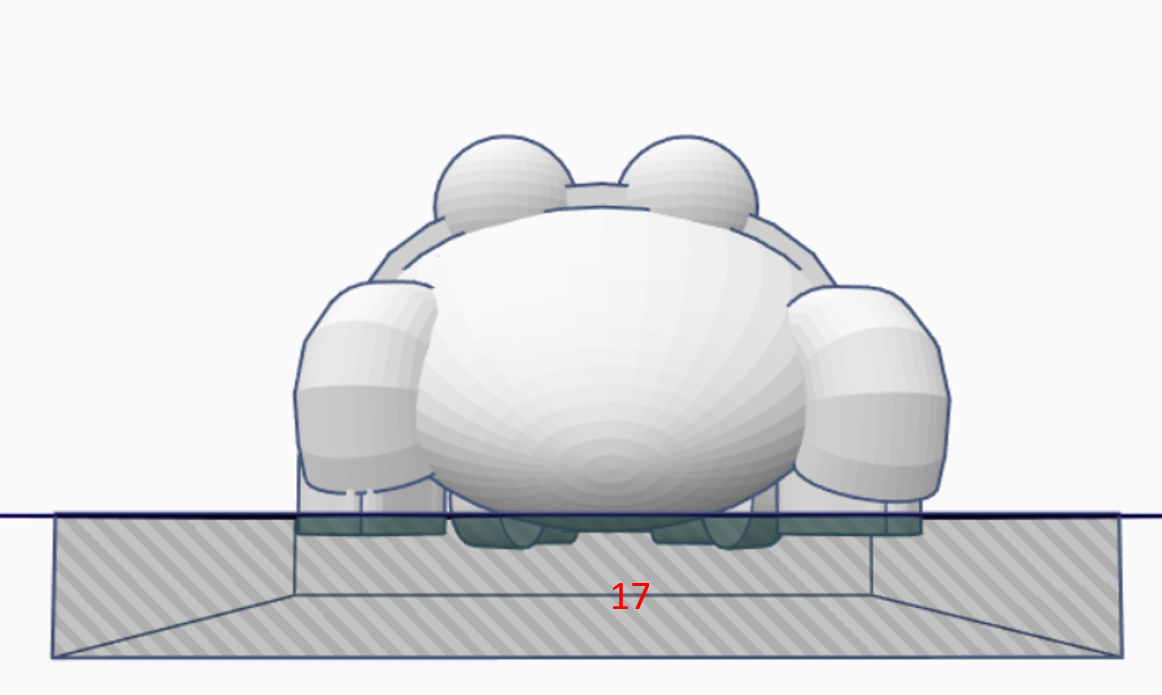
Shape 17: Place a Hole Box with the top of the Box level to the plane. Stretch the Box over the entire frog. This is to make the bottom of the frog flat so the frog will print and rest nicely.
Phone Charger
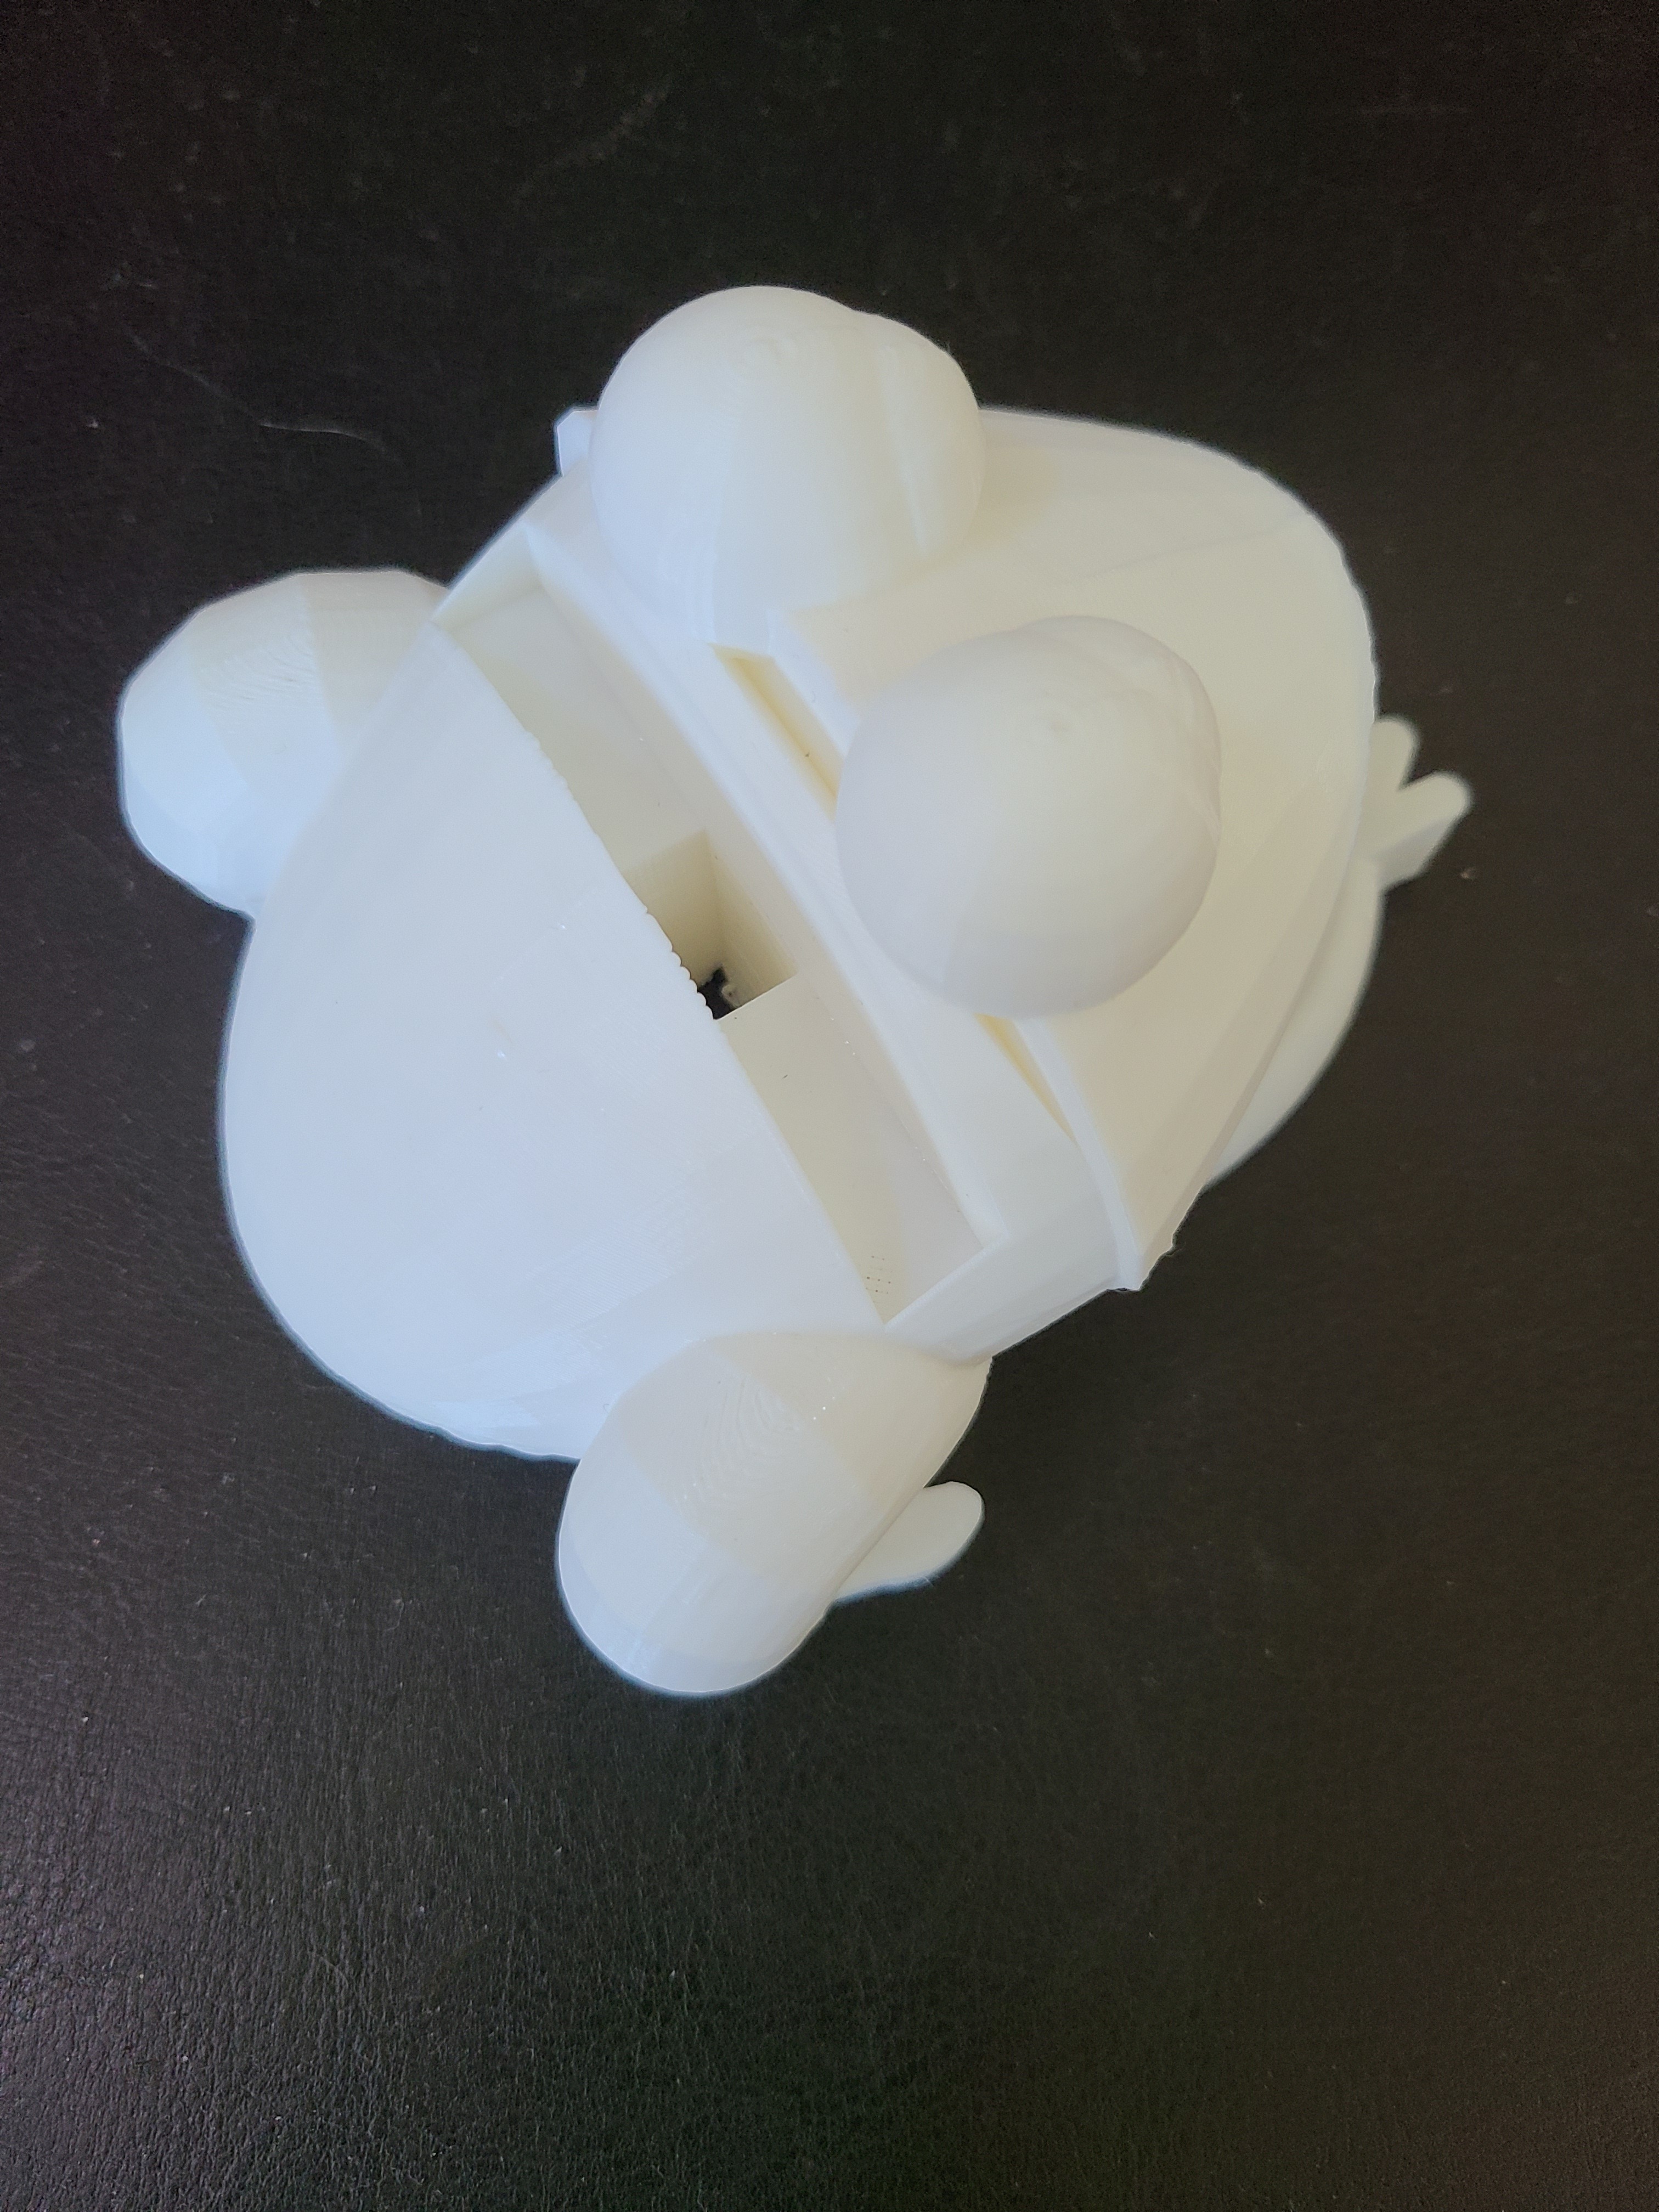
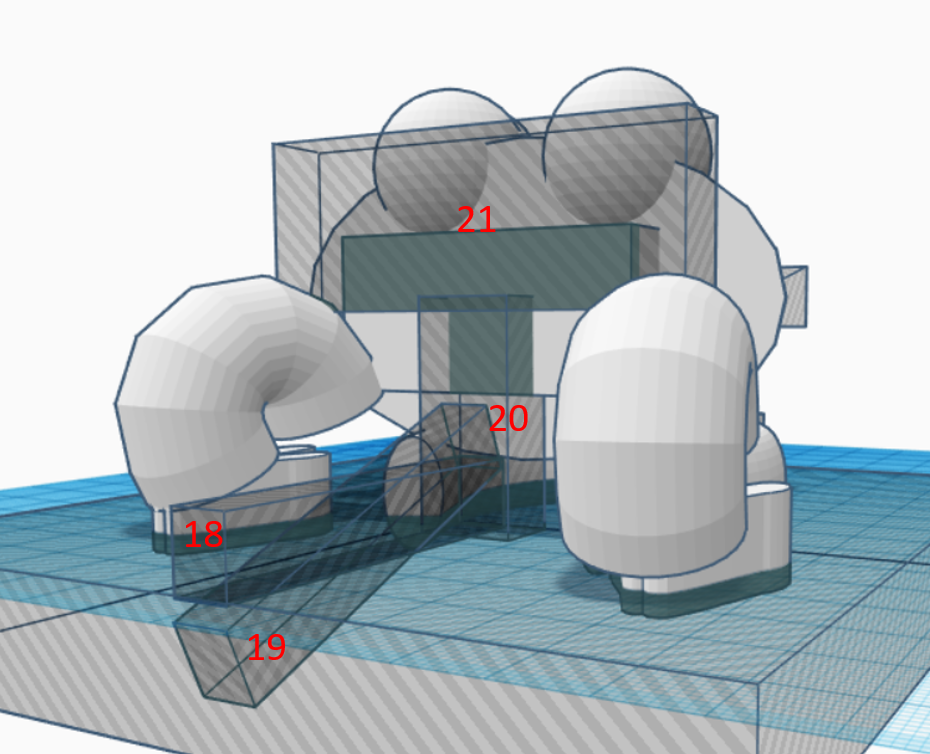
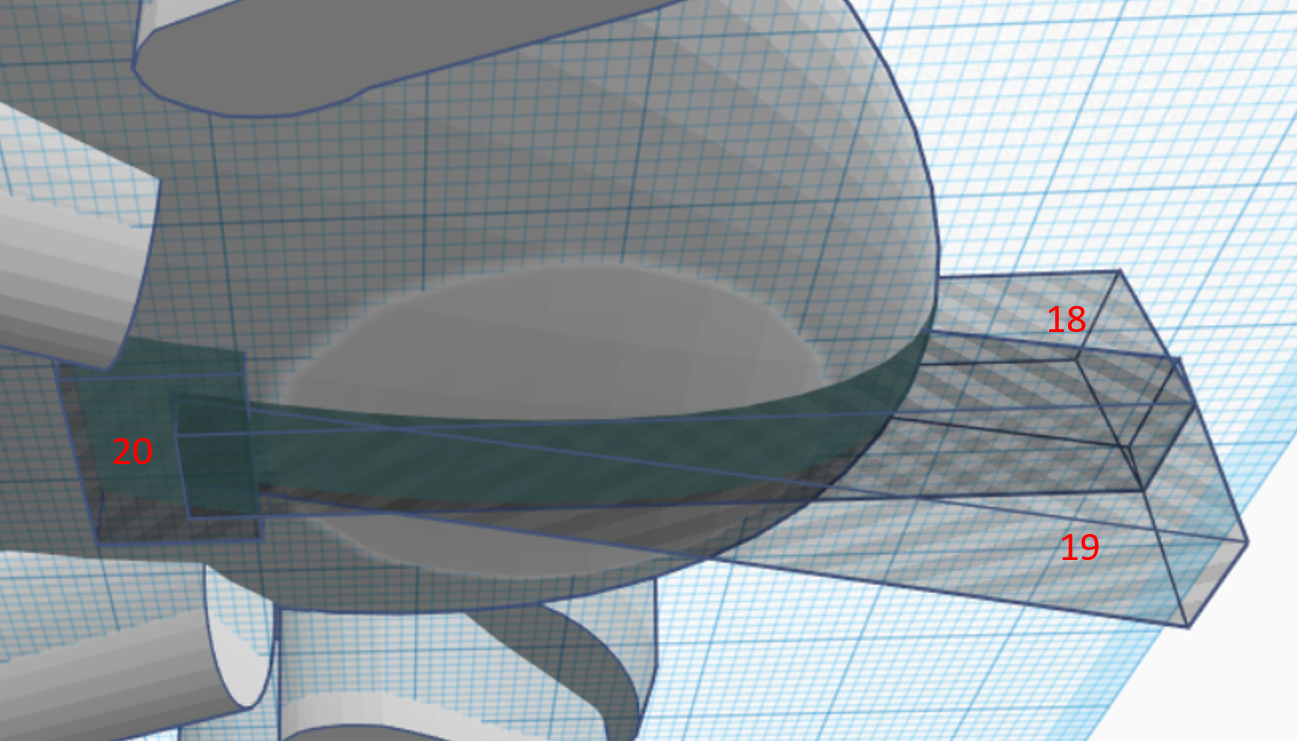

This section describes how to make the phone holder and the channel for the phone charging cable.
Cable Channel:
Shape 18: Box, Hole, scale height 10, width 7.5, depth 55, center with the body, level with the ground.
Shape 19: Duplicate shape 18 and rotate it 22.5 degrees, then move it down 2.
Shape 20: add a new Box Hole, scale height 35, width 15, depth 10, center with the body, move where seen in the image.
Phone Holder:
Shape 21:To make the phone holder you'll first need to get the dimensions of your phone or phone case. You can find the dimensions of the case by measuring or by looking if a seller provides the product dimensions. If your dimensions are in inches you need to convert the measurements to millimetres, or click edit grid in the bottom right and change your units to inches. Create a Box that is 1-2 mm wider than your phone or case, and around 1-2 mm longer and 26 mm high. As an example the S20s dimensions are 151.7 x 69.1 x 7.9 mm so the box could be 26 x 71 x 10.
Place the Box centered and overlapping with the vertical channel (Shape 3) by a small amount (1-3 mm is good).
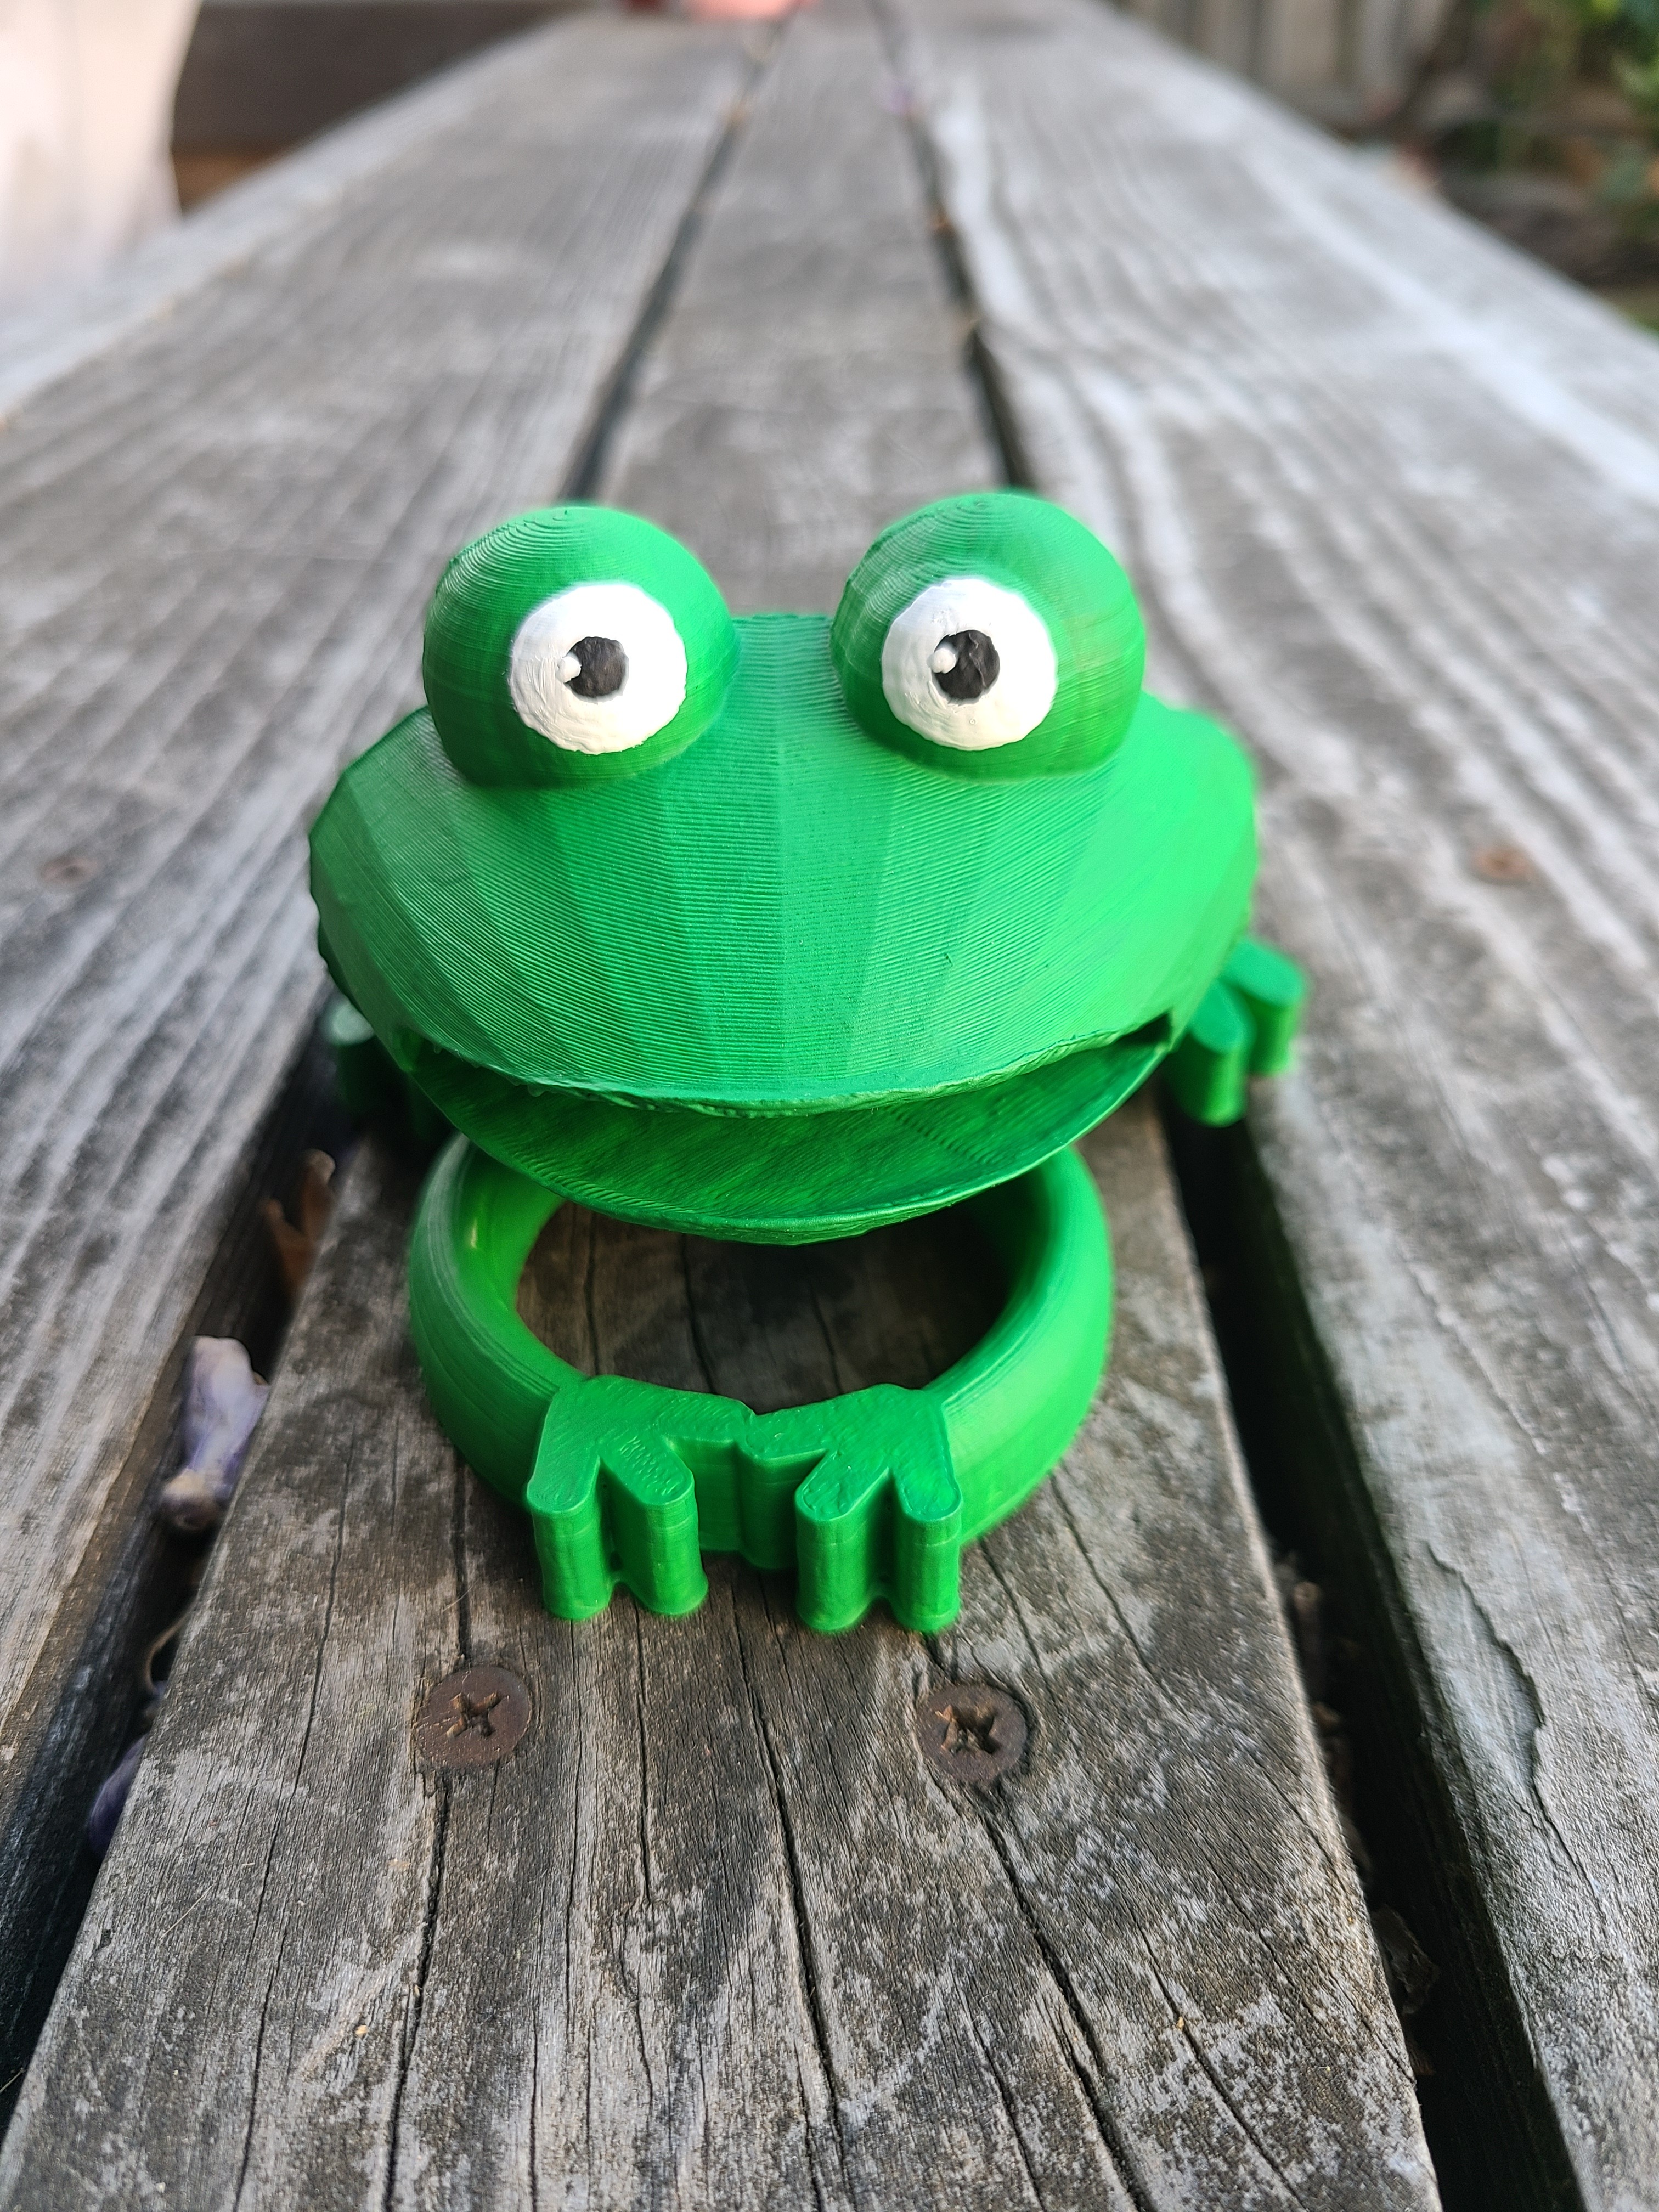
Congrats! You can print and paint!