Friends-inspired Gallery Wall

For this Friends-inspired gallery wall, you'll need an assortment of craft supplies, which I will link with each project.
You can make all of these fan art pieces to go for a gallery wall, or pick & choose for a little nod here & there.
Included projects:
- Yellow Frame Quilled Art
- Gladys Fan Art
- Unagi Cross Stitch
- Umbrella Art (easy)
- Friends Quote Cut-Out Art
Don't forget to check The Fisch Life IGTV channel for videos!
If you make any or all of these, pretty please share them with @TheFischLife on Instagram or Facebook & don't forget to tag @Instructables on Instagram & Facebook too!
Yellow Frame Quilled Art


Can you even have Friends fan art without the purple door & yellow frame? *said like Chandler*
SUPPLIES:
- purple paper or card stock - 4"x 6" (or cut to fit frame)
- one strip of 1.25" x 1/8" yellow paper
- four strips of 1/8" x 6" yellow paper
- glue
- kabob stick (or something to quill with)
- scissors &/or paper cutter (for cutting the above
- ruler
- frame & back to fit purple paper - no glass
Step1:
Fold the 1/25: x 1/8" yellow paper to make a rectangle. This will be the inside of your frame.
Glue it down.
Step 2:
Quill your other pieces, rolling the paper up & then rolling the other side. (In the video, I did this part before the rectangle.)
Unroll it a little, & make an arc in the middle (the spirals should be pointed up, with the arc like a mountain in the middle).
Adjust them as needed.
Glue one down on each side of the inner frame you already glued down.
Step 3:
Frame this frame art & enjoy!
Gladys-inspired Art


How about Phoebe's artwork called Gladys? With this tutorial, you can make your own less-creepy version.
SUPPLIES:
- picture frame (mat & glass optional)
- scrapbook paper of your choice for the background, should fit frame or mat
- brown paper
- purple paper
- peach paper
- glue stick
- double-sided tape or adhesive squares
- silver beads
- thread
- needle (optional)
- tape (optional)
- scissors
- Gladys template
Wanna watch the Gladys DIY video that goes with the tutorial?
Step 1:
Frame your background piece & close the picture frame. You can use a mat or not. You can have glass in the frame or not.
Step 2:
Print the template & cut out the piece of the template: dress, head/neck, hair, hand. You can adjust the size to fit your frame. You'll have to cut either part of the fingers away or part of the dress away.
Step 3:
Trace the template pieces onto the appropriate color. If you trace them upside down, it's not a big deal if the pencil marks don't get completely erased. Add back the part of the dress or fingers (whichever you cut away in step 2) with your sketching. Cut out the pieces & make any necessary adjustments.
Step 4:
Glue the pieces together & mount on a piece of peach paper/card stock (the color you used for the head/neck & hand). The hand should overlap onto the dress.
Step 4:
Make Gladys' necklace. String together some silver beads. You can use a darning needle if you'd like. When happy with the length of the necklace, put it on Gladys & "clasp" it with a piece of tape on the back. Alternatively, you could use a double-sided photo square.
Step 5:
Attach Gladys to the front of the frame using double-sided tape or photo squares. If your frame has glass, attach her to the front of the glass.
Step 6:
Pretend you're Regina Phalange with your very own Gladys. :)
Downloads
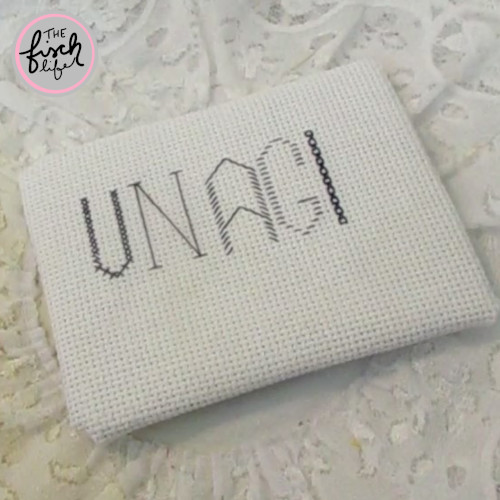
Unagi Cross Stitch


Ah yes, that state of awareness...or a salmon skin roll.
Supplies:
- cardboard
- white paint
- cross stitch fabric
- embroidery floss (or thread)
- needle
- scissors
Step 1:
"Write" out "UNAGI" with some scrap thread or embroidery floss on your cross stitch fabric. Make sure that your cross stitch fabric is a bit bigger than the cardboard & the "UNAGI" is small enough to fit comfortably on it. Use huge stitches. I used blue for my example. It doesn't matter which color you choose, because this will be taken out later.
Step 2:
"Trace" your letters with the color embroidery floss you want. I believe I used two threads. I used different patterns, but you could do all the same kind of stitch if you'd like.
Step 3:
Remove the large stitches. You can remove them all at once or as you go.
Step 4:
Paint the front of the cardboard white.
Step 5:
Mount the cross stitch on the cardboard. Fold the corners over & stitch & tie opposites together. Fold the edges & stitch at the corners. The stitch & tie opposite edges together. similarly. Trim thread tails off.
Step 6:
Attach a binder clip to the top, hang it up, & achieve unagi.
Umbrella Art (easy)


*clap clap clap clap*
This is a really easy way to make some understated Friends fan art.
SUPPLIES:
- white paper or card stock to fit frame
- red paper or card stock
- blue paper or card stock
- yellow paper or card stock
- glue stick
- scissors
- frame
- pencil (optional: if you'd like to sketch out the umbrellas first)
- pen/marker (optional: if you'd like to sign it)
Step 1:
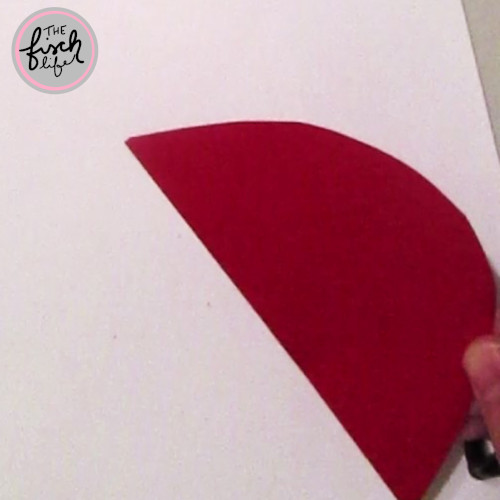
Cut out two half-circles in each color. Vary the sizes. I made 2 in each color, the same size. You can sketch them out first, if you'd like.
Step 2:
Cut little arcs to make the half-circles look like umbrellas. You can also sketch these out if you want to.
Step 3:
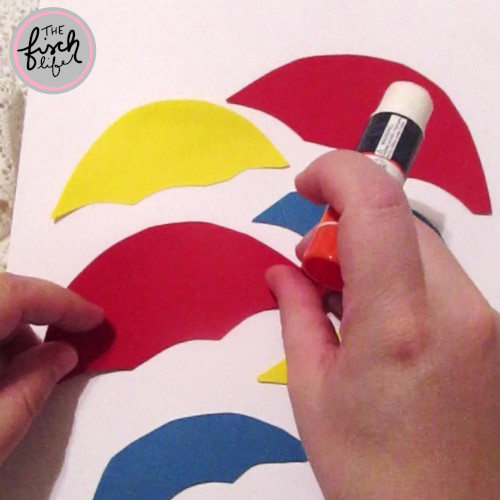
Lay out the umbrellas on the white paper.
Step 4:
Once you're happy with the layout, glue them down.
Step 5:
Sign your artwork (optional).
Step 6:
Frame it.
Step 7:
Hang it up & sing the Friends theme song on repeat.
Friends Quote Cut Out Art


"I wish I could, but I don't want to." -Phoebe Buffay
This one takes a little while, so you might want to listen to this cover of "Smelly Cat" by yours truly. :)
Supplies:
- card stock in black & white - cut to the desired size
- scrap paper - cut to the desired size
- small piece of white paper
- pencil
- eraser
- black marker or pen
- exacto knife (be careful!)
- cutting mat
- tape
- glue stick
- liquid glue
- red, yellow, & blue gems
*Be very careful & do this project at your own risk.*
Step 1:
Sketch your desired quoted onto the scrap paper, remembering that it's something you'll be cutting out letter by letter. Make sure to leave enough room for the attribution & gems.
Step 2:
Stack the sketch on top of the black card stock & tape to the cutting mat.
Step 3:
Cut out the quote.
Step 4:
Remove the scrap piece. Clean up any letters & remove any little pieces hanging from the back of the black card stock.
Step 5:
Write the quote attribution (in my case, "-Phoebe Buffay") on the small
piece of white paper. Sketch it out with pencil first, or just go for it with a black marker or pen.
Step 6:
Glue the black card stock (with the words cut out) to the front of the white card stock. Glue the attribution to the black card stock.
Step 7:
Arrange the gems to your liking & glue with a small amount of liquid glue for the gems. I used the color order of the dots between the letters of "Friends."
Step 8:
Trim any excess white paper off & display however you like.