Friend Finder
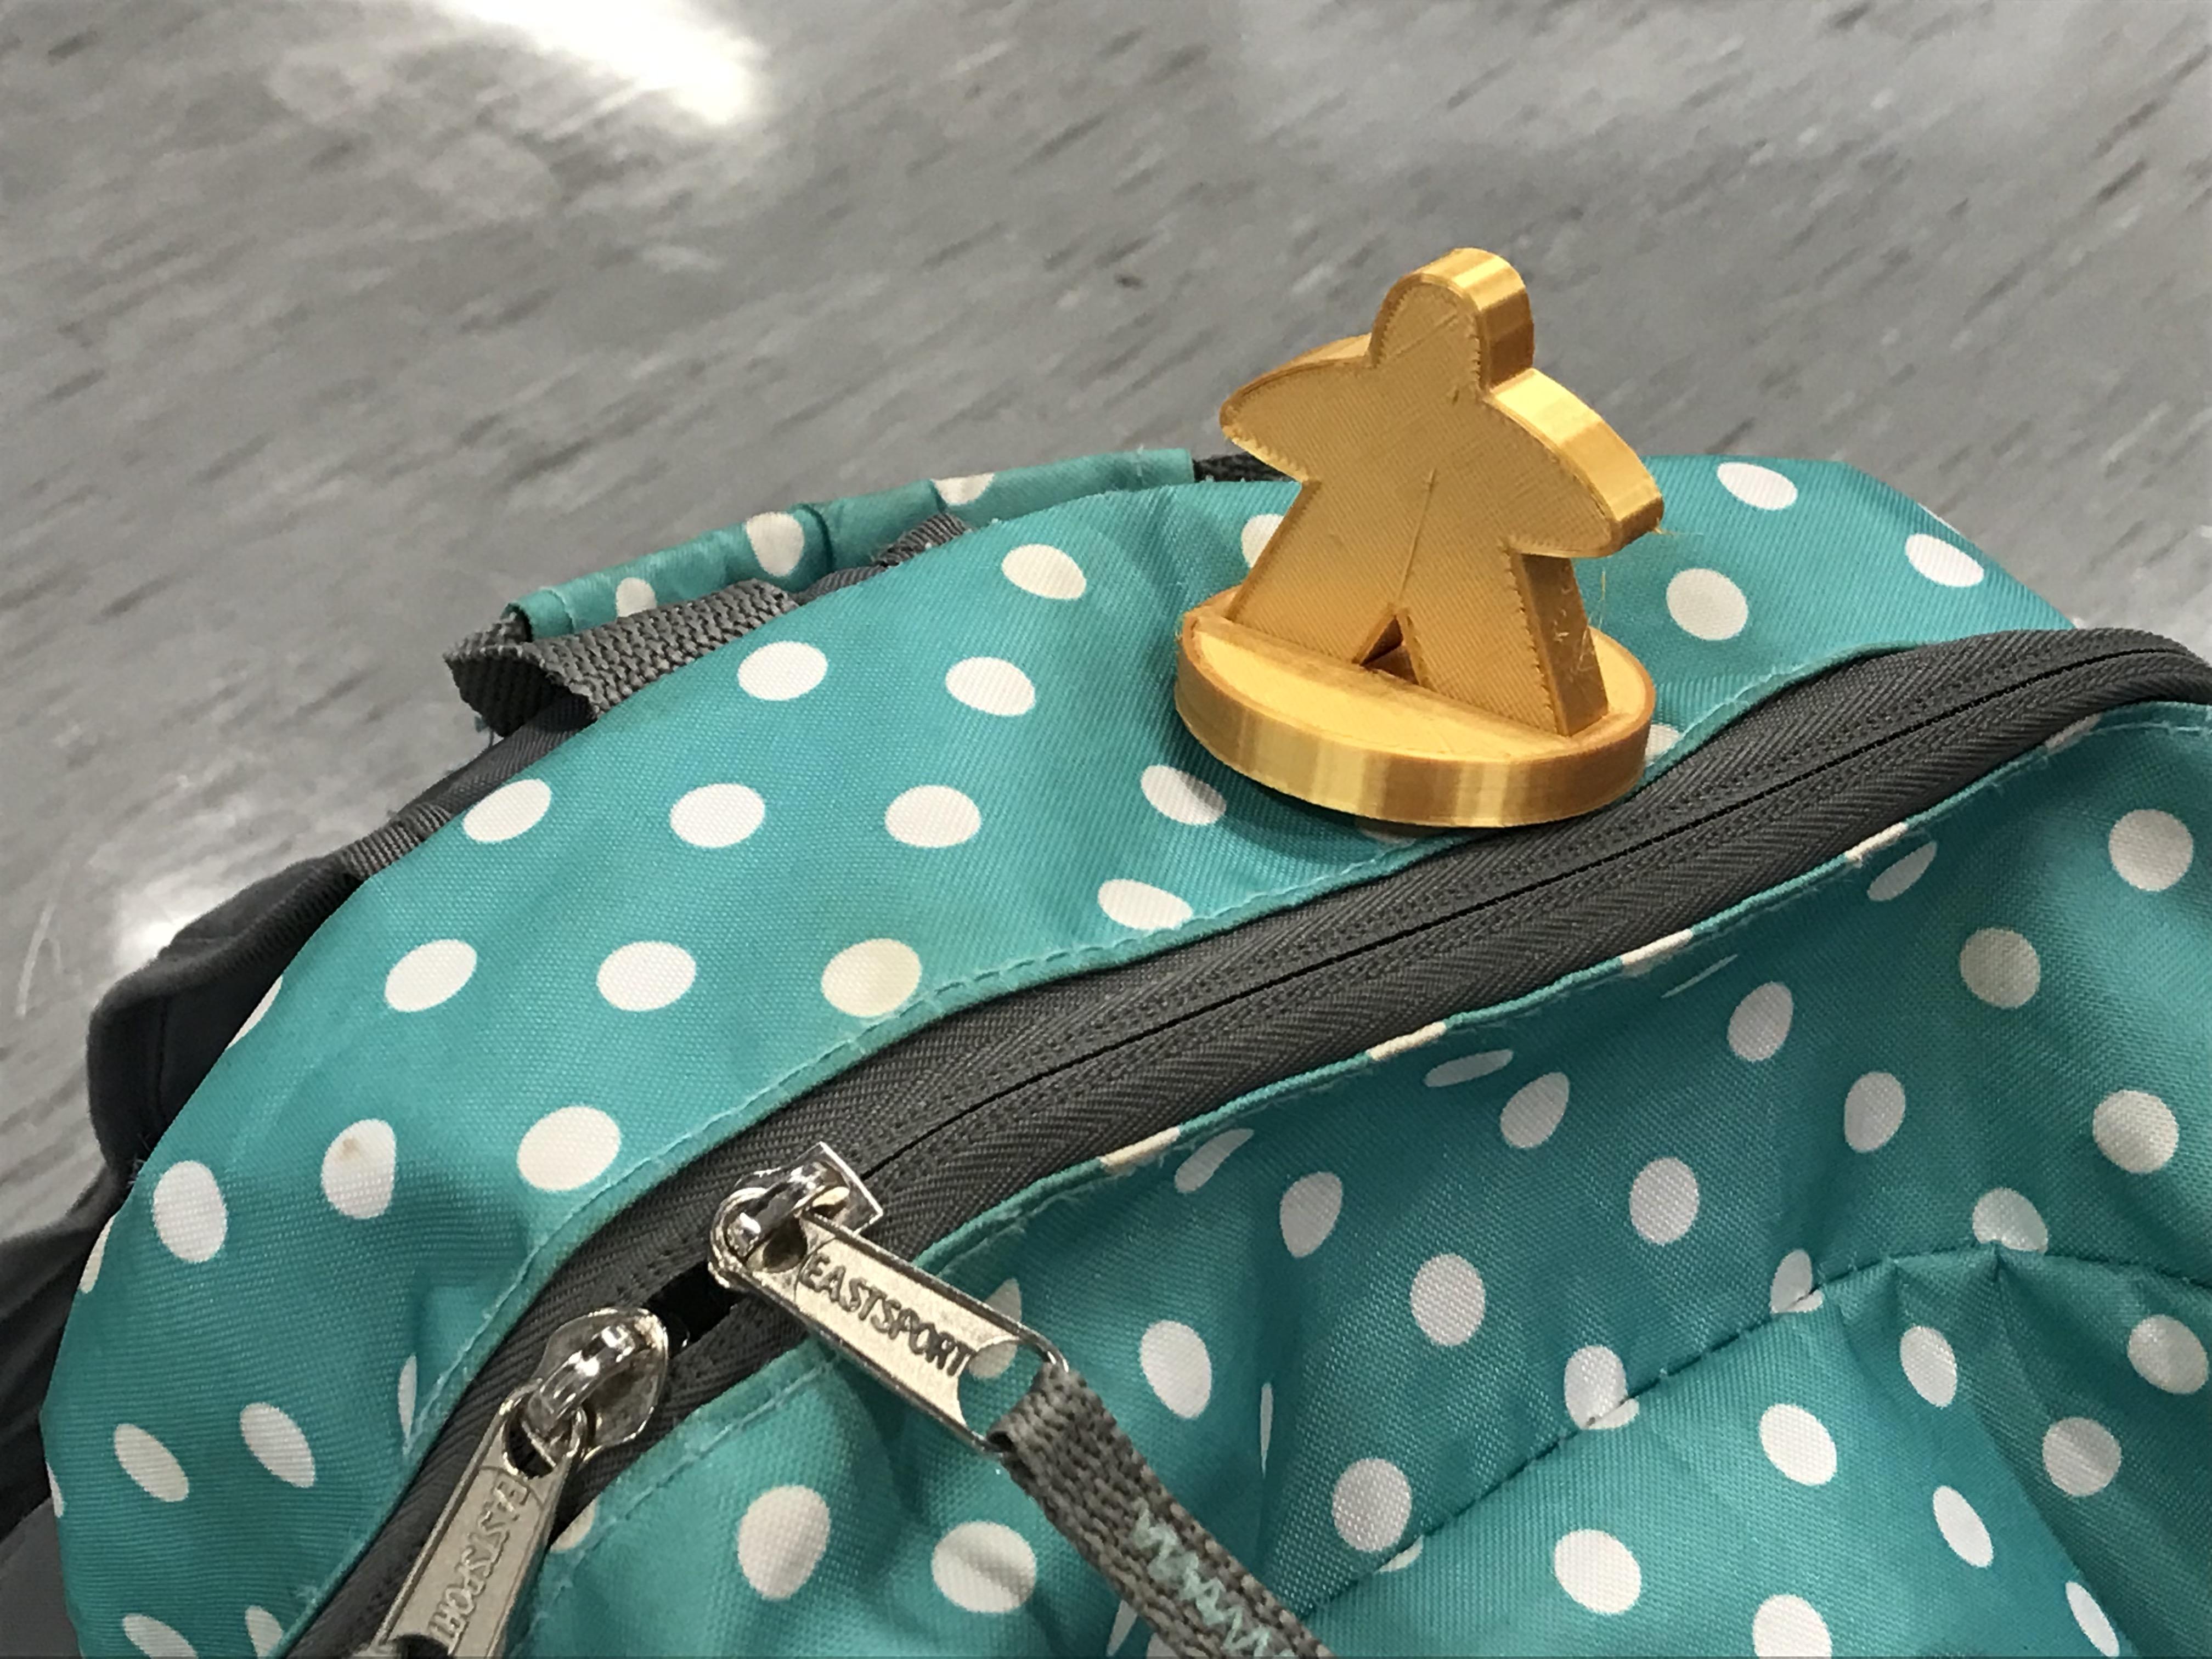
As a member of my high school's Link Crew,* I was devastated to hear that some of the new students at my school were having a really hard time finding people to sit with at lunch. The teacher in charge of Link Crew got inundated with emails from desperate parents whose kids couldn't find friends, and he called upon us to fix this problem. We were to sit with the new pupils and keep them company until they could find more permanent friends. The problem with this, though, is that it leaves the Link Leaders pretending to befriend other students because they have to, not because they want to. Additionally, once the Link Leaders, who are generally upperclassmen, graduate, the younger students might not have friends to get them through what can be considered some of the hardest years of schooling. When I noticed these faults in the system, I realized they introduced a problem I could solve using technology to encourage interaction, something we have been missing since the beginning of the COVID-19 pandemic in early 2020.
Friend Finders can come in a variety of shapes and colors. I made these in four different colors, one four each of the four grades at my high school, so that students could easily identify other people in their year. In this tutorial, I will show four options for "buddies," or the toppers that sit on the stands. My school has three main components that students are involved in (art, STEM, and athletics), and I included a fourth for Link Leaders so that they can be easily identified and approached regardless of their interests.
*More about Link Crew here: https://www.boomerangproject.com/link/what-is
Supplies
- TinkerCAD
- 3D printer, corresponding software & filament
- 2 magnets per Friend Finder made
- Glue
Link Leader Buddy
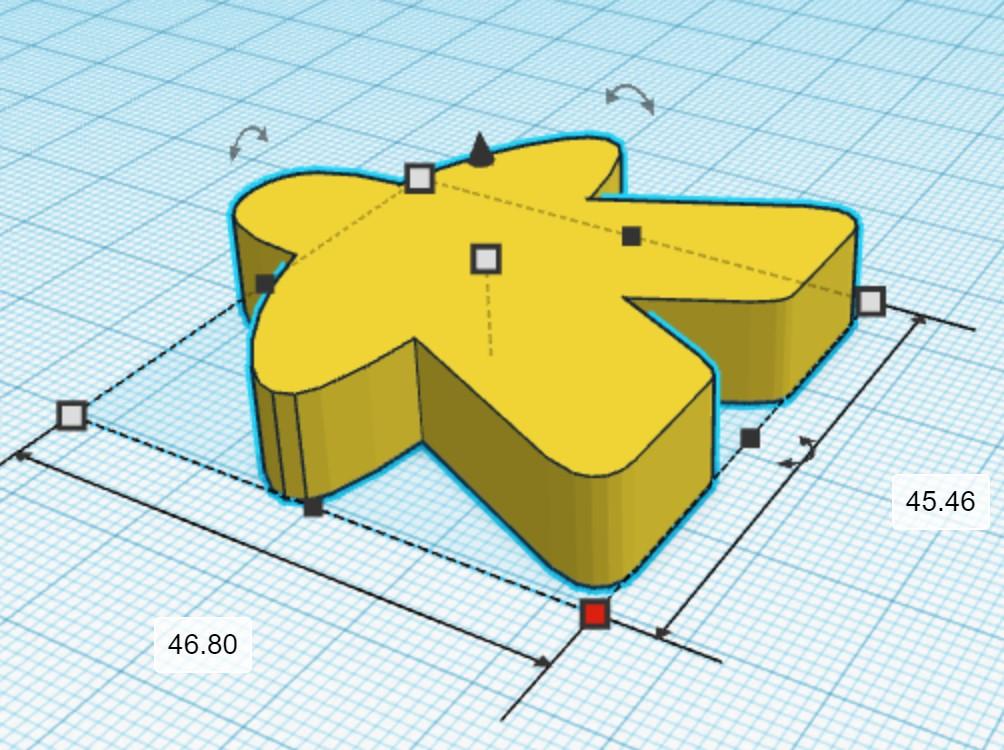
- On TinkerCAD, scroll to shape generators --> all shapes --> more --> more
- Drag the "Carcassone" shape onto the build plate
- Change its dimensions to 45.46 mm wide, 9 mm tall, and 46.8 mm long, as shown in the image
STEM Buddy
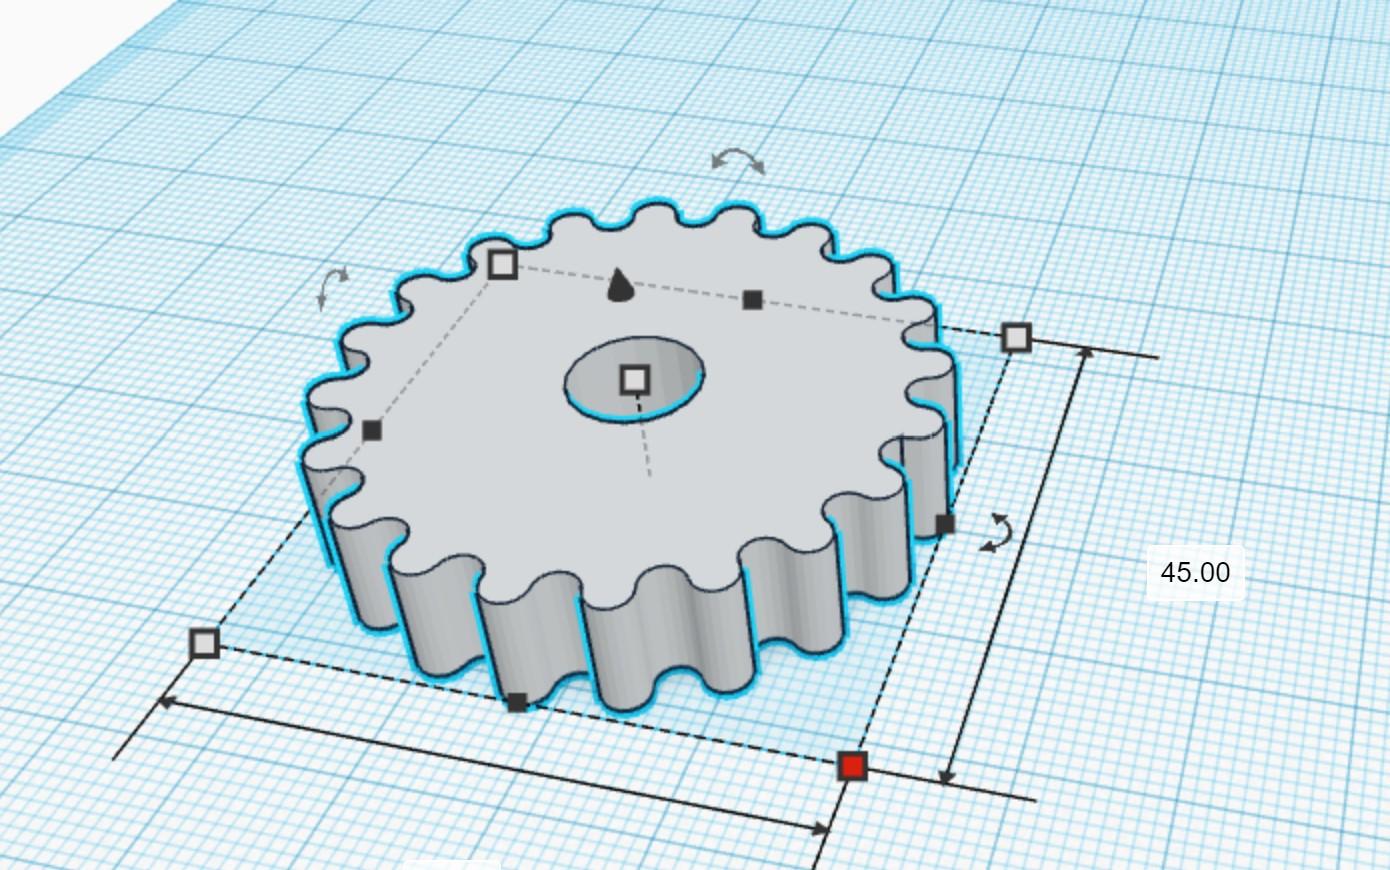
- On TinkerCAD, scroll to shape generators --> all shapes --> more --> more
- Drag the "Useful Gear" onto the build plate
- Change its dimensions to 45 mm wide, 9 mm tall, and 45 mm long, as shown in the image
Art Buddy
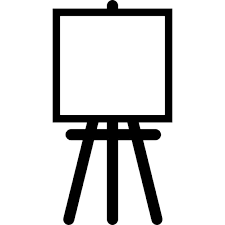
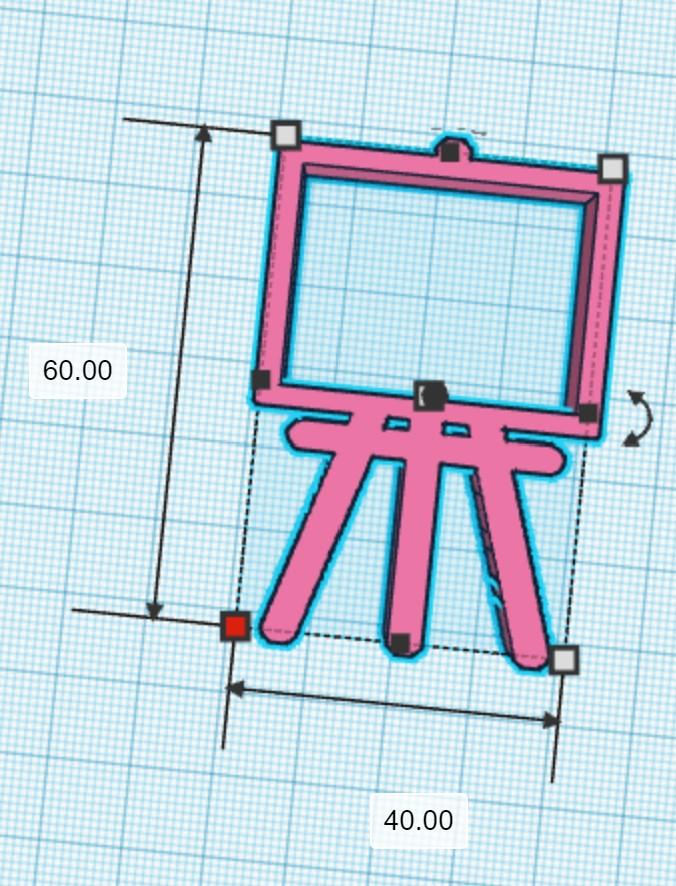
- Download the image attached to this step
- On a web browser, search for "[file type]* to STL converter" (I used this site)
- Download the new file
- On TinkerCAD, click "import" then select the new file and import it at 100% scale (there's a good chance it will be tiny at this point)
- Expand the image to 60 mm by 40 mm by 9 mm, as shown above
*I saved it as a PNG
Athletics Buddy
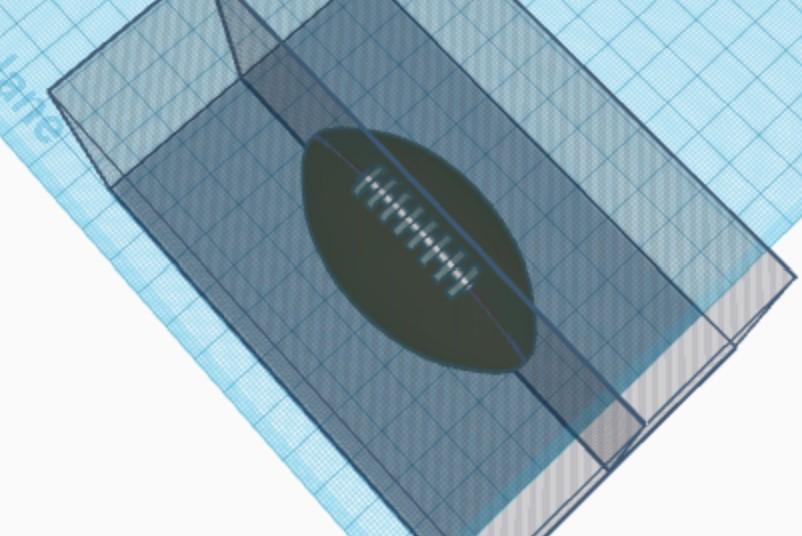
- On TinkerCAD, scroll to Fun & Games --> Sports
- Drag the "Football" onto the build plate
- Drag two "Boxes" (cubes), as found in Basic Shapes, onto the build-plate
- Make each one 123 mm by 39 mm by 71 mm and set them next to each other 1 mm apart
- Select both and hit the "Group" button on the top right
- Make that union a "hole"
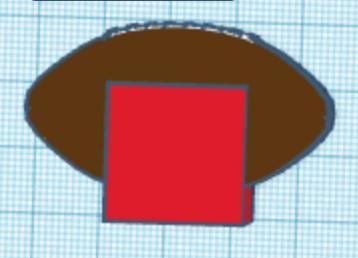
- Using the "Align" button on the top right, align the group to the football as shown in the image above
- Use the "Group" button to merge the group with the football
- Rotate the football by 90 degrees then hit the "d" key so it is flat on the build-plate
- Adjust the football cutout's size to be 25 mm by 44 mm by 9 mm
- Insert another "Box" and adjust its sizing to 20 mm by 20 mm by 9 mm
- Using the "Align" tool, center it with the football, as shown above
- Merge the two using the "Group" tool
Making the Bases
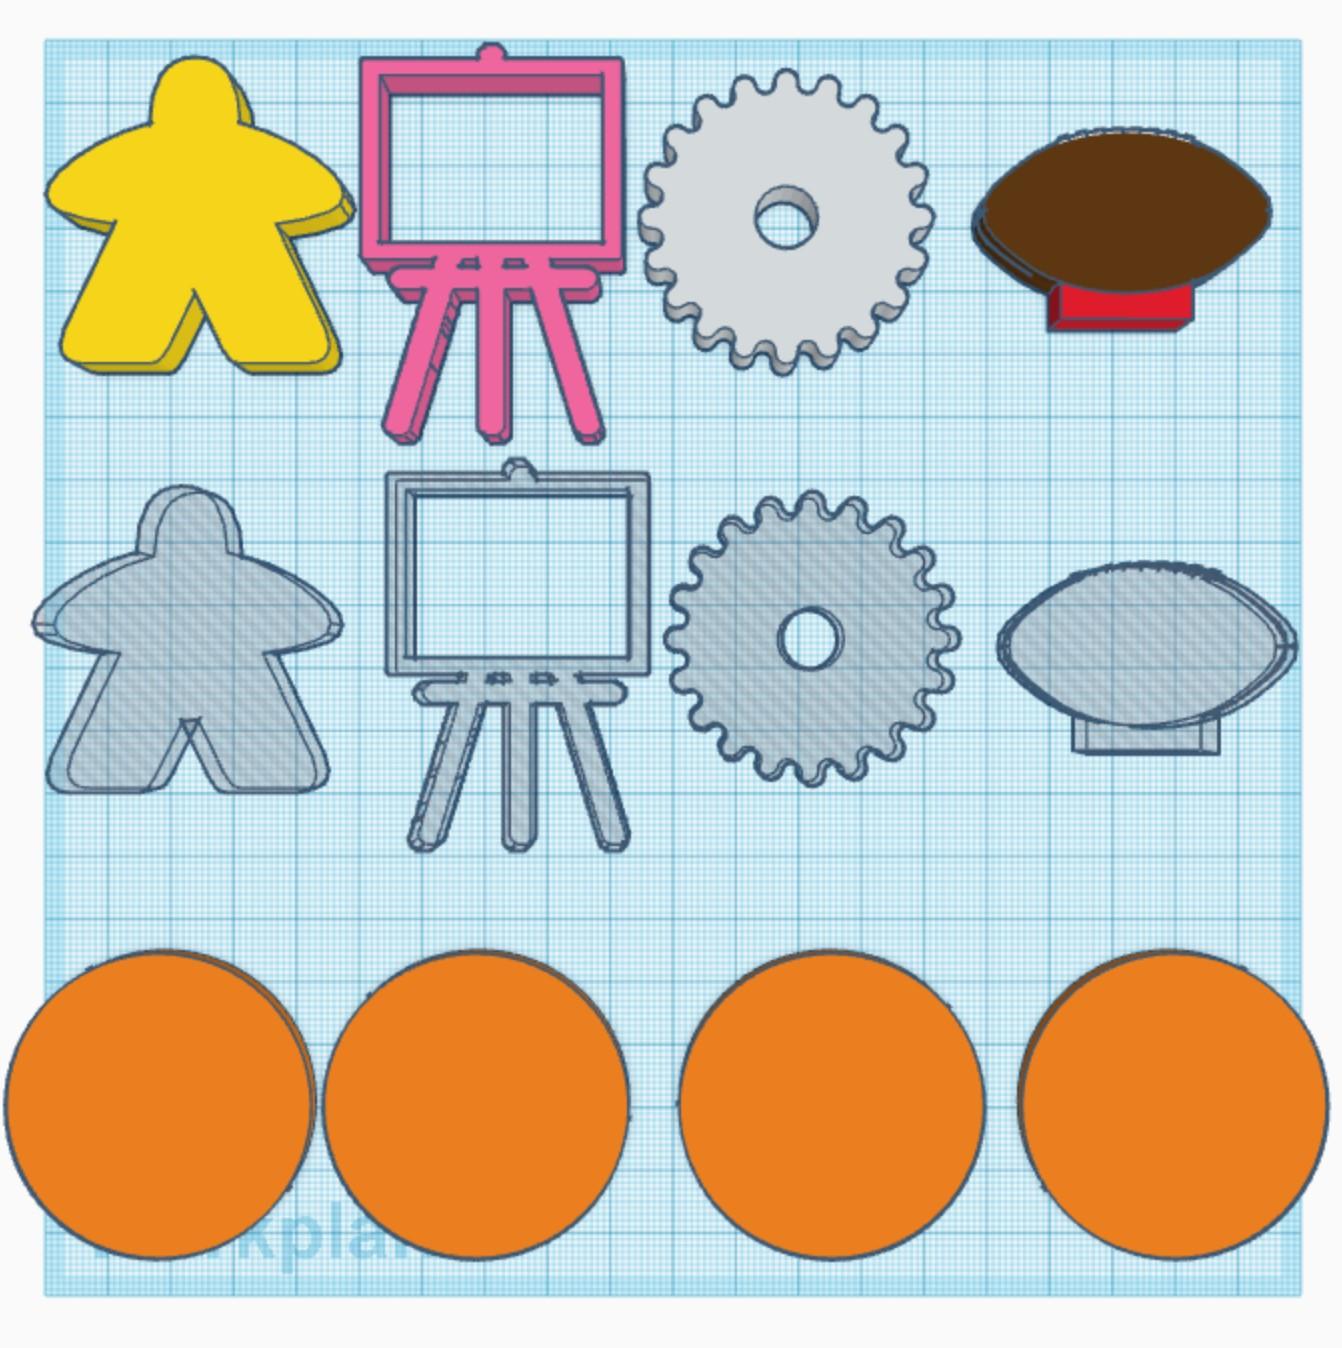
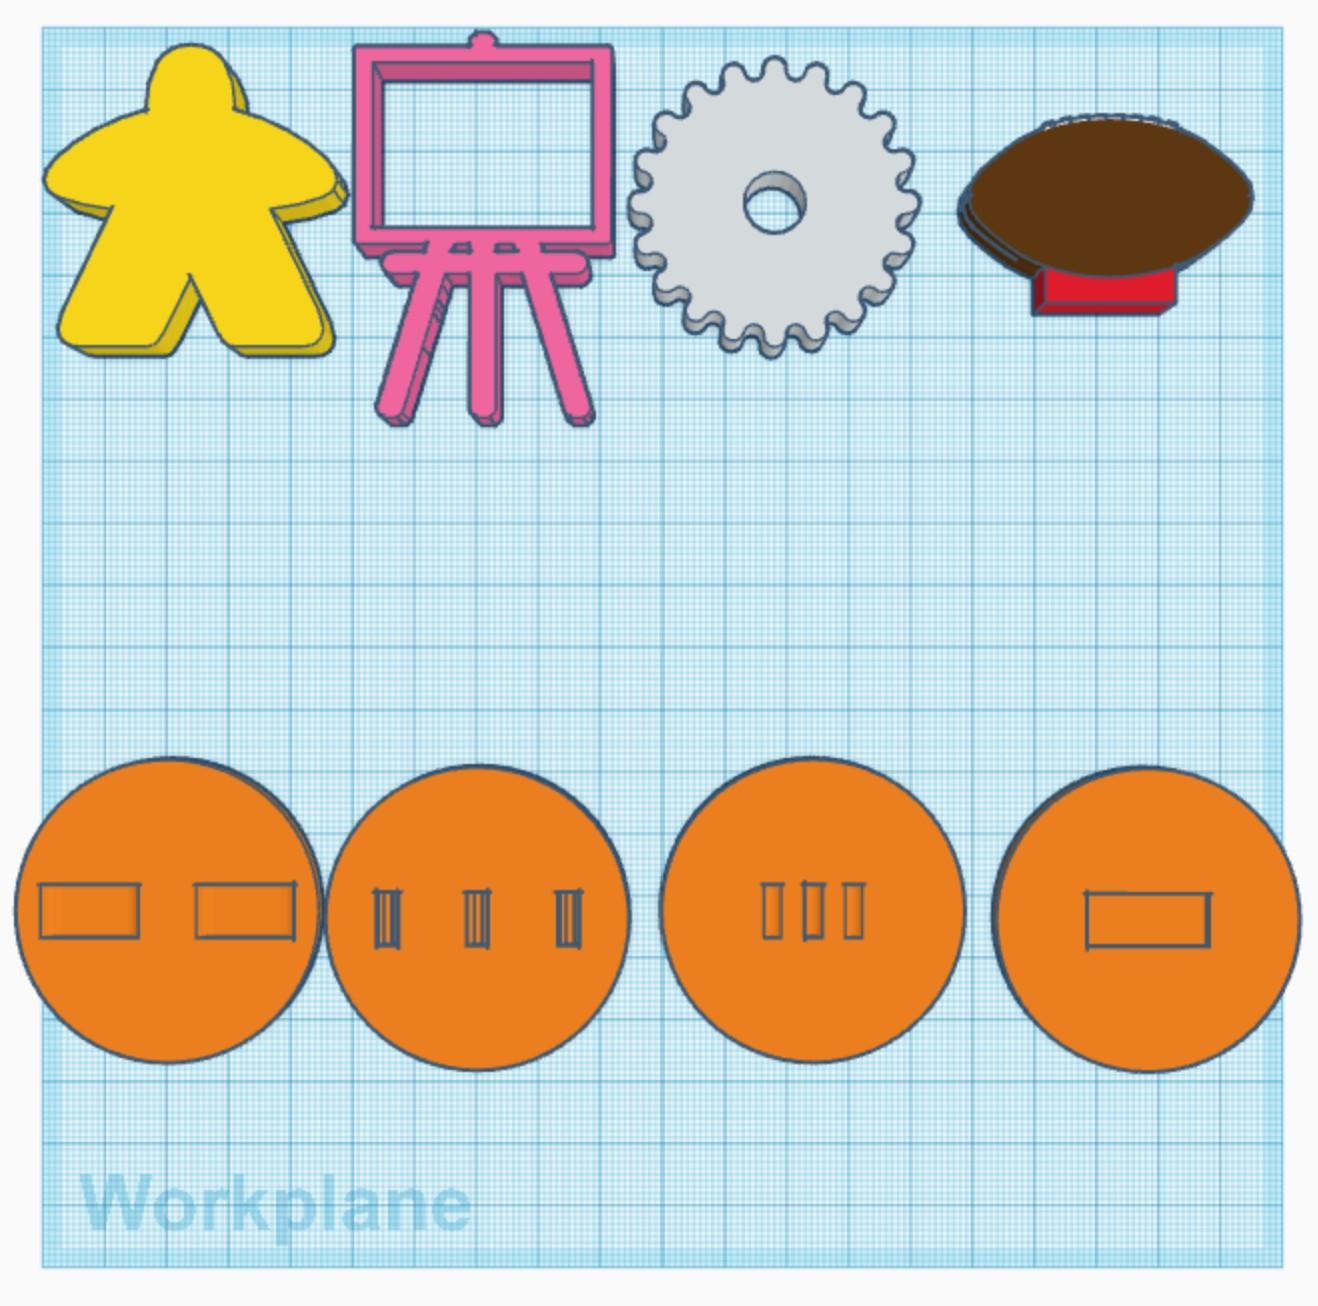
- Duplicate each of the "buddies" by selecting them then hitting control (or command) + D and move the duplicates away from the original versions to work with them separately
- Make all of the duplicates "holes" using the shape menus
- Duplicate the cylindrical base until there are four on the build-plate
- Drag a cylinder, which can be found in the "Basic Shapes" menu, onto the build-plate
- Adjust its "Sides" measurement to 64
- Change its dimensions to 48 mm by 48 mm by 3 mm
- At this point, your build-plate should look something like the first image above
- Rotate each of the "hole" shapes by 90 degrees so that they are upright
- Select the first "hole" and a cylinder
- Center the "hole" on the cylindrical base using the "Align" tool
- Select the shape and then hit the "D" key to make it flat on the build plate
- Repeat steps 10 & 11 until all of the "hole" buddies are aligned with their bases
- Select all of the "hole" shapes and move them 1 mm up
- Select one of the "holes" and its corresponding cylinder then use the "Group" tool to merge the two
- Repeat step 14 until all of the pieces have been merged
- At this point, your build-plate should look something like the second image above
Go Make Some Friends!
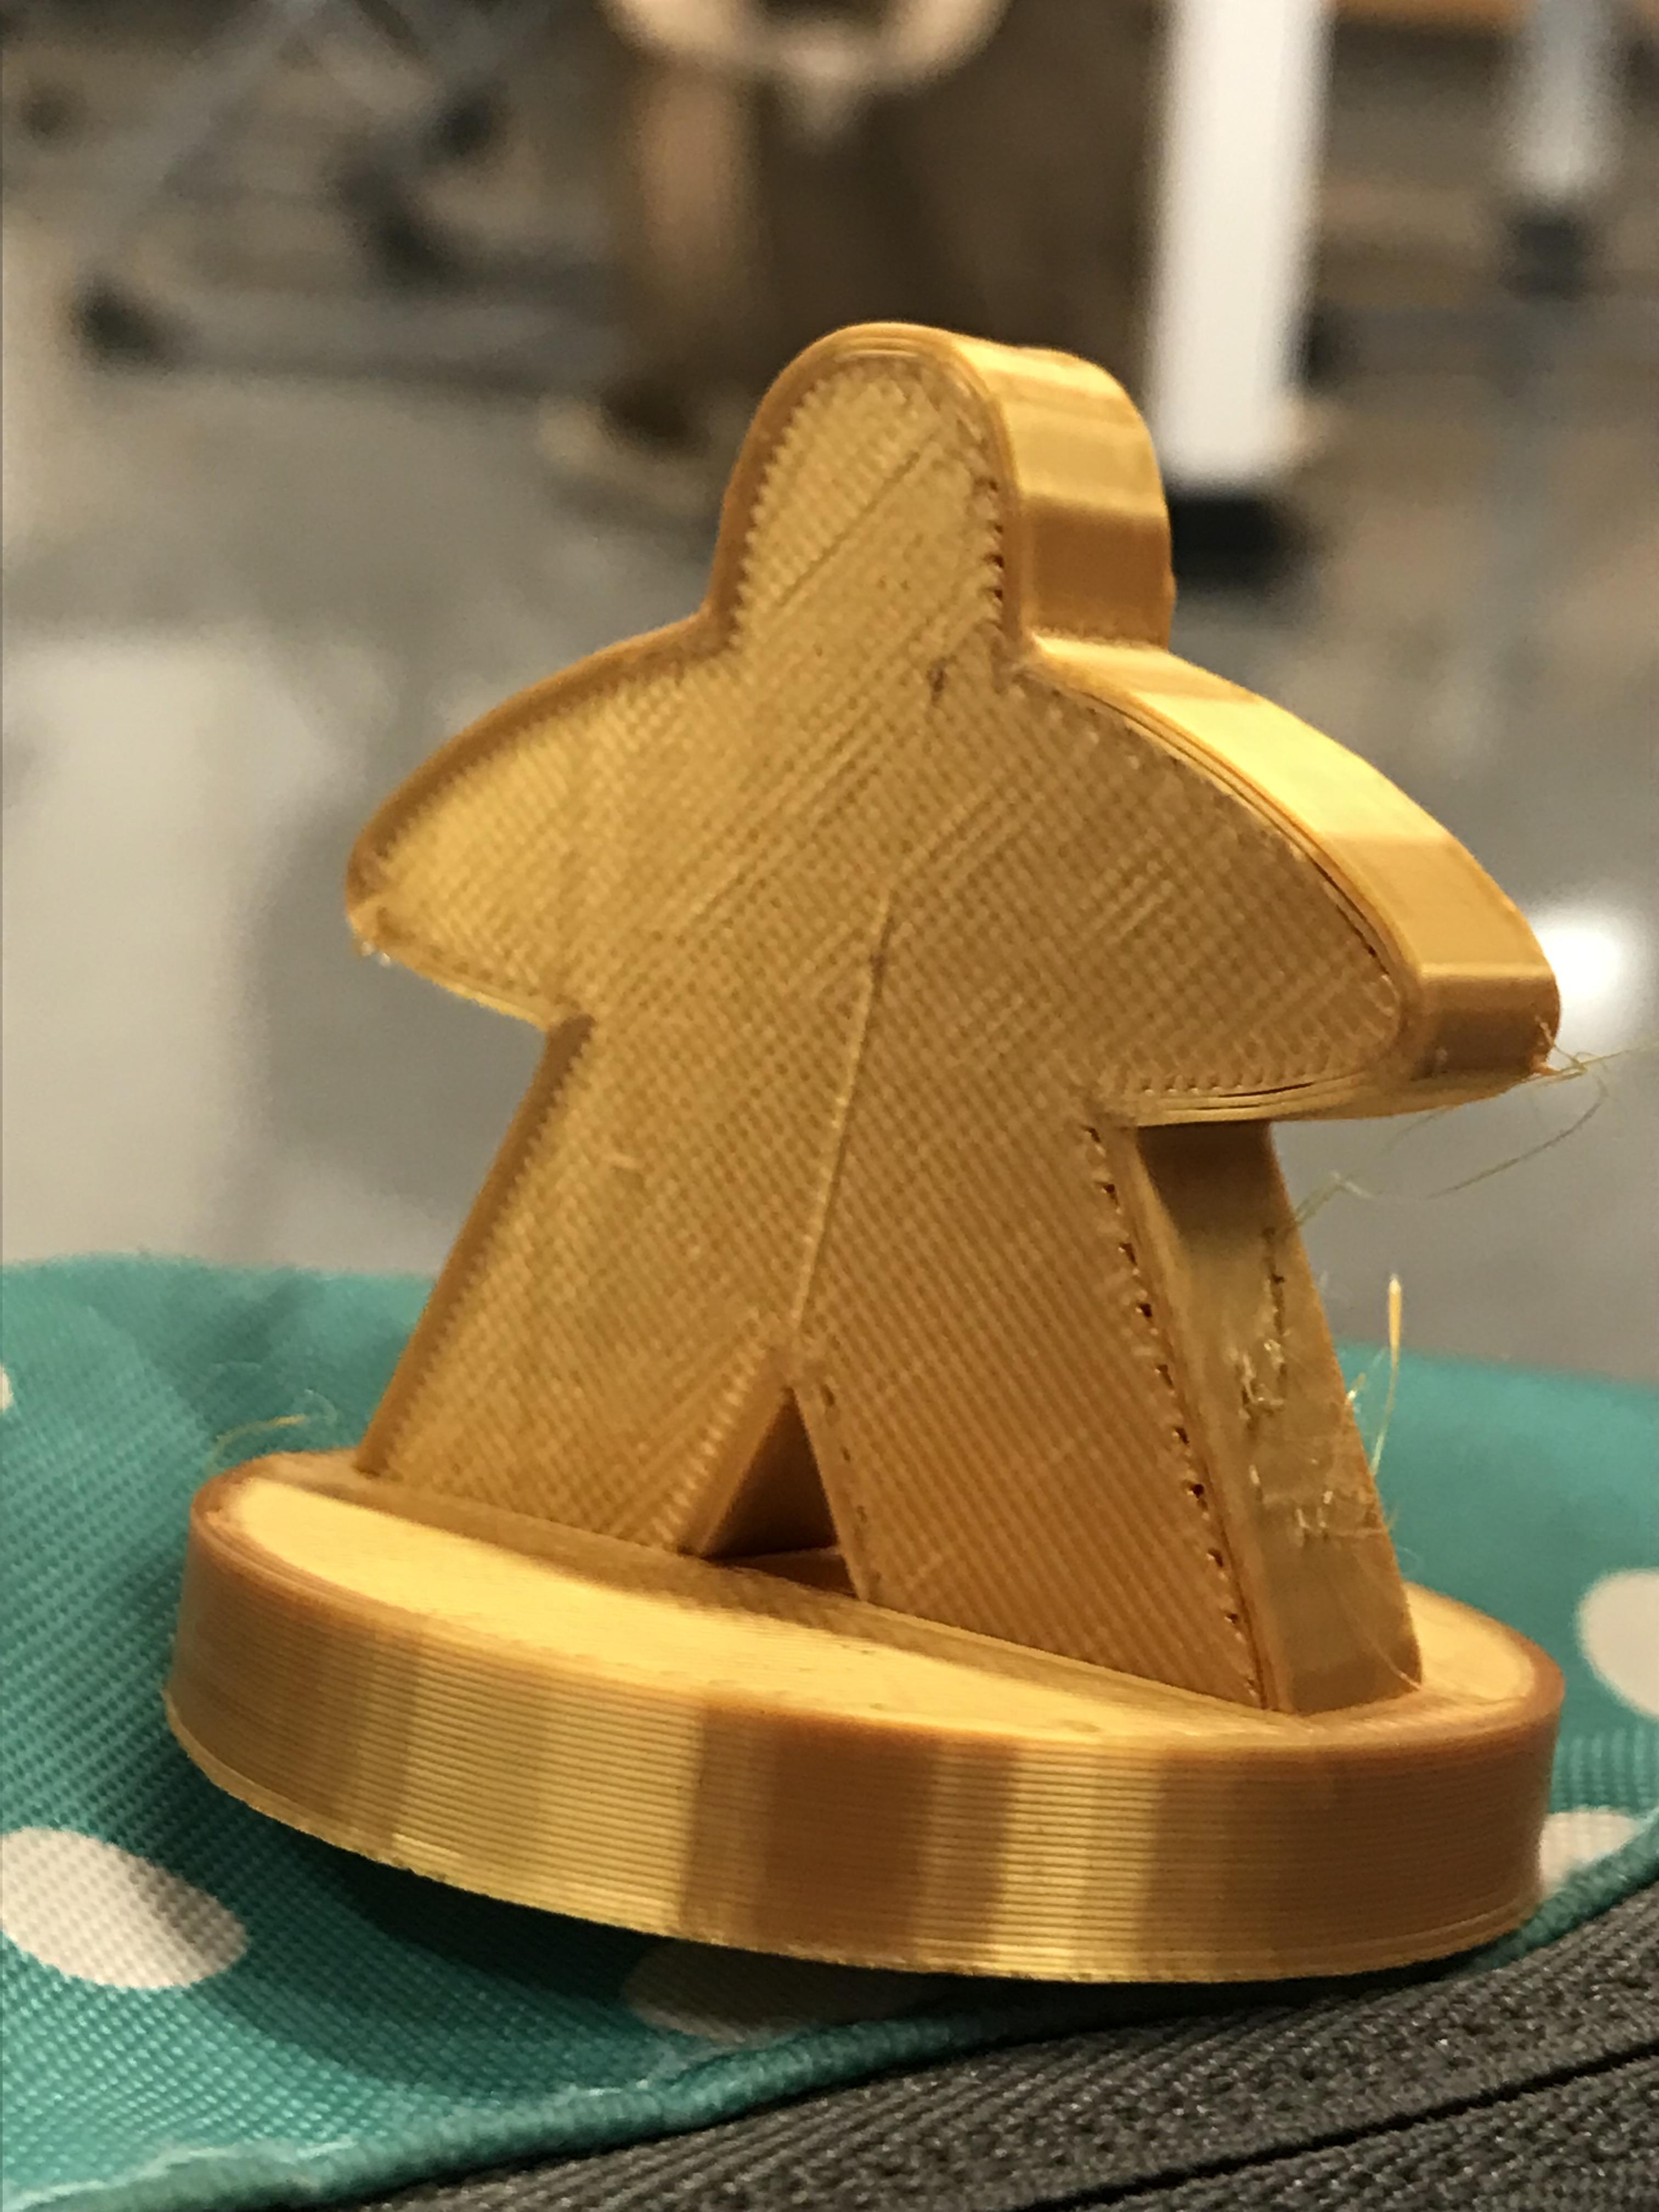
3D print your design according to your printer & software's instructions, then assemble the design by fitting the Buddy into the holes in the base. After that, take two small magnets. With a hot glue gun, secure one magnet to the under-side of the stand. To secure the Friend Finder to a shirt or backpack, slip the other magnet underneath the fabric and place the top side on the other side of the fabric. The magnets will hold the Friend Finder in place.
You can make this design with any Buddy, and from here, the possibilities are endless! I hope the Friend Finders will help create meaningful relationships both in your community and mine <3