Frame Your Own Face: Crafting a 3D Photo Keepsake
by Shlok Pagar in Design > 3D Design
343 Views, 2 Favorites, 0 Comments
Frame Your Own Face: Crafting a 3D Photo Keepsake

Hello Everyone.
I made a Photo Frame of my own face. The interesting thing about it is that it is 3D. By reading this instructable you will be able to make your own personalized 3D face!
The process will include Face Scanning, 3D CAD ( For Designing ), 3d Cam (For machining). It can get a little Technical.
Content -
- Supplies
- 3D Face Scanning
- Importing into Meshmixer
- Editing Face Model
- Production- What To Do Next?
- CNC Router - Machining
- Finishing
- Painting
Supplies
Supplies - Mobile, Laptop, 3d printing or any 3d machining ( You can use service ), Art Materials
Software Used - Autodesk Meshmixer ( Free ), Polycam (3d Scanning) , Slicer or CAM software
3D Face Scanning
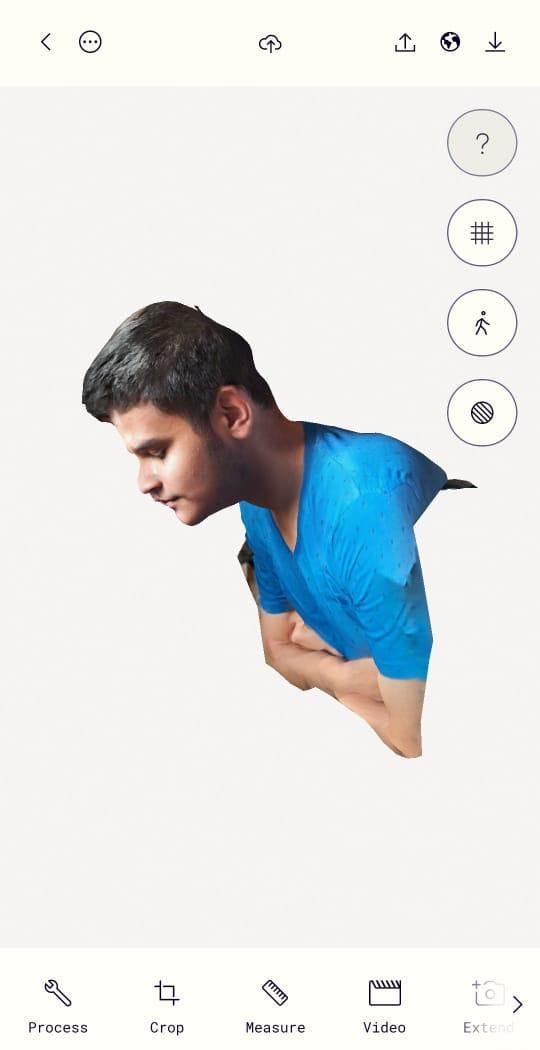
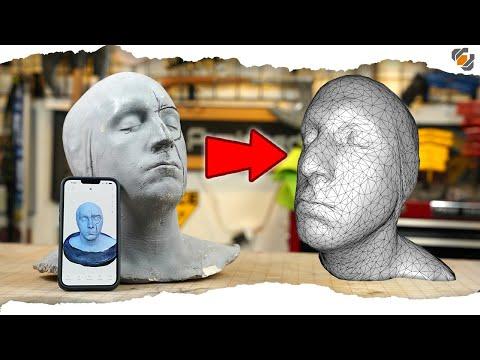
Typically, precise 3D scanning requires specialized scanners, but for creative purposes, a mobile camera can suffice. I utilized the mobile application Polycam, available for both Android and iOS users.
From my experience, I've learned:
- It's beneficial to have someone assist you with scanning your face.
- Natural lighting has proven to be very effective.
- The slower the camera motion while revolving, the better the results.
- Scanning can become somewhat monotonous. If the results are unsatisfactory, consider trying an alternative application like Kiri Engine.
I have provided a video for step by step tutorial for 3d scanning.
Importing the Model Into Meshmixer
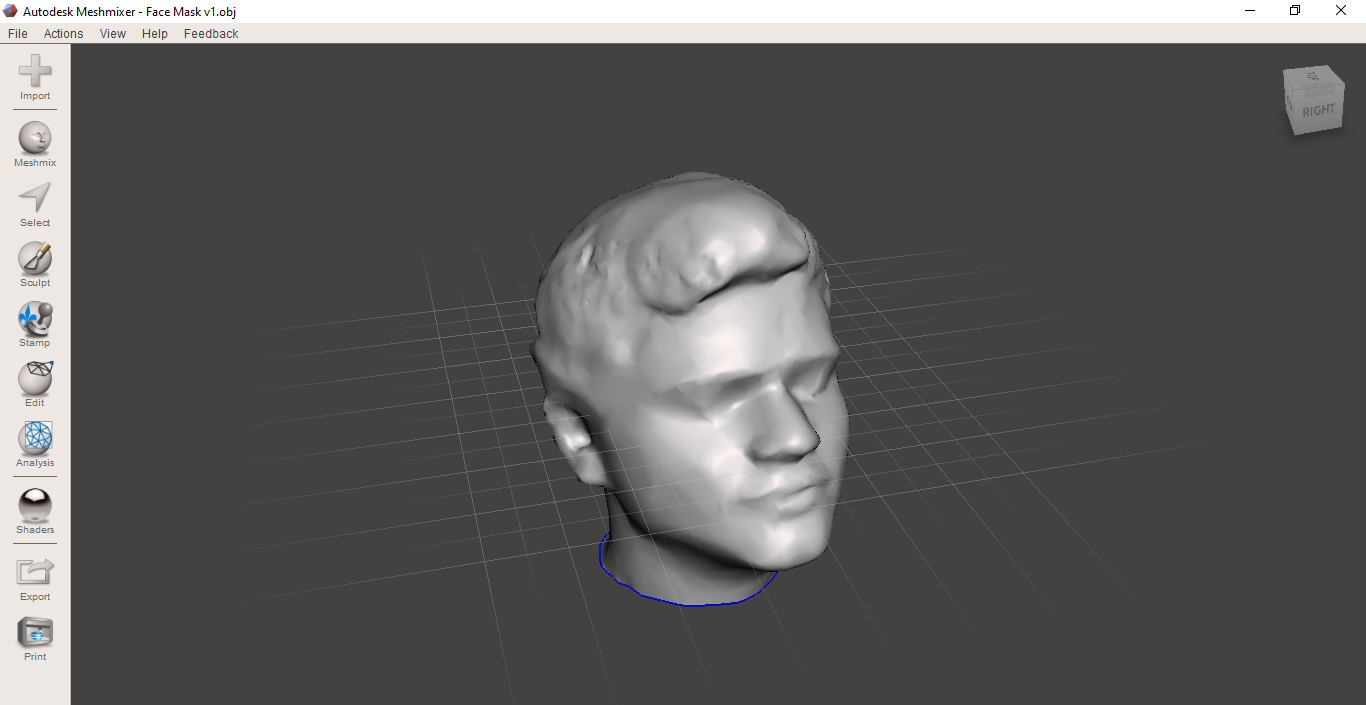
After finalizing your model, you need to export it in OBJ format. Meshmixer, which is a free software available for download from any web browser. Meshmixer will be used for Editing the model.
To proceed, open your model file in Meshmixer.
Editing Face Model
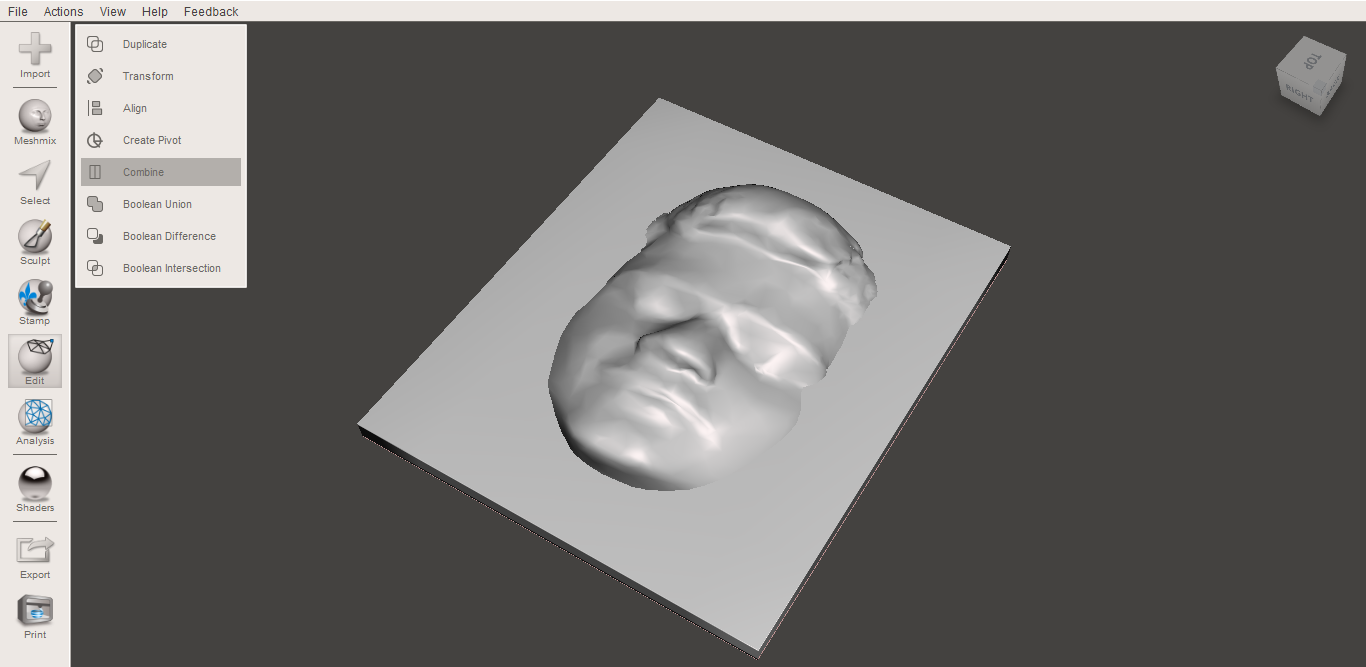
After Importing the model. You will have to Edit the model.
- Familiarize yourself with the navigation of the model.
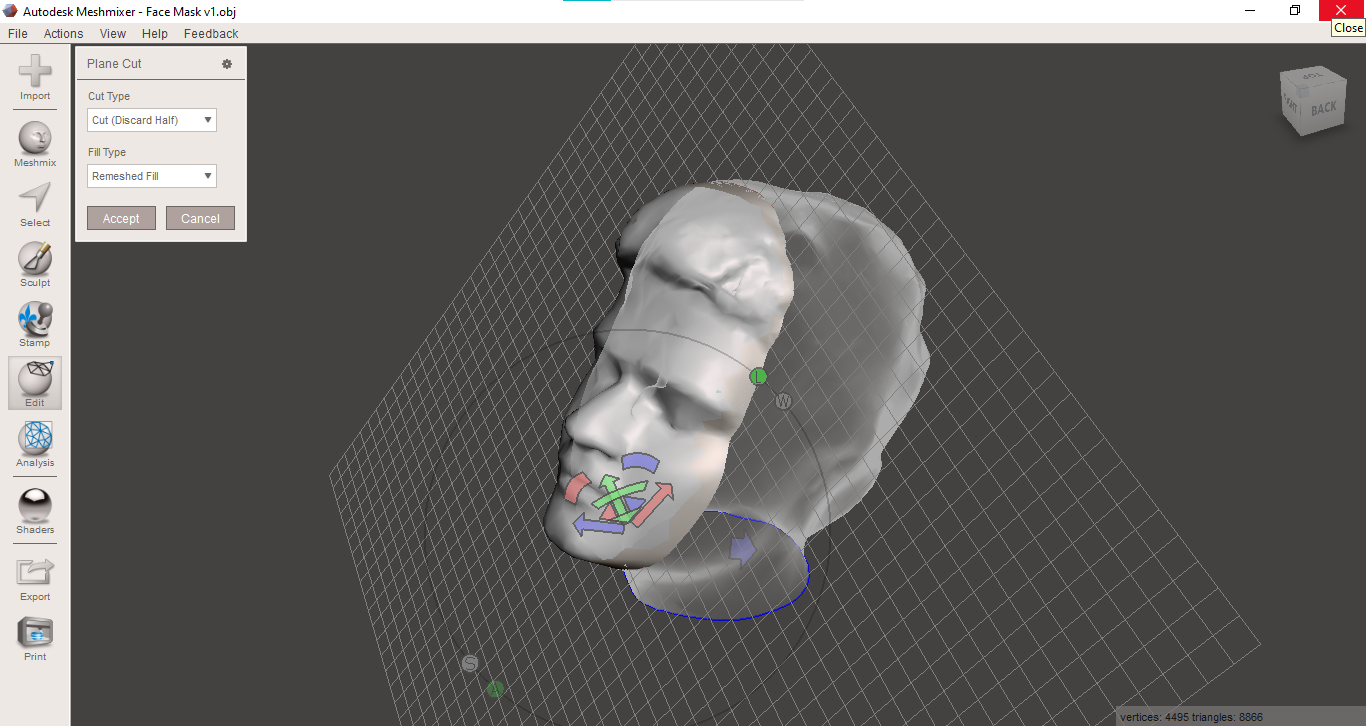
- Use the Plane Cut feature in the Edit Tab.
- Rotate the cutting plane in X, Y, and Z until you get the Correct alignment of it. Refer to the screenshot for alignment. (Photo 2)
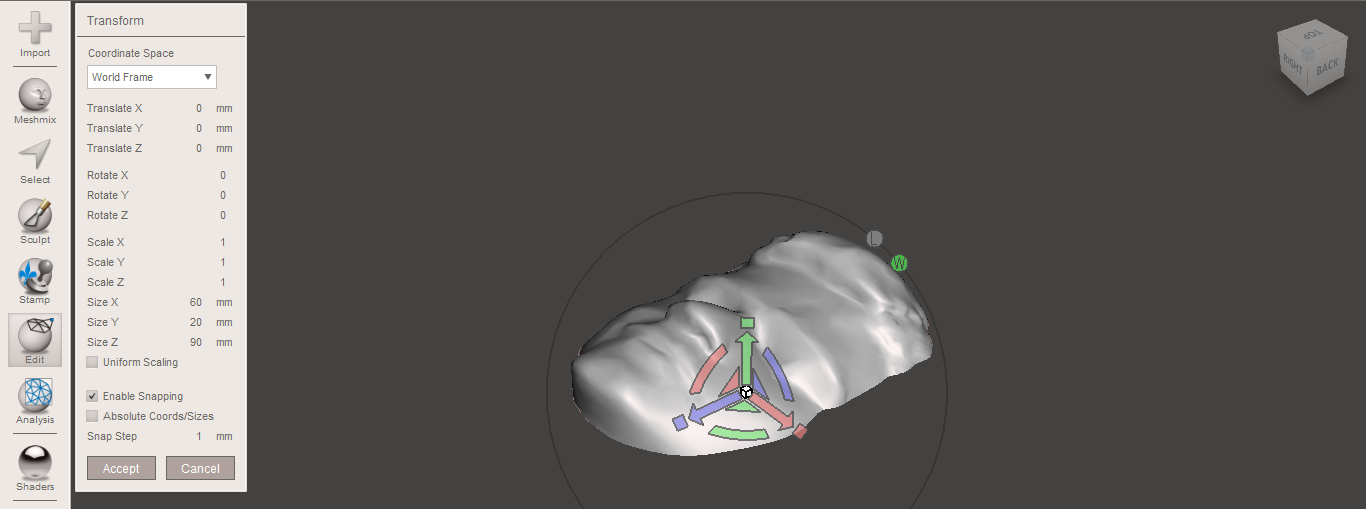
- Now we have to scale the model. For Scaling - Edit > Transform. You can scale the model according to your needs. If you want a reference of my dimensions see Reference Photo 3.
- We need to add the base plate to the model.
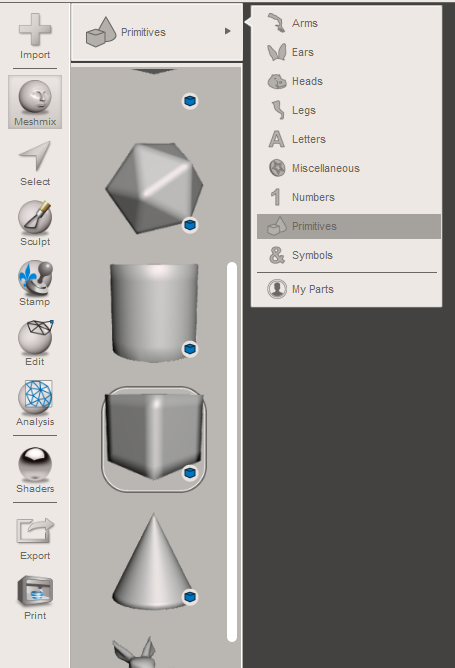
- Select Cuboid from Meshmix - Refer to Photo 4
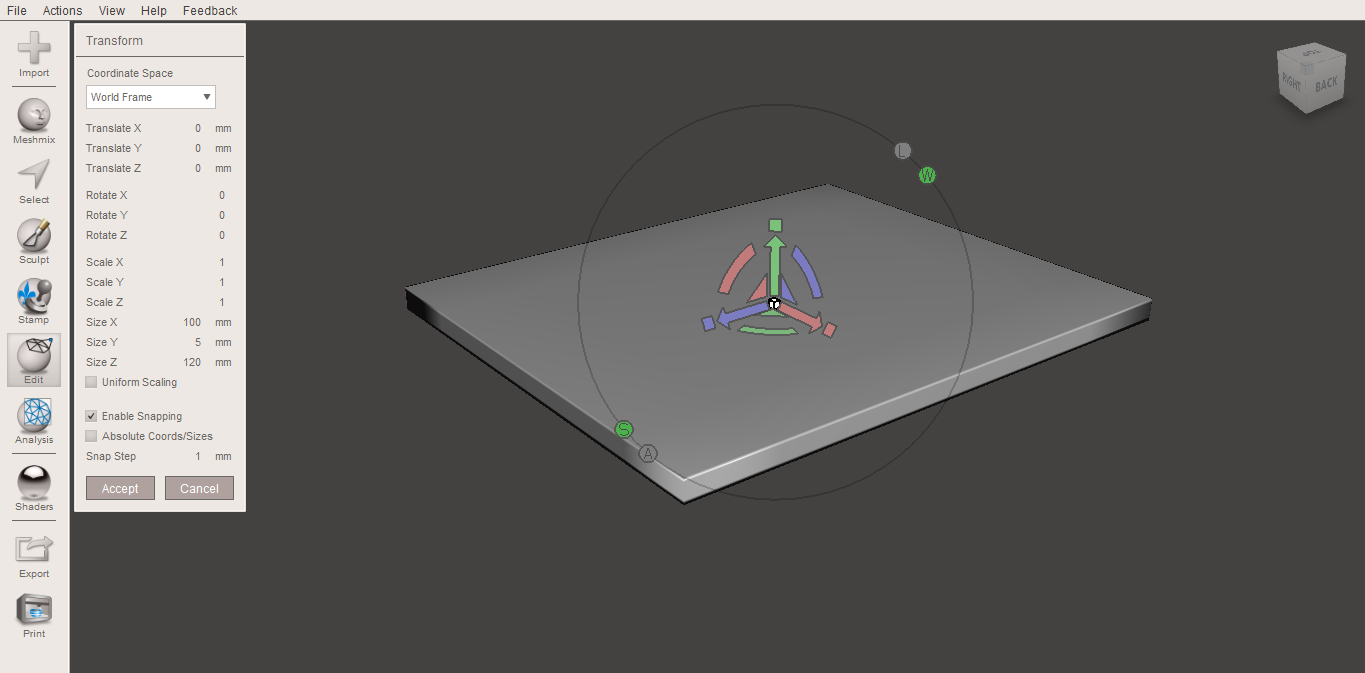
- Scale it according to your needs. For using my scale refer to photo 5
- Now we need to combine these two bodies. First, you need to align the face model and base plate on top of each other using the transform command on the face model. Refer to Photo 6.
- After Finishing the alignment, Select both item's whole pressing shift. Then use the command Combine.
- Your Face Model is ready :)
- Export the face model into stl format.
I know that it can be hard for a newcomer to follow this, but you can do it.If you have any doubts feel free to ask.
Production- What to Do Next?
After this, you have two options for production -
- 3d Printing - You will have to import the model into a slicer. After that input it into the printer.
- Machining - Processes like CNC routing, CNC milling
I would recommend 3d Printing as it is a much simpler and cheaper process than machining.
I chose Machining (CNC Router) because I had access to it. I will cover the steps I have taken.
For 3D printing you will have to slice up the model in a slicer and import the model in 3d printer
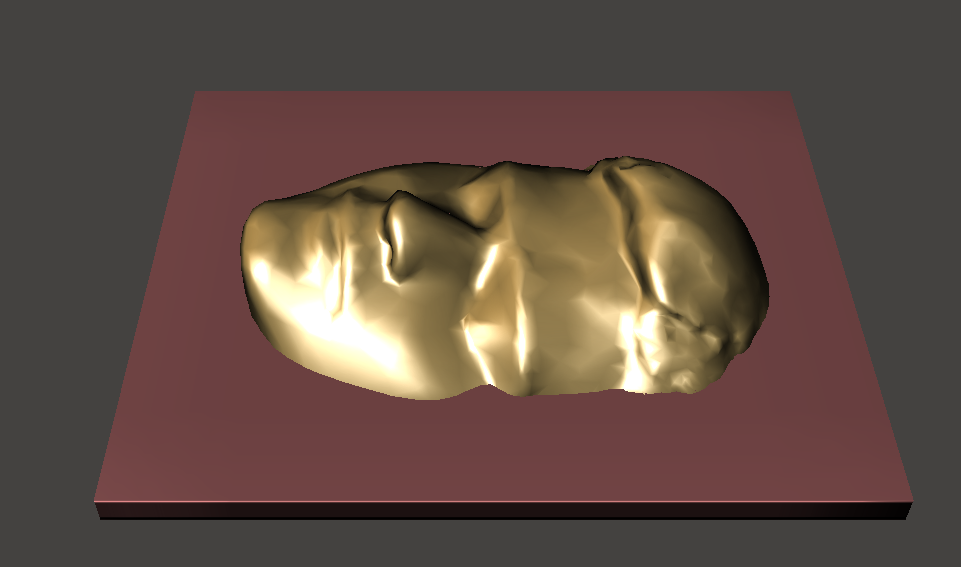
CNC Router - Machining
CAM is a software which gives path for the machine cutting tool.
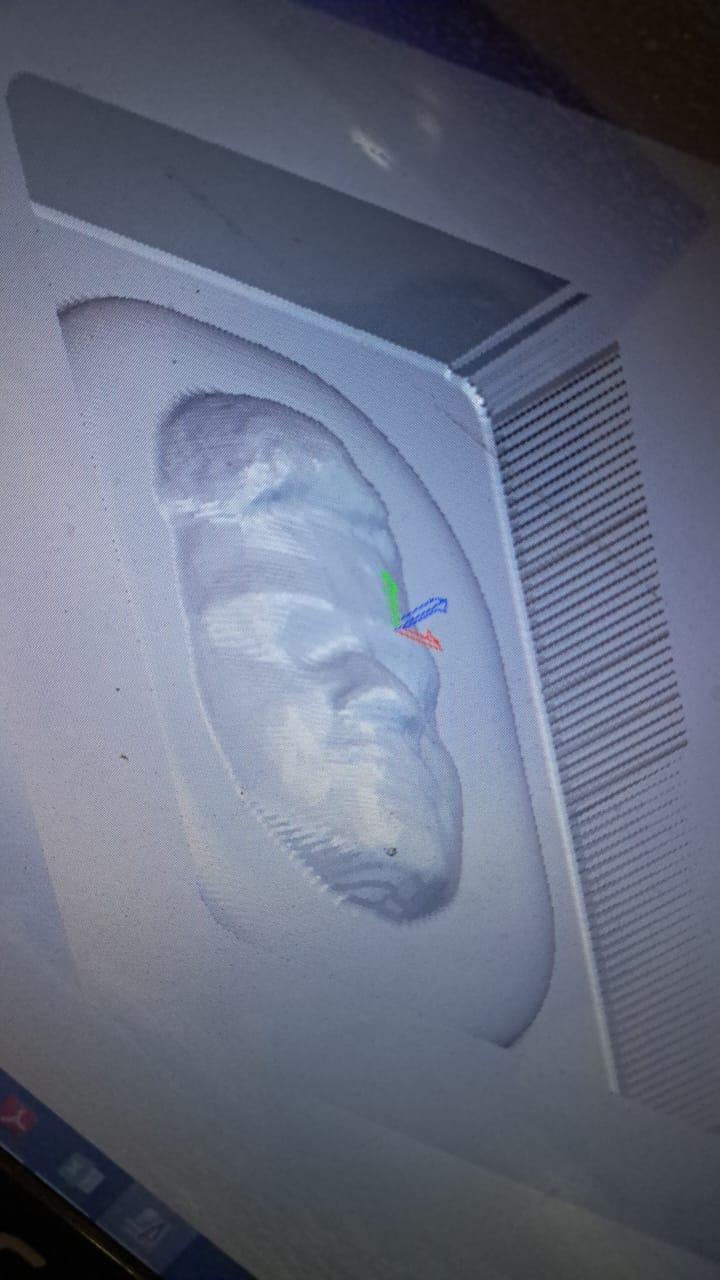
For machining you will have to import the model in a CAM software. There are various options for the software. The industry I sent used ArtCam for CAM. The Cam setting was done by the designer in the industry. It was designed for CNC Router Machining. I have attached simulated photo and machining process vedio.
Some Specification for machining were -
- Material Selection - HDHMR
- Machine Selection - CNC Router
- Tool Selection - 4 mm Ball nose
- Step Down- 4mm, Step over - 0.5mm
- 10000 rpm spindle speed
- Machining time = 2 hr
- Machining cost = Rs 700
- 120 x 140 x 25 mm Material cost = Rs 55 (Rs 300 / sq feet )
These are some of the specifications. If you wish to make the 3d photo in metal, you can perform the machining on VMC (Vertical Milling Machine).
Downloads
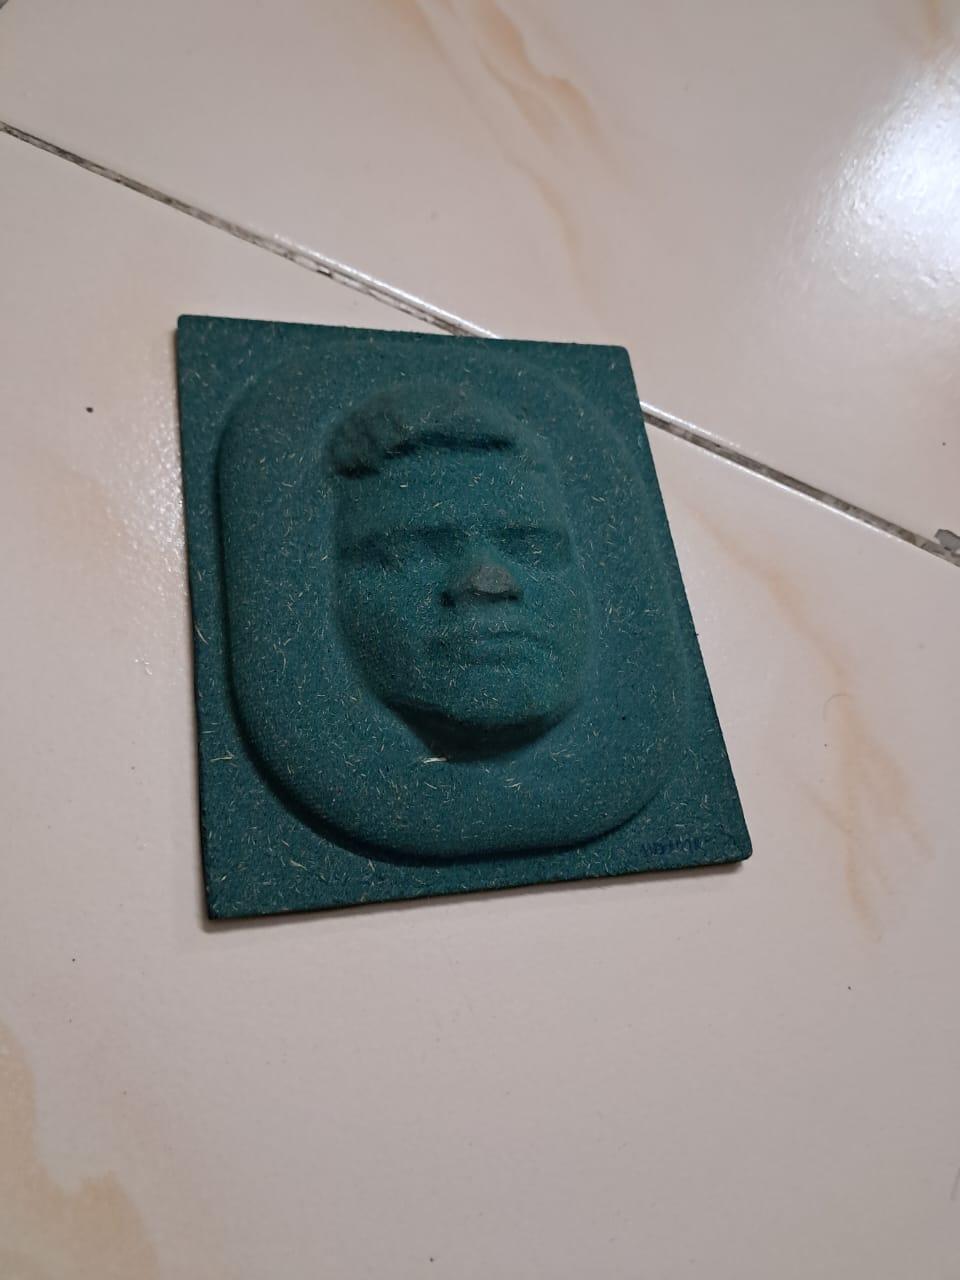
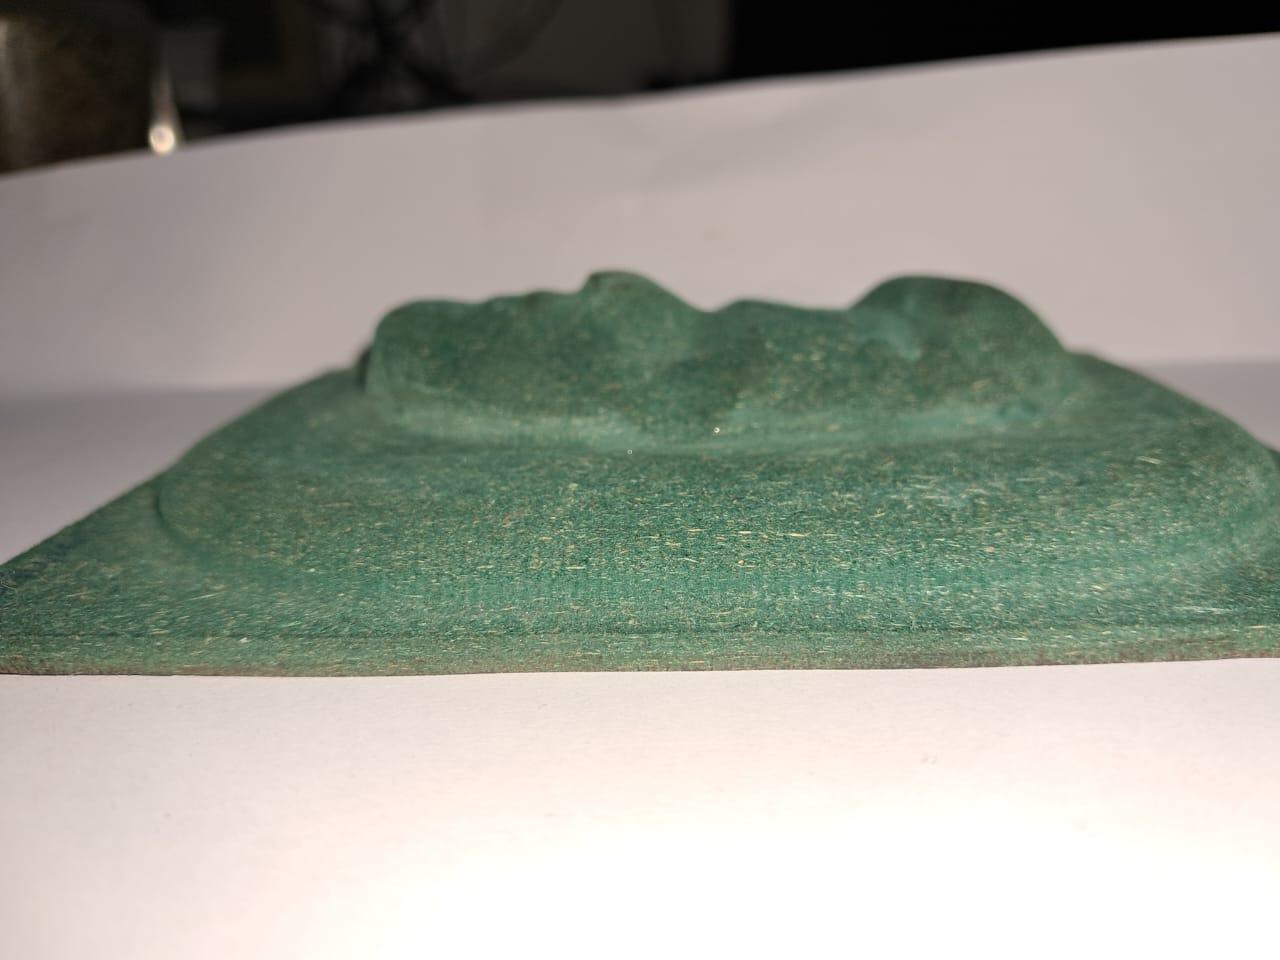
Finishing
With this done your technical stuff comes to an end. Your 3D face model is now complete!
Follow the following steps -
- Polish the Face Model with Fine Polish Paper. Dust it off with a soft brush.
- Apply Glue and Water in 50 - 50 proportion and apply the mixture to the model. Apply 2 or more coats of it. You can also apply MDF primer.
- Let it dry.
- Unleash your Creativity!
You have many options you can decorate and paint the model face.
Painting
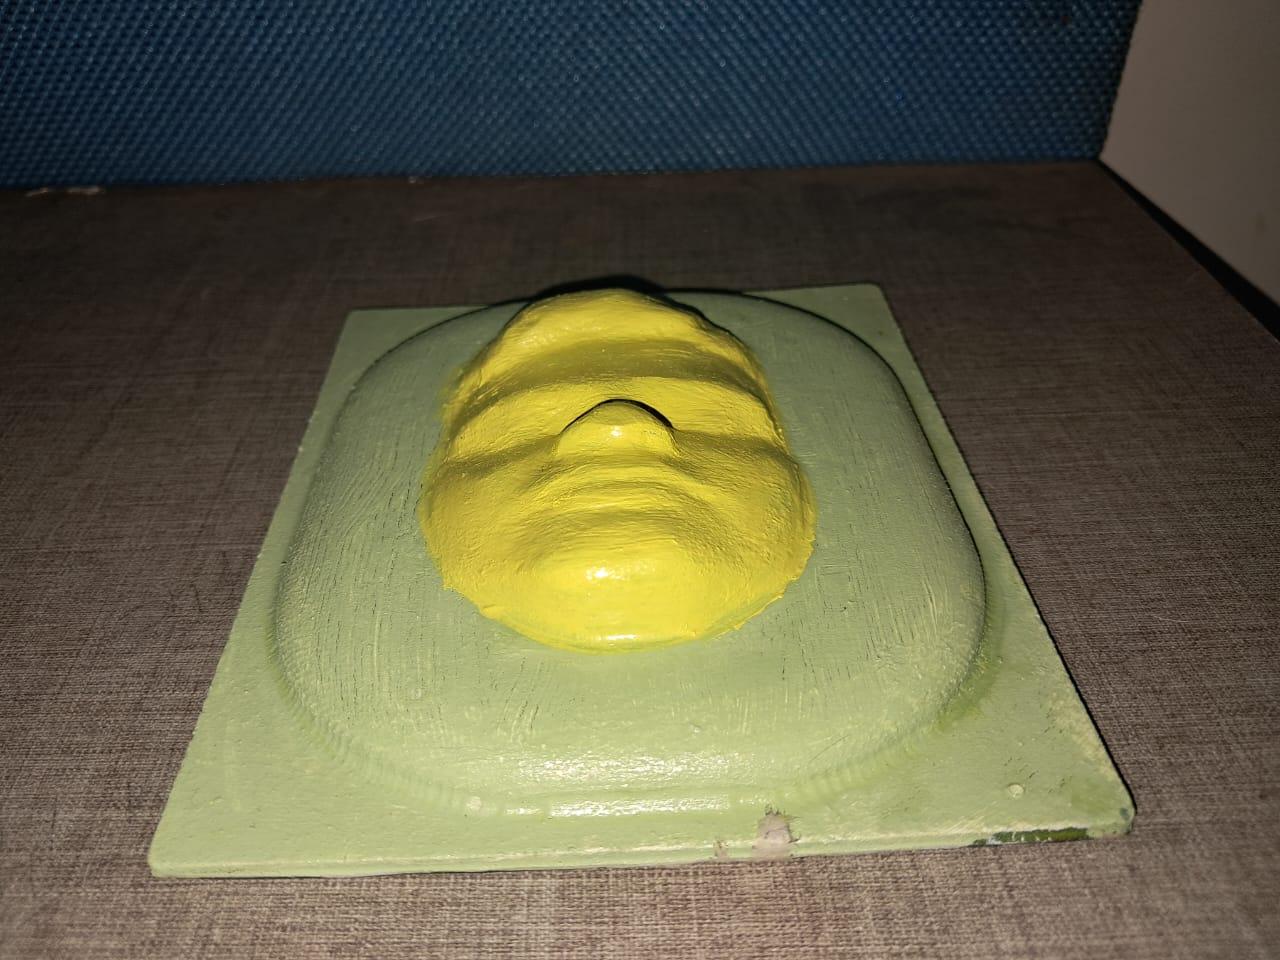
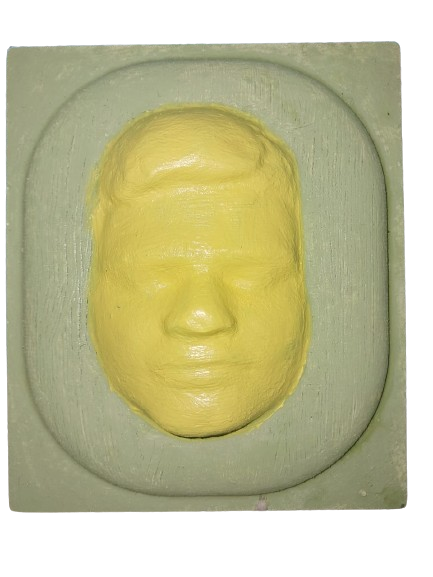
I only Painted it with Acrylic color.
1. Mixed Media Collage:
Combine fabric, paper, metal accents, and small memorabilia for a textured, personalized collage around the frame.
2. Painted Theme:
Paint themes like galaxies or nature scenes, blending 3D elements with the painted background for a cohesive look.
3. Mosaic Art:
Create a vibrant mosaic with small pieces of colored glass, ceramics, or tiles on the frame.
4. Engraving or Etching:
Engrave patterns, symbols, or text, including quotes or decorative designs, around the face.
5. Steampunk Style:
Adorn the frame with gears, cogs, and mechanical elements for a unique, industrial aesthetic.
6. Light Integration:
Integrate small LED lights to highlight features or create a glowing effect around the frame.
7. Nature Elements:
Decorate with natural elements like small branches, dried flowers, or leaves for an organic touch.
8. Abstract Patterns:
Use abstract shapes and bold colors to paint or sculpt modern, artistic patterns on the frame.
9. 3D Add-ons:
Attach additional 3D elements like miniature sculptures or figurines to enhance depth and complexity.
10. Personal Storyboard:
Create a storyboard with small pictures, symbols, and text to tell a personal story around the face.
Conclusion
I had fun doing this project.
If you have any doubts about the project feel free to ask questions in the comments.
Thank you for staying with me until the end. Hope you the best of luck for your own personalised 3d face model !