Fraction Collector for Chromatography (Lego Wedo and "Scratch")
by siderits in Workshop > Science
14962 Views, 19 Favorites, 0 Comments
Fraction Collector for Chromatography (Lego Wedo and "Scratch")
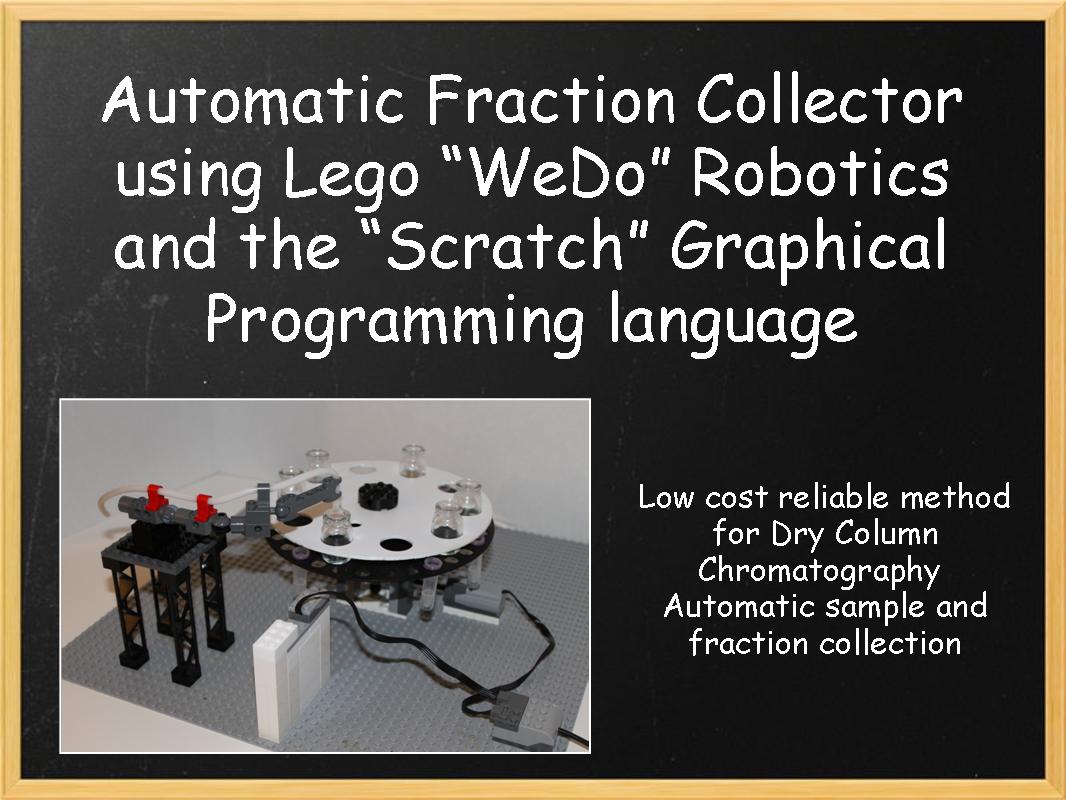
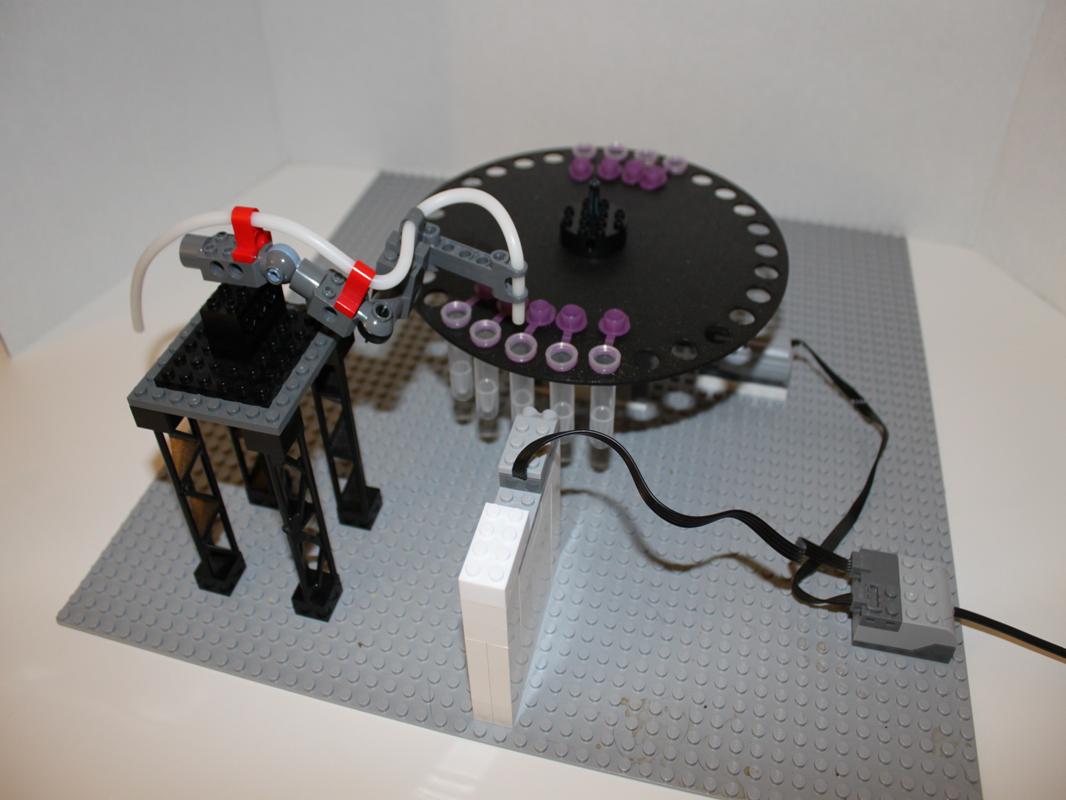
We demonstrate how to make a reliable and useful scientific instrument called a "Fraction collector" for use with column chromatography applications or educational science projects.
We used the free downloadable "Scratch" graphical programming language and the Lego WeDo robotics kit to make this Auto Sampler/Fraction collector. The only cost is for the Lego WeDo robotics components and the Lego pieces used for the apparatus. We have taken the system through hundreds of cycles and it works reliably. In a nutshell, the scratch program gets input from a sensor and controls a servo motor. The motor turns a sample wheel that holds empty tubes until the sensor "detects" a tube in front of it. It then tells the program to stop the motor for a certain amount of time, then repeat the process for the next empty tube. Each tube stops under a sample outflow to collect a few drops then moves on to the next empty tube to collect the next sample.
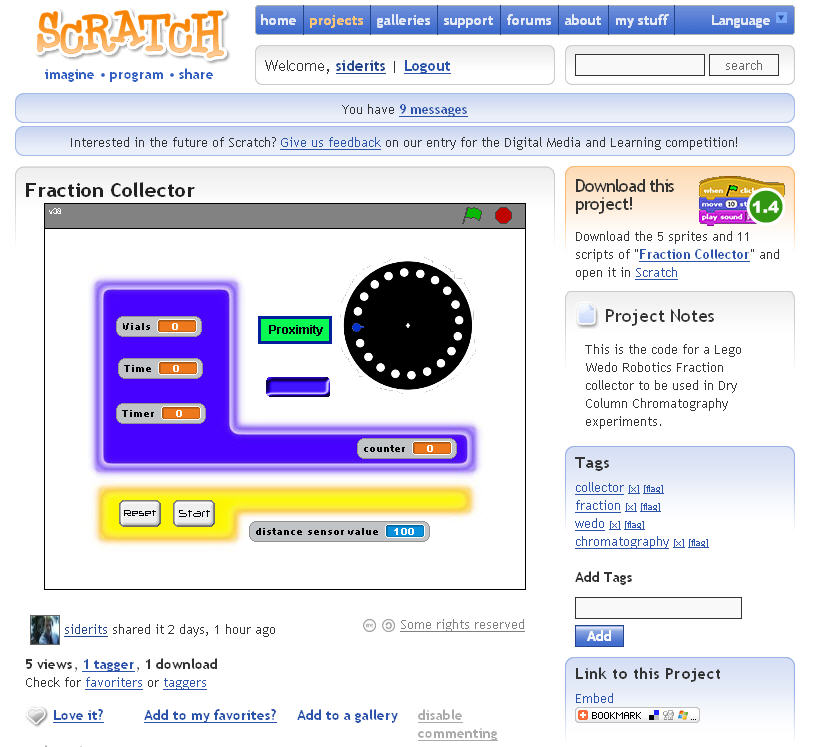
The program that we wrote to control the Servo Motor and Sensor is also downloadable from the Scratch Website and you can easily change it for your own use.
We'll explain what a fraction collector does and how its used with column chromatography.
To start with, If you wanted to sample the outflow from something over time or collect timed samples then you might want to use a fraction collector. It stops a sample bottle or vial for a given amount of time to collect some drips from an outflow tube and then moves the next empty sample container into position. Another variation on this theme would be to start with sample containers that had something in it, for example "algae" and stop in a magnetic field (between two magnets) for specific amounts of time or in front of an LED to give the sample different amount of light at a specific wavelength. You can stop the sample for a constant amount of time or program the sampler to stop at the magnets, fro example, for increasing or decreasing amounts of time for each sample. It would do this for 1-40 samples. This project can be easily reconfigured to include a proximity switch and light sensor with an LED circuit. You can even have multiple sites contributing sample to the containers as they stop and start at different positions.
OK, back to the project, a Fraction collector can cost 4,000-15,000K$, ours cost less than 150$ and has a "build time" of less than 30 minutes (if you have the Lego and WeDo parts and you download our program script from the "Scratch" website).
Out apparatus can accept from 1-40 small sample vials or up to 10 larger sample bottles. The prototype is so easy to work with that you can do much more than we've described.
Here are a few websites for reference as we go along.
Scratch graphical programming website: scratch.mit.edu
Bionicle website: http://bionicle.lego.com/en-US/default.aspx
WeDo website: www1.lego.com/education/search/default.asp
PicoBoard: www.picocricket.com/order-picoboard.php
If you have a child who likes Lego or you have a friend with kids who like Lego then just ask them to put this together for you.
The main Lego parts (aside from the WeDo kit are: the gear box, 3 axles, generic building pieces and some Bionicle joints.
Video of Working System:

The Audio segments were taken from an online Text-To-Voice site sponsored by AT&T.
You input your text and it generates an MP3 for you to download for your project.
Setting Up the Drive Tower (Gear Box and Servo Motor):
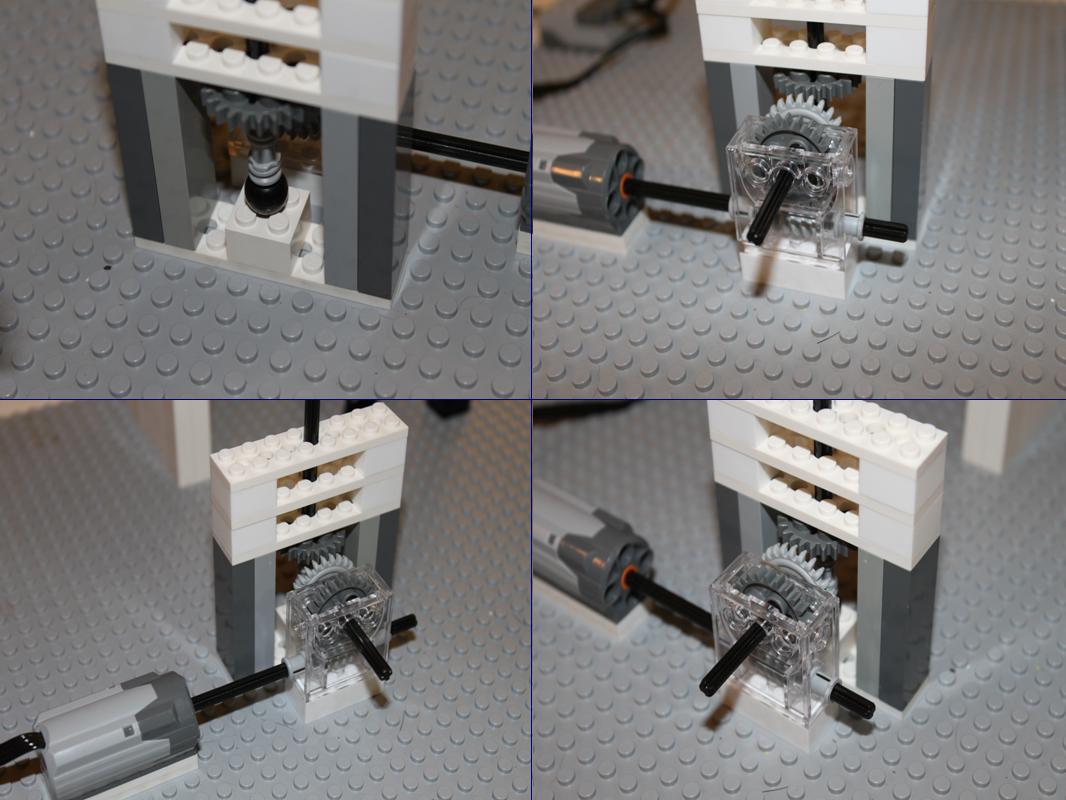
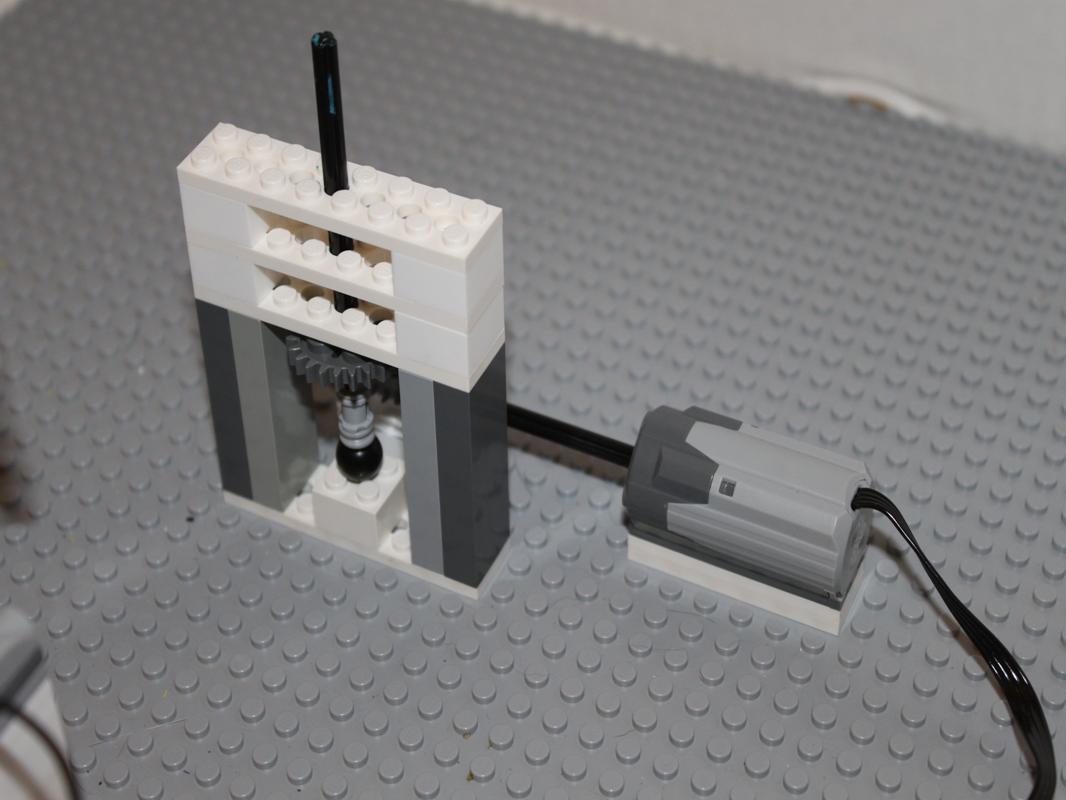
First steps Steps: The "Drive Tower" will support and turn the sample holder.
Now:
Start the Scratch Program
Reveal the “Motor” blocks
Drag the “Motor on for 1 sec” block onto the canvas and click it.
Watch the motor spin for 1 Sec
Next build the "Drive Tower"!
Building the Proximity Sensor Tower:
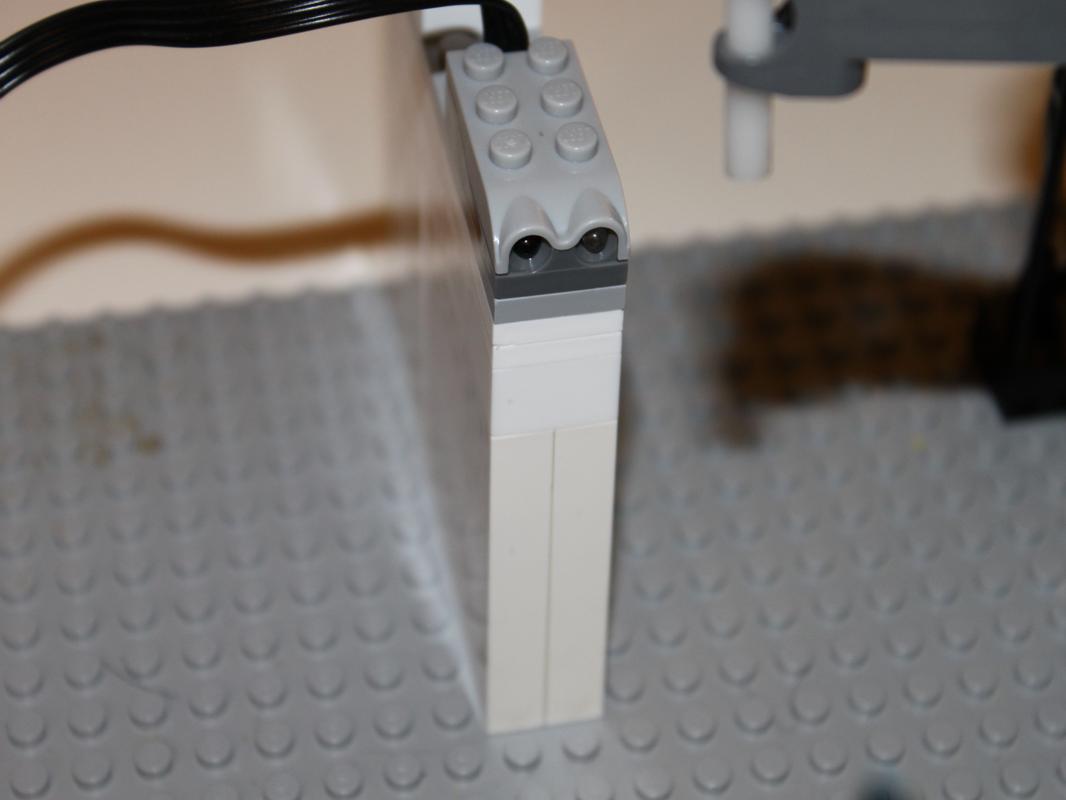
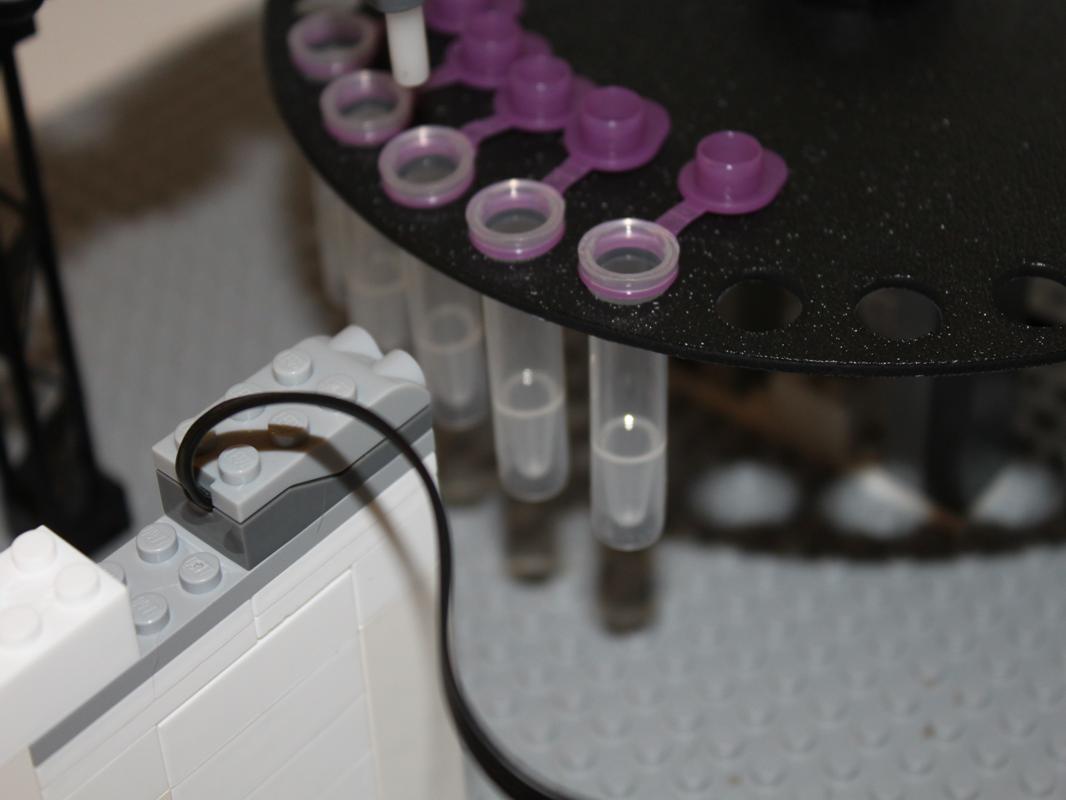
Don't worry too much about the height yet since we can change that easily after we get everything else set up.
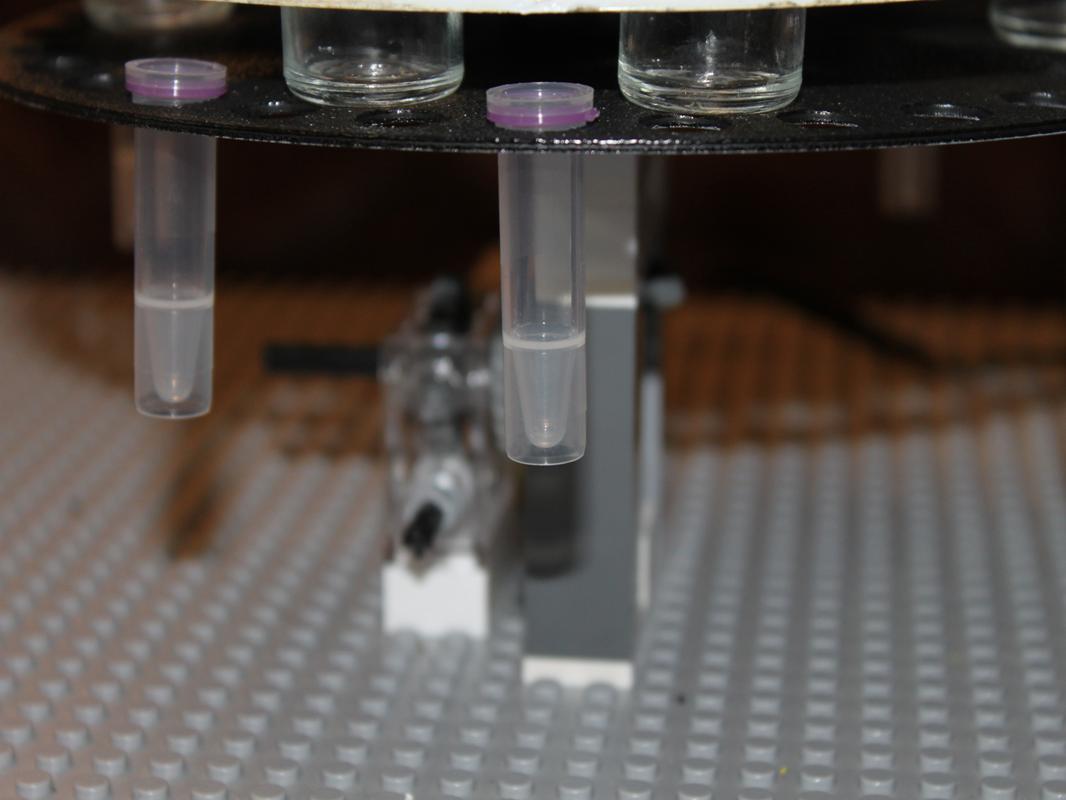
The sensor is positioned at a level below the surface of the sample "holder" (just a plate with holes that hold the sample vials) so that as each tube passes in front of it, the tubes can be detected by the sensor.
Even if we put larger clear glass sample contained on an upper level, the sensor still detects the tubes that hang down since they bounce the IR signal back to the sensor. That way we can use these to trigger the sensor to stop the rotation of the sample holding disk so that the clear glass sample bottles stop where we want them to stop.
Make the Chromatography Column Outflow Positioning Arm:
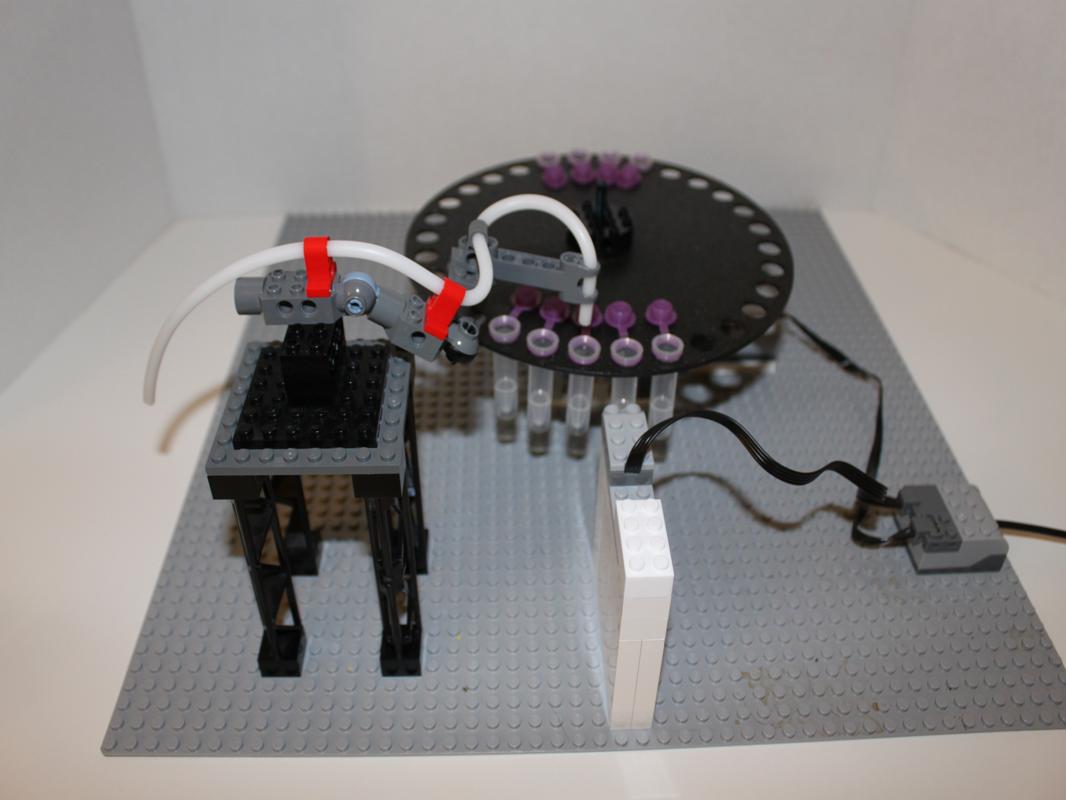
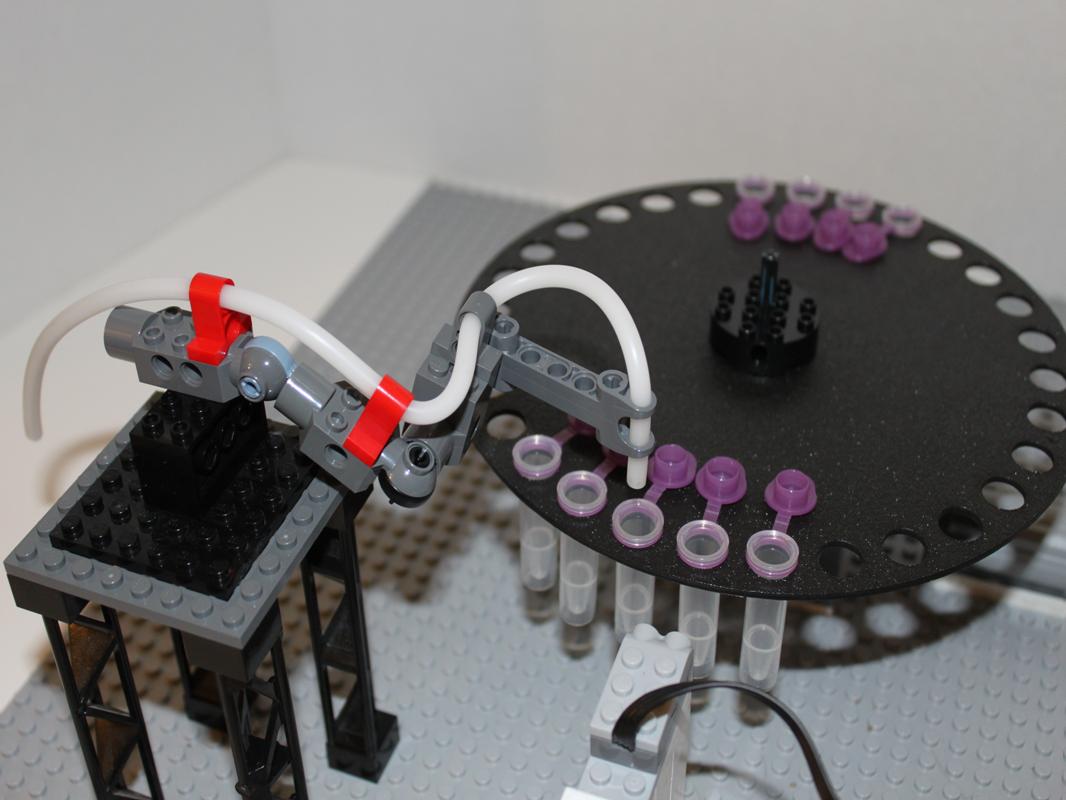
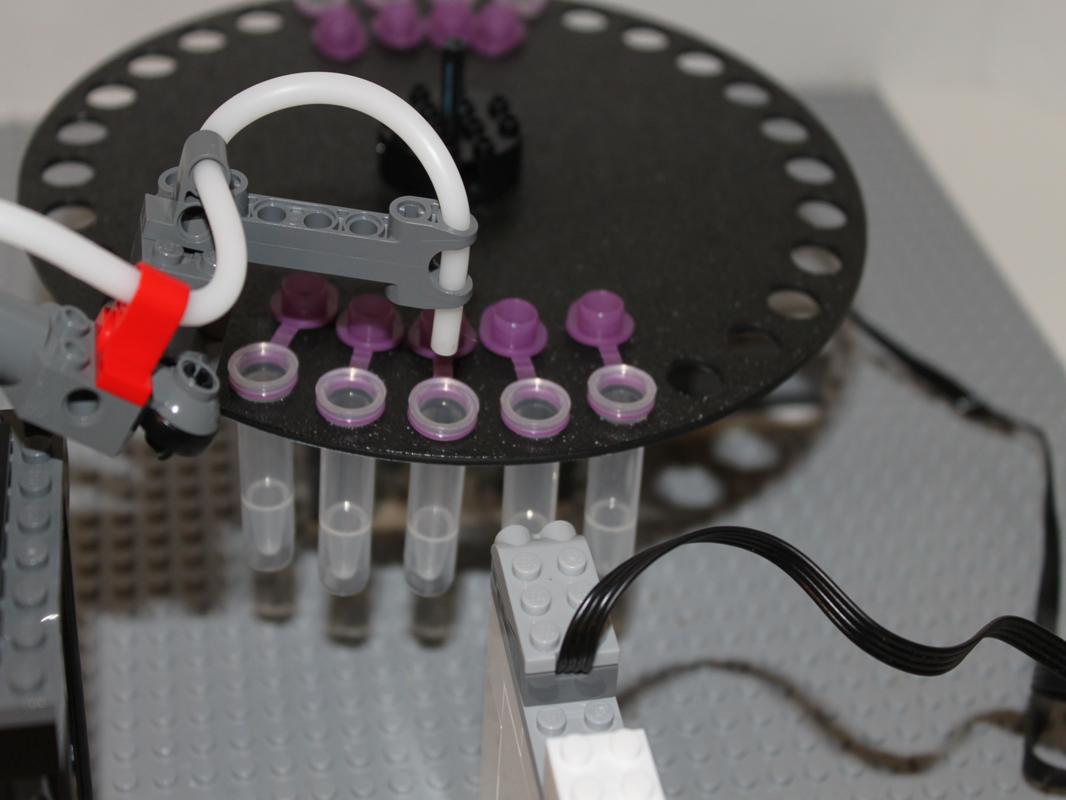
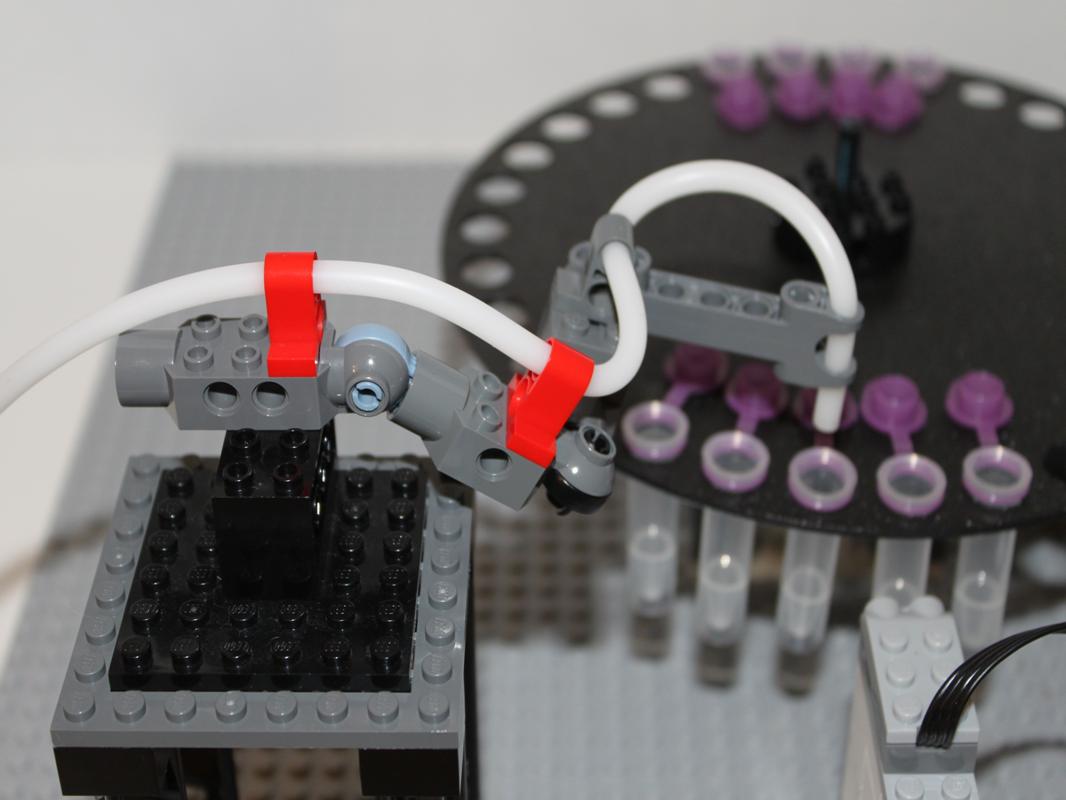
Making the Sample/vial Holder:
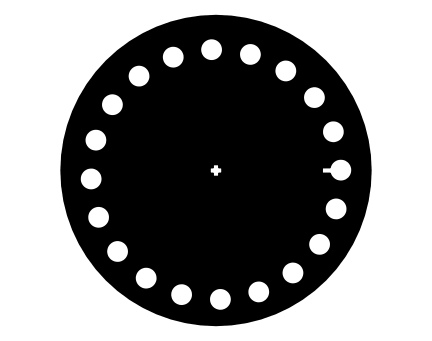
You can use a small "Dollar Store" plastic plate and drill a few holes.
Take a compass and find the center of the plate (remember high school geometry) and then mark a circle from the center for the holes to be drilled. "Step" around the circle with a compass or use a protractor to measure where you want the holes to be drilled.
This holder just sits on top of the drive tower spindle. If you don't glue the spindle to the plate you'll have to make an "X" for the drive spindle to fit into.
Writing the "Scratch" Contoller Program:
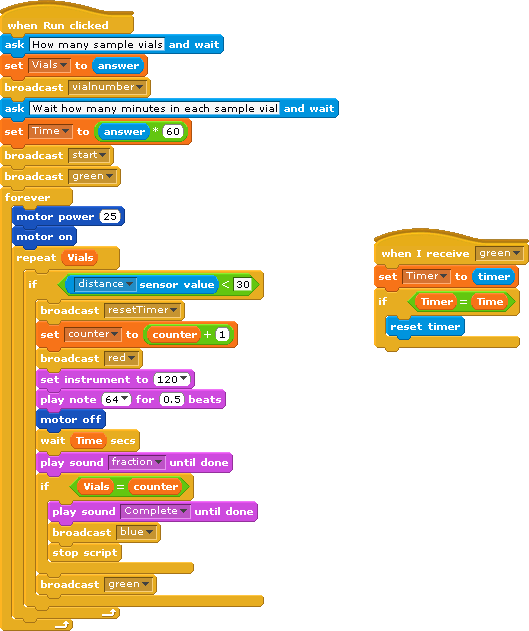
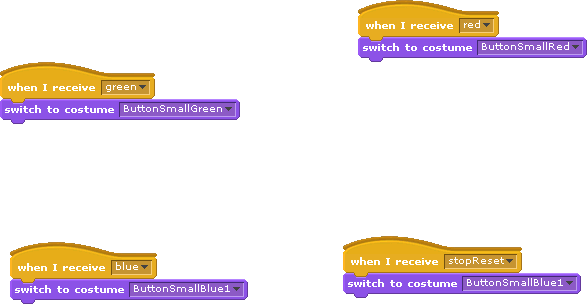
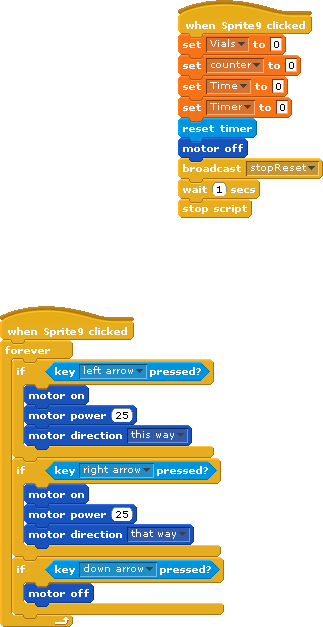
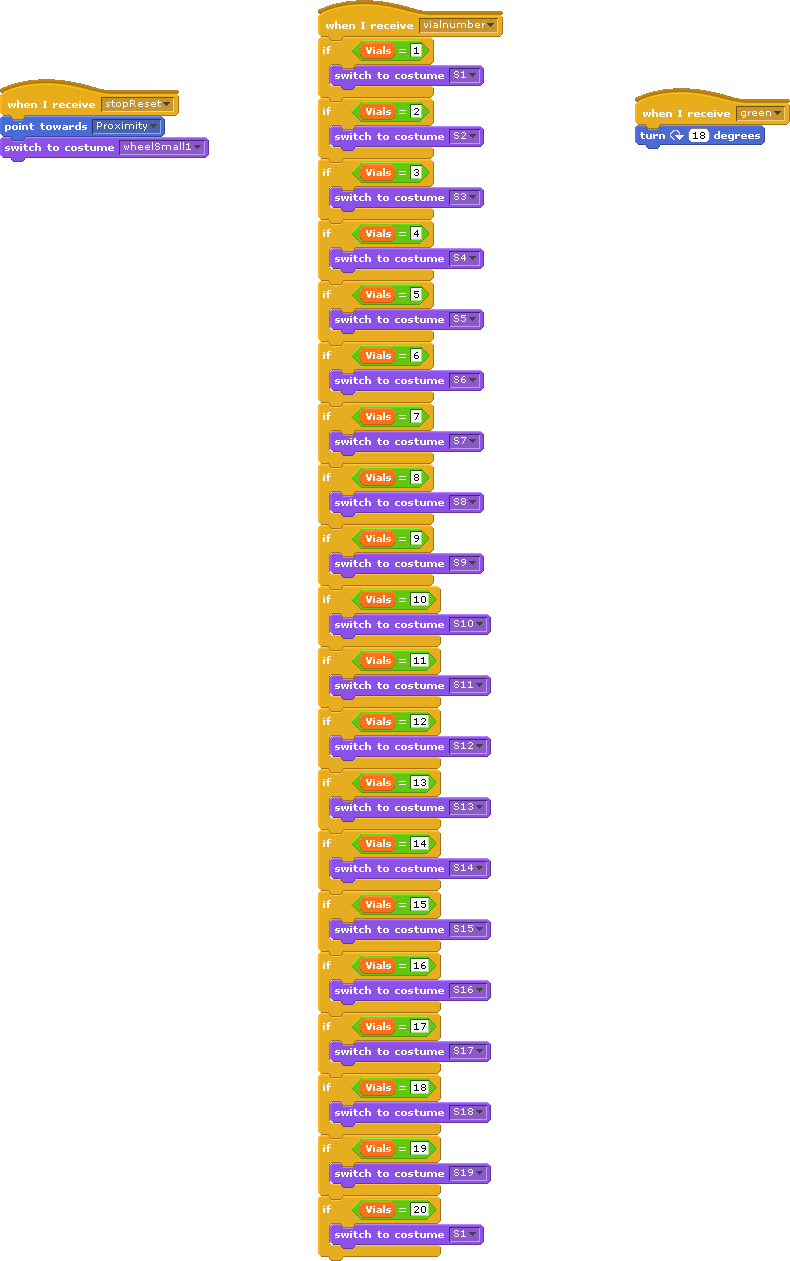
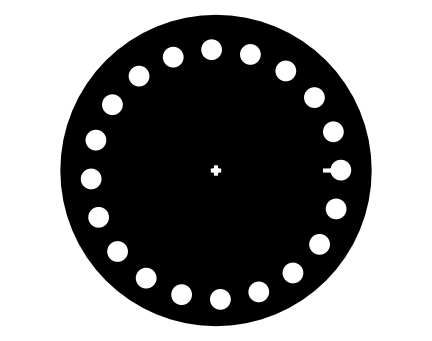
Don't worry, you can download the program that I wrote for this project form scratch.mit.edu website and run it on your computer. Feel free to change and improve on it. It will even play voices to tell you whats happening while the program is running.
You'll need to install the free Scratch program on your computer so that you can run the program locally.
Scratch.mit.edu Here is the "Scratch" website so you can get the program.
Here is the link to my online Scratch programs. Download it to your computer.
Remember it will run but not do anything unless you have the proximity sensor and motor hooked up to your computer.
http://scratch.mit.edu/users/siderits
Text-to-Voice audio files for this project were made at ATT Voice DEMO website.
Approach to writing "pseudo-code" in Scratch for this project:
Step One:
- Connect the WeDo hub to the USB port
- Then connect the Servo motor and proximity sensor to the Hub
- Go into scratch to reveal the motor block to see the motor functions
- Now look at the sensing group and find the distance sensor
- Make the motor move and the sensor report distance to the screen
Step Two:
- Build the system as in the images
- Put a tube into a hole so that it can rotate into the distance sensor path
- Make the motor stop for a set period of time
- Make the motor start again until the next sensor interrupt
Step Three:
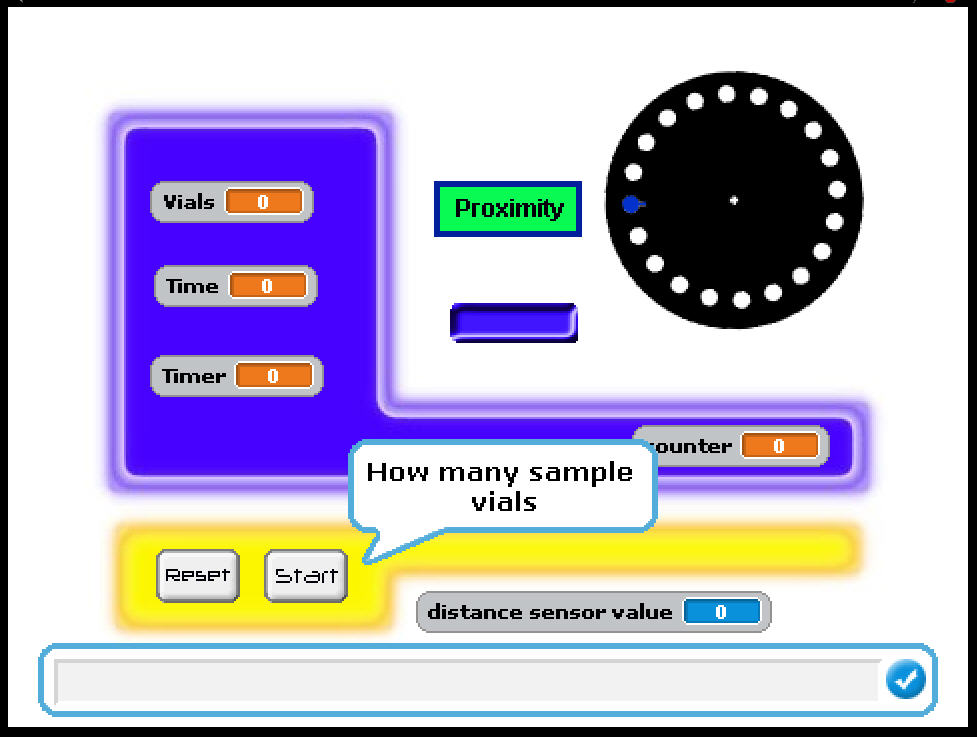
- Make the program ask how many tubes have been loaded
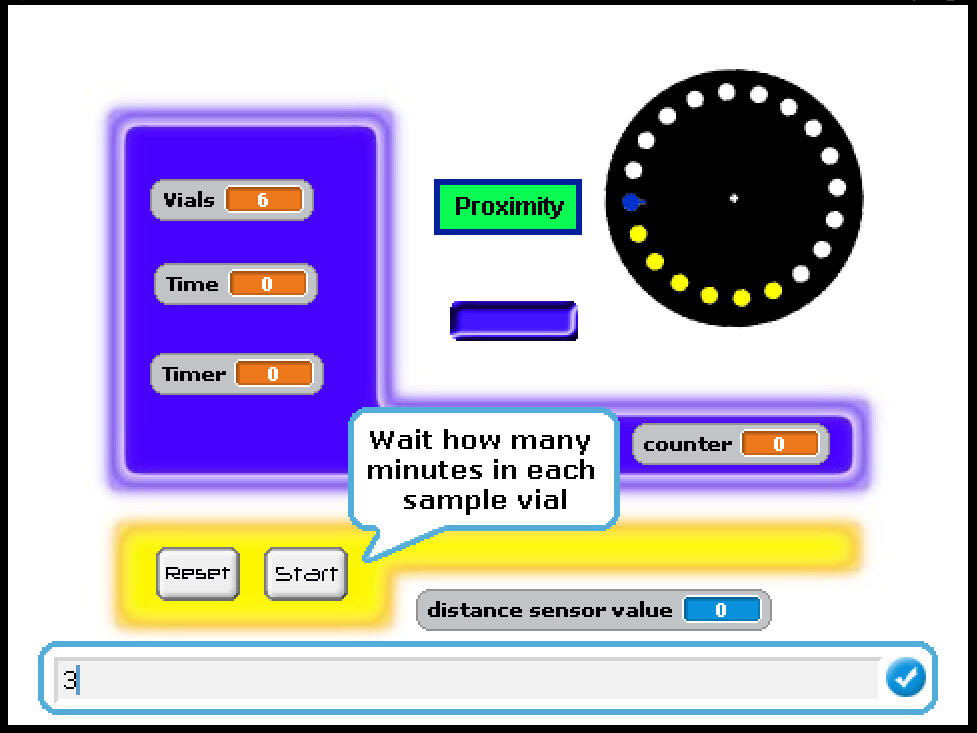
- Make the program ask how many minutes to stay on each sample tube
- Add a graphic that shows whats happening
- Add some sounds so that you know whats going on during the run
Next step adding functionality:
- Using the PicoBoard interface add a photosensor and an LED
- Cover the top of the other container to keep them clean during run.
Adding Larger Sample Collection Capabilities:
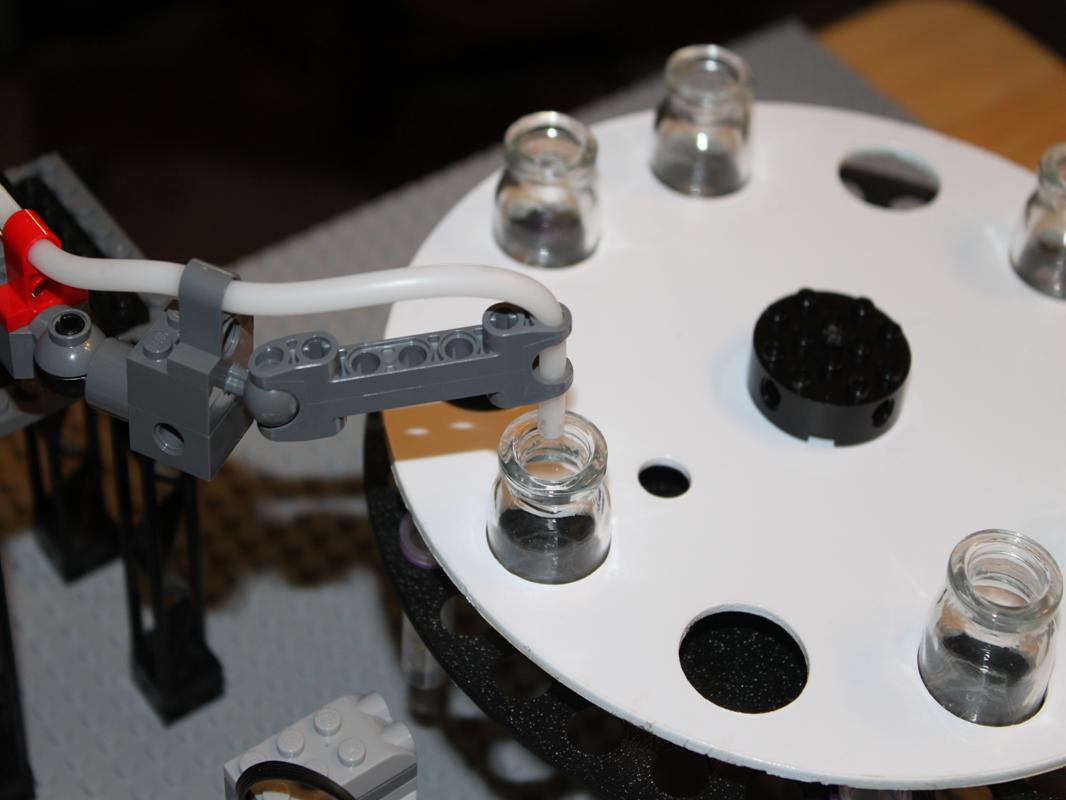
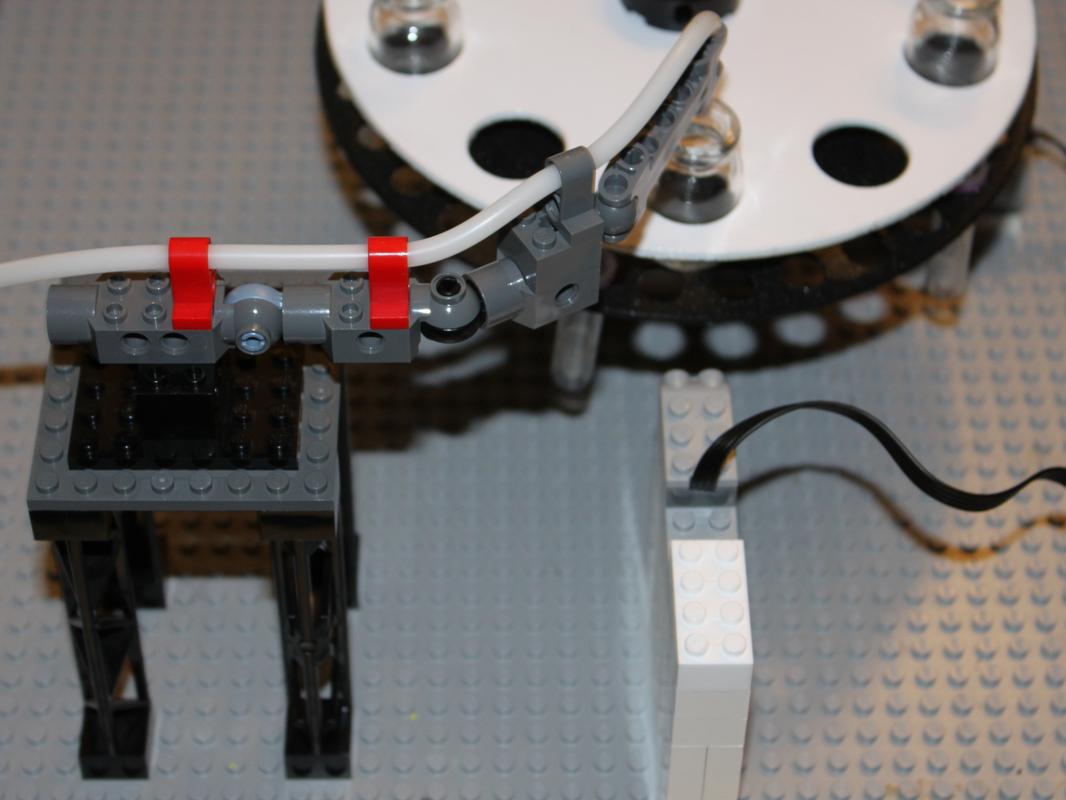
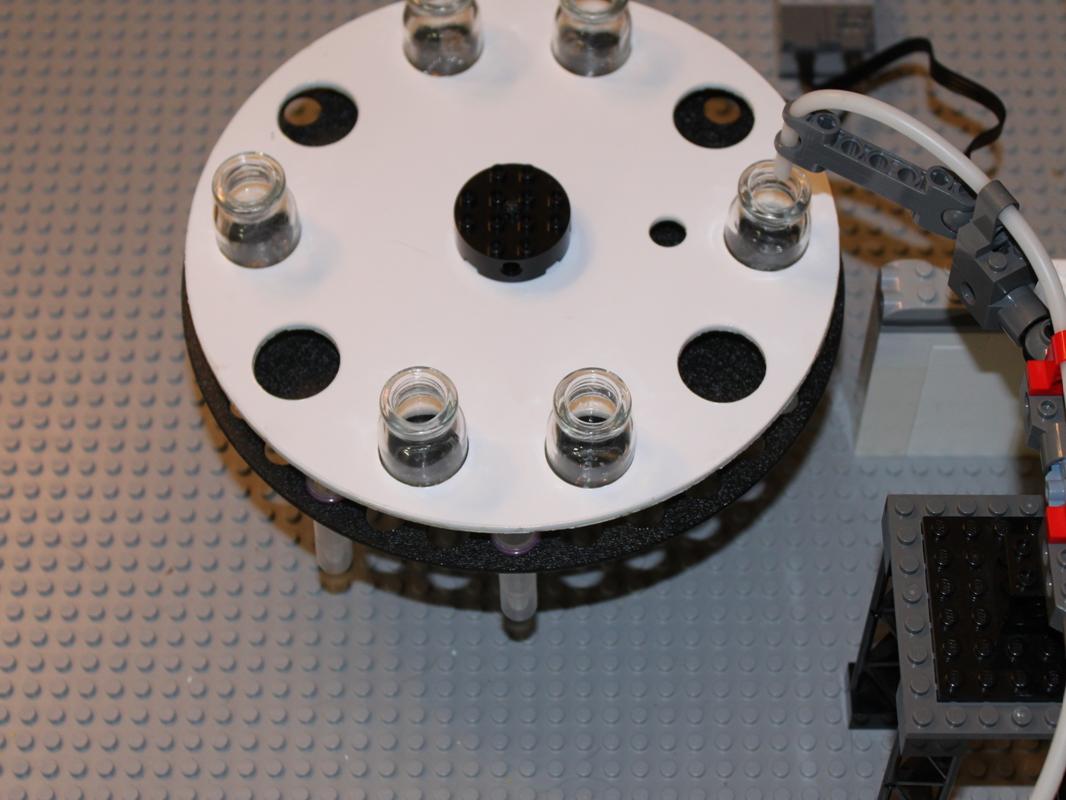
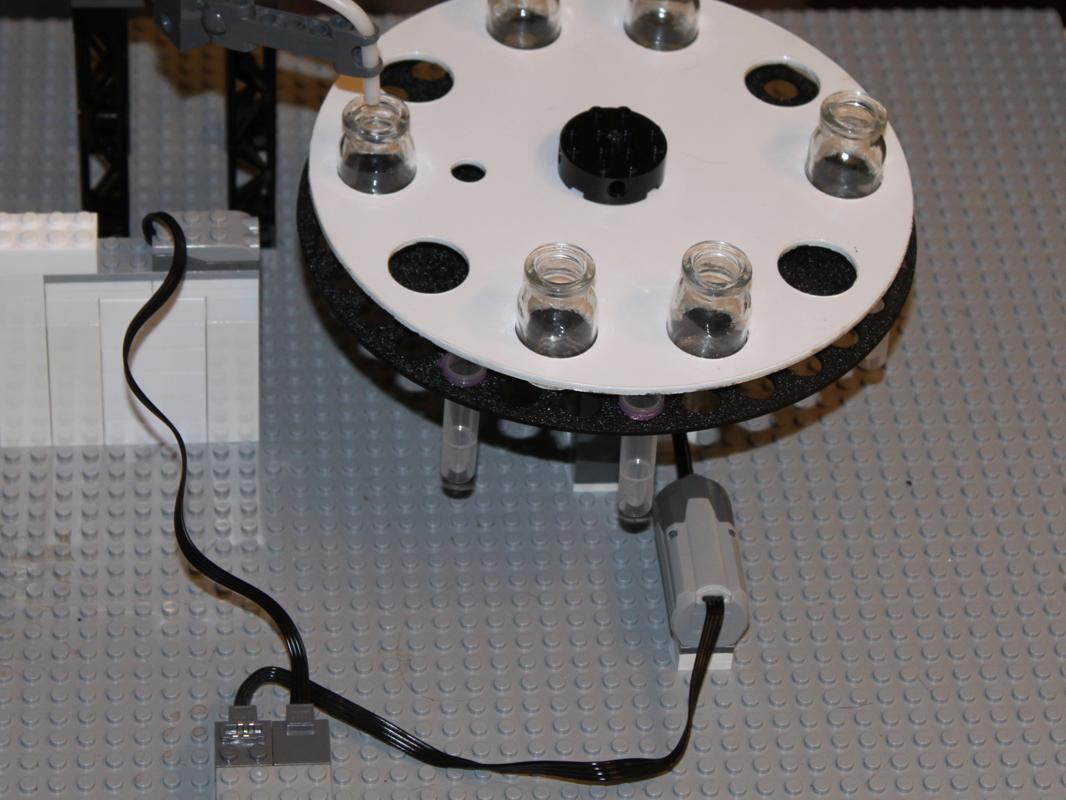
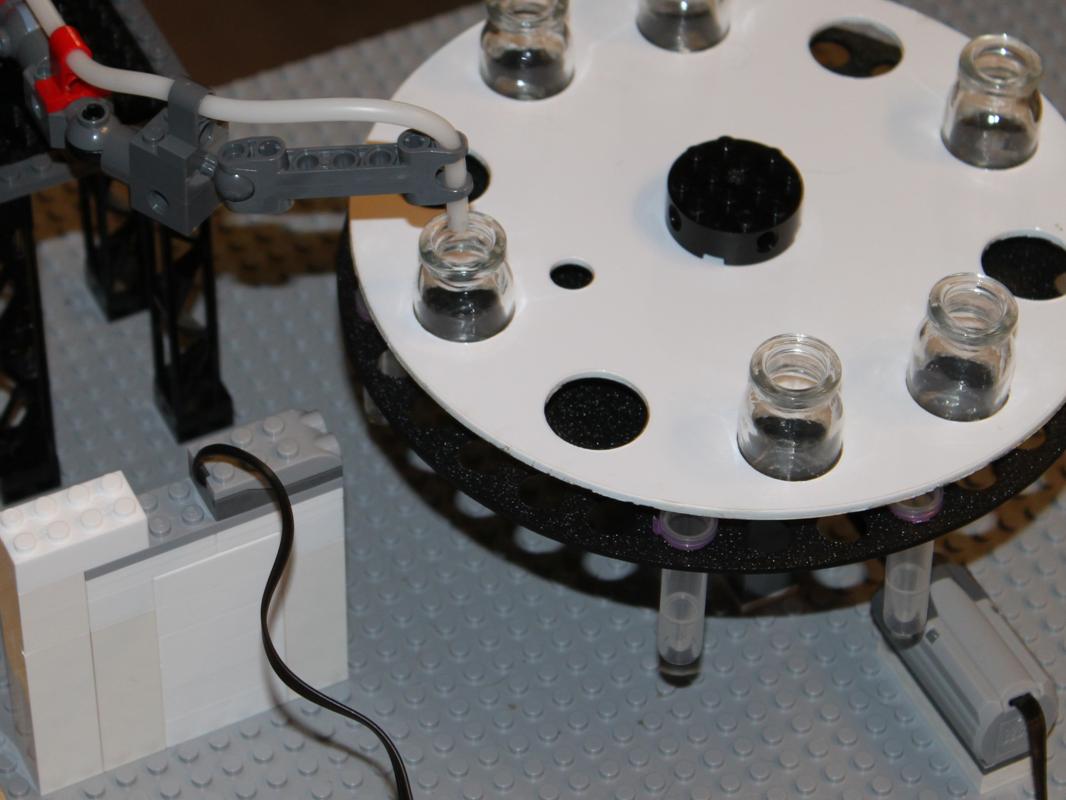
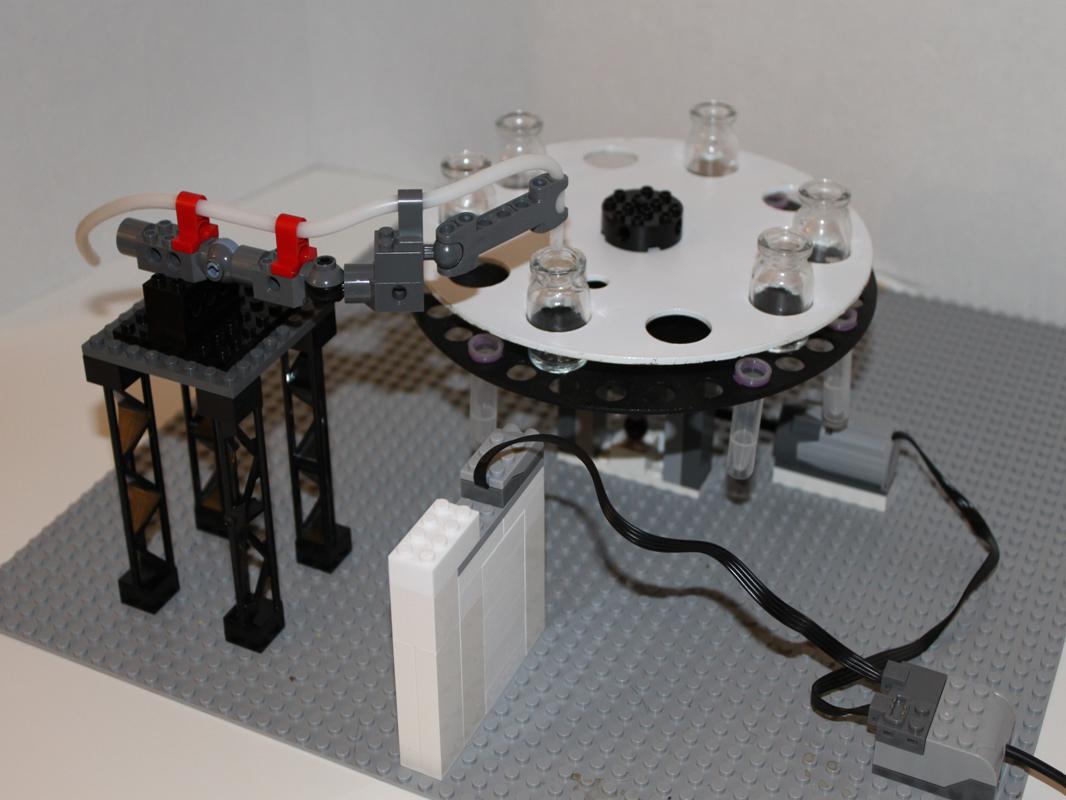
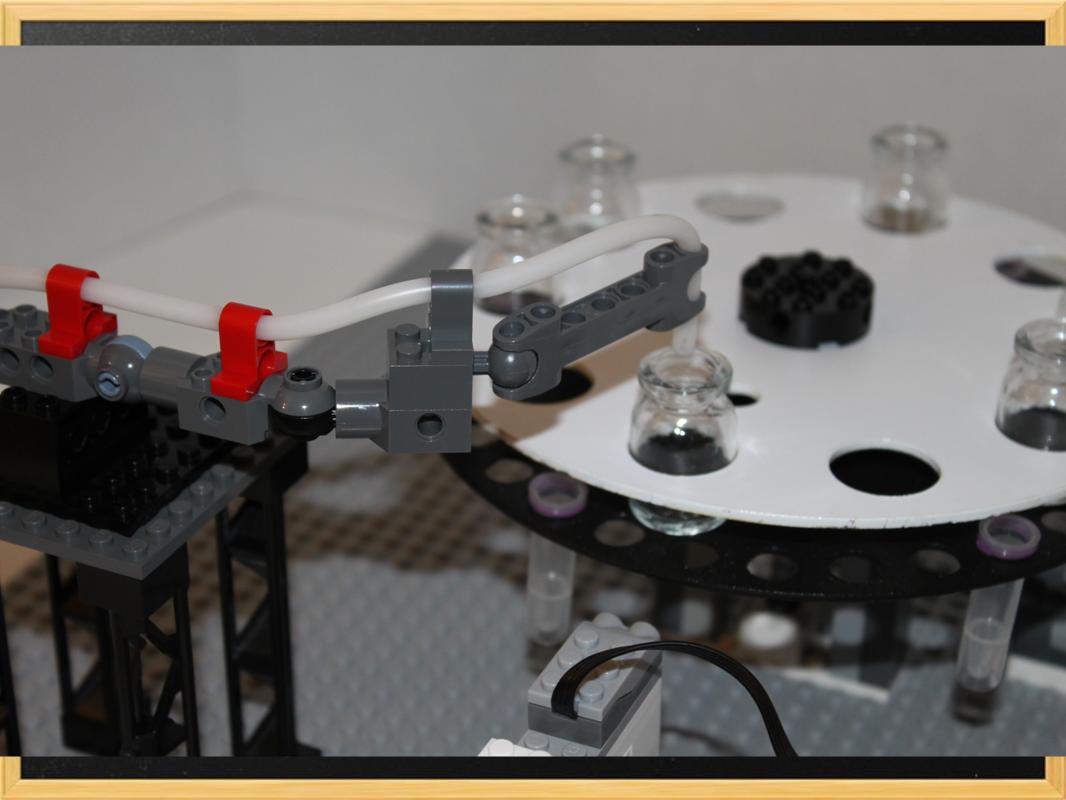
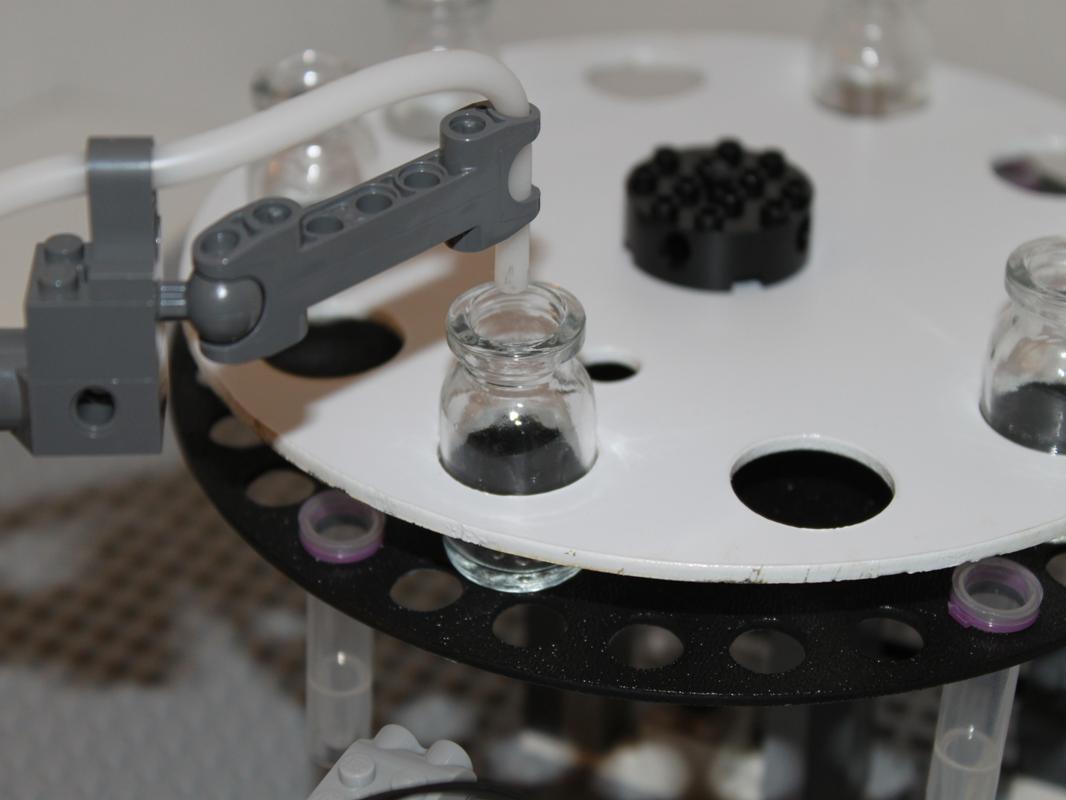
We used the original tubes that hang down to trigger the proximity sensor since the IR signal would go through the glass bottles and not bounce back to the sensor.
Notice how the tube that hangs down is place in front of each glass bottle.
This assures that the glass bottle will stop under the sample delivery arm.
Why Is This a Useful Approach to Prototyping Different?
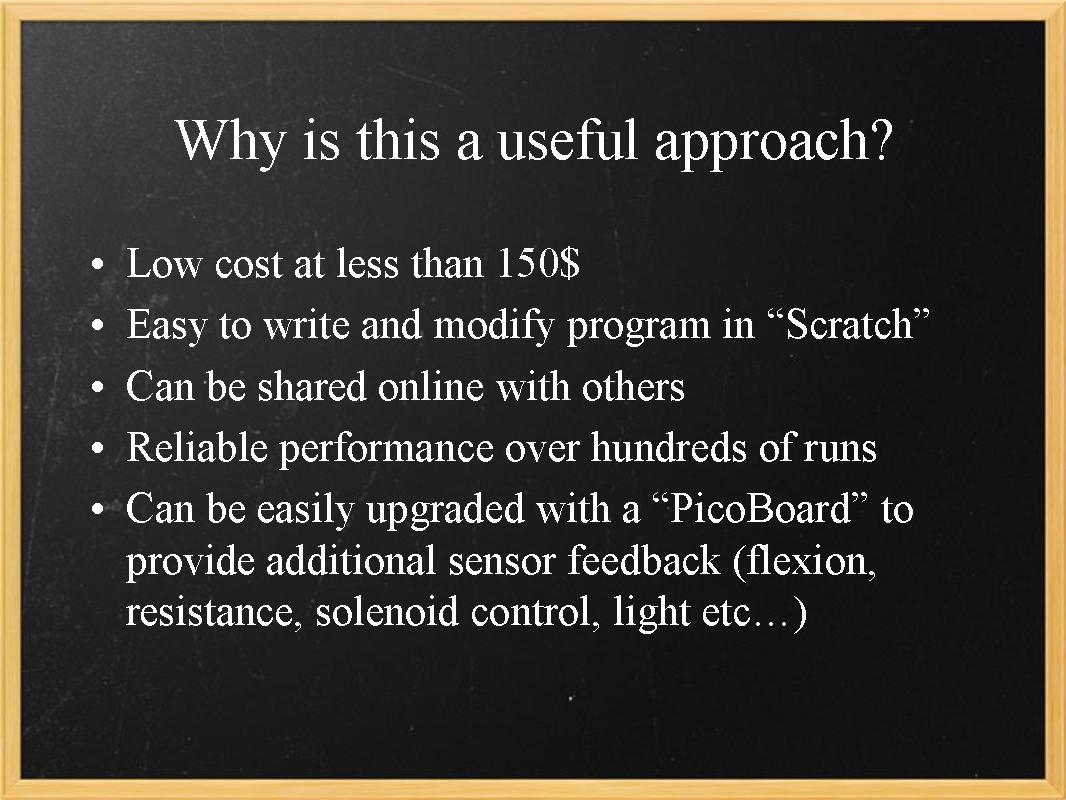
Each of these projects began with a "challenge statement".
For example: Challenge statement - "We can make an automatic fraction collector that is cheap, reliable, would support "chronobiologic" applications, can be upgraded easily, includes a control program that we write and revise in real time and put it together in an hour from parts available for under 100$ (including Ebay purchases and left over Lego pieces).
Our team is the Experimental Pathology Rapid Prototyping team in the Investigational Pathology Section of the Laboratory. Its multidisciplinary and includes medical students, bioengineering majors, laboratory technicians, technologists, high school science students and doctoral prepared experimentalists. Everyone takes a part and everyone learns from each other.
For example, our Lego "specialist" is a 13 year old 7th grader (no kidding he's our "goto" guy for Lego constructs). Our best Scratch programmers happen to be juniors in high school ( outstanding in their science classes), our University Bioengineering major handled the questions that dealt with "Chronobiology" and our medical student answered questions on Dry Column Chromatography (DCC). Everyone played a part.
Our next step for his project will be have the tubes feed in a straight line or follow a chained/belt/track driven system instead of a circular disk. We'd also like to add a solenoid to temporarily close the outflow when the sample containers swap out and a "sample capper" to close each tube. We'll also add a drain function to the software so that it can stop over and empty space to drain the remaining column into a waste bin. We also had a suggestion that this could be used to expose algae for different periods of time to a magnetic filed (between two magnets.
The Following Will Provide More Information on Key Topics:

to the key areas of this project.
- See video of the system in action (with programed voice outputs)
- What is a Fraction collector and why make one?
- What is Dry Column Chromatography and what does it do?
- What is "Scratch" graphical programming and why use it in this project?
- What is Lego WeDo robotics and how does it control the sensor and motor?
What Is a Fraction Collector?
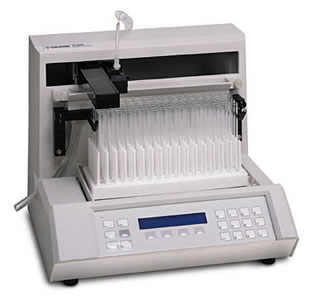
This information about Fraction collection is from the online "Library for Science"
"Fraction Collector A fraction detector is a device that allows regular or specified samples to be taken from a column eluate and stored in a retrievable form. The storage vessels are usually small sample tubes or vials that are oriented in a rotating disk or in a moving belt, there movement usually being controlled by a microprocessor. On receiving a signal from the microprocessor, the next vial is placed under the column outlet and the eluate collected until receiving another signal from the computer. Once the properties of the chromatogram that describes the separation has been ascertained, then the collection program can be defined. The fractions can be collected on a basis of time either at regular intervals or a specific times to collect specific peaks. Alternatively the fractions can be collected by monitoring the detector output and when a peak starts to elute the fraction collector is activated and the peak collected in a specific vial. When the peak returns to base line the column eluate is then directed to waste until the next peak starts eluting. Fraction collectors are in common use with most liquid chromatographs. They are used to collect samples for further purification, subsequent examination by spectroscopic techniques or for biological or organoleptic testing."
What Is Dry Column Chromatography?
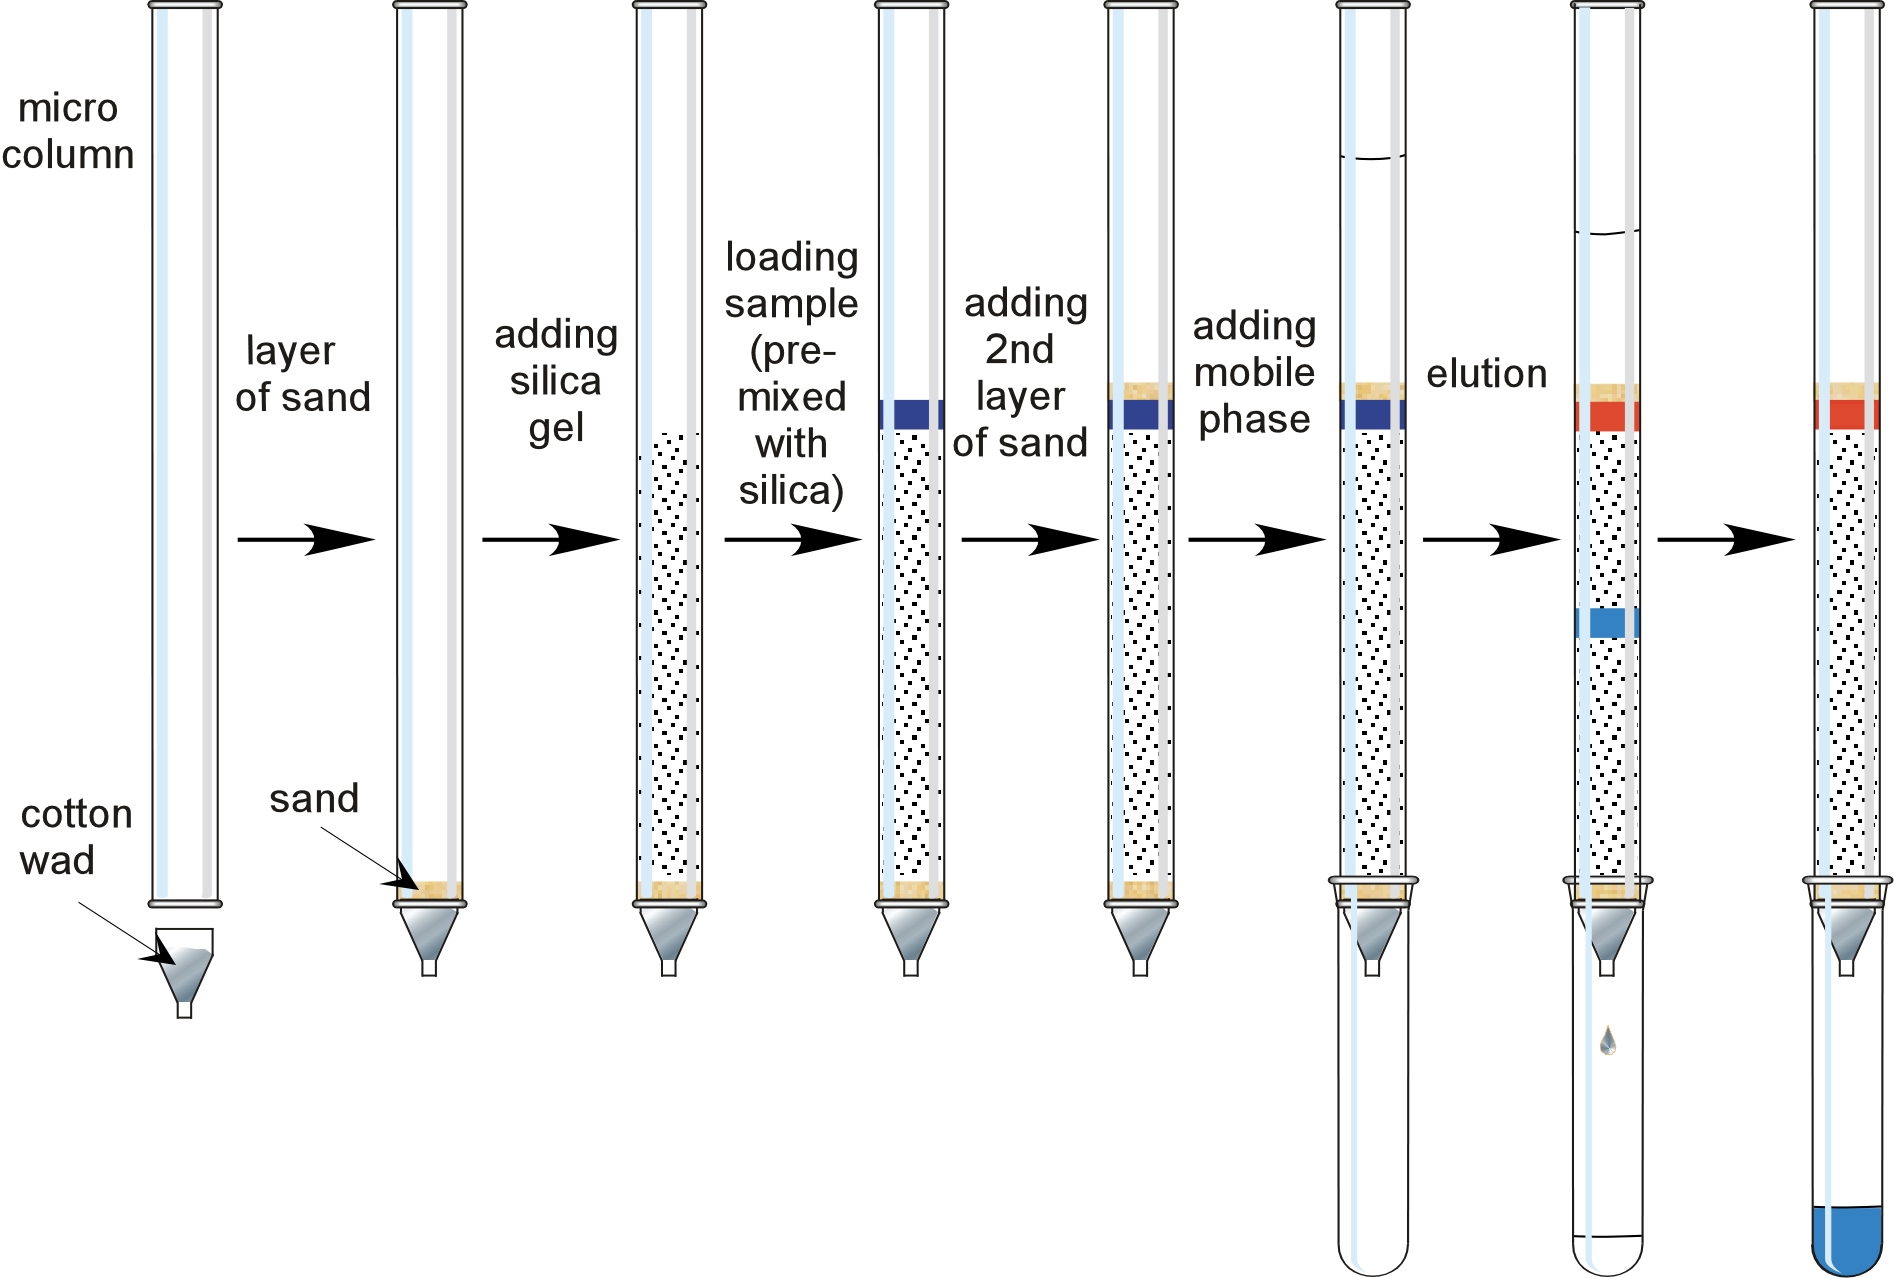
Microflash DCC: orgchem.colorado.edu/hndbksupport/colchrom/colchromprocmicroflash.html
Column video: images.google.com/imgres
What Is "Scratch" Graphical Programming?
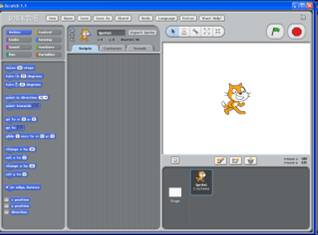
1. Building-block programming – To create a functioning program in Scratch, the user simply has to snap graphical blocks into stacks. In most programming languages the user would need to create a large amount of code, and this code might have numerous errors. With Scratch, this is not the case. The graphical blocks are designed to fit together only in ways that make syntactic sense, so there are no syntax errors. The best feature of Scratch is the ability to make changes to a program while it is running; it is easy to experiment with new ideas incrementally and iteratively.
2. Media manipulation – With most programming languages it is quite difficult to create programs that control and mix graphics, animations, music, and sound. With Scratch the user can collaborate graphics, animations, music, and sound very easily.
3. Sharing and collaboration – After creating a program with Scratch, it is easily accessible for other people. The creator can upload their program to the Scratch website, where anyone can view the program. This is excellent if one needs immediate feedback.
What is a Pico Board?
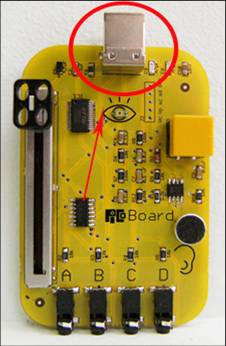
The Pico Board was also developed by MIT. This is a small yellow board that has 4 resistors, a sound sensor, a light sensor, a button, and a slider. This board is connected to the computer through a USB cable, and the information that it reads can be accessed through Scratch.
What Is Lego WeDo Robotics?
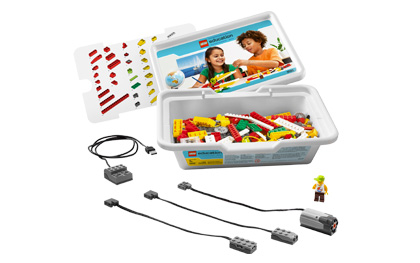
"The LEGO® Education WeDo™ Robotics Construction Set is an easy-to-use set that introduces young students to robotics. Your students will build LEGO models featuring working motors and sensors and program their models using the LEGO Education WeDo Robotics Software (900095). When the set is combined with the WeDo Robotics Activity Pack (909580), students will explore a series of cross-curricular, theme-based activities while developing their skills in science, technology, engineering, and mathematics, as well as language and literacy. The set contains more than 150 elements including a motor, tilt sensor, motion sensor, and LEGO USB Hub.
$129.95 Complete Kit
$44.95 Hub separate
$19.95 Sensor 15 cm in mm separate
$ 7.95 Motor separate
Kit includes:
http://www.legoeducation.us/store/detail.aspx?ID=1573&c=0&t=0&l=0
When the motion sensor, designed for the LEGO® Education WeDo™ Construction Set, is attached to the LEGO USB Hub, it can detect objects within a 15 cm range and is automatically detected by the WeDo Software.
Use the Power Functions M-Motor with the new power function connector to bring your LEGO® models to life. The Power Functions M-Motor is compatible with both LEGO building systems and can be used with the LEGO Education WeDo™ Robotics Construction Set and the Simple and Motorized Mechanisms Set."
Both Motor and sensor work with the Scratch program.
Discalimer:

WE urge you to follow all of the manufactures instructions for all Power-tools (that you never read in the first place). This project may require obtaining some of your child’s toy’s we suggest this is done after they are sleeping. We will not be held responsible for any damage caused during a temper tantrum (you or the child).
As always use extreme caution when using anything that heats up, pinches, cuts, and squeezes or causes traumatic, caustic or thermal injury.
This project is presented for demonstrative purposes. Therefore safety devices and procedures may have been removed or circumvented. This is purely for this instructable and not advised for personal use.
We are sharing our experience, not telling you what to do or to do it.
If you choose to try this, then it is at your own risk!
No really, we're not kidding about this.
Son of disclaimer:
This is an example of how we constructed a prototype system for educational or quick test prototype applications.
We make no claims about it's functions or use in research.
Although it functions reliably for illustrative and demonstrative purposes and may be ideal for a quick fix, or a "chronobiological" prototype application or even educational/classroom purposes we take neither credit nor responsibility for your actions.
Biological stuff is really dangerous! Especially some of the things that you might put into a chromatography column or the solvents that might be used in such a column.
Be careful, read instructions, don't smoke, eat healthy, get exercise, do not stand on apparatus etc..
Good luck.
Project Description:
Center for Parabiotics Research and the Investigational Pathology Department