Fractal Snowflake Ornaments


Having recently acquired a desktop CNC for prototyping and small batch production, I decided to experiment with milling bits and CAM software; since it's never too early to prepare for Christmas, it was an obvious decision to begin with ornaments.
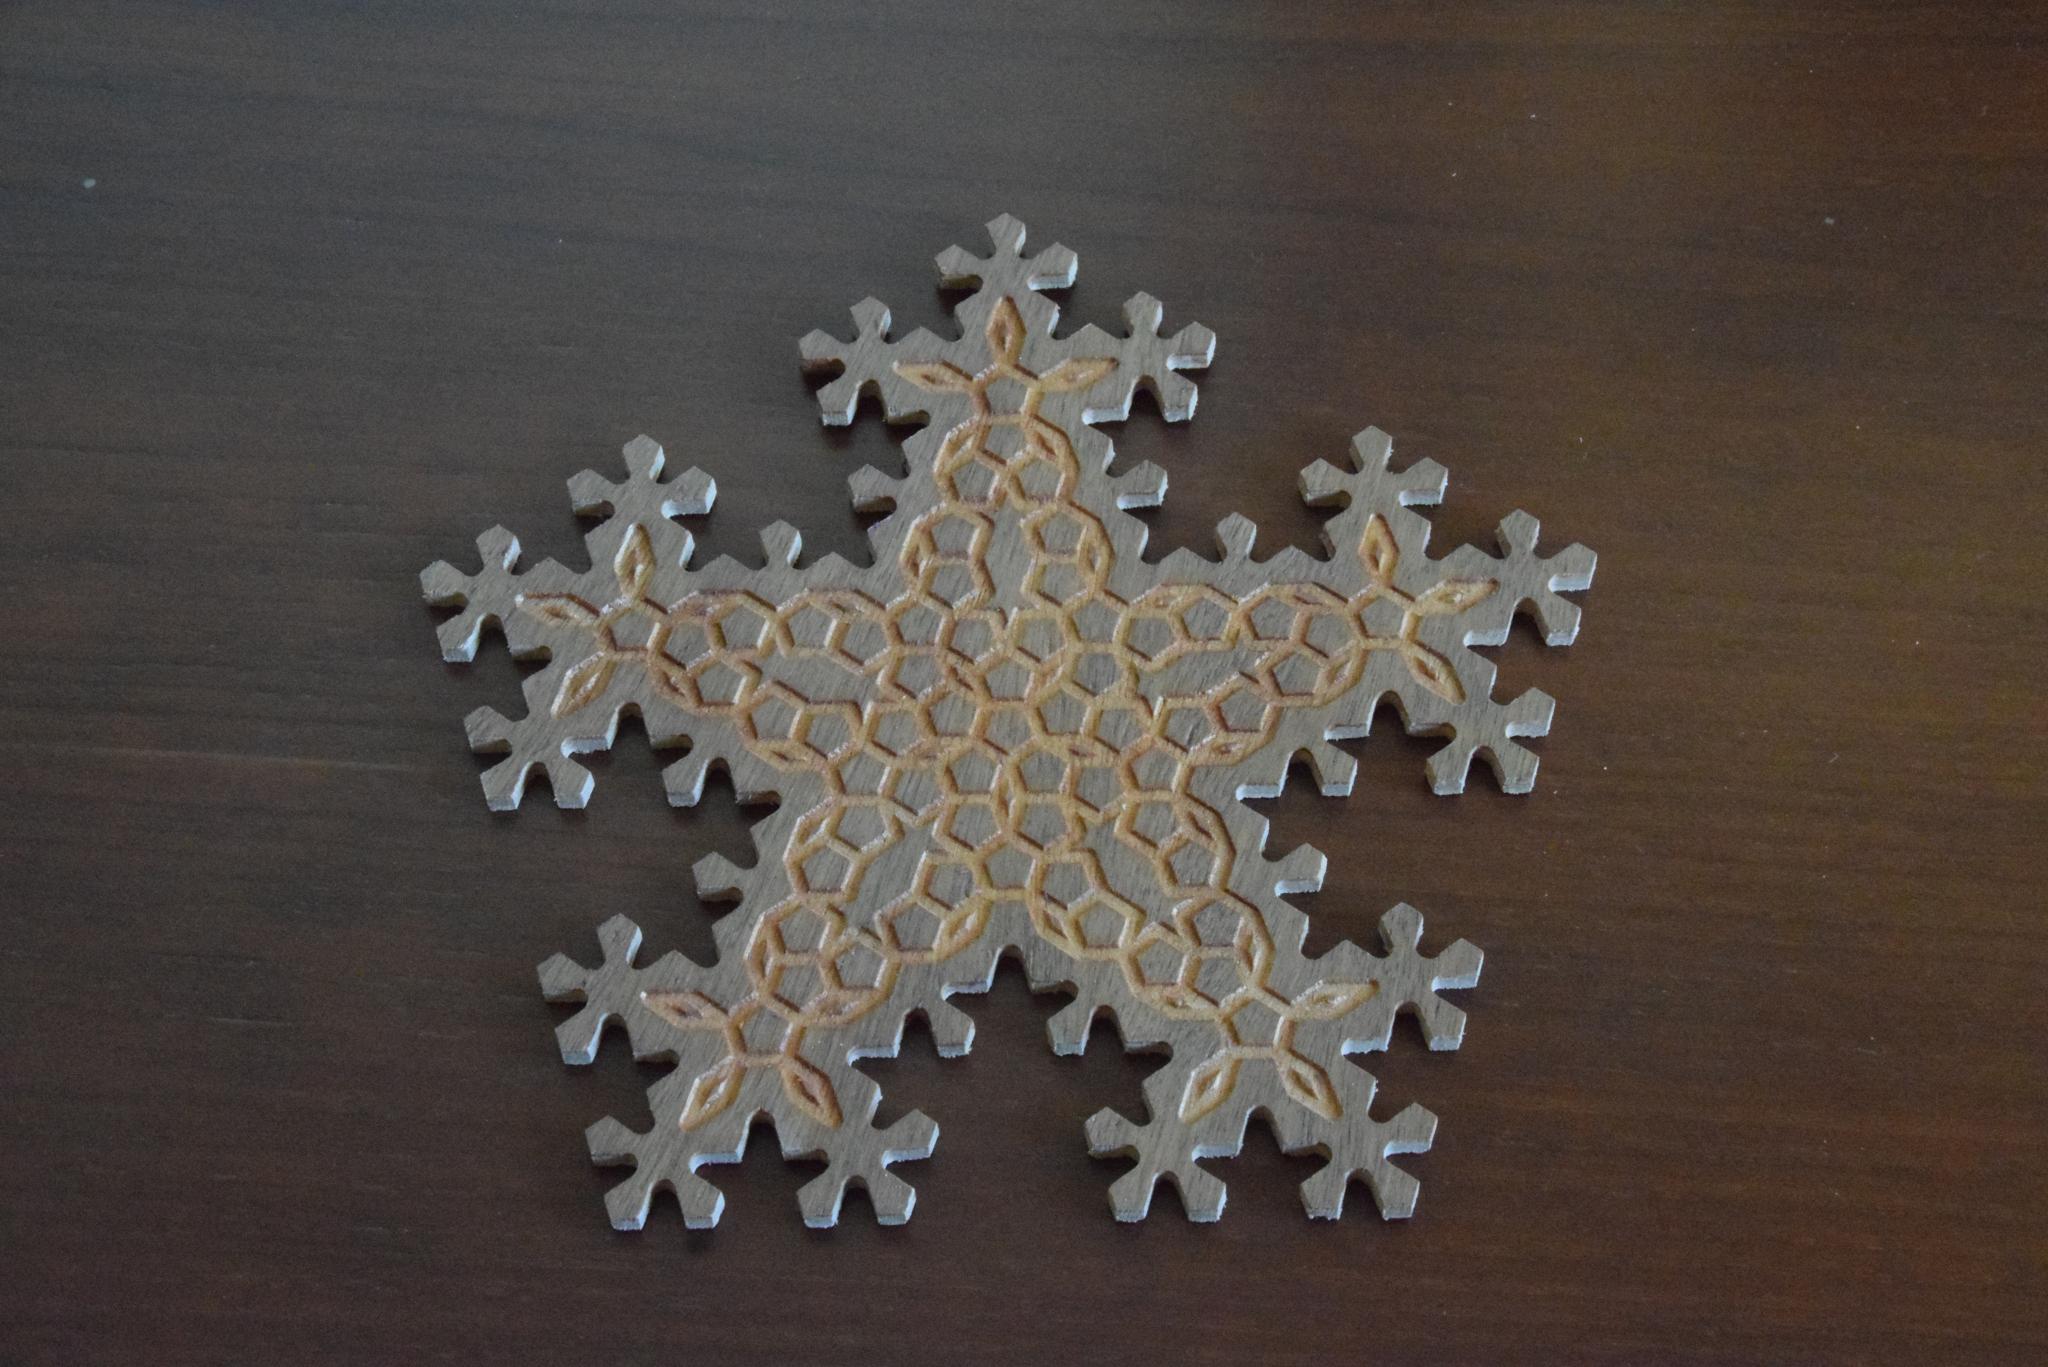
Up to now, I've been designing 3D prints inspired by mathematical structures; furthermore, I wanted a pattern which would produce a different result depending on the choice of milling bits and tool paths. So I decided to choose a 2D pattern based on the pentaflake fractal.
Supplies
Essential materials
- Plywood sheet(s)
- Sandpaper
- Diamond needle files
- Wood surface sealant (e.g. wood stain, oil, varnish)
- Engraving v-bit
- Downcut bit
Optional materials
- Resin
- Resin colorants
- Toothpicks
Plywood Preparation
Plywood can be tricky to engrave, as it is prone to tear out. We will need to apply some kind of sealant to the surface to reduce the chance of that happening.
Lightly sand your plywood sheet and apply wood stain / oil / varnish according to the instructions. You can try a wood stain in a different color to make the engraved pattern stand out more.
CAM Setup
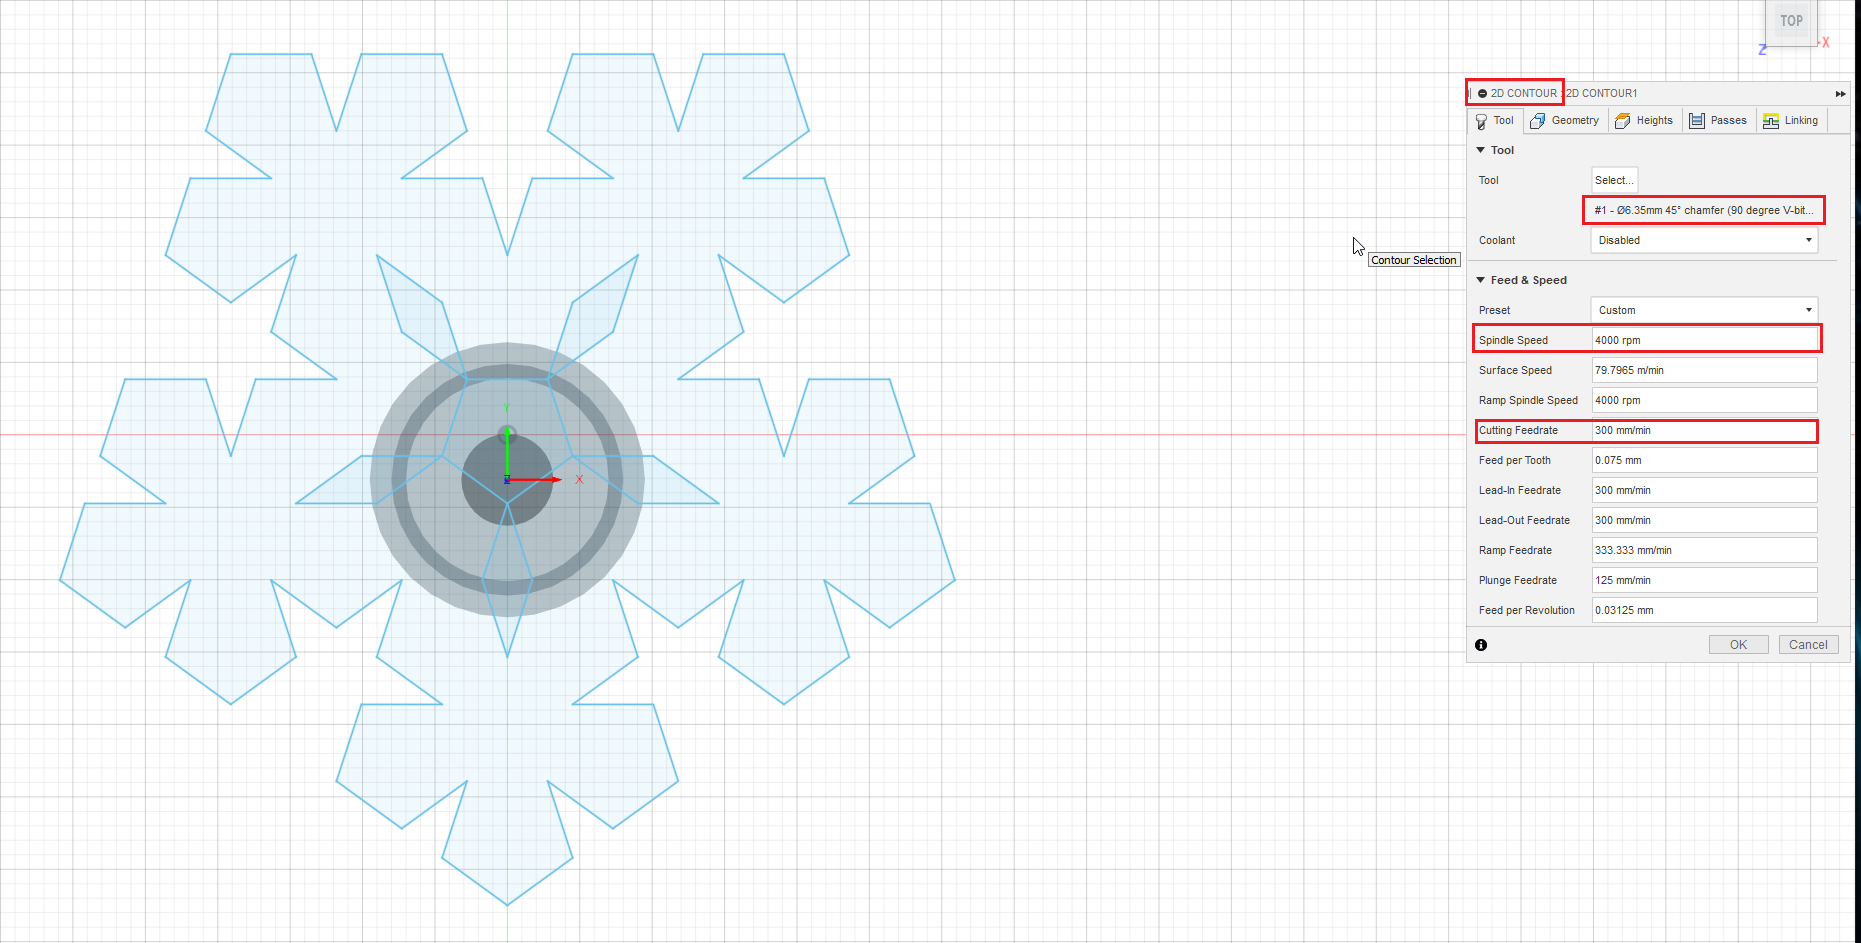
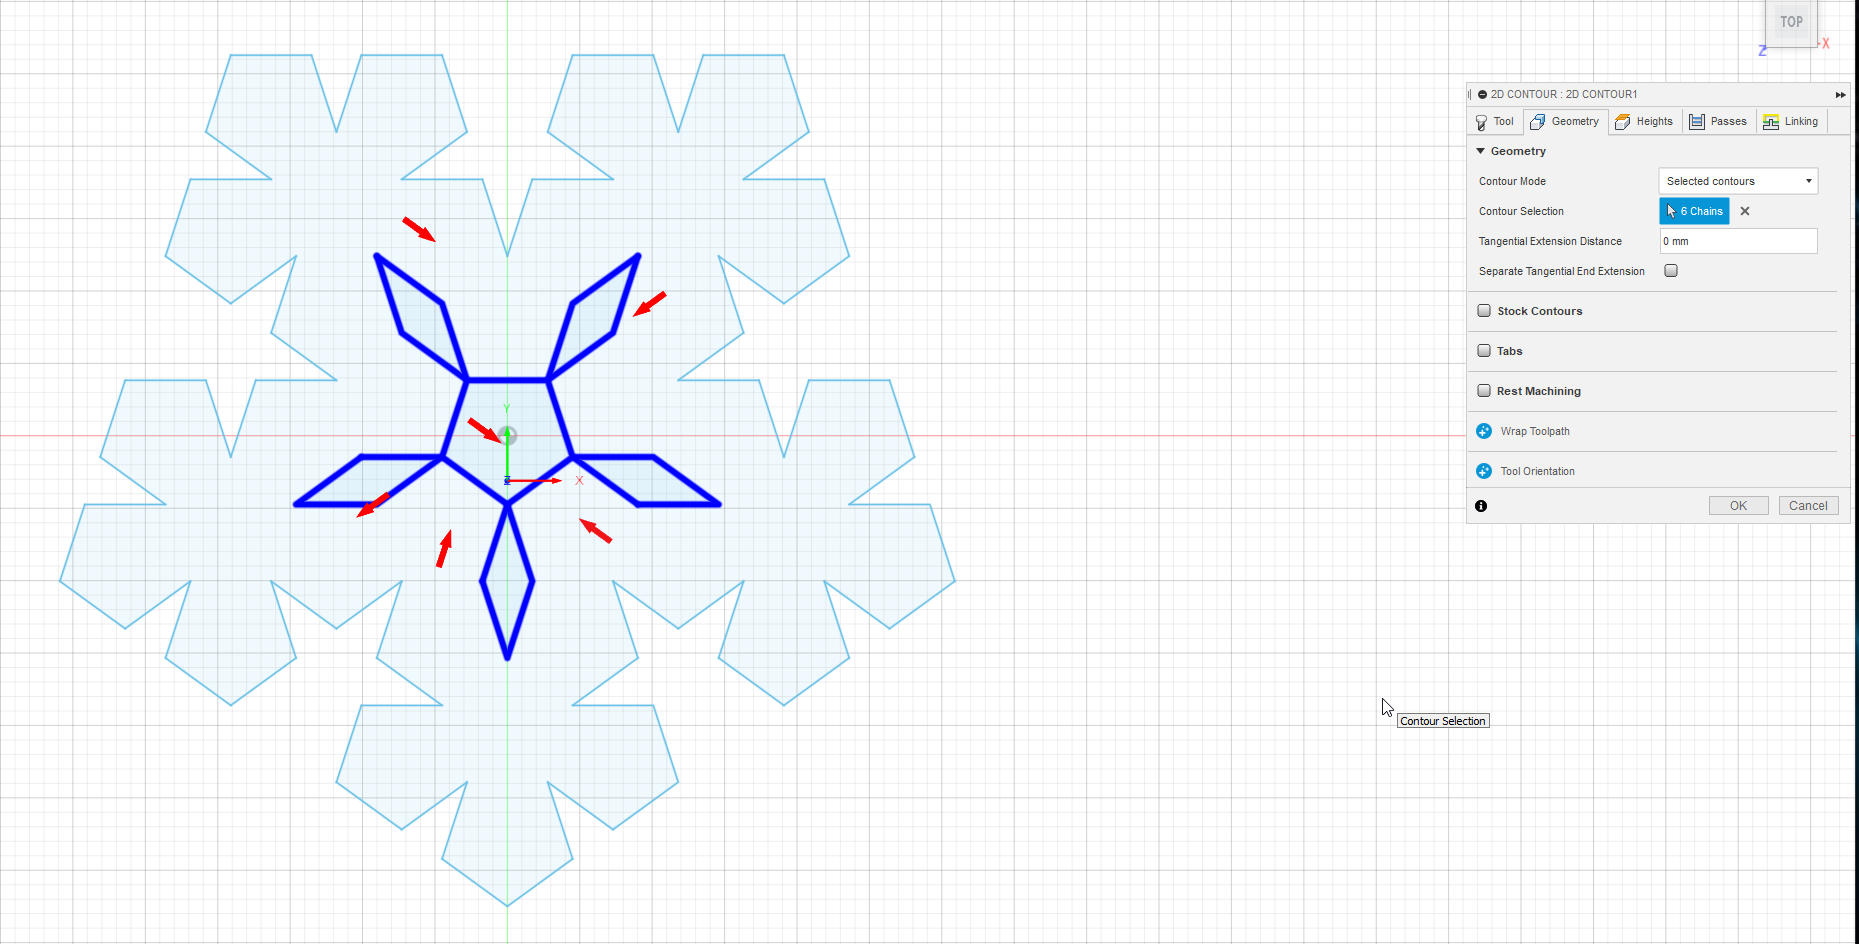
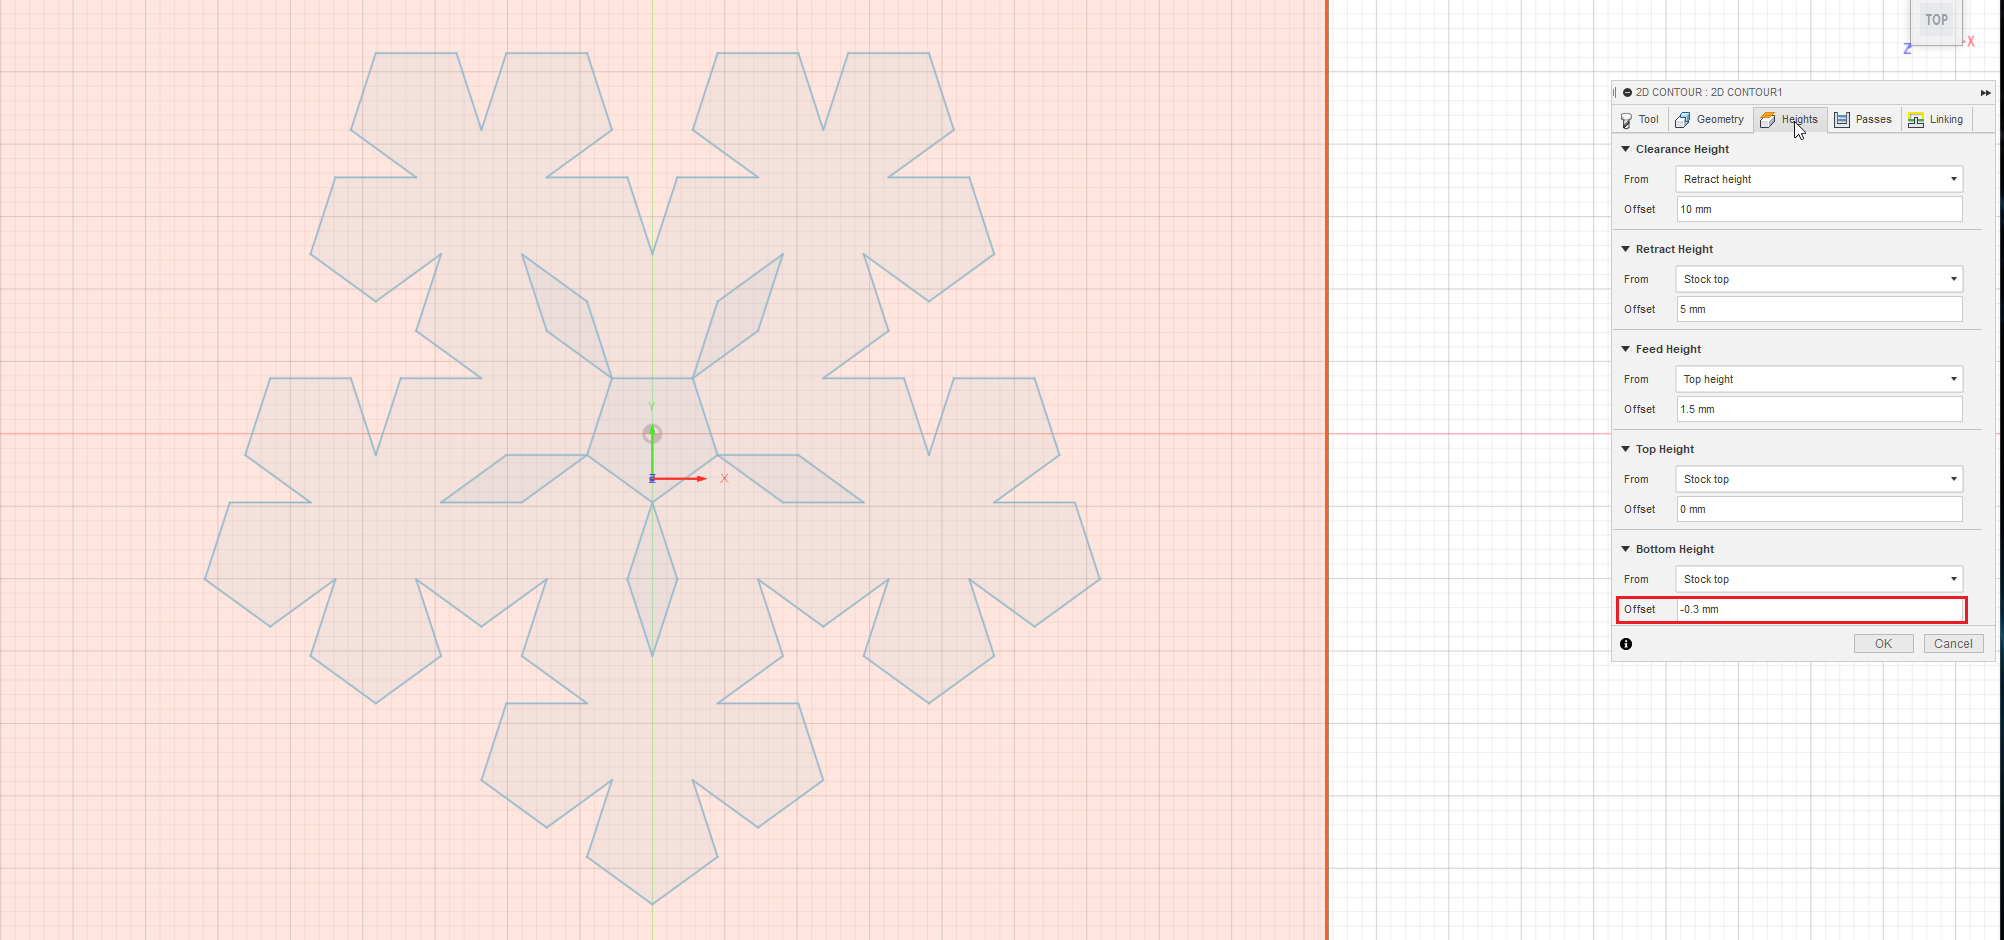
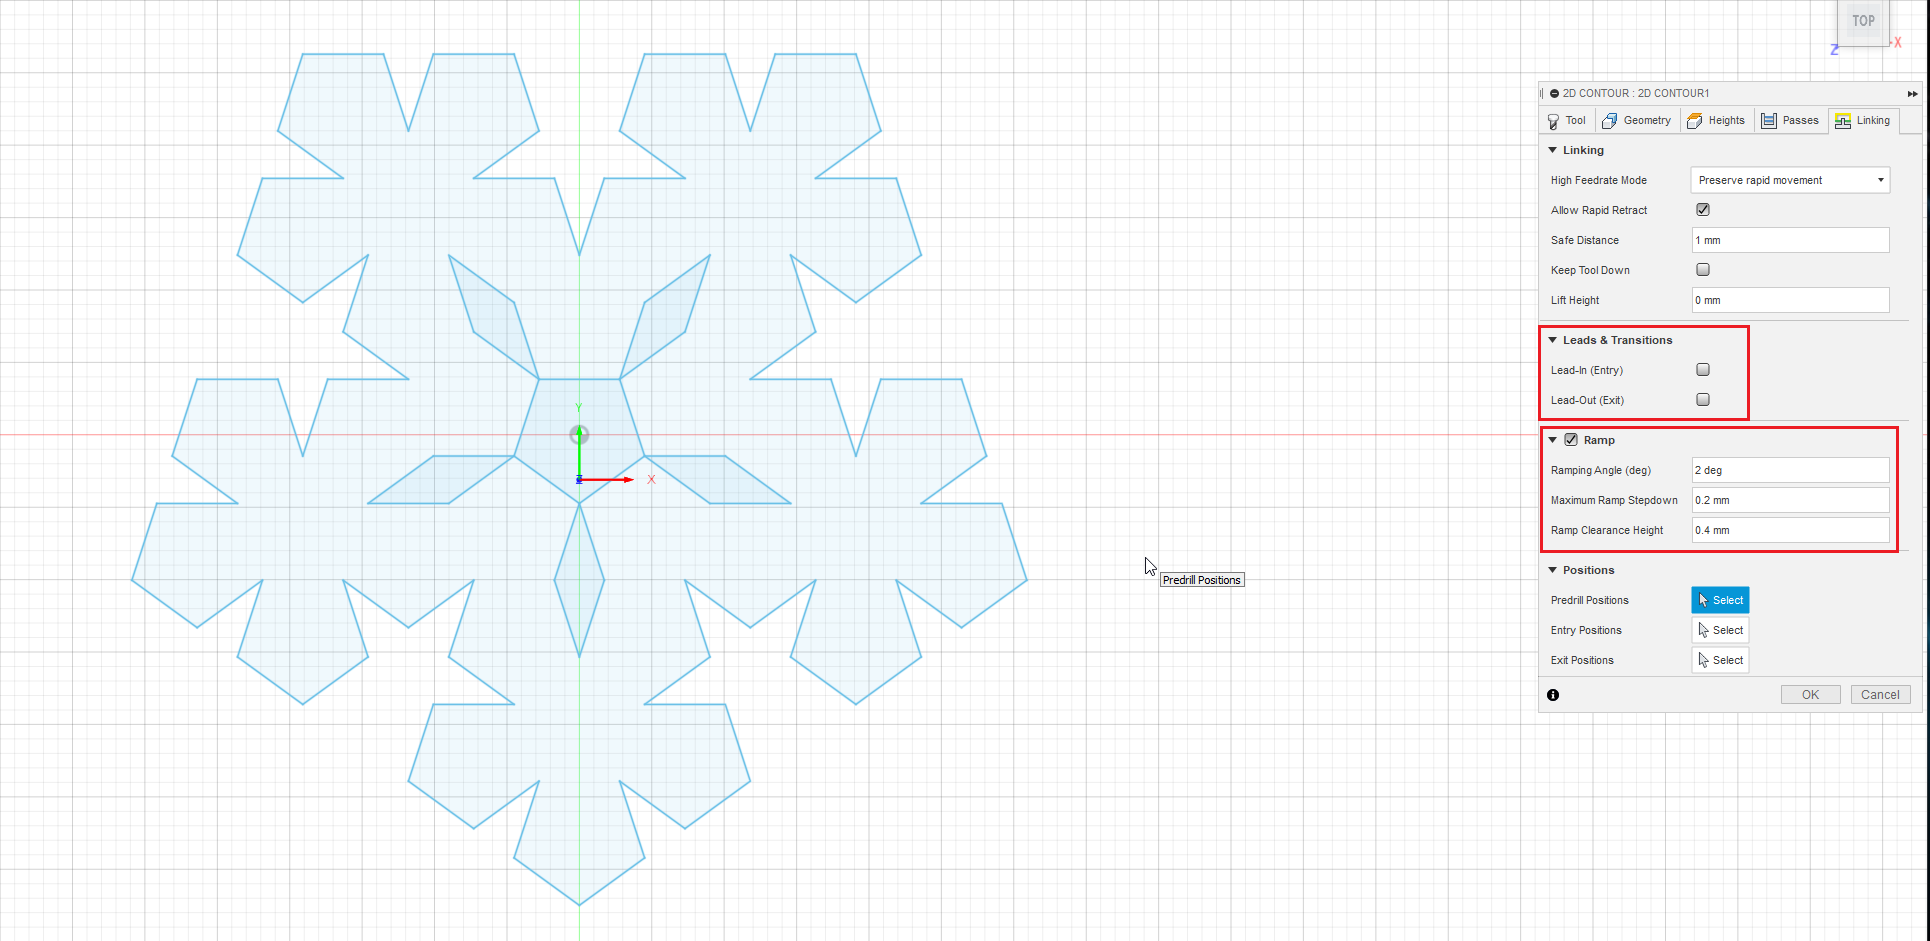
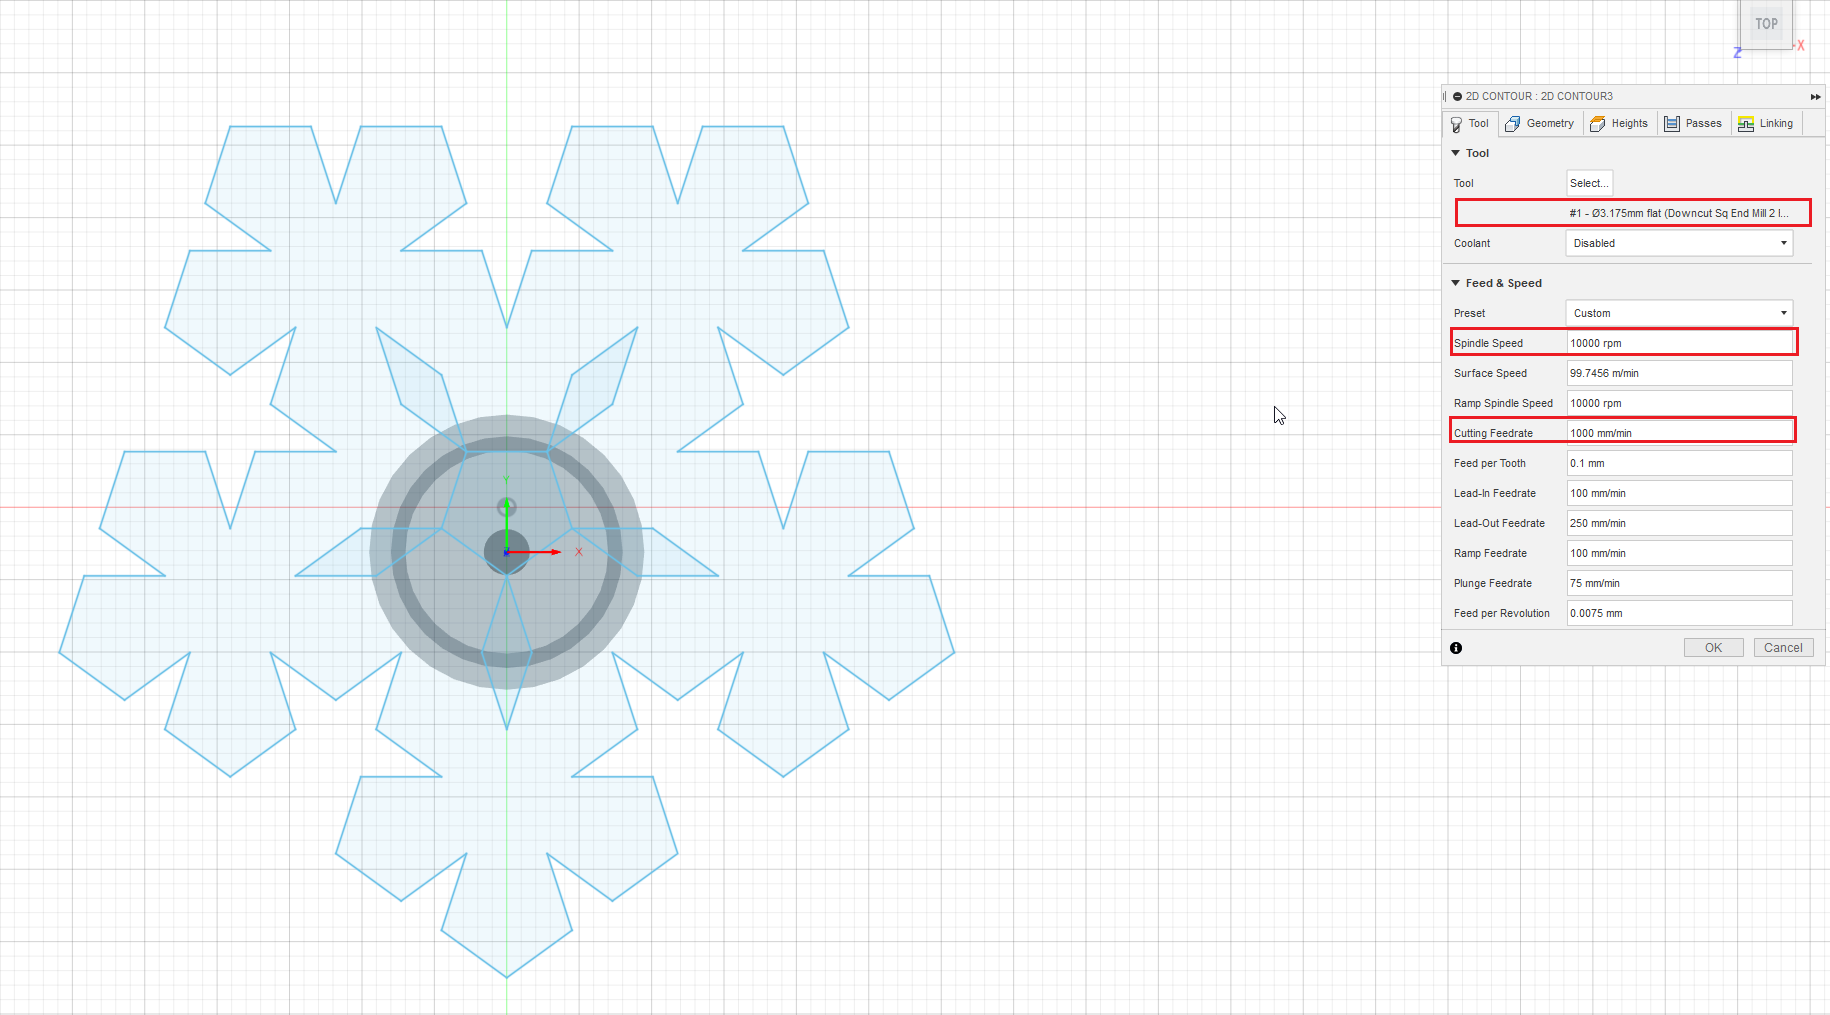
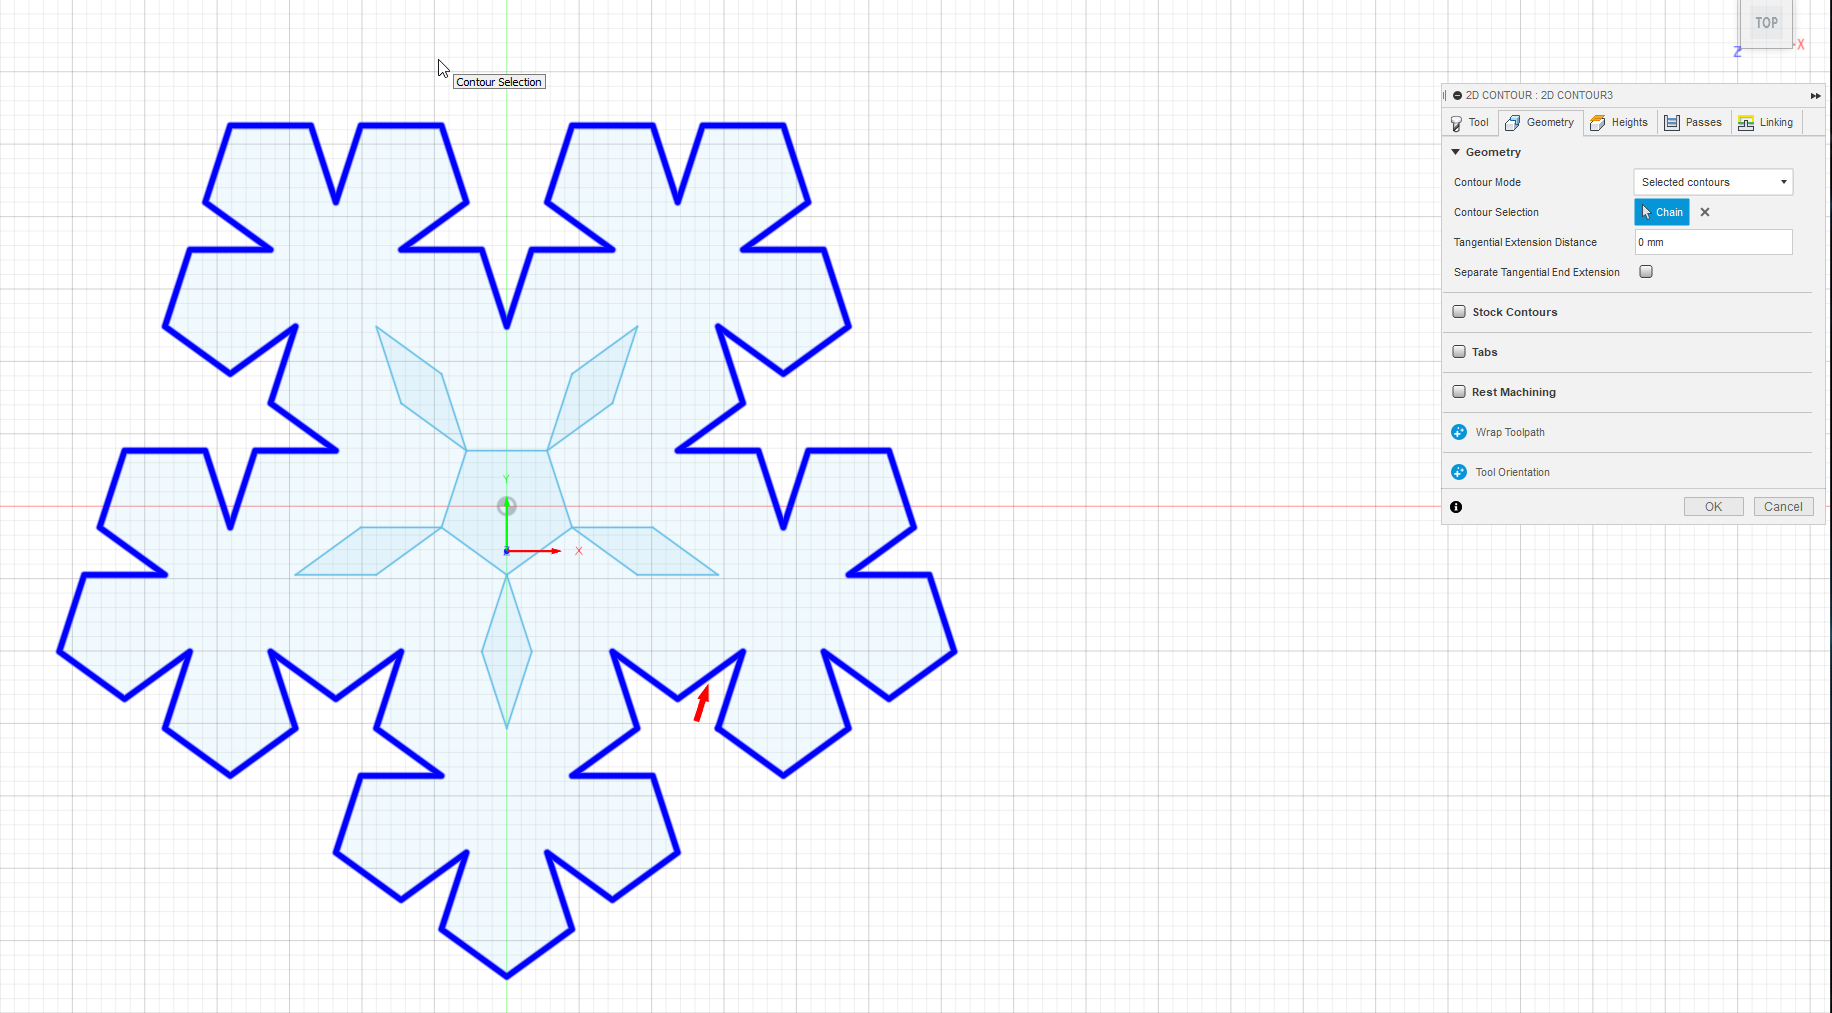
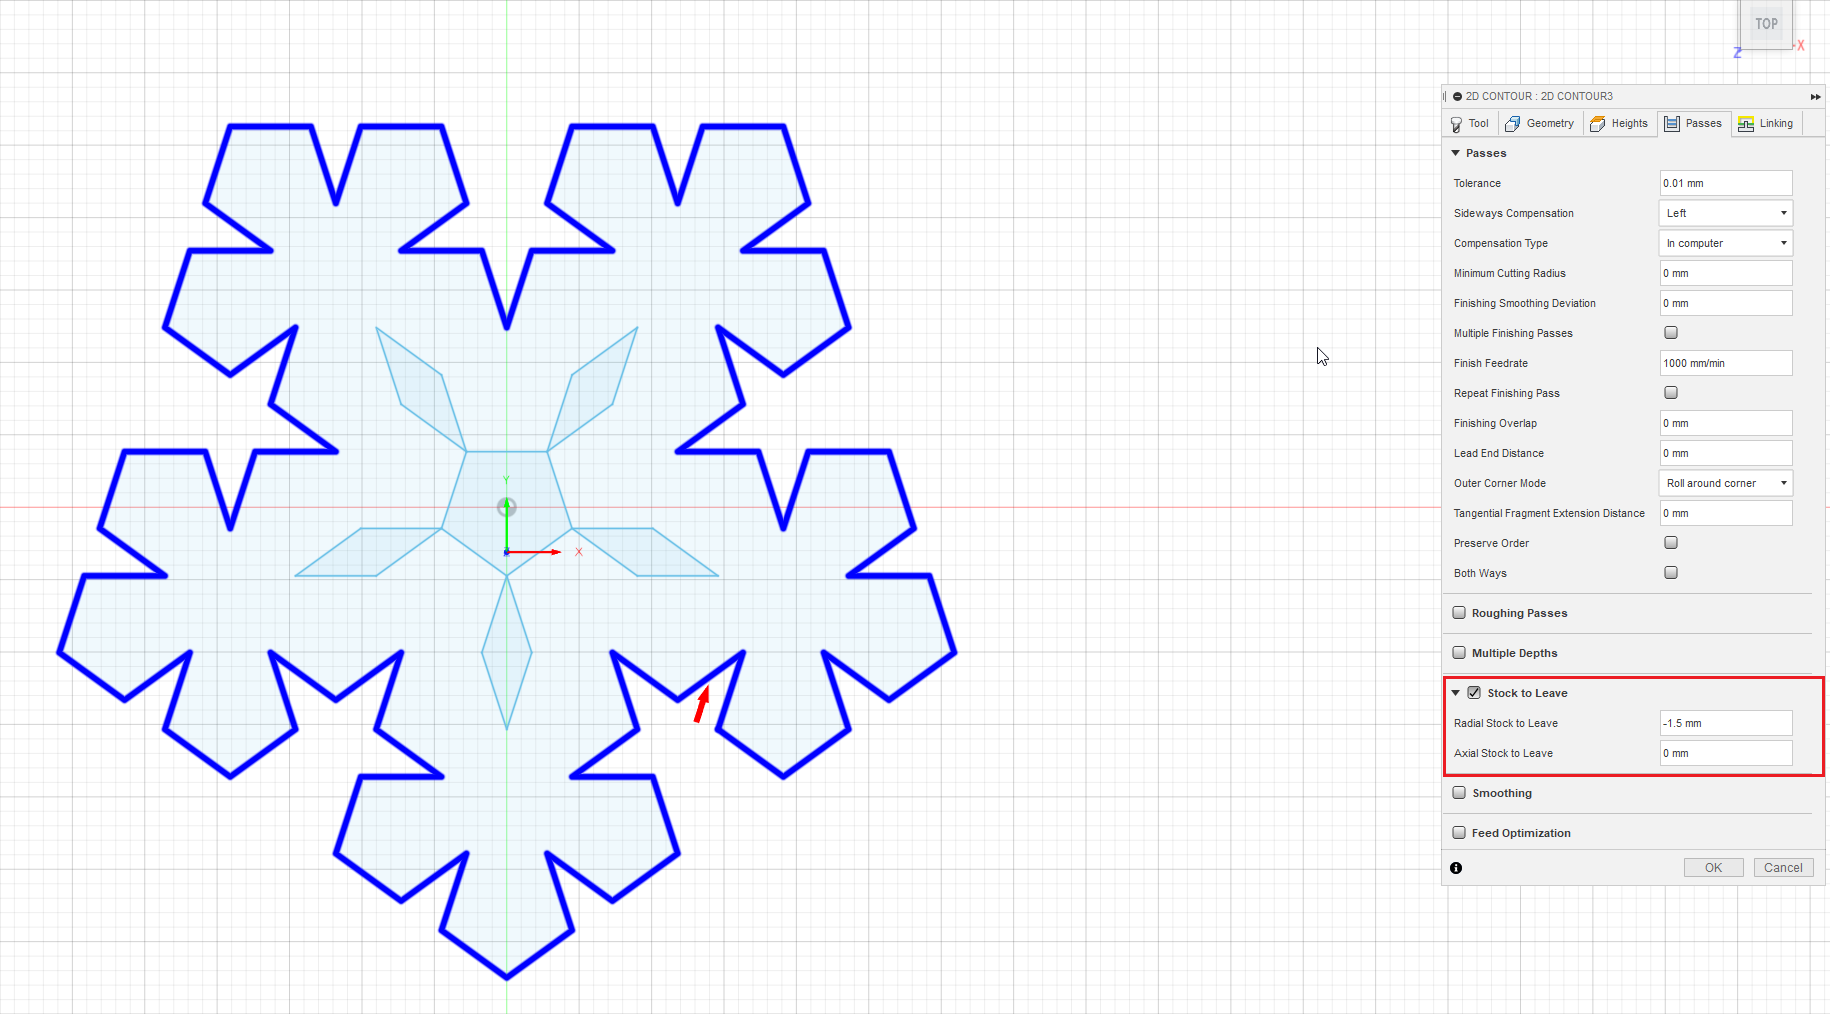
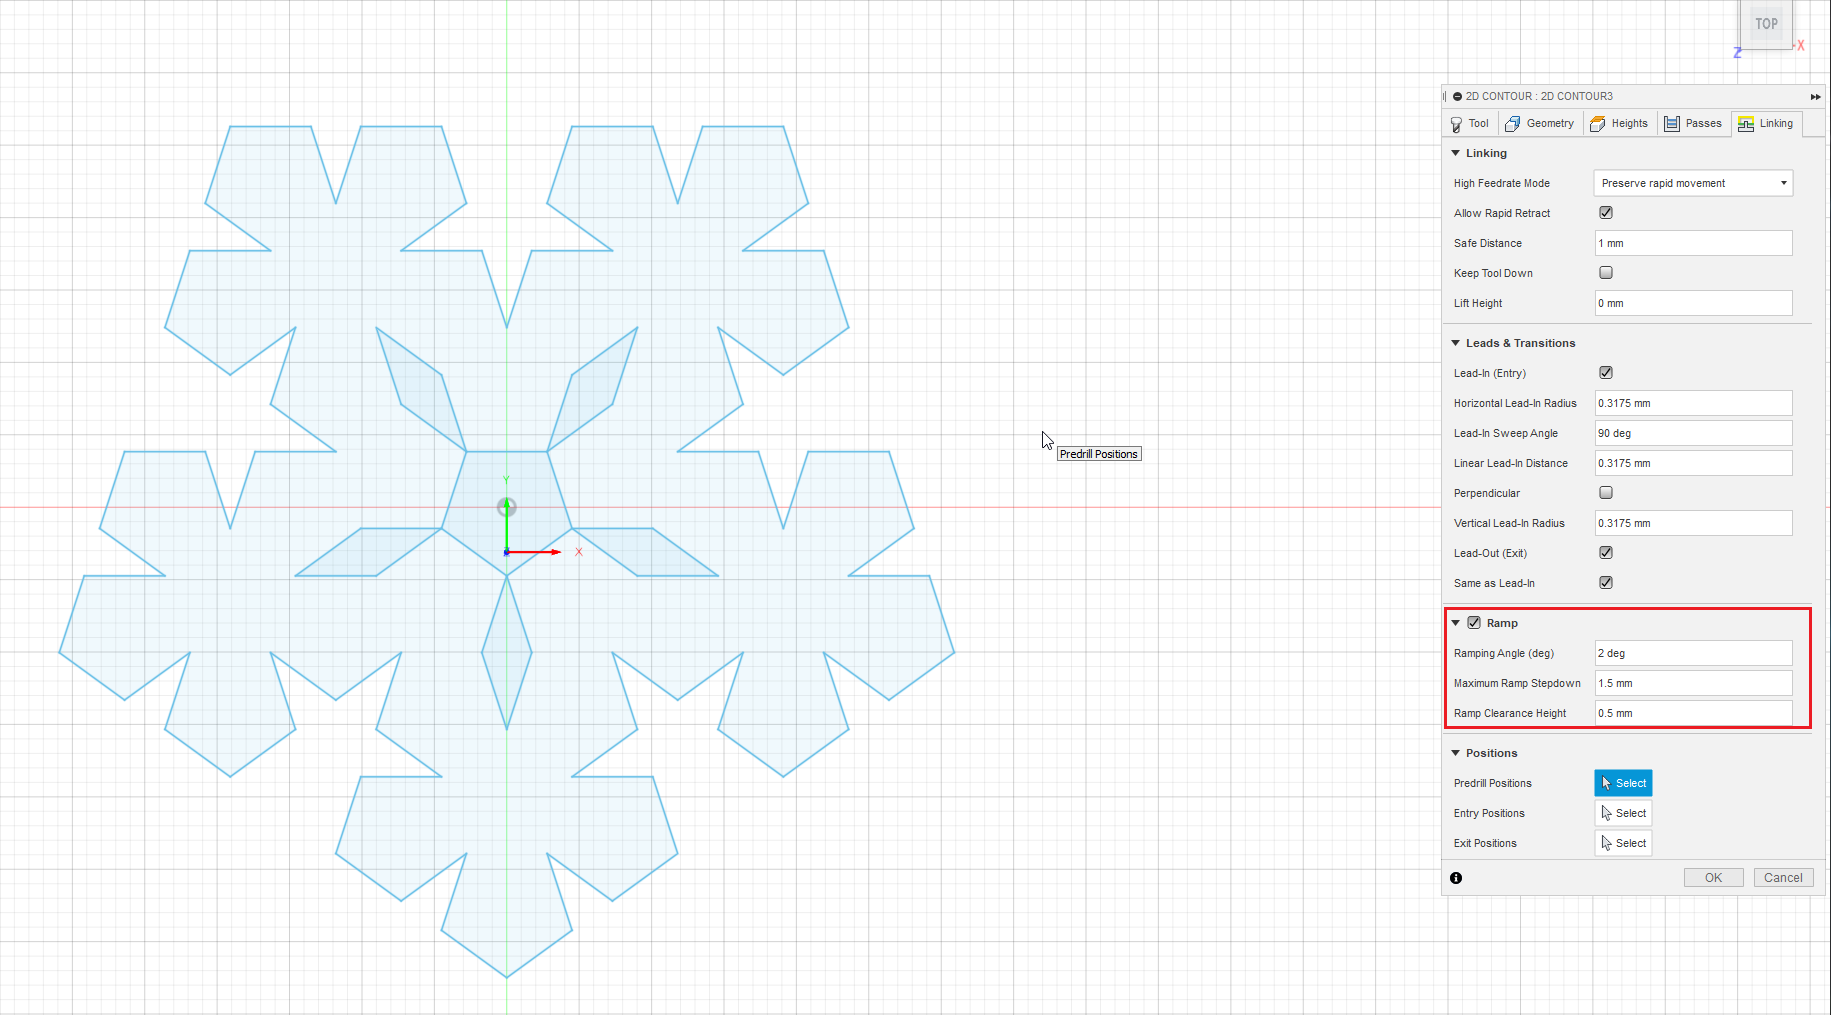
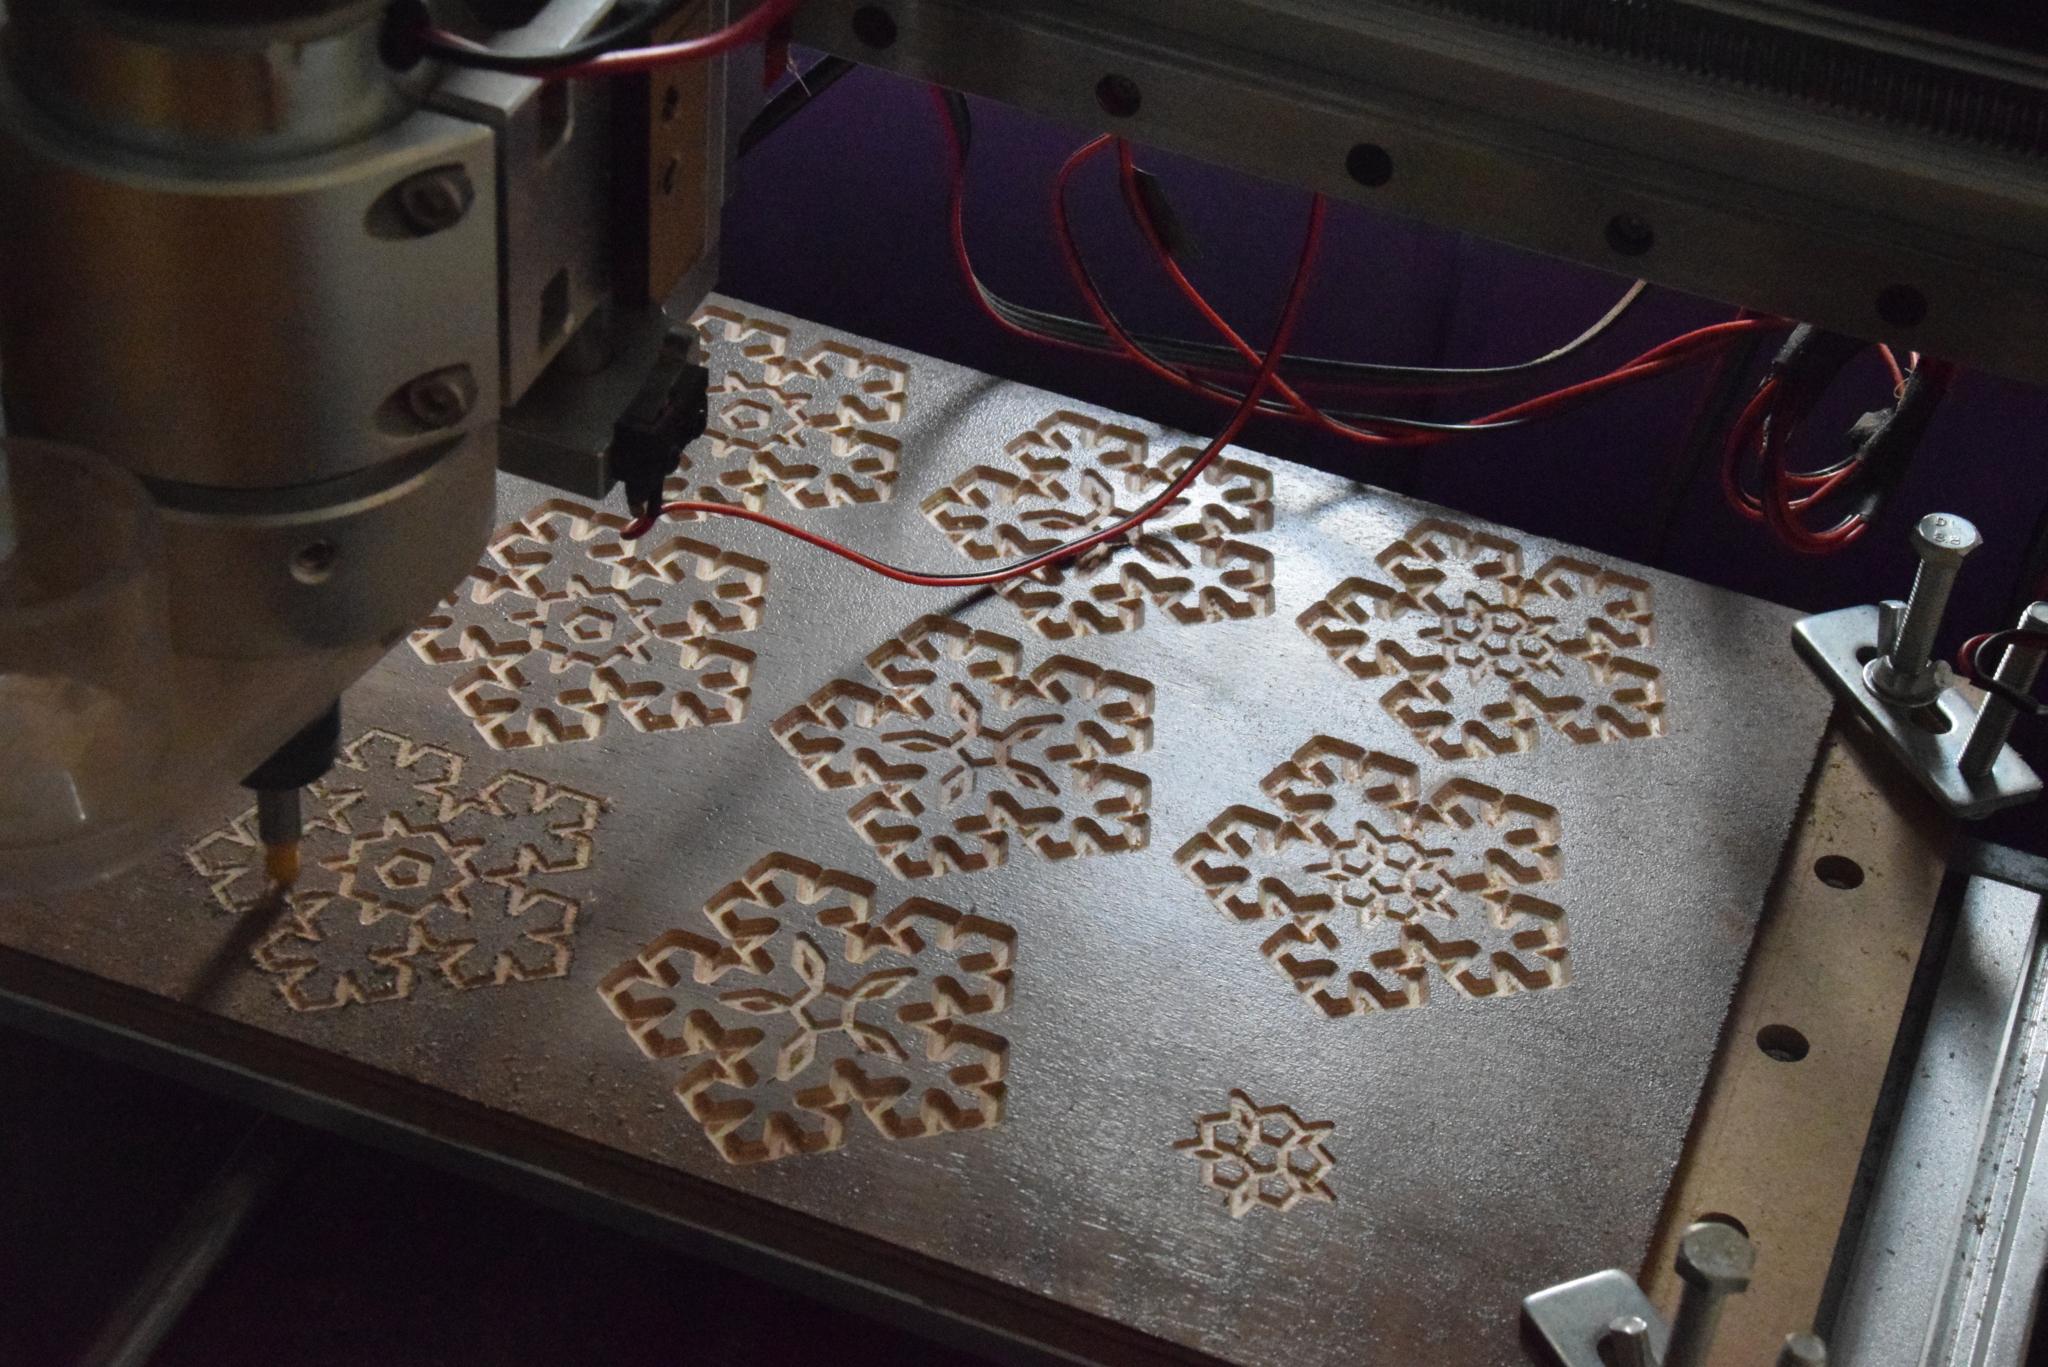
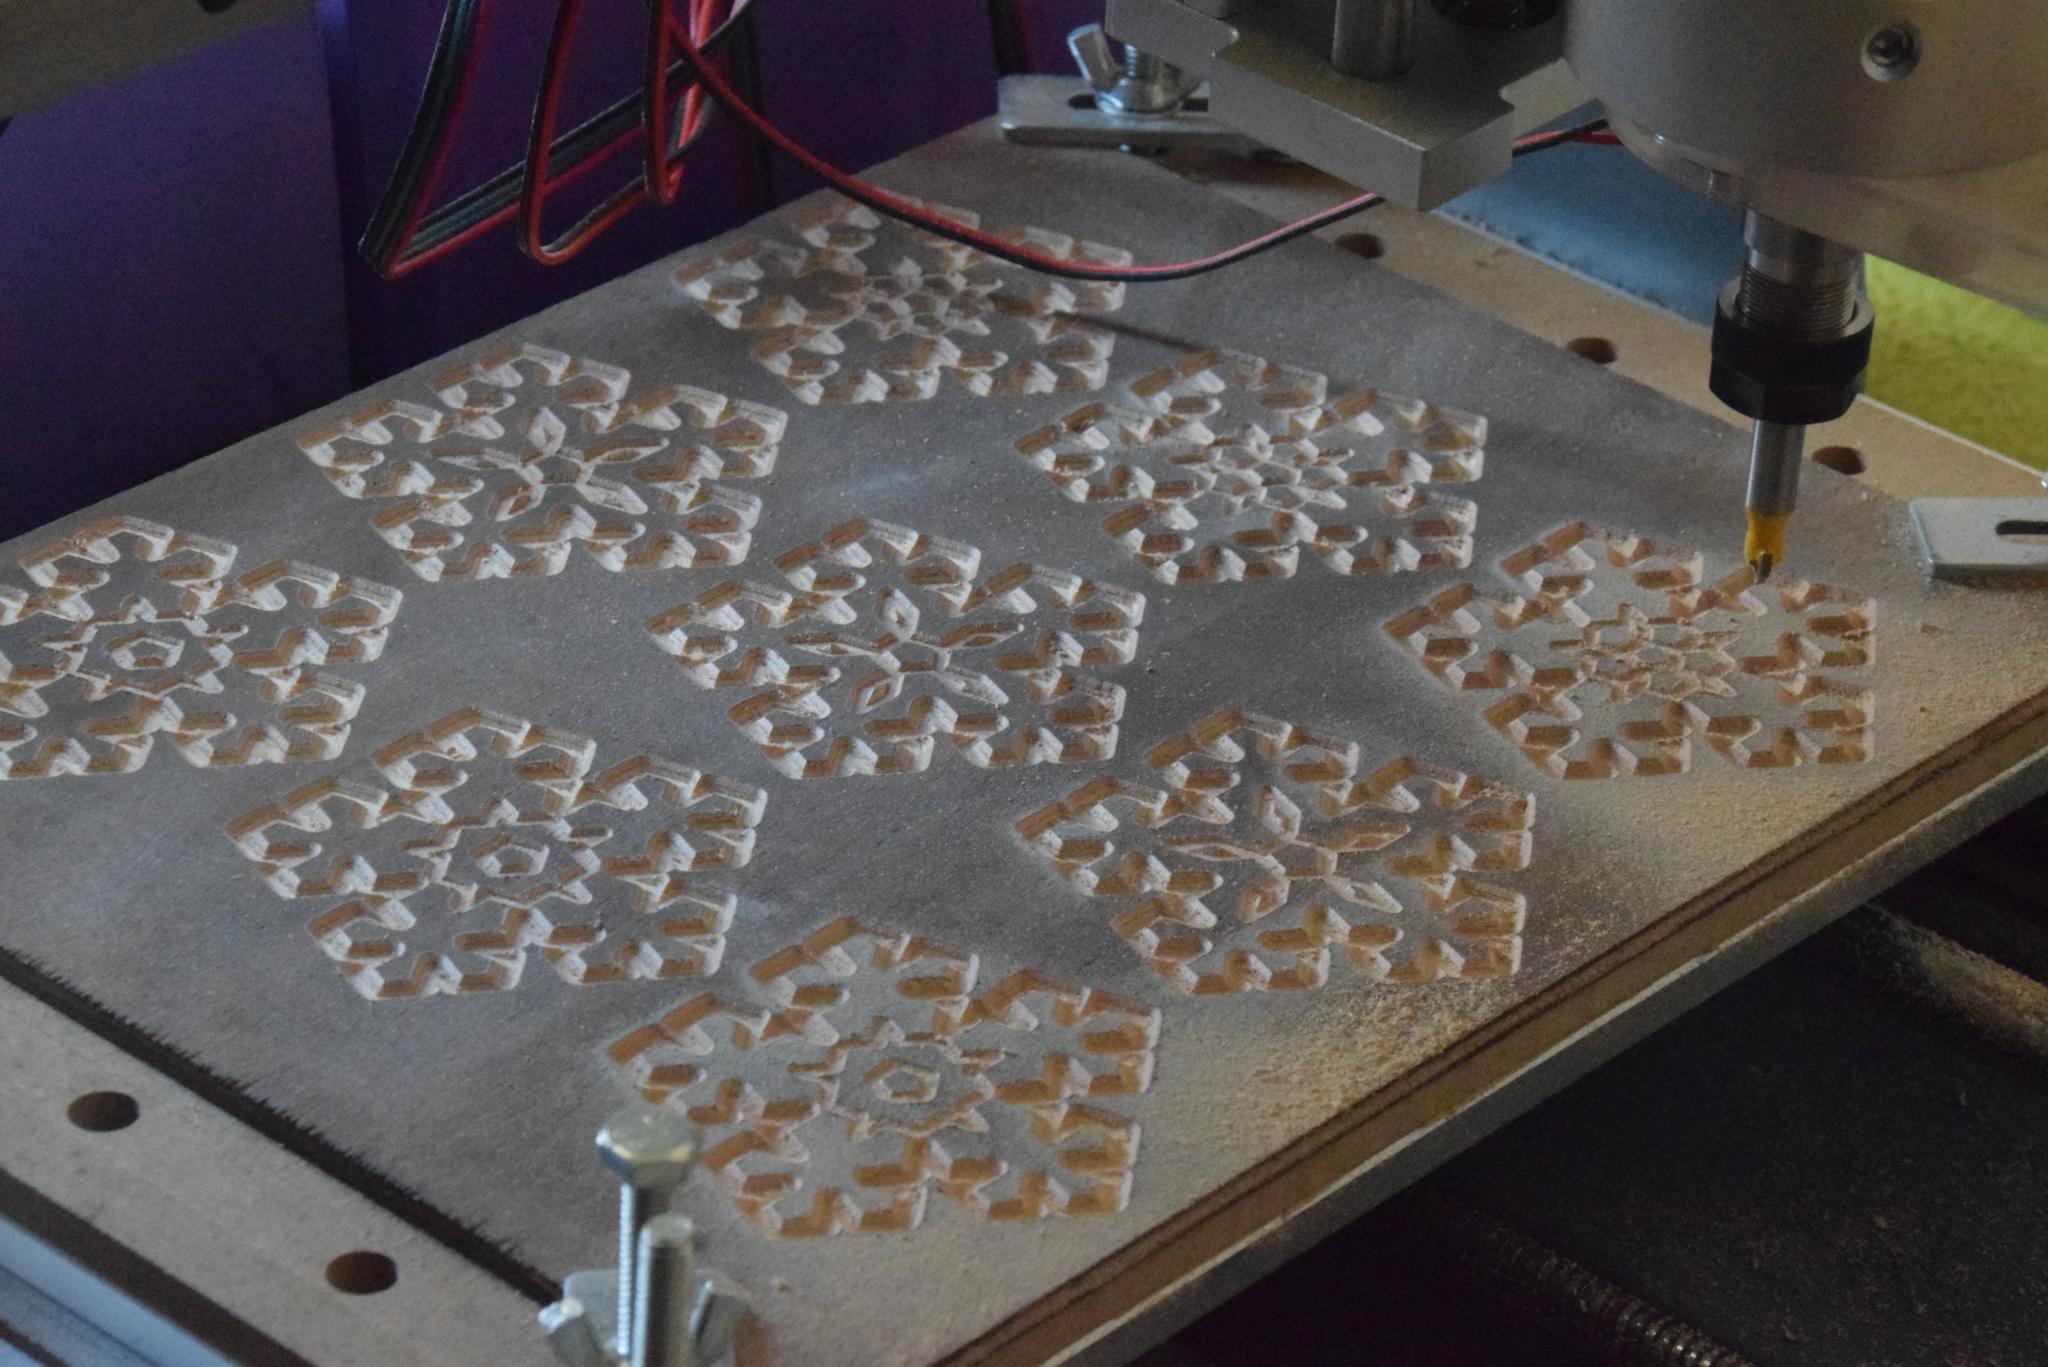
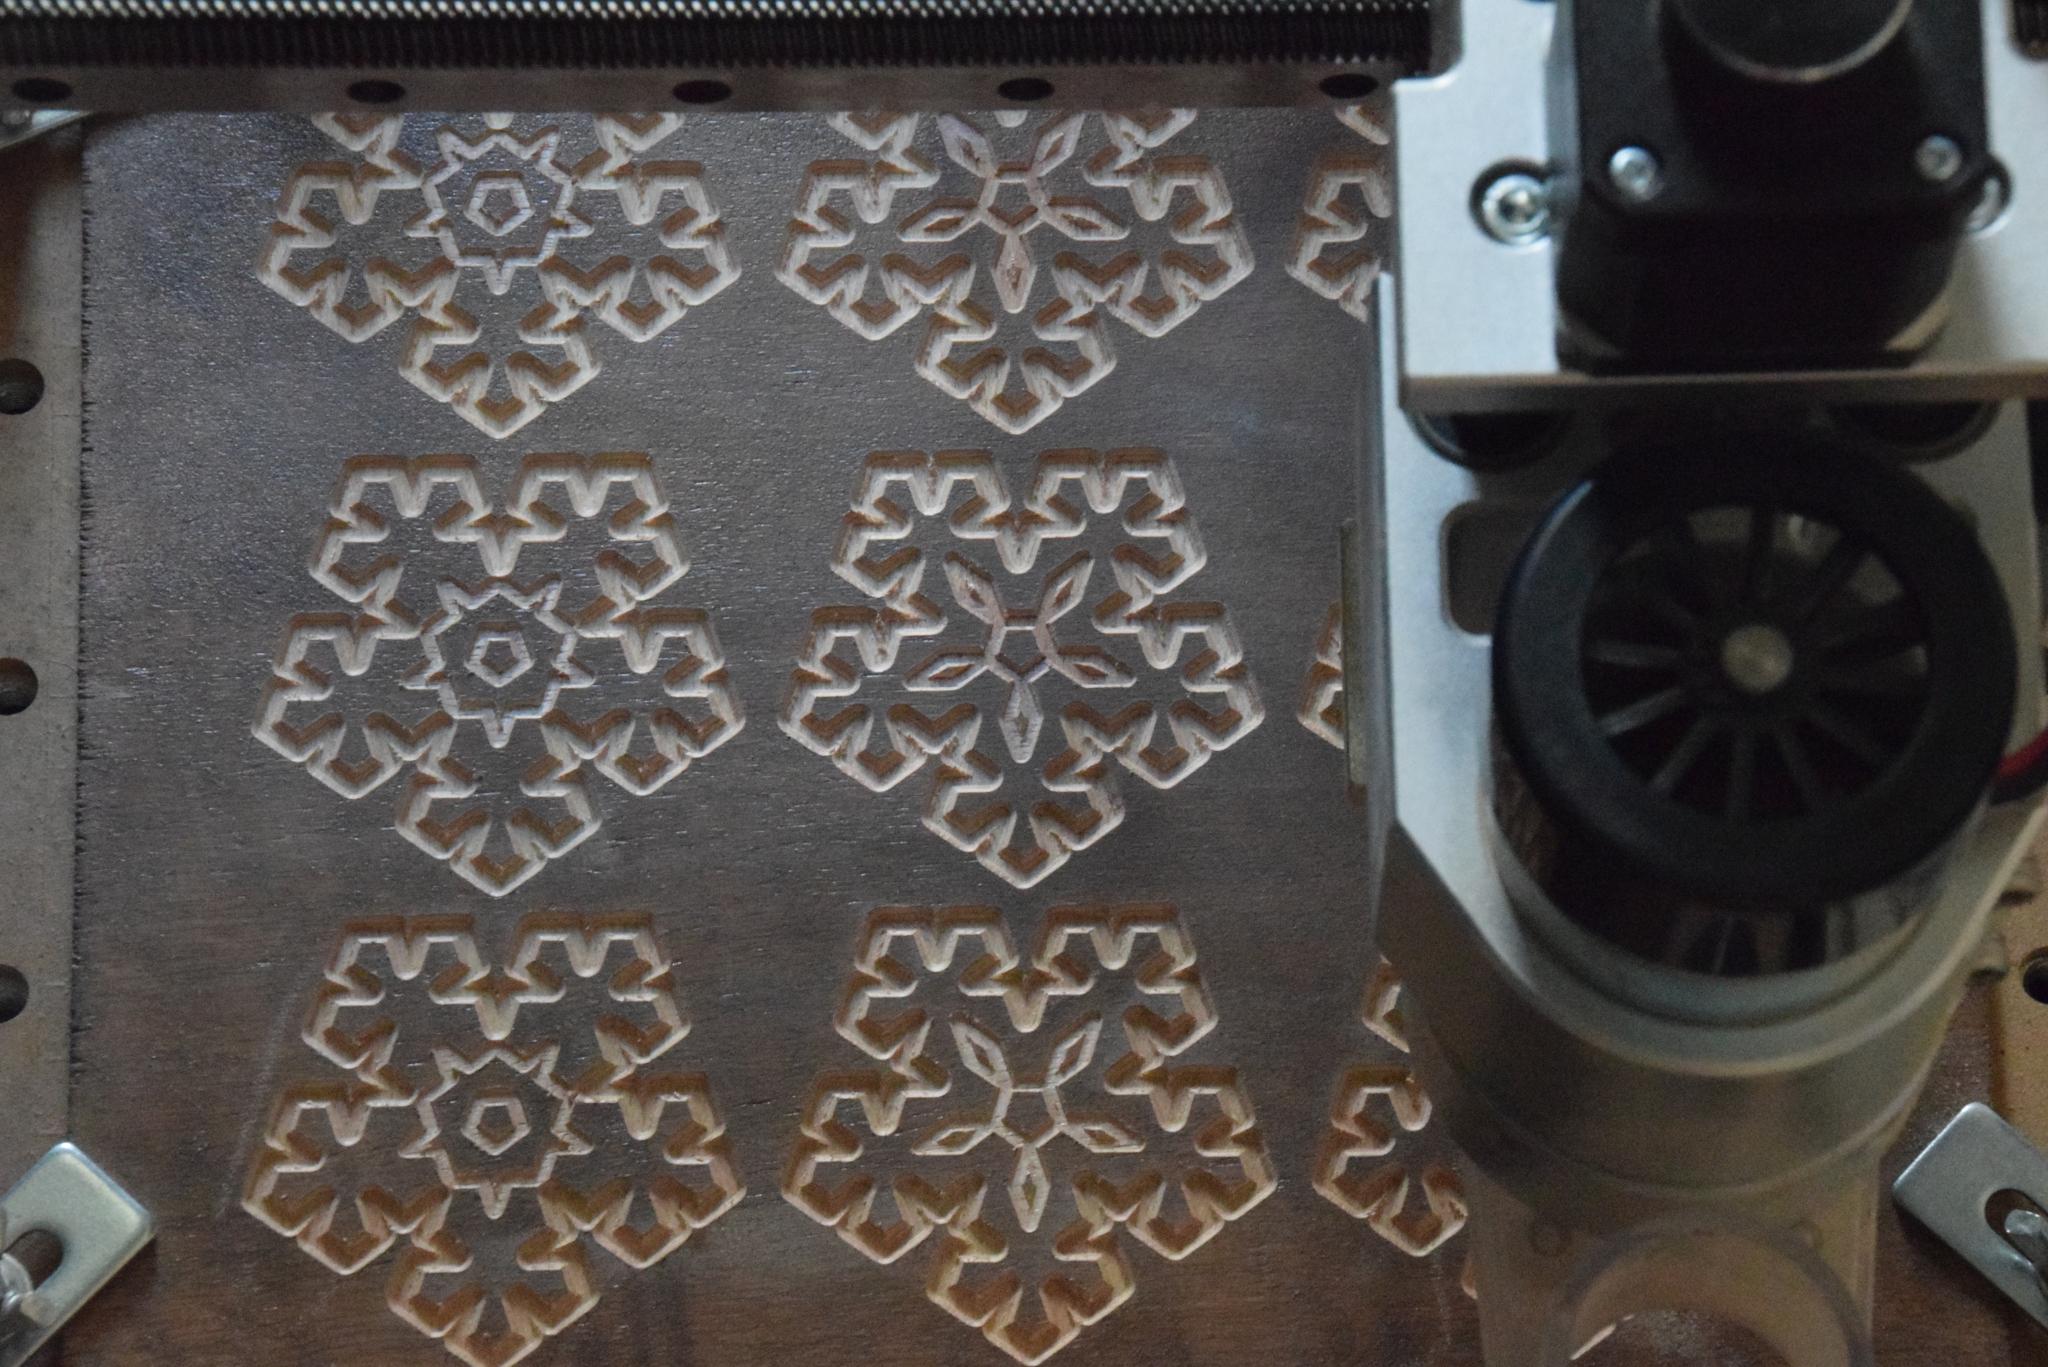
This is where you unleash your creativity! Using combinations of bits and toolpaths, and parts of the included designs, you can make many interesting variations. For instance, you can trace paths within the snowflake using v-bits, or hollow out closed paths; or you can trace part of the outer contour with a v-bit and finish off with a downcut bit, or inset the outer profile.
If your plywood consists of differently colored sheets, you can adjust the engraving depth so that the pattern is of a different color than the surface.
In one of the variations shown, the outer contour is carved with a 90 degree v-bit for first 1.5 mm from the top and a downcut bit for the rest. In another, an inset is applied to the outer contour, which is then carved with a downcut bit.
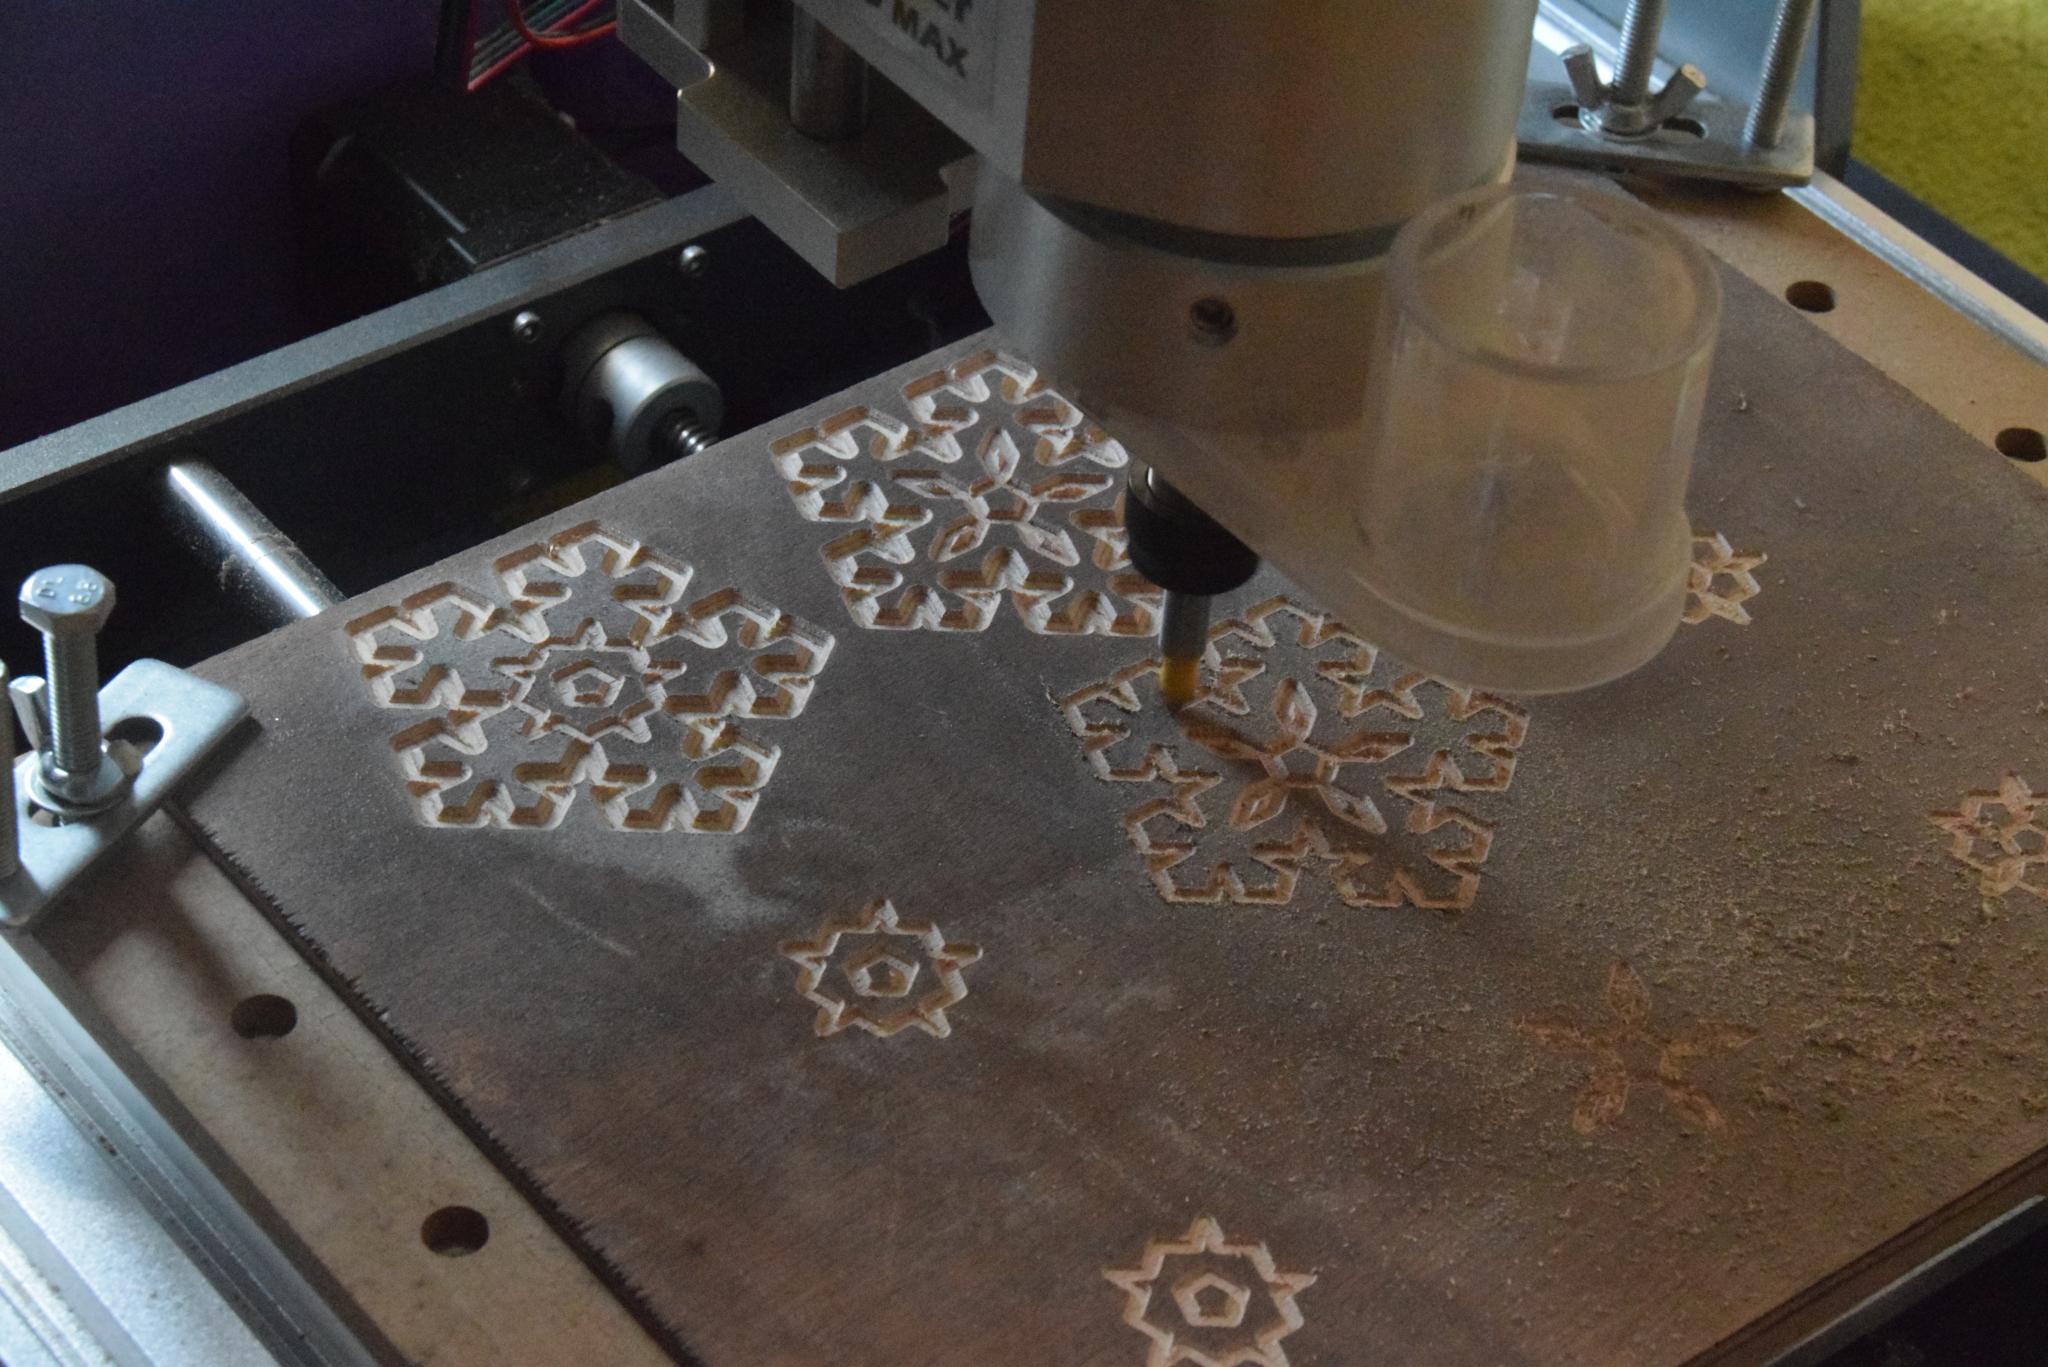
I used a downcut bit to ensure a nice finish on the top plywood surface. Although this bit leaves a few strands on the bottom surface, they can be easily trimmed with a diamond needle file.
When using a v-bit for engraving, it is important to trace the same path multiple times with ever-increasing depth, and use a slow feed rate. This guarantees an almost perfect cut.
Included is a variation with a step-by-step choice of parameters for gcode generation.
Post-processing

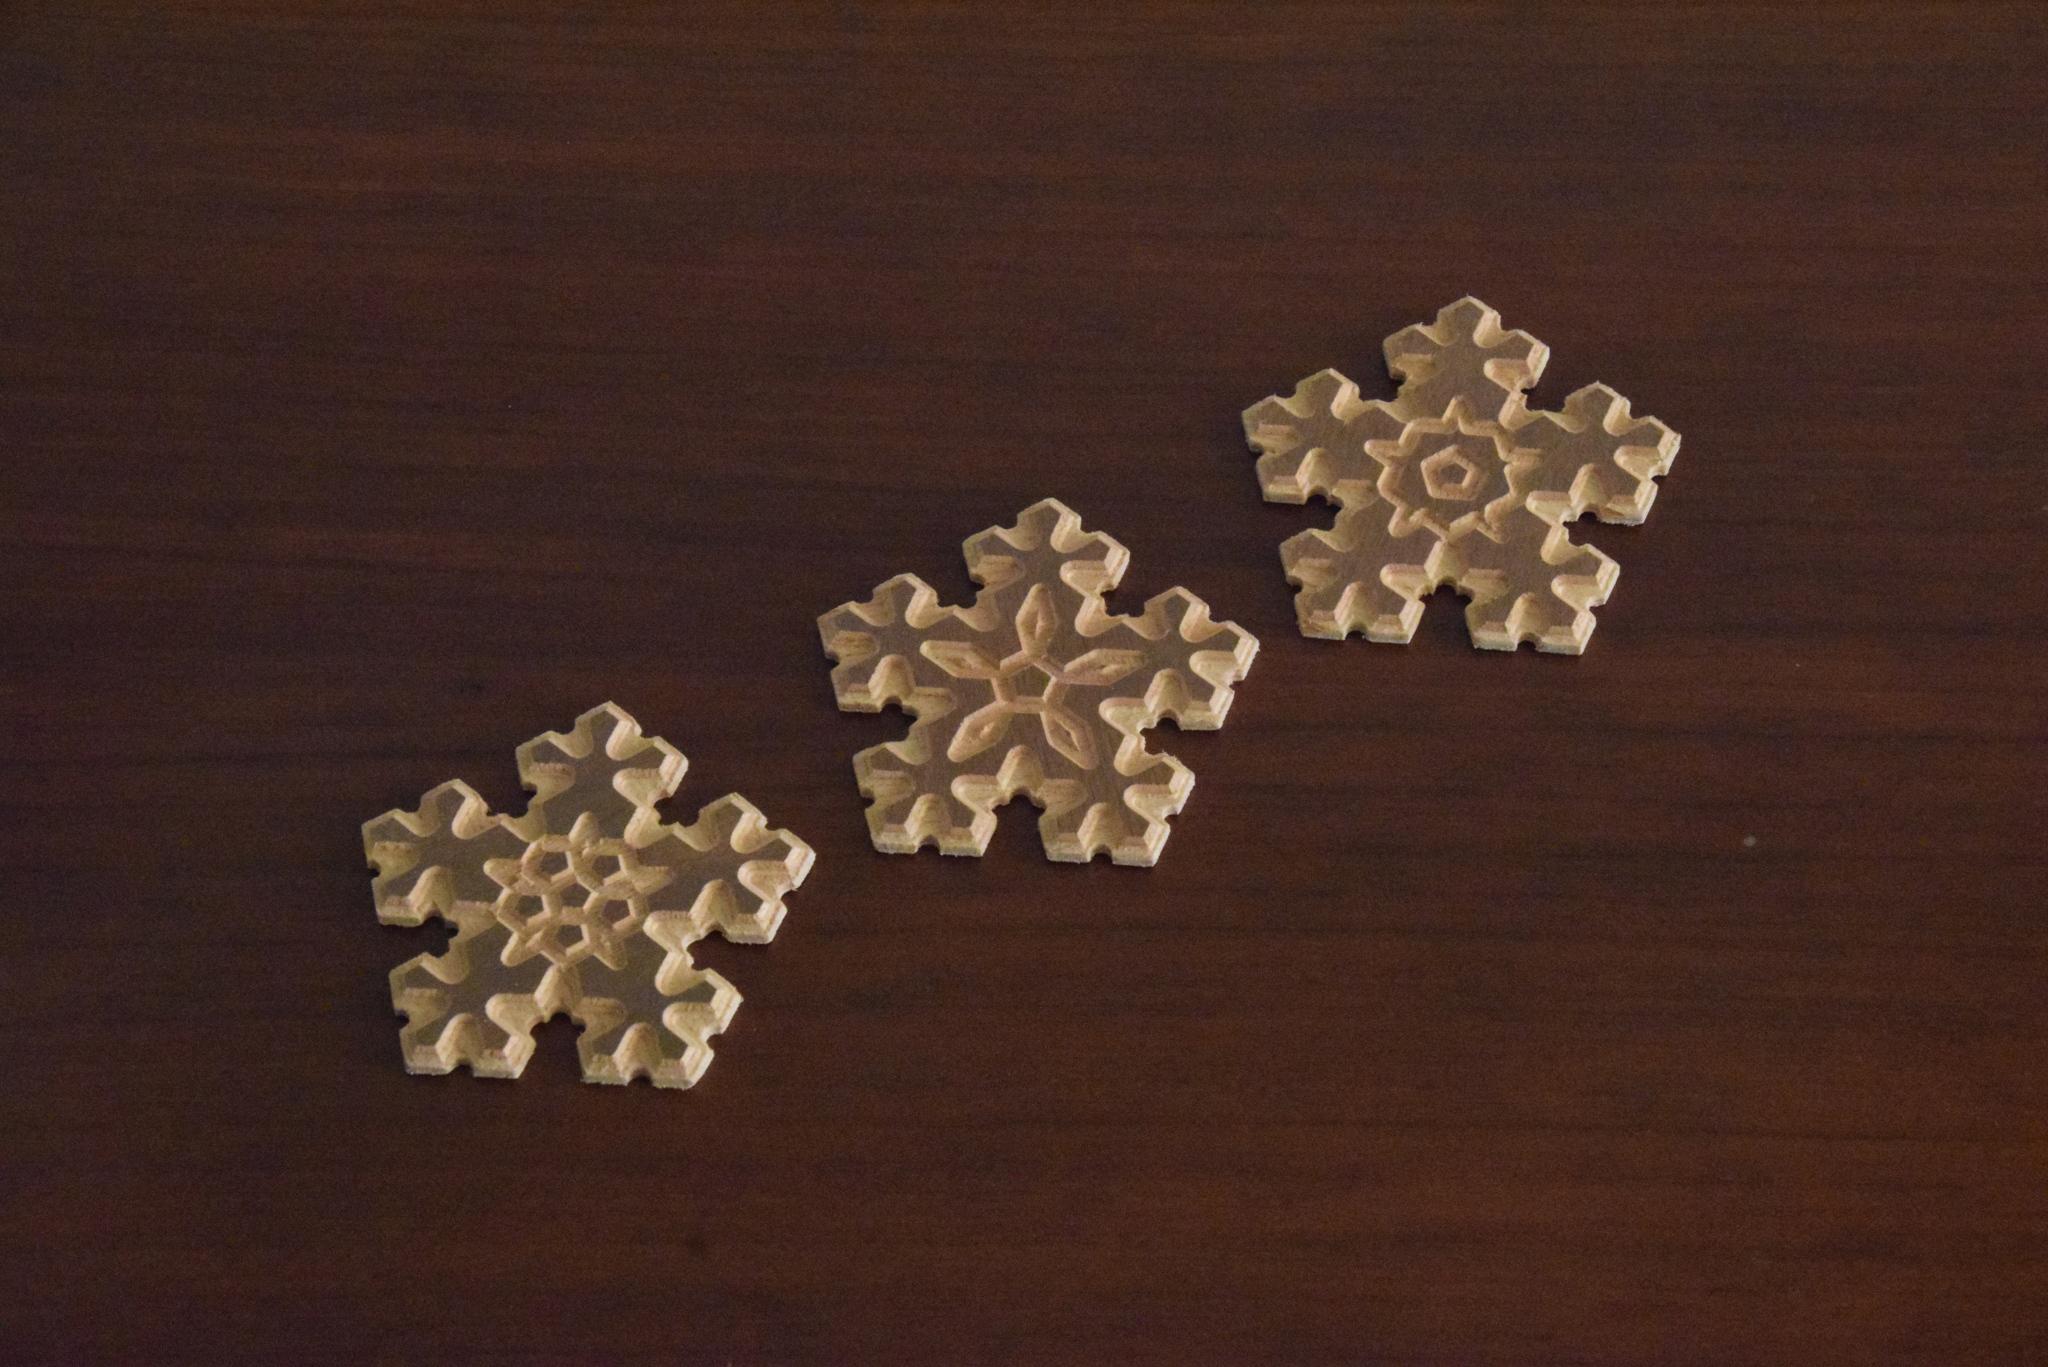

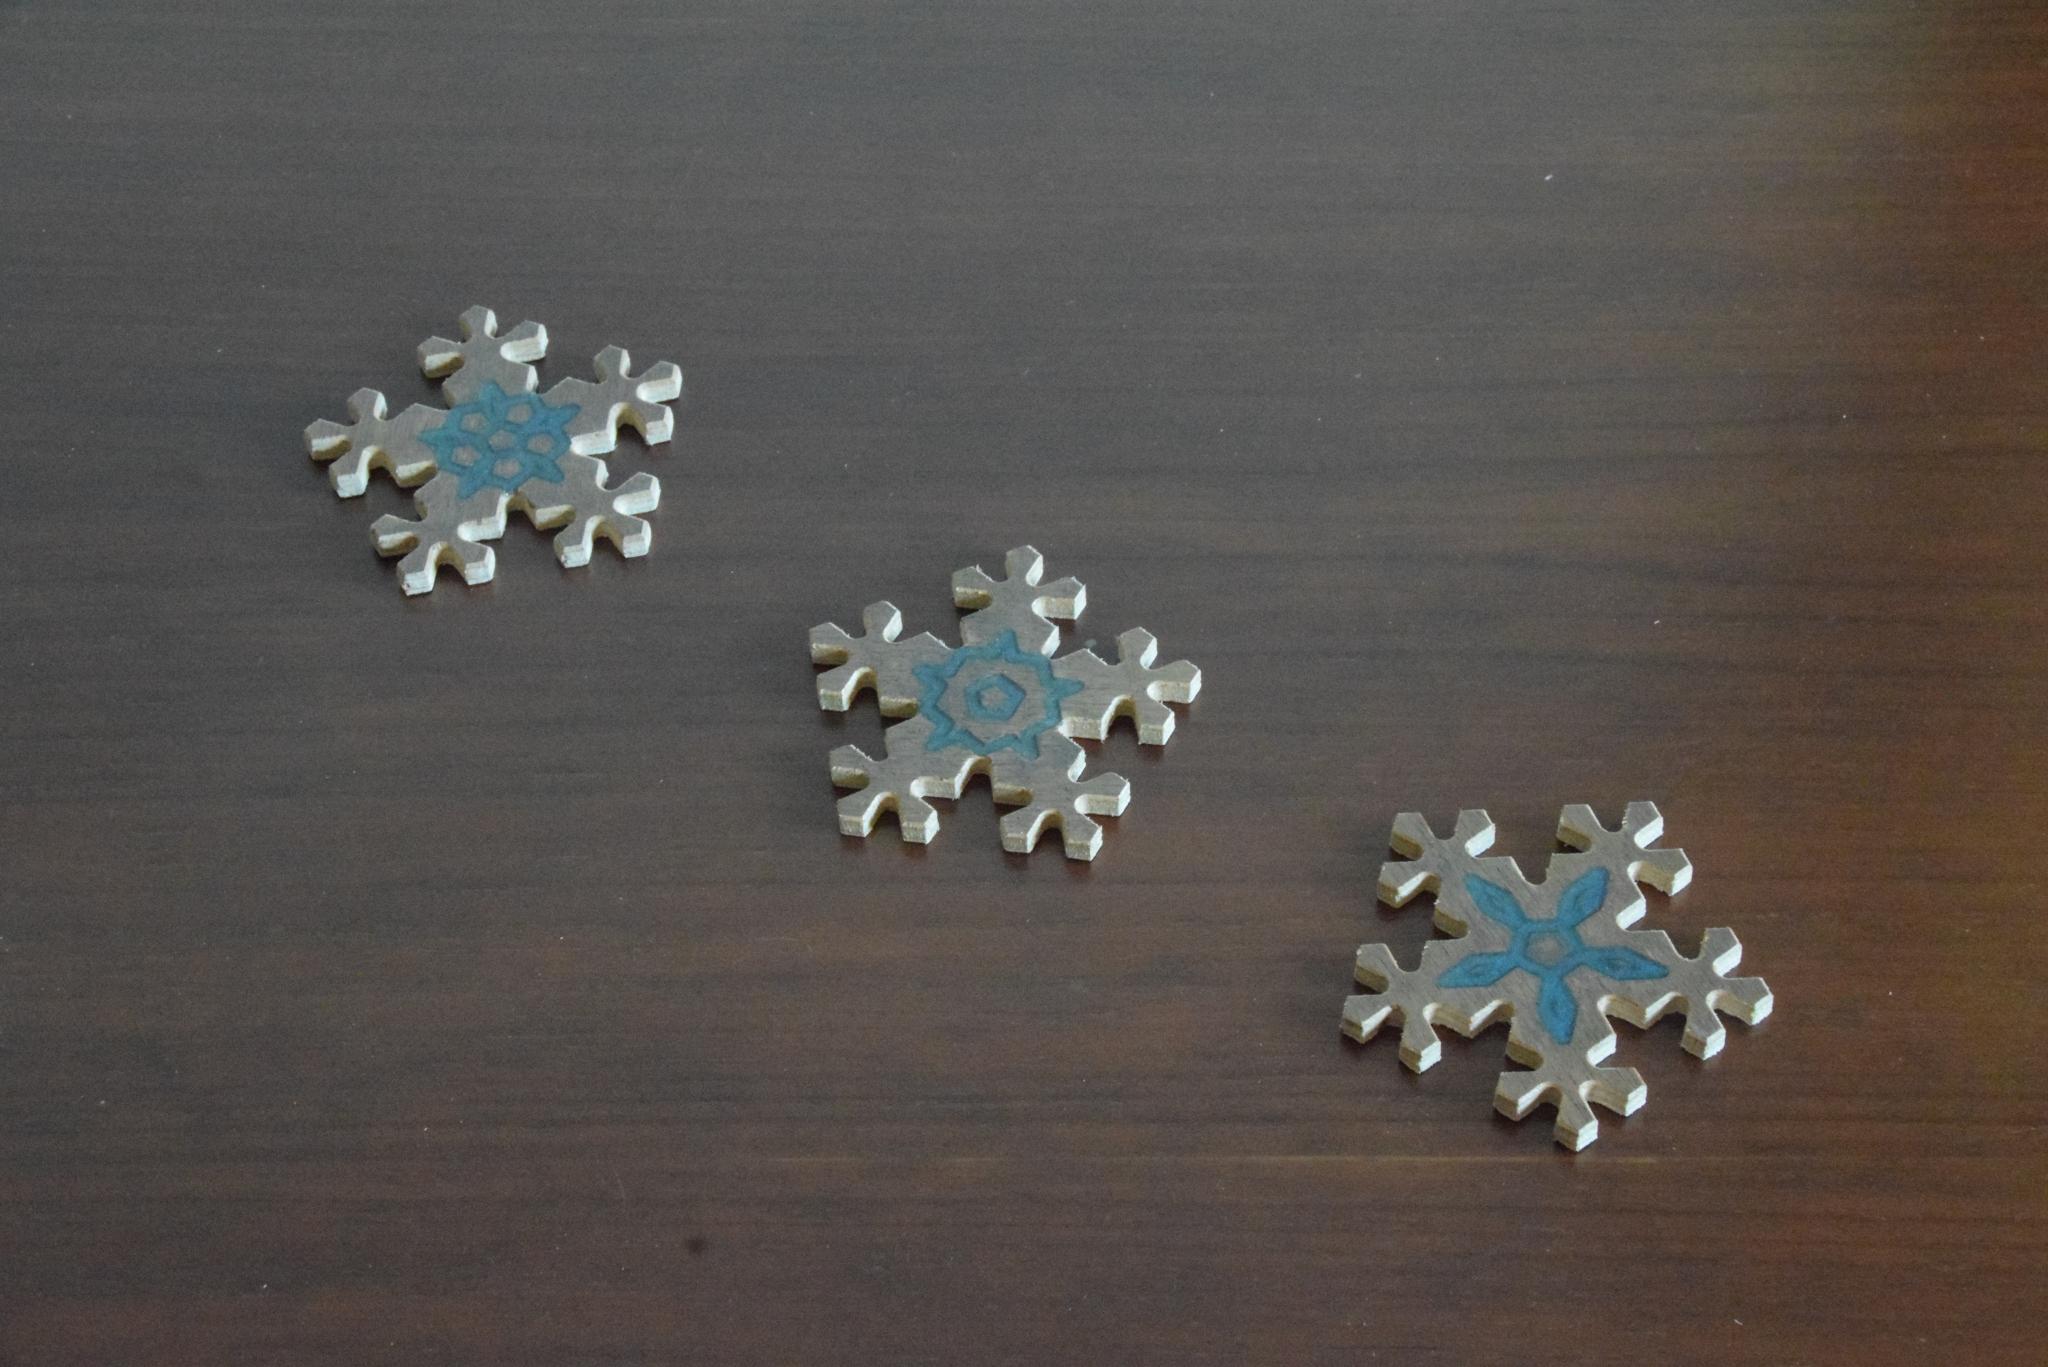
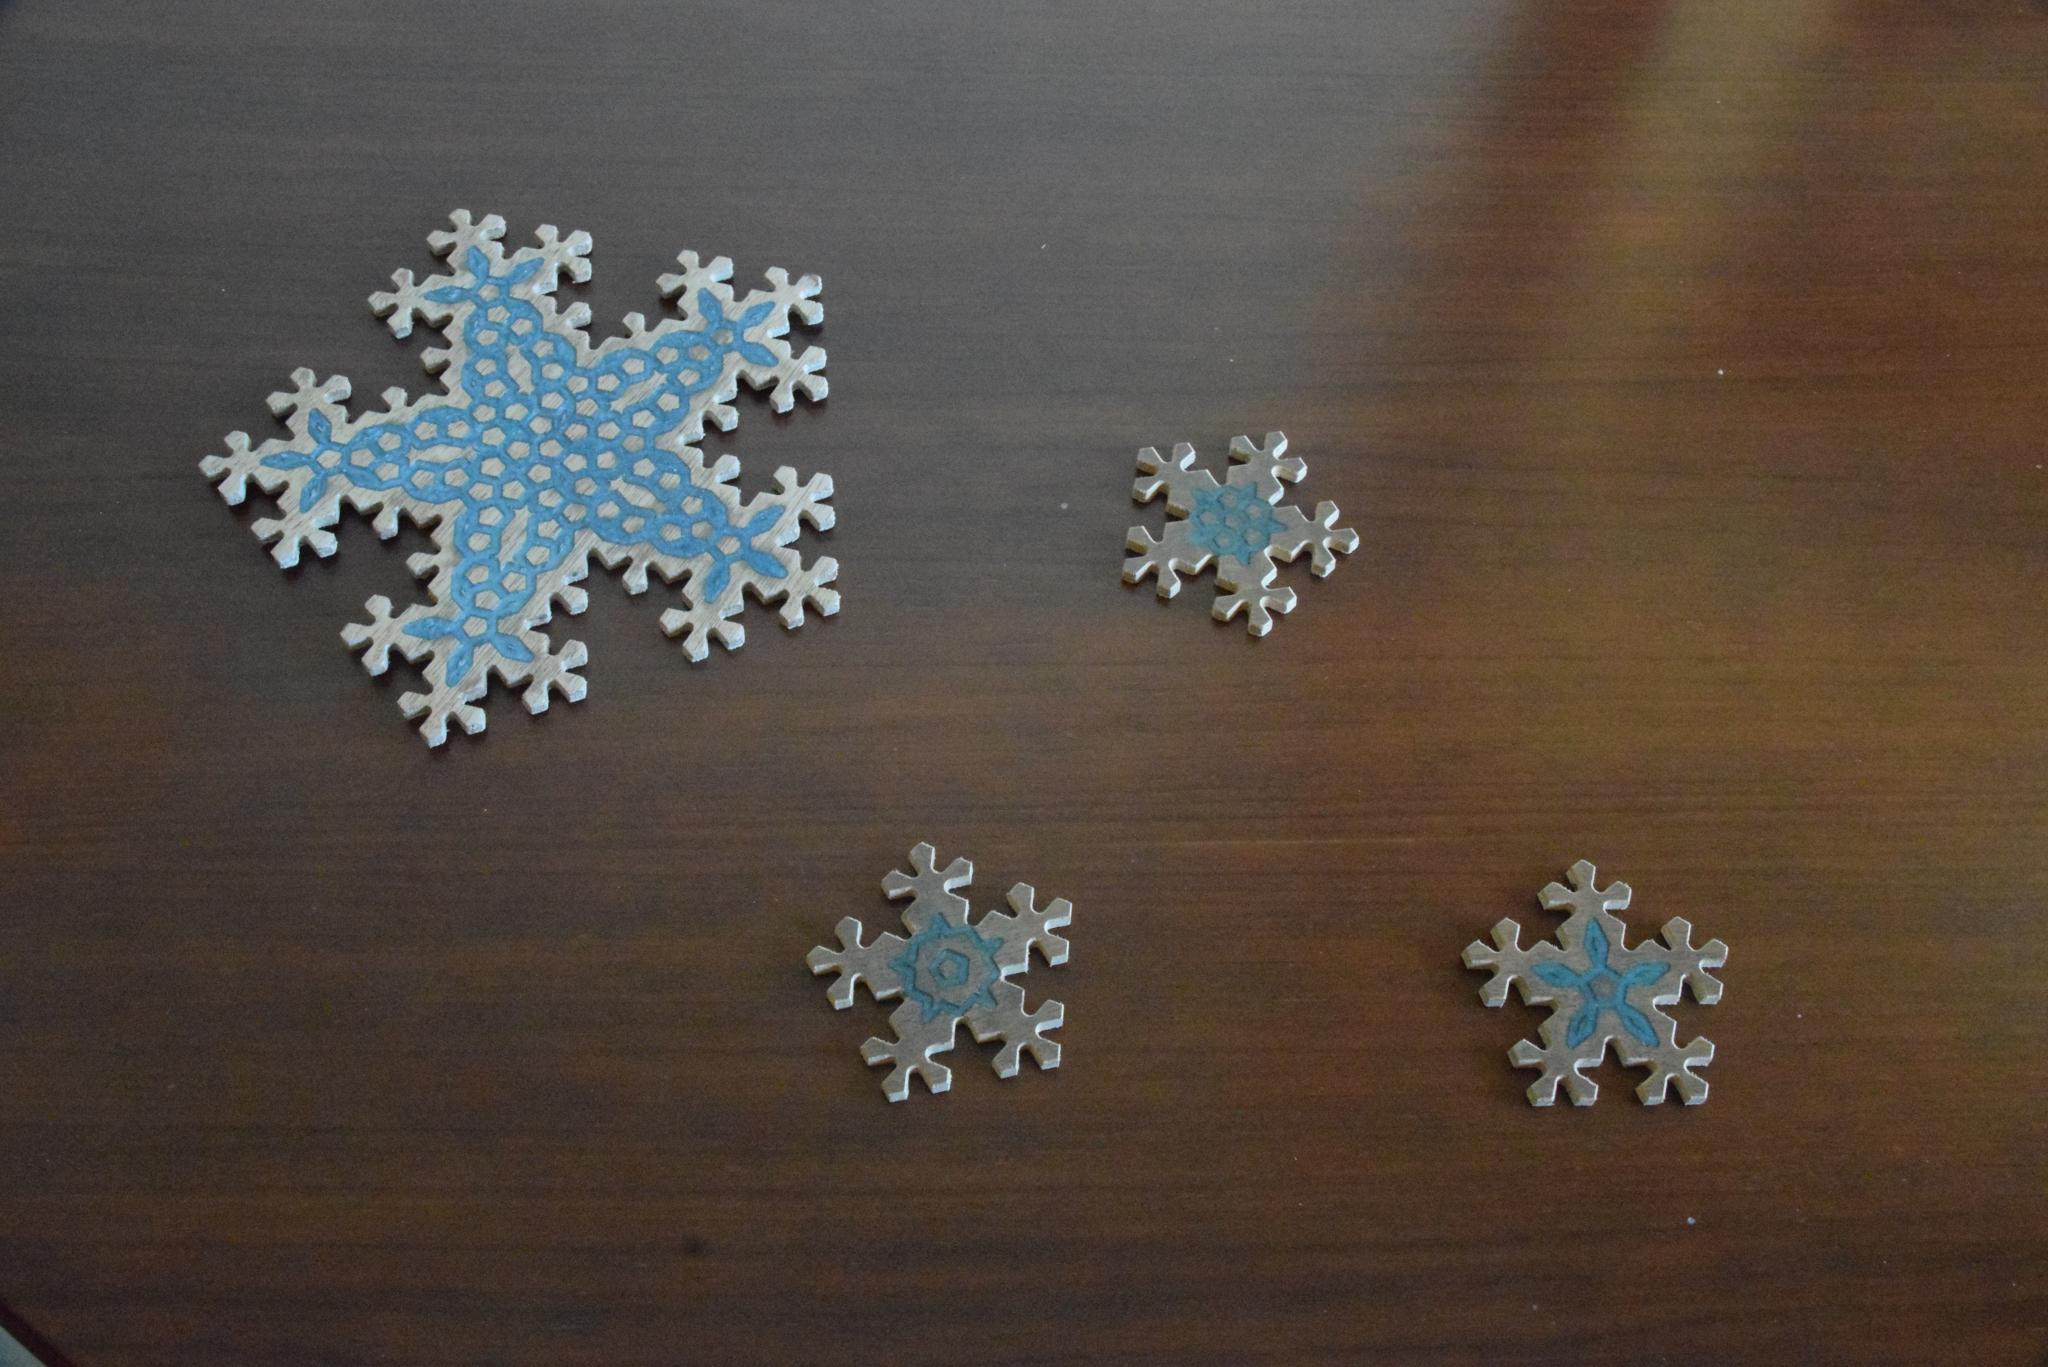
Now that your robot has produced your ornament, it's time to turn it into a masterpiece!
The first step is to remove any surface imperfections using sandpaper and diamond needle files. Now it's time to decide whether your design is ready as-is (especially if you've used a differently colored wood stain), or whether you wish to add further refinements. For instance, you can try filling the engraved pattern with resin, or even painting it (but this might be tricky). When using resin, make sure to pick one which sets slowly, and use a toothpick for application, since the engraved paths can be quite intricate.
It is finally time to impress your friends, as they marvel at the beauty of your creation!