Flux Capacitor PCB Badge V3
by Arnov Sharma in Circuits > Microcontrollers
3889 Views, 30 Favorites, 0 Comments
Flux Capacitor PCB Badge V3

.gif)
.gif)
Hey Everyone what's up!
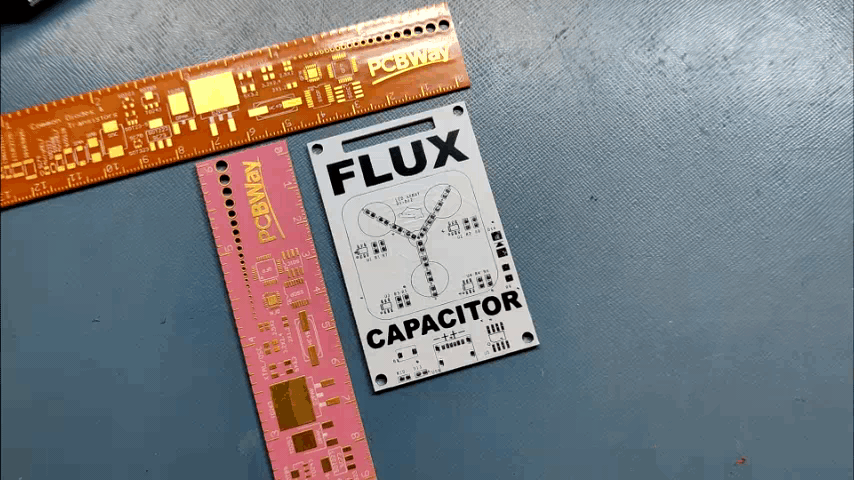
So this is my FLUX CAPACITOR Badge version 3 which is a replica of the actual flux cap which was in back to the future movie.
I've prepared its V1 a few months ago, back then, it had a couple of Throughole componenets which included the main MCU and Slide Switch, so I switched to all SMD components to make this project easy to assemble.
Like its previous version, this edition requires 2.6V at 0.0069A which is around 0.017 Watts or 0.000000000017 Gigawatts
It uses a CR2032 3V Coin Cell to power or we can use any TYPE C cable connected to a smartphone charger.
In these Instructables, I'm gonna show you guys how I prepared this Badge by following a few easy steps.
Let's get started
Supplies
Material Required
these are the things used in this built-
- Custom PCB (which was provided by PCBWay)
- LEDs 06038205S Mosfet IC
- SMD Tactile Button
- 10K Resistance 0603
- M7 Diode
- Attiny13A SOIC8
- USB Type C port
- 1K Resistance 0603
- Lithium CR2032 Cell SMD Holder
- Solder paste
- Arduino as ISP Programmer setup (consist of Arduino Nano or UNO)
Circuit Study
.jpg)

Above is the Circuit diagram of V3.
Let me explain how this setup works.
In total there are 12 LEDs divided into Four different parts. Each part contains 3 LEDs connected in parallel, these 3 LEDs are then connected with 8205S N channel Moseft IC. Total 4 of these Mosfet ICs are being used to drive 4 different LED parts. An Attiny13A is being used to drive the gate of 4 Mosfets. I've also added a Push Button on Pin D4 of Attiny to control the state of Mosfets. A Type C Port has also been added to power this setup through any Smartphone Charger.
To recreate the Flux Capacitor Animation, I've placed LEDs in a twisted way.
The First 3 LEDs that are connected in parallel are placed in the innermost part. then the second 3 LEDs are placed a little bit above the innermost part. The other two layers are placed in a similar fashion.
By Turning the Mosfet ON in a sequence starting from inside to outside, we get a chasing pattern similar to Flux Capacitor.
Also, you can get this Flux CAP from here -
Getting PCBs From PCBWAY
.gif)
.gif)
After Finalizing the PCB, I sent the Gerber data to PCBWAY for samples.
I choose White Soldermask for this project with a Black silkscreen.
I've added graphics on Both sides of PCB to increase the aesthetic of PCB, Quality of the PCB I received was just awesome.
I have Been using their service for a while and I have to say, it's pretty decent for getting started.
Checkout PCBWAY from here- https://www.pcbway.com/
PCB ASSEMBLY

These are the steps for the main assembly of the FLUX CAP V3 PCB.
- Solder paste Dispensing Process
- Pick & Place Process
- Hotplate Reflow
Because this PCB Doesn't have any Through-hole component, we dont have to add any component with soldering iron, except for the Coin Cell holder on the backside.
SOLDER PASTE
.gif)
The first step is to add solder paste to each components pad one by one.
To Apply solder paste, I'm using a Solderpaste Dispensing Needle with a Wide syringe, and the solder paste I'm using is a regular solder paste consisting of 63% Tin 37% Lead.
PICK & PLACE PROCESS
.gif)
After carefully applying Solderpaste we move on to the next step which is to add componenets to their assigned location.
I used an ESD Tweezer to place each component in its place.
HOTPLATE REFLOW

After the "Pick & Place Process", I carefully lifted the whole circuit board and place it on my DIY SMT Hotplate.
I made this Hotplate especially for making projects like these which require SMD soldering. hotplate available in the market were not exactly cheap so I made a minimal version of that which you can check out from here-
https://www.instructables.com/DIY-SMT-Hotplate-Pro...
the hotplate heats the PCB from below up to the solder paste melting temp, as soon as the PCB reaches that temp, solder paste melts and all the components get soldered to their pads, We carefully lift this PCB and try not to shake it as the solder paste is still melted and components might move a bit from their location if shake the circuit too much.
we lift the PCB and then place it on a cooler surface for a little bit, to cool down the heat of PCB.
Code
This is the code that I used in this project-
const int switchPin = 4;
int pinsCount=4;                        // declaring the integer variable pinsCount
int pins[] = {0,1,3,2};
int lightMode = 1;

void setup()
{
    pinMode(0, OUTPUT);
    pinMode(1, OUTPUT);
    pinMode(2, OUTPUT);
    pinMode(3, OUTPUT);
    pinMode(switchPin, INPUT_PULLUP);
   digitalWrite(0, LOW);
   digitalWrite(1, LOW);
   digitalWrite(2, LOW);
   digitalWrite(3, LOW);

}
void loop()
{
    if (digitalRead(switchPin) ==LOW)
    {
        lightMode = lightMode + 1;
        if (lightMode == 3)
        {
            lightMode = 1;
        }
    }
    if (lightMode == 1)
    {
        digitalWrite(pins[0,1,2,3], LOW);
        delay(300);
    }
    else if (lightMode == 2)
    {
      for (int i=0; i<pinsCount; i=i+1){    // chasing right
      digitalWrite(pins[i], HIGH);         // switching the LED at index i on
      delay(70);                          // stopping the program for 100 milliseconds
      digitalWrite(pins[i], LOW);          // switching the LED at index i off
    }
      for (int i=pinsCount-1; i>0; i=i-1){   // chasing left (except the outer leds)
      digitalWrite(pins[i], HIGH);         // switching the LED at index i on
      delay(70);                          // stopping the program for 100 milliseconds
      digitalWrite(pins[i], LOW);          // switching the LED at index i off
     }
    }

    //delay(200); // see text
}
Downloads
Programming Attiny13A


We cannot directly program ATTINY13 through any USB, there's a method for programming the Attiny straight from the USB port but I'm not doing that.
Instead, I'll be using the ISP flashing method which will utilize the SPI Pins of attiny13A to burn the bootloader in it and then Flash.
Getting Attiny13 Core Installed on Arduino IDE
Before starting the Flashing process, we first need to download and install the Attiny13 Core files in Arduino IDE. https://github.com/MCUdude/MicroCore
- Open the Arduino IDE.
- Open the File > Preferences menu item.
- Enter the following URL in Additional Boards Manager URLs: https://mcudude.github.io/MicroCore/package_MCUdu...
- the Tools > Board > Boards Manager... menu item.
- Wait for the platform indexes to finish downloading.
- Scroll down until you see the MicroCore entry and click on it.
- Click Install.
- After installation is complete close the Boards Manager window.
Preparing the Arduino as ISP setup
AVRs chips usually come blank, they need to be set up to be Arduino IDE compatible but to do that you need an AVR programmer do to that, for example, a USBASP.
Fun Fact, you could make your own AVR Programer with an Arduino Uno or a Nano board in a very easy step.
- Connect your Arduino board with com port and select Example>ArduinoISP, upload this sketch onto your board.
- After uploading, go to the tools menu and choose the Arduino as ISP option in the programmer section.
- Now for flashing Attiny13A, we can select the Attiny13A in the Board section.
Attiny85 and Attiny13A share the same pinout
The programming process uses VCC, GND, RST, MISO, MOSI, and SCK.
- 5V of Arduino to VCC of Attiny
- GND to GND
- D10 of Arduino to RST of Attiny
- D11 of Arduino to MOSI of Attiny
- D12 of Arduino to MISO of Attiny
- D13 of Arduino to SCK of Attiny
Instead of using an Arduino Nano and a breadboard for this job, I will use my DIY Attiny Programmer which I made for flashing the Attiny or Atmega MCUs.
Instead of Wiring, it utilizes a SOIC8 Clip to make the connection between the Arduino board and Attiny MCU. It's pretty much the same as the above wiring Schematic.
Also, I've added 6 Dip8 Sockets in parallel with each other to program more than one attiny at a time.
Check out more about this Programmer from here-
https://www.hackster.io/Arnov_Sharma_makes/multipl...
- connect the Board to the Arduino as ISP Setup in the above wiring config
- choose the right port, right programmer (Arduino as ISP), and hit Burn Bootloaderwait for a few seconds, you will get done burning the bootloader message.
- Now Open the sketch that you want to upload to this AttinyGo to the Sketch menu and select Upload using the programmer.
- and your Sketch will get uploaded onto the attiny13.
3D Printed Enclosure
.gif)
To make this setup wearable, I prepared an Enclosure for it. we can add any ID Card strap with it and wear the badge.
I designed the enclosure in Fusion360 and then 3D Printed it on my ender 3 with orange PLA.
Downloads
REMOVING STRINGS
.gif)
.gif)
.gif)
Because I used a 0.8mm Nozzle with a High Temp 205°C, the 3D Printed part had many strings connected between them. These Strings are made due to plastic oozing out of the nozzle while the extruder is moving to a new location
To remove these strings, here's a neat hack.
I used a lighter's flame to retract the strings, by bringing the flame close to strings, strings melt and then they can be removed quite easily by just rubbing the melted string with fingers.
After removing strings, I added the PCB onto the Enclosure with four M2 Screws, and the Assembly Process is now completed.
RESULT
.gif)
.gif)
.gif)
At last, we put a CR2032 Coin cell in its holder and press the button present in front.
This will initiate the Chasing sequence and the LEDs will glow.
By Pressing the button again, it turns off the Chasing Sequence and the Badge Stops working.
This method of using an SMD Tactile button eliminated the THT Slide switch.
This is it for today folks, thanks for reading this Instructables.
And I'll be back with a new project pretty soon!