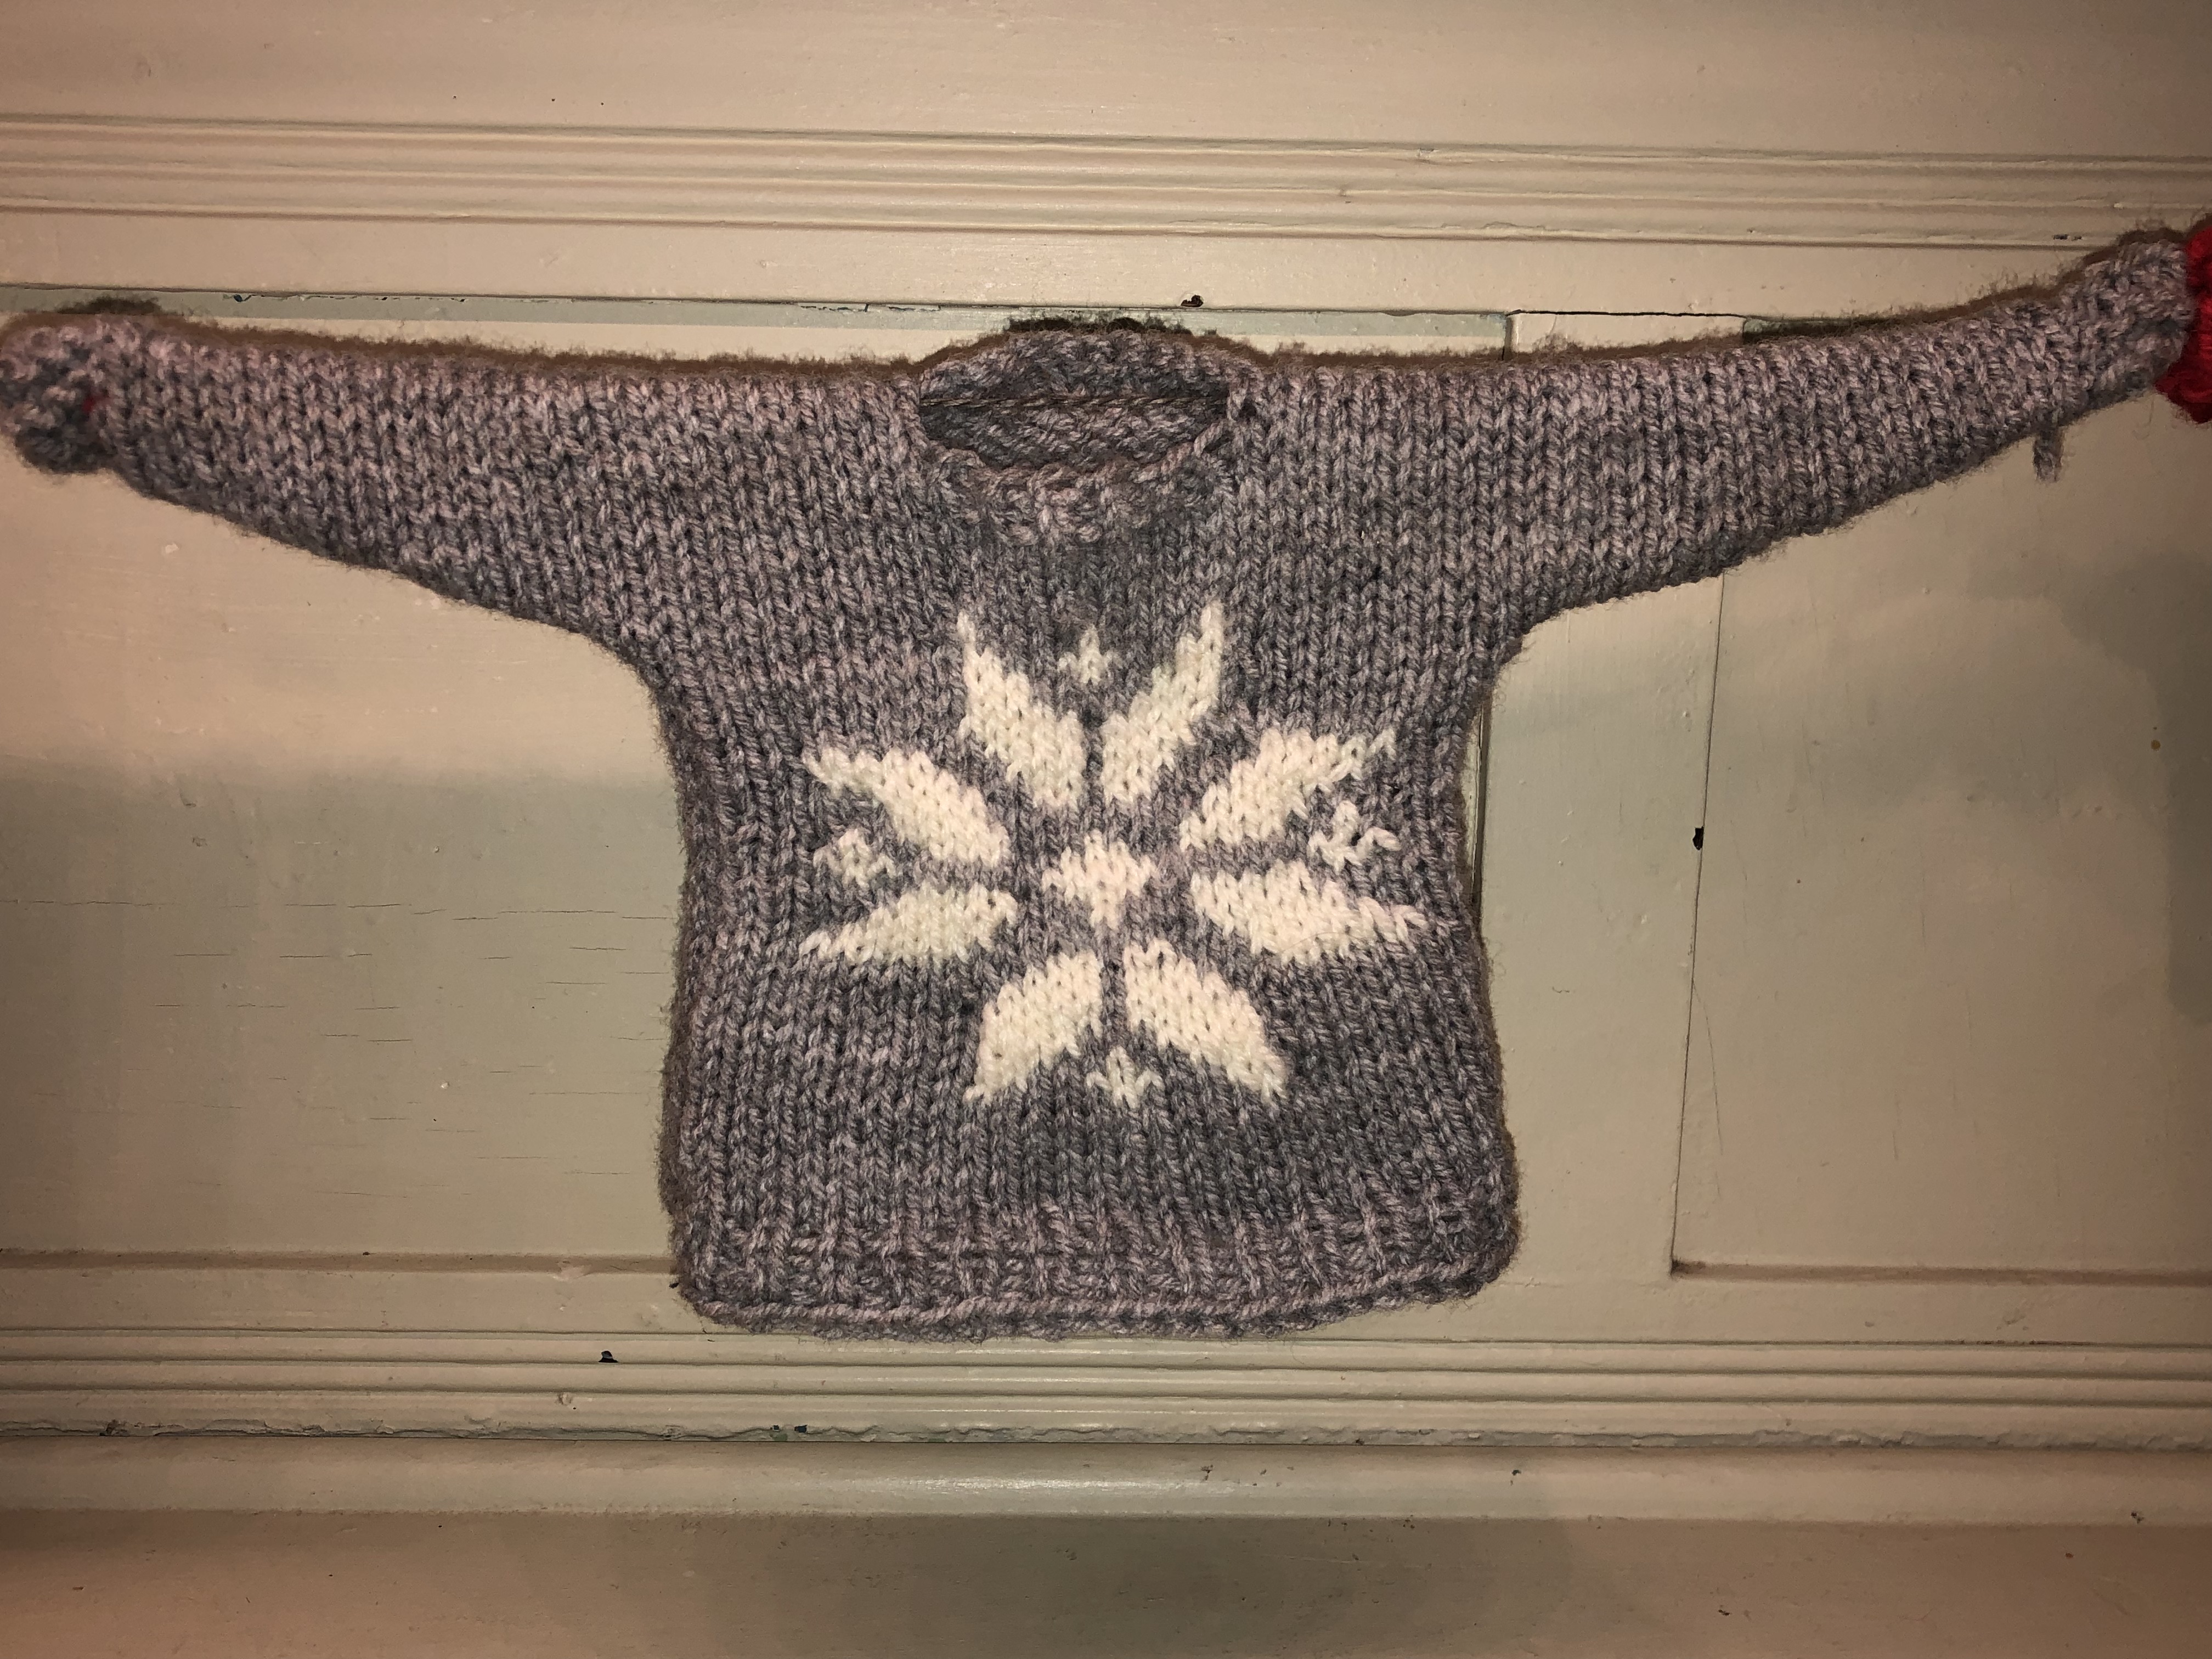
Flashing Sweater

In this project I knitted a traditional sweater with the typical star image in a Nordic style. It's a small sweater so it doesn't take long time to knit. If you find it hard to knit with two colors you can just use one.
After the knitting I sewed a LED inside the sweater and together with a Lilypad Mainboard I programmed it to blink in 8 different colors. The Lilypad Tri-color LED have a red, a green and a blue light and by mixing these three colors you can have any colors you like. In this project the LED is programmed to show all of the possible colors: " black", red, yellow, green, cyan, blue, magenta, and white.
Materials
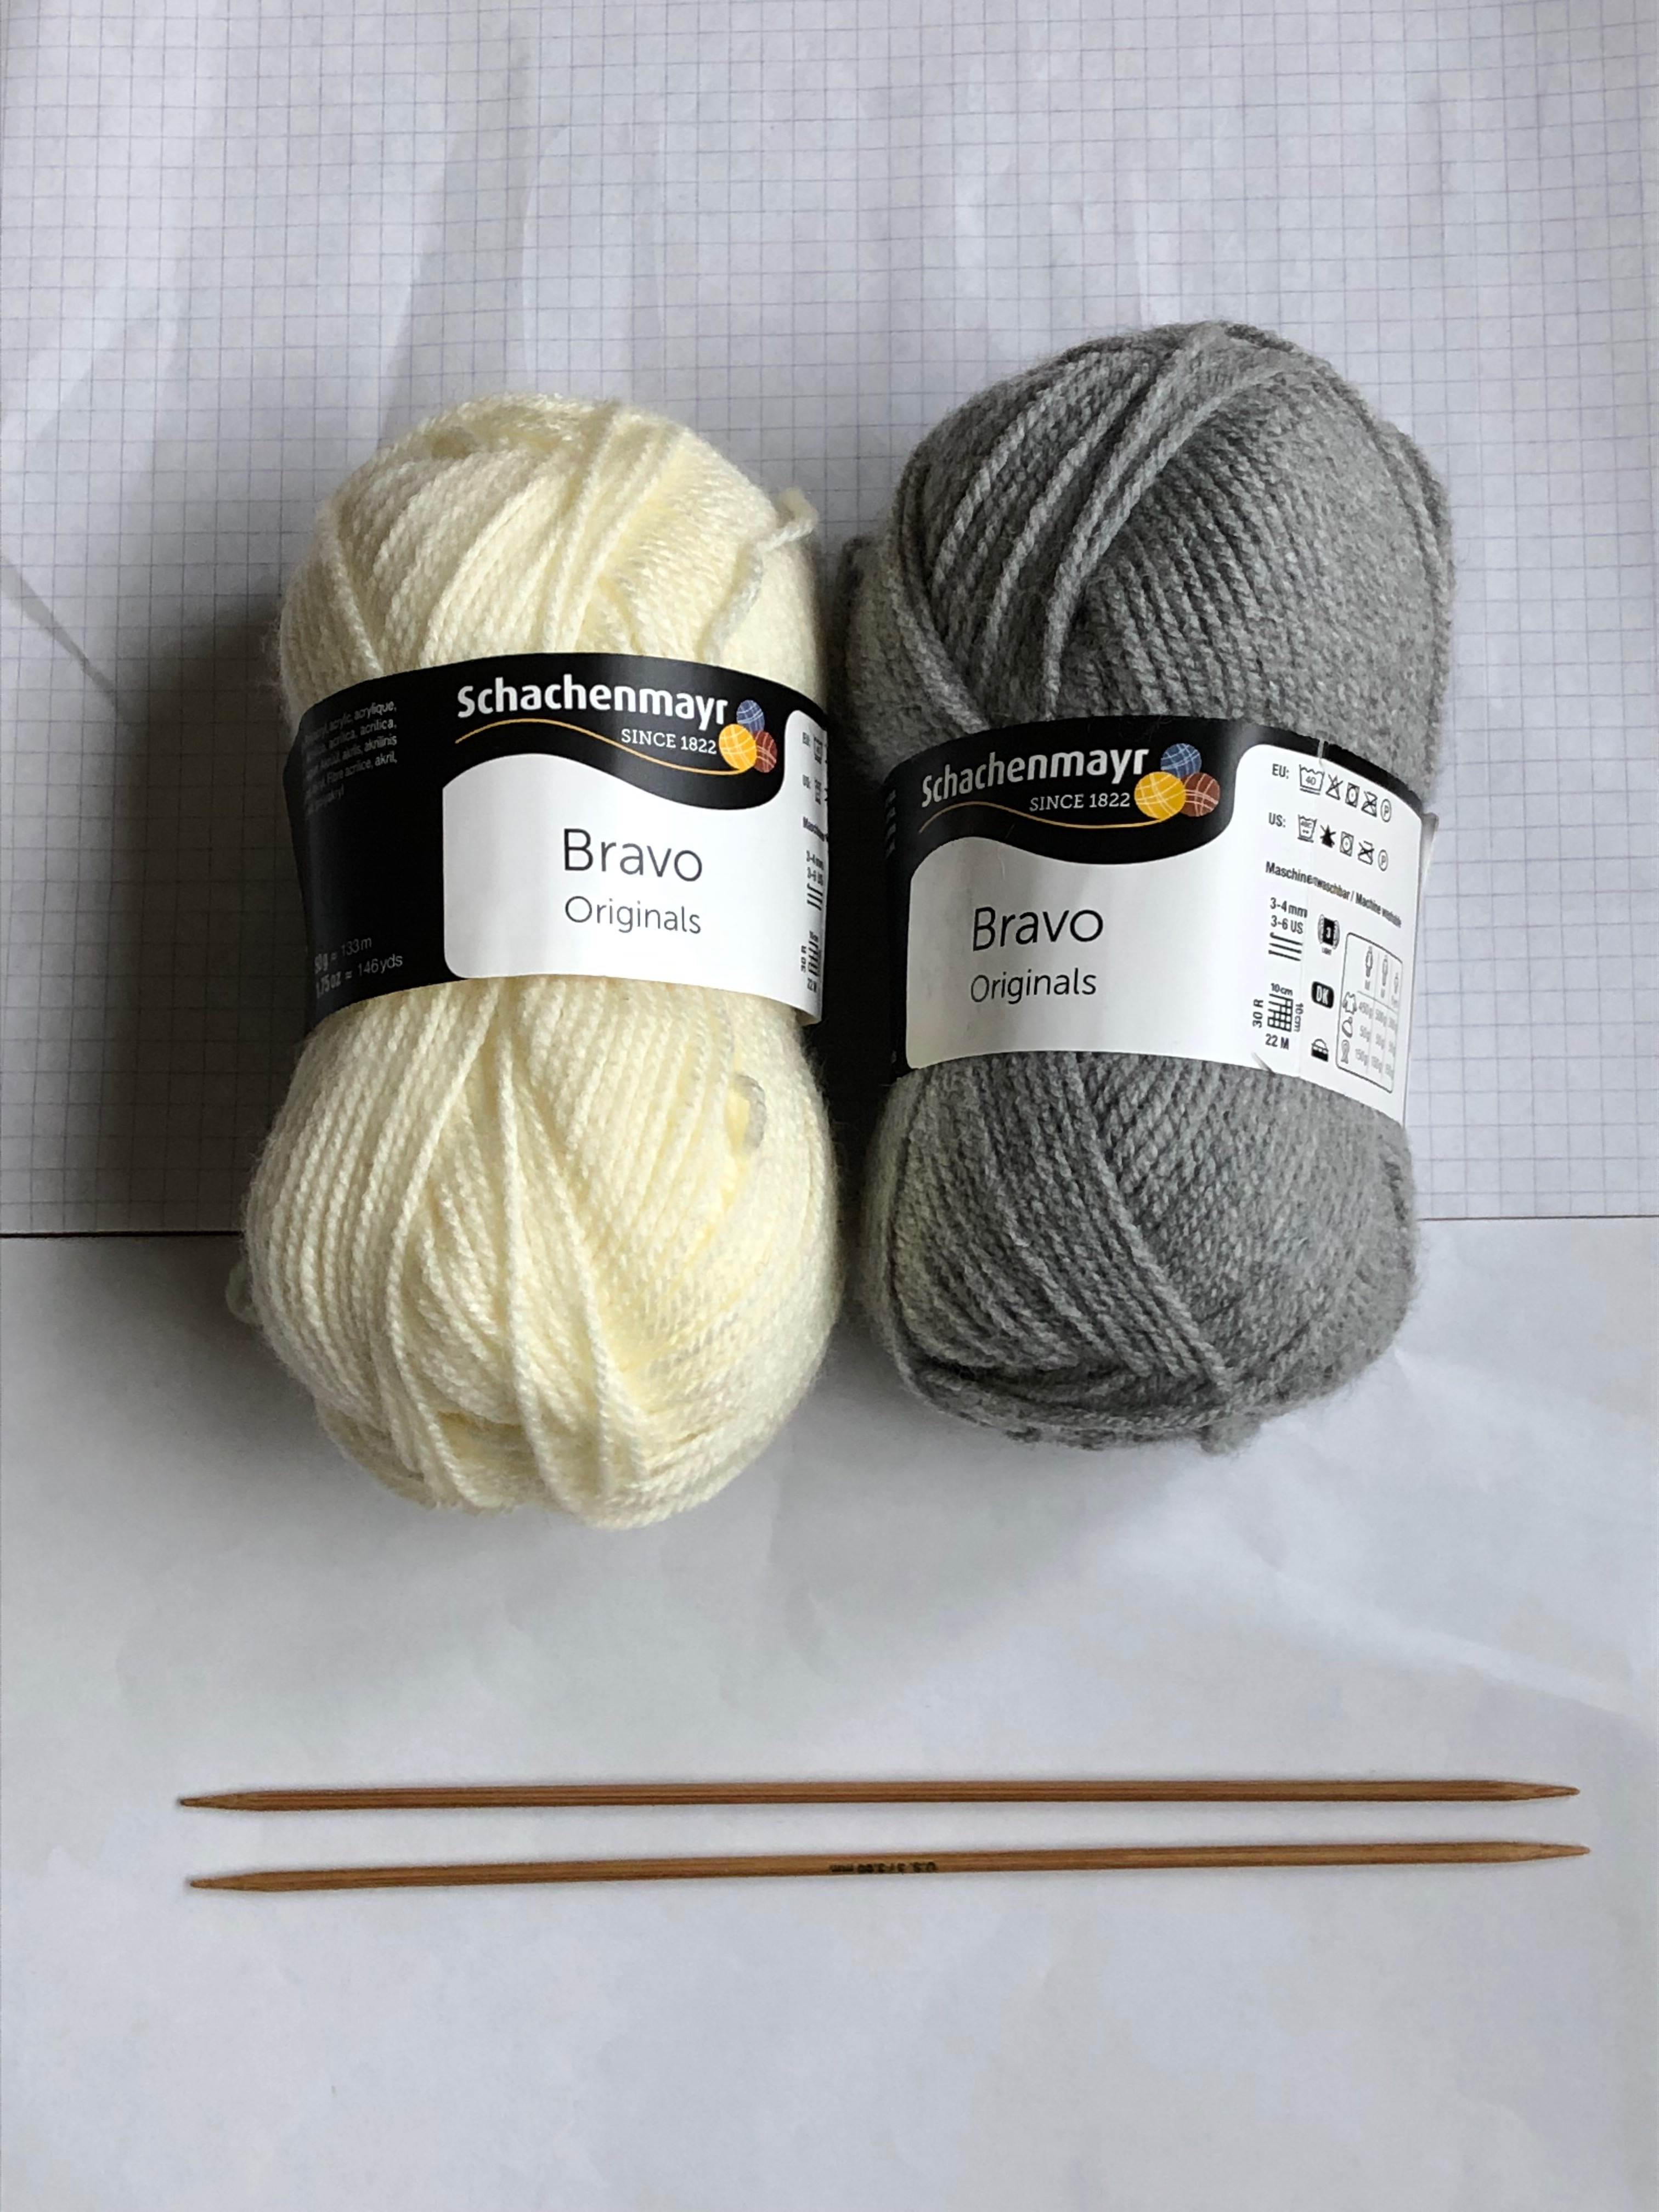

Materials
For the knitting
- Yarn, I used acrylic yarn
- Knitting pattern from Save the children
- Knitting pins, 3 mm
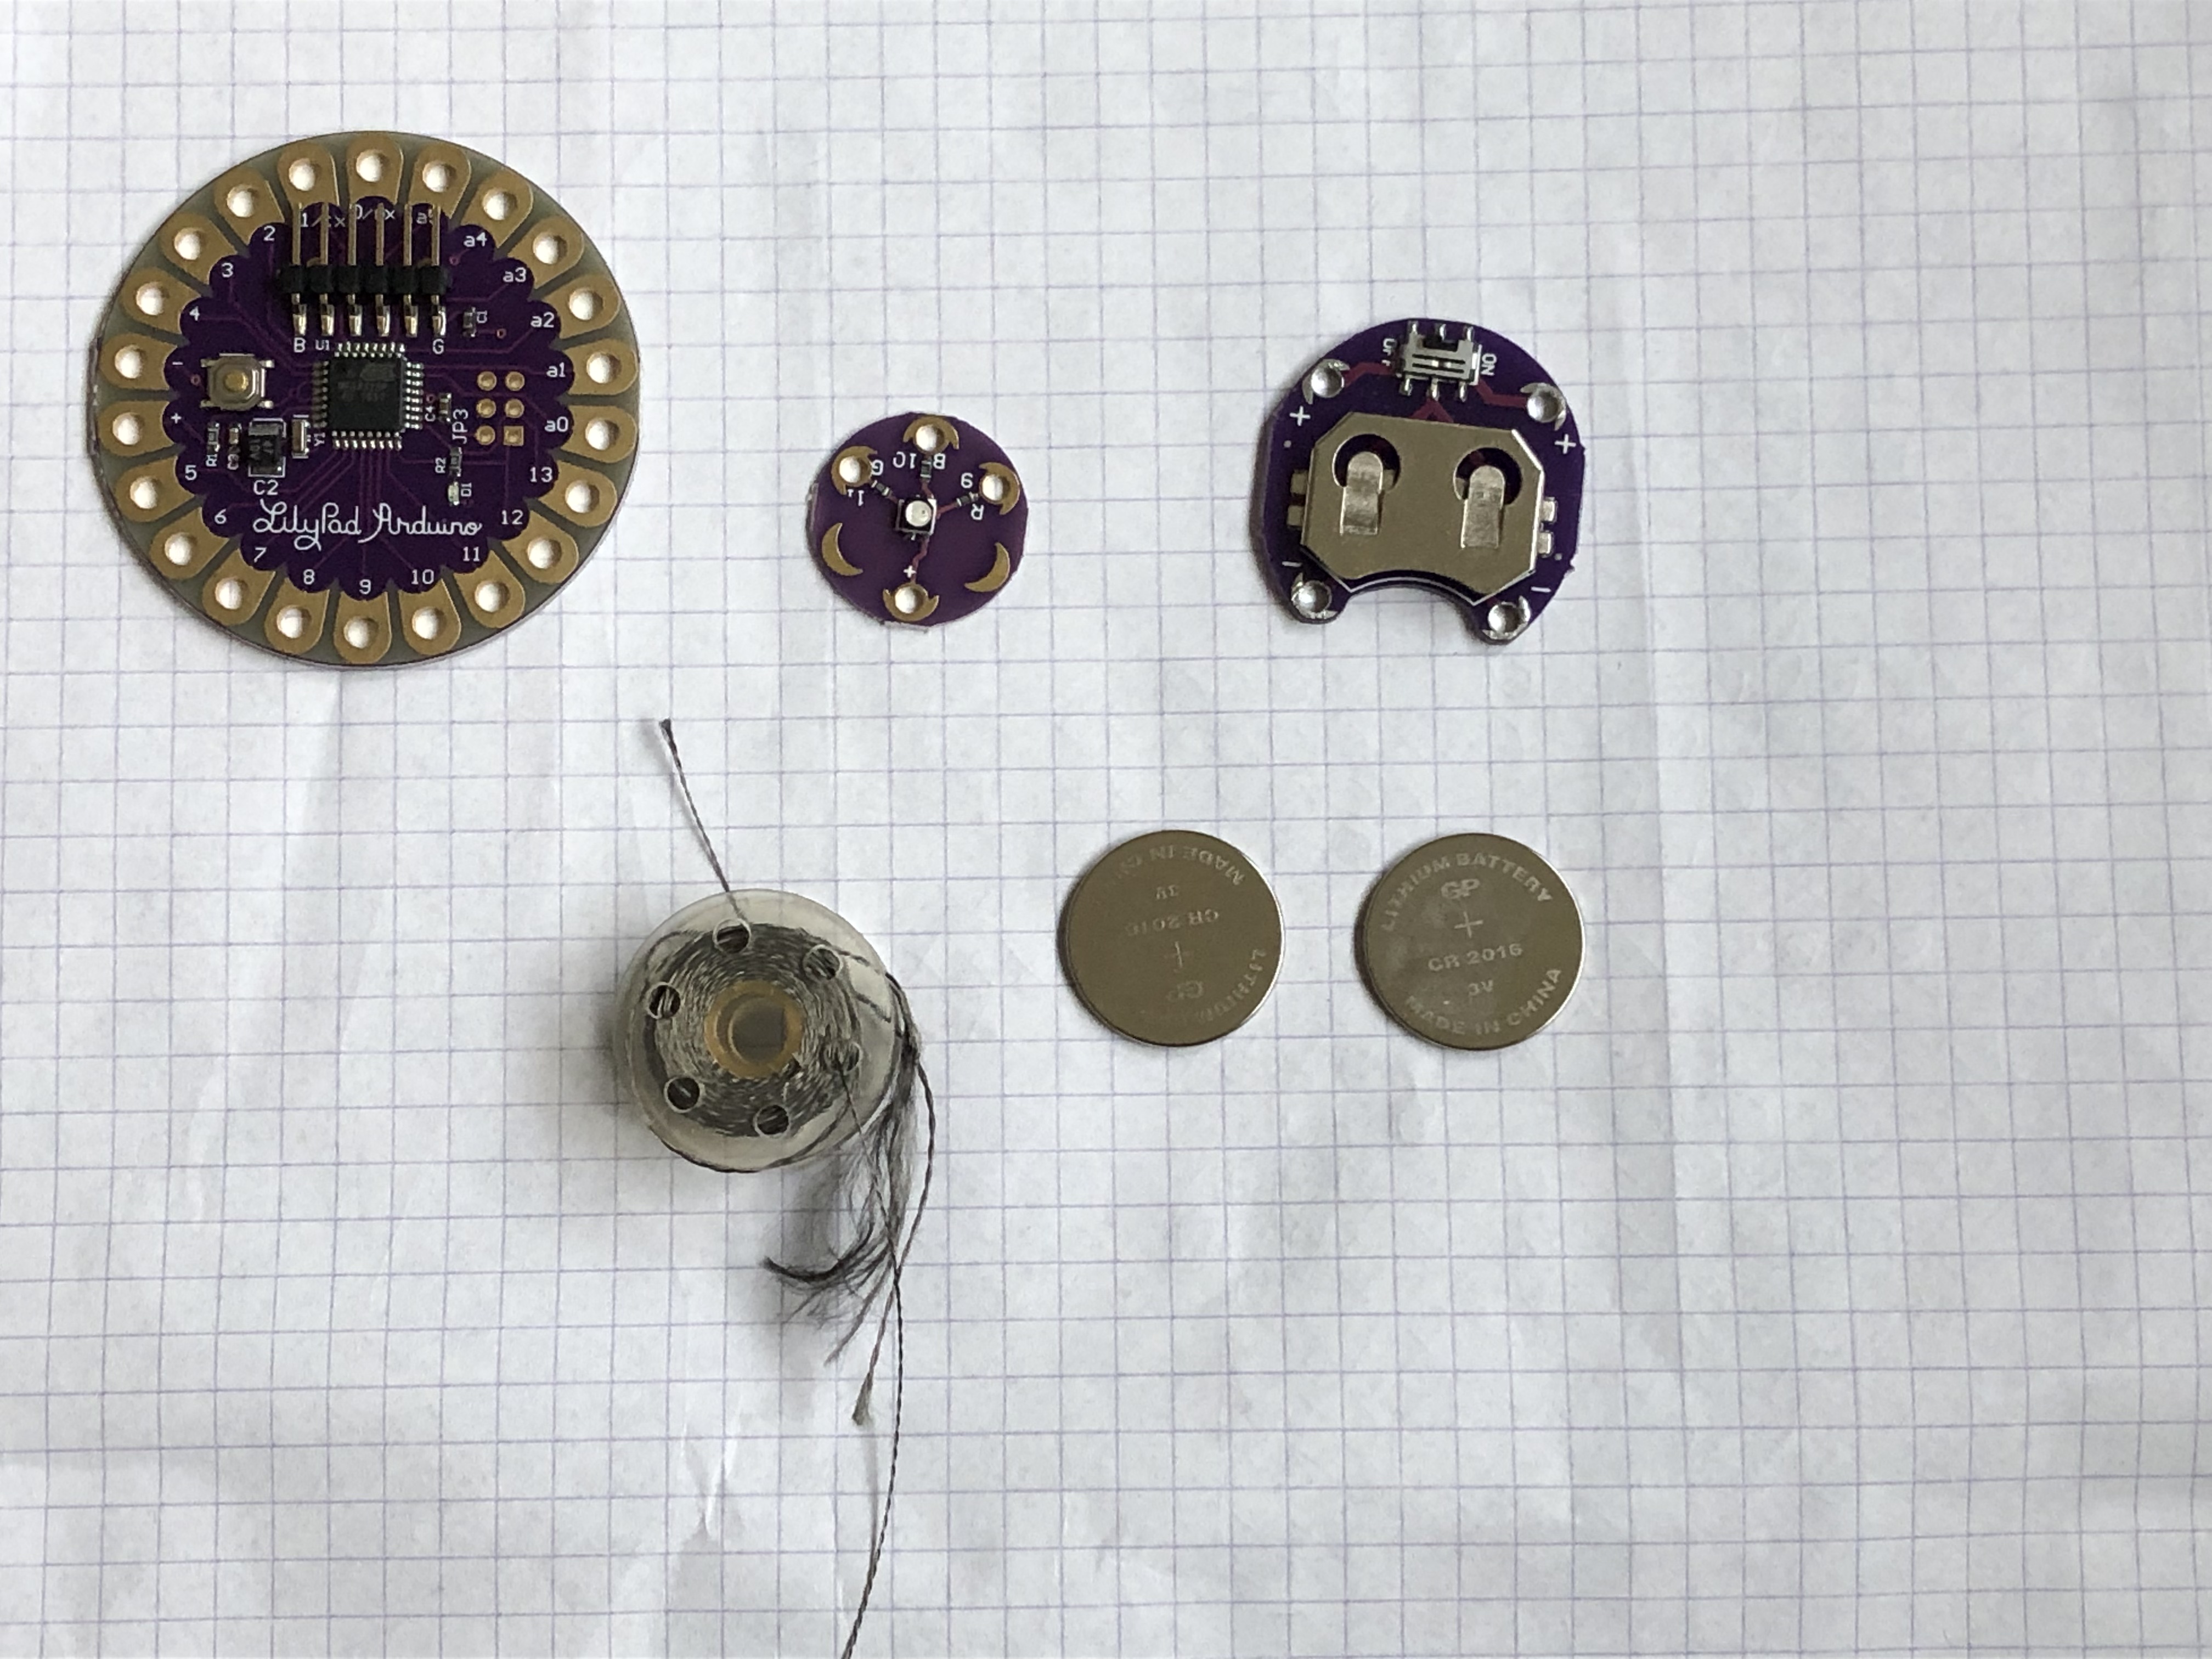
For the LED
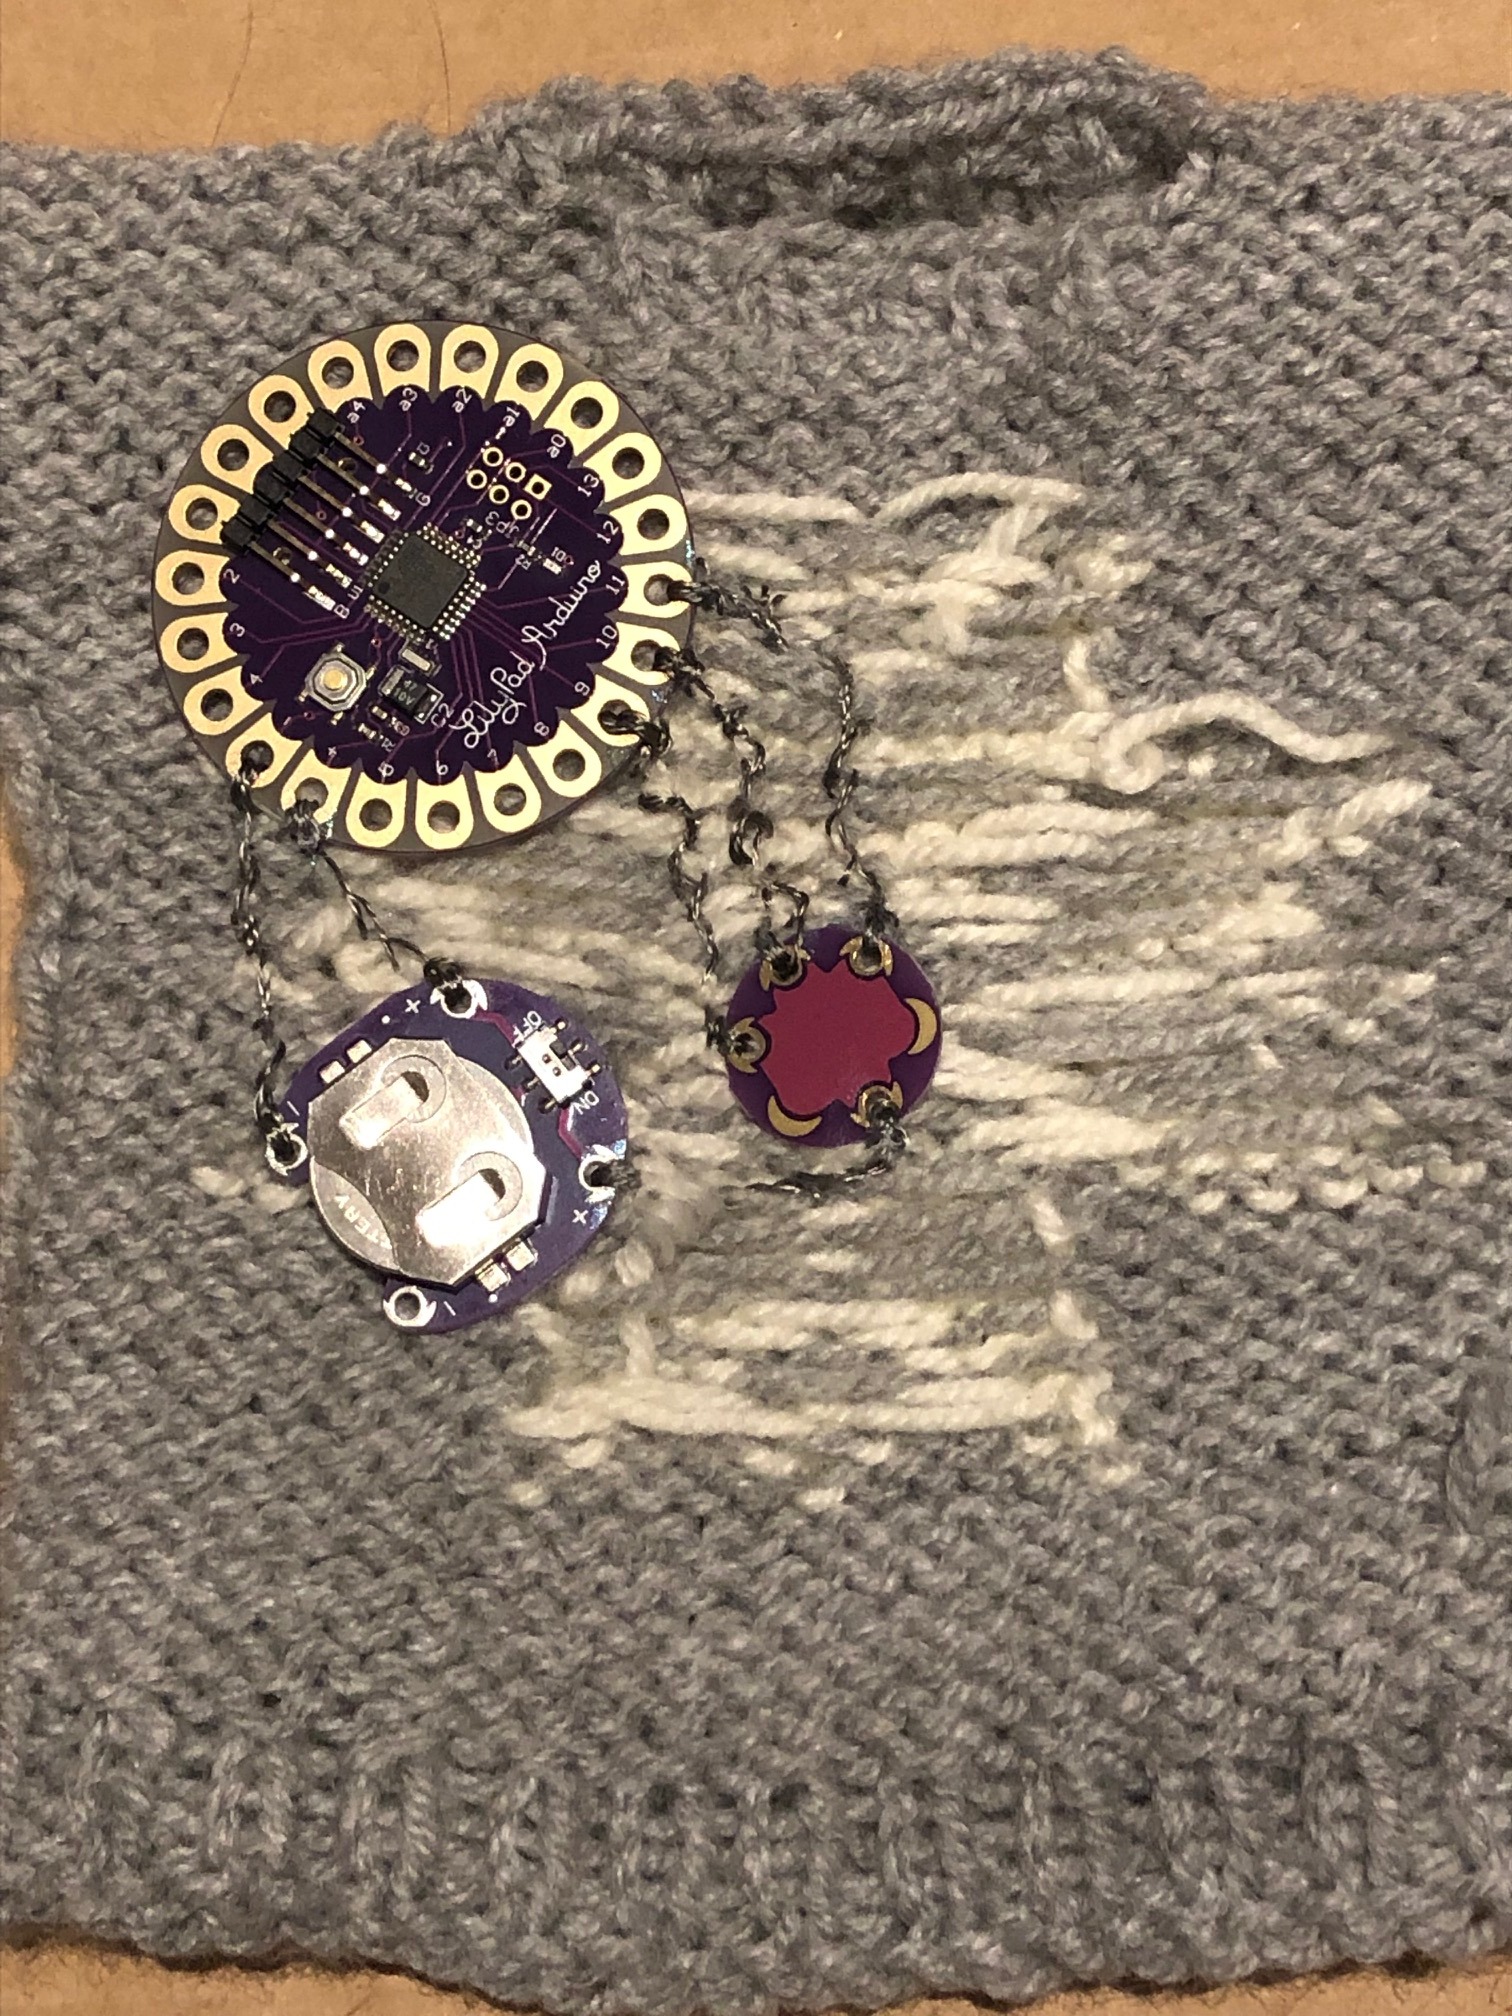
- Lilypad Mainboard
- Tri-Color LED
- Lilypad Battery holder
- 2 Cell Battery CR 2016
- Conductive thread
- 4 Alligator clips (not on the picture)
- FTDI Basic 5 V programmer with USB/Usb mini cable (not on the picture)
- 6 connection cables (not on the picture)
Knitting
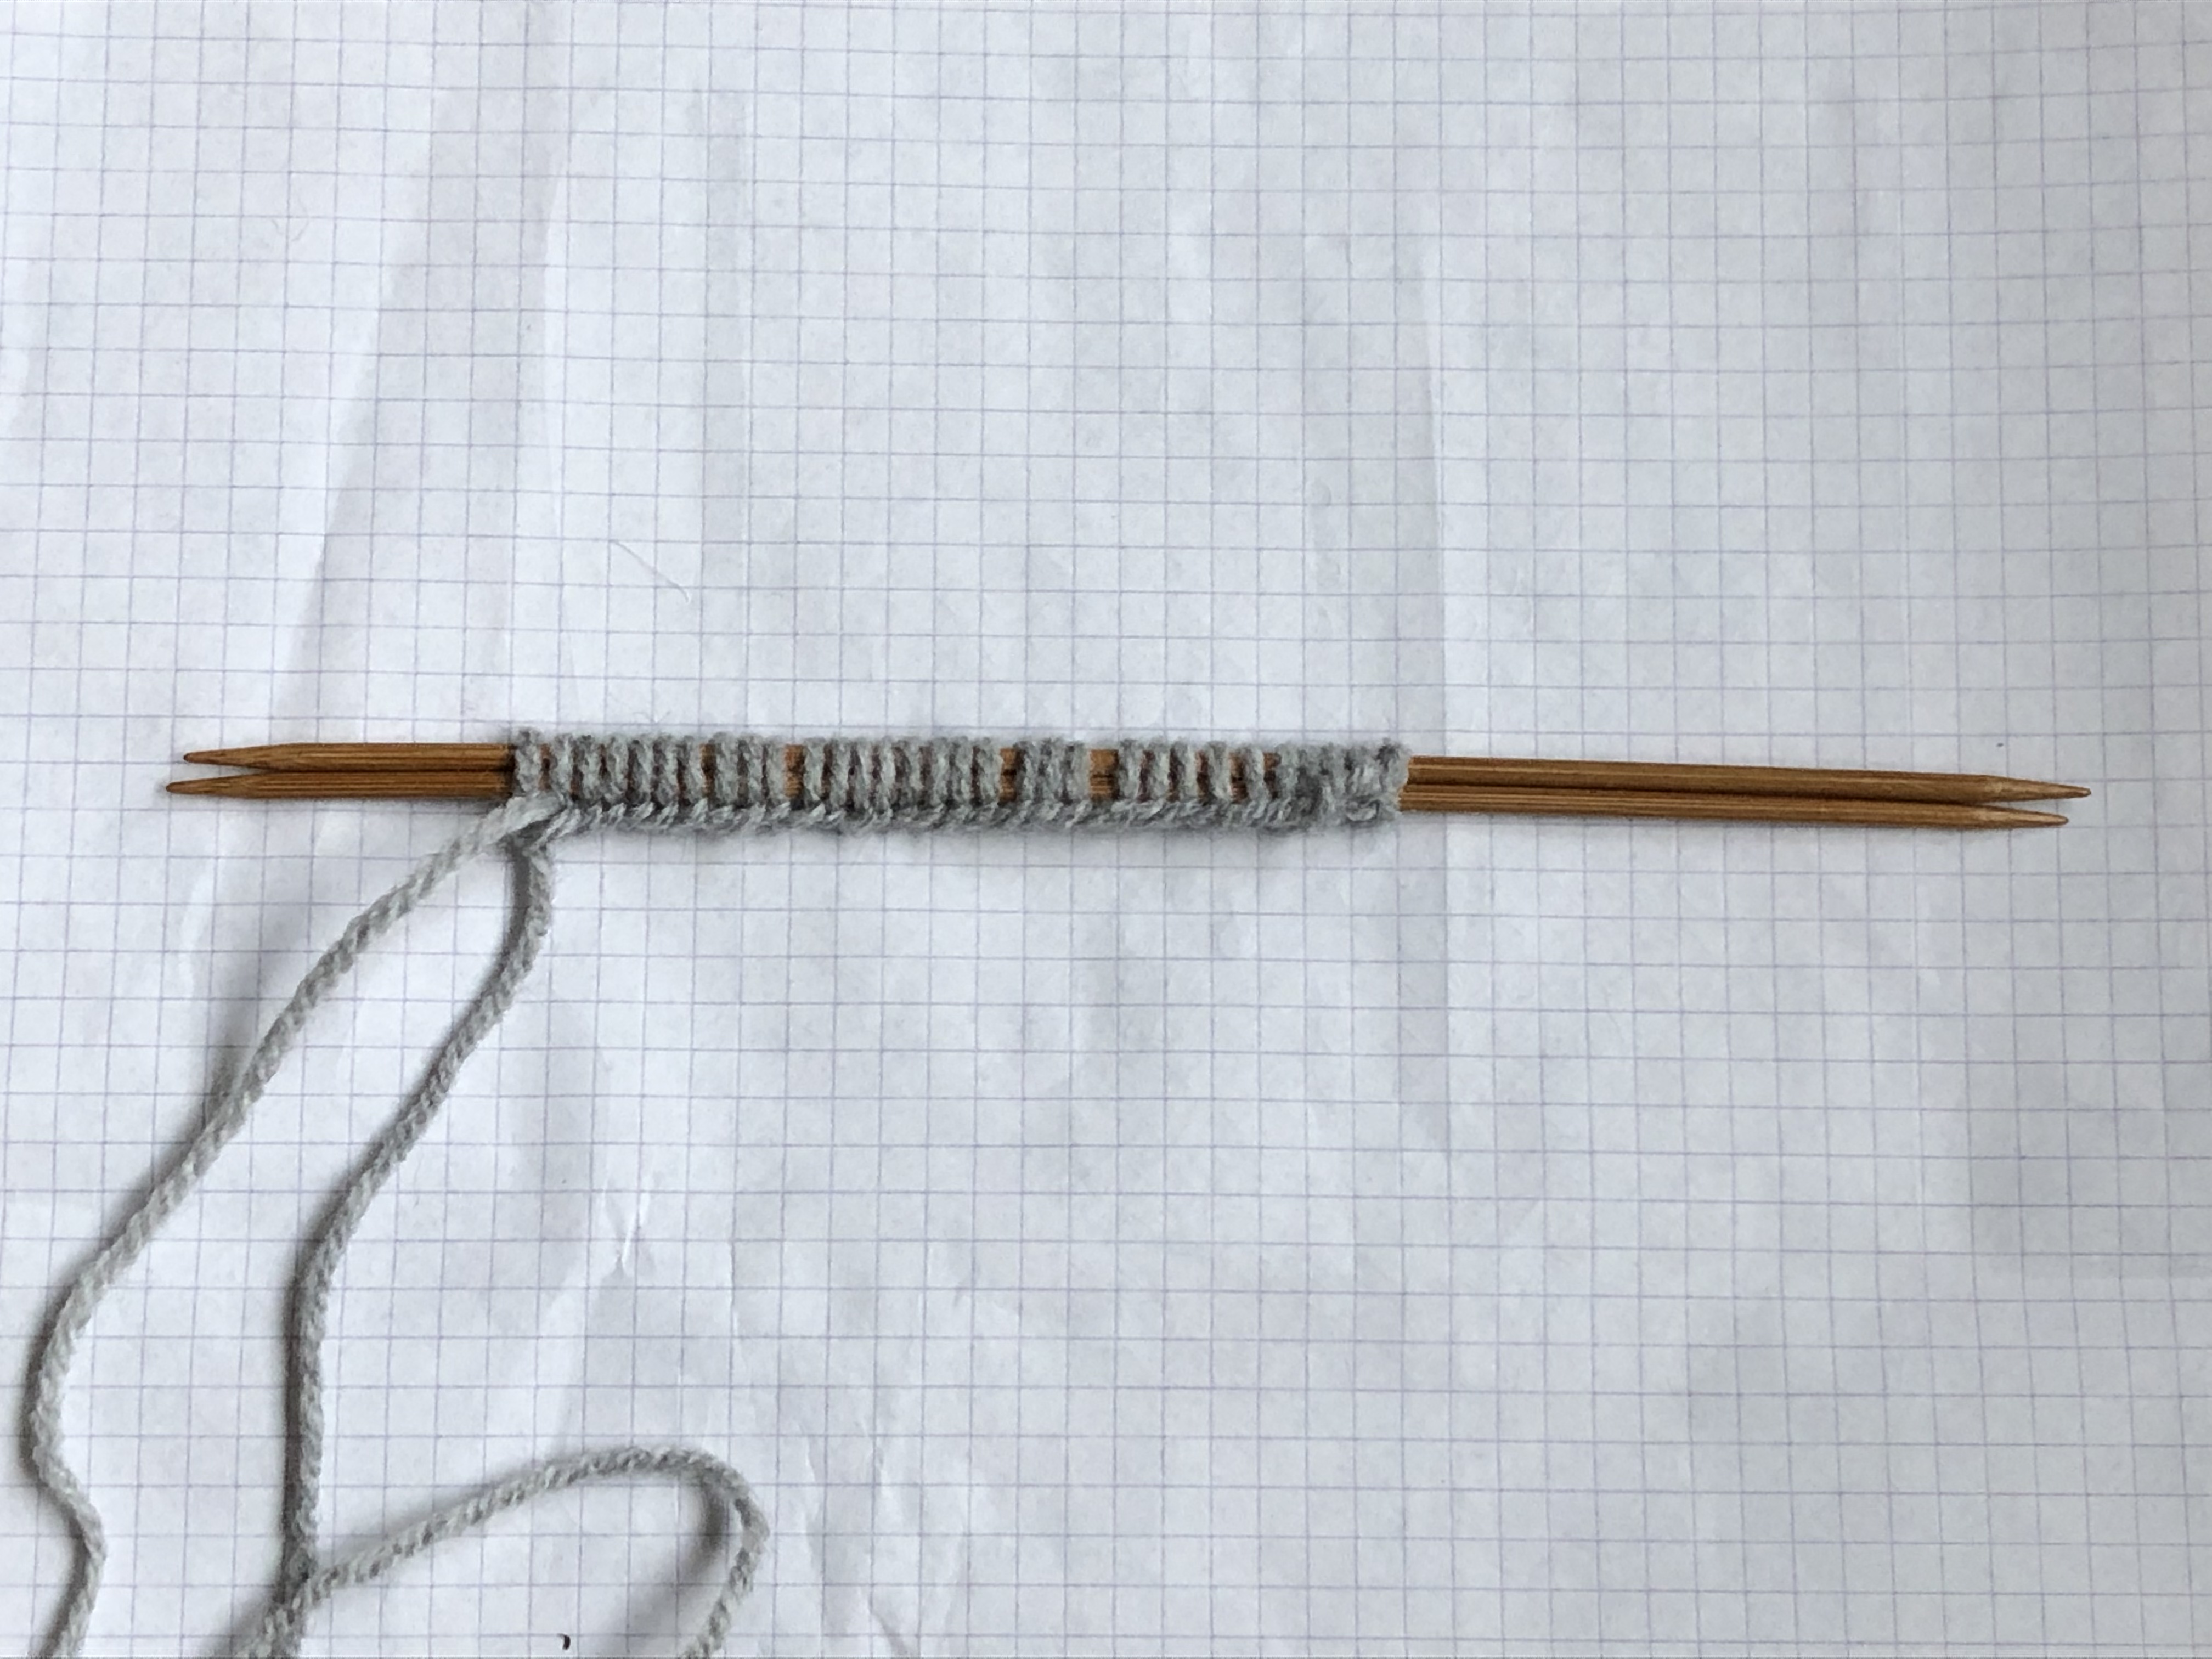
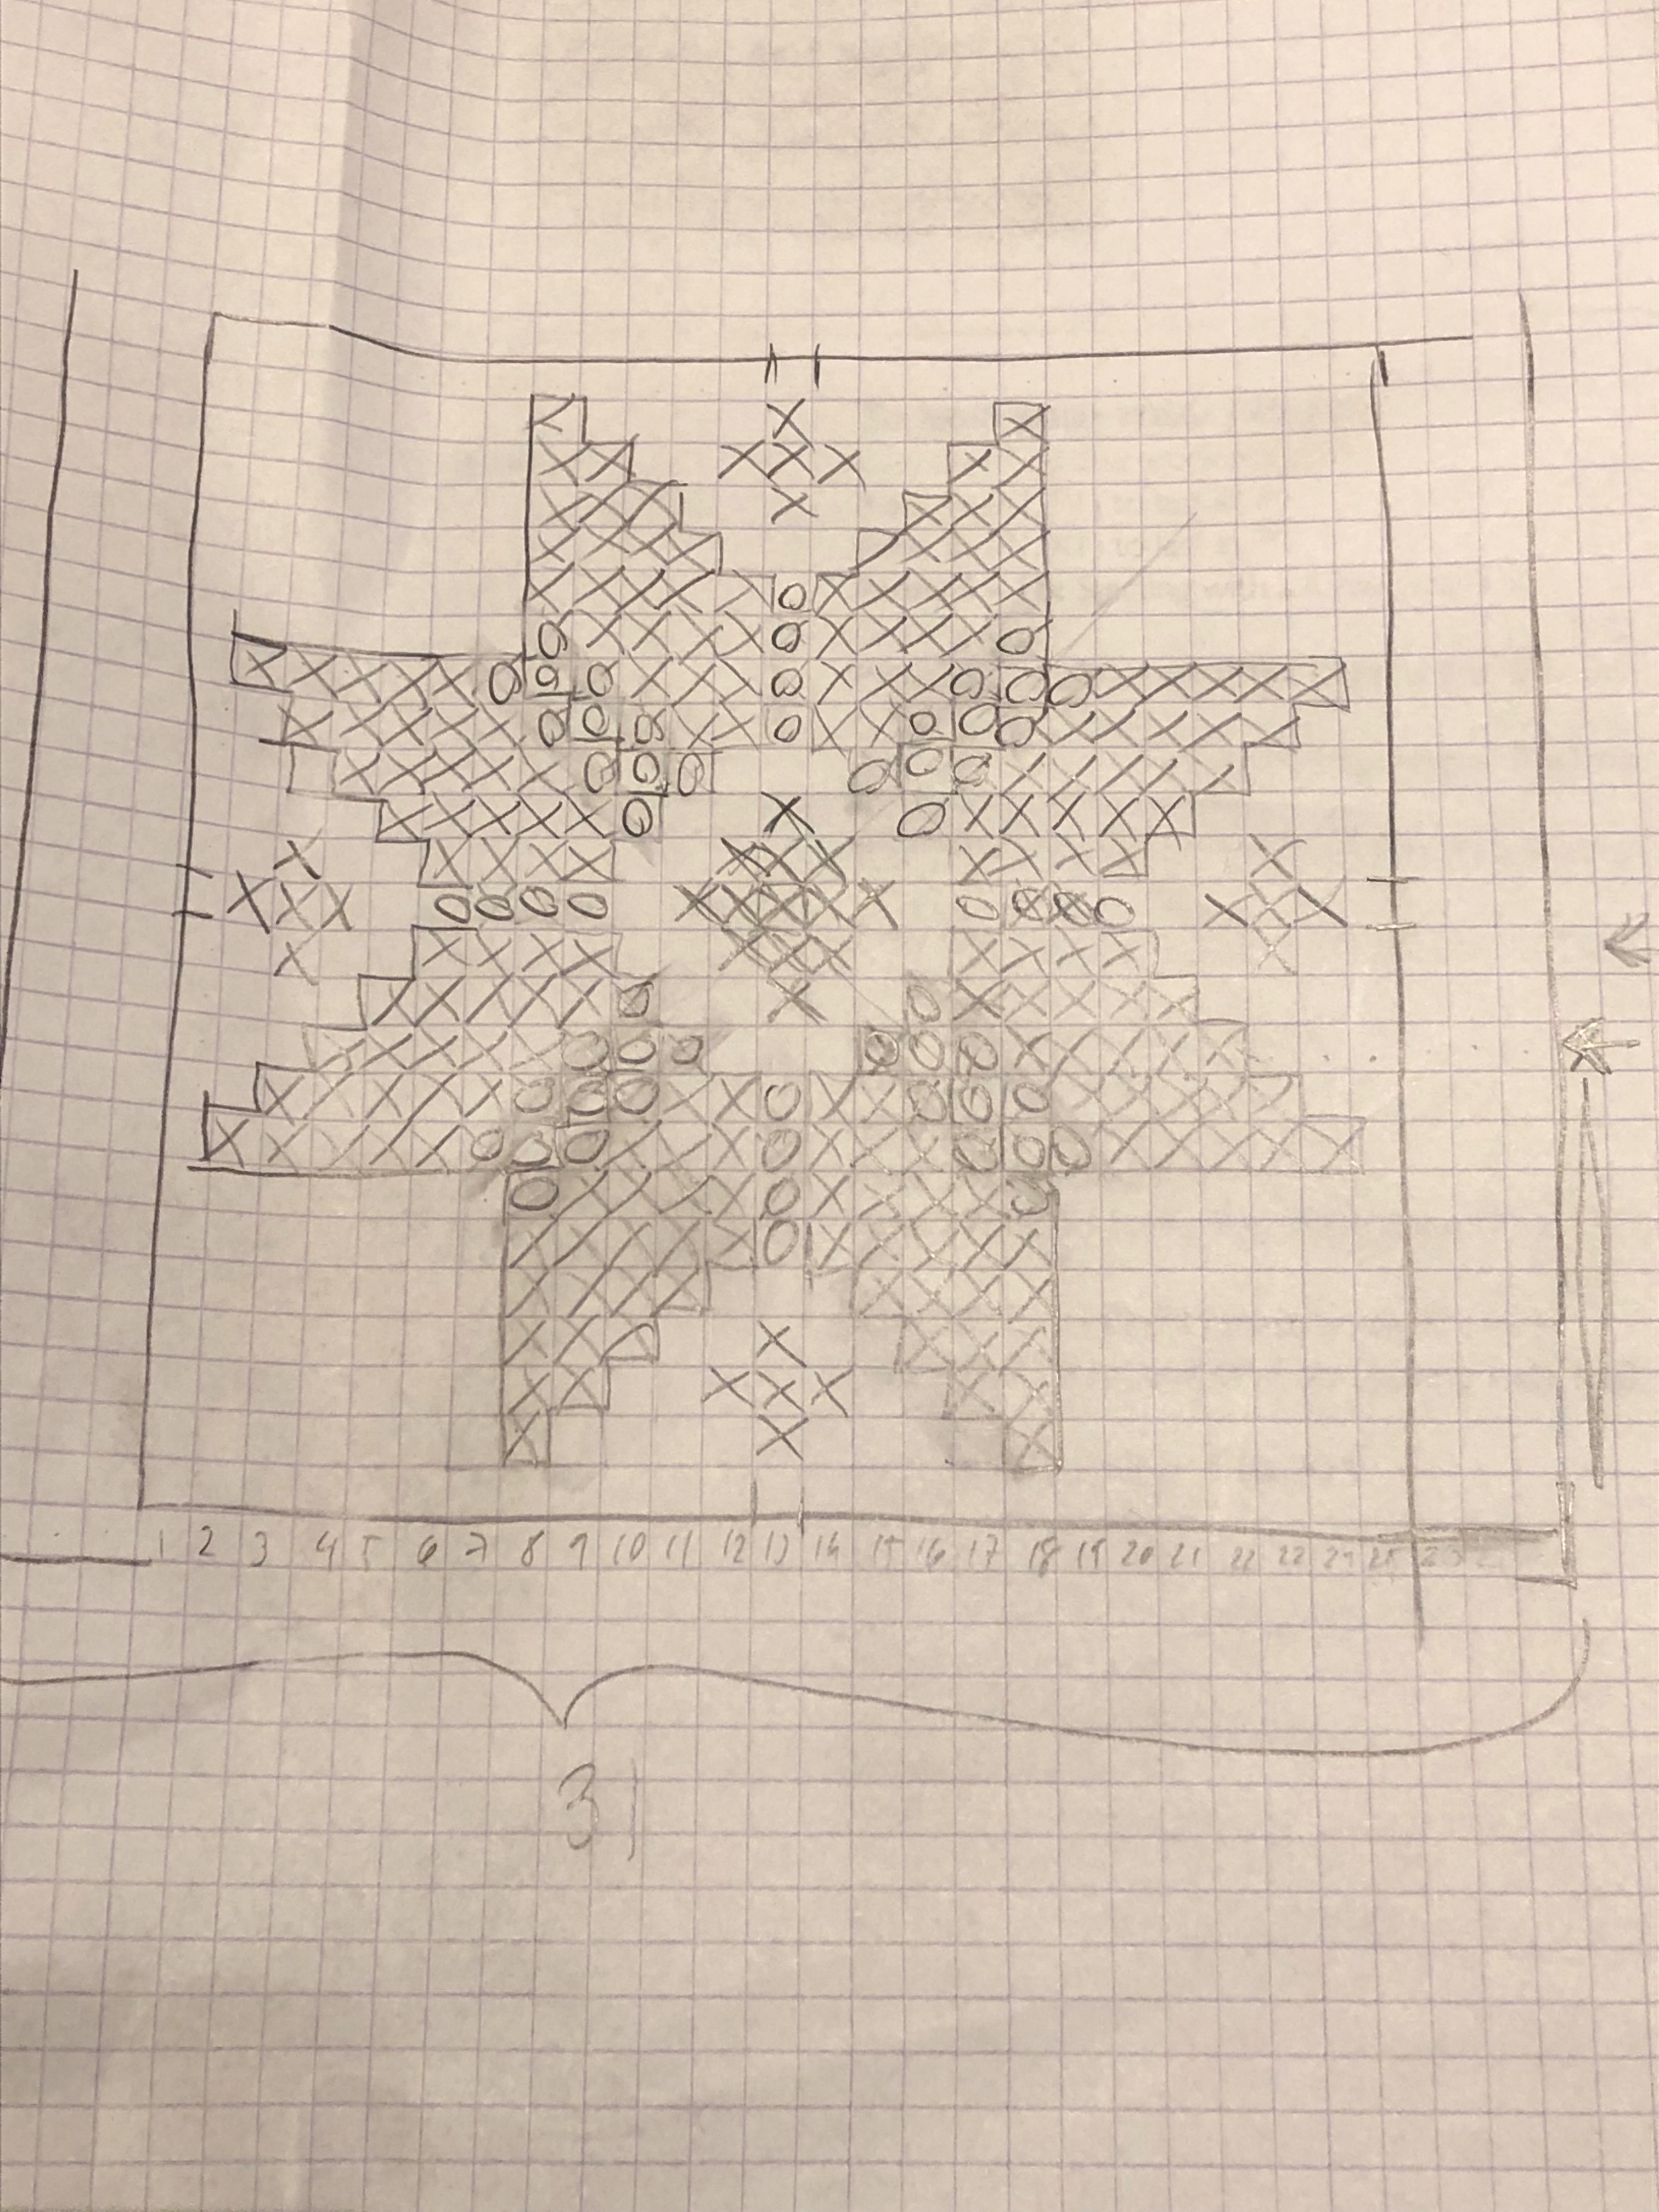
Knit a sweater by following the pattern from Save the Children.
(I knitted it bigger with 31 stitches instead of 17 and made the arms and sweater longer.)
Connecting the Mainboard With the Computer
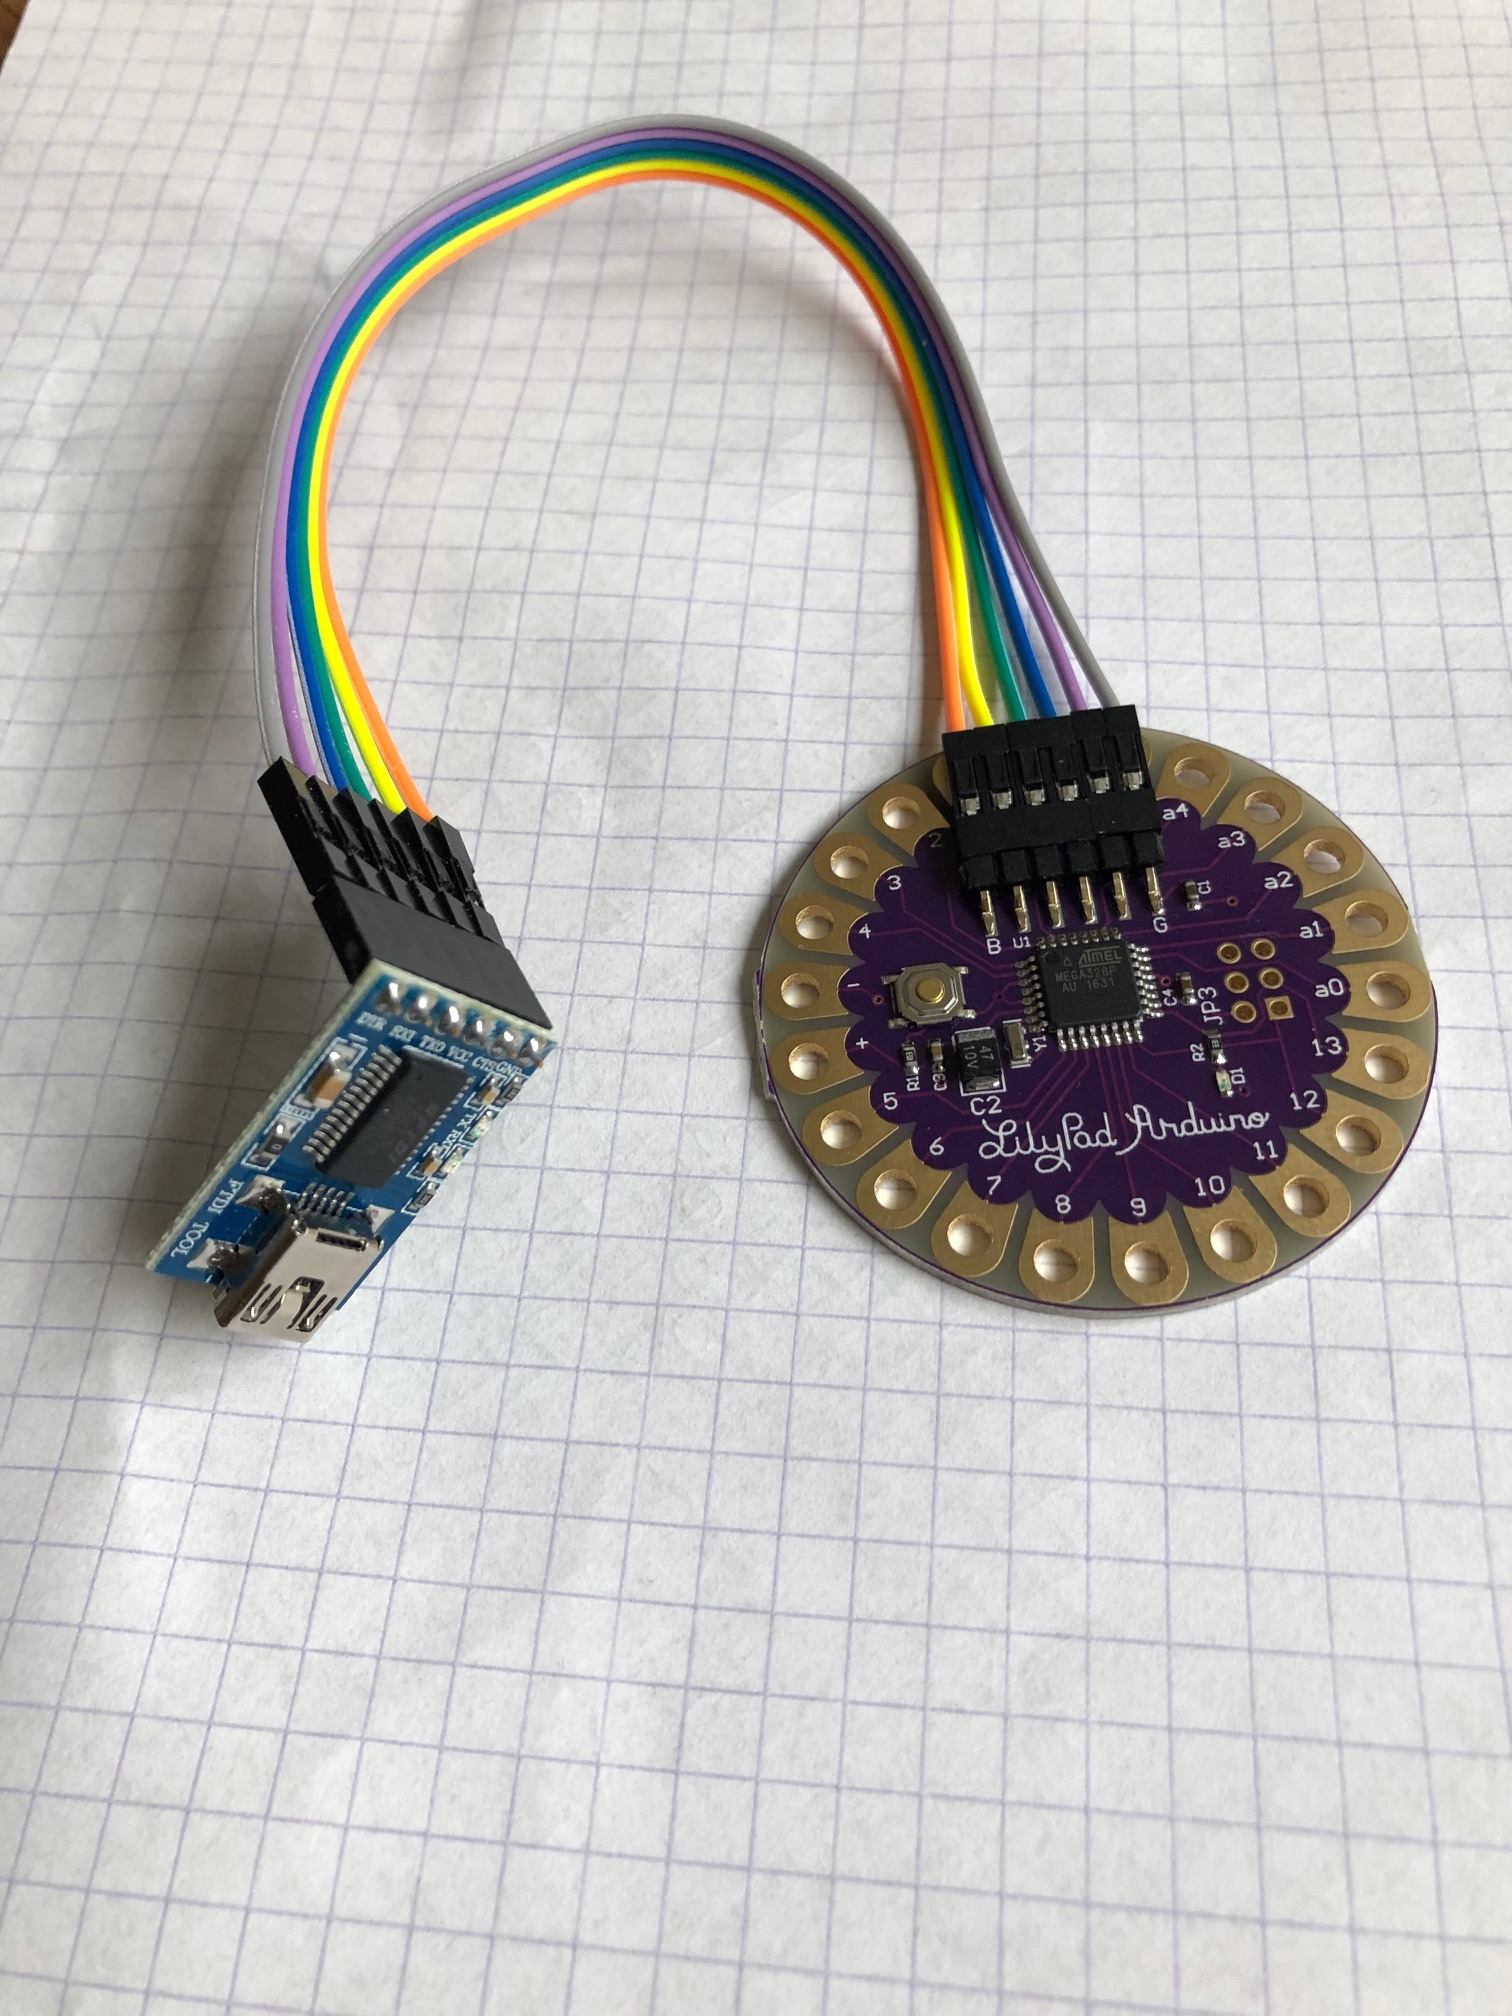
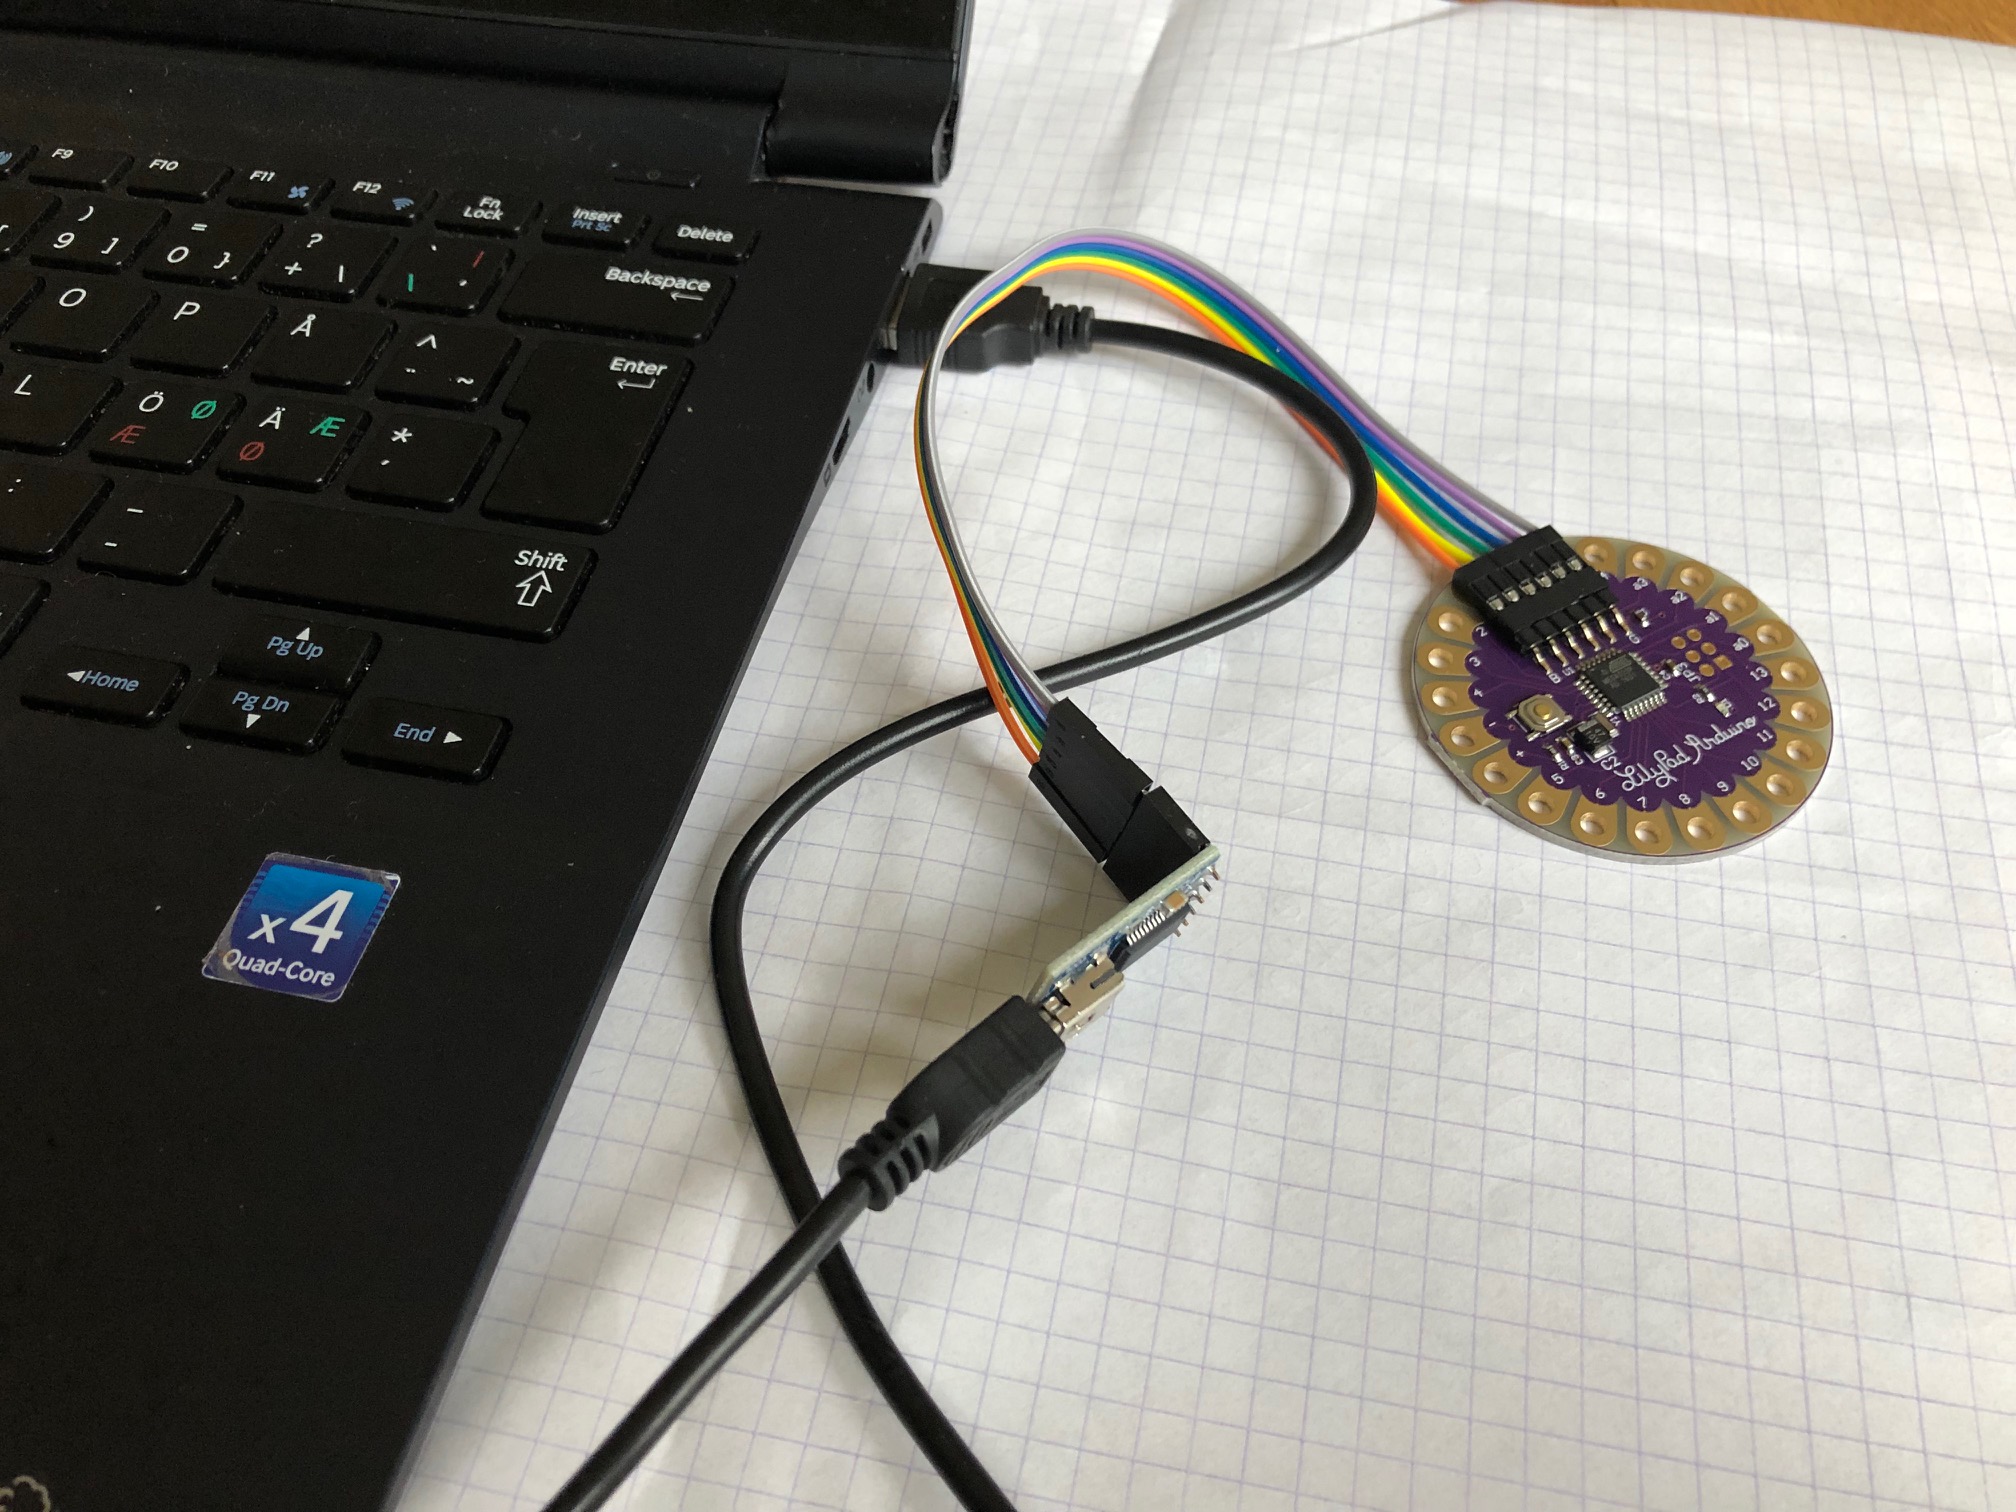

- Connect the FTDI to the Lilypad Mainboard with the cables lines. See instructions on Thngs
- Put the USB in the computer and the mini USB in to the FTDI
- Connect the Tri-color LED with the Lilypad Mainboard using the alligator clip. + to +, green pin to port 9, blue pin to port 10, red pin to port 11
With the alligator clip you can try the code before sewing the led into your project.
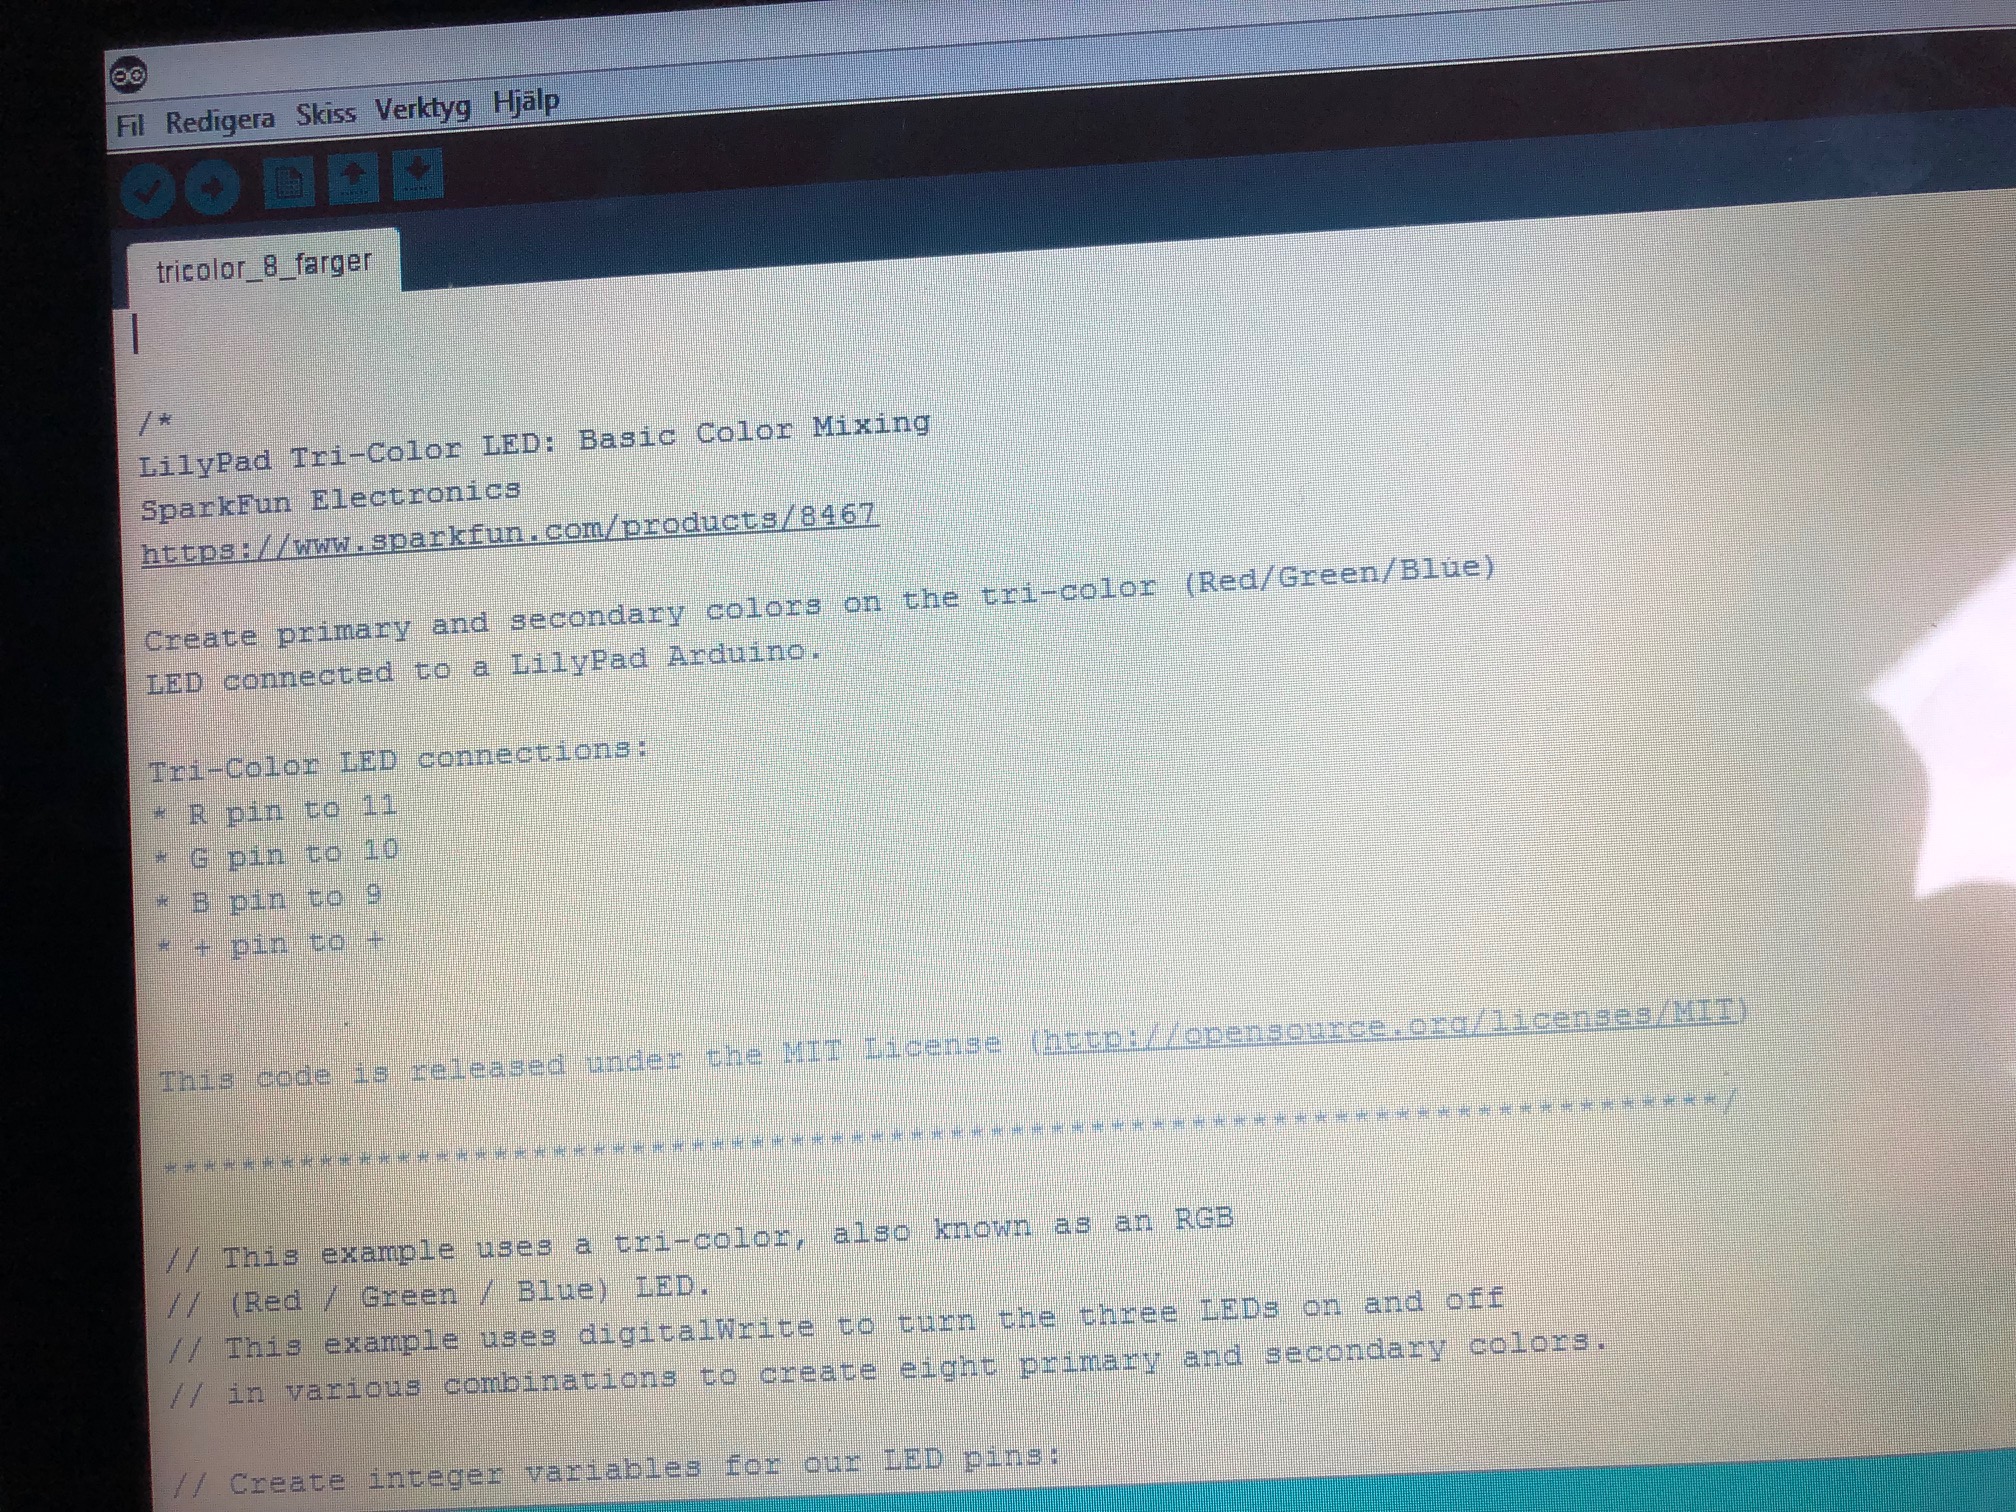
Code With Arduino
.jpg)
- Open Arduino or download it for free here
- Copy the code from Sparkfun and paste in into a new sketch in Arduino
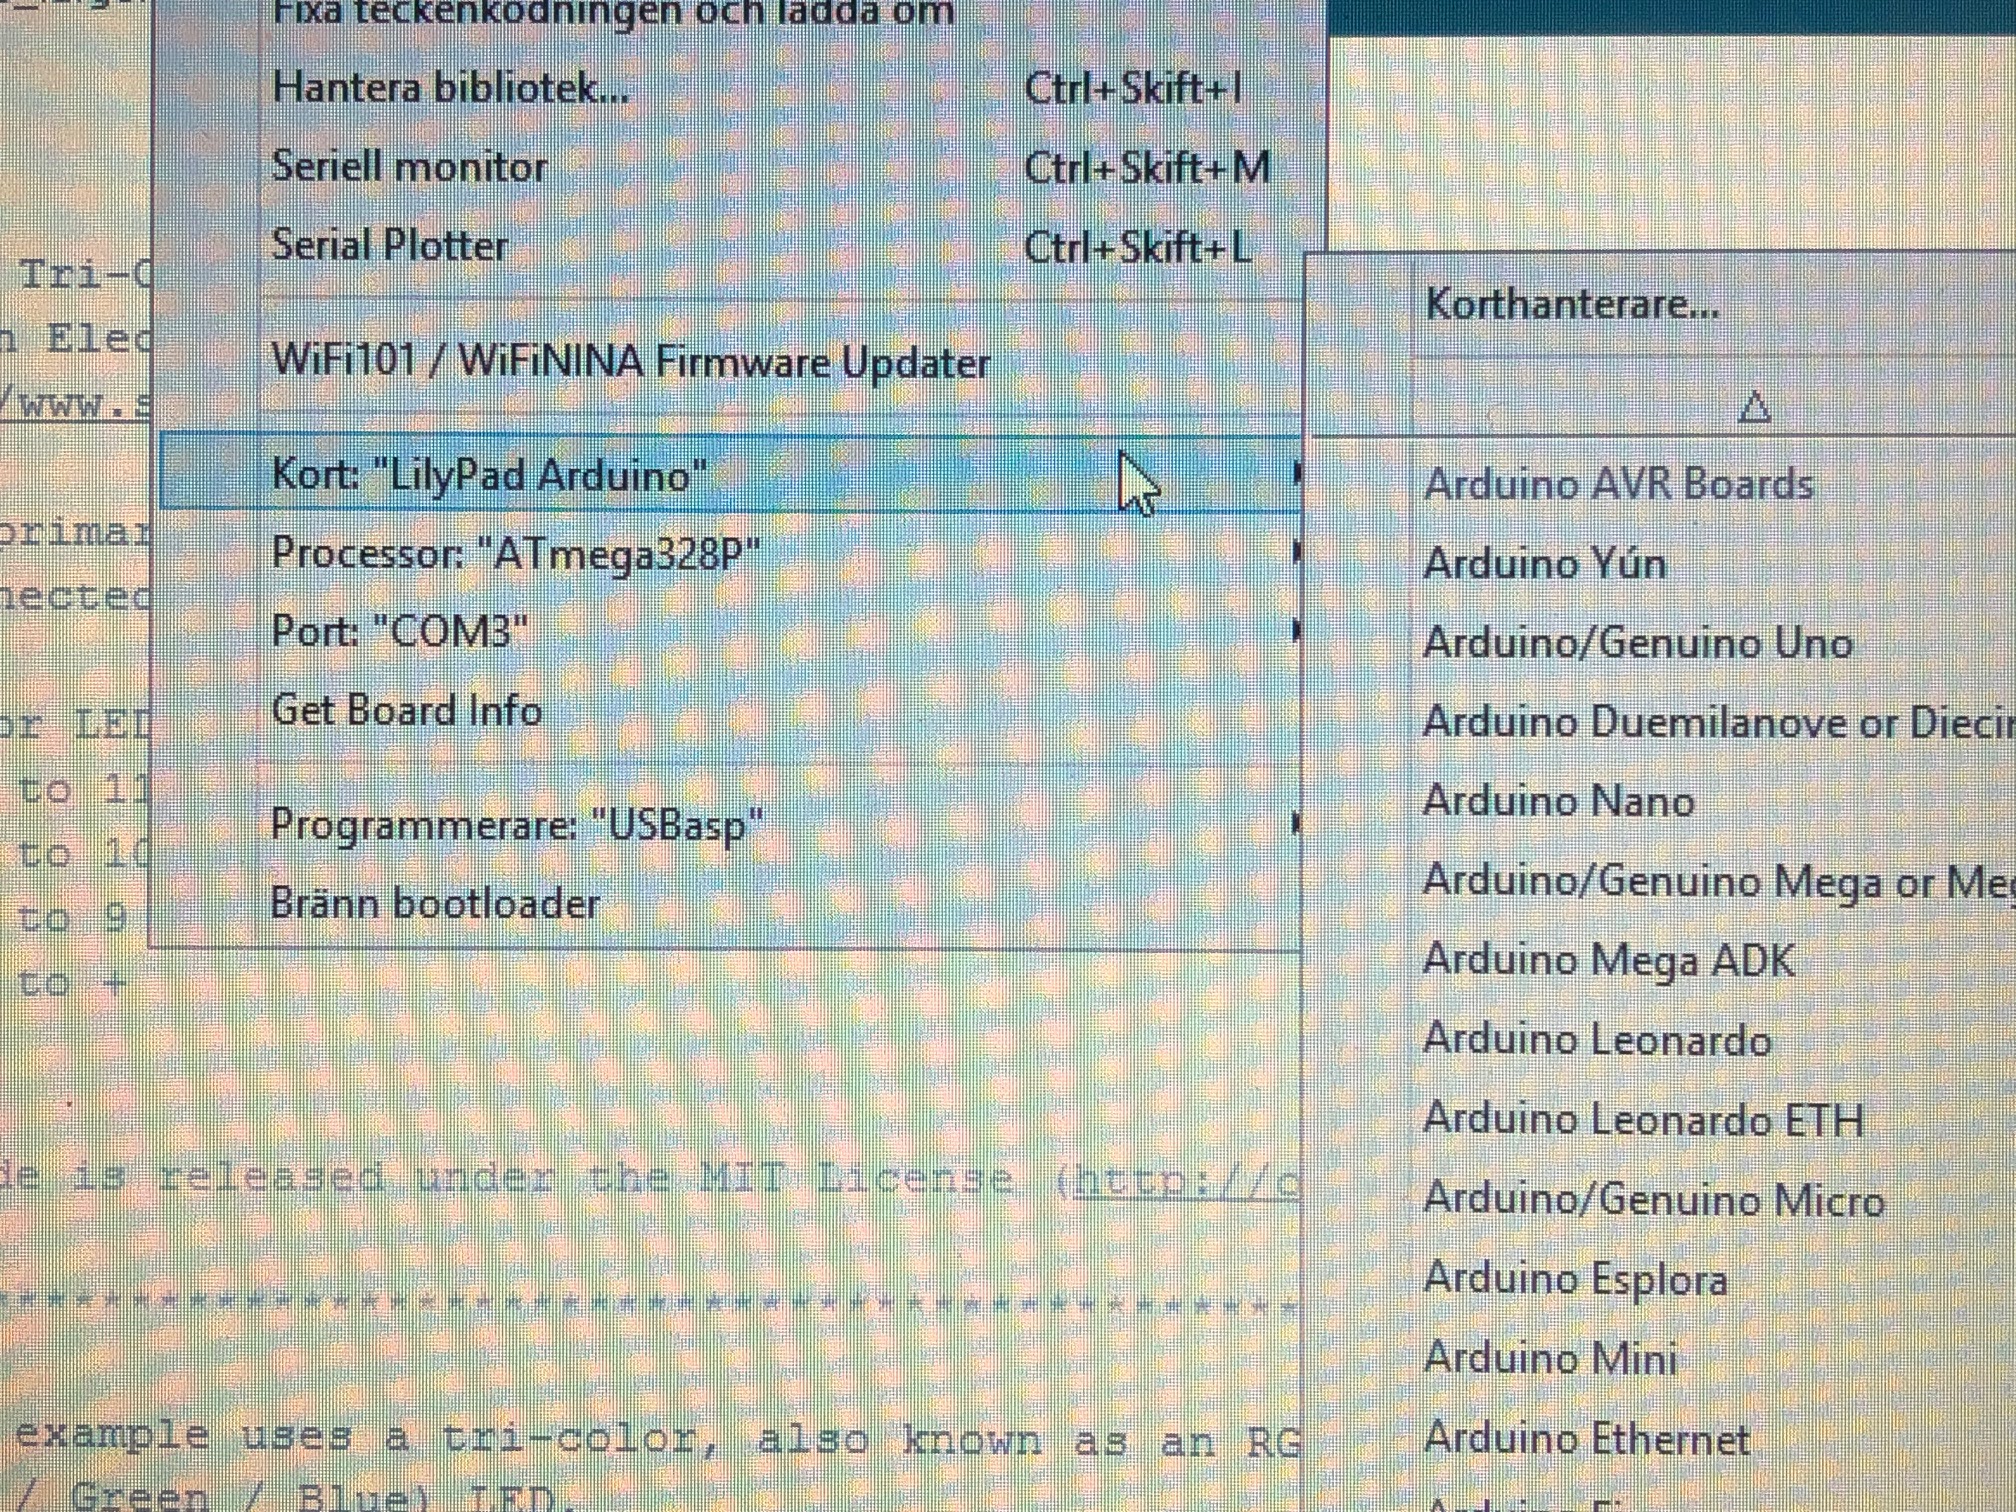
- Select Board type: Tool->Board->LilyPad Arduino
- Select Processor: Tool->Processor->ATmega328
- Select correct Serial port: Tool -> Serial Port-> COM+the number that you're using
- Select Programmer: Tool->Programmer->USBasp
- Click on Upload
Sew the Components Into the Sweater
- Turn the sweater inside out
- Follow the instructions in the pictures
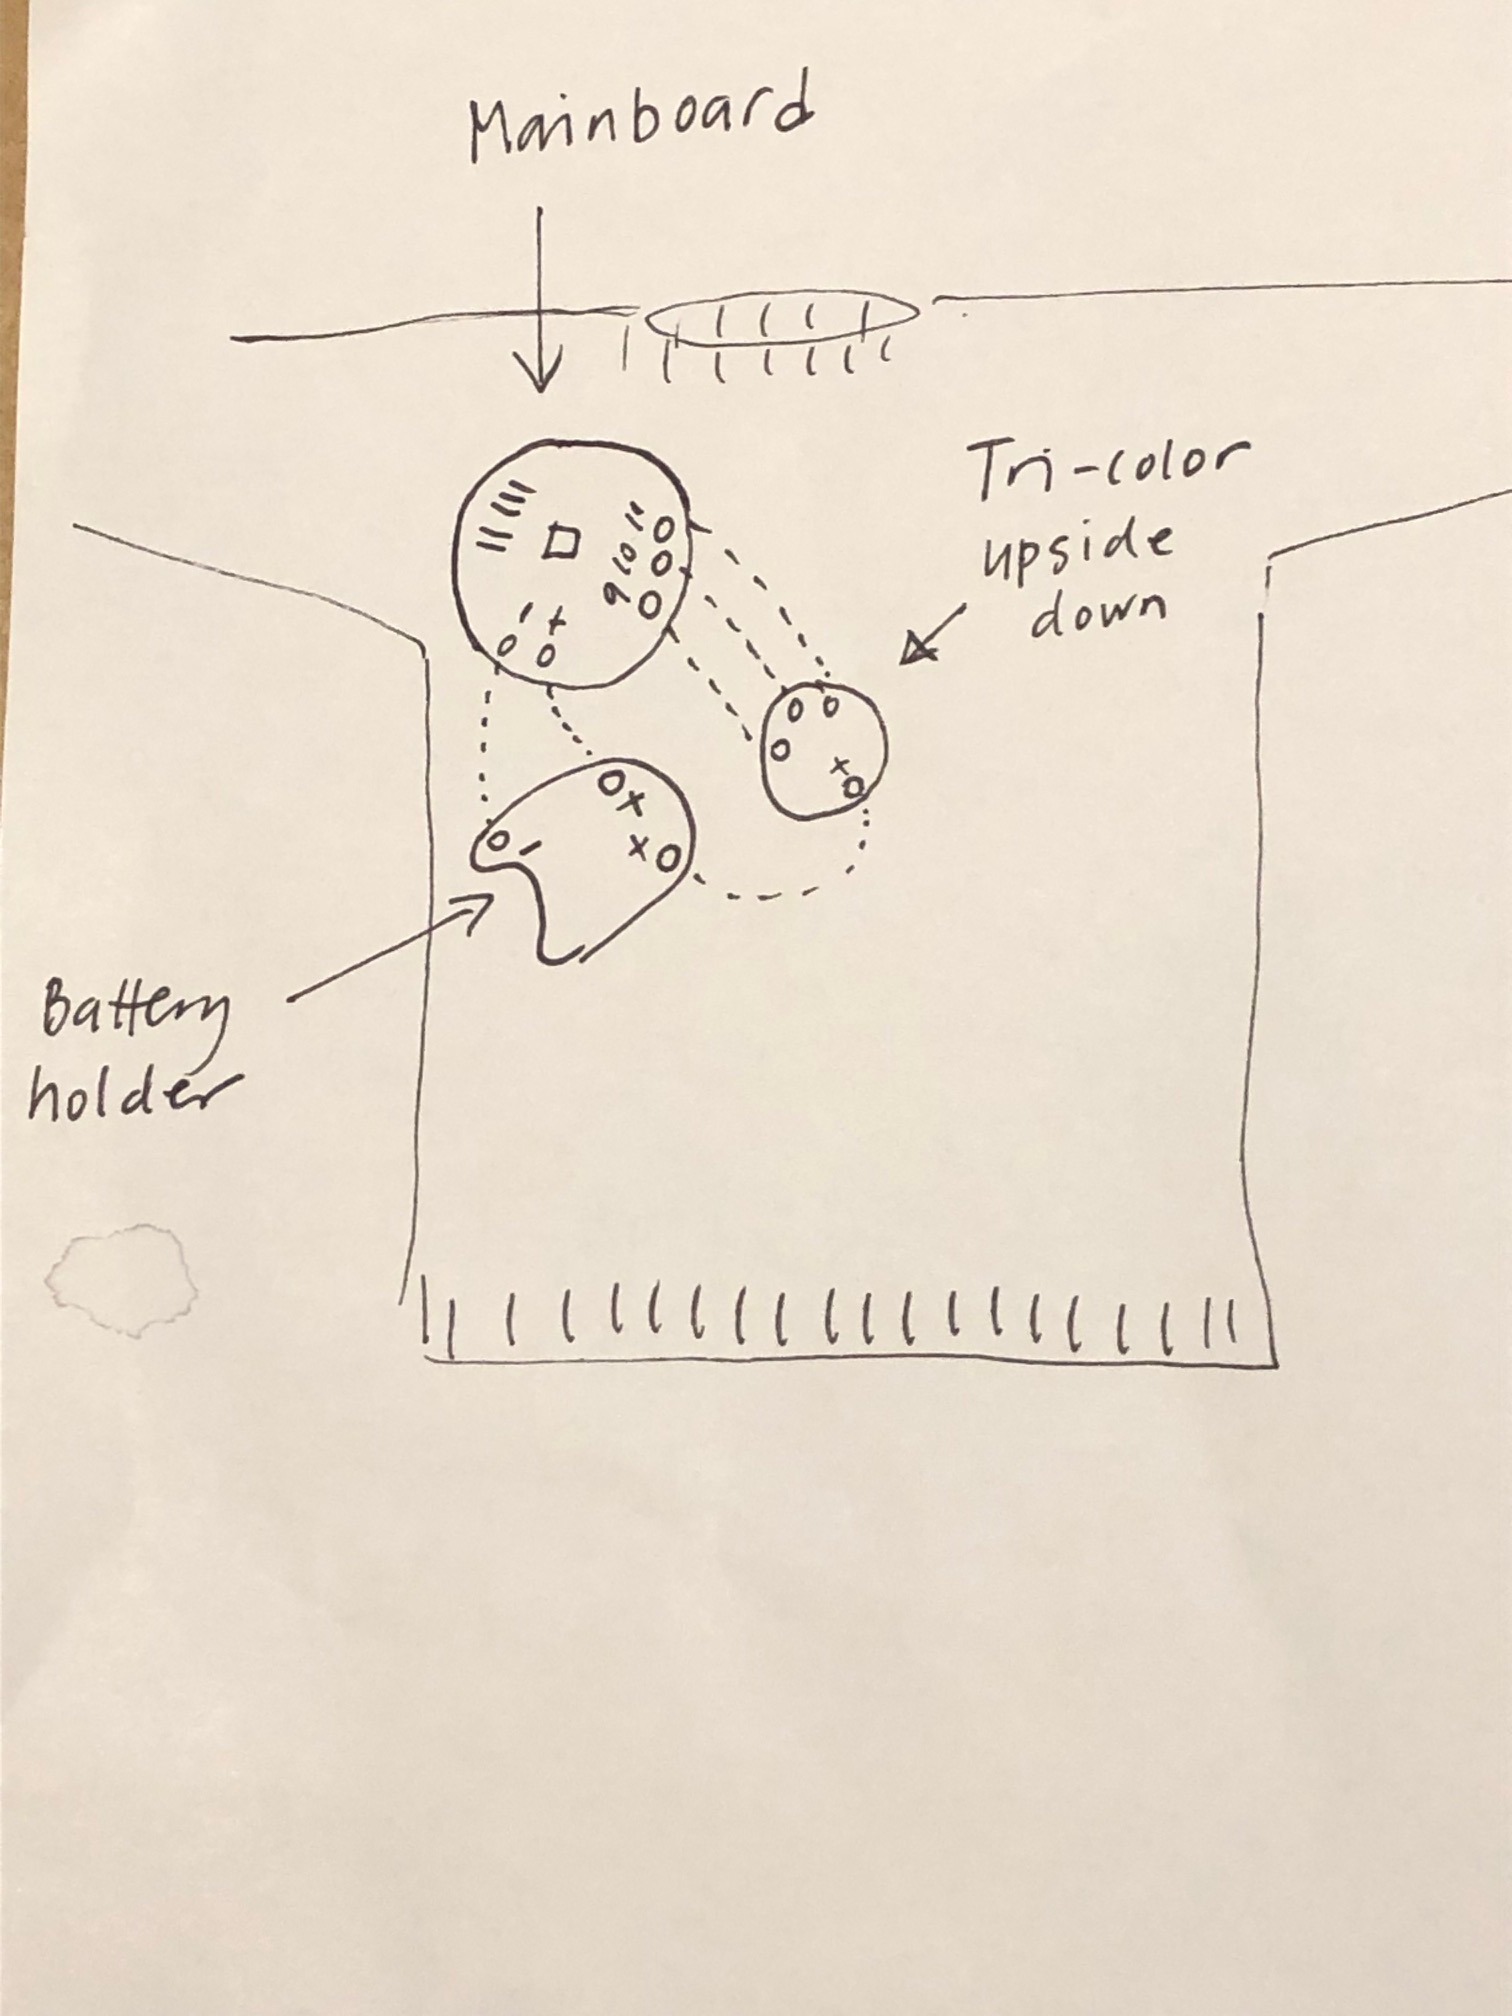
- Start with the Tri-Color LED and put it upside down in the middle of the star.
- Cut a peace of the conductive thread and attach the plus on the Tri-Color LED with at least four stitches, close to the pin and sew to the plus on the battery holder.
- Connect plus on the Tri-Color to the plus on Lilypad Mainboard
- Continuing sewing everything together with no lines crossed, otherwise the circuit wont work.
Sewing advice
- Make sure you have shorted the threads so the circuit will work
- Use nail polish at the ends of the conductive thread
- I used stem stitch but you can use any stitches as long as it's a good connection
- Make sure the thread have a good contact with the pins. Sew a lot of stitches around the pin.
- No lines must be crossed