Fixing Cracked Glass on IPhone 3g/s
by Estallbaum in Circuits > Apple
50556 Views, 82 Favorites, 0 Comments
Fixing Cracked Glass on IPhone 3g/s
.JPG)
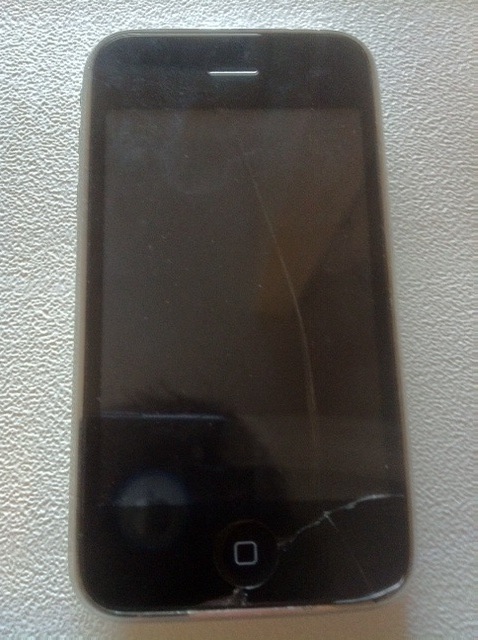
If you have ever experienced the pain and despair of picking your once shiny iPhone off the ground to find a disgusting fissure across the screen? Don't panic, if you are reading this, you have probably already been turned away by your local Apple store. With the replacement part, a steady hand, and little bit of luck, your phone can be as good as new! I would rate this process as moderately easy, assuming you have some basic tinkering experience or technical knowledge. I accept no responsibility for the damage you may or may not inflict on your iPhone while performing this tutorial. I highly recommend that anyone attempting this process, carefully read through my entire tutorial before proceeding at their own risk.
NOTE: This tutorial is done with an iPhone 3gs but the process is EXACTLY the same for the 3g, a specific replacement digitizer is required for the 3g however.
NOTE: This tutorial is done with an iPhone 3gs but the process is EXACTLY the same for the 3g, a specific replacement digitizer is required for the 3g however.
Materials and Tools Needed
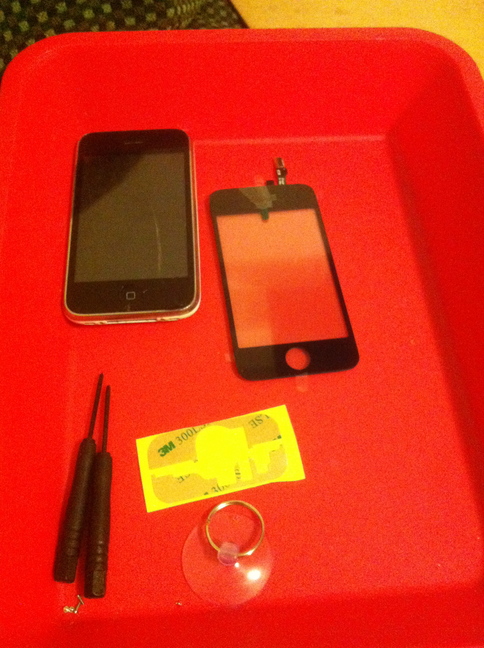
Materials
1. Replacement Digitizer for Iphone 3g(s)
2. Iphone with damaged digitizer(glass)
3. Phillips Head screwdriver size #00
4. Jeweler size flathead screwdriver
5. Suction Cup
6. Hairdryer (not pictured)
7. 3m double sided sticky tape
1. Replacement Digitizer for Iphone 3g(s)
2. Iphone with damaged digitizer(glass)
3. Phillips Head screwdriver size #00
4. Jeweler size flathead screwdriver
5. Suction Cup
6. Hairdryer (not pictured)
7. 3m double sided sticky tape
Disassembly
.JPG)
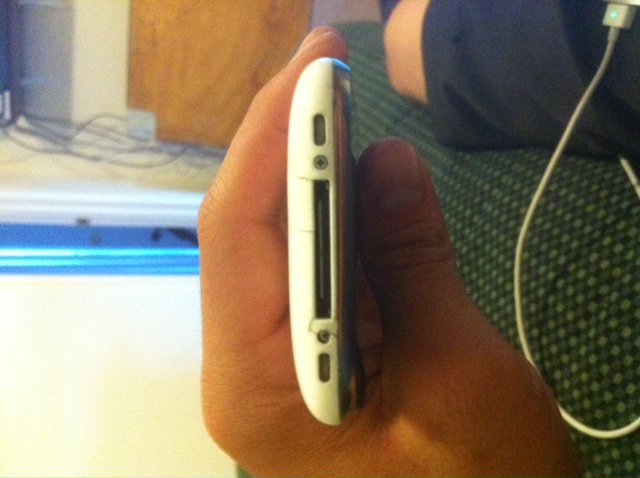
Using the Phillips head screwdriver, remove the two little screws that are on the bottom of the phone under the home button; be careful not to lose them.
Separating Screen From Bottom Case
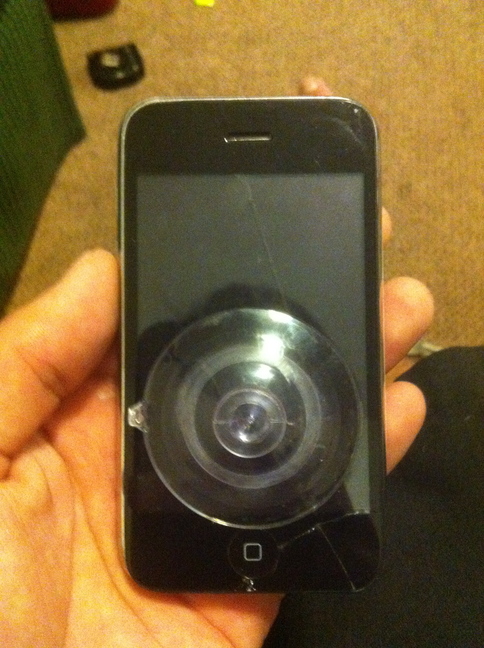
Secure the suction cup to the bottom half of the screen and gently pull up to separate the touch screen assembly from the body of the phone. Be careful not pull on the ribbon cables that connect the two pieces of the phone under the the ear piece.
Disconnecting LCD
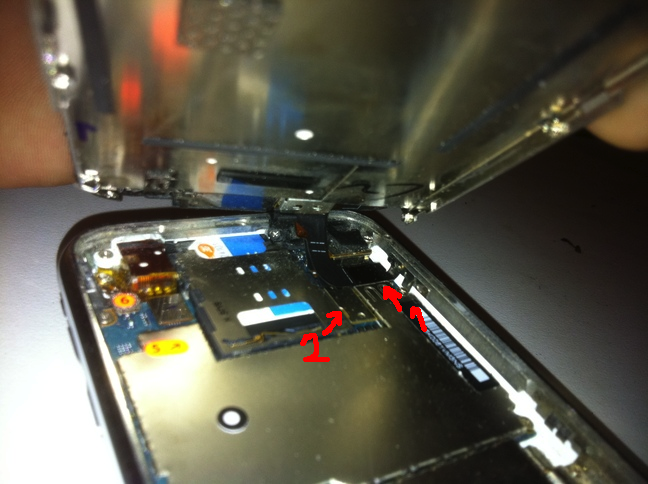
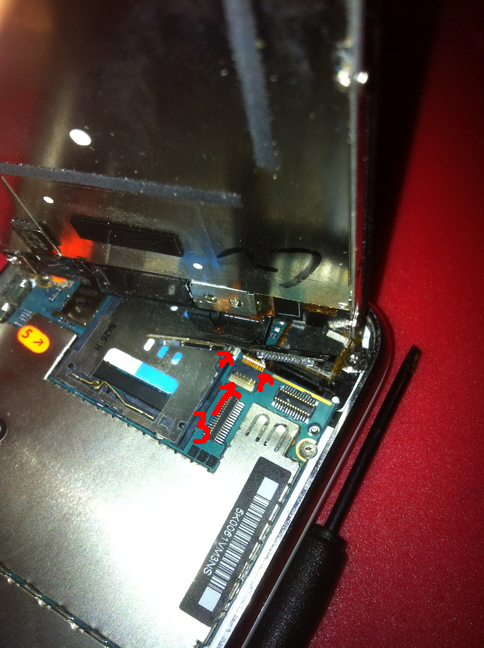
Disconnect the series of ribbon cables in the order shown by gently prying up the connectors with the flathead screwdriver. The 3rd cable has a different type of connector that you slide horizontally out of its slot. Sometimes the 3rd cable disconnects itself so don't worry if you think you pulled too hard on it.
Removing LCD
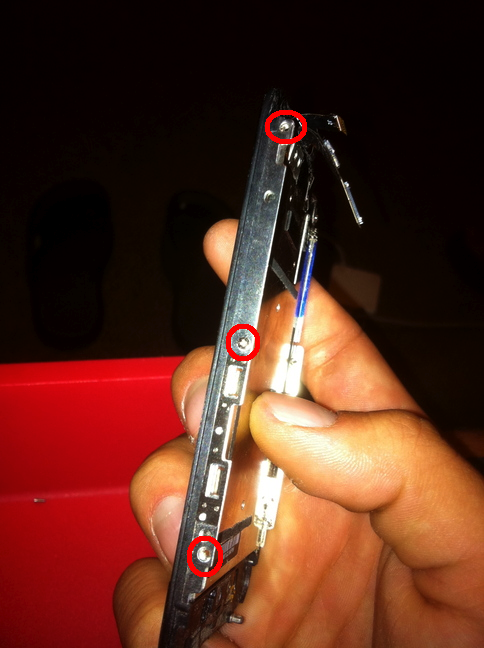
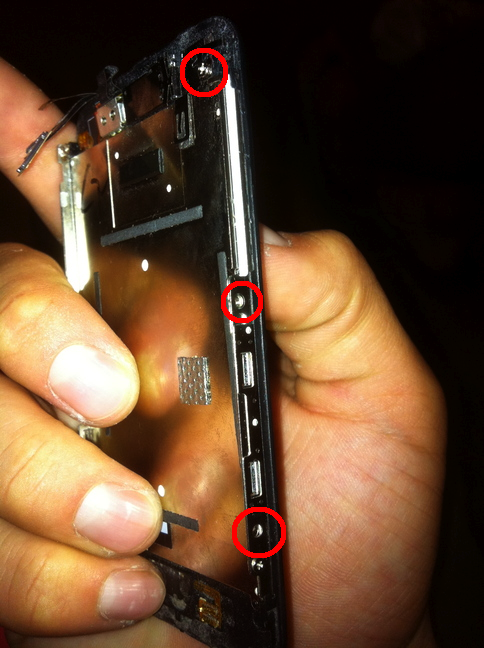
Remove the 6 screws that hold the LCD to the digitizer. There are 3 on the left, 2 on the right and 1 on the back near the top.
Removing LCD Contd.

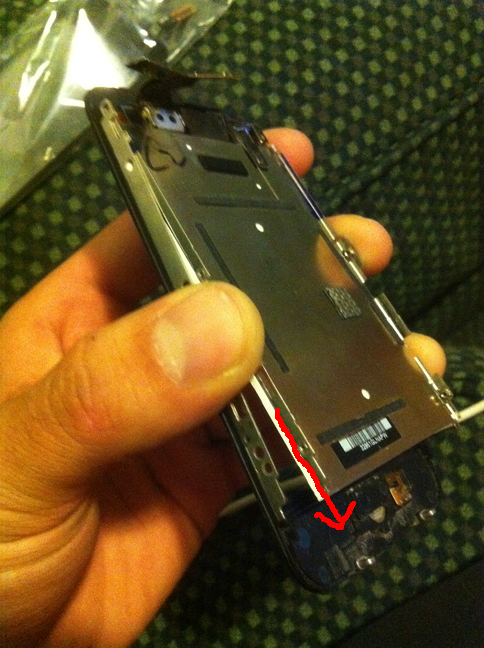
Ok folks, this step is tricky. Take the flathead screwdriver and gently insert it between the two metal frame pieces as seen in the picture and gently work up the LCD, be careful to not touch the face of the lcd screen with the screwdriver or you will damage your LCD. Try to wedge up the LCD just enough so you can grab the edge of the frame with your fingers. Once you have some separation between the glass and the LCD, gently pull the LCD up and in the direction of the arrows to detach it from the glass.
Removing Glass From LCD Frame
.JPG)
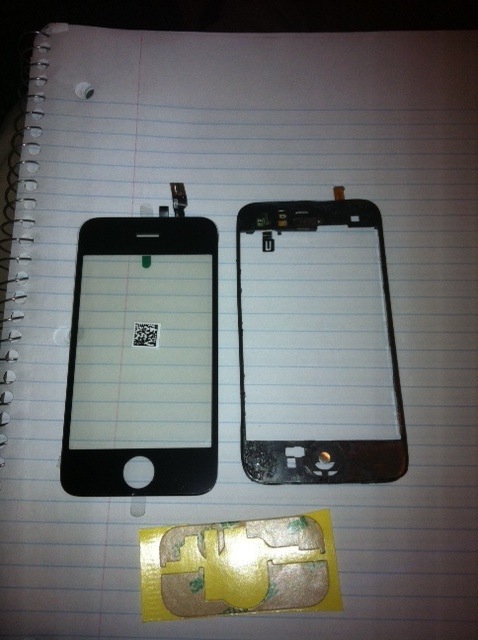
Use the hairdryer and heat up the front of the glass to soften the adhesive that holds the glass digitizer down. There is sticky tape on the top and bottom in the inside, as well as a little on the sides. Basically everywhere on the front that is black. You don't need to keep the hair dryer on the glass for too long, you should still be able to handle the assembly. Starting with the longer sides of the assembly, gently pry the frame from the glass. The flathead screwdriver is great here to get between the glass and the frame and gently pull them away from each other. Peel off residual adhesive from frame assembly and discard your broken digitizer.
Replacing the Digitizer
Apply double sided tape to frame assembly, noting which piece goes on the top and bottom. Smooth out any air bubbles if needed. If your frame is a little bent, don’t be afraid to gently straighten it out. Remove the plastic protective wrap from replacement digitizer and remove the 2nd side of the sticky tape.Make sure the ribbon cables go through the middle of the frame and don't get stuck in the adhesive. Stick the bottom part of the glass where the home button is first, and then move to the top. Don't be afraid to squeeze the spots where you have applied new adhesive to ensure a secure bond.
Reassembly
Replace LCD by sliding the top in first, making sure to mate up the 2 connectors on the top right part of the screen. It can be a little tricky to get the LCD seated right, but enough gentle wiggling should get everything lined up correctly. The LCD is aligned when all 6 screw holes are lined up along the sides. Finally, replace the 6 screws that hold the LCD to the frame. Make sure you used the 6 shortest screws in this step. The two remaining longer screws are put in during the last step.
Reassembly Contd.
.JPG)
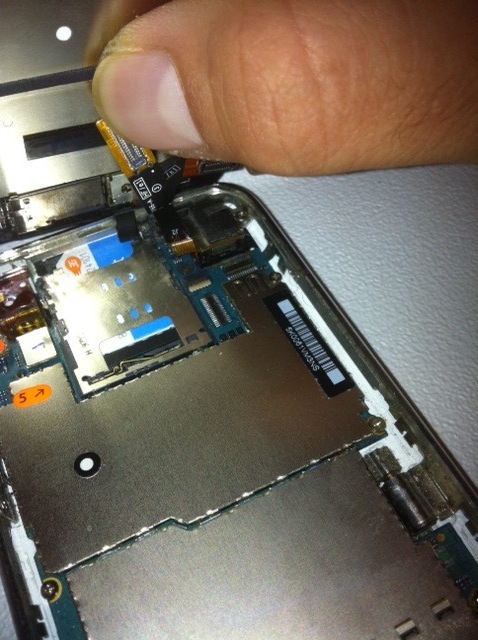
Now we need to reconnect the 3 LCD ribbon cables. Start by bending back the 2 larger connectors and isolating the 3rd and smallest one. It needs to slide back into the top of its port. It can be frustrating to get the ribbon in at first but if you can get the tip in, you can push the rest in using the flathead screwdriver. Carefully attach the remaining 2 connectors that snap downwards with a distinct click.
Finishing Touches
.JPG)
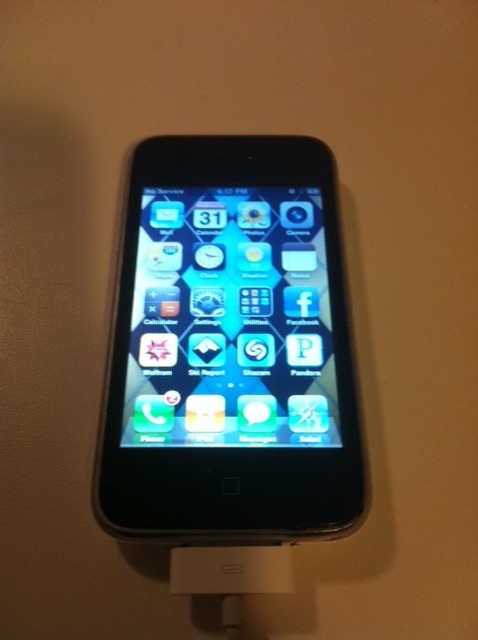
Fit the touchscreen assembly back into the body by matching up the top edge first and pressing the bottom of the screen in until the screen sits flush on all sides. Lastly, replace the 2 screws in the bottom.
Check to make sure your screen functions properly and the speaker and microphone are operational.
Check to make sure your screen functions properly and the speaker and microphone are operational.