Fitbit Raspberry Pi
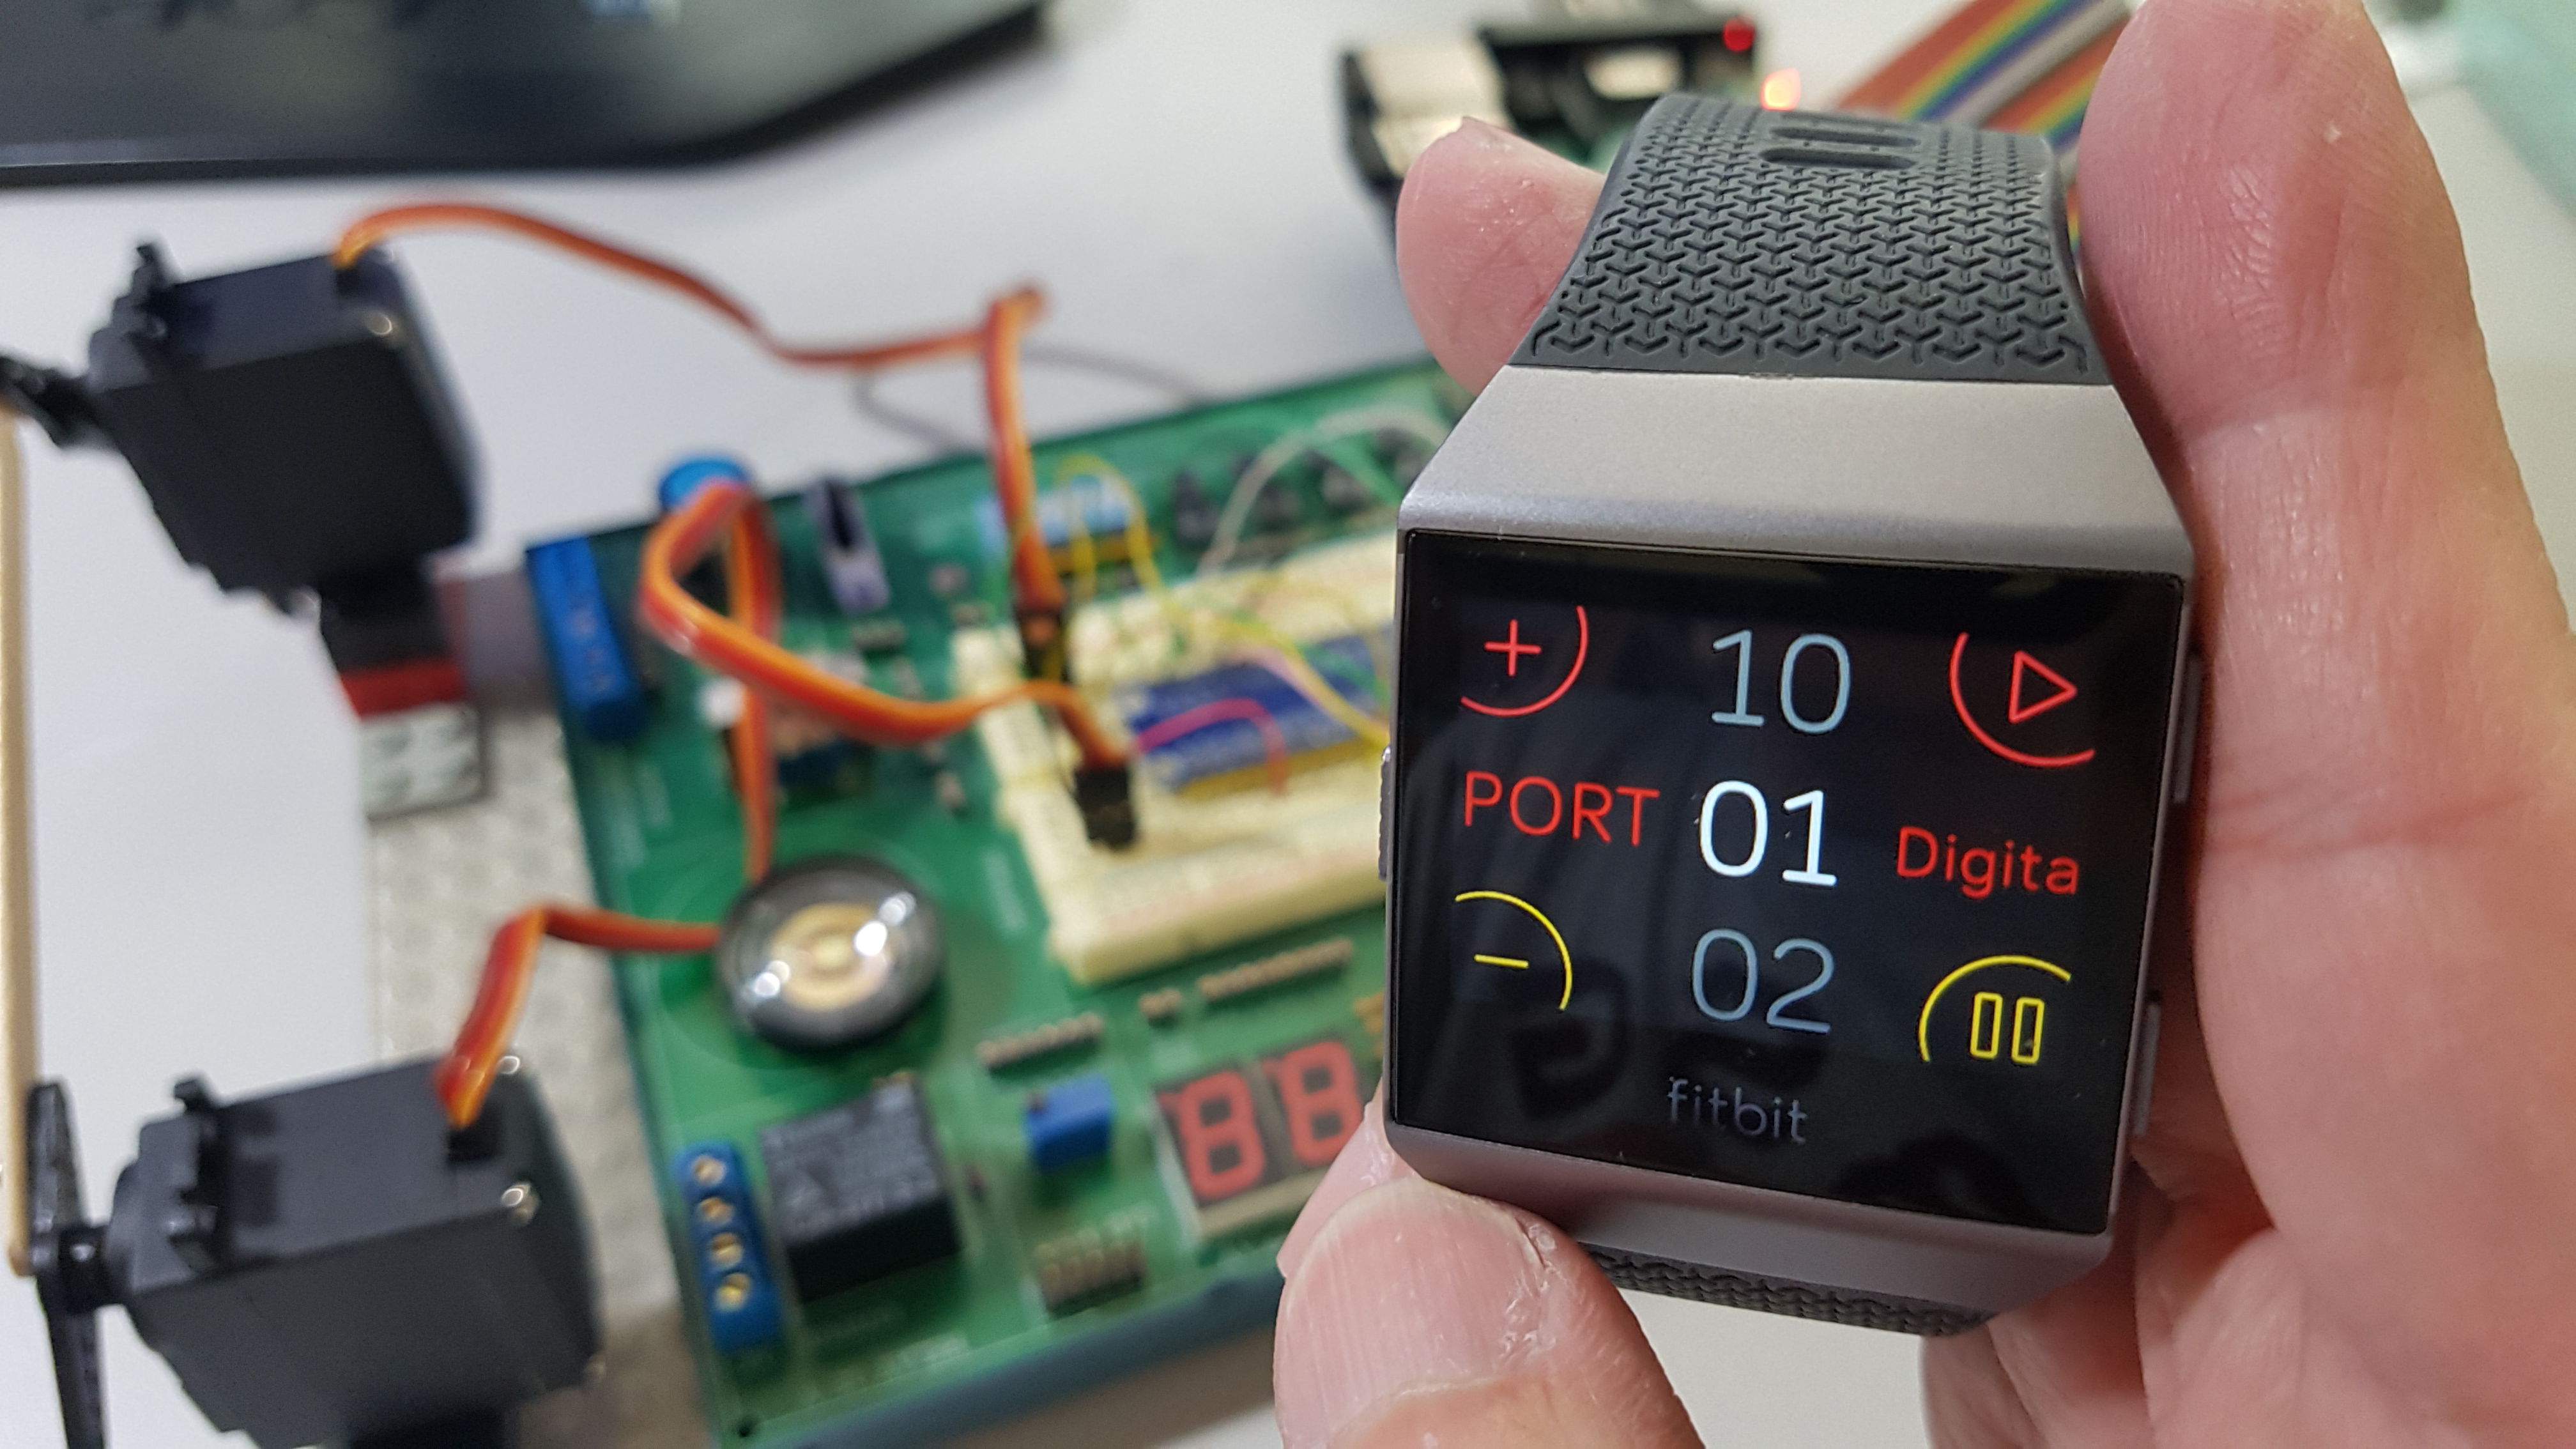
This project shows how to use Fitbit watch to control IO on Raspberry Pi. This project had been developed on Fitbit ionic. But it should work on any Fitbit watch with FItbit OS installed. We can control both digital and analog port by using pigpio and web socket library which running on RPi. This project support 10 IO ports on RPI Port 1-5 are set for Digital port which can only on/off. Port 6 -10 are set for Analog port. Users can send increase or decrease value for Analog port. In this project, we demonstrate analog port by using servo. Please note that analog value will vary depend on analog devices.
Project Prepare
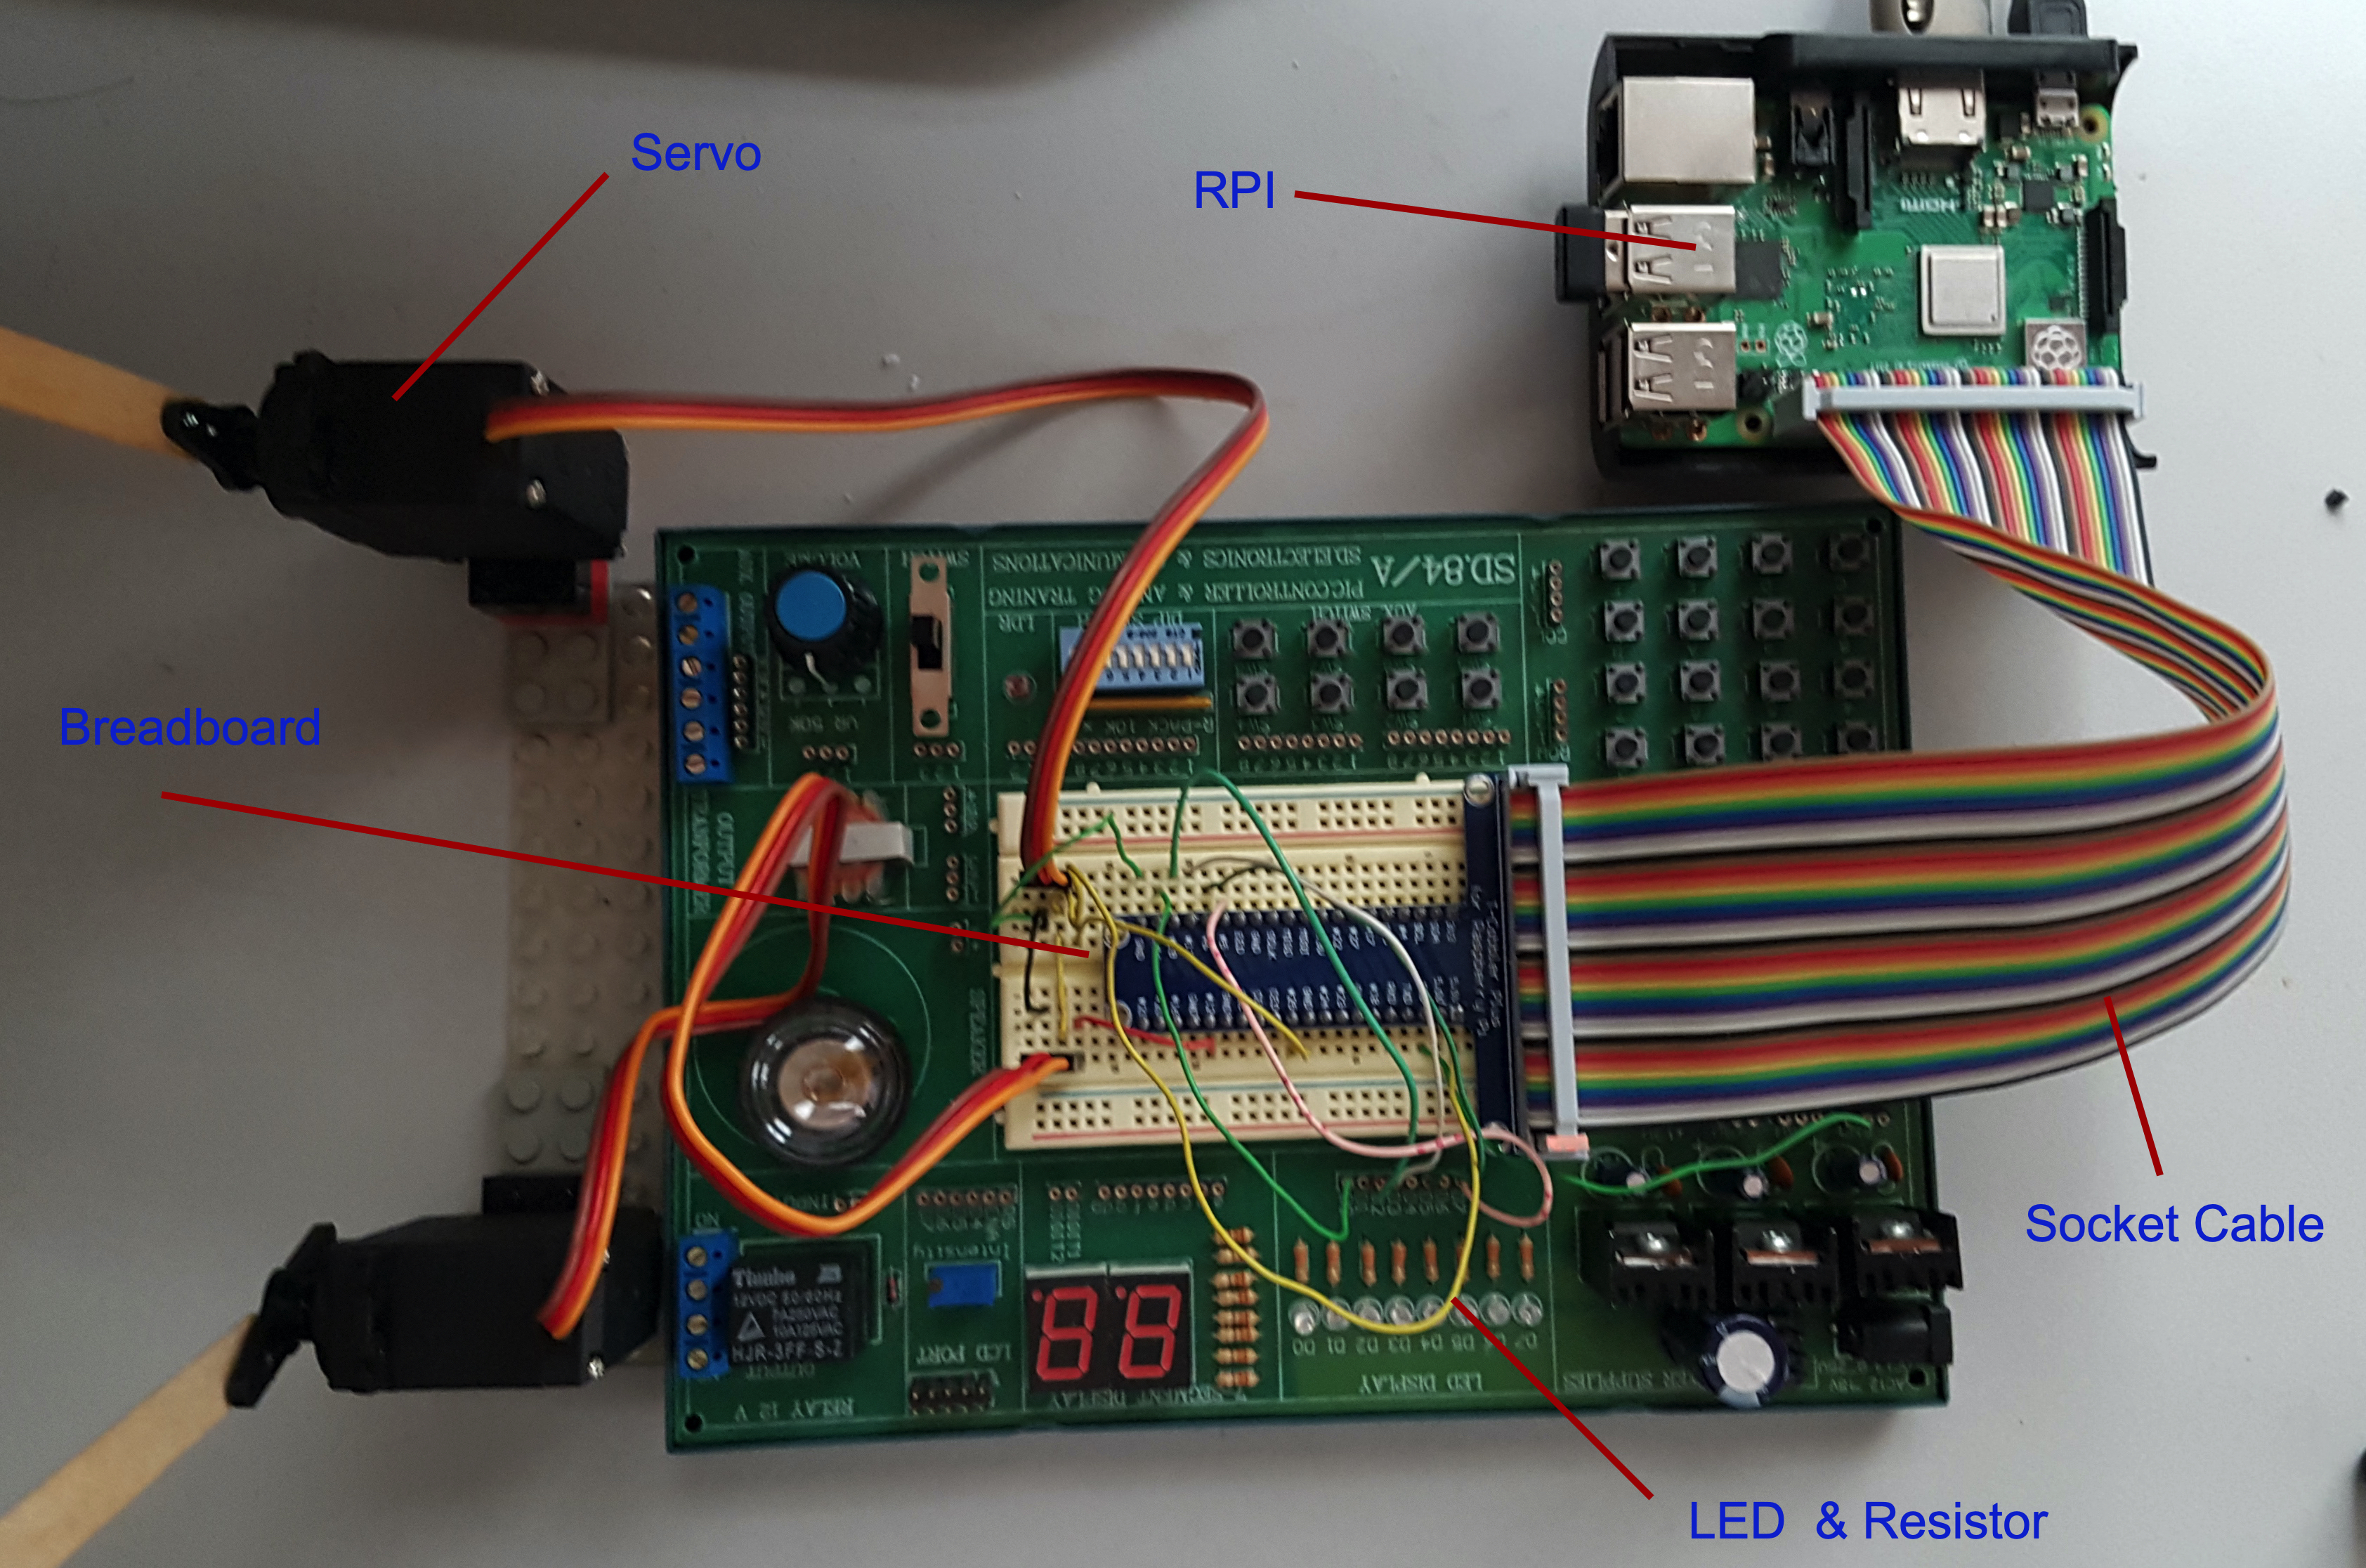
Hardware
1. Raspberry Pi ( We tested on RPi 3)
2. Cable for RPI's socket IO
3. Breadboard with five LEDs and five 330 ohm resistors or
4. Servo
5. Fitibit watch with Fitbit OS installed
Software
1. pigpio for installation go to https://www.npmjs.com/package/pigpio
2. web socket library go to https://github.com/websockets/ws
3. Fitbit studio's account go to https://studio.fitbit.com
4. Fitbit OS Simulator download from https://dev.fitbit.com/getting-started
For more information on develop Fitibt program go to https://dev.fitbit.com/getting-started
Download Software
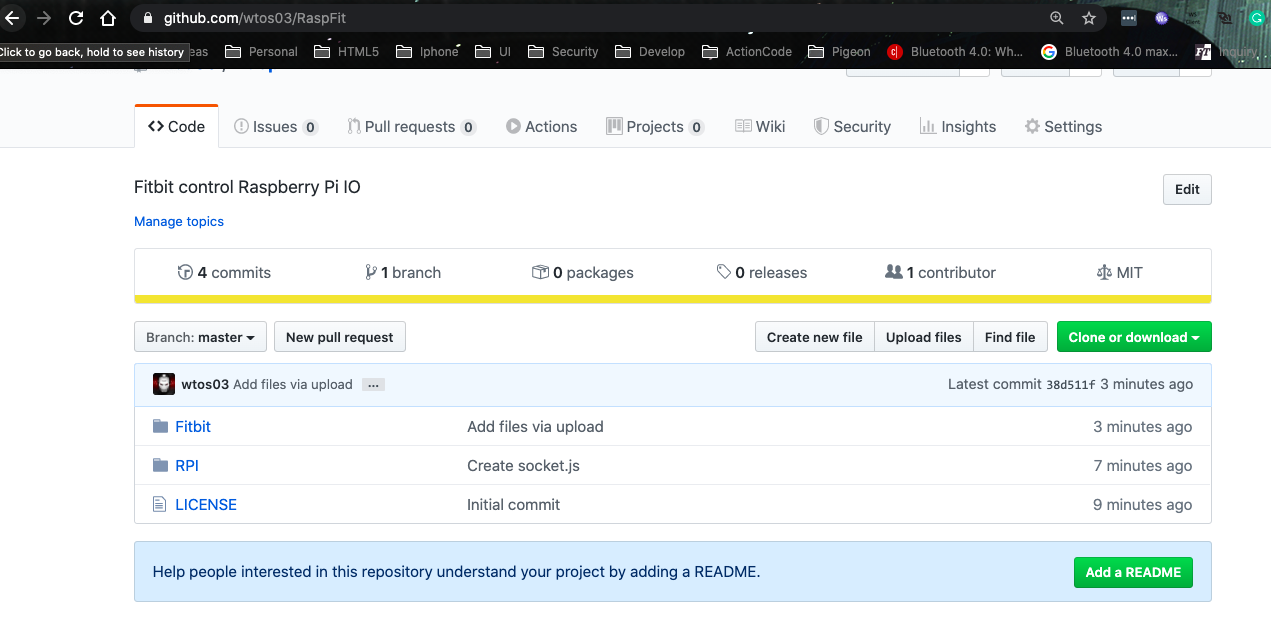
1. Download project from https://github.com/wtos03/RaspFit
2. Unzip project files.
3. Program RPI's socket server is at RPI/socket.js.
4. All Fitbit project files are under Fitbit directory.
For information on directories for fitbit development, please see details at https://dev.fitbit.com/build/guides/application/#folder-structure
Create Account for Fitbit Studio
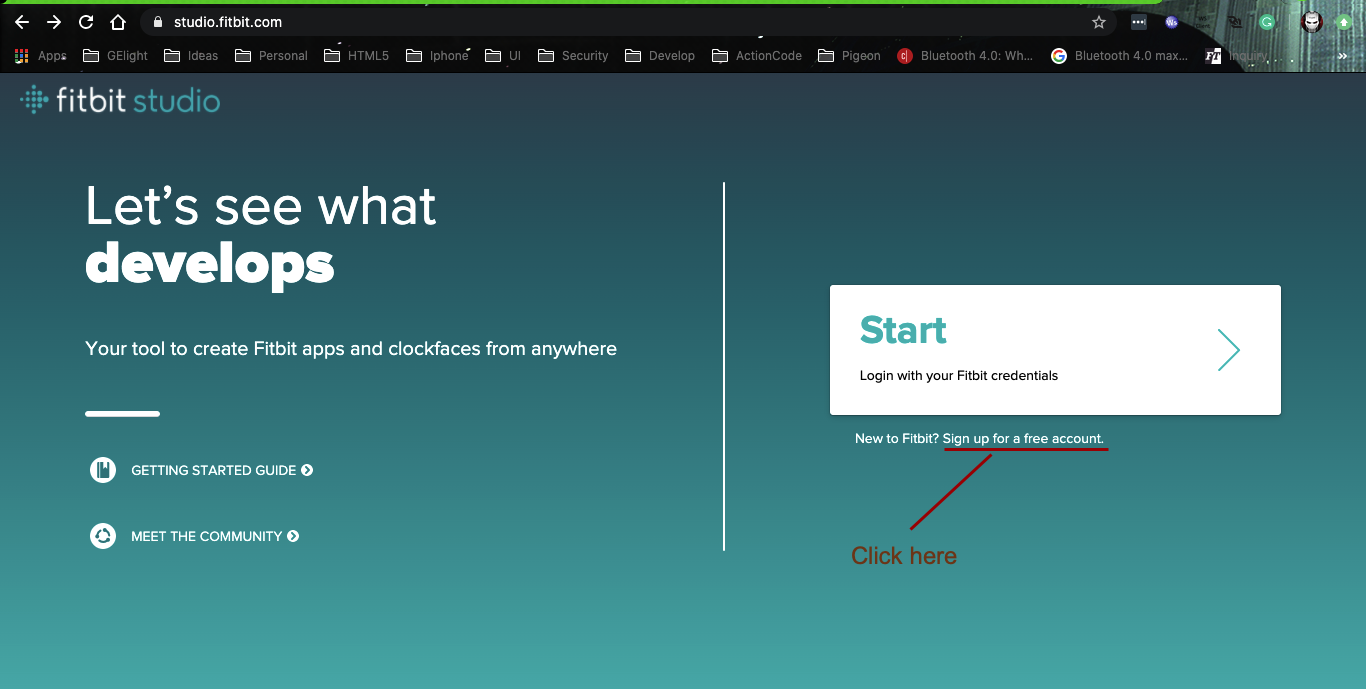
1. Go to studio.fitbit.com
2. Sign up for new Fitbit studio at studio.fitbit.com.
Create Fitbit Application Project
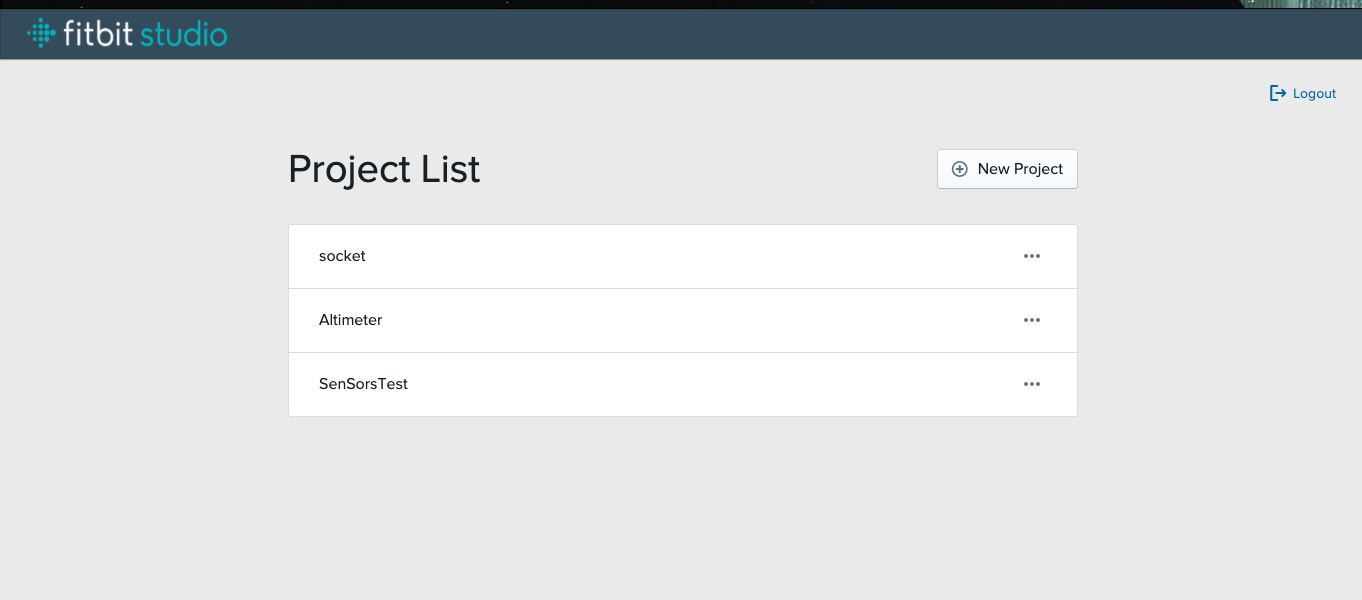
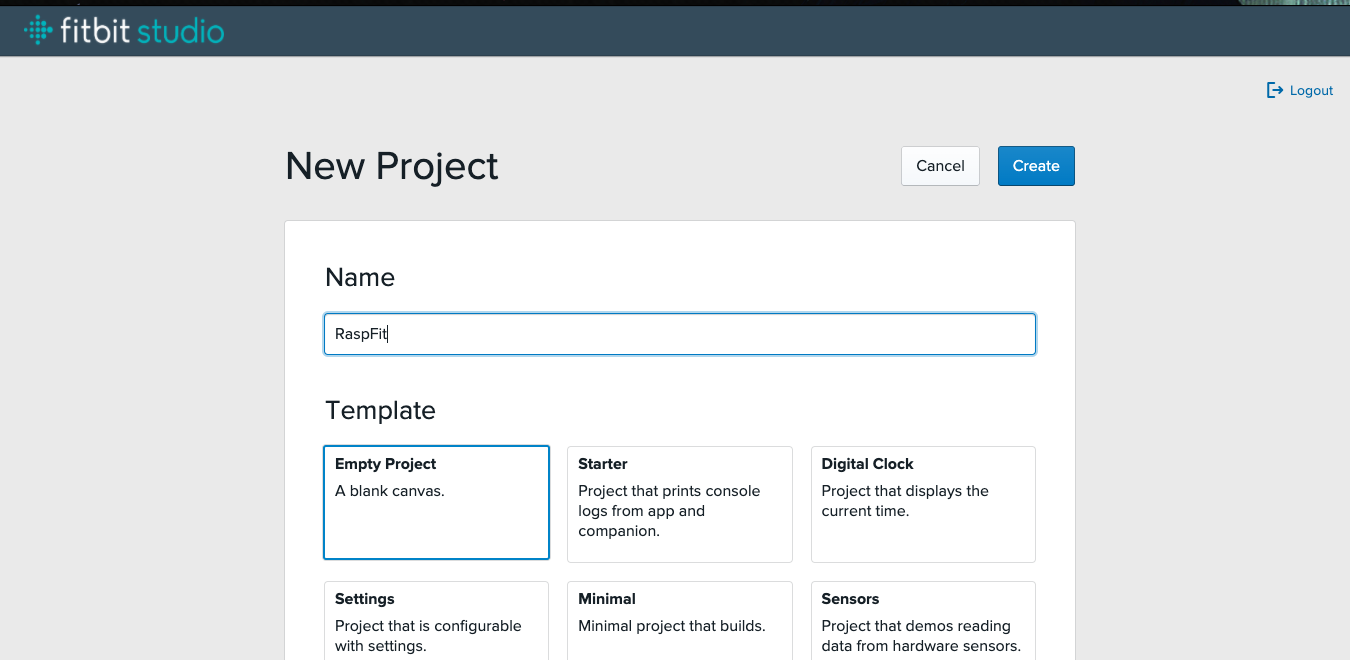
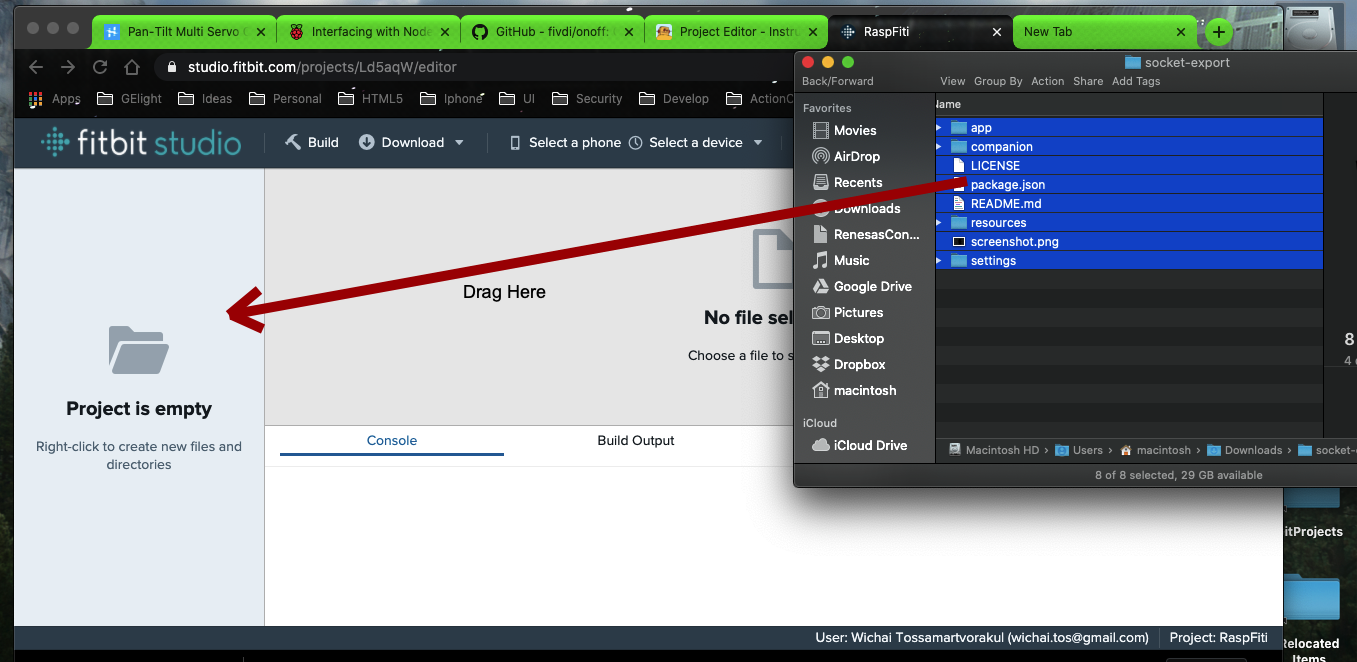
1.Goto studio.fitbit.com
2. After login, click new project.
3. Enter New project's name. Select empty project template and click create.
4. Select all files and folders that unzip from step 1.
5. Drag all files into Project files area.
Start Developer Bridge on Mobile Fitbit
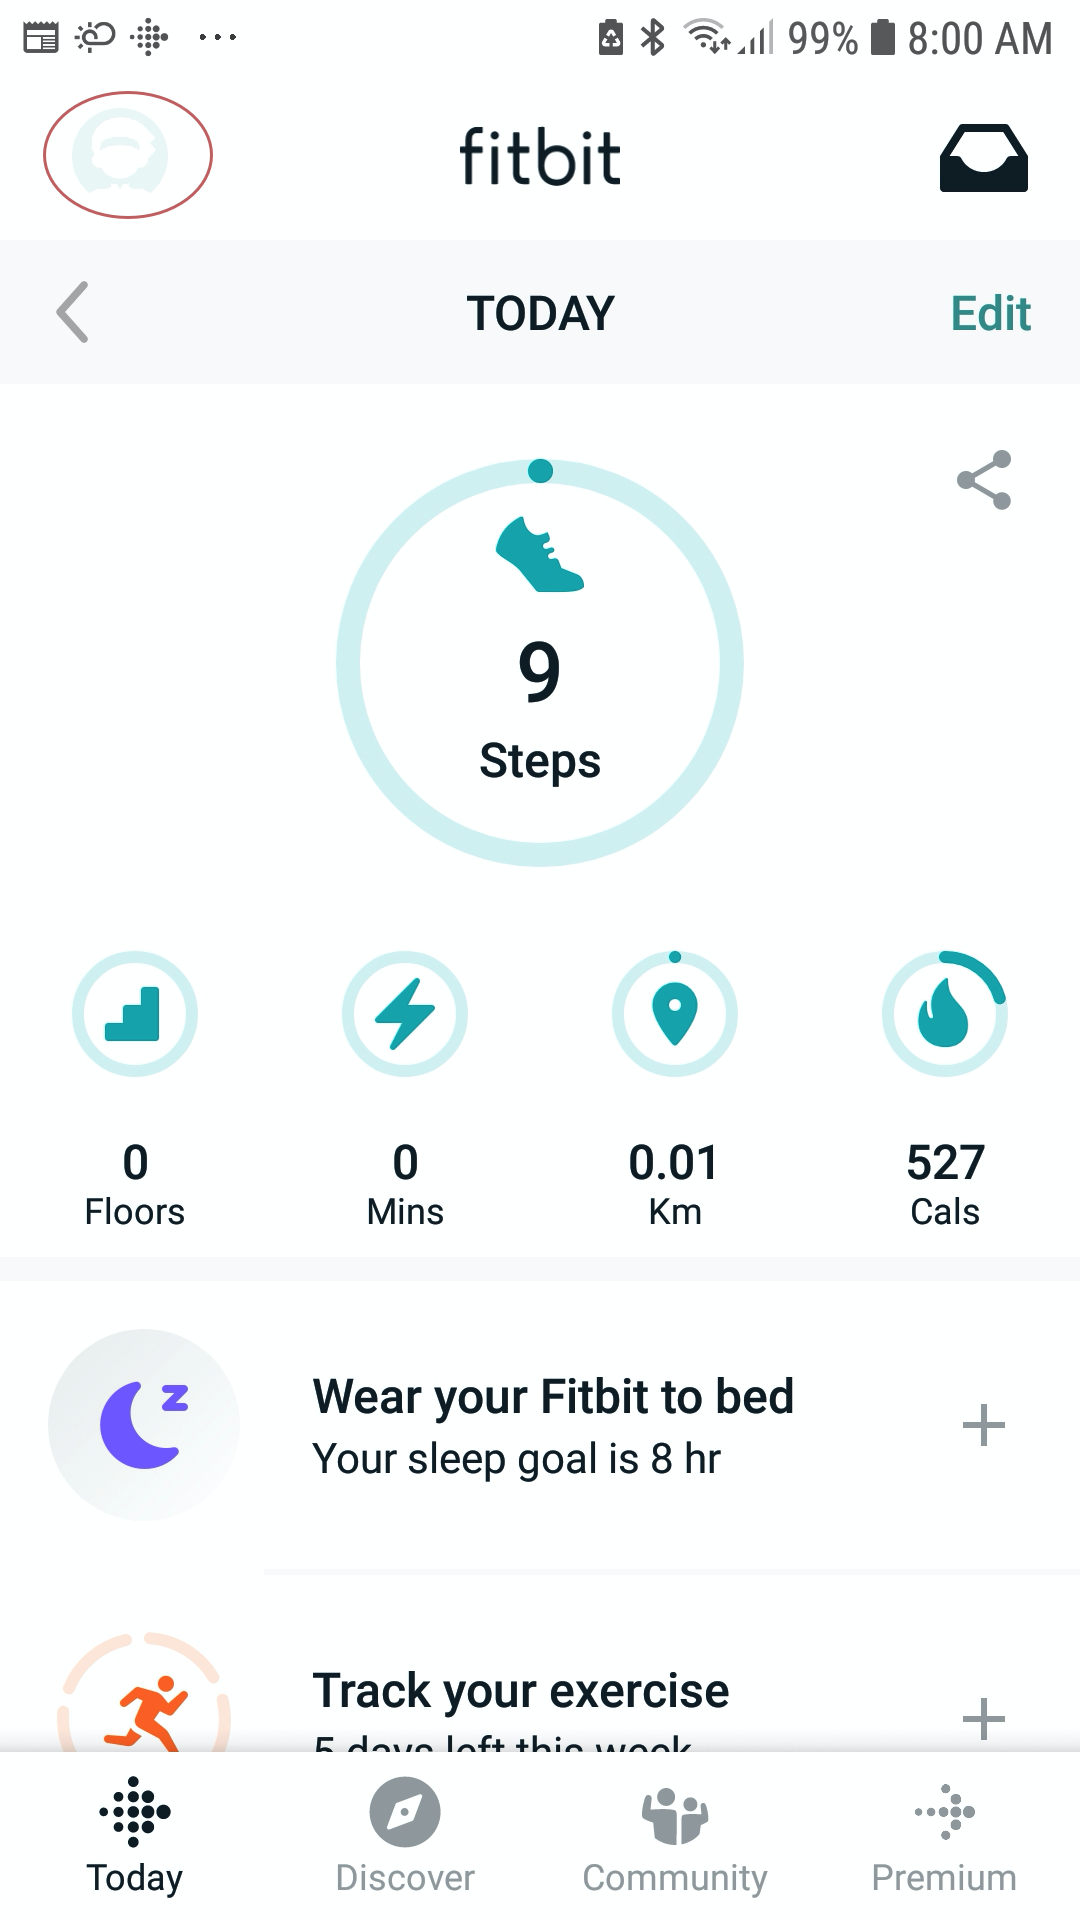
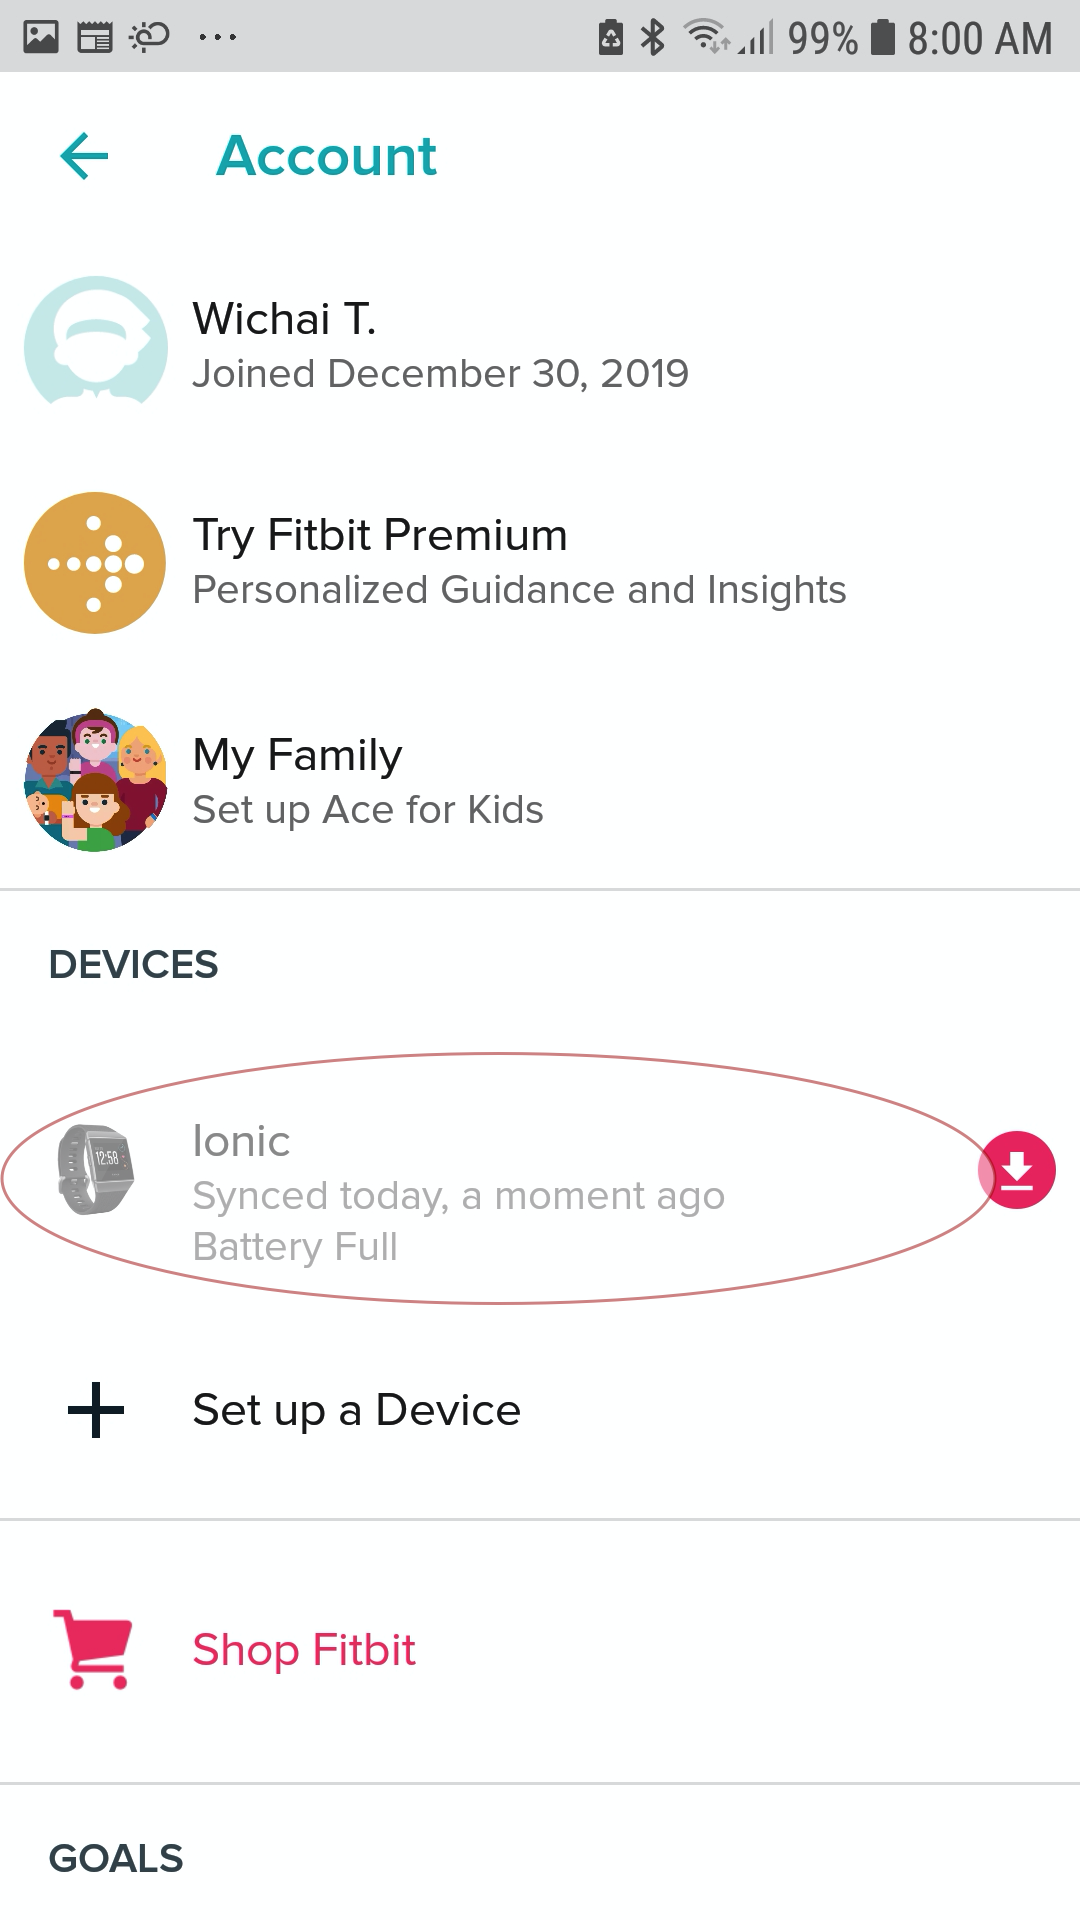
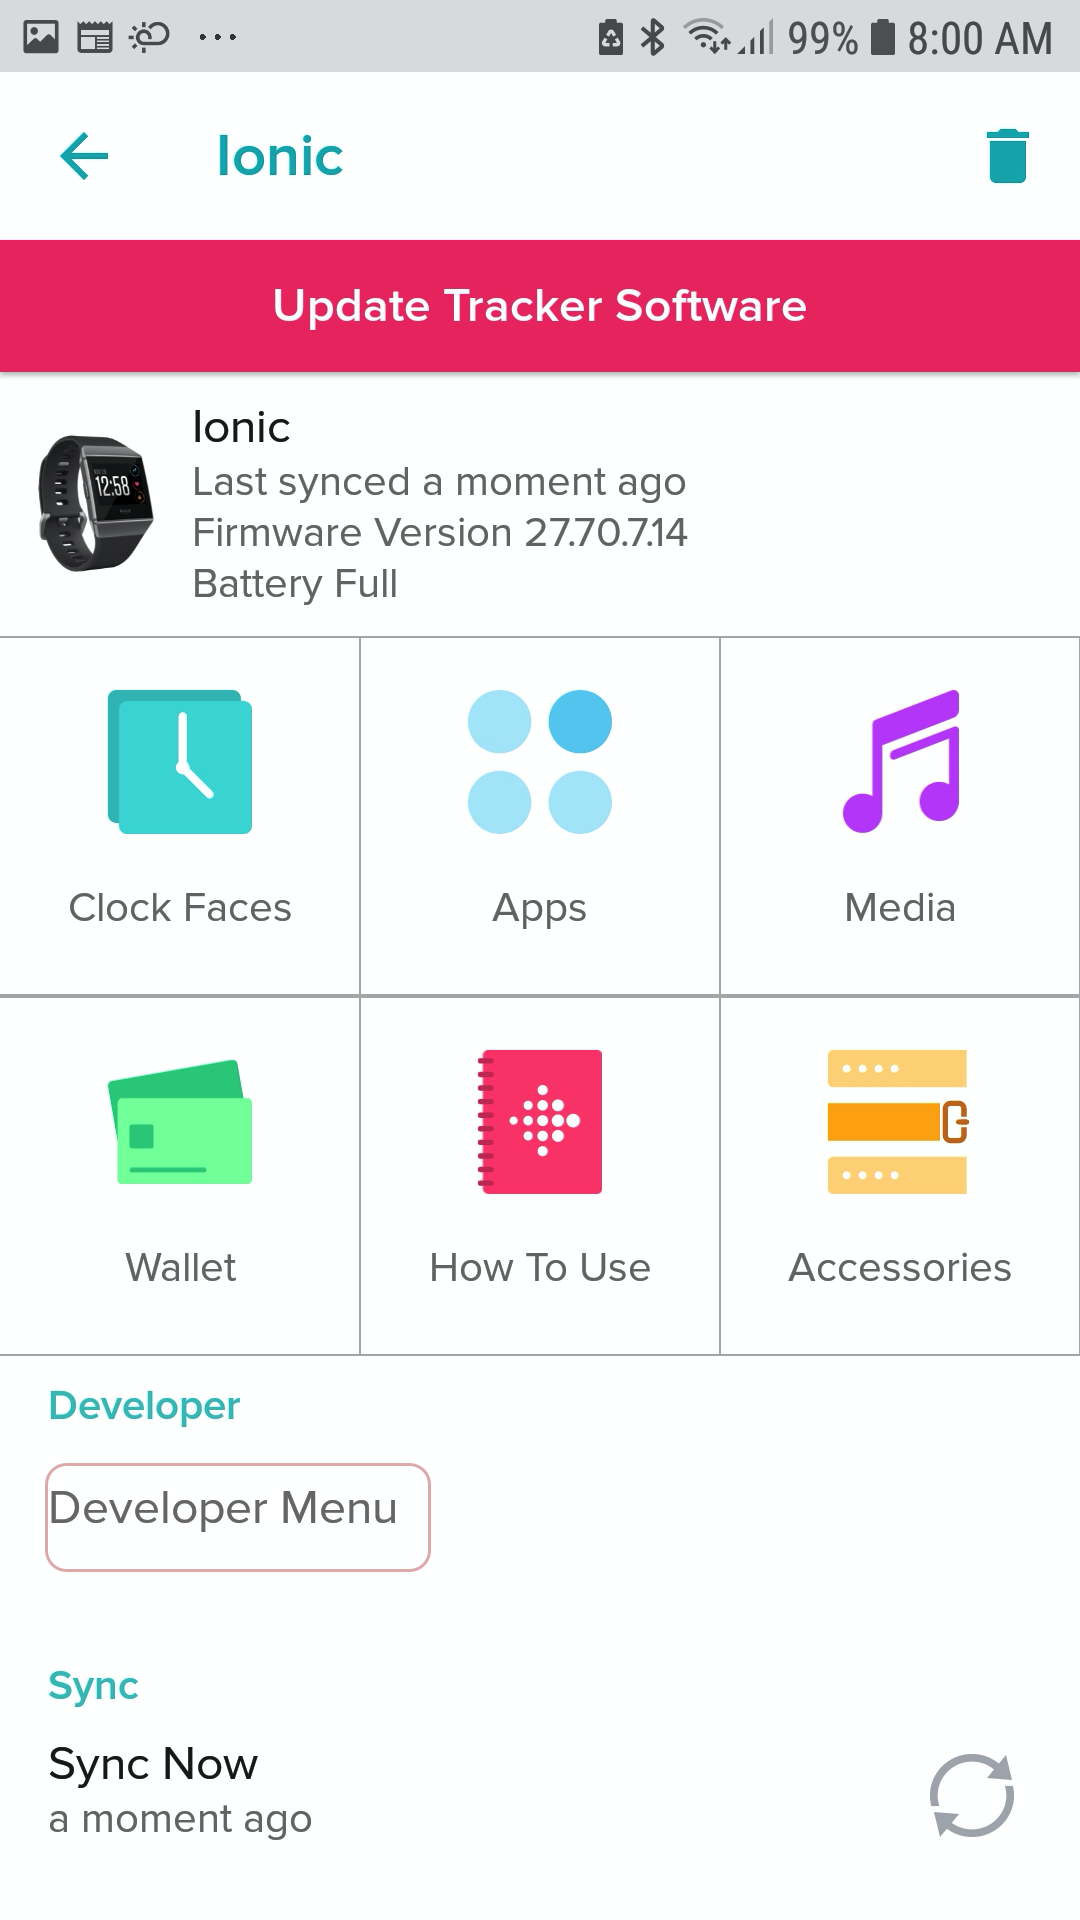
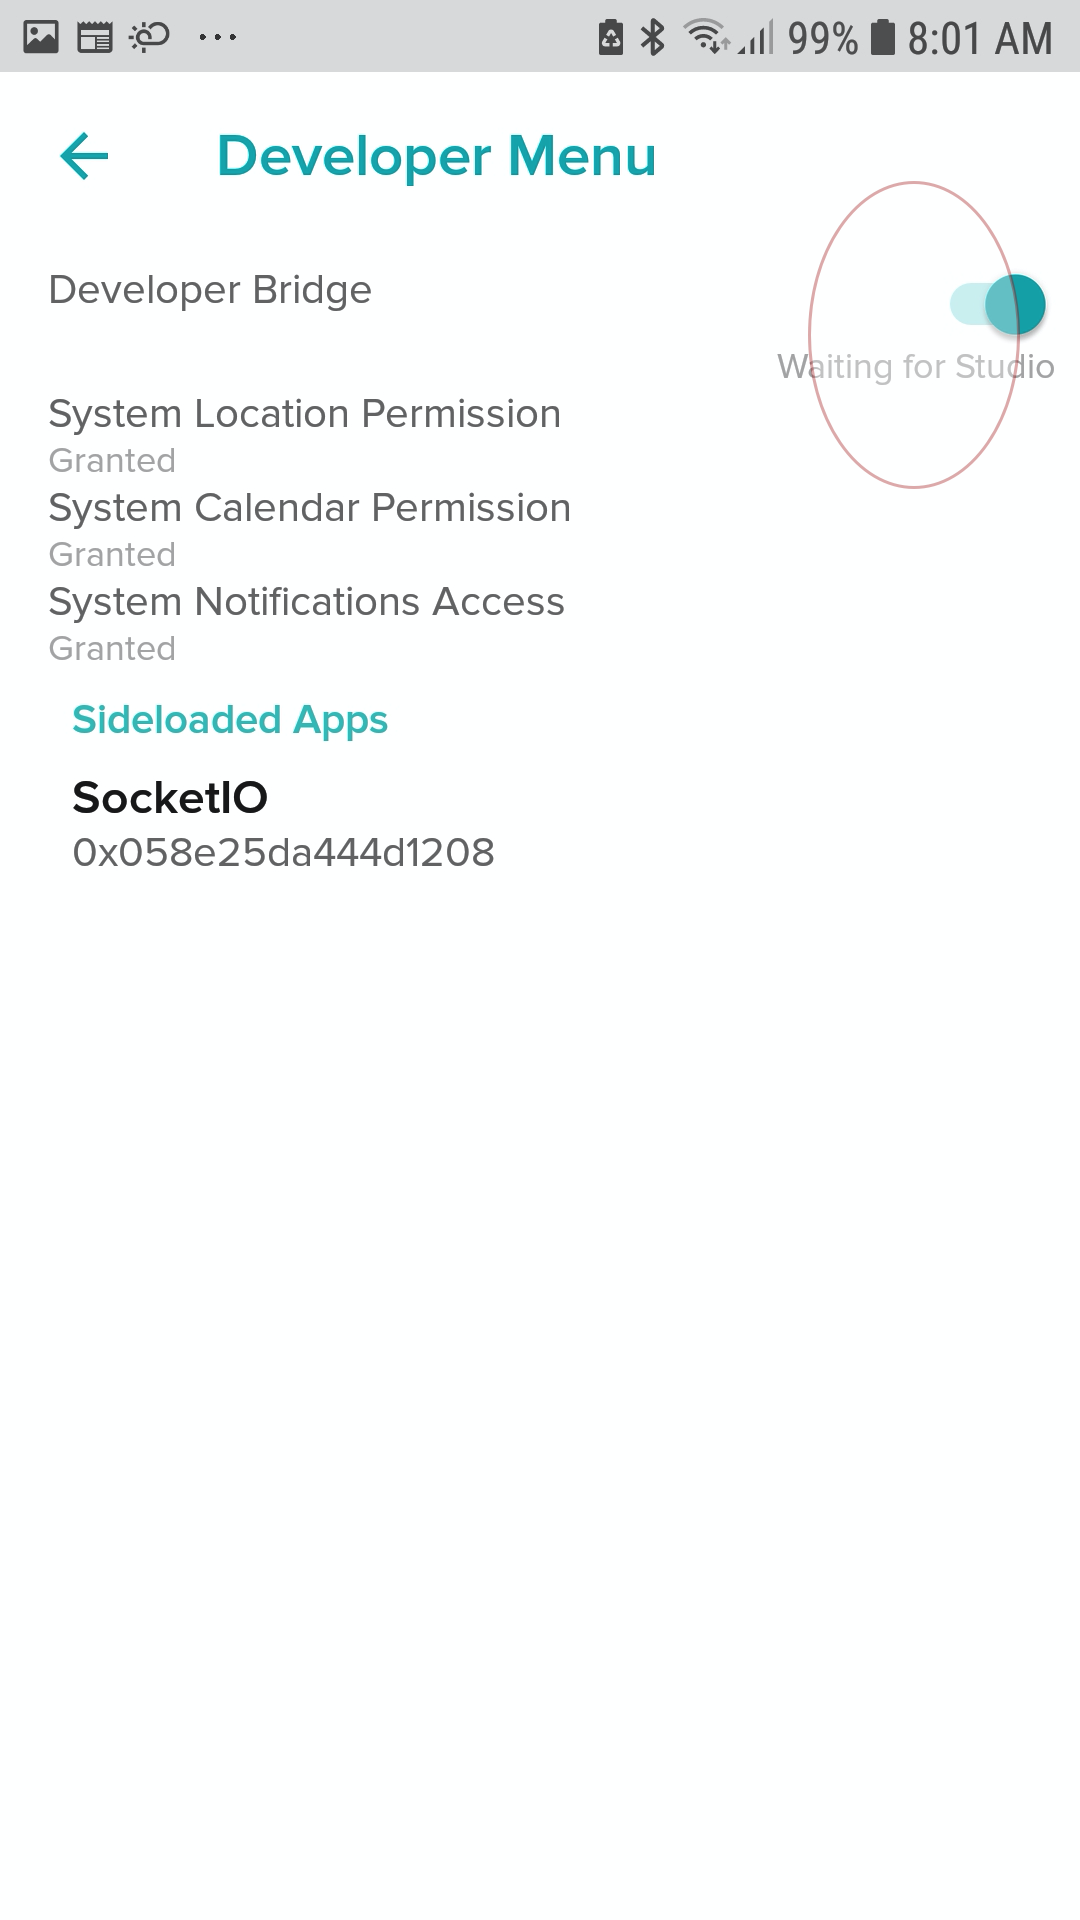
1. Start Fitbit application (on mobile).
2. Select Account on top left.
3. Under devices, select your watch model.
4. Select Developer Menu.
5. Enable Developer Bridge. Wait message change from connecting to connected
Start Developer on Fitbit Watches
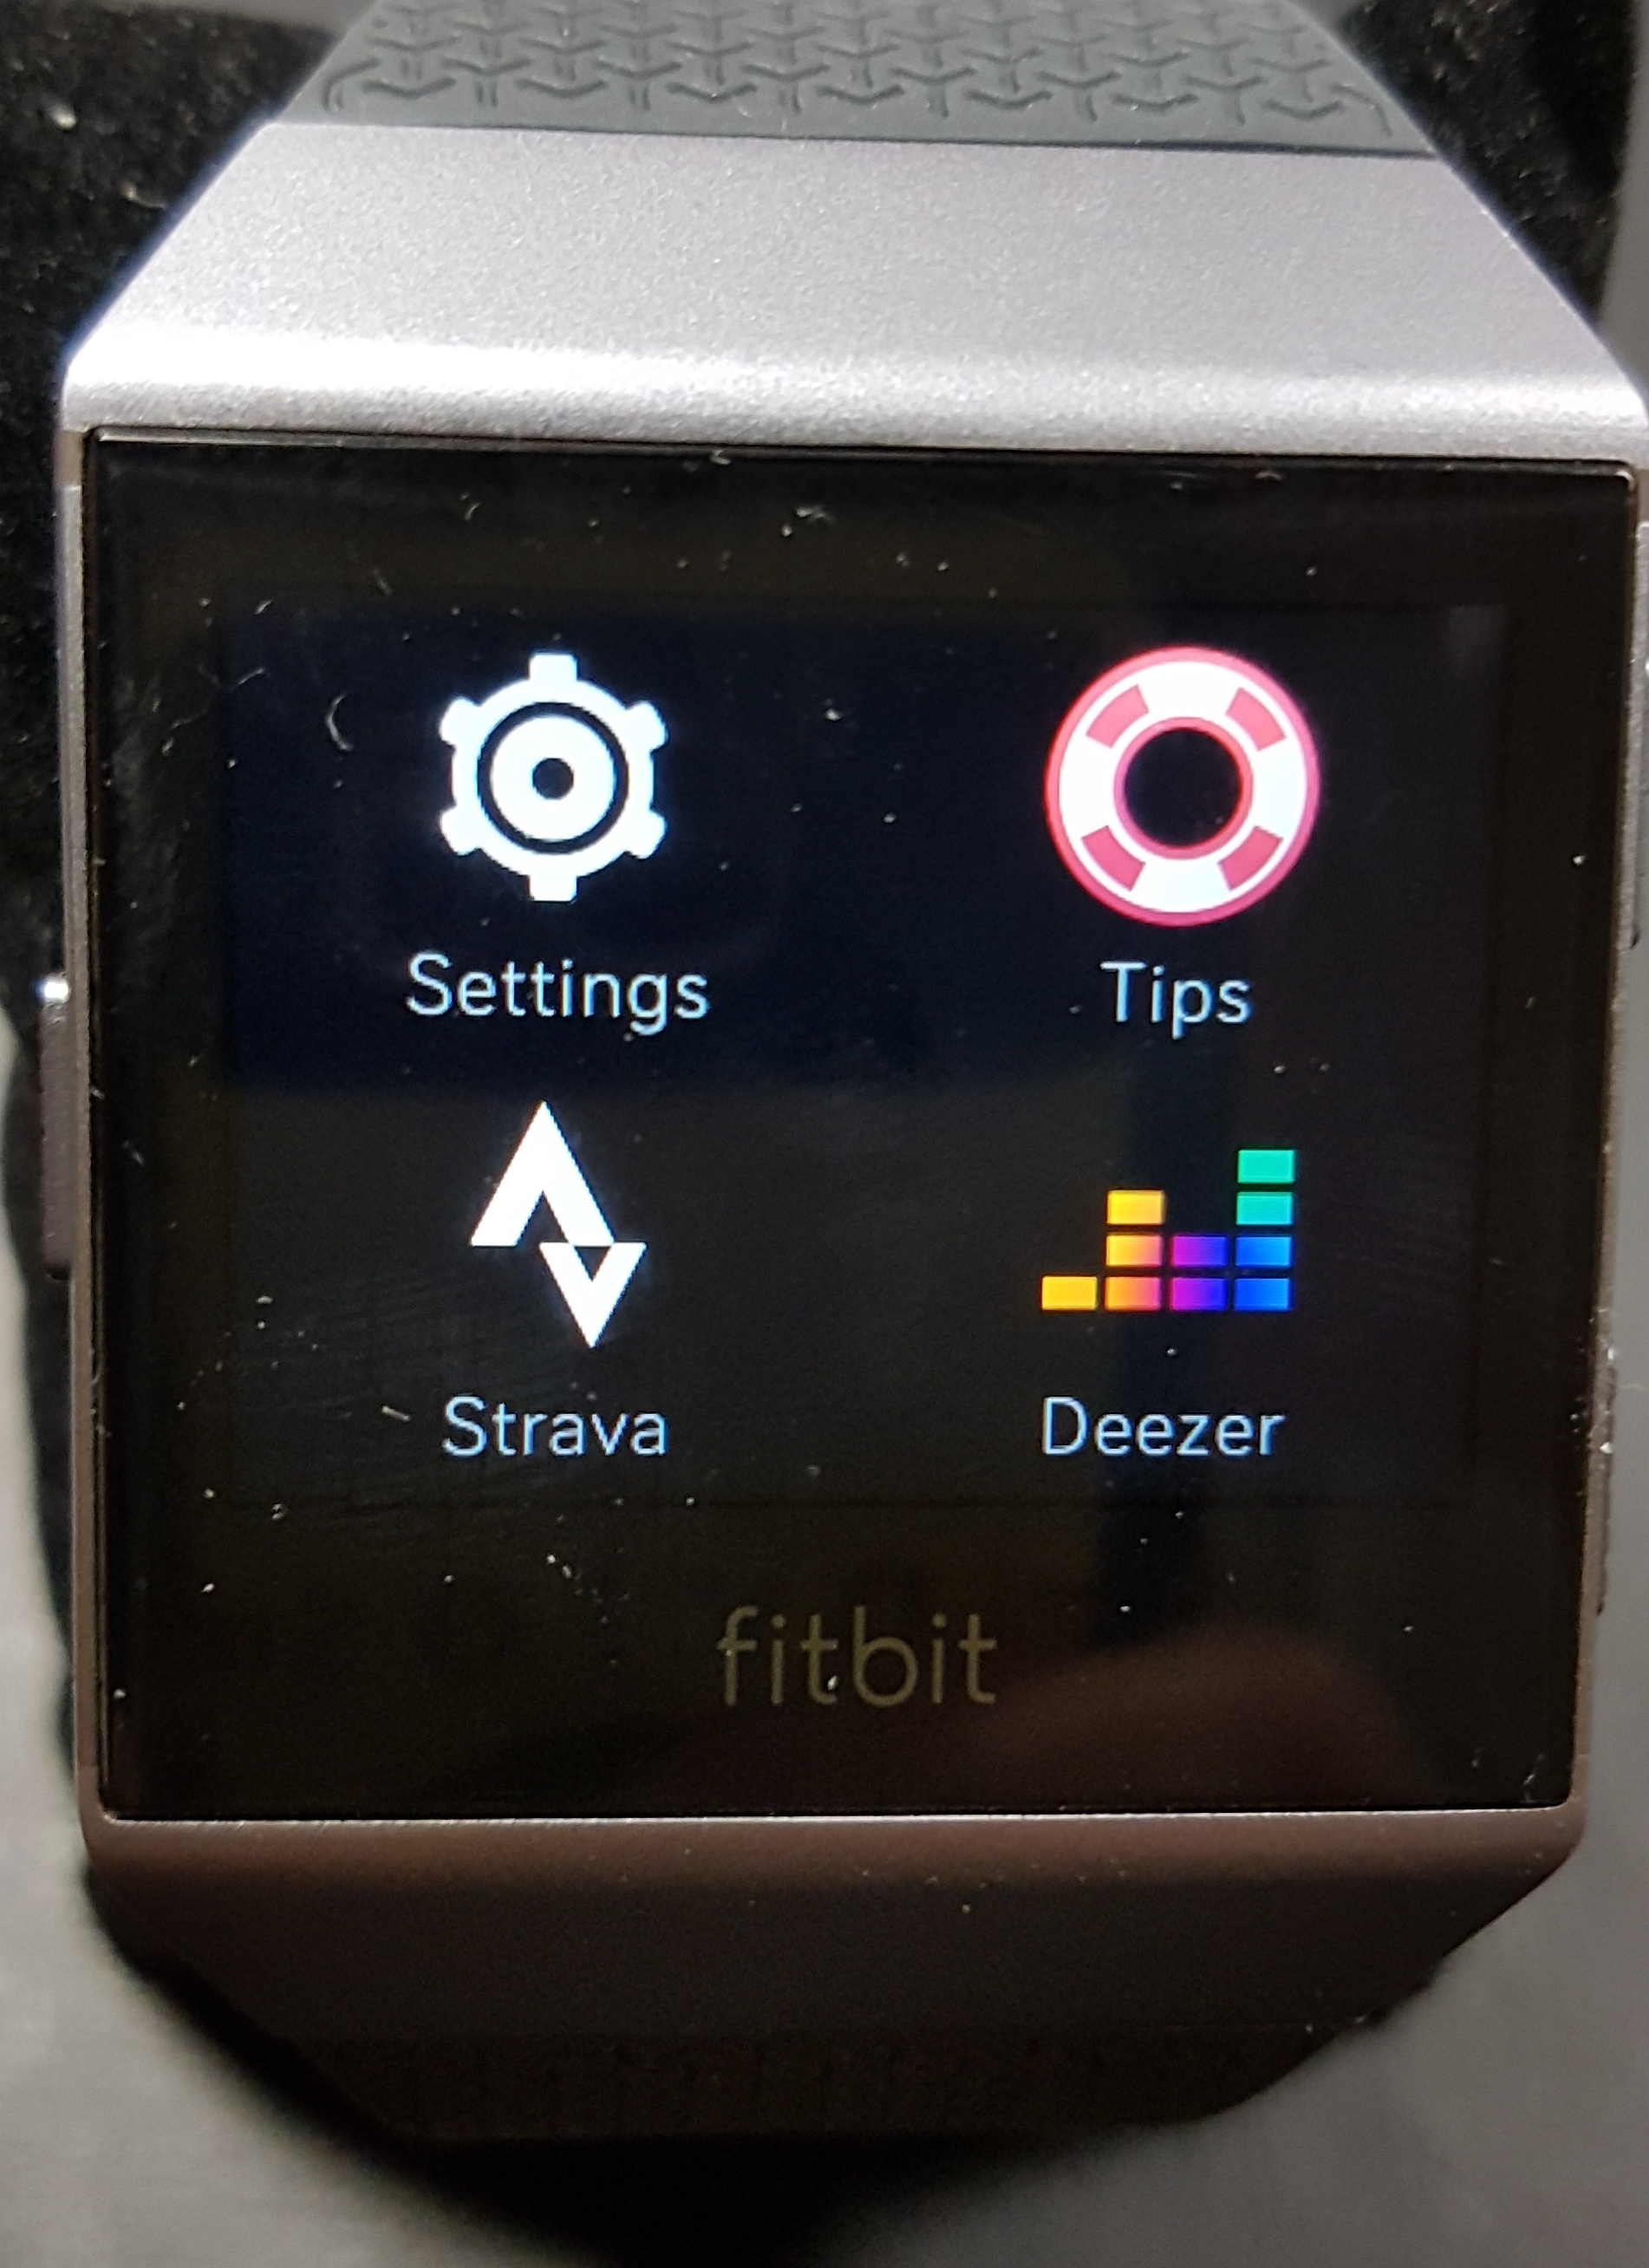
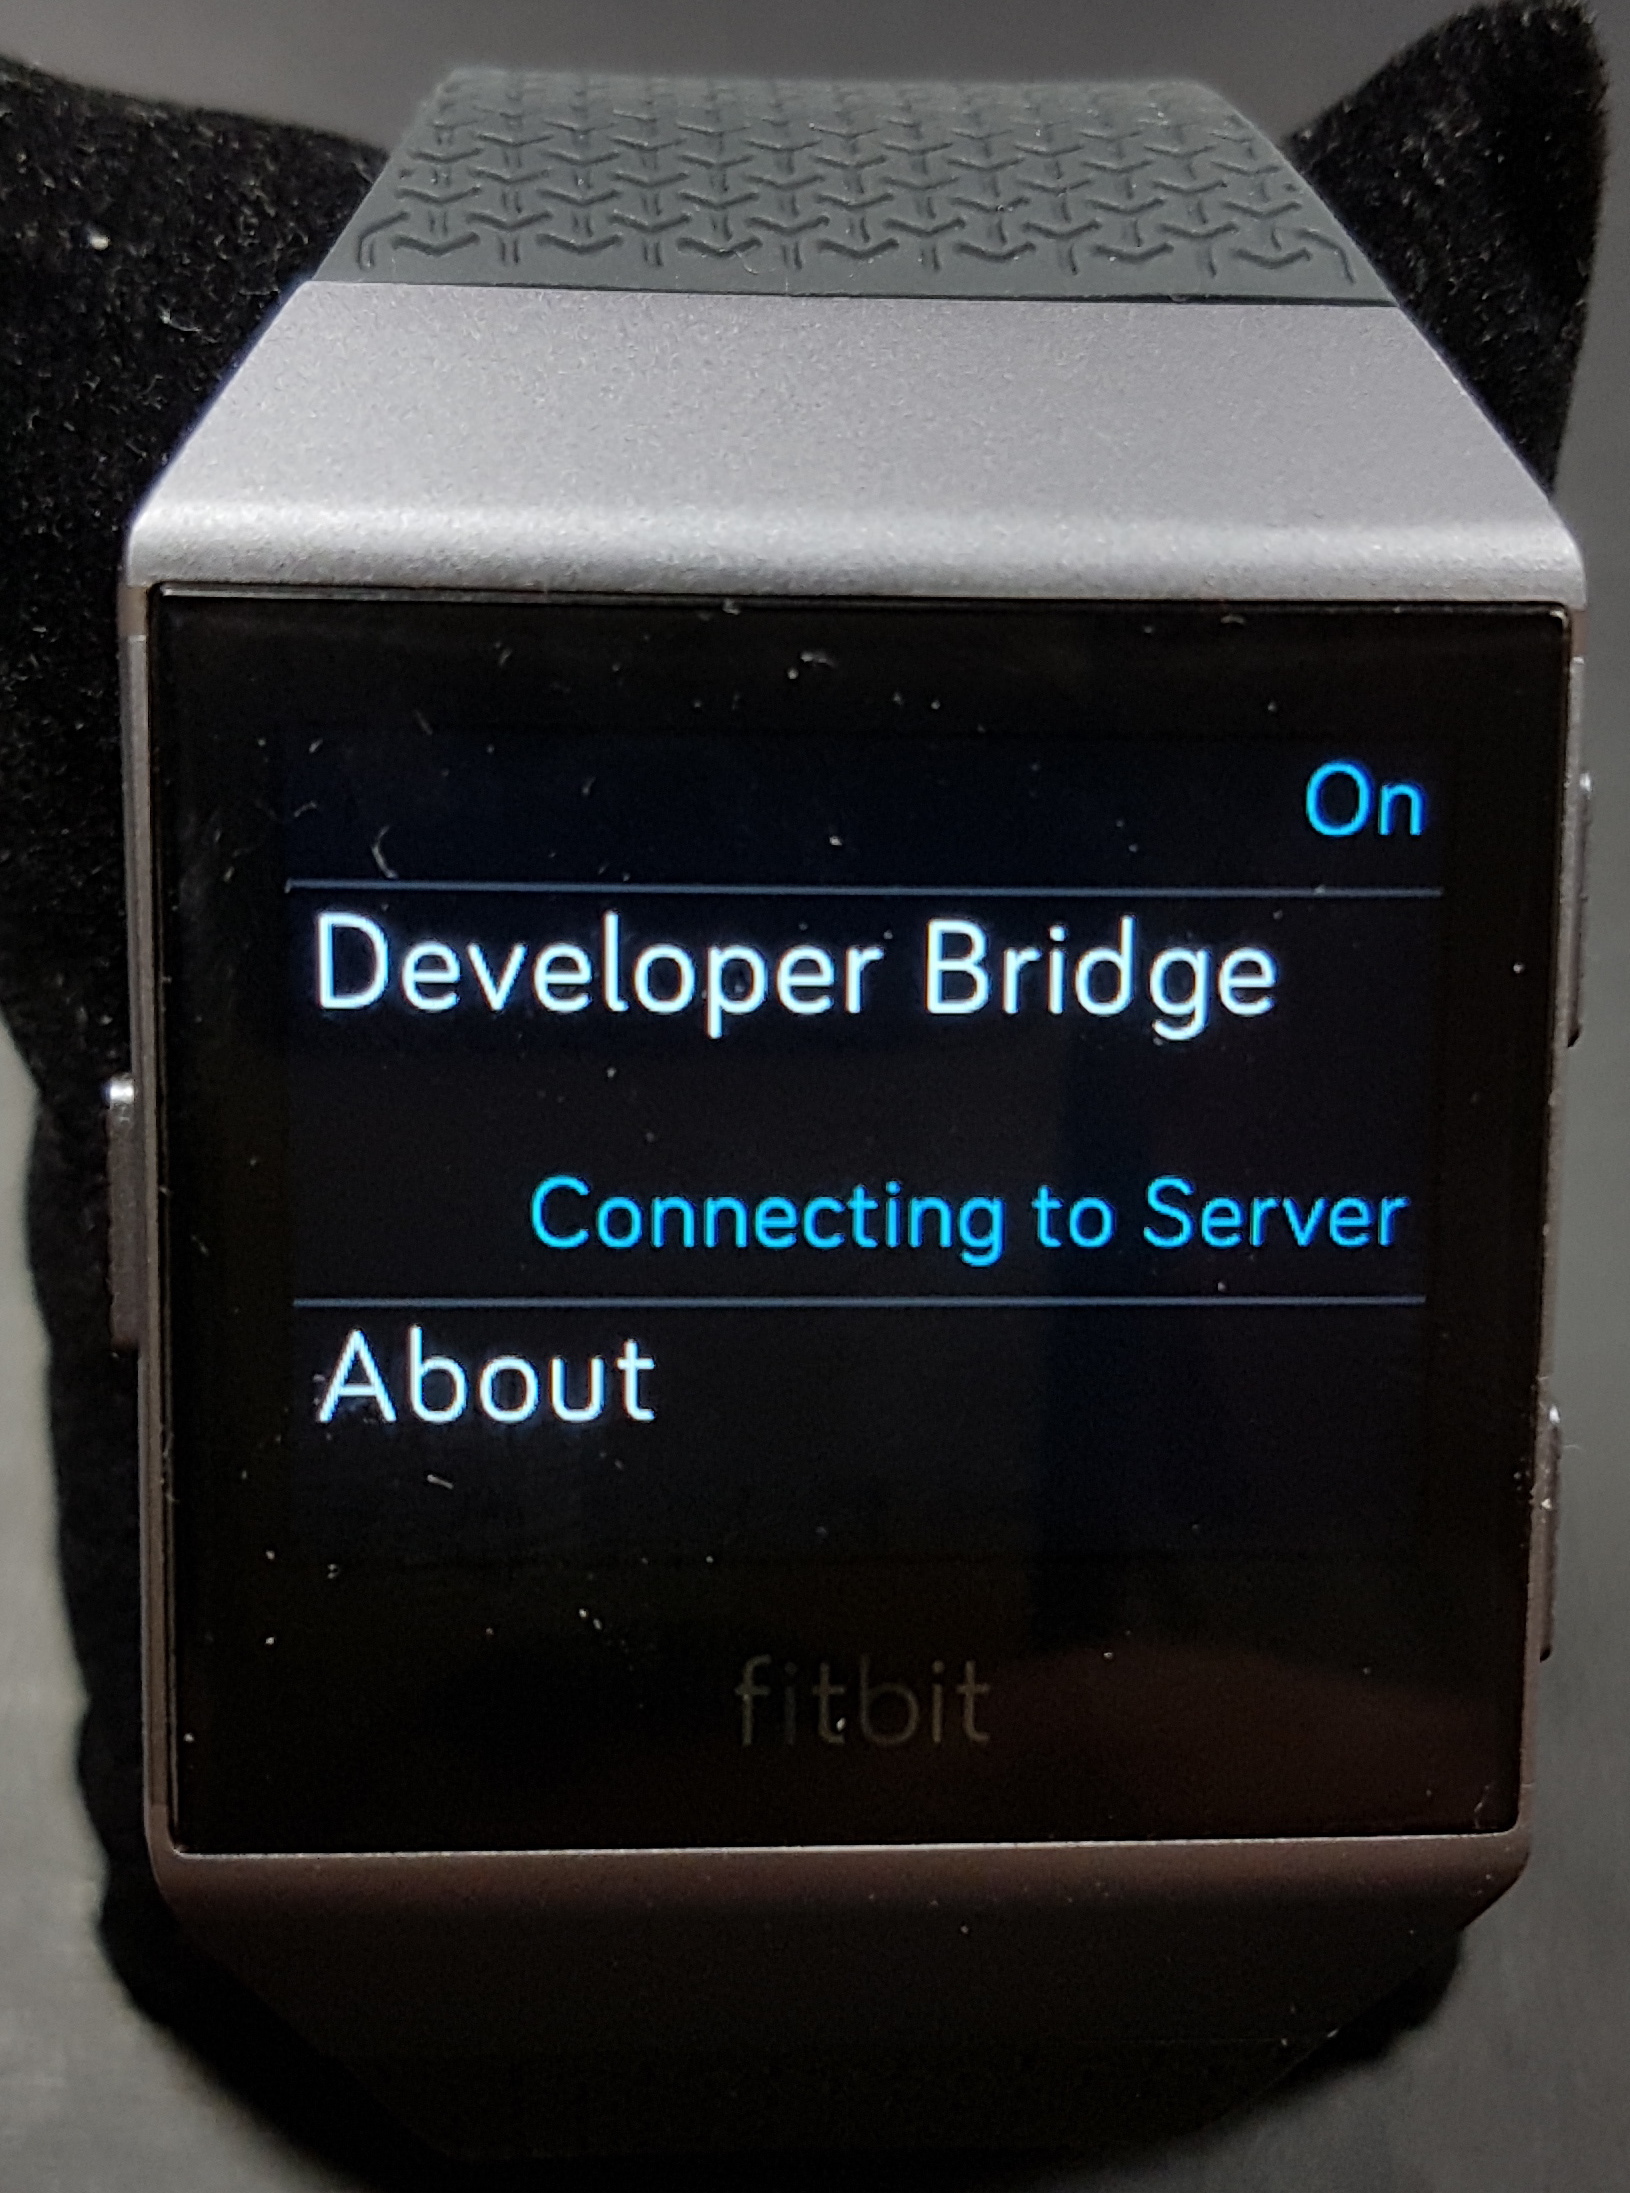
1. Goto Setting.
2. Scroll down until found "Developer Bridge".
3. Select action to Connecting to Server.
4. Wait until show message "Connected to Debugger".
Connect Fitbit Studio With Mobile and Watch
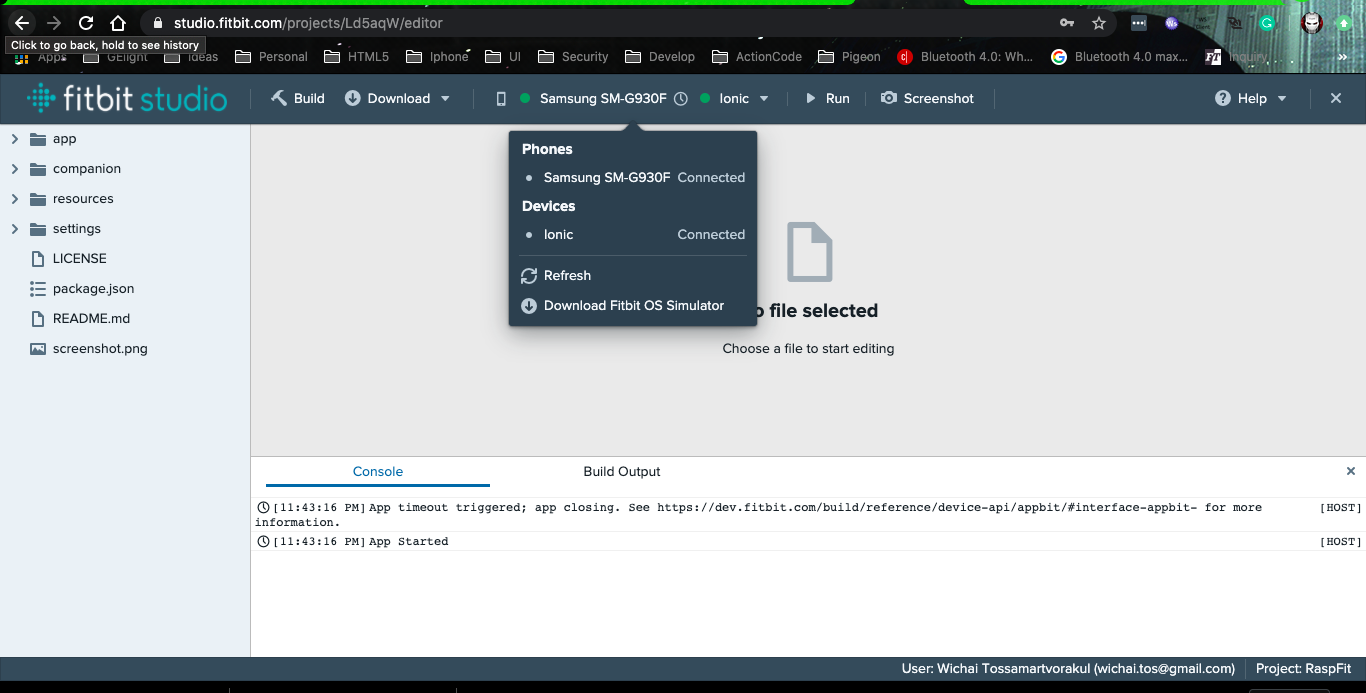
1. On top menu, press Select a device.
2. Select our watch.
3. On top menu, press Select a phone.
4. Select our phone.
5. Wait for both phone and devices show connected
Install Program on Watch
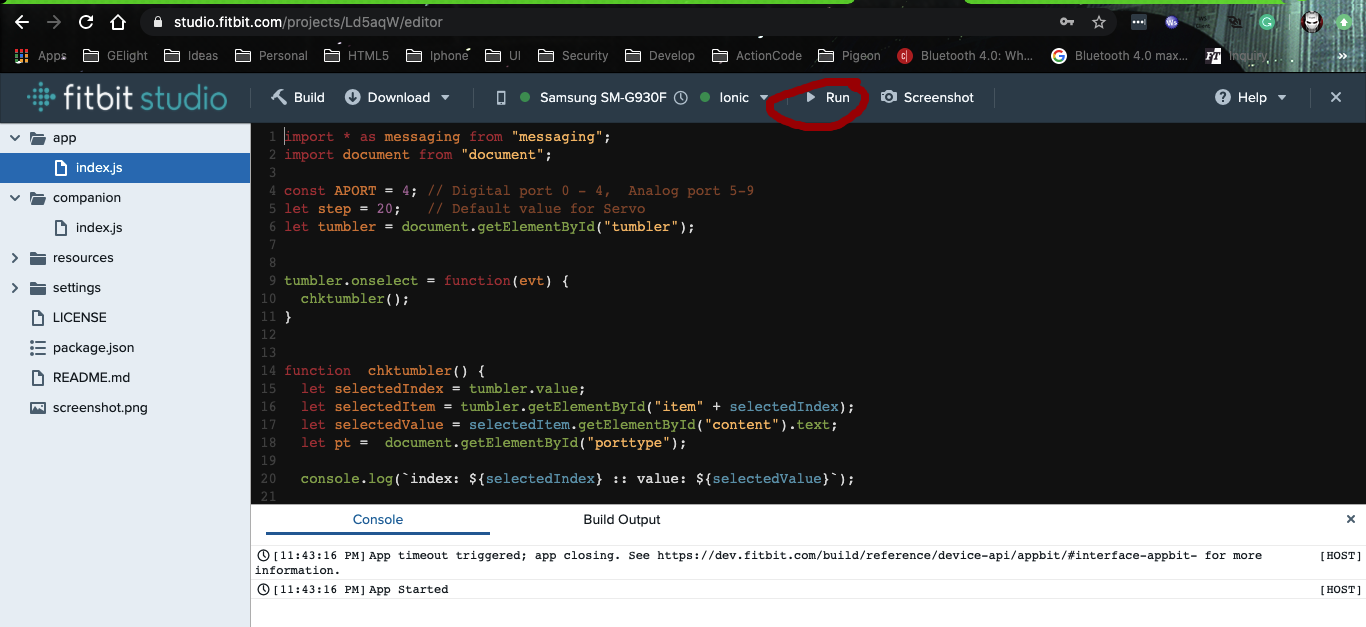
1. On top menu, press Run.
The Fitbit studio will start to compile and download programs on both mobiles and watch.
2. Scroll watch's screen to the left to see whether the program had been installed.
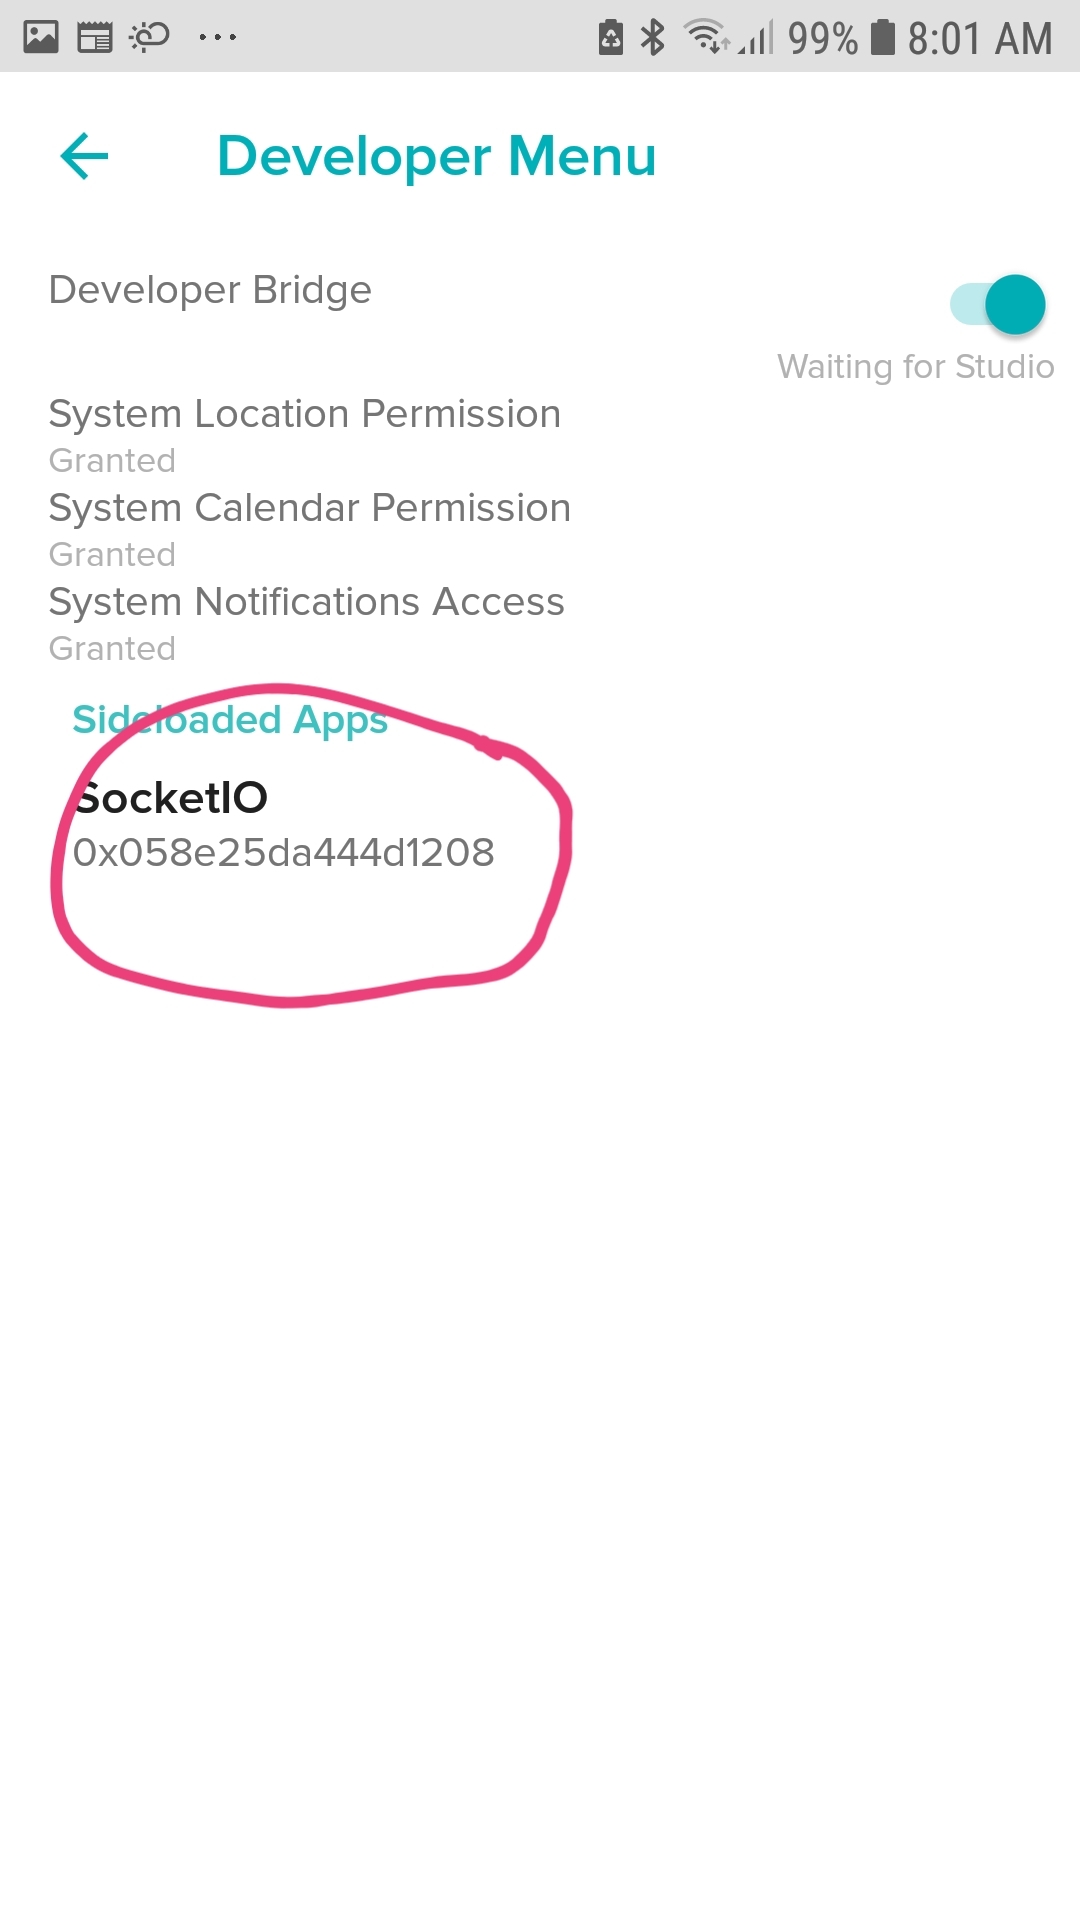
3. Go to Fitbit application
4. Select Account on top left.
5. Under devices, select your watch model.
6. Select Developer Menu.
7. You should see program installed under Sideloaded App
Connect IO for RPI
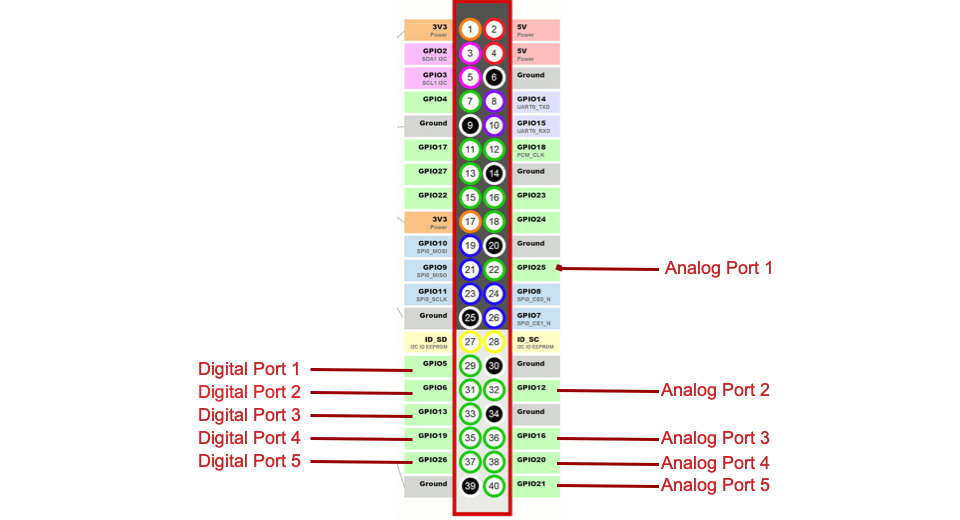


1. Connect IO Socket with breadboard via cable.
2. Connect LED to IO port with 330 Ohm Resistor to limit the current .
3. Connect Servo with IO port that assigned for analog port
Install Software for RPI
1. Install web socket library using command
npm install --save ws
2. Install pigpio library
sudo apt-get update
sudo apt-get install pigpio
3. Download program socket.js from https://github.com/wtos03/RaspFit under directory RPI
4. Put socket.js in home directory.
Start Program on RPI
1. Run command
$sudo node socke.js
2. To start program automatically when starting RPI. Add command line in /etc/rc.local
Test and Run Program
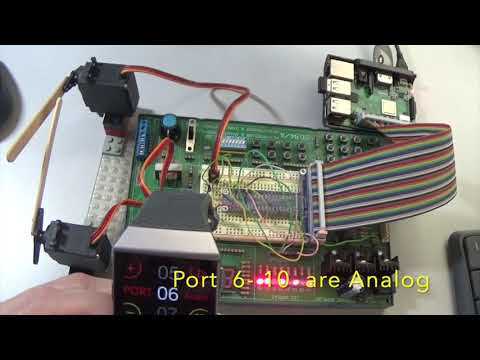
1. Start Fitbit Applicaiton on Mobile
2. Select Account on top left.
3. Under devices, select your watch model.
4. Select Developer Menu.
5. Select program installed under Sideloaded App.
6. Select Settings
7. Set IP Address of RPI and Port ( This project use 4000)
8. Adjust step for analog value if needed ( Default = 20)
9. Go back and exit the Fitbit Application
10. Start program on Fitbit watch.
11. Select port you want to control
12. Buttons on the right use for ON/OFF devices
13. Buttons on the left use for increment/decrement analog value
Troubleshooting
Error: Cannot control I/O on RPI
- Check network by ping RPI 's address.
- Exit program on both Fitbit watch and RPI.
- Start Fitbit Application and Sync with Fitbit watch.
- Start program on RPI.
- Start program on Fitbit watch.