First Aid Kit
![20231004_220736.png](/proxy/?url=https://content.instructables.com/FT2/UOCE/LYCZSGCP/FT2UOCELYCZSGCP.png&filename=20231004_220736.png)
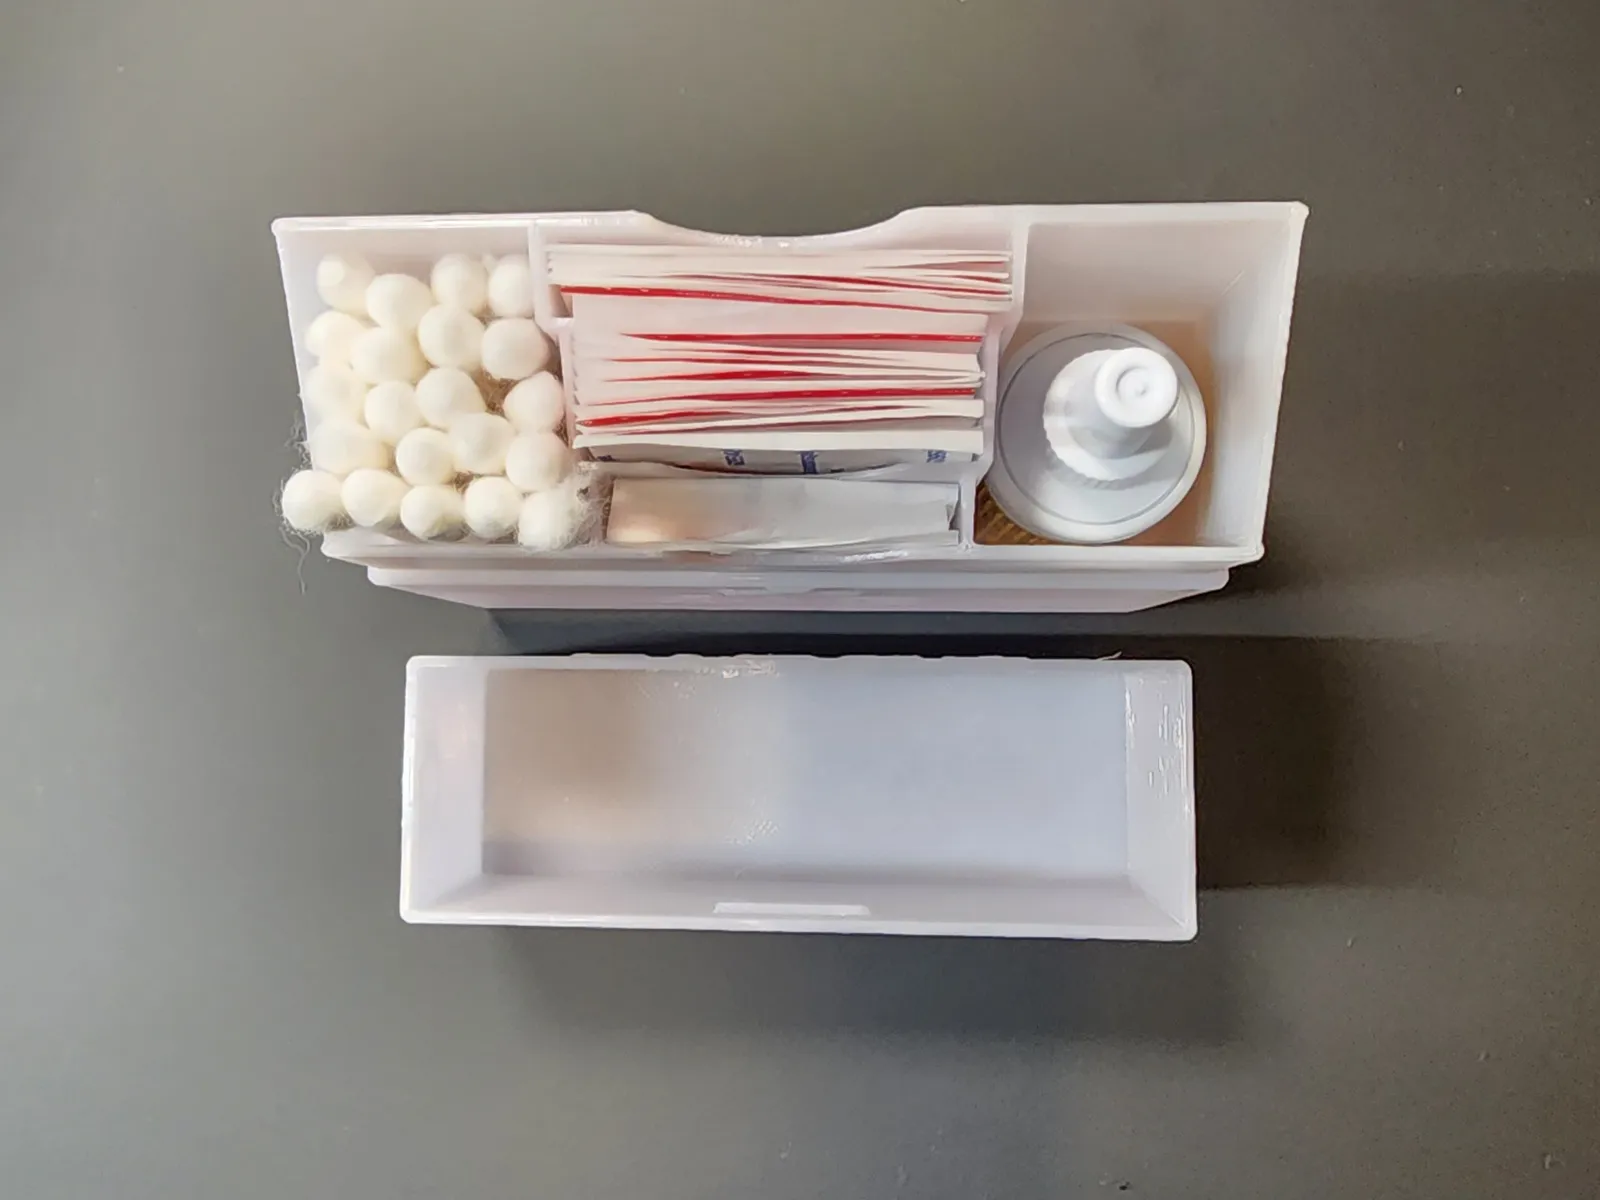
designed this 3D printed first aid kit, because in the forest, camping or excursion, we are never safe from a small injury. easily transportable, this small kit will not take up space in your bag. very practical in the car too
Supplies
tools need:
- computer
- fusion 360
- 3d printer
- PLA + filament
- and some stuff to put inside when it's print
files are provide, a parametric version as well (fusion 360 format) you can make your own style and all the settings (inside, outside, thickness, height, number of compartement inside and their size, ect )
![Capture d'écran 2024-07-08 142707.png](/proxy/?url=https://content.instructables.com/FCG/5T6H/LYBKDASO/FCG5T6HLYBKDASO.png&filename=Capture d'écran 2024-07-08 142707.png)
![Capture d'écran 2024-07-08 143512.png](/proxy/?url=https://content.instructables.com/FL6/Q58O/LYBKDB85/FL6Q58OLYBKDB85.png&filename=Capture d'écran 2024-07-08 143512.png)
![Capture d'écran 2024-07-08 144248.png](/proxy/?url=https://content.instructables.com/FMU/47YB/LYBKDBKL/FMU47YBLYBKDBKL.png&filename=Capture d'écran 2024-07-08 144248.png)
FIRST STEP:
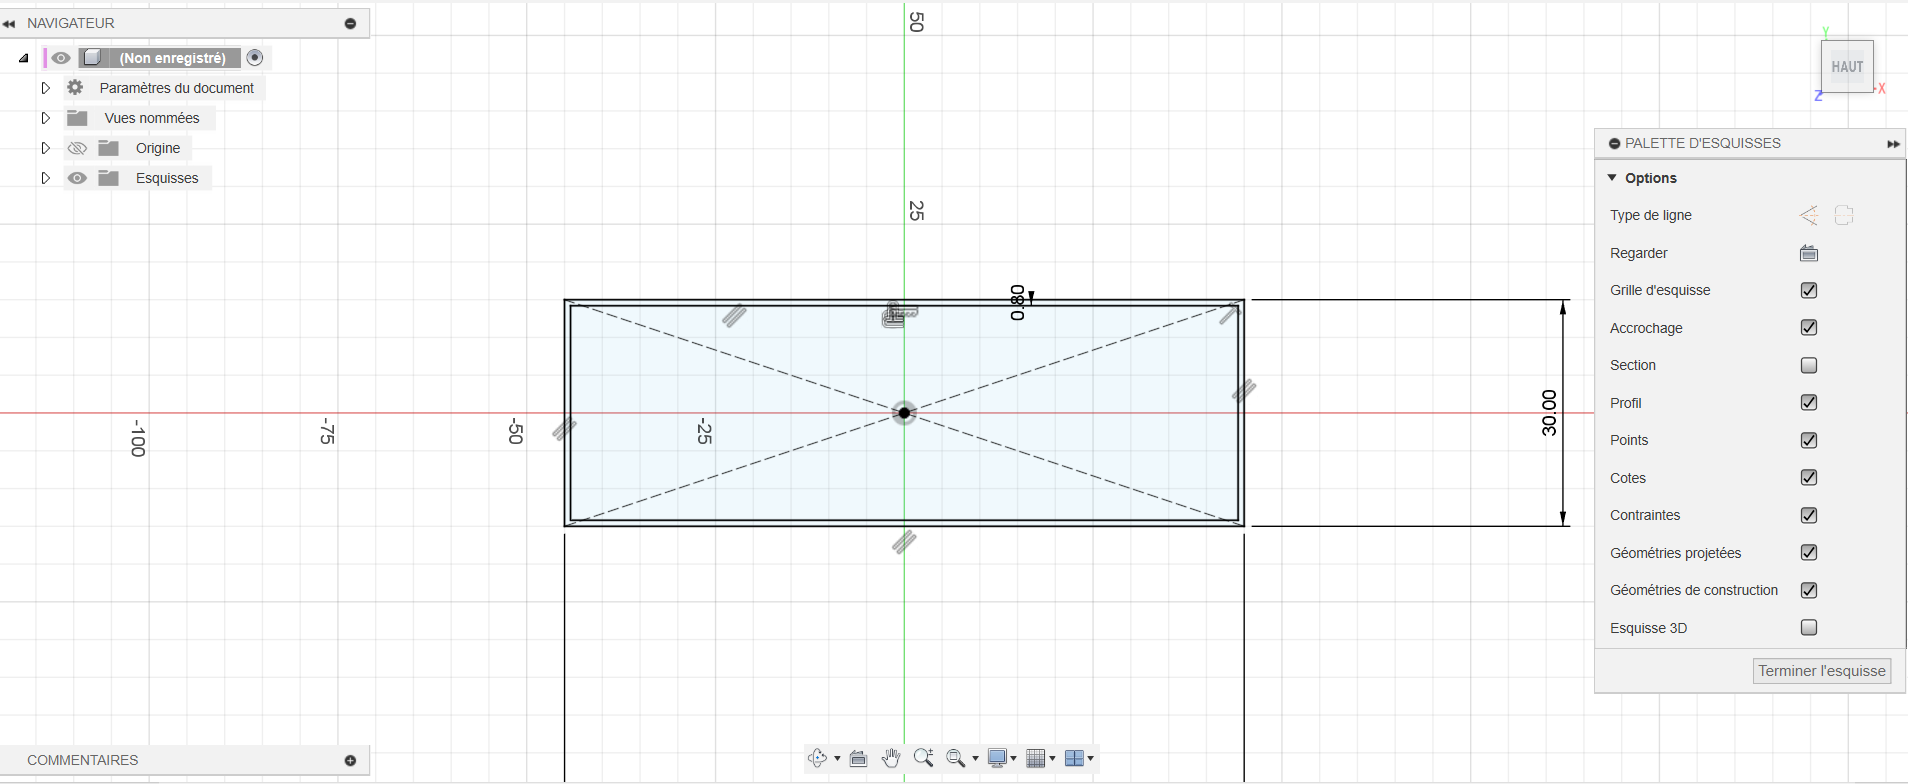
using fusion 360, create a sketch.
- From this sketch draw a rectangle of the desired size (this rectangle will represent the surface of your first aid box).
- Add an offset to this rectangle.
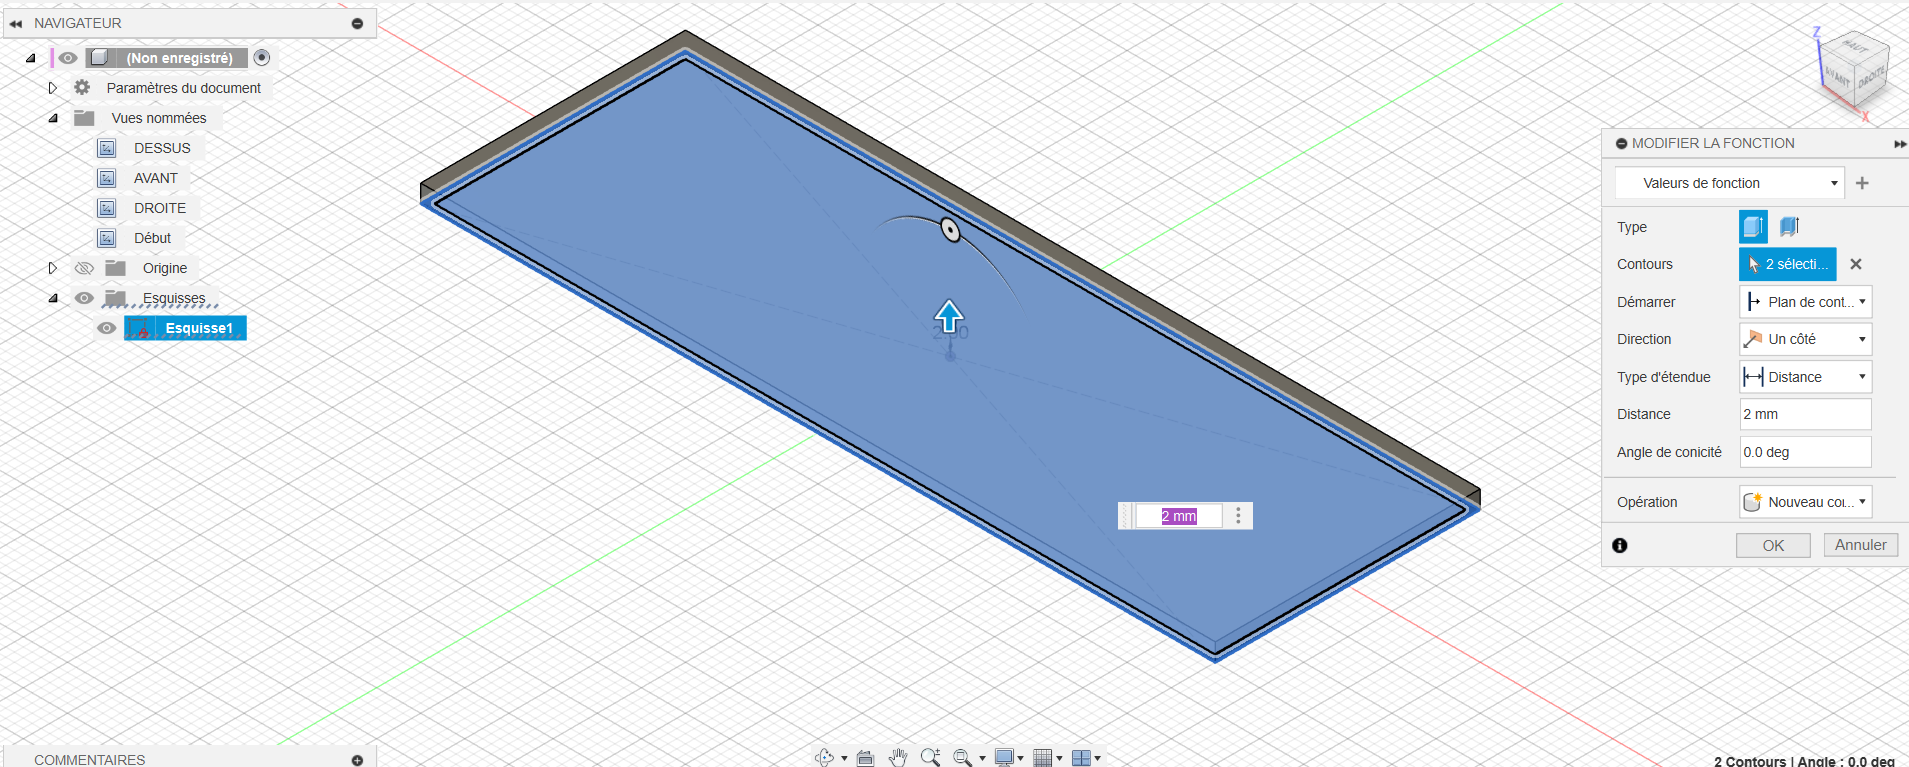
- extrude the rectangle and the offset created about 2mm height (this will be the bottom on the box)
- do a second extrusion of the desired height, but select only the offset (this will represent the total height of the box)
(this part of the first step contains everything you need to make the lid of your first aid box)
![FMU47YBLYBKDBKL.png](/proxy/?url=https://content.instructables.com/FRQ/9O6X/LYBKDBLP/FRQ9O6XLYBKDBLP.png&filename=FMU47YBLYBKDBKL.png)
![FCG5T6HLYBKDASO.png](/proxy/?url=https://content.instructables.com/F3N/BC1V/LYBKDCJK/F3NBC1VLYBKDCJK.png&filename=FCG5T6HLYBKDASO.png)
![Capture d'écran 2024-07-08 150731.png](/proxy/?url=https://content.instructables.com/F3P/3W4C/LYCZSF7I/F3P3W4CLYCZSF7I.png&filename=Capture d'écran 2024-07-08 150731.png)
![Capture d'écran 2024-07-08 151301.png](/proxy/?url=https://content.instructables.com/FCP/JBVY/LYCZSFIE/FCPJBVYLYCZSFIE.png&filename=Capture d'écran 2024-07-08 151301.png)
![Capture d'écran 2024-07-08 151841.png](/proxy/?url=https://content.instructables.com/FQO/UYDU/LYCZSFQ4/FQOUYDULYCZSFQ4.png&filename=Capture d'écran 2024-07-08 151841.png)
![Capture d'écran 2024-07-08 152319.png](/proxy/?url=https://content.instructables.com/FTE/JRGU/LYCZSFV6/FTEJRGULYCZSFV6.png&filename=Capture d'écran 2024-07-08 152319.png)
![Capture d'écran 2024-07-08 153035.png](/proxy/?url=https://content.instructables.com/FIK/ITKO/LYCZSG1Y/FIKITKOLYCZSG1Y.png&filename=Capture d'écran 2024-07-08 153035.png)
now that you have the beginning of your box, we are going to add a nice shape to it, and a few compartments... examples: (plaster aids, antiseptic, painkiller)
Second step:
- return to the sketch made in the first step, and modify it. add compartments to your box by drawing new rectangles of the desired dimensions; arrange these new rectangles inside your box as you wish. these new rectangles will represent new storage spaces
- add an offset place inside to all the new rectangle add previoulsy
- select all the new offset create (only those one) and extrude them to the same height you do for the box. (join)
- now we gonna shape the box, create a new sketch on the left side of the box and drawn a construct line as show in the picture.
- add a Plane At Angle to the construct line made previously.
- use slipt body function on the plane at angle made before.
- the body is now split in 2 parts. remove the small one, now you first aid box is finish
Third step:
Use your 3D printer to print the 2 object you have just made in fusion.
PLA works perfectly fine.
Use
2 perimeters
2 top/2 bottom
Infill 20% where it's need
No raft, no skirt no support needed
Print speed depend of your printer.
It should not be difficult to print