Final Evaluations 2020

Hello everyone! My name is Vedant Vyas and this is my Grade 10 Computer Engineering Project for Final Evaluations 2020. For this project, I chose to design a car that could be programmed to move around on its own or could be controlled using an app controller. I chose to design this car because I love to learn and take on new challenges and because I have learned a lot of different units throughout this course and thought that I could apply those to my design. In order to exceed expectations, I implemented a distance sensor that would stop the car as soon as it sensed an obstacle within a few centimetres. I have done a lot of research on this project by looking at various other projects to get an insight into what I would have to accomplish. I also spent a lot of time learning how to wire a new H-bridge, program a distance sensor, and wire motors. Throughout this tutorial that I have made, you will learn how to design this car yourself by looking at examples, diagrams, and a step-by-step instructions manual.
Materials
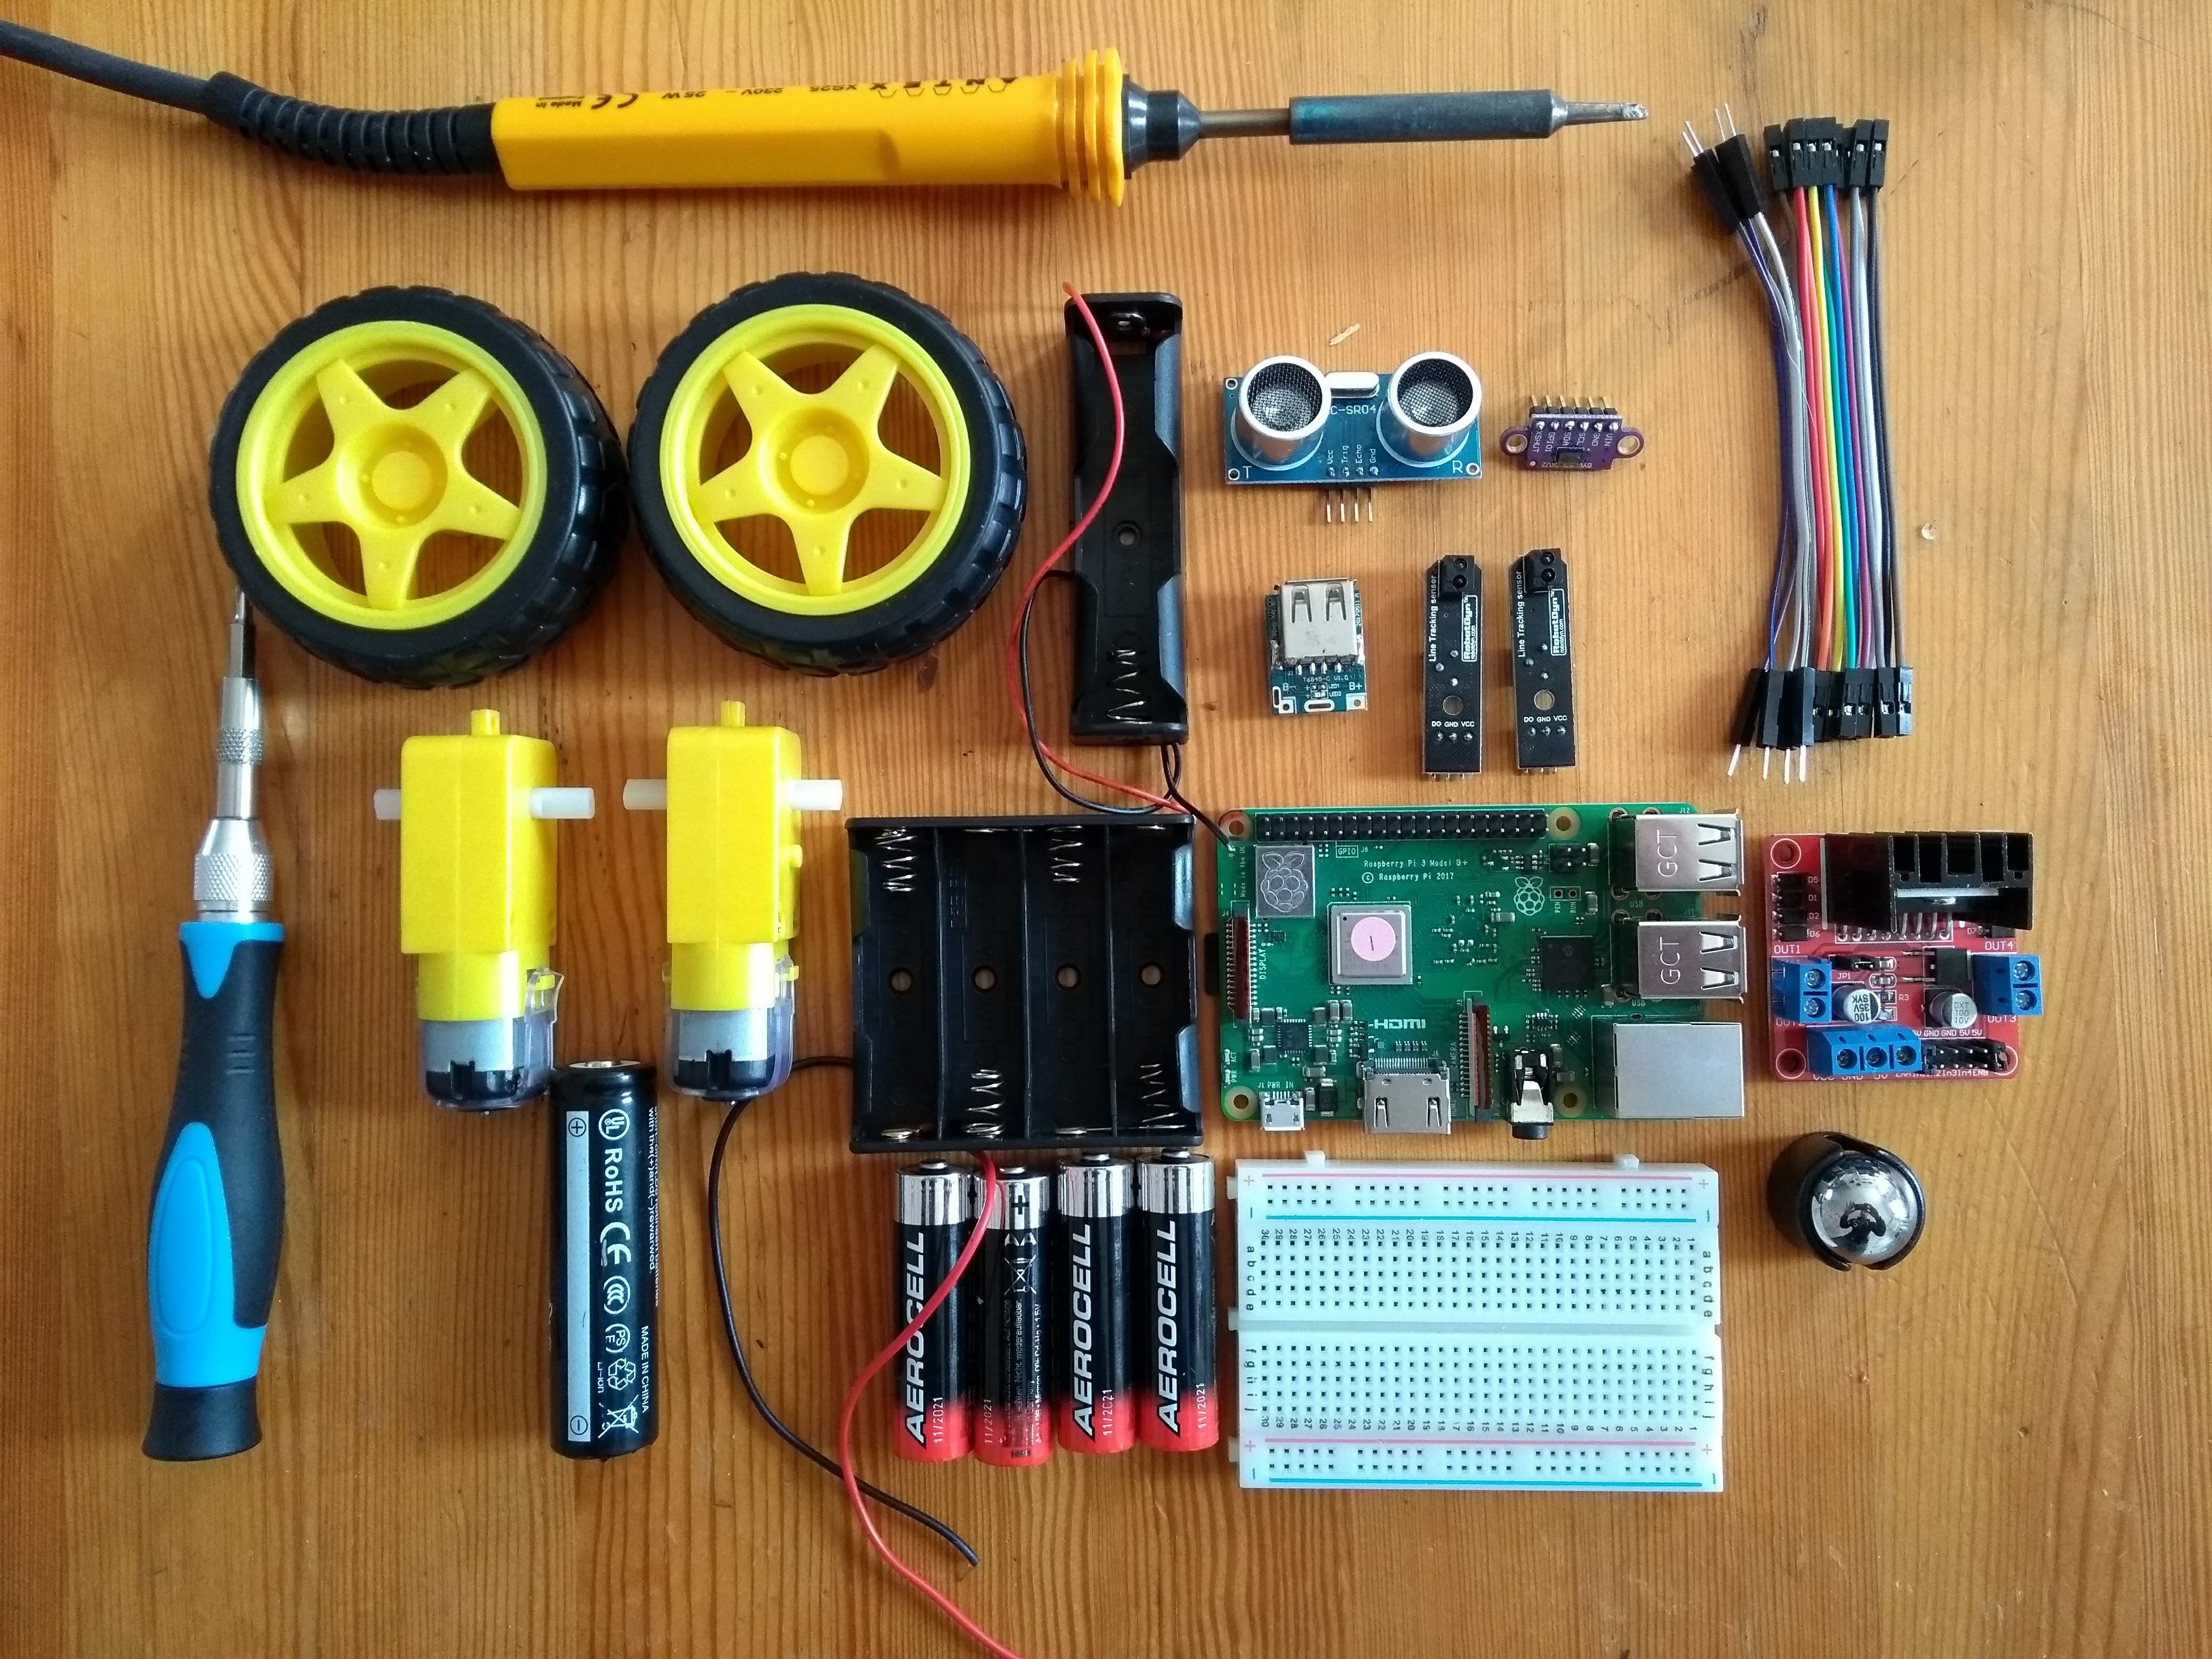
- 1 Car with 2 Motors
- 1 Raspberry Pi Model 3 B+
- 1 Solderless Breadboard
- 1 9V Battery
- 1 H-Bridge Model HLF1808
- 11 Male-Female Jumper Wires
- 3 Female-Female Jumper Wires
- 13 Normal Wires
- 1 Distance Sensor
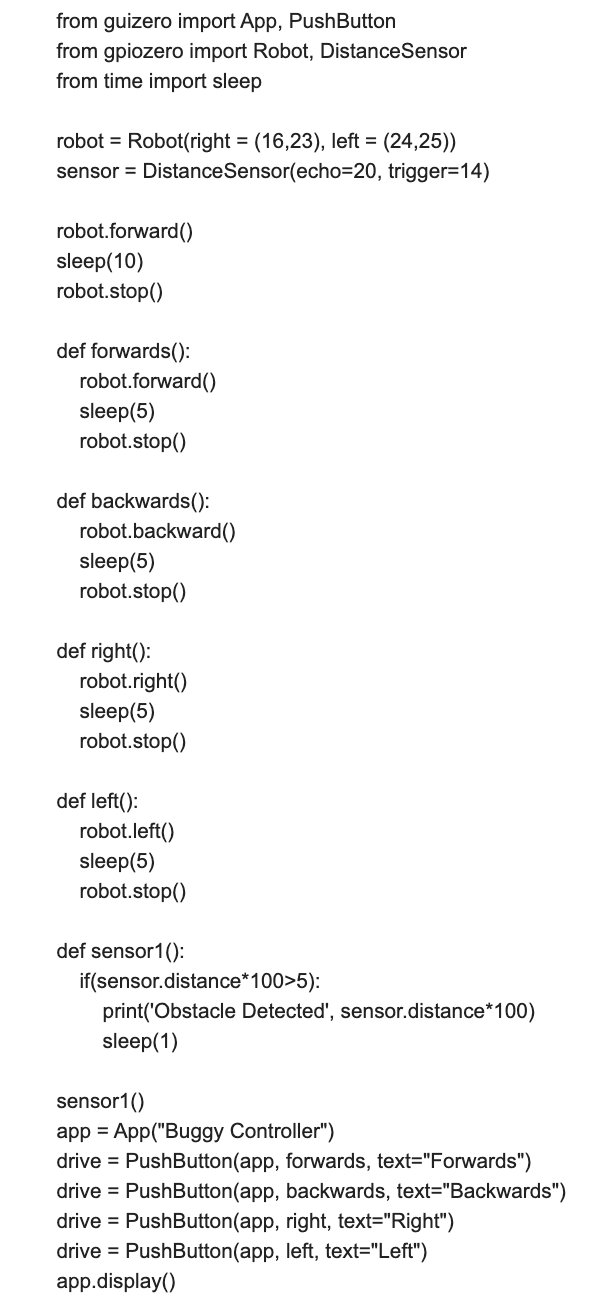
Example Screenshots
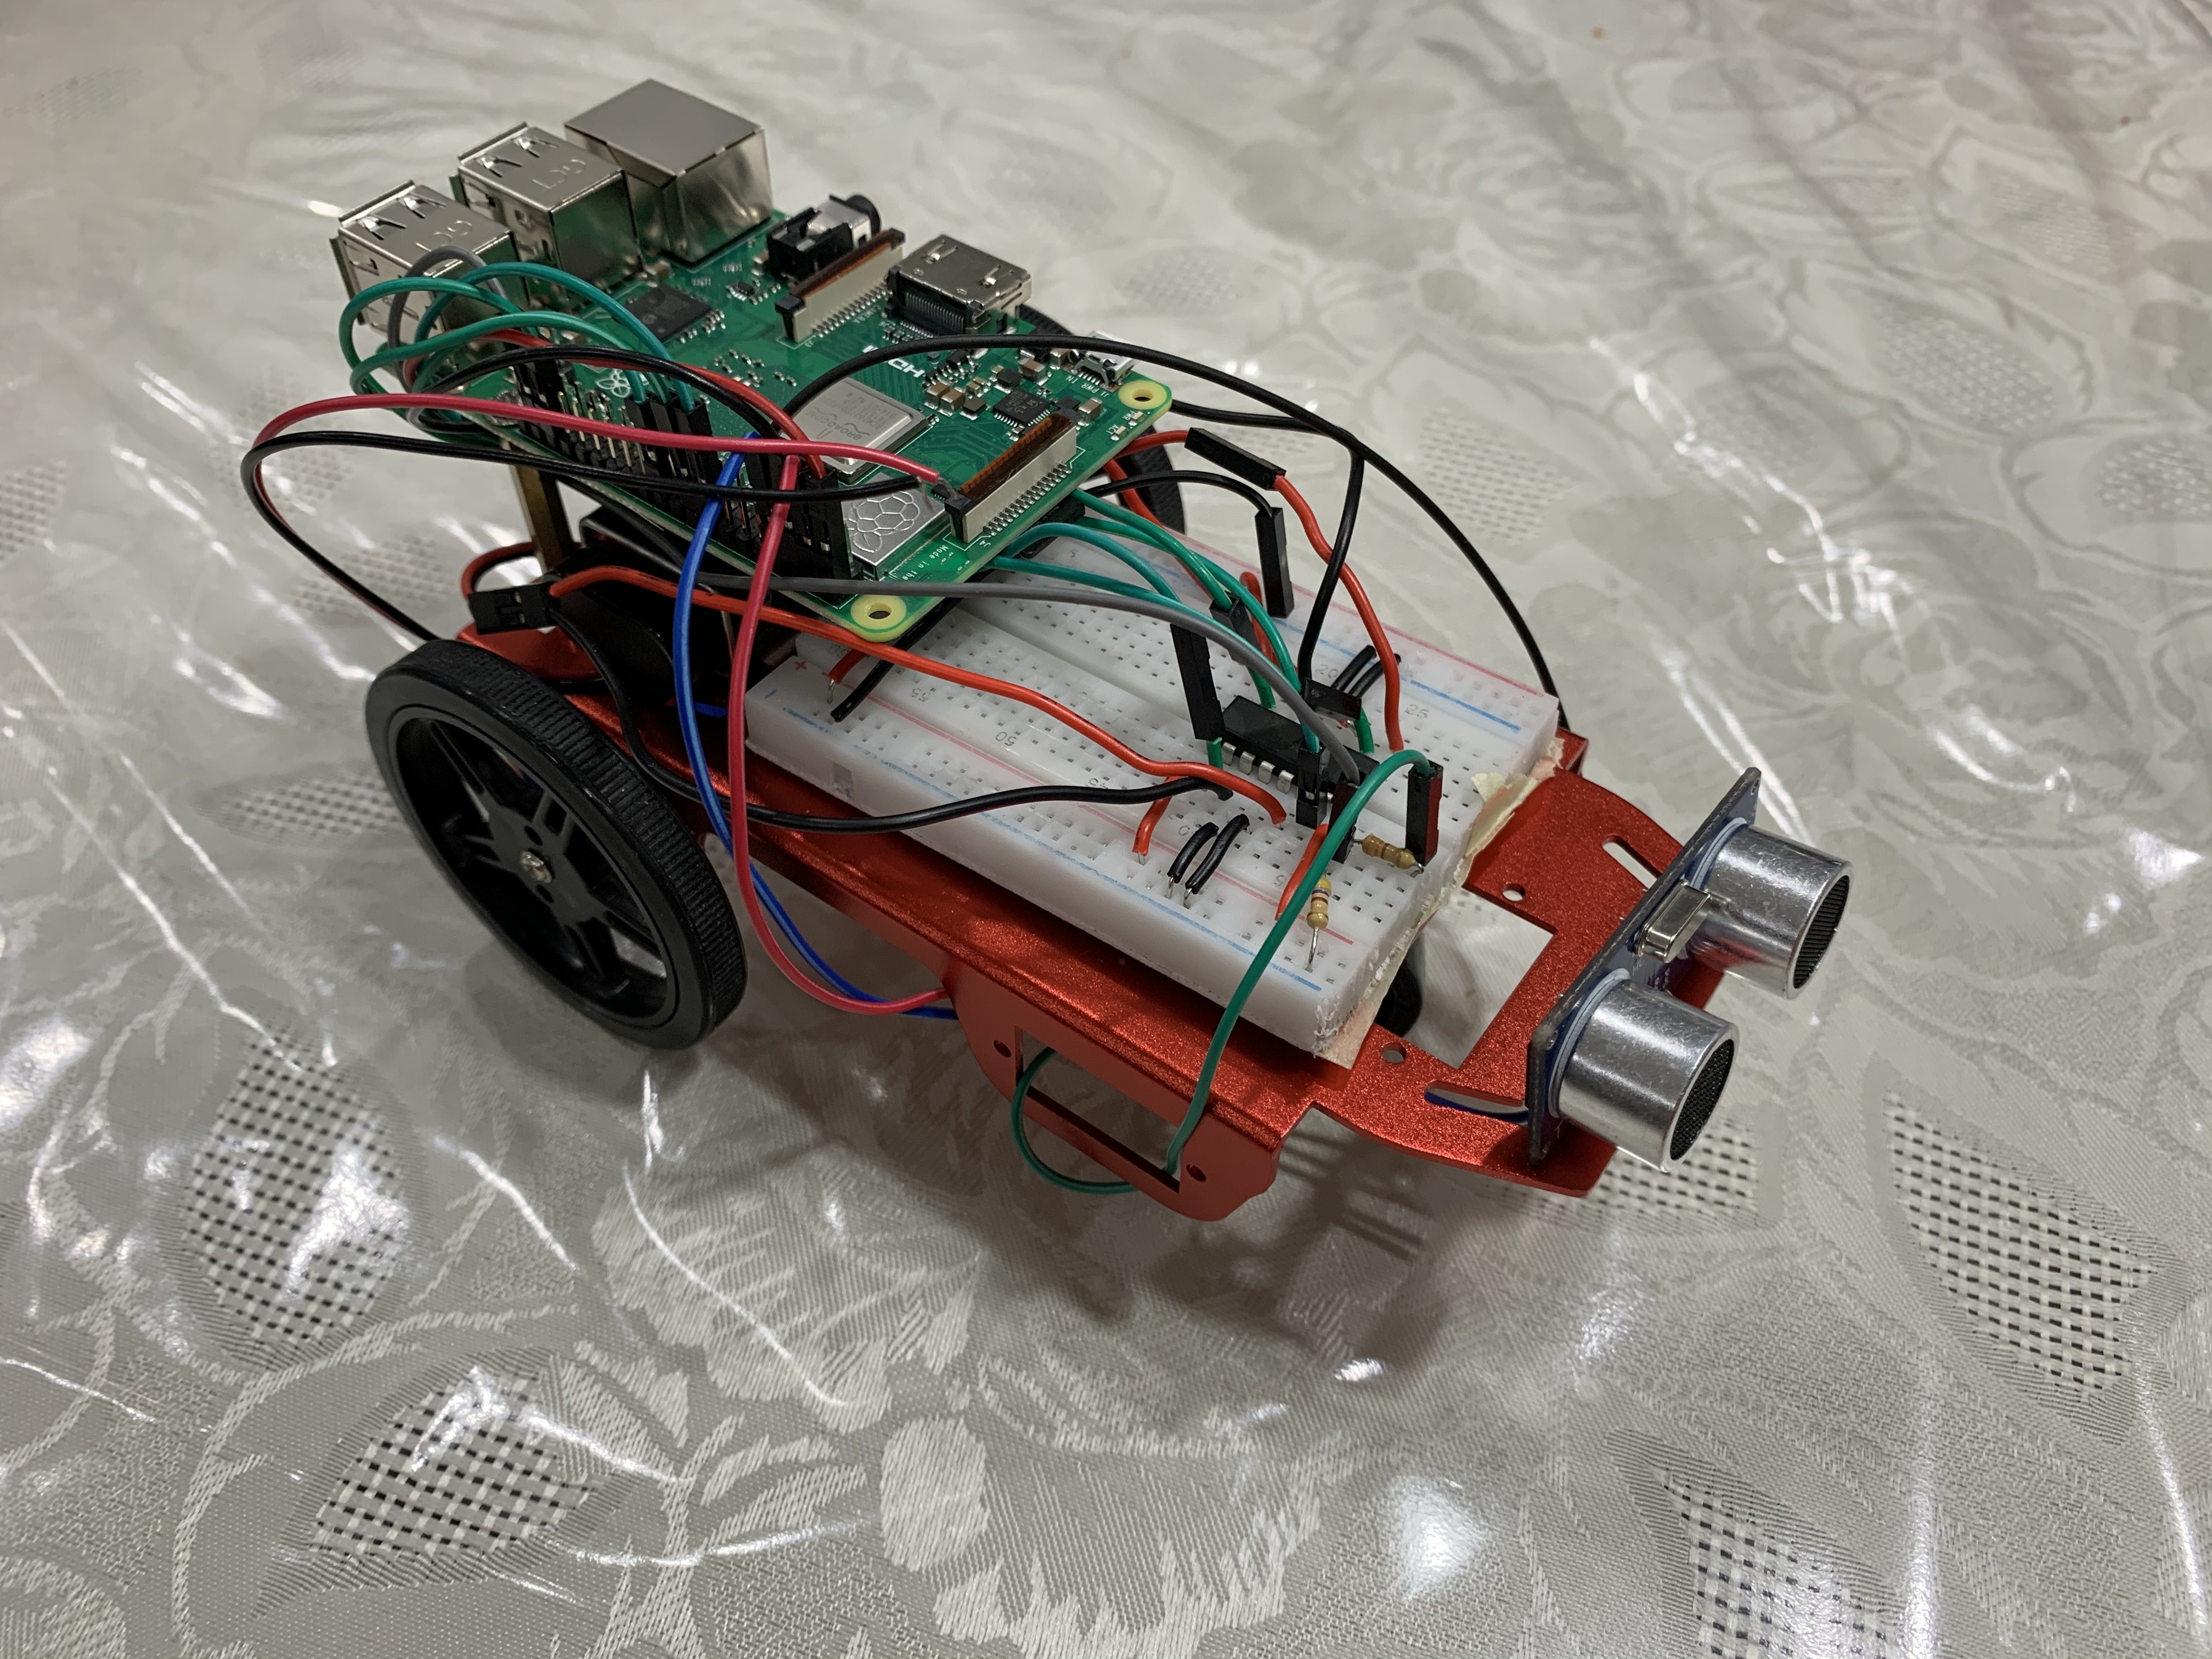
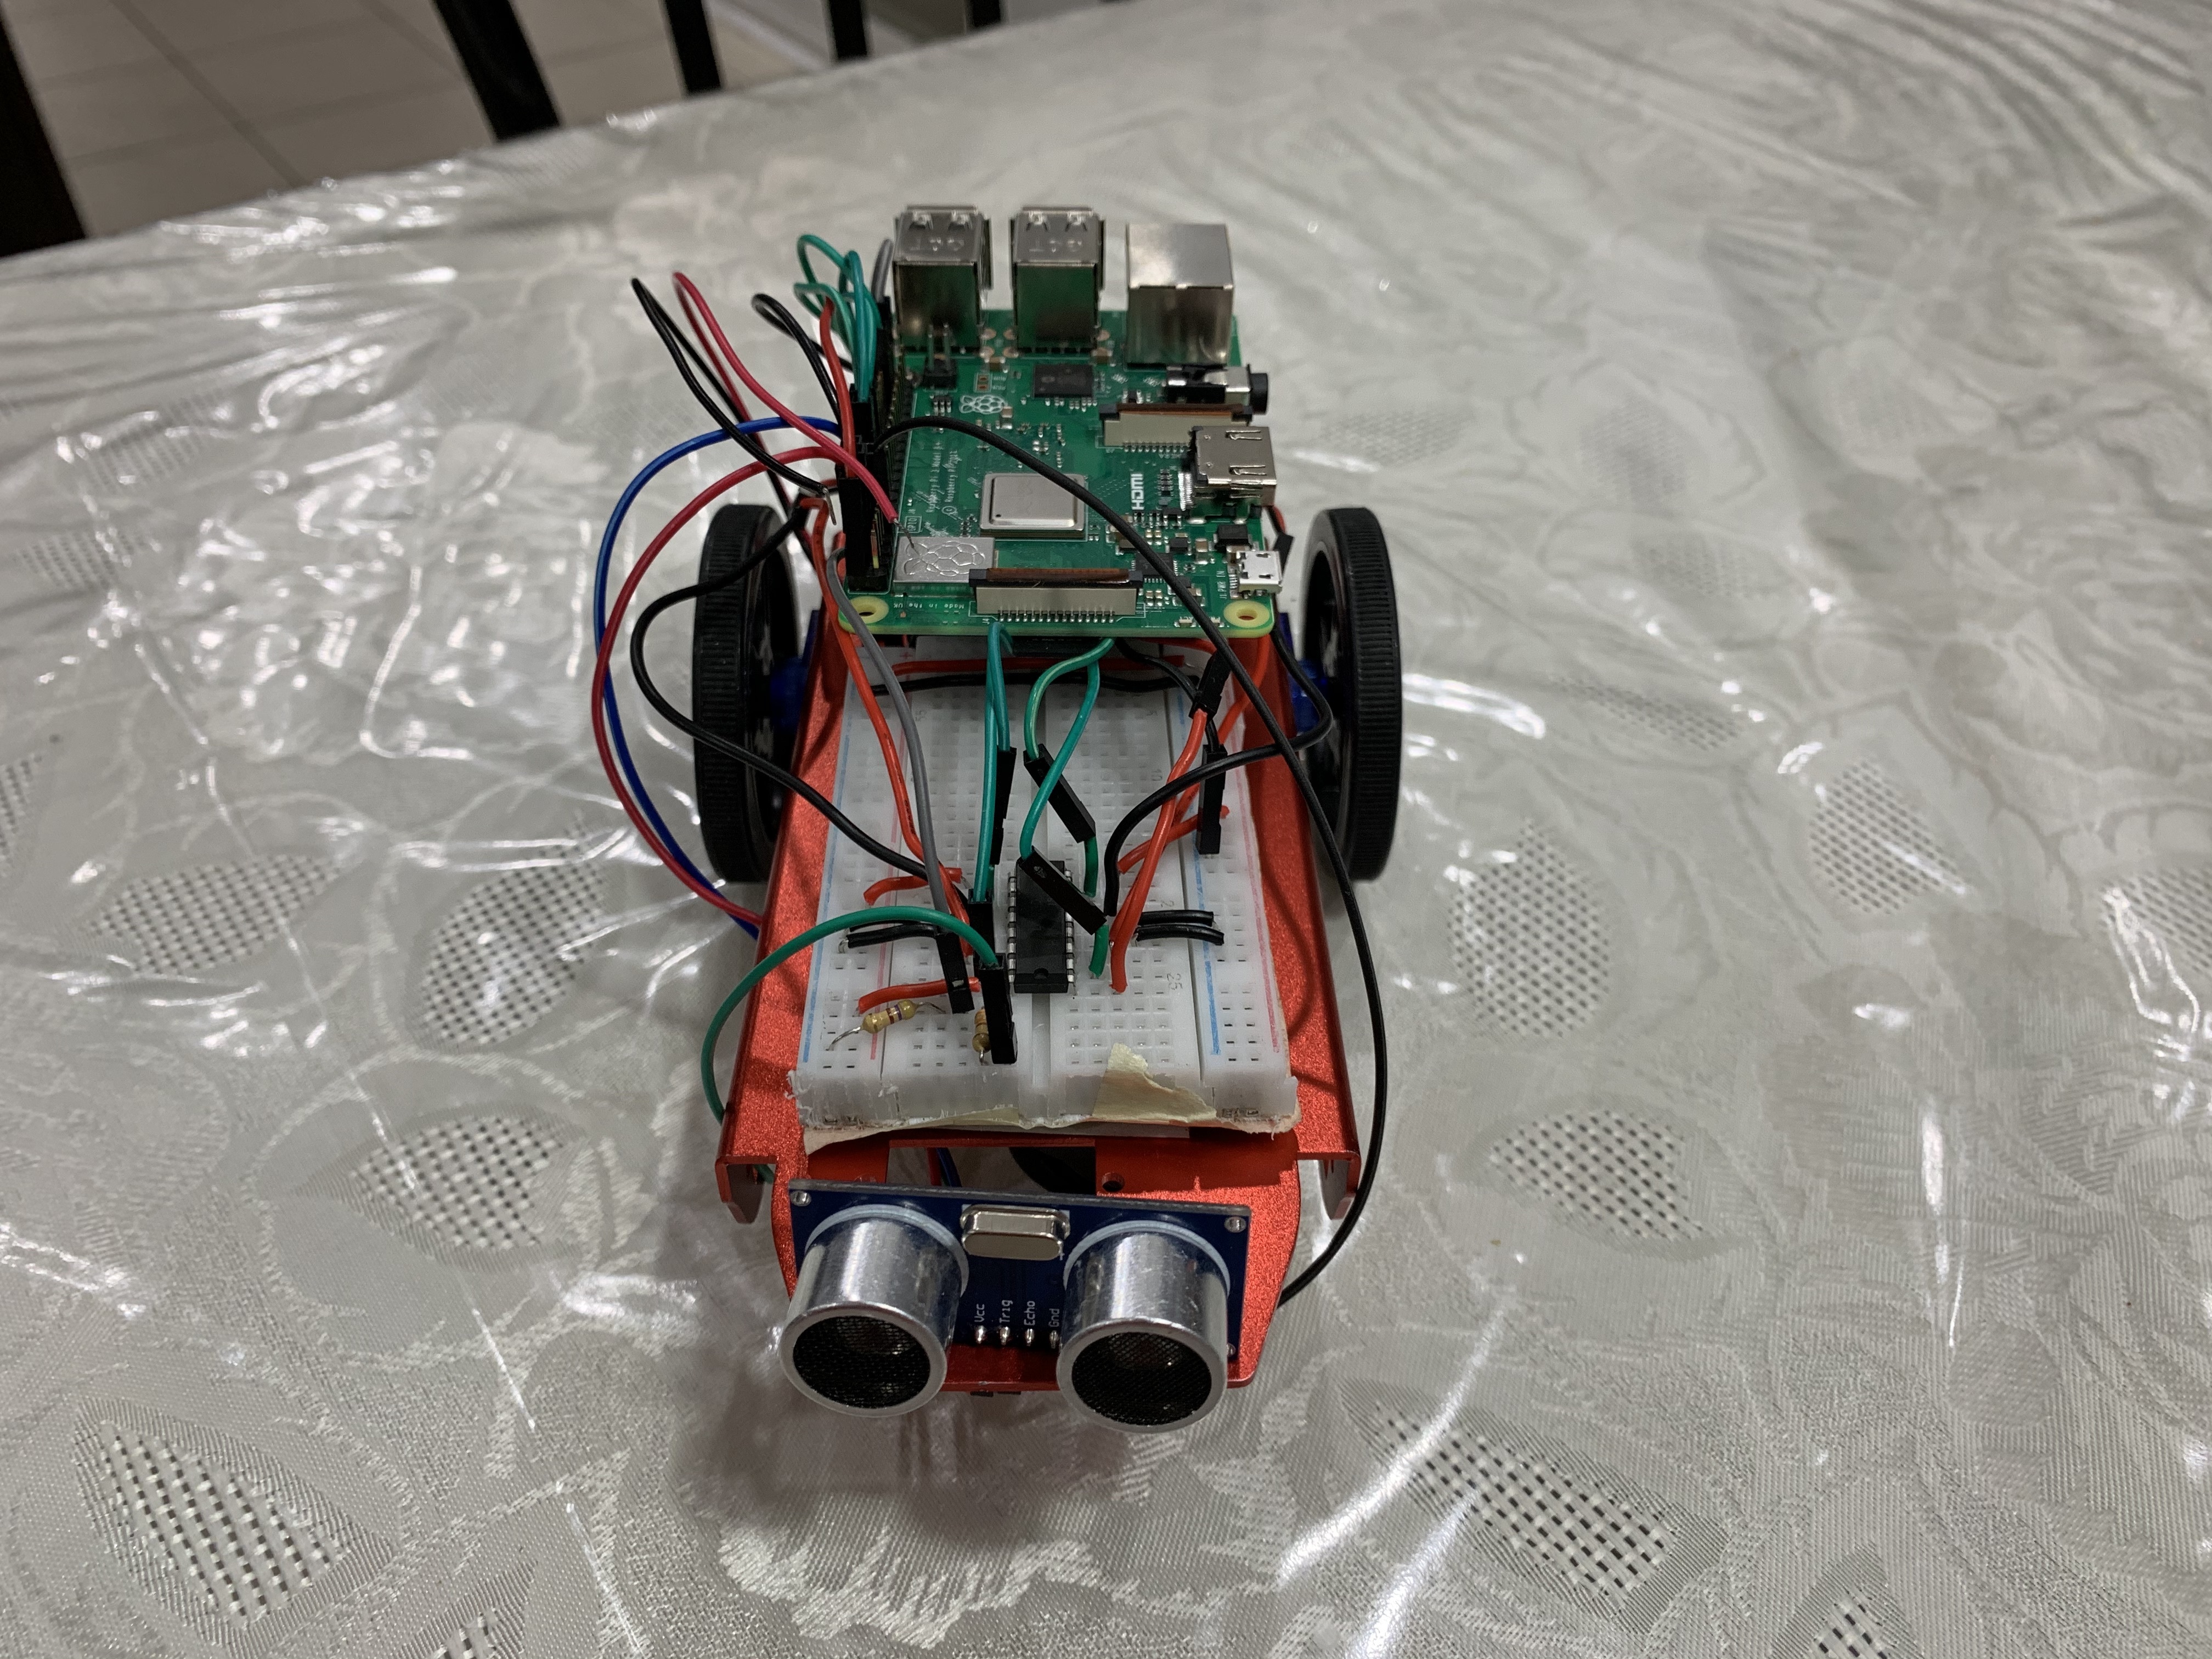
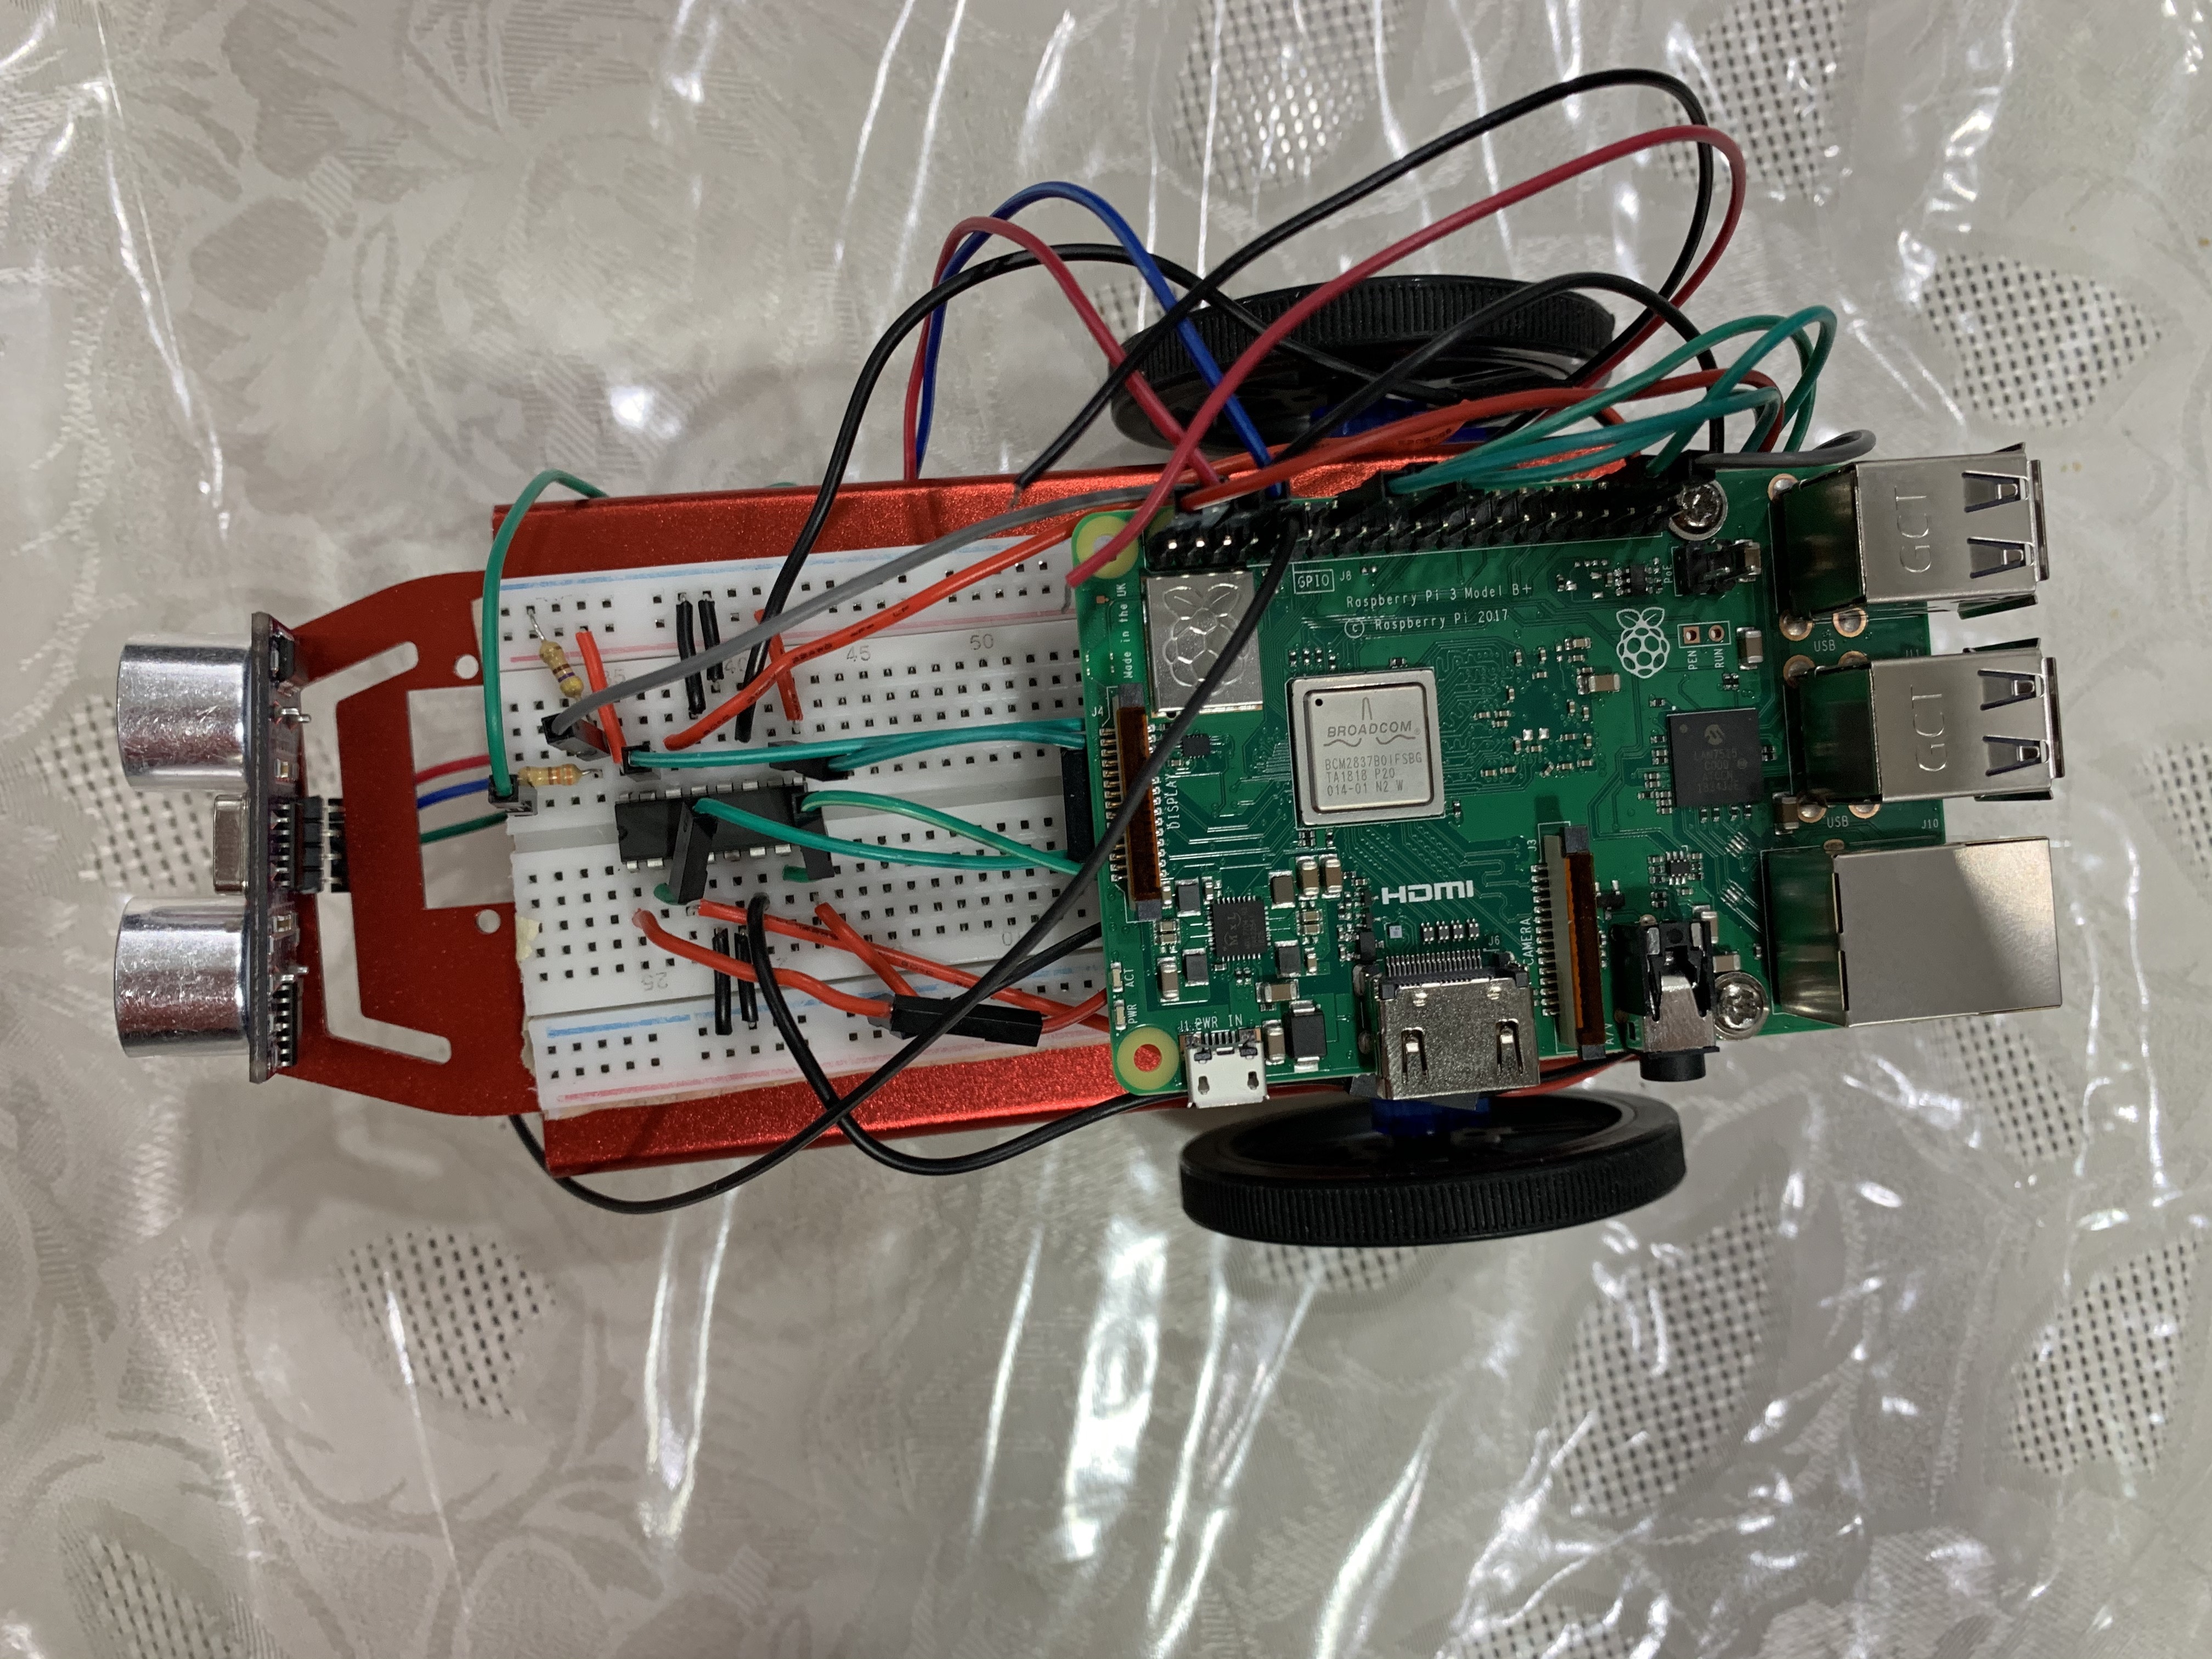
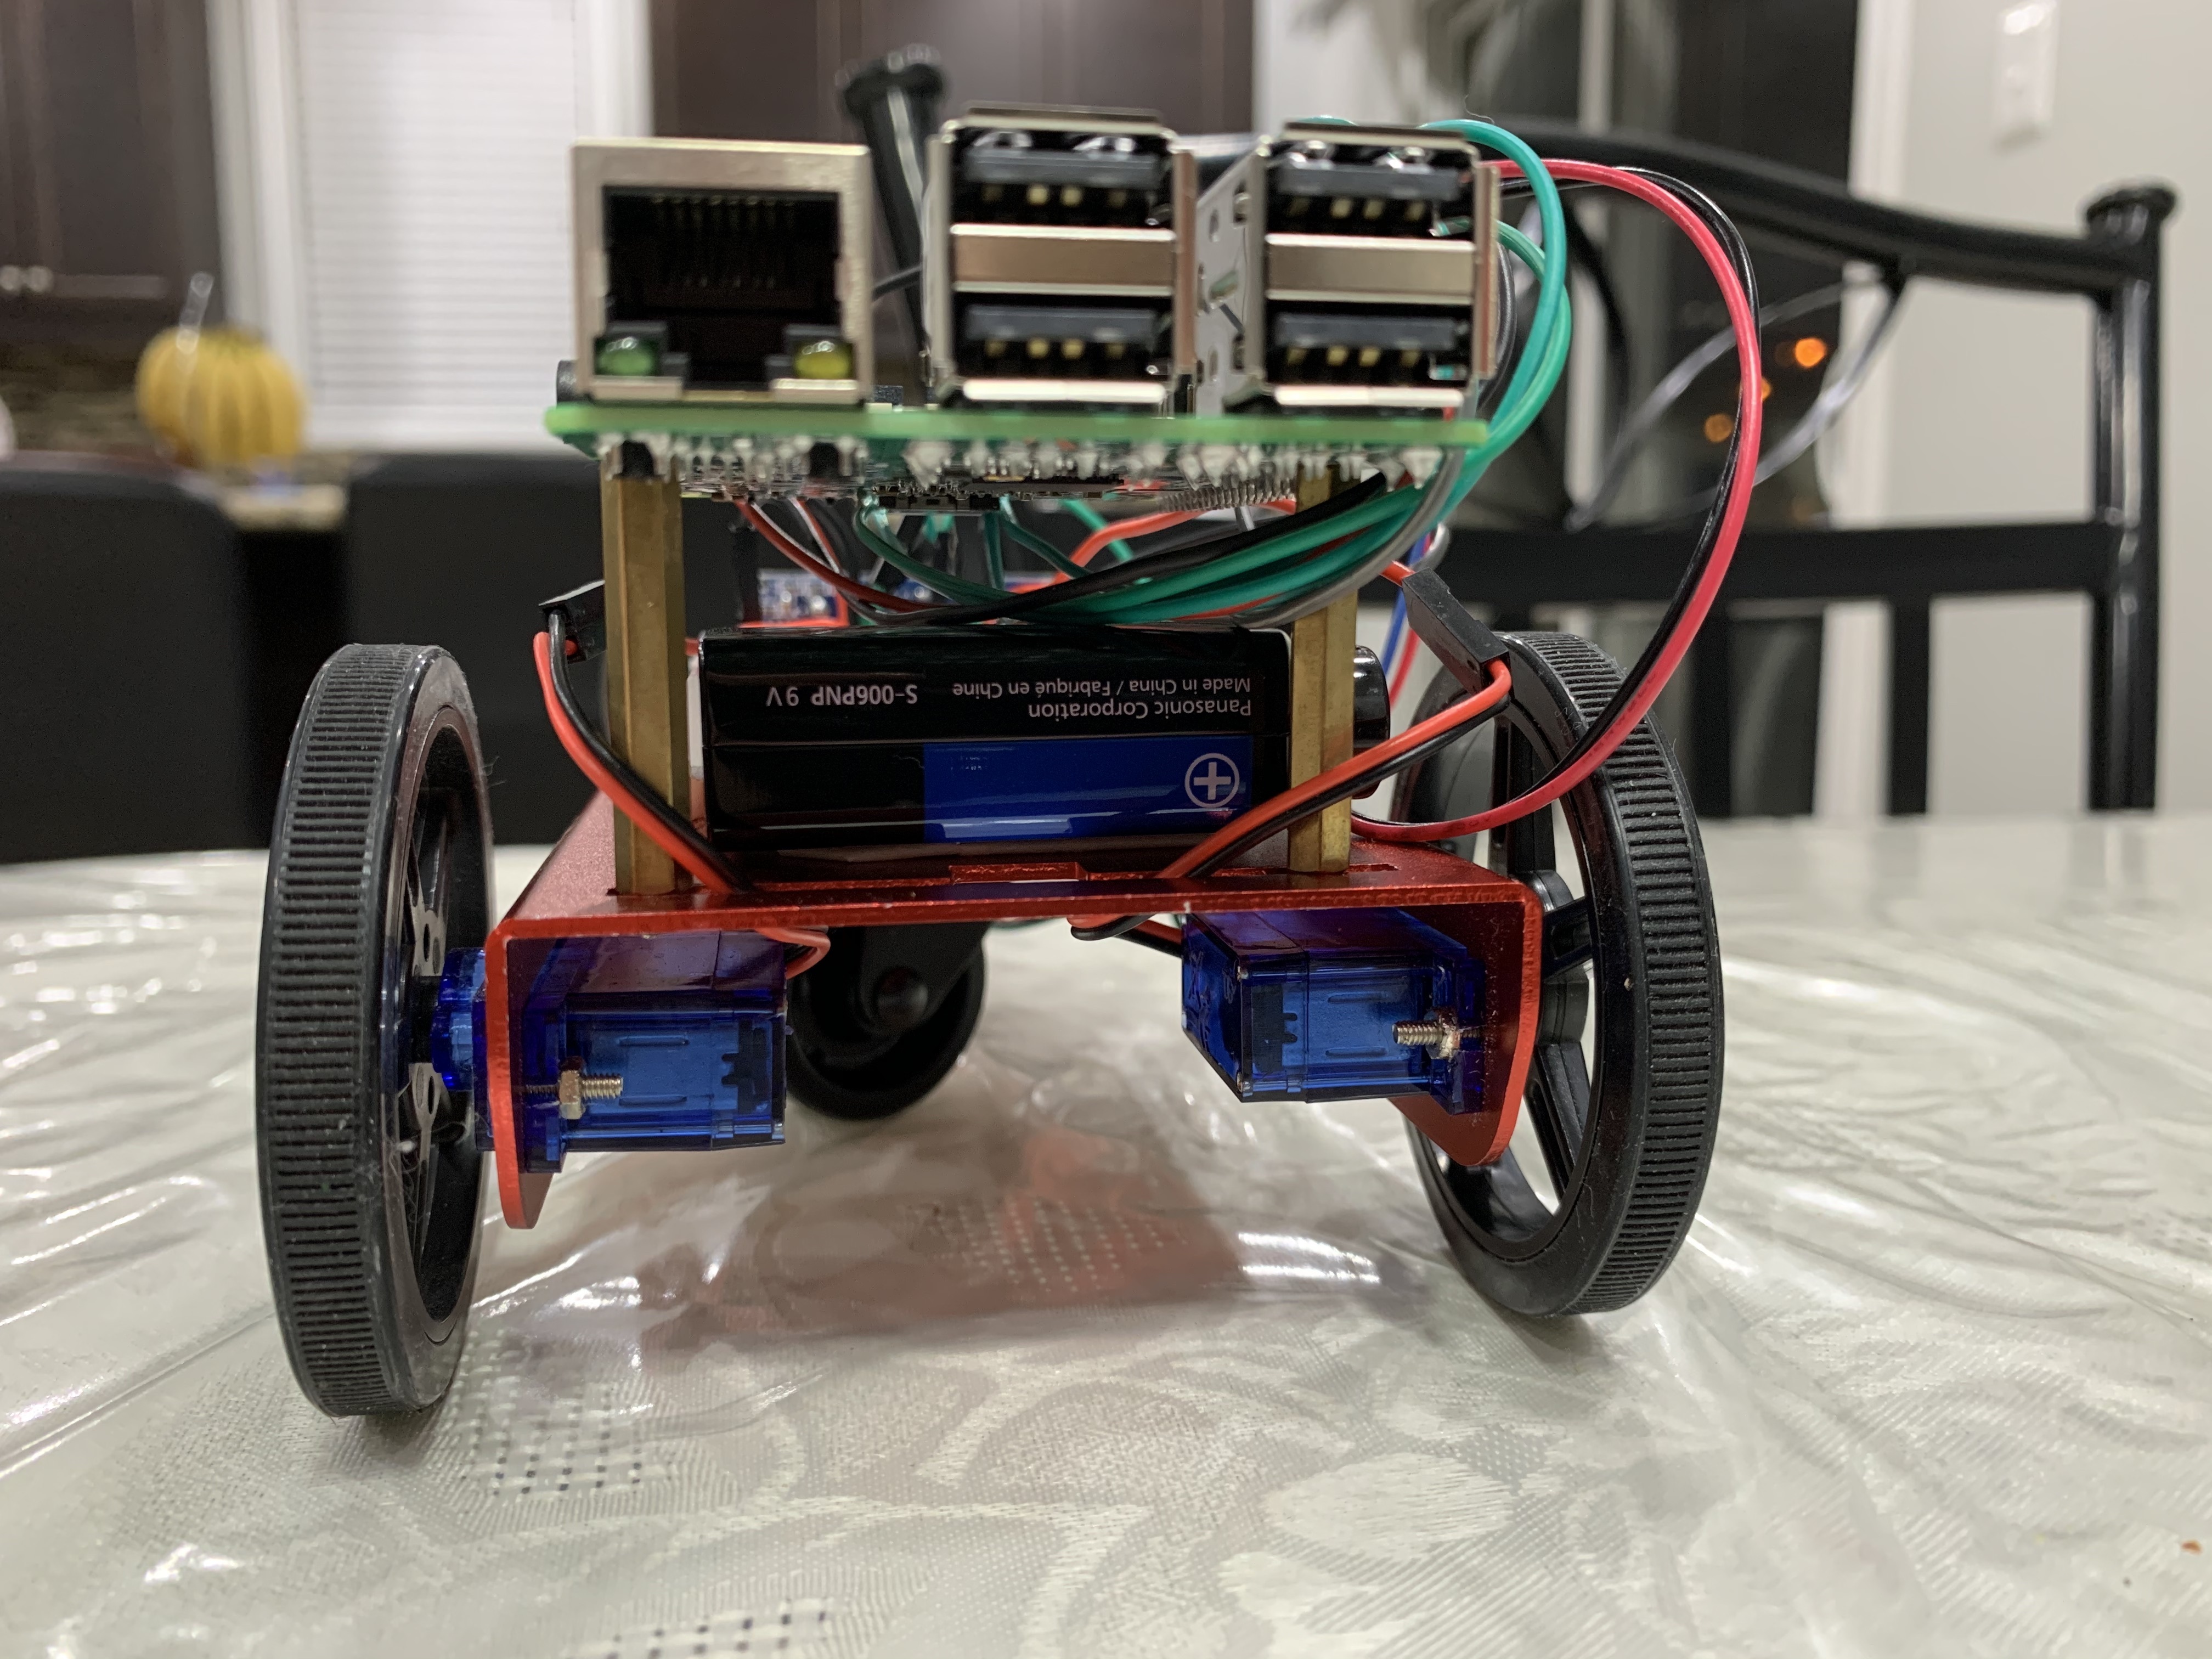
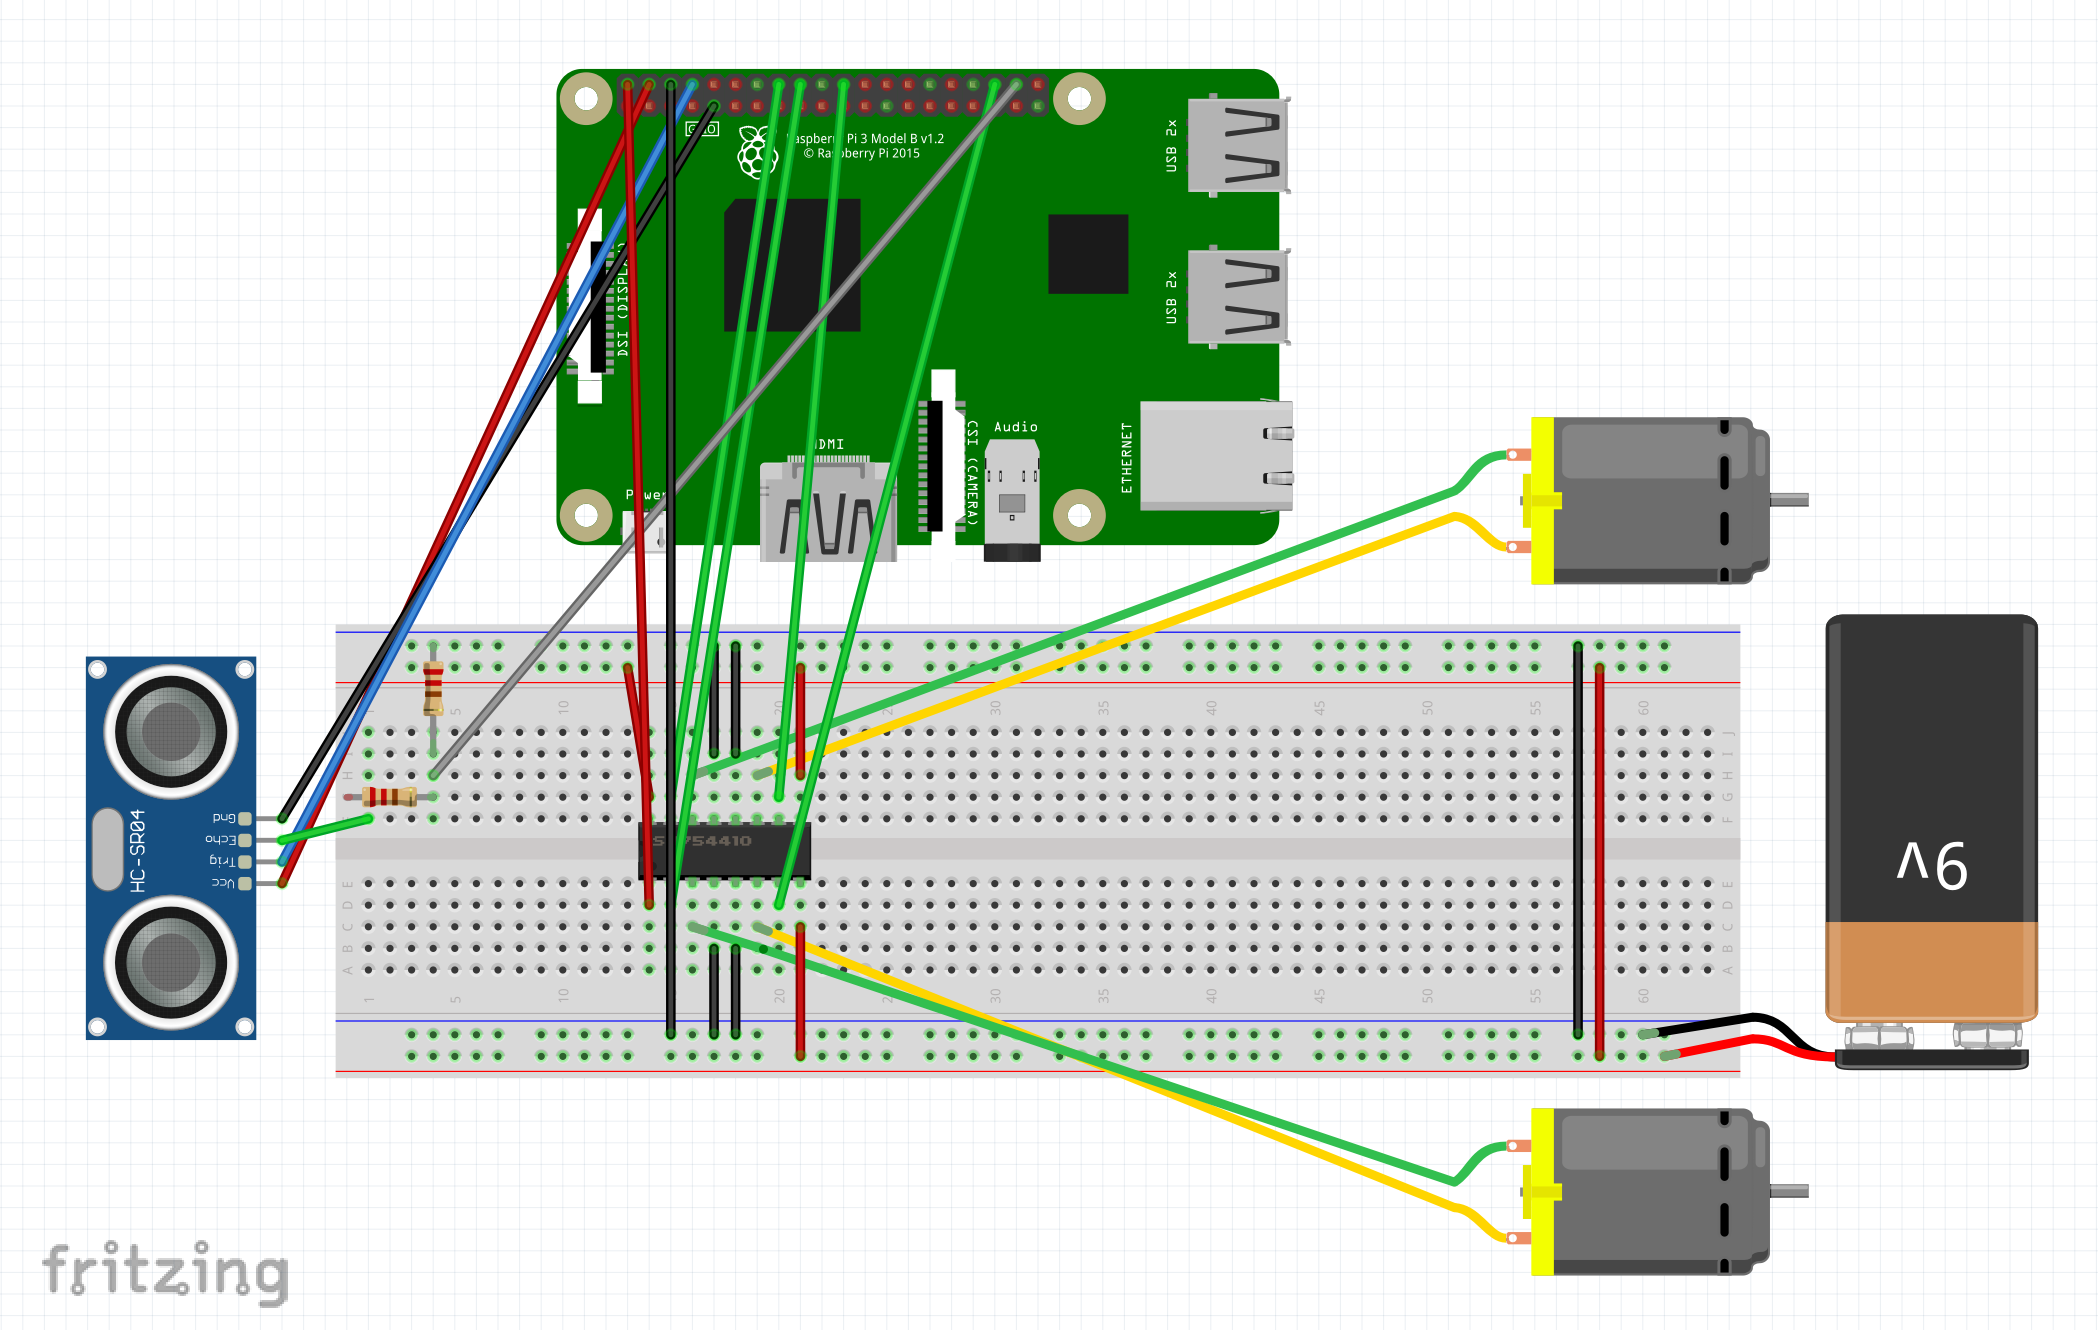
Circuit Diagram
Step-By-Step Instructions - How to Build/Wire the Car
- Before beginning this project, you will need to make sure that your raspberry pi is fully functional with a Linux OS System and can run Python.
- Now that you are ready, let's begin by taking a solderless breadboard and attaching the HLF1808 H-bridge to it (as shown in the wiring diagram).
- Next, you will need to take 3 wires and plug them into the 3 corner legs of the H-bridge and the power rails. Plug these 3 wires into the top-right, bottom-right, and bottom-left legs of the H-bridge (look at the H-bridge with the dip facing forward). Try to use red wires for this so that you know that these are used for power.
- Take a male-female jumper wire and connect one end to the raspberry pi 5V pin and the other end to the top-left leg of the H-bridge.
- Now, you will need to take 4 wires (preferably black) and connect them from the middle 2 legs of the H-bridge to the ground rails. You will also need to take an additional male-female wire and connect it from a ground pin on your raspberry pi to the ground rail on your breadboard.
- Once you have implemented the power and ground wires, you can begin wiring your motors by taking the red wire and placing it into the third leg from the top of the H-bridge. After that, you will take the black wire and attach it to the third leg from the bottom of the H-bridge. If you have attached the motors properly, they should functions perfectly once you're done these next few steps.
- Now, you will need to take your 9V battery and attach the 2 wires into the ground and power rails (red = power, black = ground).
- Once you have finished wiring your battery, you will need to take 4 male-female jumper wires and connect them from any raspberry pi gpio pins to the remaining unused H-bridge legs.
- Finally, you will need to take 1 black and 1 red wire and connect them across your breadboard from the ground-ground rail (black wire) and power-power rail (red wire).
- Optional - if you want, you can use a distance sensor to help improve your project. To wire a distance sensor, you will need to follow these specific steps:
- Take 1 female-female wire (red) and attach it from the VCC pin on the sensor to a 5V pin on the pi.
- Take another female-female wire (black) and attach it from the GND pin on the sensor to the ground rail on your breadboard.
- Take one more female-female wire and attach it from the TRIG pin on the sensor to a gpio pin on the pi.
- Finally, take a male-female wire and attach it from the ECHO pin on the sensor to an empty space on your breadboard. Then take a 330 Ohm resistor and connect it from the wire to another empty space on your breadboard. Next, you will need to take another male-female wire and attach it from the 330 Ohm resistor to an empty gpio pin on the pi. Lastly, you will need to connect a 470 Ohm resistor from the second wire you connected to the ground rail.
- Now you are ready to code using Python!
Step-By-Step Instructions - How to Code Using Python
- Begin coding by defining your libraries (eg. from gpiozero import LED).
- Next, you will need to define all of the variables that you will be using (eg. led = LED(9)).
- Now that you have defined everything you need, you can begin coding by writing a simple statement to test if your motors are fully functional. This will require you to write a 3-step statement similar to this:
- robot.forward()
- sleep(5)
- robot.stop()
- If the code helps your motors work, then you are ready to proceed to the next step. This step will require you to write a def function (eg. def forwards(): ) that will help your car move forwards, backwards, right, and left with the help of an app that you will install later on.
- If you chose to add a distance sensor to your car, then you will need to add an additional def sensor1 function. This function will allow you to print out the distance between your car and an obstacle. This function will require you to write these simple lines of code:
def sensor1():
if(sensor.distance*100>5):
print('Obstacle Detected', sensor.distance*100)
sleep(1)
- Now that you have finished writing this code, you are ready to install the VNC Viewer app.
Example Code
