Filament Guide for Elegoo Neptune 3D Printer
by annadomingo in Workshop > 3D Printing
1033 Views, 7 Favorites, 0 Comments
Filament Guide for Elegoo Neptune 3D Printer
Hello everyone! My name is Anna. Below you can find step by step instructions on how to build a filament guide for your Elegoo Neptune 3D printer. Some key features about this design are that no screws are needed, provides freedom to move your filament guide up and down once it is assembled on the printer, and it is low cost as you can 3D print all the parts of the assembly.
Note: Knowledge on any Computer Aided Design Platform is not required when following the steps below to build a filament guide. The files to print each spare part can be found in the instructions.
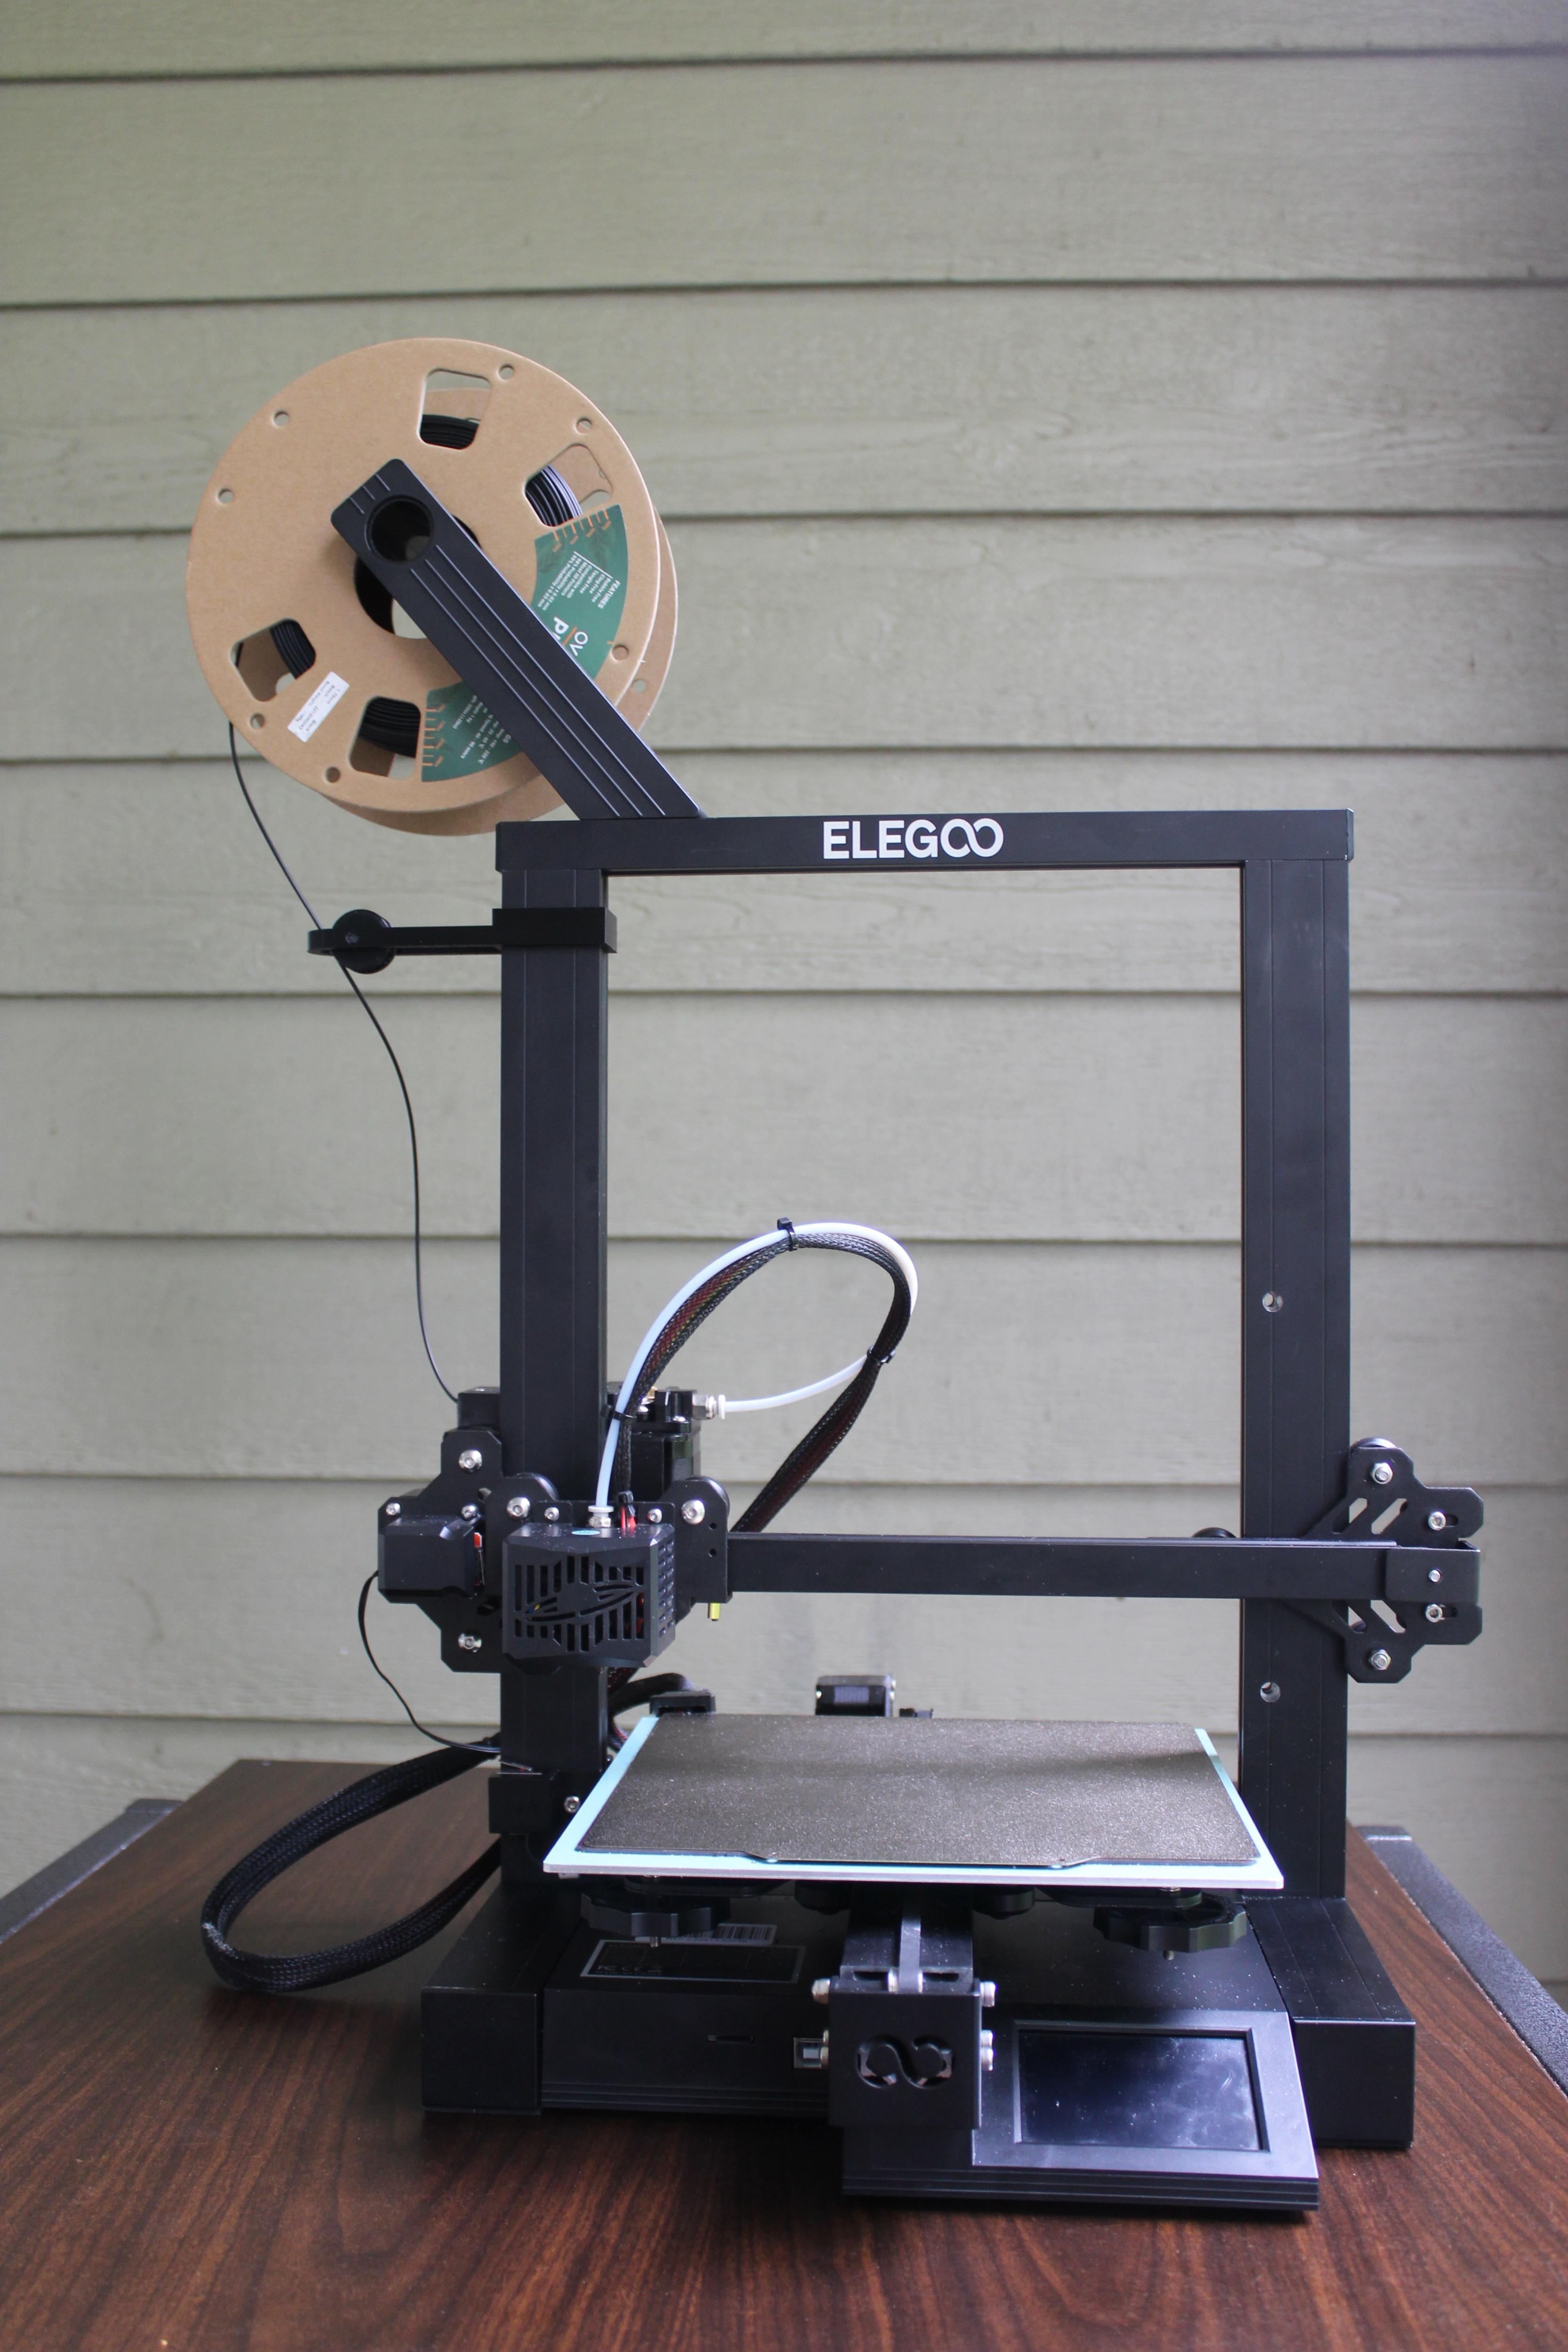
A couple of months ago I got my first 3D Printer for one of my College courses. Once assembled I printed a figure as a trial. Unfortunately, when I came back the figure was not yet printed. Having a closer look I realized that the filament got stuck with the threaded rod used to move up and down the Z-axis, not letting the filament run through the nozzle. I decided to build a filament guide in order to avoid this from happening in future prints.
Supplies
- 3D Printer
- Filament
- SolidWorks Software / Cura Software
Overall Design Idea
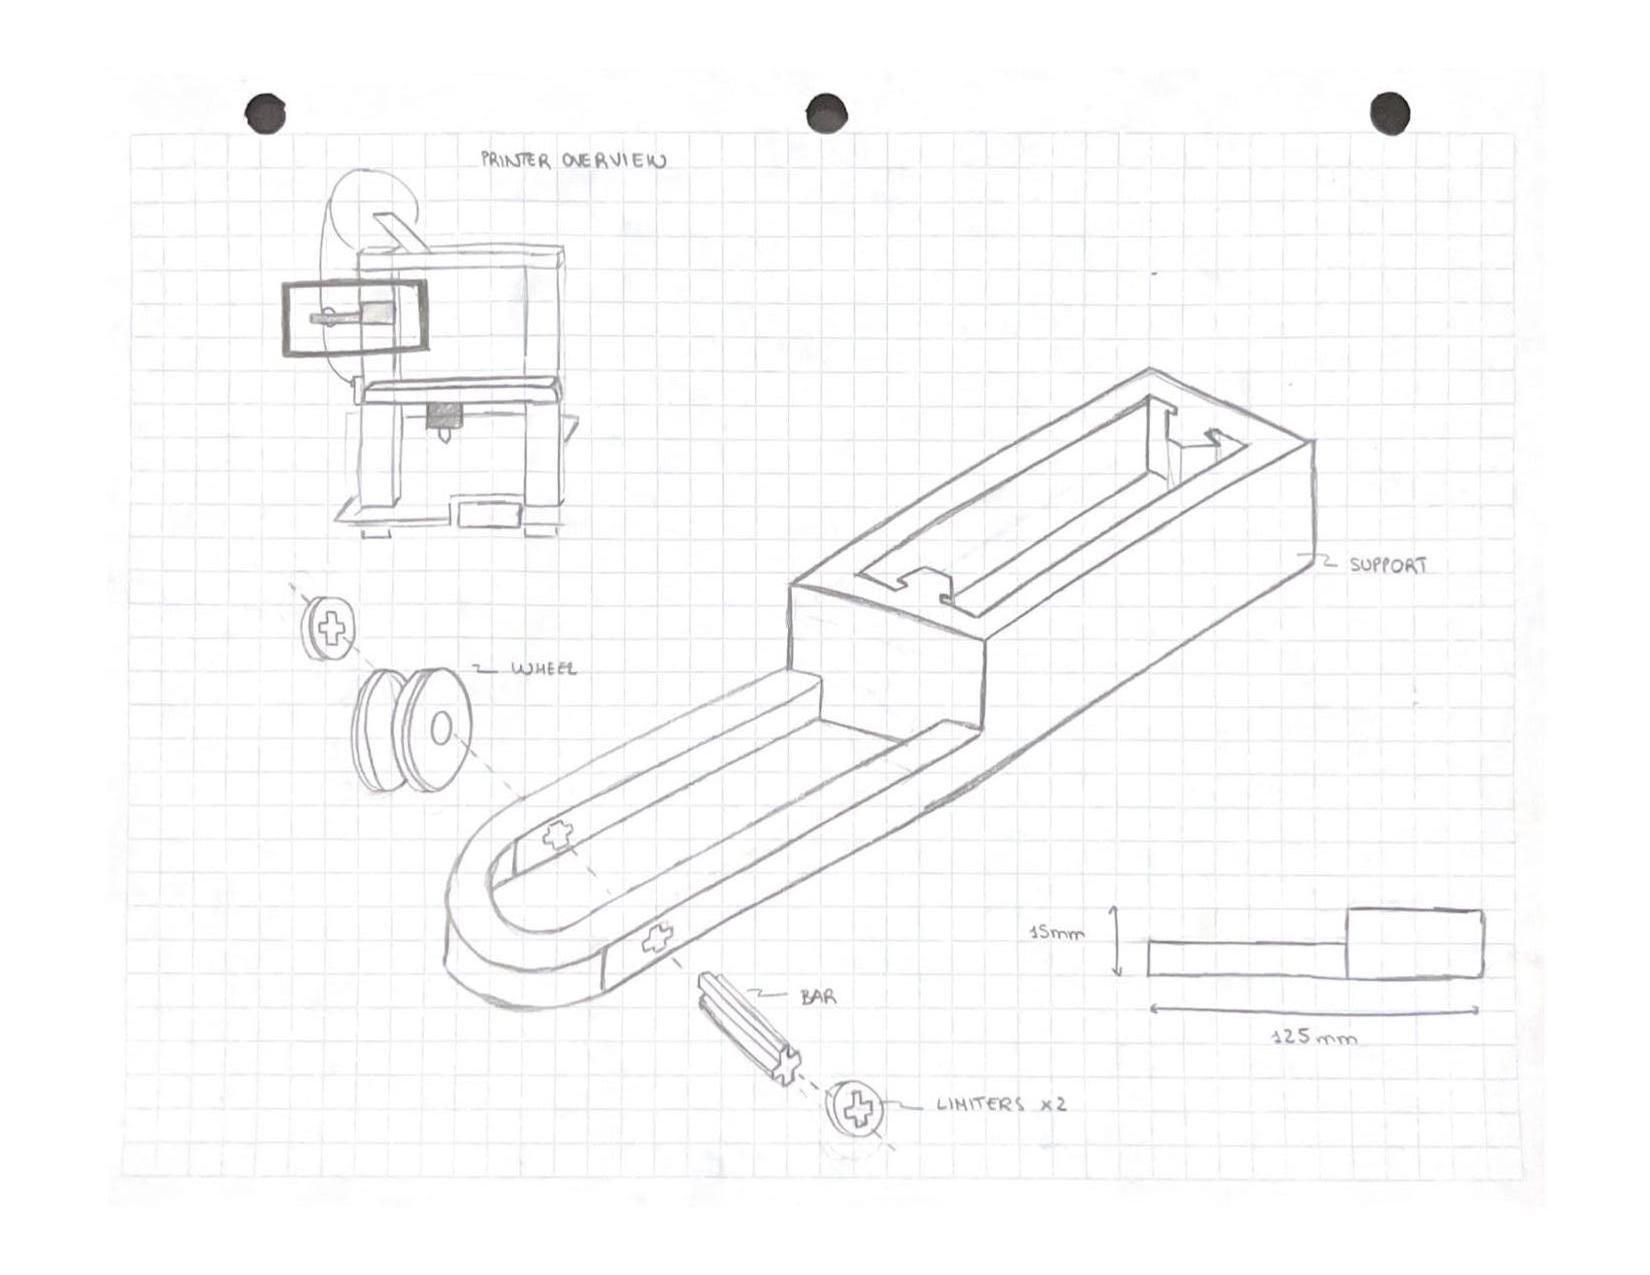
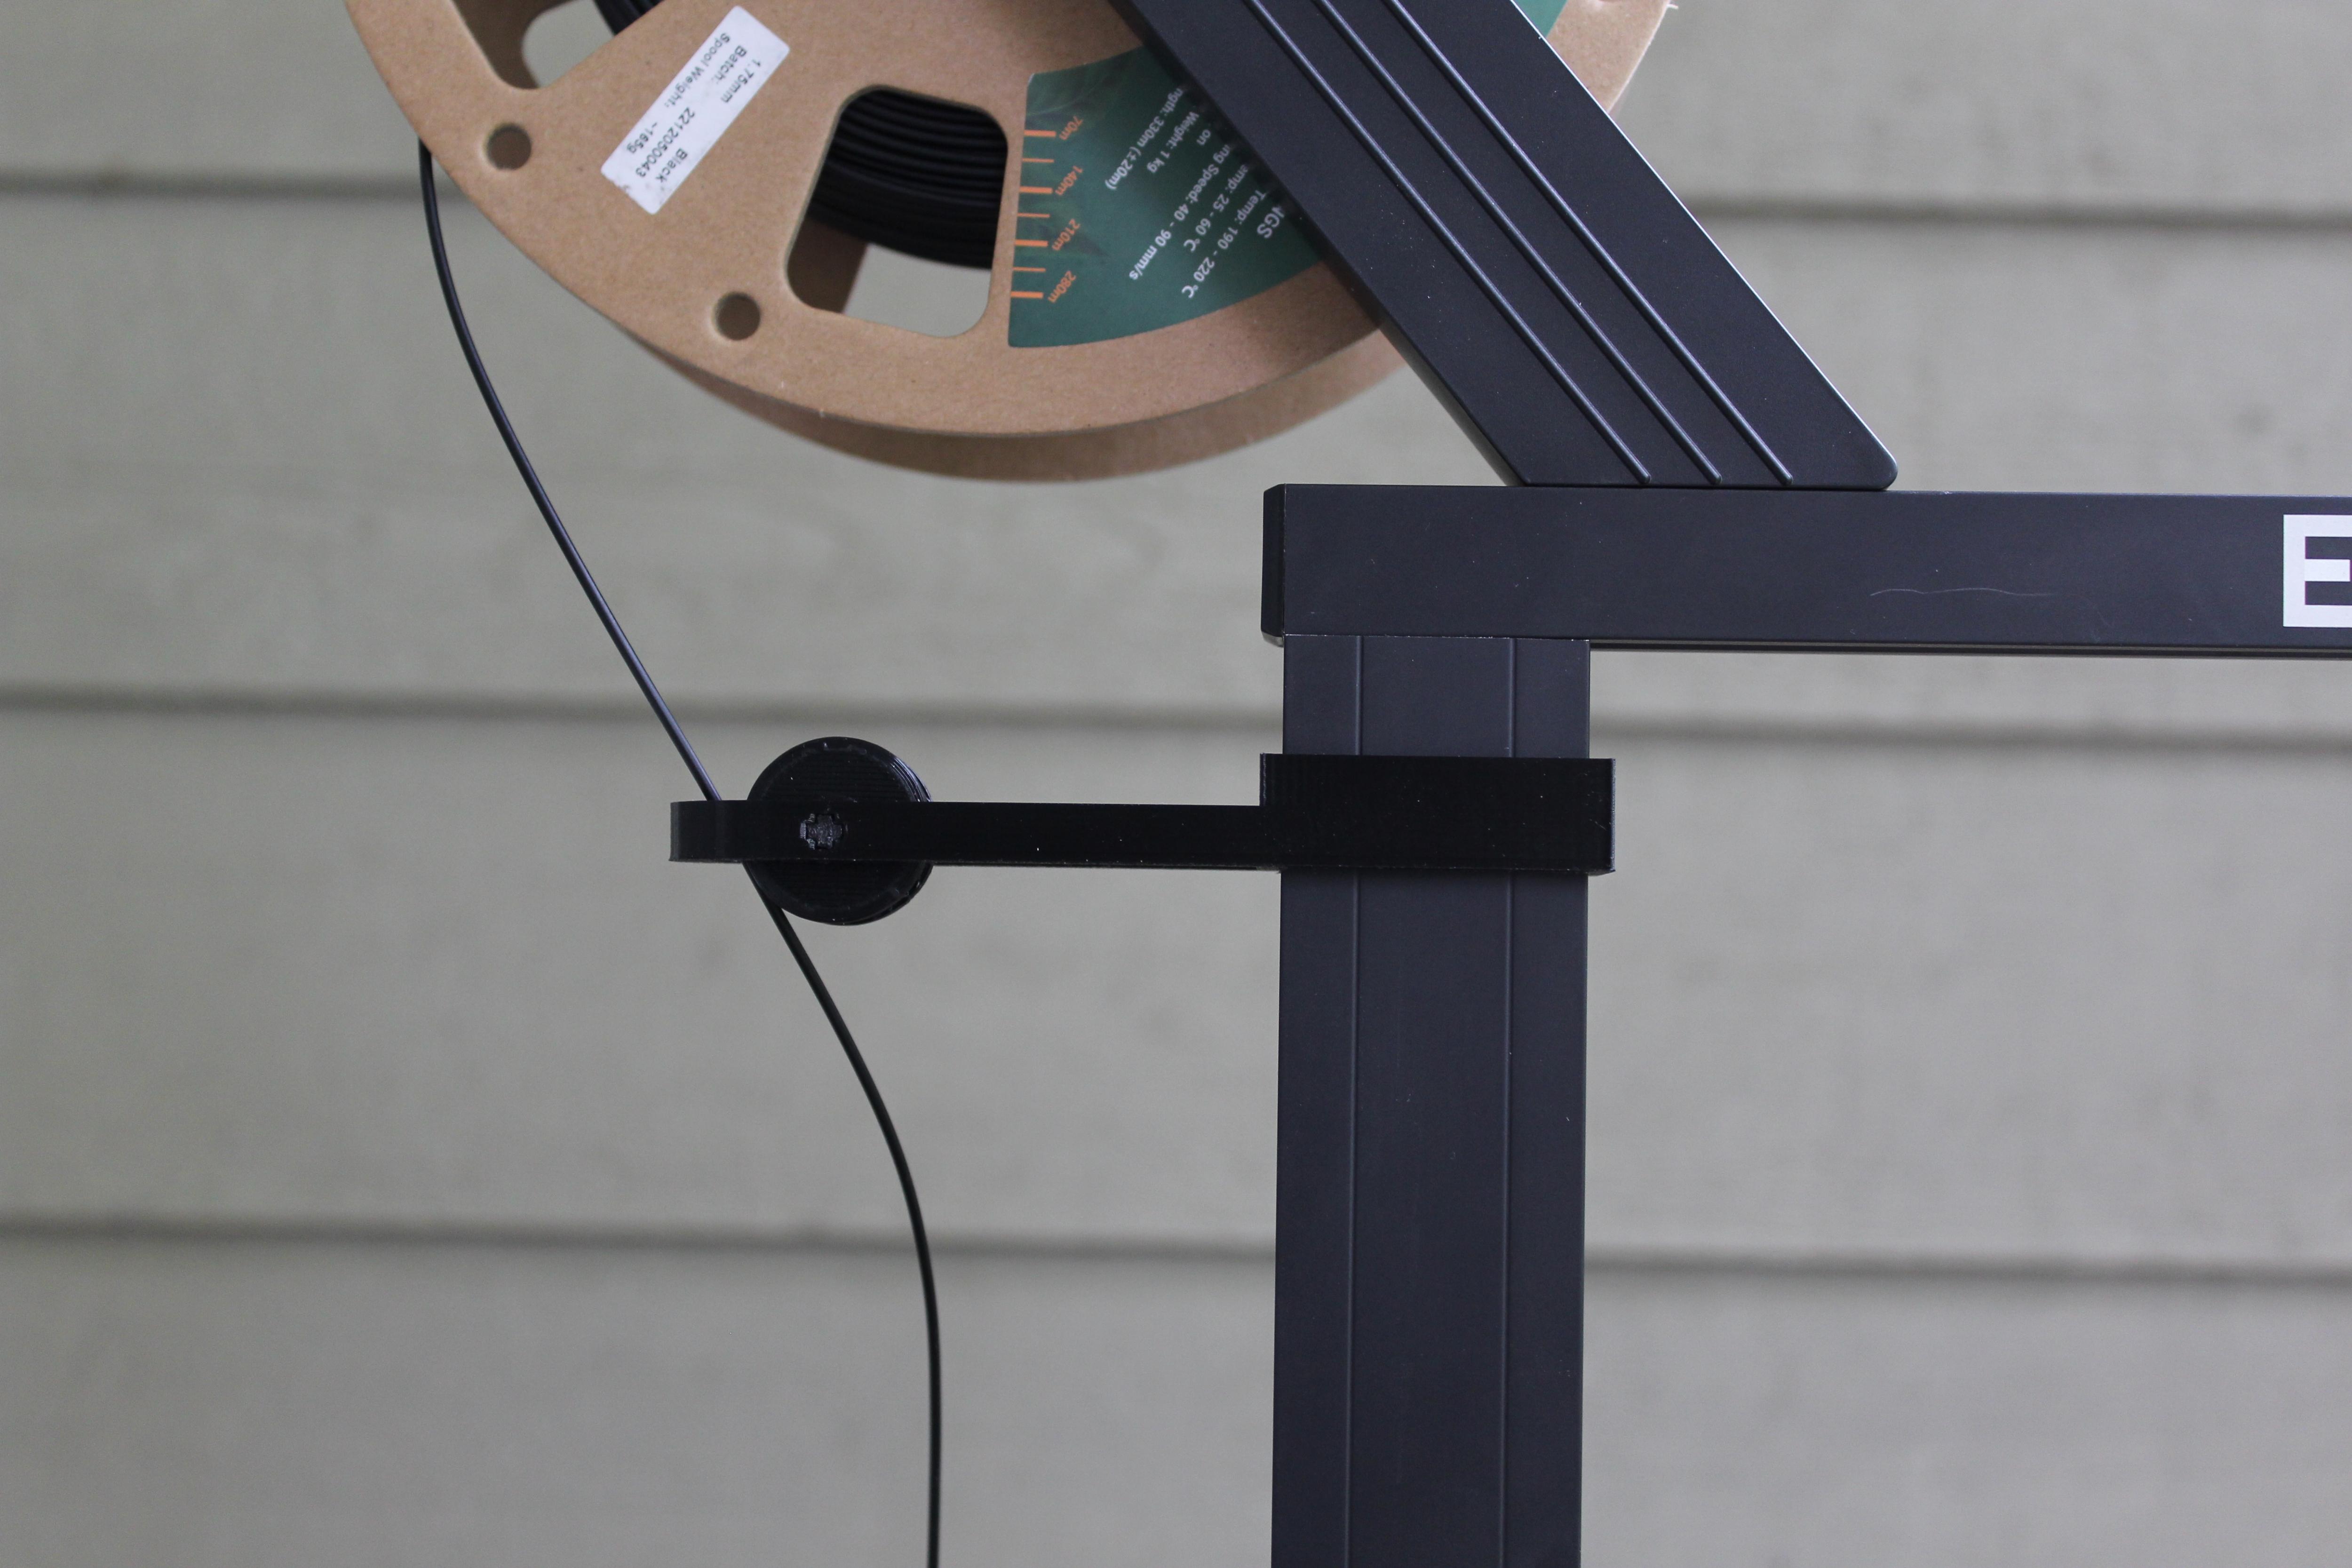
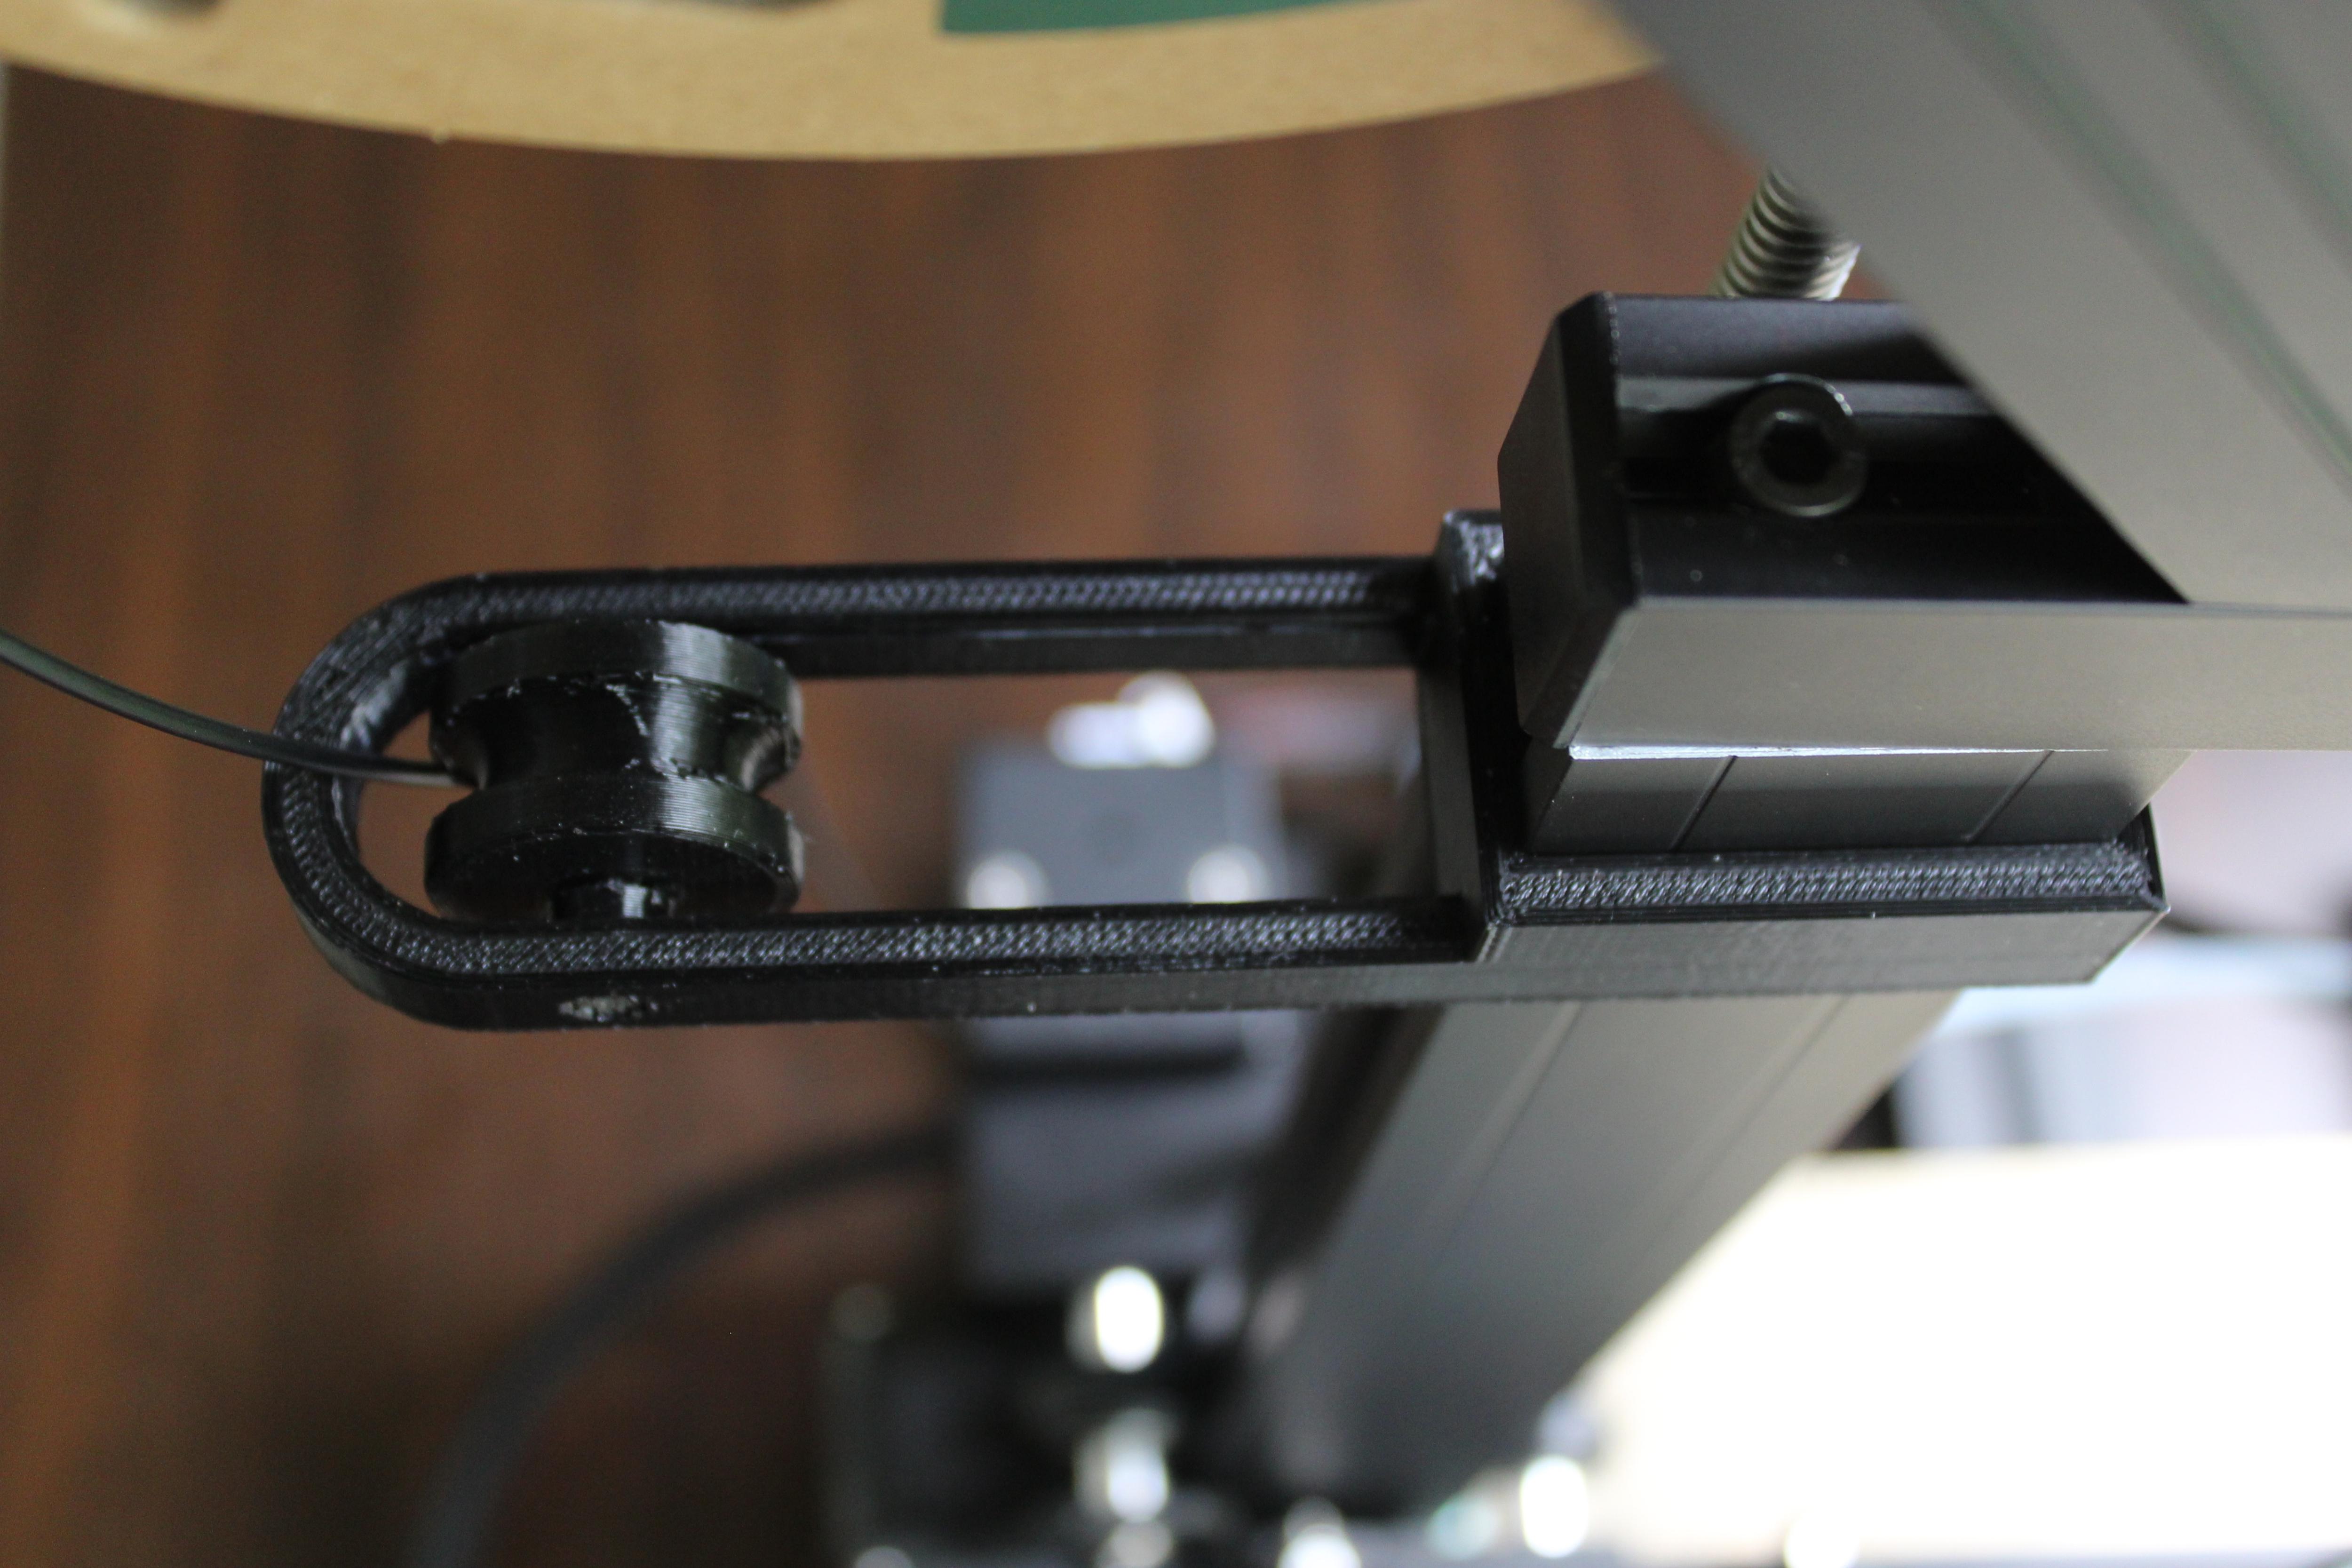
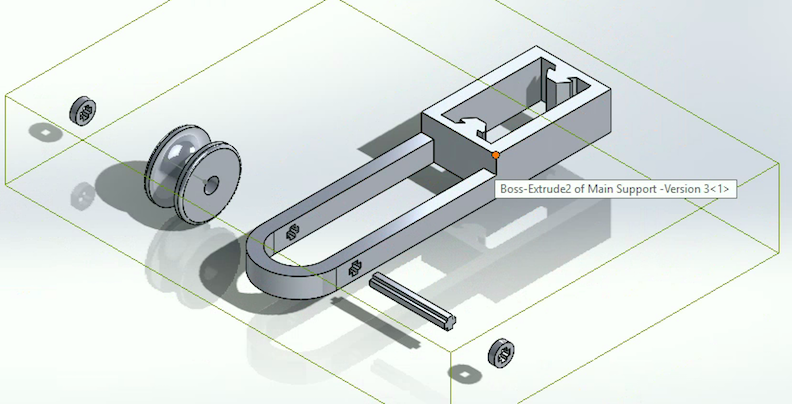
This design embodies 5 spare parts which can all be 3D printed. The main support of the filament guide has the same measurements as the 3D printer left support, it creates enough friction and grip for it to stay still without falling down. But it also allows us to move it up and down when applying some force. For optimal performance the filament guide has been positioned somewhere in the middle of the filament roll and the extruder. Therefore, I have set the dimensions of the guide taking into consideration that measurement. Lastly, I have decided to place a wheel in between the main support to reduced any possible damage to the filament due to friction. For the wheel to be steady I added two limiters, one in each side. I will give more details on the exact dimensions on the next section.
Build Support With SolidWorks Software
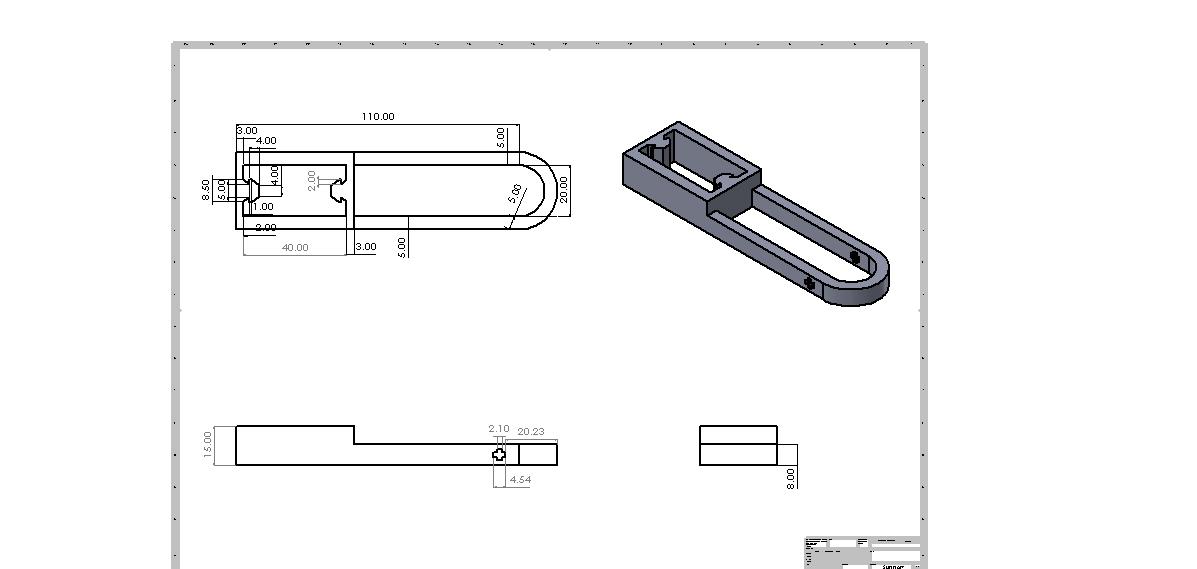
After getting all the dimensions required from the printer, it is time to design each part in SolidWorks Software. We will start with the Support.
Note: As I mentioned before you do not need any knowledge on the software. You can find the STL files of each part once you get to the printing step.
Note: I have also uploaded the drawing files with all the required dimensions. For a more challenging process I would encourage you to build from scratch each part using any CAD software!
Downloads
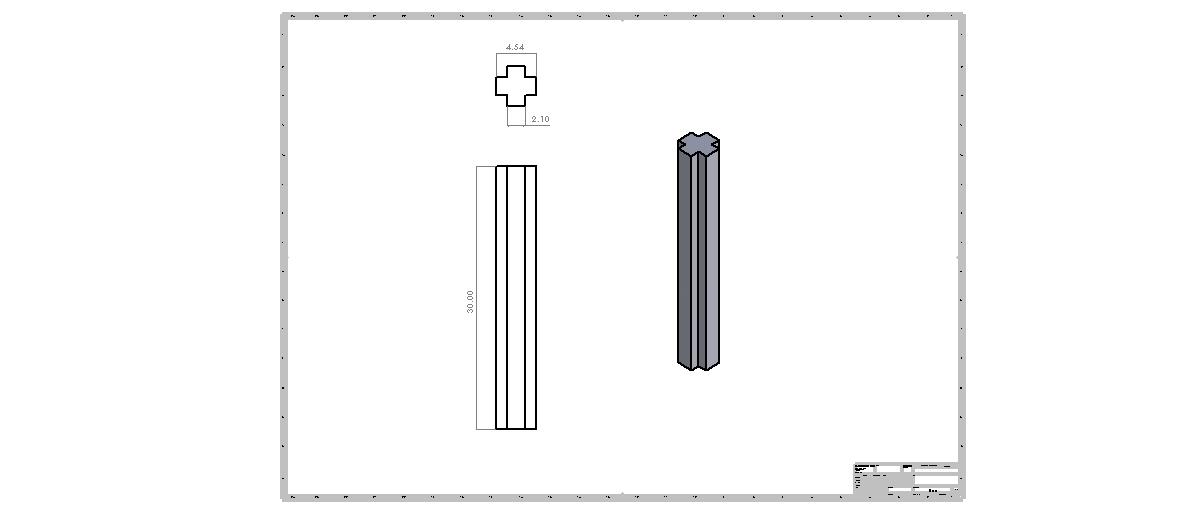
Build Rod With SolidWorks Software
.JPG)
Downloads
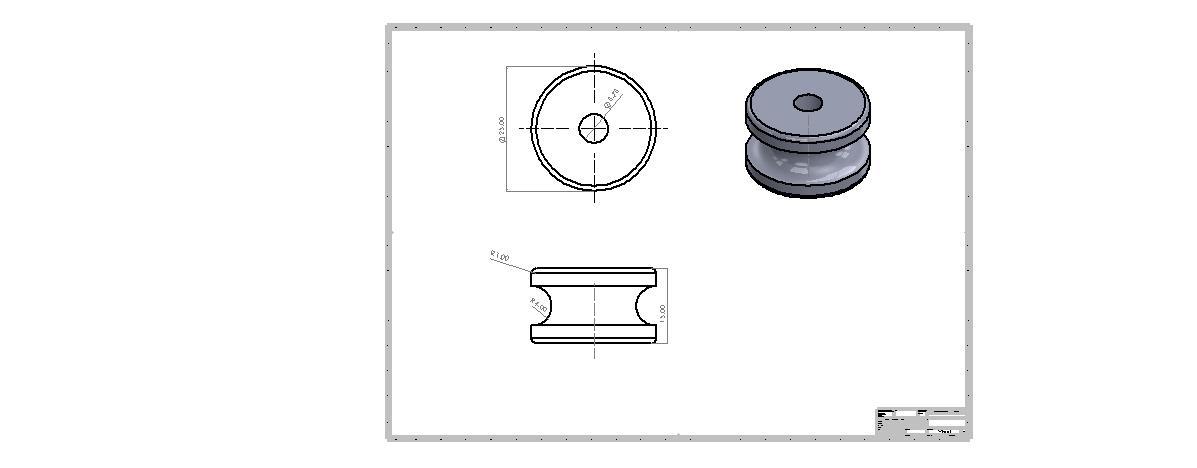
Build Wheel With SolidWorks Software
.JPG)
Downloads
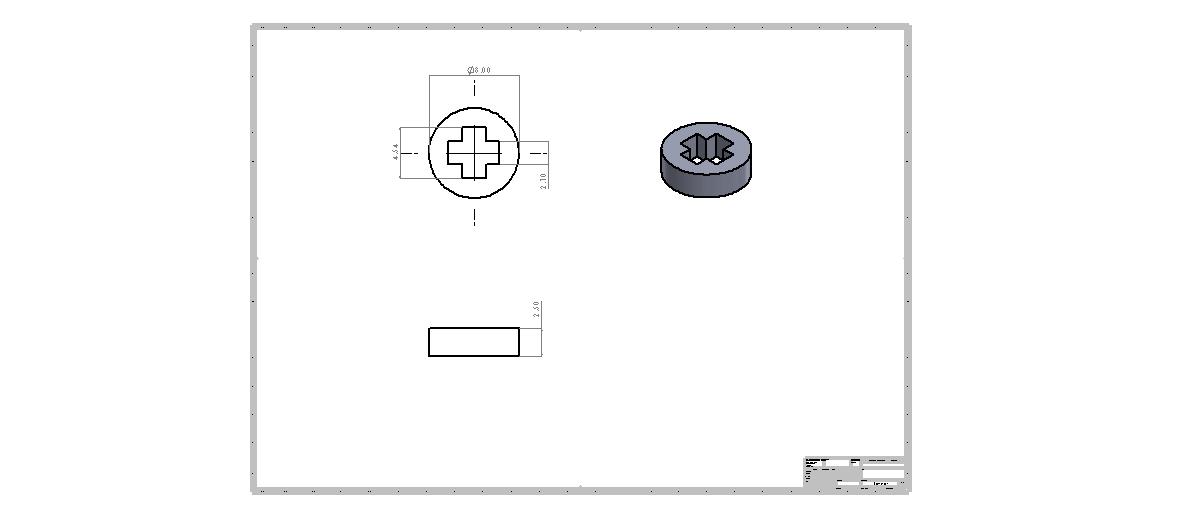
Build Limiters With SolidWorks Software (x2)
Downloads
3D Printing
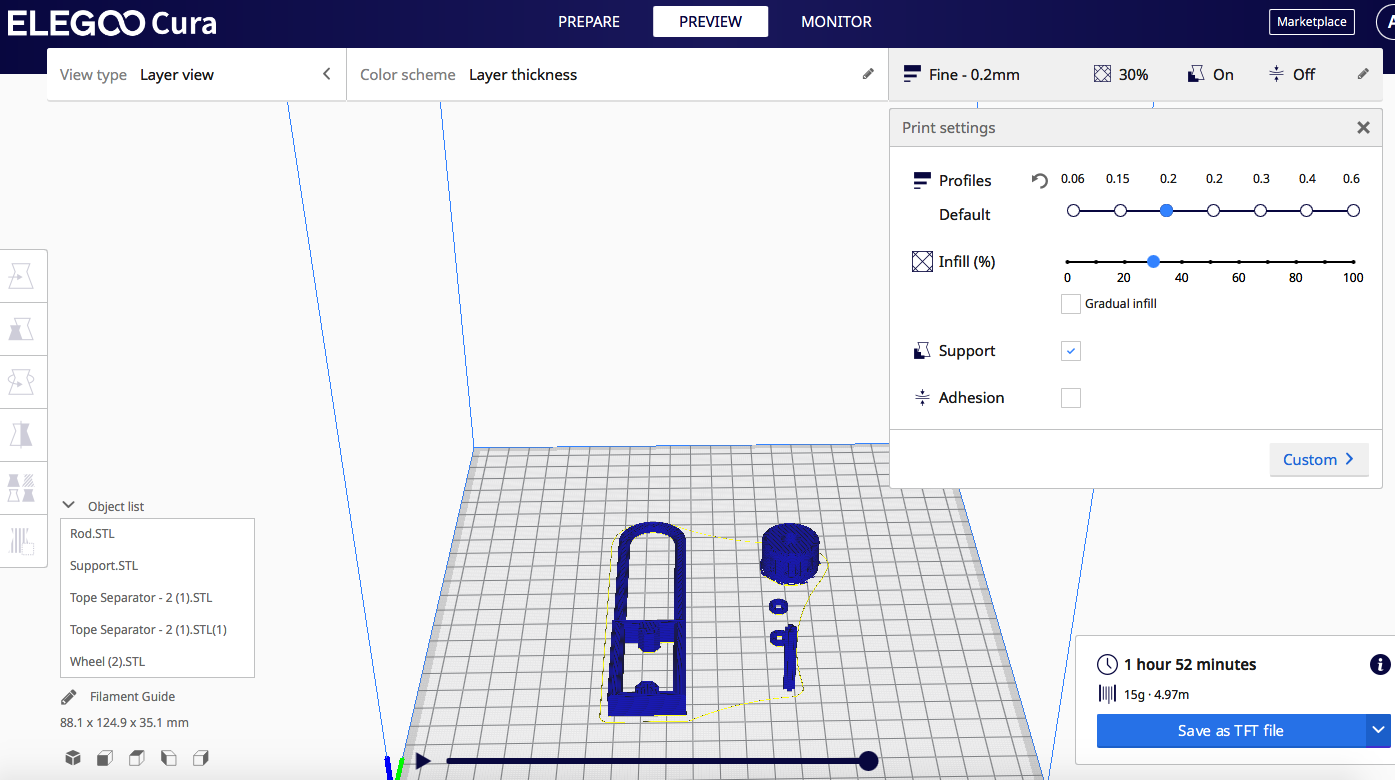
Use the documents attached below (or your own) to insert all the parts of the filament guide on the Cura Software.
Note: Pay attention to the orientation, and the settings of the print.
Recommended Settings:
- Profiles (default): 0.2mm
- Infill: 30%
- Check support to auto generate them where needed
This print will take 1 hour 52 minutes, and just 4.97 meters of filament.
Assemble Printed Parts

Almost done! Now we have to assemble the printed parts. Guide yourself with the pictures and the video attached.
Note: The pieces might not fit smoothly at first. Give it a few tries when putting everything together.
Assemble Filament Guide on Printer
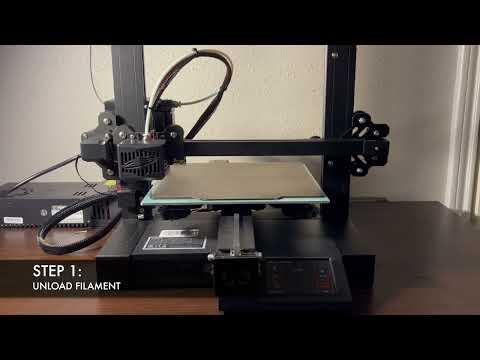
After the printed parts are assembled, the last step is to place it on the printer! The video bellow contains instructions on how to do so.
Now your 3D printer has a filament guide which will prevent it from getting stuck!