Fantasy Globe
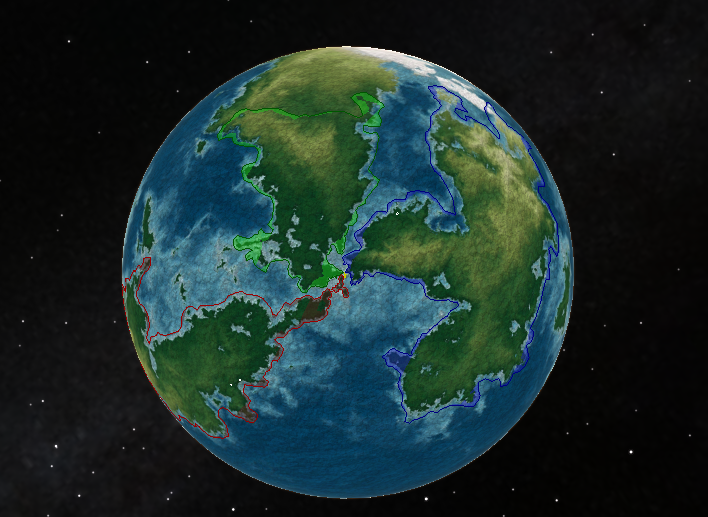
Hey kids, so you wanna make your own fantasy globe? Look no further, everything (most of things) were already done for you!
The following steps will show you how to make use of Google Earth and Map Generators that are available online to make our own navigable globe.
Step 1: Get Google Earth Pro

It is available for free and can be downloaded from Google's website. Remember: Google is your friend!
Step 2: Make a World Map
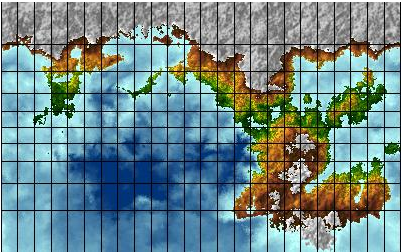
This step is very versatile and you can use a multitude of options available to you (from drawing by hand to using someones else creation). But here I will cover the one that is free and I liked the most.
For map creation I used this random generator with the manual (and examples) available here.
If you want to generate big sized map (~8kX16k) it will take quite some time, so before you generate full size I would advise to check if you like the seed by using the web interface.
P.S.
While generating I add " -c -c (for ice caps) - pq (square projection folds on globe better) -B (for fake 3d effect - bump map) -C Lefebvre2.col (for satellite colours look)"
Step 3: Gathering Necessities
For nice looking global view you may want to use a hex grid overlay and maybe some clouds. So lets make em!
For making your own hex grid I will use GIMP:
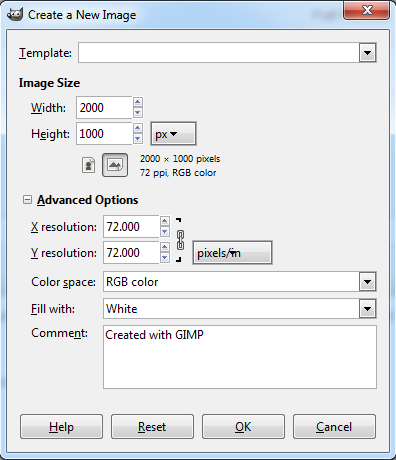
- Open Gimp and make a plain (filled white) new image with the same size as your world map
File->New->change width/height ->"+advanced options"->Filled With(White)->Press OK
- To create grid
Filters->Distorts->Mosaic->Tiling primitives(Hexagons). Next uncheck all the boxes on the right. and select the following settings:
Tile size - as you wish
Tile height - 1.0
Tile spacing - 1.0
Tile neatness - 1.0
Light direction ~ 150-160 (seems to give the least shadowing)
Color variation - 0
- Next we need to delete the white background
I just used this instruction.
Save in PNG format to preserve transparency.
Now you have a grid! I would create a separate image with the grid and the map combined for future reference (if you would like to select the region and redraw it in better detail, if your grid will be constantly "floating" it will be problematic). For that just open the map with Gimp and drag the Hex Grid image into the Layers window on the right. Merge them and Save (If you have troubles with this - google how to merge two images).
For the next detail I would like to have some clouds, so lets just search for a nice image with transparent background. I like this one.
Now we should have the bells and whistles.
Step 4: Making Image Overlay
Now to the most exiting: seeing your wold come to life!
Lets open Google Earth and create our first map overlay.
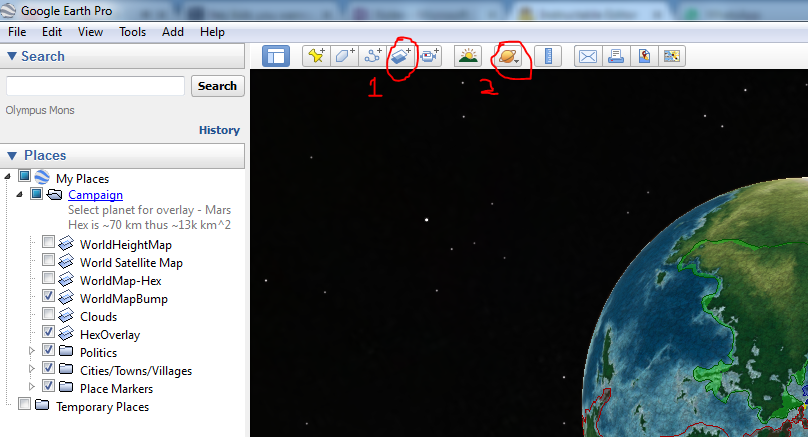
Click on the Add Image Overlay (circled in red 1) button and select the image with the map and hex overlay together.
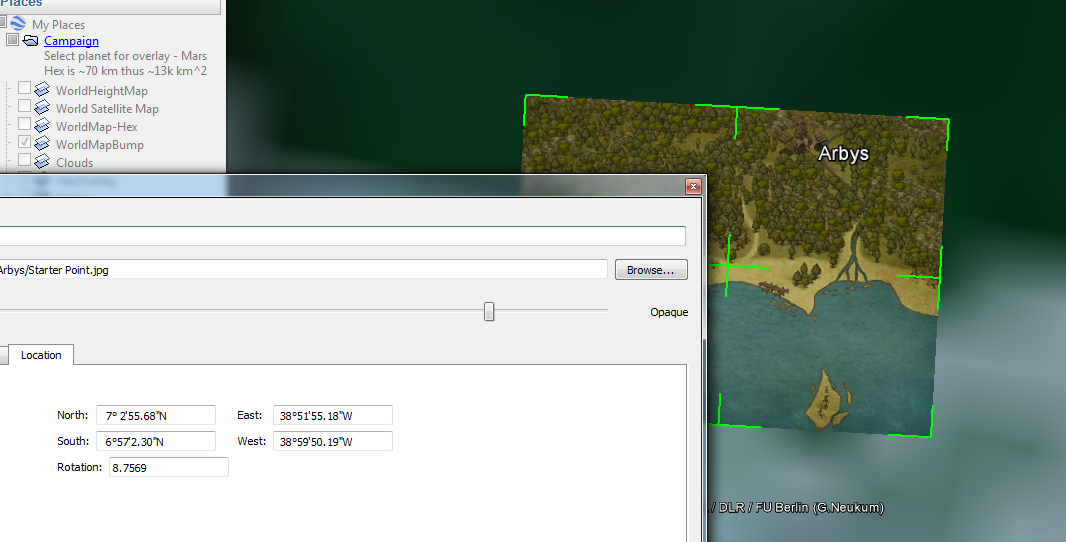
The setting window will appear, don't close it but move it aside. You will see your image with Green outlines(stretch), center(move) and a diamond(rotation). You can play around with the position but at the end I would suggest to input the following coordinates in the settings window to maintain consistency.
- North: 90° 0'0.00"N , East: 180° 0'0.00"E
- South: 90° 0'0.00"S , West: 179°56'7.34"W
(I have to maintain West uneven, otherwise the map collapses to a line)
Follow the same procedure for adding the World Map, Hex Overlay and Clouds. I prefer to have all of them as separate layers so I can turn them on and off.
As a planet I also prefer to select Mars (circles in red 2), as it is smaller and my map dimensions made more seance with it.
Step 5: Add Flare

With the main job done now you can go full psycho with adding minimaps for separate regions, towns or even single buildings and you can zoom from main map all the way to the building size overlay.
For drawing smaller maps I like to use Inkarnate. But you can use literally anything else like Hexographer, Campaign Cartographer or your hands. One of the uprising promising options is Crusader Knights 2 Generator, but as of the moment of publishing it was not quite usable.
You can position all the smaller maps just by dragging them around and making them appropriate size. You can check if your scale makes sense by using Ruler tool in Google Earth.
After done with that you can add Placemarks for your cities and places of interest (you can change the icons of the placemarks and add your own icons to the library)
Next step would be to draw political map using Add Polygon option and maybe some roads with Add Path. You can make all of this options switchable to show (or not) to your players.
Step 6: Save Your Creation and Give It to Your Players
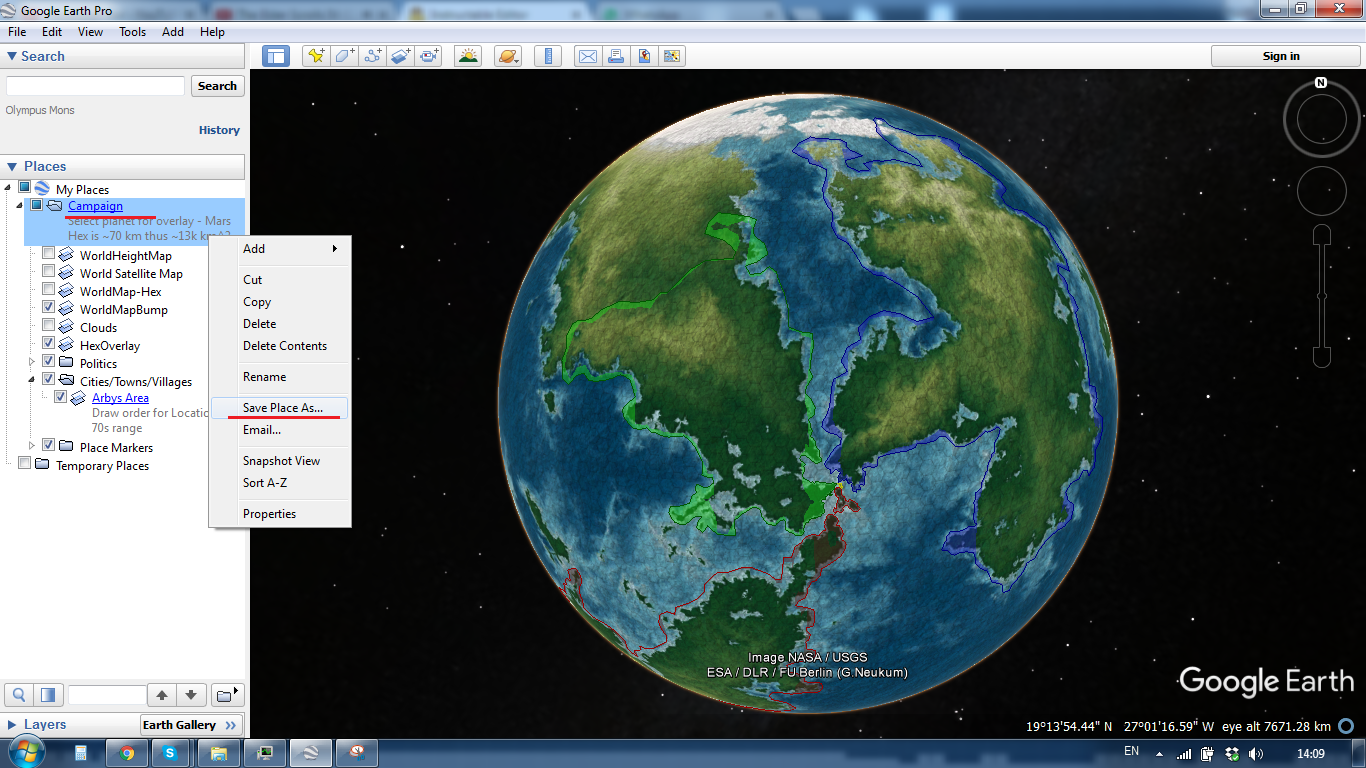
You can save all your custom globe by clicking on your campaign folder and choosing Save Place As and exporting it to a .kmz file.