Fancy Pallet Box

.gif)
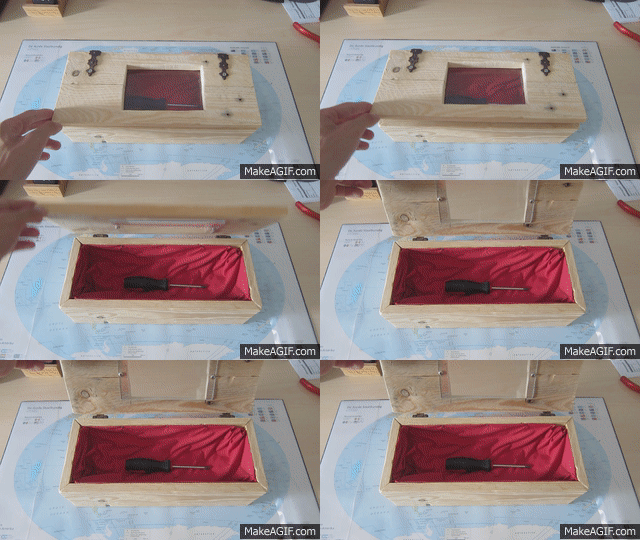
I got a lot of new pallets for new projects, so I took 2 pallets to make this fancy box. It took me about two days to make. You don't need any sewing skills for the cloth on the inside because you put it in with nails. You also need a piece of plexiglass. And when your done you'll have a fancy box to put your fancy stuff in. In this project I cut all the corners with a 45 degree angle so the wood grain would continue along the box, I have no idea how this is called.
All the Sides
![IMG_3547[1].JPG](/proxy/?url=https://content.instructables.com/F95/XFER/IQYT2UBC/F95XFERIQYT2UBC.jpg&filename=IMG_3547[1].JPG)
![IMG_3550[1].JPG](/proxy/?url=https://content.instructables.com/FQO/H3L9/IQYT2UDG/FQOH3L9IQYT2UDG.jpg&filename=IMG_3550[1].JPG)
![IMG_3552[1].JPG](/proxy/?url=https://content.instructables.com/F75/XHN2/IQYT2UFQ/F75XHN2IQYT2UFQ.jpg&filename=IMG_3552[1].JPG)
For this project i got two one meter by 9.5 cm or 39 by 3.7 inches white wooden pallet planks. As I wrote in the previous step I cut all the corners with 45 degree angles so the wood grain would continue along the side of the box. I actually made this box to test this. I wanted to see if it was difficult with only a hand saw. But in the end I did get a good looking box even though the edges weren't perfect. The front and the back side are 35 cm or 13.5 inches. And the other sides are both 15 cm or 6 inches.( you can cut all the sides from just one plank. 35cm+35cm+15cm+15cm=1 meter, it's the same with inches) The wood is also 2 cm or 0.8 inches wide. When you cut the sides on a 45 degree angle you have to make sure that you double check on all your measurements. I decided to use no nails or screws in the box so when I glued everything together make sure that the wood grain is alined with that on all the sides. You also have to put a lot of weight on the top so the box doesn't turn out to be wobbley. I just put a ship ton of books on it.
The Bottom
![IMG_3559[1].JPG](/proxy/?url=https://content.instructables.com/F0N/MJNM/IQYT2VI6/F0NMJNMIQYT2VI6.jpg&filename=IMG_3559[1].JPG)
![IMG_3563[1].JPG](/proxy/?url=https://content.instructables.com/FAG/AK96/IQYT2VJ8/FAGAK96IQYT2VJ8.jpg&filename=IMG_3563[1].JPG)
For the bottom I just got two pieces of the second pallet plank. You do have to cut one in half so everything will fit. You don't have to put them in very carefully because the cloth will be on top of it. When you glue the bottom to the bottom you have to make sure that you put a weight on top so the box won't be wobbley. You can just do this with books just like in the last step.
The Top
![IMG_3567[1].JPG](/proxy/?url=https://content.instructables.com/FPK/YPV6/IQYT2WKM/FPKYPV6IQYT2WKM.jpg&filename=IMG_3567[1].JPG)
![IMG_3553[1].JPG](/proxy/?url=https://content.instructables.com/FZU/4A0B/IQYT2WM2/FZU4A0BIQYT2WM2.jpg&filename=IMG_3553[1].JPG)
![IMG_3565[1].JPG](/proxy/?url=https://content.instructables.com/FKO/J3N1/IQYT2WMP/FKOJ3N1IQYT2WMP.jpg&filename=IMG_3565[1].JPG)
![IMG_3564[1].JPG](/proxy/?url=https://content.instructables.com/FFJ/RQ3G/IQYT2WND/FFJRQ3GIQYT2WND.jpg&filename=IMG_3564[1].JPG)
For the top I got two hinges from some scrap metal, they are really rusted and I like how it looks in combination with the wood and the cloth. For the top I got two scrap pieces of wood, they are both 7.5 cm or 3 inches. And if you put two of the pieces next to each other you get exactly 15 cm or 6 inches, wich is also the with of the box. But before you glue it you have to make a hole in it for the plexiglass. You really need to measure for the size of plexiglass you have. And like is wrote in the beginning you have to double check all of your measurements because I did something wrong and now my plexiglass in 2cm or 0.8 inches to far to the right. Now you can glue it all together. And again you need to put some some books on it. When the glue has cured you can put the plexiglass in with two screws. Now you can put the hinges in. I had to bend them 90 degrees so it would bend over the side. You can see what I mean in the pictures. After bending the you can put them on the box with more screws.
The Cloth
![IMG_3570[1].JPG](/proxy/?url=https://content.instructables.com/FCR/VTE9/IQYT2X3K/FCRVTE9IQYT2X3K.jpg&filename=IMG_3570[1].JPG)
![IMG_3575[1].JPG](/proxy/?url=https://content.instructables.com/F1Q/NYYO/IQYT2X49/F1QNYYOIQYT2X49.jpg&filename=IMG_3575[1].JPG)
![IMG_3574[1].JPG](/proxy/?url=https://content.instructables.com/FXN/GF66/IQYT2X50/FXNGF66IQYT2X50.jpg&filename=IMG_3574[1].JPG)
![IMG_3569[1].JPG](/proxy/?url=https://content.instructables.com/FQ1/SDST/IQYT2X60/FQ1SDSTIQYT2X60.jpg&filename=IMG_3569[1].JPG)
![IMG_3576[1].JPG](/proxy/?url=https://content.instructables.com/FL6/UCAQ/IQYT2X71/FL6UCAQIQYT2X71.jpg&filename=IMG_3576[1].JPG)
![IMG_3580[1].JPG](/proxy/?url=https://content.instructables.com/FN1/F3FM/IQYT2X7Y/FN1F3FMIQYT2X7Y.jpg&filename=IMG_3580[1].JPG)
![IMG_3578[1].JPG](/proxy/?url=https://content.instructables.com/FLL/8ZPY/IQYT2X98/FLL8ZPYIQYT2X98.jpg&filename=IMG_3578[1].JPG)
If you don't want to do this you can just skip this step.I got a red cloth to put in the box. My cloth was around 45 cm by 20 or 17.7 by 7.8 inches long. I cut out the corners because you don't need them. Then you have to put something soft on the bottom of the box, I got something that was laying in a drawer somewhere in our house. I put about two to four layers on the bottom. Then I put the red cloth in I used small nails to hold the cloth on the sides. But when you nail the cloth to the side of the box make sure that you fold all the sides so the cloth won't raffle.
Done

Your done have fun with your new fancy box. You can put all kinds of fancy stuff in here. I just keep my camera and SD-cards in here.
If you have any questions you can just ask me in the comments. :-)
If you have any questions you can just ask me in the comments. :-)