Faking a Color 3d Print
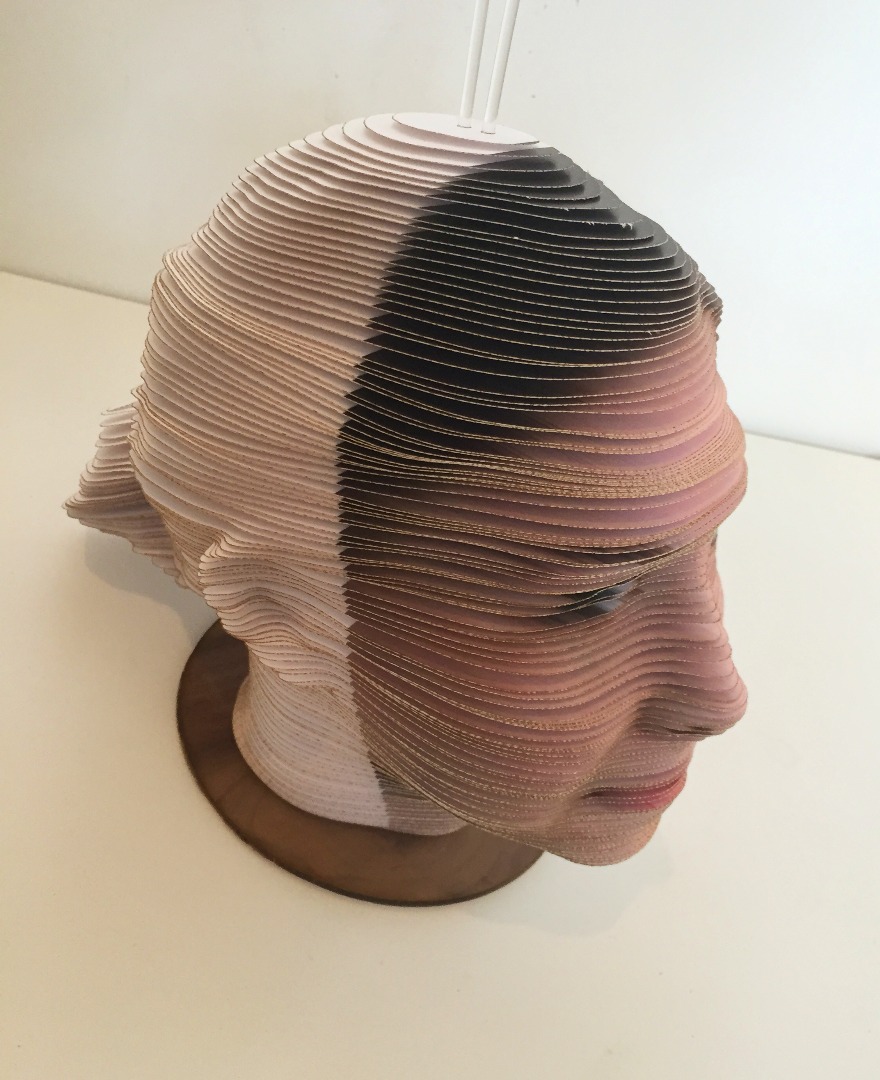
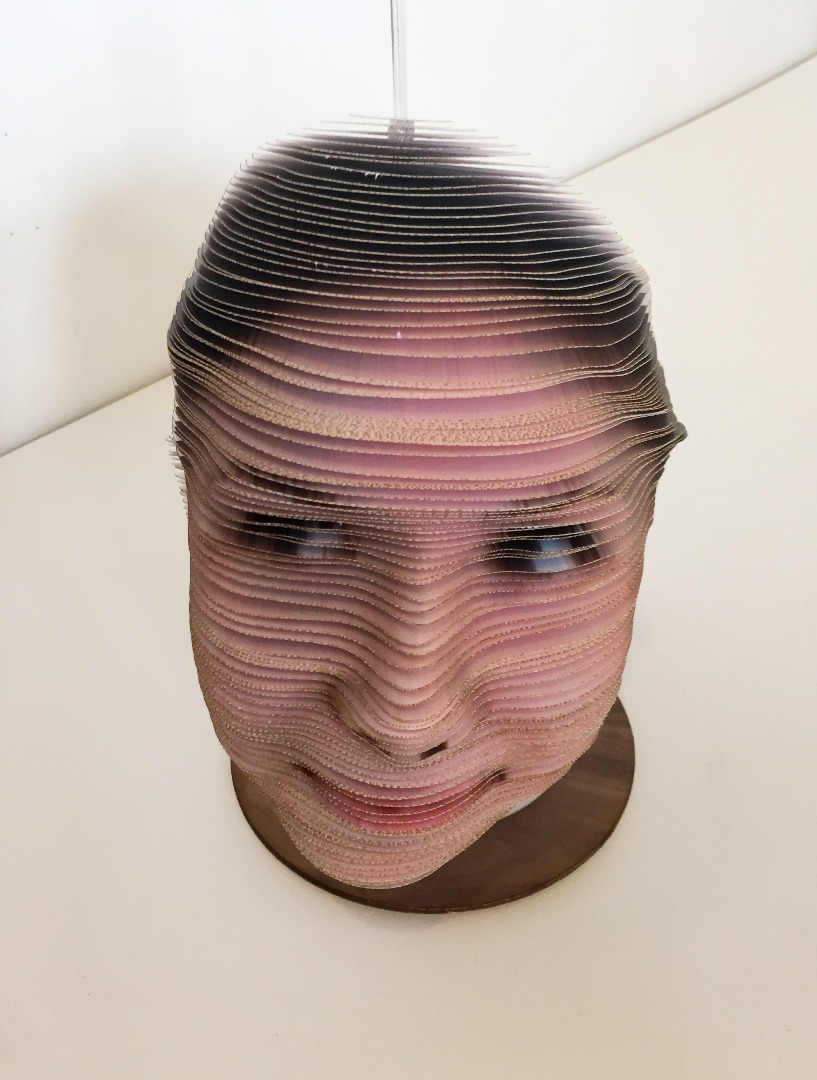
This Instructable will show you how to fake the output of a color 3d printer using paper, a printer, and a laser cutter (or some similar method of cutting paper). The process is similar to others that stack slices to form a model. The difference is we will also take a slice of a 2d image (one line of pixels) and print this to the paper before cutting.
Here’s the general work flow:
- Create a projection image (an image you will project onto the model)
- Slice the model along the z axis at a given spacing
- Slice the projection image along the z axis – this means taking one row of pixels and stretching it over the paper
- Print the slice images to paper
- Cut the slices on the corresponding print
- Assemble the slices to form the physical model
You’ll need:
- Model (STL format)
- Projection image (this can be a screenshot of your textured model, or a standalone image)
- A printer
- Paper (some sturdy cardstock works well)
- A way to cut the paper ( a laser printer, craft cutter printer, or scissors if you’re patient and have more dexterity than I do)
- Some assembly supports – acrylic or wooden dowels, washers of the desired thickness
- Some programming chops
Creating a Projection Image
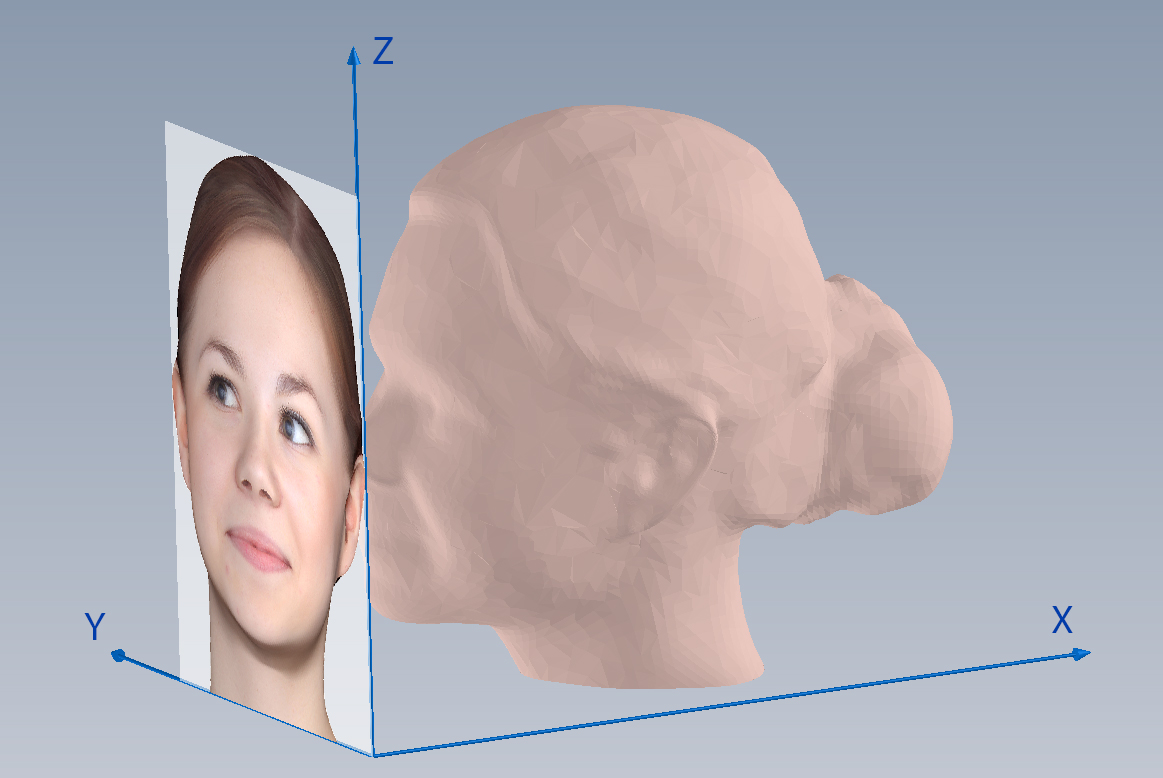
Let’s talk a little about the position of the image relative to the model. The slices are perpendicular to the z axis. The image could be set up either normal to the x or y axes. For now, we are going to set it normal to the x axis.
Ideally, you will be working with a model that already has a texture mapped to it. In this case:
1. Open your model in a mesh viewer. Turn off any perspective distortion (turn on ‘parallel projection’, or off ‘perspective’, depending on your program). Set you view to be normal to the x-axis, and take a screen shot. The positive x-axis should be going into the screen, or your image may be reversed.
2. Crop this image to the limits of the model and change the image size to be the same as the size of your model. The width of the image will be the y range of your model. The image height will be the z range. 
If you do not have a texture mapped to your model, but have a standalone image, you will need to project onto the model. Follow the first two steps using the untextured model. Then:
3. Load your projection image as a new layer. Adjust its scale, rotation, and position so that it fits over the model image (until you can make the image below look like the image above). 
If your image does not align well with your model, you will need to either transform your model or distort your image so that it does.
Slicing the Model
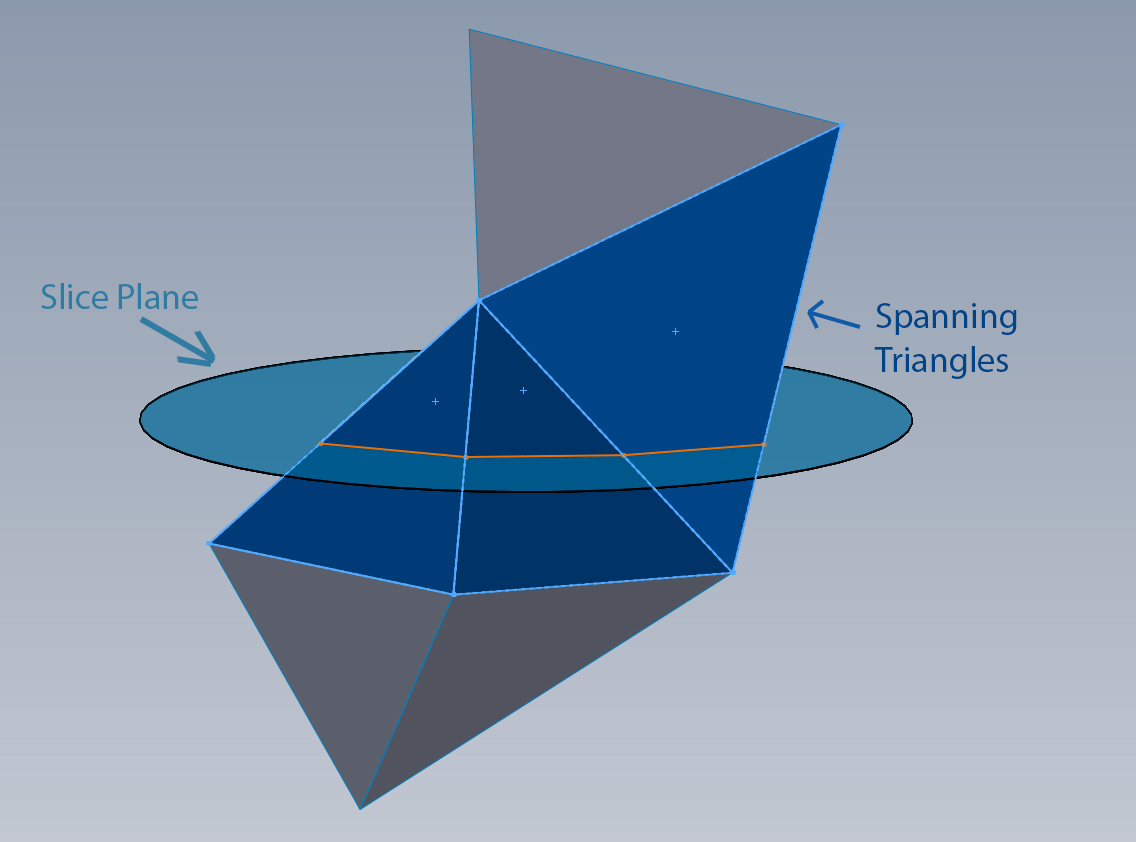
There are free slicing programs out there, but I wrote my own because I needed to control the layout of the slice on the paper, in order to register the slice with the corresponding paper print. I’m attaching this code, which does the following:
- Read in an STL.
- Translate the vertices in the x-y plane so that the model is centered on the page. All vertices are translated by the same values.
- Set a slice spacing. This is how often you will sample the image. In the example model, I separate each slice by a 1/16” thick acrylic washer. Accounting for the thickness of the cardstock, this worked out to a spacing of about .07”.
- For each slice’s z height, find the triangles that span that slice. One or two vertices will have z values greater than that slice. One or two vertices will be less.
- For each triangle that spans that slice, there will be two edges that intersect the slicing plane. Calculate the points of these two intersections.
- Draw a line between these two points. When this is done for all spanning triangles, the result will be a complete slice through the model.
- Write these lines to an SVG file.
- Add holes to the SVG file for guide rods, if desired. These holes are for assembly and will need to be in the same place for each slice.
This code is set up for one slice per paper. Your model’s x and y lengths must fit within your piece of paper. There is no limit on the z height, however.
Slicing the Image
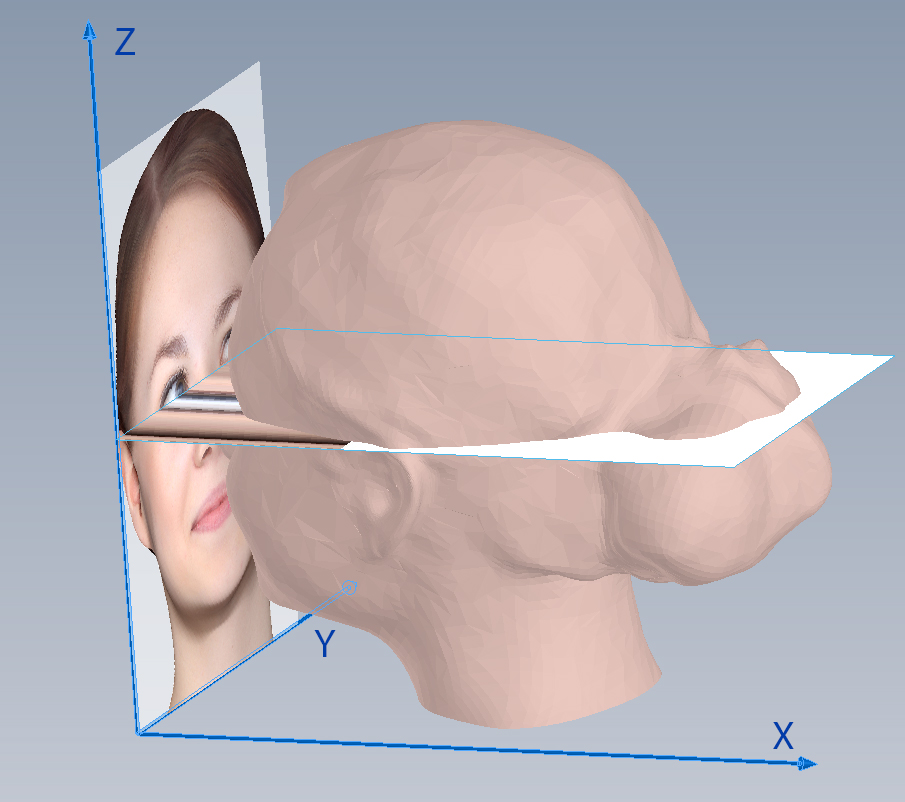
At every slice thickness, we are going to take a row of pixels from the projection image, and smear that some distance over the page. How far back is up to you. If you extend it over the entire length of page, you will get a mirror image on the projection image on the back side of the model. The attached code does the following:
- Set the output image size. The width is the same as source image, which is the same as the model’s x length. The height of the output image is the model’s y length. See the image above. which shows one image slice at the level of the eyes.
- For each slice, sample the input image at that slice’s z height. The row of pixels at the input image at this height will be copied to the the output image. This can be done across the entire page, or you can limit it up to some percentage of the page. This decision will depend on your model, your slice spacing, and your own preferences.
On the example piece, I set the image depth to stop just before the ears because I did not want the image to project onto the back side of the ears.
Printing and Assembly
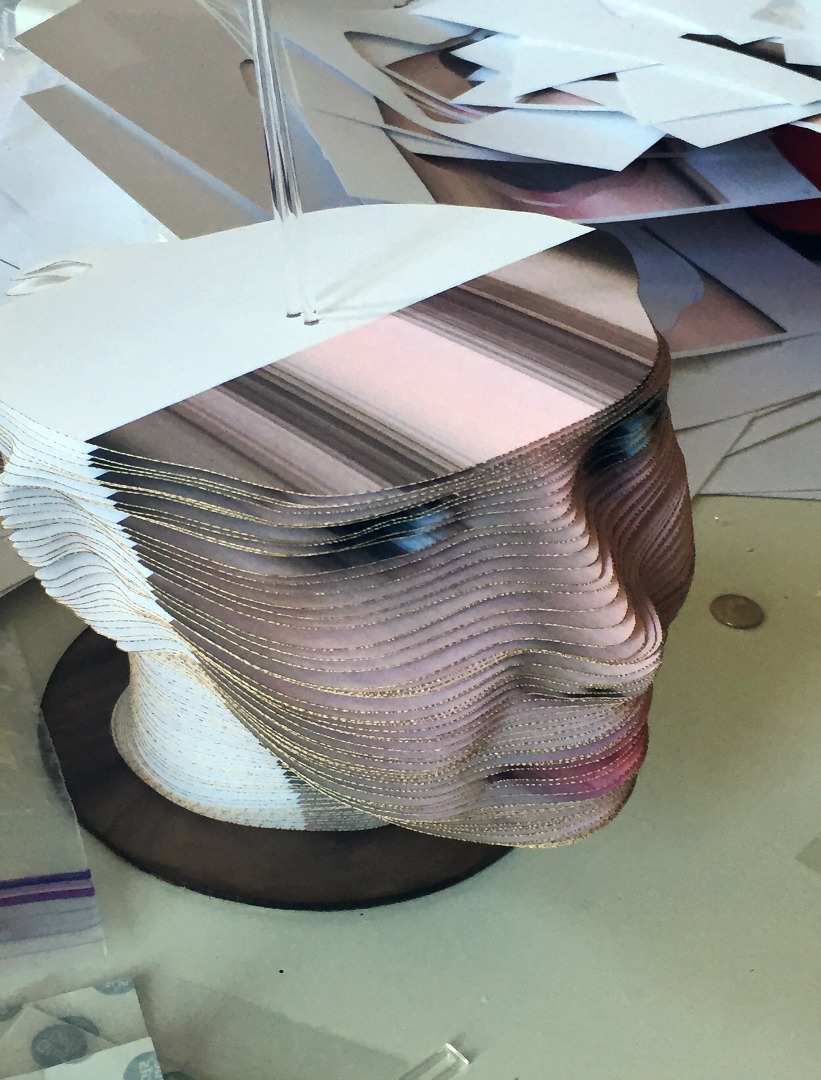
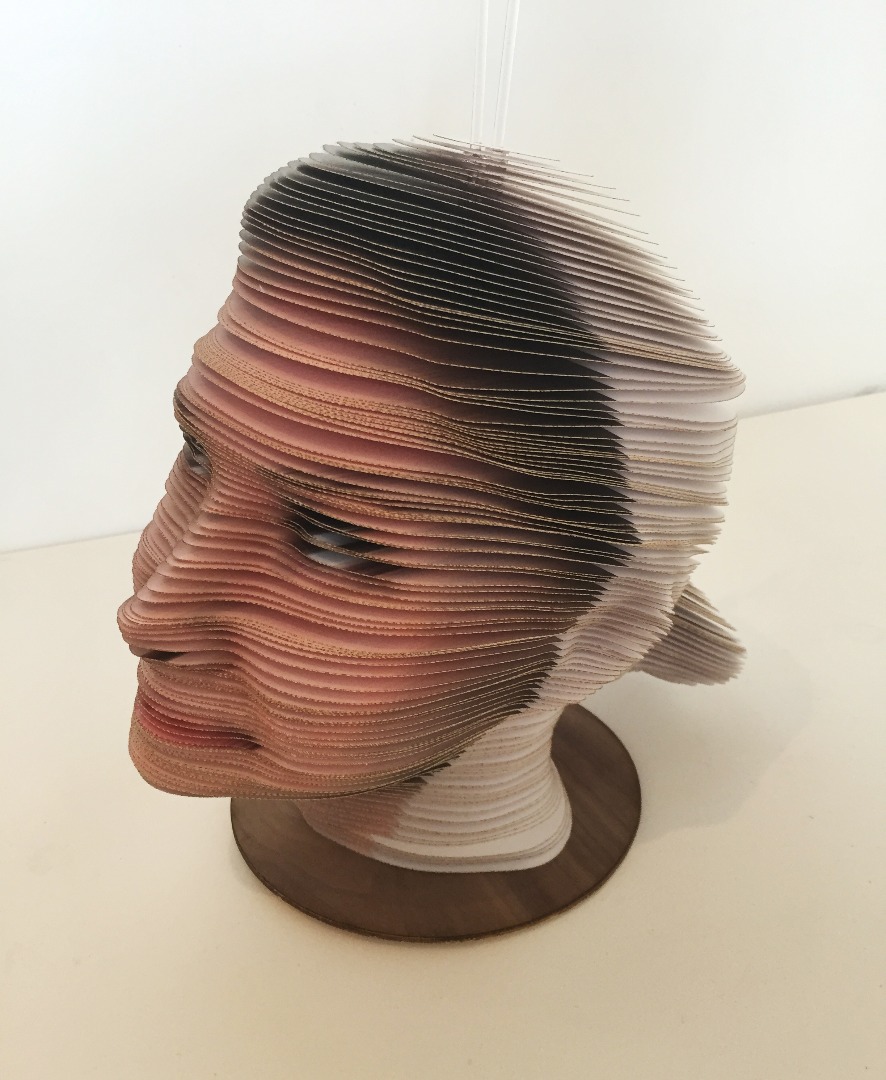
Print out your images to paper. Set your print settings to print to the center of the page, and make sure no scaling is taking place. Number these images by hand or include some numbering in your code, so they will be printed to the images.
Next, cut the printed images. On my laser cutter, I didn’t do anything special for registration, I just butted up the paper against the left and top rulers. No scaling or offsets should be needed
And finally, put it together. Feed a slice over the guide rod(s), add a washer (if used), and then add the next slice.
Some tips:
- Check your work early on. Open a few slices at different z heights to make sure there are no surprises in orientation and that they fit in the page. Print out a few images, cut them, and assemble, to make sure you’ve got your projection image registered to your model correctly, your vector image aligns to your prints, and that no weird flips or scale issues are happening.
- If you are using paper separated by washers, separate the guide rods as far as possible for model stability, to keep the paper level. I would suggest using three rods.
- This Instructable was for projecting a single image, but from here I hope you can see how you could project more images from other sides, to get a fully colored model.
Thanks for reading and good luck!
Attached is code for Octave (https://www.gnu.org/software/octave/). The main script is colorSlicerOctave.m. Put these files in the same folder as your STL model and projection image. Edit the script to input this path, the STL file name, the image name, guide hole locations, layer thickness, and page size. The output of the code will be jpg files for each slice's image and svg files for each slice's shape.