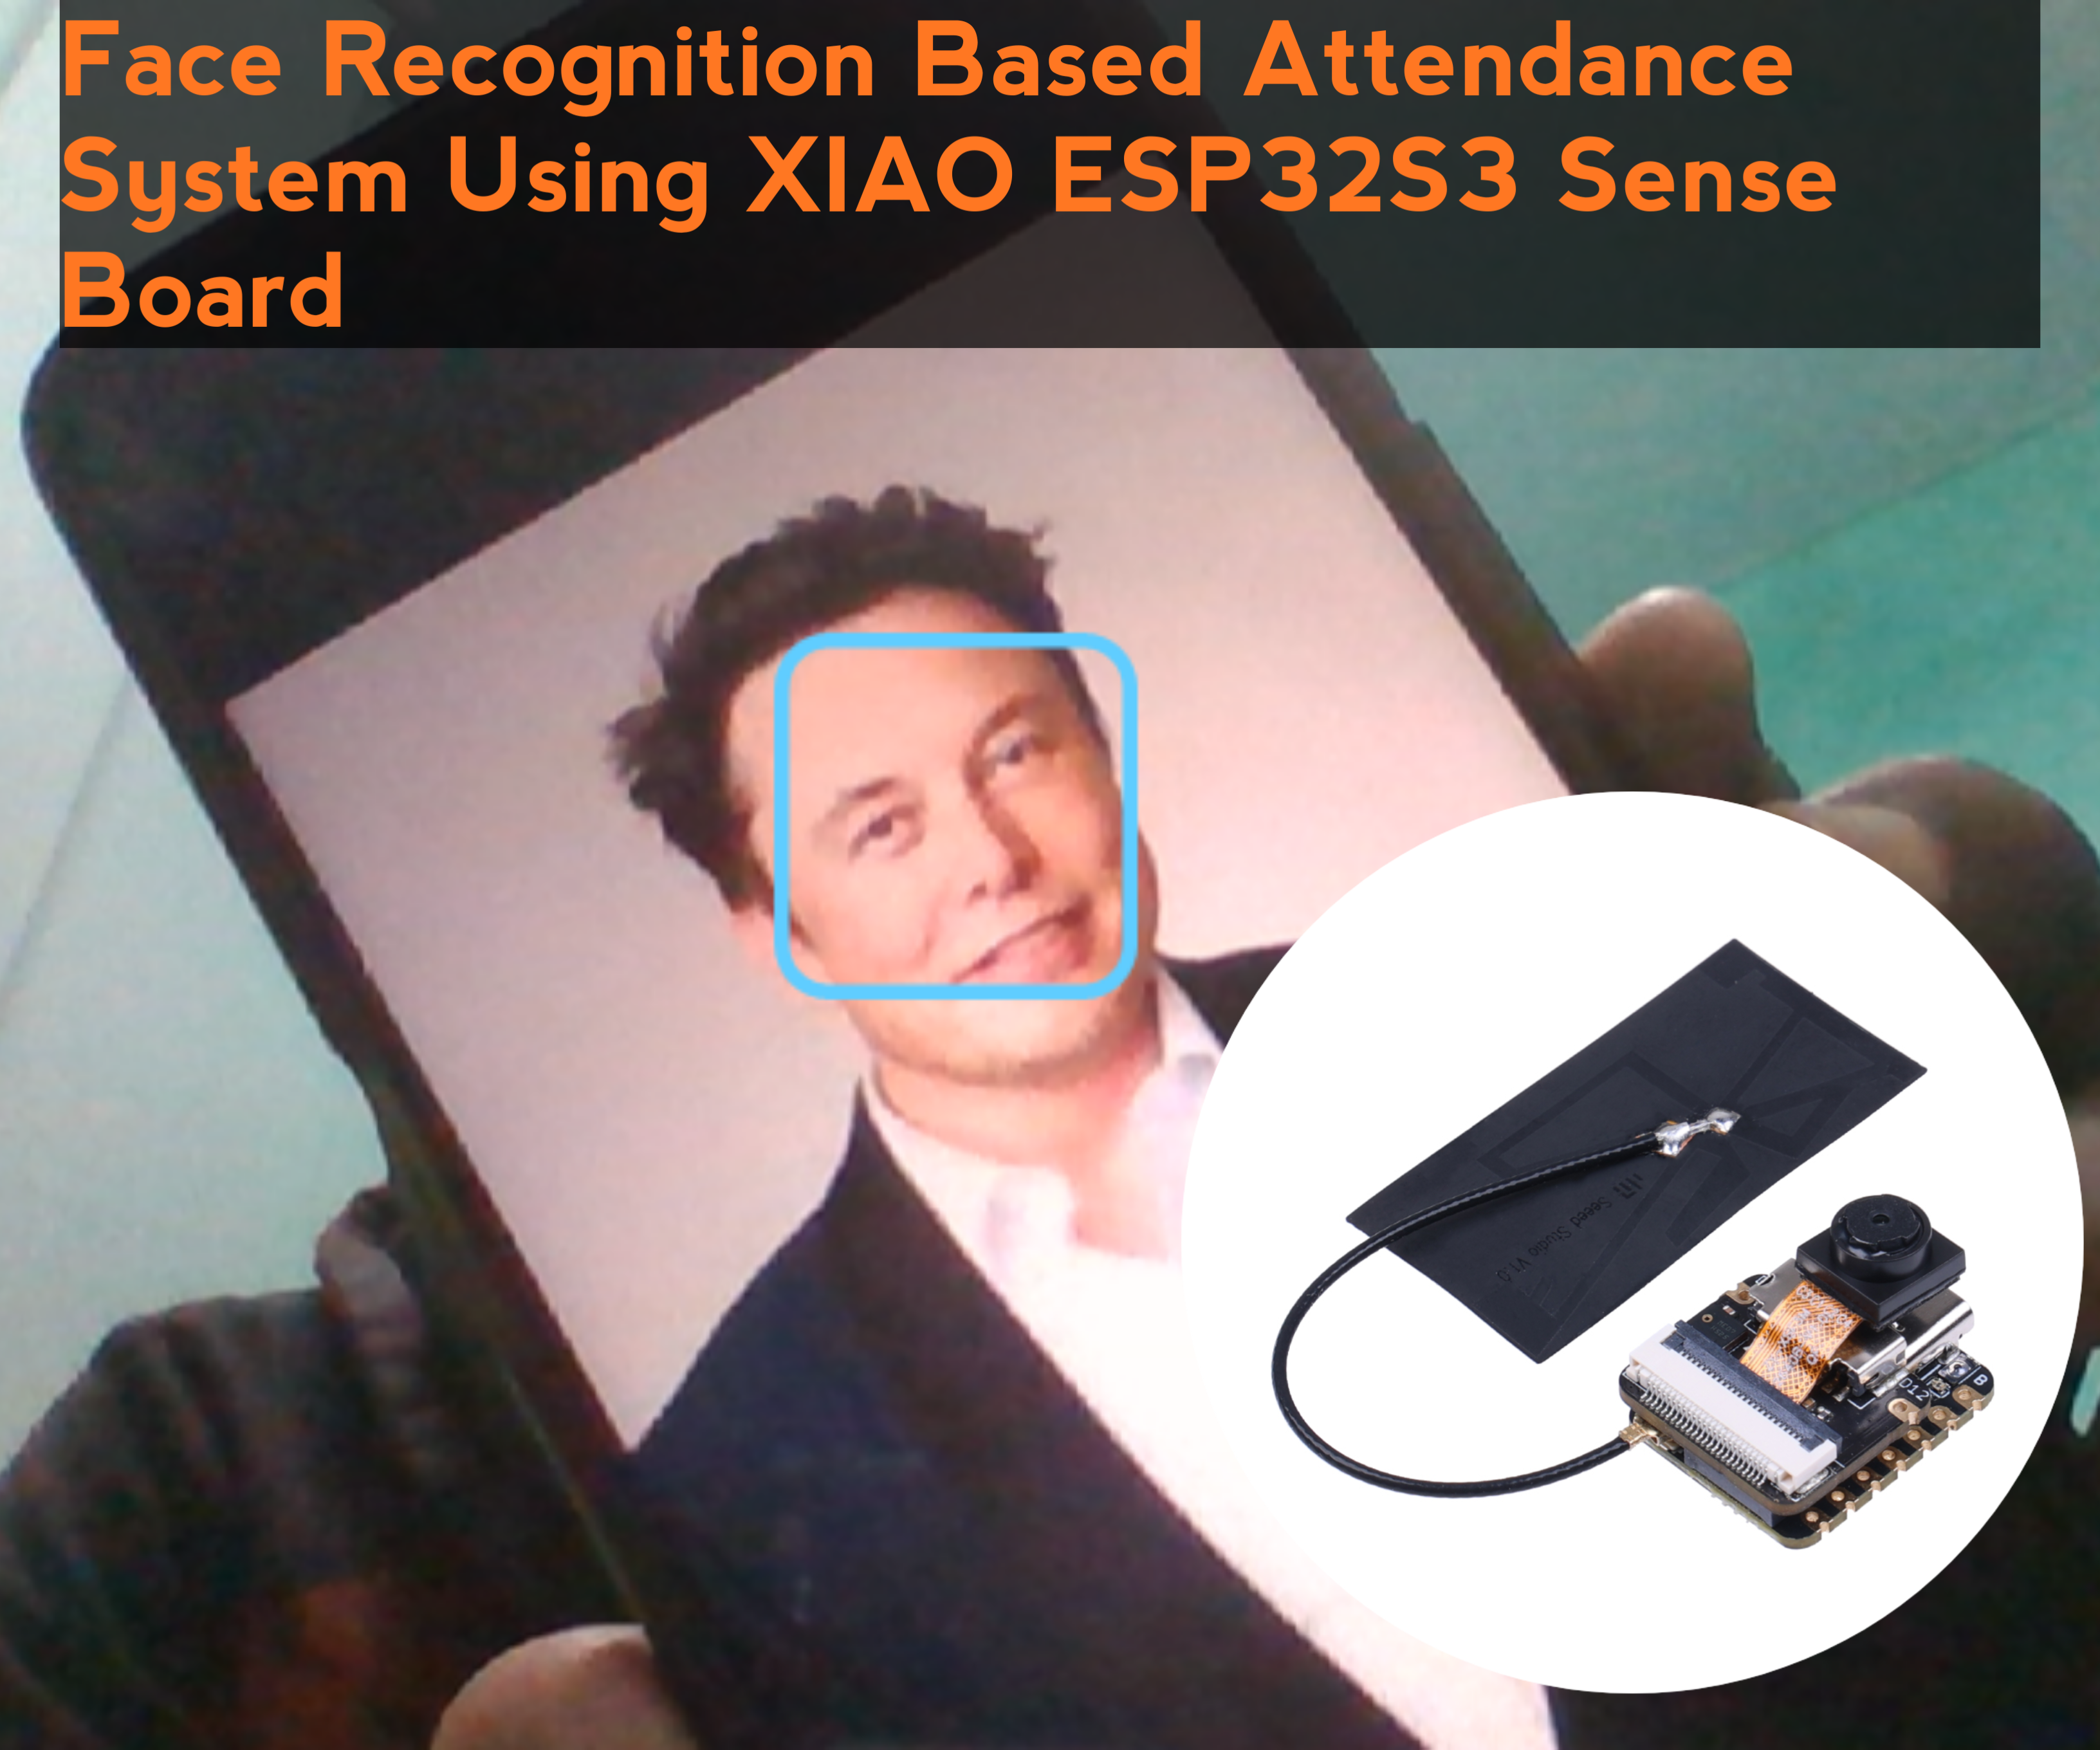
Face Recognition Based Attendance System Using XIAO ESP32S3 Sense Board
by Shahbaz Hashmi Ansari in Circuits > Wireless
2253 Views, 6 Favorites, 0 Comments
Face Recognition Based Attendance System Using XIAO ESP32S3 Sense Board

Greetings everyone, and welcome to my Instructables tutorial. Today, I'll guide you through creating an Face Recognition Based Attendance System using XIAO ESP32S3 Sense Board.
Project Overview:
In this project, we will be using XIAO ESP32S3 Sense Board as our camera input and we will be using OpenCV & Visual Studio for the face detection and as the face is detected it will record the attendance with date and time in CSV file.
I want to thank Seeed Studio for their sponsorship in making this project possible.
Without further ado, let's dive into the project and get started!
Supplies

Below are the components required for making this Face Recognition Based Attendance System using XIAO ESP32S3 Sense Board:
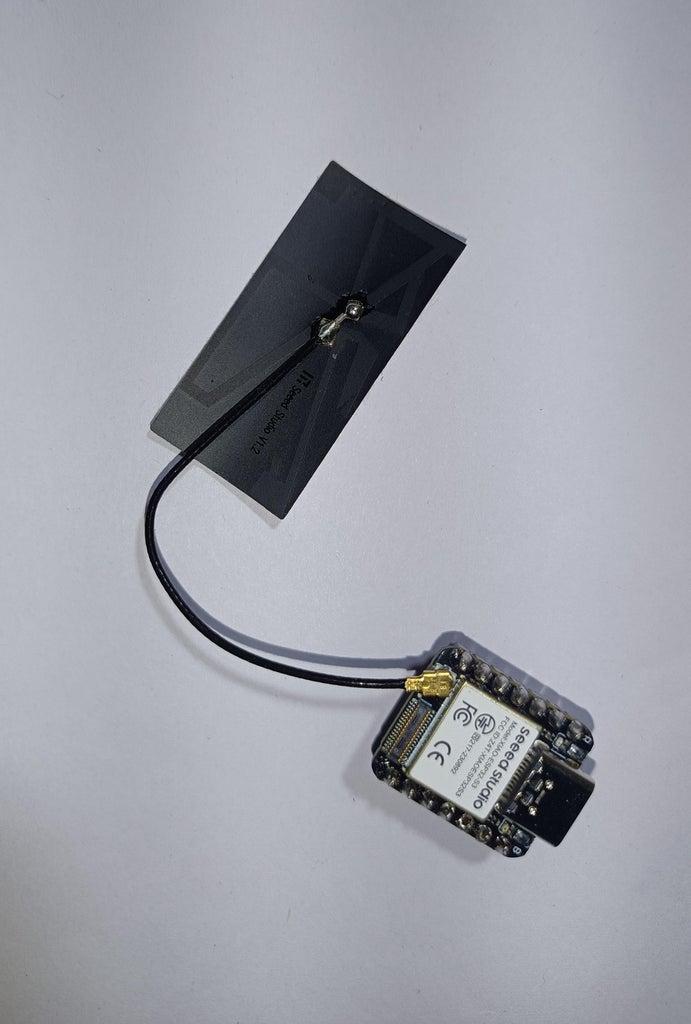
- Seeed Studio XIAO ESP32S3: BUY NOW!
- PCB Board : https://www.seeedstudio.com/fusion.html
Installing the Library:
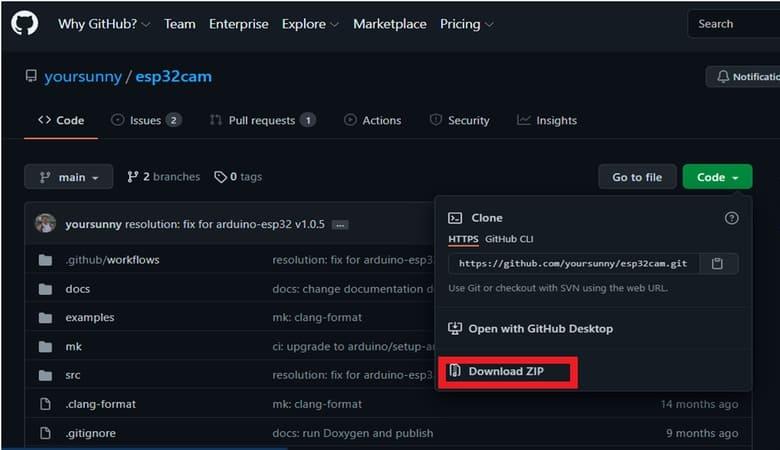
Go to the following Github Link and download the zip library as in the image.
Once downloaded add this zip library to Arduino Libray Folder. To do so follow the following steps:
Open Arduino -> Sketch -> Include Library -> Add .ZIP Library… -> Navigate to downloaded zip file -> add
Time to Upload the Sketch:
- Now connect the USB cable to the XIAO ESP32S3 Sense
Next, upload the following code:
#include <WebServer.h>
#include <WiFi.h>
#include <esp32cam.h>
const char* WIFI_SSID = "ssid";
const char* WIFI_PASS = "password";
WebServer server(80);
static auto loRes = esp32cam::Resolution::find(320, 240);
static auto midRes = esp32cam::Resolution::find(350, 530);
static auto hiRes = esp32cam::Resolution::find(800, 600);
void serveJpg()
{
auto frame = esp32cam::capture();
if (frame == nullptr) {
Serial.println("CAPTURE FAIL");
server.send(503, "", "");
return;
}
Serial.printf("CAPTURE OK %dx%d %db\n", frame->getWidth(), frame->getHeight(),
static_cast<int>(frame->size()));
server.setContentLength(frame->size());
server.send(200, "image/jpeg");
WiFiClient client = server.client();
frame->writeTo(client);
}
void handleJpgLo()
{
if (!esp32cam::Camera.changeResolution(loRes)) {
Serial.println("SET-LO-RES FAIL");
}
serveJpg();
}
void handleJpgHi()
{
if (!esp32cam::Camera.changeResolution(hiRes)) {
Serial.println("SET-HI-RES FAIL");
}
serveJpg();
}
void handleJpgMid()
{
if (!esp32cam::Camera.changeResolution(midRes)) {
Serial.println("SET-MID-RES FAIL");
}
serveJpg();
}
void setup(){
Serial.begin(115200);
Serial.println();
{
using namespace esp32cam;
Config cfg;
cfg.setPins(pins::AiThinker);
cfg.setResolution(hiRes);
cfg.setBufferCount(2);
cfg.setJpeg(80);
bool ok = Camera.begin(cfg);
Serial.println(ok ? "CAMERA OK" : "CAMERA FAIL");
}
WiFi.persistent(false);
WiFi.mode(WIFI_STA);
WiFi.begin(WIFI_SSID, WIFI_PASS);
while (WiFi.status() != WL_CONNECTED) {
delay(500);
}
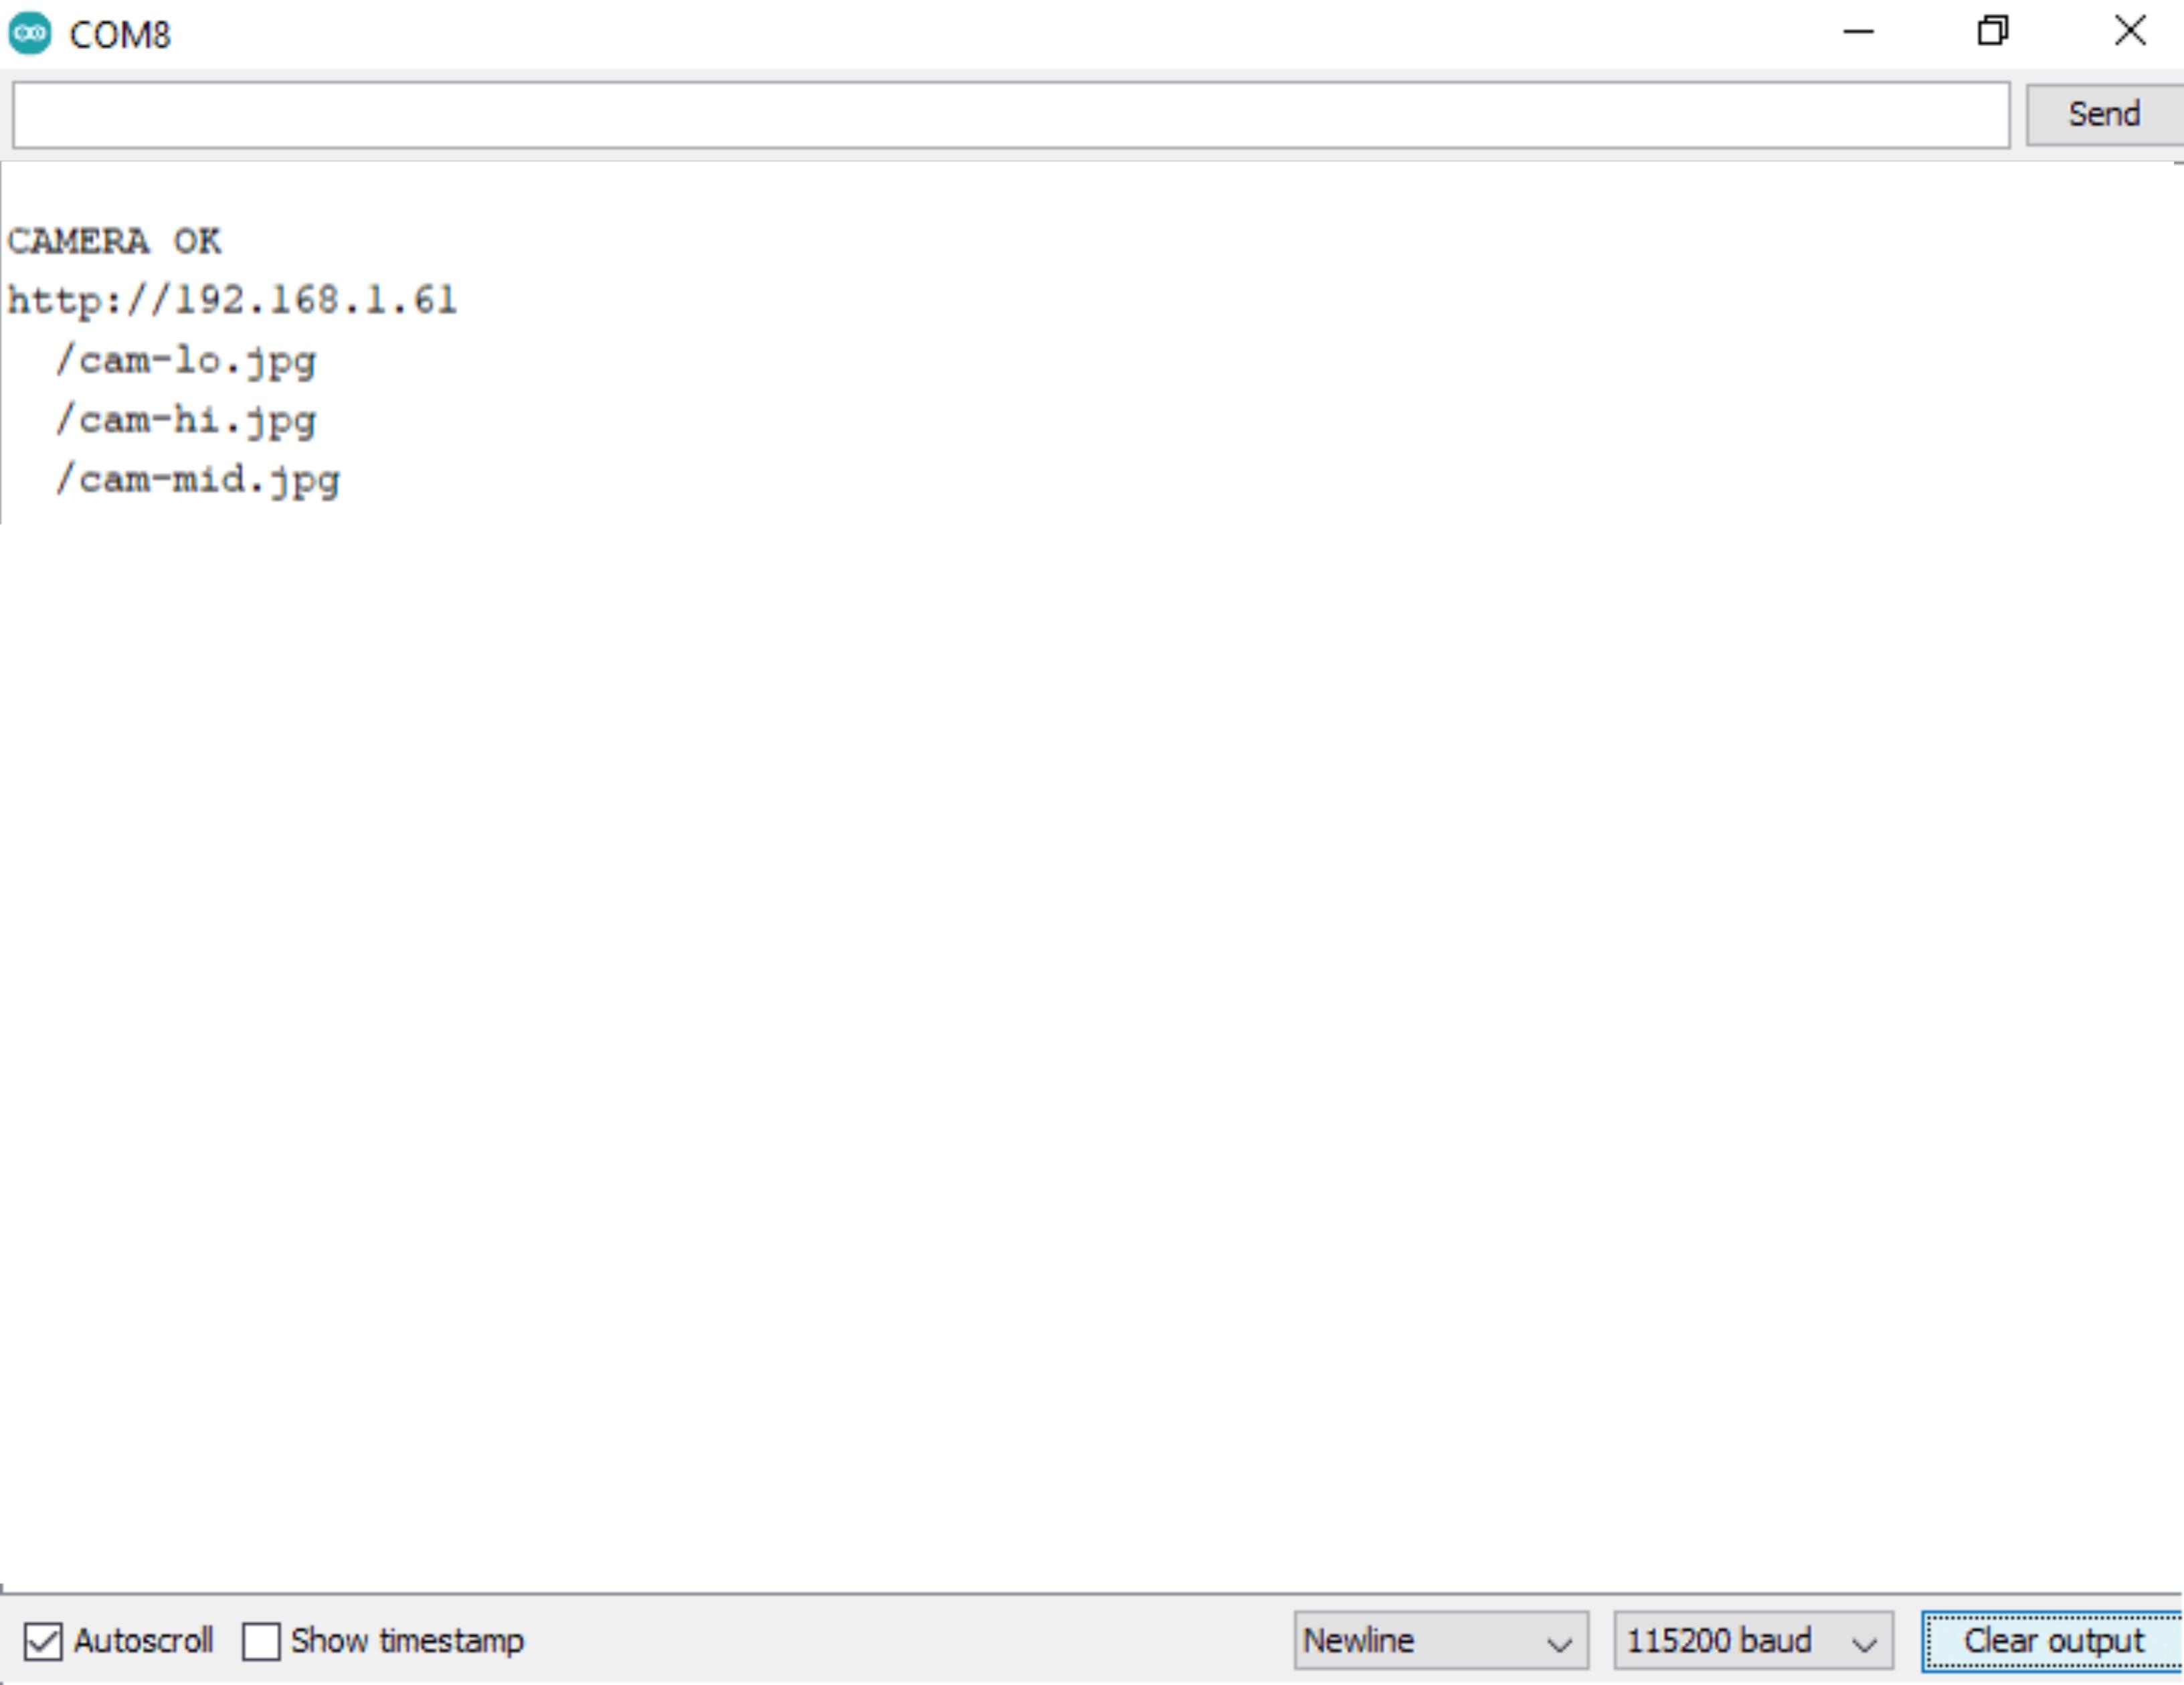
Serial.print("http://");
Serial.println(WiFi.localIP());
Serial.println(" /cam-lo.jpg");
Serial.println(" /cam-hi.jpg");
Serial.println(" /cam-mid.jpg");
server.on("/cam-lo.jpg", handleJpgLo);
server.on("/cam-hi.jpg", handleJpgHi);
server.on("/cam-mid.jpg", handleJpgMid);
server.begin();
}
void loop()
{
server.handleClient();
}
Change the SSID and password variable and in accordance with your WiFi network.
- Now open the Serial Monitor and then copy the IP address visible, we will be using it to edit the URL in python code
SEEED Studio & Seeed Fusion Service:

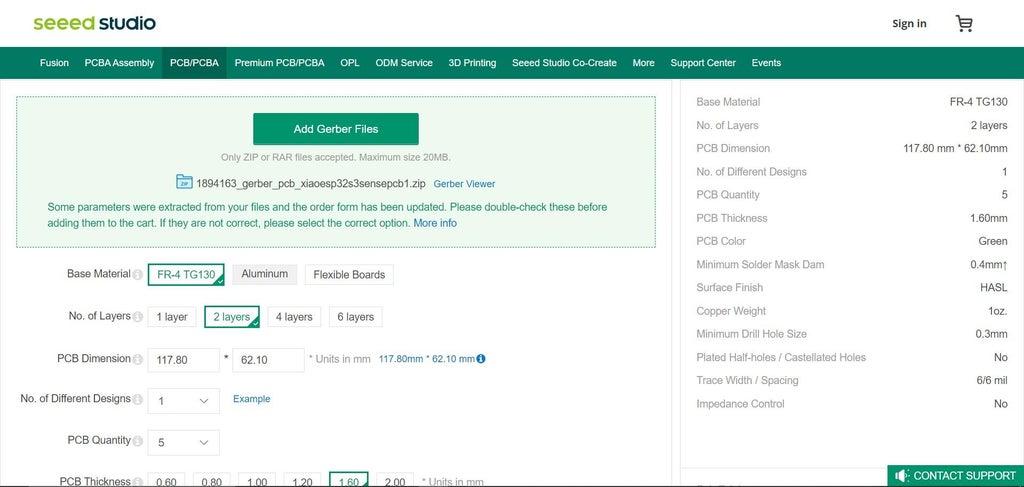
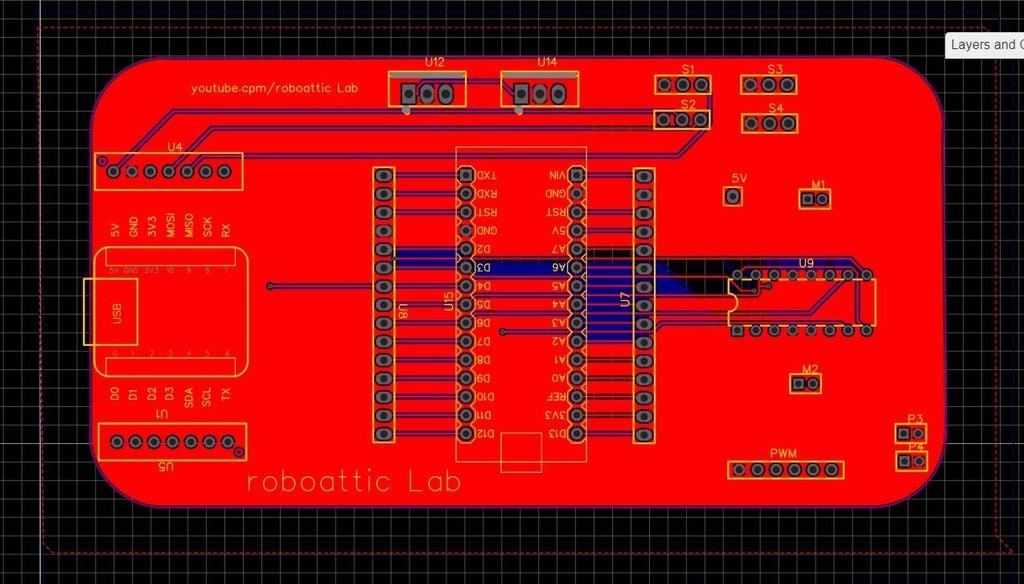

SEEED Studio gave me an XIAO ESP32S3 board and a PCB Board to make my circuit easier.
SEEED Studio helps people make their projects. They work with other tech companies and offer many hardware parts that can be used in IoT projects. They can also make custom parts, from one piece to over 10,000 pieces. They are based in Shenzhen, China, but they also have offices in the US and Japan.
Their products, like the PCBs & XIAO ESP32S3 board, are very good and they were delivered very fast. The PCBs were also cheap.
SEEED Fusion is a service that makes and assembles PCBs quickly. They handle everything from making the PCBs, getting the parts, assembling them, and testing them.
After you have a working prototype and people are interested in it, SEEED’s Propagate Service can help you sell your product.
Want more details Check here: https://www.seeedstudio.com/fusion.html
Installation of the Python Libraries:
- Now open the command prompt as administrator.
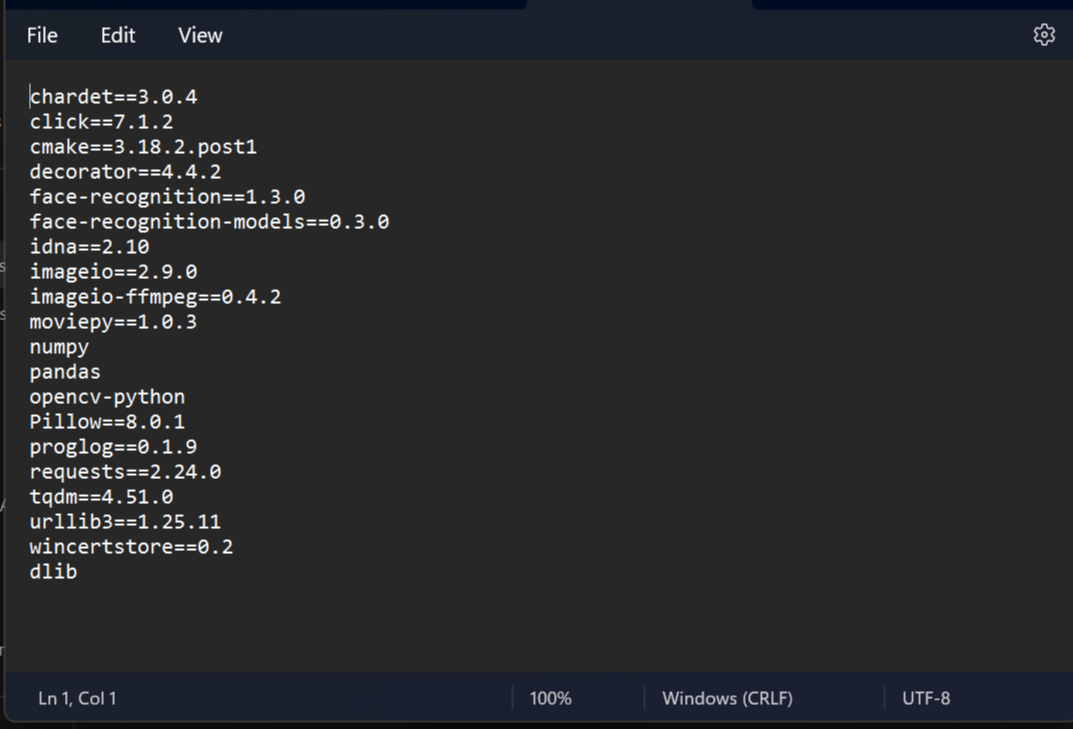
- Now install the following libraries:
chardet==3.0.4
click==7.1.2
cmake==3.18.2.post1
decorator==4.4.2
face-recognition==1.3.0
face-recognition-models==0.3.0
idna==2.10
imageio==2.9.0
imageio-ffmpeg==0.4.2
moviepy==1.0.3
numpy
pandas
opencv-python
Pillow==8.0.1
proglog==0.1.9
requests==2.24.0
tqdm==4.51.0
urllib3==1.25.11
wincertstore==0.2
dlib
For installing the library one by one do the following task:
pip install "library name from above"
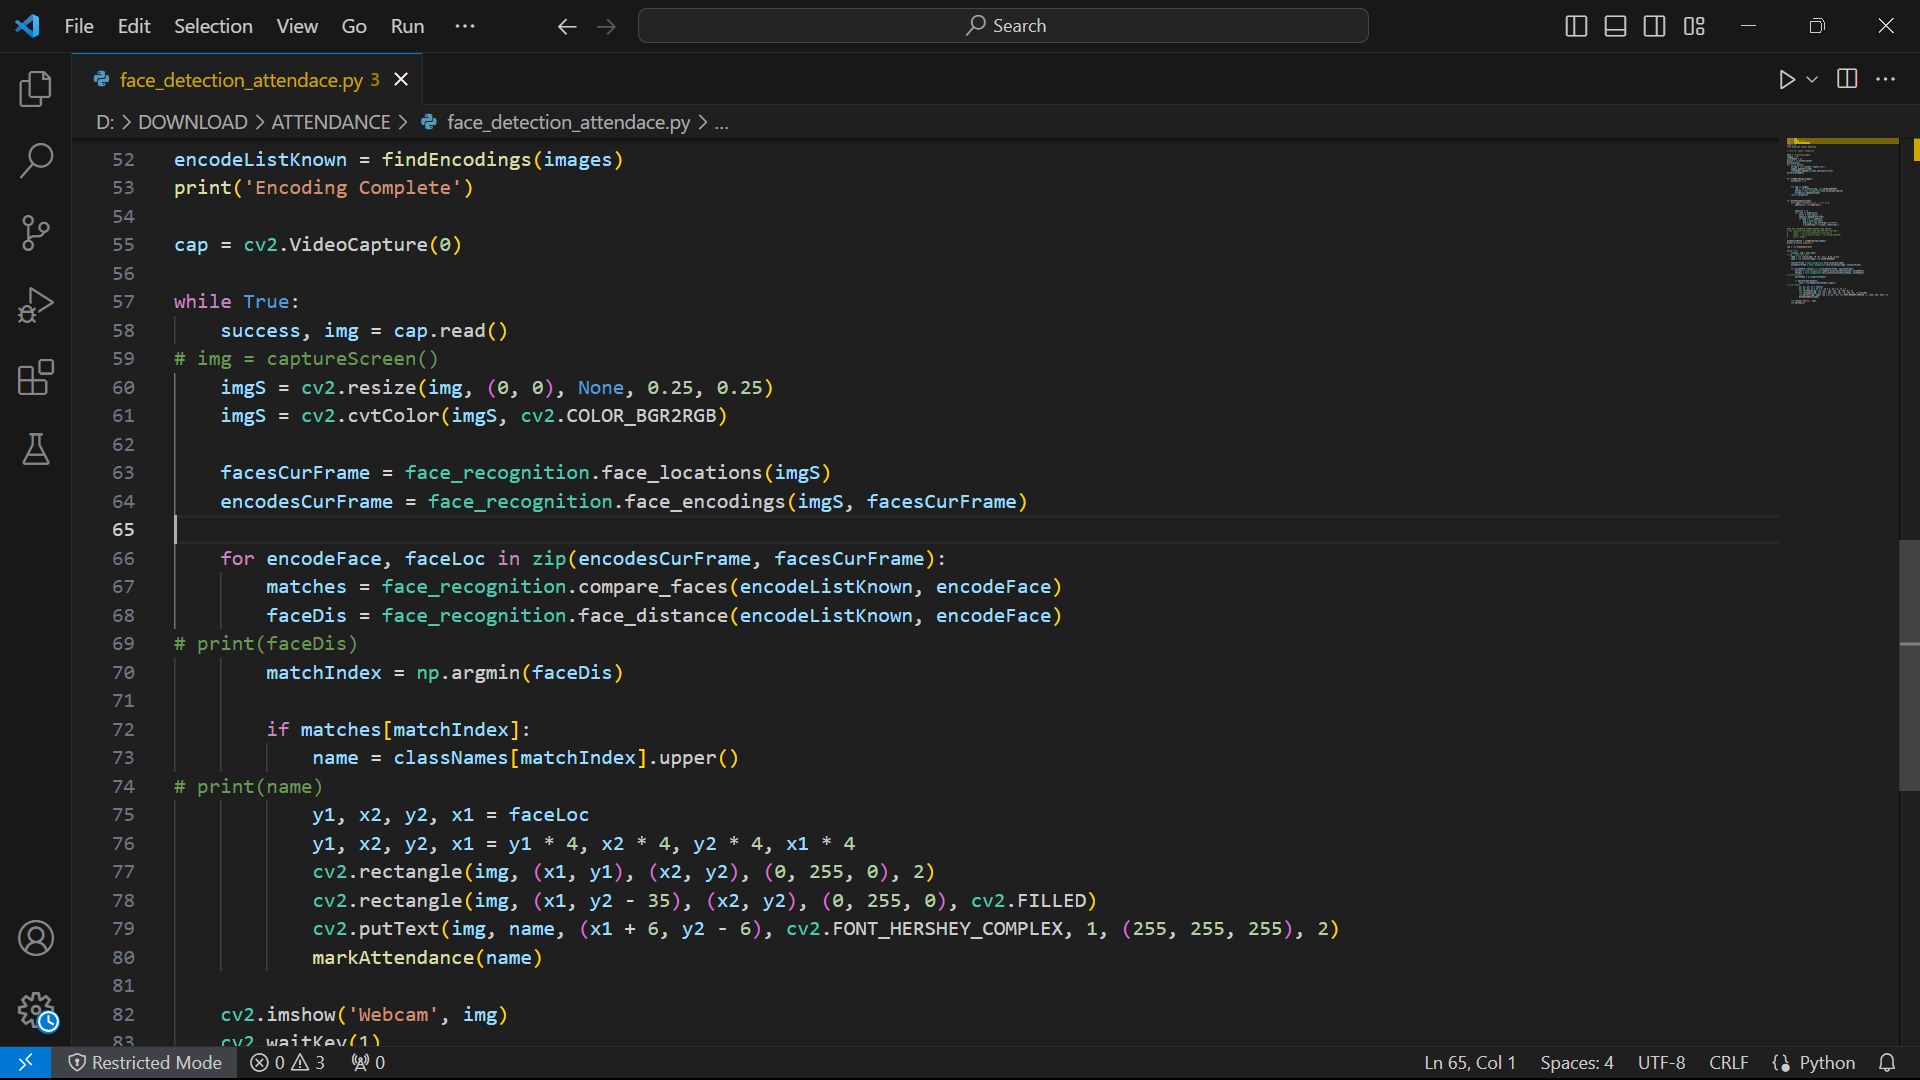
Face Detection Python Code:
.png)
- To add the users who need to be detected, create a folder with the name image_folder folder. Then add the image into that folder (Remember the image name should be that person's name, example Shahbaz.jpg).
- Now Run the below Python Code:
import pandas as pd
import cv2
import urllib.request
import numpy as np
import os
from datetime import datetime
import face_recognition

path = r' enter the image_folder path here'
url=' Past URL copied from Arduino serial monitor'
##'''cam.bmp / cam-lo.jpg /cam-hi.jpg / cam.mjpeg '''

if 'Attendance.csv' in os.listdir(os.path.join(os.getcwd(),'attendace')):
    print("there iss..")
    os.remove("Attendance.csv")
else:
    df=pd.DataFrame(list())
    df.to_csv("Attendance.csv")


images = []
classNames = []
myList = os.listdir(path)
print(myList)
for cl in myList:
    curImg = cv2.imread(f'{path}/{cl}')
    images.append(curImg)
    classNames.append(os.path.splitext(cl)[0])
print(classNames)


def findEncodings(images):
    encodeList = []
    for img in images:
        img = cv2.cvtColor(img, cv2.COLOR_BGR2RGB)
        encode = face_recognition.face_encodings(img)[0]
        encodeList.append(encode)
    return encodeList


def markAttendance(name):
    with open("Attendance.csv", 'r+') as f:
        myDataList = f.readlines()
        nameList = []
        for line in myDataList:
            entry = line.split(',')
            nameList.append(entry[0])
            if name not in nameList:
                now = datetime.now()
                dtString = now.strftime('%H:%M:%S')
                f.writelines(f'\n{name},{dtString}')


encodeListKnown = findEncodings(images)
print('Encoding Complete')

#cap = cv2.VideoCapture(0)

while True:
    #success, img = cap.read()
    img_resp=urllib.request.urlopen(url)
    imgnp=np.array(bytearray(img_resp.read()),dtype=np.uint8)
    img=cv2.imdecode(imgnp,-1)
# img = captureScreen()
    imgS = cv2.resize(img, (0, 0), None, 0.25, 0.25)
    imgS = cv2.cvtColor(imgS, cv2.COLOR_BGR2RGB)

    facesCurFrame = face_recognition.face_locations(imgS)
    encodesCurFrame = face_recognition.face_encodings(imgS, facesCurFrame)

    for encodeFace, faceLoc in zip(encodesCurFrame, facesCurFrame):
        matches = face_recognition.compare_faces(encodeListKnown, encodeFace)
        faceDis = face_recognition.face_distance(encodeListKnown, encodeFace)
# print(faceDis)
        matchIndex = np.argmin(faceDis)

        if matches[matchIndex]:
            name = classNames[matchIndex].upper()
# print(name)
            y1, x2, y2, x1 = faceLoc
            y1, x2, y2, x1 = y1 * 4, x2 * 4, y2 * 4, x1 * 4
            cv2.rectangle(img, (x1, y1), (x2, y2), (0, 255, 0), 2)
            cv2.rectangle(img, (x1, y2 - 35), (x2, y2), (0, 255, 0), cv2.FILLED)
            cv2.putText(img, name, (x1 + 6, y2 - 6), cv2.FONT_HERSHEY_COMPLEX, 1, (255, 255, 255), 2)
            markAttendance(name)

    cv2.imshow('Webcam', img)
    key=cv2.waitKey(5)
    if key==ord('q'):
        break
cv2.destroyAllWindows()
cv2.imread
- Remember to update the URL variable in the code with the URL copied from Arduino serial monitor.
- Update the path variable in the code with the path of the image_folder folder.
Now you can run the code and bring the image of the person in front of the XIAO ESP32S3 Sense.
Working:
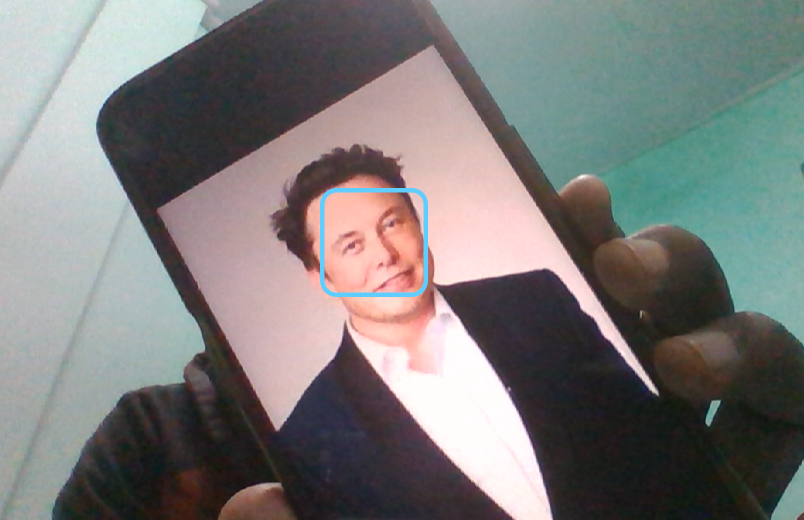
After successful detection of the face it mark your attendance in Attendace.csv file.
Thank you for your interest in this project. If you have any questions or suggestions for future projects, please leave a comment and I will do my best to assist you.
For business or promotional inquiries, please contact me via email at Email.
I will continue to update this instructable with new information. Don’t forget to follow me for updates on new projects and subscribe to my YouTube channel (YouTube: roboattic Lab) for more content. Thank you for your support.