Face Mask With E-Paper Display
by Dr H in Circuits > Raspberry Pi
3548 Views, 28 Favorites, 0 Comments
Face Mask With E-Paper Display


The corona virus outbreak has brought a new piece of fashion to the western world: face masks. At the time of writing, they became compulsory in Germany and other parts of Europe for everyday use in public transport, for shopping and various other occasions. My daughter, a midwife in training, has made many masks for her family and colleagues, and gave me the idea for this project, indicating me to the following:
While face masks could be helpful to restrict the spread of the virus, and self-made community masks now come in several shapes sizes and patterns and even with illumination, they have a common problem: they make their wearer faceless. At least to a certain degree, as mouth and nose shall be covered. Which makes non-verbal communication difficult, and all these faceless faces do not only frighten small children.
In the following I would like to describe a novel solution for this problem: a face mask with an integrated display. Located about where your mouth should be, it may allow you to express your general state of mood - happy smiling, normal, tense, angry, annoyed, ... - by displaying either an image of an appropriate mouth or a sketch of a mouth, some text message, symbol or even an animation.
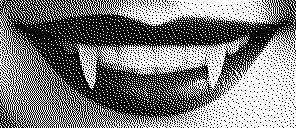
I won't exclude that the concept could have some use in practice, but at least it could be great fun to wear at parties. And can give you the chance to wear the smile of you favorite celebrity, vampire, orc, shark, cat, dog, ... .
The following description of the prototype is intended to allow you to build your own version of the device, hopefully improved and fitted to you special needs and wishes. As the layout is simple and the device mostly consists of commercially available parts, only limited technical skills and equipment are required for assembly.
Please show us your versions, layouts, ideas for improvements and images to display on the device.
Supplies
- WaveShare flexible 2.9'' e-paper display with driver HAT (€ 33 via Amazon.de)
- I bought the components separately:
WaveShare flexible 2.9 inch e-Paper display (via Eckstein, € 19), 296x128 pixel b/w.Wiki
WaveShare eInk display driver HAT (via Amazon.de, € 9)
- Raspberry Pi Zero , I used a version 1.3 model,
you may also use a Raspberry Pi Zero W (Pimoroni.com, € 10.51) - Pimoroni Button shim (€ 8.55 at Pimoroni.co.uk)
- A thin, rigid but flexible plastic plate as backing for display
(I used a unused display protection sheet for iPhone 5) - USB power bank and long micro USB cable,
or in combination with RPi Zero, Pimoroni Zero LiPo shim, LiPo and a LiPo charger - Commercial or custom made face mask (flat type)
-
Optional: a longer ribbon cable (FFC 24 pin 0.5 mm pitch) would be helpful,
e.g. 60 cm - SAMTEC FJH-20-D-24.00-4 via Digi-Key (longest fitting of-the-shelf cable I could find)
or just daisy-chain 20 cm FFC pieces using adaptors (as done here)As of the end of May 2020 Adafruit is offering 25 cm 24 pin extension cables and extender connectors:
(cable: https://www.adafruit.com/product/4230, 1.5 US$), connector: (https://www.adafruit.com/product/4524) - Optional: patent fasteners or sewable velcro strips to fix to the display to a face mask
or a cloth envelope, rubber bands (used some from a bra repair kit) - Double sided tape to fix the position of the display in the envelope (or you may sew to fix it)
- Lanyard strip for the RPi Zero
Technical Layout and Concept


WaveShare is offering a flexible 2.9 inch e-paper display in the size of 6.6 x 2.9 cm and a resolution of 296 x 128 pixels, plus a Raspberry Pi HAT to simplify the control of their e-ink displays. The size and resolution of the 2.9'' display allows to display a mouth in near full size and, being flexible, it can be placed over curved surfaces. A small connector has to be attached to the display which then has to be connected with the RPi HAT with a 24 pin flat band cable.
Using a Raspberry Pi Zero as microcontroller offers a wide range of opportunities to control the display., For the prototype I picked the button shim from Pimoroni, as it is a simple and inexpensive off-the-shelf solution that can be used in combination with other HATs/pHATs and may offer enough control options for most purposes. Optimized programming (any help welcome!) may allow to reduce power consumption of the system to a minimum.
A simple way to generate the required black and white images will be described in a later step. In principle you may display "animated GIF"-like movies, but keep in mind that refreshment rates are above a second/frame, but partial refresh of the display might be helpful.
A limitation of the current layout results from the relatively short cable connecting the RPi and the display. The cable coming with the HAT is 20 cm long, the longest analogous cable I could find was 60 cm long (but not available in May 2020). To have the Raspberry in the range of your hands, e.g. in a wrist band, one could concatenate several of these cables with connectors in between. for the moment I resorted to the option wearing the RPI Zero as a lanyard (see images).
You may wear the display mask without the RPi, as the e-Paper display does require external power just for changing but not for displaying an image. So you may may just pick your "simile of the day", attach the RPi with the display, load the according image to the display, and then disconnect the RPi.
For a childrens' version you may use the flexible 2.13'' display offered by WaveShare. As it has a resolution of 212x104 pixel, you must generate bmp files in this size. Adapting the script to for this display is very simple.
Adafruit is offering similar flexible displays and a driver board fitting to theirs Feather board family. This would allow to adopt this concept to be used with an microcontroller. For more details see Step 9.
Generate Black and White Images


You may generate the images to be displayed by using vector graphics (e.g. InkScape) or pixel graphics (e.g. The GIMP) programs, but the final output must be a 296 x 128 pixel black and white bmp-file.
So, for a color image to be shown on the e-paper display it has to be converted into a black and white image.
You may either use bmp images from the collection (last step), or you generate some of your own.
as described in the following. There might be different ways to reach the goal, but I used a very simple and straightforward procedure using The GIMP:
- Just get a picture-file with the mouth-portion having a size of minimum 296 pixel wide 128 pixel high.
This may require a high-res frontal portrait. - Select an area with a width to height ratio of about 2.32 to 1 and use Image - Shrink to selection*
- Then, using Image - Scale image* to shrink to 296 pixel wide (or 128 pixel high).
- As next, select a 296 x 128 pixel large area and truncate image to selection as above.
- As the size must be exactly 296x128 pixel, use Image-Adjust Canvas Size* to correct if required
- Now convert image to grayscale using Image - Mode - Grayscale.
This step is not strictly necessary, but can be quite useful for adjustments and optimization (see step 9). - Then convert into a b&w bitmap using Image - Mode - Indexed* with options "1 bit" and "Floyd-Steinberg" dithering
- Finally, export the bitmap as BMP to an appropriate folder
- You may try to optimize the results by modifying parameters as contrast or brightness of the gray-scale image. Color- Components - Extract components-RGB green channel is a simple option to improve images and enhance red components as the mouth. Go back to step 7.
- For an "animated GIF"-like movie, you may prepare a number of consecutive images as above and name and number the BMPs in a logical way. You then may display them one after the other on the display.
- Place the files in the pic-subfolder off the e-paper example folder, if required rename them (e.g. image_1.bmp, ...)
- Replace the bmp-file names given in the example script with the ones of your files.
Remarks:
- I am not sure if I got the English names of all GIMP commands right, as I am using a German version.
- For some of the example images selections of images taken from the internet were used, so these might not be used in publications or for any commercial purposes.
Electronics and Assembly


Assembly of the electronic parts is relatively simple. The button shim, if used directly attached to the RPi, has to be soldered to the RPi's GPIO as indicated on the manufacturer's instructions. As the shim is very thin, a HAT can be placed on the GPIO with shim attached. Use as little solder as possible and try not to contaminate the GPIO pins above the shim area, desolder if required. In combination with the WaveShare e-Paper HAT you may even add a Pimoroni ZeroLiPo shim to the GPIO in addition to the button shim, which could allow to use a small LiPo as a power source. Then place the e-Paper HAT to the GPIO using the stand-offs coming with the HAT.
Connect the e-paper display and the flat connection cable to e-paper adaptor and then to the e-paper HAT as described by the manufacturer (blue makers at the end of the FFC cable down-side). Set the two switches on the HAT accordingly to the requirements of the display used, for the flexible 2.9'' display to "A" and "0".
Be sure that you have you have installed all the required software and libraries installed.
You may first use the example scripts given by Pimoroni and WaveShare to check functionality of the components, then test the project-specific code (shown in a later step).
Given the hard- and software is working, you may now attach the display and the e-Paper adaptor to the display envelope or the mask. I would suggest to fix display and adaptor on some flexible but sufficiently rigid backing, I used a thin plastic sheet and double sided tape. Now the backing sheet can be used to fix the display to your mask or to a larger protection envelope, e.g. by sewing or using double sided tape, patent fasteners or small magnets.
As the FFC cable connecting RPI and display is just 20 cm long, I used a lanyard string wrapped around the HAT stand-offs to make the Raspberry Pi wearable close to the face. As discussed, longer cable or a cable extension would be handy.
For the prototype I used a pocket-like piece of plastic tissue (20x9.5 cm), actually some packaging material that had been on hand. I then cut a hole for the display and fixed the display / backing plate in there. I then attached four plastic latches on the corners, see images. To hold the whole thing in place on the face I used two translucent rubber bands with hooks from a bra repair kit. So they go all around your head and length adjustments are very simple.
The Script
The example script is a merger of demo scripts provided by WaveShare for the display HAT (see Github here) and by Pimoroni for the Button Shim (see here). Any praise goes to them, I'll take any blame. Any remarks and suggestions for optimization are welcome.
The WaveShare script requires several libraries to be installed, as indicated in the documentation on GitHub.
So does the Pimoroni script, but here there is a tool to do the job for you.
Best use a freshly flashed SD-card with Raspian, then add the Pimoroni tool using
sudo apt-get install pimoroni
and use it to install the button shim codes (found under "others") and the dependencies.
For the WaveShare part, copy their drivers and examples package from the GitHub page and install it and any dependencies as described there (!). Most dependencies might be already fulfilled.
Place the script in the python examples folder of the WaveShare display software and copy the bmp-files into the pic subfolder.
Using the script is relatively simple. In case, change the names of the bmp-files in the BMPs lists to the ones you'd like to display. You may prepare backup lists and just replace the one desired in the active list by copying in.
Run the script. Check if things are running well. You then may remove the HDMI and USB adaptors (with some USB-hubs, removing may stop the RPi) and place the display mask on your face and the lanyard around your neck. Have a look in the mirror and play to check if everything is working well.
The script has been striped to the minimum required to read the buttons and display the bmps. So if you would like to display text, lines or geometric figures, please add the required elements from the 2in9d example script.
The images, which must be located in the "pic" folder, are listed in the list "BMPs", which consists of 5 sublists with the names of 5 images each, or 25 images in total. The first image in each sublist is linked to button A, the second to button B, and so on. The sublists can selected by a long press of the buttons A to E, i.e. panel 1 is selected using button A, panel 2 by button B etc. The script defines several threads running in the background, watching for each button to be pressed, either shortly or held for longer than 2 seconds, resulting in a change of flag variables. The loop of the main program just detects if a button was pressed/hold reading flags button_was_held and button_was_pressed, and which flags (panel_flag, button_flag) has been raised. Then it sets the corresponding variables (panel or image) accordingly. Finally the image corresponding to “BMPs [panel][image]” is selected from the list and written to the display. Then flags are reset to their ground states “null” or "False".
The rest of the script is mostly about setting variables, initiation of the display and some error handling.
You may run the script from the IDE, or from the console using “python3 Button_shim_2in9_1.py”. Alternatively you may have the script running directly after boot.
The script is still undergoing optimization, so please check for updates.
The latest version (2020-May-10) contains a function to display the images in the list BMPs, display_gallery(), and one to display those in collection_x lists, display_collections(). Not included in the listing below, see attached file.
Please be aware that, to avoid "ghosting", erase any image if the display is not used for several days.
#!/usr/bin/env python

# from Pimoroni button shim script
import time
import signal
import buttonshim

# import and start display
#from WaveShare-paper script

# -*- coding:utf-8 -*-
import sys
import os

picdir = os.path.join(os.path.dirname(os.path.dirname(os.path.realpath(__file__))), 'pic')
libdir = os.path.join(os.path.dirname(os.path.dirname(os.path.realpath(__file__))), 'lib') <br><br>if os.path.exists(libdir):
    sys.path.append(libdir)<br>

import logging
from waveshare_epd import epd2in9d
import time
from PIL import Image,ImageDraw,ImageFont
import traceback

#Set output log level
logging.basicConfig(level=logging.DEBUG)

'''                  #not required here
font15 = ImageFont.truetype(os.path.join(picdir, 'Font.ttc'), 15)
font24 = ImageFont.truetype(os.path.join(picdir, 'Font.ttc'), 24)
'''

#set BMP list
BMPs = [["Mouth_15.bmp", "Mouth_4.bmp", "Mouth_11.bmp", "Mouth_5.bmp", "Mouth_10.bmp"],
        ["Katze_1.bmp", "Hai_1.bmp", "Hai_4.bmp", "Hund_1.bmp", "Corona_1.bmp"],
        ["TheQueen_2.bmp", "TheQueen_1.bmp", "C_Darwin.bmp", "Vampire_1.bmp", "Mouth_22.bmp"],
        ["Mouth_17.bmp", "Mouth_12.bmp", "Mouth_16.bmp", "Mouth_18.bmp", "Orc_1.bmp"],
        ["White.bmp", "Black.bmp", "Dirt_1.bmp", "Dark_sparks_1.bmp", "Bricks.bmp"]]

#replacement lists
# BMP-list_1 - ["", "", "", "", ""] ' generate  backup lists of your favorite combinations
# BMP-list_2 - ["", "", "", "", ""]

default_image = "Corona_1.bmp" # Image to be shown on startup

def display_image(image): # function to write image to e-paper display

    Himage = Image.open(os.path.join(picdir, image))
    epd.display(epd.getbuffer(Himage))
    time.sleep(.5)

def display_gallery():     #can be used to list and display all images

    epd = epd2in9d.EPD()
    epd.init()
    epd.Clear(0xFF)
    for i in range (5):
        for j in range (5):
            print (i,"   ",j)
            to_display = BMPs[i][j]
            print (to_display)
            display_image (to_display)
            time.sleep (1)             #wait 1 second before next

#Long press detection
@buttonshim.on_hold(buttonshim.BUTTON_A, hold_time=2)
def hold_handler_a (button):
    global button_was_held, panel_flag
    button_was_held = True
    print("Long press button A detected!")
    panel_flag = "panel_1"

@buttonshim.on_hold(buttonshim.BUTTON_B, hold_time=2)
def hold_handler_b (button):
    global button_was_held,panel_flag
    button_was_held = True
    print("Long press button B detected!")
    panel_flag = "panel_2"

@buttonshim.on_hold(buttonshim.BUTTON_C, hold_time=2)
def hold_handler_c (button):
    global button_was_held,panel_flag
    button_was_held = True
    print("Long press button C detected!")
    panel_flag = "panel_3"

@buttonshim.on_hold(buttonshim.BUTTON_D, hold_time=2)
def hold_handler_d (button):
    global button_was_held,panel_flag
    button_was_held = True
    print("Long press button D detected!")
    panel_flag = "panel_4"

@buttonshim.on_hold(buttonshim.BUTTON_E, hold_time=2)
def hold_handler_e (button):
    global button_was_held,panel_flag
    button_was_held = True
    print("Long press button E detected!")
    panel_flag = "panel_5"

#short press detection
@buttonshim.on_release(buttonshim.BUTTON_A)
def button_a(button, pressed):
    global button_was_pressed, button_flag
    button_was_pressed = True
    print("Short press button A detected!")
    button_flag = "button_1"

@buttonshim.on_release(buttonshim.BUTTON_B)
def button_b(button, pressed):
    global button_was_pressed, button_flag
    button_was_pressed = True
    print("Short press button B detected!")
    button_flag = "button_2"

@buttonshim.on_release(buttonshim.BUTTON_C)
def button_c(button, pressed):
    global button_was_pressed, button_flag
    button_was_pressed = True
    print("Short press button C detected!")
    button_flag = "button_3"

@buttonshim.on_release(buttonshim.BUTTON_D)
def button_d(button,pressed):
    global button_was_pressed, button_flag
    button_was_pressed = True
    print("Short press button D detected!")
    button_flag = "button_4"

@buttonshim.on_release(buttonshim.BUTTON_E)
def button_e(button,pressed):
    global button_was_pressed, button_flag
    button_was_pressed = True
    print("Short press button E detected!")
    button_flag = "button_5"

#set base state of flags and working variables
button_flag = "null"
panel_flag = "null"
image = 0 # image indicator
panel = 0 # panel indicator: sets panel 1 as base panel
button_was_held = False
button_was_pressed = False
to_display="xxx.bmp"

try:
    logging.info("epd2in9d w/ button shim")

    epd = epd2in9d.EPD()
    logging.info("init and clear")
    epd.init()
    epd.Clear(0xFF)  # write white
    display_image (default_image) #display default image

    print ("""
           Button SHIM: control-main.py, adapted for 2in9d display.
           Light up the LED a different color of the rainbow with each button pressed
           and display a certain image on the display.
           """)

    while True:

        time.sleep(.5) # pause between check circles

        if (button_was_held == True):
            #print (panel_flag, button_flag)

            if panel_flag == "panel_1":
                panel = 0

            elif panel_flag == "panel_2":
                panel = 1

            elif panel_flag == "panel_3":
                panel = 2

            elif panel_flag == "panel_4":
                panel = 3

            elif panel_flag == "panel_5":
                panel = 4

            panel_flag = "null"
            button_was_held = False
            buttonshim.set_pixel(0x94, 0x94, 0x94) #white, as panel change indicator
            button_was_pressed=False
            logging.info ("clear display")
            epd.Clear(0xFF)  # write white - optional clear display step


        elif (button_was_pressed == True):

            if button_flag == "button_1":
                   buttonshim.set_pixel(0x94, 0x00, 0xd3) #violet
                   image = 0

            elif button_flag == "button_2":
                   buttonshim.set_pixel(0x00, 0x00, 0xff) #blue
                   image = 1

            elif button_flag == "button_3":
                   buttonshim.set_pixel(0x00, 0xff, 0x00) #green
                   image = 2

            elif button_flag == "button_4":
                   buttonshim.set_pixel(0xff, 0xff, 0x00)  #yellow
                   image = 3

            elif button_flag == "button_5":
                   buttonshim.set_pixel(0xff, 0x00, 0x00) #red
                   image = 4

            to_display = BMPs[panel][image]
            print (button_flag,": ",to_display)
            display_image(to_display)
            button_was_pressed=False

    logging.info("Clear...")
    epd.Clear(0xFF)

    logging.info("Goto Sleep...")
    epd.sleep()

except IOError as e:
    logging.info(e)

except KeyboardInterrupt:
    logging.info("ctrl + c:")
    epd2in9d.epdconfig.module_exit()
    exit()
Downloads
A Cloth Mask Version and Further Application Concepts

In the current prototype version, the display can be either worn above a usual face mark or be attached to existing masks with velcro strips or magnets. But you actually would like to integrate the display in a mask, with some option for rapid placement and removal.
What I did so far was to use a mask I bought at a local tailor shop ("Schneiderei Schmargendorf") made of some rather thick cloth, identified the right area the display should be placed and then cut a hole into the outer layer of the mask. For the display cable a slit was cut in the inner side at an appropriate position. The backing plate was cut to the minimal required size and several small holes pushed in to allow sewing. Then the display was fixed on the backing plate using double sided tape, with was also applied to the edges to fix plate and display to the cloth layer. Then the display was placed in the mask, the cable moved to the slit and the cloth was fitted to the backing plate. It might be helpful to strengthen the cut edges go the cloth before this, e.g with a small amount of super glue. In case fix the backing plate by sewing after you checked that everything fits well. Connect the cable to the HAT and start the Pi.
The limitation of this approach is that you may not wash the mask with fixed integrated display. But there would be several other ways to attach the display to the mask. One option could be to add another, removable tissue layer to a mask, and hold the display in place by velcro strips or patent fasteners. That way it might removed easily for mask washing or moved to another mask.
Later, improved versions may integrate a dedicated display holder to achieve a more professional look.
----------------------------
While the original idea was a face mask with display, a very similar layout might also be used for name tags, or a display integrated into clothes or wrist bands.
Or think about a "Who am I" version with a headband with integrated display, displaying images or terms randomly picked from a larger collection.
An idea I find rather ridiculous, but do not want to left it unmentioned, would be a Niqab with such a display.
You have additional ideas? Please let me know!
As the whole project is still ongoing, have a look for updates from time to time.
Image Collection - Mouths & Faces


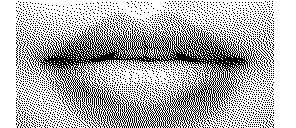
Here you find a collection of images that can be used on the 2.9 inch display, with focus on faces, usually restricted to the mouth part. Among others, it contains HM the Queen (2x), President Obama, Ghandi, the Dalai Lama, Stalin, Paul Newman, Pavarotti, and my cat.
Please be aware that, as I used images from the internet as source for some of them, copyright protection still may apply and they might not be used for commercial purposes.
Collection - Patterns


Here are a number of patterns that could be displayed, most generated using the GIMP.
Image Collection - Signs, Symbols and Text


More example images for the 293x128 display:
Signs and symbols, texts.
Again: some images or symbols (e.g. Raspberry, Apple, Instructables) might be copyright protected and shall not used for commercial purposes.
Alternative Layout: Adafruit Feather and E-paper Display


I realized today (21-May-2020) that Adafruit is also offering flexible e-paper displays of the same size and dimensions (https://www.adafruit.com/product/4262, 27 US$) as well as 25 cm 24 pin 0.5mm pitch extension cables (https://www.adafruit.com/product/4230, 1.5 US$) and extender connectors (https://www.adafruit.com/product/4524).
They have an e-paper driver for their Feather board family (Adafruit eInk Feather Friend with 32KB SRAM, https://www.adafruit.com/product/4446, 9 US$) that comes with an SD card holder to hold all these images.
I assume that this might allow a more compact and energy efficient layout than the Raspberry Zero version described herein, and would be a perfect solution if you'd prefer to use a STM32F405, 32u4 or nRF52840 platform. Unfortunately, it seems not to be trivial to combine Adafruit's eInk Feather Friends and WaveShare displays.
I really like to see a version with BLE and an app to control which images are displayed.
WaveShare is offering an Arduino display driver shield and a ESP3266 based display drivers, if you prefer these.