F1 Car


In this project, you will be building an F1 car with the functionality to move forward, flash lights, and create sound. This project will use 3D printing, Circuit playground express, a servo motor, a small battery, and python coding to bring your car to life.
Supplies


- Adafruit Circuit Playground Express
- Continuous Rotation Micro Servo
- 3D Printer
- Small Battery
Retrieve the Design

- To find the design, use this URL OpenRC F1 car - 1:10 RC Car by barspin - Thingiverse
- Click the Download button, this will provide a zipped file.
- Right click on the zipped file and choose the export all option.
- This will create a new unzipped folder with all of the necessary STL files.
- Insert each component into the Makerbot website and scale down to 80%
- Below is a list of the components needed:
- Center Body
- Center Lid
- Chassie Front
- Chassie Rear
- Front
- Motor Cover
- Nose
- Rear Rim (2)
- Rear Wheel Axle
- Spur Gear
- Tire (4)
- Wheel Axle Holder Left
- Wheel Axle Holder Right
- Front Spoiler
- Rear Wing
- Rain light and Diffuser
Write the Code

- Follow these instructions to install CircuitPython onto your CPX: https://learn.adafruit.com/welcome-to-circuitpython/installing-circuitpython
- Connect your CPX to your computer and save code.py onto it.
- The provided code will:
- Cause the Car to Move forward.
- Cause three red lights and a green light to flash.
- Cause a sound corresponding to the lights.
- The code:
Assemble the Car


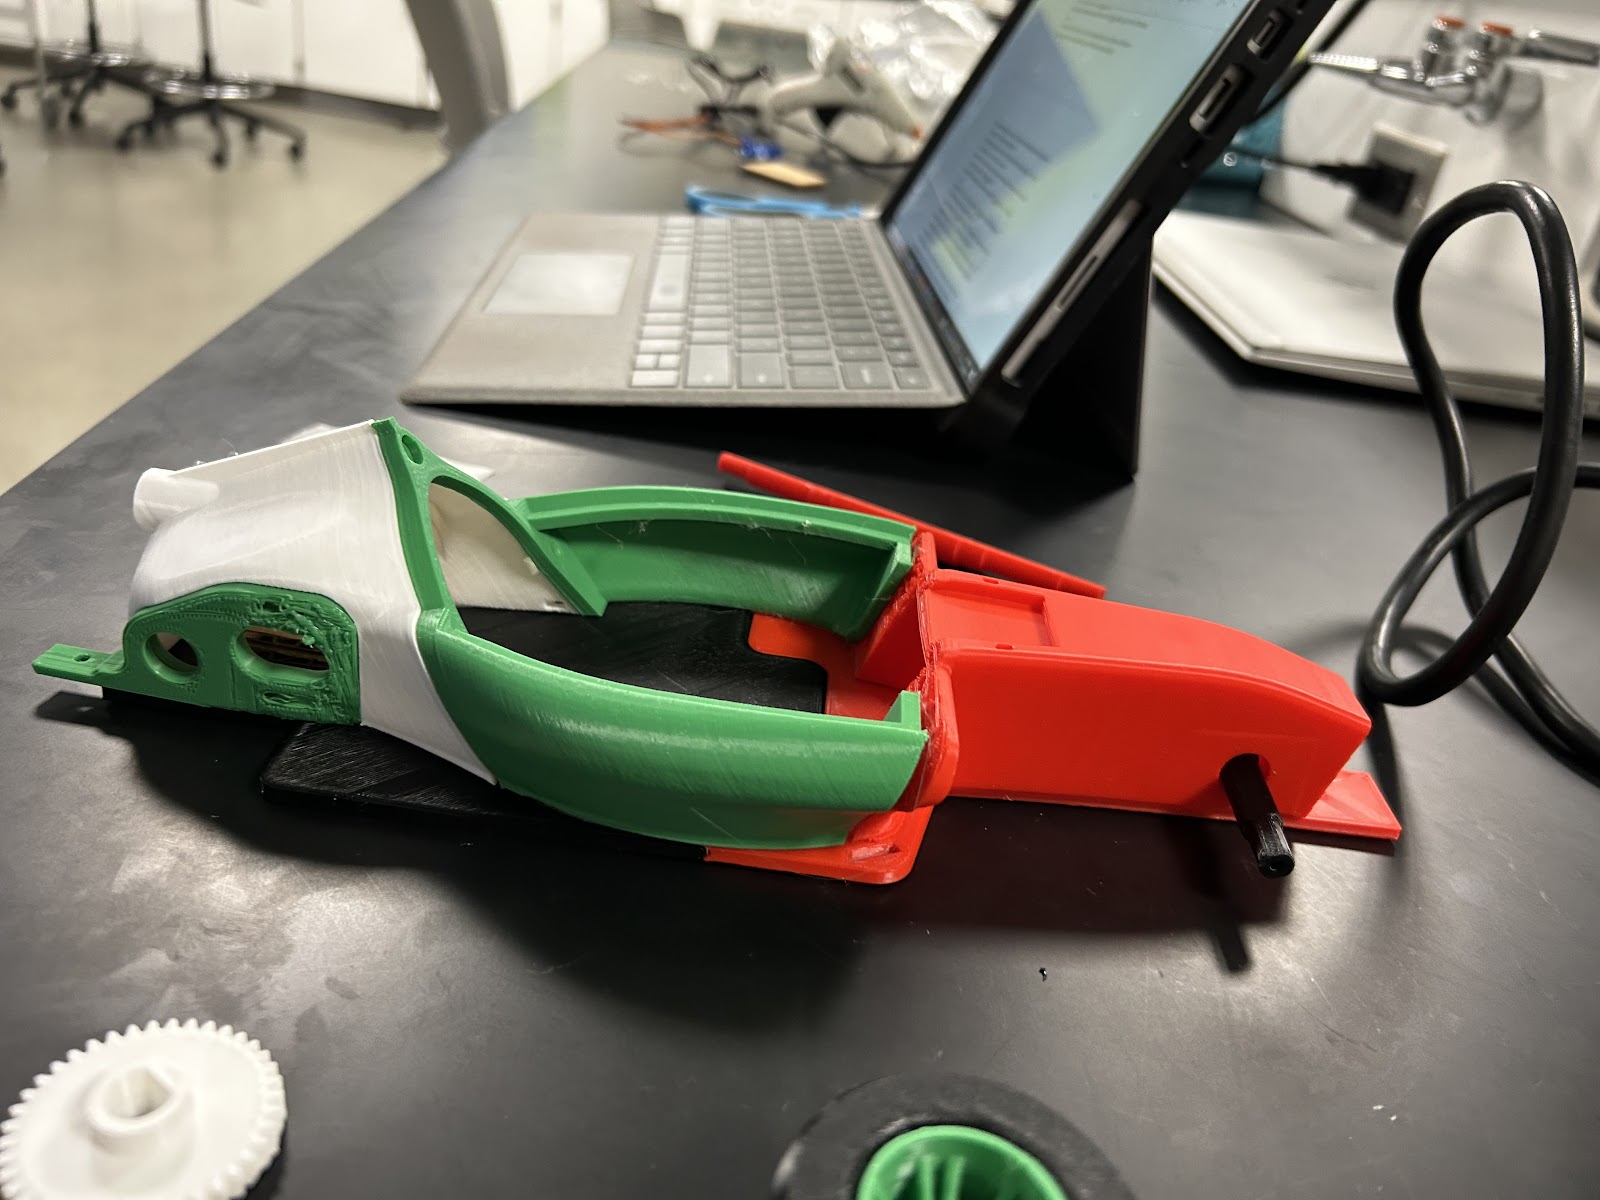
- Attach the “Chassie Front” to the “Chassie Rear”
- Attach the “Wheel Axle Holder Right” to the back right of the car with the flat part slightly hanging off
- Put the rear axle into the circular hole in the “Wheel Axle Holder Right”
- Put the other side of the rear axle into the circular hole of the “Wheel Axle Holder Left,” and attach it to the “Chassie Rear”.
- Attach the cardboard piece provided to the “Chassie Rear” just in front of the rear axle.
- Attach the Servo Motor on top of the cardboard piece so that the part that turns goes through the oval shaped hole on the “Wheel Axle Holder Right”
- Attach the small gear to the part of the Servo motor that spins through the oval shape on the “Wheel Axle Holder Right”
- Slide the bigger gear onto the axle so the teeth of the two gears touch. This will cause the axle to spin and the car to move.
- Attach the “Motor Cover” on top of the two axle holders, the piece should slide on so part of it is flush to the “Chassie Rear”.
- Attach the “Center Body” so that it is flush with the “Chassie Front” and “Motor cover”
- Attach the “Front” so that it is flush with the “Chassie Front” and “Motor cover”
- Slide the Front axle into the hole in the “Front”
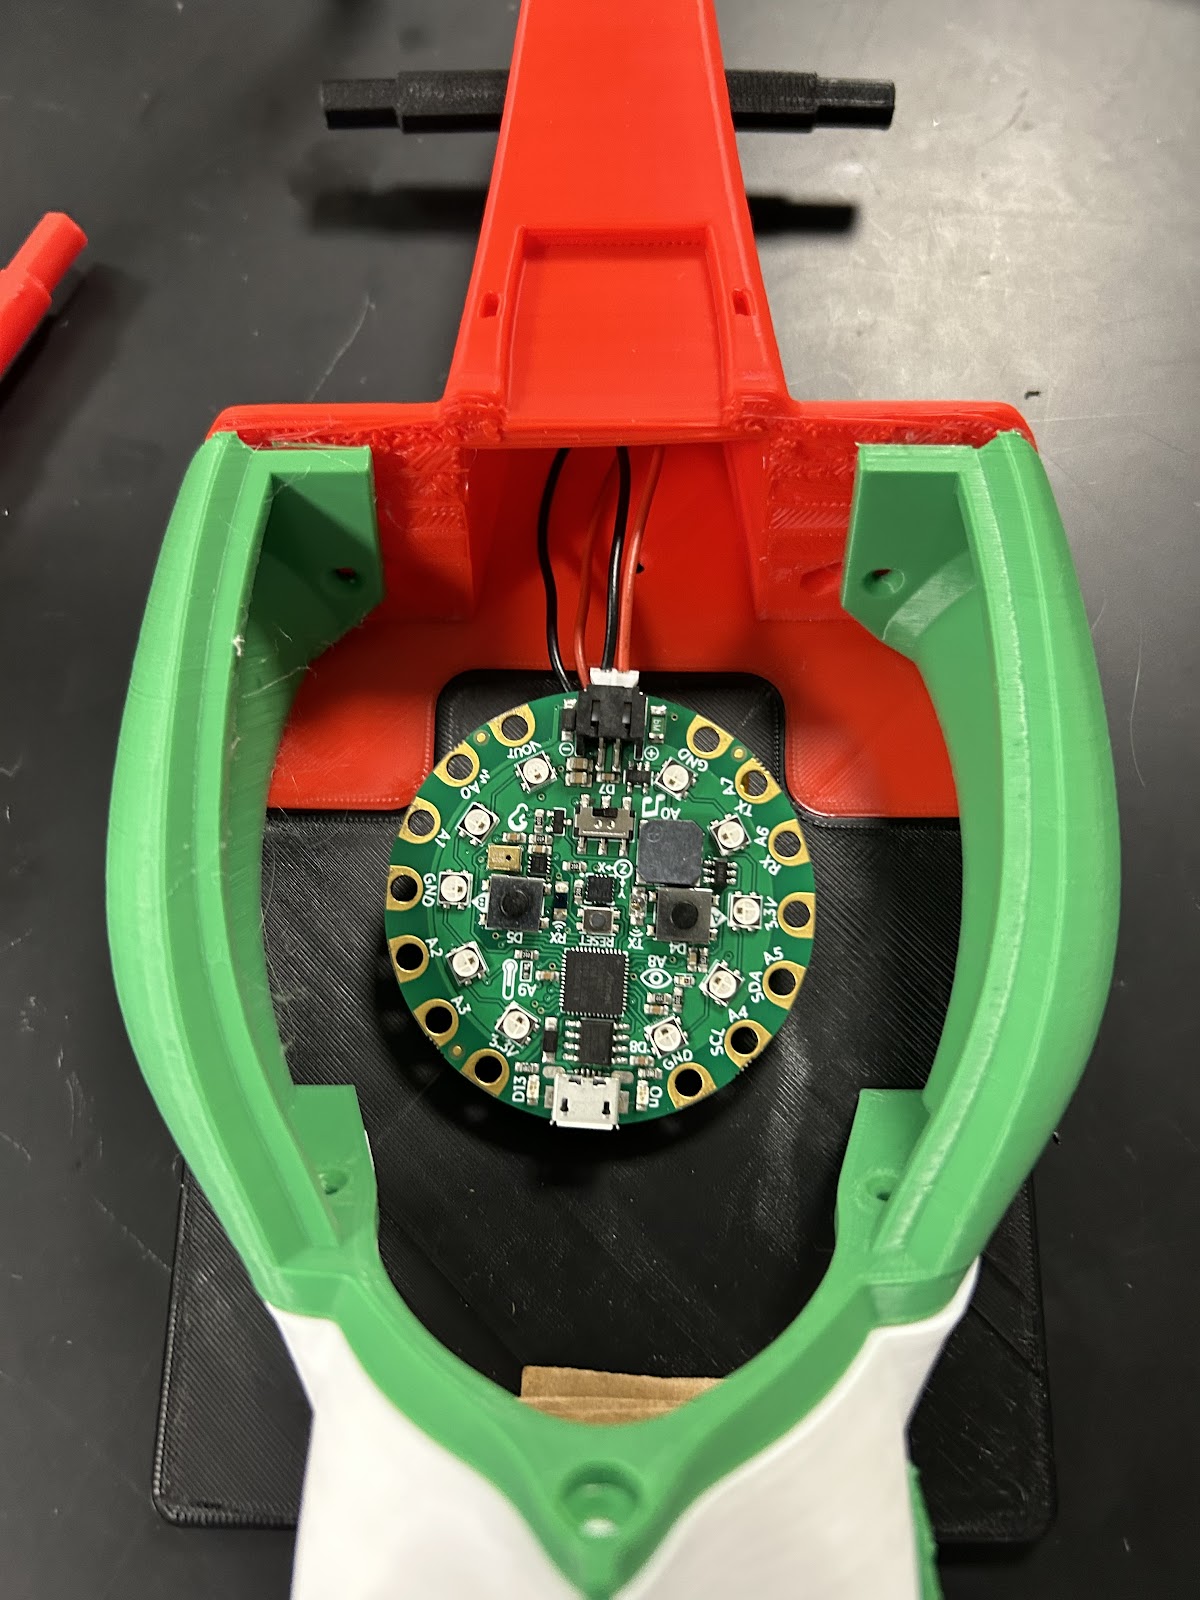
- Secure the Battery to “Chassie Rear” inside the “Center Body”. Keep in mind that this battery must connect to your Circuit Playground Express.
- Secure the Circuit Playground Express on the inside of the “Center Body,” and connect the wiring to the Servo Motor. Button A should be accessible through the hole in the “Center Lid”
- Attach the “Center Lid” on top of the hole in the “Center Body” so that is fits flush
- For each wheel, the rim will slide into the tire (This is already done for you), and the rim will also slide onto each axle .
- Wrap Rubber bands around each tire to provide traction to the wheels
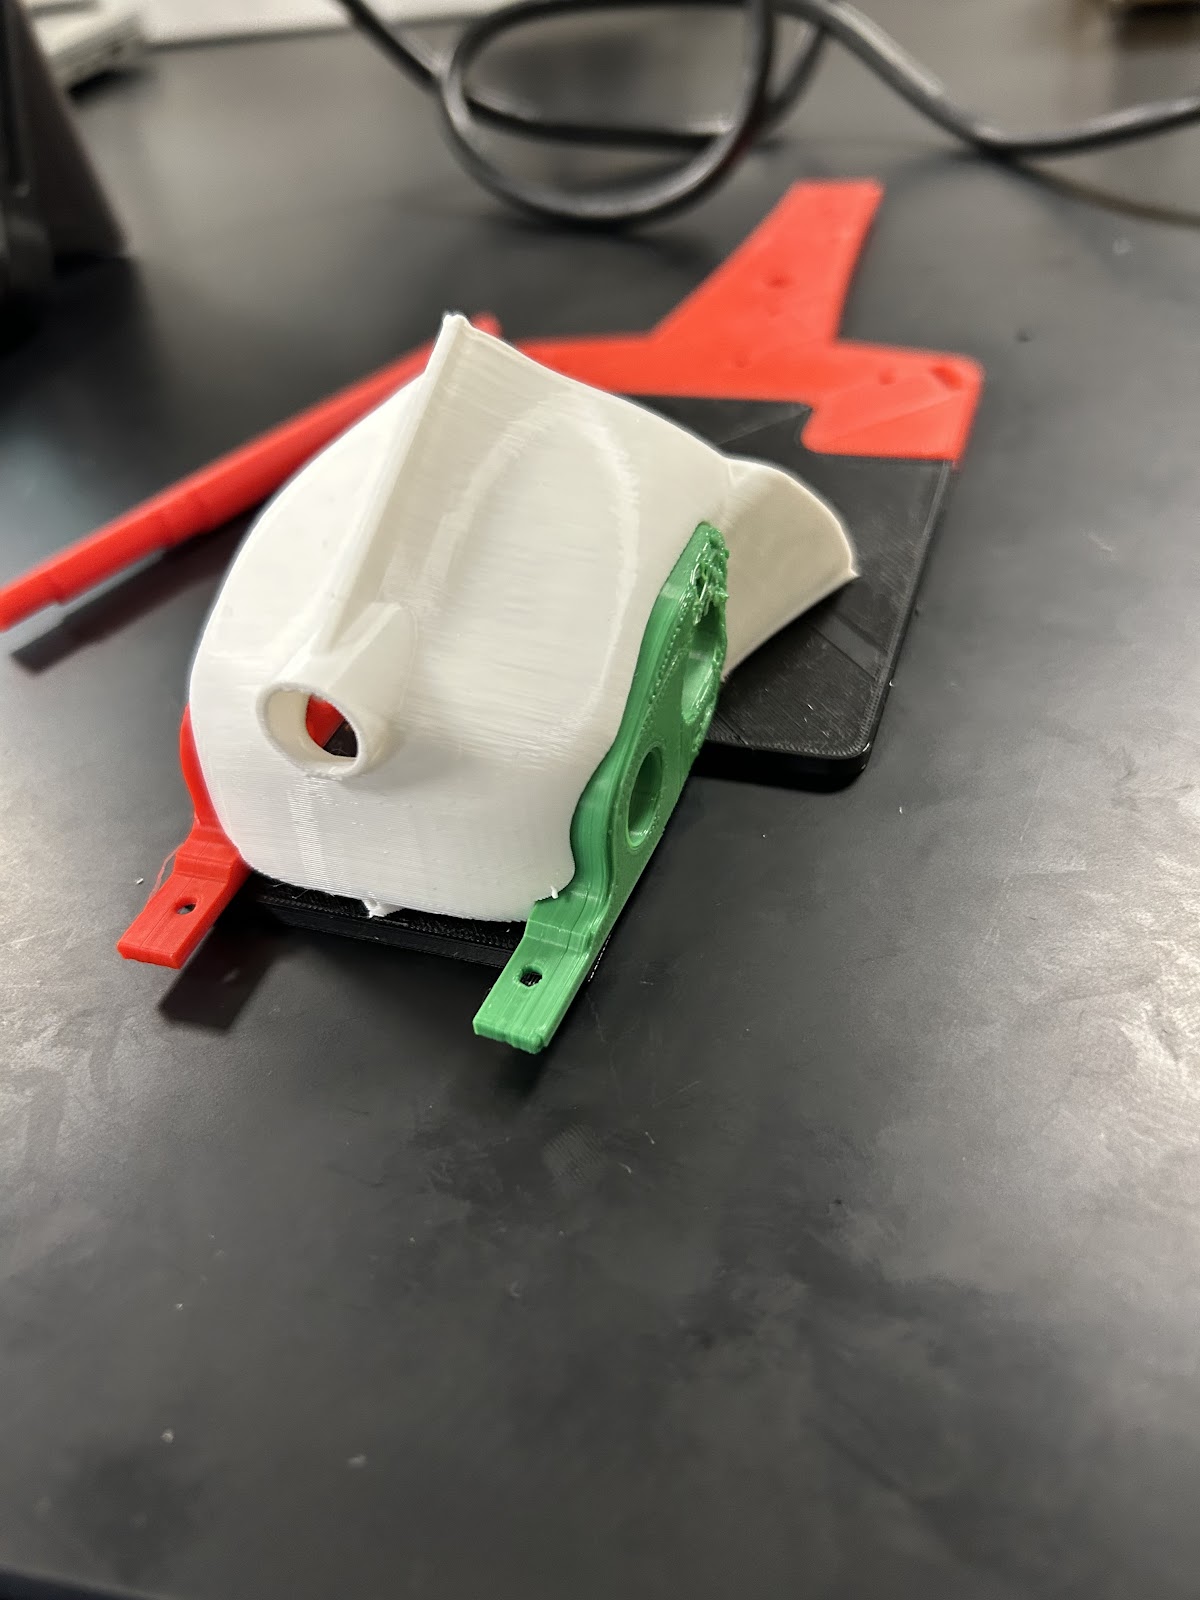
- Attach the “Nose” to the front of the car where the gap is in front of the “Front” piece
- Attach the "Rear Wing" in between the excess axle holders and the "rain light and diffuser."
- Attach the “Rain light and Diffuser” as shown below