Excellent Gift Idea - Customizing a Tool Handle With a Laser at Tech Shop
by apexchaser in Workshop > Laser Cutting
3605 Views, 14 Favorites, 0 Comments
Excellent Gift Idea - Customizing a Tool Handle With a Laser at Tech Shop
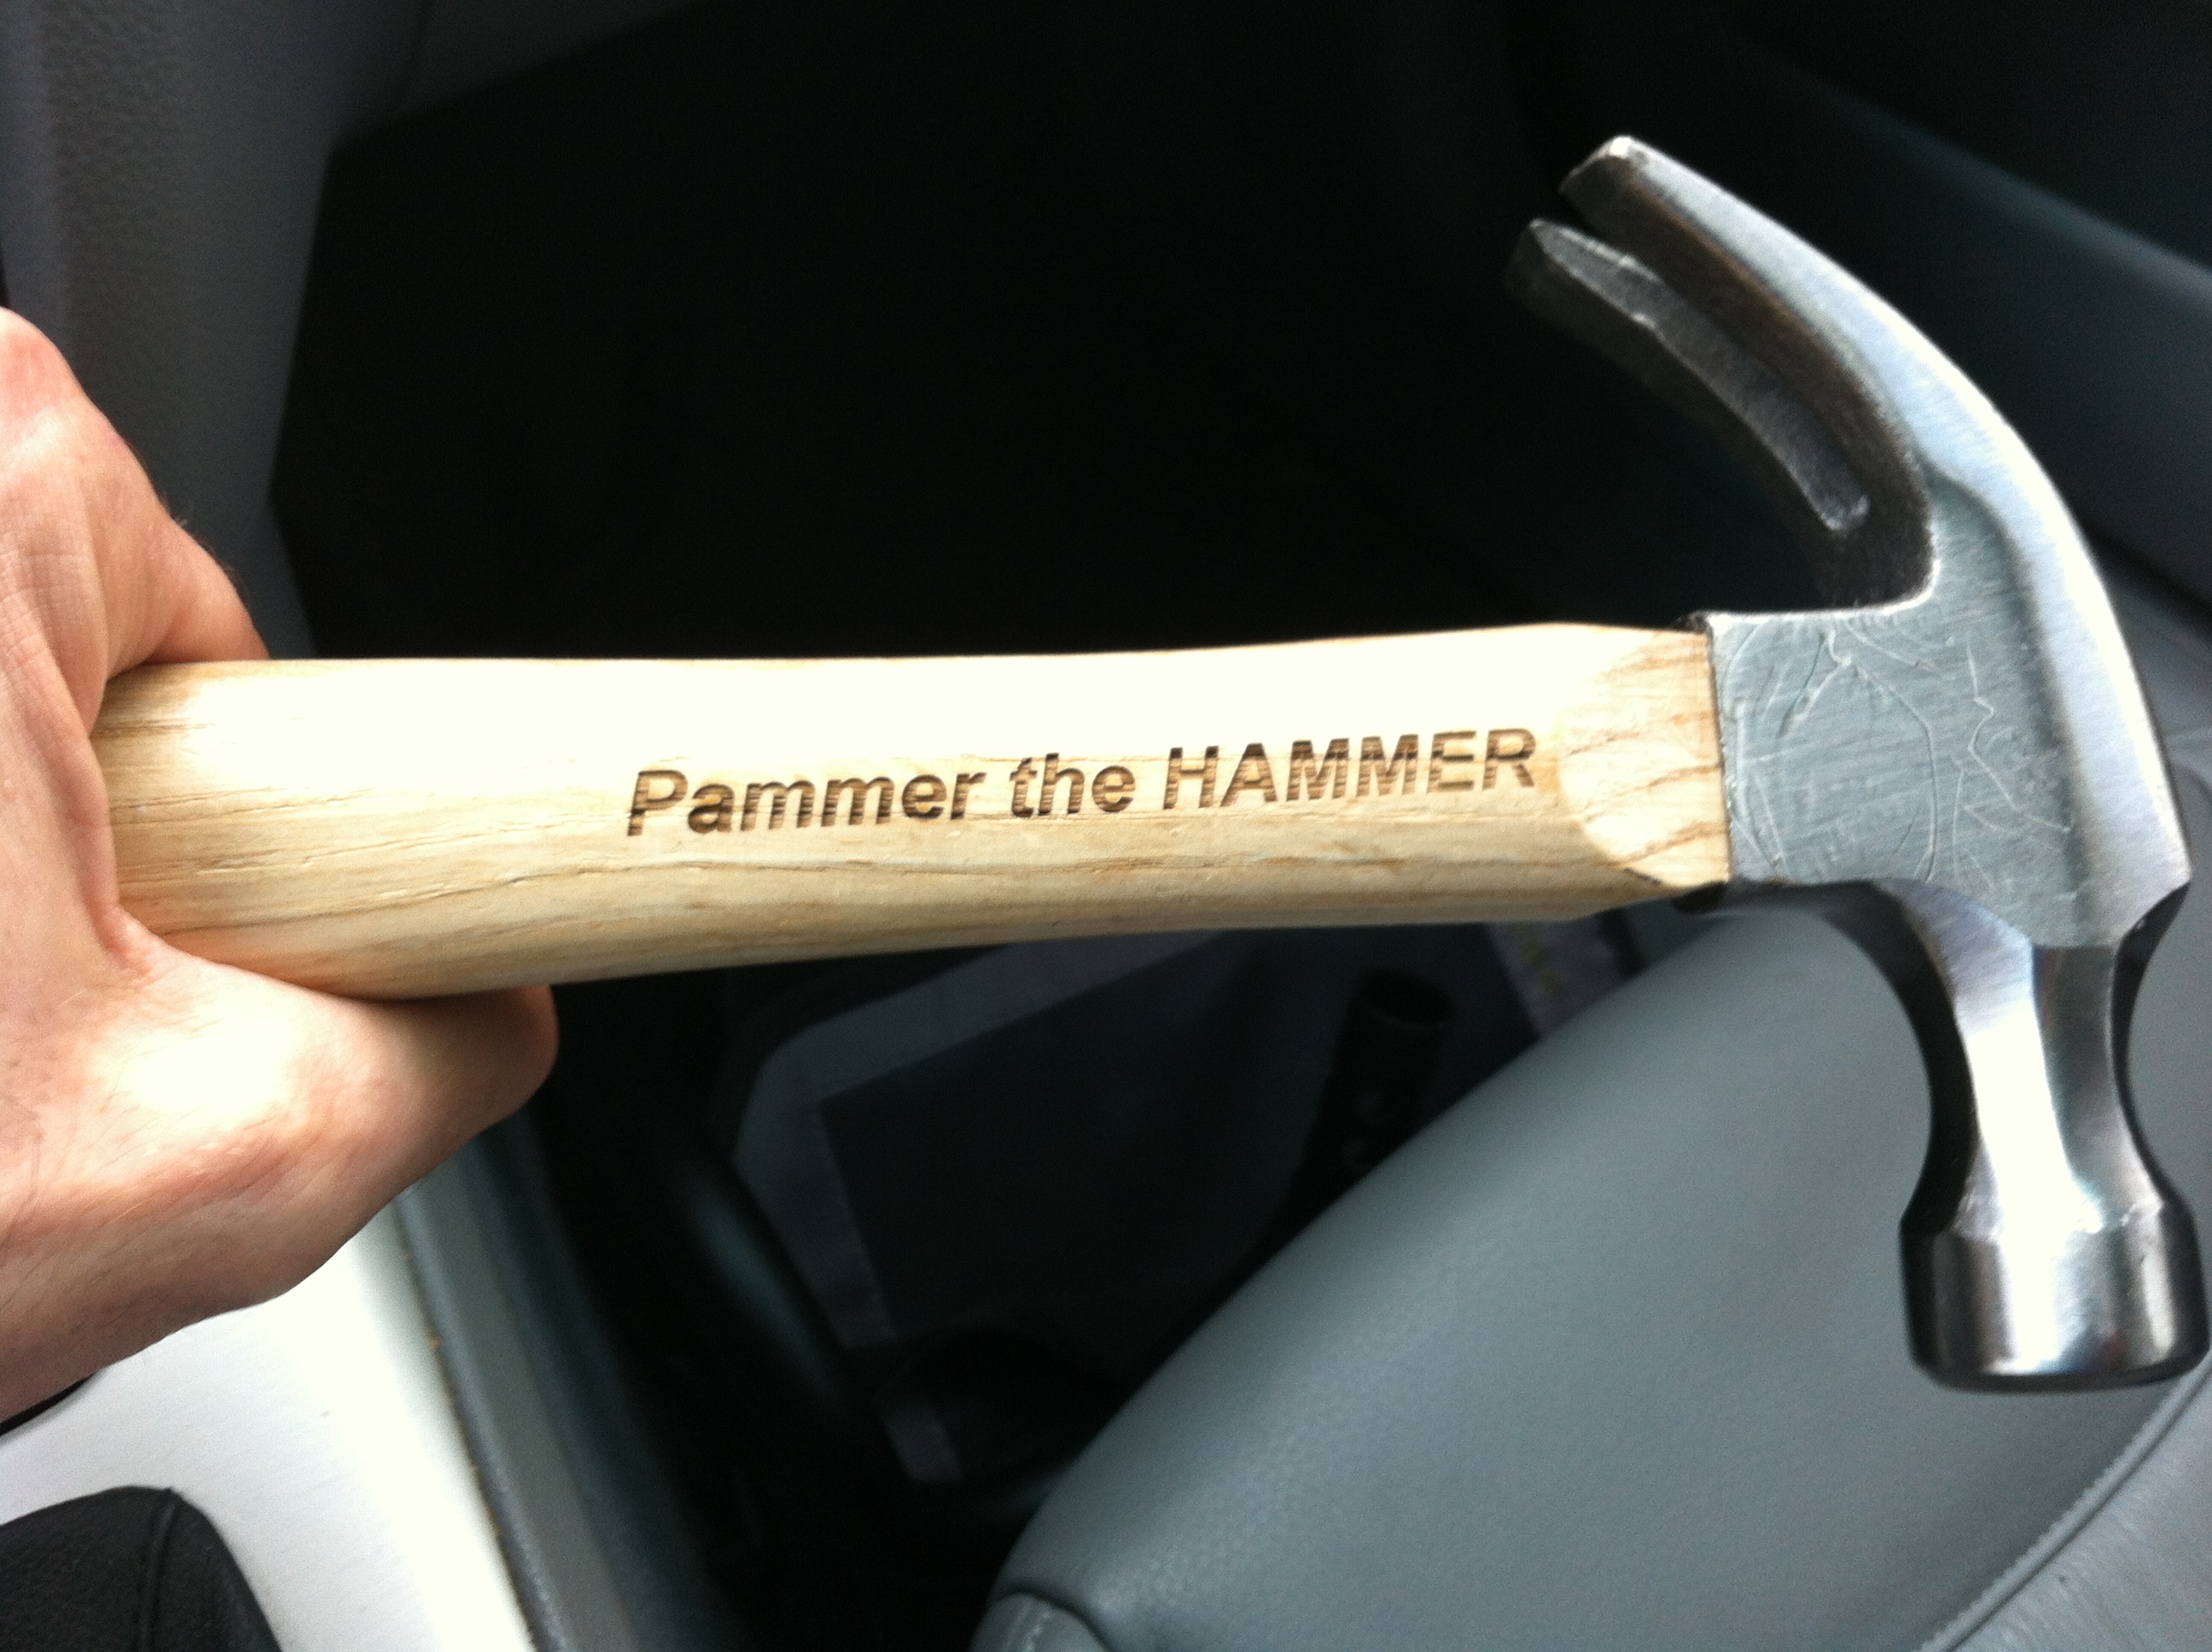
Learn how to very quickly and easily customize a tool handle using a Laser Etching machine. I made it at Tech Shop!
Makes an excellent gift for that person who has everything, or elegantly customize your own tools so they won't disappear.
In this Instructable, you will learn how to set up and etch your name or other custom phrase onto the wooden handle of a tool (in this case a hammer) using a Trotec 80W Laser etching/cutting machine.
Materials & Tools List
• Wooden handled tool - in this case a "Task Force" hammer from Lowes.
• Membership at Tech Shop and Laser SBU class certification (to get access to the laser etching machine).
• calipers or ruler to measure the location of the "etchable" area on your tool handle.
• Membership at Tech Shop and Laser SBU class certification (to get access to the laser etching machine).
• calipers or ruler to measure the location of the "etchable" area on your tool handle.
Lay Out Your Artwork in Preparation for Etching
1. Identify the area of the tool handle that is as flat as possible and free of any major blemishes in the wood, and then use your ruler or calipers to measure the length and width of that area. In the case of the hammer handle I was going to etch, I determined that there was a 3" by 0.75" area on the side of the handle which was relatively flat/on the same vertical plane, and thus would allow the laser to stay in fairly good focus as it etched my artwork onto that surface.
2. Put a small pencil mark at the top left corner (the "origin") of your measured etchable area on the tool handle (determined in step 1 above). You will use this mark to align the laser at the beginning of your etchable area once you position the tool on the laser etching table.
3. Using CorelDraw or Adobe Illustrator (both are available on the PCs connected to the laser etching machines at Tech Shop), lay out your artwork/text, making sure the text and art stays within a rectangle with the dimensions you established in the step above. Once your artwork is done, send the artwork to the Trotec Laser "Job Control" software by PRINTING the image from Coreldraw or Illustrator, making sure to select the appropriate Laser print driver.
Set Up the Laser and Etch Your Design
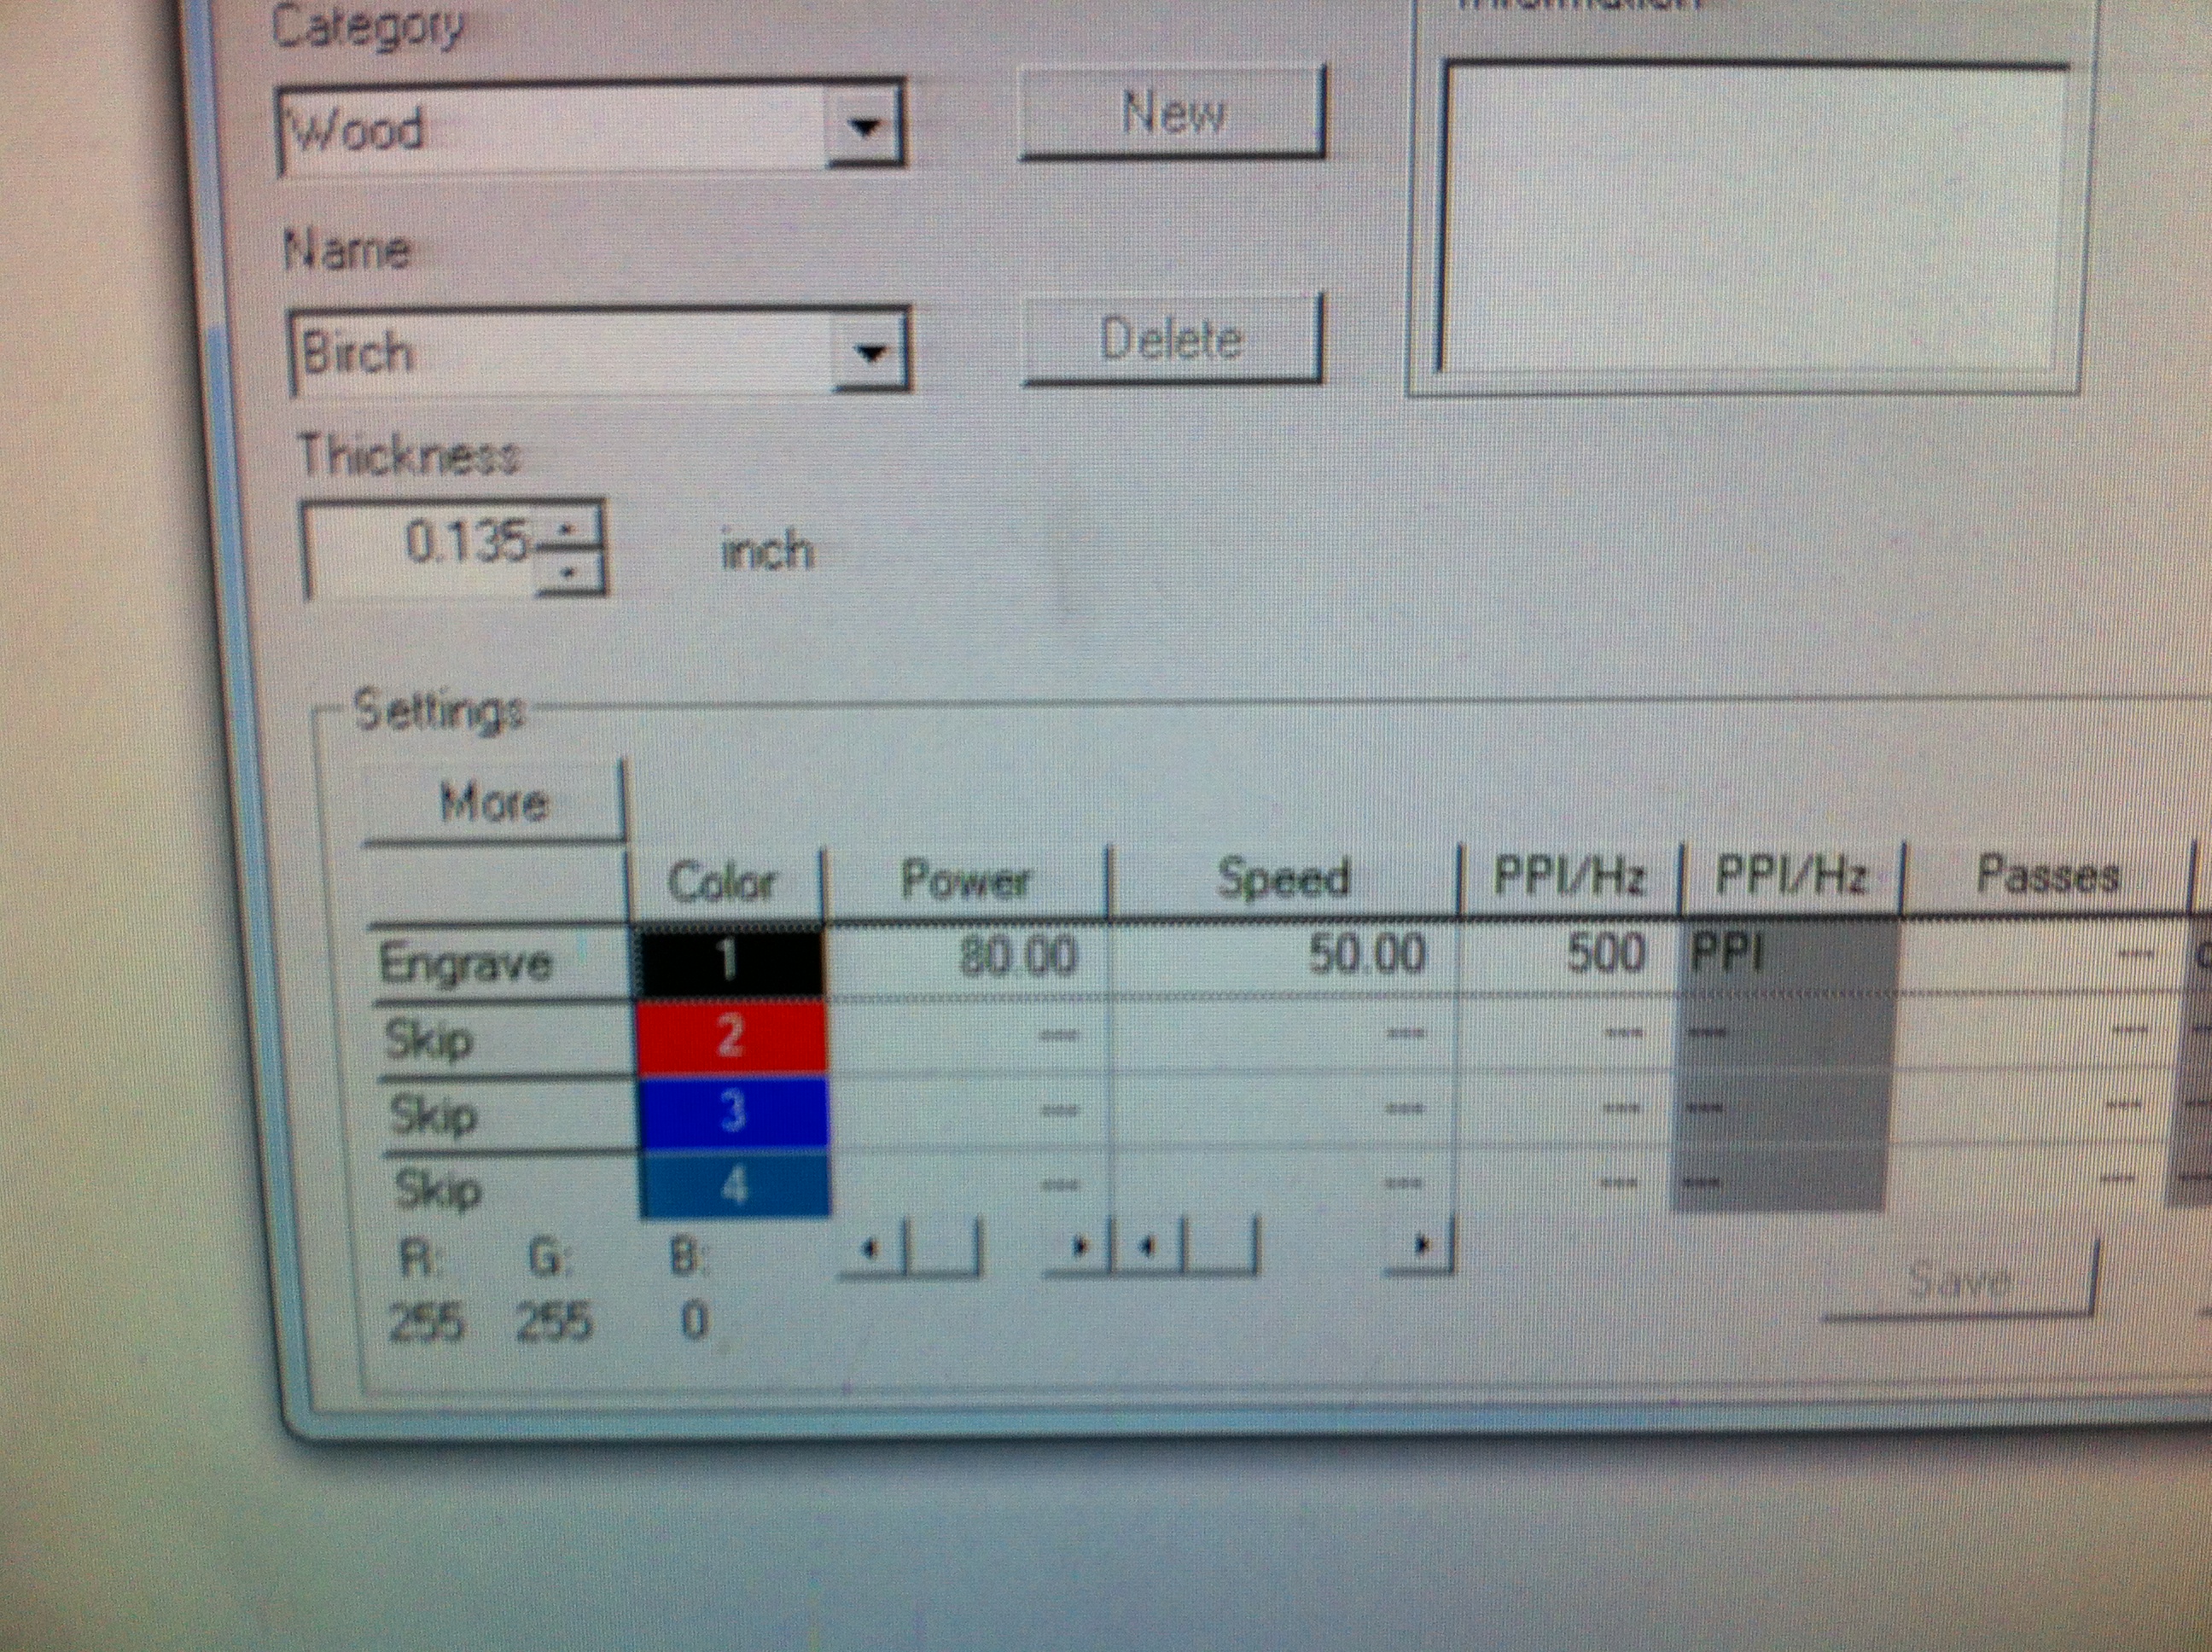
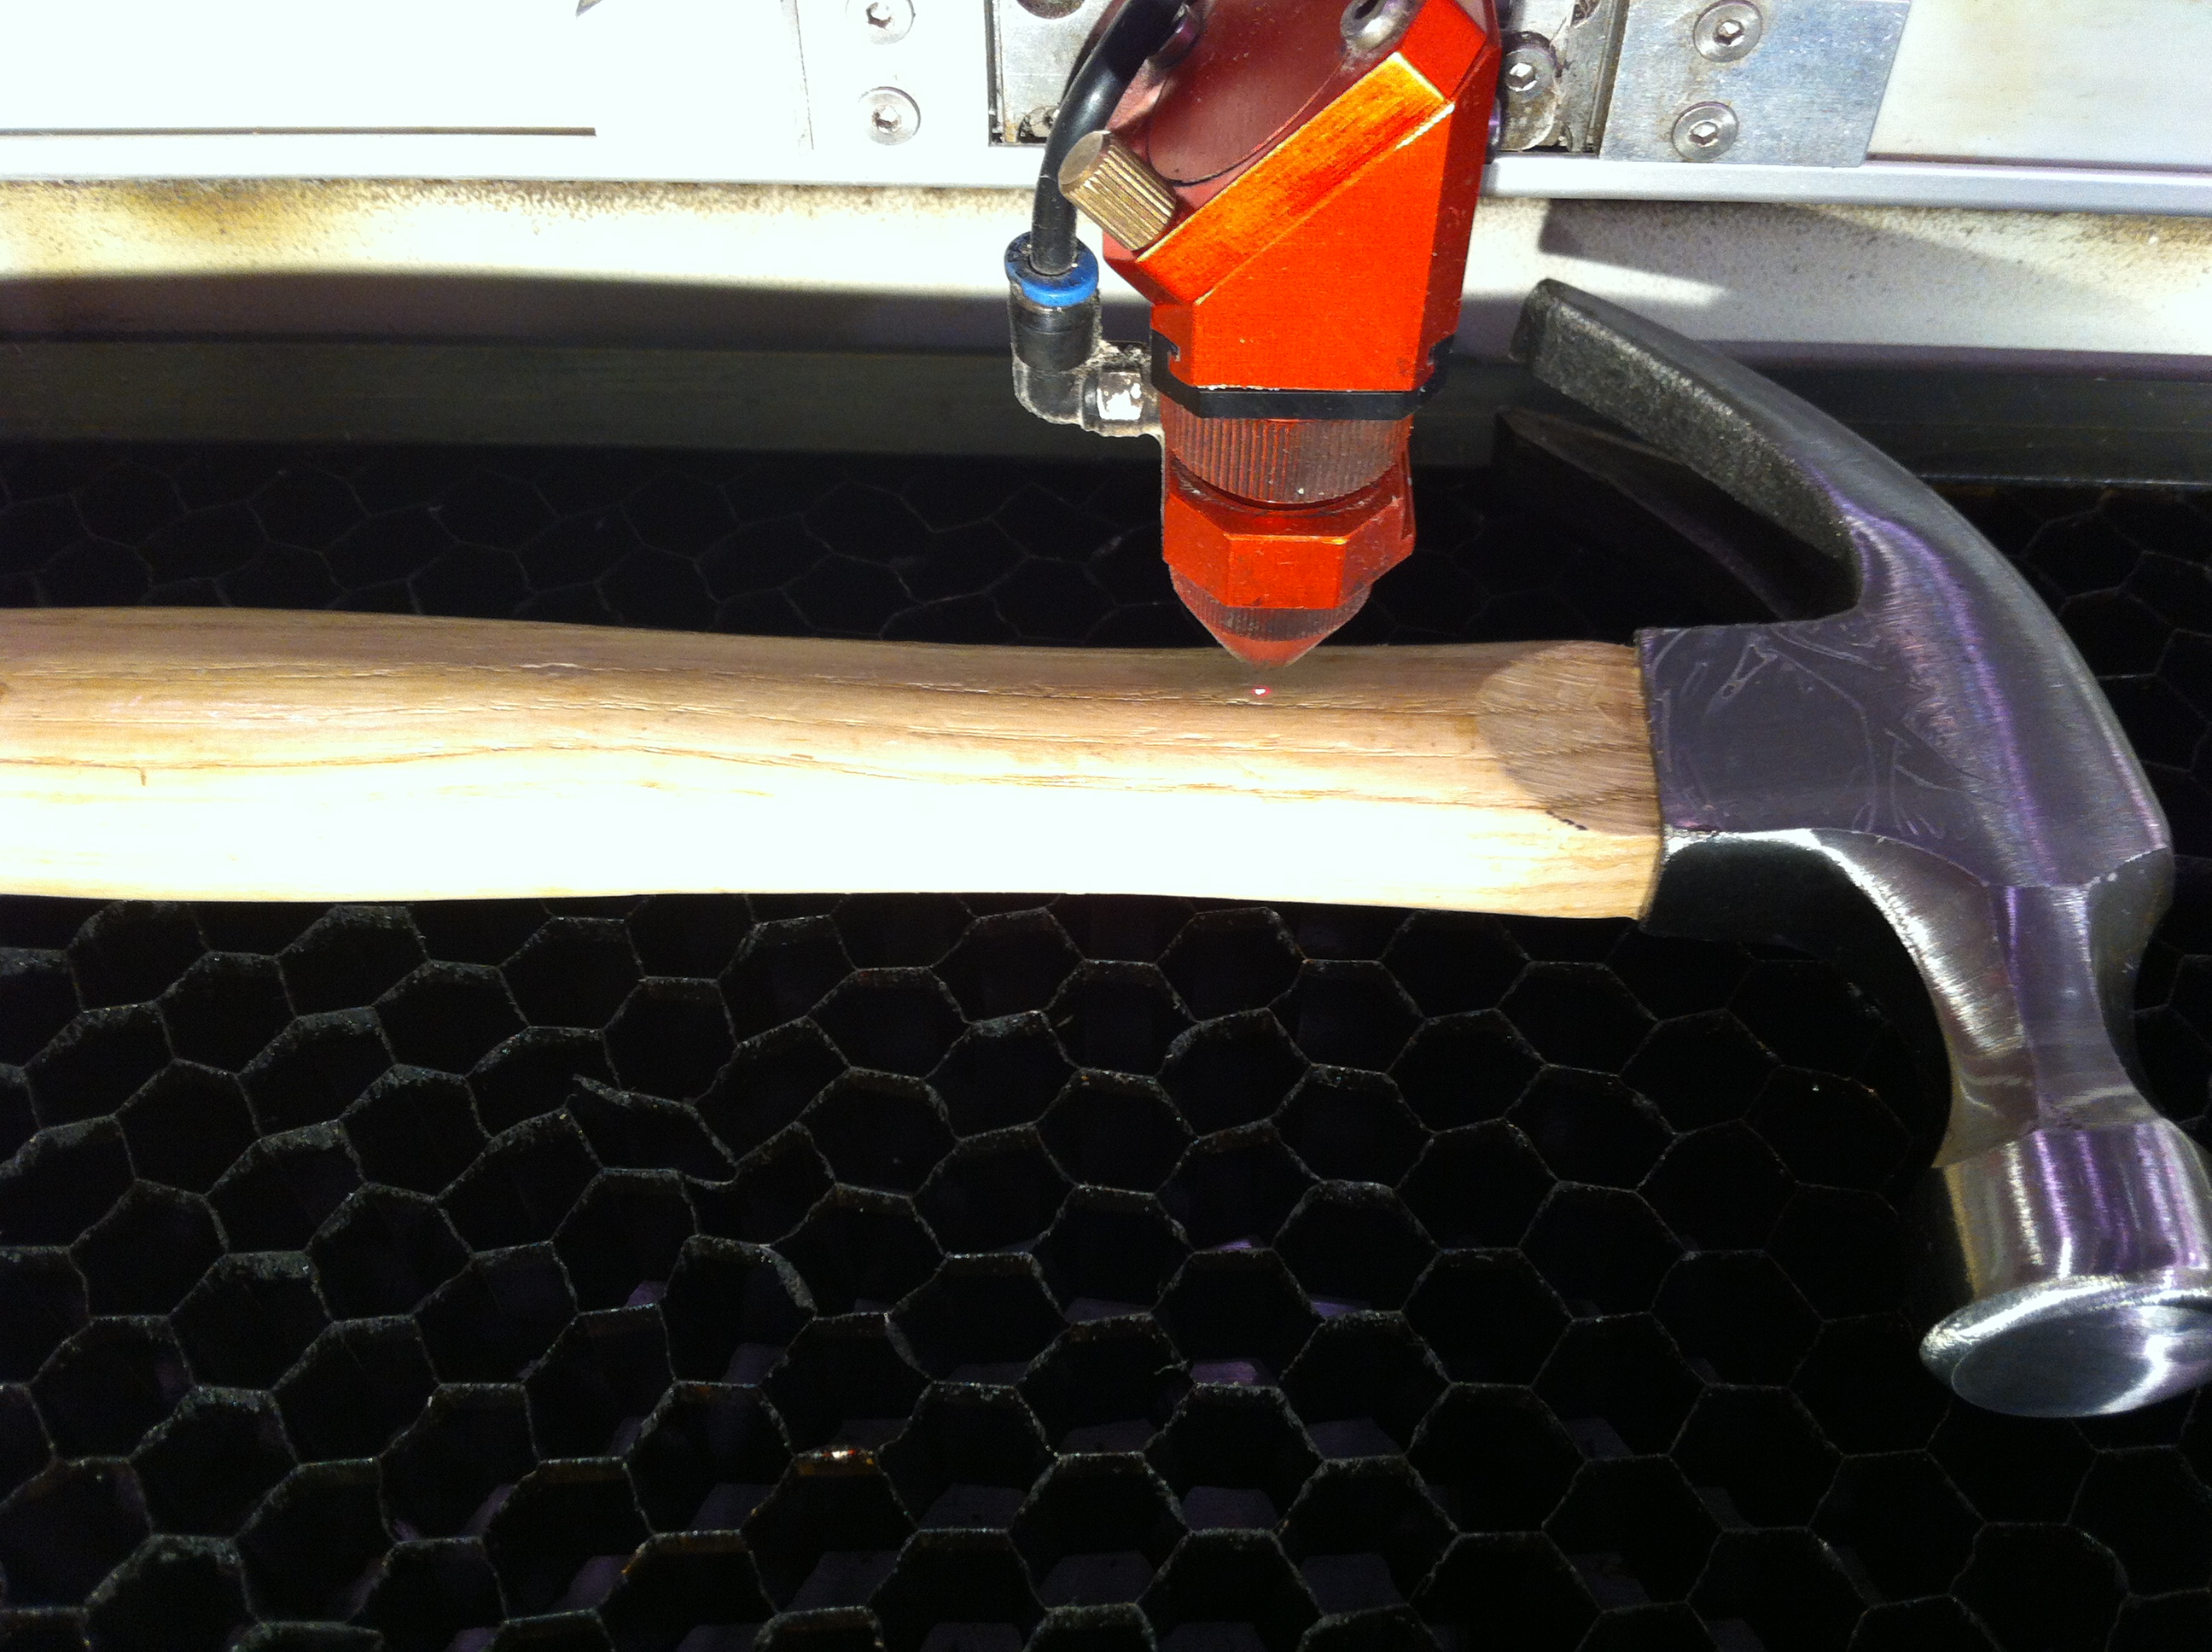
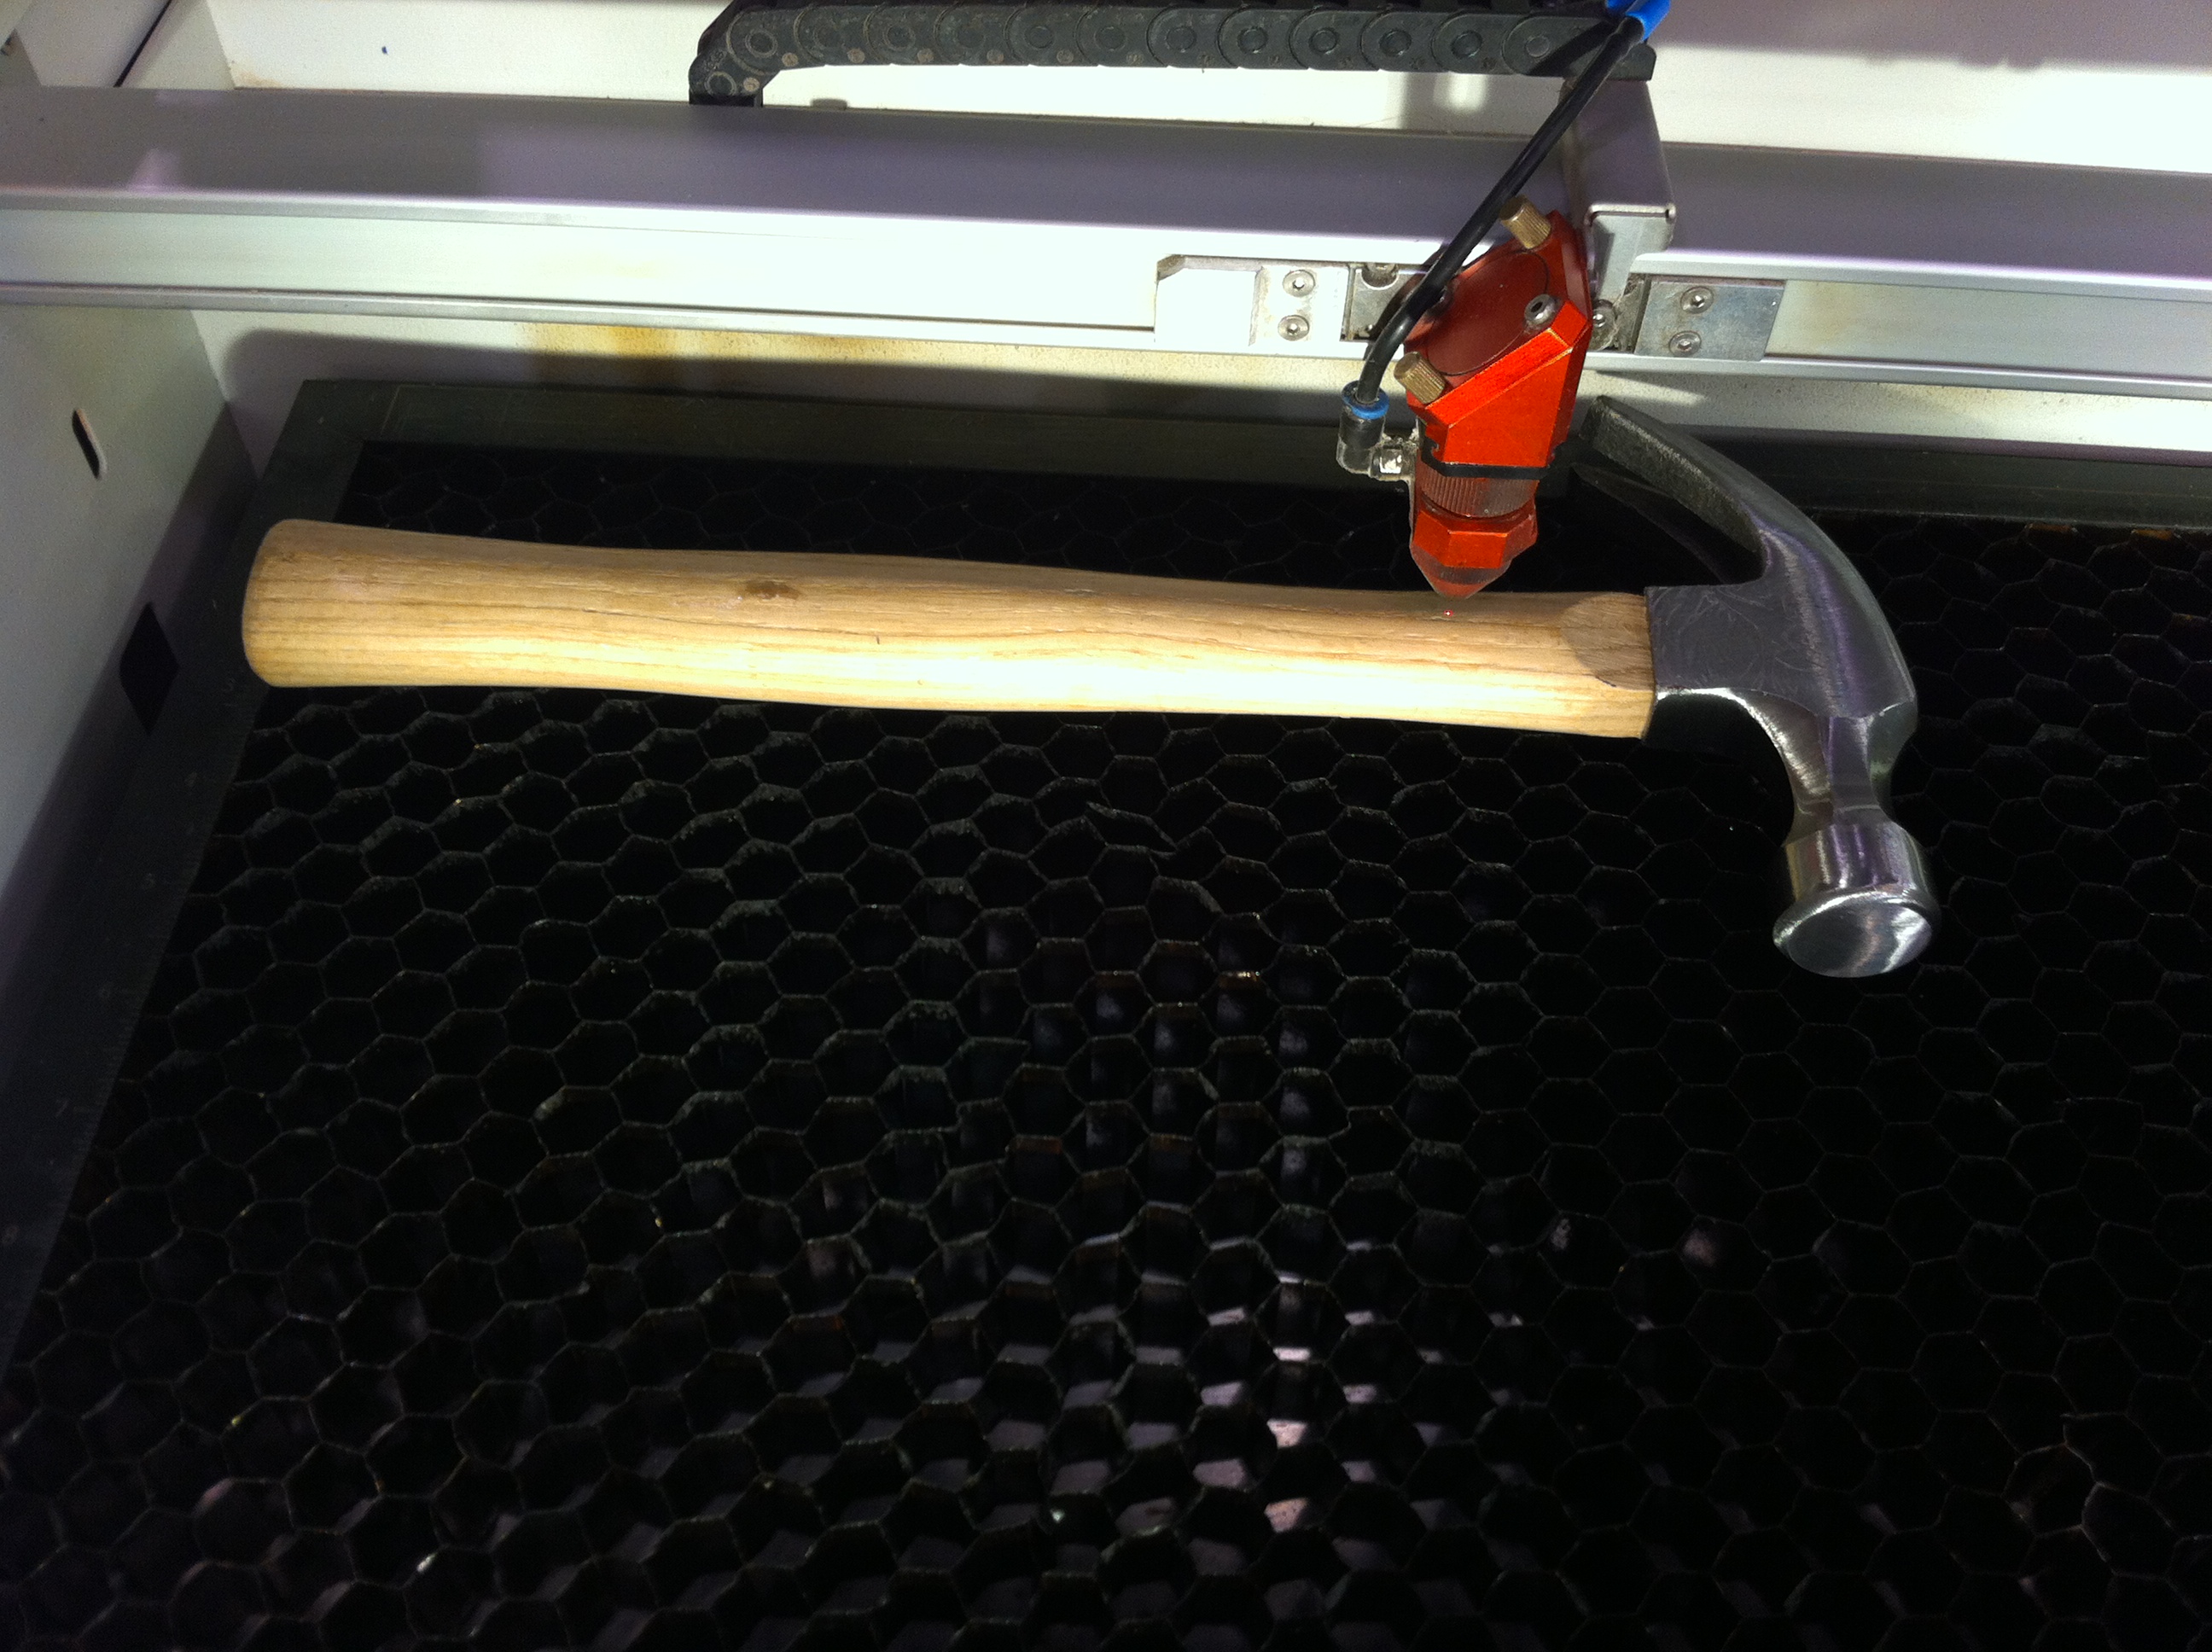
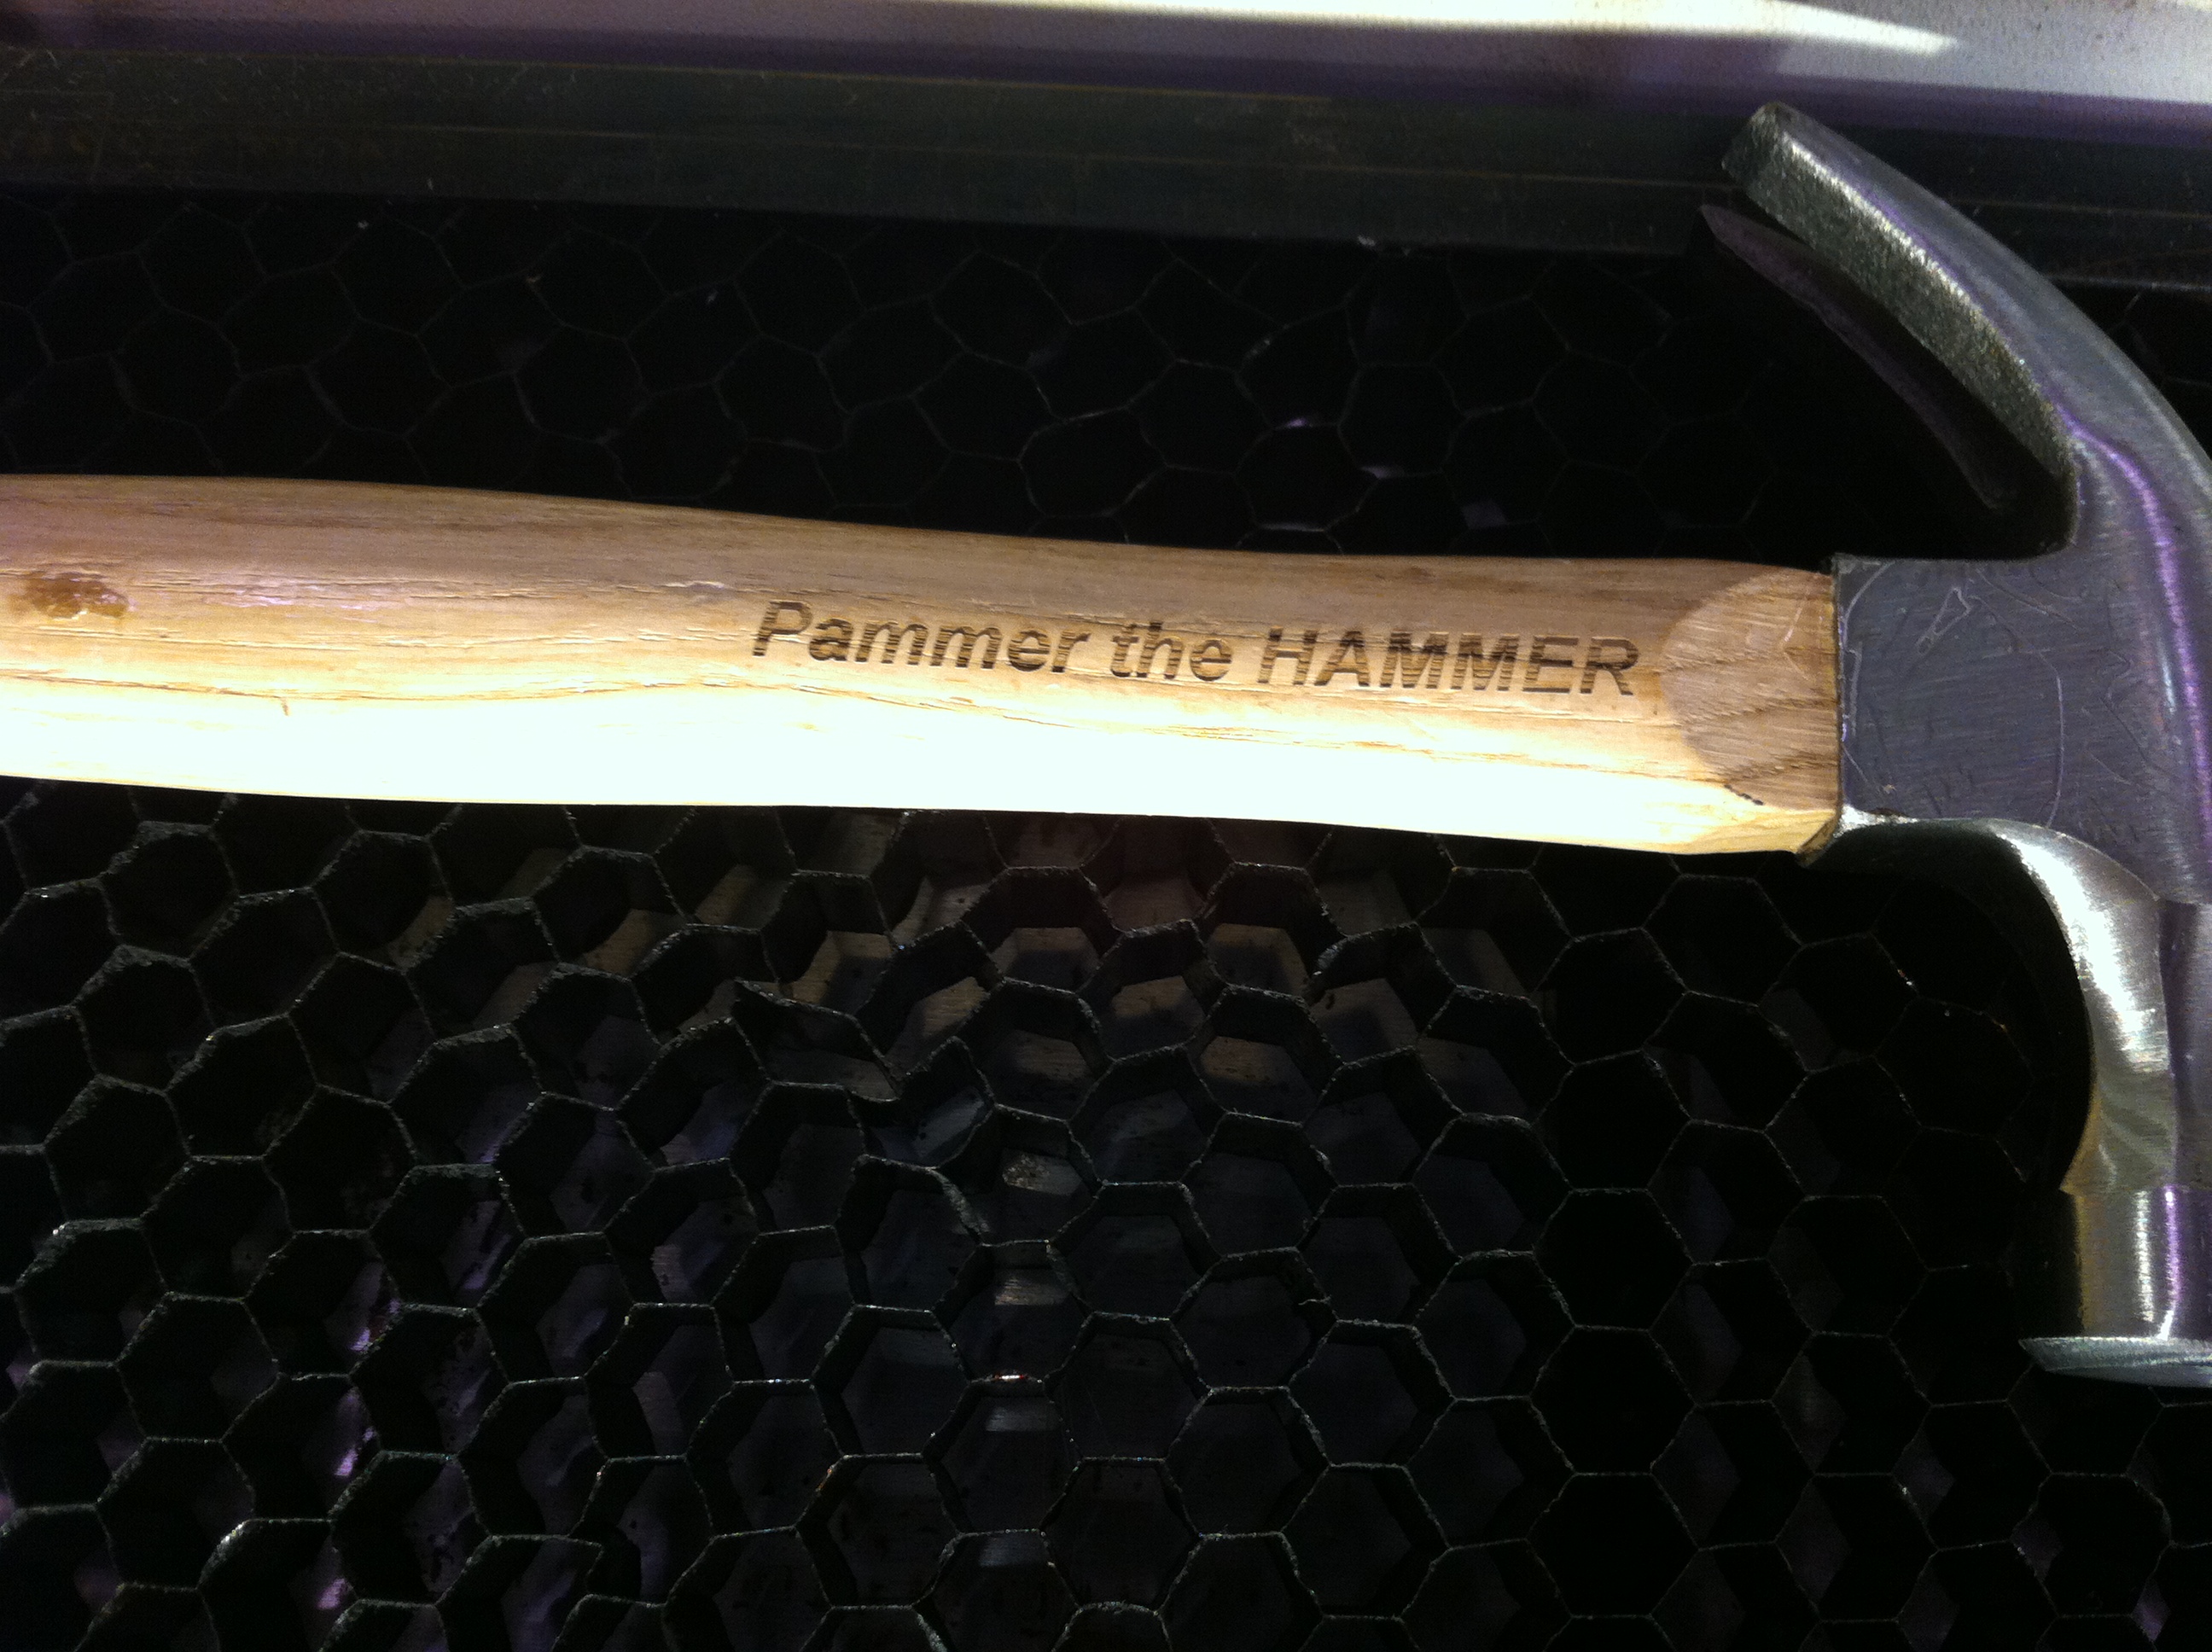
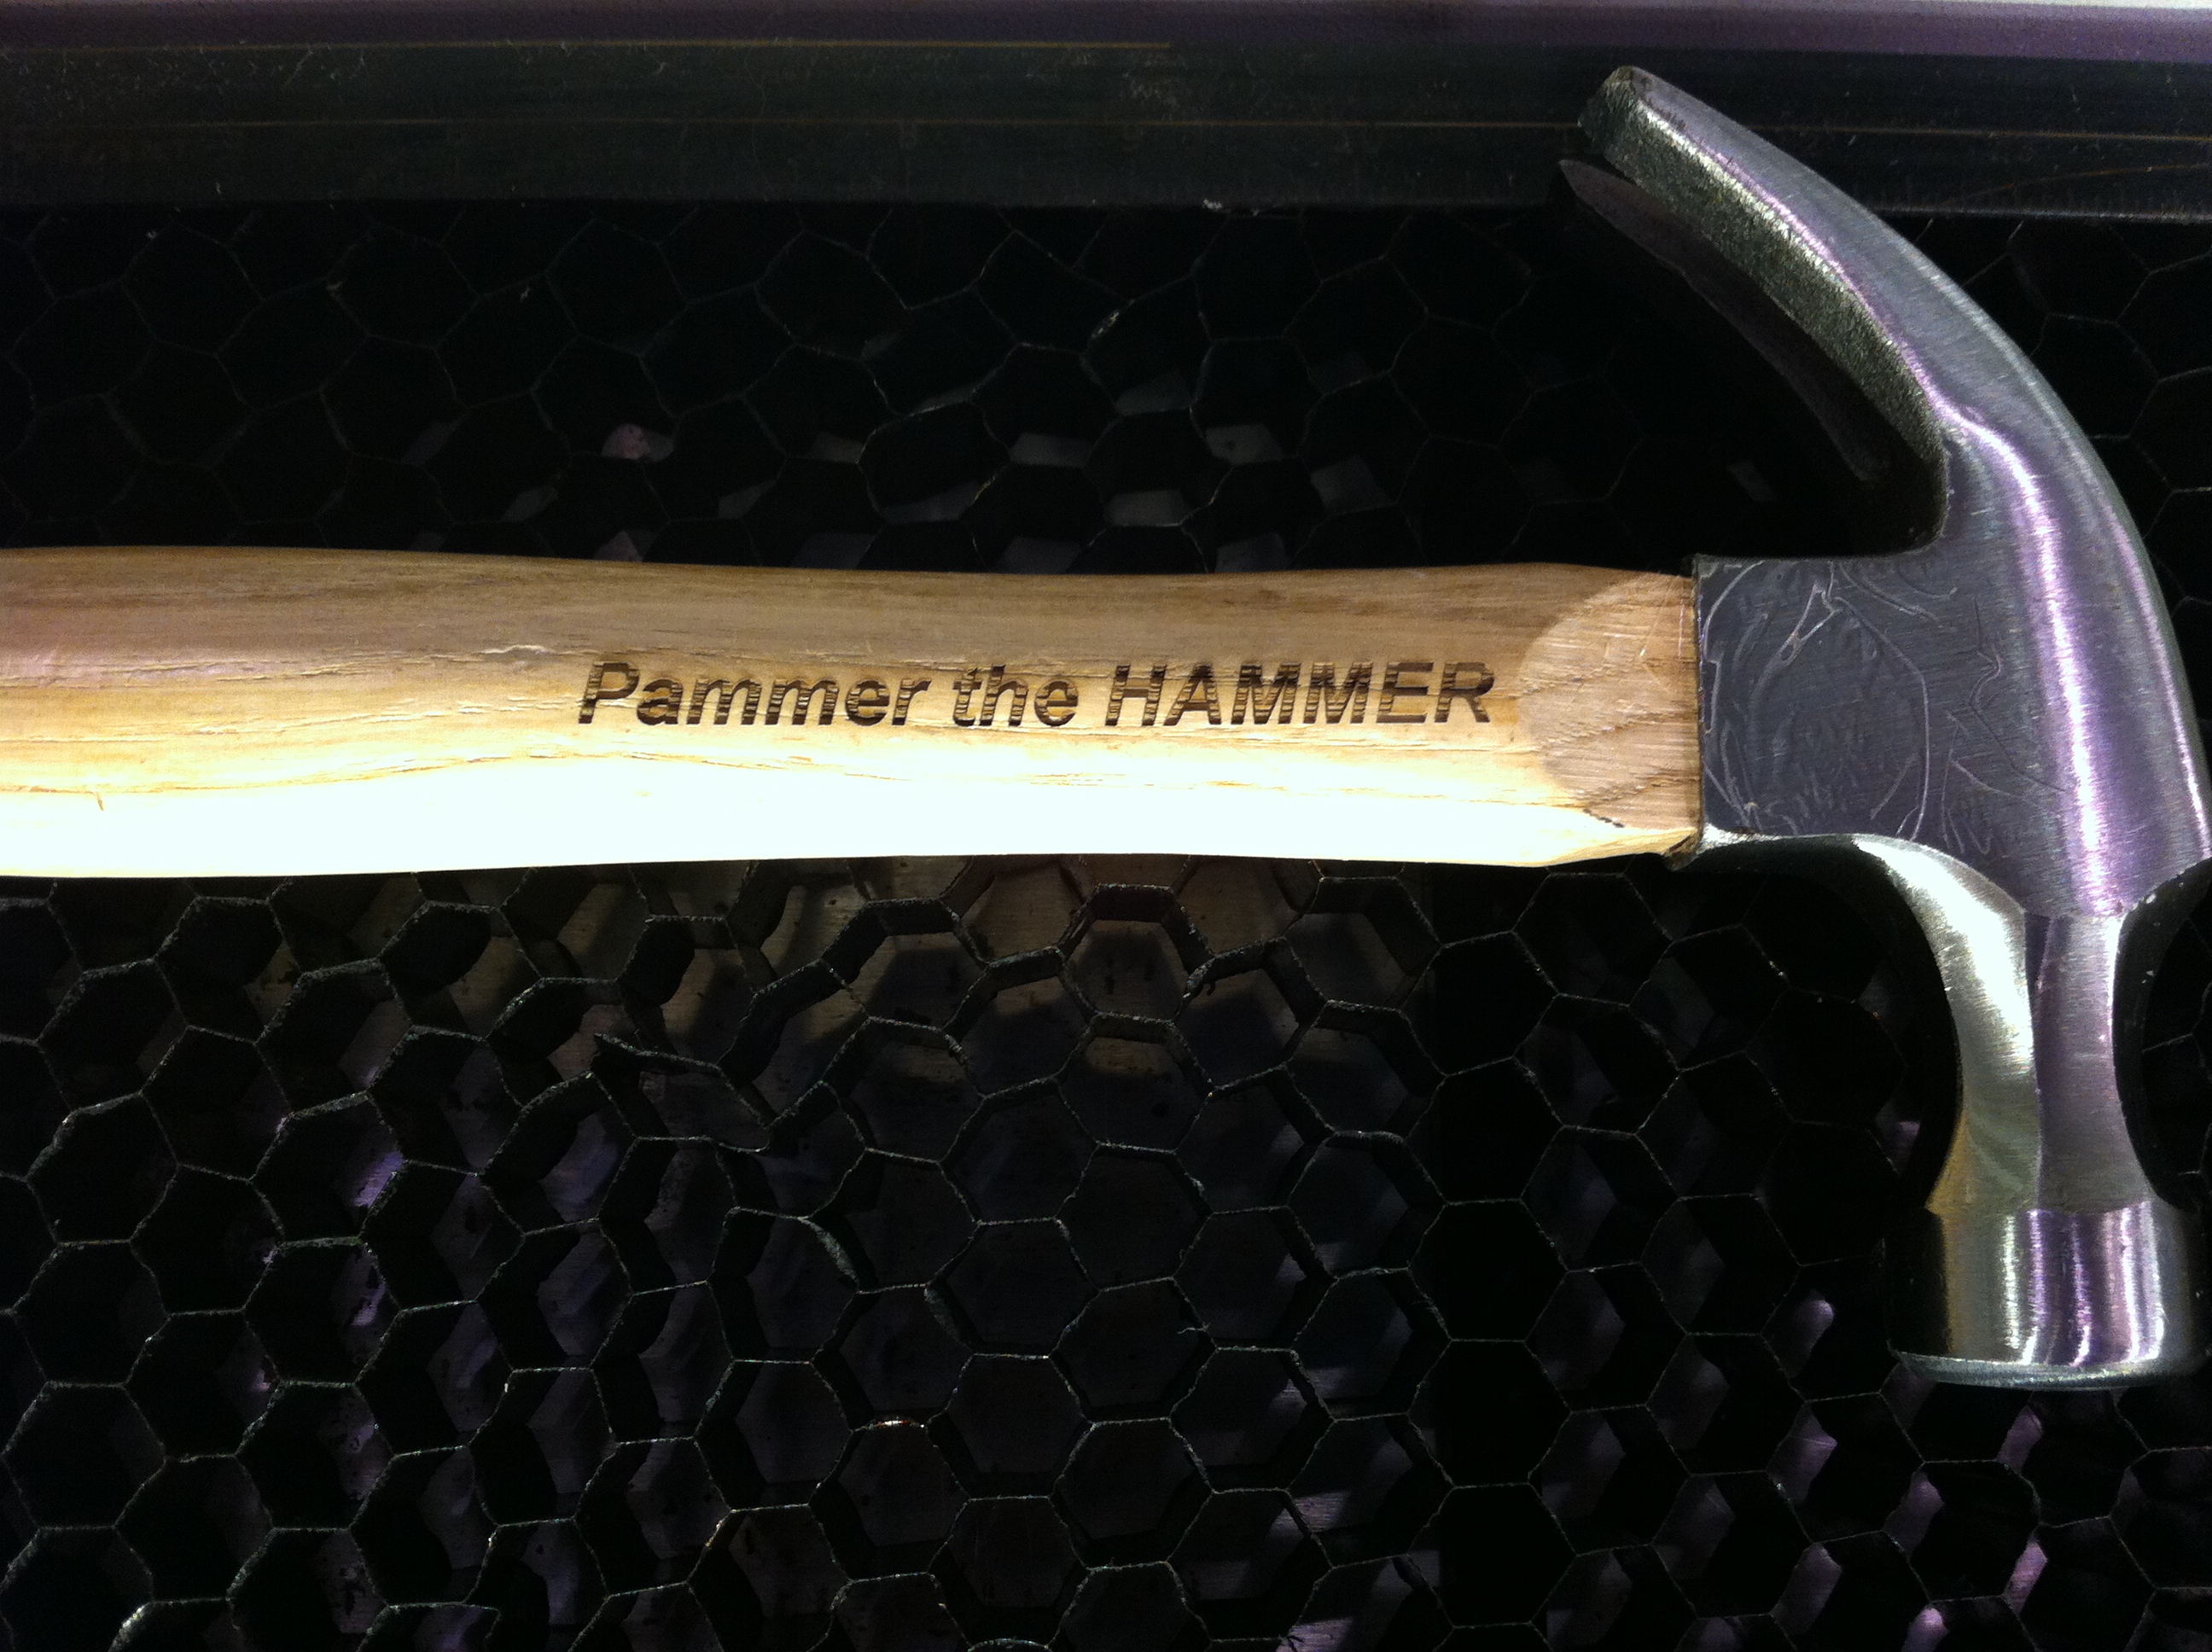
Once your artwork is in Job Control (you should have learned how to use the Job Control software in the Laser SBU class at Tech Shop), you're ready to put your work into the laser etching table in the machine, align and focus the laser, and etch your design.
4. Import the job into the work area of Job Control, and then bring up the Material Settings dialog box from Job Control. Select Wood from the drop-down list of materials, and then choose the appropriate type of wood. For my project, Wood/Birch was a good starting point, and then I adjusted the settings to Power:80, and Speed:50. Consult with the helpful experts at Tech Shop if you're not sure what power and speed settings to use, and ideally, do a test run onto a piece of scrap wood similar to the wood you're about to etch. When in doubt, err on the side of TOO LOW a power setting (or too high a speed). You can always make a second pass if one pass is not powerful enough, but you don't want to ruin your work piece or worse, cause a fire by going with too much power.
5. Manually lower the table on the laser etcher using the control panel on the Trotec Laser to give yourself plenty of room to place your tool, and then put the tool to be etched onto the table, making sure the handle is horizontal (parallel to the ruler along the top of the etching honeycomb tray).
6. Move the laser head (again, using the manual control buttons on the Trotec control panel, approximately to the center of the area you plan to etch, Then focus the laser on the surface of the tool handle (use the focusing procedure you learned in the Laser SBU class).
7. CRITICAL STEP - CRASH TEST: After you've focused the laser head, use the manual X/Y control arrows on the Trotec control panel to very slowly move the laser head over the tool handle and make 100% sure that once focused on your etching "target area", the laser head will not at any point come into contact with the tool handle or tool itself. In the example of the hammer I etched, the hammer head protruded above the vertical plane of the handle sufficiently that the laser would have crashed against it. So I had to lay out my art work and position the tool on the laser table to make sure that the hemmer head would be to the right of the area I was going to etch, and therefore the laser head would not go over that area. Keep in mind that after you position the laser for etching and begin the etching process, the laser WILL go back to the "origin" (top left corner) of the etching table before moving back to your target etching area, so you need to make sure there is no part of the tool that may hit the laser between your etchable area and the top left "origin".
8. Ok... that was painful. Now, let's position the laser. Use the manual X/Y controls on the Trotec control panel to move the laser head over the pencil dot you market in step 2. Use the red pointer dot projected by the laser head to help you align the laser over the pencil mark.
9. Go back to Job Control on the PC. You will see the cross-hairs on the screen indicating the position of the laser on the etching table. Drag your artwork near the cross-hairs, until it "sticks" to the crosshairs, with the crosshairs at the top-left corner of your design. The artwork is now positioned to be etched onto the area you identified in step 1.
10. Outline Job (the "belt and suspenders" step): From the Job menu in Job Control, select Outline which will start the laser head moving and trace the outer edges of your job. Watch the laser head as it moves through the outline, to make sure that you have positioned the laser correctly and your whole design will etch onto the previously identified etchable area. Hit cancel to end the job outline once you've confirmed that the design will etch onto the desired area of the tool.
11. Final checklist: Double check one last time that the material settings are set appropriately, you have focused the laser on your work area, the laser is set to start etching at the top left corner of your desired area, and that there's no risk of the laser crashing onto your tool.
12. GO! Hit the PLAY button on the Job Control software and watch your work get etched onto the tool handle!
13. Second Pass (optional): WITHOUT MOVING YOUR WORKPIECE, open the top lid of the laser, and closely inspect your work etched onto the tool handle. With the power settings on the laser set as indicated above in step 4, the design was visible but not etched deeply (or darkly) enough for my taste. So I decided to go for a second pass. Right click on your image in Job Control, select "reset job", and then you can send it to the laser one more time, making sure you haven't moved your work nor the laser head itself. Two passes worked beautifully on the wooden handle I was etching.
Downloads
Brand Modification and Wrap-up
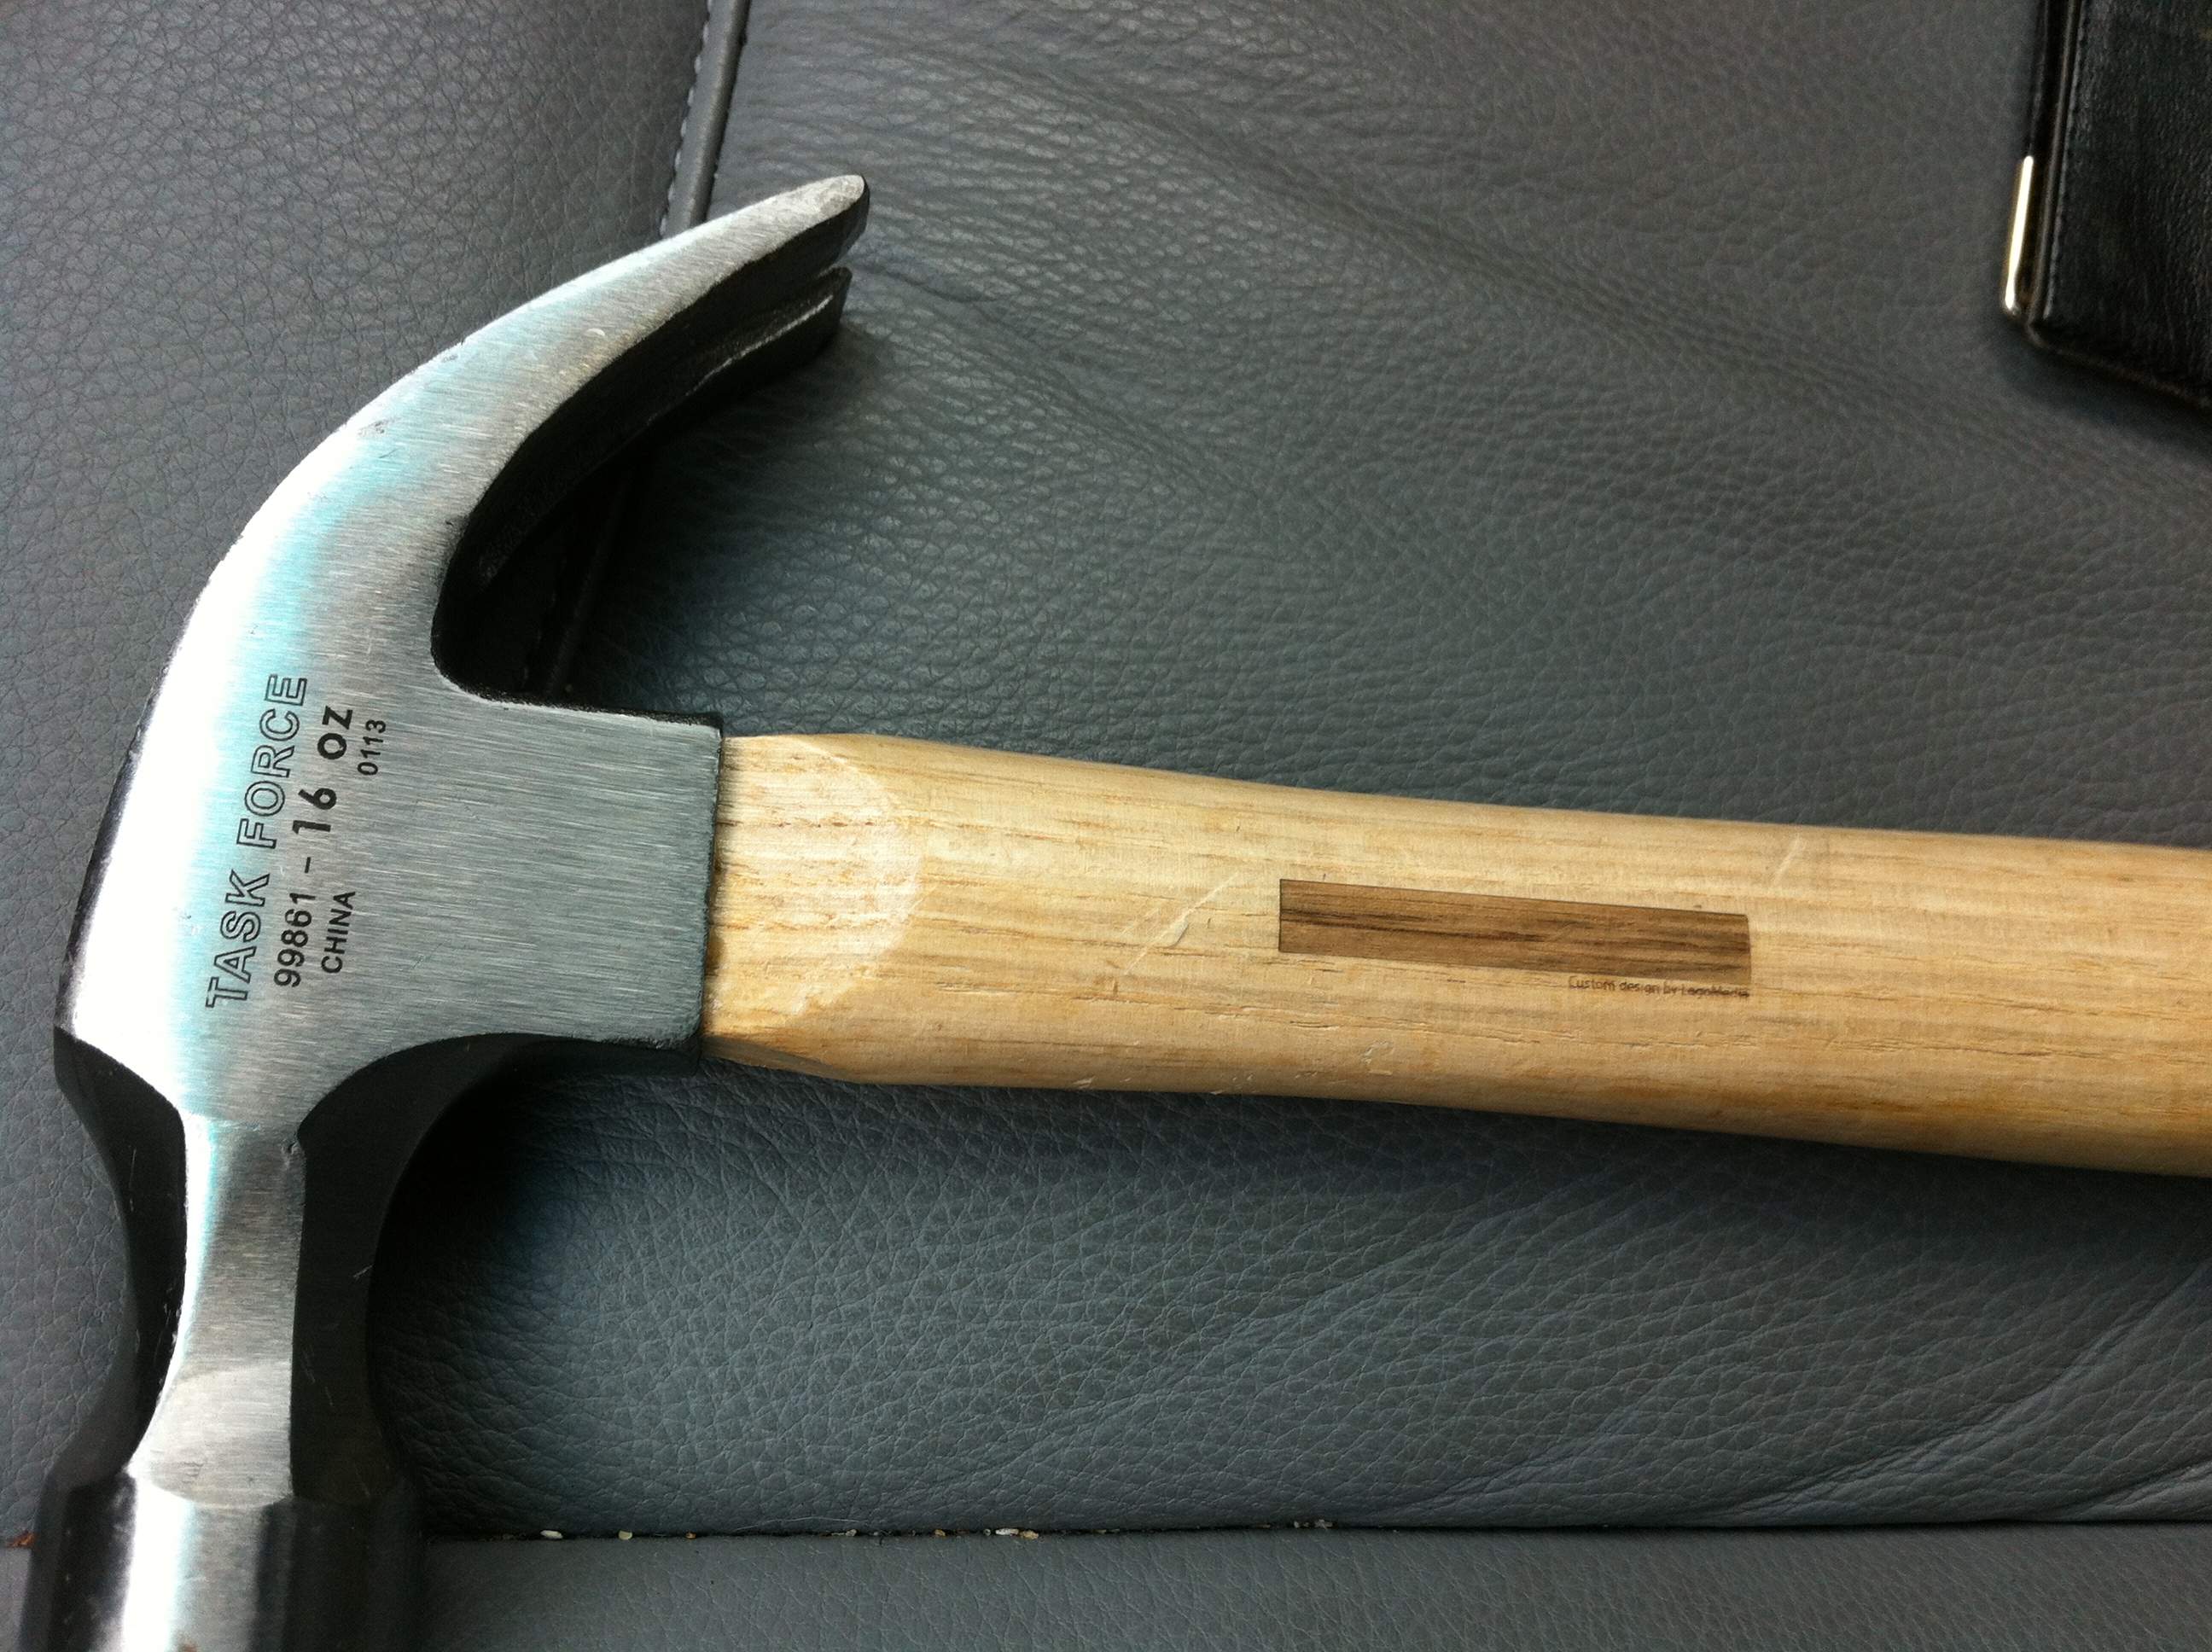
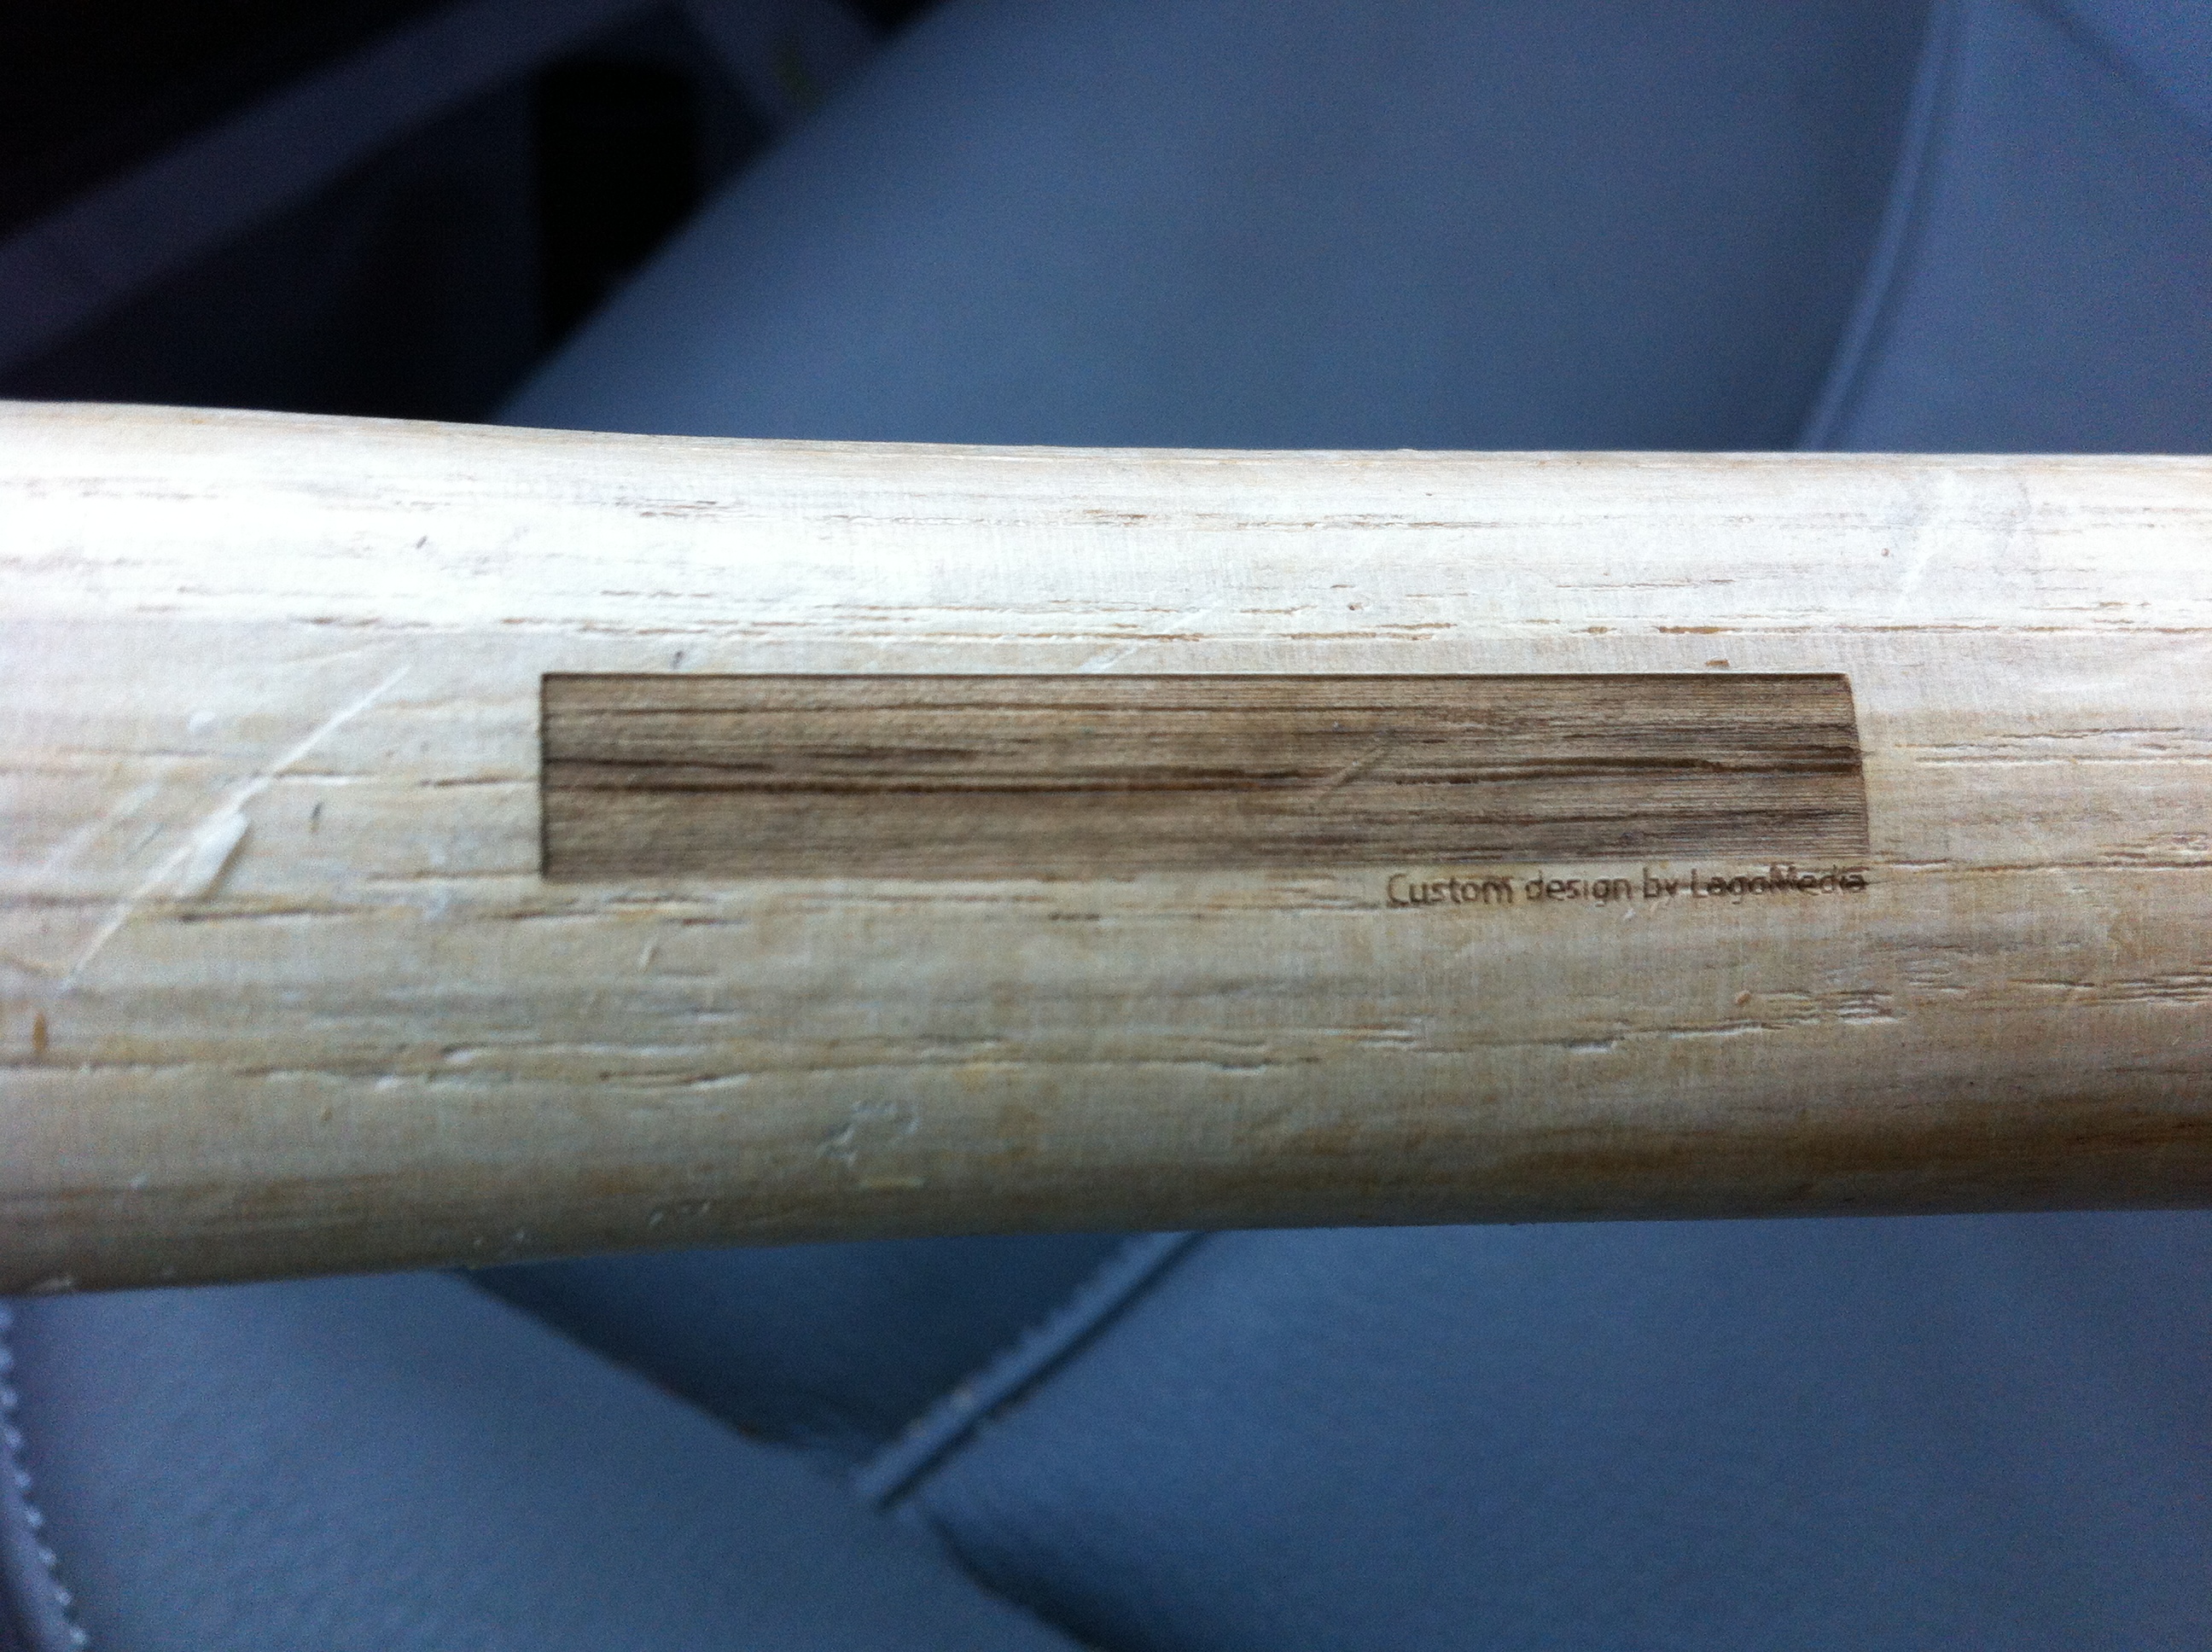
In the case of the hammer I was etching, there was a brand burned onto the tool handle, on the side opposite I was etching. I decided to get rid of that brand. Here's a suggestion on how you can do the same.
14. Using your ruler or calipers, measure the size of a rectangle that would completely cover the brand you went to eliminate.
15. Back in Corel Draw or Illustrator, create a filled rectangle (using BLACK, the color that is set to "etch" on the Job Control software) with the dimensions you measured above. In my case, I also added very small text under the rectangle with my own custom brand (Custom Design by LagoMedia).
16. Print the rectangle to the laser, in order to send it to Job Control.
17. Repeat steps 4-13, making sure you position the tool appropriately so that the laser head will never come into contact with any part of your work, and etch the rectangle over the existing tool brand. Done... you've now custom-branded (or UNbranded) your work piece. In the case of my work, a single pass with the laser was enough to burn off the original brand, and leave a subtle, not-unattractive rectangle in its place with my "Custom design by LagoMedia" in very small letters underneath.
I hope this has been a helpful Instructable. Good luck, have fun, and please share your feedback/comments!