Epic Fantasy Leaf Crown in Tinkercad
806 Views, 1 Favorites, 0 Comments
Epic Fantasy Leaf Crown in Tinkercad

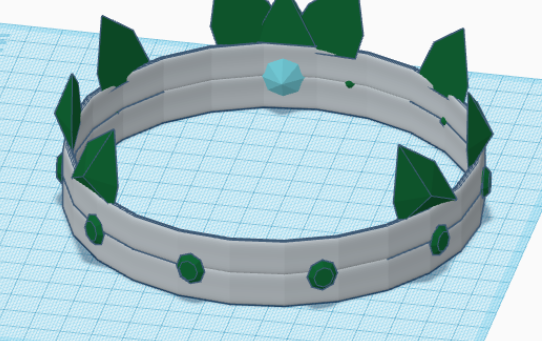
This is the crown I made; I hope you enjoy!
Supplies
Tinkercad; device that can use it.
Crown Base


Create a new model in tinkercad
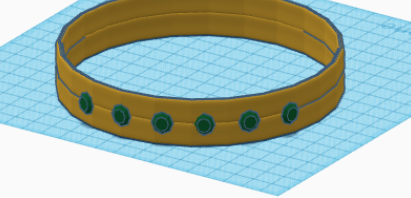
Insert a ring into the model, and resize to a little wider than your head width in millimeters make it easier to make the rest of the crown.
Then Adjust the height to about 11.5mm, and then change the color to whatever color you want the crown to be. (I used a shade of yellow for gold.)
Then adjust the thickness to 1 square
Then clone it and put the second crown base directley above the other.
Step 1: Gems


Then insert a gem; and make it the color you want the gems on the crown to be. (I used green)
Rotate it 90 degrees so that it is facing toward you and scale it as shown.
Next; move it to the center of the crown as shown. Then duplicate it twice and rotate the duplicates 23 degrees, and move them next to it as shown.
Step 2:The Rest of the Gems


Then group those first three gems by clicking on them while pressing shift and then clicking the group button; which is a circle over a square in the top right corner as shown. then clone and rotate it as shown.
Then group those two groups of gems; clone them; and rotate them as shown; so that there is a circle of gems around the whole crown.
then remove every other gem; except for a spot which will be the front of the crown. Leave the three gems there.
Next insert a blue gem right behind the middle gem, and adjust as shown.
(I changed the color because It looked better in gray.)
Last insert a pyramid; and move it so that it is directly above the blue gem. Adjust the width to 3 and make it the same color as the crown; as shown.
Step 3: Shards


Insert a shard; and change the color to match the rest of the gems.
Then move it so that it is ajacent to the pyramid which should be above the blue gem. Next change the center height to about 6.7. It should look like the first image when you are done.
Next clone the shard; and click on the mirror Icon; which should look like the top right corner of the second image, and click on the arrow indicating sideways movement as shown in the third image.
Then adjust it so that It looks like the fourth image; by rotating and moving it.
Step 4: the Prongs


This is the second to last and most complicated step. Congratulations on making it this far!
Clone each shard; and then rotate the two clones and move them so they are above the gems next outside the middle ones as shown in image one above.
Then clone it and rotate it so that it is directly above the next gem; and repeat the same process on the other side as shown.
Then repeat so that the next shards are above the next gems as shown.
Then do the same thing again so that the next two shards are above the last gems as shown.
Final Step: the Top

This is the last step.
Last you need to make the front top look cooler. I did this by inserting an arrowhead; and moving it to the center as shown.
You are done! Congratulations!
P. S. This is my first instructable.