Engineering the Image of a Cat Into a 3D Printable Shape
by Sammy50 in Workshop > 3D Printing
7410 Views, 14 Favorites, 0 Comments
Engineering the Image of a Cat Into a 3D Printable Shape
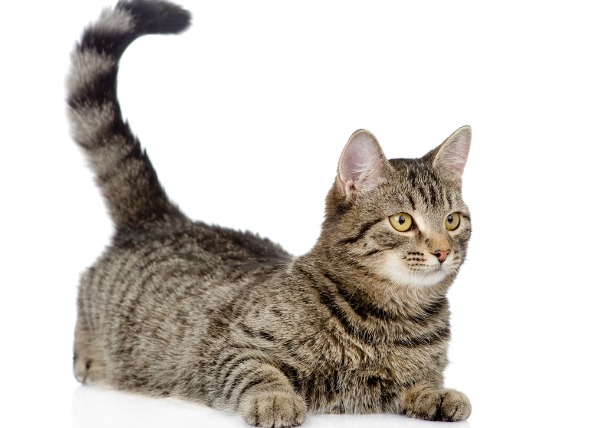
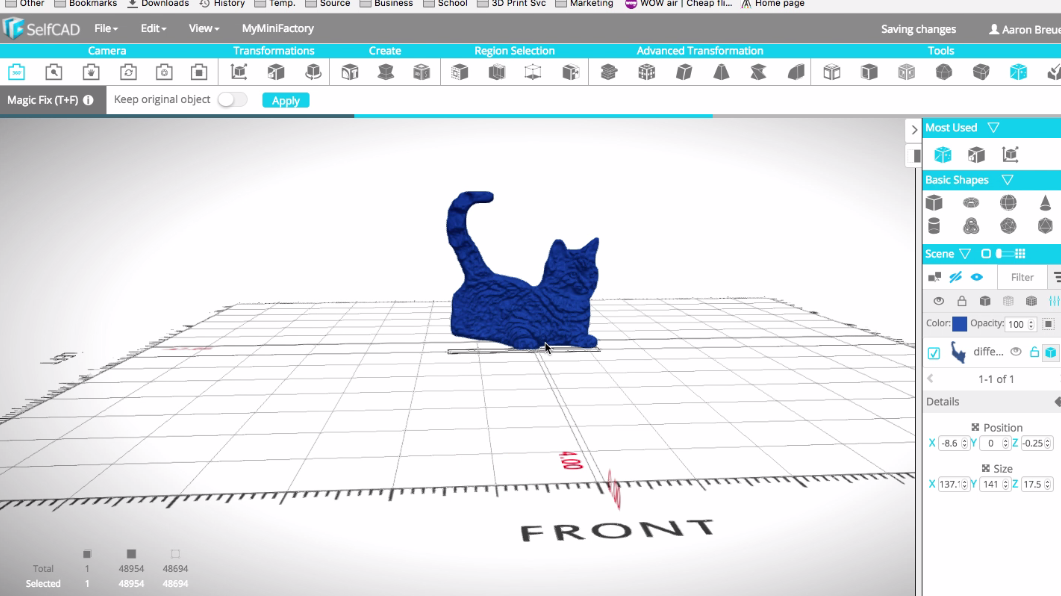
Objective: Create a Printable 3D shape from an image. This is a quick tutorial on converting any image into a printable 3D model, like the above image of a cat.
3D printing has always been an amazing technology ever. But despite that, CAD software have been challenging and confusing to many people, especially creating printable objects after drawing them. But good news is here! You can now turn any image into a printable 3D model easily using SelfCAD (No prior experience needed).
Tools
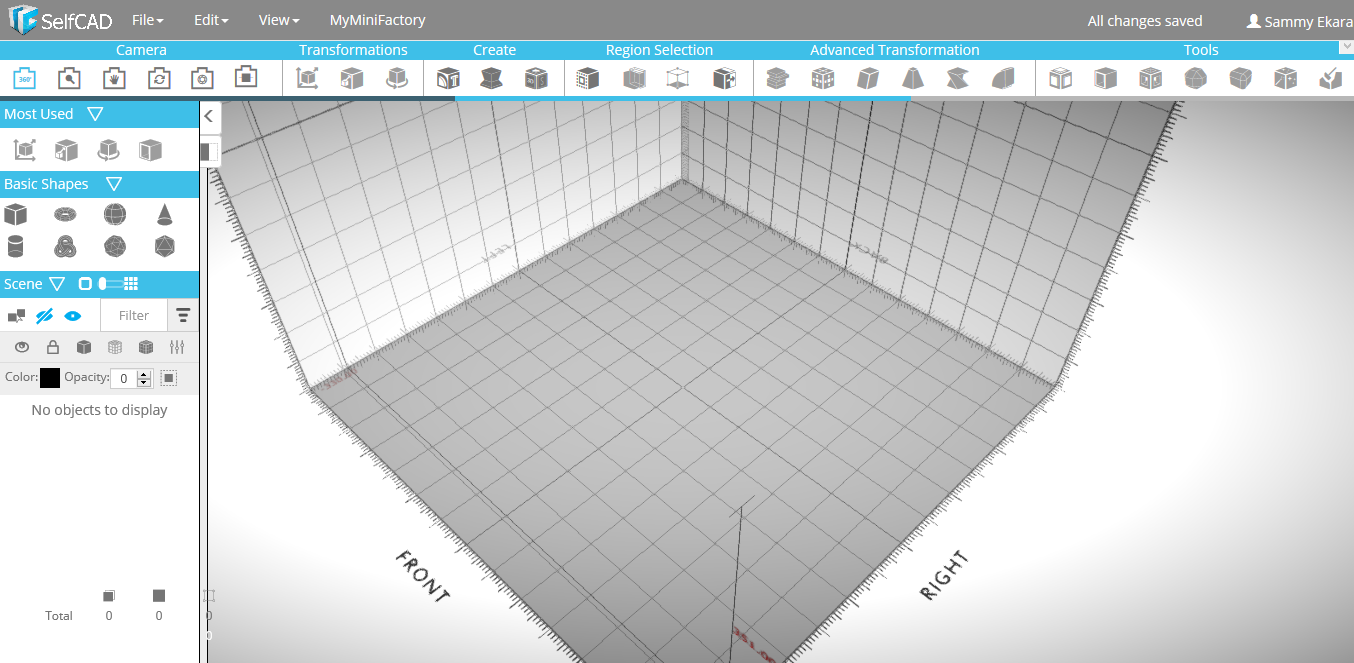
1) SelfCAD software - Go to www.selfcad.com
and create a Free Trial Account (free for 30 days and $4.99 after the free trial expires). Then launch SelfCAD editor (the programs runs in your browser, no installations required).
2) Image of Cat - Click this Link to download the image of the cat.
3) Find a 3D printer - If you do not own a printer, use one of many online 3D printing services and have the print sent to you
4) Choose a printing material - Learn all you need to know about 3D printing materials on our Blog
Start Modeling
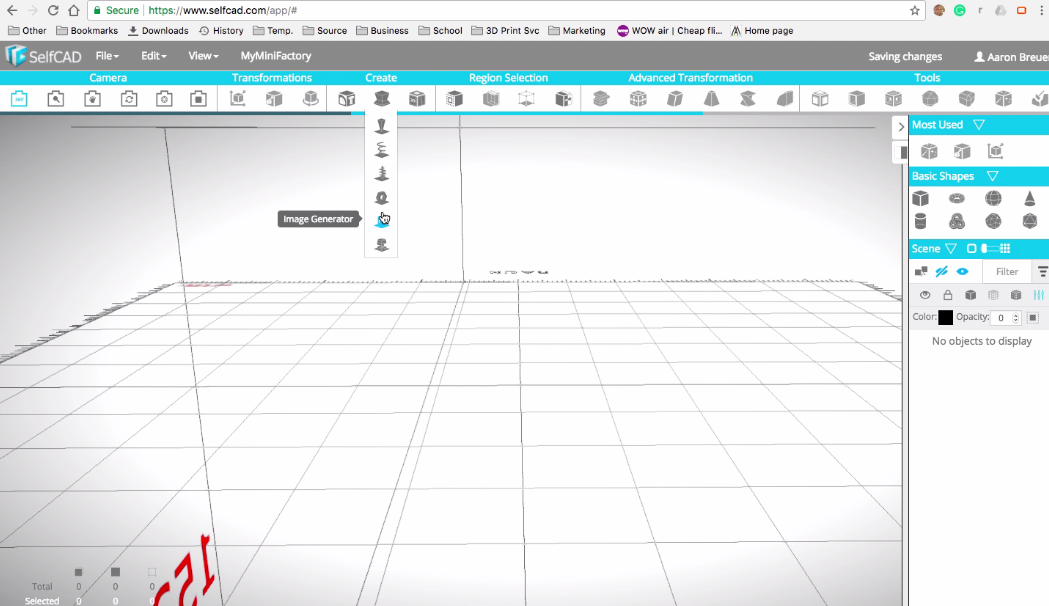
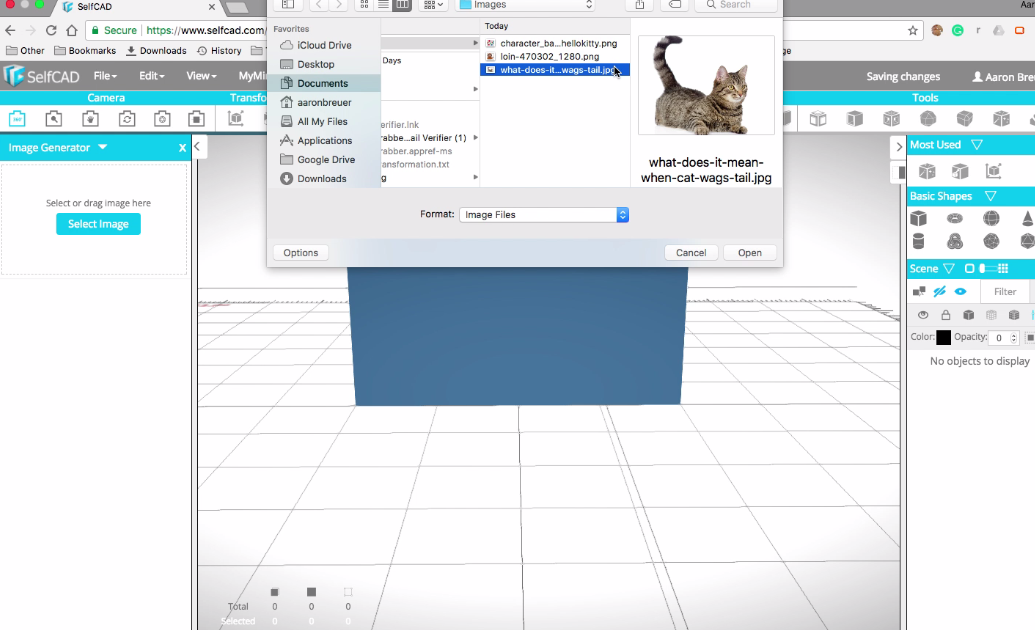
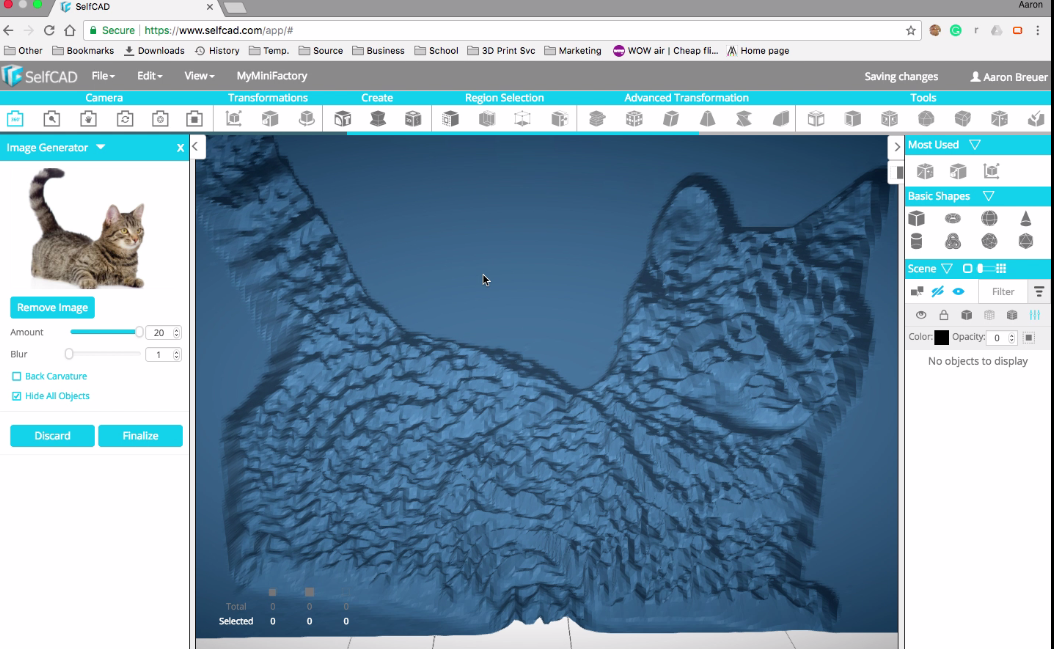
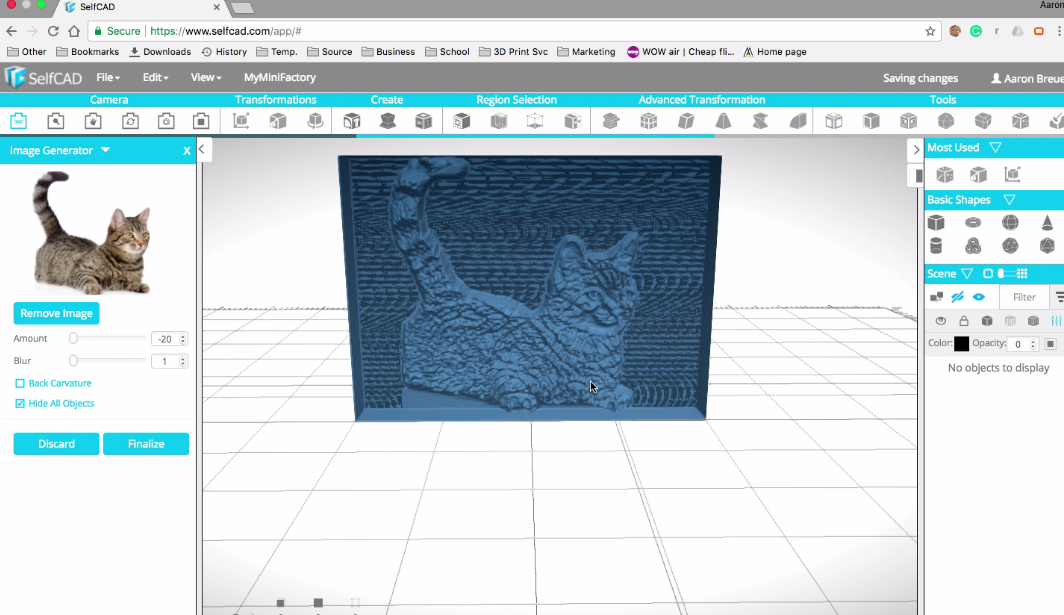
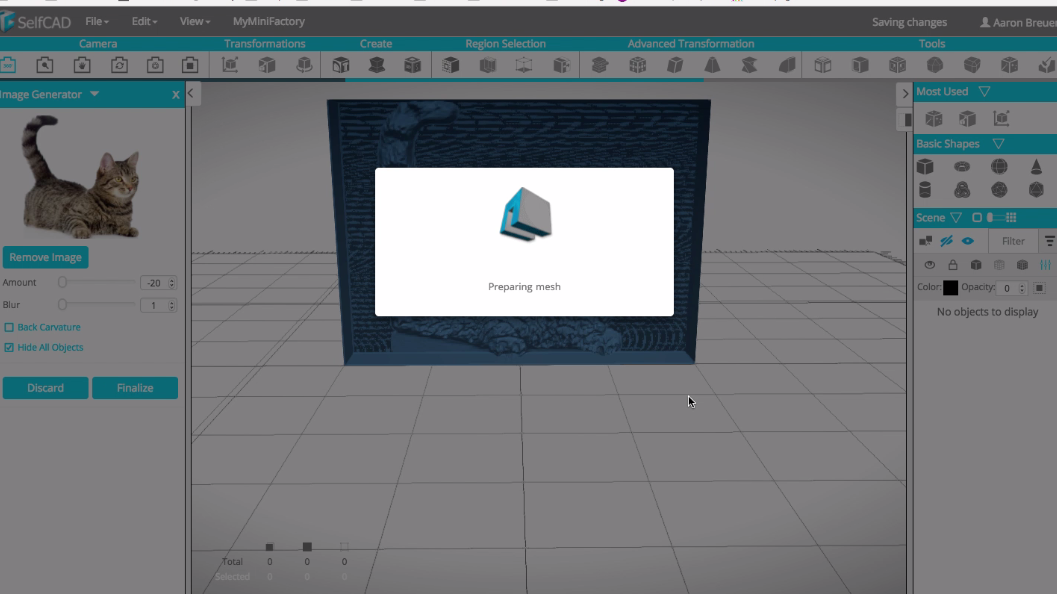
- Go to the create tab and click ImageGeneretable and select the image in which you want to work on from the create section of the top panel as shown in the picture above.
After selecting the image, you will realize that the image is engraved instead of sticking out, it's inside when you zoom it.
- The structures of this image are not bad and there are no much hanging pieces hence you can print it. However, the problem is, you cannot carry out your Boolean in order to cut the image off. This is because the cat is more deeper than the board. Hence, when I move the cube to cut the shape I will be cutting the entire image of the cat. So, how are we going to do it?
- To achieve our target we have to go all the way to the reverse, that is, by ensuring the Amount section is to it's minimal. This will add some more steps to the shape (as shown above) but we can easily separate them or we can have a way of cutting it off.
Finaling the Shape
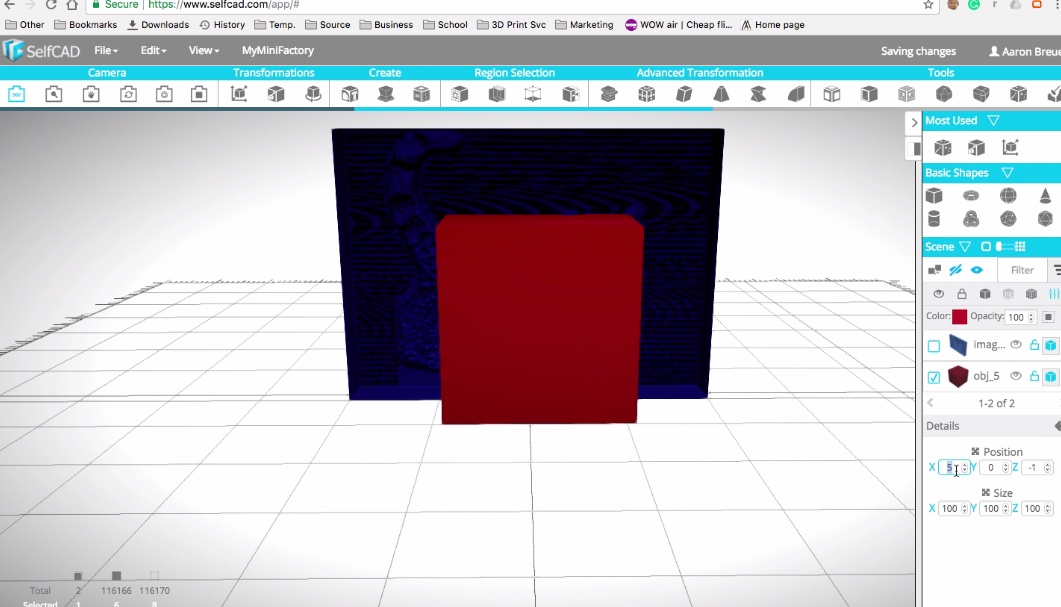
- To separate them, we have to finalize the Shape first. Click the Finalize Tab after finalizing it's time now to position our image in the middle, you can achieve this by ensuring the X, Y and Z values in the position tab are all set to zero.
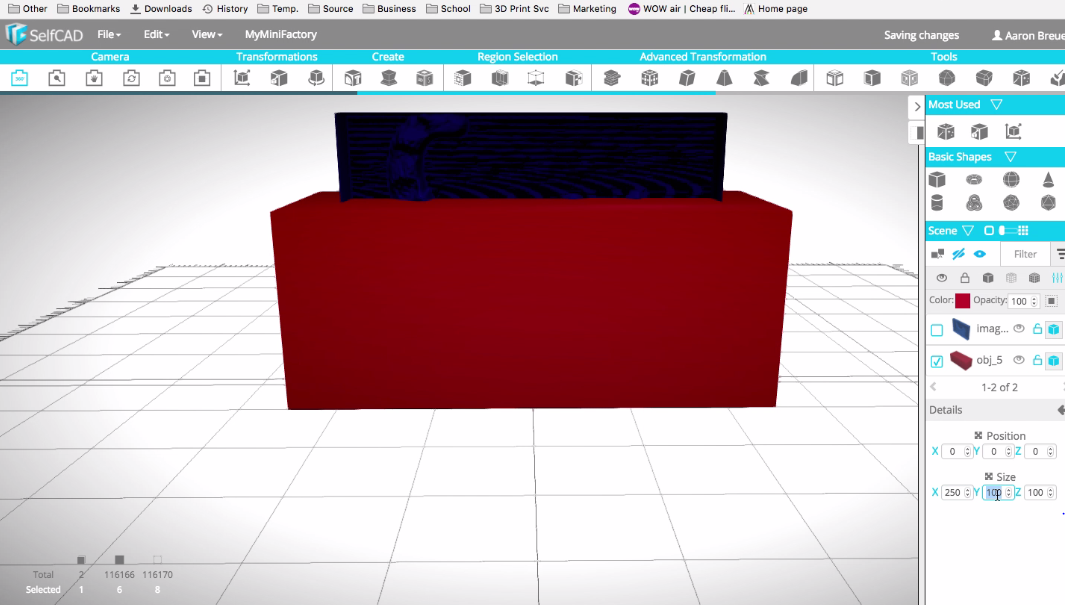
- Select the image, then select the cube on your left hand side and drag it towards the model. Change the position of the cube by clicking on it and setting the values of X,Y and Z to Zero on the Position tab and in the Size set the values of X, Y and Z to 250, 200 and 100 respectively. The cube will cover the shape entirely as shown above.
Cutting Out the Shape
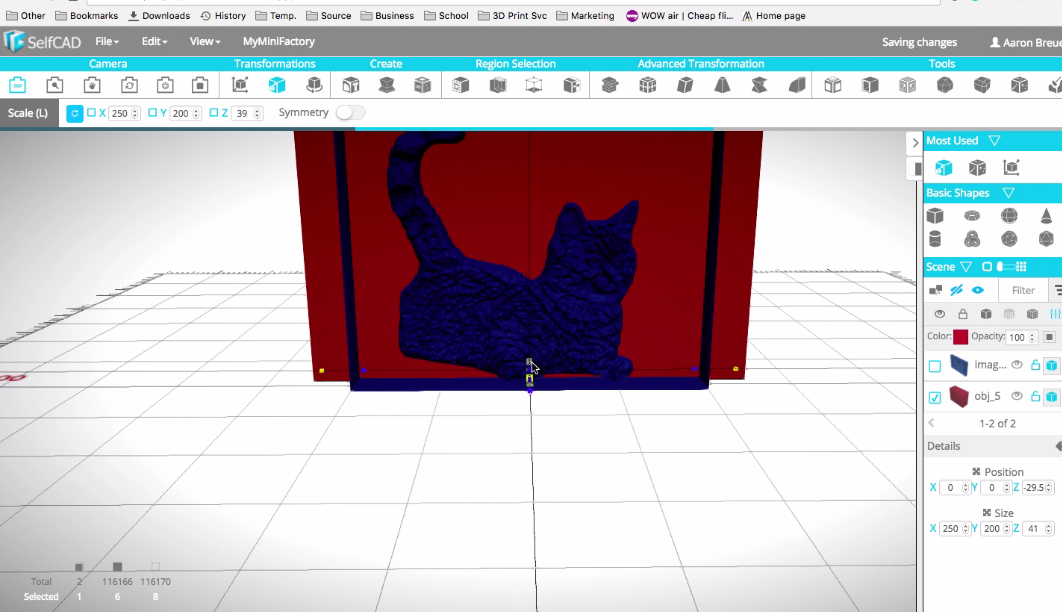
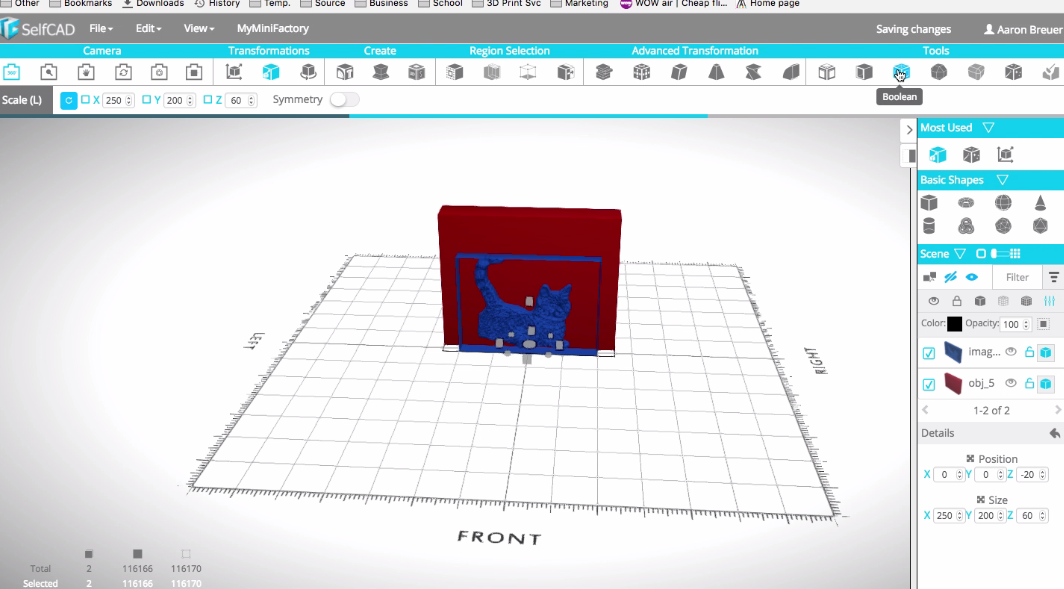
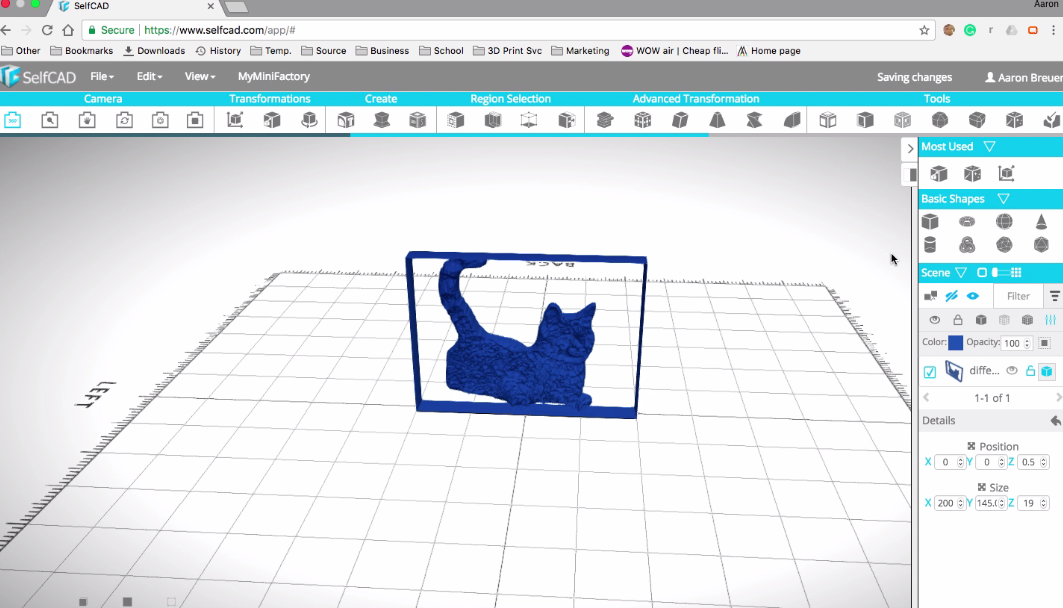
- First, we need to do the Scaling. On the transformation tab click Scale. After selecting and dragging to and from you will find that the shape is now visible well as shown above. If we clip the image in the state in which it is in, we shall remain with borders. So to avoid this, we have to carry out Boolean operation.
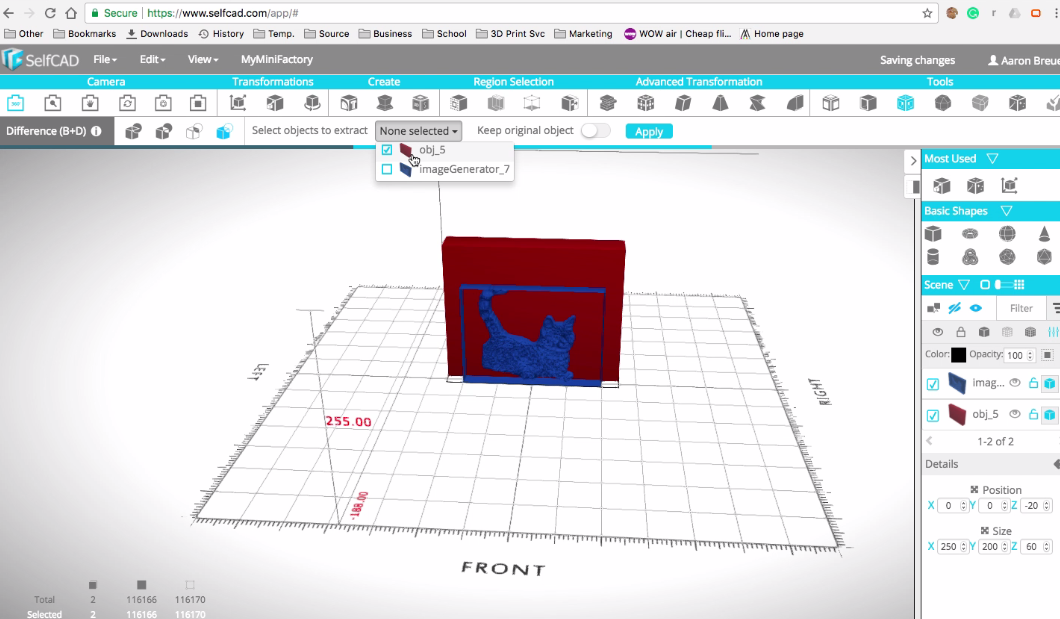
- Select the Image by clicking on it (Or check the box of image on your left hand side) and then choose Boolean in the Tool Tab. After that click on the difference and in the Select Image extract tab select the first option. That is, obj_5 in our case and click apply.
- After processing you will realize that it left borders and we have an extra work to do in order to remove them. But that is simple.
- Simply select and drag the cube from the basic shapes towards the image.
- Position the image back to 0 in Y axis and 5 in Size part. Adjust X and Z to 250 and 100 respectively. After scaling you will realize that the image moves up, and this because it scales up in both sides.
- Our shape is now easily printable. However, it will require support structures in order to print it perfectly hence, the parts surrounding the cat needs to be removed so that we may remain with the cat only.
Removing the Parts Surrounding the Cat
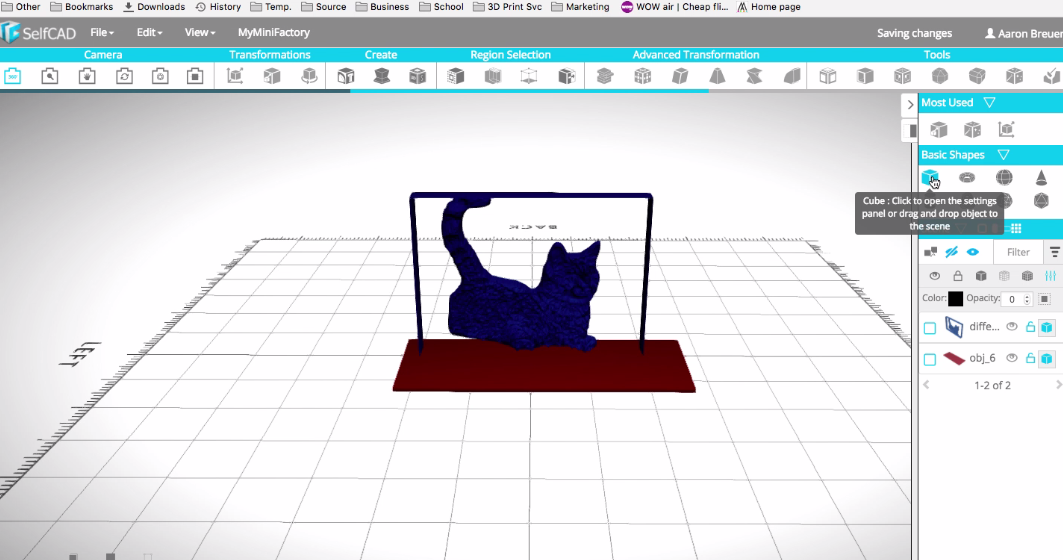
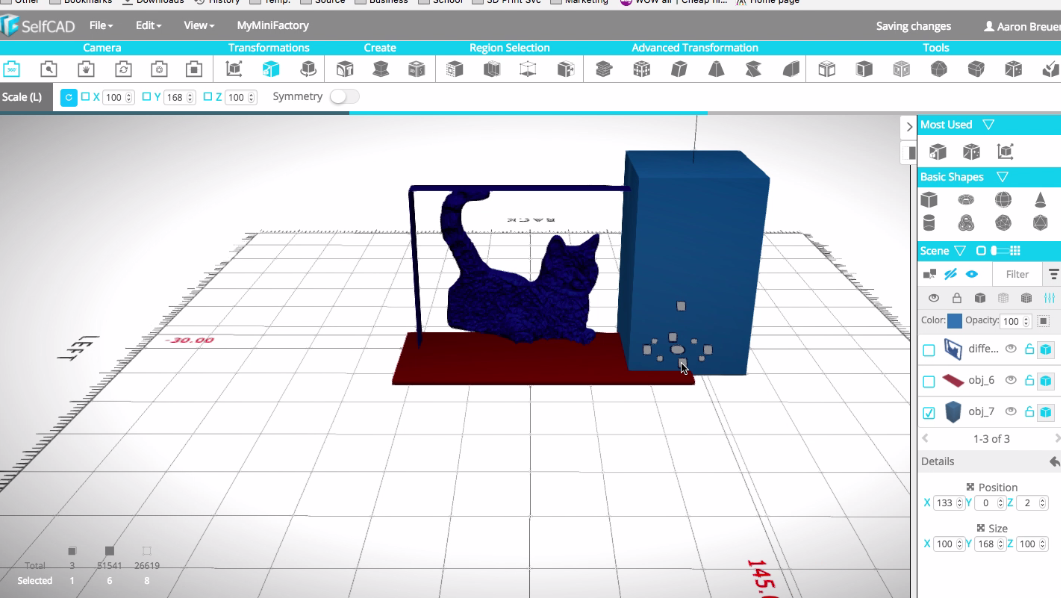
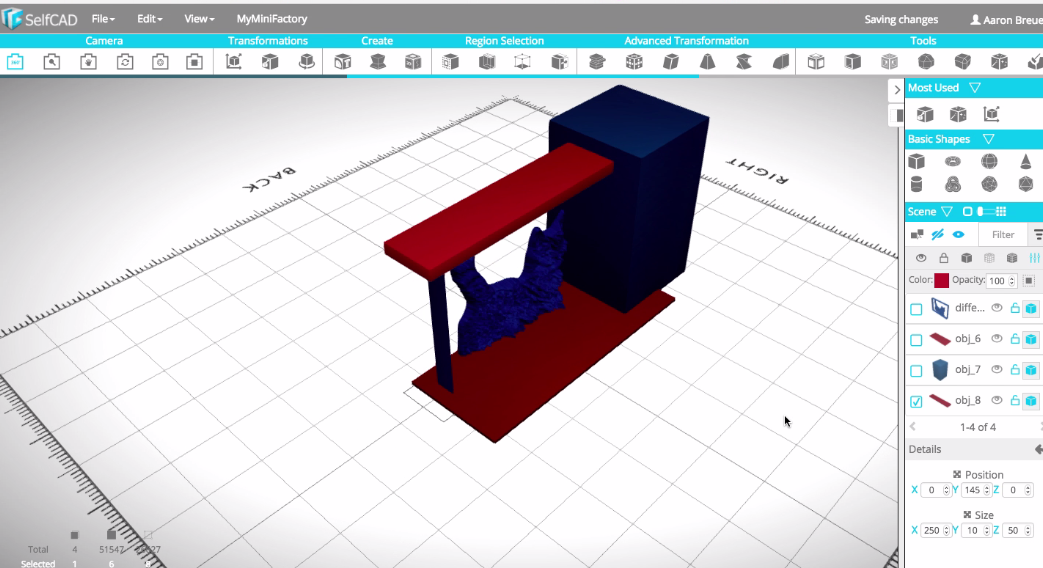
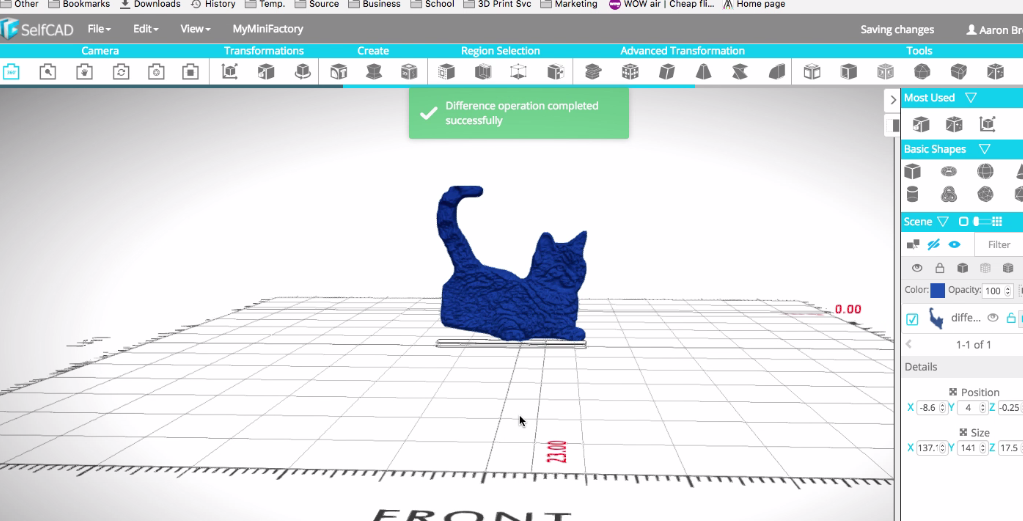
- Select everything and then drag the cube towards the image like in the previous step. Select the cube and scale it up. And in our case, the size is 145 and the position is 2.
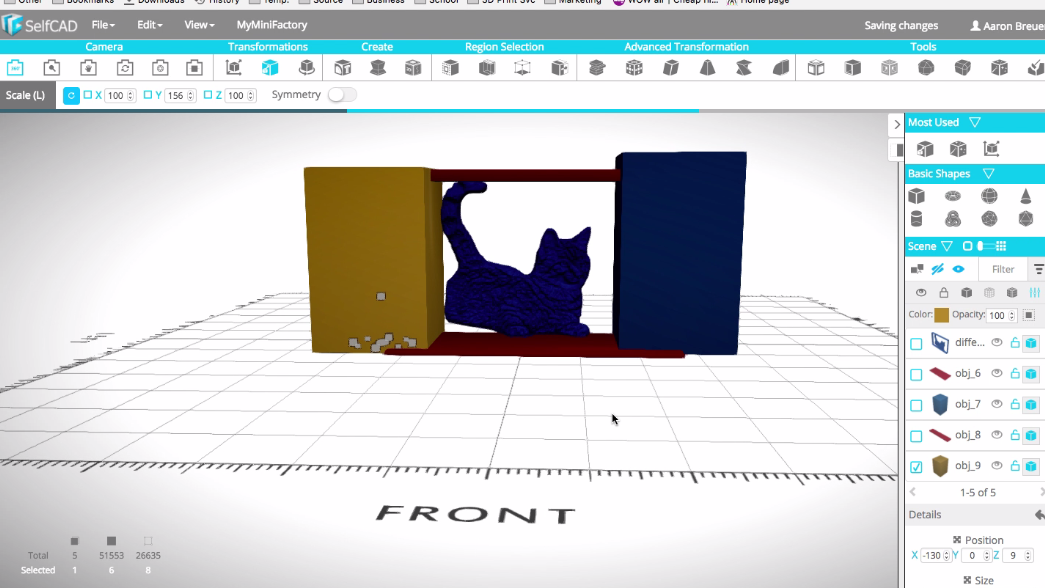
- Take another cube and position X and Y to 0 and 145 respectively adjust the size of X, Y and Z to 250 10 and 50 respectively to look like the above image in the 3rd position.
- Take another cube and place it towards the back of the Image and scale it upwards to be as shown above.
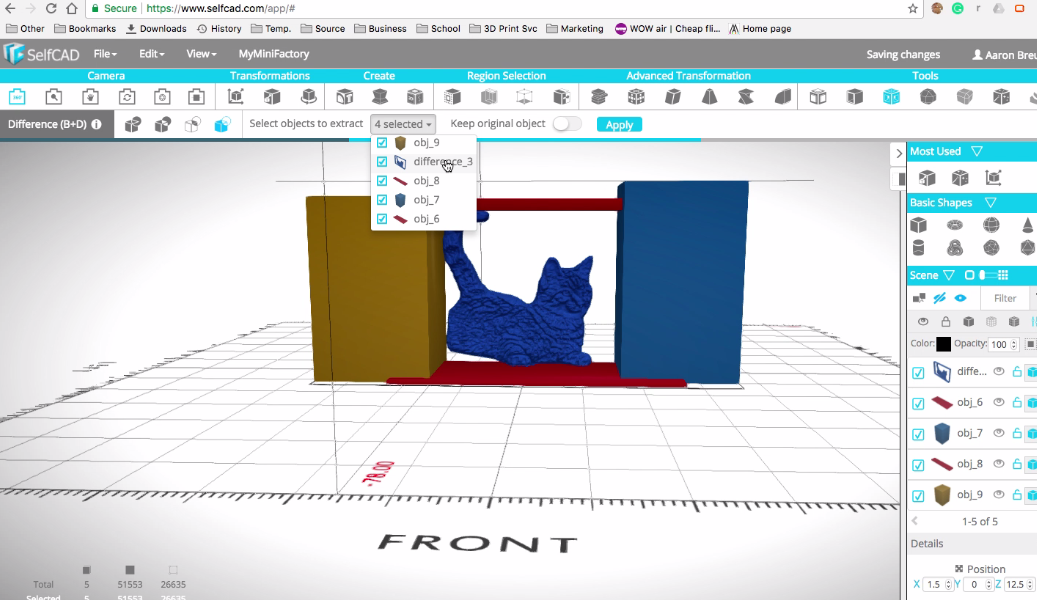
- Select everything now (You can do this checking the boxes of the images on your left hand side) and select Boolean on the Tools Tab. Click Difference, and in the "Select objects to extract", select everything except part showing the shape (In our case it's Difference_3). You can check this in the 5th image above.
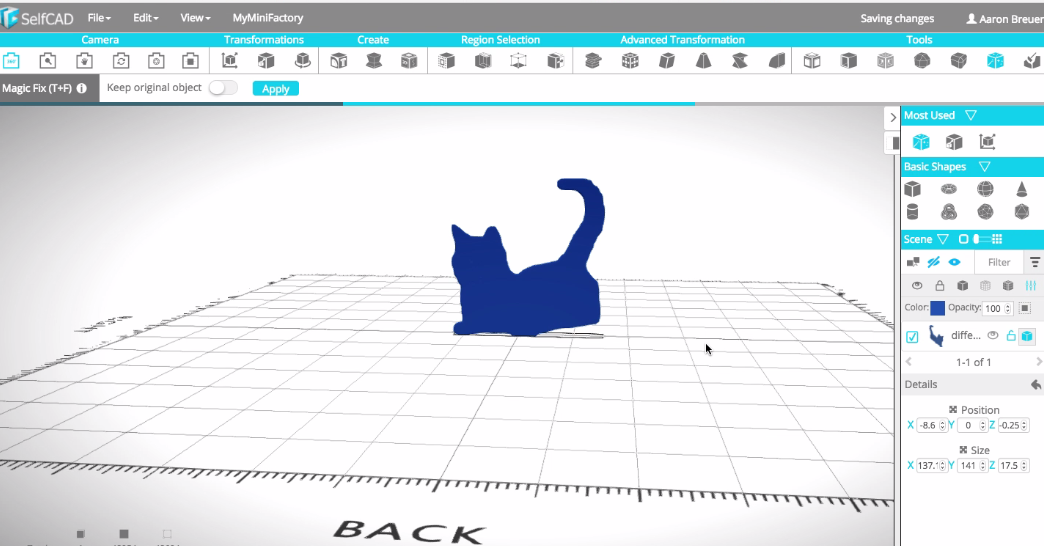
- After doing this, click apply. After processing the difference you will find out that all the other parts are done away with and shape of the cat is the only one which remains as shown above.
- Position the image to 0 in the X position in order to reduce the size of the lines that are on front of the shape.
Finally, we need now to do the Magic fix. Select the Magic fix tool in the Tool tab and click apply. After processing we shall now be having a nice printable shape of a cat.