Ender 3/Ender 3 Pro Time Lapse With Webcam or Phone
by giantjovan in Workshop > 3D Printing
1160 Views, 2 Favorites, 0 Comments
Ender 3/Ender 3 Pro Time Lapse With Webcam or Phone
I will show you how to make Ender 3/Ender 3 PRO time lapse using Webcam or Phone.
Supplies
PC Mouse
Download and Print Files
If you are using web cam, also download camera holder.stl
Disassemble Mouse
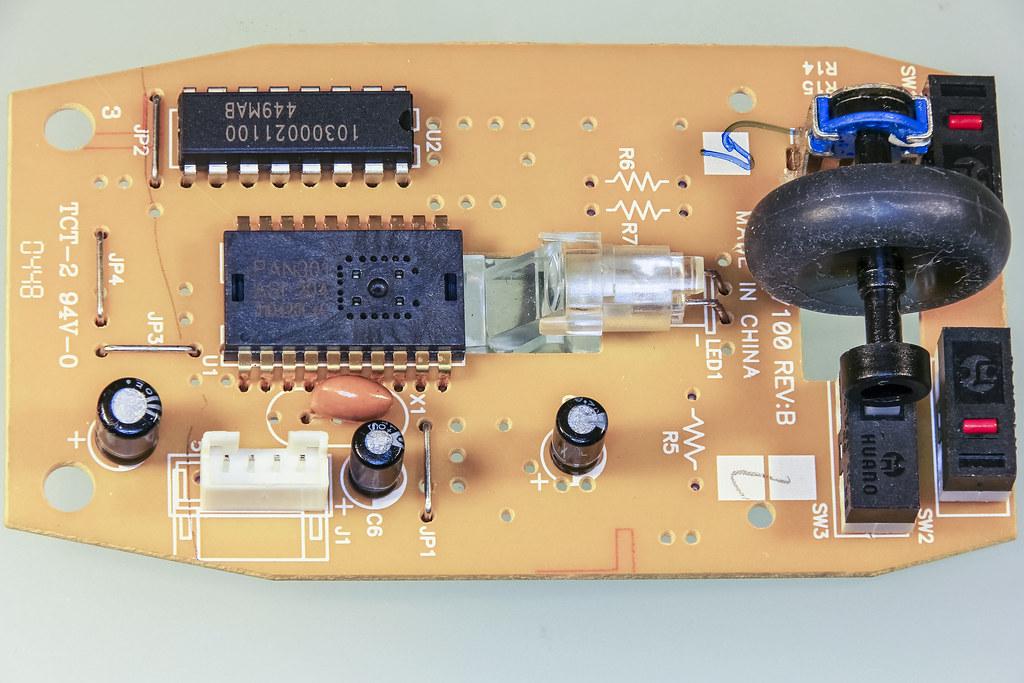
Disassemble the mouse and unsolder left click button. Take wire and solder it to the button and to the left click button terminals on mouse PCB. Then assemble mouse.
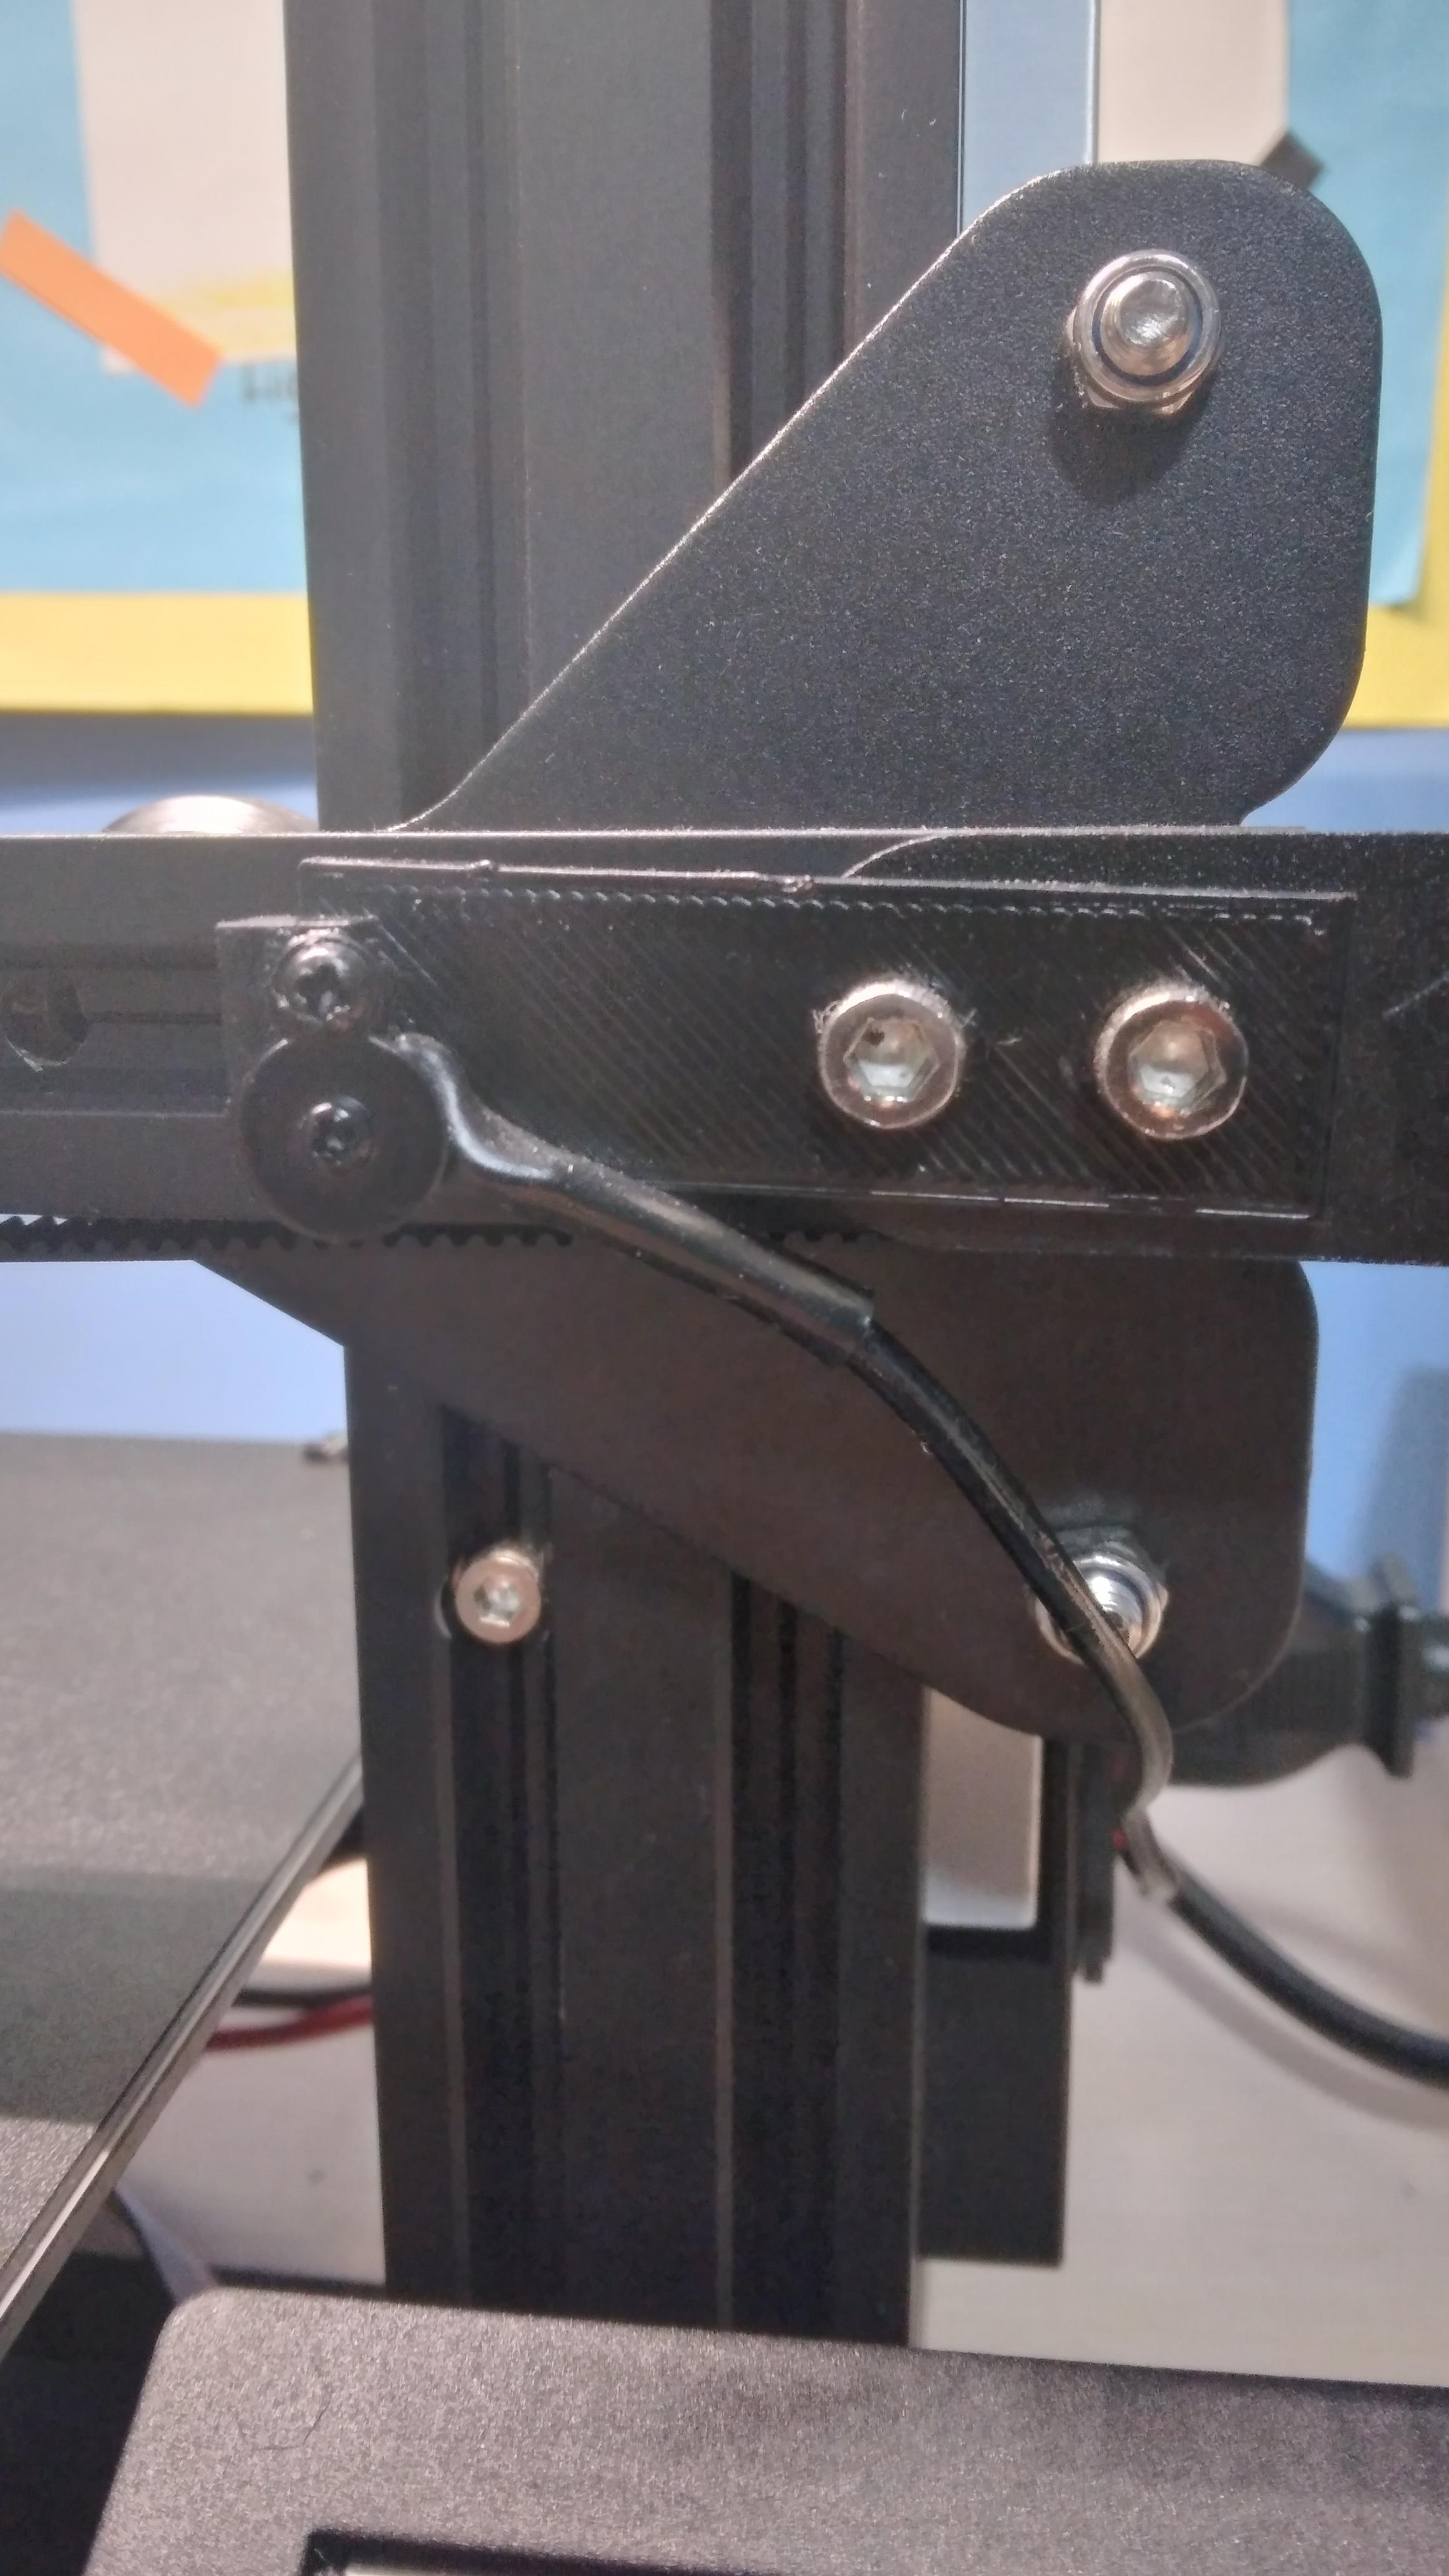
Screw Button to the Time Lapse Holder and 3D Printer
Screw button to the time lapse holder and then to the 3D printer.
Screw Camera Holder to the Webcam and 3D Printer
Screw camera holder to the webcam and then to the 3D Printer.
How to Run Time Lapse
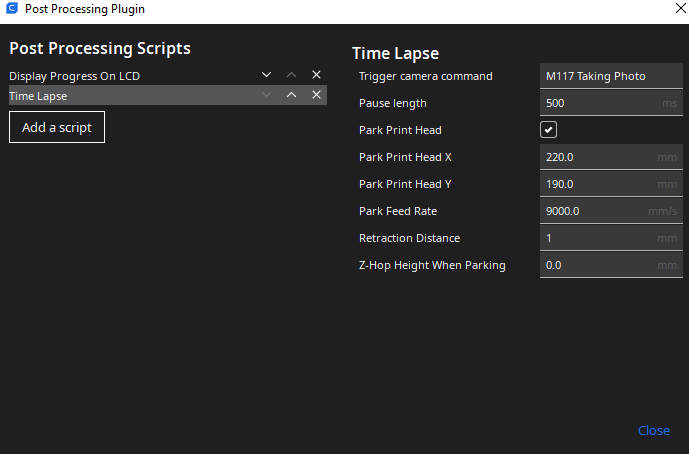
To run time lapse you would need to place script in the your slicing software. (I am showing it for Cura)
To place script go: Extensions/Post Processing/Modify G-Code/Add A-Script/Time Lapse
If You Are Using Webcam Skip This Step
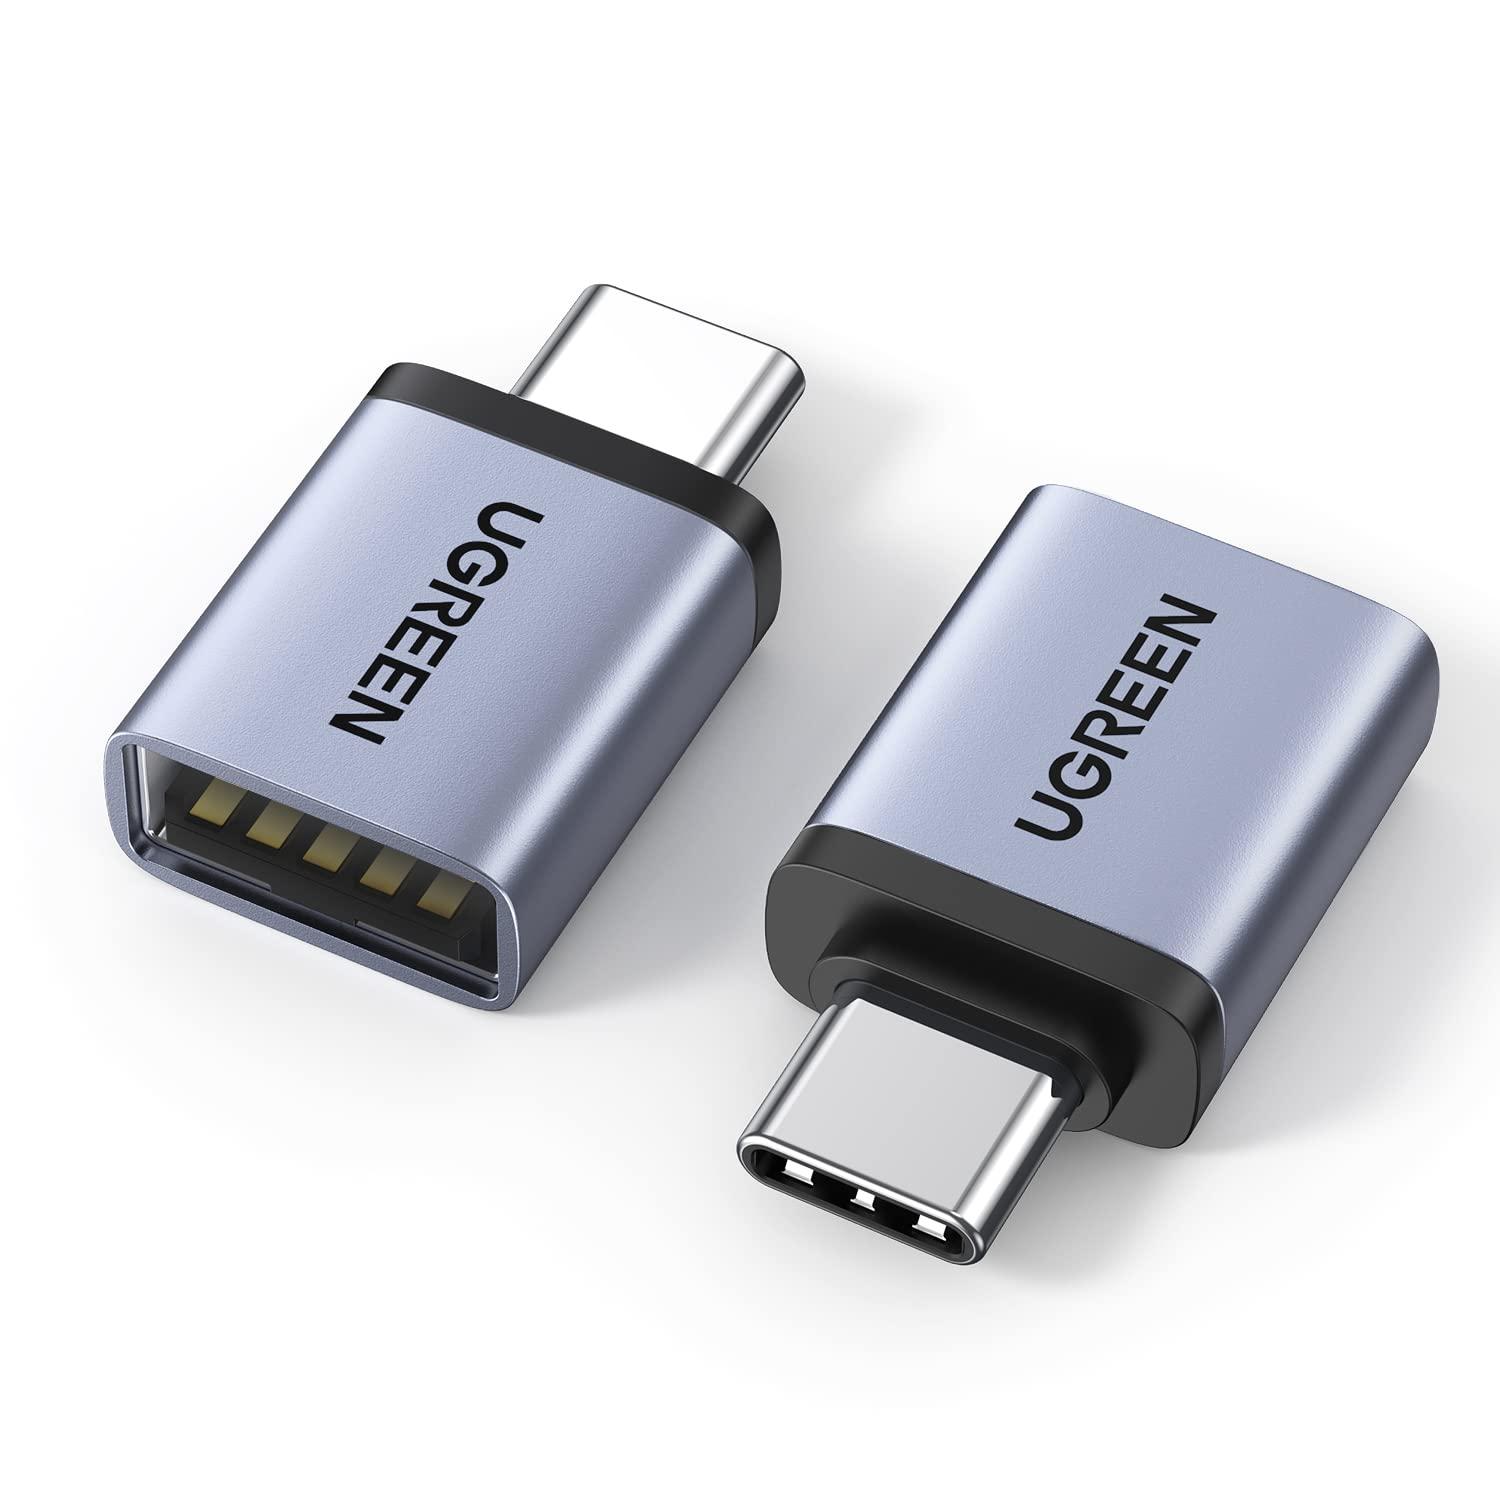
You will need one of these adapters for your phone.
Connect mouse to phone using adapter.
Then open camera and place phone in the position that is good for time lapse.
Make phone stay like that.
Open camera and place mouse cursor on the button that takes pics.
Now start print.
If You Are Using Phone Skip This Step
Connect mouse and webcam to PC.
Open camera software and place mouse on button that take pics.
Now start print.
How to Make Time Lapse Using Pics
Download "Time-Lapse Tool".
Import all your pics that are taken.
Chose speed and click export.
You are done. You created time lapse.
Hope this was helpful!