Enchanting Flutter: Multicolor LED Edge-Lit Butterfly
by Pari Hathiram in Workshop > Laser Cutting
3017 Views, 26 Favorites, 0 Comments
Enchanting Flutter: Multicolor LED Edge-Lit Butterfly
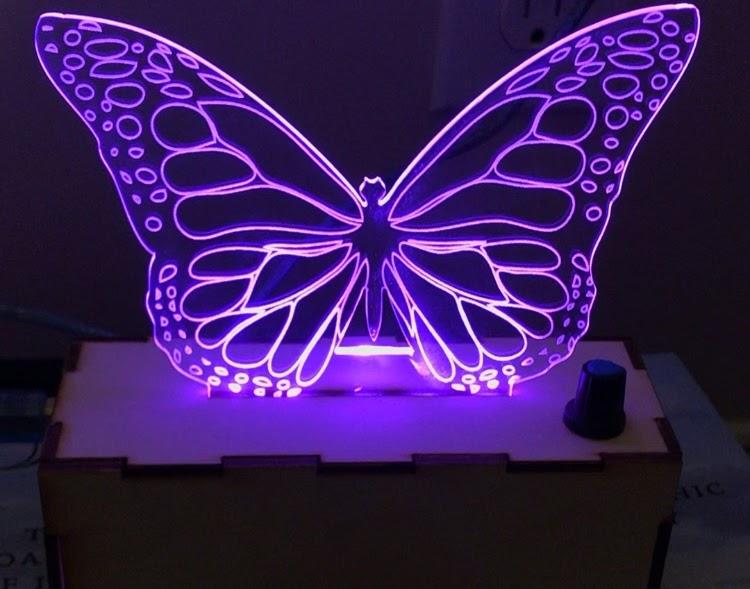
If you're looking to add a touch of creativity and charm to your room, this DIY LED edge-lit butterfly sign is the perfect project for you! With customizable colors and playful glow, it will brighten up any space and add a unique flair to your decor. In this Instructables I will show you the step-by-step process of creating this DIY LED edge-lit butterfly sign. So, let's get our dreams into realities!
This project uses 2 software systems: Tinkercad and Inkscape.
Hey, I'm Parinaz Hathiram, a junior in high school enrolled at Charlotte Latin School in Charlotte, North Carolina. Volunteering is a passion of mine, and I am particularly drawn to digital fabrication technologies such as 3D printing, laser cutting, and CNC machines. I enjoy using my skills in these areas to make a positive impact on my community.
Supplies
- Laser Cutter (Fusion Pro 48)
- Acrylic
- Cardboard
- Wood
- Vinyl Cutter
- Vinyl
- Inkscape
- Electronics
- Potentiometer
- Jumper cables
- Arduino
- Neopixel
- Soldering Iron
- Breadboard
- Computer
The Planning Process

.png)
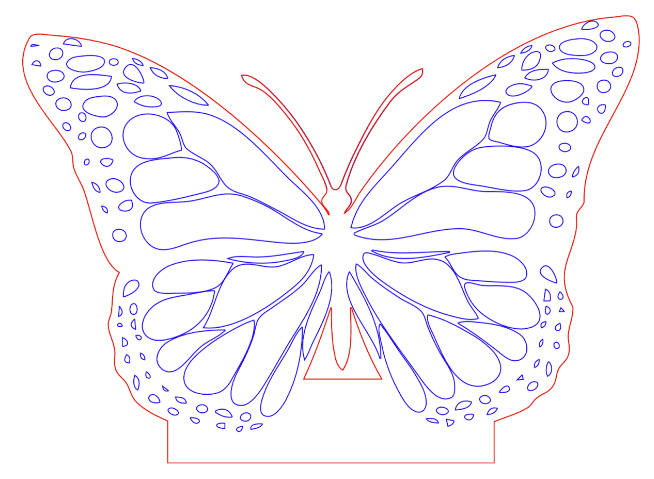
1. At the beginning of the project, there has to always be some planning. First I chose what I wanted to make for the acrylic part of the lamp. I chose a butterfly because they are one of my favorite insects. Butterflies remind me of the circle of life and how they only live for 10 days, but those 10 days are the happiest and prettiest.
2. I used Inkscape and followed this video: Making an Edge Lit Sign. Following the video, I got my image of the internet then traced the image to a Bitmap. I color-coded my design. Blue is the engraving and red is the vector cut. I used layers to manipulate the design and used it as an advantage since I didn't want to risk moving any of the components out of their alignment.
Plan for the Box
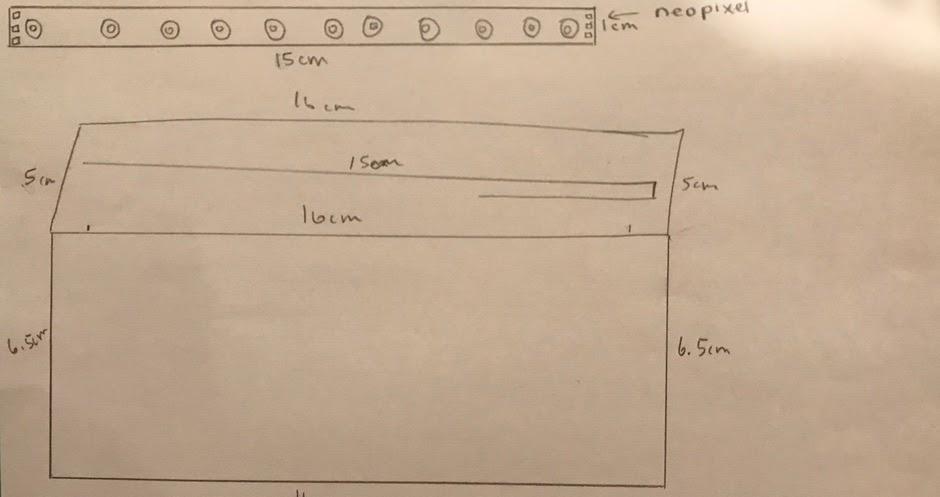
I drew the dimensions of the box and the slot where the acrylic would fit in. The maximum length of the Neo-Pixel was 6 inches. I did the box measurements in centimeters because I am used to the metric system.
The width of the box is 16 cm
The height of the box is 6.5 cm
The depth of the box is 5 cm
The slot of the acrylic is 15 cm
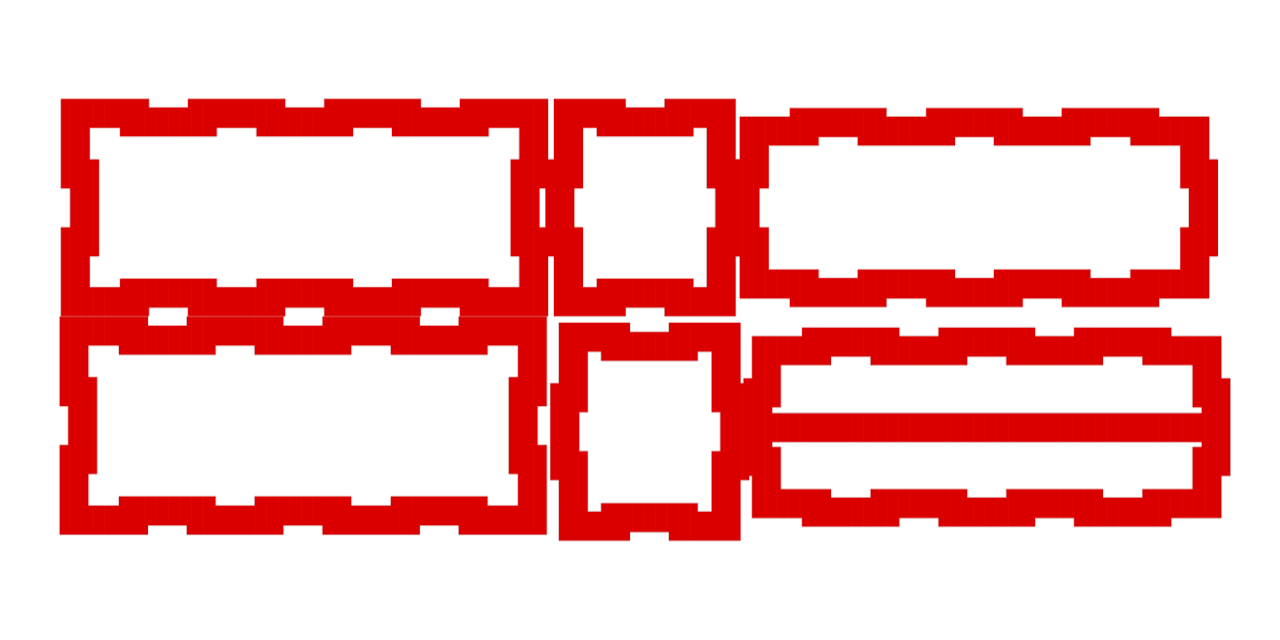
Inkscape version of Box
I took the dimensions from my plan and inserted them into Inkscape. I converted the measurements from centimeters to inches. I haven't made the stroke of the lines hairline yet because I had trouble viewing them in Inkscape.
The width of the box is 6.594 in
The height of the box is 2.944 in
The depth of the box is 2.694 in
The slot of the acrylic is 5.906 in
Cutting the Acrylic
.png)
.png)
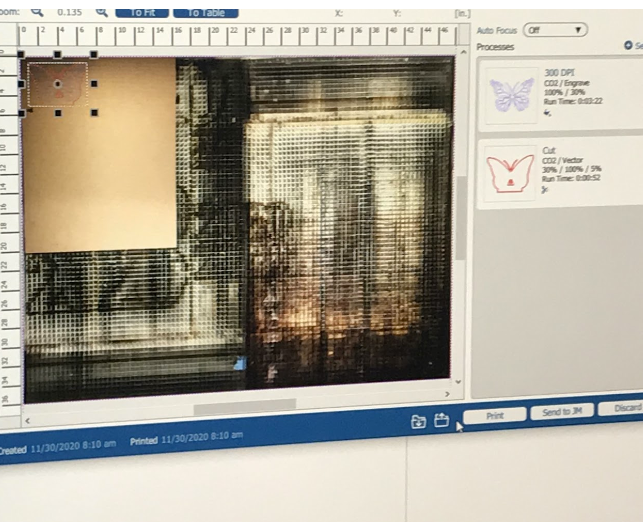
I went to the Fusion Pro 48 Laser Cutter and first imported my design to Corel Draw. I made sure that my vector cut was on hairline stroke and my engraving was higher than the hairline stroke. To see if the design worked. First I printed it on cardboard, and then would print the final copy on Acrylic. I then followed the workflow for the Fusion Pro 48 Laser Cutter, which is attached below.
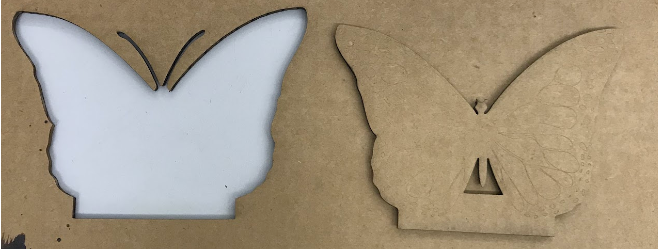
Cardboard Cut/ Engraving of Butterfly:
Cutting this on cardboard first is important because first you want to make sure your design works and there are no mistakes made. I followed the workflow of how to use the laser and cutter, and then chose the type of cardboard, which was 1/8 inch cardboard. This would also be the size of my acrylic cut.
Picture 2 was my cardboard cut, which turned out to be great because there were no mistakes, except because of the heat of the laser the antennas burned off.
Acrylic Cut:
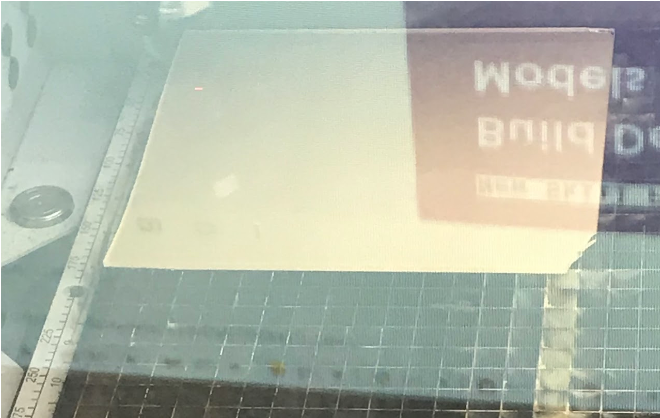
I used the appropriate size of acrylic, which was 1/8 inch, so it's the same as the box and cardboard cut of the Butterfly. I focused the laser on the center of the material and then began printing.
I pressed start on the Laser cutter and it started to cut/ engrave the design onto the acrylic. This took approximately 4 mins.
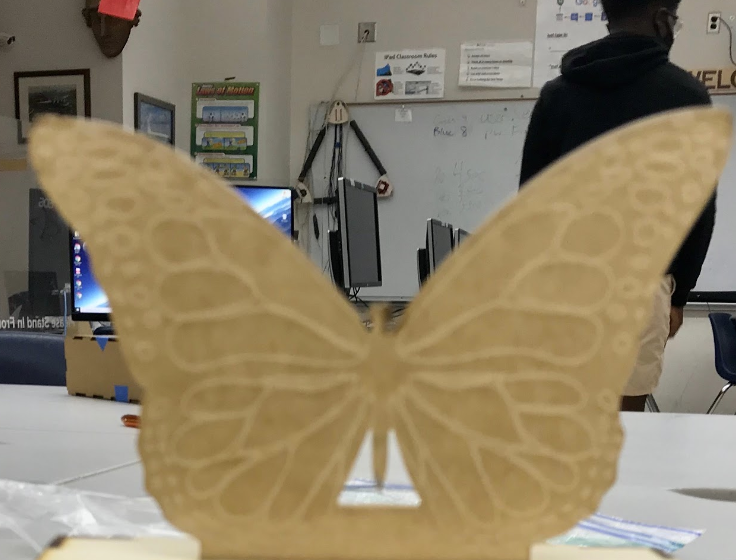
Once I have finished all of the components, I would peel the paper off to give it the final effect.
The Final Product
I sandpapered the outline of the butterfly so that the lights wouldn't go through, and they would bounce, resulting in more light.
Fusion Pro 48 Laser Cutter Work Flow
Importing Files from corelDRAW to Epilog Dashboard, and preparing for the printer-
- Open your .CDR file in corelDRAW on the pc connected to the FusionPro
- Print your file using Ctrl + P
- Select Epilog Engraver under the Printer options
- Select “Use printer default (Custom, Landscape)” under the Page options
- Check your Preferences by going on to
-Preferences…
-Advanced…
-Paper Size has to pe “PostScript Custom Page Size”
-Then Click ok until your back to the Print page
- Click on the Color tab at the top of the Print page
- Set the Color to RGB
- Click on the PostScript tab at the top of the Print page
- Make sure that “Convert True Type to Type 1” is NOT checked
- Click Apply on the bottom of the Print page
- Click Print on the bottom of the Print page, this will pull up the Epilog Dashboard with your file
- Before doing anything else, properly align the Two integrated FusionPro cameras by selecting on the machines Touch Interface (see Icons on the FusionPro Touch Interface) NOTE: The camera video feed will not appear accurately if the machine is not focused for the material on the bed. This is a critical step for EVERY single print job.
-Jog
-Then Jog the machines lens to somewhere on your material
-Click the Auto Focus button and wait until the FusionPro is done
-Then Click the Park Axis Button
- If your design isn't centered/positioned how you want it to be, Click on your design and drag and drop in into the correct position (you will have video feed coming in from the FusionPro to help with design placement)
- Alternatively, while you have your design selected, you can use the blue bar on the left of the window to position your design using X & Y values in correspondence to a point on the workplane
- Here you can also rotate and scale your design to fit your needs
- Go to the Right side of the window
- As long as you have jogged and focused using the machine’s touchscreen, you can turn off Auto Focus in the Epilog Dashboard menu.
Setting up your Material settings -
- Select your Material and Put in into the FusionPro
- On the Right side of the window under the Auto Focus tab, you have your Processes
- Make sure your Processes view is set to combined, unless planning on just Vectoring or just Engraving
- Click on the Process you intend on cutting
- Under Process Type, Select Engrave or Vector depending on which you intend that process to be (the Off Process Type can be used in that specific process does not need to be sent to the printer, this is just like clicking “don’t print” in corel)
- Next, Click the file folder with the down arrow next to the Process name, to Import the Material Settings
- Find the Right Material and Resolution, Click it, and It will be used on that Process
- Alternatively, you can Color Map your design by clicking on the process you want to Color Map, and then selecting Color under the Split By setting
- Then Repeat all steps under the “Setting up your Material settings” for any remaining Processes
Sending Prints to Job Manager and the FusionPro-
- At the very top of the Epilog Dashboard, you can select how the FusionPro is connected
- If the FusionPro is plugged into the PC via a USB cord, you can select USB Connection
- If Not, or if having problems with wired connection, select Web Connection under the same drop down
- Under that bar you have the ability to change the file name before you send it to the laser, if wanted
- When your File is Prepared, and your Material settings are correct, click “Send to JM” and then “Print” in the bottom left hand corner, this will send the File from Dashboard to Job Manager, save your settings in Job Manager, and then to the FusionPro
Starting your Cut on the FusionPro-
- If you are ever in doubt of where the FusionPro is going to cut your design, click the Trace icon on the Touch Interface and the laser will trace an outline of the area of the work surface
- Check to Make sure that all Blower switches are on before proceeding
- Check to make sure that your material is aligned correctly
- On the Touch Interface, click on the job menu, and then select your Print (the most recent file is always at the top) the file chosen will be highlighted in blue
- Then click the Play button to the left of the joystick to start your print
- The FusionPro will show all of your settings set on the Touch Interface, as well as a ETA while printing
Creating the Wooden Box
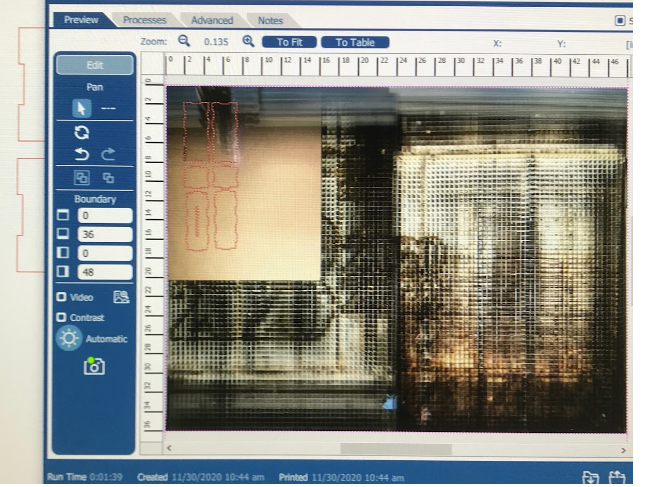
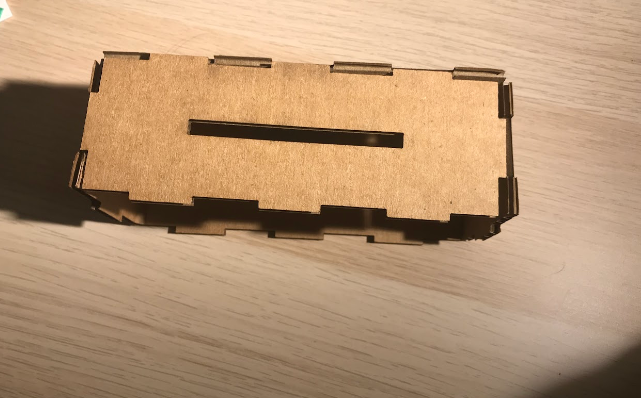
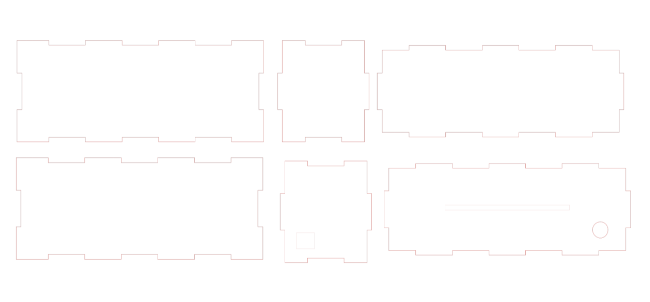
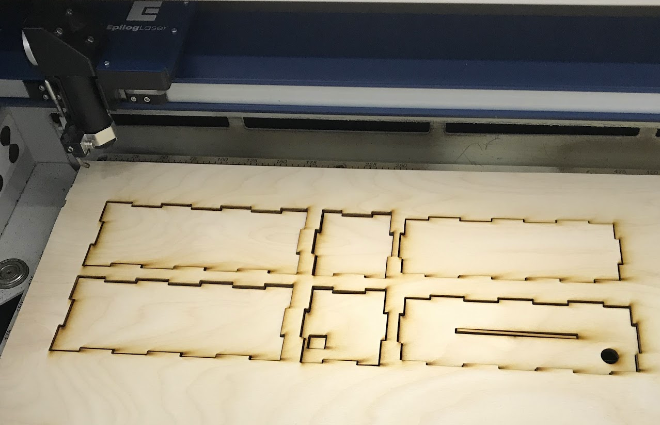
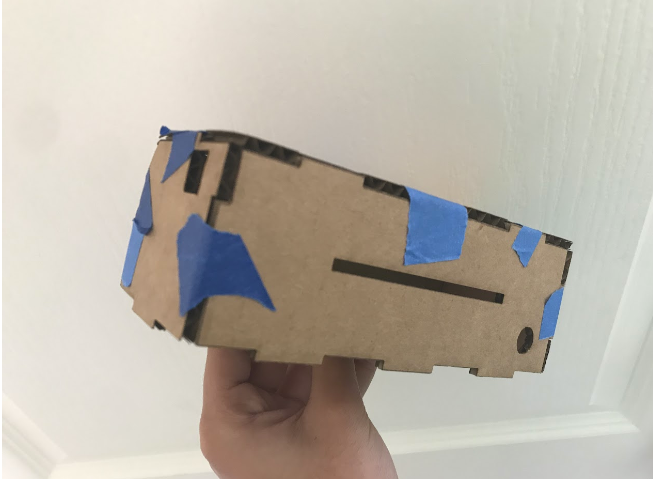
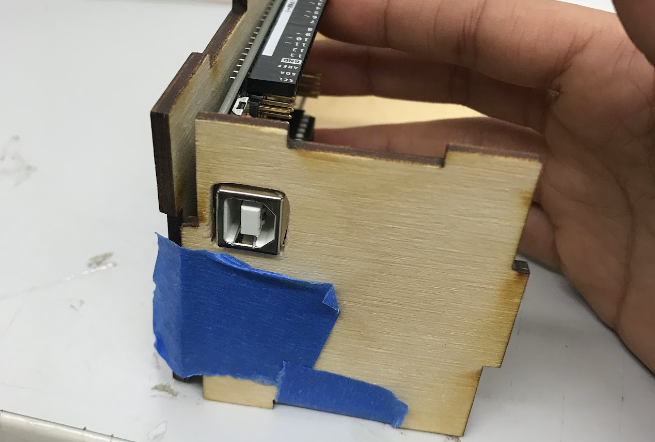
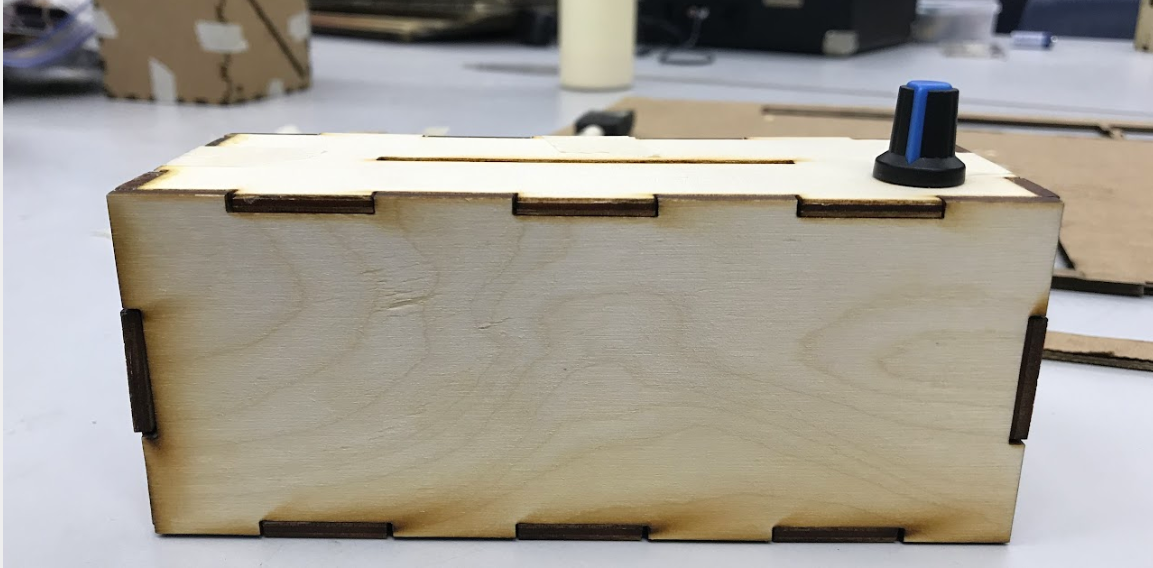
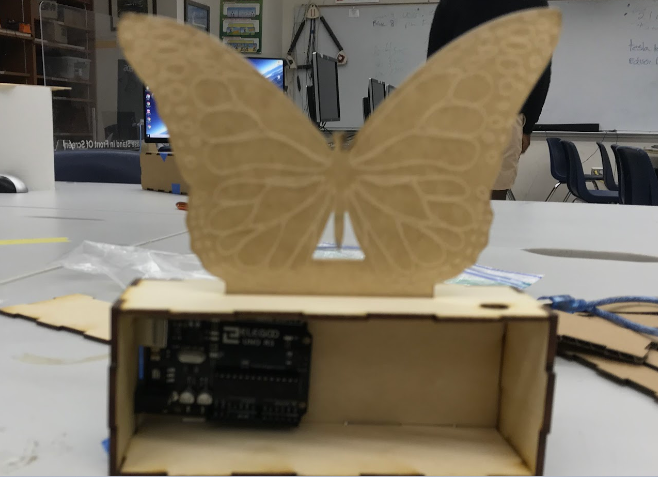
1 . I used the Fusion Pro 48 Laser Cutter, imported my design to Corel Draw and made sure that my vector cut was on hairline stroke. To see if my design worked I first printed it on cardboard, and then I would print the final copy on wood. Followed the work flow for the Fusion Pro 48 Laser Cutter.
2 . I cut the design on cardboard just like how I cut my butterfly design and followed the workflow of how to use the laser and cutter, and then chose the type of cardboard. I used 1/8 inch cardboard, which would fit the size of my acrylic.
3 . Once the cardboard was cut, I taped the pieces together to see how my box would look, and check for alterations. I realized that the slit for my acrylic was too wide, and that a hole is also needed to utilize my potentiometer, and to provide access for wiring.
4 . Using my original box plans, I utilized Inkscape and adjusted the depth of my slit, I added a hole for my potentiometer, and a square-shaped box so the port of my Arduino would fit. I used a caliper to measure the dimensions of the acrylic, potentiometer, and Arduino port.
5 . Followed the same steps to cut the first cardboard box, and then taped the box to see how it looks. Everything worked, so I printed it on wood.
6 . I went to the Fusion Pro 48 Laser Cutter and first imported my design to Corel Draw. Made sure that my vector cut was on hairline stroke and printed the box on 1/8 inch wood.
7 . I taped the box and placed all components to check if they fit. The Arduino port wouldn't fit, so instead of wasting materials, I decided to sand the hole down so the Arduino port would fit.
8 . After spending a hour of sanding, the Arduino port fit into the slot. If I could redo this step, I would edit the dimensions on Corel Draw, and then send it to the laser cutter again.
The Final Box
Picture 8: I wood-glued the tabs of the box together and Voila!!
Arduino and Wiring Components
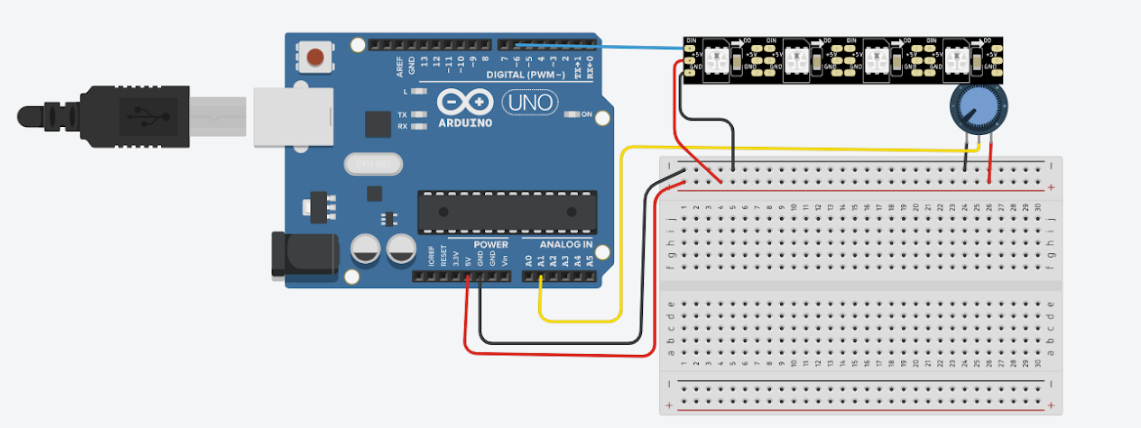
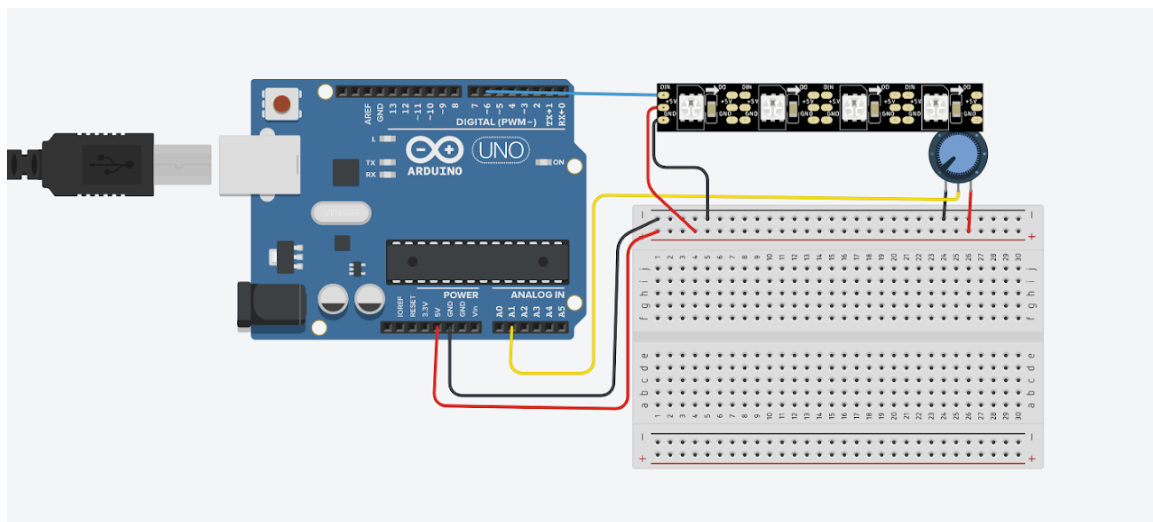
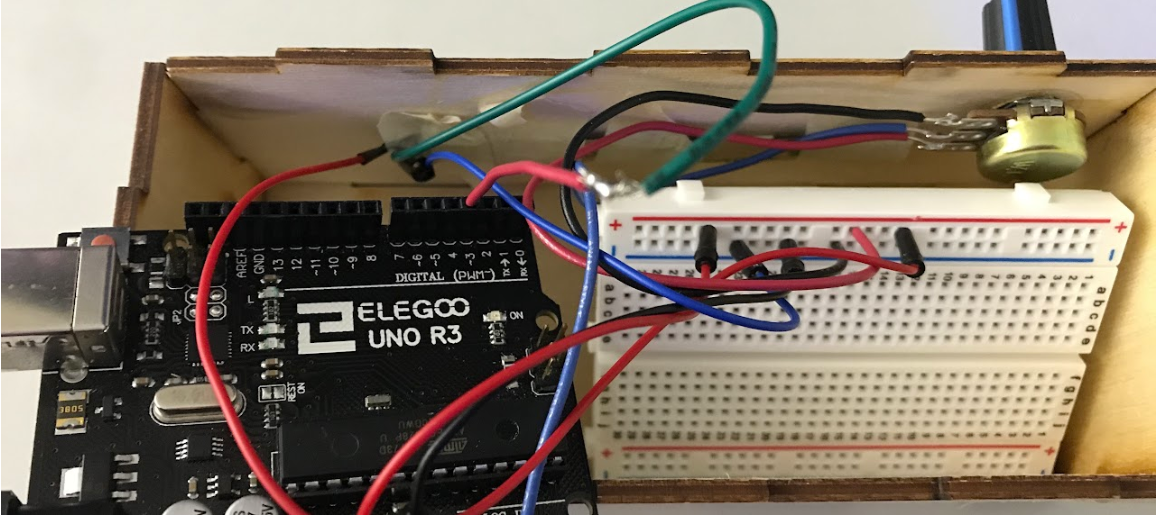
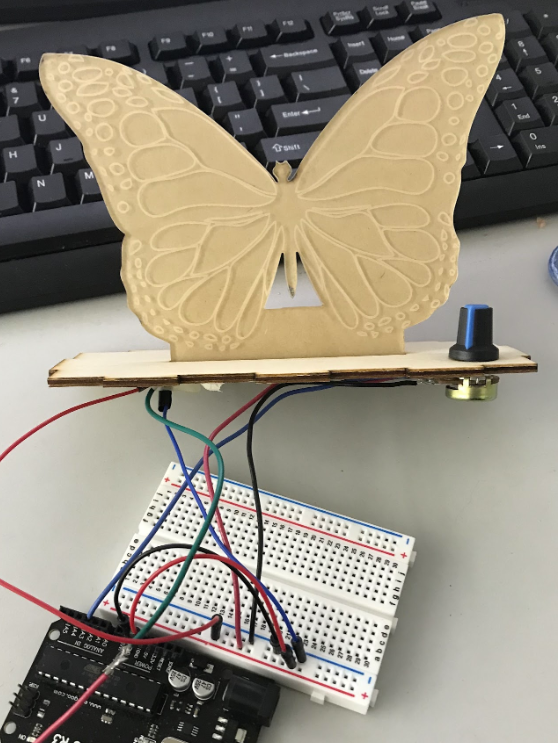
Wiring:
1 . I used Tinker Cad to first test out and see how I would wire the potentiometer and the Neo-Pixel. I followed many videos and tutorials on Youtube to see the best way to wire my breadboard. I then copied this wiring and transferred it to real life.
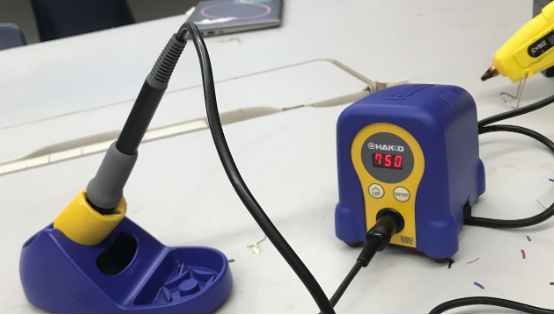
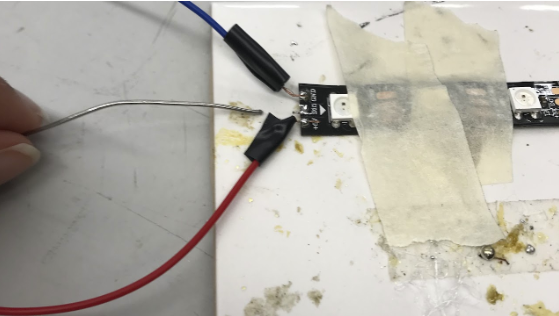
2 . To transfer the wiring from Tinker Cad, I would need to solder the wires onto the Neo-Pixel. The soldering iron would need to be heated to 750° F, then I would take the solder and melt it onto the appropriate part of the Neo-Pixel.
Code:
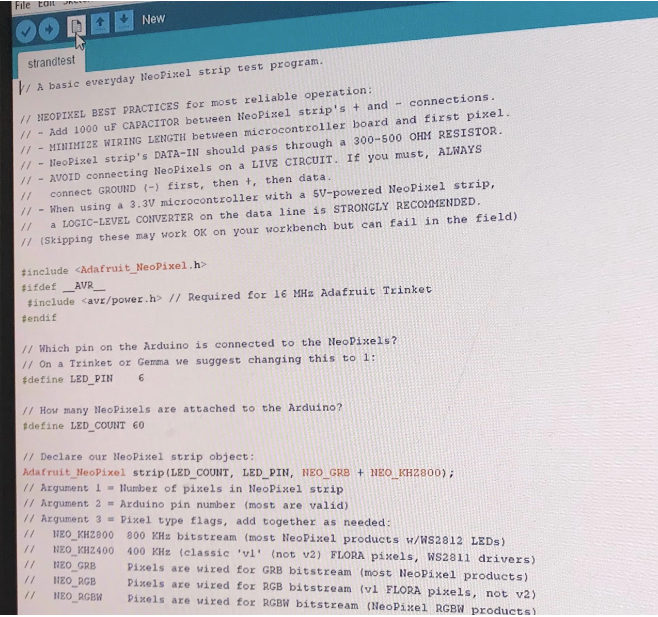
To test if the Neo-Pixels work, I went into Arduino IDE. There are many pre- written codes in the system called, libraries. I went into the examples, and choose strand test under the Neo-Pixel section. This is the code for a simple strand test, I uploaded it to my Arduino and saw it in action.
Rewiring:
Since I found some problems with the mini breadboard, and the potentiometer. I decided to get another potentiometer and a breadboard with rails. I rewired the wires and made the appropriate changes in Tinker Cad, which then I transferred to my Arduino.
I soldered the wires to the Potentiometer since the female to male cords were too loose. I taped the working Neo-Pixel under the slit where the acrylic would go. I changed the mini breadboard to the ones with positive and negative rails, so I could navigate the wires easier.
Code
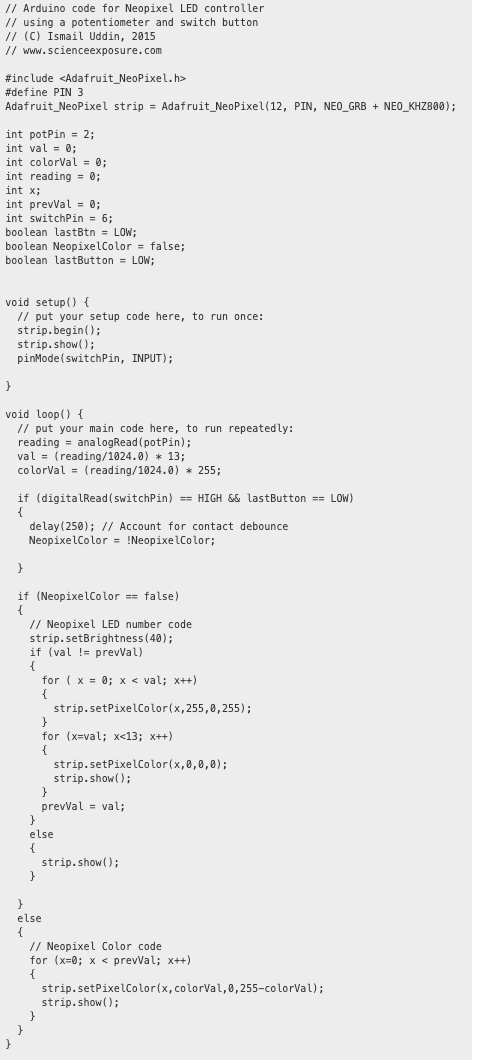
Code:
// Arduino code for Neopixel LED controller
// using a potentiometer and switch button
// (C) Ismail Uddin, 2015
#include <Adafruit NeoPixel. h>
#define PIN 3
Adafruit _NeoPixel strip = Adafruit_NeoPixel(12, PIN, NEO_GRB + NEO_KHZ800);
int potPin = 2;
int val = 0;
int colorVal = 0;
int reading = 0;
int x;
int prevVal = 0;
int switchPin = 6;
boolean lastBtn = LOW;
boolean NeopixelColor = false;
boolean lastButton =Low;
void setup () {
// put your setup code here, to run once:
strip-begin();
strip. show();
pinMode (switchPin, INPUT);
}
void Loop() {
// put your main code here, to run repeatedly:
reading = analogRead(potPin);
val =(reading/1024.0) * 13;
colorVal = (reading/1024.0) * 255;
if (digitalRead(switchPin) == HIGH && lastButton == LOW)
{
delay (250); // Account for contact debounce
NeopixelColor = !NeopixelColor;
}
if (NeopixelColor == false)
{
// Neopixel LED number code
strip.setBrightness (40);
if (val != prevVal)
{
for ( x = val; x <13; val; x++)
{
strip.setPixelColor(x,255,0,255);
}
for (x-val; x<13; x++);
{
strip.setPixelColor(x,0,0,0);
strip. show();
}
prevVal = val;
}
else
{
strip.show();
}
}
else
{
// Neopixel Color code
for (x=0; x < prevVal; x++)
{
strip. setPixelColor (x, colorVal, 0, 255-colorVal);
strip. show();
}
}
}
Final Touches: Vinyl Sticker


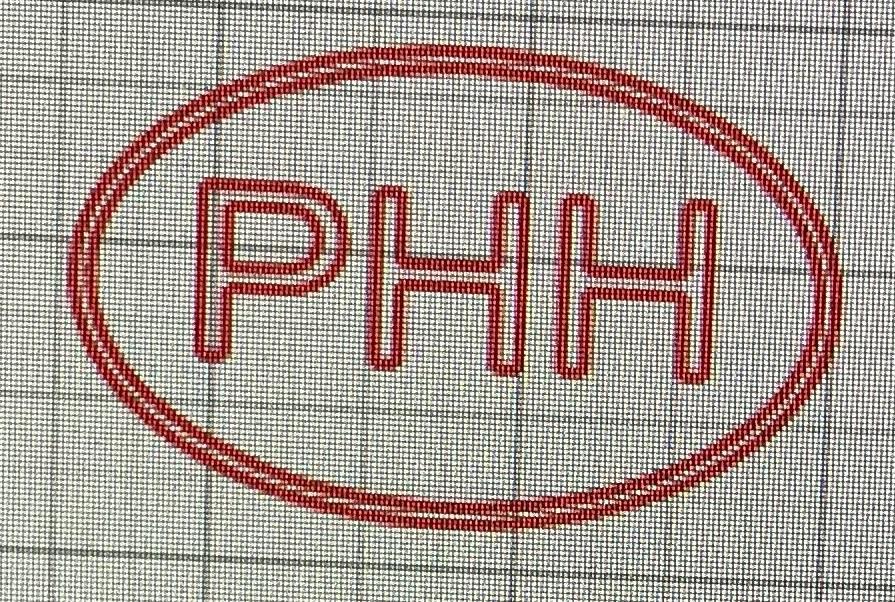
Picture 1: Is my digital version of my sticker on Inkscape. I used an ellipse to draw the border and then typed in the letters. I chose my desired font and then turned this image into a path, so the vinyl cutter can process and read the cuts.
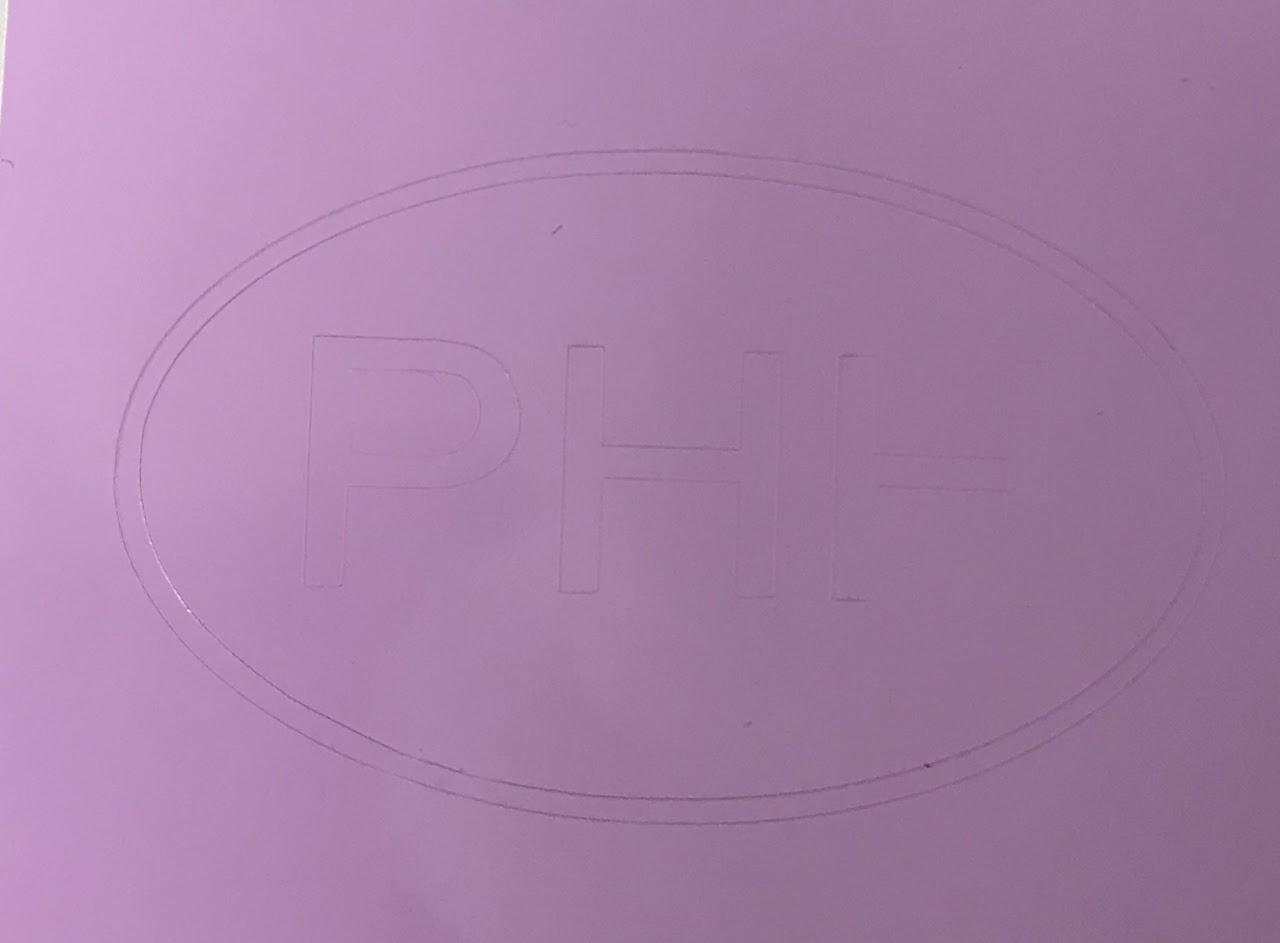
Picture 2: This is the path version of the Vinyl sticker.
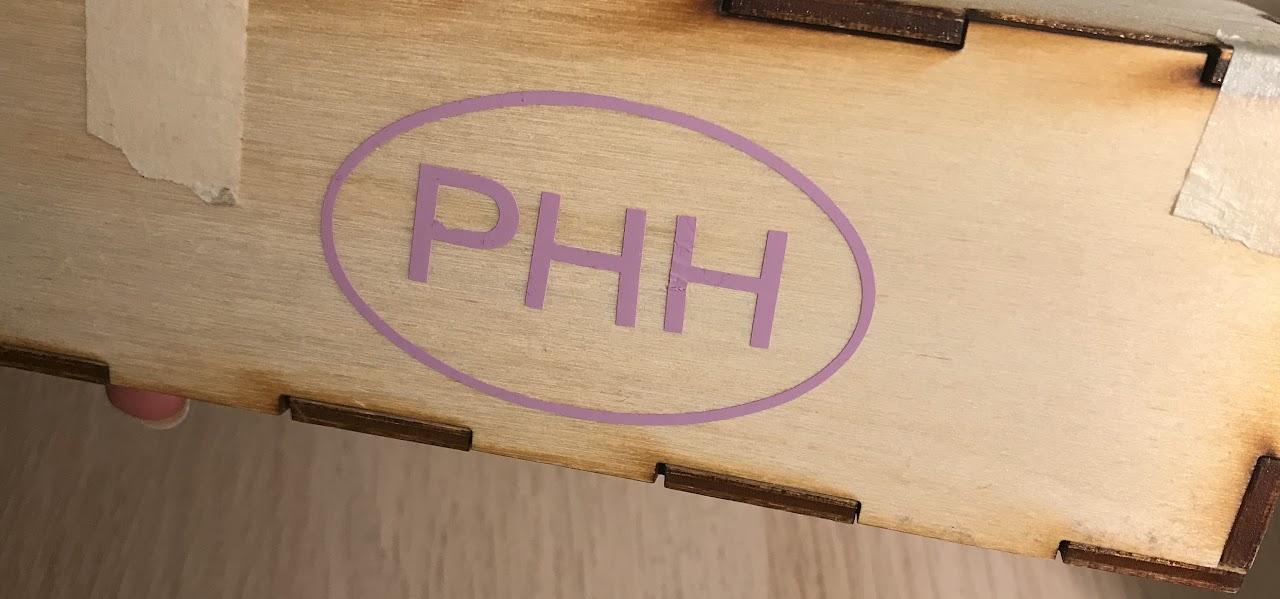
Picture 3: Then I uploaded my SVG to Corel Draw and followed the Vinyl cutting process, which is attached below.
Picture 4: I chose my desired color of vinyl, and then followed the Vinyl Cutting process, like in the step above. I used tweezers and weeded the vinyl cut. I then used transfer tape and stuck it at the bottom of my box.
Picture 5: Final Sticker!
Overall Vinyl Cutting Process:
- Make a design on Inkscape.
- Use split view to see how it will print and change stroke path.
- Save as SVG.
- Go to the MAC, and get a sticky sheet.
- Place the vinyl paper to the sticky sheet.
- Load the sticky sheet with the Vinyl paper into the Vinyl cutter.
- After the sheet is loaded, click print on the MAC.
- When it's done printing take the vinyl paper off the sticky sheet.
- Use tweezers to peel the vinyl.
- Peel the sticker and place it on transfer paper.
- Use a squeegee and scrape the transfer paper to ensure your sticker is stuck without any air bubbles.
- Stick your sticker where you want and at an angle peel the transfer paper.