Embroidery 101: Freestyle Weaving
by Brooklyntonia in Craft > Sewing
5515 Views, 161 Favorites, 0 Comments
Embroidery 101: Freestyle Weaving


Weaving is one of my favorite ways to approach a new embroidery project, because it's so much fun to experiment with. There's not so much of a right and wrong way to do it. The following steps will show you one way to approach weaving with embroidery. Once you've tried it out, start experimenting and trying some of your own variations. The blue backed embroidery pictured above is some of my own experimentation. It's full of options that you'll be able to do once you've mastered the following steps.
Circular Weaving


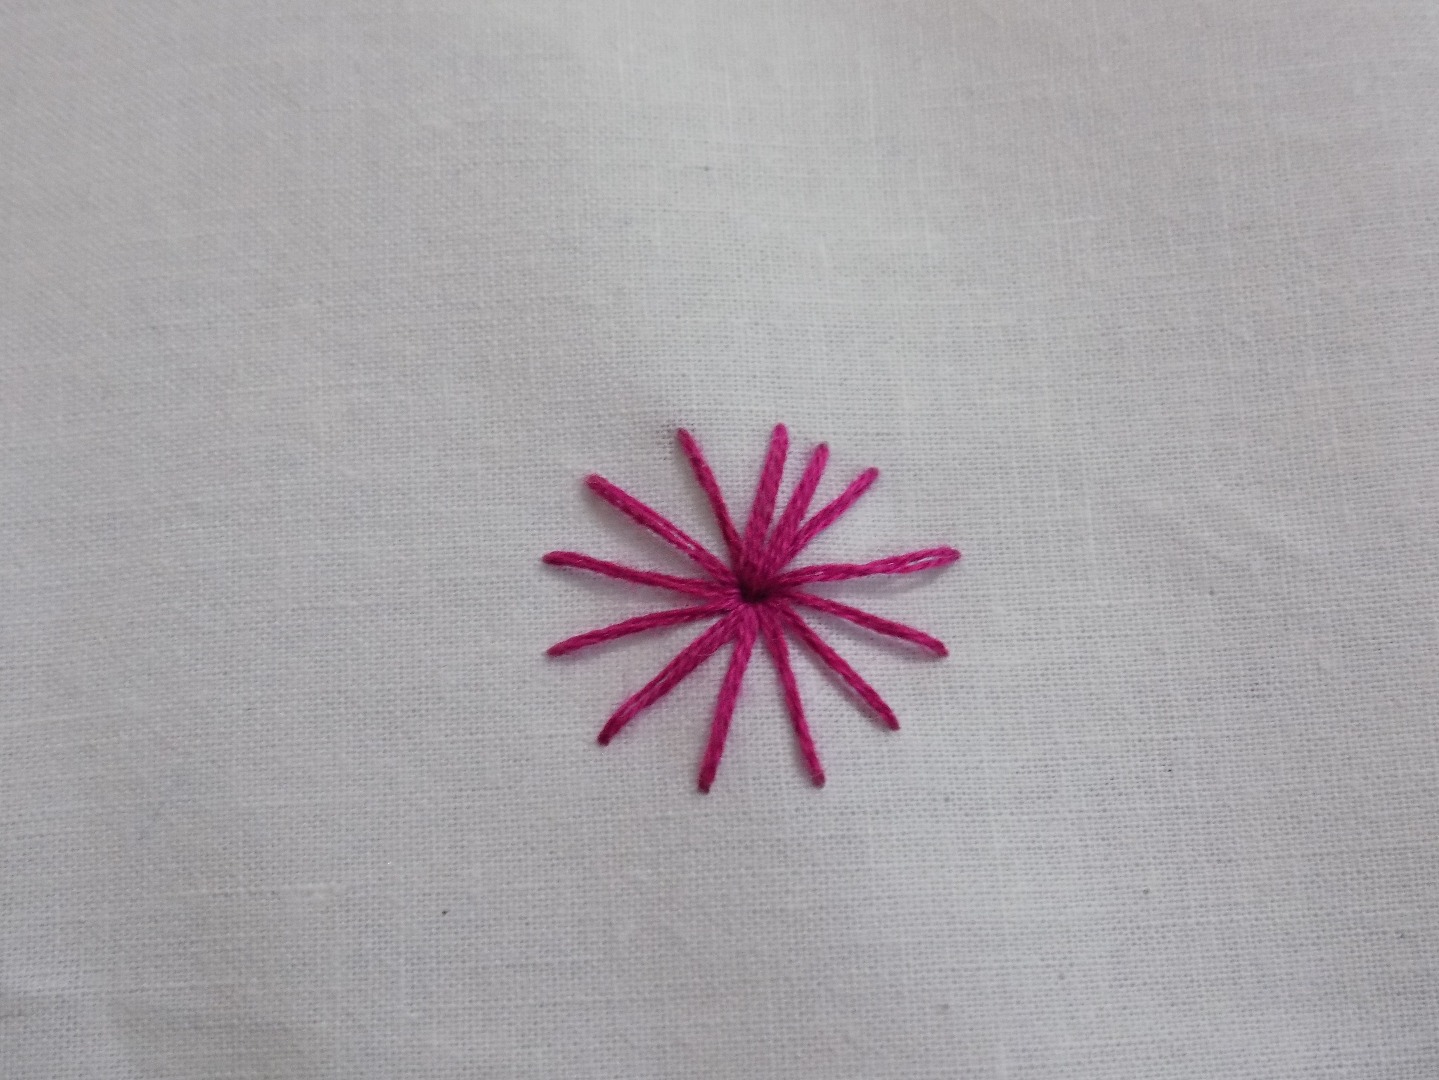
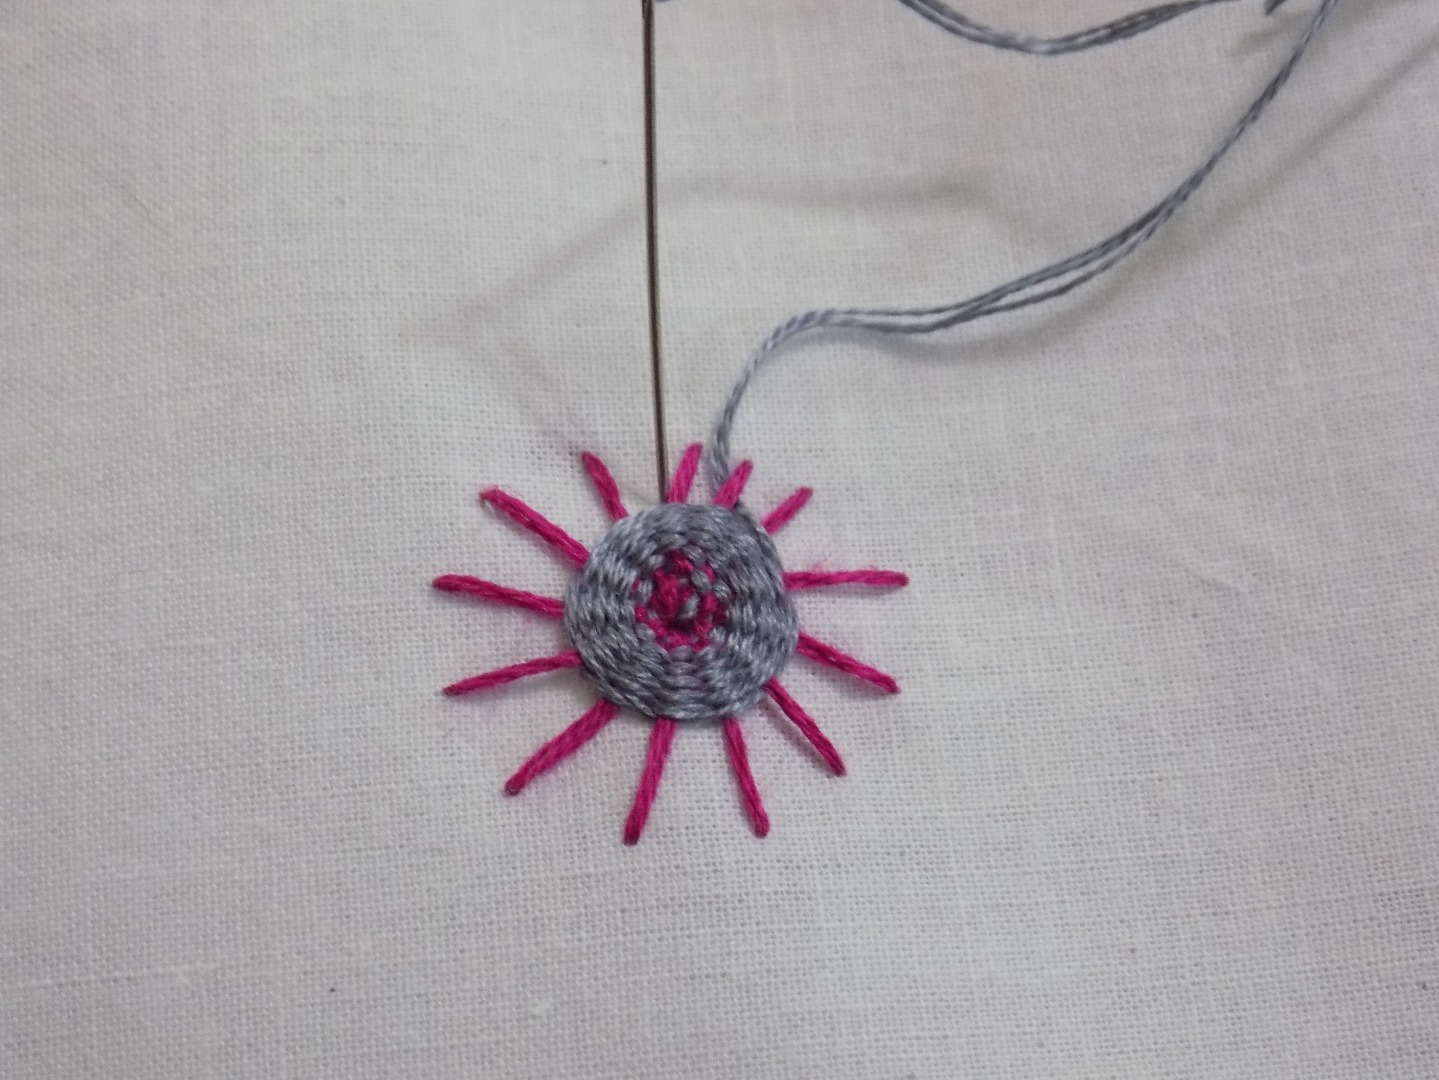
Start by pulling your needle from the back of the fabric. This will be the outer edge of your "sun beam."
Insert your needle where you want the center of your "sun beam" to be. You could draw a circle on your fabric as a guide, but this doesn't need to be perfect. Pull you needle back up on the outside and re-enter in the center. Repeat until you have a complete "sun beam" with an odd number of stitches. If you have an even number, you'll have to skip a stitch each time you go around and it can be less attractive.
Weave


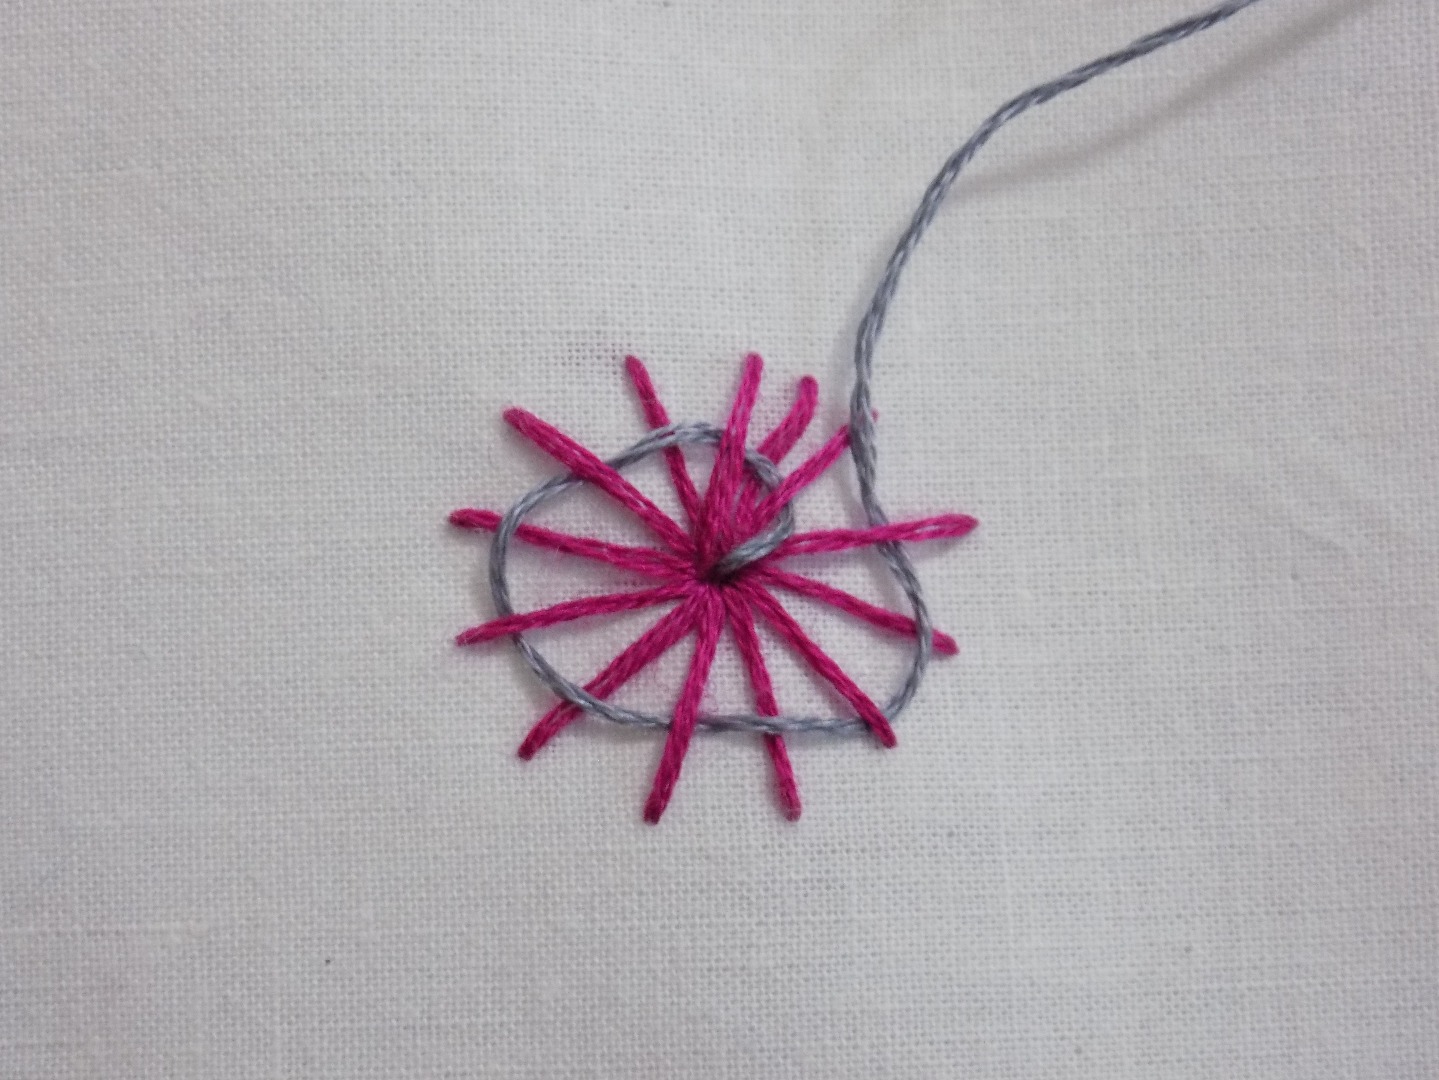


Pull your second color up through the center of your "sun beam."
Weave your needle over one stitch, under the next, and then over the next. Pull your thread through snugly.
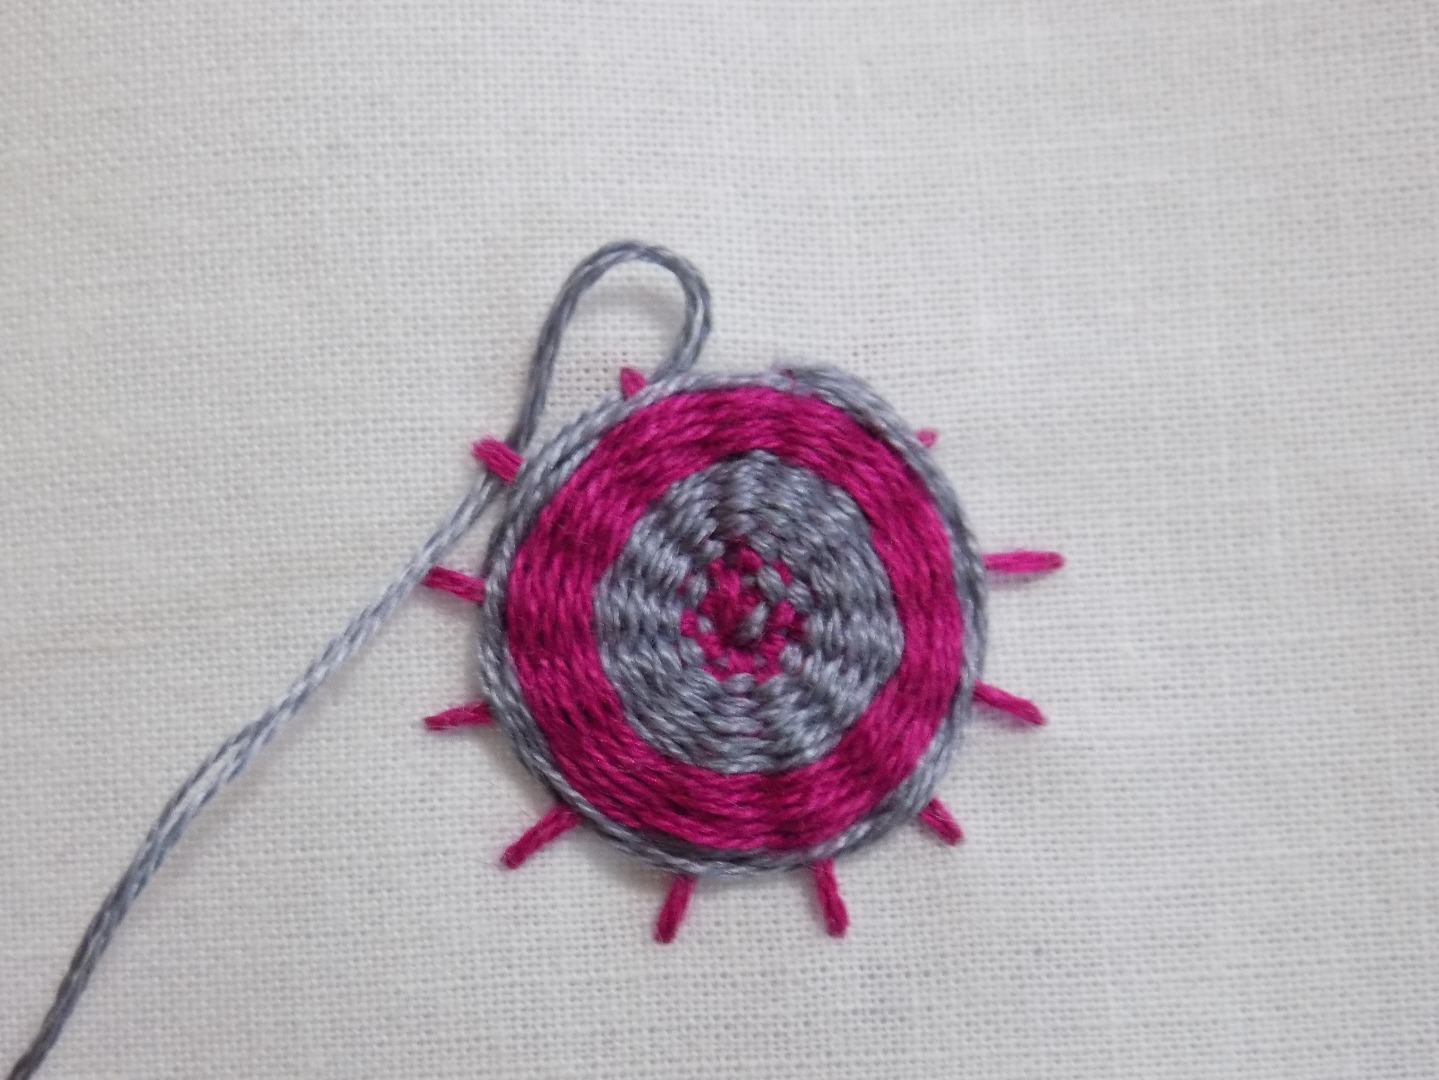
Circular Weaving Continued


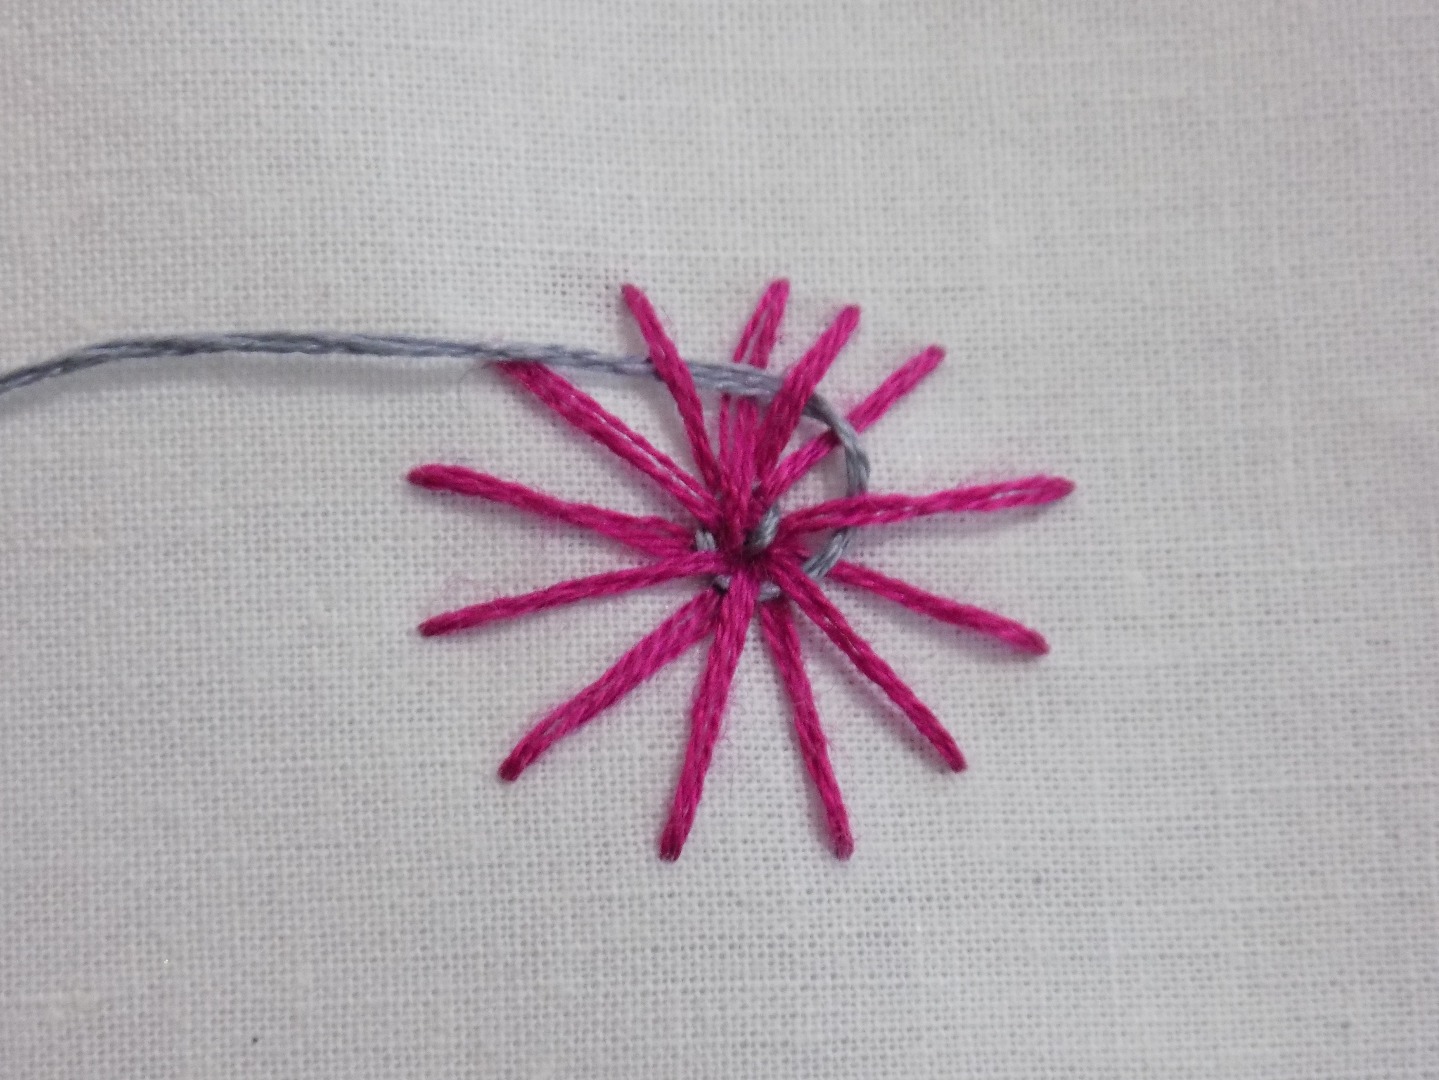
Continue to weave your needle up and down as you work your thread around in a circle. Now, you can continue to weave around in a circle and have a very cool woven embroidery element. However, you have other options as well.
To change colors, send your thread to the back after going over one of the sun beam stitches.
Bring your second color, or in this case, the color I started with, up from the back in the same spot.
Circular Weaving Continued


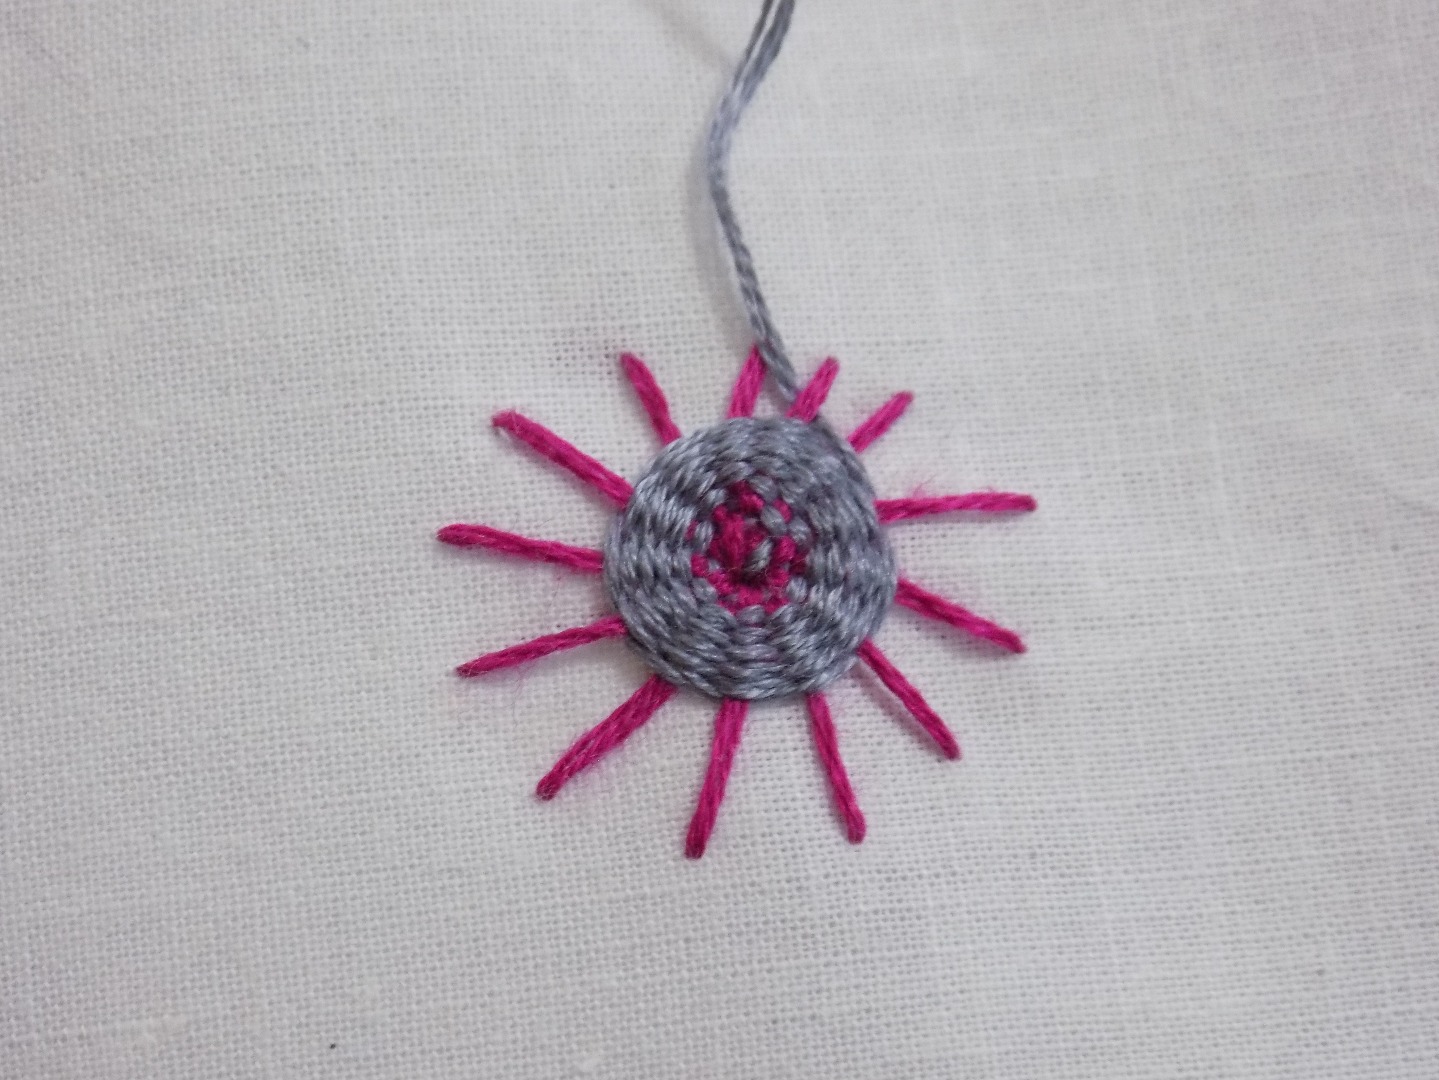
Continue to weave around your circle with the new color.
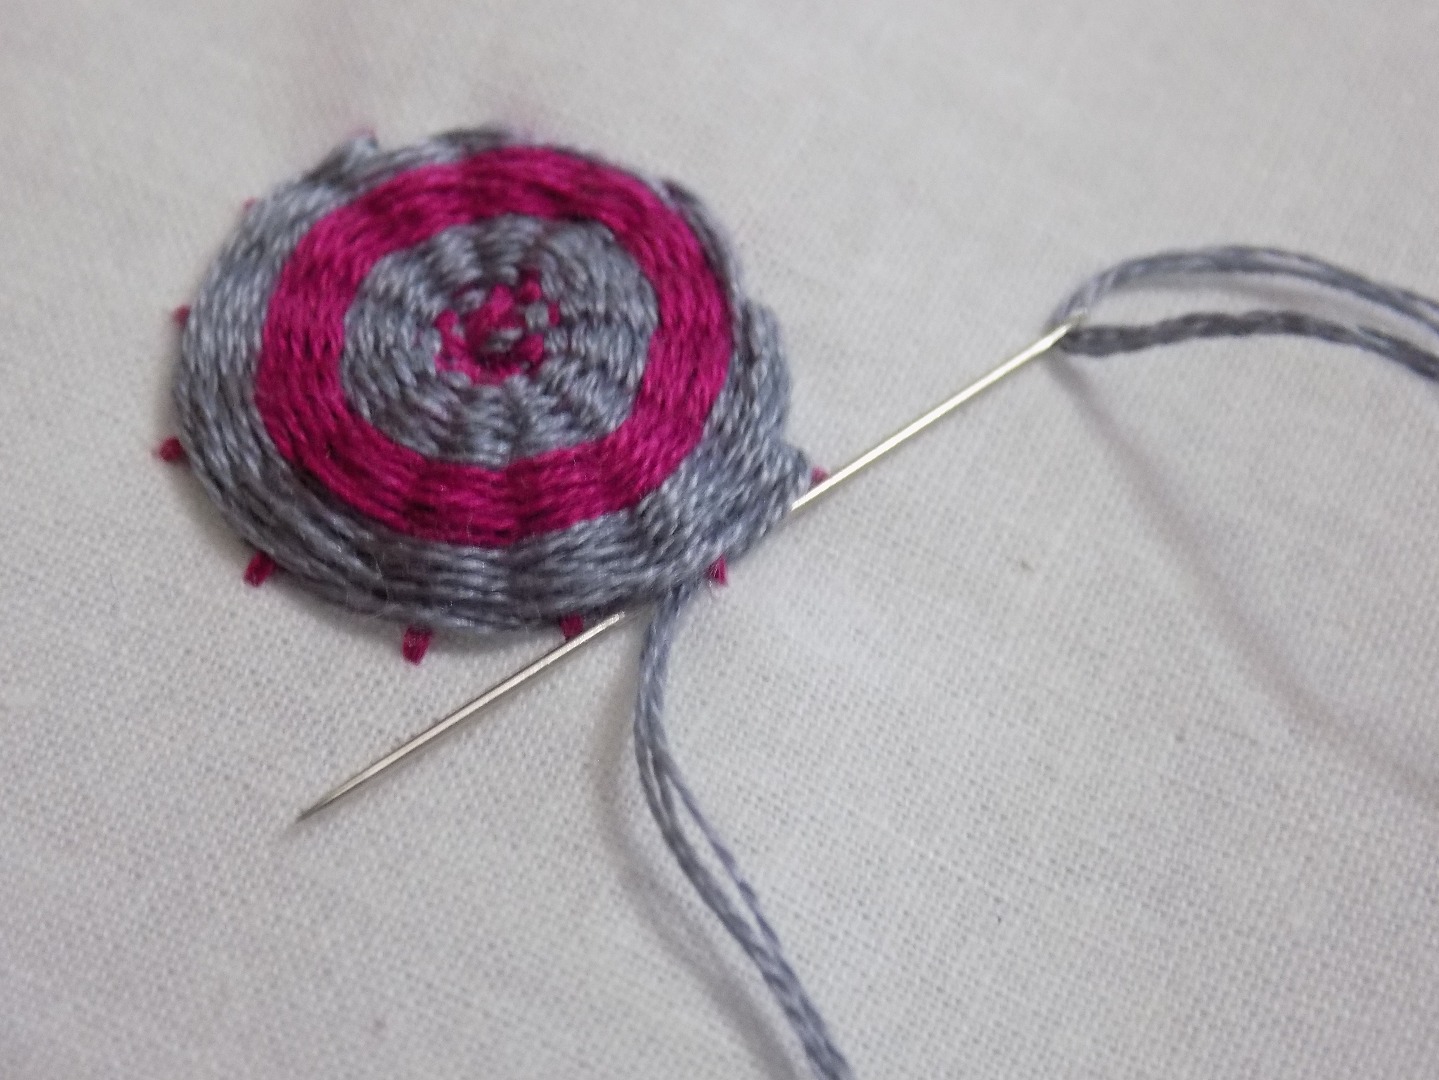
Circular Weaving With Imperfect Circles

My circle wasn't perfect. One of the sun beam stitches filled up with weaving before the others. To continue weaving to end of the other sun beam stitches, reverse the direction of your weaving when you get to the last one that isn't full. Then, reverse again on the other side.
Basically, instead of going all the way around, you'll switch back and forth between clockwise and counterclockwise.
Circular Weaving Finishing

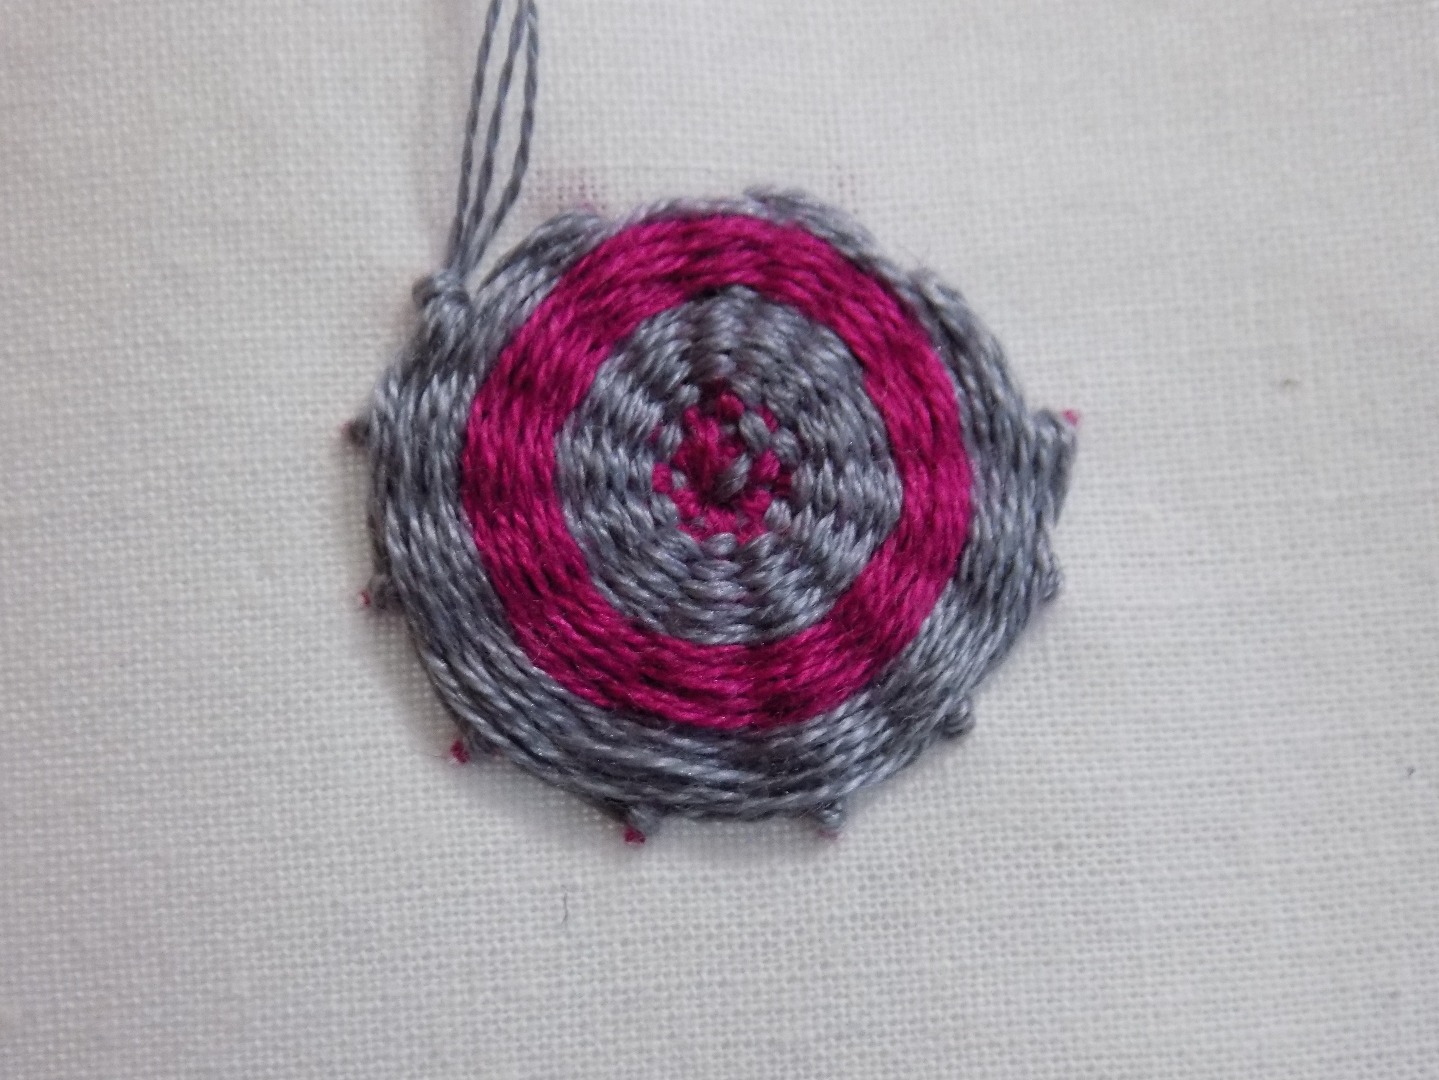

When you've filled up the stitches with weaving, work your way around one last time. On your last pass around the circle, make a loop around the end of each stitch before moving on to the next one.
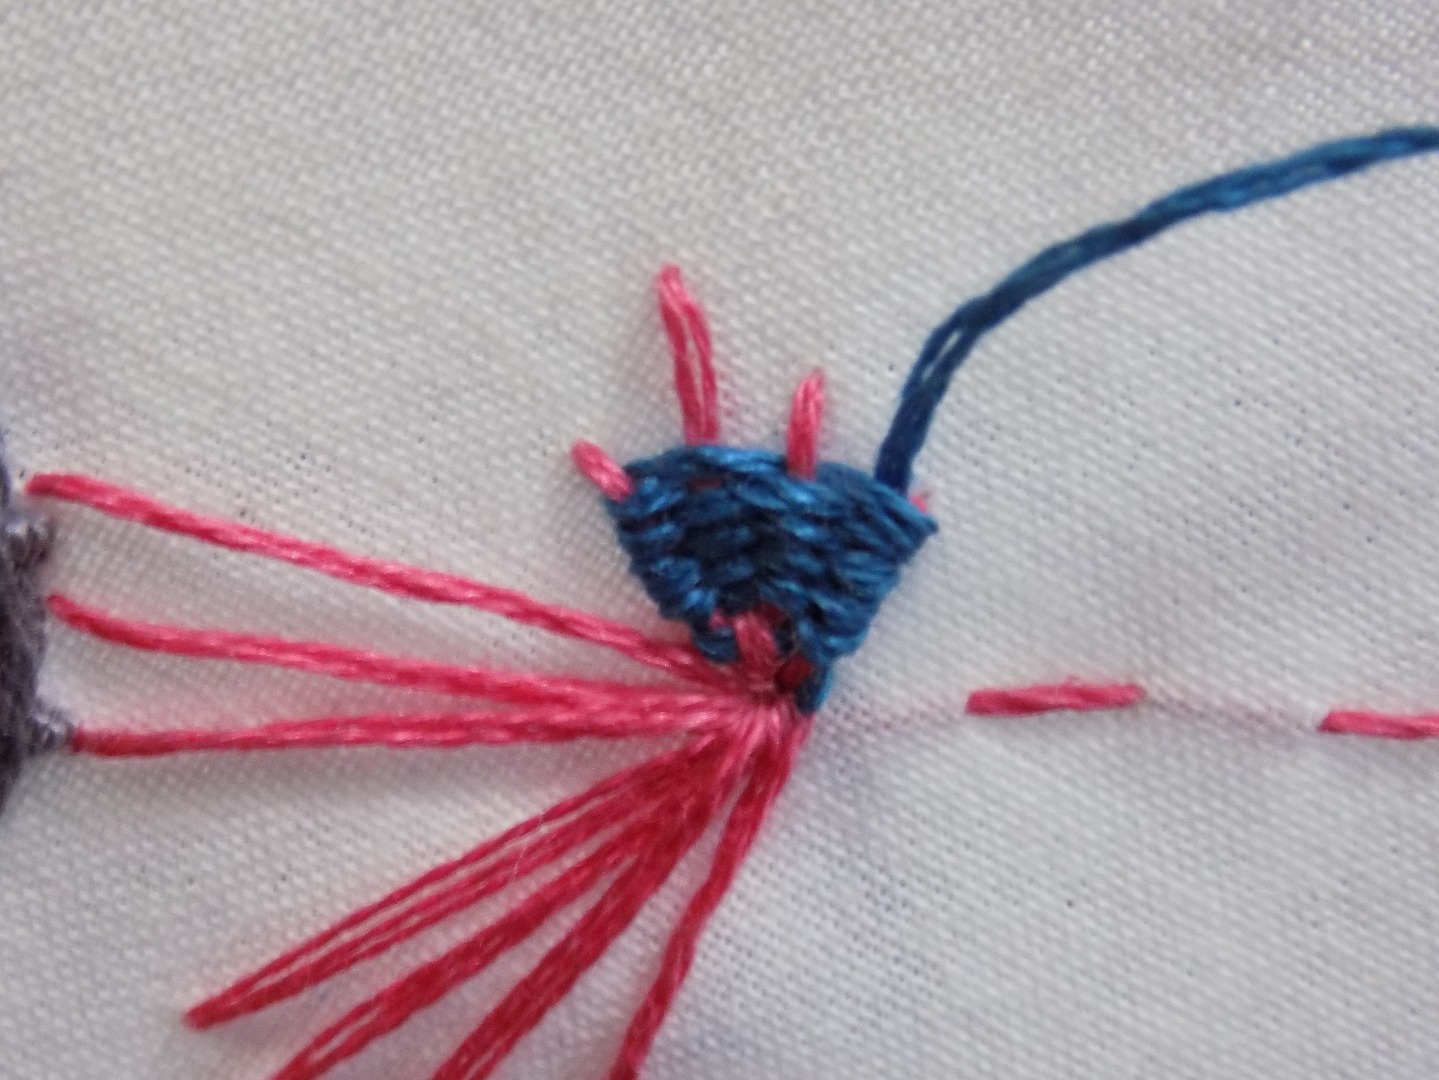
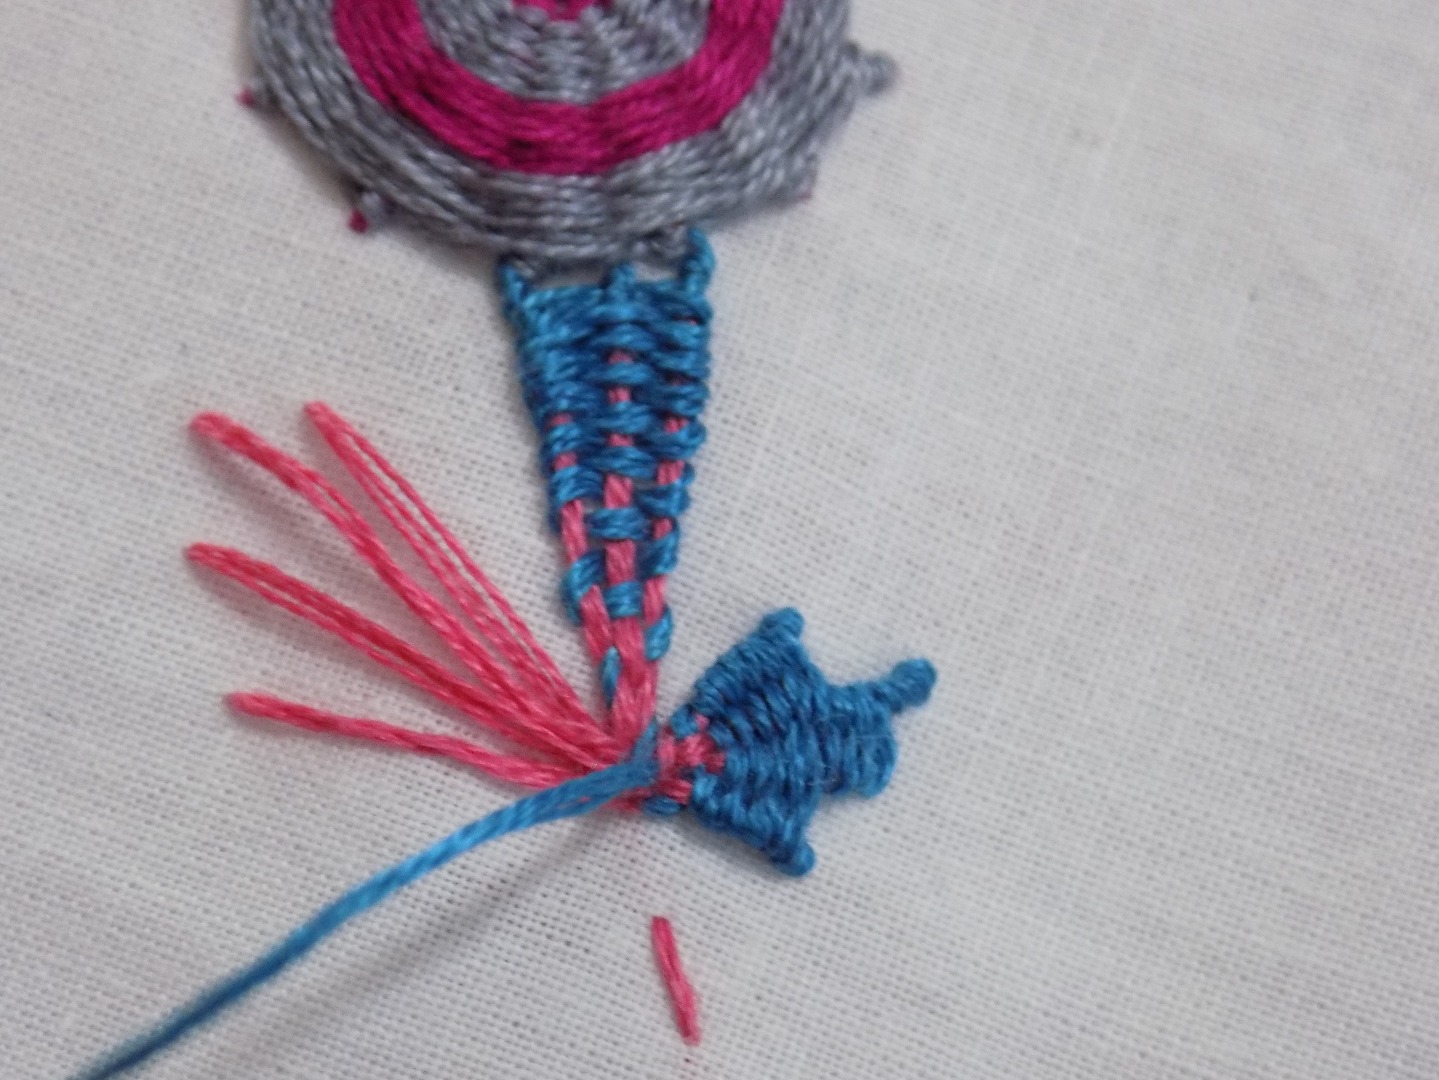
Different Shapes


Instead of just a circle, you can weave any series of stitches. Here, I'm going to do three smaller sections with radiating lines.
Back and Forth
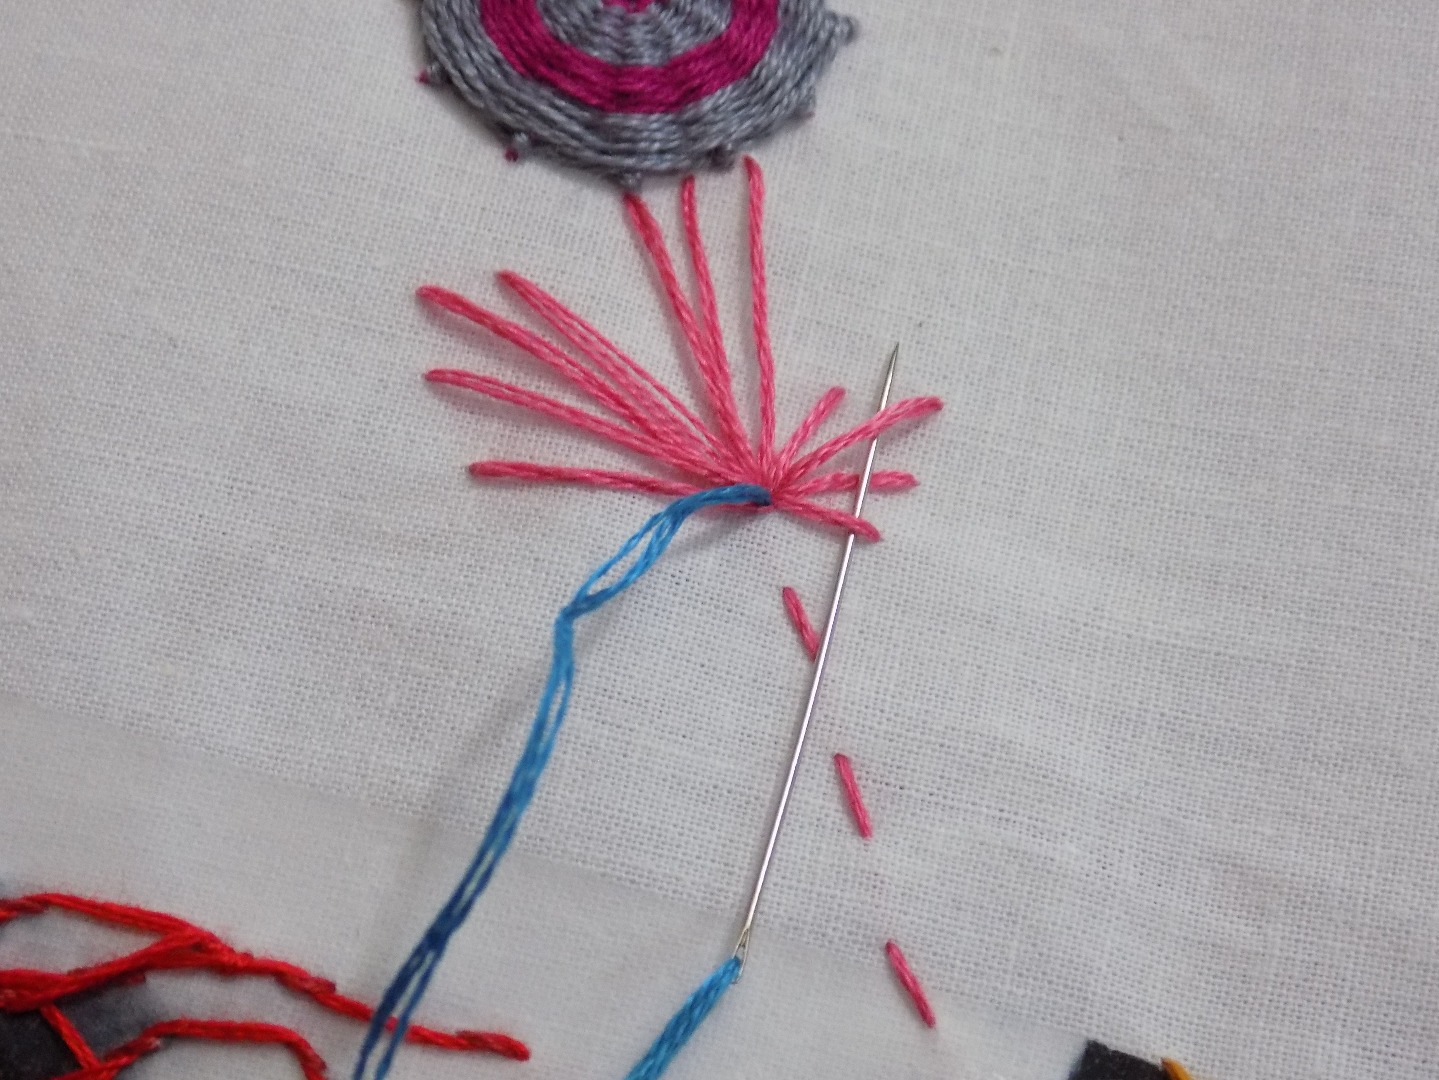


These smaller sections don't allow you to go around in a circle. You'll weave over and under in the same way, but when you get to the last stitch, wrap the thread around and continue to weave in the other direction.
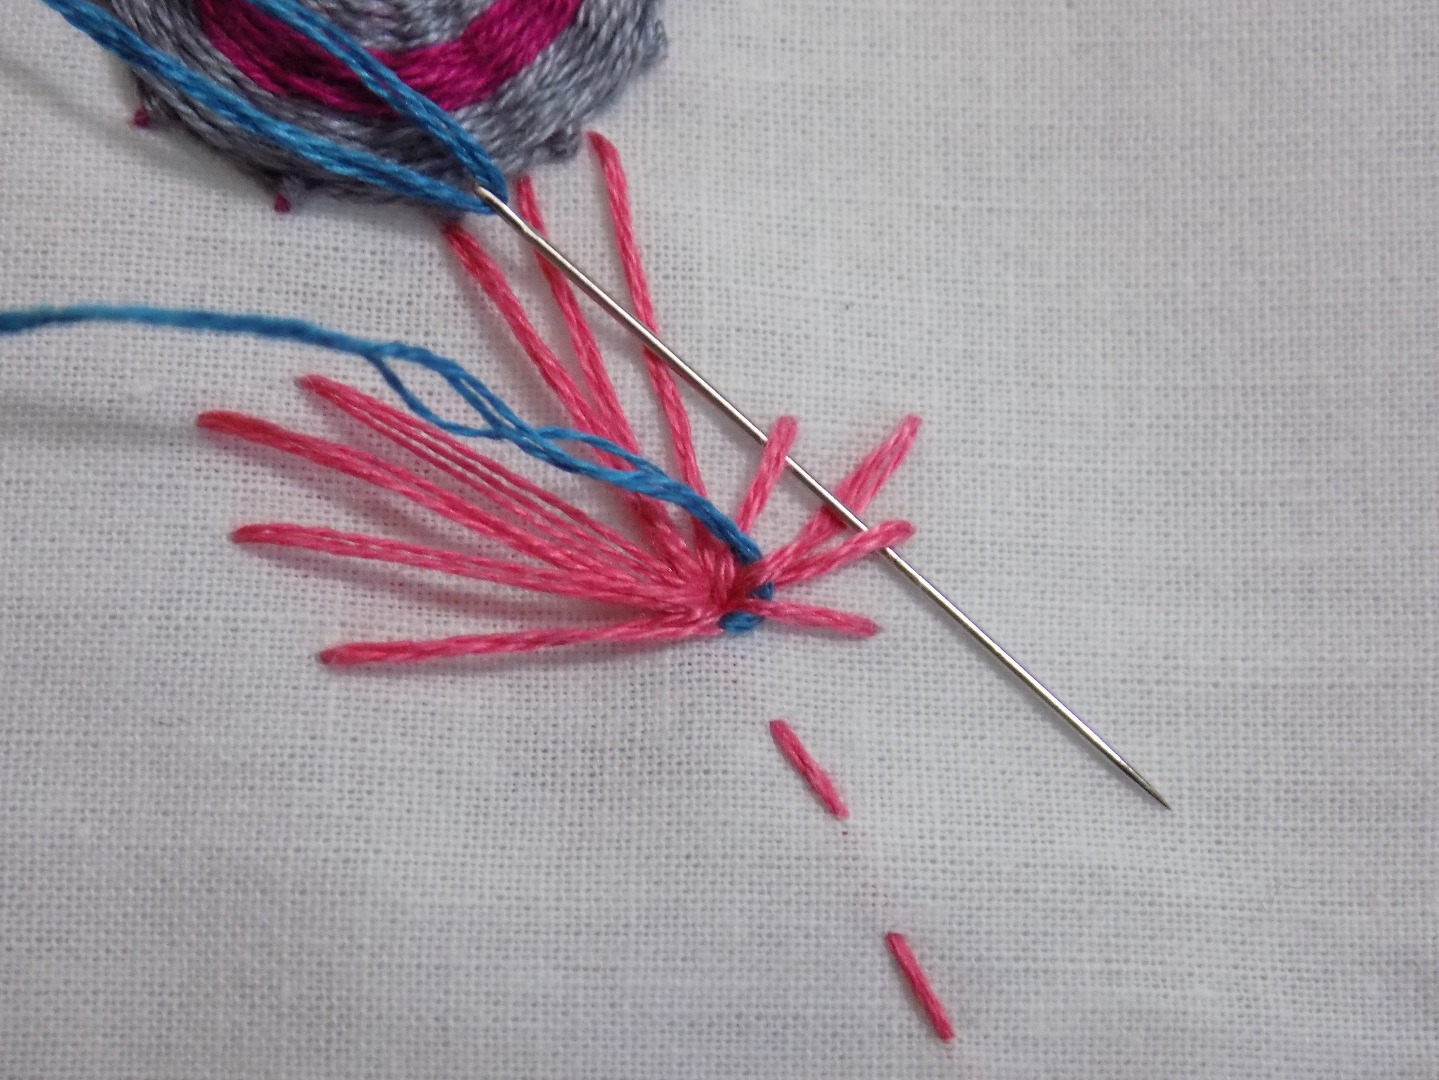
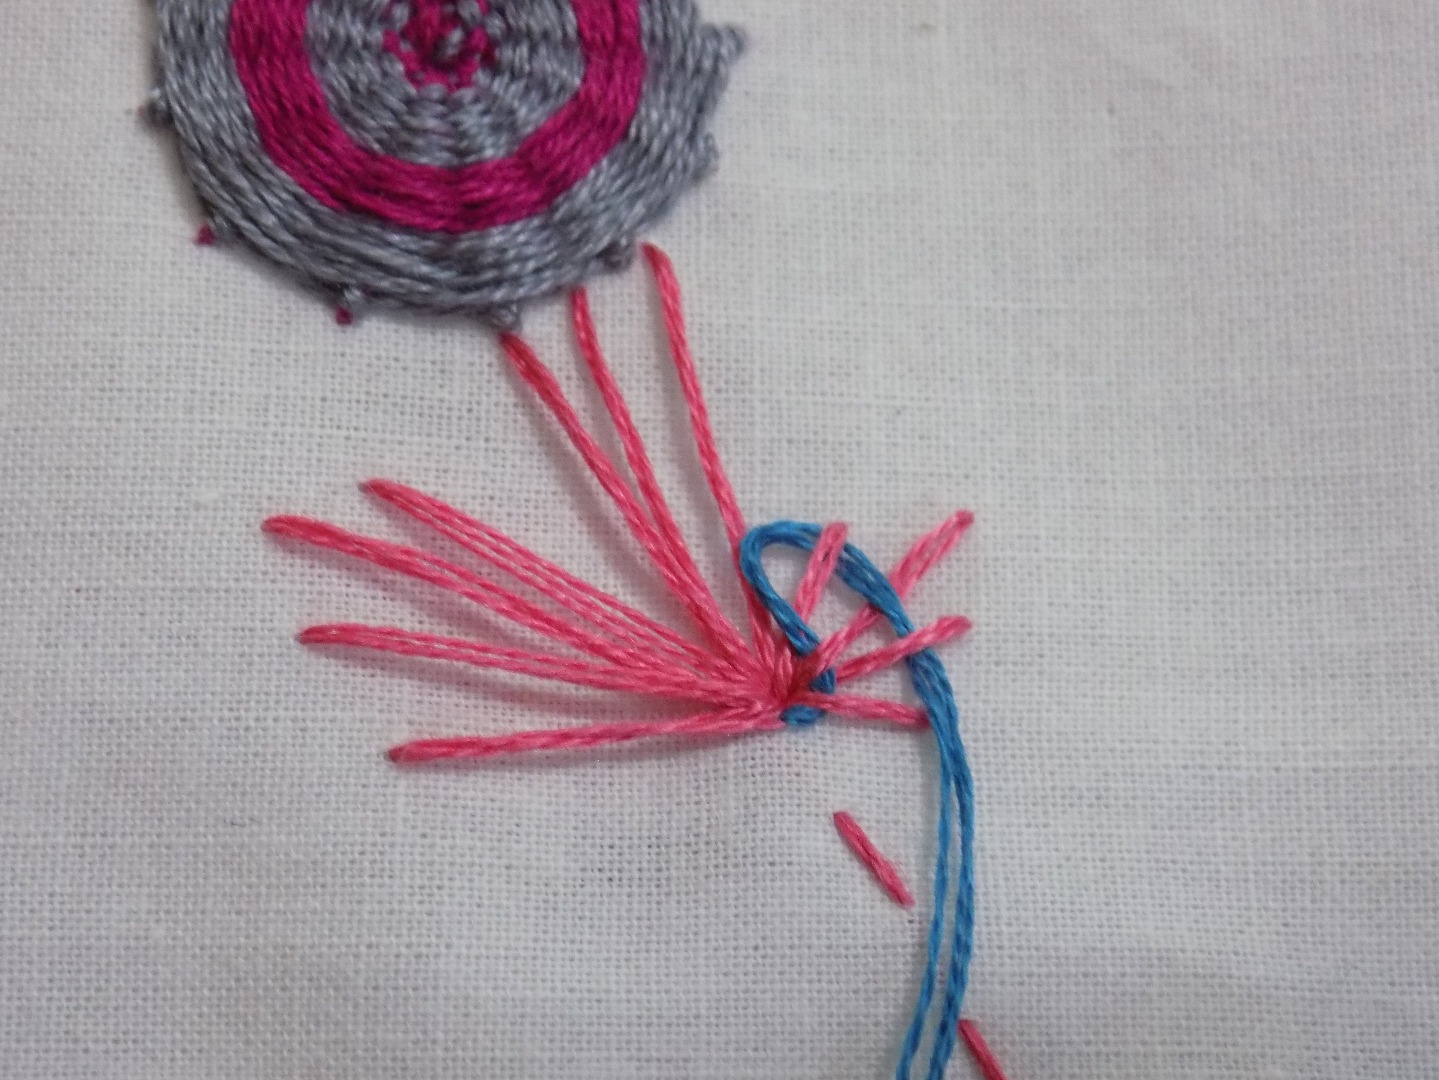
Continue Back and Forth
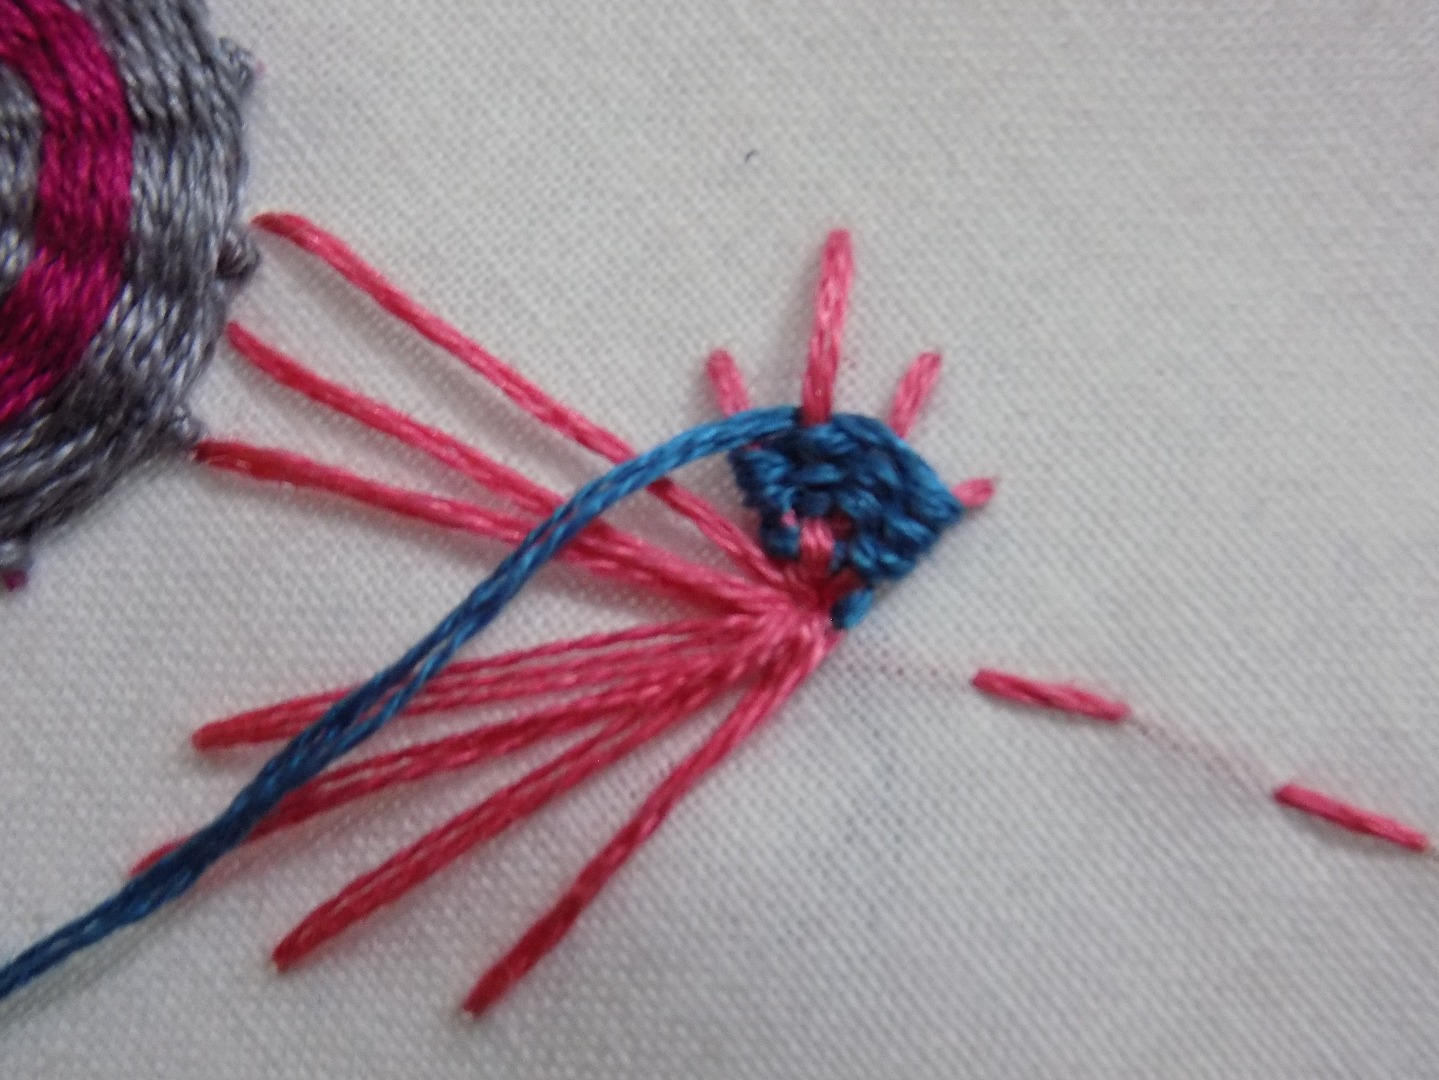

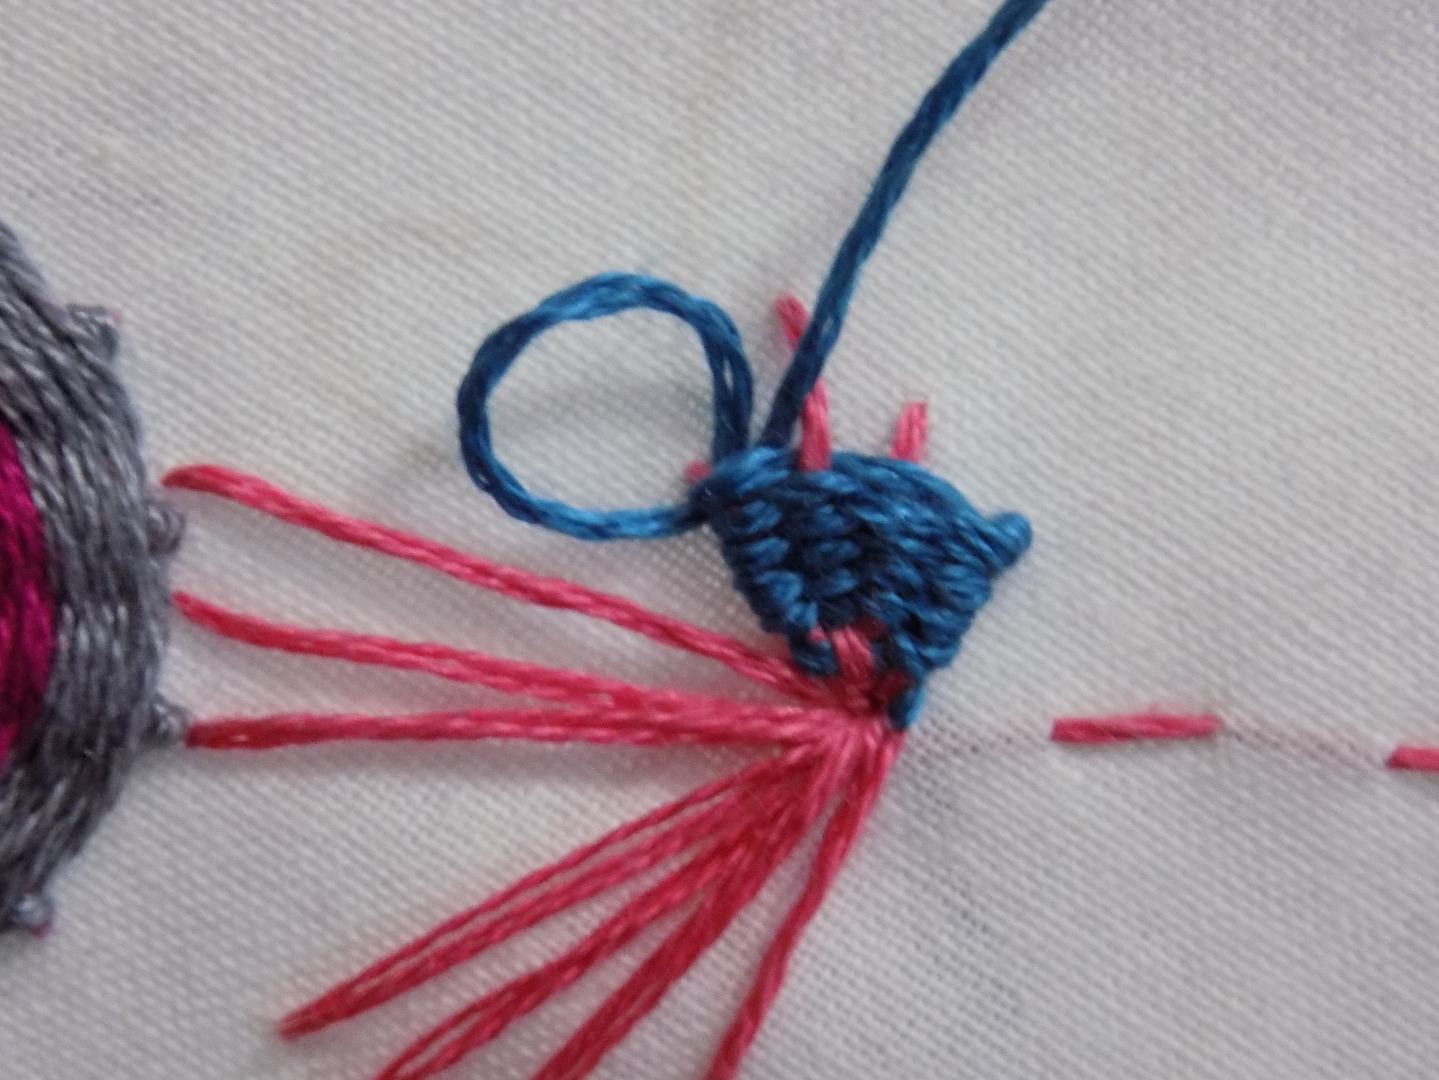

You'll continue to weave until one or more of your radiating stitches is full. Make a loop around the end and continue to weave only those stitches that aren't full. If you end up with only one stitch that isn't full, continue to loop the thread around it until it's covered and then send your thread to the back.
You can weave tightly like I did on the smaller radiating stitches for a more solid color or weave loosely like on the larger section for a more checkerboard look.
Keep Experimenting
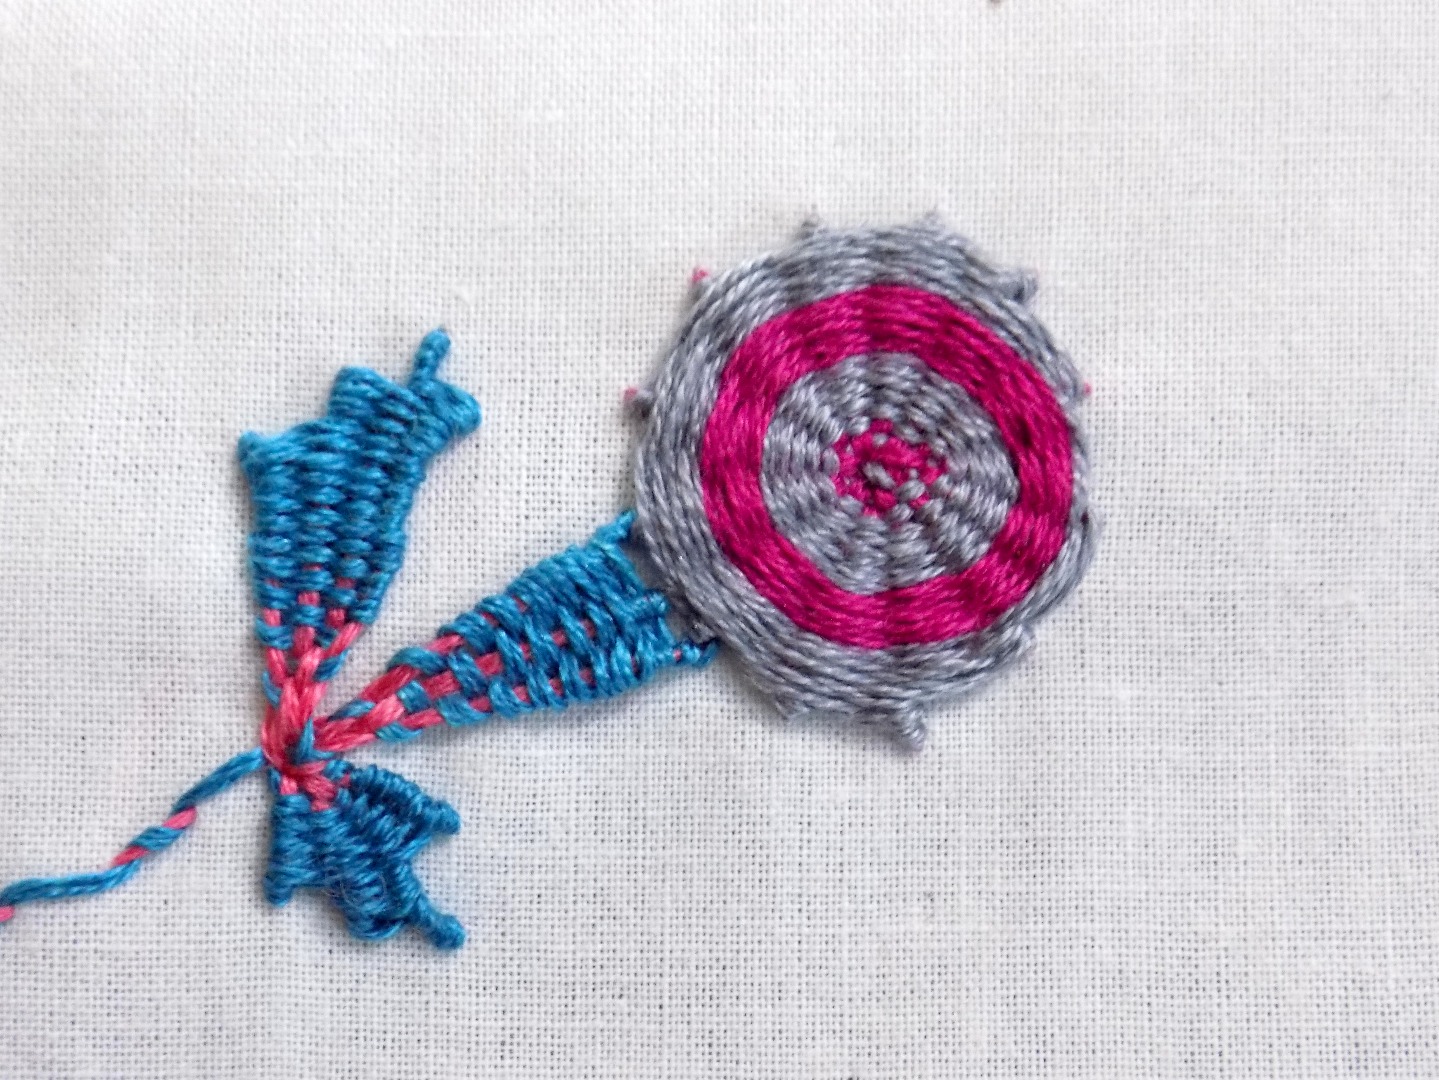
Instead of radiating lines, you could create a square, a pyramid, or some other analogous shape only you could dream up. Your imagination is the limit with embroidery weaving.