Embossed Foil Name Cards

My goal was to develop a process for easily creating embossed gilded letters for use on business style name cards. These cards consist of two layers of laser cut paper laminated together with a composite gold leaf in the middle.
I made this at TechShop.
Warning
Only use tools that you have had the appropriate training for. Always wear appropriate protection for environment and tools in use. Understand and accept the inherent risks associated with any operation.
Tools Used
Laser Cutter
Xacto (brand) Knife
Straight Edge (chunk of CLEAN aluminium)
Materials Used
Arches Hot Press Watercolour Paper
Strathmore Coal Black Drawing Paper
Glad Press'n Seal or Scotch Artist Mount (any laserable low tack mask)
Wax Paper
3M Super 77 Spray Adhesive
Spray Adhesive for Metal Leaf
Composite Metal Leaf
Design
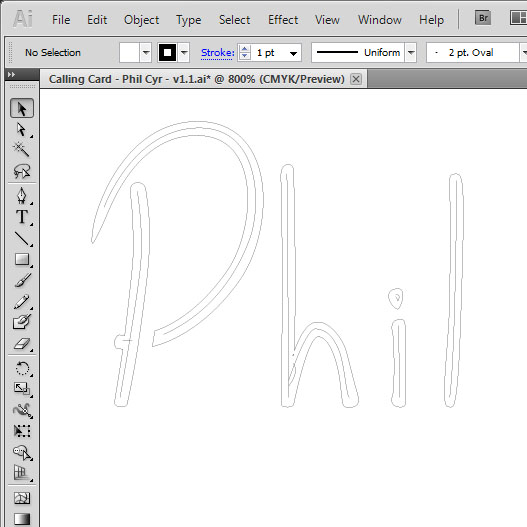
Ensure that your design has no islands. The card should stick together on its own. If the bridges are worked into the design they are hardly noticeable. Also, since the cut is centered on the line, adjust spacing of important elements to take this into account.
The aspect ratio was chosen to match US standard business cards, but shrunk a bit so the longest dimension is that of a credit card. This is to allow the finished product to reside in a wallet without damage.
Make sure your design has cut marks and fit as many into one sheet as reasonably fit. I calculated that on my first production run each card took 6 minutes of my time to create- That is I completed four sheets of ten in four hours. If the sheets fit 12 I would have reduced that time per card by 20%.
Cut Layers
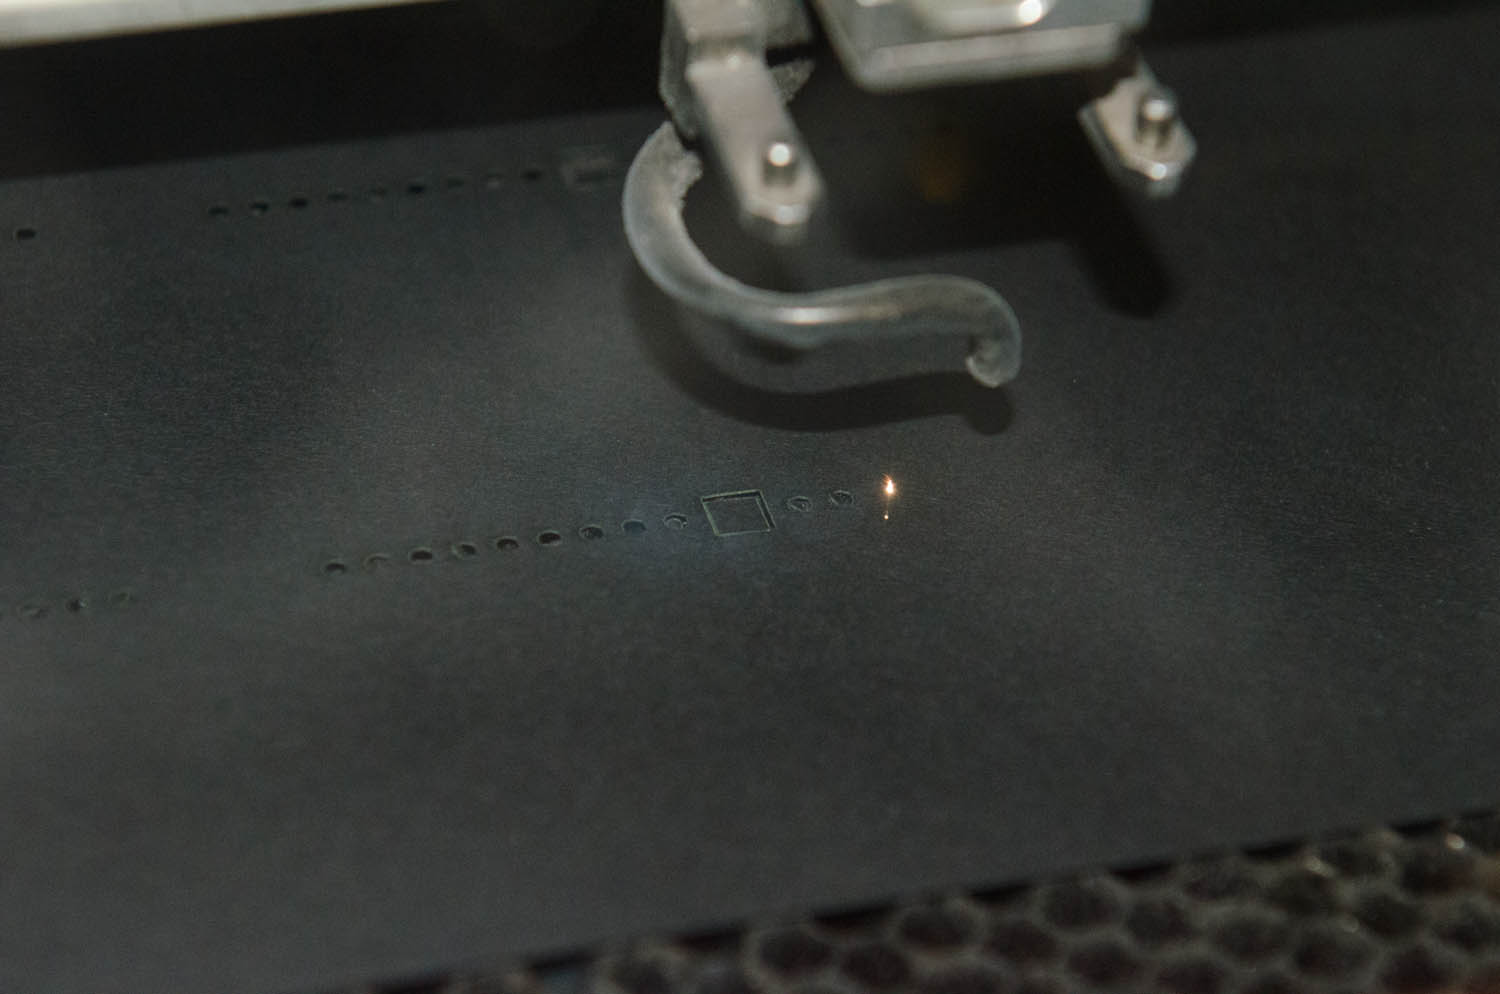

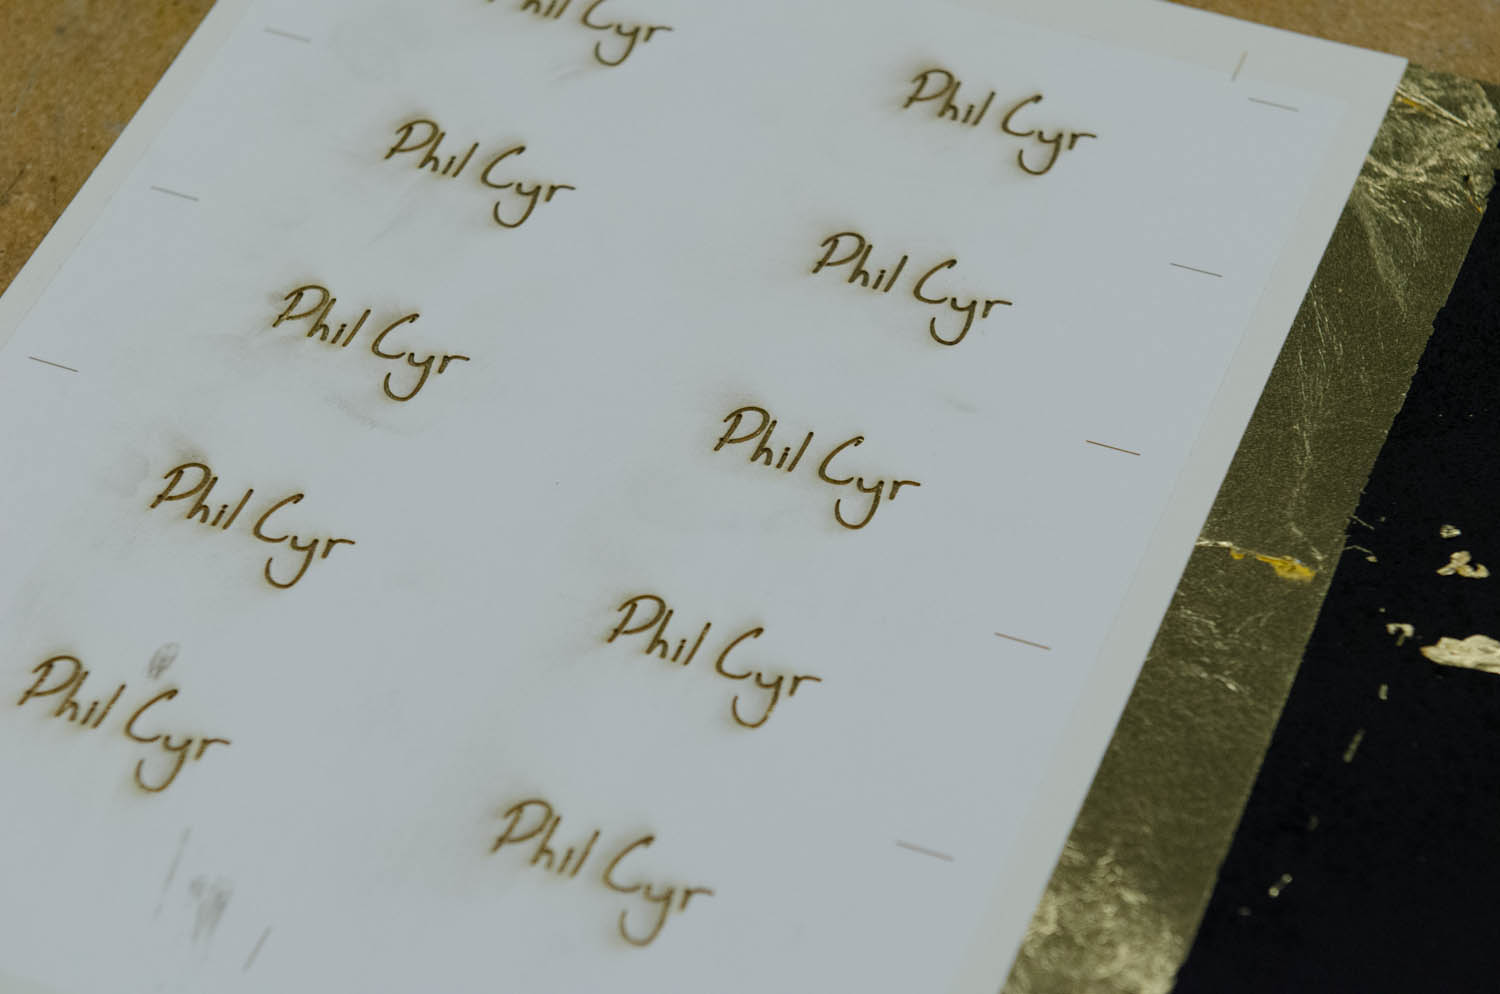
Cutting paper makes a lot of smoke and soot. If the white card stock is not protected it will get a burnt halo around each cut. Applying a removable masking material to the card stock will make sure that the cut is as clean as possible. I used paper applied with "Artist Mount" a Scotch brand removable adhesive. If you let it dry for a couple minutes before applying the mask it will leave little residue, if you are not patient enough the residue usually comes off with a clean eraser.
Careful testing and documentation of the correct settings is required to produce the cleanest cuts and etchings.
Once the sheets are cut, weed out any stuck parts with something pointy.
Careful testing and documentation of the correct settings is required to produce the cleanest cuts and etchings.
Once the sheets are cut, weed out any stuck parts with something pointy.
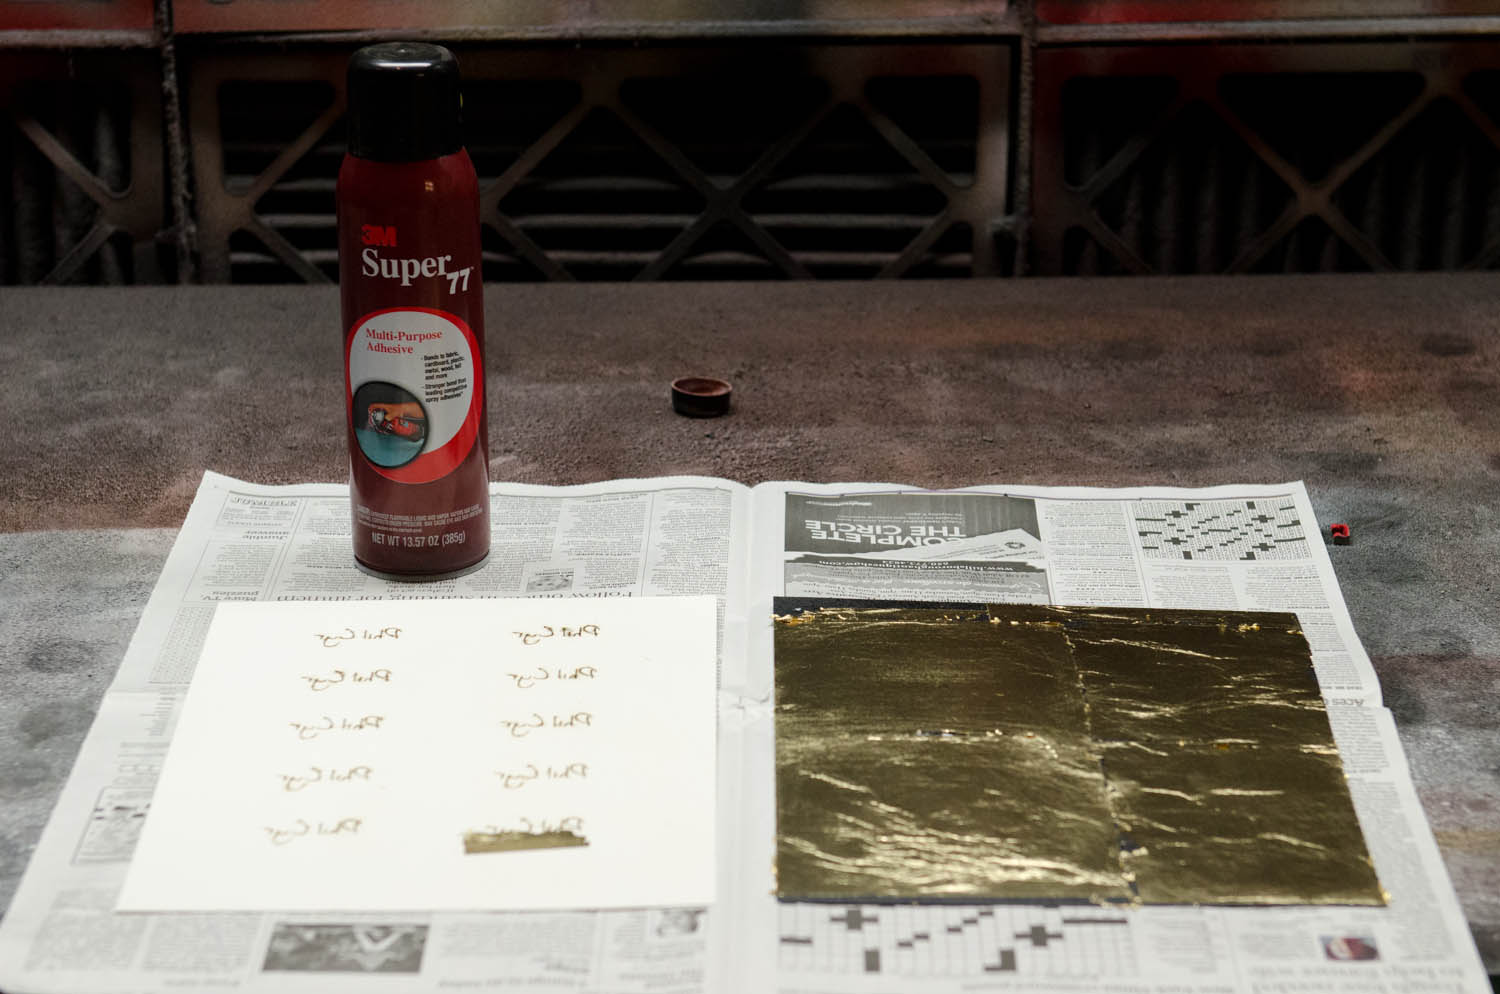
Gild


Before laminating the two sheets together the foil must be applied. I've wanted to learn more about gilding for a while (and would still like to learn in a more serious way) and decided that I would use a composite gold leaf for the foil center. Since the leaf is very thin, even though I cover the whole sheet, it is not noticeable in on the edges where it has been cut through.
If you don't have the proper tools (pad, knife, size, bole...) you can get by with some wax paper and no intentions of cutting the leaf to size, that is fine with relatively inexpensive leaf, and faster too.
Before applying the leaf a cheap spray size can be found at the store that sold you the leaf. The one I got is advertised as a low mist formula, which seems to mean it comes out in large blobs.
Make sure your work space is CLEAN. Any dirt will cause lots of problems.
Open the book to expose a leaf. If it is wrinkled use a light puff of air to flatten it out. Place a piece of wax paper on the bare leaf (pictured). Press medium firmly on at least the corner that is facing the primary direction of movement to keep it from peeling back while in motion.
Gently pick up the wax paper and move the leaf to the final location. Press down. Slightly overlap the leaves, and press very firmly where overlap is. I have found that laying a sheet of card stock over the wax paper can help you apply pressure without distorting the leaf. Good application will reduce the chance that when removing excess a large area will peel up.
Laminate
Apply spray adhesive to both surfaces. Wait for it to dry, then carefully align and press together.
Cut
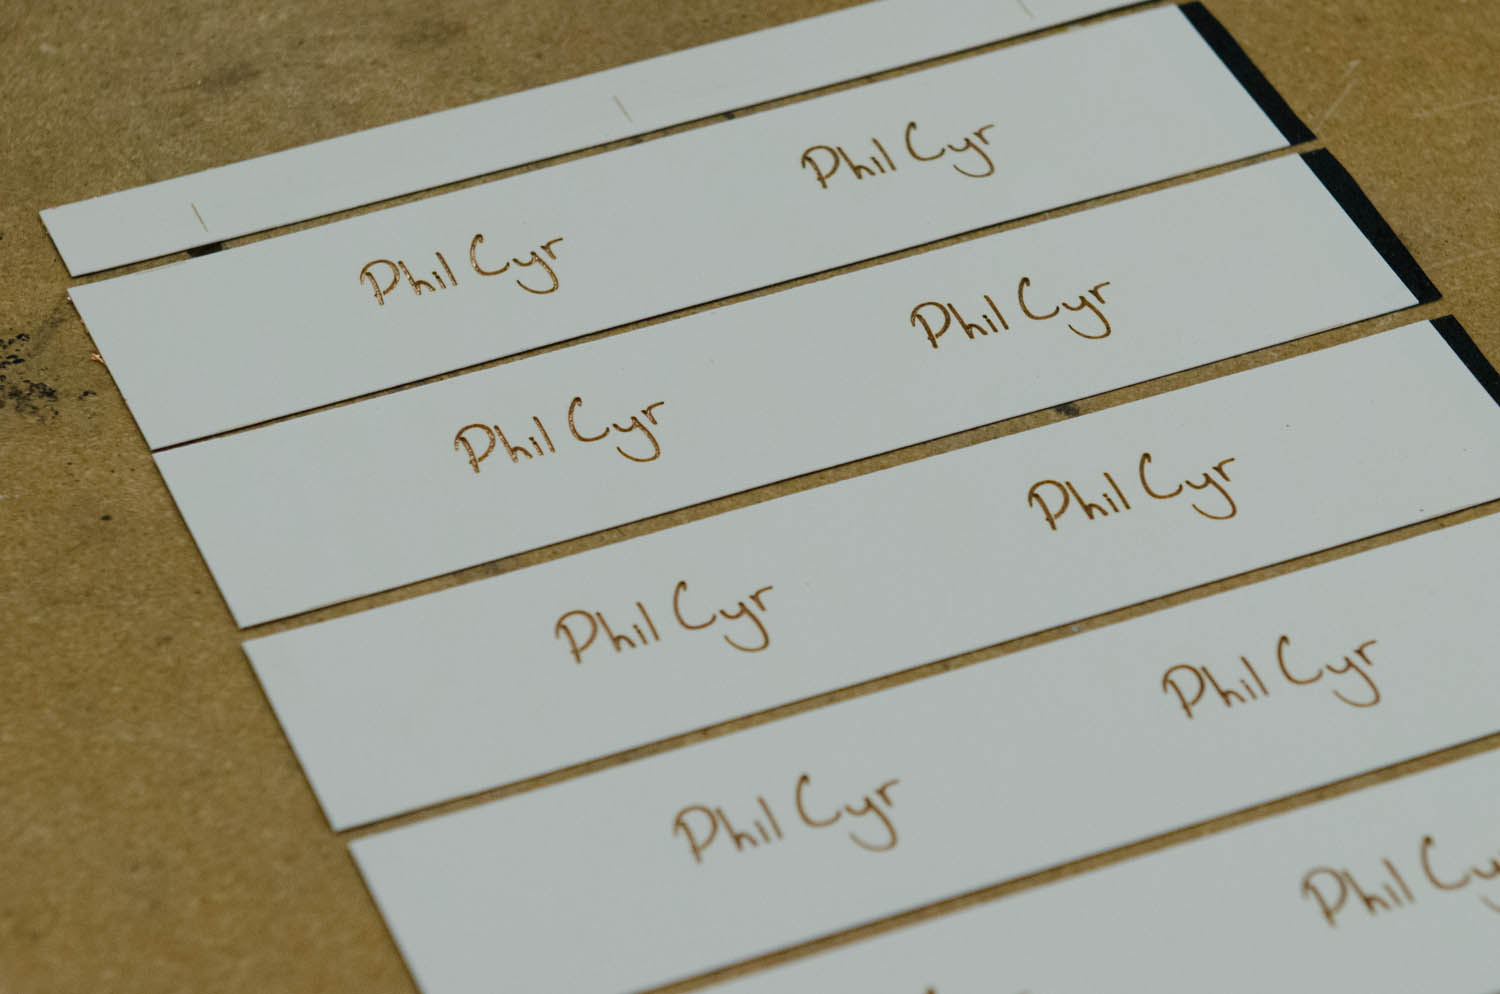
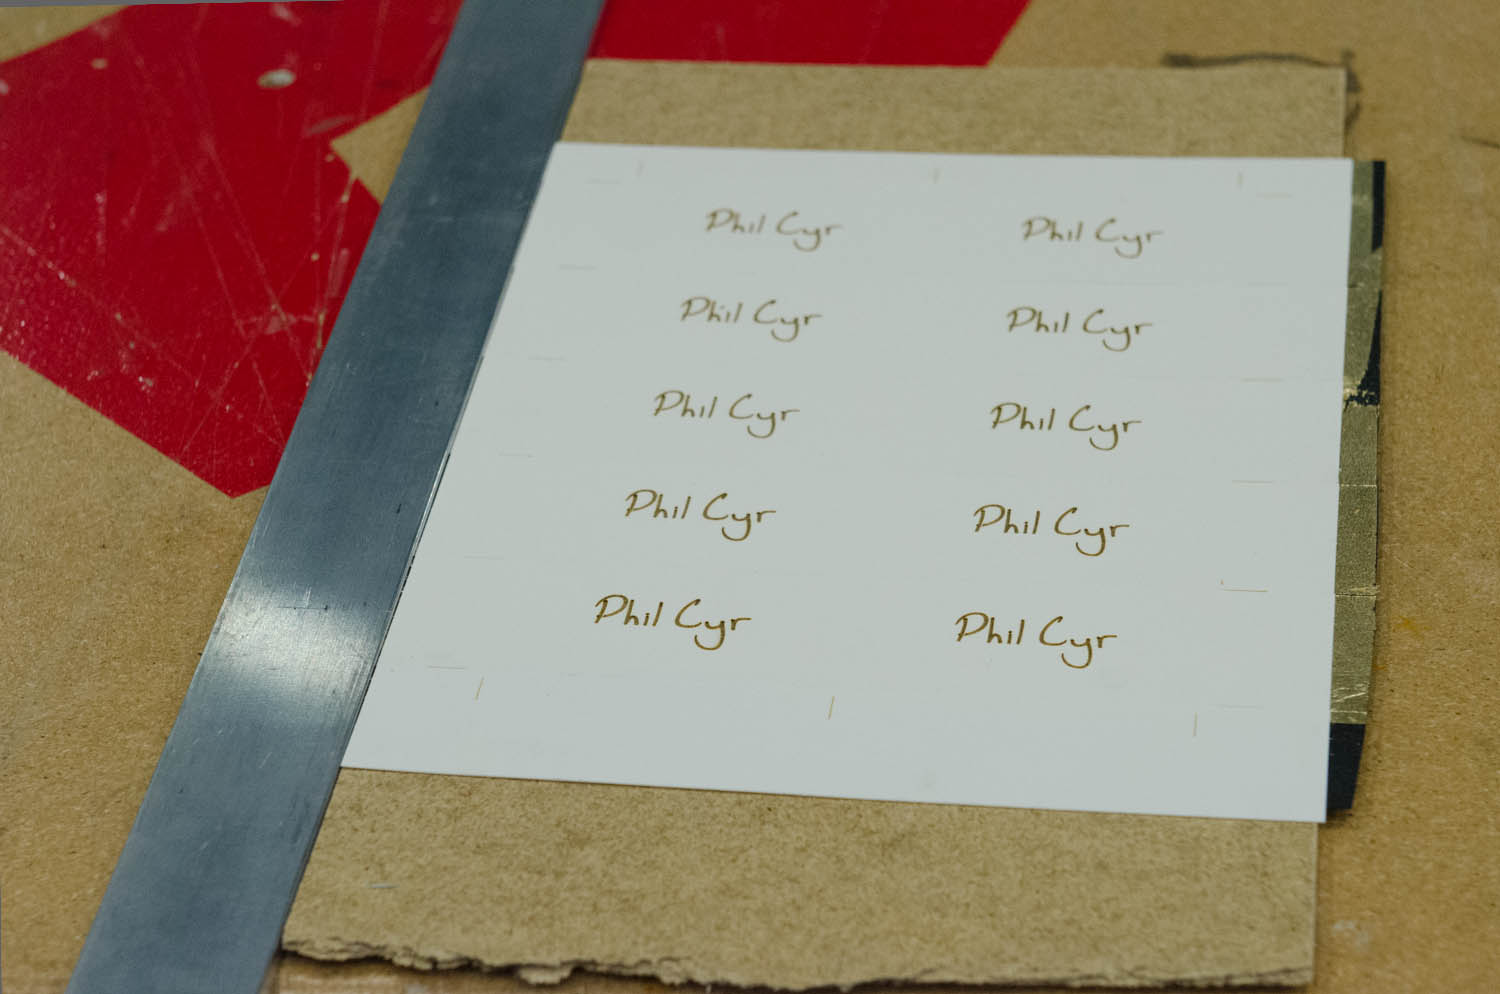
First cut the sheets into strips in the direction with the most parallel cuts. Save the ends with the cut marks and keep the strips in order. Then re-assemble the sheet and line up the strips, the other direction can be cut, while carefully holding the straight edge down.
Tables don't like knives. Cutting mats are very important. I don't have a big enough one for full sheets like this, so I used a piece of particle board.
Tables don't like knives. Cutting mats are very important. I don't have a big enough one for full sheets like this, so I used a piece of particle board.
Enjoy
Realize that photographing cards is hard.
Project Notes
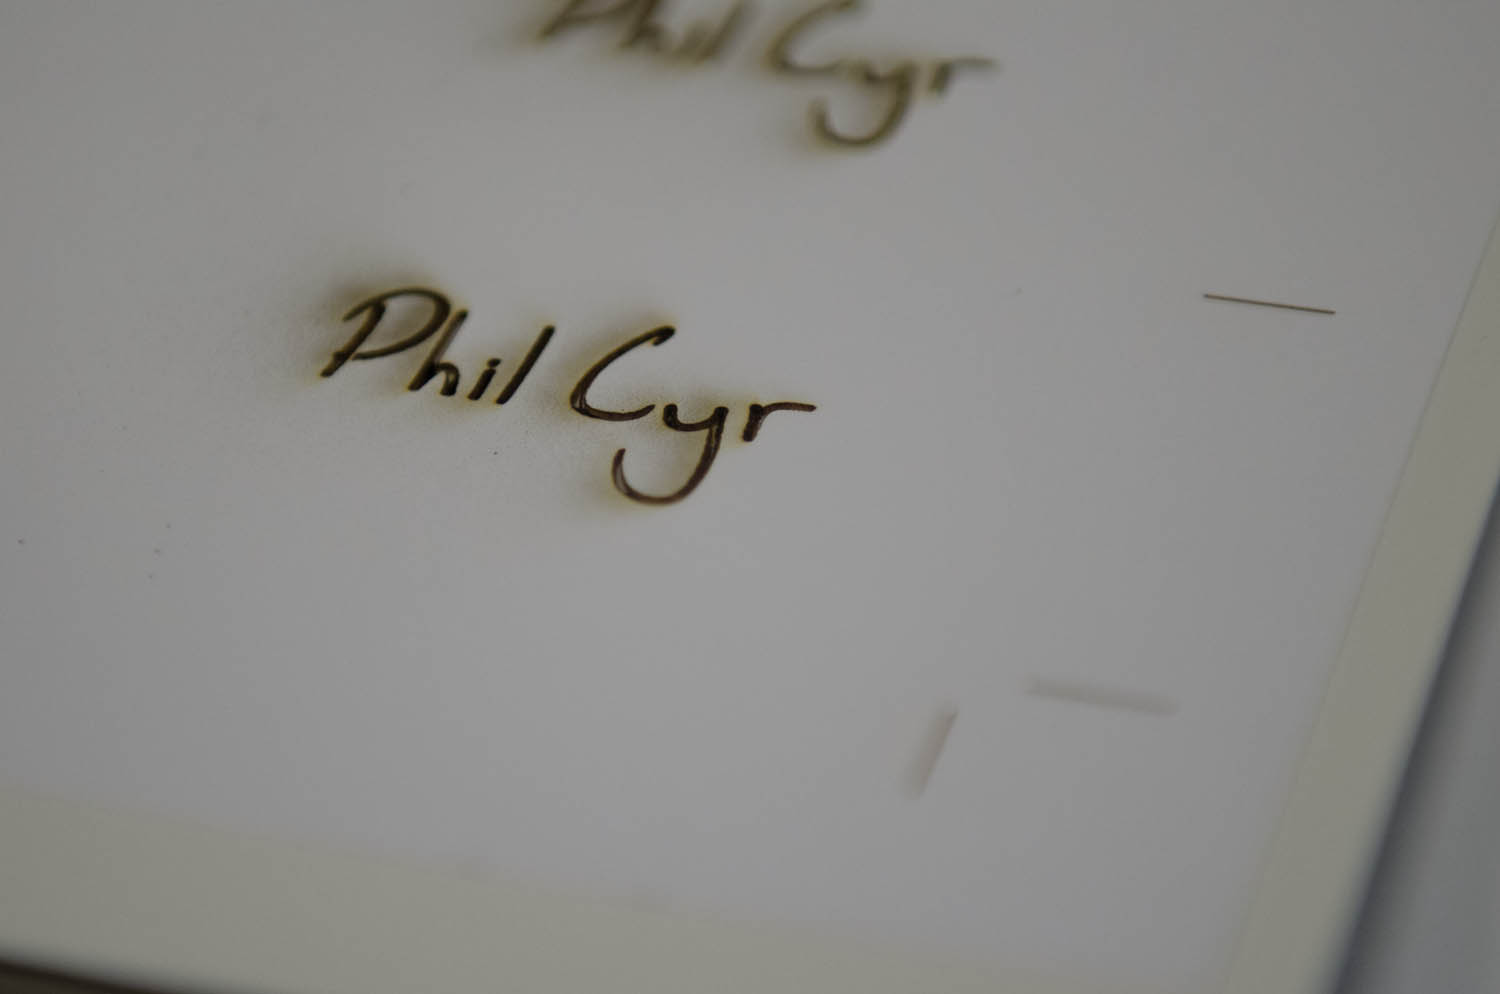
I used a 300 gsm white paper combined with a 160 gsm black paper. When a single card is viewed edge-on the black is nearly invisible.
Project Notes
I used a 300 gsm white paper combined with a 160 gsm black paper. When a single card is viewed edge-on the black is nearly invisible.