Embodied Interactions Drawing Project
by carissathompson18 in Circuits > Arduino
1547 Views, 30 Favorites, 0 Comments
Embodied Interactions Drawing Project

This project is created as a course assignment at the California State University, Long Beach; taught by Behnaz Farahi: DESN 586 Human Experience and Embodied Interactions Studio.
I wanted to design an interactive glove-based painting system for artists, educators, hobbyists, and anyone interested in exploring the intersection of technology, creativity, and self-expression. The project's aim is to create a bridge between the physical and digital realms, allowing users to engage with digital art in a more tangible and immersive way. By combining the Arduino platform with the p5.js web application, this project offers a unique, hands-on experience that encourages users to explore their creativity and express themselves through an intuitive and engaging interface.
The context for this project lies at the crossroads of art, technology, and education. As digital art continues to gain popularity, it is essential to provide accessible and innovative tools that cater to a wide range of users, from professional artists seeking new mediums to educators who want to inspire students and cultivate their interest in STEAM fields. The glove-based painting system is designed to accommodate users with varying levels of technical expertise, fostering an inclusive environment for people of all backgrounds and abilities.
This project matters because it challenges the traditional boundaries of artistic expression and encourages users to think outside the box when creating digital art. By providing an immersive and tactile experience, it promotes a more profound connection between the artist and their work, fostering a deeper understanding of the creative process. Furthermore, by incorporating elements of programming, electronics, and design, this project aims to encourage the development of new skills and promote interdisciplinary learning.
Ultimately, the interactive glove-based painting system has the potential to inspire a diverse range of people to participate in the ever-growing world of digital art and design. It fosters collaboration, innovation, and a sense of community among its users, empowering them to explore their creativity and make their mark on the world in new and exciting ways.
Case Studies:
- Case Study: Mi.Mu Gloves
- Mi.Mu Gloves are wearable musical instruments created by musician Imogen Heap and her team. The gloves use a combination of sensors, accelerometers, and gyroscopes to track hand movements and gestures, enabling users to create music and control sounds in a more intuitive and immersive way. By offering artists a new form of expression, Mi.Mu Gloves have been used in various live performances and music production settings, pushing the boundaries of music creation and performance.
- Case Study: Drawdio
- Drawdio is an electronic pencil designed by Jay Silver and Eric Rosenbaum at the MIT Media Lab. The project combines a graphite pencil with a simple electronic circuit, allowing users to draw musical instruments on paper, among other applications. Drawdio has been used in educational settings to teach students about circuitry, conductivity, and the science behind sound. The project has also inspired hobbyists and artists to explore new ways of creating interactive art and music.
URL: https://web.media.mit.edu/~silver/drawdio/
- Case Study: T(ether)
- T(ether) is a spatially aware display developed by researchers at the MIT Media Lab that enables users to interact with virtual objects through a glove-like interface. The system uses a combination of motion tracking and depth-sensing cameras to create an immersive 3D environment, allowing users to manipulate virtual objects with their hands. The project has been used to explore new forms of collaboration, interaction design, and artistic expression in the fields of architecture, design, and virtual reality.
Supplies
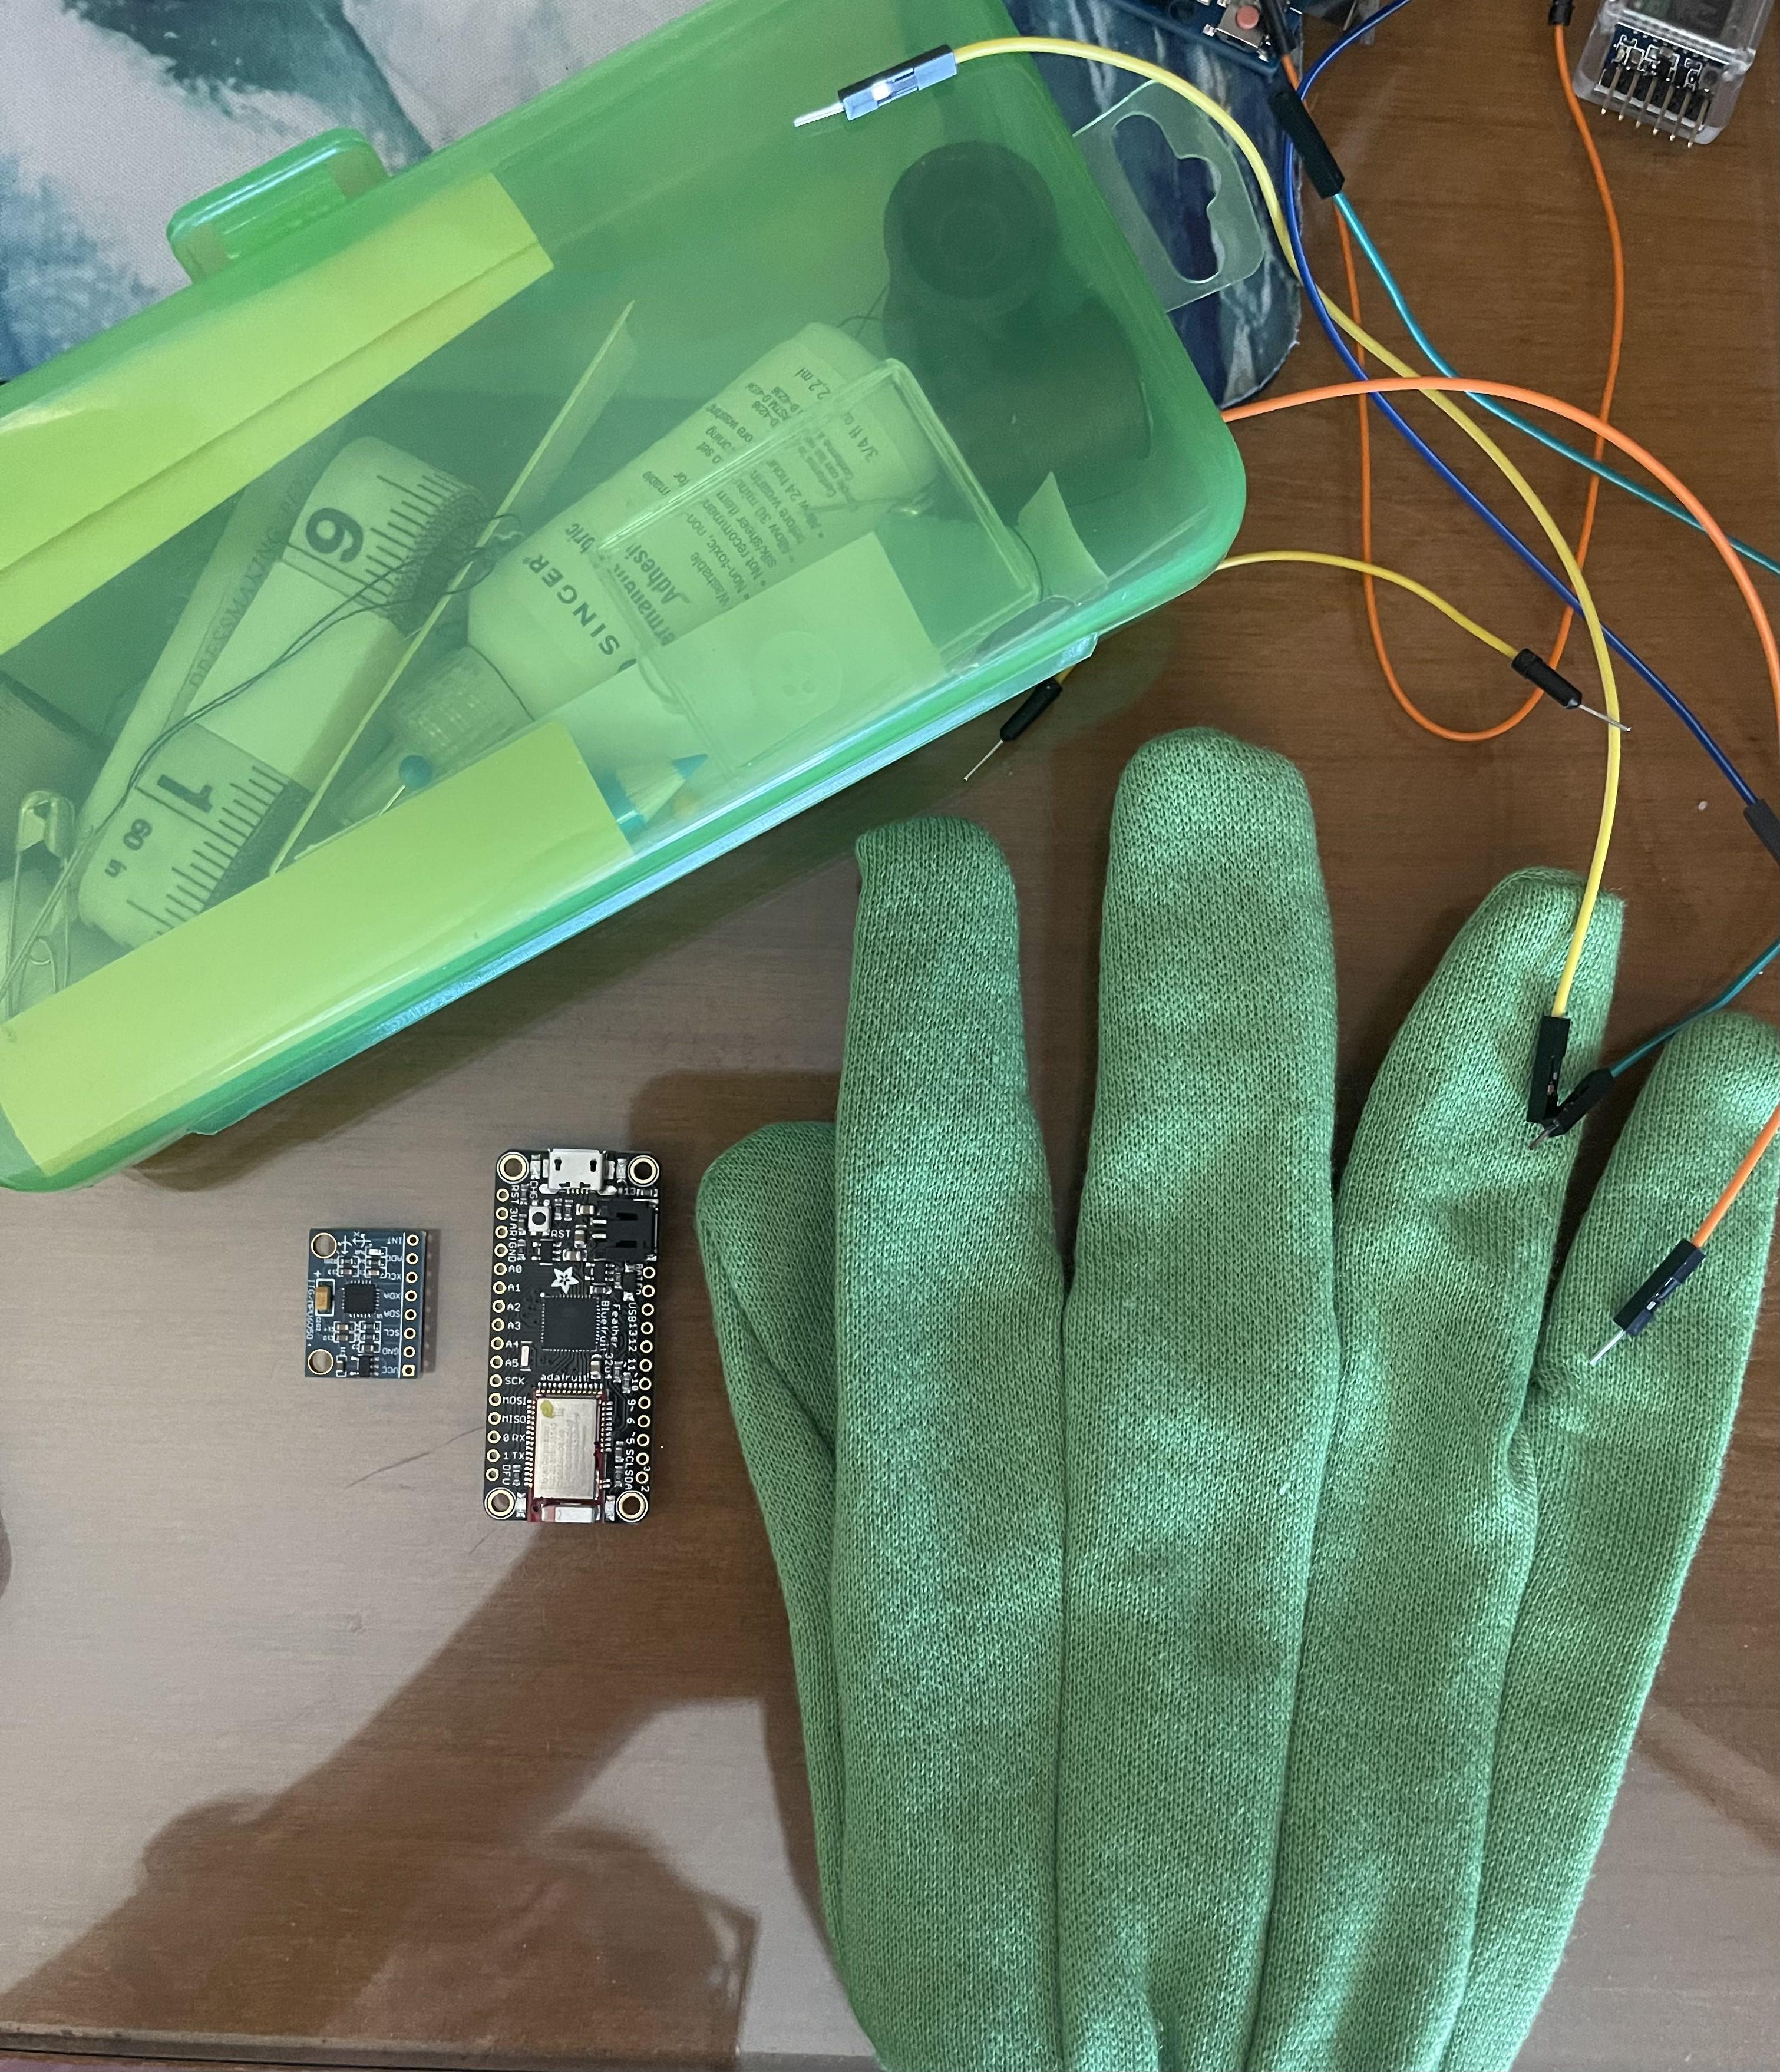
- GY-521 MPU-6050 3-axis accelerometer and gyroscope module
- Adafruit 32u4 (or an Arduino-compatible board with a built-in USB connection)
- jumper wires
- A sewing kit
- A glove
- A computer with Arduino IDE installed
Download Adafruit Board
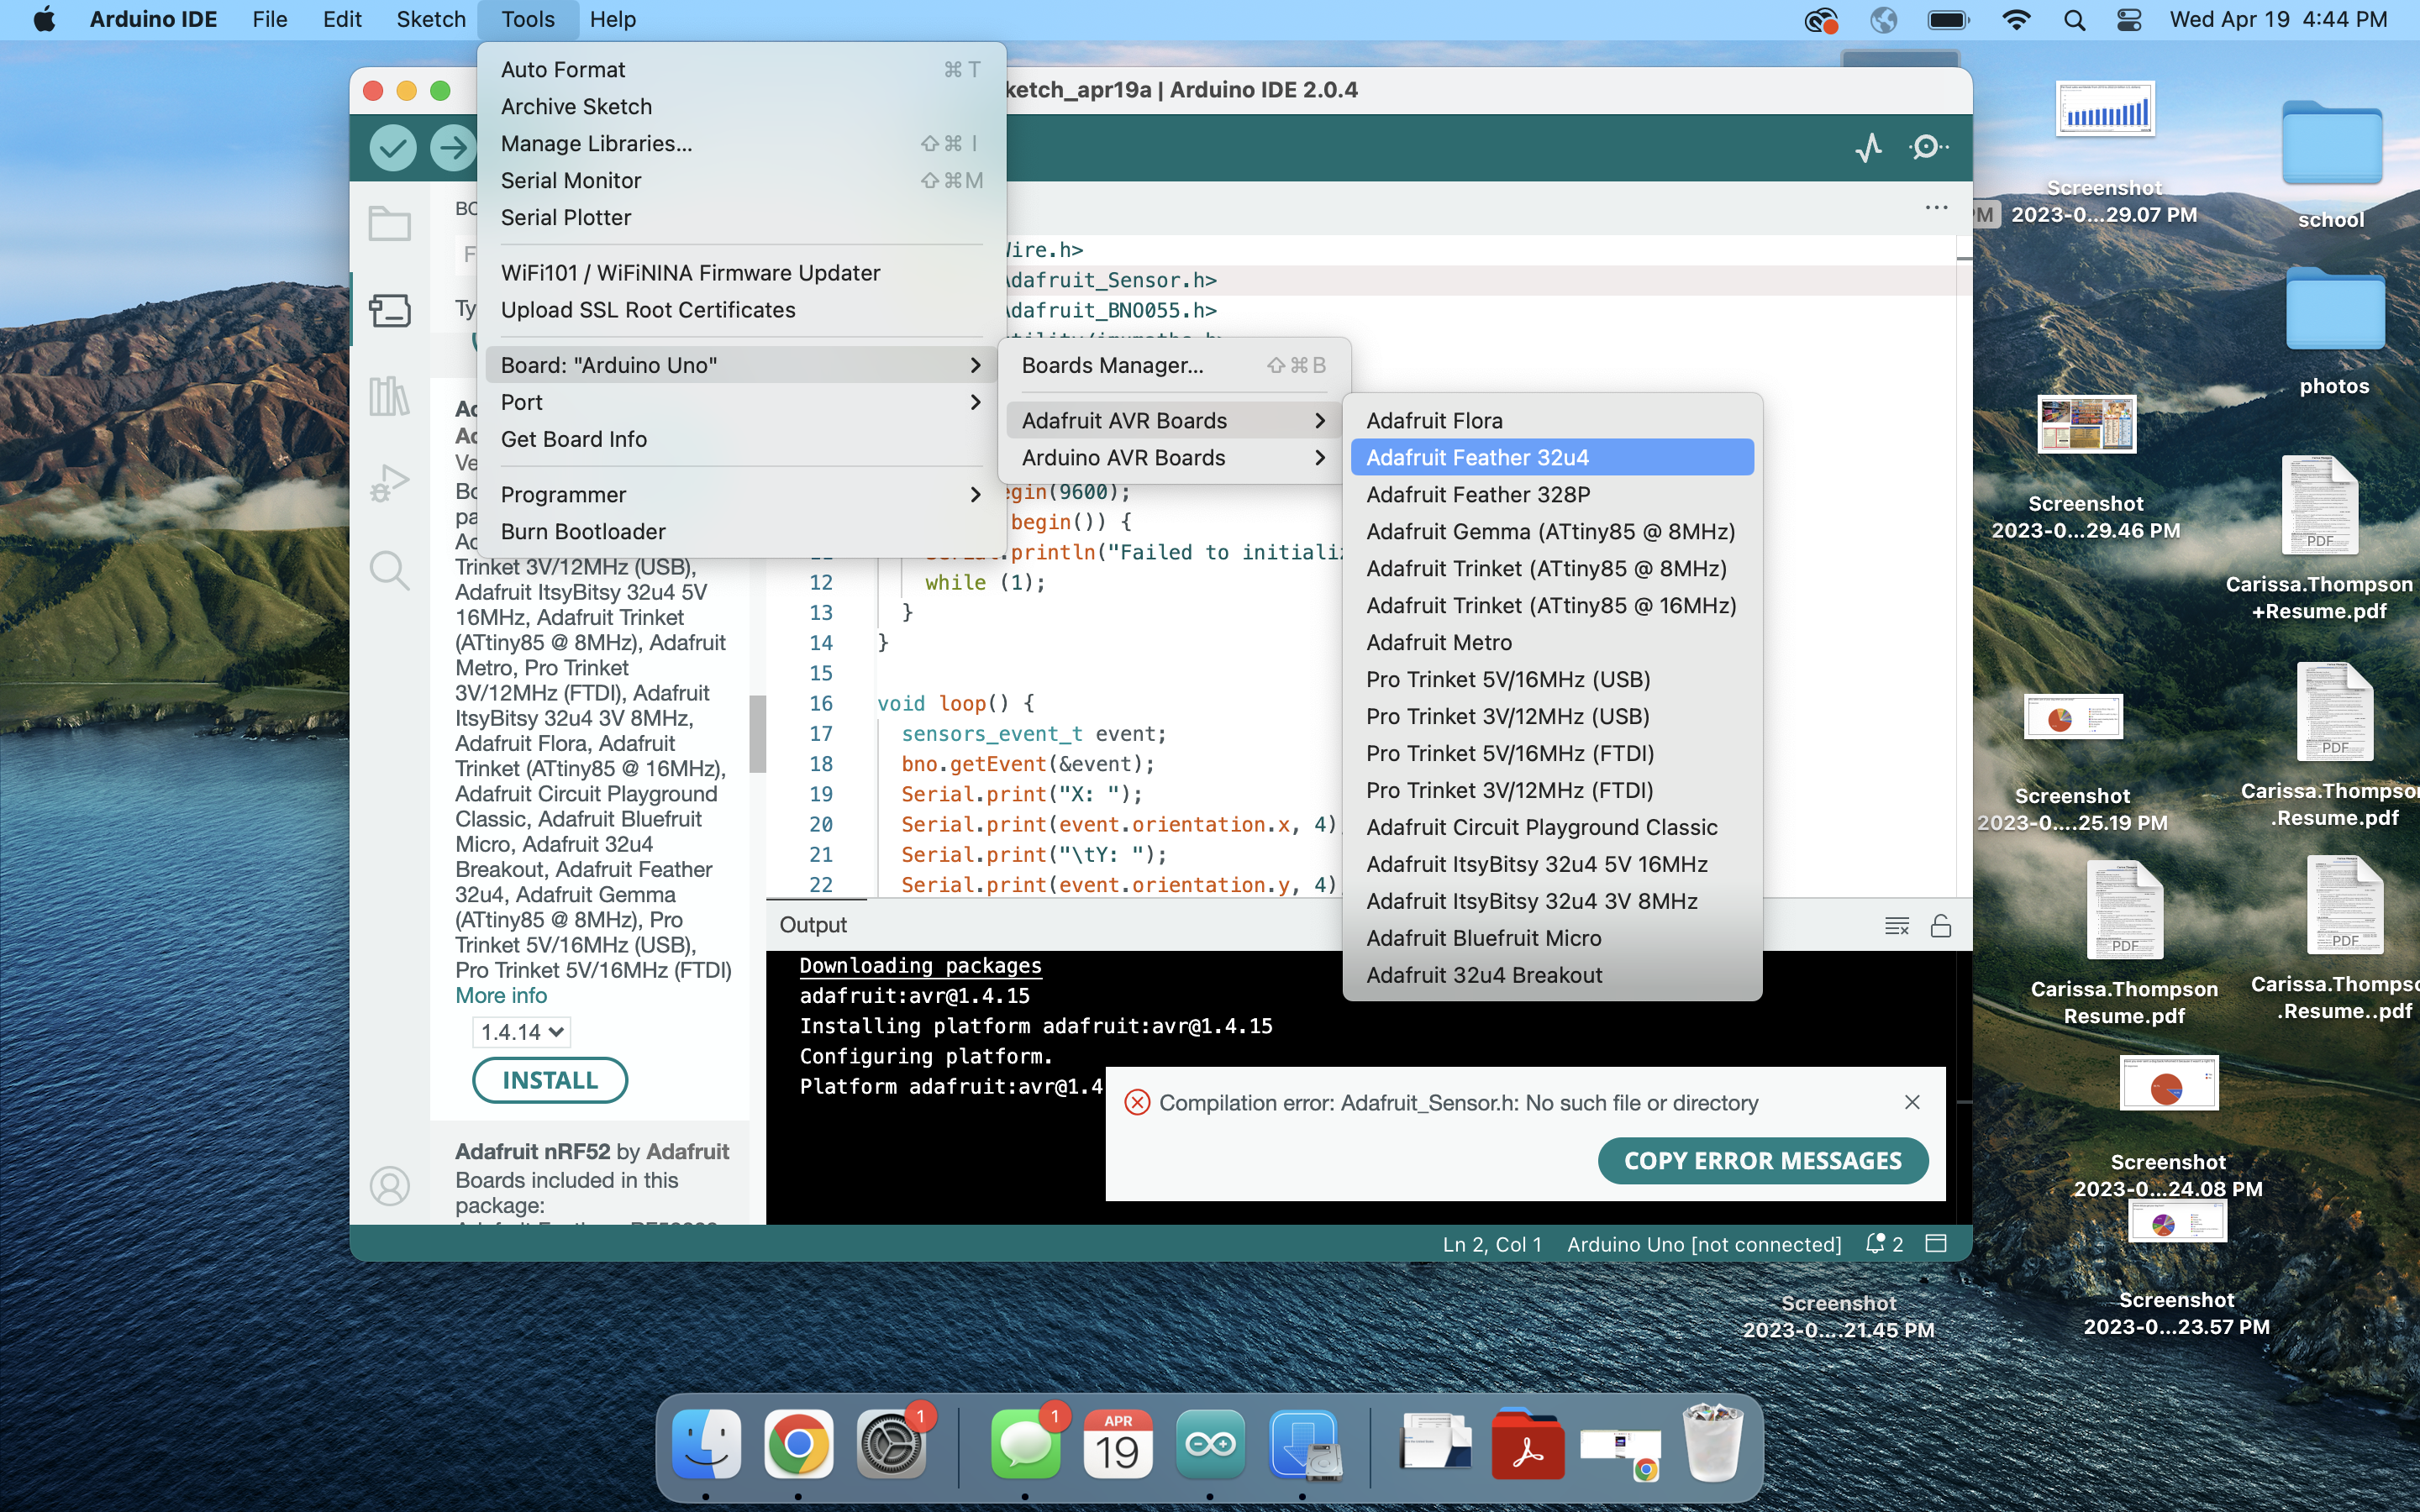
To use the Adafruit Feather 32u4 with the Arduino IDE, you need to install the board package for it. Here are the steps:
- Open the Arduino IDE and go to File > Preferences.
- In the "Additional Boards Manager URLs" field, add the following URL: https://adafruit.github.io/arduino-board-index/package_adafruit_index.json
- Click "OK" to save the preferences.
- Go to Tools > Board > Boards Manager.
- In the search box, type "Adafruit AVR Boards" and install the package.
- After the installation is complete, go to Tools > Board and select "Adafruit Feather 32u4" from the list.
Once you have selected the board, you can upload your sketch to the Feather.
Install "p5.serialPort.JS" Library.
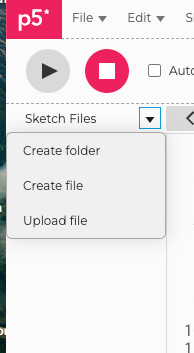
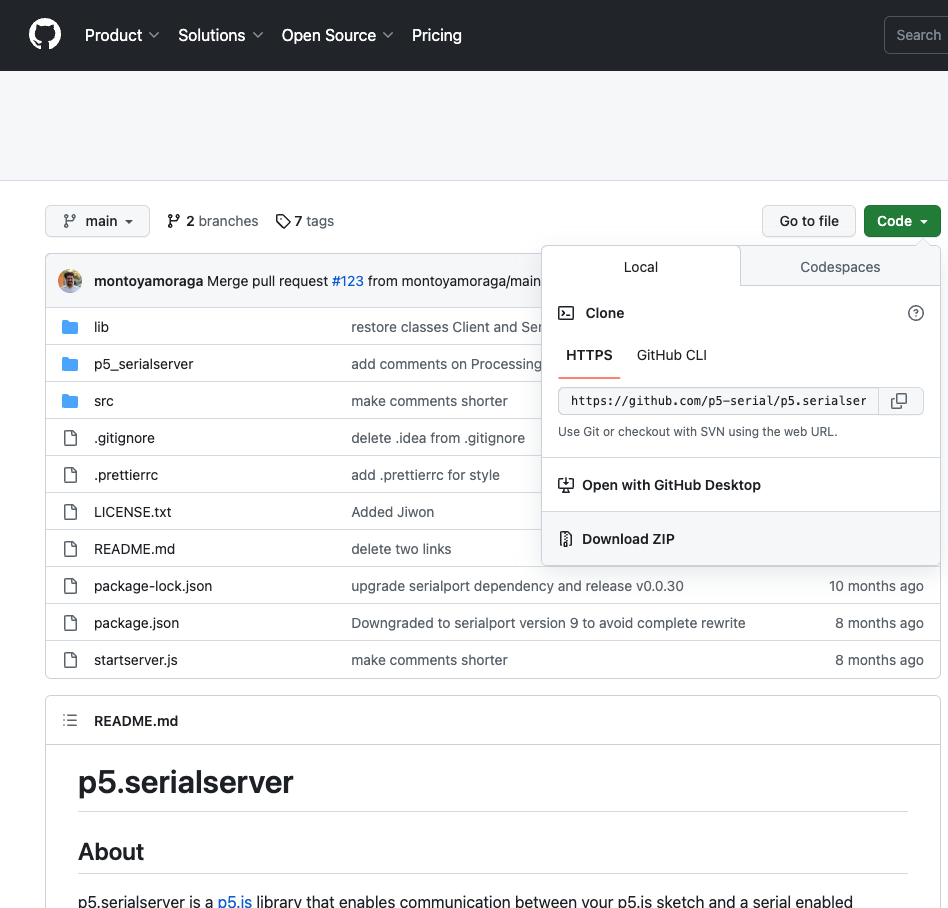
Download the Github library for your p5.js:
https://github.com/p5-serial/p5.serialserver
To install the p5.serialport.js library in your p5.js project, follow these steps:
- Download the p5.serialport.js library:
- Go to the p5.serialport GitHub repository: https://github.com/p5-serial/p5.serialport
- Click on the green "Code" button and then click "Download ZIP" to download the entire repository as a ZIP file.
- Extract the ZIP file:
- Locate the downloaded ZIP file on your computer.
- Extract the contents of the ZIP file to a temporary folder.
- Locate the p5.serialport.js library file:
- Open the extracted folder and navigate to the "lib" folder.
- Inside the "lib" folder, locate the "p5.serialport.js" file.
- Add the p5.serialport.js library to your p5.js project:
- Copy the "p5.serialport.js" file to your p5.js project folder.
- In your project's HTML file (usually "index.html"), add the following line inside the <head> section after the p5.js library script tags:
Install the P5 Serial Control Onto Your Computer
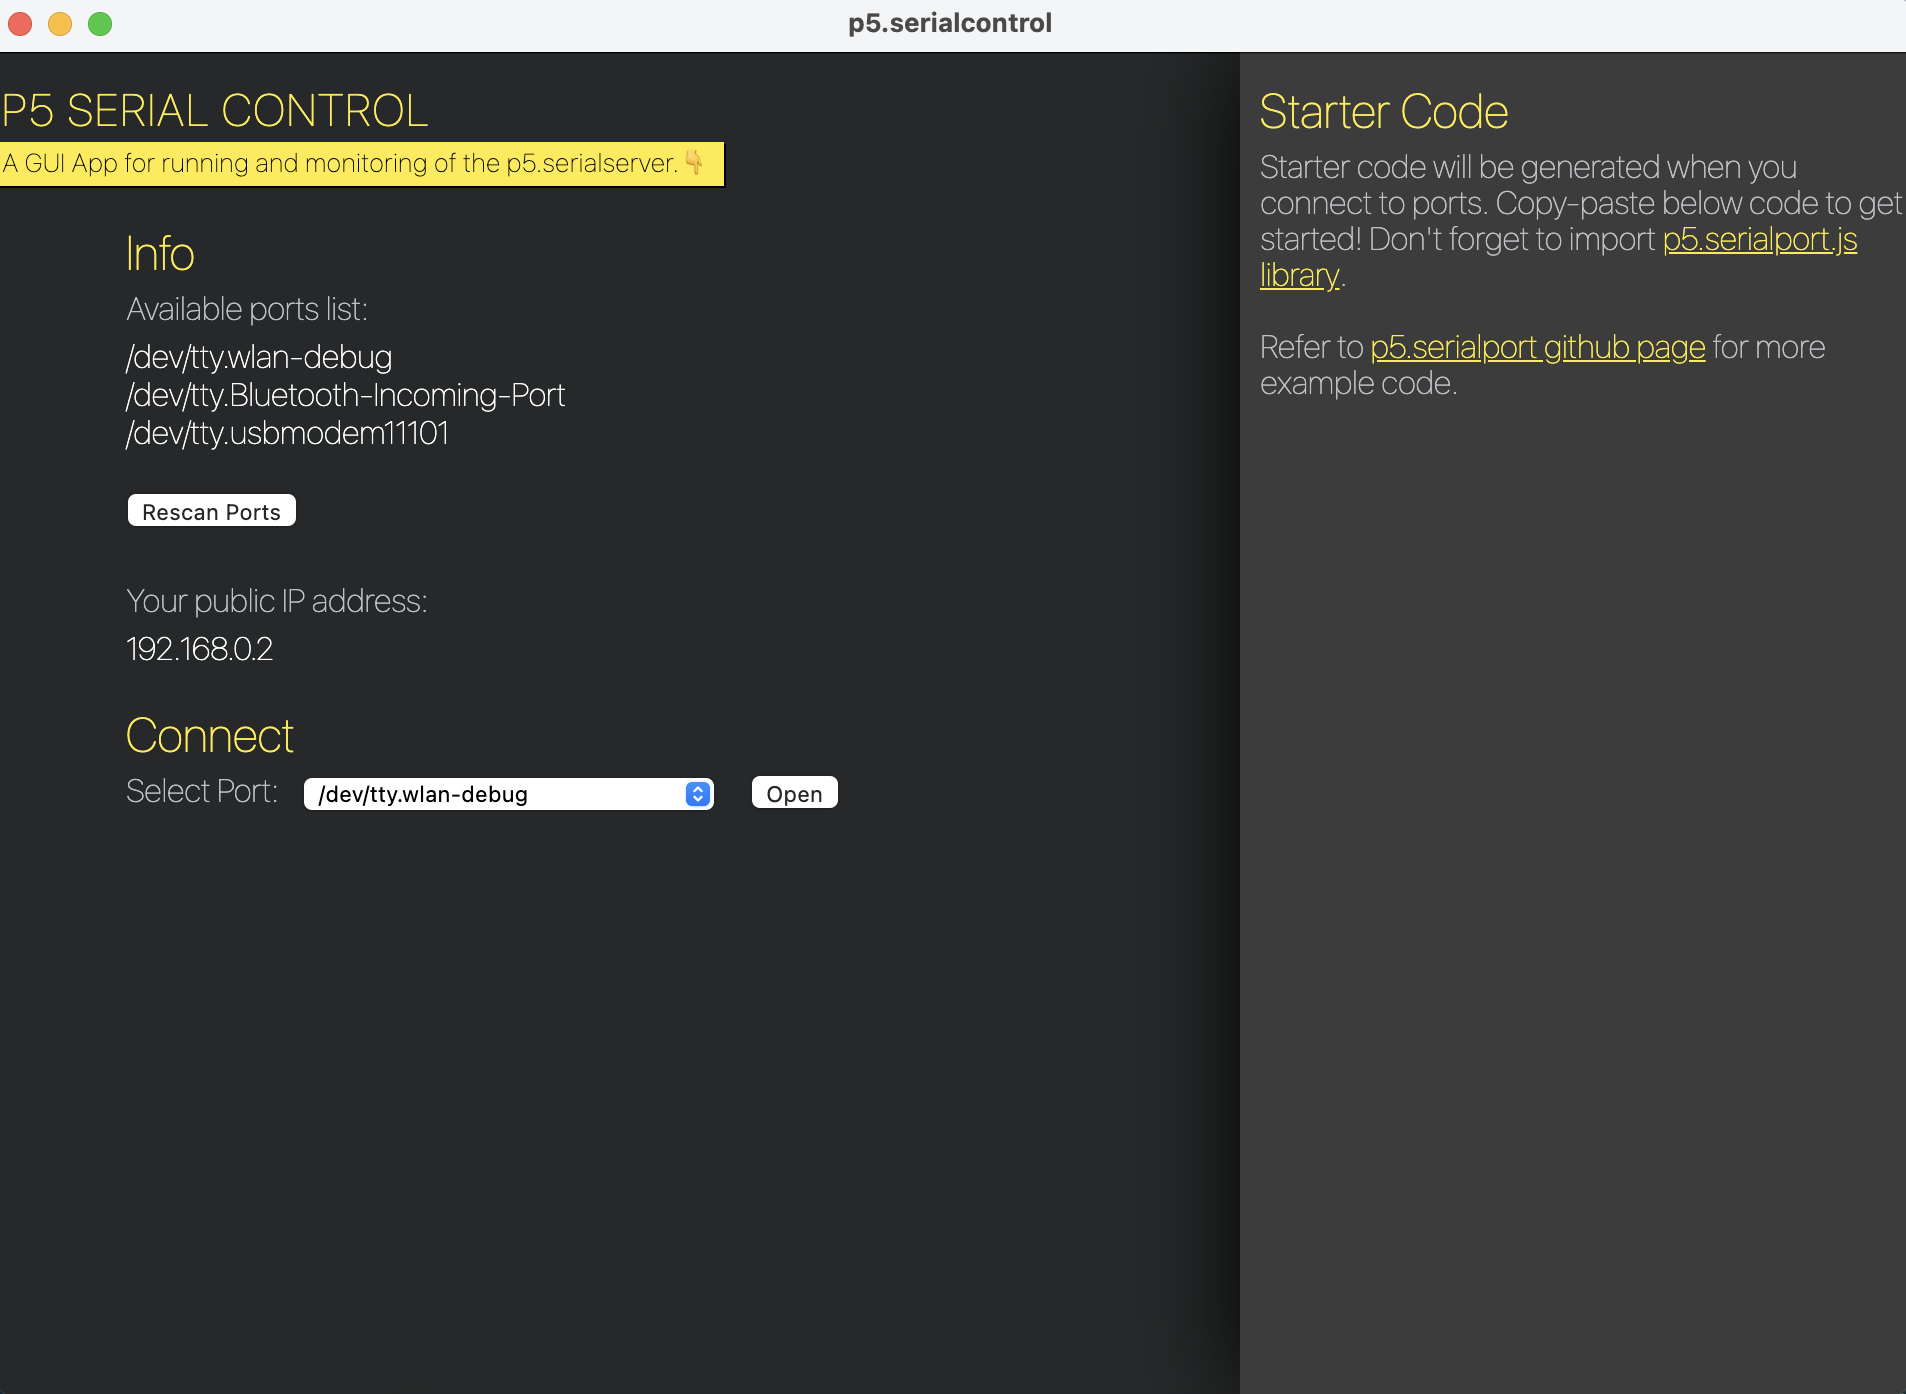
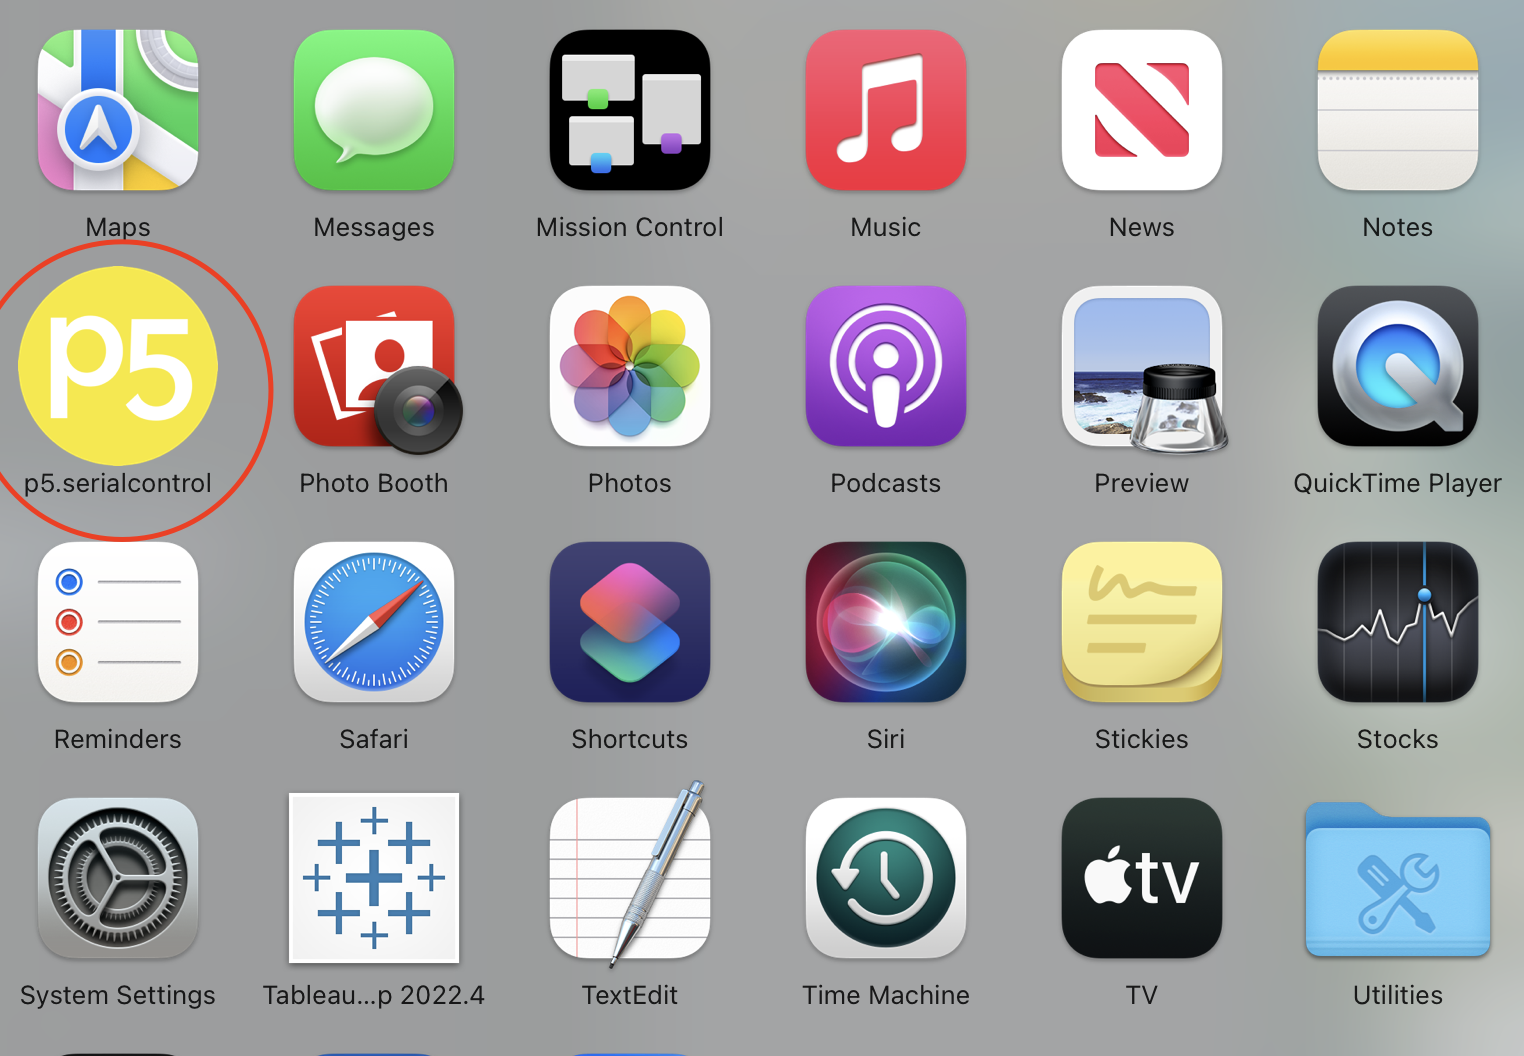
Go onto this page: https://github.com/p5-serial/p5.serialcontrol/releases
and download the correct assets based on your computer system.
Your app should look like the picture included.
Figure Out Your Connections for Your Glove
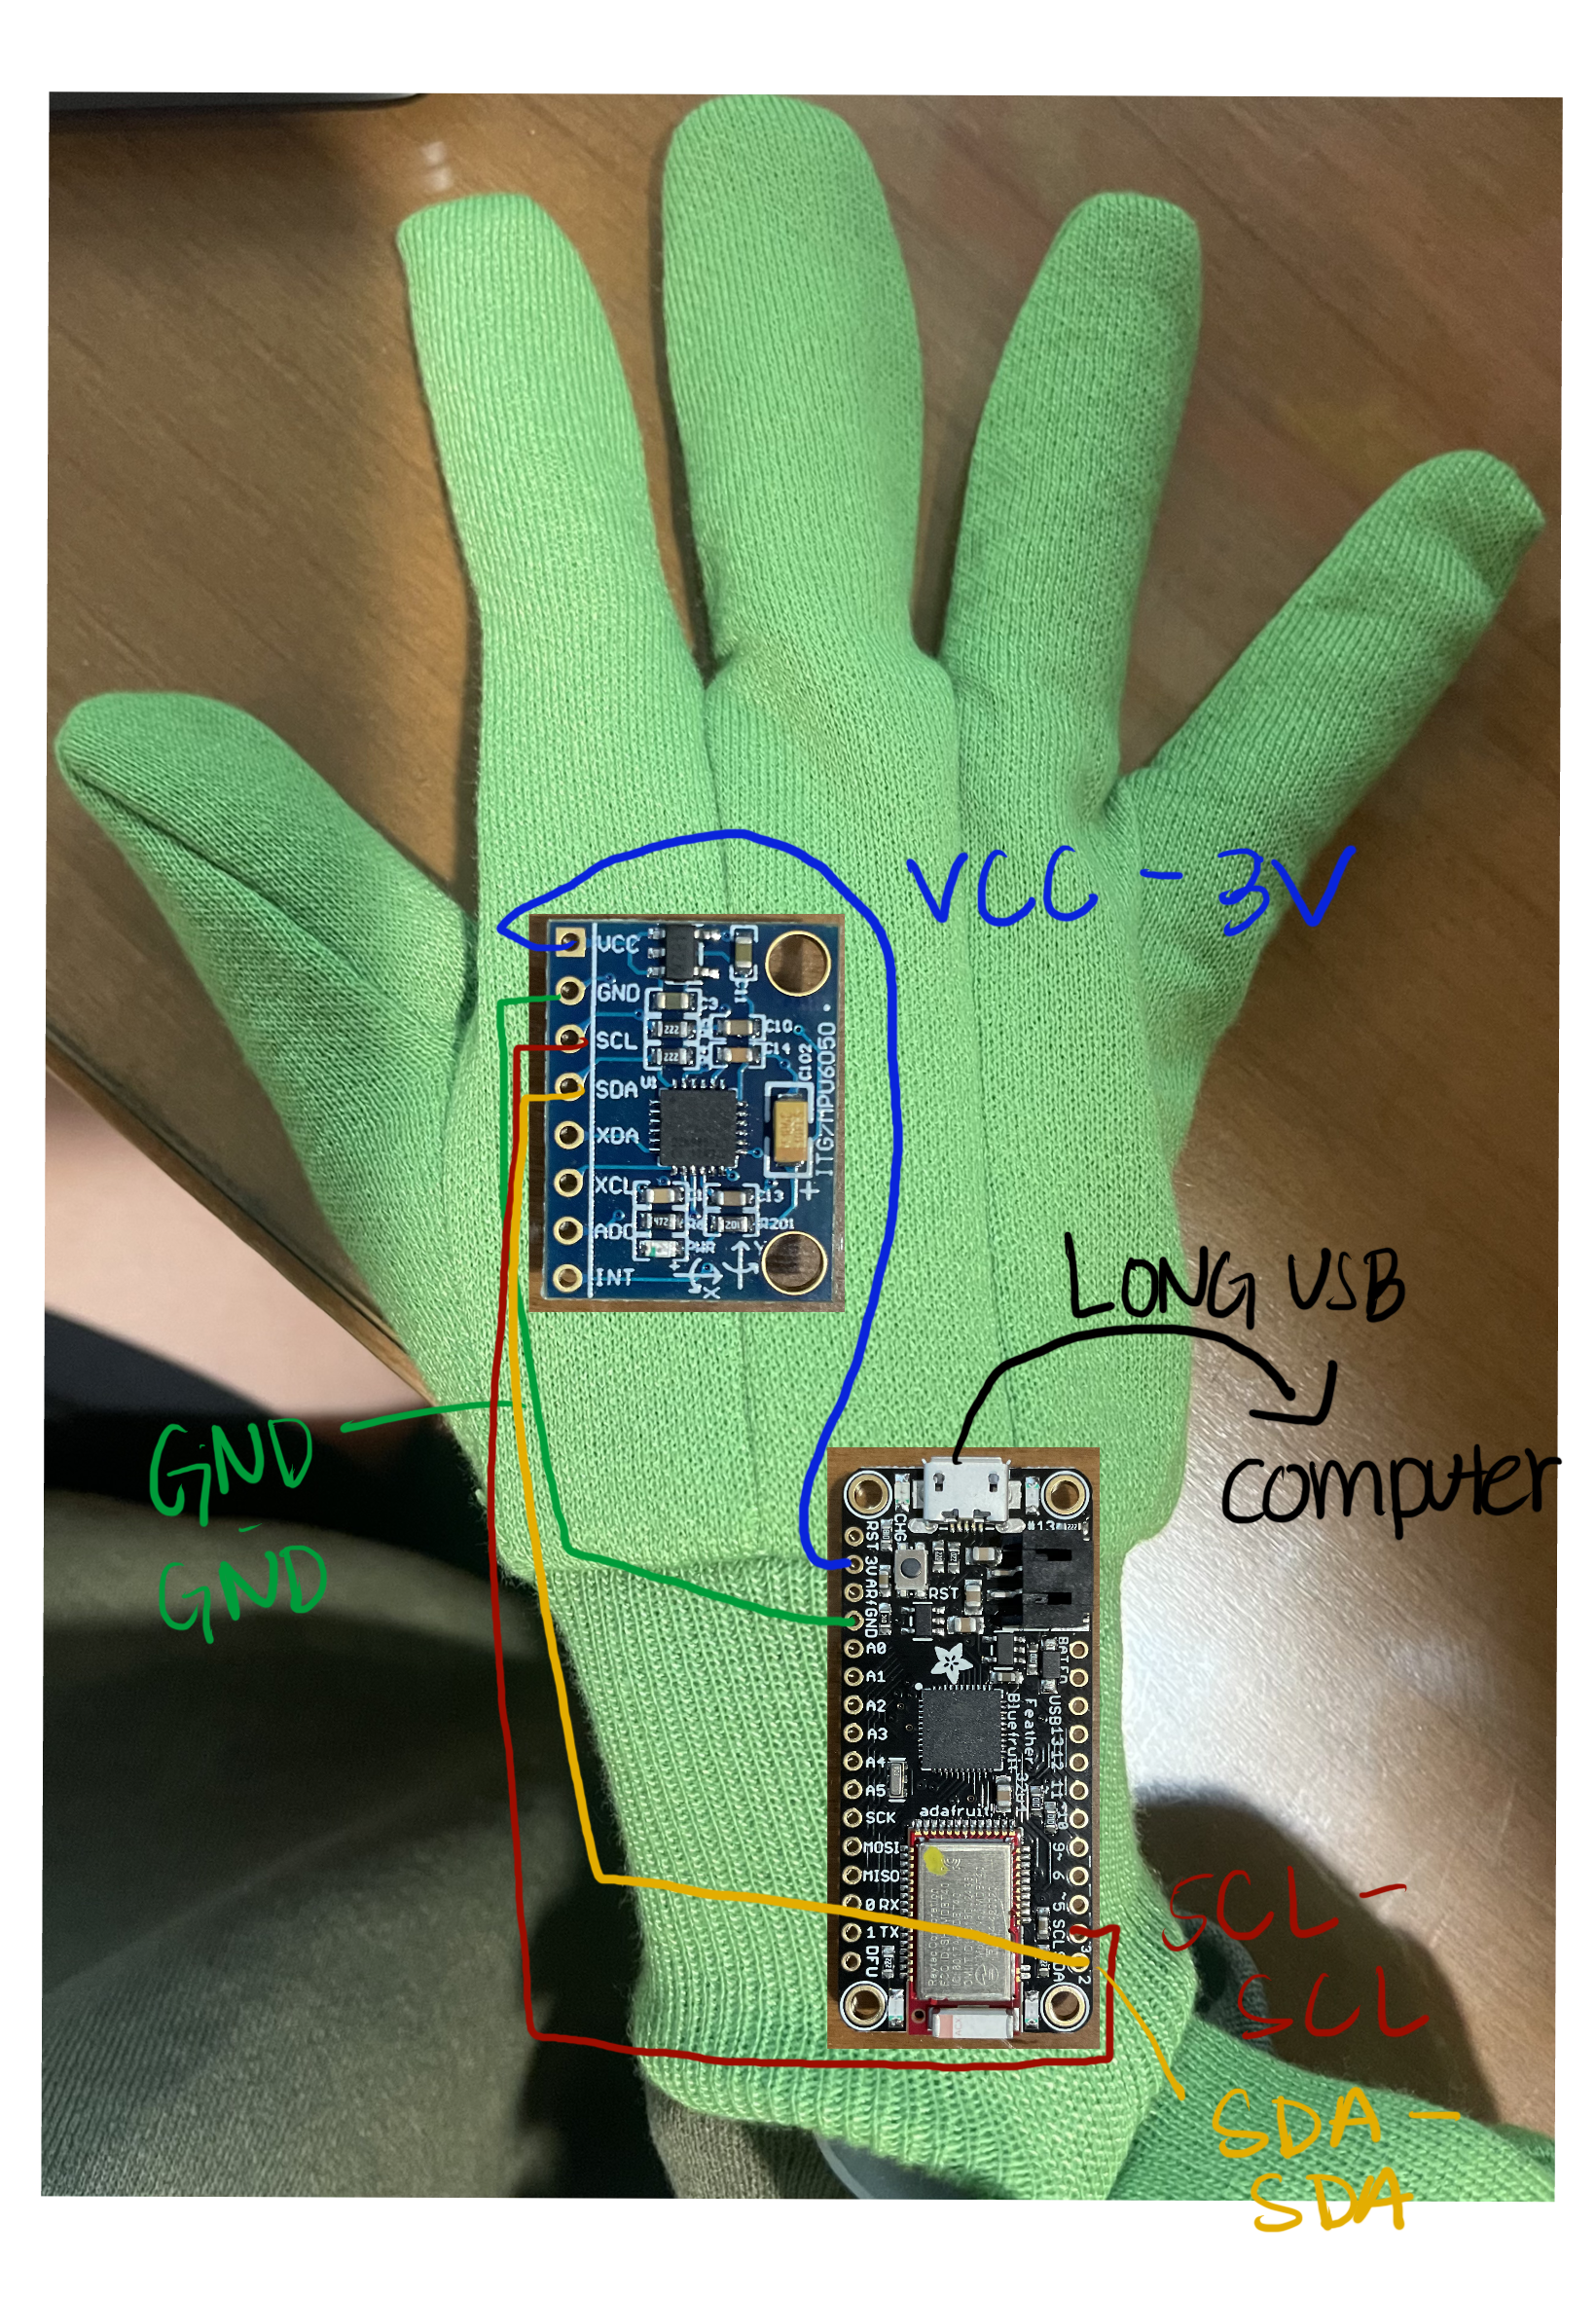
It is best to first figure out exactly where you are going to connect your glove
Connect the GY-521 MPU-6050 sensor to the Adafruit 32u4:
- Connect VCC on the sensor to 3.3V on the microcontroller using a female-to-male Dupont wire.
- Connect GND on the sensor to GND on the microcontroller.
- Connect SCL on the sensor to SCL (also labeled as SCK) on the microcontroller.
- Connect SDA on the sensor to SDA (also labeled as MOSI) on the microcontroller.
Solder Your Wires to Your Board
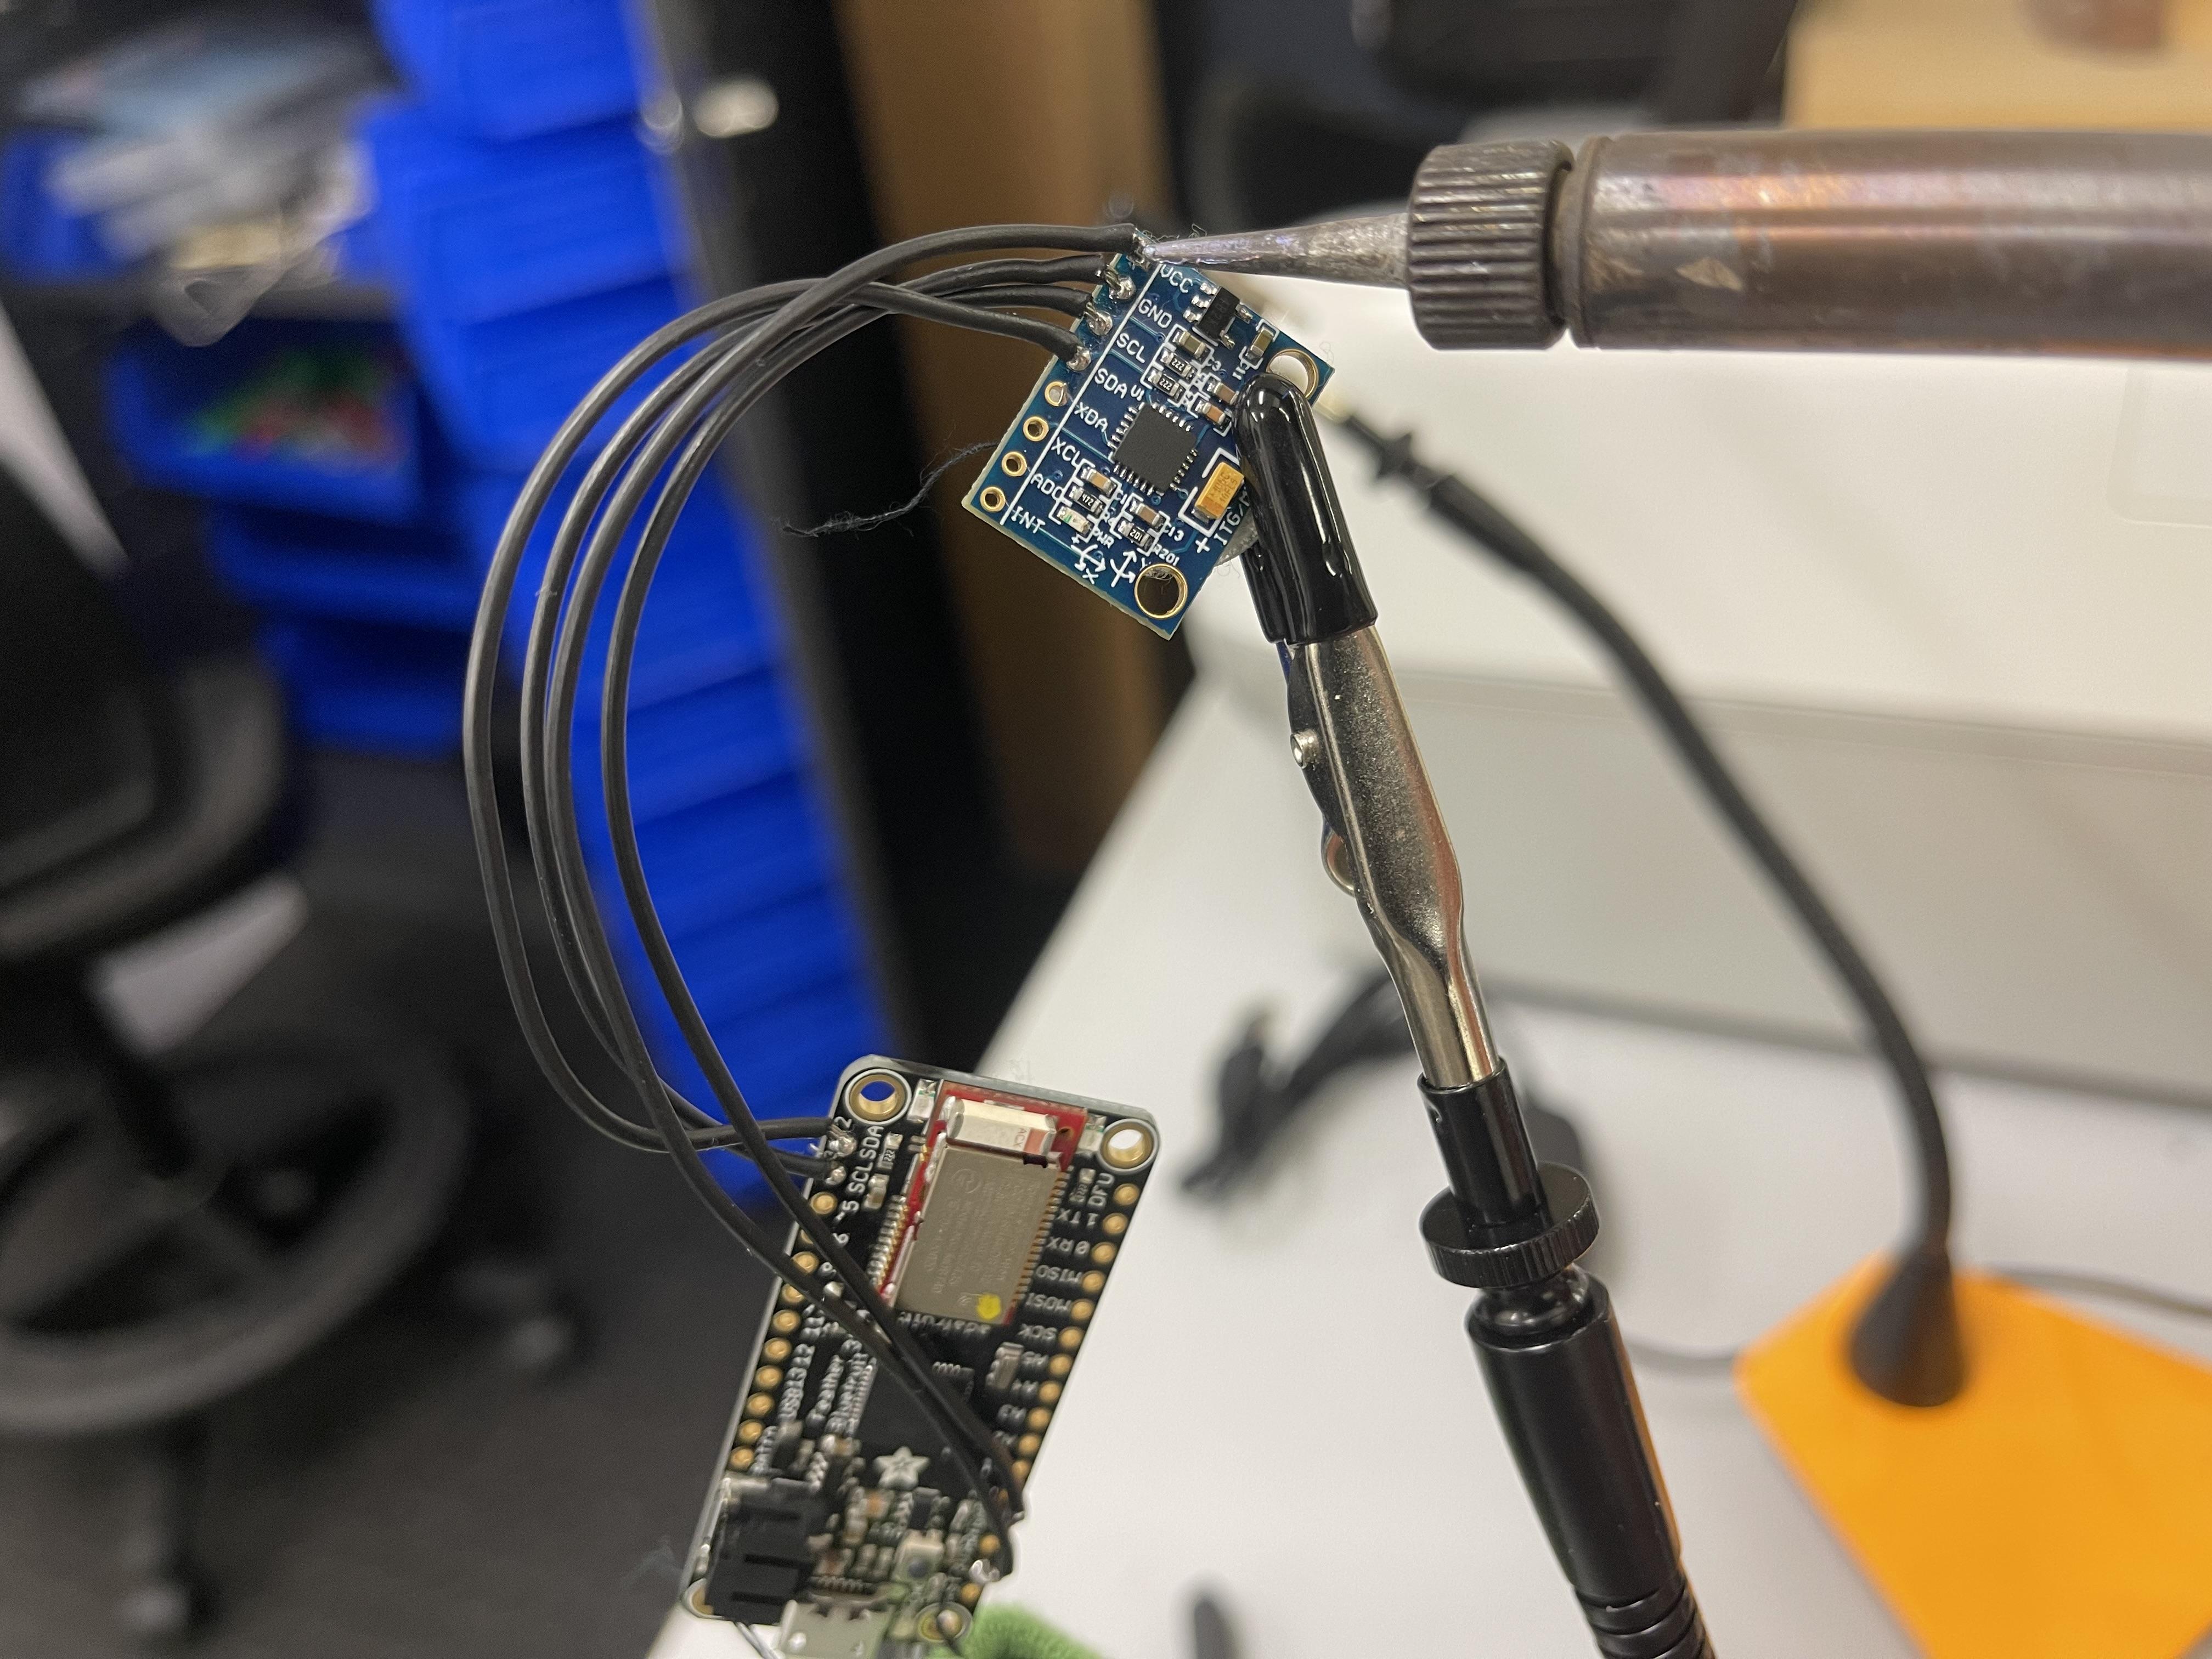
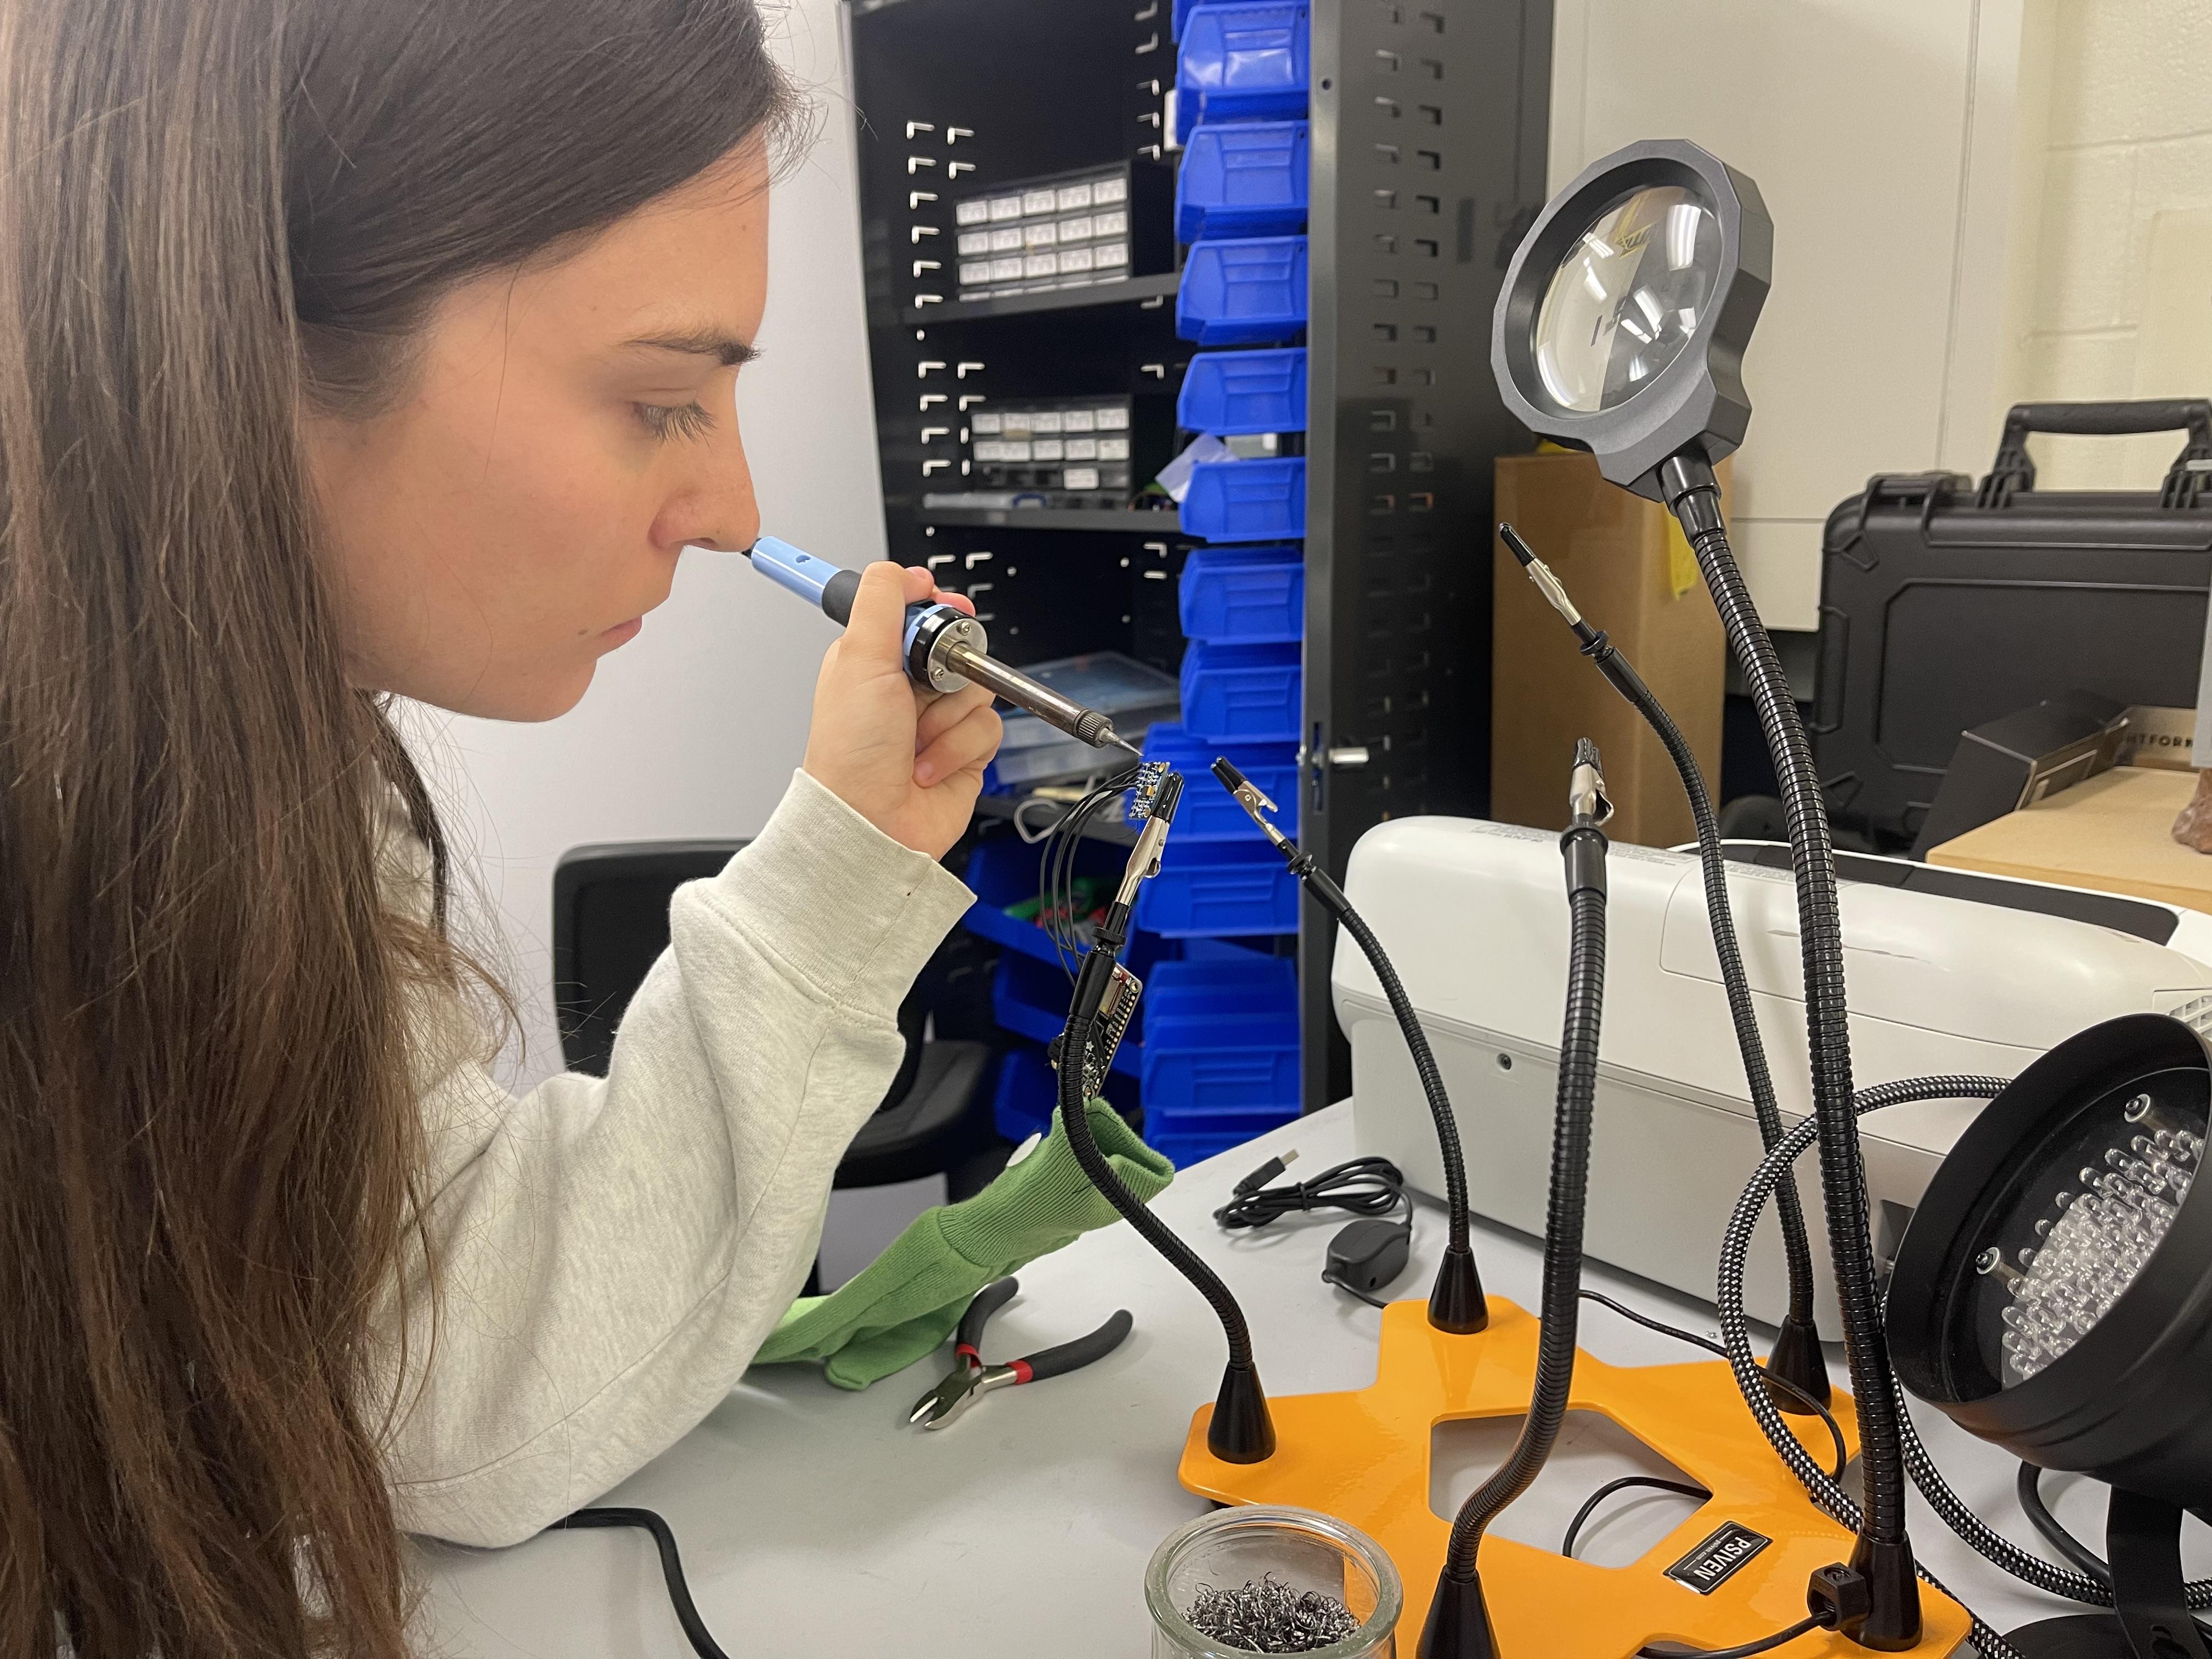
- Gather all the necessary tools and materials, including the soldering iron, solder wire, solder wick, helping hands, safety glasses, and your project board.
- Clean your soldering iron's tip with a damp sponge or brass wire brush. This will remove any oxide buildup and ensure a clean connection.
- Plug in your soldering iron and wait for it to heat up. Different irons will have different heat-up times, so consult the manufacturer's instructions.
- Apply a small amount of solder to the tip of the soldering iron. This is called tinning, and it helps improve heat transfer.
- Position the component on the board and use the helping hands to hold it in place.
- Touch the tip of the soldering iron to the pad and the component lead simultaneously, making sure they are touching each other.
- Wait a few seconds for the solder to melt and flow around the pad and lead. Be careful not to overheat the component, as this can damage it.
- Remove the soldering iron and wait for the solder to cool and solidify. This should take only a few seconds.
- Repeat steps 6-8 for each component that needs to be soldered.
- Once all the components are soldered, use solder wick to remove any excess solder or bridges between the pads.
- Inspect your work to ensure that all joints are clean and shiny and that there are no bridges or cold joints.
- Finally, test your project to ensure that it is functioning as intended.
Sew the Sensor and Microcontroller to the Glove
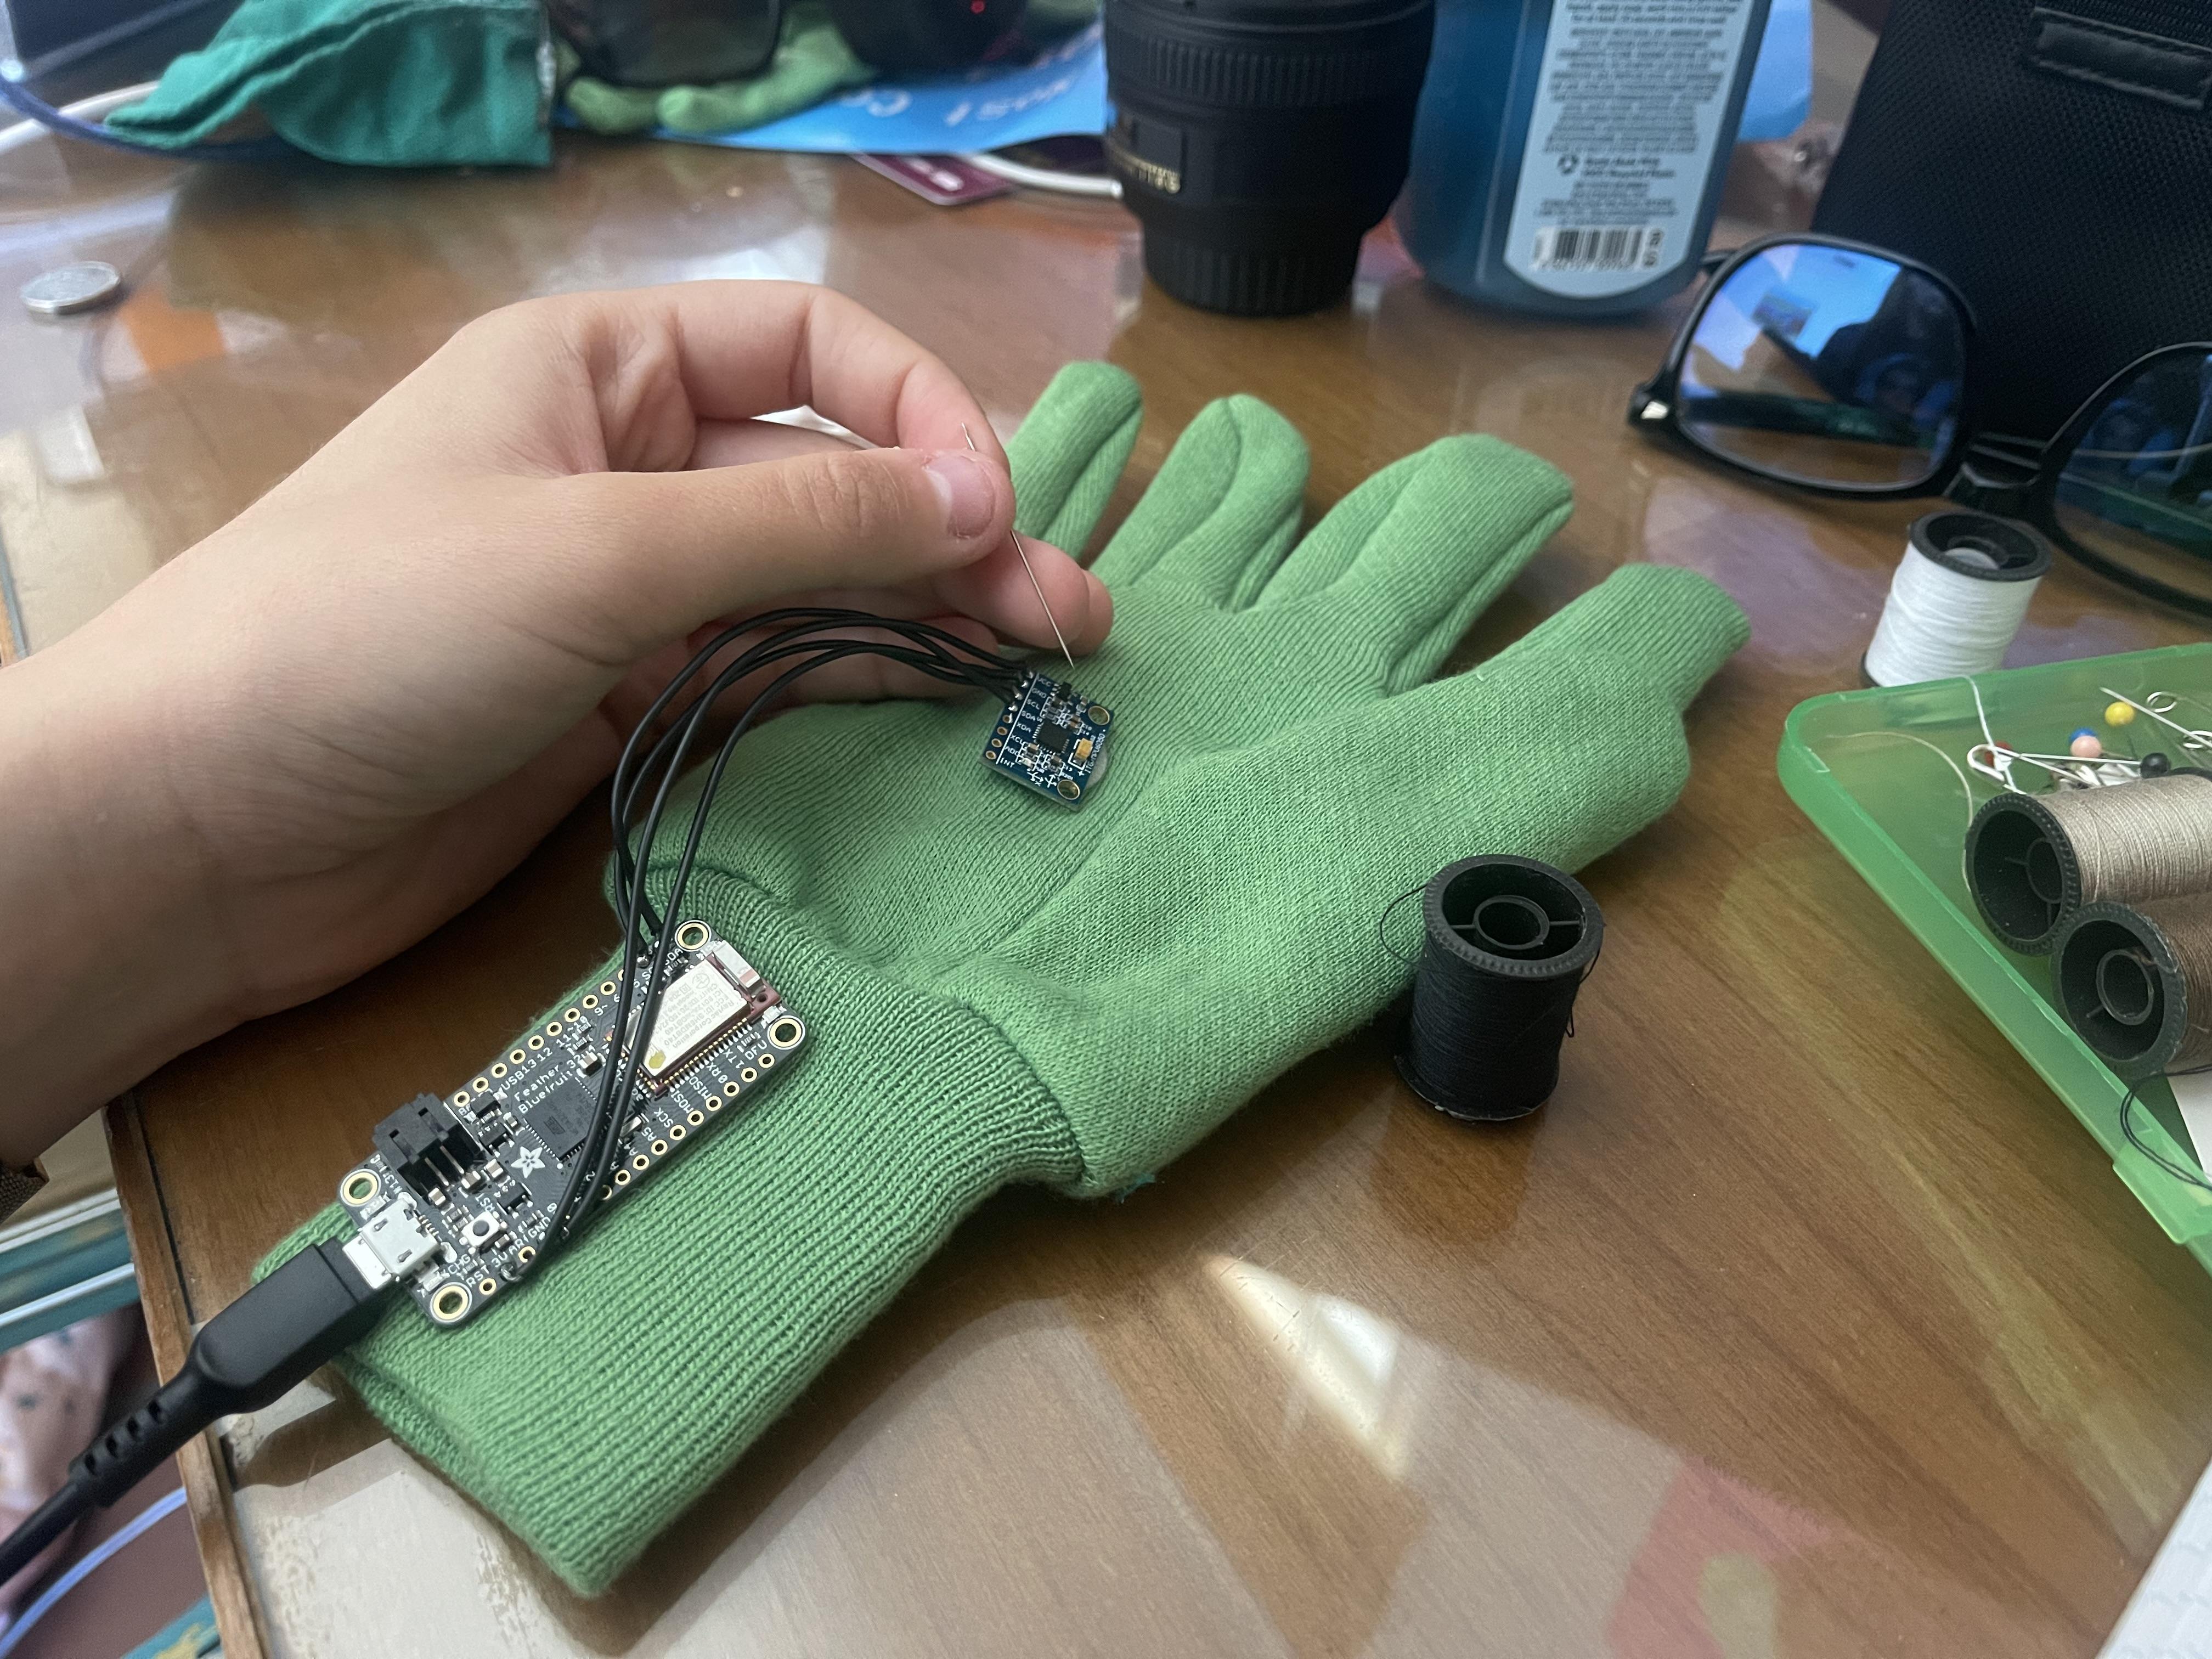
Sew the sensor and microcontroller to the glove:
- Position the GY-521 MPU-6050 sensor on the back of the glove, near the knuckles.
- Secure the sensor to the glove using a few stitches around the edges.
- Position the Adafruit 32u4 microcontroller on the glove's wrist area.
- Secure the microcontroller to the glove with stitches around the edges.
- Ensure that both components are securely attached and that there is enough wire length to connect them.
Set Up Your Aduino
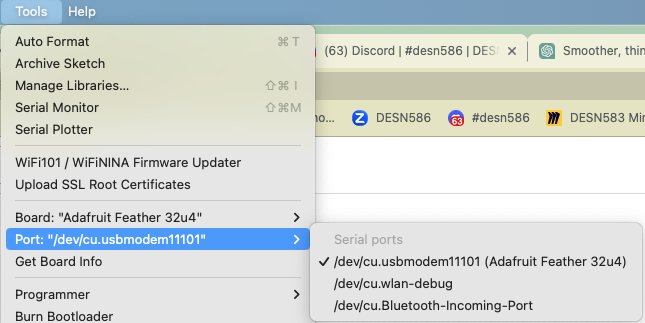

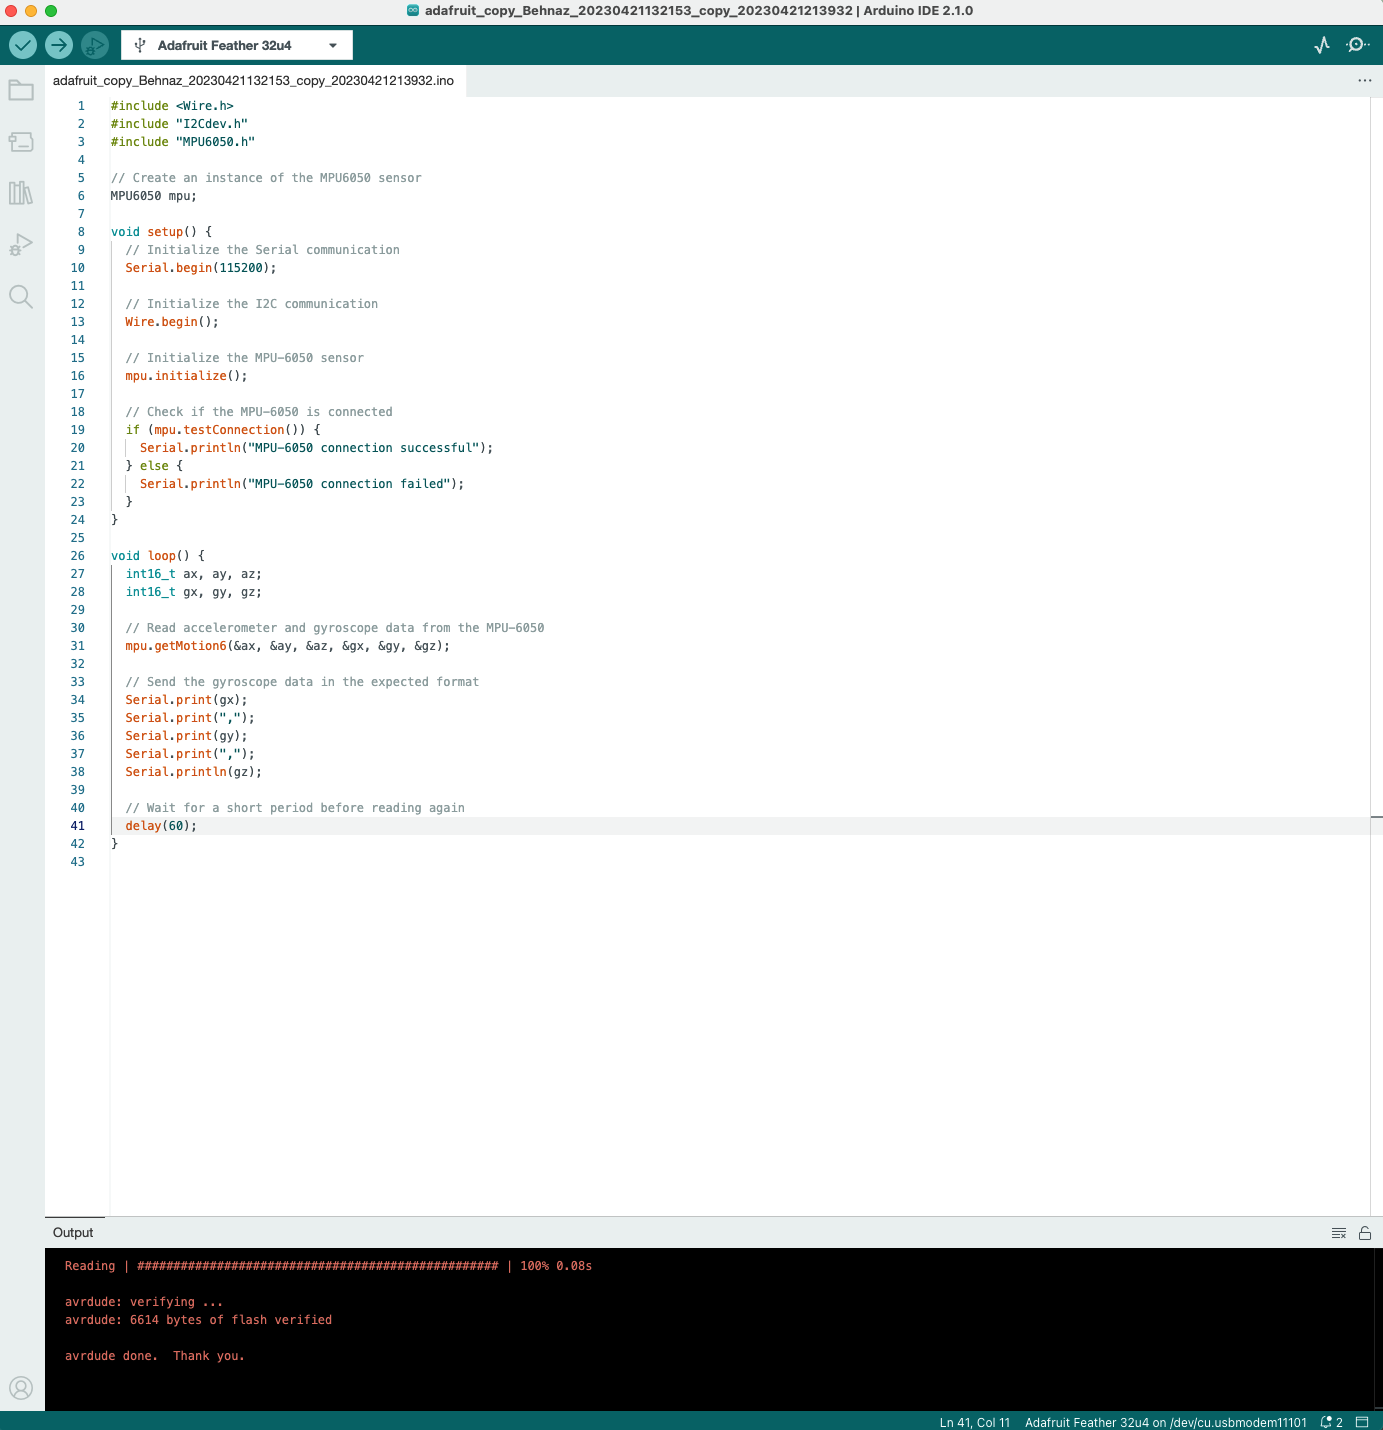
You need to make sure when you are connecting your adafruit to your Arduino, that the usb cable you are using is for data-transferring, not JUST for charging.
Add the following code to your Arduino, and upload the code:
Downloads
Code for Index.html on P5.js
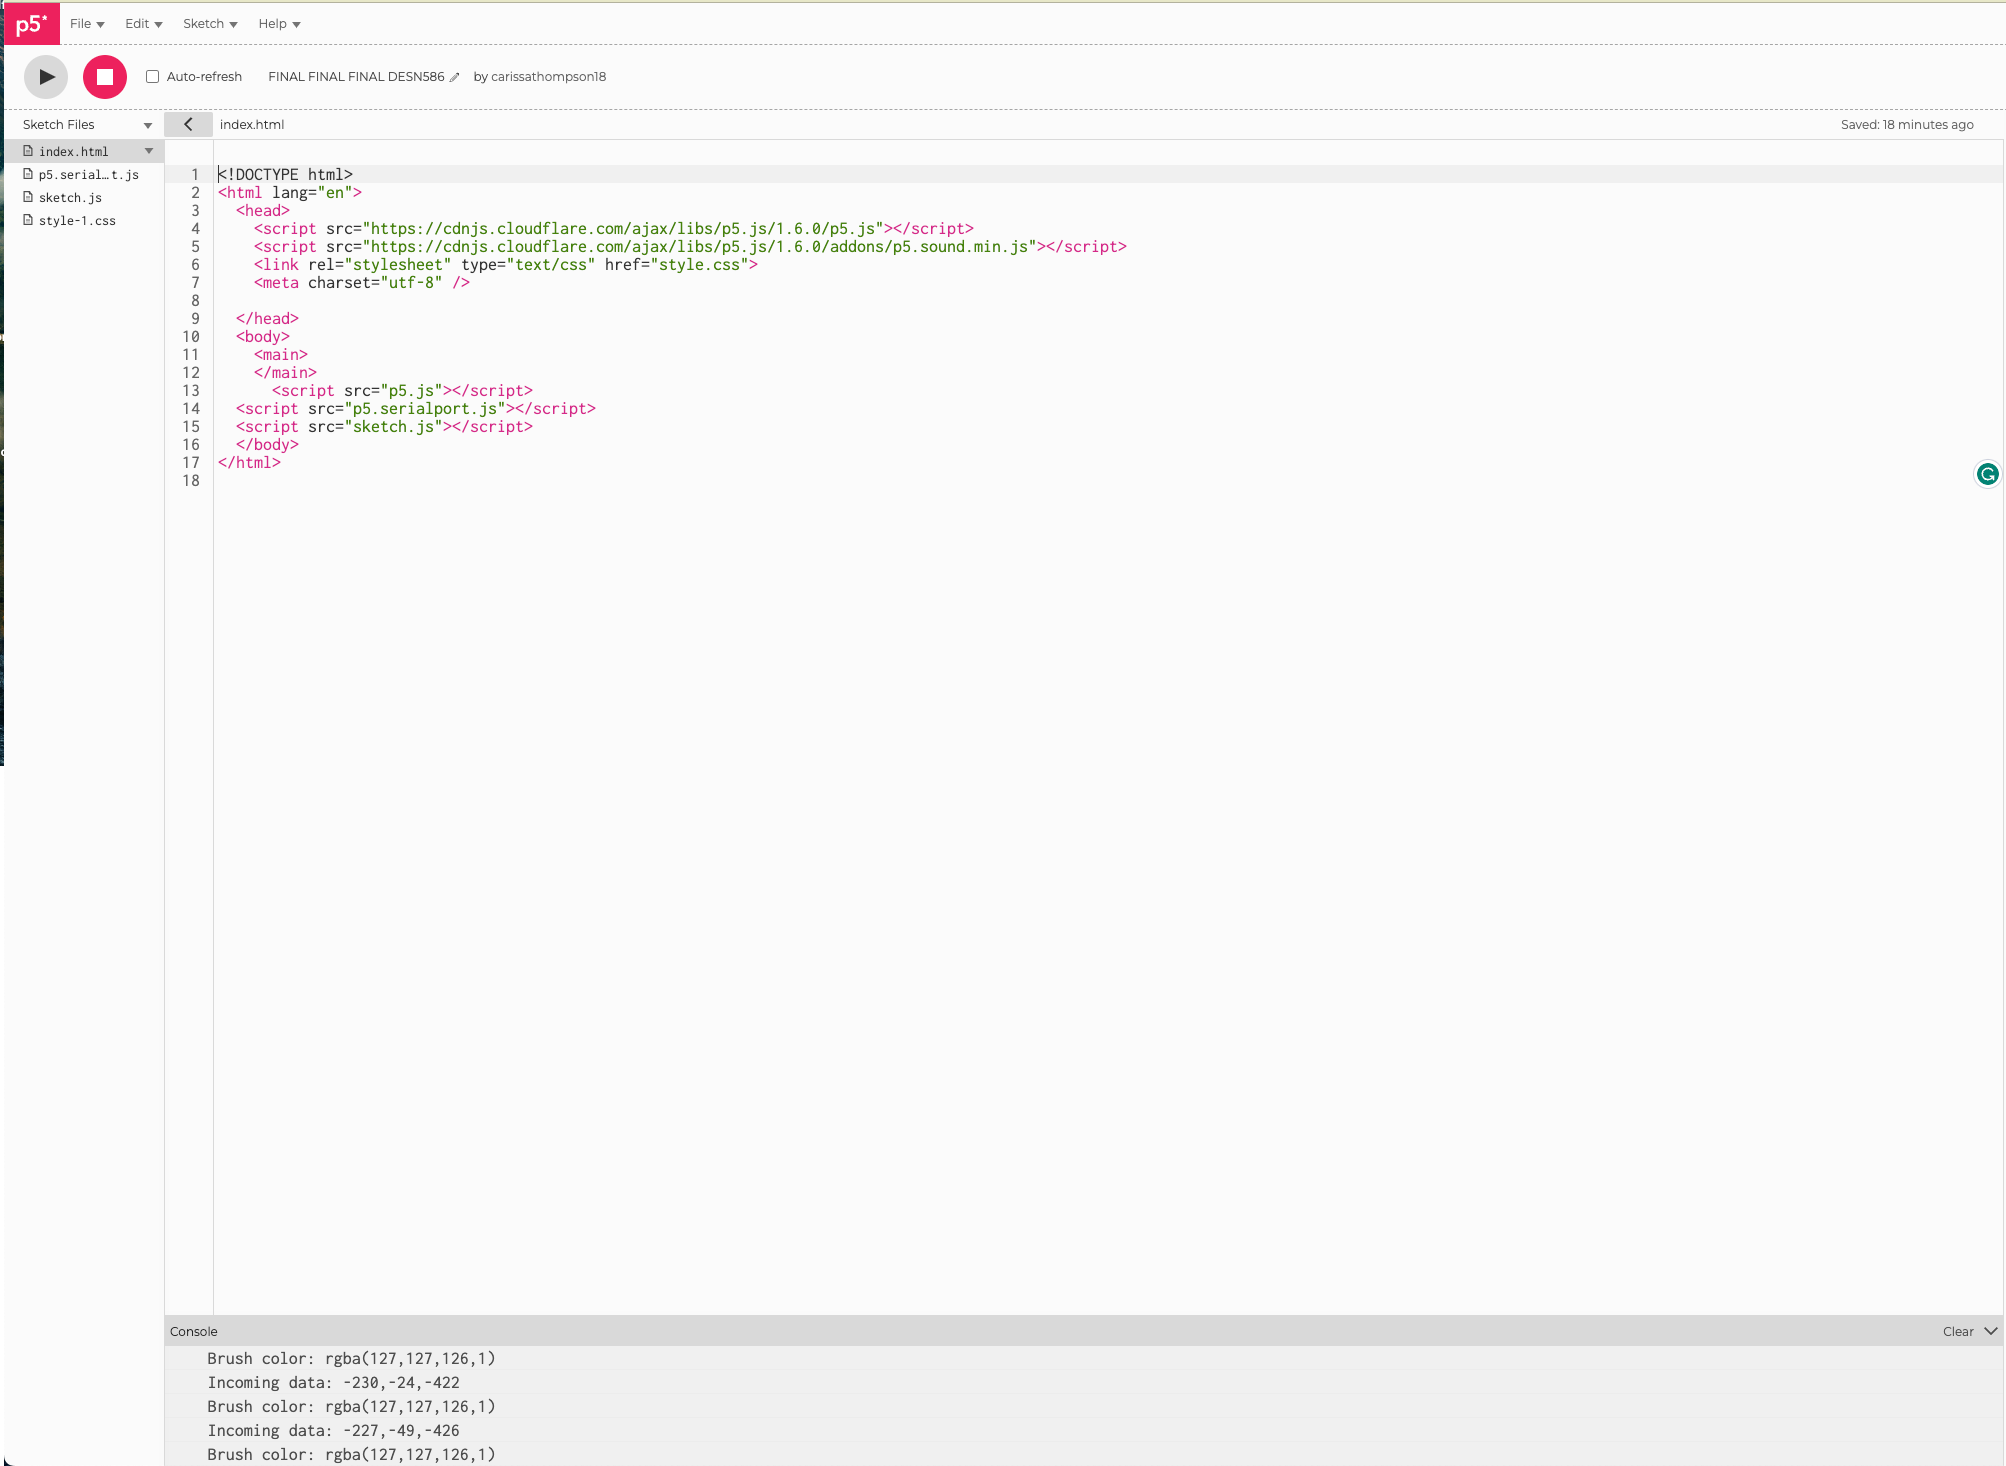
Add the following code to your index.html on p5.js:
Downloads
Add the Sketch.js Code to Your P5.js
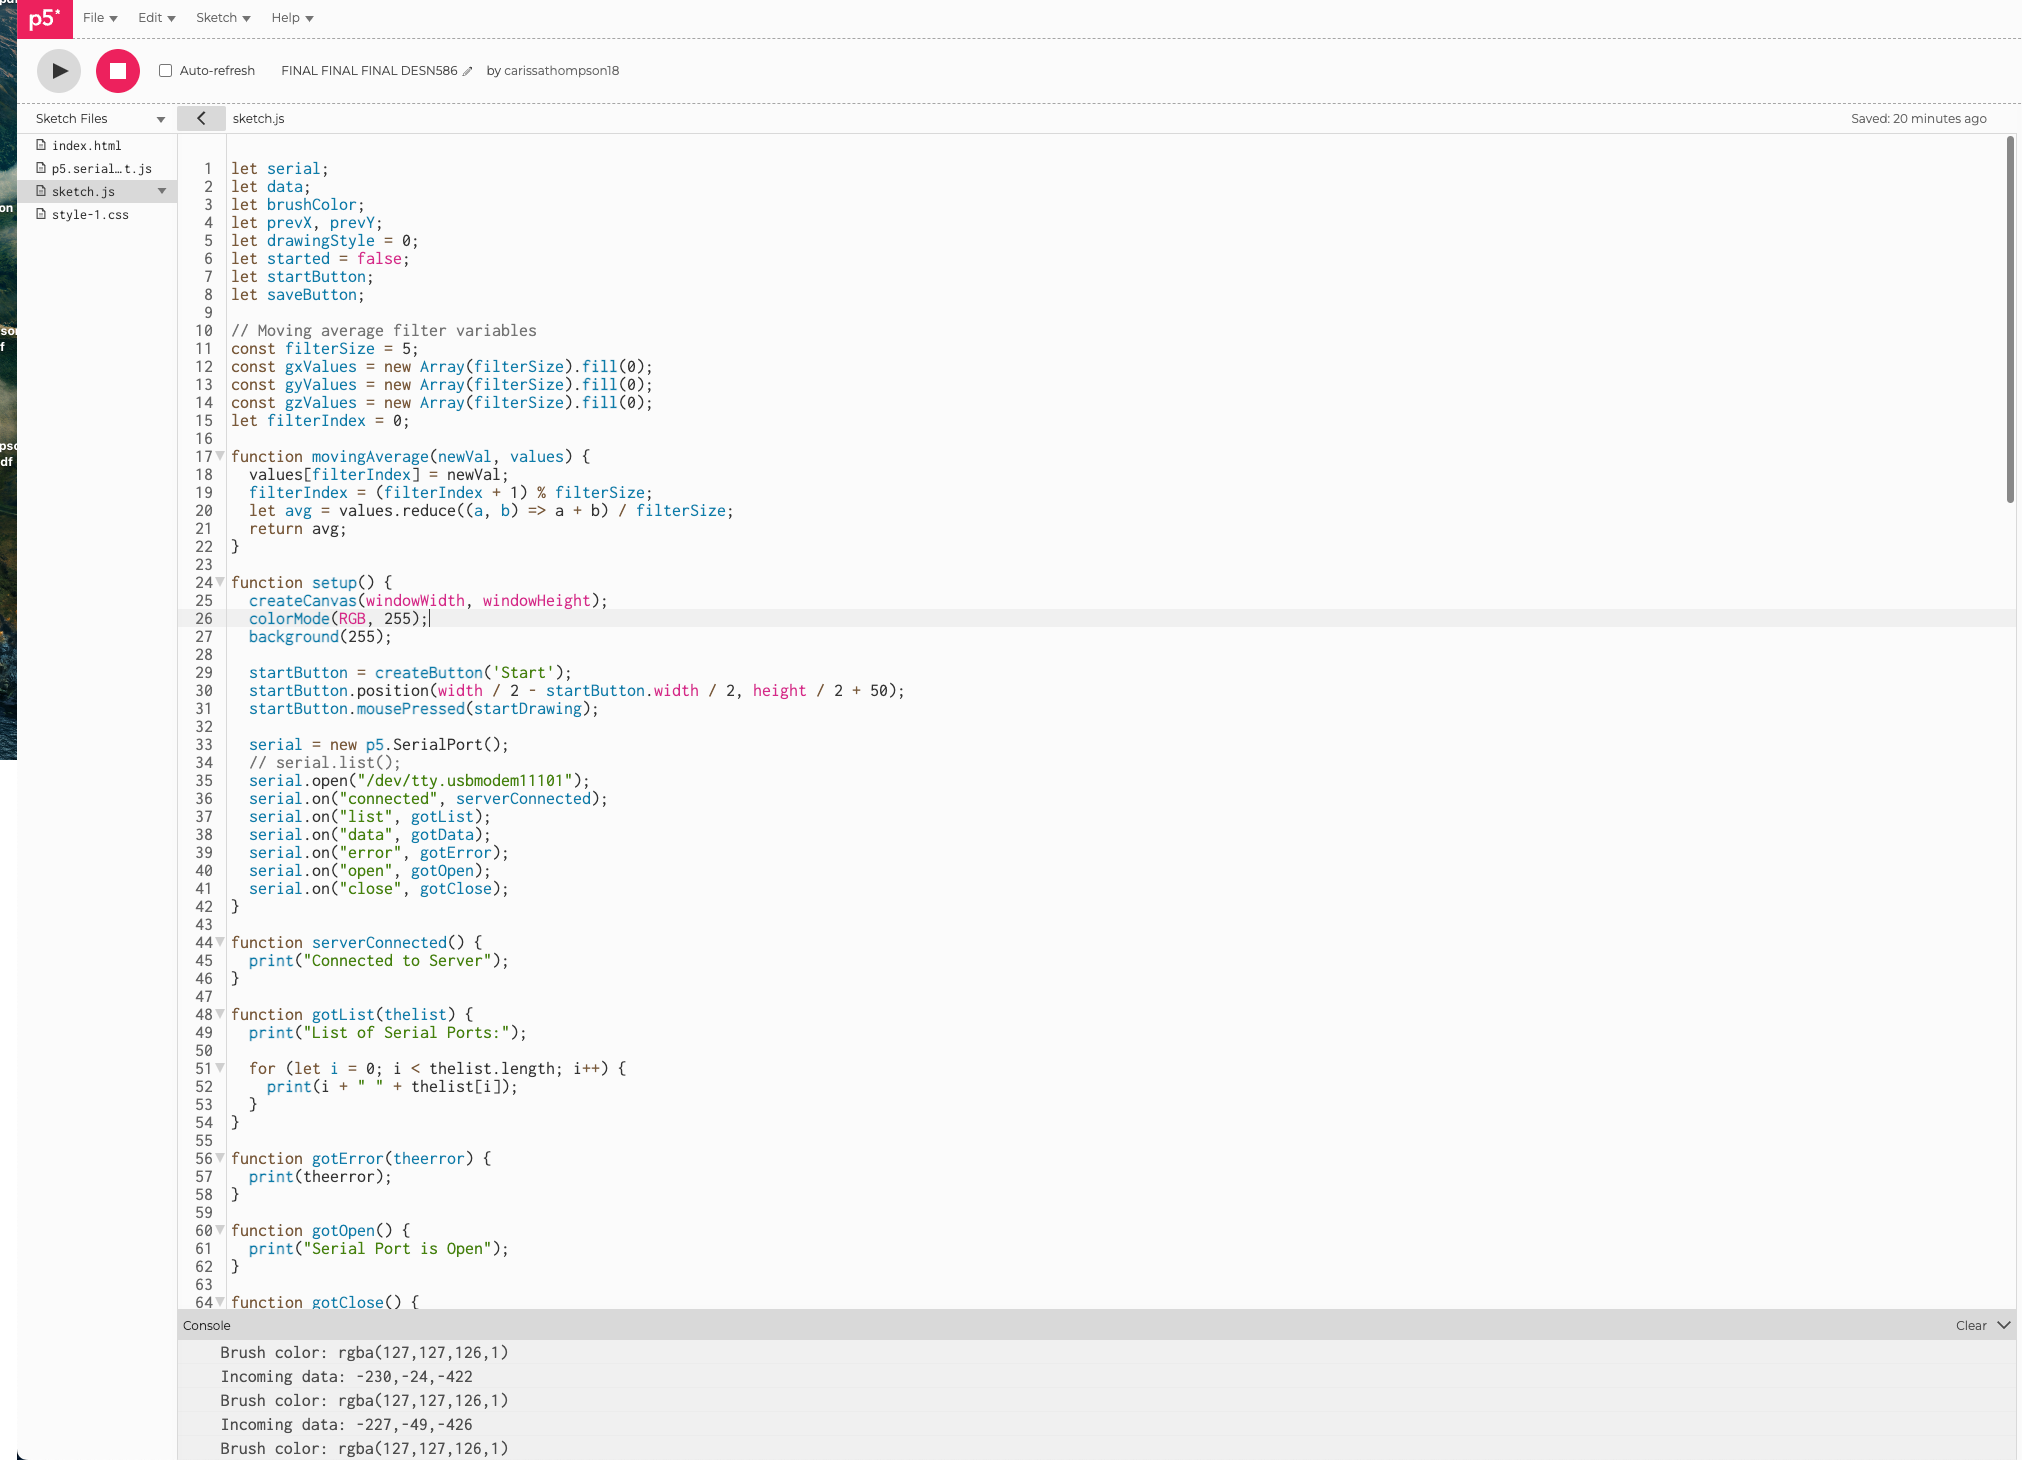
Add the following code to your sketch.js
Downloads
Test to Make Sure Everything Is Working
You should be able to move your glove, and whatever translates from the glove, will show up on your p5.js sketch!