Editing a Drone Video
.png)
Welcome! Here are a few guidelines I've learned for when your editing a drone video.
Throughout this instructable I'll be giving tips and tricks I've used when editing vlog's and drone videos.
Finding the Right Music
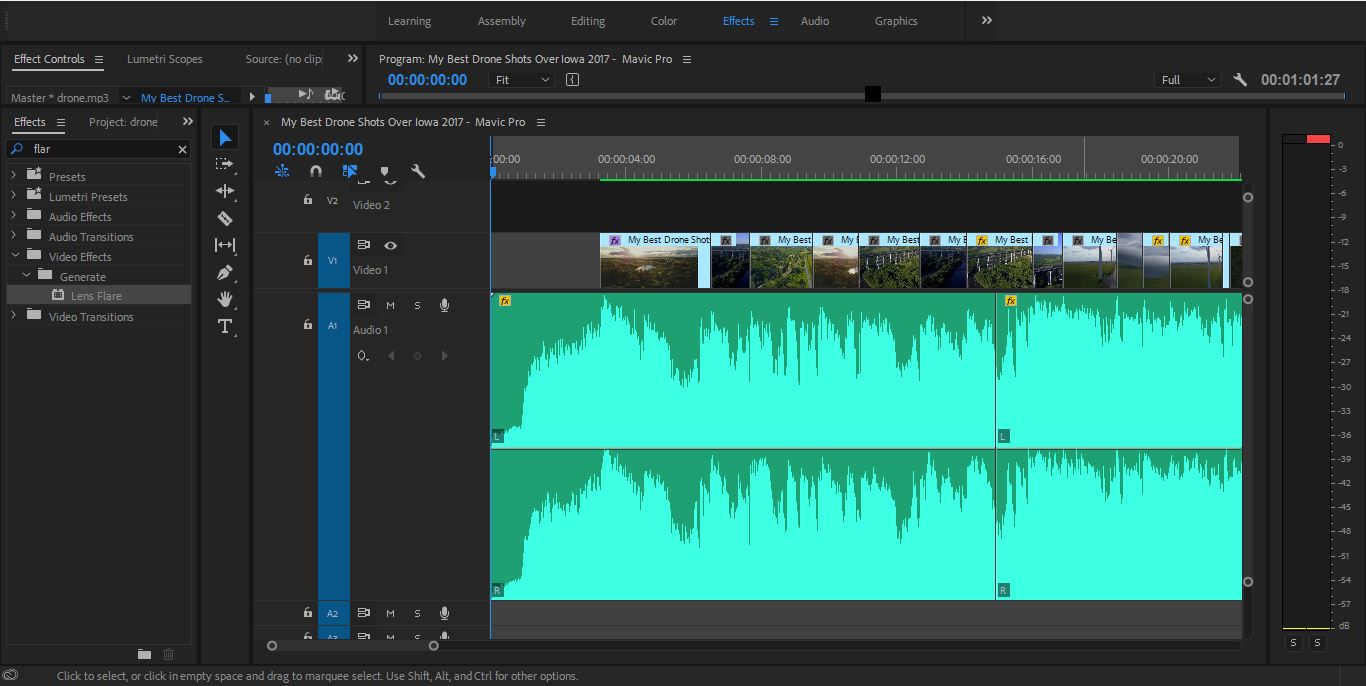
When starting a drone video or any video its important to have the right kind of music. For drone videos its a little bit of a pick and choose situation.
It also depends on what kind of video you want, if you want a more transitional upbeat drone video I'd recommend using upbeat music with a bit of a snap to it.
However if you want a slower more meaningful video you might want to find potentially softer, smoother music.
Depending on whether or not your using your drone music as background music for the rest of your video (like a vlog for example) you might have to do some editing like raising or lowering the audio.
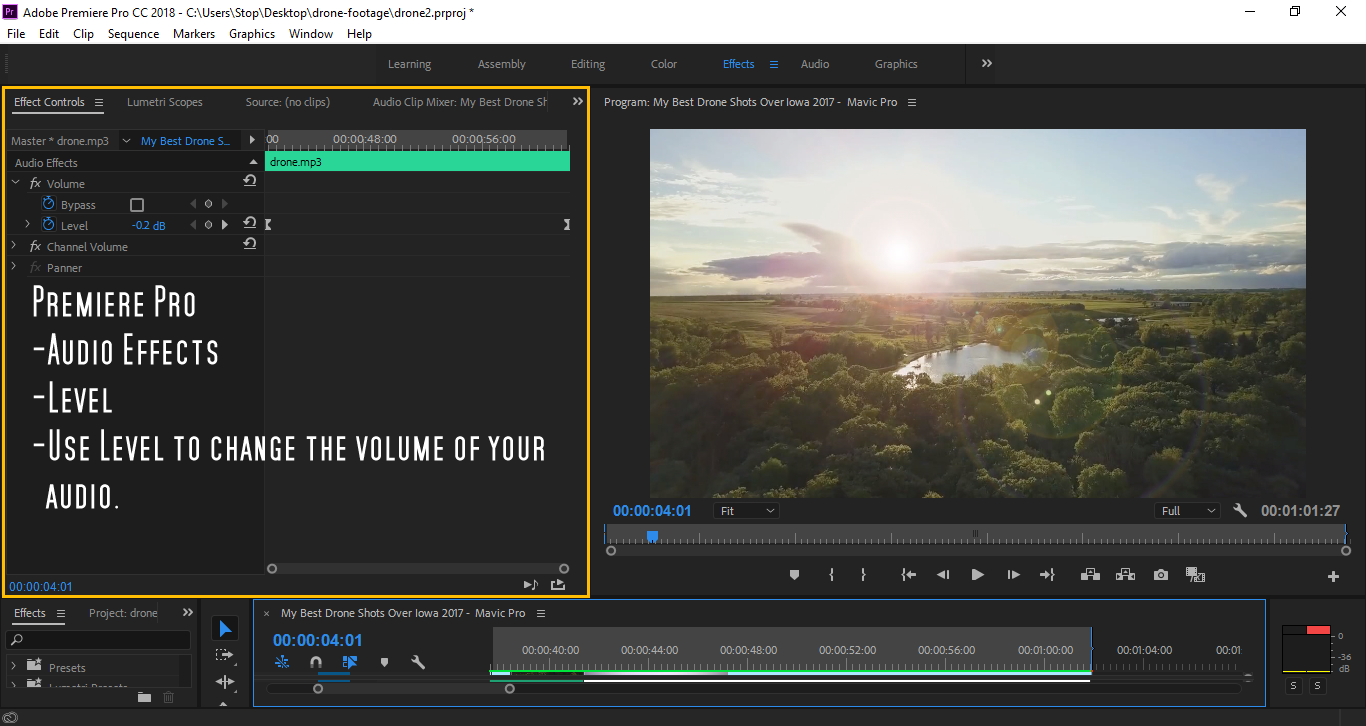
If you plan on using background music for a vlog or more of your video (if you have adobe premiere pro) you'll want to select the audio clip you want to change.
1.Go to the effects control panel (usually on the left).
2.Set a key-frame at the beginning and end of your clip under the level option.
3.You can adjust the level of your audio by clicking on the pre set number under the levels option and moving your mouse left or right. Moving the number into the negative will lower your the sound and level of your audio.
Side Note- Before using Premiere Pro I was used to having a (lower volume) option in my previous video editing software and when it comes to Premiere Pro they really don't make anything just out there and easy.
When it comes to drone videos if you find the right music you really don't have to worry about to much audio editing.
Splicing Clips With the Razor Tool
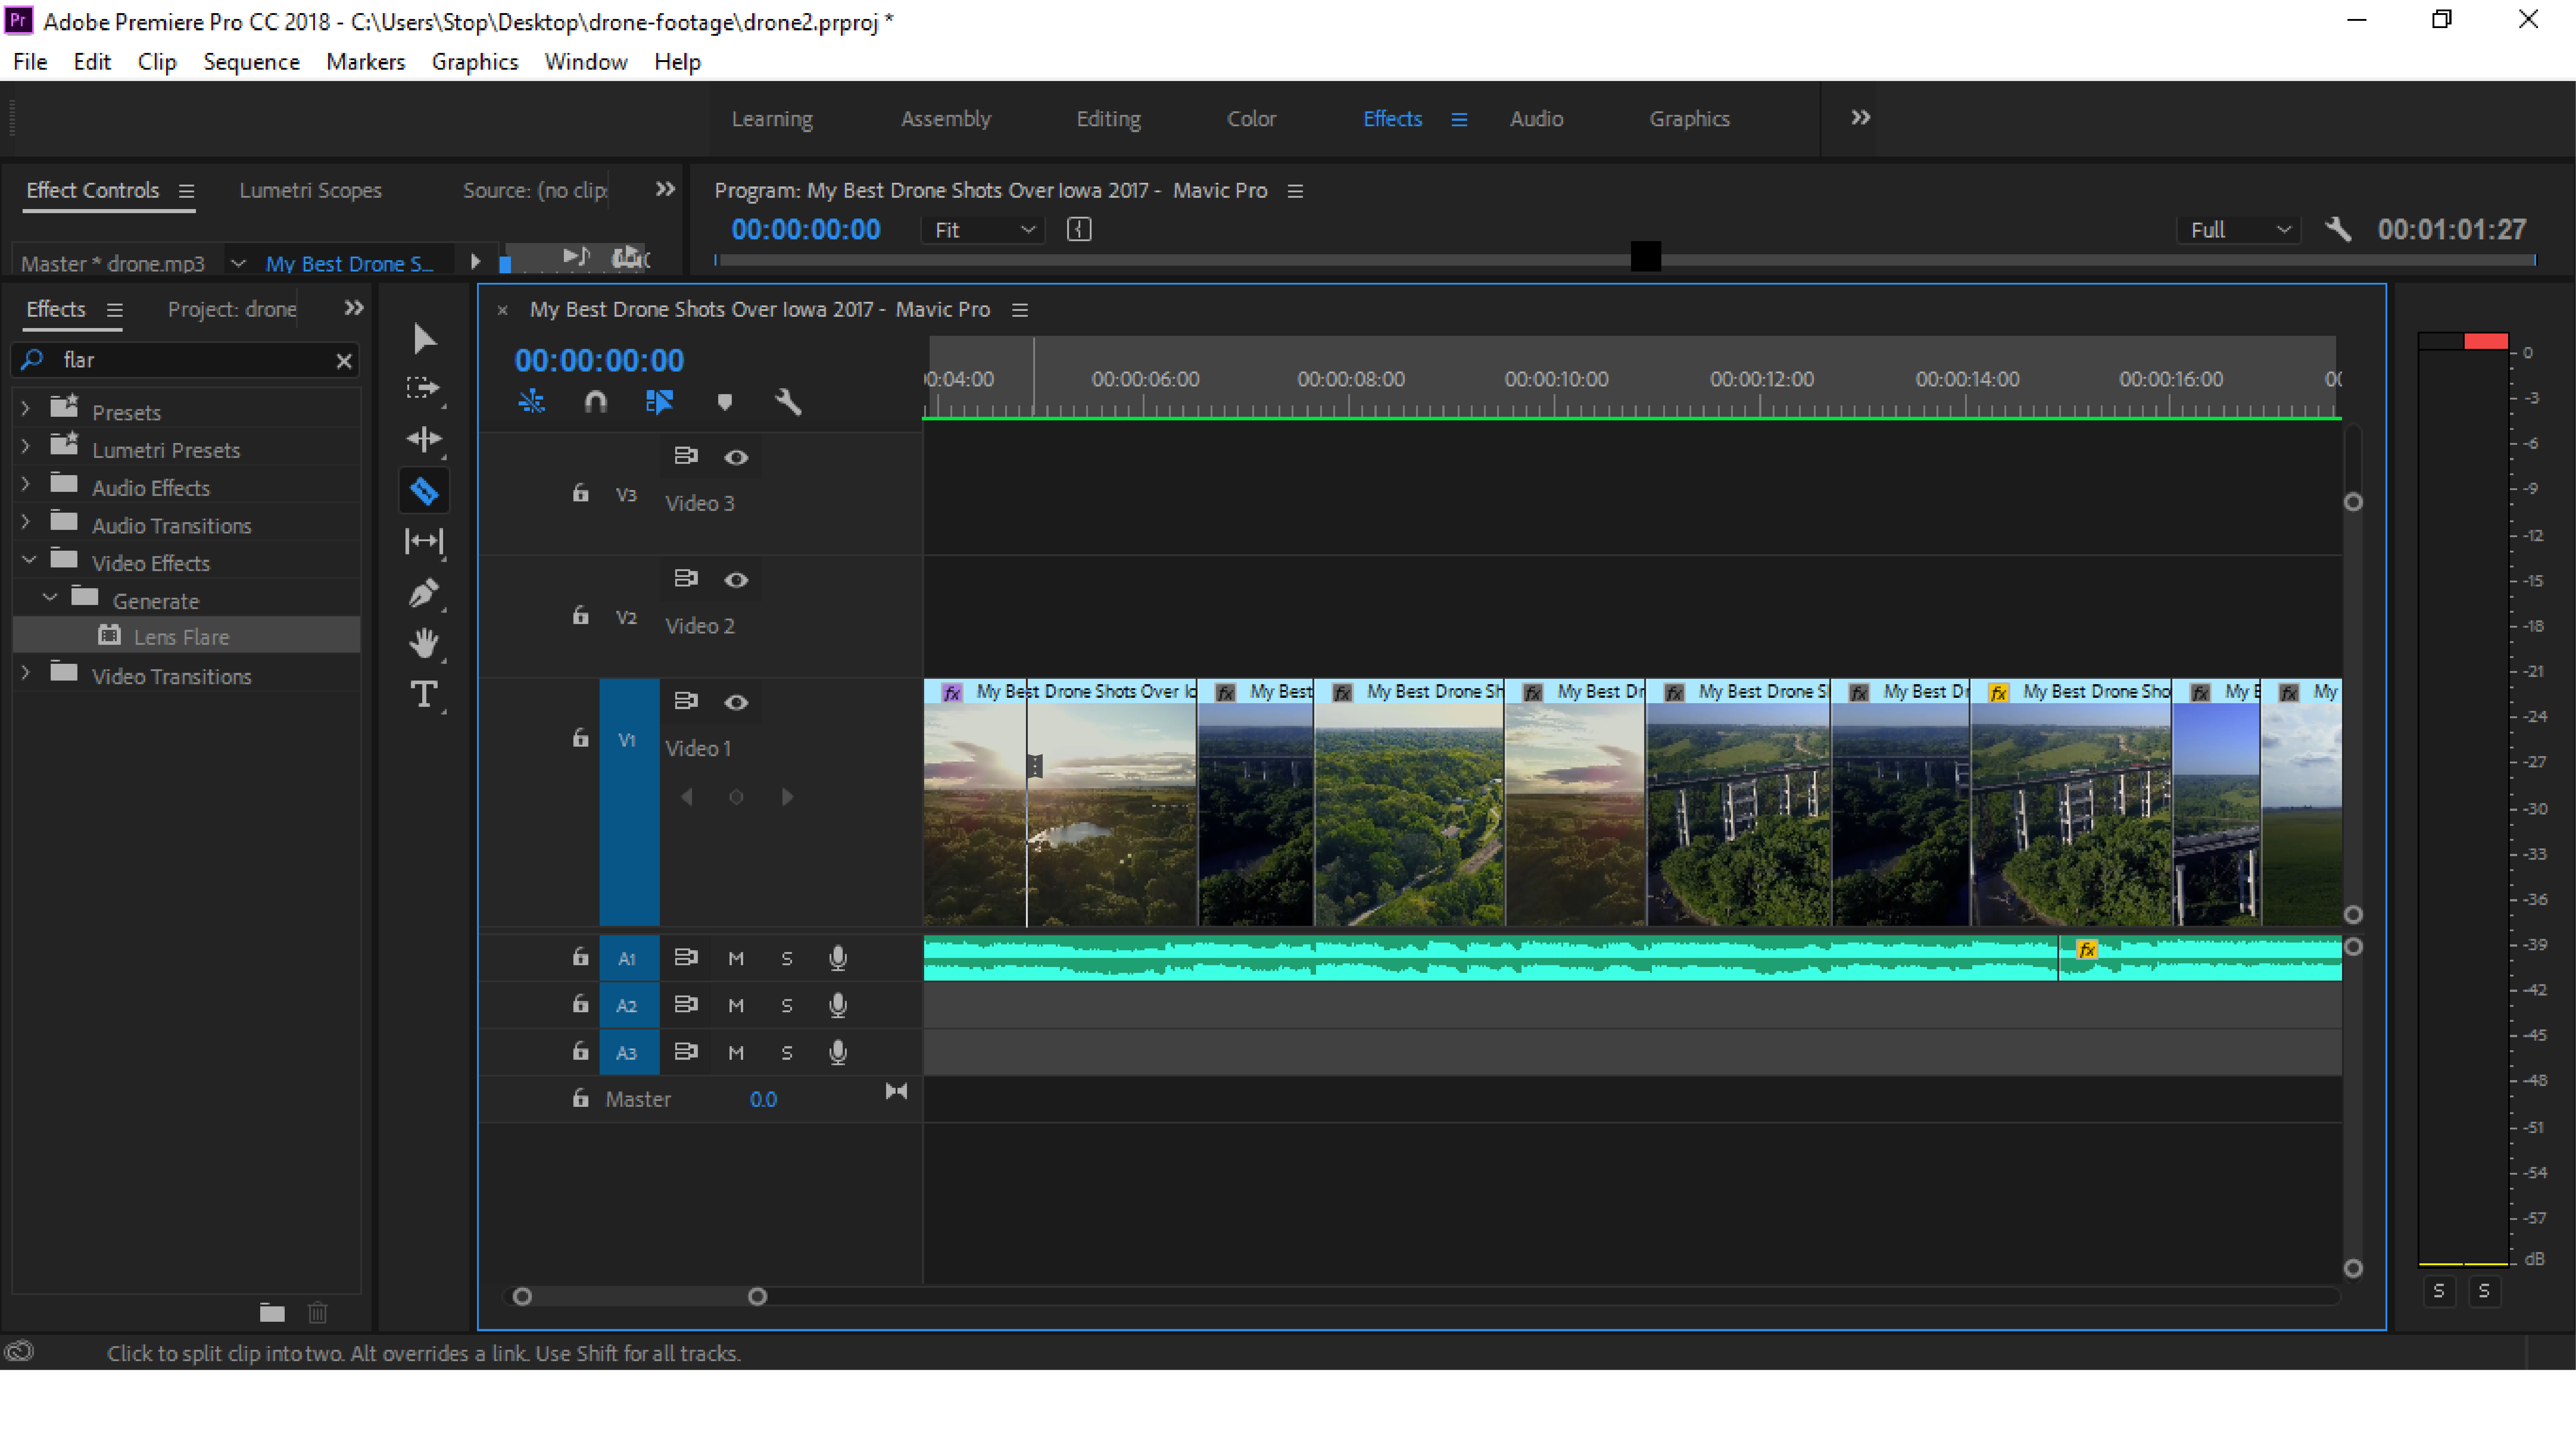
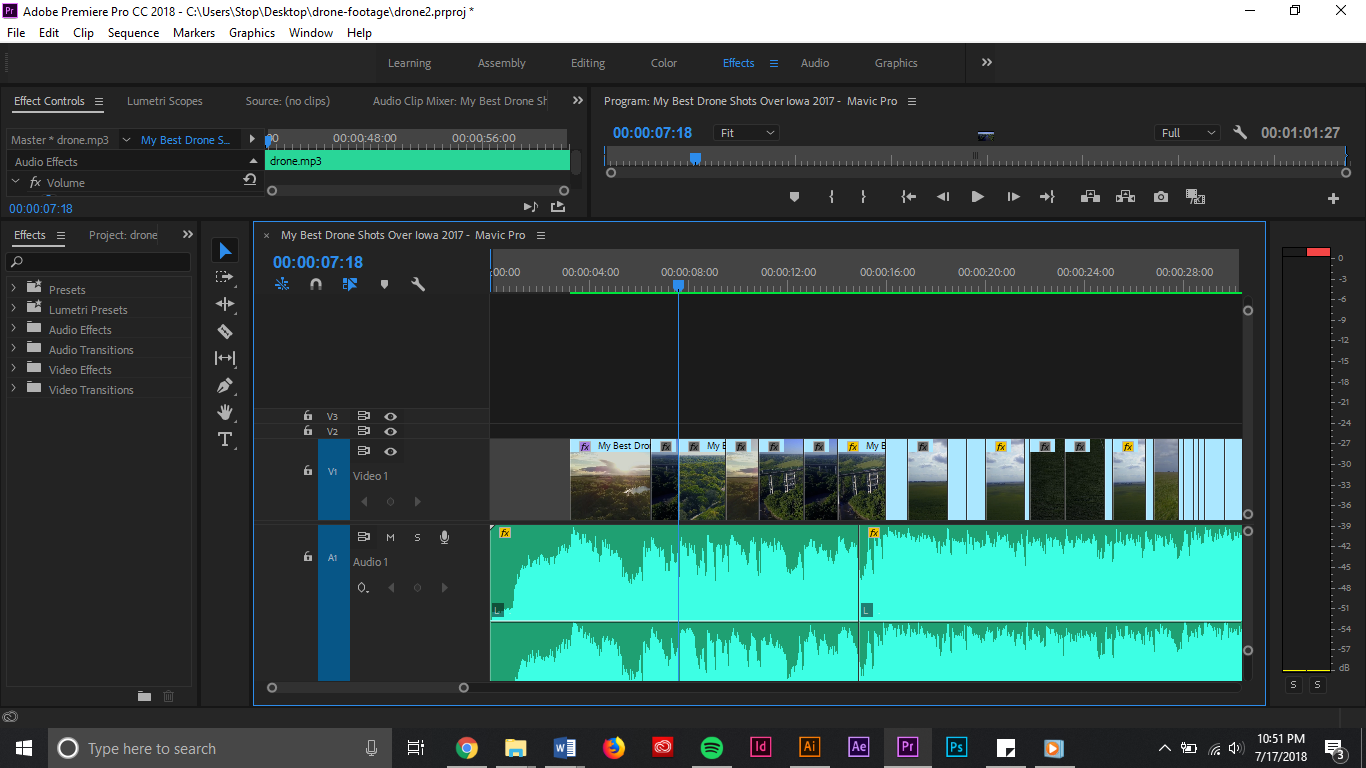
So, chopping up your footage also has a bit to do with music. When your editing a snappy drone video its common that your clips should transition to the beat of your selected music of choice.
If you look at your audio clip, usually you'll notice the little peaks of the audio.These usually are either where there's a peak in the volume or there's a increase in the bass (from what I've seen).
If your looking for a good snap transition in your footage you'll want to select the razor tool and create a snip in your footage at one of the first peaks of your audio.
Tip: When your editing your footage its good to keep your scenery organized. Meaning if you have a bunch of clips of a bridge you should keep them all together instead of spreading them out through the whole video. This is so you can transition from one thing to the next like bridges to towers to fields etc.
After you've created a snip in your footage you'll want to find the next clip you want to snap to.
Once you've found what clip you want to use next, use the razor tool to create a snip at the next clip you've selected.
After you've made a cut in the footage delete the footage in between your two cut clips.
Align the new clip, next to your first cut clip and bam! you've made a snap transition.
Finishing Up
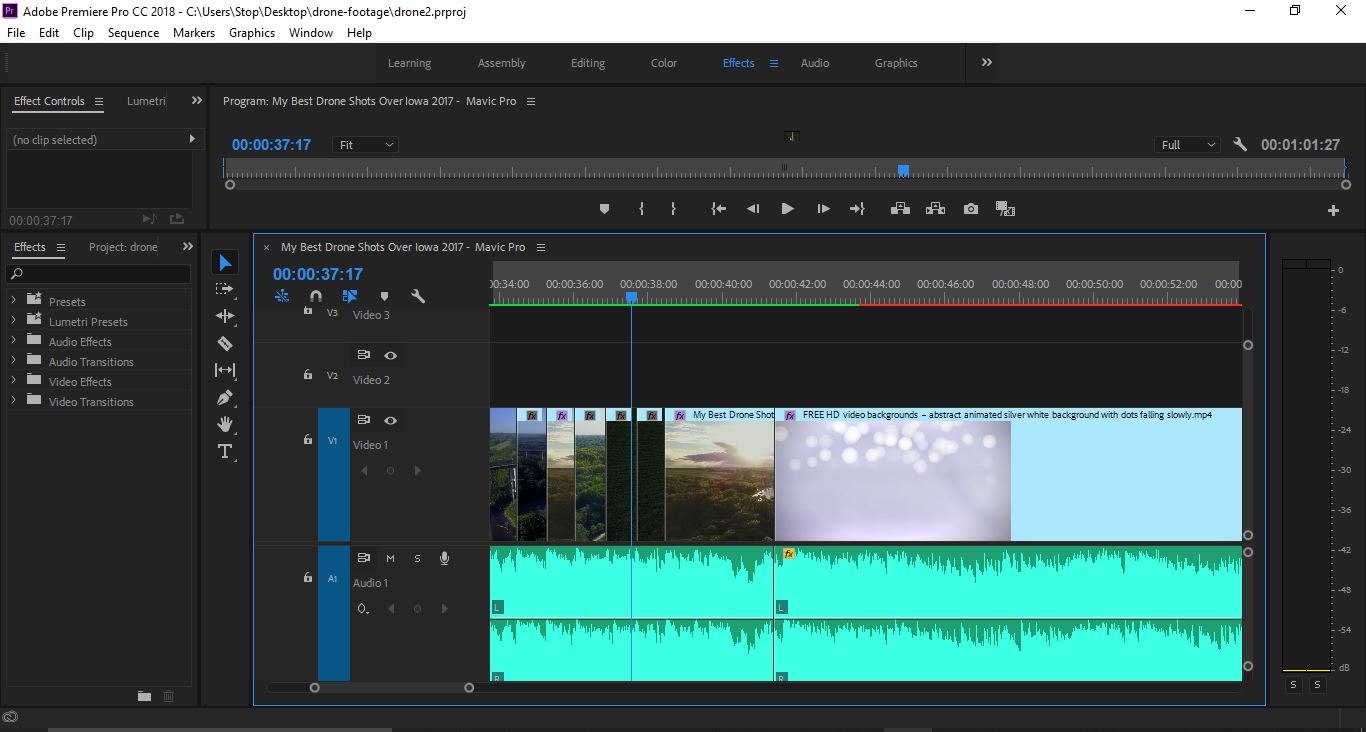
When it comes to ending your video if your uploading it to youtube its a good rule of thumb to add features and or annotations to the end of your video.
This means adding 20 seconds of footage to the end of your video where your end card will be displayed. YouTube makes it pretty simple.