Edit Photos With Software You Already Have
by sawfish5 in Design > Photography
433 Views, 2 Favorites, 0 Comments
Edit Photos With Software You Already Have
I have been into photography for a while now, and over time, I have learned how to make really nice photos with pre-installed software on a pc. Here I will show you how to use this method with angelfish, but it will work with anything.
Note that I exaggerated the method shown so you can see what everything does.
Supplies
A high quality camera(I use a canon EOS rebel T5. The T7 is the new model)
Good lighting
A PC running windows
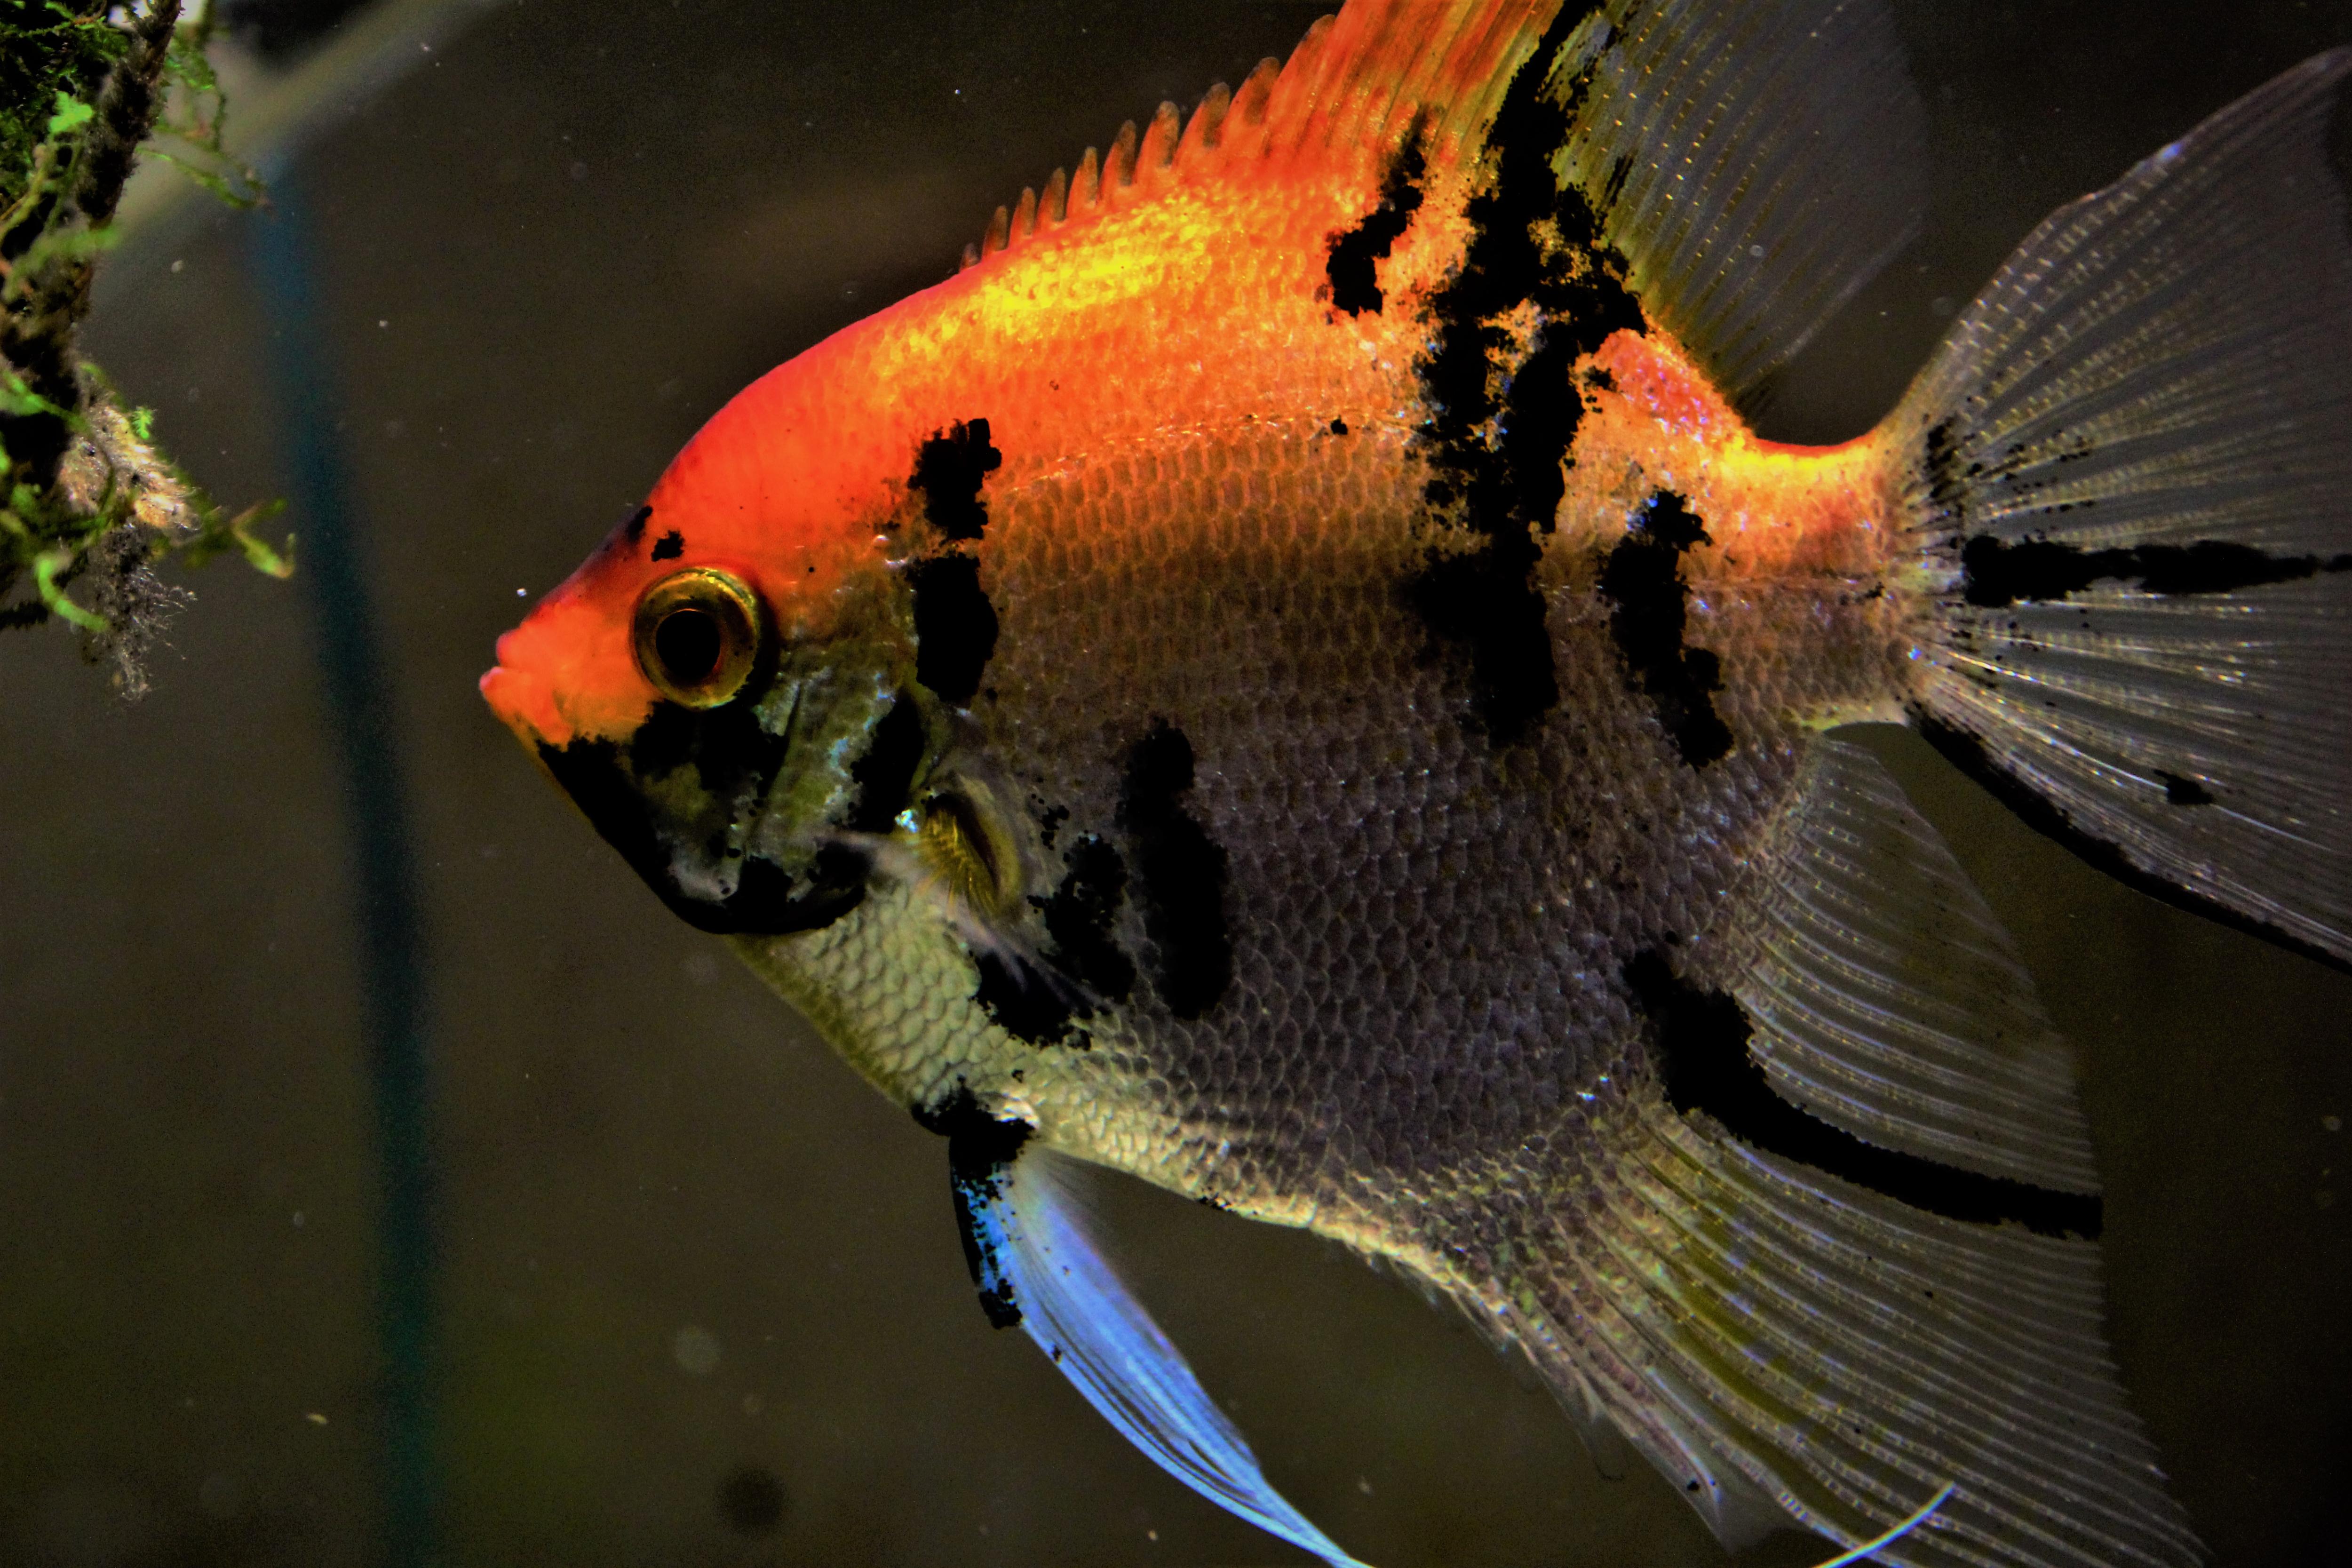
Taking a Good Picture
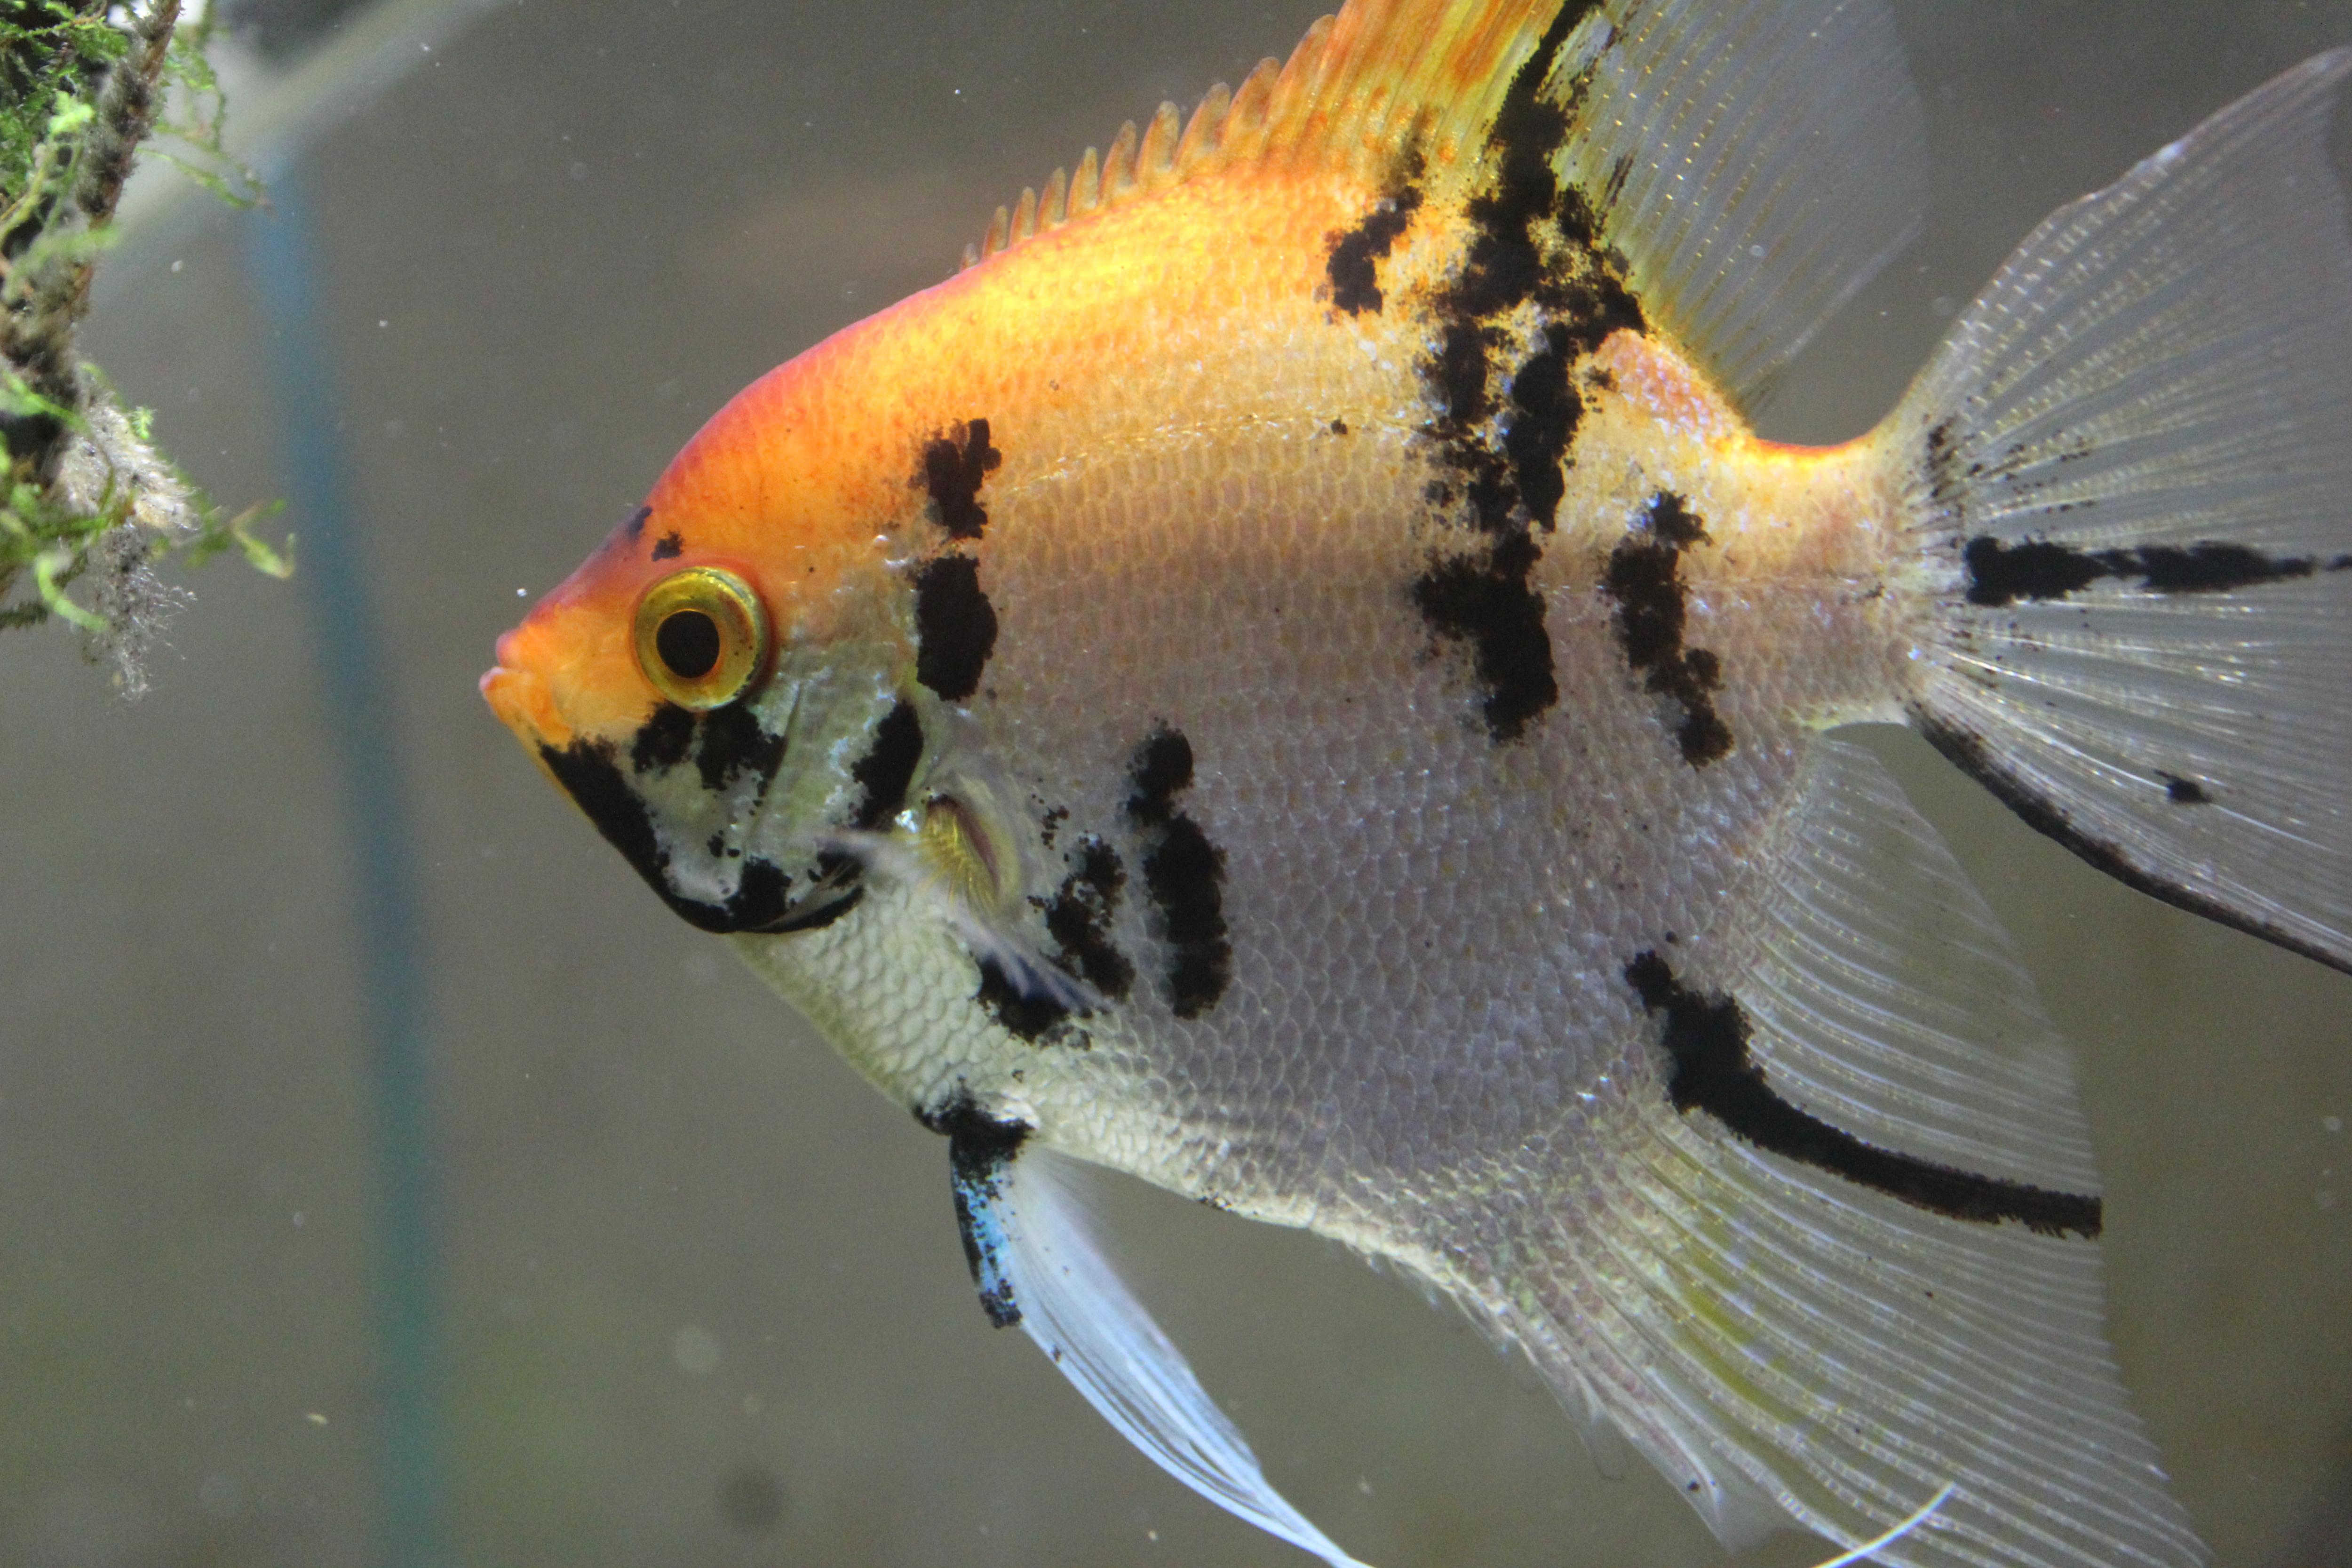
Choosing a Good Photo
Start Editing
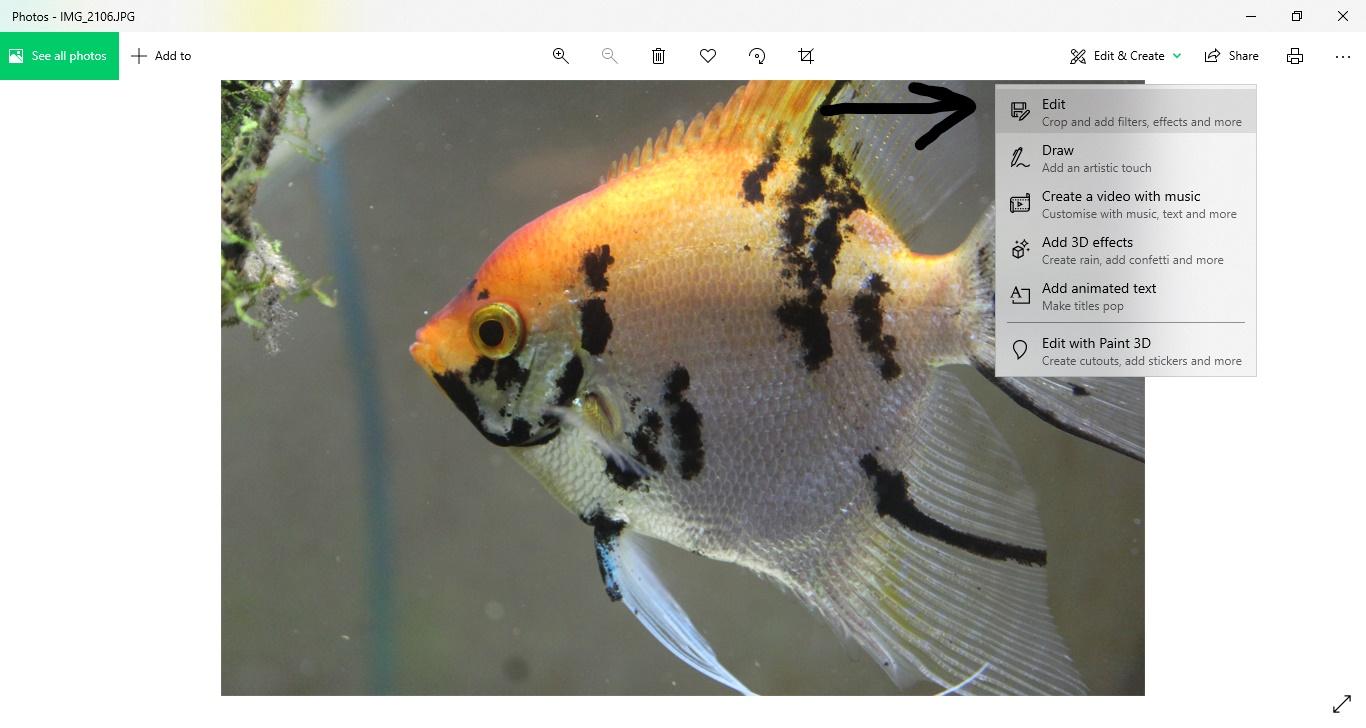
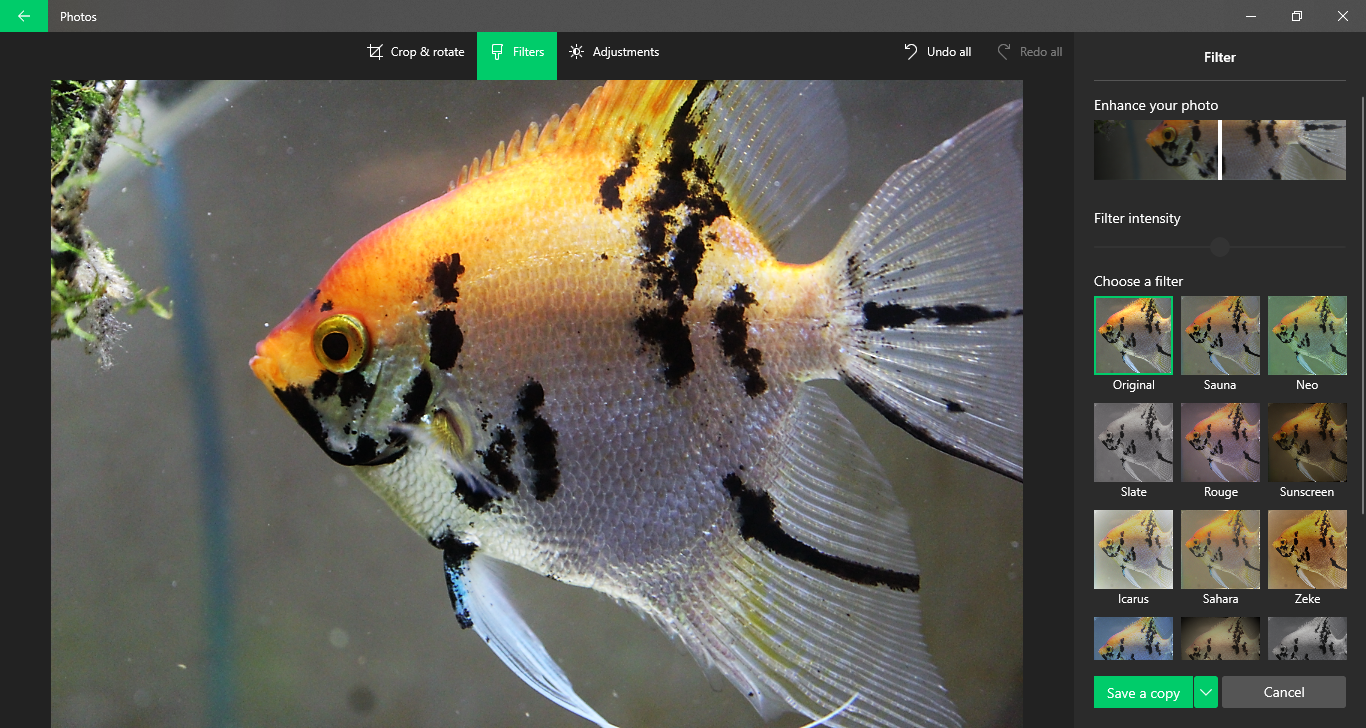
The next step is to start editing your photo. On a PC, open your image in the "Photos" app, click “edit and create”, and then click “edit”.
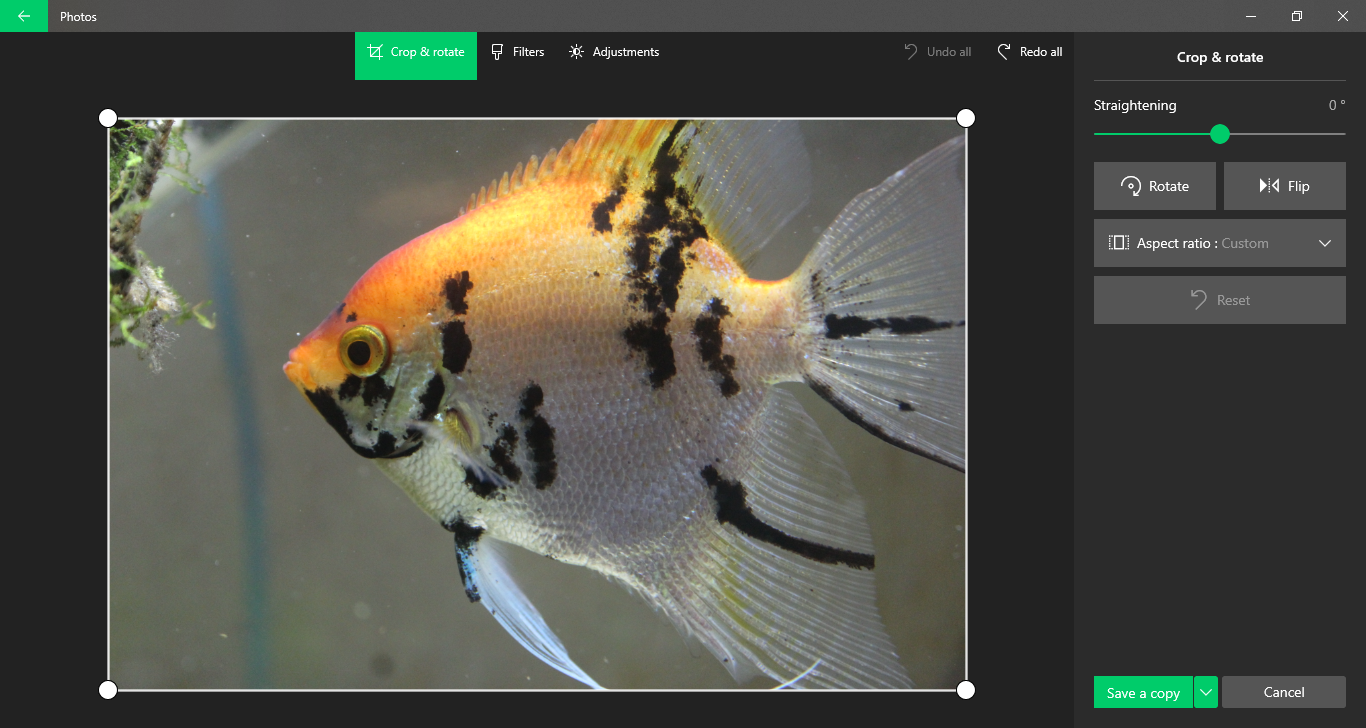
Once opened, you will be faced with a cropping screen. Unless you want to, don't crop the image.
Go to the "Filters" tab and click "Enhance your photo". I leave the slider at the default position, because if you enhance your photo too much, it will usually take on a bluish color, though this will be different with every picture.
Adjust the Light Levels
The next step is light adjustment. This is the most important step, so be sure to play around with the settings a little bit.
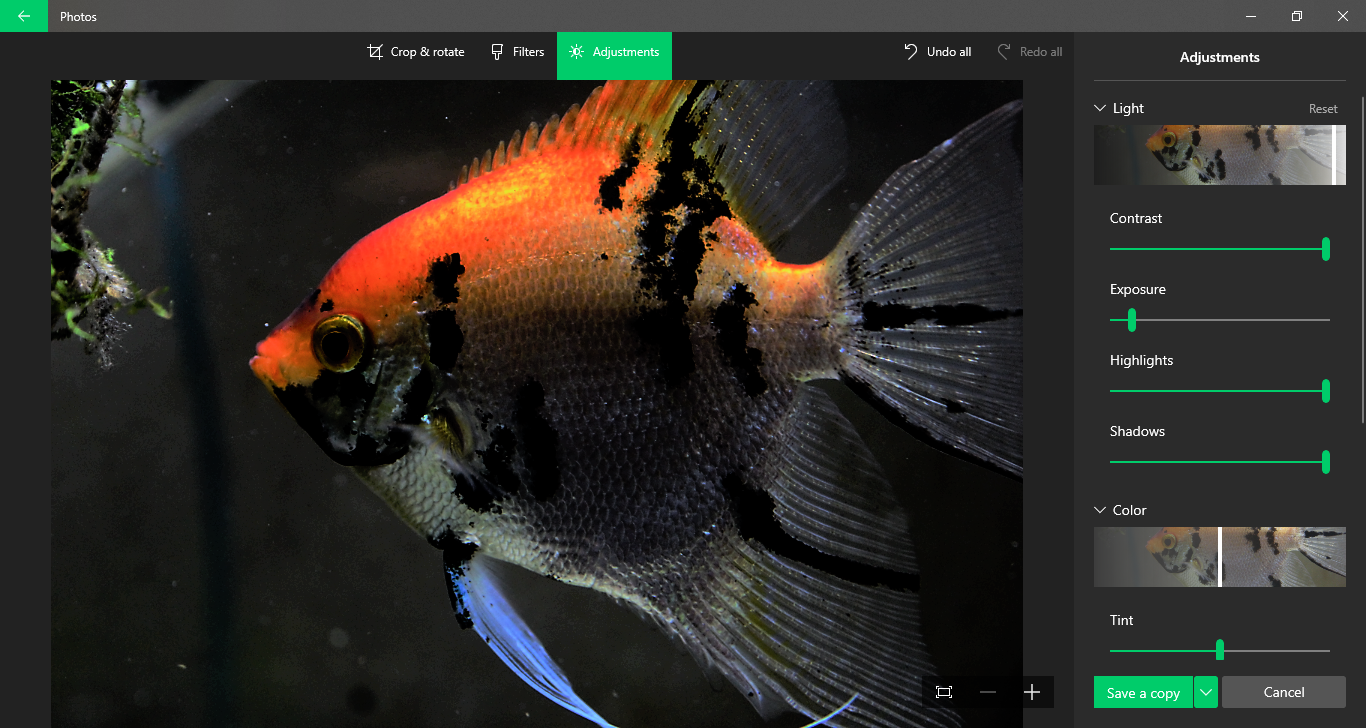
Go to the "Adjustments" tab and click the "Light" dropdown menu. The "Light" Slider changes how light or dark your image is. I usually set the "light" box almost all the way up and the "contrast" slider all the way up. Contrast sets the vibrance between the light and dark colors. The exposure sets the vibrance of all the colors. I like the "exposure" slider fairly low, but not all the way down. If it is too low, your image will be dark. Last, I like to move the "Highlights" and "Shadows" sliders all the way up. "Highlights" changes the vibrance of the lighter colors in the image, and "Shadows" changes the vibrance of the darker colors.
Adjust Image Color

Next, you can adjust your color. Note that all these are optional.
Under the "Color" dropdown menu, turn the "Color "box almost all the way up, or until you are happy with the result. “Color” changes how bright the image colors are. This step will vary by photo.
I usually leave the "Tint" slider alone, as this will drastically change the color of the picture, though I do usually turn up the "Warmth" a slight bit.
Final Changes
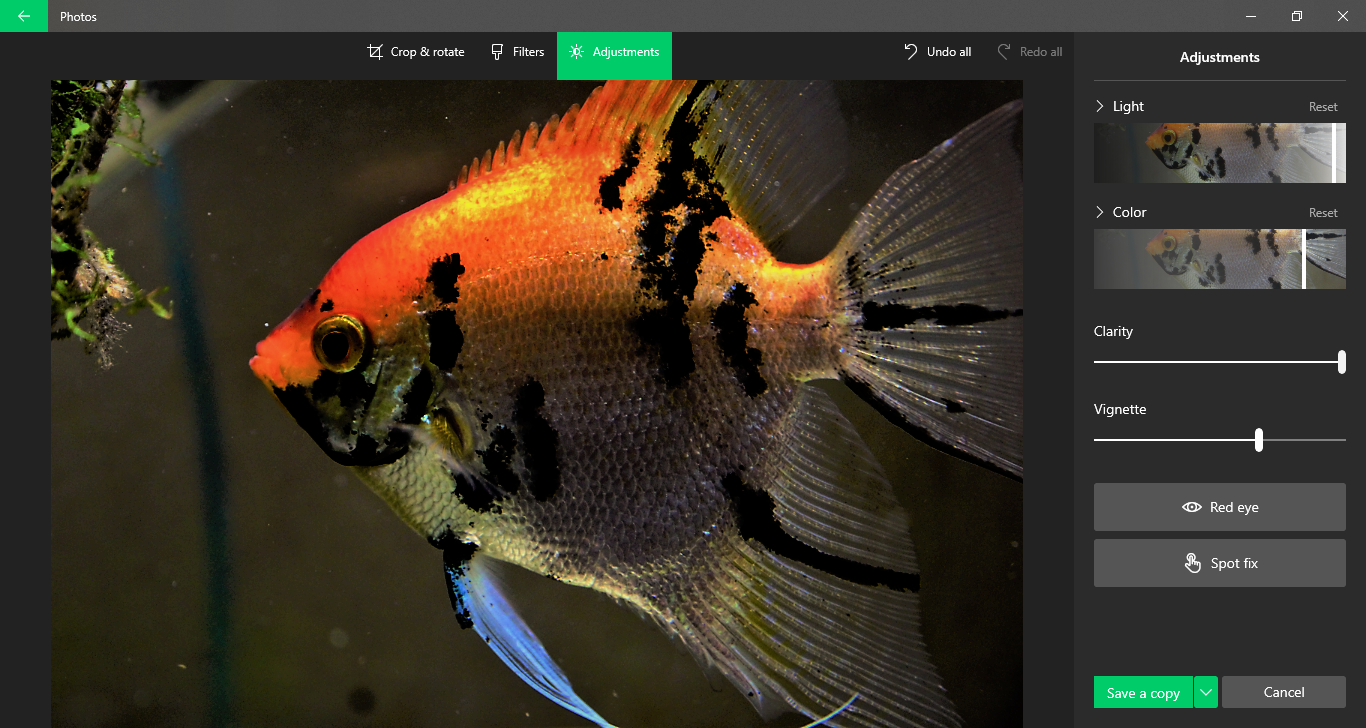
The last few things I recommend doing is changing the "Clarity" and "Vignette" sliders.
I usually set "Clarity" slider all the way up and the "Vignette" slightly up. Clarity increases the sharpness of your picture, and really improves the overall look, and vignette darkens or lightens the corners to fade into the center of the picture.
Finishing Up
All that's left to do is save your image and enjoy your work! Click on “save a copy” and it the editor will not change the original picture, and instead create a copy of the original picture to change in the same folder. If you click “save”, the editor will overwrite the original file, which I don’t recommend doing. If you aren’t happy with the results, just play around with the settings until you like it. Good luck, and happy editing!