Easy-to-Make Polyhedral Kaleidoscopes
by edmark in Workshop > Science
23593 Views, 119 Favorites, 0 Comments
Easy-to-Make Polyhedral Kaleidoscopes
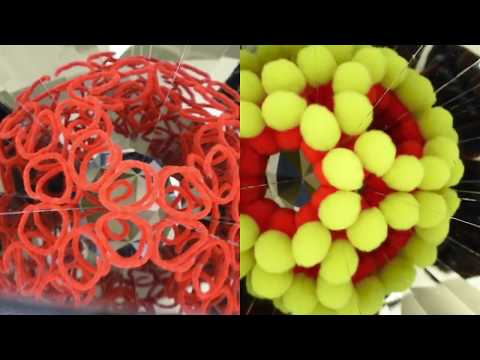
Like a regular kaleidoscope, a polyhedral kaleidoscope (PK) uses mirrors to create a repeating pattern. But whereas a regular kaleidoscope creates flat patterns, a PK creates orb-like patterns. In addition, as the name implies, PKs are also very useful tools for recreating various polyhedra, and demonstrating their respective symmetries, and as such are useful for teaching spatial geometry. (Note: 2D photos and videos cannot do justice to what it's like to view objects in an actual PK; viewed live, with binocular vision, the results are fully dimensional and completely convincing.)
This Instructable describes how to easily make three different PKs. They have been designed to be easy to build, and don't require the use of any special tools, except a laser cutter. These three PKs, combined with their respective inserts (called fundamental domains), are capable of producing a wide variety of polyhedra, including all the Platonic solids, most of the Archimedean solids, most of the Catalan solids, and many other mirror-symmetric polyhedra. In addition, placing random shapes into a PK can result in the creation of very interesting and beautiful forms. As of this writing, nobody on the planet produces and sells PKs, so you have to make your own.
In order to function properly, a PK must be constructed with extreme precision. Historically, this has meant that the fabrication of a PK required considerable craft skills, as well as access to precision tools and machines. Consequently, very few people have ever seen--or even heard of--a polyhedral kaleidoscope. But the ever-increasing access to laser cutters and laser cutting services has created an opportunity for the do-it-yourselfer to create precision artifacts without being a skilled craftsperson. This instructable contains all the information, instructions, and cutting files you will need to easily create your own polyhedral kaleidoscope. Let's get started!
Supplies
(see below)
Choose Your Version--V1: Expensive-and-easy, or V2: Inexpensive-but-a-bit-tricker-to-make
A significant potential obstacle to making these kaleidoscopes is the cost, specifically the cost of the front-surface acrylic mirror. To address this issue I have added a less expensive alternative (V2) that yields nearly the same results, but at a much lower cost. It does, however, require a couple more processes, and bit more crafting ability.
Here are each version's relative advantages and disadvantages.
V1 Advantages:
- Very easy to make
- Uses a true first-surface mirror, so there is no gap between reflections
- Mirror surface is relatively scratch-resistant
V1 Disadvantages:
- Expensive
- It's not possible to remove scratches in mirror
V2 Advantages:
- Inexpensive
- Minor scratches can be removed with polishing compound
V2 Disadvantages:
- Requires a bit more skill to produce
- Not a true first-surface mirror, so there is a very small gap between reflections.
- Usually more ripples in the reflection than with V1.
- Mirror surface is not very scratch resistant
In the following steps, whenever a process is needed only for V2 (and not for V1) it will be clearly indicated.
Materials
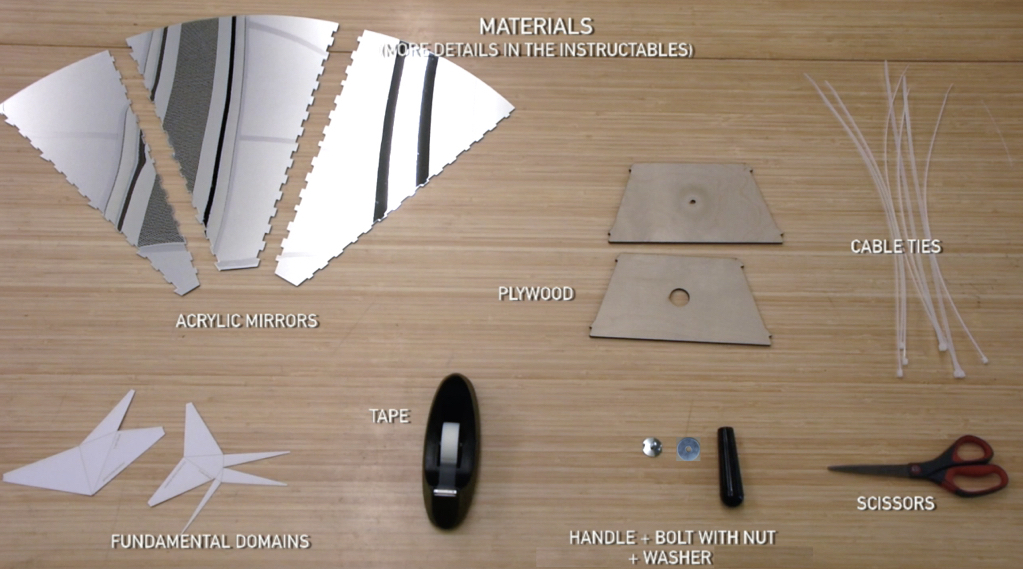
I have added a second—less expensive—version of the kaleidoscope to this instructable. (Please see the preceding step for a discussion of the two versions.) Please note that the first few items on this materials list are divided into those that are only needed for V1 and those that are only needed for V2.
For V1 Only:
From FirstSurfaceMirror.com: (choose mirror sizes based on which PKs you want to make)
Description / Price
For *532 PK: First Surface Acrylic Mirror—1/8" x 18" x 19.5" / $220
For *432 PK: First Surface Acrylic Mirror—1/8" x 10.5" x 20" / $121
For *332 PK: First Surface Acrylic Mirror—1/8" x 8" x 15" / $75
For V2 Only:
From Amazon.com:
Description / Price
For *532 PK: 2 PETG Mirror Sheets—1/32" x 11.9" x 17.9" / $23
For *432 PK: (I haven't determined the mirror requirement for these yet)
For *332 PK: 1 PETG Mirror Sheet—1/32" x 11.9" x 17.9" / $23 (only requires one of the two sheets)
1 Roll of 2 Inch, 60 Yard Masking Tape / $9
From TapPlastics.com:
Description / Price
For *532 PK: 2 Acrylic sheets—1/8" x 12" x 18" / $26
Everything below this point is needed for both V1 and V2
From WoodCraft.com:
Qty / Part # / Description / Price
1 / 131406 / Baltic Birch Plywood—1/4" x 12" x 30" / $8
From McMaster.com: (Enter the part number in the "Find" box on their website)
Qty / Part # / Description
3 / 57455K71 / Tapered Handle, Fluted, 1/4"-20 x 1/2" Insert 3-7/8" Handle Long
1 pk / 7130K21 / Standard Nylon Cable Tie, 17" Long, 50 lb Tensile Strength, White*
1 pk / 92221A240 / Flush Head Fanged Bolt with Nut, 1/4"-20 Thread, 3/4" Length
1 pk / 91090A109 / Large-Diameter Flat Washer, 1/4" Screw Size, 1-1/4" OD, .042" to .051" Thick**
* Cable ties are also readily available at hardware stores. Be sure whatever ties you use are not wider than 0.2" or they won't fit in the slots on the PKs.
** The large-diameter flat washers are also available at hardware stores, where they can usually be purchased individually. You need one washer for each PK.
For Fundamental Domains
To make the fundamental domains to place inside the PKs you will need heavy duty cardstock in either 11x17 or A3 size.
From Amazon.com:
1 11x17 Card Stock 110lb(297GSM) 250 sheet or 1 A3 Card Stock 300GSM - 100 sheets
Files for Laser Cutting
At the bottom of this step you will find two zip files, each of which contains all the files needed to cut the mirrors and mounts for the PK, and to cut the fundamental domains that go into the PKs.
File All Files (AI).zip contains files compatible with Adobe Illustrator.
File All Files (SVG).zip contains the files compatible with Inkscape (a free program).
In order to make the files friendly for laser cutters that use color coding to indicate how lines are to be treated, the lines to be cut are red, the lines to be scored are blue, and the text to be rasterized is black. All lines are .001" thick.
What follows is a description of the contents of each of the Adobe Illustrator files. (The Inkscape files contain the same drawings, but the layers have been broken out into separate files.)
File: Mirrors & Mounts
This file contains cutting paths for the three different PKs. The three different PKs are distinguished by the use of *532, *432 and *332 (orbifold notation) in their layer names. These numbers represent the symmetries involved in each of the PKs.
*532 is the PK for polyhedra with the same symmetry as an icosahedron
*432 is the PK for polyhedra with the same symmetry as an octahedron
*332 is the PK for polyhedra with the same symmetry as a tetrahedron
(If you are only going to make one PK, I suggest you make the *532, since it has the most fundamental domains.)
There is one layer for each of the three PK's mirrors. The name of each layer includes the dimensions of the mirror required to make the mirrors in that layer. This information will help you when purchasing mirror stock. There is also a special combination layer that combines the *532 and *432 on a single mirror in order to be as efficient as possible in the use of mirror (however, as of 9/2019, combining the mirrors won't actually save you any money when ordering from FirstSurfaceMirror.com).
There is one layer for each of the three PK's handle mounts (to be cut out of plywood).
The layer *532_Domain_Guide_lc contains a minature version of the *532 PK. this is useful for forming materials (e.g. Sculpey) before placing them in the actual PK
Files: 532 Fundamental Domains, 432 Fundamental Domains, 332 Fundamental Domains
These files contain the cutting paths for the fundamental domains of the three PKs. Each of the files contain one layer for each fundamental domain. To allow for rapid cutting of sets of fundamental domains, each file also contains layers that combine the fundamental domains. These layers have the word "group" in their name. These group layers have been laid out to fit on both A3 and 11"x17" cardstock.
Here are the cutting files:
For V2 Only: Laminating the Mirror
Skip this step if you are making V1
The body of the kaleidoscope for V2 is made of laminated plastic sheets, namely, the very thin mirror sheet laminated to the 1/8" acrylic sheet. The thin mirror sheet is provided with an adhesive back with which to laminate it to the 1/8" acrylic. Do this laminating before you laser cut the pieces.
Instructions for Laminating before laser cutting:
- Remove the protective layer from one side of the 1/8" acrylic.
- Remove the adhesive covering from the BACK of the thin mirror and place in on the 1/8" acrylic, making sure that it is fully surrounded by the slightly larger 1/8" acrylic.
- Press the mirror onto the 1/8" acrylic (To make the surface as flat as possible, it's best to first put another flat material on top of the mirror; if you just push with your bare hands you will tend to put slight ripples in the mirror surface, due to uneven pressing of the adhesive)
- Remove the protective coating on the mirror, and cover the entire surface with masking tape (doing so will result in a cleaner laser cut).
The laminated sheet is now ready to be laser cut.
IMPORTANT NOTE REGARDING LASER CUTTING: You will get much better results if you do the laser cutting in two passes for these laminated sheets. For the first pass set the power to cut through only the thin mirror sheet. For the second pass set the power to cut through the 1/8" acrylic. This two-pass cutting will give you a much cleaner cut than if you cut through the entire laminate at once.
Cut the Mirrors and Plywood Handle
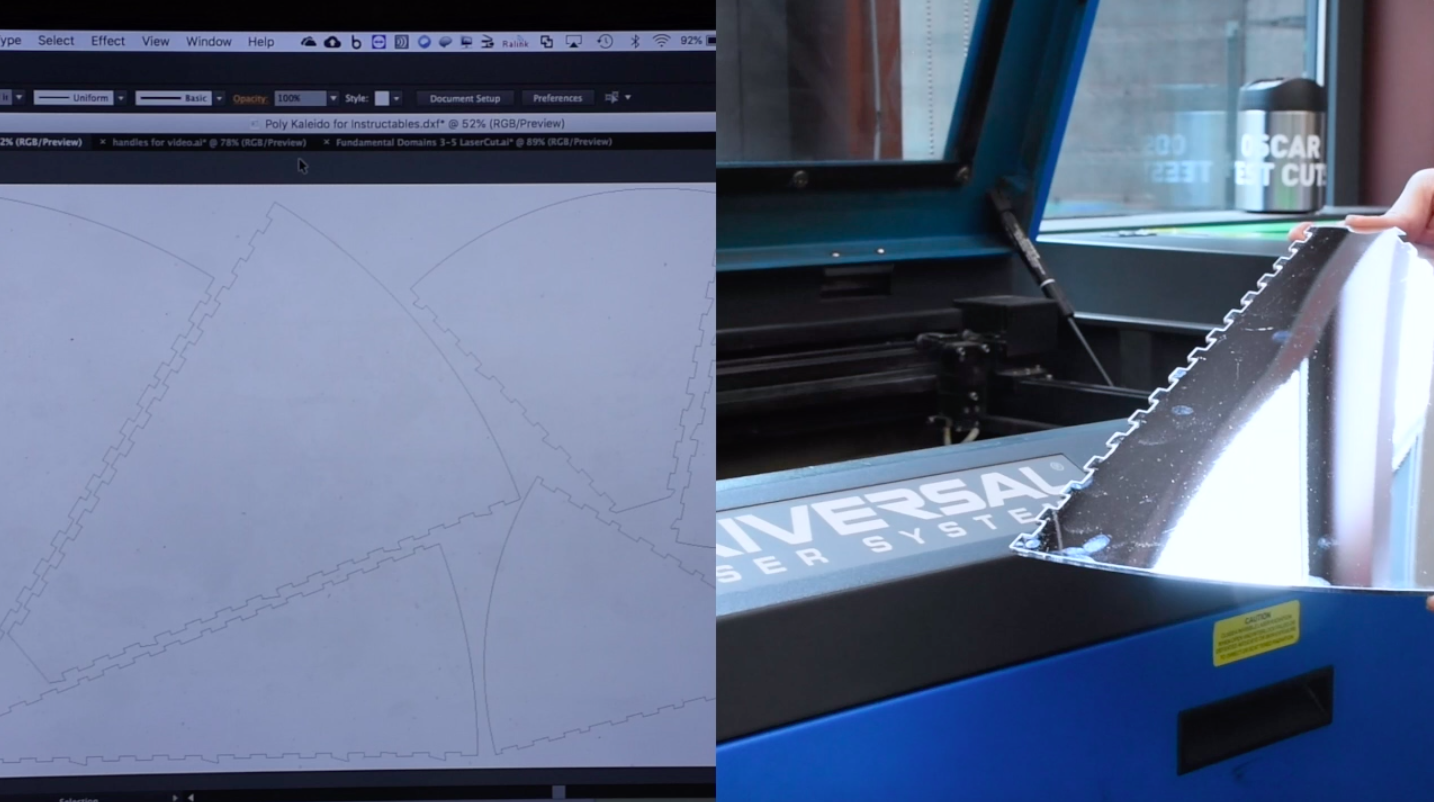
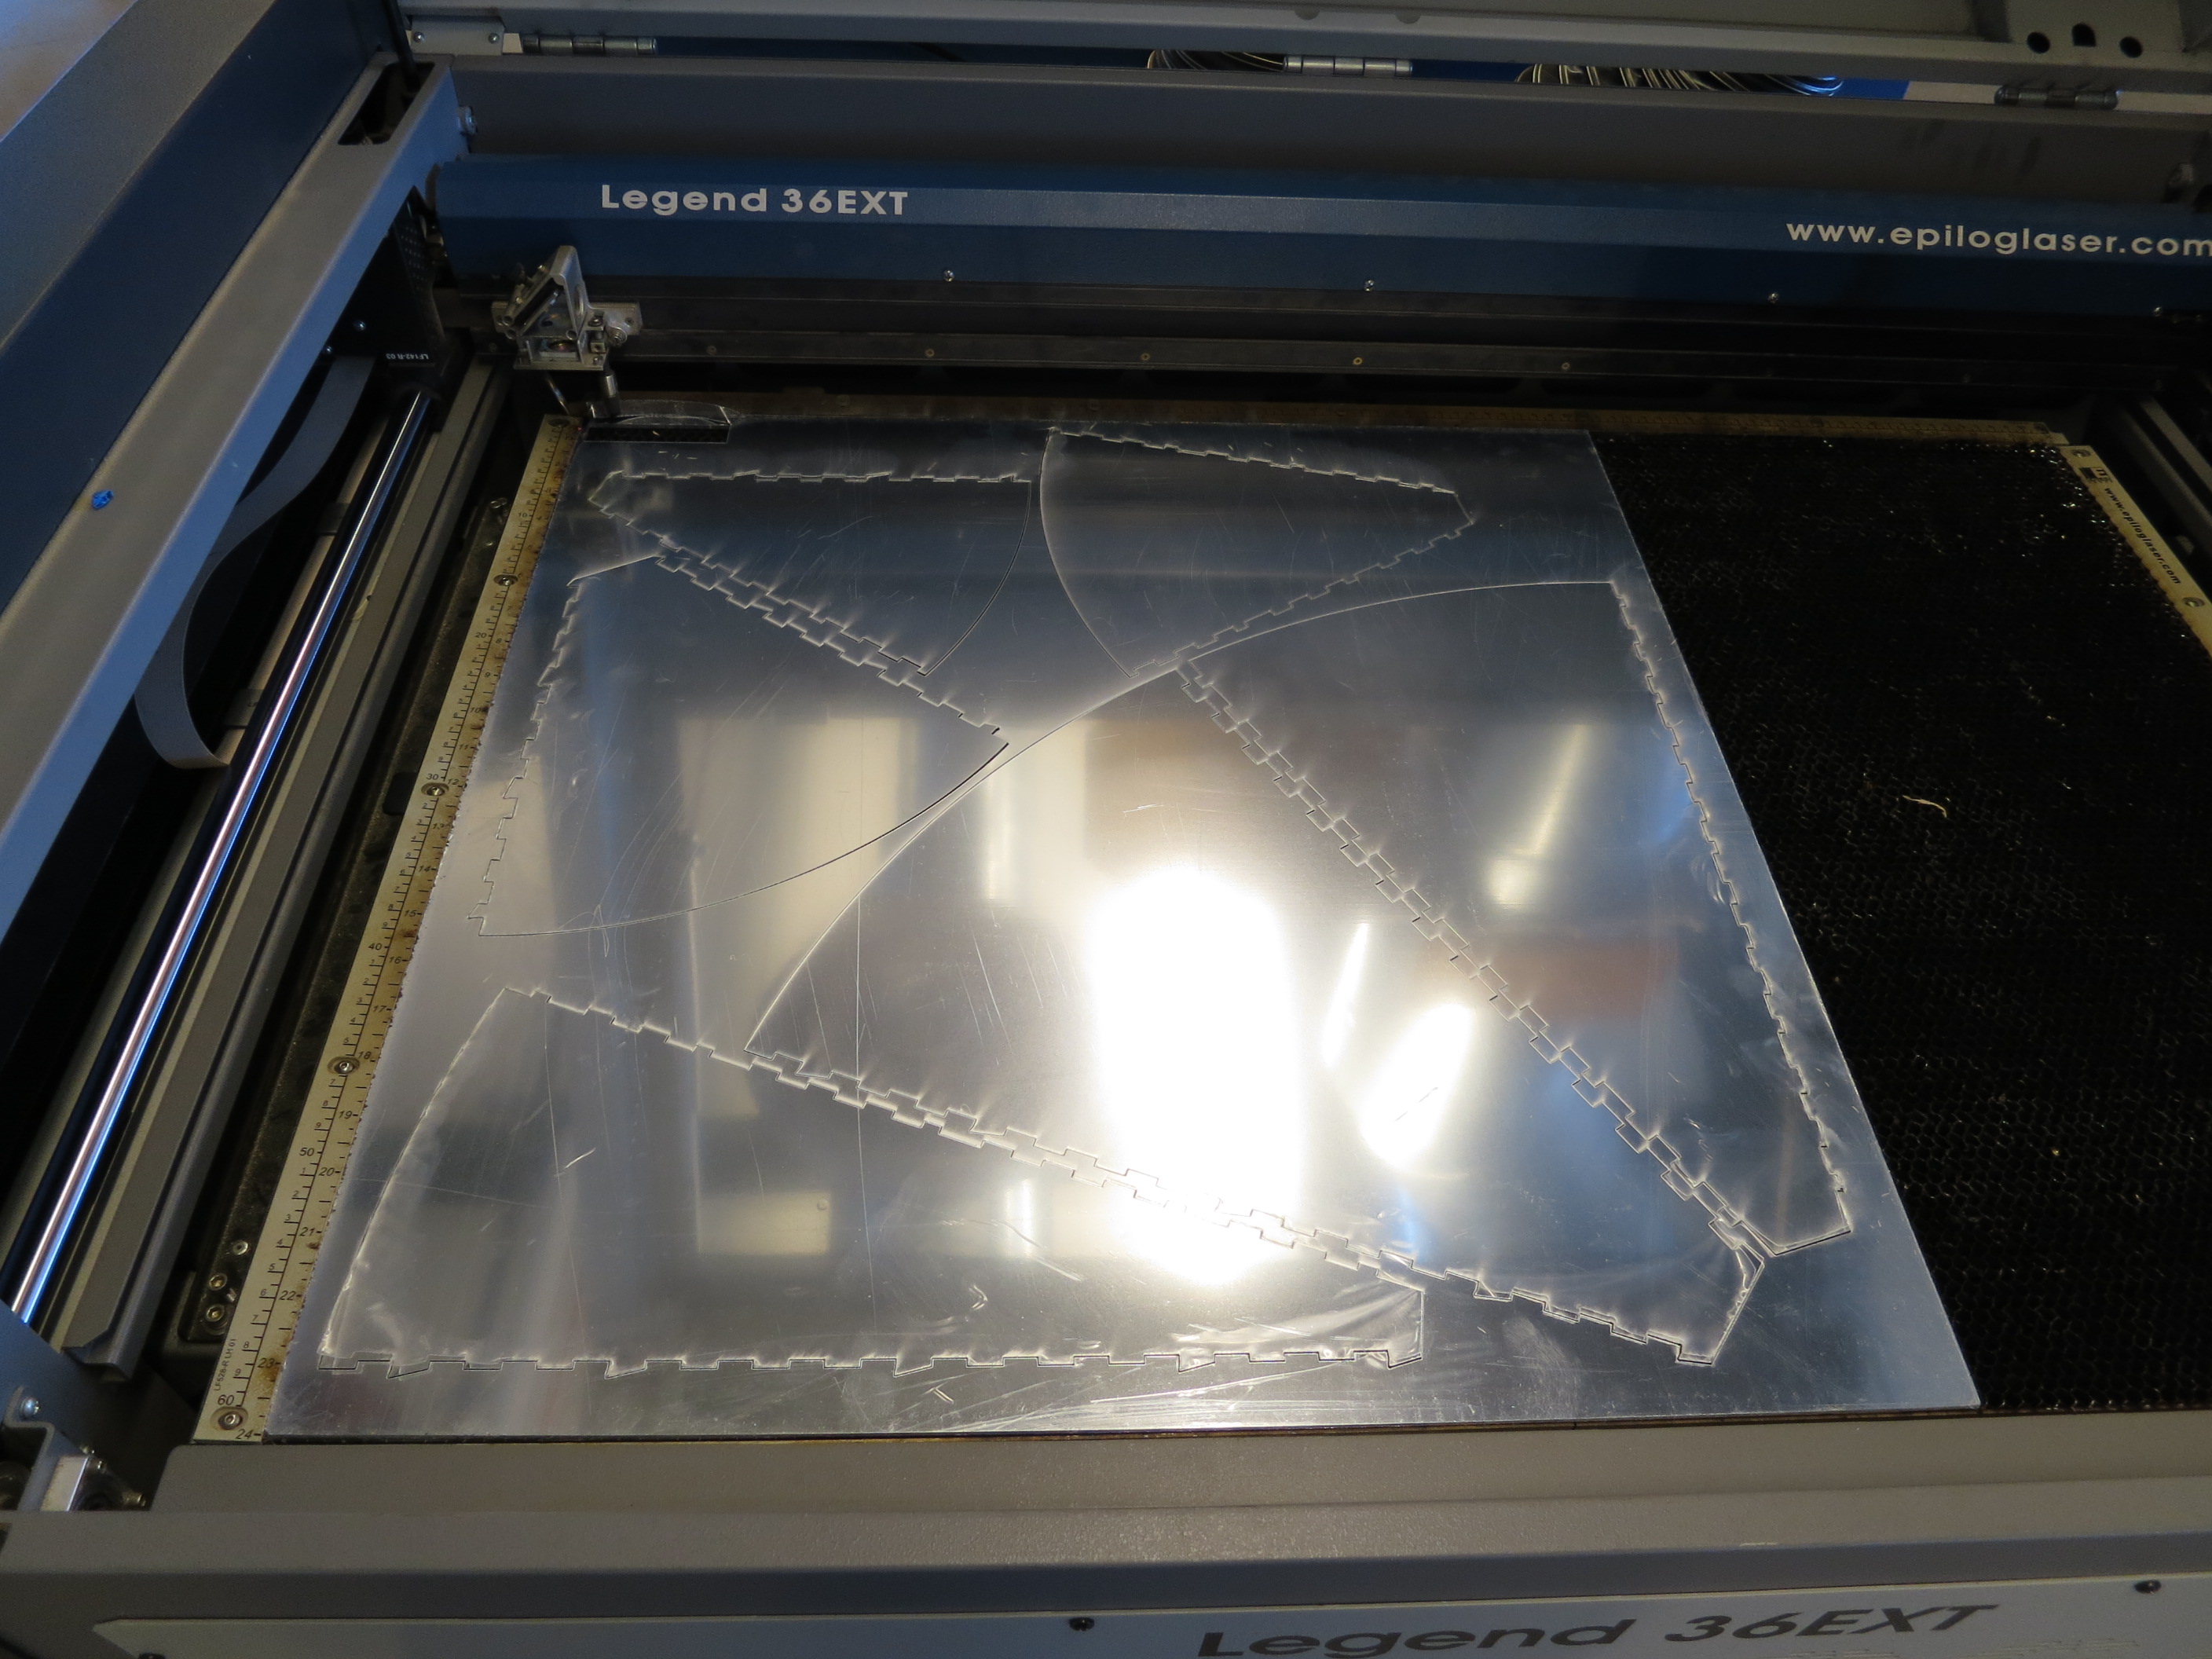
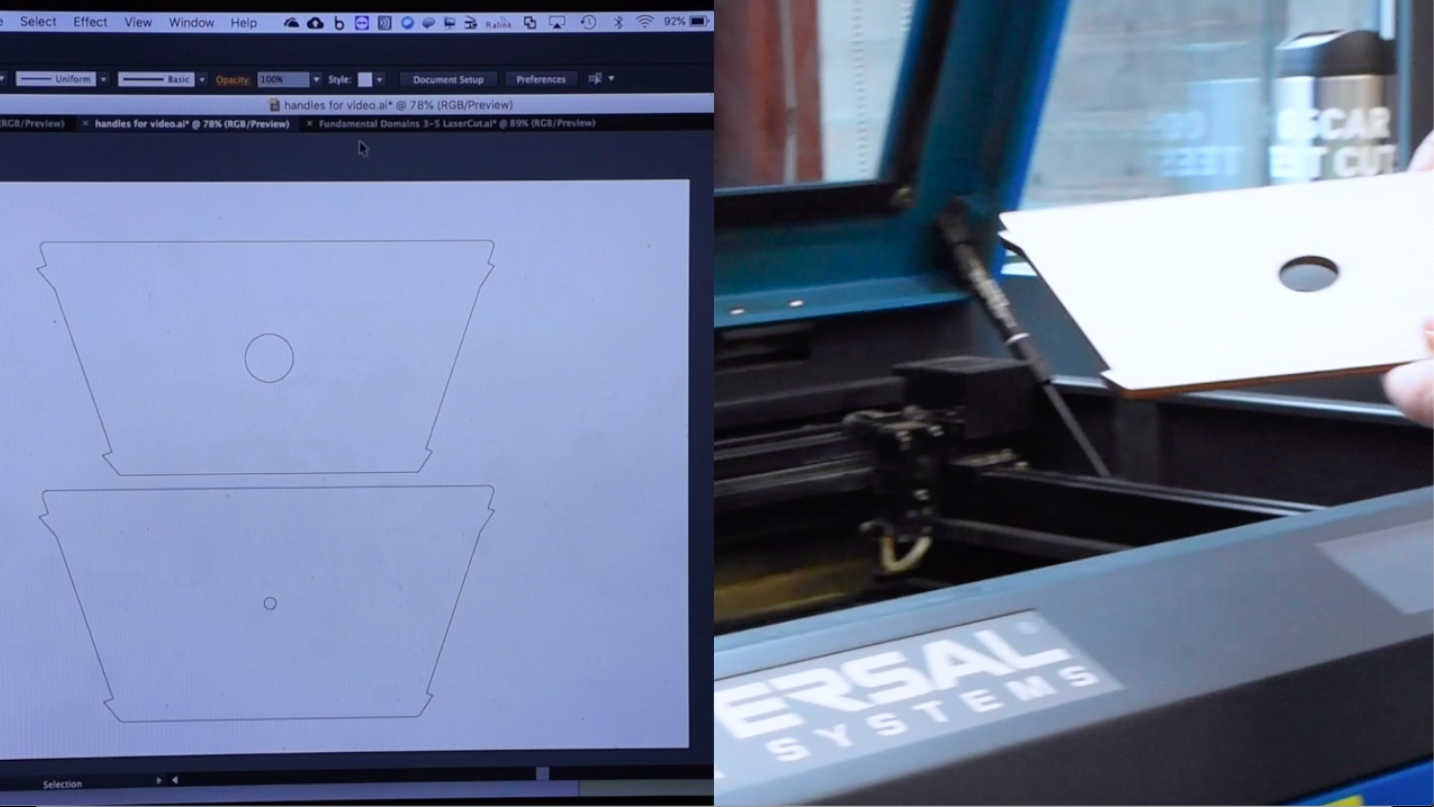
For this step, you will need to use a laser cutter or find an online laser cutting service (search "laser cutting service" on Google to find services nearby). If you have never used a laser cutter before, I encourage you to find a maker space and learn how to use this easy-to-use and handy machine.
All the files required to cut the mirrors and the plywood with a laser-cutter can be found at the end of step 2.
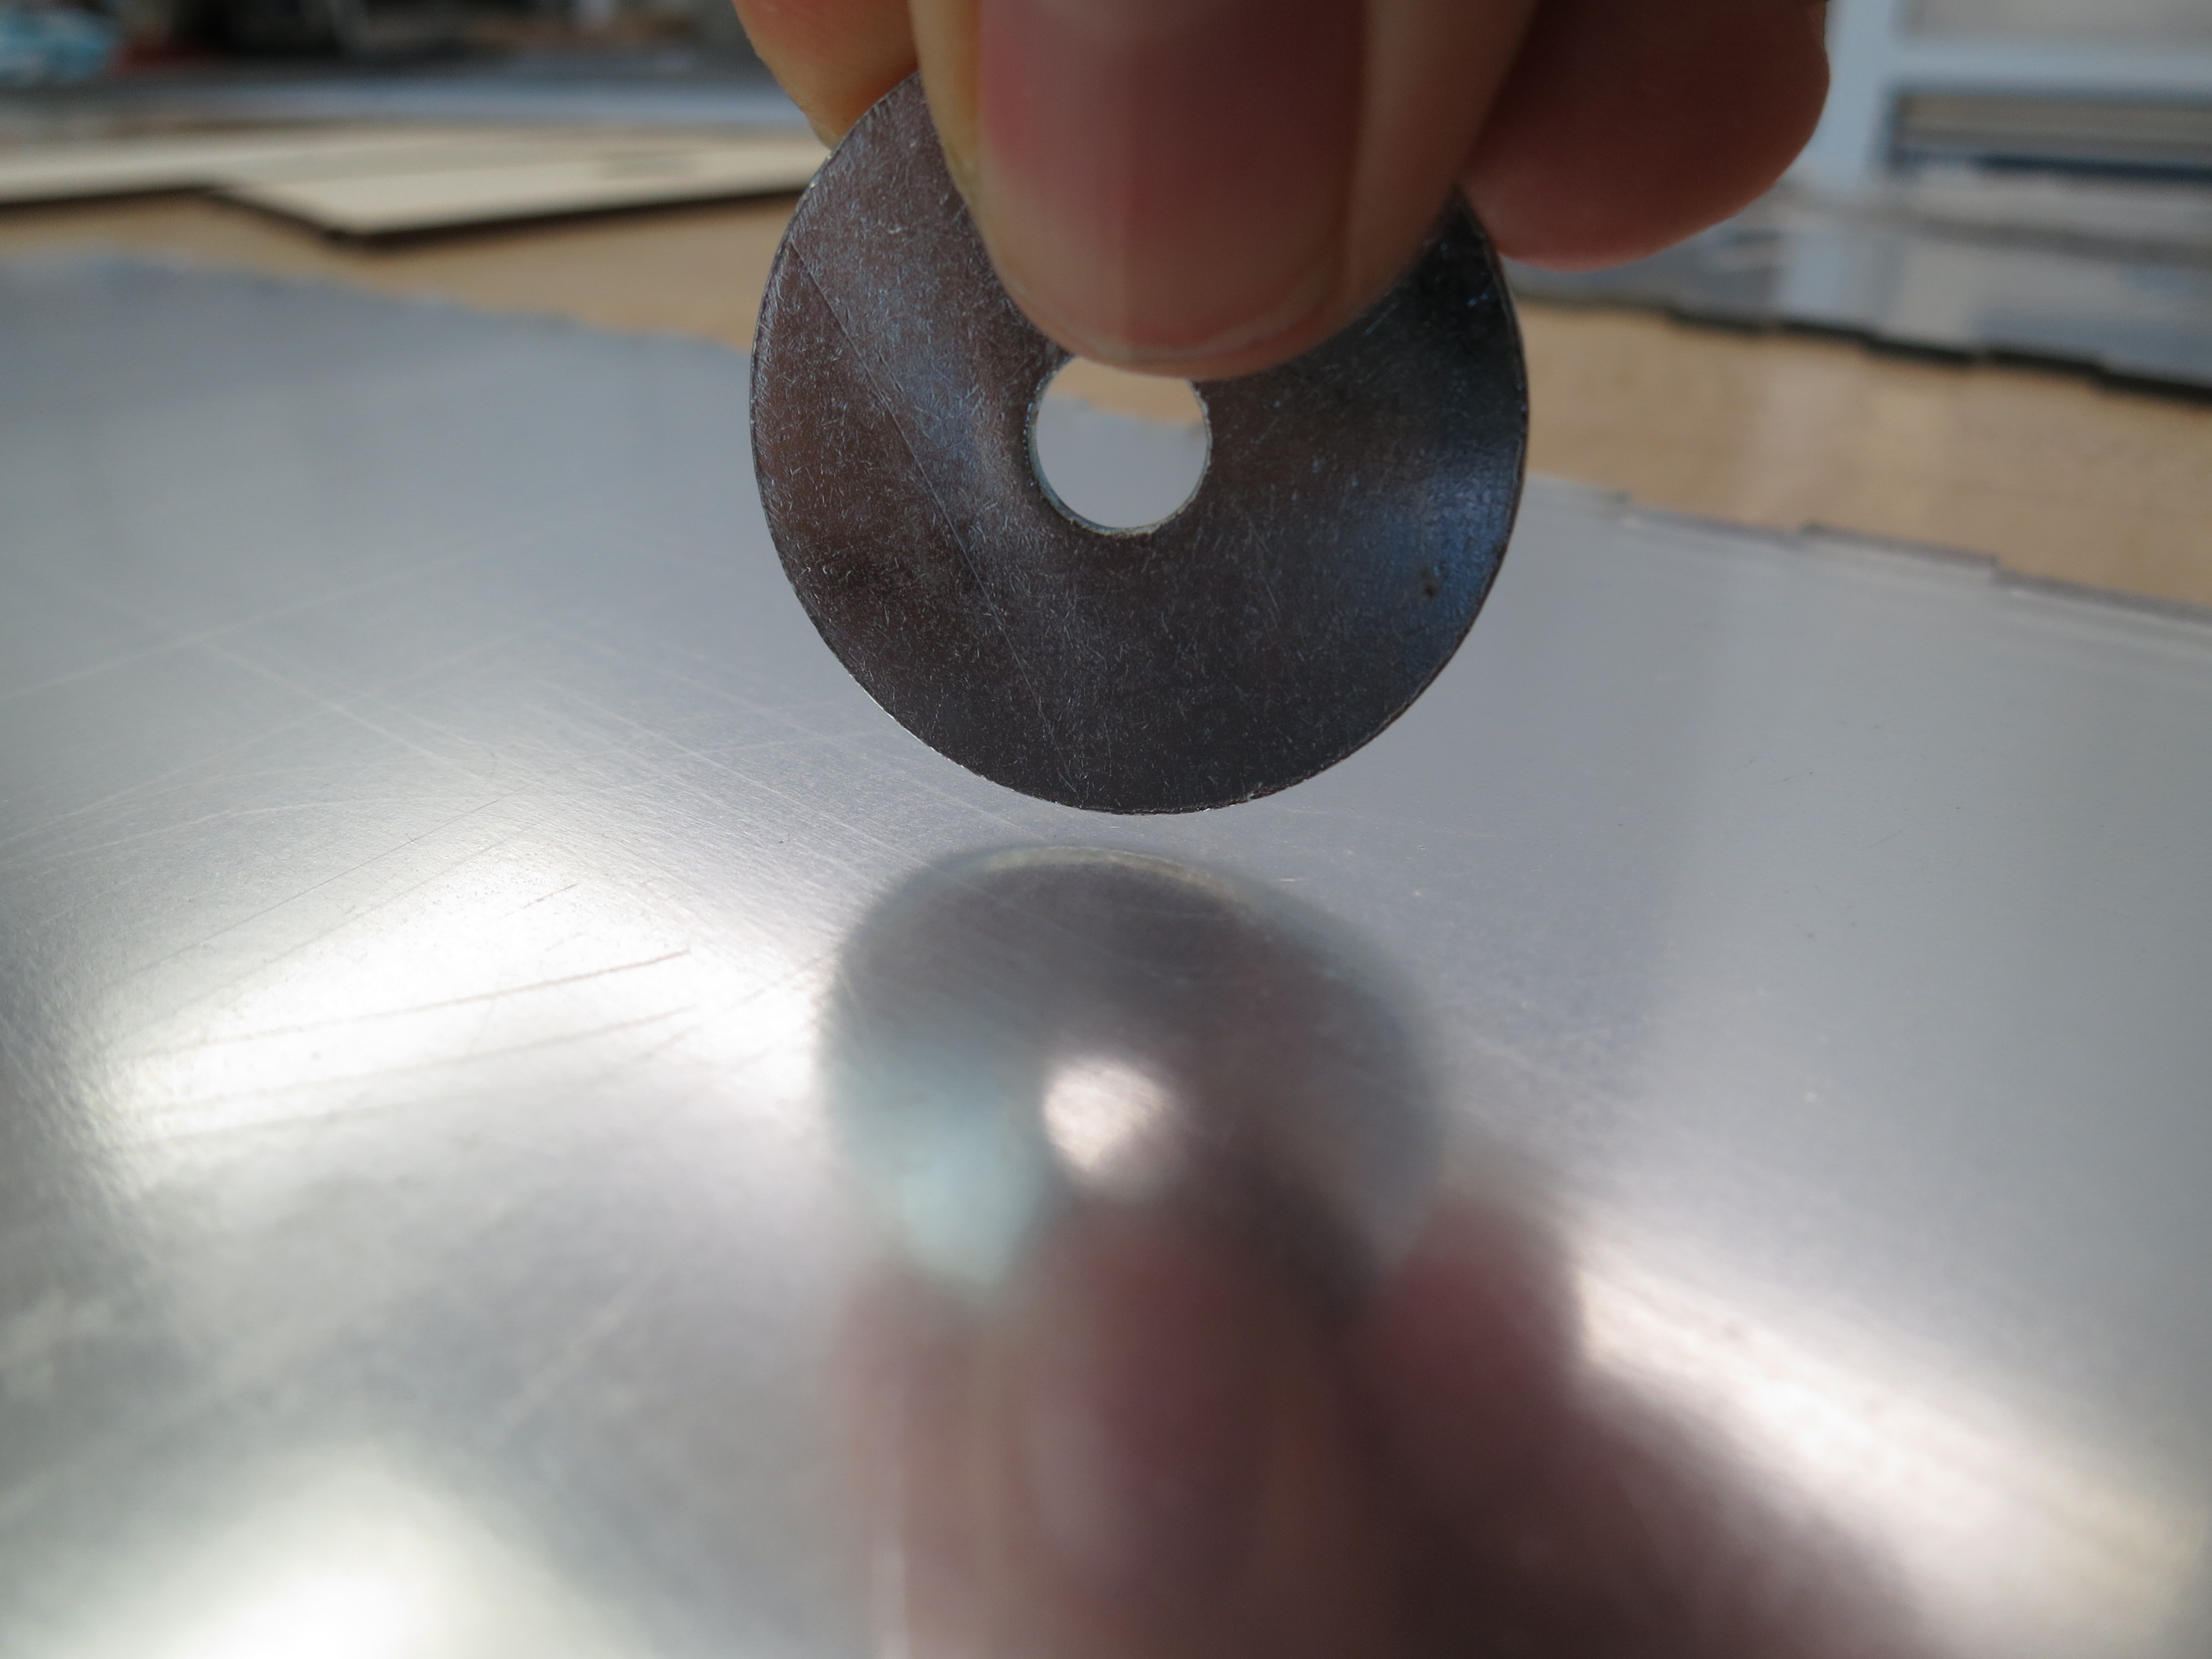
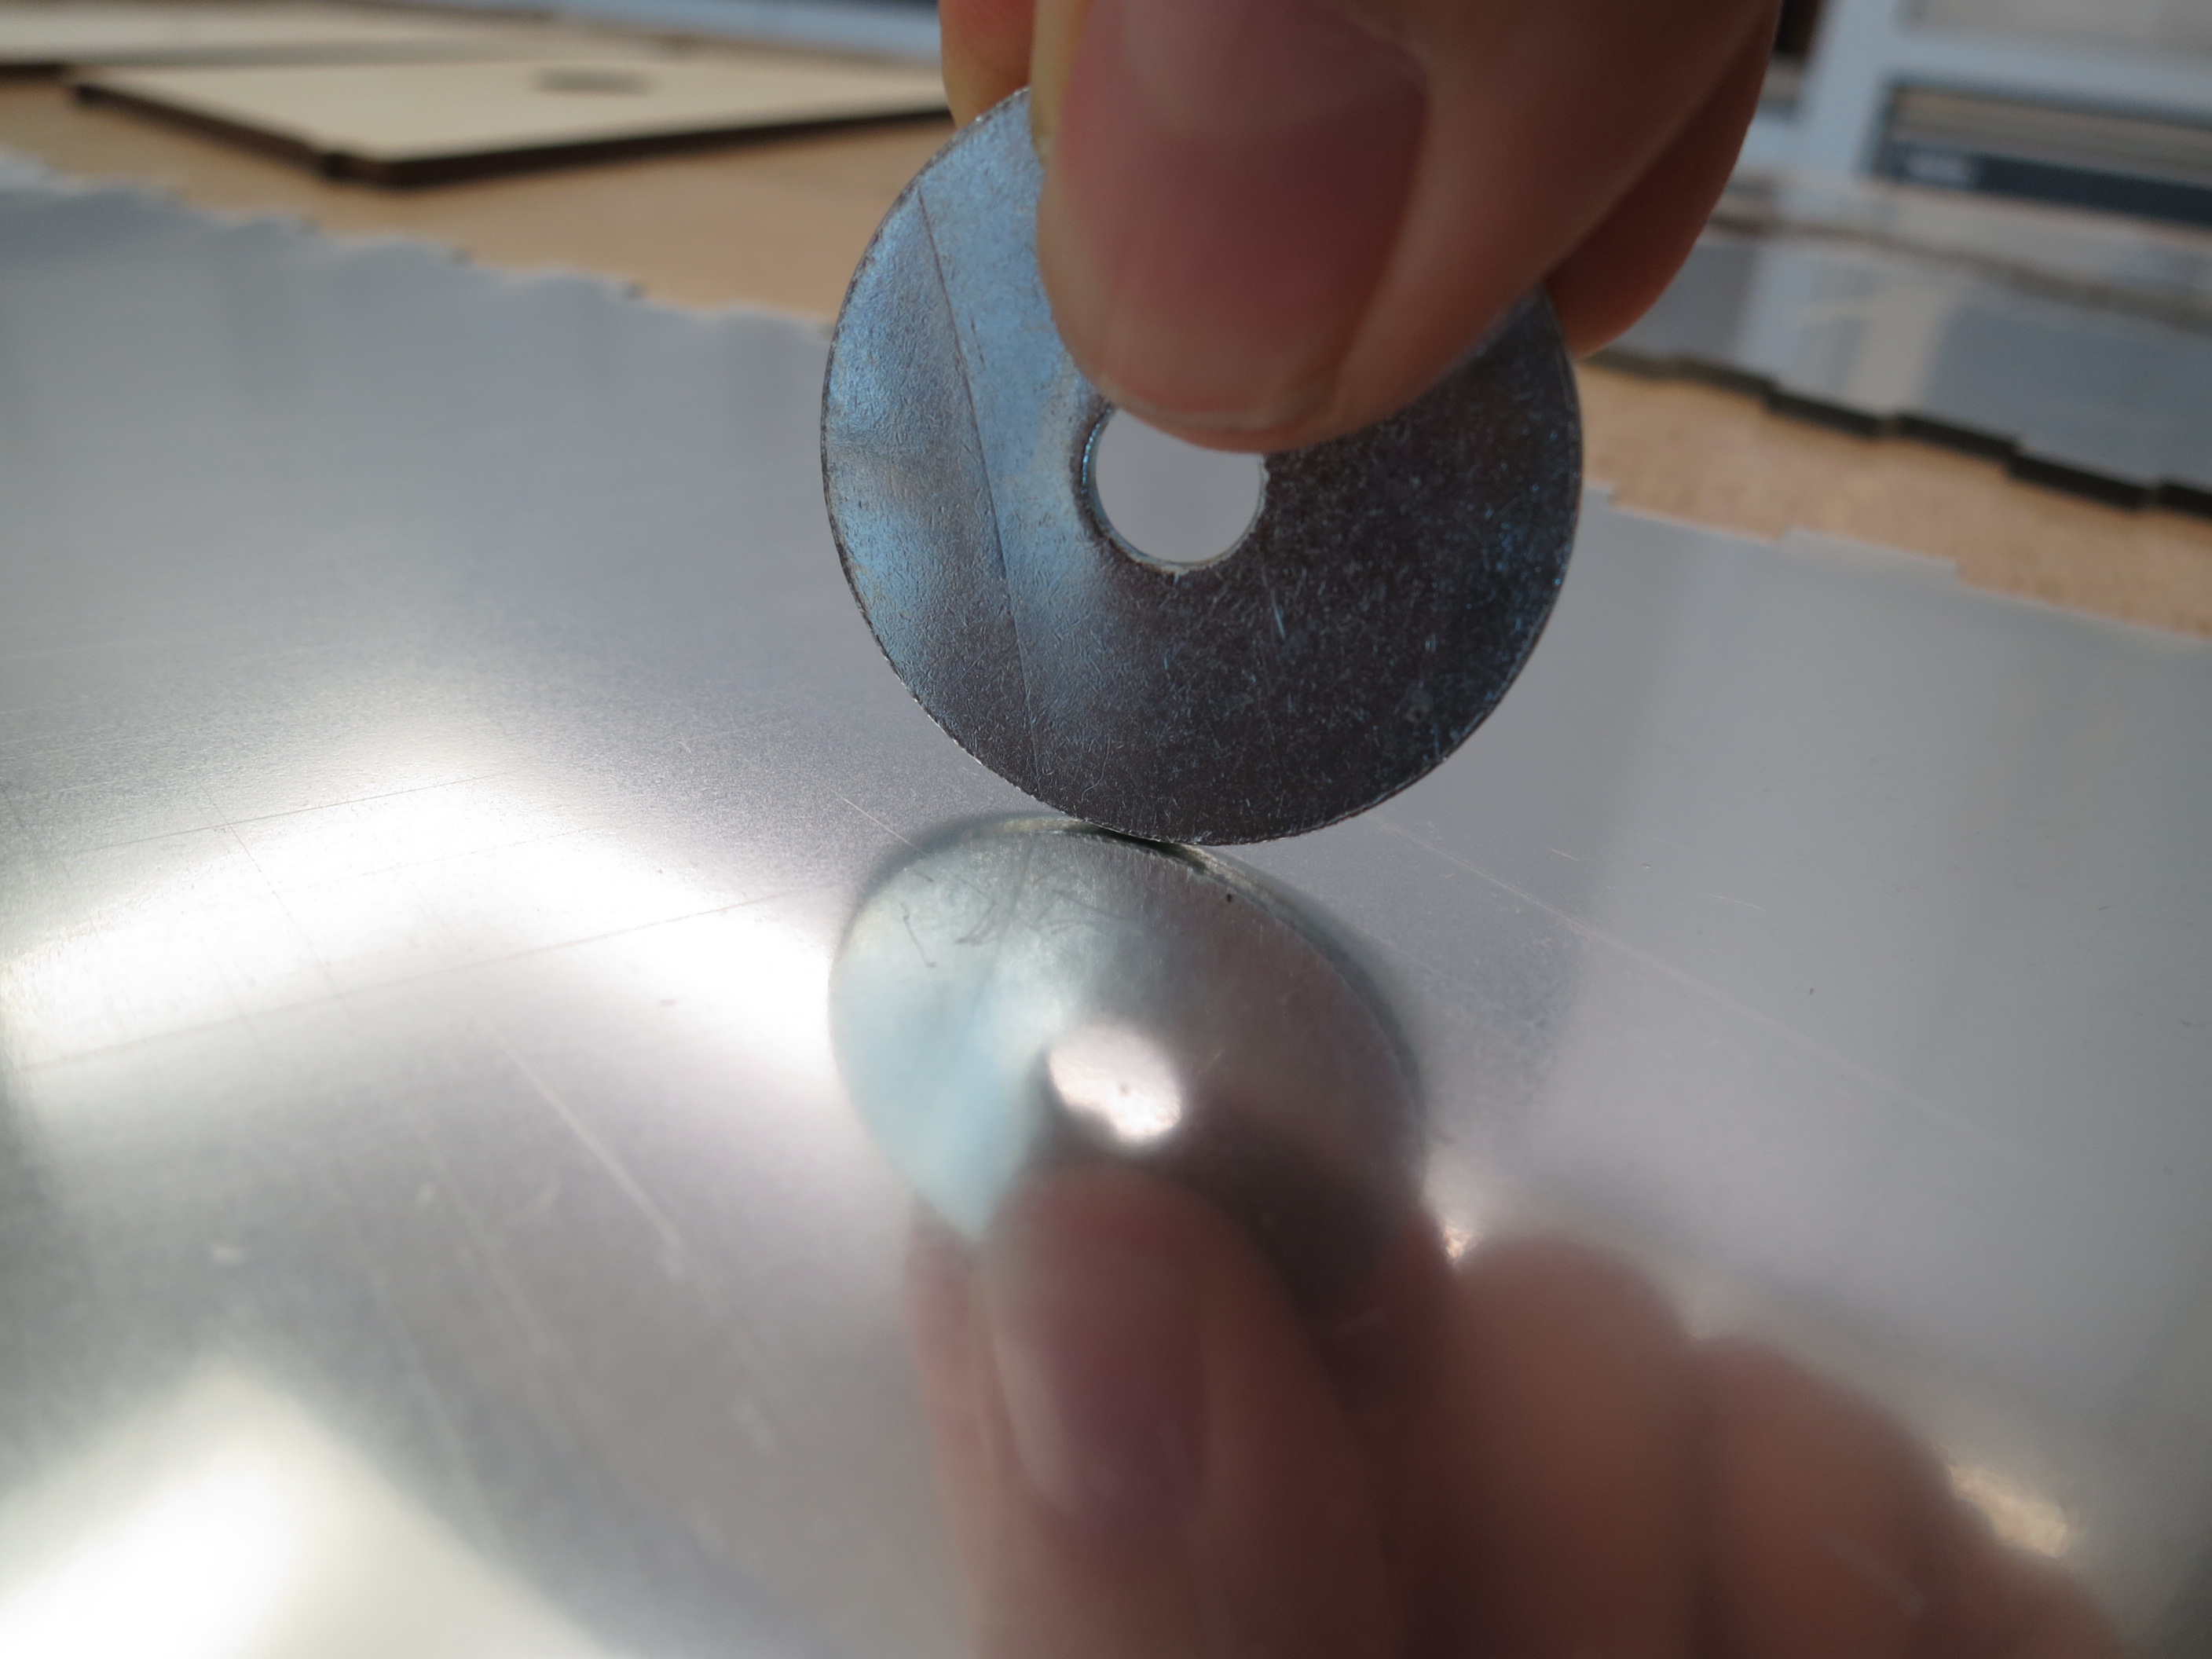
IMPORTANT: When cutting the mirrors, make sure that you orient the mirror so that the silvered side is facing up. Although both sides of the acrylic are reflective, only one side has the silver coating. In order to avoid double reflections, you must have the silvered side facing into the kaleidoscope, so it is very important that you properly determine which side is which. You can determine this is by holding something against the surface and seeing whether or not there is a gap between it and its reflection (see photos below). The side without the gap is the silvered side, and that is the side that should face up in the laser cutter.
Always handle the mirrors with care. The most reflective side is particularly vulnerable to scratching. The protective plastic should not be removed until you are ready to assemble the mirrors.
Assemble the Mirrors
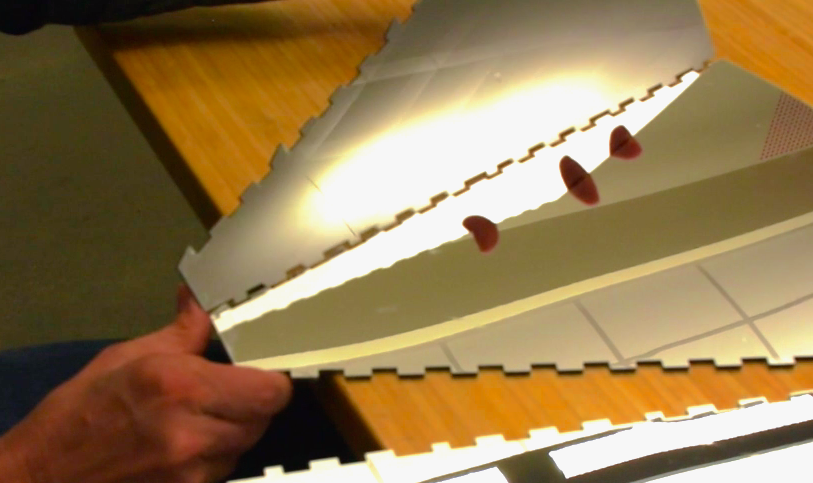
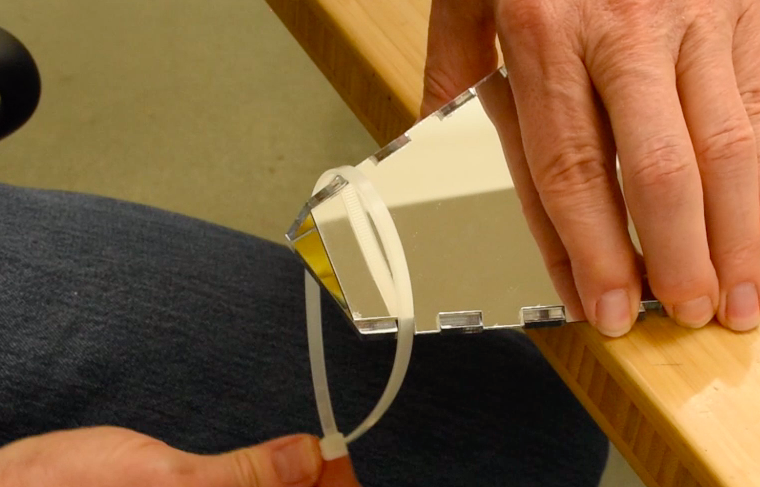
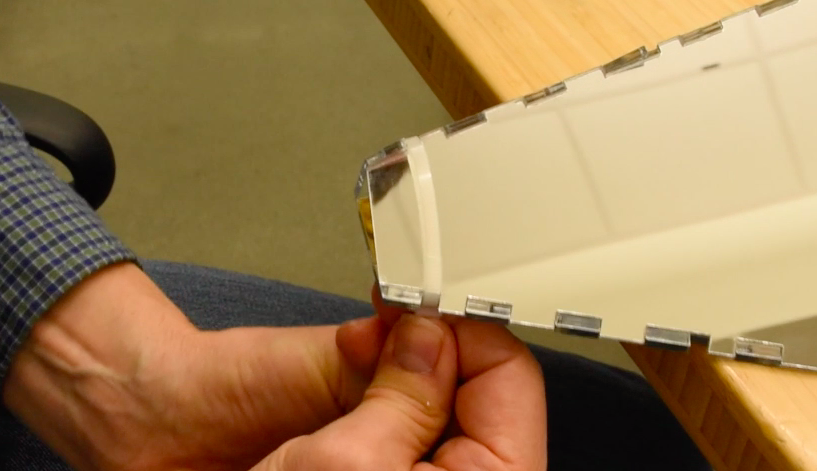
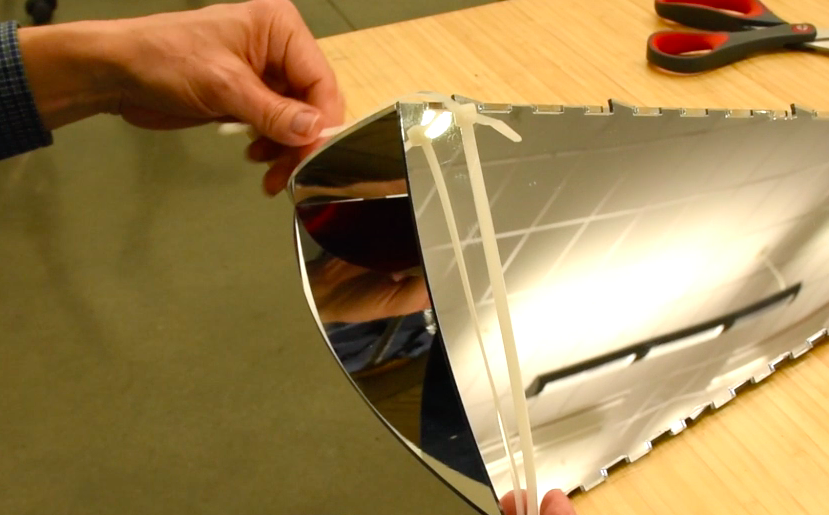
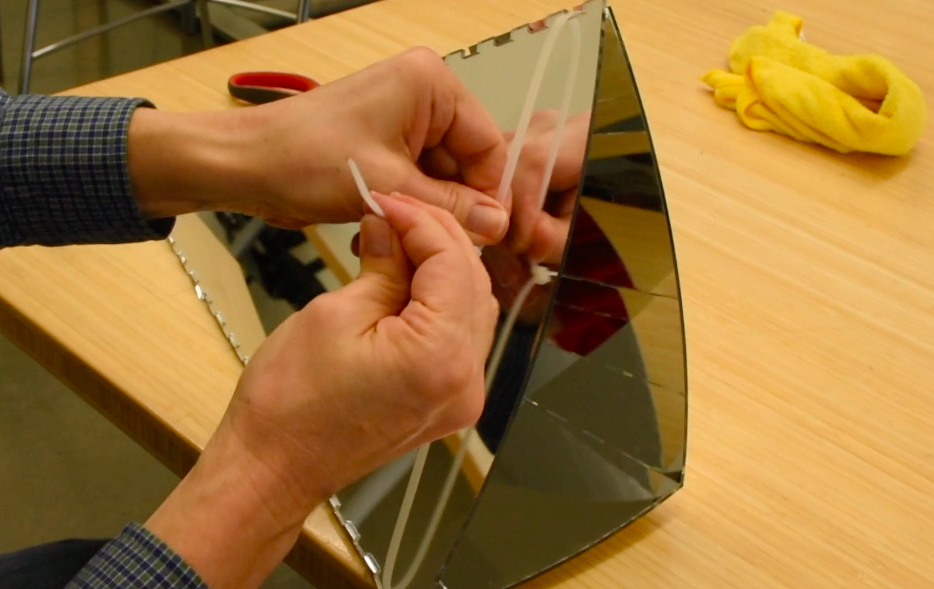
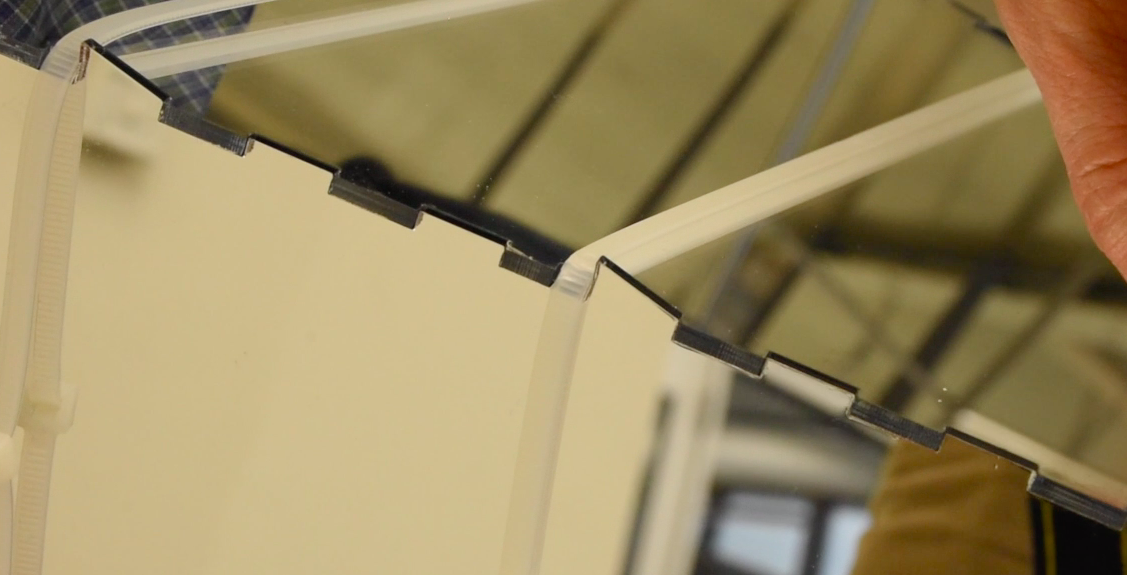
Although the kaleidoscope can be assembled by one person, the process will will be easier if you have set of hands to help you.
Before assembling the mirrors, remove the protective plastic from both sides, and gently clean the silvered side of each mirror. (The silvered side must go on the inside of the kaleidoscope, which will make it harder to clean once the kaleidoscope is assembled.) I recommend using a microfiber cleaning cloth for this.
Use the indents in the mirrors to align them as you put them together, being sure to face the silvered sides inward. Once you have positioned the mirrors, secure them with the cable ties. Take note of the four sets of slots (next to the pointy edges sticking out) along the edges of the mirrors. The cable ties should pass through these slots as they wrap around the mirrors. Start by securing the cable ties on the large end of the kaleidoscope, and then secure the small end. Do not add the two central cable ties at this time.
Make sure the ties are pulled tight to keep the mirrors in position.
Note: For the large end, you will probably need to attach two cable ties together.
Create the Handle Assembly
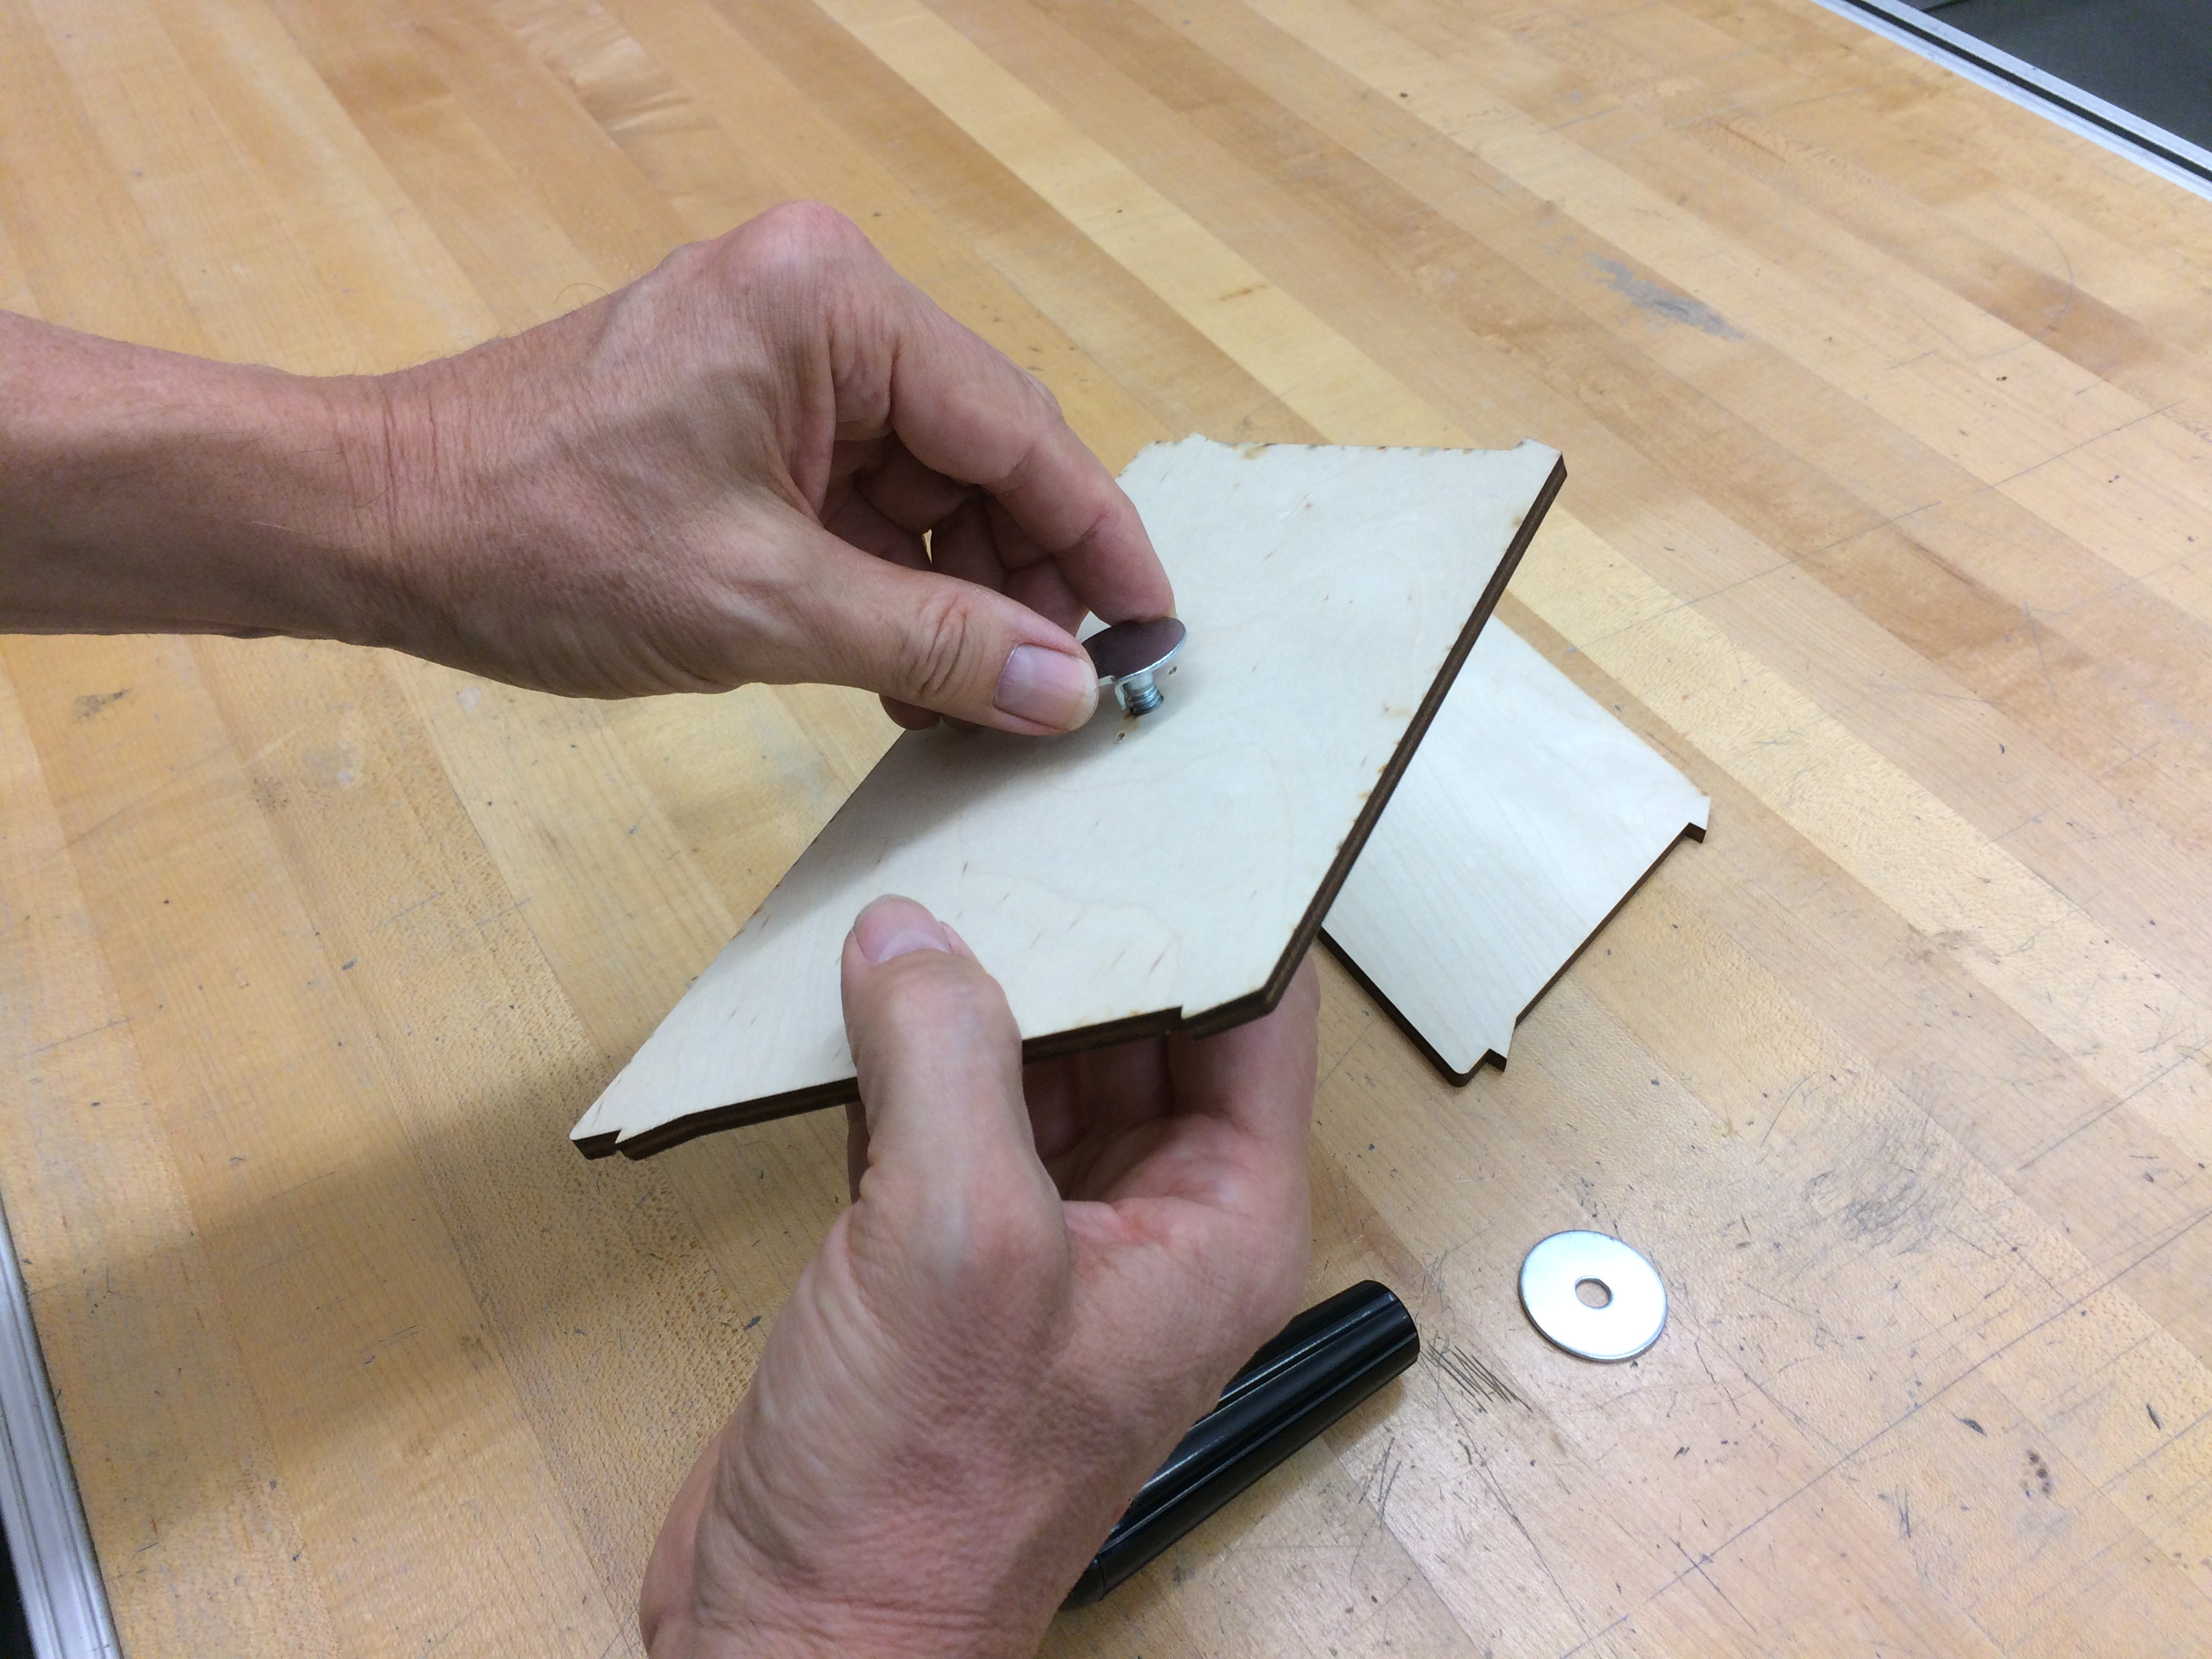
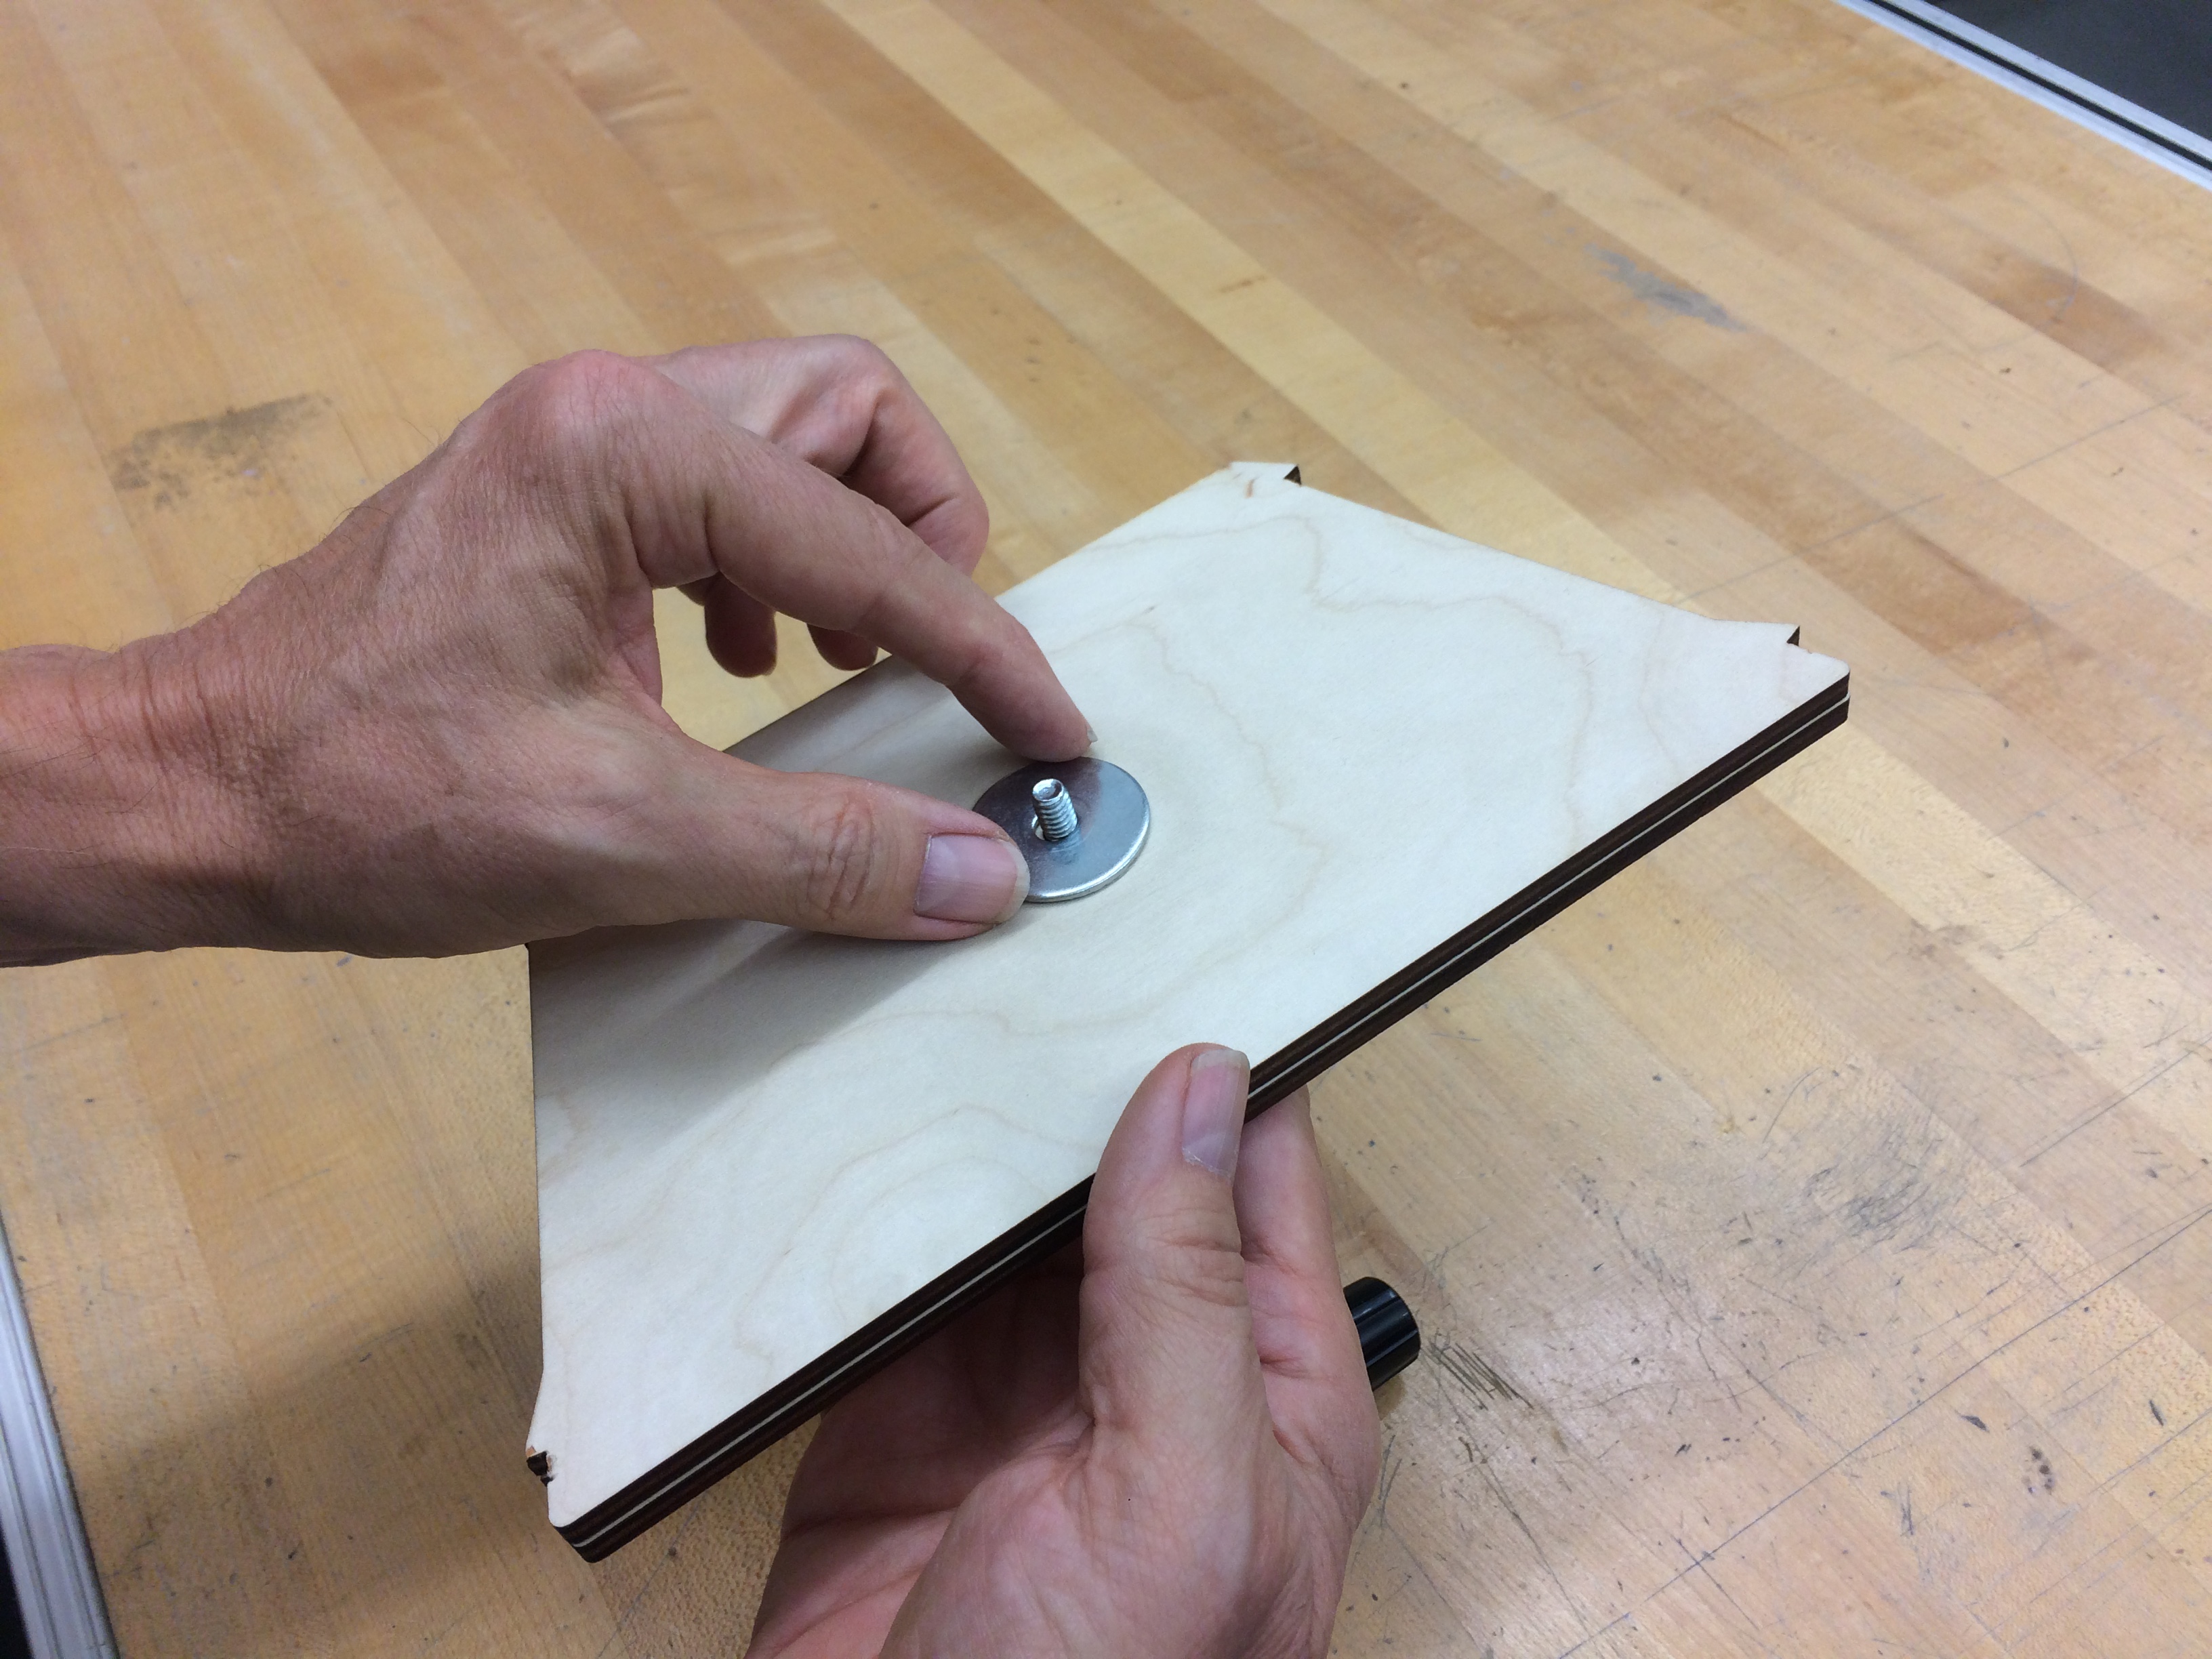
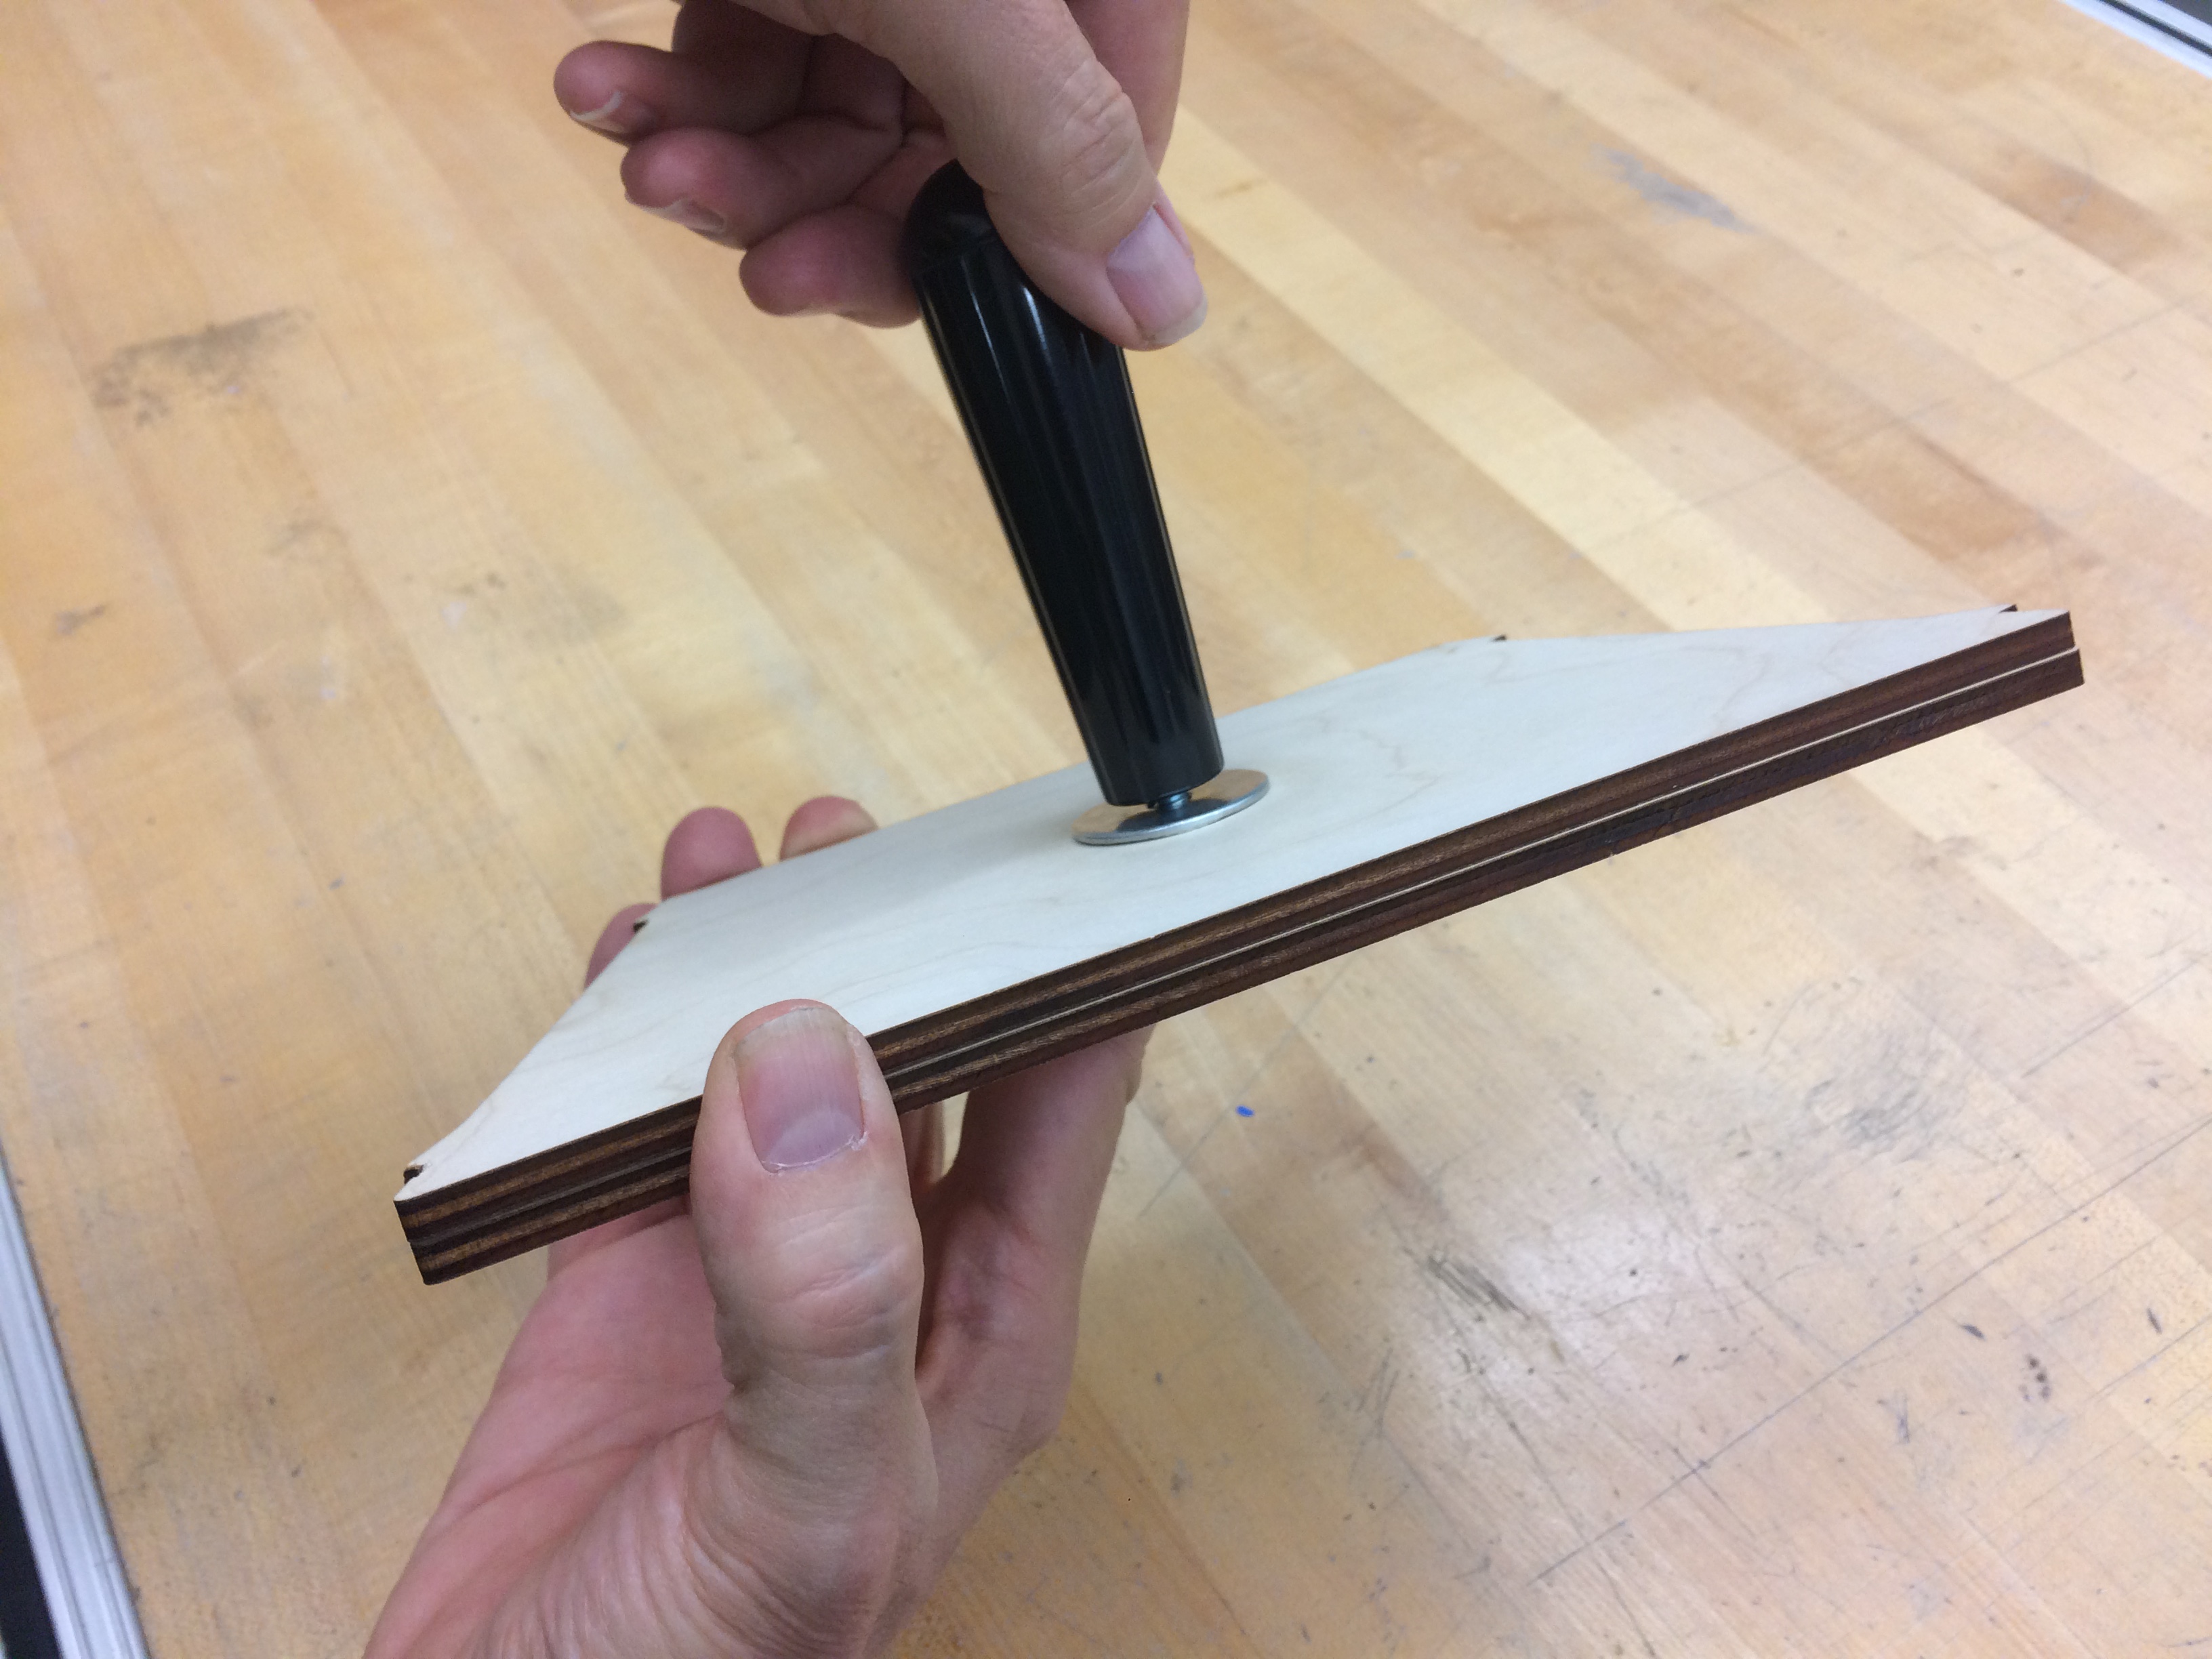
- Insert the bolt through the smaller hole in one of the wood panels.
- Flip the panel and add the washer.
- Screw the handle onto the bolt.
- Put the two wooden panels together, and hold them in alignment as you perform the next step.
Note: the purpose of the second wood panel is to create clearance for the head of the bolt. The two panels will be held in alignment once they are attached to the kaleidoscope (in the next step).
Attach the Handle Assembly to the Kaleidoscope
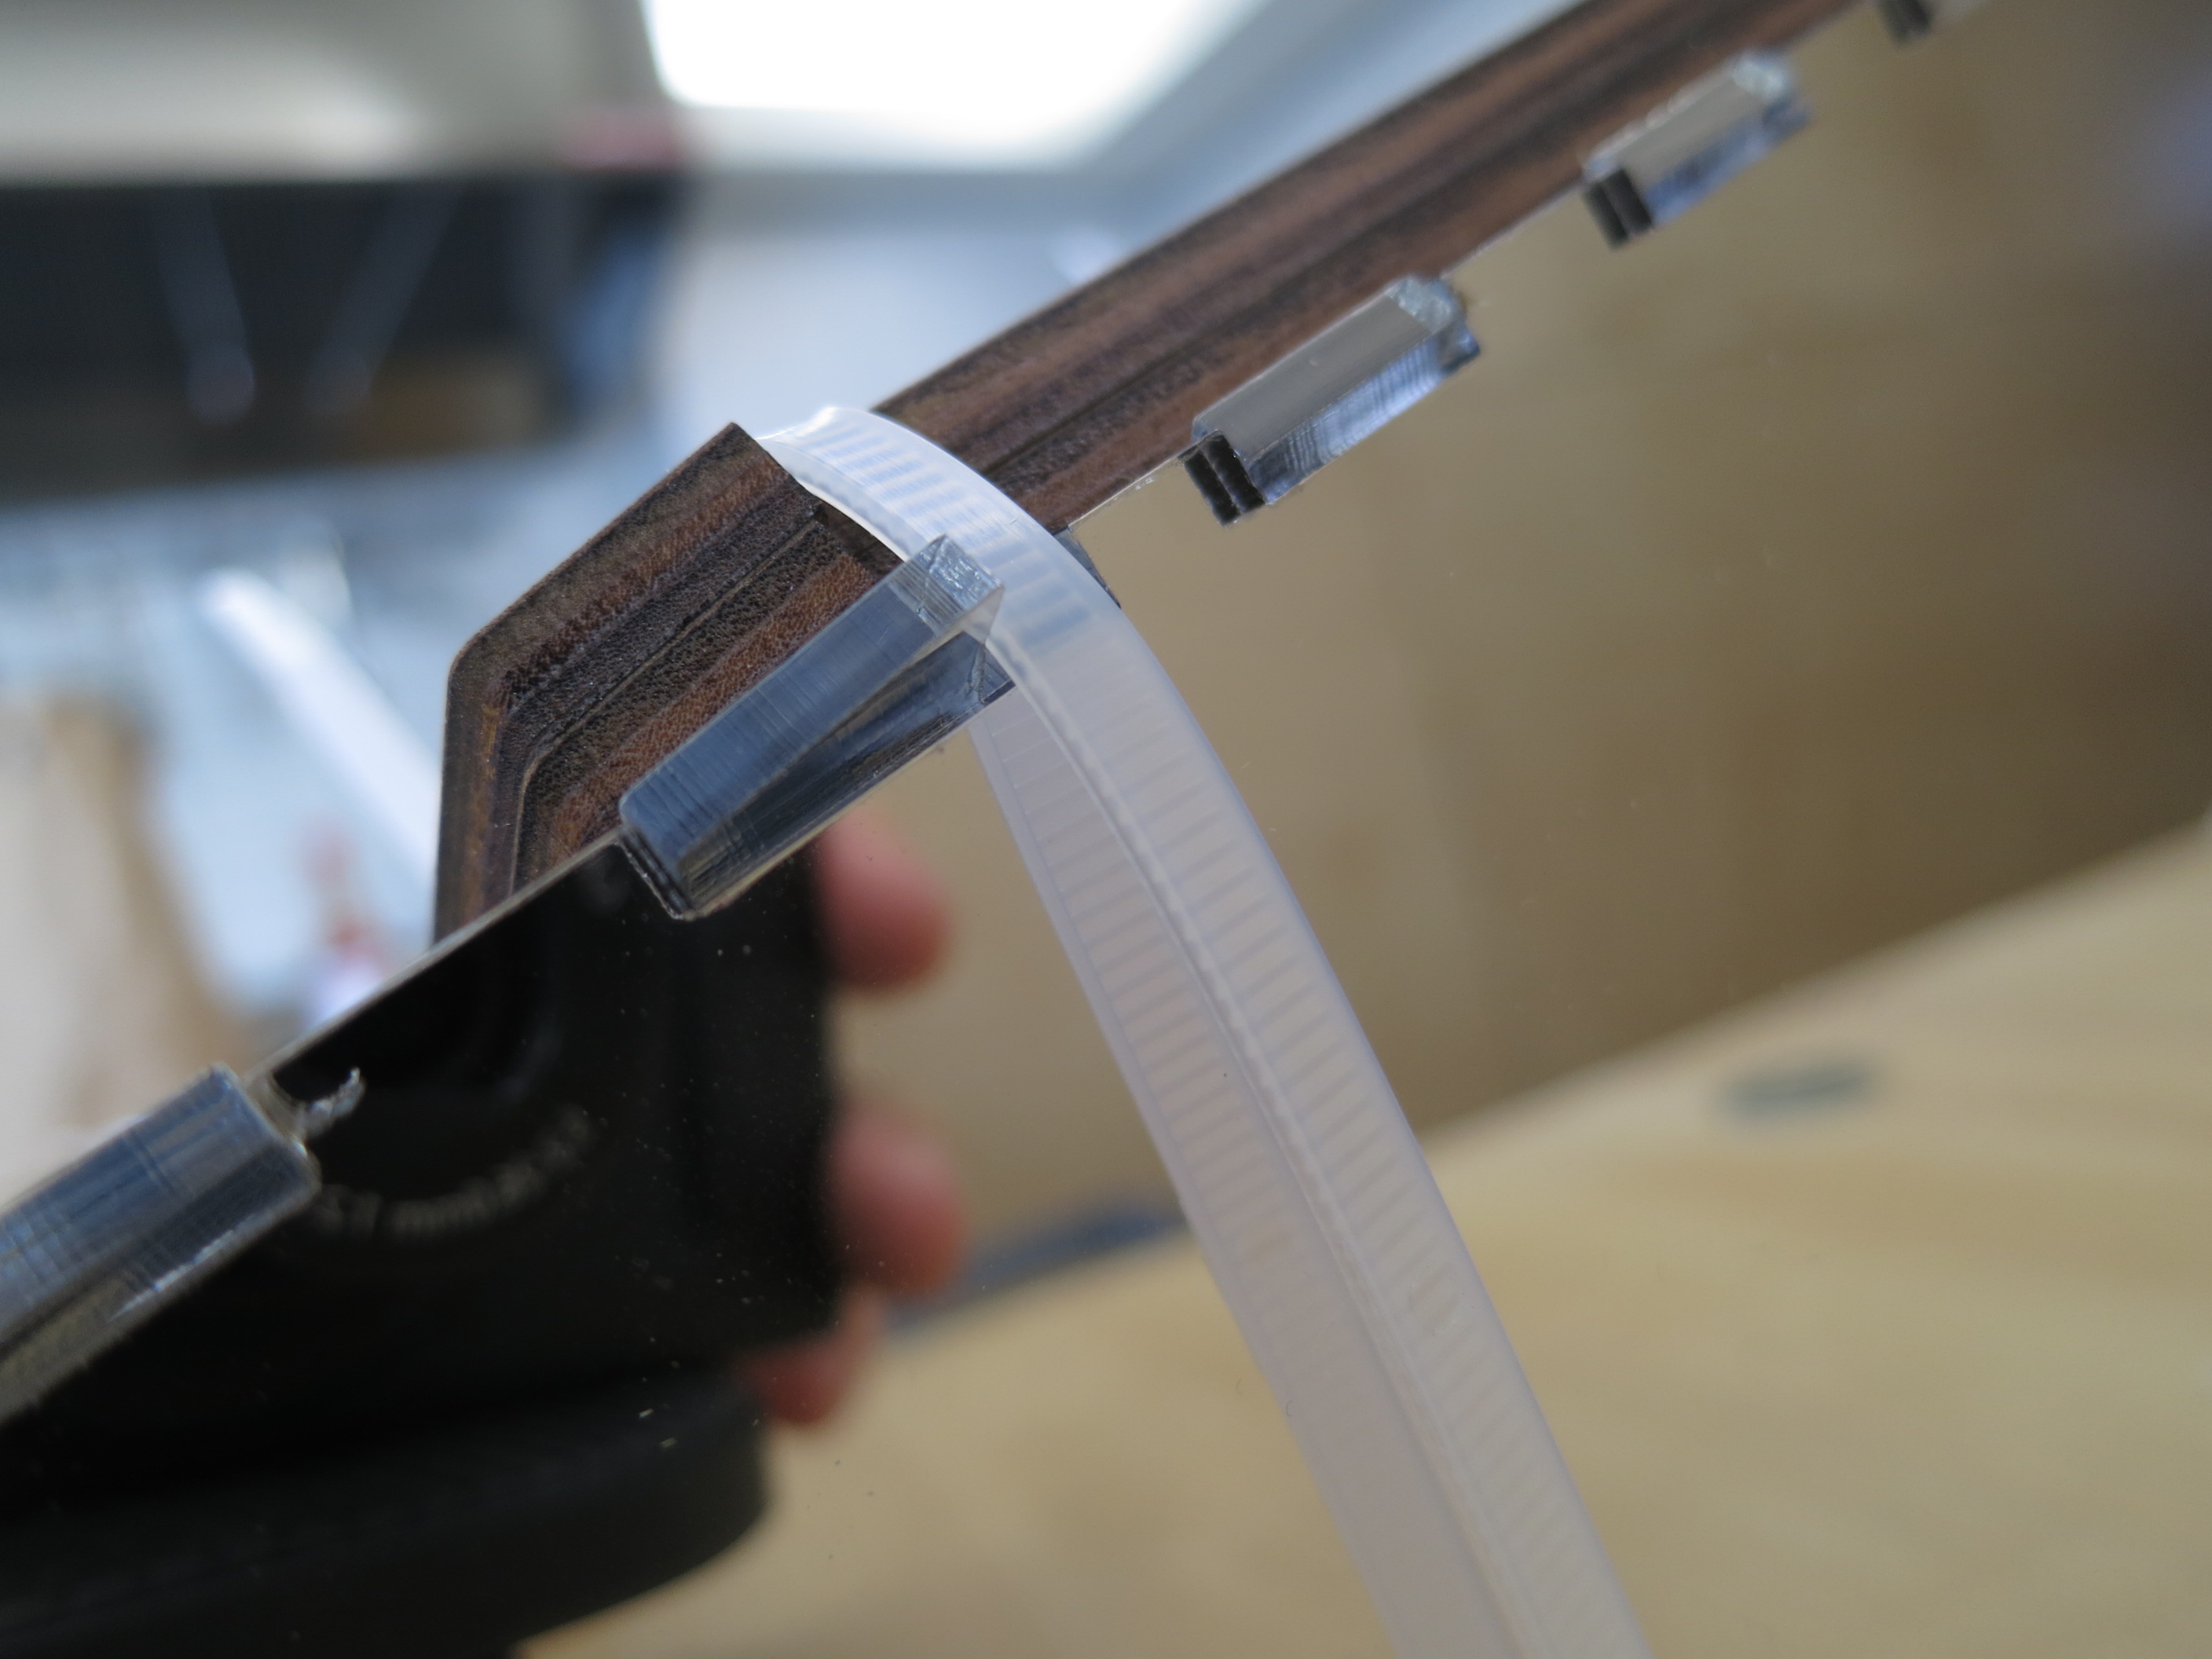
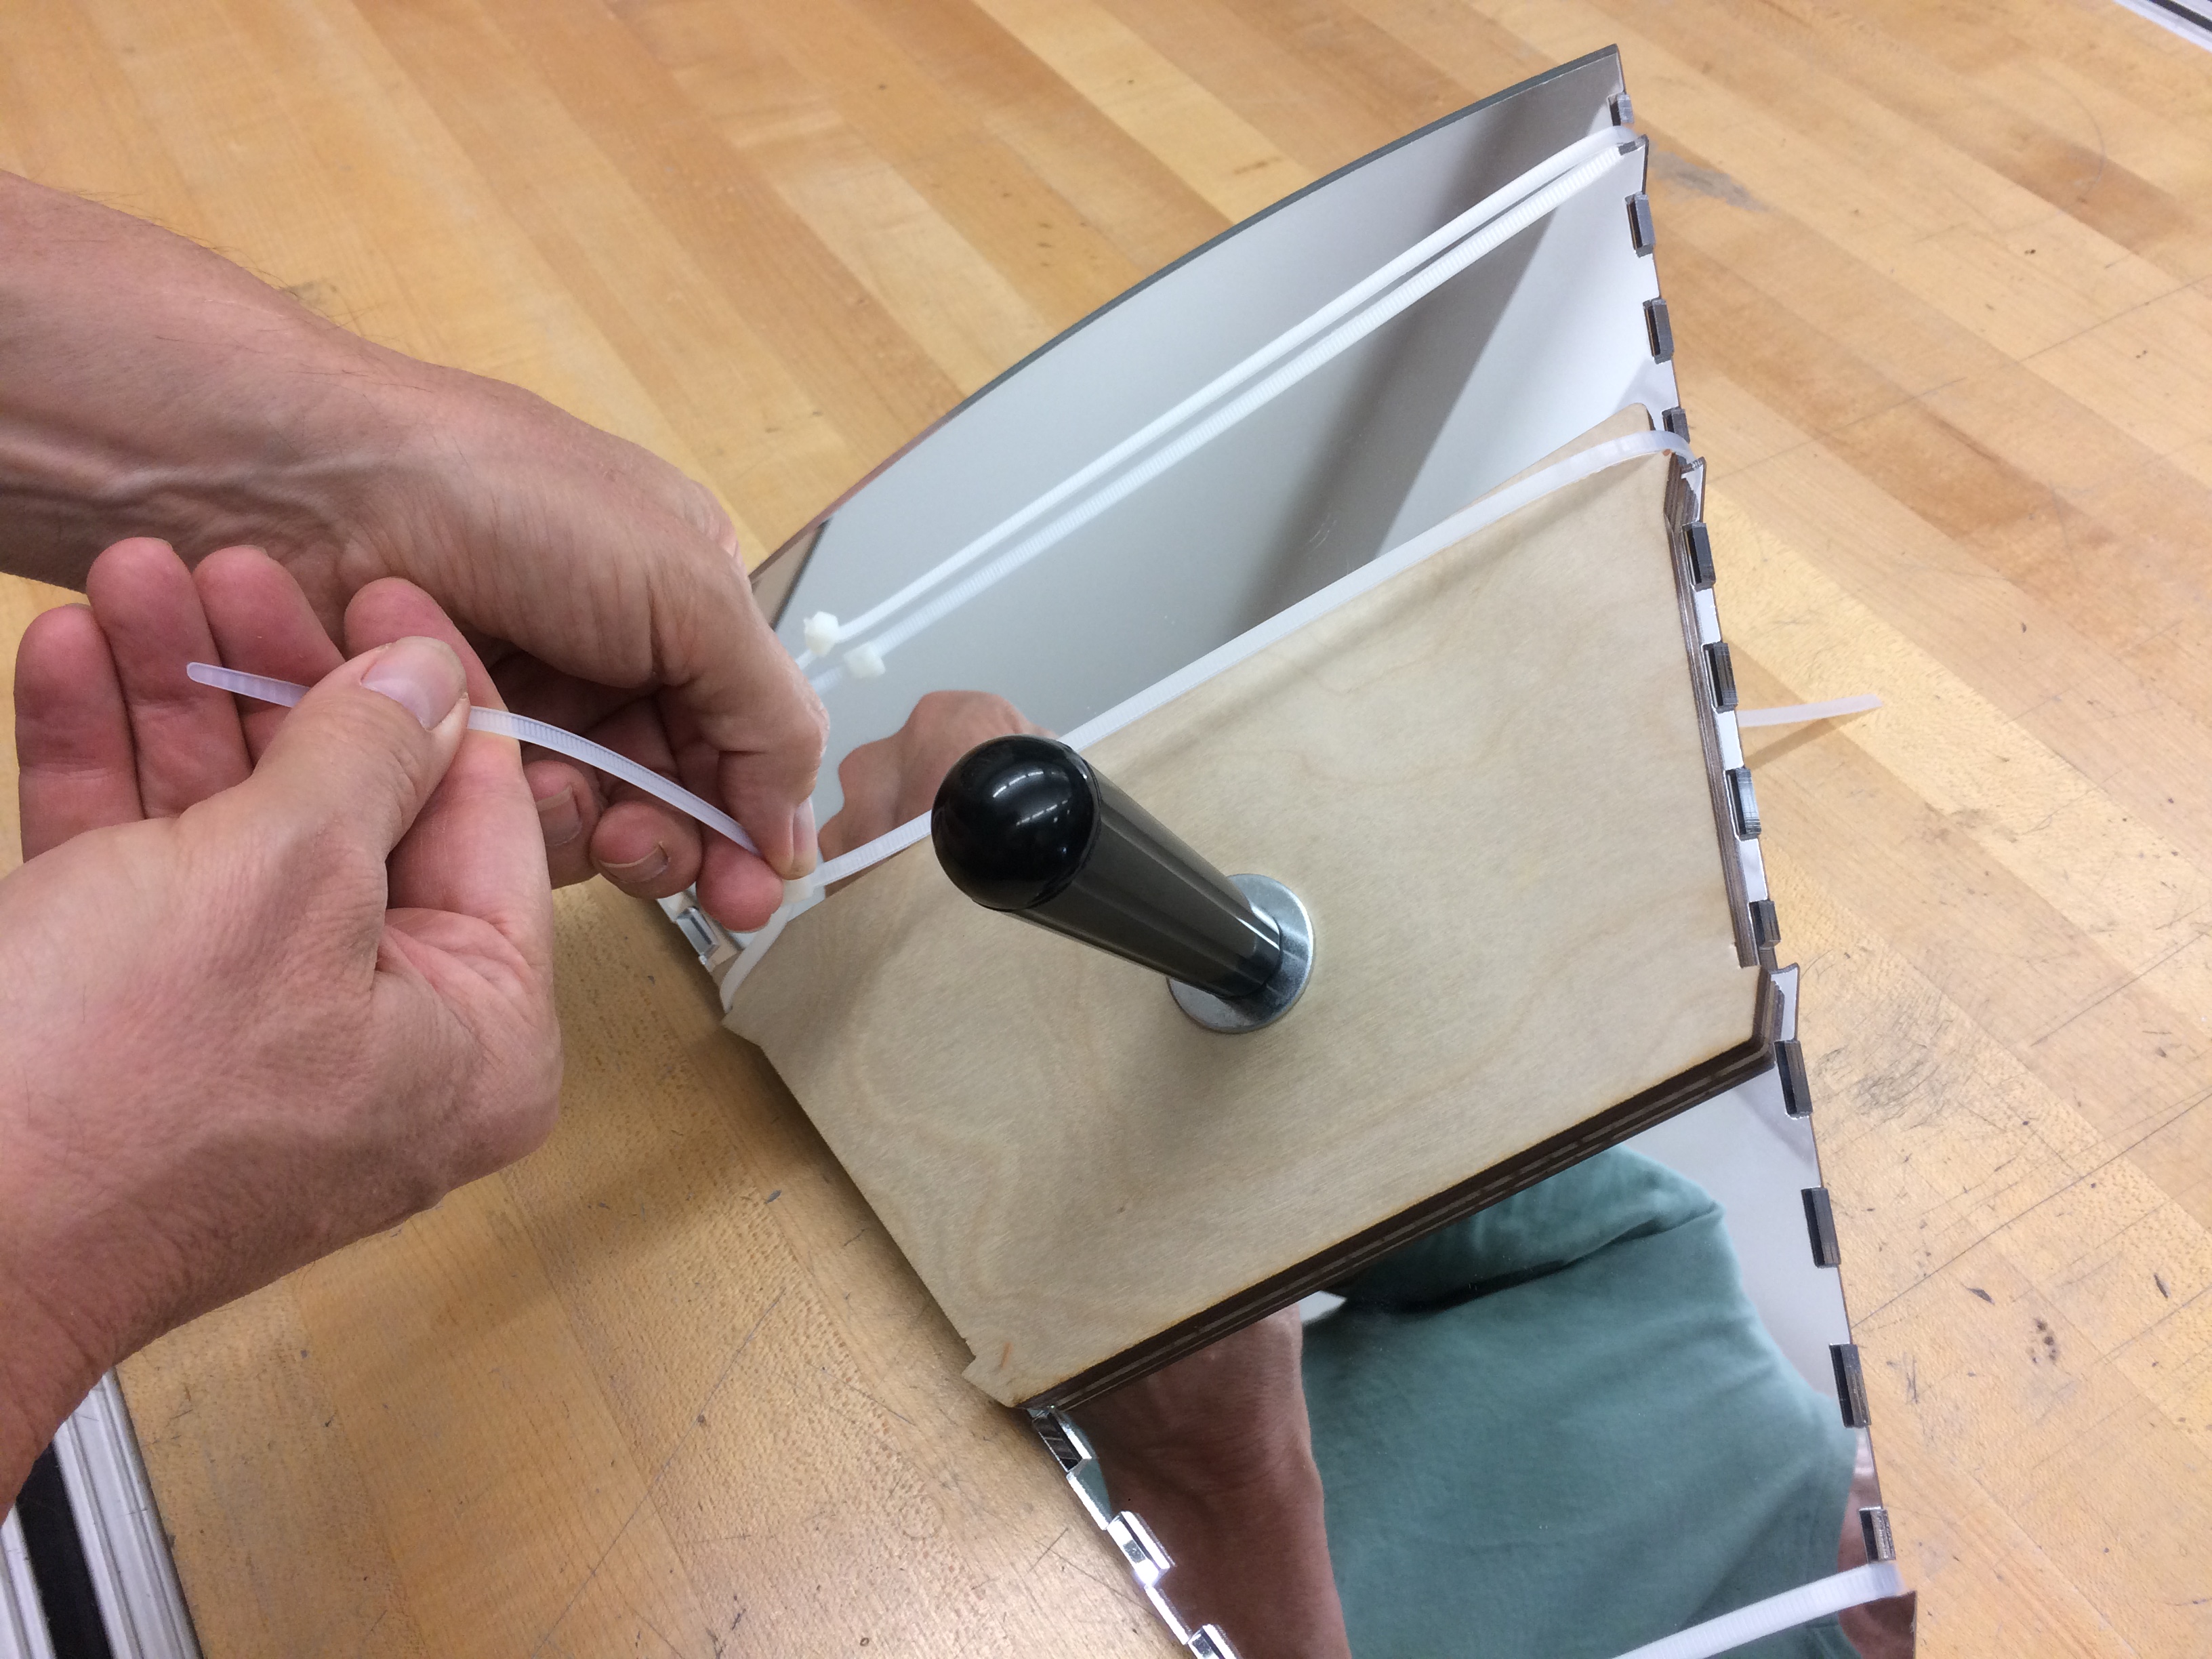
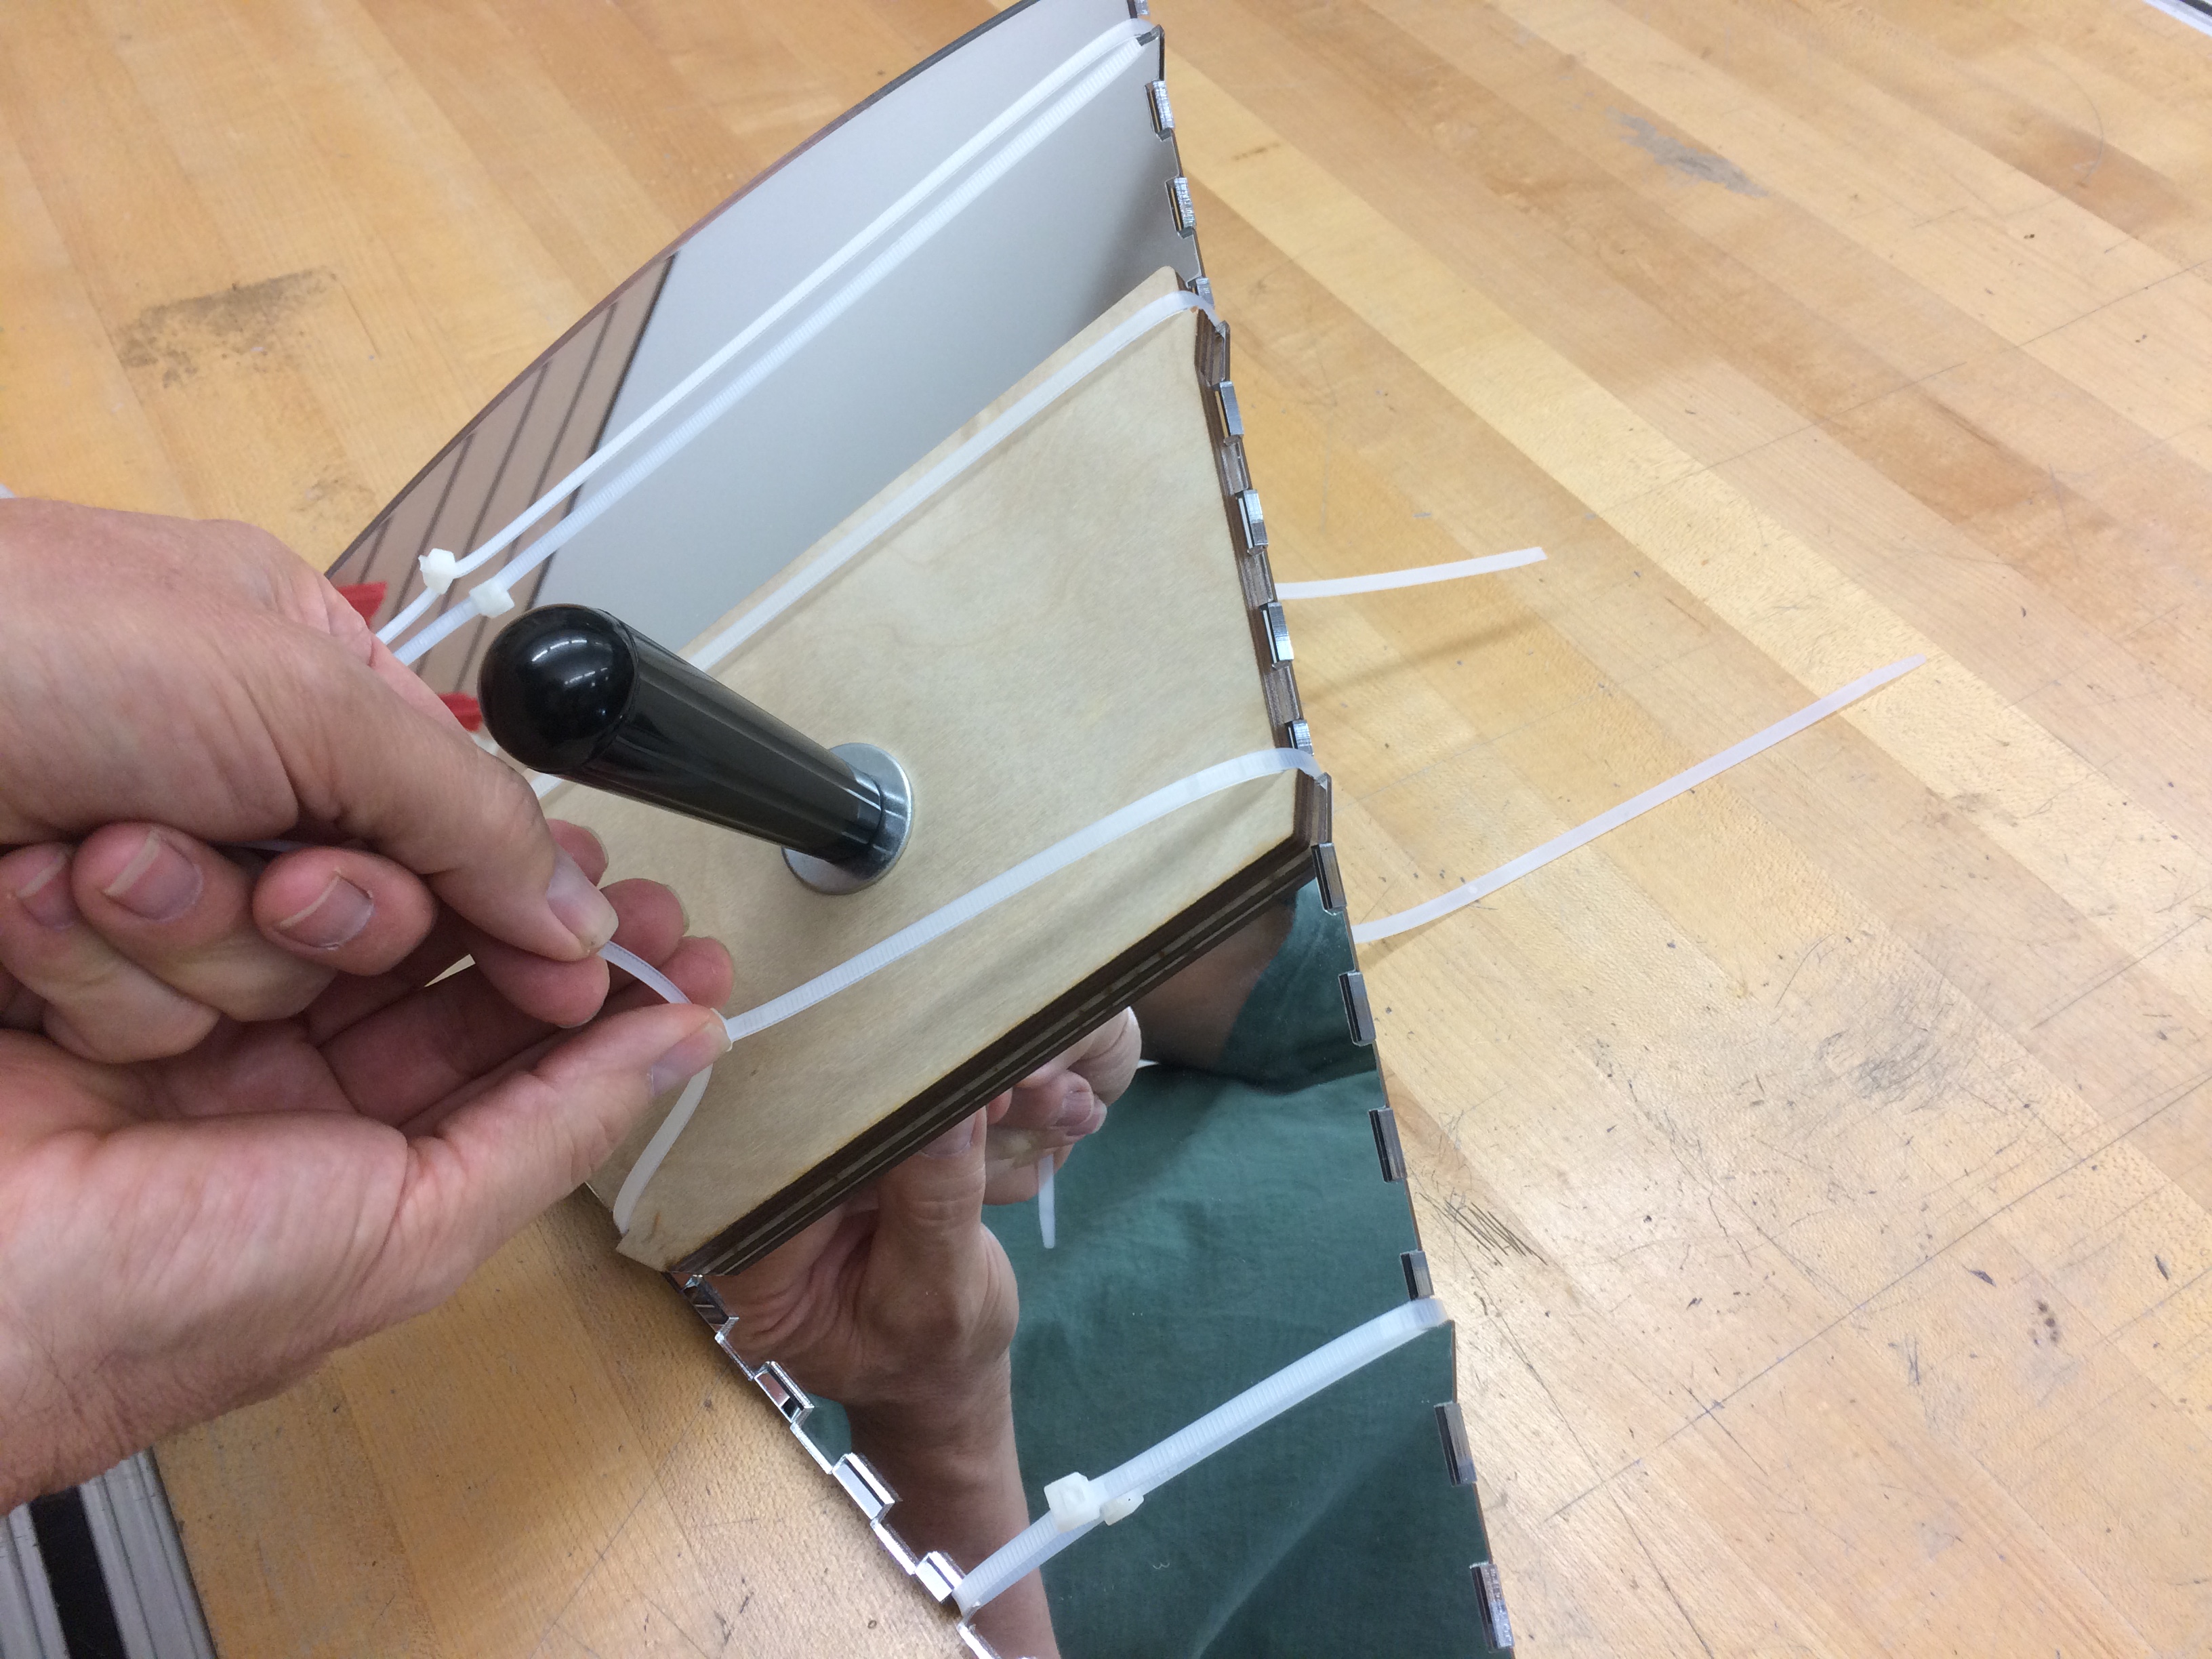
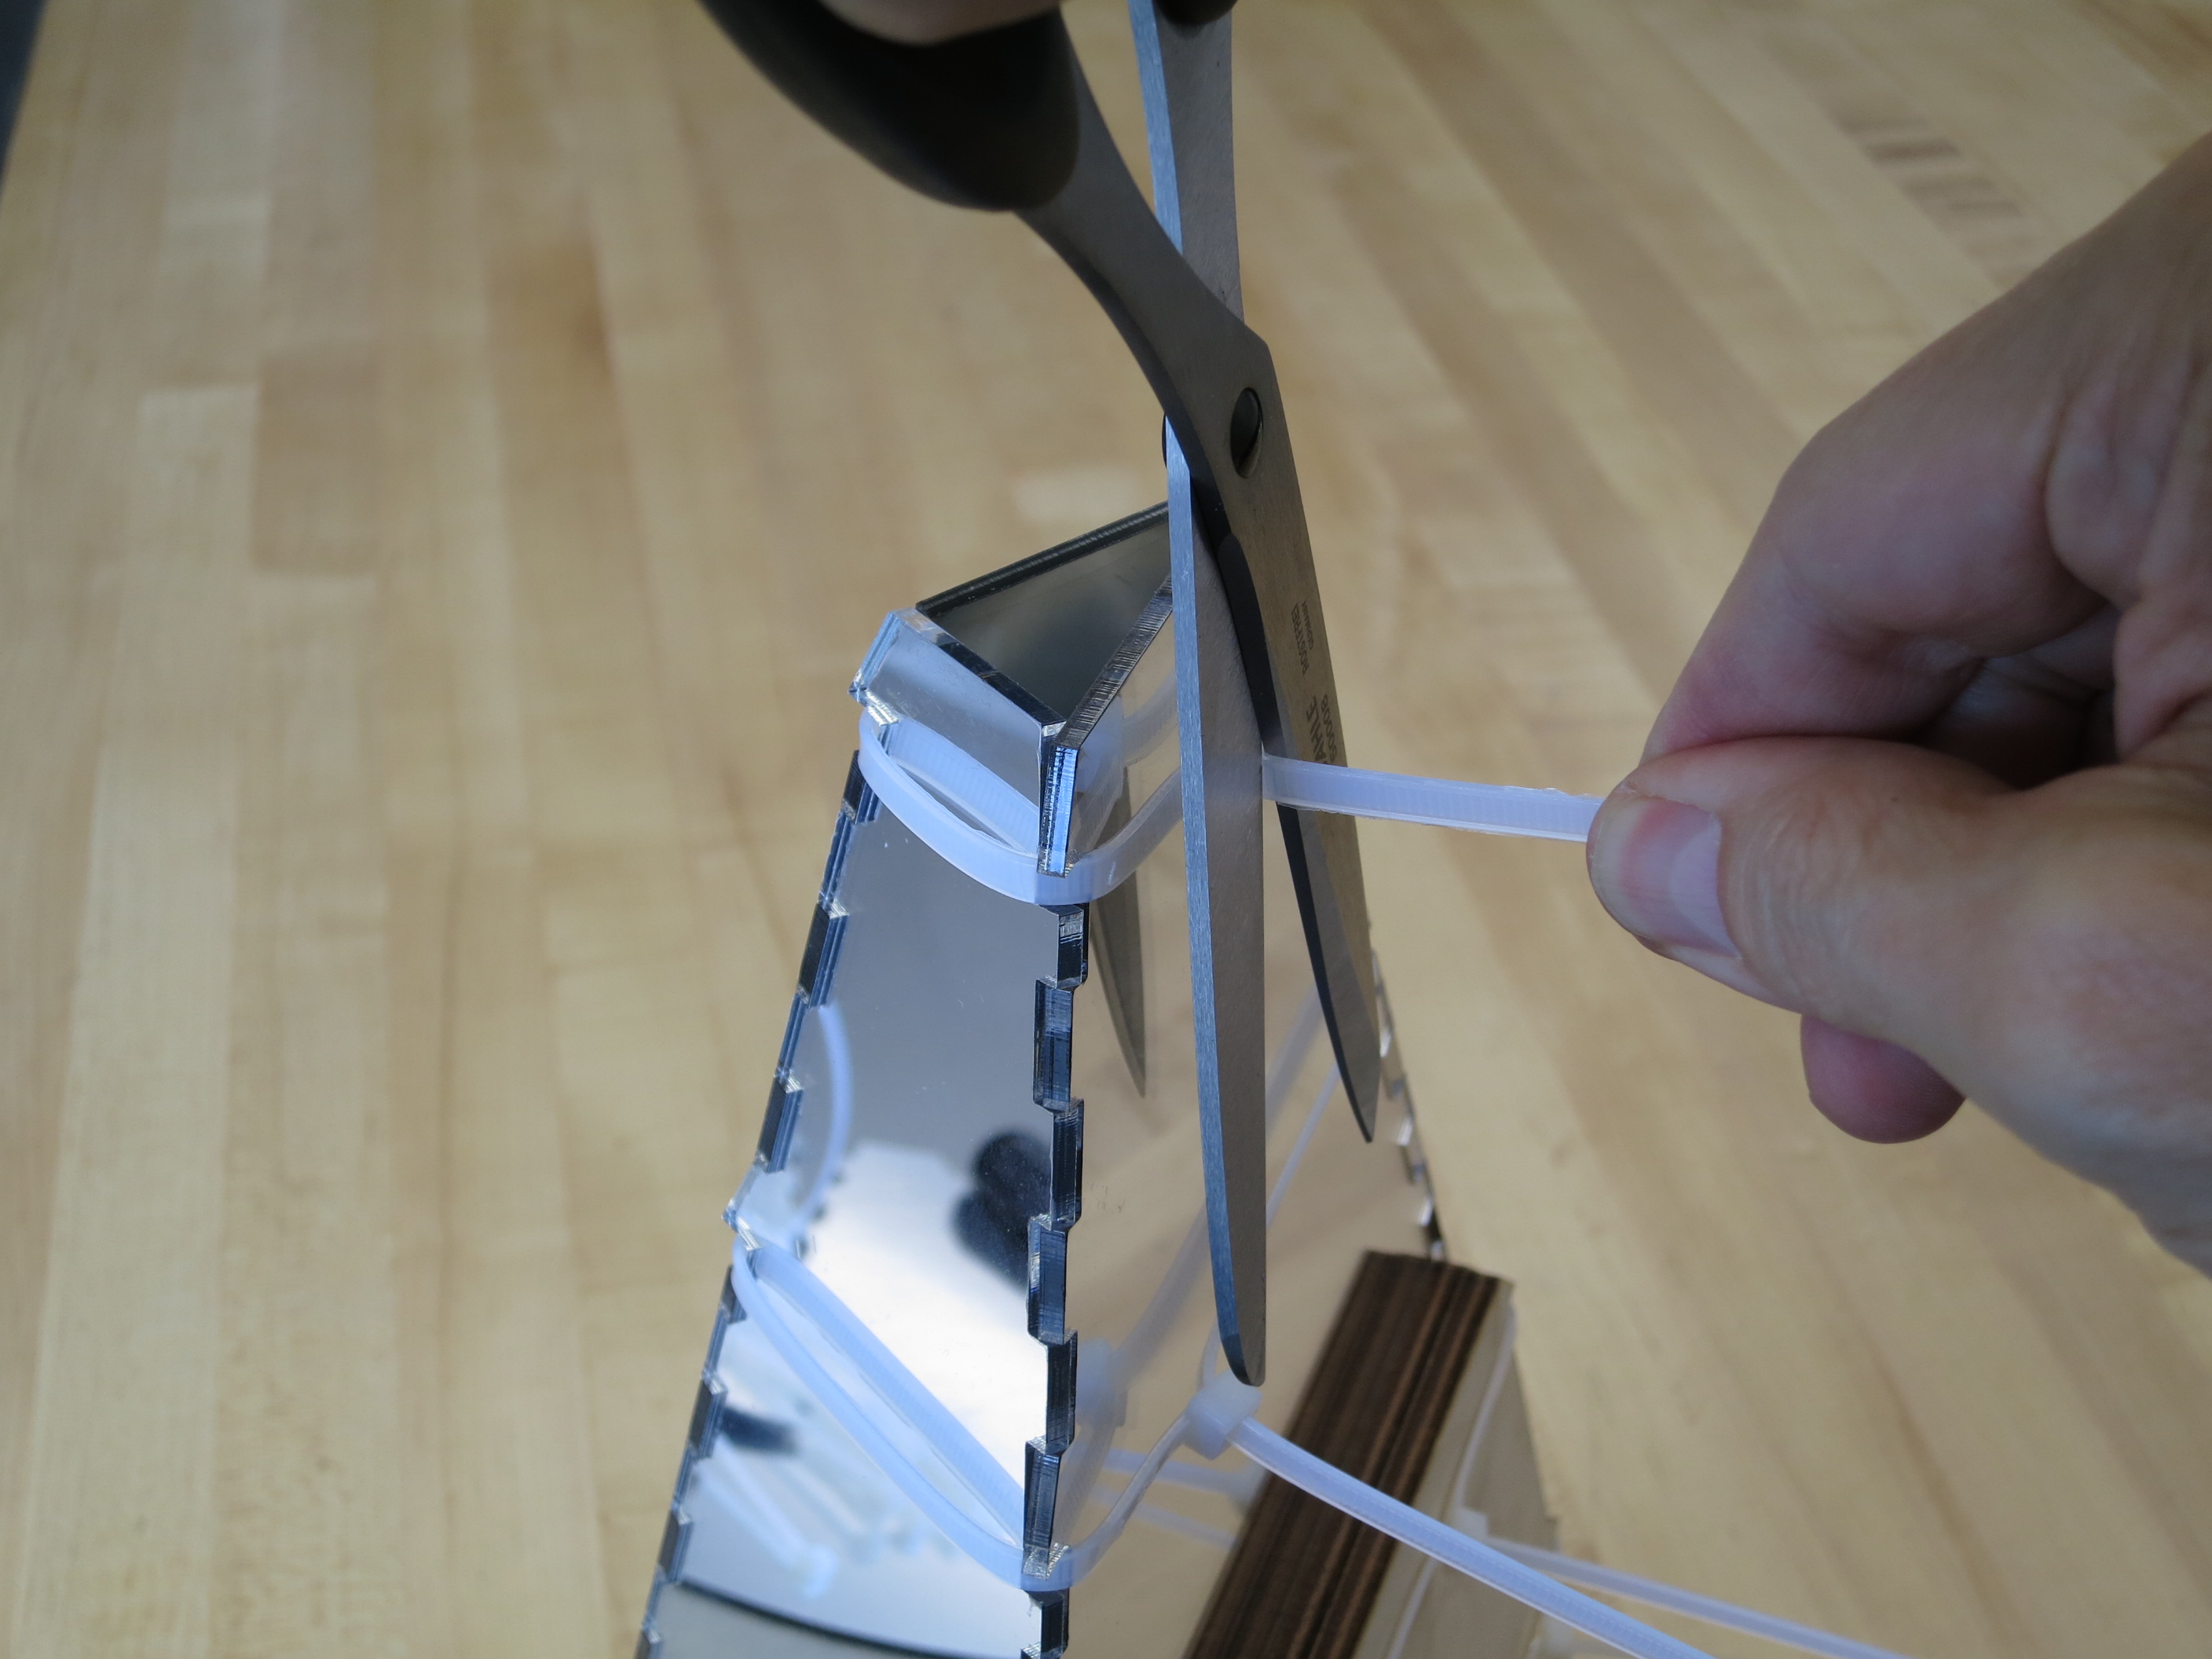
The handle assembly is attached to the widest mirror of the kaleidoscope using two sets of cable ties. These cable ties also help hold the kaleidoscope together.
Align the tabs on the wooden panels with the pointy tabs on the kaleidoscope, and run the cable ties through the slots next to the tabs. Tighten the cable ties around the kaleidoscope and the handle as shown in the photos.
Once all four sets of cable ties have been fully tightened, trim off their ends.
Cut the Fundamental Domains
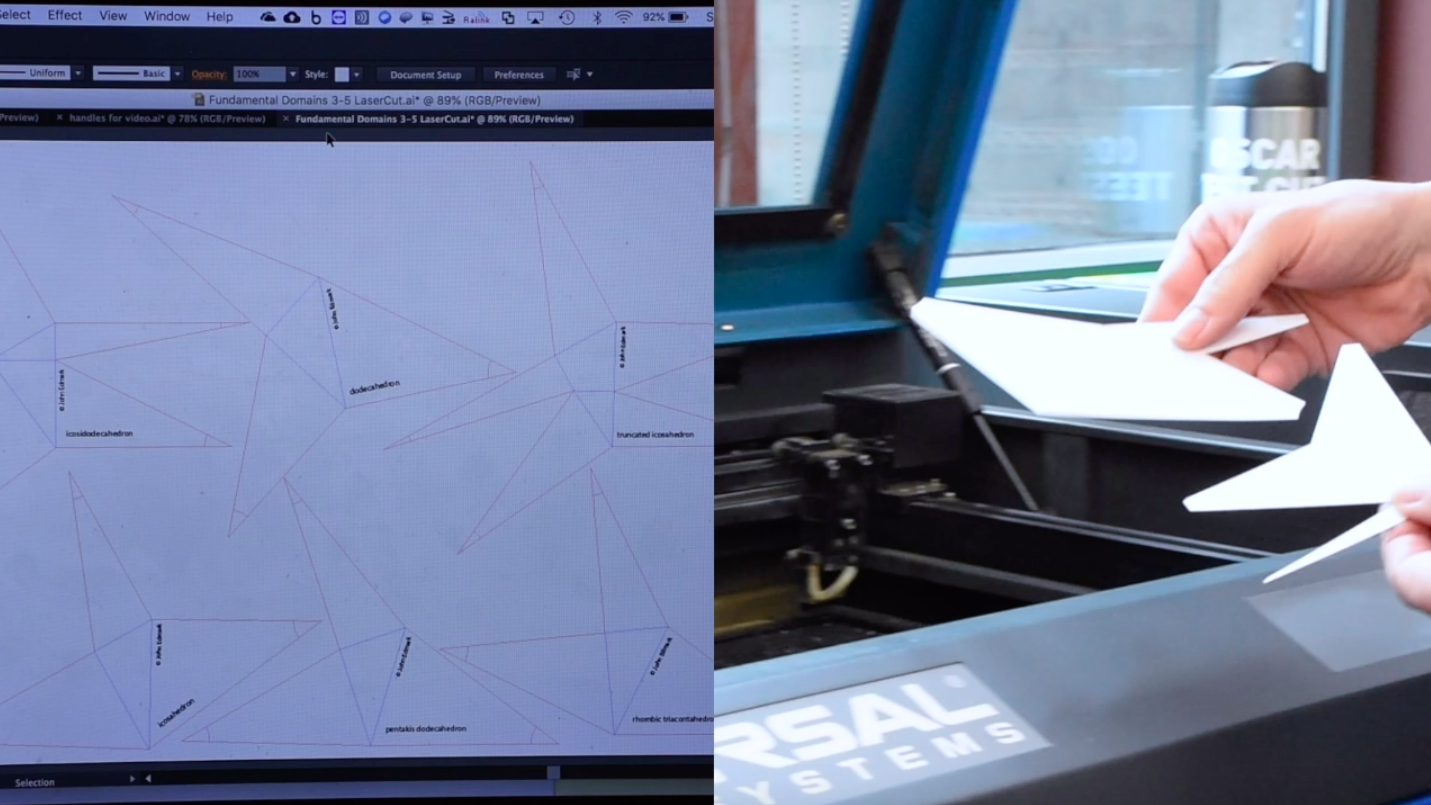
For this step, you will also need to use a laser cutter or find an online laser cutting service. If you have limited access to a laser cutter, you might find it more efficient to cut the fundamental domains at the same time as the mirrors and the handle mounts.
All the files required to cut the fundamental domains can be found at the end of step 2.
The fundamental domains should be made out of heavy duty cardstock in either A3 or 11x17 size. Sources for this cardstock are listed at the end of step 1.
Fold the Fundamental Domains
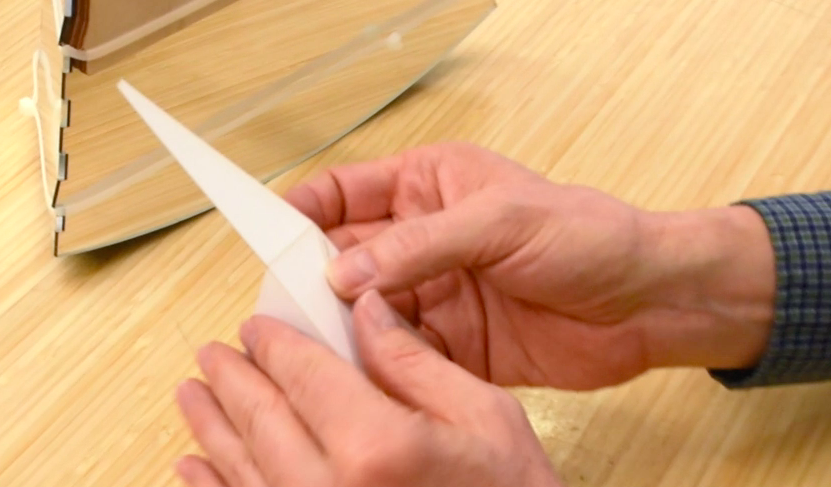
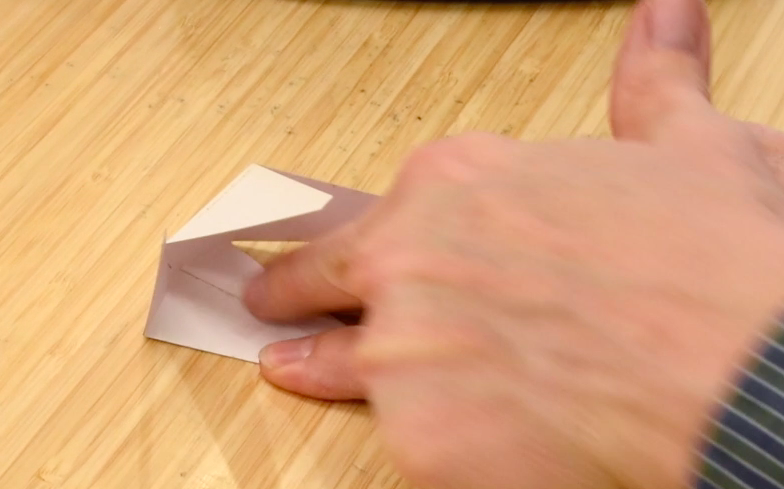
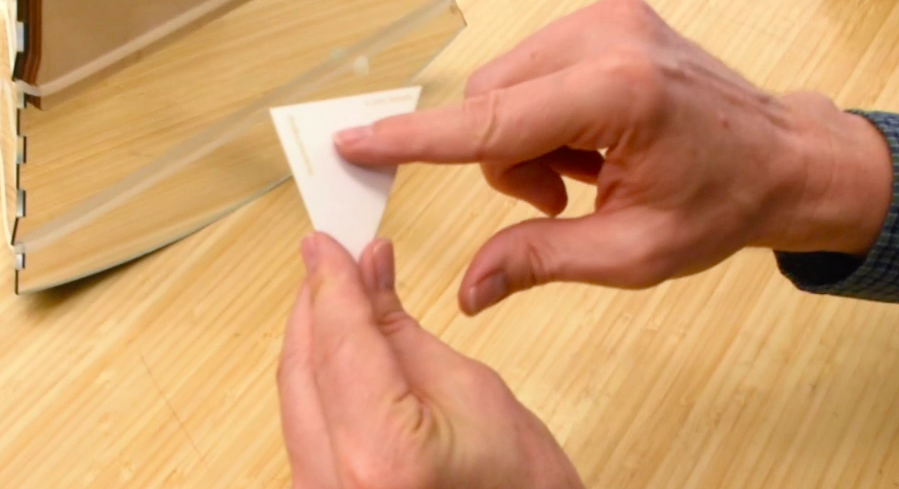
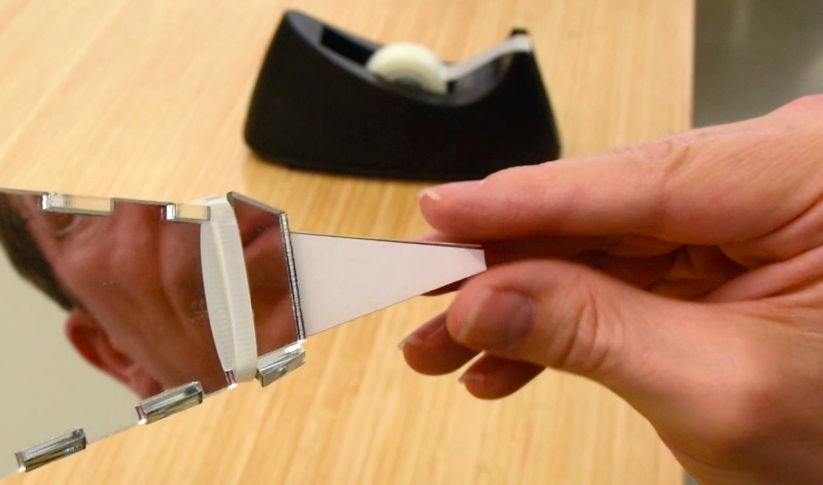
Once you have cut the domains, you can fold them by simply following the score lines. It's a good idea to individually crease each fold completely in order to overcome the bending resistance of the paper. For the simpler domains, there is no need to tape them; they will naturally settle into the proper form when placed in the kaleidoscope. For the more complex domains, you will need to tape parts of them in order to help maintain their shape.
Now it's time to slide your domains into the kaleidoscope and experience the magic!
Place the domain onto the larger mirror with the domain's identifying text facing the mirror. Orient the the narrow "tails" toward the small end of the kaleidoscope, and then slowly tip the kaleidoscope until the domain slides down to the small end. To help the domain get settled into place, you can pull the tails protruding from the narrow end of the kaleidoscope.
To remove a domain from the kaleidoscope, gently tap on the protruding tails of the domain.
Be Creative!
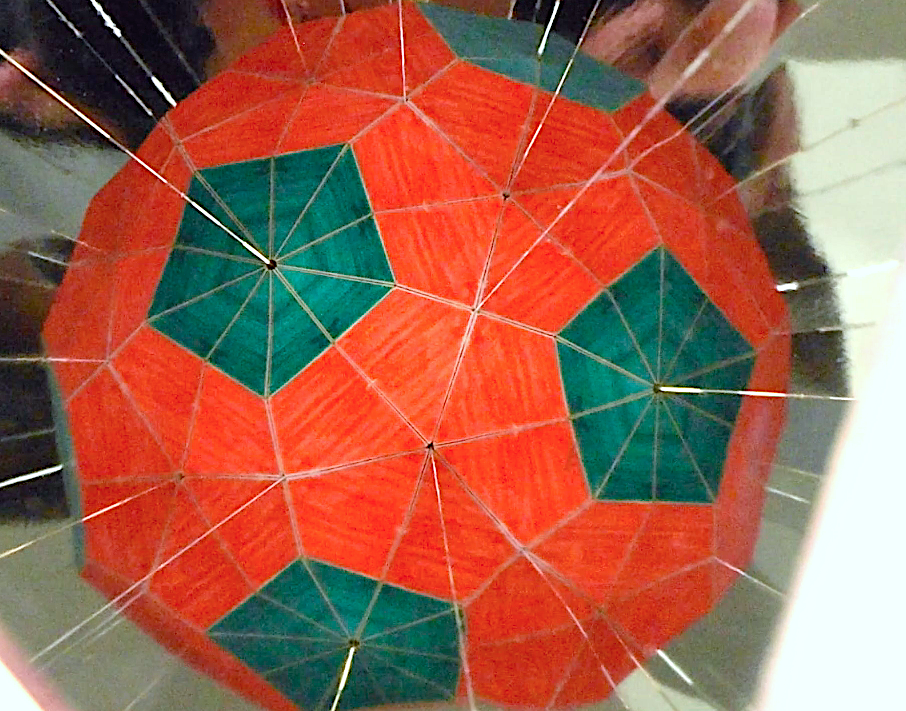
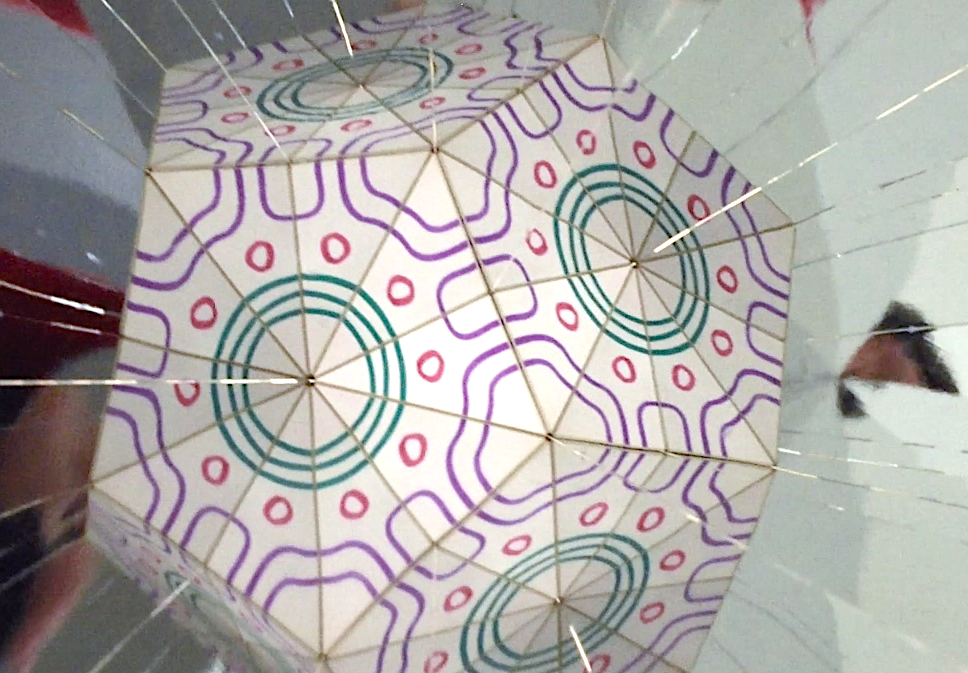
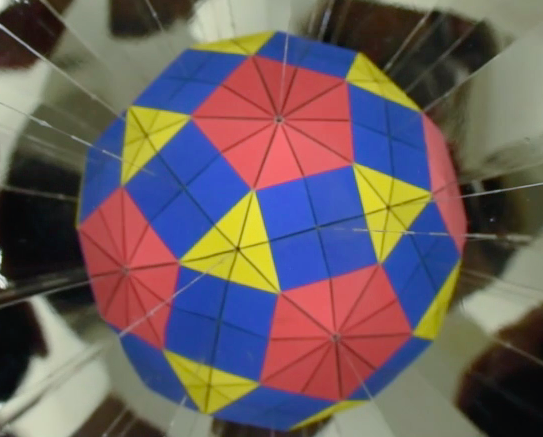
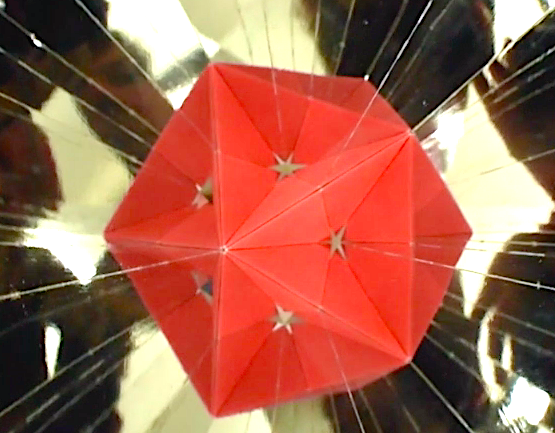
Experiment with coloring the fundamental domains to emphasize certain symmetries or to create interesting patterns. And don't limit yourself to using only the provided domains. Create different shapes and test them in the kaleidoscope. You can also insert all kind of objects and observe the shapes that result.
I hope you enjoy making, learning, and playing out with your polyhedral kaleidoscopes! Please share your results and any new ideas you have with the rest of us in the comments section below.
Acknowlegements
I am deeply indebted to Mathieu Penot, who provided invaluable assistance in creating this instructable, including producing the video. I'm also grateful for the assistance of Mark Schafer, who created the SVG files from my Adobe Illustrator files.